Category: Photography

  • 5 Reasons for Doing Natural Light Portraits

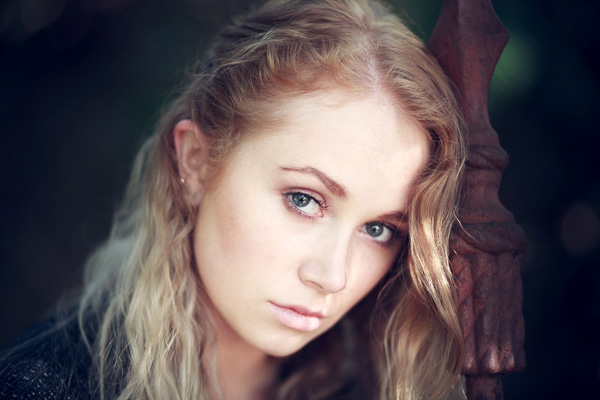
    Natural light portrait

    With all the attention given to the art and craft of shooting portraits using flash, you could be forgiven for thinking that this is the only way to take a portrait. The truth is that while fashionable Speedlites get all the attention, there are photographers working almost entirely in natural light and creating beautiful portraits without a softbox or light stand in sight.

    One of the most prolific is Eduardo Izq, a photographer based in the United States who has built an impressive portfolio of natural light portraits taken using local models and dancers. Eduardo takes natural light portraiture to an extreme, often photographing his models without make-up. He may not be creating beauty portraits in the conventional sense, but by concentrating on character he is capturing portraits that are beautiful in a deeper, more fundamental way.

    Please take some time to look at Eduardo’s website, you will learn a lot from it. For another insight into his work you can also read my interview with Eduardo about his ballerina portraits.

    Intrigued? Here are five more reasons why you should take some natural light portraits:

    1. It teaches you about light

    To get the best out of natural light you need to become an observer of light. How does the quality, and quantity, of light change where you live from hour to hour, and season to season? How is the light affected by weather and the location? To take good natural light portraits you need to work in the most flattering light, and that usually means finding the shade or going out and taking portraits at the end of the day during the golden hour and twilight (my article The Magic of Natural Light: Twilight will help). Doing so will help you appreciate the quality of light in your area. This knowledge will also help you in other areas of photography.

    2. Light is linked to location

    As you become more aware of light you will come to see that the quality of light is linked to location and season. When you take a portrait of somebody outside, the light provides a link between the subject and the place they are in, tying the two together. Light, location and subject are entwined: it was only possible to take a photo of that person in that place with that type of light at one particular time. It’s almost impossible to reproduce the effect afterwards – the uniqueness of the light becomes part of the image. That is something different (not necessarily better, just different) from the effect of using flash, which is easily reproduced.

    Natural light portrait

    The soft light of the setting sun links the portrait of the woman with her horse to the location. Both are lit by the same light, a type of light that occurs naturally in this location in certain conditions at the right time of year.

    3. Natural light is simple

    Natural light portrait

    Natural light is also ideal for black and white portraits. Here the light is shaped by the archways on the right.

    Flash is not complicated for everybody, but it takes time to master and that can get in the way when you are starting out. One of my friends told me a story about a portrait shoot that went wrong. She modelled for a photographer who was working outdoors, and he spent so long setting his lights up and measuring the light that the shoot never really got going. She wasn’t happy with the results and I guess neither was the photographer.

    Natural light is different because it is simple. In fact, I often go on a portrait shoot with just one camera and a single lens. This simple approach to equipment lets you concentrate on composition, lighting, and building rapport with your subject. Another benefit is that it is quick and easy to move from one place to another if you don’t have much gear. It is much more difficult if you have flash because you also need to move the extra equipment.

    4. Your relationship with the model is critical

    The number one thing that determines the success of your portraits is your relation with your subjects. Building rapport is essential, especially if you’ve never worked with your model before. Simplifying your approach means that you have more time to concentrate on building the relationship. This is essential. Your model’s pose and expression are the prime factors that determine the success of the portrait.

    A portrait shoot is a collaboration, two people working together to create a beautiful image. If you ignore your model at the expense of setting up lights, the results will suffer. It takes real skill to be able to set up your lights quickly and effectively, while building a relationship with your subject. That can come later. If you start off with natural light, it gives you time to learn how to build rapport, and you can introduce flash at a later stage. Master one skill at a time.

    5. Natural light is beautiful

    Natural light portrait

    The subject of this portrait is lit by the extremely soft red light that appears briefly after the sun has set.

    It’s hard to beat the beauty of natural light at its best. The photo to the right is a good example. We were taking portraits at the beach at the end of the day and the light became more and more magical as the sun disappeared over the horizon. For a few short minutes we experienced the beautiful red afterglow of the sunset, and I used it to take the last few portraits of the session. Moments like this don’t come often, but the results are worth it. Shooting in light that is beautiful, yet fleeting and difficult to find, elevates your portraits to another level.

    Your turn

    What is your experience of shooting portraits in natural light? Do you prefer to take the simple approach to equipment and lighting? Can you recommend any portrait photographers who work in natural light? Let us know in the comments.


    The Natural Portrait ebookThe Natural Portrait

    My ebook The Natural Portrait teaches you how to take beautiful portraits in natural light. This 240 page ebook, published by Craft & Vision, takes you through the entire process of natural light portrait photography through from finding a model, deciding where to shoot, working with natural light and post-processing your images. Click the link to learn more or buy.

    The post 5 Reasons for Doing Natural Light Portraits by Andrew S. Gibson appeared first on Digital Photography School.
    Digital Photography School

  • How to Get Super Sharp Landscape Photography Images

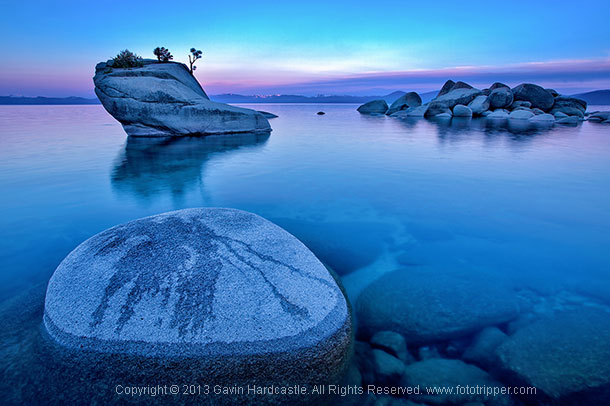
    The most common question I get asked by my workshop students is ‘how do you get such sharp images?’. It’s actually really simple. Basically, avoid movement of any kind while the shutter is open, focus well and choose the right aperture for your creative vision. Mostly it’s just plain old common sense with a couple of technical elements thrown in, so if you want to learn how to get super sharp landscape photography images, here’s my list of top tips.

    Top tips for sharper landscape photography

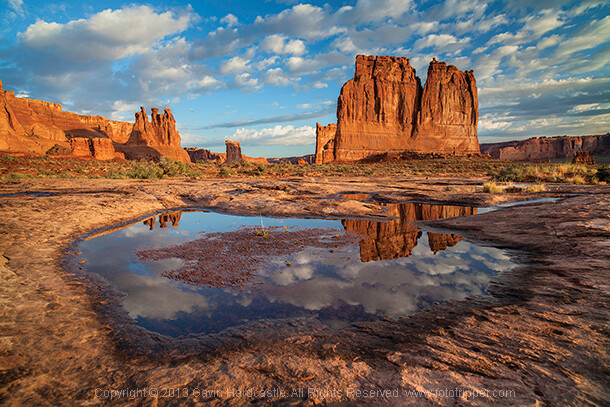
    How to take sharp landscape images - Gavin Hardcastle

    1 – Use a good tripod with a sturdy ball head and make sure everything is TIGHT

    Seems obvious, but time and time again I see students using decent tripods and they often don’t have everything clamped down tightly. For example, the attachment that is screwed to the underside of your camera should be as tight as you can get it, eventually it’ll work its way loose. Make sure that ball head is completely locked down once you’ve composed your shot.

    2 – While taking the shot, don’t place your hands on your tripod

    The vibrations of your hands will blur the shot. When that shutter opens, your hands should be nowhere near the camera.

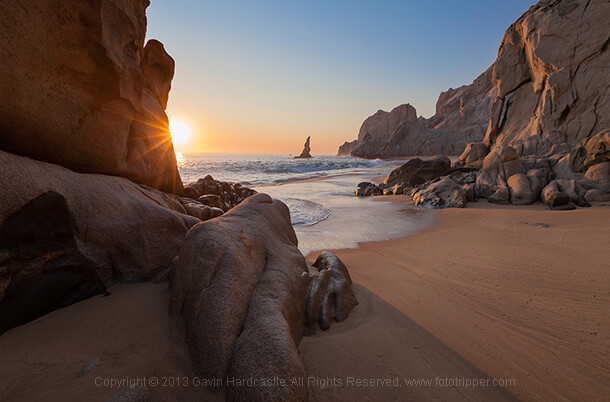
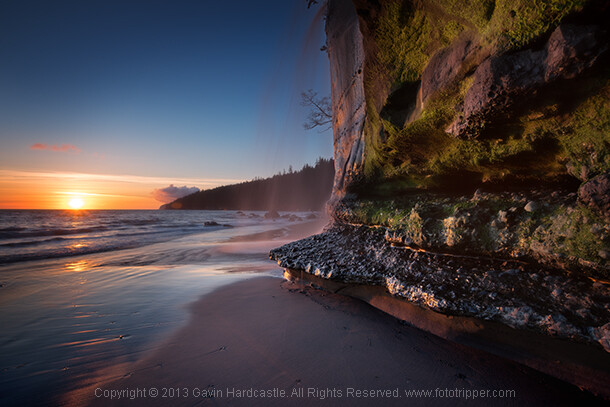
    How to get ultra sharp landscape shots - Gavin Hardcastle

    3 – Use the 2 second timer or a remote shutter release

    This insures that the shutter won’t open until you are completely hands free.

    4 – Cheap lenses will defocus while you rotate your circular polarizer

    This is another one that seems obvious but I’ve seen it happen a lot. Let’s say you’ve achieved perfect focus on your landscape composition and now you’d like to rotate the polarizer which is attached to your perfectly focused lens. Guess what, as you rotate that filter, the lens is now losing its focus because of the movement and pressure you’re exerting on the filter. This rarely happens with high end lenses but I’ve seen it happen a lot with cheaper kit lenses that are poorly engineered. When this happens simply remember to refocus before hitting the shutter.

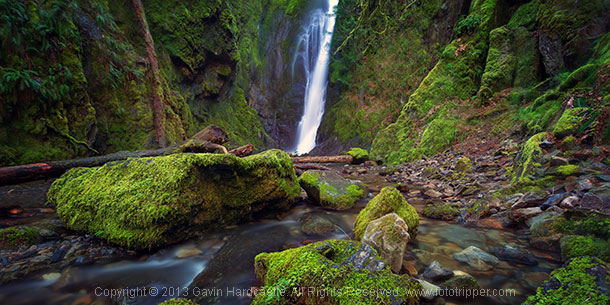
    How to get tack sharp landscape images Gavin Hardcastle

    5 – Enable the mirror lock-up if you have a DLSR

    Using mirror lock-up ensures that the mechanical shock induced by the cameras mirror mechanism has dissipated by the time the shutter opens.

    6 – Remove your camera strap

    In windy situations it will act like a sail and induce vibration.

    7 – Add some weight to your tripod’s central column

    If the conditions are windy, it will also help reduce vibration.

    8 – Place a small but heavy bean bag on your camera and lens

    Do this just before taking the shot to further eliminate movement from shutter shock.

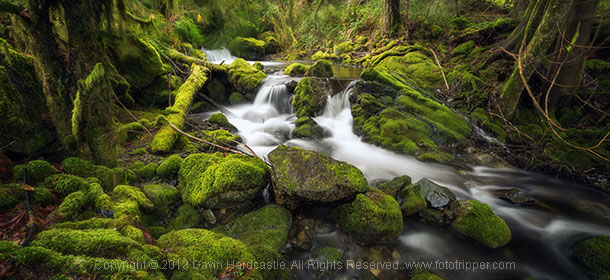
    How to get very sharp landscape photos - Gavin Hardcastle

    9 – Choose a Mid-range to Narrow Aperture

    This one should be an article in itself but for now it’s important to understand that if you want corner to corner focus in your landscape images you’ll need to select an aperture that gives you a wide depth of field. Using f/2.8 is pointless, so pick an aperture like f/11 or f/16 depending on how close you are to your foreground subjects. Be aware however that the narrower the aperture (larger number like f/22) the less sharp your image will be due to light diffraction so experiment with your lenses to discover their sweet spot for wide depth of field.

    Side Note: Shallow depth of field in landscapes can be beautiful when done well, in which case you’ll need a wide aperture like f/2.8 and ideally a lens that delivers beautiful bokeh – most super wide angle lenses don’t do bokeh well.

    How to get really sharp landscape photographs

    10 – Focus In the Distance

    Don’t focus on the object closest to you. Pick an object in the middle distance that has a clear contrasting line and focus on that. You could focus to infinity but beware that most of the wide angle lenses I’ve used actually focus beyond infinity so I often have to focus to infinity and then carefully rotate the focus wheel back so that it’s just slightly before the ‘infinity’ mark.

    11 – Put Your Glasses On

    If you need glasses in order to see clearly and focus on things, it should go without saying that you might need to put on your stylish and expensive bifocals in order to achieve clear focus in your photography. Besides, everyone knows that glasses make you look cool and more intelligent, so why not put them on?

    12 – Use Live View or EVF magnification

    If you have a DLSR with an optical viewfinder I highly recommend that you use your cameras ‘Live View’ mode and then magnify it to your point of interest and use your manual focus ring to achieve sharp focus  If your camera has an EVF (Electronic View Finder)  you can do the same thing while looking in the EVF. I actually prefer this because you don’t get distracted by glare on the LCD or external light sources. Either way, remember to disable auto focus if you decide to focus manually with Live View.

    How to get super sharp landscape images

    I use every single one of these techniques in my Vancouver Island photo workshops and I teach them to all of my students. If you follow these tips every time you shoot landscapes, you’ll be sure to get much sharper images. If you’ve got some of your own tricks and tips for getting super sharp landscape images please leave a comment below and share your knowledge.

    The post How to Get Super Sharp Landscape Photography Images by Gavin Hardcastle appeared first on Digital Photography School.

    Digital Photography School

  • The Rule Of Thirds: When To Use It, When To Lose It

    The rule of thirds has been around for so long that it’s tough to say who came up with it. Long before the camera was ever invented, artists used it as well as the golden ratio to make their masterpieces as far back as the Renaissance. The first time it was written, though, was by an artist and engraver by the Continue Reading

    The post The Rule Of Thirds: When To Use It, When To Lose It appeared first on Photodoto.


    Photodoto

  • How to Spring Clean Your Memory Cards

    Ahhh spring. A great time to bust out your lens pens and lens cloths and dust off your photography equipment. But don’t forget to spruce up your memory cards before heading into the summer season.

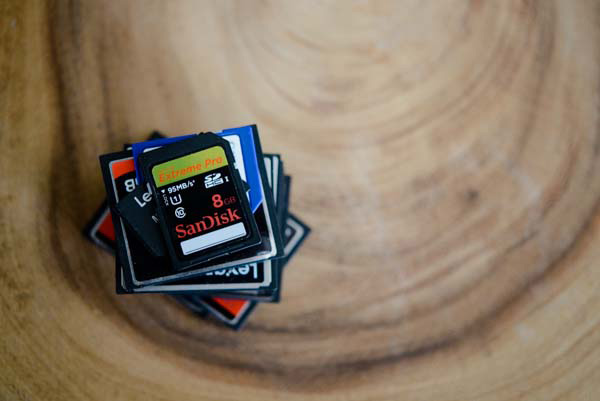
    memory_cards_clean006

    Start With a Memory Card Inventory

    Take the time to survey how many cards you have and what state they are in. This is especially important if you have multiple types of cards floating around. Ensure that there are no stragglers hiding in a camera bag pocket or at the bottom of a lens case. My tip: I write numbers on my memory cards so I can double check I have all my cards before leaving a location.

    Back-up Images on Your Cards

    Do you ever snap a quick photo but forget to move it off the card? Now is a great time to move those images over to your computer, leaving room on your memory cards for new photos. Here is another great tip: delete images from your card in a batch. Limiting the amount of times you change data on your memory card will help extend the life of your cards. So choose to delete the images off your card in one format, either in your camera or on your computer, instead of deleting single images as you shoot. Better yet use “Format” to wipe and reformat the card in camera.

    Store Your Cards Properly

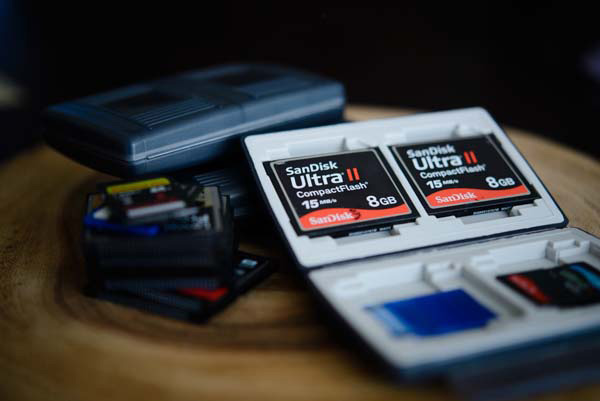
    All memory cards, no matter the type, have delicate parts. Keep your cards safe and dust free by storing them in a container designed for memory cards. There are a ton of memory card wallet options available. Take a few minutes to think about what your memory cards go through and then look for a container that will work for you. Do you need a waterproof case? Are you a wedding photographer who carries around more than a few cards? If so, this is a worthwhile investment for you.

    memory_cards_clean007

    Write Your Name on Your Cards

    We’ve all seen the Facebook posts of an image being shared around the web off of a found camera or memory card, in an effort to return the device to its owner. Don’t let that be your photo! Write your name and contact information on your cards. Losing a memory card is a downer – they aren’t cheap and those images could be lost forever. Simply including your email address, website, or phone number along with your first name, may increase the odds of having a lost memory card returned.

    Label Used Cards

    Come up with a system to label used cards. It happens – you start taking photos, and forget which cards you’ve used and which you haven’t. You then have to do the classic move of putting the card into your camera to check if it is full. Skip this step by coming up with a way that quickly identifies which cards are full. If you’ve numbered your cards, you can keep track of the numbers. My personal system is to put used cards into my card wallet backwards. A quick glance tells me which cards are ready to use.

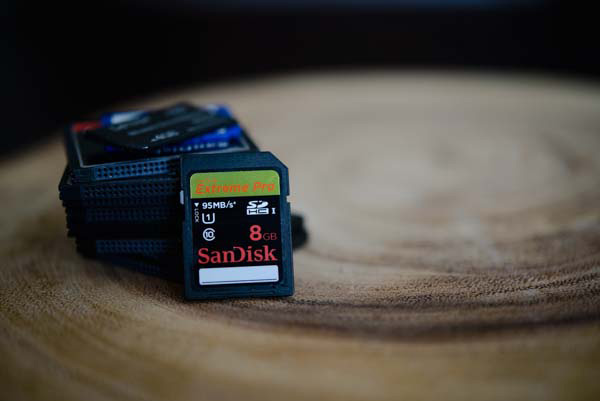
    memory_cards_clean005

    Do you have a memory card organization system? Tell us what works for you in the comments below.

    Need some new cards or some accessories? Try some of these:

    The post How to Spring Clean Your Memory Cards by Nikole Bordato appeared first on Digital Photography School.

    Digital Photography School

  • How to Charge What You are Worth as a Photographer and Why

    bambi-cantrellBambi Cantrell may not be a name you recognize unless you are a wedding photographer. She’s been doing photography since about 1982 and was someone who I followed early on in my career in photography. She’s a frequent speaker at the popular WPPI conference every year and was a recent teacher on Creative Live. These videos are segments of that talk that discuss that area of value of yourself as a photographer and pricing so make a profit and a good living.

    In this video below Bambi talks about many extremely important aspects to being a photographer including:

    • How important what you do as a photographer is to documenting the lives of your clients, not just what they look like but who they are as people
    • How you need to follow your dreams and to never take no for answer, but to always keep moving forward no matter what anyone else says
    • Doing what it takes to make it, and perseverance is key to success
    • If you can afford yourself you are too inexpensive
    • How to charge what you are worth confidently and to value yourself as an artist and photographer
    • Perceived value and when it’s okay to spend more money on something

    The second video below covers some of the same concepts again and more in depth on the topic of valuing yourself and your work, and charging enough to take enough money home at the end of the day.

    So if you are an aspiring photographer hoping to make it as a pro, or maybe you’ve been doing it for a while and just can’t seem to turn a profit – give these a listen!

    You might also want to learn about creating relationships to help you grow your business, how to make your next big decision be the right one, and the Ultimate Guide to Going Pro – all right here on dPS.

    The post How to Charge What You are Worth as a Photographer and Why by Darlene Hildebrandt appeared first on Digital Photography School.

    Digital Photography School

  • Five Tips for Special Event Photography

    Often times shooting special events is not the most glamorous gig in photography, but when a client calls you up looking for a photographer to shoot an event, you take the job.  Sometime’s you end up somewhere great like the trading floor of the New York Stock Exchange, other times you’re in a small, dark, dull event space with only 20 people making the best of the situation.  Regardless of the size or location of the event, you’re job is to make some great images.  There are a lot of little things that can make diving into special event photography much easier or much harder on yourself, below are a few ideas of how to prepare and execute the photography at your next event.

    Event photography tips 01

    #1 Dress Like You Belong There

    As a photographer, there are plenty of times when you can go to work in jeans and a t-shirt, after all clients aren’t watching you do post production.  When photographing a special event however, you should dress like you belong there and blend in with the crowd.  This doesn’t necessarily mean a suit and tie every time for men, or that a blazer is necessary for women, but slacks/dressy pants, comfortable, low key, black shoes and a nice shirt/blouse usually are a must.  If it is a higher end event you men should be sure to wear a suit coat and tie while women should wear a blazer if they feel it is necessary.  If you’re unsure of the appropriate attire, always air on the side of safety if you’re over dressed you can always take the coat off and stick the tie in your pocket.

    Event photography tips 02

    #2 Take Pre-event Shots

    While it may be an afterthought for your client at the event, the event planner responsible for dotting the i’s and crossing the t’s will love that you captured shots of the room prior to the guests arrival. Not only will it be something they can use to sell their services in the future, it will also allow them to catalog the set-up in case they have a very similar type of event in the space again. This will prove invaluable to the client and should be the way you start any event.

    #3 Don’t Over Shoot (but don’t undershoot either)

    The divide on Over vs Under shooting seems like it would be quite blurry, it really isn’t. If you are photographing a special event, you have to remember that even though great photos are key, the attendees having a good time is the top priority. While it is completely acceptable to photograph the attendees, both candidly and posed, be sure to make mental notes of who you have photographed so that you aren’t going to the same groups of people over and over again. Along with posed shots, if the lighting allows for it, bump up your ISO and shoot candids with ambient light. Once you move past a cocktail hour and into a reception, keep your focus to the stage. Candid audience or crowd shots are nice here and there, but a good rule of thumb is that once plates go down and people are eating, keep the camera pointed away from the tables and onto the stage and shoot conservatively.

    Event photography tips 03

    #4 Be Quick

    Wether it’s a panel discussion or candids at a cocktail hour, no one is at the event to be with you. Accept it. While shooting candids, be ready to go, take a step back, click off three frames and move on, any more than that (unless it’s a VIP or there is a glaring, non-camera related, issue) and you might be intruding on the attendee’s time. When shooting a panel discussion, or anything on a stage, shoot a lot with a long lens. While close, intimate shots from a wide lens look awesome, the people who are paying, or are invited to the event aren’t there to look at the back of their head. If you do have the opportunity to shoot from up close, be quick, quiet and stay as low as possible.

    Event photography tips 04

    #5 Edit Hard and Deliver Quickly

    I find that no matter how hard I try to not over shoot an event, I still end up trashing about half of what was shot. It usually isn’t because the shots aren’t good, but because there is something very similar and slightly better in the edit. If you shoot three frames each of every group you photograph at an event(which is pretty typical) and have hundreds files, there’s no reason you can’t cut at least one of the frames for each group, if not two. Your client only needs the cream of the crop since there is only be a limited amount of use for event photos. If there are any VIP’s you might want to leave an extra frame or two in if they are also good, but for the general attendees the top frame of three works best every time. The same rule applies to shots of speakers or the panel at a discussion, edit hard and give the client the cream of the crop.

    Once you get your edit down to the best images, bring your files into your editing software (I am still a diehard Photoshop guy) and crank out the images. The best thing about corporate events is that for the most part everything should be consistent and can be batch processed out in no time. From here, deliver your files, unless a disc is requested, we deliver everything via our PhotoShelter page online.

    Event photography tips 05

    Special Event Photography may not be the most fulfilling form of photography in the world, but when it comes time to pay the bills, you will be glad that you learned how to execute the photography aspect of them.  There are always events going on and opportunities to find work, just remember to dress the part, get photos before the event as well as during it, not over shoot, be in and out of groups and to edit hard with a quick turnaround to keep clients happy.

    Event photography tips 06

    The post Five Tips for Special Event Photography by Patrick Nugent appeared first on Digital Photography School.

    Digital Photography School

  • Large Library Management with Lightroom and Daminion [for Advanced LR Users]

    daminion-opener

    If you have Lightroom you might assume that you have all you need for managing your images. That may not be the case and many professional and keen amateur photographers benefit from combining Lightroom with the image management software Daminion.

    Daminion is an image management solution which helps you do large library management with Lightroom. You can think of it as being the rough equivalent of the Lightroom Library module operating on steroids. Daminion’s biggest advantage is that it is true multiuser software so, with Daminion server installed, multiple users can access a single catalog. This is something that Lightroom is notoriously poor at doing and which Adobe has so far failed to address despite multi-user/multi-computer access being one of the top ten feature requests for Lightroom.

    You can download a version of Daminion here using the Download link. At the time of writing the current release version is 2.5 and version 3 is still in beta. Daminion comes as both a standalone and a server version. The Daminion standalone Free version handles up to 15,000 images per catalog. The paid versions are Basic, Standard and Pro which give you 25,000, 75,000 and unlimited images in a catalog respectively. There are also multiple Daminion server versions, one for non-commercial use and others for individual professionals and small teams.

    NOTE: Daminion is available for PC only and not currently available for Mac.

    You can install both the server and client versions on the same computer – the server version will run faster than the client version so it has value when you have a lot of images in a catalog. When you consider that some Daminion users have catalogs of a million or more images, speed of accessing and filtering these images becomes important.

    Setting up Daminion

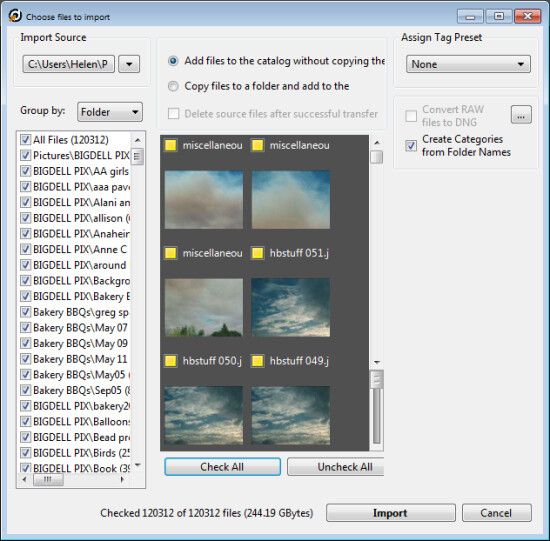
    Once you have downloaded and installed Daminion, launch it and you can create a catalog. Like Lightroom you must import the images you want to manage with Daminion into the catalog. If the Add Files dialog doesn’t open automatically you can find it by choosing File > Add Files and then select the folders to import from.

    daminion-import

    While you can create and manage multiple catalogs in Daminion, like Lightroom, you can’t search across multiple catalogs so you should be careful about how you organize your images in catalogs. What makes sense in terms of catalog organization will depend on how you work with your images and if it makes sense to have them all in one catalog or in separate ones.

    Daminion will recognize and manage a wide range of file types including common raster and vector formats as well as camera RAW images, video, music, and PDF formats. This gives it a broader scope as a management tool for digital media collections than Lightroom which is limited to photo and video formats only.

    You can copy the images to another location on import or import them from their current locations. You can also group images by folder, date or file type on import. As the images are being imported you can begin to work with those already imported.

    daminion-work-while-importing

    daminion-catalog-tags

    Organizing and tagging

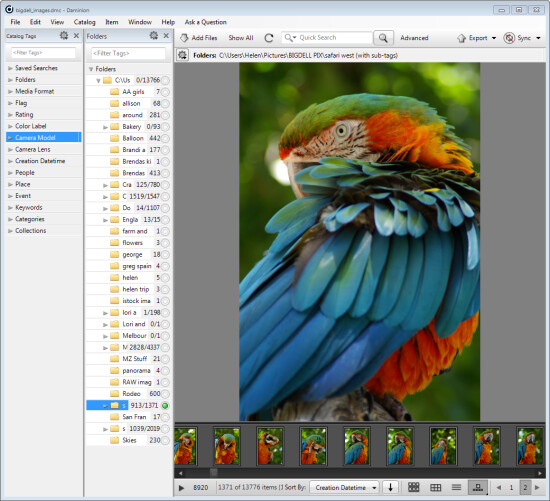
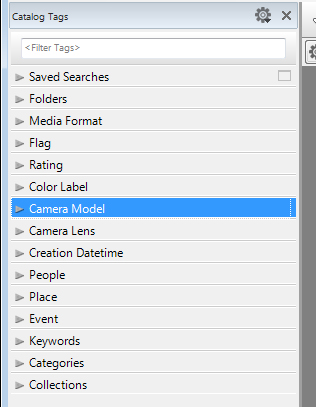
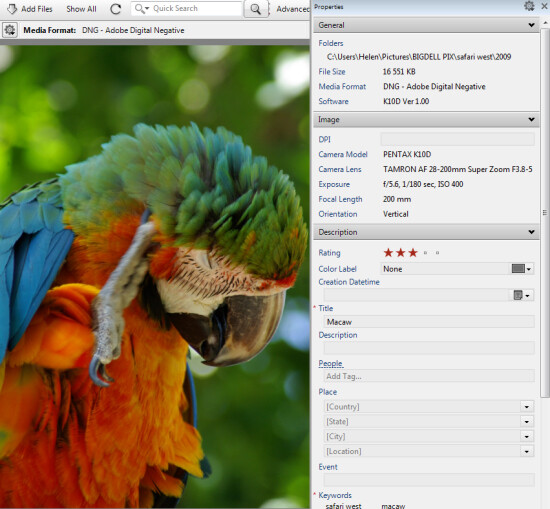
    When you have some images imported into Daminion you can investigate the tools you have for managing and organizing them. The Catalog Tags panel on the left of the screen (see image on the right) is pre-populated with tags. Some of these are created from the image metadata, such as Camera lens and Camera Model, and others are those that you may have applied to the images in other programs such as keywords, ratings and color labels.

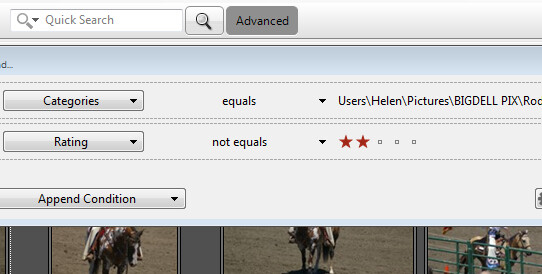
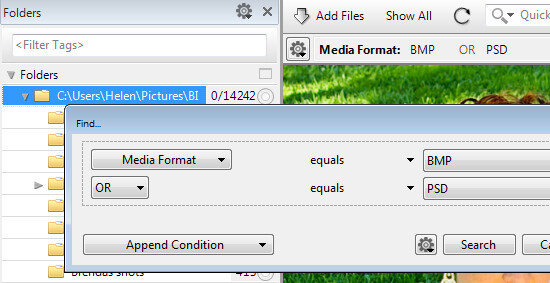
    To filter the images by any catalog tag click the tag group and the tag to view and click the circle icon to view images that match that tag. You can perform AND and OR filtering using the Find dialog which you can find by clicking the Advanced link immediately to the right of the search box on the toolbar (see image below).

    daminion-searches

    You can also add tags and keywords to your images using the Catalog Tags panel. These can be written to the image XMP metadata so they will be accessible not only within Daminion but also in other applications such as Lightroom and Bridge.

    There are benefits to using Daminion for image management and filtering in preference to Lightroom. Daminion provides multiple ways to categorize your images including Categories, Collections, Events, Places, People and more. It also supports hierarchical tags, with no limitation on nesting levels. So you can configure hierarchical tags for categories, people, places, keywords, events and so on whereas in Lightroom you can create hierarchical keywords only. You can also create your own custom user defined tags in Daminion to categorize images by criteria that are meaningful to you. Daminion can write metadata directly into the RAW images rather than needing to do so to sidecar .xmp files, and it makes it easy for you to filter your image collection by writing complex searches using Boolean (AND/OR) operators.

    daminion-boolean

    Viewing your images

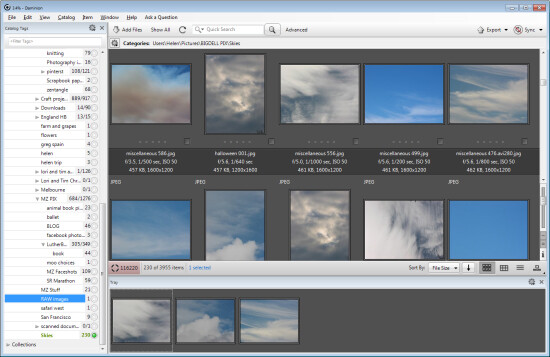
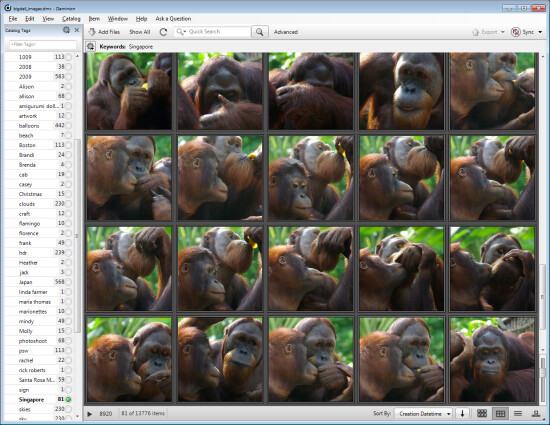
    You can view your filtered images in one of a number of ways. You can sort them using a range of sort options including by shutter speed, file size, file name and so on. You can also view the images as thumbnails, using a compact view, details or filmstrip view.

    daminion-compact

    In Thumbnail view you can customize the information displayed above and below the image so it is easy to see the image properties that are meaningful to you. At any time you can view an image full screen by pressing Enter or click View.

    You can select any image and view and edit its properties using the Properties panel. While Daminion is not an editor you can use it to rotate your images.

    daminion-properties

    As you work through your images you can drag images you want to do something with into the Tray. The Tray stores these images until you are ready to work with them such as by sending them to an external editor or using the multiuser checkout feature. The checkout feature helps you manage multiple people working with the same catalog, it maintains an audit history and gives you the ability to undo changes if, for example, a newer version of an image is replaced by an older version.

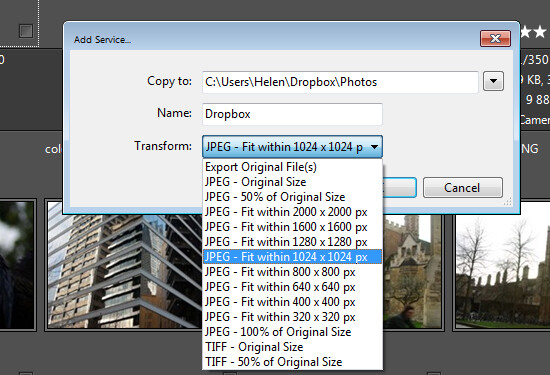
    One handy feature of Daminion is the ability for you to publish images from Daminion direct to Dropbox so they are viewable on your iPad or other device. The Publish panel can be set up to convert and resize images including raw format images and then export them to a Dropbox folder on your computer. When this folder syncs to Dropbox the uploaded images can then be viewed on other devices.

    daminion-publish

    Is Daminion for you?

    If you’re looking for a way to allow multi-user access to your image collection then Daminion is a great tool. It can be used along-side Lightroom for managing and organizing images which you then develop in Lightroom. The metadata changes made in either program can be easily viewed in the other program and the two work in tandem very well.

    Do you also need some Lightroom organizational help? Try these:

    • Use Lightroom Collections to Improve your Workflow
    • 8 Important Things to know about Lightroom Collections
    • Why Lazy Photographers Should Use Lightroom Smart Collections
    • Organizing Images in Lightroom 5
    • Seven Pieces of Advice for New Lightroom Users

    The post Large Library Management with Lightroom and Daminion [for Advanced LR Users] by Helen Bradley appeared first on Digital Photography School.

    Digital Photography School

  • The dPS Weekly Photography Challenge – Going Buggy

    Last week’s challenge featured landscape photography. In keeping with the theme of getting outside, this week we’re going to focus (pun intended) on the smaller creatures in Mother Nature’s world – the bugs.

    Here’s a few images to inspire you for the weekly photography challenge – bugs!

    Photograph The Katydid by Steve Passlow on 500px

    The Katydid by Steve Passlow on 500px

    Photograph Next to you... by Yvonne Späne on 500px

    Next to you… by Yvonne Späne on 500px

    Photograph yummy :P by bug eye :) on 500px

    yummy :P by bug eye :) on 500px

    Photograph Locust by Matteo Senesi on 500px

    Locust by Matteo Senesi on 500px

    Photograph Spider by Thomas Forysiak on 500px

    Spider by Thomas Forysiak on 500px

    By Rovanto

    By Vinoth Chandar

    Share your Going Buggy images!

    Simply upload your shot into the comment field (look for the little camera icon in the Disqus comments section as pictured below) and they’ll get embedded for us all to see or if you’d prefer upload them to your favourite photo sharing site and leave the link to them.

    Need help? How about some articles on macro photography like these:

    • 6 Tips for Near-Macro Photography with a Telephoto Lens
    • Reverse Lens Macro: Close Up Photography Lesson #3
    • Macro Photography for Beginners – Part 1
    • Macro Photography for Beginners – Part 2

    The post The dPS Weekly Photography Challenge – Going Buggy by Darlene Hildebrandt appeared first on Digital Photography School.

    Digital Photography School

  • Mastering the Art of Depth Creation

    In the simplest terms, photography is a method of duplicating reality. While you cannot change reality, you can present it in the best way possible. Though you are duplicating reality, you can present your subjects in a way that tells a story — you can make the everyday seem ordinary or fantastic, by using simple photographic techniques. No matter what Continue Reading

    The post Mastering the Art of Depth Creation appeared first on Photodoto.


    Photodoto

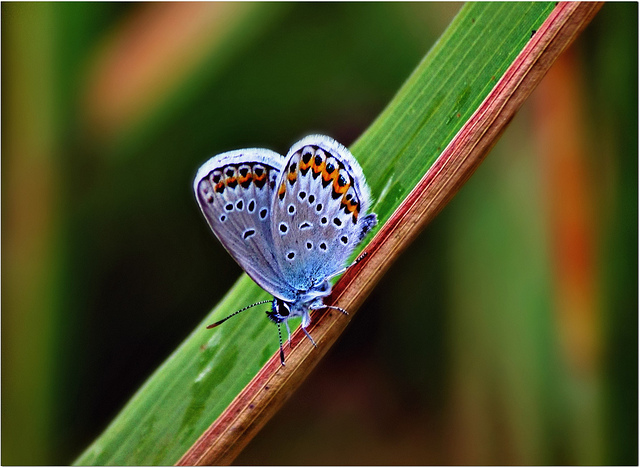
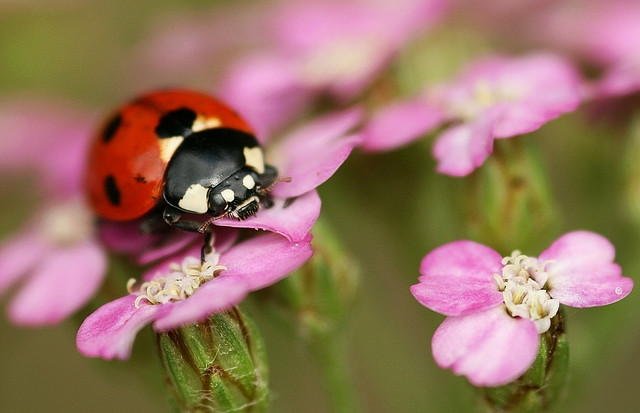
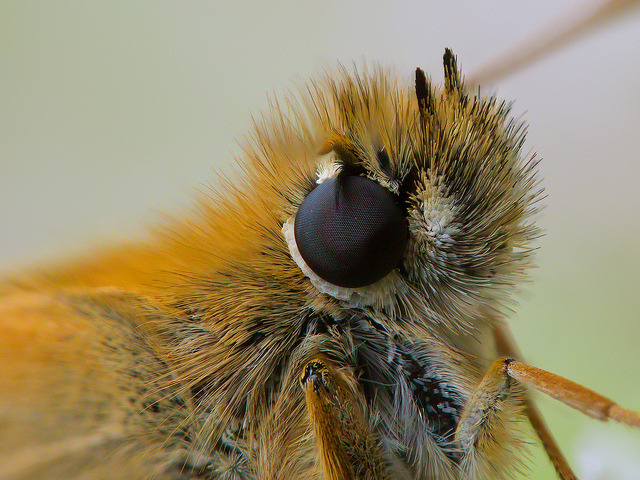
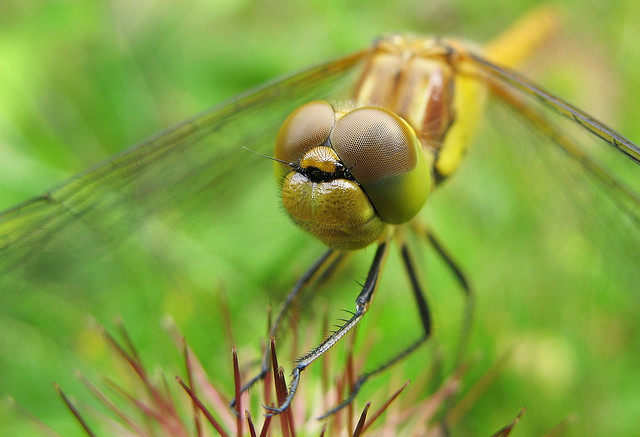
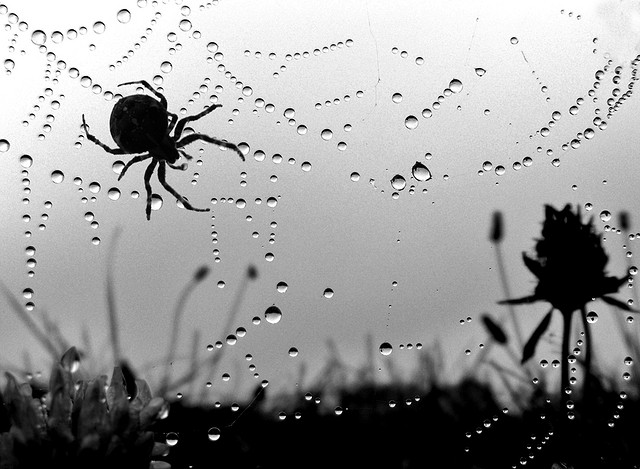
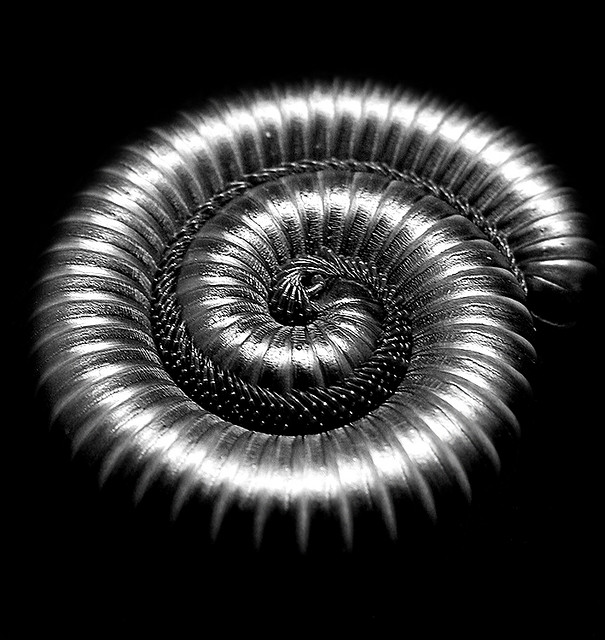
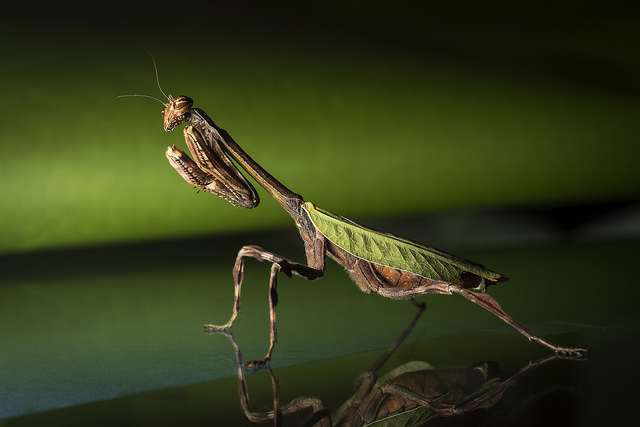
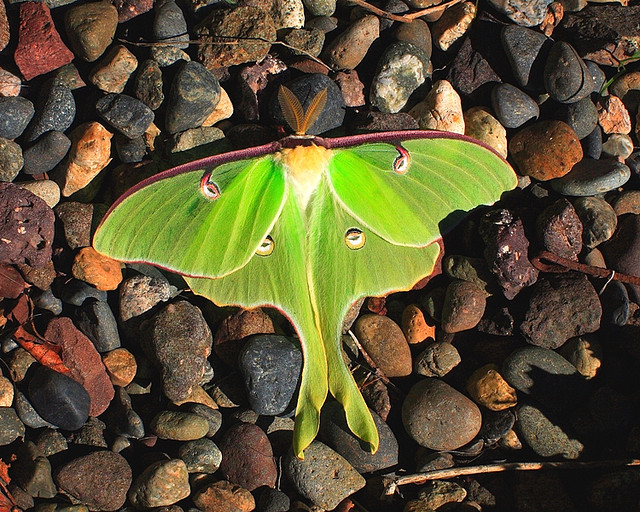
  • A Collection of Photos of Nature’s Smallest Creatures – it’s a Bug’s Life

    In the last two weeks we’ve look at the flora and some full on stunning landscapes. Now it’s time for some fauna, but focused in a little closer on some of its smaller members, photos of nature’s smallest critters. The insects!

    Right around the corner in the Northern Hemisphere is spring with its showers and flowers. But there would be no flowers without the bees and insects to pollenate. So today we pay homage to our little buddies that work so hard. I bring you:

    It’s a Bug’s Life

    By Pablo Fernández

    By ????????? ????????

    By Prabhu B Doss

    By Adam Foster

    By Laurenz Bobke

    By Viola’s visions ????

    By nutmeg66

    By Alexey Kljatov

    By Bùi Linh Ngân

    By nutmeg66

    By Alexey Kljatov

    By Reinhold Stansich

    By Vinoth Chandar

    By Stuart Williams

    By Ferdi De gier

    By Stavros Markopoulos

    By Don Sutherland

    By nutmeg66

    By Lutz Koch

    By Jon McGovern

    By Matt Reinbold

    By Alx Murray

    By Harald Hoyer

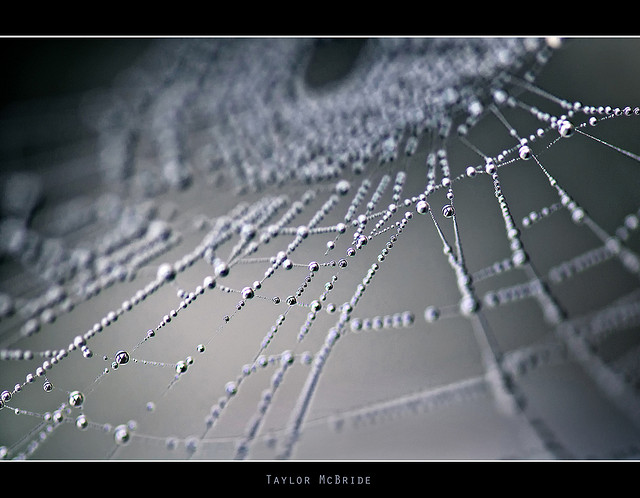
    By Taylor McBride

    By Bart van Dorp

    By Ray Dumas

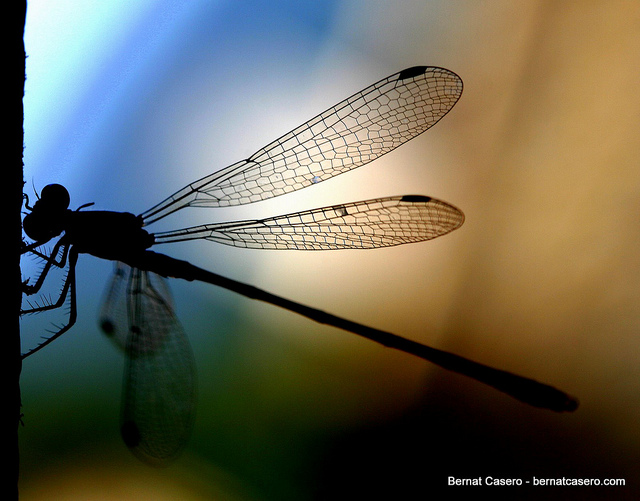
    By Bernat Casero

    By quas

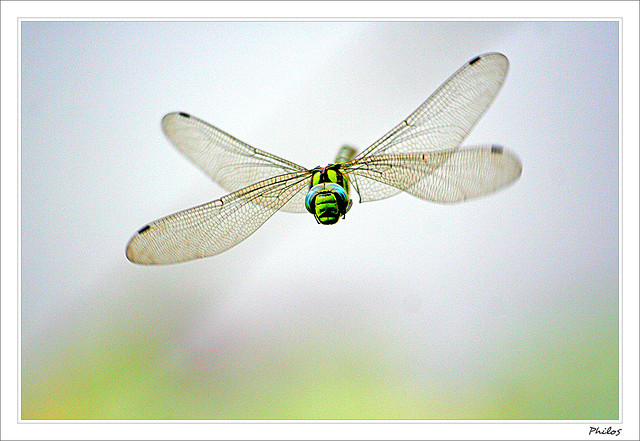
    By Phil

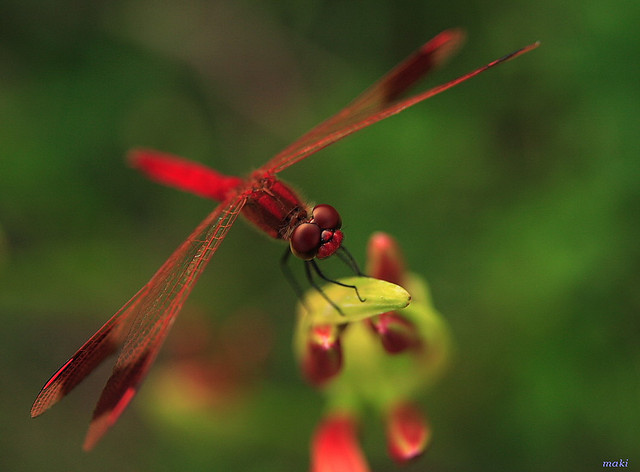
    By Maki_C30D

    By Lisa Brown

    By matt knoth

    By casch52

    Want to give this a go but need some close up tips? Try these?

    • How To Photograph Dragonflies
    • It’s a Small World – the World of Macro Photography
    • 6 Tips for Near-Macro Photography with a Telephoto Lens
    • Extension Tubes: Close Up Photography Lesson #2

    The post A Collection of Photos of Nature’s Smallest Creatures – it’s a Bug’s Life by Darlene Hildebrandt appeared first on Digital Photography School.

    Digital Photography School