Category: Photography

  • Finding and Achieving Your Style in Lightroom

    Photo processed in Lightroom

    There are so many options for processing photos in Lightroom that it’s no surprise that some photographers get confused. If you’re finding it difficult to decide what to do with your images (in the post-processing sense) you’re not alone.

    The key is to think about what you want to achieve with your processing. That’s not always easy, but you may find it useful to start by thinking about the following aspects. Your answers will help determine the approach you take.

    Colour

    Do you want a bright, colourful image or a desaturated one? Perhaps you’d even like to work in black and white. If you are working in colour do you want the colour to be accurate, or your photo to be predominantly warm or cool toned? The decisions you make about colour will have a big impact on the direction you take once you get to the Develop module in Lightroom.

    Tonal values

    Do you want a light image, or a dark one? High contrast or low contrast? Some of this will be determined when you take the photo. For instance, if you decide you want to create a portrait with a dark background, then ideally you would make sure that the background is dark in the first place. But, there are ways of making backgrounds darker that mean you can change the look of a photo quite dramatically in Lightroom if you wish. There’s an example of that later, keep reading.

    General feel

    Do you want your photo to be conservative or edgy? Modern or maybe nostalgic, vintage or retro? These concepts may feel a little hard to pin down, but again they will help determine the path you take in Lightroom. If you want to create an image with a nostalgic feel, then how does that affect your approach to colour? Or to contrast? How would it be different if you decided to go for a modern look instead?

    Portraits

    With photos of people, do you want them to look stylized or natural? Are you interesting in capturing character or beauty? Or maybe even both? Do you want your subjects to be sexy or sensual, or asexual? Do you want them to be casual or fashionable? Again, some of these concepts are somewhat airy, but thinking about them will help you work out what approach to take in Lightroom.

    Please note that you don’t have to think about all of these aspects. For most most photos, you will probably only have to consider two or three . Here are some examples:

    Example 1: Portrait with dark background

    The inspiration for this approach came from looking at the work of photographers like Tom Hoops, who use dark backgrounds to great effect in their portraits.

    The first example is a portrait I took of a girl standing in the doorway of a concrete bunker. The light is coming from her left.

    Photo processed in Lightroom

    One side of the photo is already dark, so I decided to reduce the brightness of the other side to match. I used a Graduated Filter to darken the concrete wall, and an Adjustment Brush to make the model’s hair darker. Here’s the result.

    Photo processed in Lightroom

    Possible alternative B&W

    The logical extension of this thought process is to convert the image to black and white and make the background even darker. I also increased Contrast in the Basic panel and applied Clarity to the model’s eyes with an Adjustment Brush to make them stand out more.
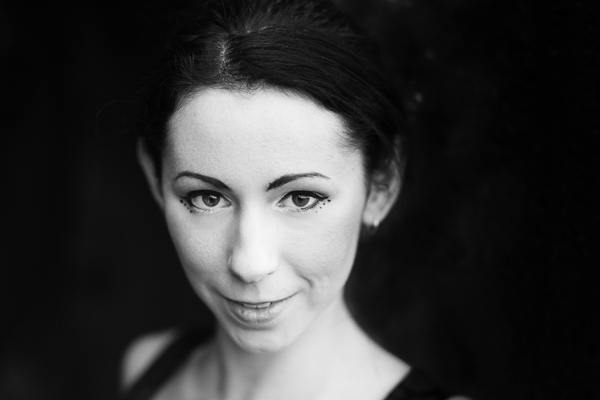
    Photo processed in Lightroom

    Example 2: Nostalgic colour

    I took this close-up photo in a market in Shanghai, China.
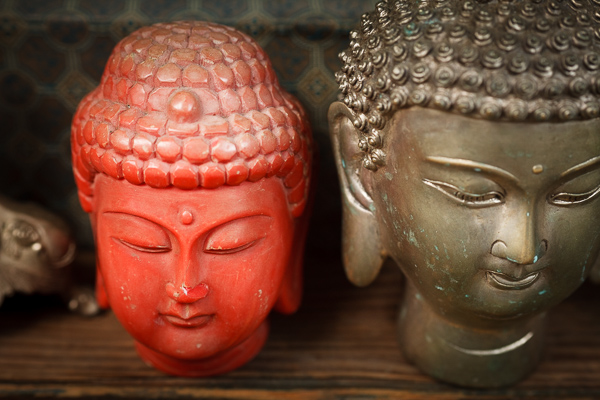
    Photo processed in Lightroom

    There are two thoughts that occur to me here. First, that the two Buddha heads have beautiful textures that I’d like to emphasize. Second, that I’d like to give the image a nostalgic feel.

    To achieve the nostalgic look, I used the Temp slider to make the photo warmer, and reduced the saturation of the colours with the Vibrance and Saturation sliders. I increased Clarity and Contrast to bring out the texture, and added a vignette using the Radial Filter. The dark shadows this creates add a sense of mystery.

    Photo processed in Lightroom

    Possible alternative add a plugin

    How about seeing how far I can push the idea of bringing out the texture and reducing colour saturation? Nik Software’s Viveza2 has some excellent tools for this. See the resulting image below.
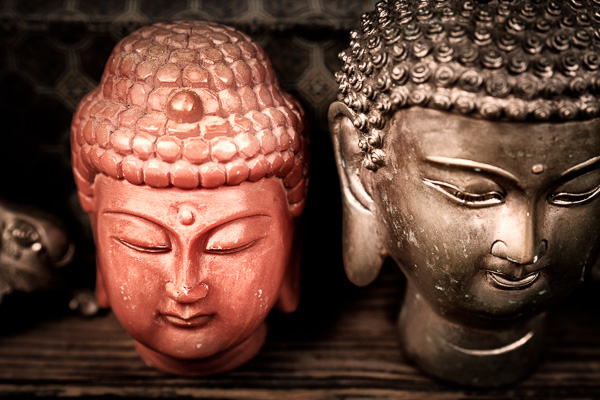
    Photo processed in Lightroom

    Example 3: Long exposure landscape

    Finally, here’s a landscape that I took one evening using a shutter speed of 30 seconds. The light is flat and dull, and there is a strong blue colour cast.
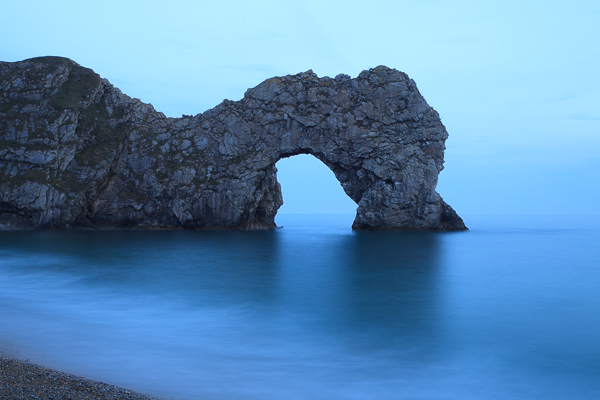
    Photo processed in Lightroom

    One option here is to emphasize the late hour and natural blue colour of the light. But I decided to take a different approach and that I wanted to create an image with warm tones. I did this by pushing the Temp slider to the right. Then I increased Contrast to compensate for the flat light and reduced Highlights to bring back some of the subtle detail in the sky. I added Clarity to the rock arch with the Adjustment Brush to emphasize it as the focal point.
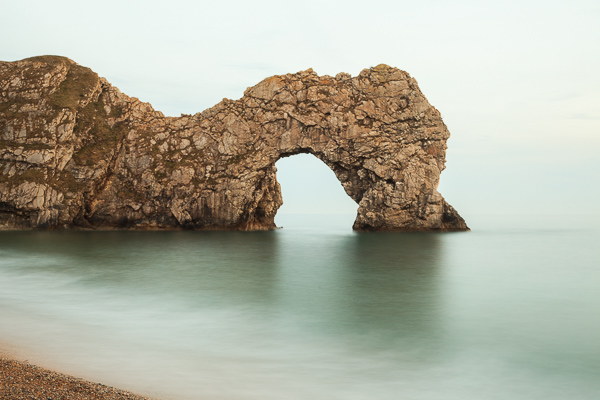
    Photo processed in Lightroom

    Possible alternative dark monochrome

    A darker, monochrome version with a blue tone to evoke the atmosphere of the blue hour when the photo was taken. I applied more Clarity to the rock arch, beach and water to enhance the texture and contrast in these areas, then added a vignette with the Radial Filter.
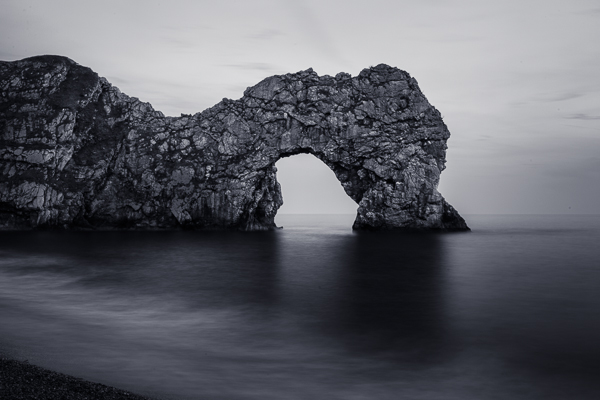
    Photo processed in Lightroom

     So as you can see there are many approaches to processing your images in Lightroom. Try different techniques and styles on the same image and you’ll start to learn which ones appeal to you most and are more your “style”. You can also create as many “Virtual Copies” of your image as you want and apply a different style to each for easy comparison. You can even save them as a Lightroom Preset if it’s a look you think you may want to use often.

    What is your approach to processing images in Lightroom? If you have any tips for our readers then please leave them in the comments.


    Mastering Lightroom ebook bundle

    Mastering Lightroom: Book One and Two

    My Mastering Lightroom ebooks are a complete guide to using Lightroom’s Library and Develop modules. Written for Lightroom 4 & 5 they take you through every panel in both modules and show you how to import and organise your images, use Collections and creatively edit your photos.


    The post Finding and Achieving Your Style in Lightroom by Andrew S. Gibson appeared first on Digital Photography School.


    Digital Photography School

  • Weekly Photography Challenge – Pet Photography

    By Jamie Grant

    Last couple of weeks have been all about nature and the outdoors. Another part of nature is the animal kingdom. So this week’s photography challenge is to get out and photograph some pets. If you don’t have any borrow your friend’s or neighbours.

    Photographing animals presents a unique set of challenges. You have a moving, possibly unwilling subject to deal with – as well as potentially tricky exposure to try and get detail in fur or feathers. Just the right light is essential, as is a delicate hand at working with your furry (or feathered, or scaled) friends.

    Let’s see how creative you can get. Here’s a few ideas to get you started:

    By Corrado Alisonno

    By Sonny Annesley

    By Sergiu Bacioiu

    By Viola’s visions ????

    By Sergiu Bacioiu

    By Rafael Acorsi

    By Paulo Brandao

    By Tambako The Jaguar

    By Charlie Stinchcomb

    By Adam Foster

    Share your pet photos!

    Simply upload your shot into the comment field (look for the little camera icon in the Disqus comments section as pictured below) and they’ll get embedded for us all to see or if you’d prefer upload them to your favourite photo sharing site and leave the link to them.

    Need help? How about some articles on pet photography like these:

    • Top 10 Pet Photography Tips and Techniques
    • How to get the “Money Shot” in Pet Photography
    • 5 Adorable Pet Photos [and How to Make your Shots even Cuter]

    The post Weekly Photography Challenge – Pet Photography by Darlene Hildebrandt appeared first on Digital Photography School.


    Digital Photography School

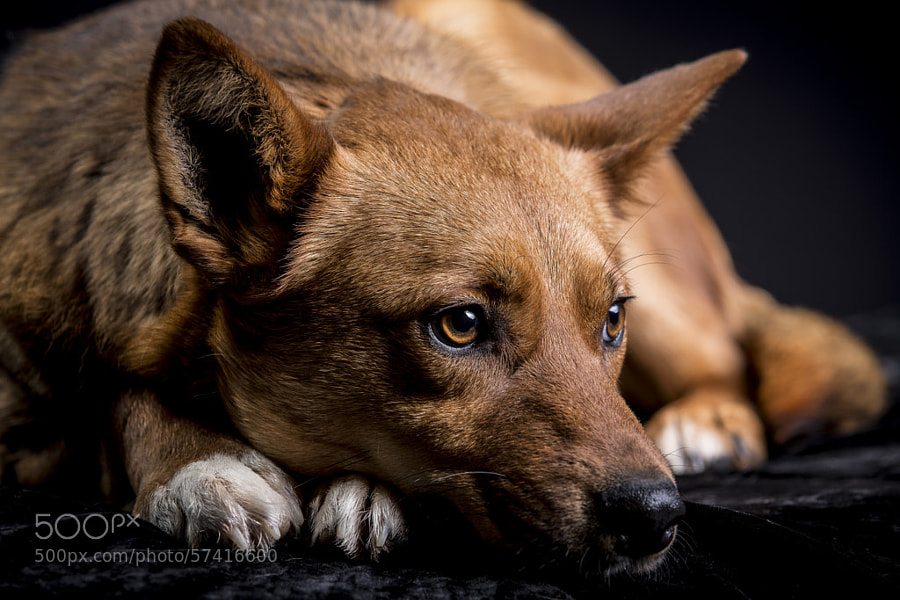
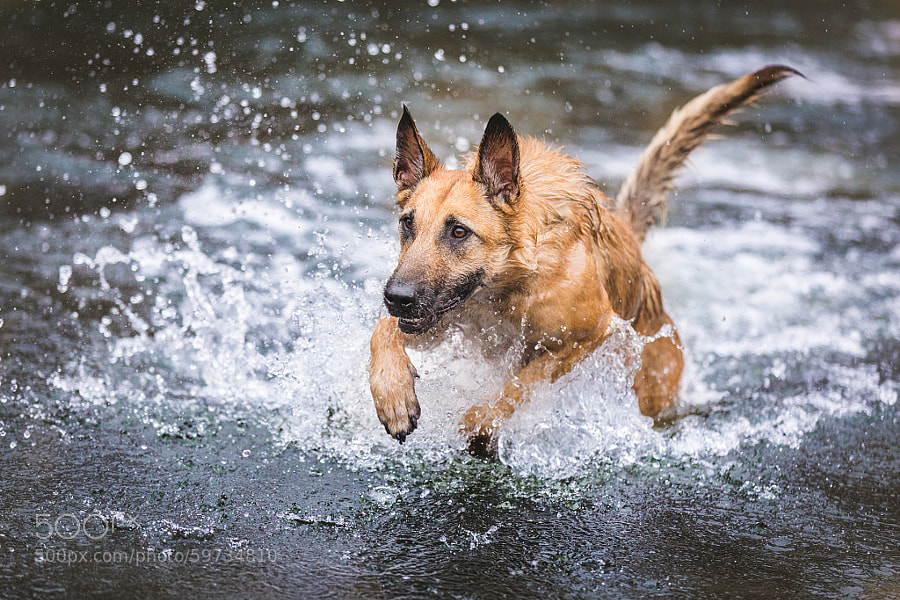
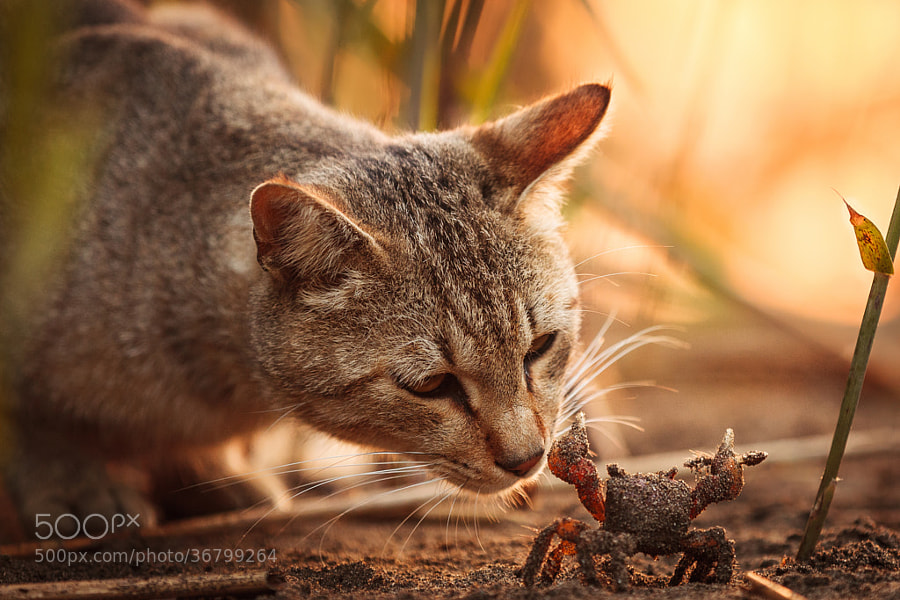
  • 38 Pet Photos to Amaze and Inspire You

    We’ve been focused on nature and landscape for a while on dPS so it’s time to shift gears and move over to the fauna, specifically – pets. If you have any pets you no doubt have endless photos of them. I have tons of photos of my cats on my iPhone. But let’s take it up a notch and see some really outstanding pet photos and see how it’s done. I might even motivate myself to get out the “real” camera and take some photos of my girls.

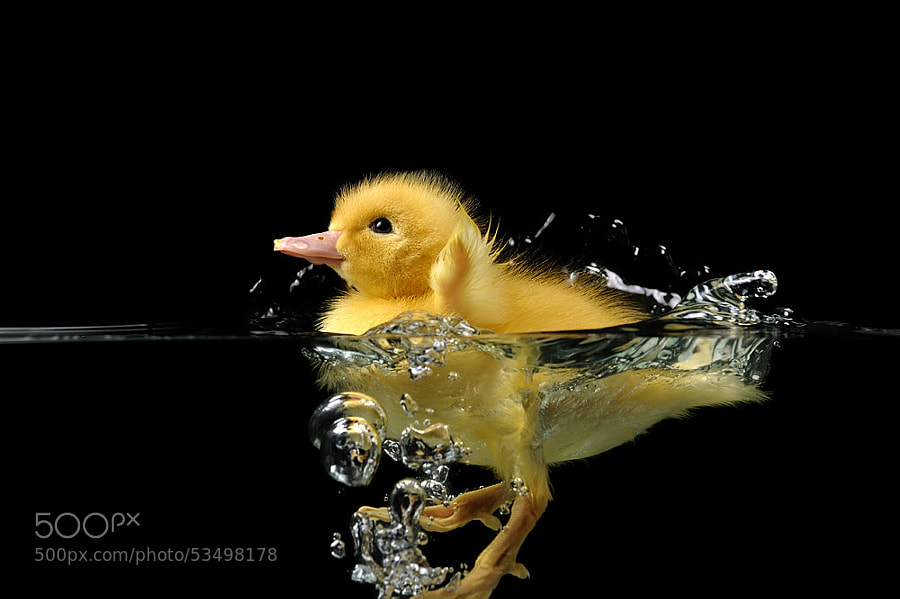
    Photograph Waiting to be Rescued by Darcy Evans on 500px

    Waiting to be Rescued by Darcy Evans on 500px


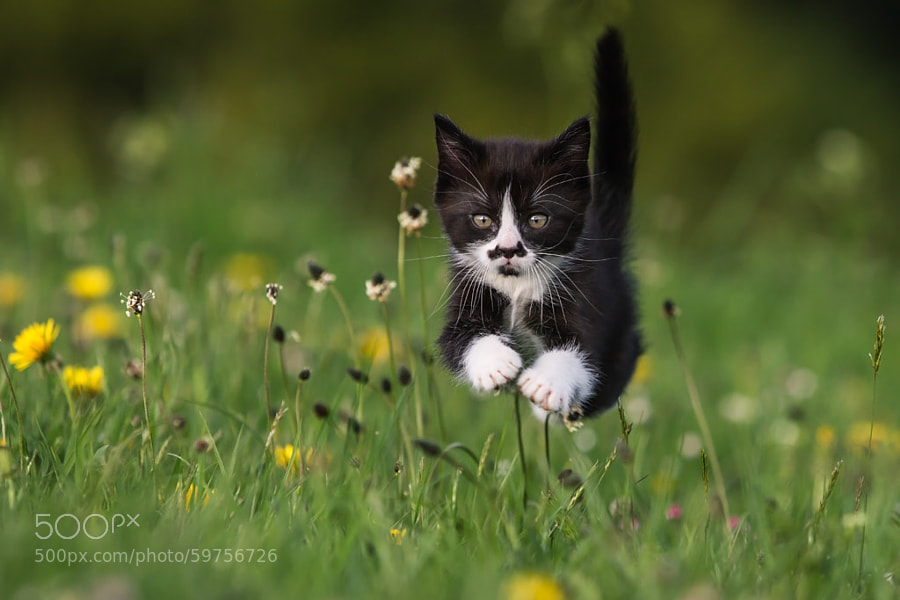
    Photograph Suspense... by Elke Vogelsang on 500px

    Suspense… by Elke Vogelsang on 500px


    Photograph Oops~! by kimera jam on 500px

    Oops~! by kimera jam on 500px


    Photograph Winter water fun by Elke Vogelsang on 500px

    Winter water fun by Elke Vogelsang on 500px


    Photograph Are you delicious ...? by Seiji Mamiya on 500px

    Are you delicious …? by Seiji Mamiya on 500px


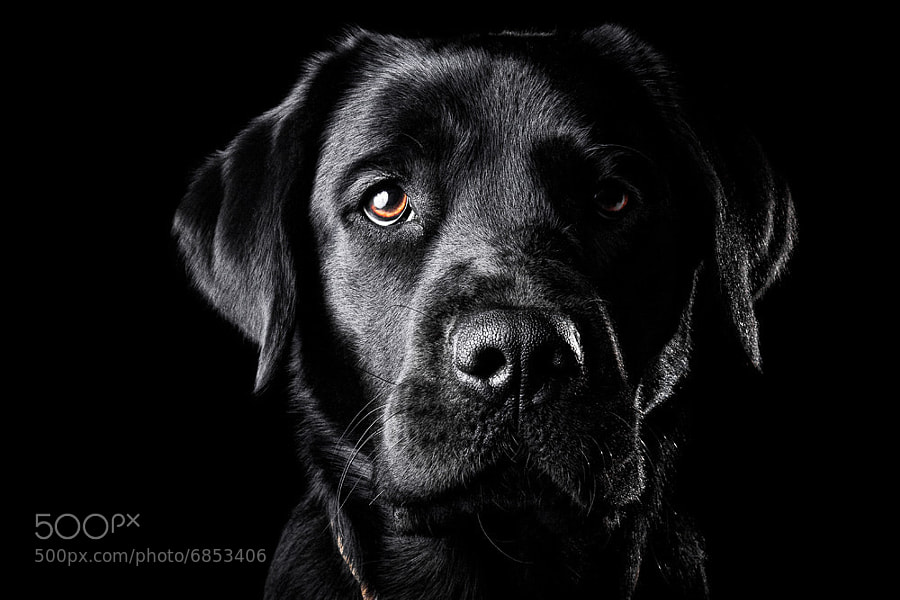
    Photograph Black Lab by Oszkár Dániel Gáti on 500px

    Black Lab by Oszkár Dániel Gáti on 500px


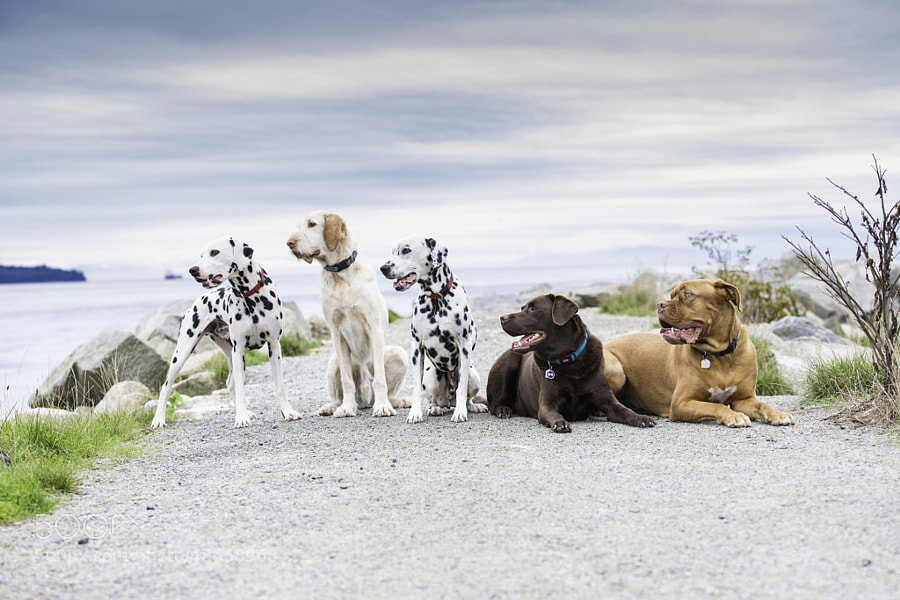
    Photograph 5 of a Kind by Darcy Evans on 500px

    5 of a Kind by Darcy Evans on 500px


    Photograph *Batman* by Regine Heuser on 500px

    *Batman* by Regine Heuser on 500px


    Photograph Eugene by Darcy Evans on 500px

    Eugene by Darcy Evans on 500px


    Photograph Look by Pavel Shapovalov on 500px

    Look by Pavel Shapovalov on 500px


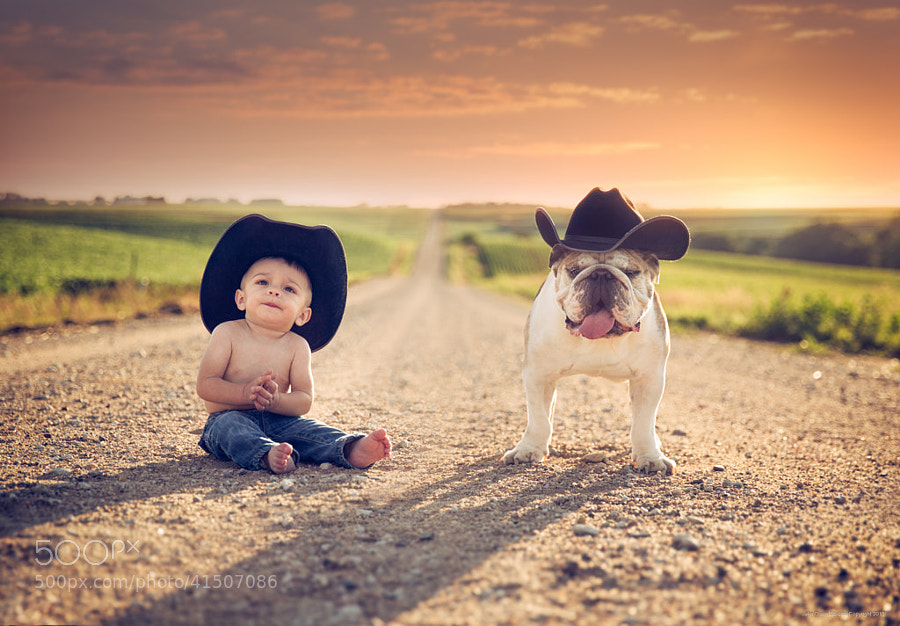
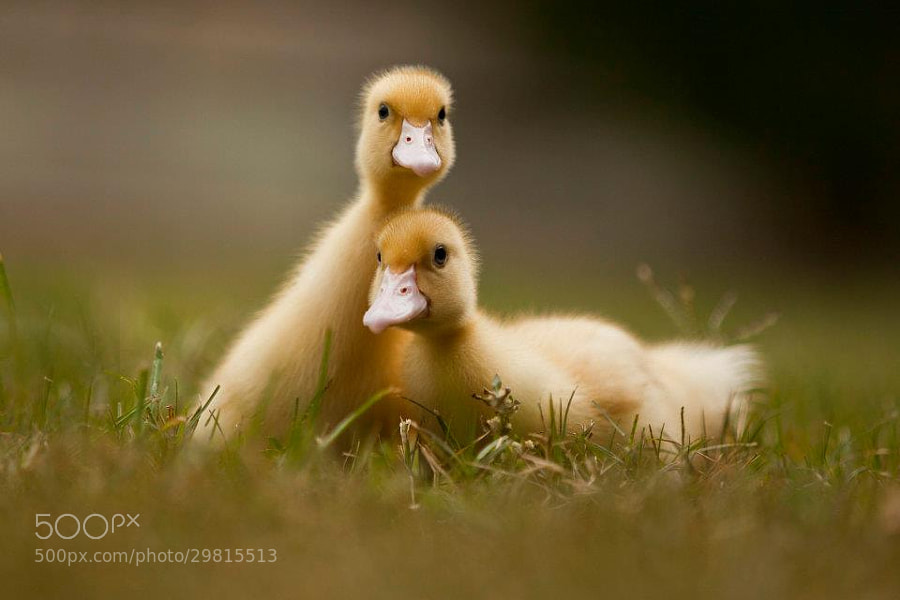
    Photograph Twins by Jake Olson Studios on 500px

    Twins by Jake Olson Studios on 500px


    Photograph Can you help me? by Tomasz Grabowiecki on 500px

    Can you help me? by Tomasz Grabowiecki on 500px


    Photograph Another Life by Jake Olson Studios on 500px

    Another Life by Jake Olson Studios on 500px


    Photograph On the run by Josh Norem on 500px

    On the run by Josh Norem on 500px


    Photograph Nice by Cheglakov  Eugene  on 500px

    Nice by Cheglakov Eugene on 500px


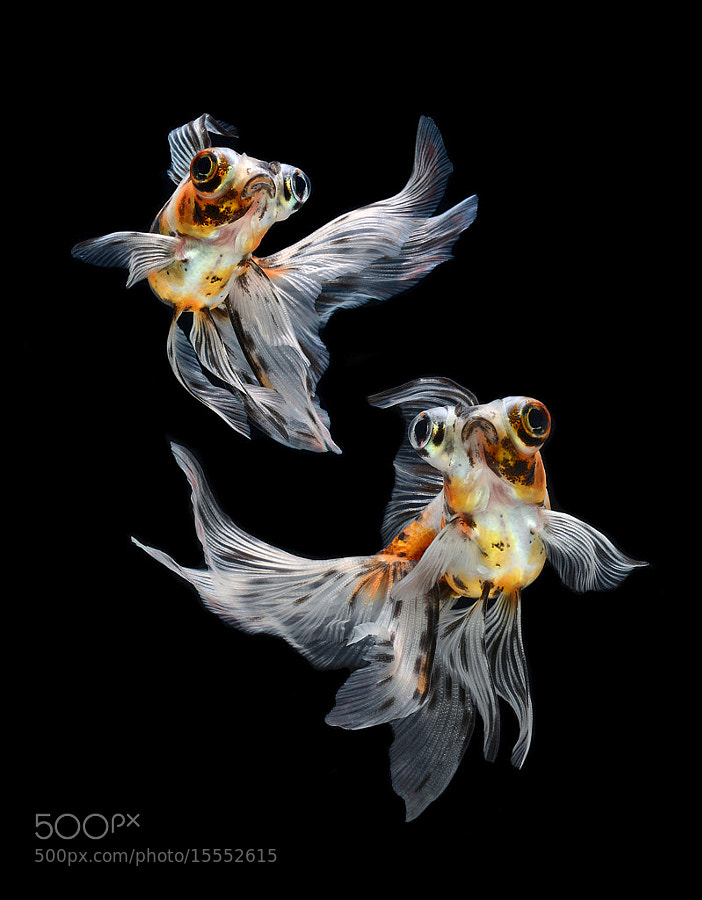
    Photograph fish dance by visarute angkatavanich on 500px

    fish dance by visarute angkatavanich on 500px


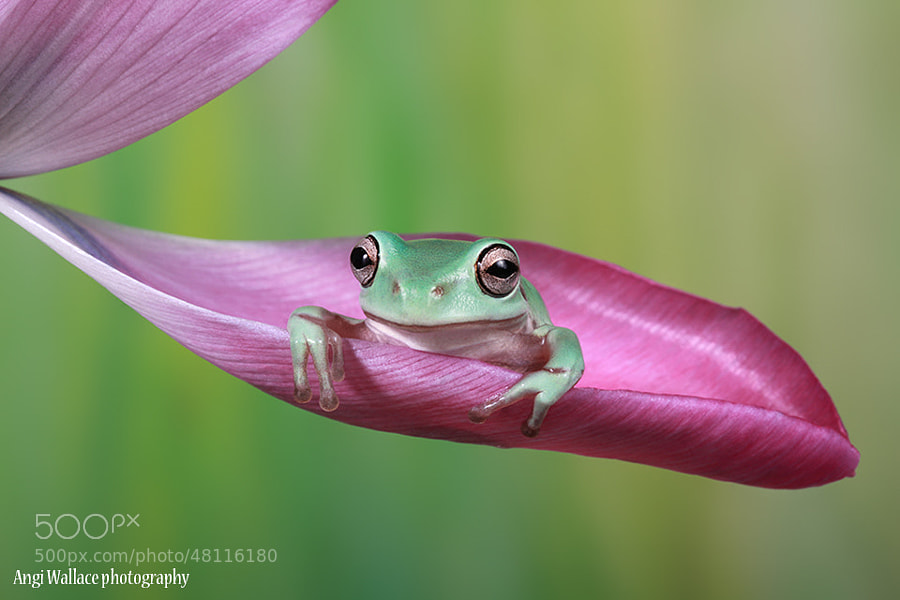
    Photograph The Cutie by Angi Wallace on 500px

    The Cutie by Angi Wallace on 500px


    Photograph It's been one of those mornings... by Andrew Walmsley on 500px

    It’s been one of those mornings… by Andrew Walmsley on 500px


    Photograph Pals by Michiyo Clark on 500px

    Pals by Michiyo Clark on 500px


    Photograph I caught the disk! by Sergey Golotvin on 500px

    I caught the disk! by Sergey Golotvin on 500px


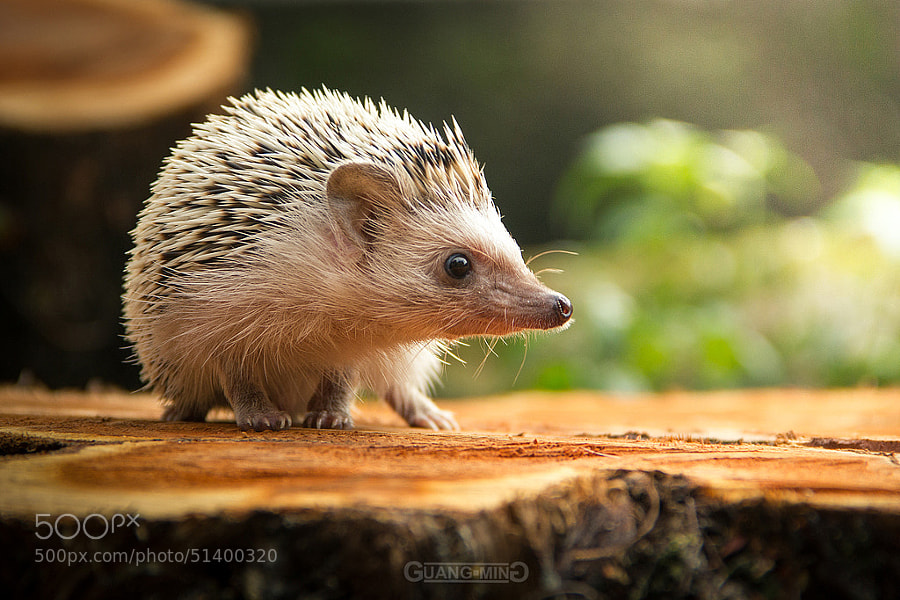
    Photograph HedgeHog by Bryan Yong on 500px

    HedgeHog by Bryan Yong on 500px


    Photograph Pencil Vs Camera - 58 by Ben Heine on 500px

    Pencil Vs Camera – 58 by Ben Heine on 500px


    Photograph Ferret by Mark Johnson on 500px

    Ferret by Mark Johnson on 500px


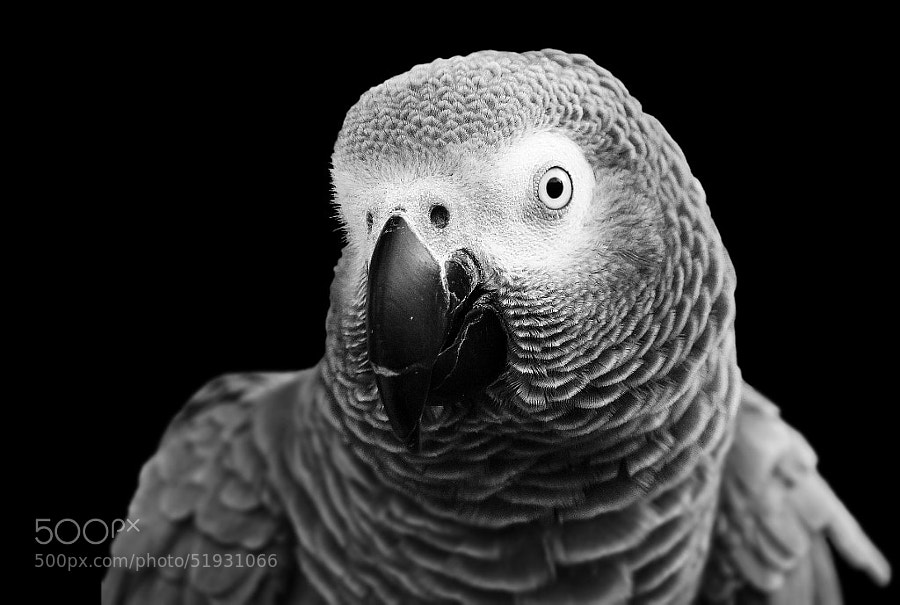
    Photograph African Gray by cherylorraine smith on 500px

    African Gray by cherylorraine smith on 500px


    Photograph fairytale 2 by Cecylia ??szczak on 500px

    fairytale 2 by Cecylia ??szczak on 500px


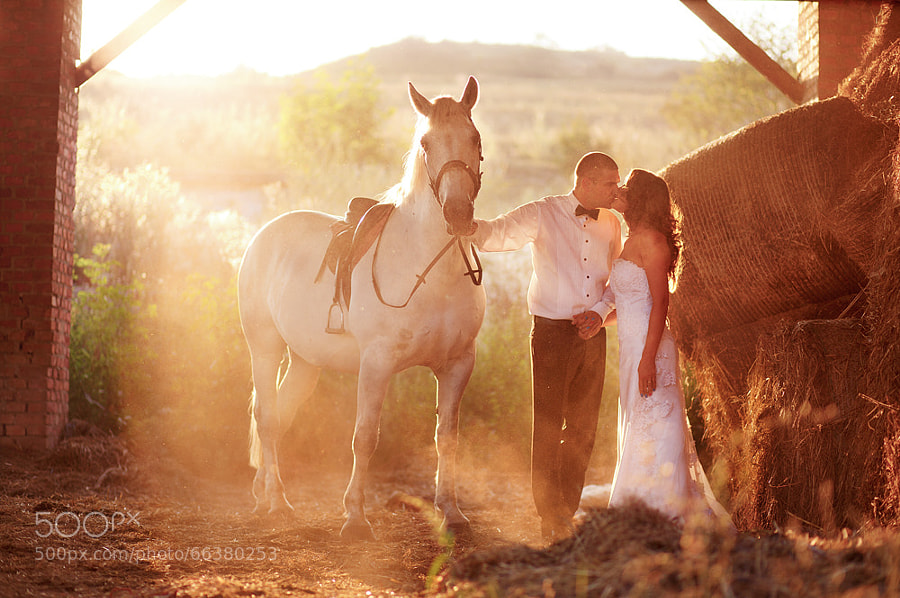
    Photograph The Kiss by Lipovan Cristian on 500px

    The Kiss by Lipovan Cristian on 500px


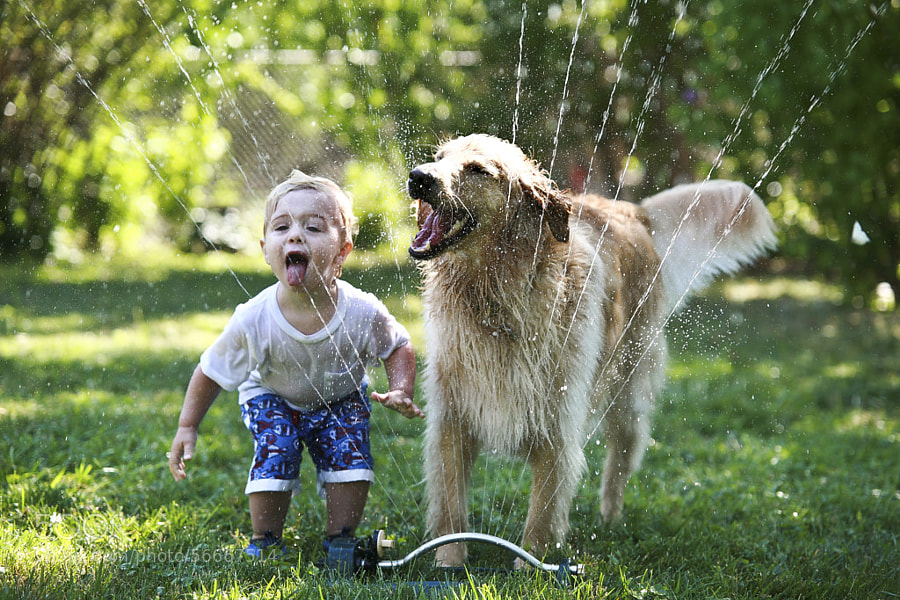
    Photograph We Don't Need Cups (or Bowls) by Kevin Duffy on 500px

    We Don’t Need Cups (or Bowls) by Kevin Duffy on 500px


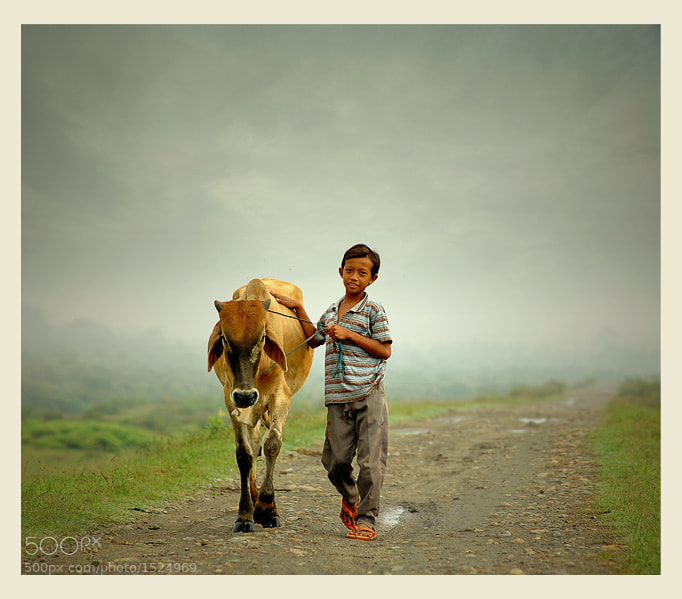
    Photograph me and my cow by Teuku Jody  Zulkarnaen on 500px

    me and my cow by Teuku Jody Zulkarnaen on 500px


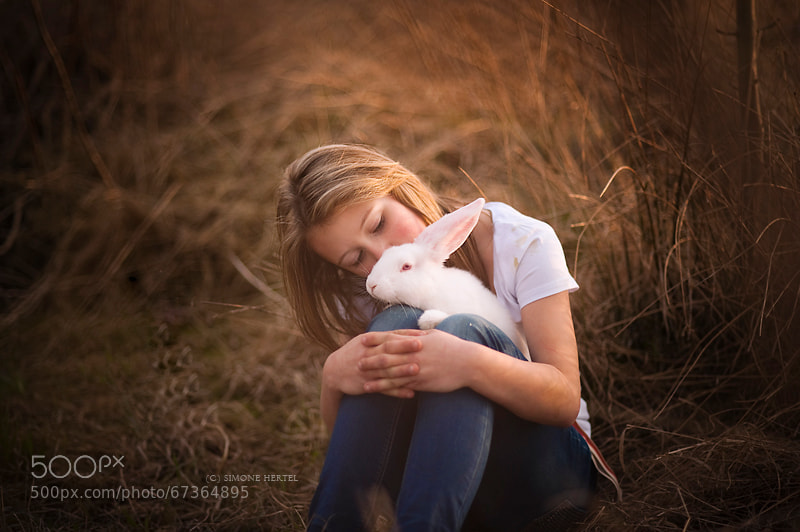
    Photograph Kisses at sundown by Simone Hertel on 500px

    Kisses at sundown by Simone Hertel on 500px


    Photograph Good Friends by ?????????? ????? on 500px

    Good Friends by ?????????? ????? on 500px


    Photograph A Still Time by Seiji Mamiya on 500px

    A Still Time by Seiji Mamiya on 500px


    Photograph cat pillow-dog blanket by Szilvia Pap-Kutasi on 500px

    cat pillow-dog blanket by Szilvia Pap-Kutasi on 500px


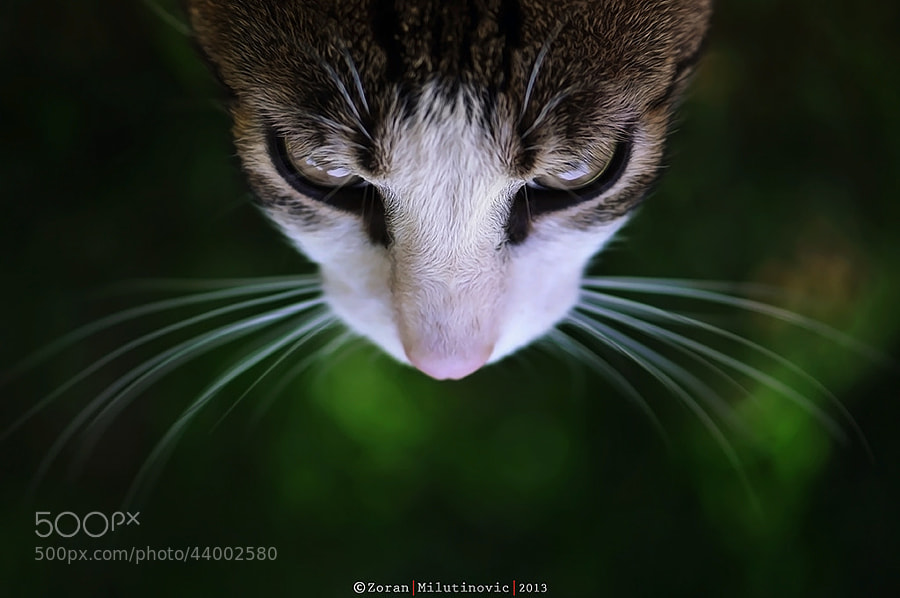
    Photograph Shiny whiskers by Zoran Milutinovic on 500px

    Shiny whiskers by Zoran Milutinovic on 500px


    Photograph wet cat  :) by Alina Esther on 500px

    wet cat :) by Alina Esther on 500px


    Photograph Jalak Lenteng  by Amir  Rodof on 500px

    Jalak Lenteng by Amir Rodof on 500px


    Photograph un petit bain ça fait du bien by Thierry Vialard on 500px

    un petit bain ça fait du bien by Thierry Vialard on 500px


    Photograph Evil duo by Matt Mcintyre on 500px

    Evil duo by Matt Mcintyre on 500px


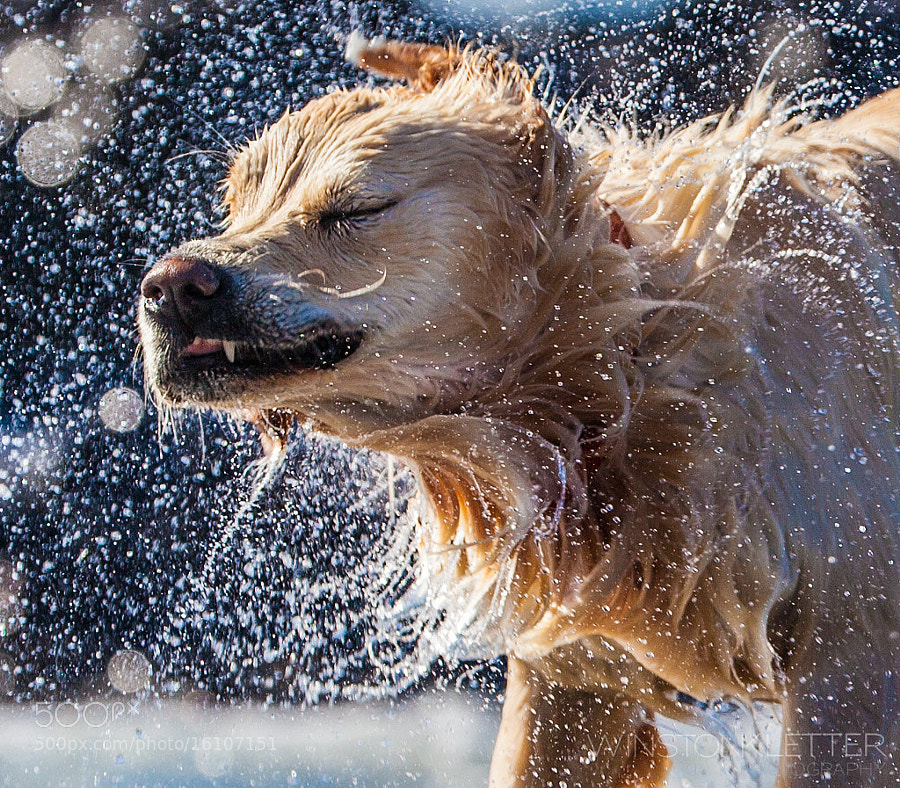
    Photograph Southern comfort by Winston Kletter on 500px

    Southern comfort by Winston Kletter on 500px


    The post 38 Pet Photos to Amaze and Inspire You by Darlene Hildebrandt appeared first on Digital Photography School.


    Digital Photography School

  • Lightroom Presets That You Have to Have at Any Cost

    Photo editing has never been so easy as it is these days. The web offers you tons of Lightroom presets and Photoshop actions to add some cool effects to your images by pressing just one button! Lightroom presets are a fantastic tool that can help to automate your workflow and to add creativity to your photo library, no matter if Continue Reading

    The post Lightroom Presets That You Have to Have at Any Cost appeared first on Photodoto.


    Photodoto

  • 11 Accessories for Long Exposure Photography

    Many ways

    Every so often I get an email from a blog reader asking “if there is one accessory that you would recommend for long exposure photography, what would it be?”

    I wish the answer was a simple one, but of course it is not.

    There are so many accessories that I carry every time I go making long exposure photographs. There are also many accessories I carry on a regular basis no matter what, and some I carry here and there depending on the location. So with that all said, here are some of my favorite items, and must have accessories for long exposure photography.

    #1 Comfortable Shoes

    It all starts with comfortable shoes because you will likely be standing for a while or walking around excessively. I personally wear Under Armour sneakers, that were designed for the New York City police department, because they are extremely comfortable and made for officers to be on their feet all day. They also have the traction when needed, like in sand or on wet pavement.

    However, when I know that I will be photographing extremely close, if not in, water then I do not use those sneakers. At that point I switch to standard waterproof boots or just remove the sneakers and go in barefoot. Wearing non-waterproof shoes while getting your feet wet is a horrible feeling. So be mindful of your surroundings as Master Yoda says.

    #2 Mobile Cable Release

    A cable release is pretty much a “must have” for long exposure photography. After 30 seconds most cameras do not have the necessary shutter speeds built-in to capture the scene, through a thick neutral density filter like a 10-stop.

    I’ve been surrounded by photographers who use cheap off-brand cable releases that stop working after the first use. I’ve also seen fancy intervalometers run out of batteries, making the cable release a dangling useless piece of plastic.

    So my backup plan is a cable from Trigger Happy. The beauty is that it’s a thin, lightweight, cable that can easily be packed in any bag or pocket. You then connect it through the headphone jack of your phone (iPhone or Android) and have a cable release that way. Triggertrap is another amazing mobile cable release brand and many times I will switch between apps because the Trigger Happy cable works fantastic with Triggertrap as well.

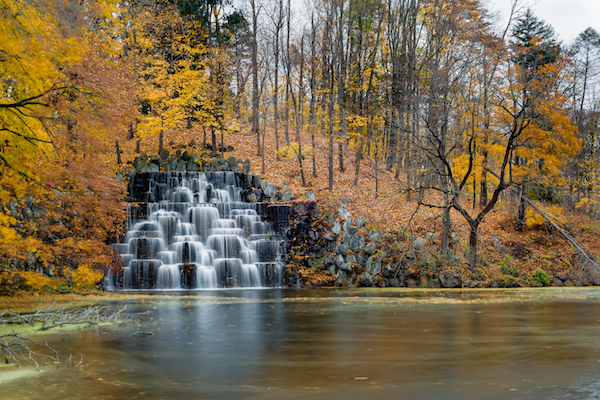
    Duke waterfall

    #3 Meal Bars

    This is too easy to forget. You wake up super early for sunrise or head out the door just before sunset, hoping to catch that last bit of glow in a glorious long exposure. But then you get to the location and realize, “Holy smokes I didn’t eat anything.”

    So this way too often overlooked meal bar idea is a must have no matter what. I even recommend this for standard exposure shooting, on photowalks, or wherever. Having at least one meal bar can boost your energy and fill that hunger craving.

    #4 Water Bottle

    Going along with the meal bar idea is a water bottle. Depending on where you are shooting, stores may not be an option for grabbing a quick thirst quencher. There are also those eco-conscious photographers out there (including myself) that prefer not buying a throw away water bottle.

    Typically I carry a Nalgene water bottle that has a decent size loop at the top. Using a carabiner it is attached to my belt or bag so that I’m not physically carrying it, but it’s always with me.

    #5 Rain Cover

    A rain cover is one of those accessories that I have whether I’m photographing long exposures or anything else. I personally use the Think Tank Photo rain covers, but there are so many awesome ones out there including the OP/TECH plastic covers which I consider emergency products.

    Although many modern mirrorless and DSLR cameras contain weather sealing (check your manual if you aren’t sure if yours has it or not), they are not waterproof and can still be impacted by the rain. So having the ability to throw a rain cover over your camera can help ensure that the camera lasts a very long time.

    Another rain cover option is the Storm Jacket by Vortex Media.

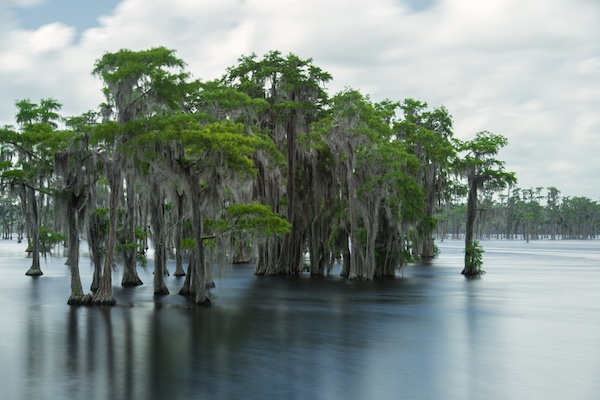
    What floats georgia

    #6 Lens Cloth

    Going along with the rain cover is a lens cloth. If you are going between cold and warm temperatures then your camera will fog up for a bit. If it’s raining then you will likely have water droplets on your neutral density filters. So having a simple lens cloth with you is good to wipe the fog or droplets from the filters.

    #7 Cold Weather Mask

    Another product I keep with me during the colder seasons, is a cold weather mask. More specifically, this one from Under Armour. The reason I like this one is because it can squeeze into the same pouch as my Think Tank Photo rain cover. Additionally, the mask covers enough of my head and face to keep me warm. Of course, if it’s a super cold day like in a “polar vortex” then I would of course prepare for that in addition to the weather mask.

    #8 Tripod Weight

    Most tripods with a center column have a hook underneath which makes it easy to hang something weighted. Tripods without a center column usually have an option to attach a hook underneath as well.

    The reason you want to weigh down your tripod is because of the extended shutter time. If you accidentally touch your tripod you could move it by accident. So weighing down the tripod can help prevent unintentional movement, thus saving your long exposure.

    I’m not saying to bring a heavy weight with you. Instead I’m saying to use your camera bag. You will likely have enough gear in the bag that can make a good 5-10 lb (2.3-4.6 kg) weight. Use the tripod hook and a loop on your bag to create the weight.

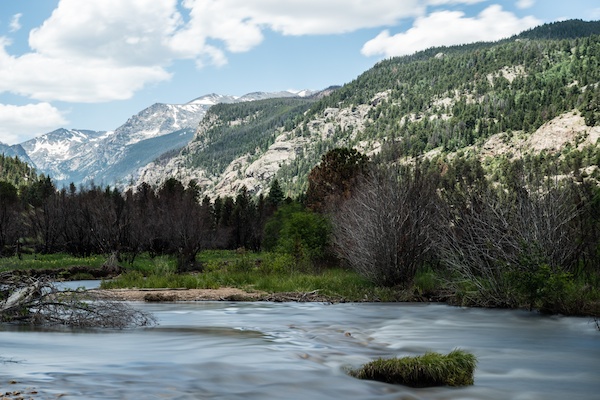
    Rocky mountain national park

    #9 Extra Camera Batteries

    This one should be a no brainer but you’ll be surprised how many photographers forget to carry extra batteries. Always keep in mind that the longer the shutter speed, the more your battery will drain. I tend to carry three batteries with me, at a minimum. Usually one in the camera body and two extras in my bag.

    #10 Red Laser Pointer

    Yup, you read that right. You won’t be making a presentation while you wait for your ten minute exposure to finish. But, depending on how dark it is outside and how dark your neutral density filter is, a red laser pointer can help you find a place to focus. If you know a tree is in the distance, put the dot on the tree and focus on it.

    You might be wondering why I recommend a laser point rather than a flashlight. A flashlight is also a good idea, but a laser pointer is lighter and can travel in a much further distance than the average flashlight.

    #11 Mobile Battery Backup

    Your mobile devices drain very fast. Especially if you are using an App like PhotoPills to calculate exposures or find the right spot for sunset. Or, if you are using your phone as a cable release as mentioned above, then your battery will drain much faster. So I highly recommend having a battery backup.

    I typically carry two with me at all times. One has two USB ports, allowing me to help charge a friend’s phone also if needed. The other is the Bolt which was a Kickstarter project. I keep that one as well because it’s lightweight, small and doubles as a wall charger.

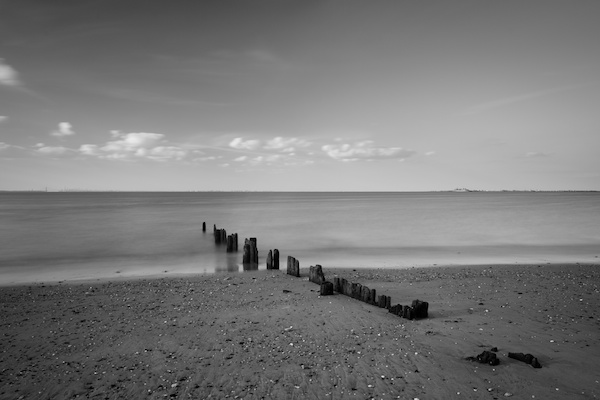
    Port monmouth pillars

    Bonus Tip

    Before I finish up this article I want to share a shooting tip for long exposure photographs. Quite often I see photographs where the sky and water is so smooth, which is fantastic. Many times the exposures are spot on and the post processing is beautiful and tasteful. However, sometimes there is something missing from the composition. That being, a point of focus.

    Long exposure photographs are some of my favorite types to make and view. However, with such smooth, ghosted and blurred subjects in the scene, not having something in focus can really make a viewer’s eye wonder.

    So instead of just capturing a scene of full motion, try to include an object in perfect focus. Stop people’s eyes from wondering and give them a starting point.

    Do you have any other long exposure photography tips or accessories to sure? Please do so in the comments below.

    The post 11 Accessories for Long Exposure Photography by Scott Wyden Kivowitz appeared first on Digital Photography School.


    Digital Photography School

  • 7 Street Photography Tips and Exercises to Try This Season

    You can currently pick up 2 eBooks on Street Photography by James on sale now at SnapnDeals!

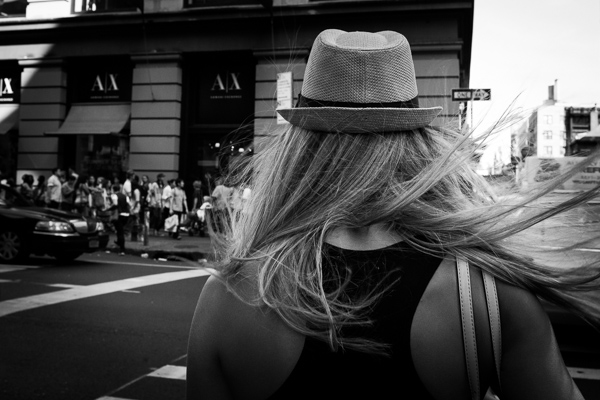
    Windswept Hair, Prince and Broadway, SoHo

    Windswept Hair, Prince and Broadway, SoHo

    If you live near me, the birds are starting to chirp, it no longer hurts your face to walk out the door, and everyone sheds their all black winter outfits and puts on their most interesting attire.

    If you live in the southern hemisphere, it’s beginning to cool off nicely. Spring and fall are the best times of the year to capture people and focus on street photography. If ever there’s a time to do it, it’s now.

    So here is a list of street photography tips and exercises to get you out there shooting.

    1. Linger in the same area

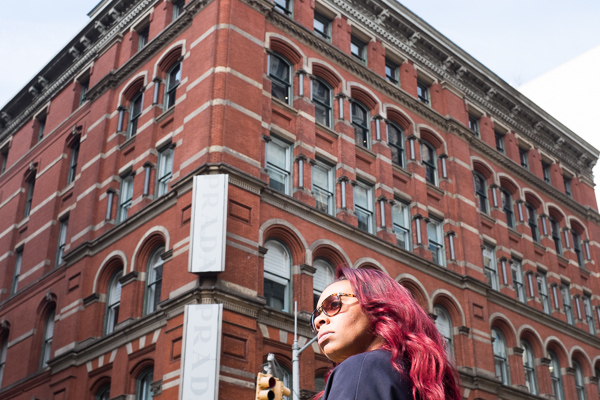
    Prada Store, Prince and Broadway, SoHo

    Prada Store, Prince and Broadway, SoHo

    For this entire list of exercises, we are going to stick to the same general area. If you notice, all of the descriptive images in this article are from the same area of SoHo in New York City, at different times of day and in different seasons. There are so many reasons why this is a beneficial way to shoot.

    The more you visit and revisit an area the more you get to know how it works and thinks, and the more you will get to know the characters. You will allow yourself to get familiar with the themes and subjects of the area. In addition, by the end of this exercise you will have a set of cohesive images that will work well when displayed together. Each image will play off the others.

    From a technical and learning standpoint, there are a lot of advantages as well. It is common for people to walk around constantly while trying to find content to photograph, which is normal, but often waiting in the same spot or area for something to happen is a more effective strategy. Whether you are walking or waiting, the same amount of interesting moments will happen, and if you are waiting you will be better prepared to see them happen and capture them correctly.

    As you visit the same area on multiple days, pay attention to the location of the sun in the sky and how it affects your images. Notice how the illumination of a scene and the appearance of your images change as you photograph into and away from the sun. Notice how the quality of light changes as a cloud moves over the sun and away again. Take the same shot twice at different times of day. Take advantage of the golden hours, as they are the most beautiful times to photograph, but don’t shy away from shooting in the harsh light of midday or at night.

    2. Capture a strong facial expression or gesture

    Window Glance, Broadway, SoHo

    Window Glance, Broadway, SoHo

    A significant percentage of the greatest street photographs have emotion to them. They make the viewer feel something. This is not by accident; it is what most likely drove the photographer to take a shot.

    It is difficult to capture someone at the height of their emotion because those moments are so fast and fleeting. More importantly, if you are not actively looking for them then you will not be able to catch the moments before they disappear. Emotion does not only have to be on a subject’s face. It can be in their stride, in their posture, and in their hands.

    Hint: It is much easier to capture an image like this if you pick a location and linger.

    3. Capture a photo with multiple subjects

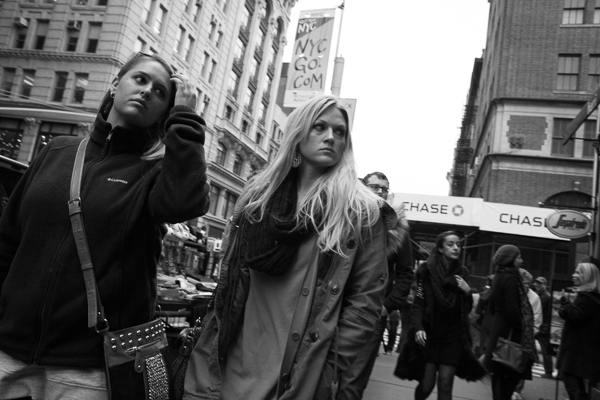
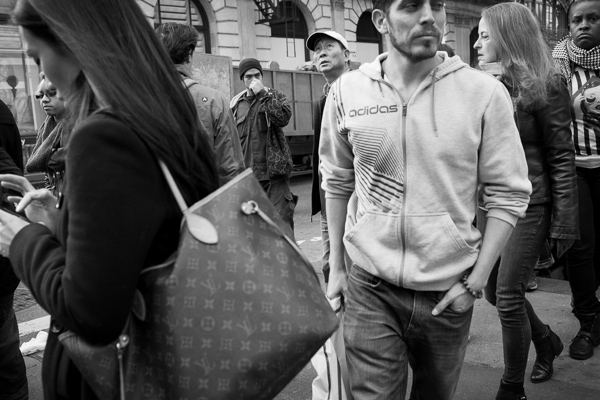
    Diverse Crowd, Prince and Broadway, SoHo

    Diverse Crowd, Prince and Broadway, SoHo

    Create a scene that is busy with delightful things for the viewer to explore. These photographs work extremely well because, in addition to being interesting, they give our eye more to look at, and can help the photo feel more balanced when done right. These elements don’t have to be people – they can be objects, animals, signs, or pretty much anything as long as they are balanced well in the scene.

    4. Capture a small detail

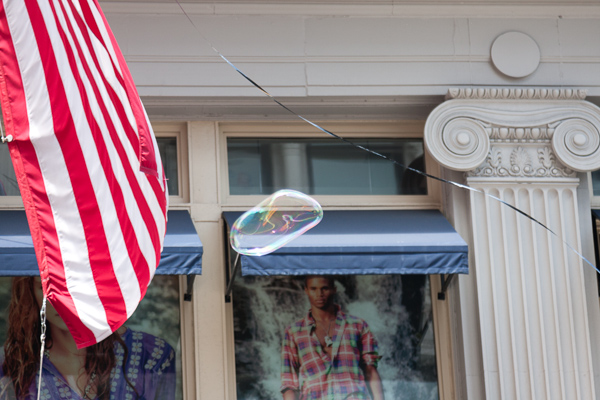
    Bubble, SoHo

    Bubble, SoHo

    The opposite of the last exercise is to hone in on a small detail. Make the entire photograph about some tiny detail that alludes to a larger idea or story.

    In the case of the image above, I tend to view the neighborhood of SoHo as a bubble. It has turned into a shopping mall and not much of a true neighborhood anymore. This photo is my way of alluding to that.

    What’s the best strategy to finding something like this? Honestly, there isn’t one except for keeping your eyes open. This tip is similar to searching for a strong expression, in that the only way to do it well is to keep your eyes open so you can see it in the first place. You will be surprised at how many of these photographic moments pass you by when you are not actively looking for them. In addition, the more time you spend in the same area the more of these types of images will pop out at you.

    5. Take a street photograph without people

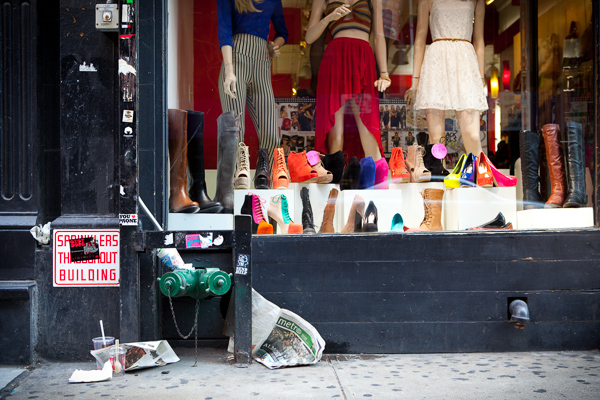
    Shoe Store Display, SoHo

    Shoe Store Display, SoHo

    Street photography is often confused with the idea that you need candid people in the frame. This is a misconception. Street photographs are about people and culture and life, but they can just as easily be devoid of people. Some of the best and most interesting street photographs are devoid of people. Lee Friedlander was an expert at this, take a look at his work for inspiration.

    6. Photograph differently

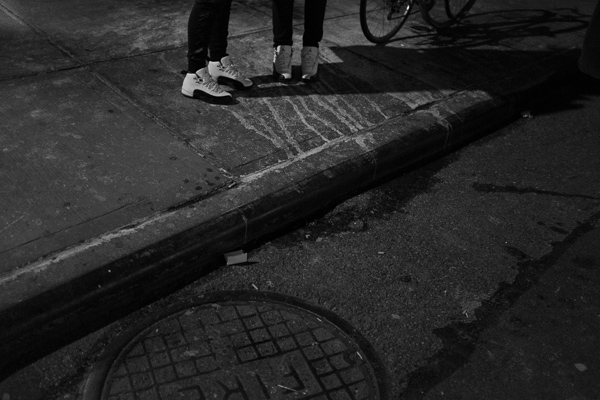
    Matching Jordans, SoHo

    Matching Jordans, SoHo

    If everyone is photographing in one direction, photograph in the other. The key to this type of work is to have fun and to create unique images that mean something to you. Create images where you live or work, where you hang out, and what you know best. Those will turn out to be the most unique and insightful images.

    7. Think of an idea and figure out how to capture it

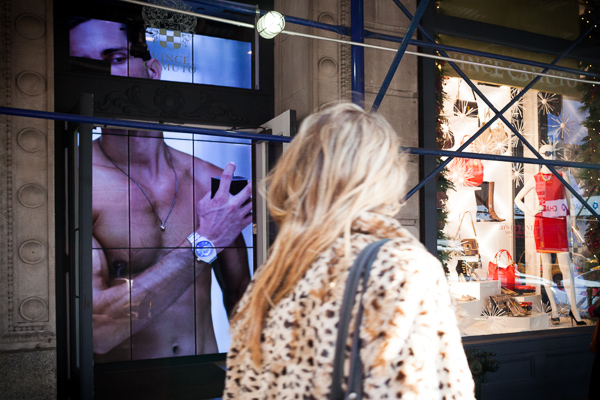
    Vince Camuto, SoHo

    Vince Camuto, SoHo

    A majority of the best street photography is spontaneous, but the more time that you spend in an area the more you will begin to think about ideas to capture.  In some cases, just thinking about these ideas will make you better able to notice and capture them when they do spontaneously happen. In other situations, however, you will be able to find an area and wait for the photo you are thinking of to come along.

    In the photo above, I wanted to create an image where it looked like a window display was beckoning to someone. The image of the naked man was on a loop from a video, so it took a some time for the right person to come and make eye contact at the right moment.

    Bonus tip – take a ‘boring’ photo

    Too often I hear people say, ‘I live in a boring area. Nothing happens here. I can’t do street photography.’ I think you can do street photography anywhere. Focus on step number five. You don’t need to live in the most fashionable area with the most people to do this type of work. Photograph suburban life. Photograph what it’s like to live in a sparse area.

    If you live in a sparse area, create a sixteen image essay that explains your neighborhood. Give me a glimpse into what it’s like there. If done well, it can be just as fascinating and interesting as anything else, and it will be unique, which is the most important thing. Explore the work of William Eggleston, Stephen Shore, or Lee Friedlander, who all did a significant portion of their work in sparse areas.

    For more street photography tips:

    • Masters of Photography: Bruce Davidson, Master of the Subway
    • In the Dark: 10 Tips for Street Night Photography
    • The Master Henri Cartier-Bresson – the Decisive Moment
    • 30 Street Photography Images to Inspire You

    You can currently pick up 2 eBooks on Street Photography by James on sale now at SnapnDeals!

    The post 7 Street Photography Tips and Exercises to Try This Season by James Maher appeared first on Digital Photography School.


    Digital Photography School

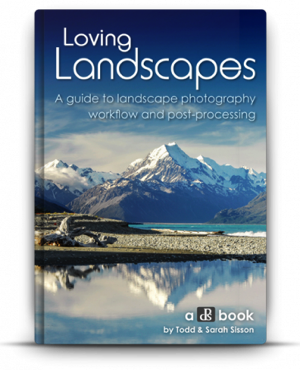
  • Win a $1500 of Camera Gear with Loving Landscapes

    NewImageLast week we announced a brand new dPS eBook – Loving Landscapes: a Guide to Landscape Photography Workflow and Post-Processing with the early bird discount of 33% off what will be its normal price.

    We’re really pleased both with the eBook and how it helps readers improve their Landscape Photography Post Processing – but also the feedback it is already getting.

    Here’s what one of our readers – Belinda said:

    “Thanks for this ebook. I downloaded it at 11pm last night moments after getting your email and was up until 3am reading it and practicing the techniques inside using Lightroom.

    While it was a later night than expected I was amazed at the results on some of my old landscape shots that I’d not paid enough post processing attention to.”

    Win $ 1500 Worth of Camera Gear

    Given the fantastic response to this eBook, we’re going to celebrate by giving you the chance to win $ 1500 of photographic gear and/or post processing software to help you improve your photography.

    To further celebrate the launch of this new eBook we’re putting a $ 1,500 prize up for grabs.

    One lucky owner of Loving Landscapes will be randomly drawn to win $ 1,500 USD to spend on either some new post-processing software (Lightroom/Photoshop etc) or some new camera gear (a lens, tripod, camera etc). You can choose what to spend the $ 1,500 on depending upon your needs.

    Entries close midnight on the 9th of May EST, so make sure you have your copy ordered before then.

    Note: If you ordered a copy last week then congrats, you’re already entered.

    FAQ

    Based upon previous competitions I know we’ll get a number of questions so here are some FAQs:

    • What if I already purchased Loving Landscapes? You’re in the draw and don’t need to do anything else.
    • Is this open to all international readers? Yes. We’ll ship the prizes to you anywhere at our cost. Our preference for the gear is to use B&H Photo and Video but if you live outside of their delivery area we’ll work with a local supplier to get your prize to you or arrange for you to get the $ 1500 so you can make the purchase at your chosen supplier.
    • Can I enter more than once? No, there is only one entry per person. Multiple purchases of the eBook only get you one entry.
    • Are there any conditions of entry? Yes, just one. The only condition of entry is that you allow us to publish your name on the blog when you’re drawn as a winner (we’ll keep any other details private). This way everyone will know who has won (we’ve previously had winners ask not to be named which has been difficult to be transparent about winner announcements).

    Here’s the deal in a Nutshell

    Buy Living Landscapes before Thursday 9th May and you get:

    • 33% off the eBook – worth $ 29.99, you get it for $ 19.99
    • An entry into the $ 1500 USD Prize Draw
    • Plus (and most importantly) you’ll come away from reading the eBook with some inspired landscape photography post processing skills!

    We’ll draw and notify the winner on the 9th May and then publish their name here on the dPS blog. If the winner doesn’t respond within 7 days we’ll draw another winner and publish their name on the blog.

    Pick up a copy of Loving Landscapes today.

    Loving landscapes

    The post Win a $ 1500 of Camera Gear with Loving Landscapes by Darren Rowse appeared first on Digital Photography School.


    Digital Photography School

  • Tips to Prepare for Your First Wedding Photography Gig

    When your photography skills reach a certain level, a family member or friend is going to ask you to shoot their wedding. They might even offer to pay you, which could be your first real gig. Score, right? You’ve made it. 😉 Of course, later when you realize the challenge ahead of you, the pride fades to anxiety, and, googling Continue Reading

    The post Tips to Prepare for Your First Wedding Photography Gig appeared first on Photodoto.


    Photodoto

  • Finding Gold in Your Image Archives

    No doubt like many other photographers, so many of my images have never seen the light of day. This is mostly for good reason; they are out of focus, poorly composed, badly timed, they just don’t make the cut. Often these images may be good, just not the BEST. I have learned though, that there can be gold hiding in your archives, just waiting to be rediscovered, taken into the develop module and shared with the world. I have found that spending some time digging through old shoots can yield some very positive results.

    Make it part of your workflow to revisit your image archives

    Maybe you have found that your photo editing workflow follows a predictable pattern, like mine. After importing, adding metadata, then backing up RAW images from a shoot, I like to take a first-pass look at the images, flagging the few that initially jump out, and rejecting those that are clearly unusable. It is easy to then go through again and pick out images that have potential, before filtering the flagged images and comparing them to find the sharpest or most accurately exposed selects. This gives me a small collection of images to edit.

    Then comes the fun part! Using any combination of Adobe Lightroom, Photoshop and Nik Software, I edit my images to see what they can become! After editing the selects, I like to back them up both locally and online to my Photoshelter portfolio, which doubles as my image archive in the cloud. Finally, these images are shared on social network accounts. Done, right? On to the next project, assignment, location…

    But maybe not. Of the images imported from CF cards, I might end up with between 1-5 images that I’m happy with. So if I come home from shooting an epic landscape with 50-100 images, what happens to the other 95% of my shots? If you’re anything like me, you probably have gigabytes worth of RAW images taking up space on your hard drive. Have you ever revisited a hard drive to find something you may have missed? I make this a regular part of my workflow and I would argue that doing so is well worth your time.

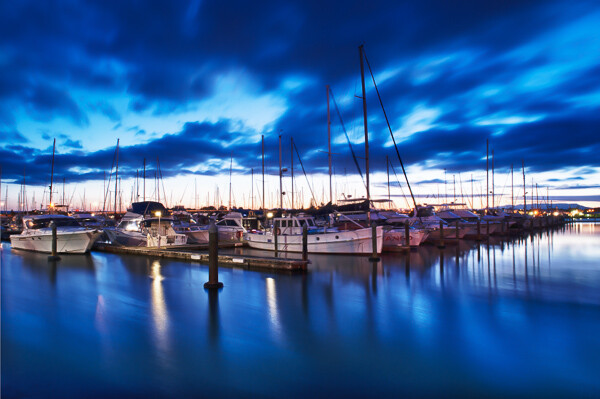
    To give you an example, here is an image I made not long after moving to Mount Maunganui, New Zealand a couple of years ago. This is a shot of Tauranga Bridge Marina:

    Tauranga bridge marina 1

    Having driven past this location dozens of times, I already had an idea of the shot I wanted before I arrived. It was a cold night, and the sky hadn’t lit up in the way I was hoping, so I stayed past sunset and into twilight, my favourite time to shoot. Still nothing very inspiring, so I went home. I followed my usual workflow and ended up with the image above, which I wasn’t entirely happy with, so I moved on to the next thing.

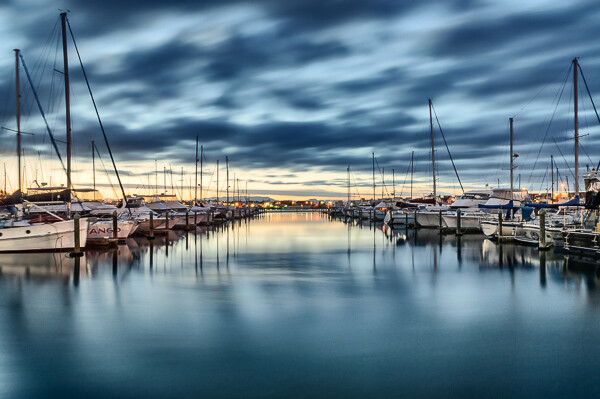
    Fast forward six months and I found myself revisiting that folder in Lightroom. I don’t remember what prompted it, but after finding this image, I edited it very differently and ended up with the image below. It was far better received by fans and clients online and became one of my top selling images last summer. Personally, I like this image a lot more than the first.

    Tauranga bridge marina 2

    Time is on your side

    Of course it’s easy in hindsight to kick myself and wonder how I missed it, but this seems to happen on a regular basis. Something about the passage of time can help you to see images in a fresh light. Maybe it’s feeling differently about the image itself, or that particular place, or simply that my post processing workflow has evolved and I can see new potential in images. Whatever the reason, I rarely feel the same about an image a month, six months, or a year later.

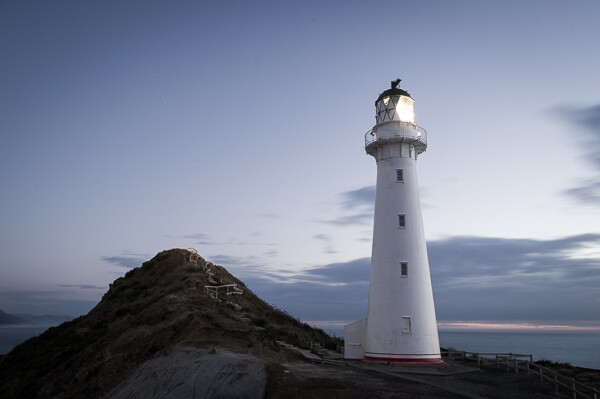
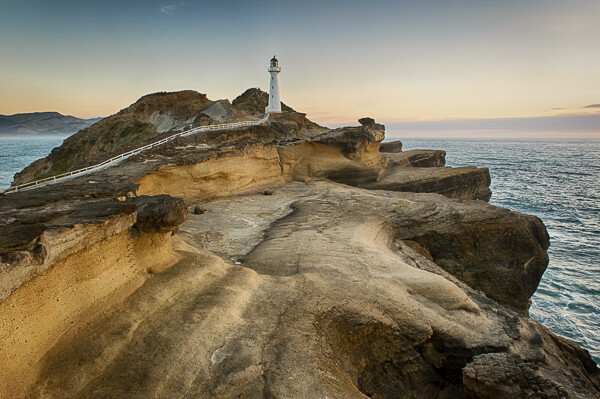
    Here’s another example from Castlepoint, in New Zealand’s lower North Island:

    Castlepoint lighthouse 1

    And here’s the image I found and edited more than two years later:

    Castlepoint lighthouse 2

    Make it a project

    It’s natural for any artist or creative to be looking forward to the next project. I think it’s healthy for any artist or creative. It’s a necessary part of growing and developing your craft. I also think, however, that it’s healthy to reflect on previous work and see how far you have come. Searching image archives is a great way of doing this. Despite not having shot film since I was a child, I liken this process to rummaging through boxes of exposed negatives and taking them into the darkroom to find the gold that has never been printed.

    I challenge you, if you don’t already, to spend some time rummaging through your archives. Go way back! To some of your earliest photographs! Or even something you shot last year; it doesn’t matter how old they are, just that you are looking at it with a fresh perspective. Make it your next project. You might be surprised what you come up with!

    Have you found any hidden gems in your archives? Share with us in the comments below.

    The post Finding Gold in Your Image Archives by Rowan Sims appeared first on Digital Photography School.


    Digital Photography School

  • How to get Motivated to do more Photography

    Are you one of those photographers who finds there’s a million other things that demand your attention and get in the way of pursuing your passion for photography?

    You’re not alone. The work/life balance is a delicate dance and it’s easy to get sidetracked by the endless tasks of day to day life, even when things are going well. As a professional photographer you’d expect I spend a great deal of time out there shooting, but the truth is that I don’t get to shoot anywhere near as much as I’d love to.

    There are a few things you can do however, that ought to help you scratch that creative itch and satisfy your photographer’s heart.

    Let’s get motivated!

    Landscape Photography Ebook

    1 – Take your camera everywhere

    Sounds like a hassle right? But you don’t need to have it on your person at all times, just leave it in the car and maybe carry a spare battery so that when inspiration strikes you’re not cursing yourself for leaving the camera at home.

    2 – Stop for that shot

    I’m guilty of this all the time. While driving, I often see lots of cool and interesting scenes along the road. I sometimes tell myself ”Oh, I’ll shoot it tomorrow on my way back”, but often you’ll find that this might be your only chance. Pull over, take 10 minutes and get that shot, more often than not you’ll be glad you did.

    Learning Landscape Photography

    3 – Butter up your spouse

    If your spouse is not that into photography, you’ve no doubt had to endure a grumpy ride home after making your beloved wait in the car for an hour while you get caught up in a sunset shoot. Plan ahead and build up some brownie points with the other half so that you can cash in those chips when you need it most. Some preemptive grovelling can go a long way.

    4 – Get a photography buddy

    If you have a friend that loves photography, it’s much more fun to go out and shoot together or plan short little shooting trips on a semi-regular basis. Join camera clubs or meetups to find like minded souls that share your passion. You’ll feed off each others energy and maybe even have a little healthy competition.

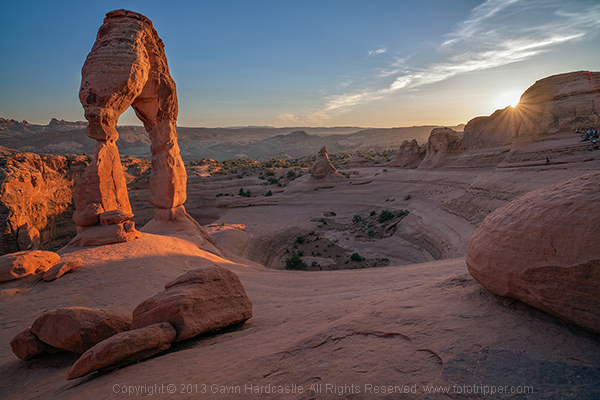
    Delicate Arch Landscape, Moab, Utah

    5 – Take a photo vacation

    Dedicate a one to two week trip at a tremendously epic location and shoot as much as your family, friends or partner will tolerate. You can even become the official ‘trip photographer’ and if you get some great shots you’re more likley to have the family appreciate your need to do photography. Getting your loved ones ‘on side’ will give you a lot more freedom to dedicate time to your art.

    6 – Rent a lens – see with new eyes

    There’s nothing better than slapping a new piece of high end glass on your camera and seeing things with new eyes. If you’ve got an interesting trip planned, it doesn’t cost that much to rent a top notch lens for a weekend or a few days. It’s like getting a new camera that you already know how to use.

    Antelope Canyon Landscape Photography

    7 – Go running to find new locations

    I’ll admit that I don’t have the patience or time for going on long hikes to discover new locations. I prefer to put on my running shoes, hit the trails and burn some calories. I can cover lots of ground in a fraction of the time it would take to hike and I’m always finding new beauty spots that I can revisit when the conditions are right. If you run daily you will also discover the best times of day for beautiful light.

    8 – Follow your peers on social media

    I don’t know about you, but nothing motivates me more than seeing the amazing work of my peers and thinking ‘I could have shot that’. The old adage of ‘right place, right time’ is so true in photography, so the more time you spend shooting, the more chances you’ll have at getting some amazing shots that will inspire your peers.

    Landscape Photography

    9 – Procrastinate and perish

    I’m starting to sound like one of those awful life coaches here but seriously, procrastination will only lead to frustration. If you’re a complete beginner, it might take a while before you nail your first unbelievable shot, but when you inevitably do, it might just be the catalyst that kicks your photography into overdrive and once you’ve been bitten by that bug, there’s no turning back. Just don’t let your spouse read this.

    What suggestions do you have for getting motivated to do more photography? What motivates you? Share with us some of your tips in the comments below.

    Some other articles to read to get you fired up include:

    • Photography projects that make you feel alive
    • Jumpstart Your Photography: Start a 365 Project
    • 8 Photo Projects in Your Own Backyard
    • Photo Project: Why You Should Create a Photo Inspiration Corkboard

    The post How to get Motivated to do more Photography by Gavin Hardcastle appeared first on Digital Photography School.


    Digital Photography School