Category: Photography

  • Versatility – Your Guide to Shooting Great Travel Photography

    Professional travel photographers realize that the key to their business is versatility: to be able to shoot all styles of photography, and to consistently capture great shots even under very trying conditions. To be a strong assignment photographer you must identify your weakness and then work on it.

    Instead of concentrating on what you shoot well why not break out of your comfort zone and try something more challenging? Some of the most experienced photographers from The WideAngle network give us their insights into a few of the specialized fields of travel photography.

    DPS1 DALE MORRIS

    Image by Dale Morris

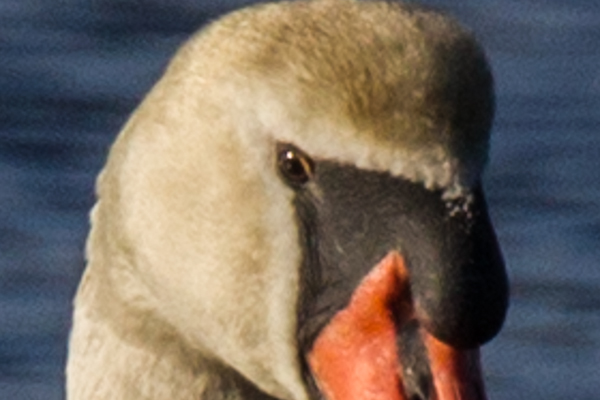
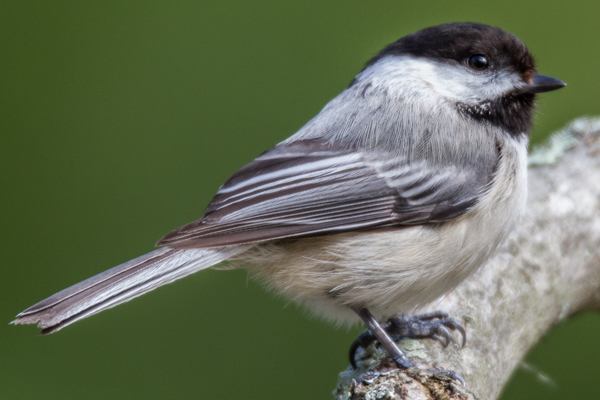
    PHOTOGRAPHING WILDLIFE

    British born wildlife photographer Dale Morris has built a reputation as one of the most widely published photographers in South Africa. His background as a trained naturalist allows him to capture aspects of the natural world that many photographers would miss.

    I’m a firm follower of the philosophy that wildlife photography is not only about getting a great image but equally about taking time out to observe, and more importantly, really enjoy the experience of being in the company of wild animals. It helps to understand that every animal stands at the center of its own concentric set of invisible circles and if something unusual (a photographer for example) steps across the outermost boundary, the animal will react (usually by becoming more alert to your presence). Move across the next circle in the set too soon and an imaginary alarm is triggered. You are now running the risk of eliciting a flight or fight response. An animal’s rear end vanishing post-haste over the horizon rarely makes for a good photo, nor does a trampled and gored camera. Move slowly and in a non-threatening manner. The secret to wildlife photography is patience, empathy, awe and a true appreciation for your subject matter.

    SHOOTING MOVEMENT

    Craig Pusey is a dedicated motoring and expedition photographer, who’s never scared to go the extra mile for a shot. You might see him scaling an Indonesian volcano or lying face down in an Andean stream just to get the perfect angle.
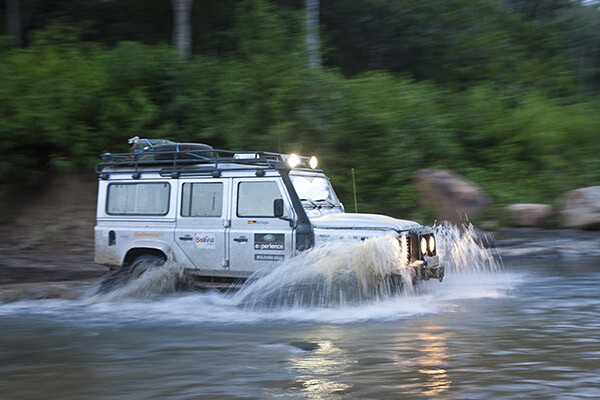
    DPS2 CRAIG PUSEY

    Image by Craig Pusey

    The perfect panning shot takes practice. For people and animals moving perpendicular to you, aim to keep your shutter speed between 1/15th and 1/90th of a second to get a bit of blur. For faster things, like cars or galloping horses, set a speed of between 1/60th to 1/125th. Try to focus just ahead of the moving object and if you have the opportunity shoot a trial pan before your subject even arrives. (This will check exposure and focus but also make sure that no obstacles are going to get in the way of your pan…it also limbers you up!).

    It’s best to start with a higher shutter-speed and then work down, but it’s also dependant on distance from you to the subject. The farther away, the lower your shutter speed will need to be to show the effect of panning. With practice you can shoot slower, and will be better be able to judge the object’s speed.

    SHOOTING ARCHITECTURE

    Laurence Garçon is an experienced Parisian artist, publisher and assignment photographer. She has travelled widely but has retained an unshakeable love affair with her hometown and is recognized as one of the city’s most visionary photographers.
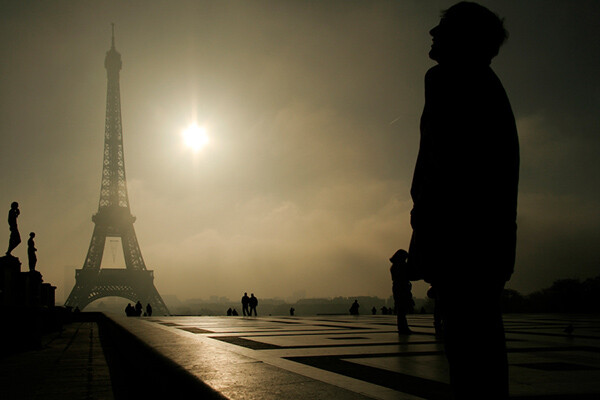
    DPS3 Laurence Garcon Misty Morning

    Image by Laurence Garçon

    Firstly, be aware of the highlights. Play with the speed and the aperture of your camera to avoid over-exposing sunlit walls, etc. Secondly, try to frame a composition that will best display the building. Be prepared to wait a while for something to happen (a passer-by, a vehicle): this could be the element that will be capture the soul of the quarter. Be aware that, in some countries you may need specific permission to photograph some particular buildings (especially airports, military buildings, ministries, embassies, sometimes even bridges). If you plan to publish your photograph of a single (isolated) contemporary building, try to always mention the name of the architect.

    PHOTOGRAPHING INDIGENOUS PEOPLE

    Axel Fassio left his home in Italy to travel the world (everywhere from Antarctica to Iceland) on assignments. In 2013 he won a first prize at PX3 Prix de la Photograhie Awards in Paris and a 3rd at the International Photographic Awards. He’s currently based in Nairobi.

    DPS4 Axel Fassio

    Image by Axel Fassio

    Ideally, if time allows you should approach a community without a camera and hangout a bit, getting to know the elders and playing with the children. The last thing you would want to do is have to rush to take pictures. Resulting images would lack of spontaneity. A few hours are enough to create a basic ‘relationship’ within the community and the resulting images will benefit hugely.

    If your time is limited, always contact the elders and ask permission to take photos. A money arrangement is common when time is tight but it’s not desirable. Negotiating to pay for each images tends only to produce aggressiveness among the people, bad memories for you and usually this shows in the shots.

    Longer zoom lenses can be used to “steal” candid portraits and a wide-angle held at waist level often has the effect of bringing the viewer more intimately into the scene. It is always better to avoid clearly aiming at a person unless he/she is very comfortable and is agreeable to being photographed. In this case, a medium-length zoom is perfect for portraits.
    DPS5 Wylie Maercklein

    Image by Wylie Maercklein

    SHOOTING PORTRAITS

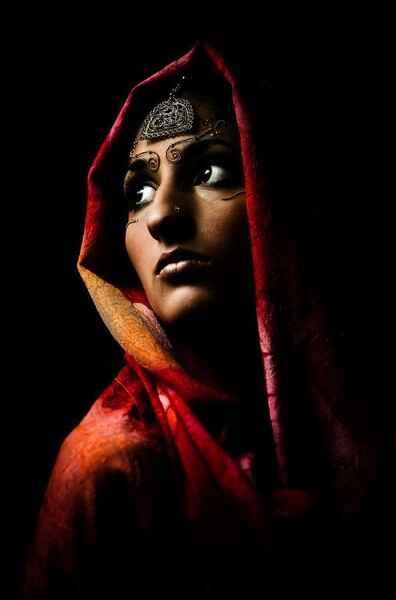
    Wylie Maercklein is an experienced Texas-based photographer and videographer with a specific talent for powerful portraits.

    Portraits are similar to other action shots to me, in that you’re just waiting for the right moment. With a group, that moment is something larger – an externalized emotion. An action. With an individual portrait, it’s an internalized thing – it’s the moment when their defences drop just a little and you see something living behind their eyes.

    LOW LIGHT AND NIGHT PHOTOGRAPHY

    British photographer Jonathan Perugia has built a reputation as one of the most prodigiously published assignment photographers in the business. In addition to his freelance work he leads photography holidays with Authentic Adventures.

    I love the way cities look after sunset, so I shoot a lot in low light. If you want to really explore this kind of photography, then adding a fast prime lens to your collection (if you use a DSLR) is invaluable. I use the Canon 50mm f/1.4, which is pretty good value. Another invaluable bit of kit is a tripod. Go for something as sturdy, but as light, as you can afford. Carbon fibre is ideal. Try to avoid anything flimsy. There are some good mini tripod options too, with bendy legs that will hook around a handrail at a push. Generally I avoid using flash, so I’m often at high ISOs. I recommend testing or researching your camera to see how high it will go without too much noise.

    DPS6 Jonathan Perugia

    Image by Jonathan Perugia

    For cityscapes, the best time to shoot is the period after sunset but before dark, when there is still colour in the sky. On a clear night you can get fantastic electric blue skies with all the city lights illuminated. Note that the brighter electric lights will start to blow out as the sky gets darker, so you may want to choose your frame accordingly. If there are no bright lights in the shot, you can use longer shutter speeds to get colour out of a sky that appears dark to the naked eye. Cloudy skies reflect street lights and can look quite surreal. This is the perfect time to do classic long exposure traffic shots with streams of light from the car lights. Smaller apertures give points of light a kind of starburst effect that looks more natural than starburst filters. You’ll notice that you can start shooting into doorways, shops, windows that wouldn’t work in daylight when the light outside is much brighter than inside.

    Experiment and enjoy the different effects and colour casts you get after dark – even ‘painting with light’ with long shutter speeds and no tripod. Look for pools of light from street lamps, windows, street stalls.

    SHOOTING LOCAL CEREMONIES

    Ingetje Tadros is a Dutch-born photographer who emigrated to Western Australia. She spends much of each year on assignment in various parts of Asia.
    DPS7 Ingetje Tadros

    Image by Ingetje Tadros

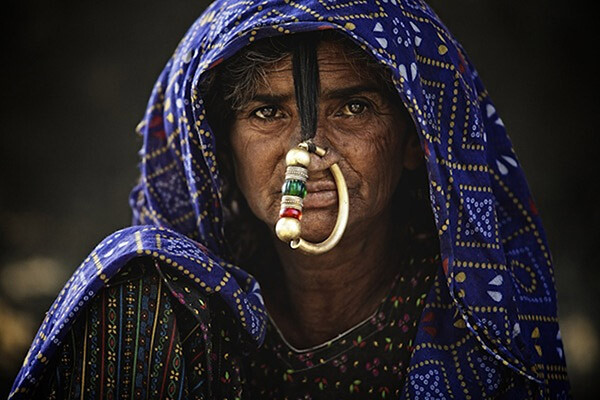
    While shooting ceremonies pay close attention to your choice of lens. Personally I like the 35mm prime as I like to be close and look for little moments. But, I also find it important that people feel comfortable with my presence and you need to be aware of personal space. When rituals are taking place it’s important to be aware what the rules are and specifically to know where you should and shouldn’t stand. Take your time and don’t just go in snapping. Try to limit use of flash to an absolute minimum as you should be as unobtrusive as possible.

    Do you have any tips on versatility? How do you approach travel photography? Please share in the comments below.

    The post Versatility – Your Guide to Shooting Great Travel Photography by Mark Eveleigh appeared first on Digital Photography School.
    Digital Photography School

  • Time-Lapse Photography Equipment Guide to Getting Started

    Currently for a limited time only get the Stage R Versatile Motion Control for Timelapse and Film and get FREE eBook – on now at SnapnDeals!

    “Never forget that all the great photographs in history were made with more primitive camera equipment than you currently own.” – Brooks Jensen

    No doubt that first time you said “Hey, wouldn’t it be fun to dabble in DSLR photography? You know, just as a hobby.” Your financial counsellors, or your spouse for that matter, broke out in budget busting hives.

    There probably isn’t a more gear focused group of enthusiasts out there, but don’t worry, taking that step into time-lapse photography doesn’t require much gear to begin – and the extra gear that can really take your time-lapse to the next level is more affordable and easier to use than ever before.

    Whether you are a brand new time-lapse photographer or an experienced shooter looking to unleash full creativity with time-lapse motion control, this article will provide a launch pad for your next steps into one of the most emotionally connecting, and at the same time freeing, creative photographic endeavours.

    Steven Michael Photography 600

    Your minimum gear checklist for time-lapse photography

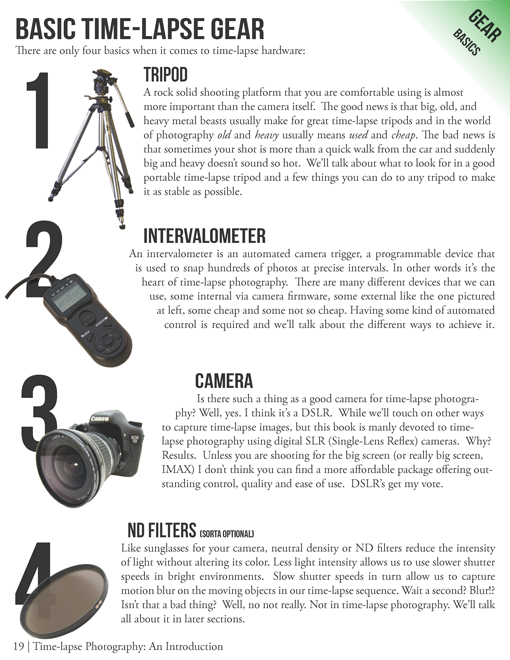
    Chances are good if you’re already a DSLR shooter you almost have everything you need to get started. These four things are essential.

    1. A tripod
    2. An intervalometer
    3. A Camera
    4. An ND filter

    timelapse-gear.png

    A closer look at a good time-lapse support system

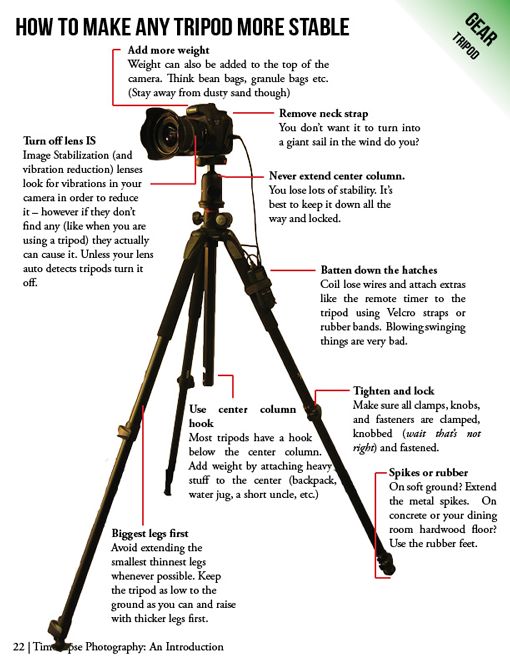
    Rock solid stability (or precise controlled movement) is just about the most important and most essential component for good time-lapse photography. Keep in mind a good tripod that meets your needs will outlast several cameras so consider budgeting a little more time and possibly cash to this category.

    • Consider the materials used – weight and strength
    • Check the load weight – avoid sagging and flexing
    • Height – eye level without using the centre column
    • The right tripod head for your work – ball heads versus pan and tilt

    timelapse-tripods.png

    Unleashing your creativity with advanced time-lapse equipment

    Time-lapse photography is benefiting from a dramatic flow of new ideas. The level of innovation, especially over the last few years, is incredible. Not only are we quickly fixing problems that have plagued photographers for years, but advanced camera controls and processing tools that used to be cost prohibitive, are now becoming affordable for the most basic hobbyist.

    Advanced camera exposure control

    The Timelapse+ can operate as a universal intervalometer for nearly any camera that supports a remote shutter release, and IR remote, or USB tethering. Bulb-ramping is its claim to fame. The Timelapse+ can perform keyframe-based, guided, or fully automatic bulb ramping – and for cameras supported by USB control, the Timelapse+ can also seamlessly integrate ISO control to smoothly ramp across a wide exposure range, making the “holy-grail” transition from day-to-night or night-to-day easier to achieve. Extended and long-exposure HDR sequences are also made easy with the Timelapse+.

    Simple and powerful advanced time-lapse sequence rendering with LRTimelapse:

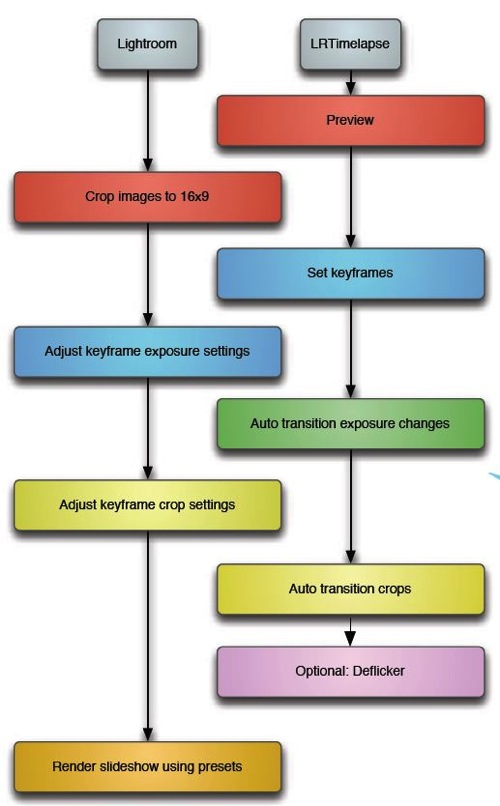
    In a nutshell LRTimelapse takes changes and corrections you make in Lightroom and then smoothly applies them throughout the entire time-lapse sequence. By altering either the first and last image, or several images throughout the sequence, LRTimelapse can quickly fade the changes we need to only the parts we want. Deflickering can also easily be accomplished in the exact same way by flattening out big exposure jumps.

    Here’s a simple workflow for editing timelapse images and rendering a movie using Adobe Lightroom and LRTimelapse.

    Lrtimelapseworkflow

    Advanced motion control

    The last few years have shown incredible advances in the field of manual and controlled camera movement, so much so that the
    average photographer can now afford motion control devices that were once only available to big budget productions. We’re talking precise, rugged and lightweight panning (left and right), tilting (up and down), and dolly movements with simple controls, such as a smartphone app, that make setup easy and intuitive. Control over motion and time combined with an interesting subject can produce what I believe to be an awesome trifecta of emotion eliciting imagery – some of the most engaging and lasting photography you’ve seen.

    Yosemite HD II, an incredible example of time-lapse and motion:

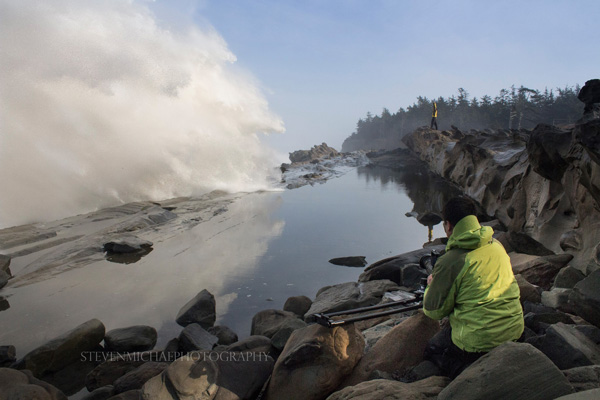
    Dolly motion shots can add multiple points of interest by highlighting components of a scene’s unchanging foreground and the larger time-altered background. The movement shots in the wave video move the camera along the jagged rocks, while the waves are slowed in the background. Some of the most popular time-lapse clips feature this kind of extreme moving contrast in many shots too. By moving the camera slowly from left to right on a horizontal track, or flipping the track system almost vertically to instead change the elevation of the camera, we can highlight stationary foreground objects in incredible ways.

    The next two axes of movement can be accomplished by camera rotation – aptly named a motorized panning and tilting head. Then combining panning and tilting on a camera slider to achieve 2, or 3 axis of movement simultaneously can dramatically elevate the interest level in a shot.

    zion 3axis motion control

    2 axis motion control

    Do you think advanced time-lapse work should be left to the pros?

    Eric Warren of Matadornetwork.com posed a related question:

    “Pros are the guys you call when you want to put a time-lapse in your car commercial. And while we tend to put pros up on a pedestal, they are often bogged down by their clients’ needs. Most commercial advertising doesn’t push the envelope of an art form.

    That job often falls to the independent artists, building their own equipment, and often not [caring] about whether their work is going to sell. Not that I want to be too demanding here, but I want to see something mind-blowing. Either something I’ve never seen before or something familiar, shown in a new way (one thing time-lapse excels at.) ….

    Consider this a call to all you independent filmmakers out there ready to push the limits of one of the most striking visual art forms.”

    Time-lapse has a way of slowing the world for the photographer while at the same time accelerating it for everyone else. Shooting time-lapse alters the way you think, it challenges your view of the world and teaches you things about our world you can bring back and share with everybody else.

    Get out and start shooting. Render some footage and break some rules. Most importantly know that you are not alone. The time-lapse community is more connected today than ever before. You have friends all over the world ready to help you get the shots you imagine.

    Currently for a limited time only get the Stage R Versatile Motion Control for Timelapse and Film and get FREE eBook – on now at SnapnDeals!

    The post Time-Lapse Photography Equipment Guide to Getting Started by Ryan Chylinski appeared first on Digital Photography School.

    Digital Photography School

  • Win One of Three Lenses From Tamron!

    Over the last few years here at dPS, we’ve run very some very popular competitions with our partners to give away, to lucky dPS readers, some of their great photographic products.

    We are lucky enough to be able to do it again this week!

    Tamron Lenses for Post Graphic - Cropped

    For this competition, Tamron is giving away THREE prizes!

    These three unique prizes are designed to help every level of photographer create BETTER pictures. Tamron is the world’s most awarded photographic lens line. Each will be won by a different dPS reader. Here’s what you could win:

    • Tamron SP 17-50 f/2.8 Di II VC – worth $ 599
    • Tamron 18-270 f/3.5-6.3 Di II VC PZD – worth $ 449
    • Tamron SP 70-300 f/4-5.6 Di VC USD – Worth $ 449
    SP 17 50MM FTamron SP-17-50MM f/2.8 Di II VC 18270VCPZDTamron 18-270 f/3.5-6.3 Di II VC PZD 70300VCTamron SP 70-300 f/4-5.6 Di VC USD

    Learn a little more about Tamron here.

    How to Win

    To win this competition you’ll need to:

    • Visit the above lens information pages and learn more about each lens and its core use
    • Leave a comment below and tell us why you’d like to win and HOW you would you utilize each lens. Please note: there is a limit of 1 entry per person
    • Do this in the next 14 days and on May 19, 2014, the team at Tamron will choose the best 3 answers and we will announce the winners in the following days

    Deadline to enter is May 17, 2014, Midnight PDT (PST). Comments left after deadline will not be considered.

    Tamron Pic  Blow

    By ‘best’ – we’re looking for people who have an understanding of the lenses and how they will best suit your needs. So you’ll need to check out the product pages to put yourself in the best position to win.

    There’s no need to write essay length comments to win – but we’re looking to hear what you like about the lens and how it would help your development as a photographer.

    This competition is open to everyone around the world no matter where you live – but there is only one entry per person. To enter – simply leave your comment below.

    Tamron logo

    About Tamron

    Disclaimer: Tamron is a paid partner of dPS.

    The post Win One of Three Lenses From Tamron! by Darlene Hildebrandt appeared first on Digital Photography School.


    Digital Photography School

  • Weekly Photography Challenge – Cityscapes

    Earlier today I shared a set of images of cityscapes. That’s designed to inspire you, make you say “wow” and want to get out there and photograph your city.

    This week I’d like to challenge you to photograph close to home. If you live in a city, you’re all set! If you’re in the country or smaller town, you just need to get more creative or take a short drive.

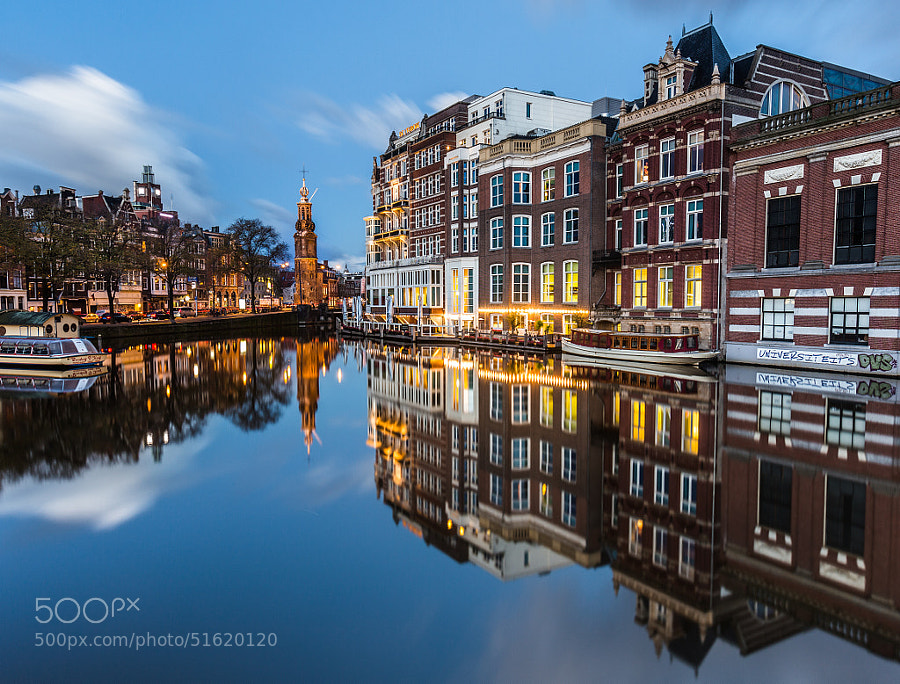
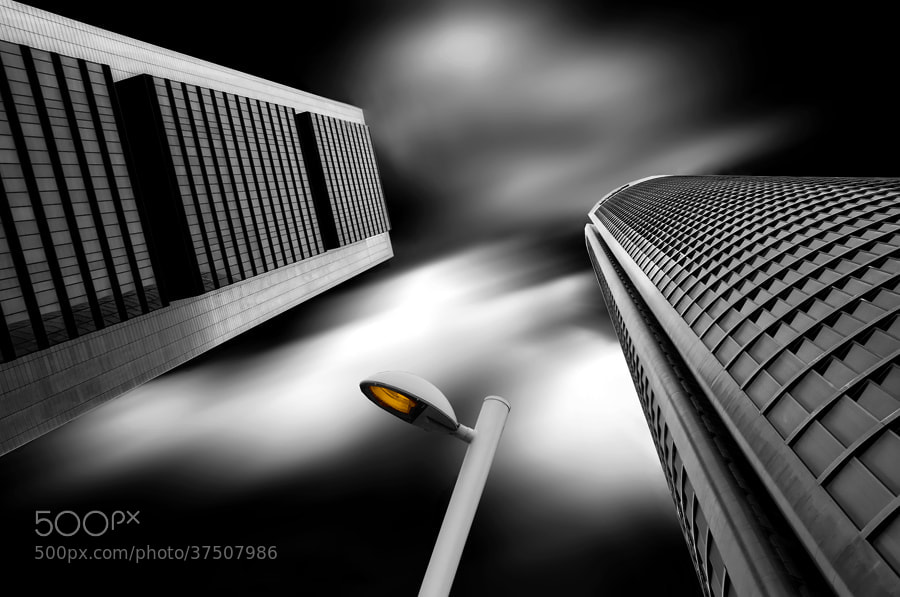
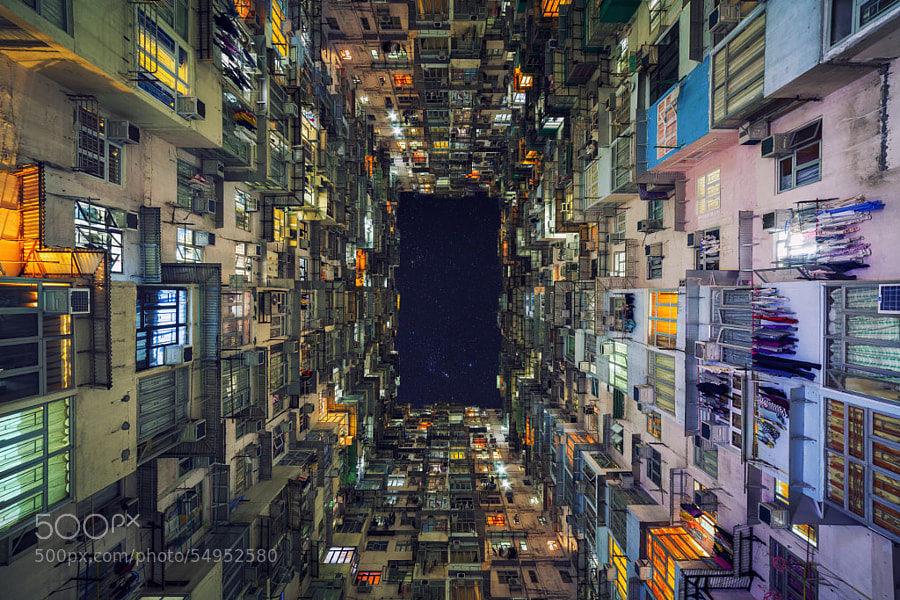
    You’ll notice that many of the cityscape images in the collection are shot at night. That’s when the city and the lights really come to life and dance for the camera. Find the best location and angle to photograph your cityscape. Try looking up at the buildings, or getting up high on a rooftop or balcony and looking down. Change up your perspective to create something different and striking.

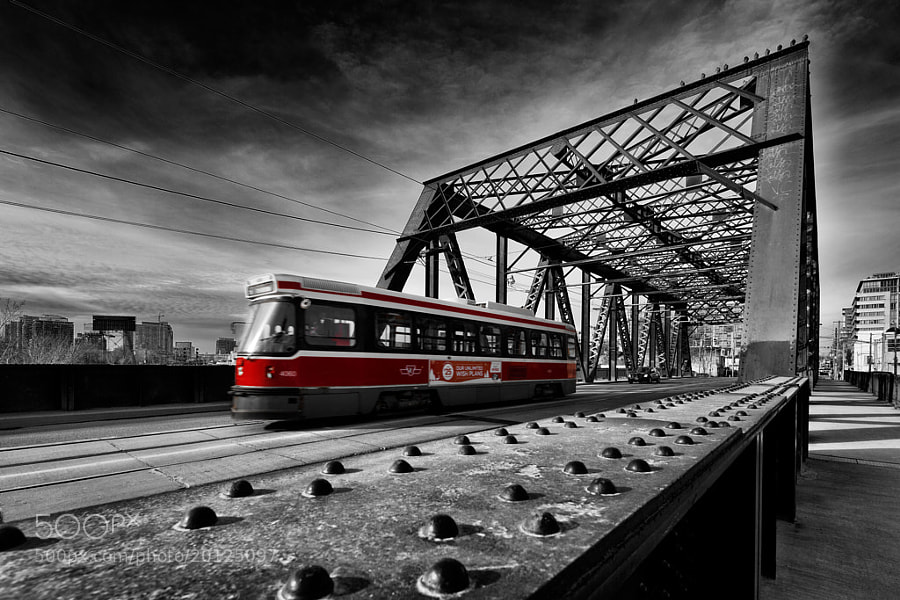
    Maybe try some black and white photography or even some HDR of the city skyline. Go capture the same scene at different times of day including: sunset, the blue hour (twilight), and after dark. Shoot wide and get the whole vista, and try some closer up and focus in on details. Here are a few images to give you more ideas:

    By joiseyshowaa

    By Chris Smith

    By Christopher

    By Pedro Szekely

    By Justin Brown

    By jesuscm

    By Paolo Margari

    By Pedro Szekely

    By Justin Brown

    By ZeroOne

    By Nathan Congleton

    By Shawn Hoke

    By David Yu

    Share your cityscape photos!

    Simply upload your shot into the comment field (look for the little camera icon in the Disqus comments section as pictured below) and they’ll get embedded for us all to see or if you’d prefer upload them to your favourite photo sharing site and leave the link to them.

    The post Weekly Photography Challenge – Cityscapes by Darlene Hildebrandt appeared first on Digital Photography School.


    Digital Photography School

  • 35 Cityscape Images to Take Your Breath Away

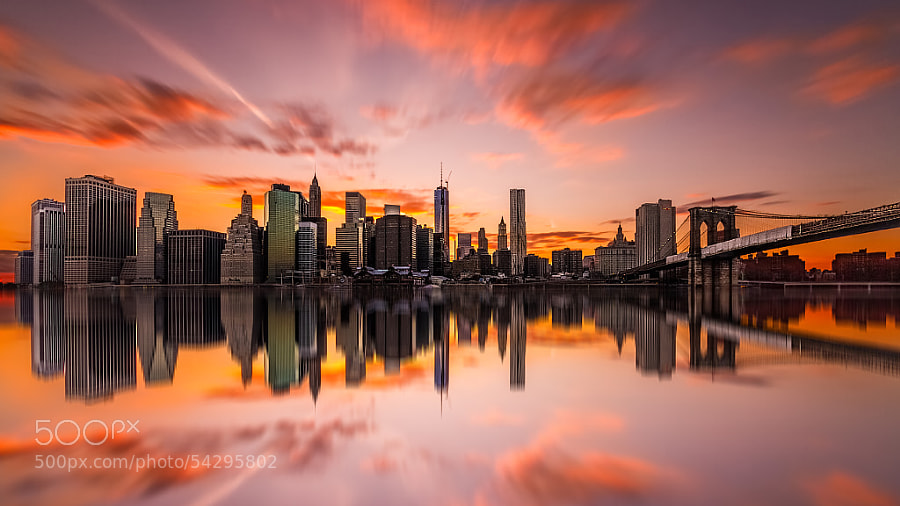
    Recently I’ve done a lot of natural world images including landscapes, bugs, waterfalls, flowers and even pets. So it’s time for something different and I’m shifting gears to man-made.

    Here’s a collection of cityscape images to get you inspired enough to get out and take some of your own. Enjoy!

    Photograph Up and Above by Sebastian Opitz on 500px

    Up and Above by Sebastian Opitz on 500px

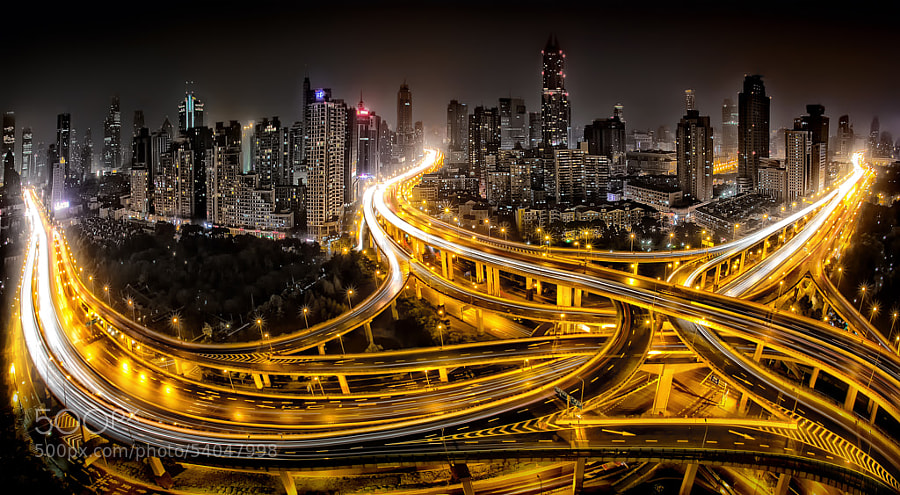
    Photograph Shanghai at Night by Clemens Geiger on 500px

    Shanghai at Night by Clemens Geiger on 500px

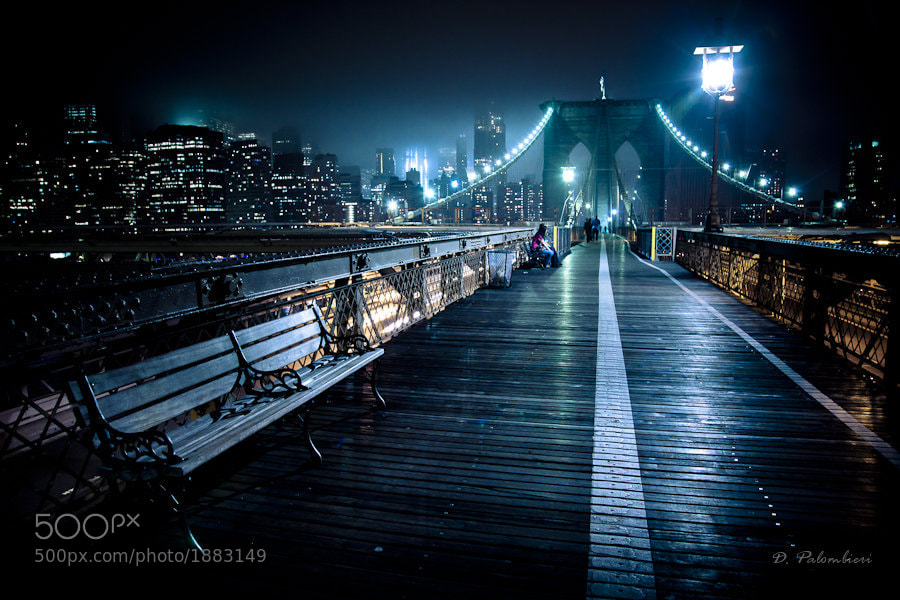
    Photograph Brooklyn Bridge New York City - NY by Dominique  Palombieri on 500px

    Brooklyn Bridge New York City – NY by Dominique Palombieri on 500px

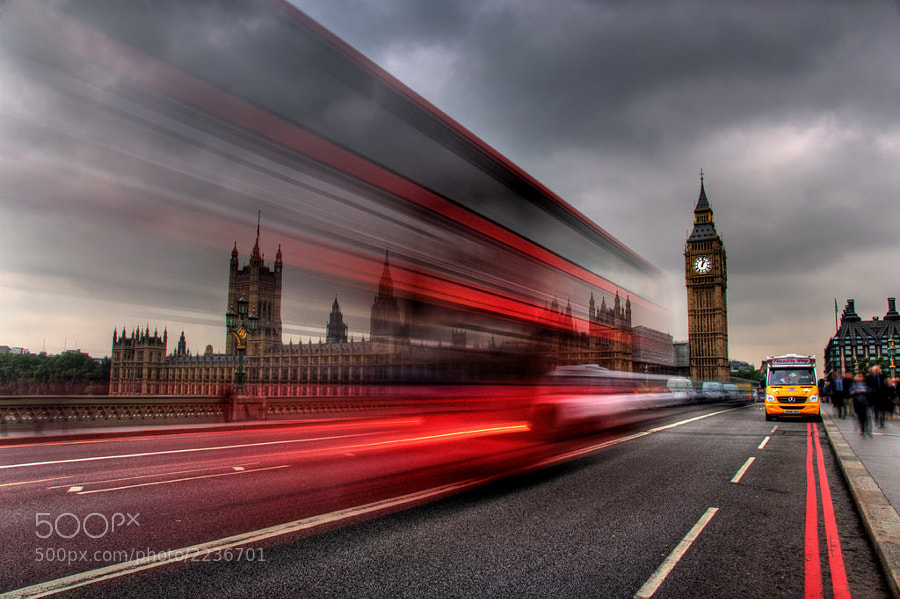
    Photograph Houses of Parliament, London by David Mar Quinto on 500px

    Houses of Parliament, London by David Mar Quinto on 500px

    Photograph Concrete Jungle 2 by Kerim Hadzi on 500px

    Concrete Jungle 2 by Kerim Hadzi on 500px

    Photograph Dark Pace by Toby Harriman on 500px

    Dark Pace by Toby Harriman on 500px

    Photograph Fire over San Francisco by Toby Harriman on 500px

    Fire over San Francisco by Toby Harriman on 500px

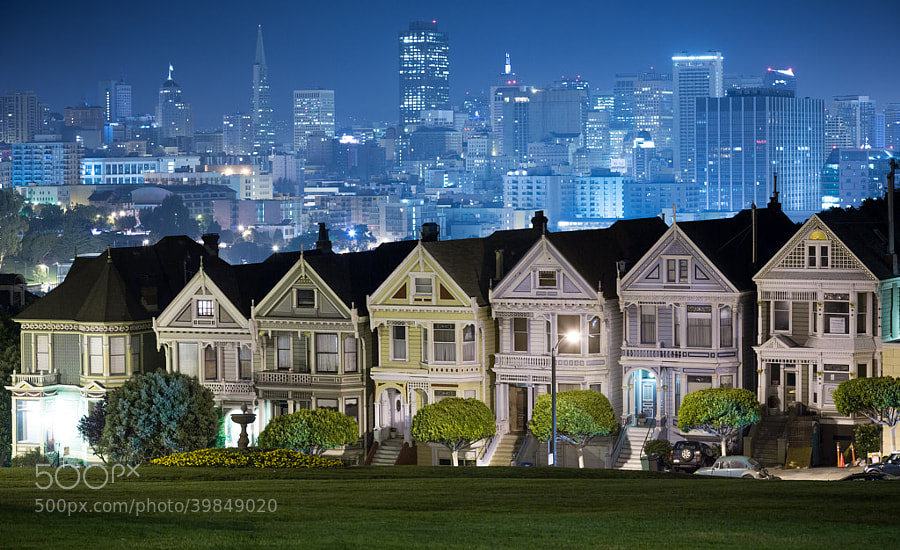
    Photograph Painted Ladies by Bobby Gibbons on 500px

    Painted Ladies by Bobby Gibbons on 500px

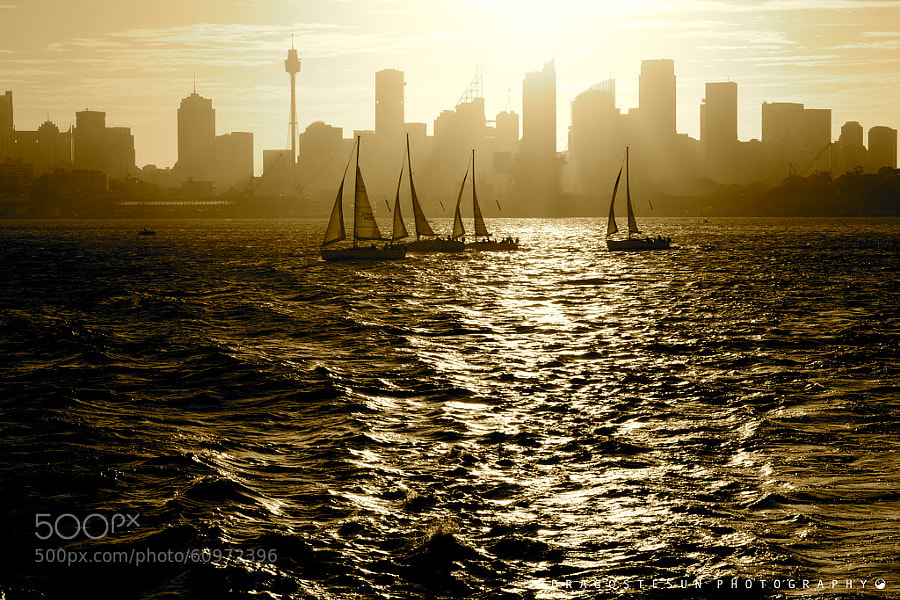
    Photograph Sydney Harbour by Dragostesun Photography on 500px

    Sydney Harbour by Dragostesun Photography on 500px

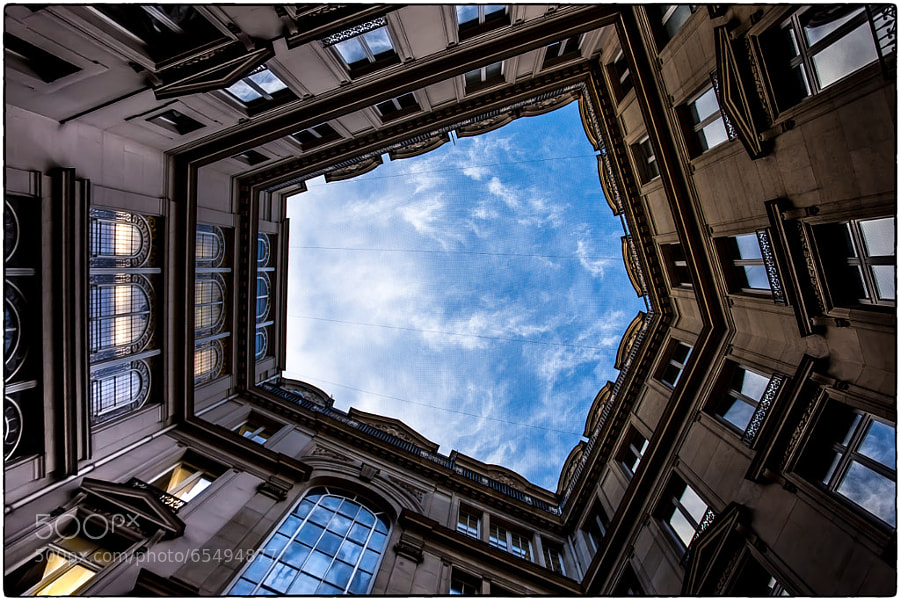
    Photograph Sky Gate by Gianluca Gobbi on 500px

    Sky Gate by Gianluca Gobbi on 500px

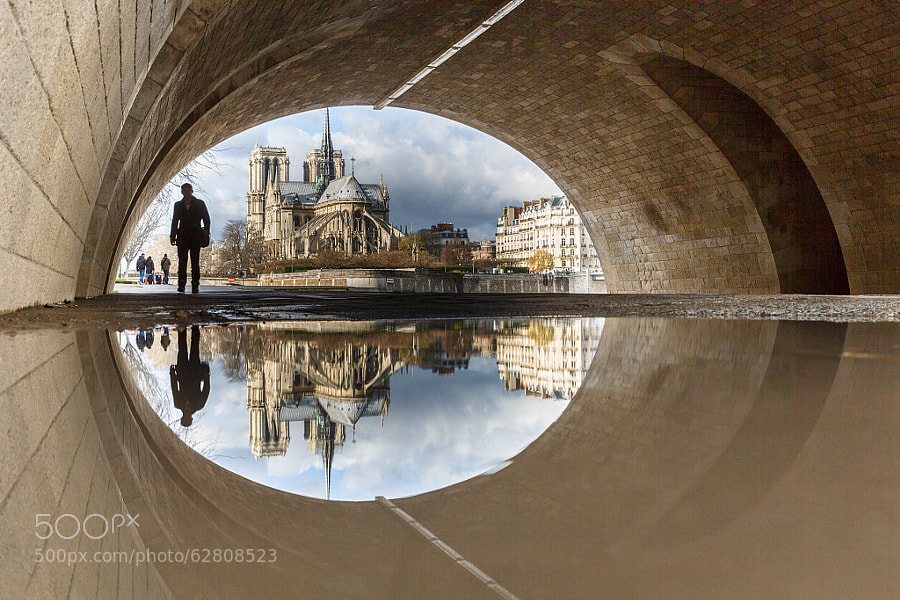
    Photograph Puddle Mirror Reflection on Notre Dame by Loïc Lagarde on 500px

    Puddle Mirror Reflection on Notre Dame by Loïc Lagarde on 500px

    Photograph Silent morning by Martin Stantchev on 500px

    Silent morning by Martin Stantchev on 500px

    Photograph Windows by Catalina Justiniano on 500px

    Windows by Catalina Justiniano on 500px

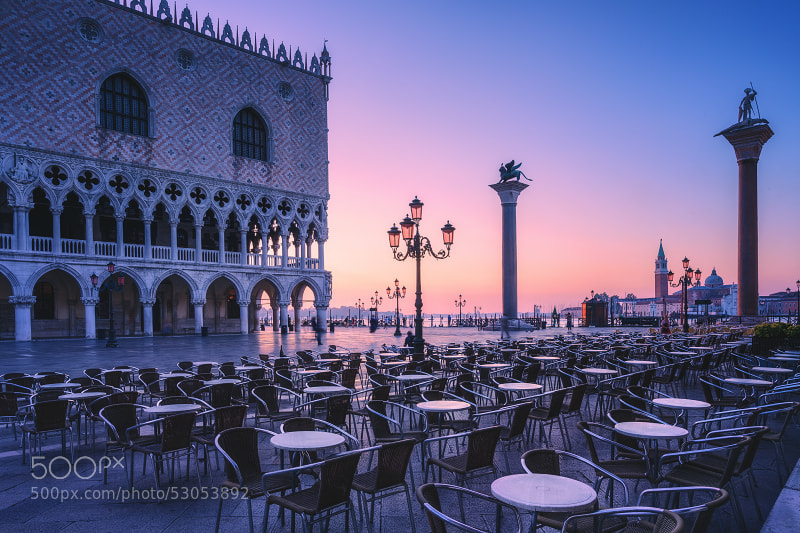
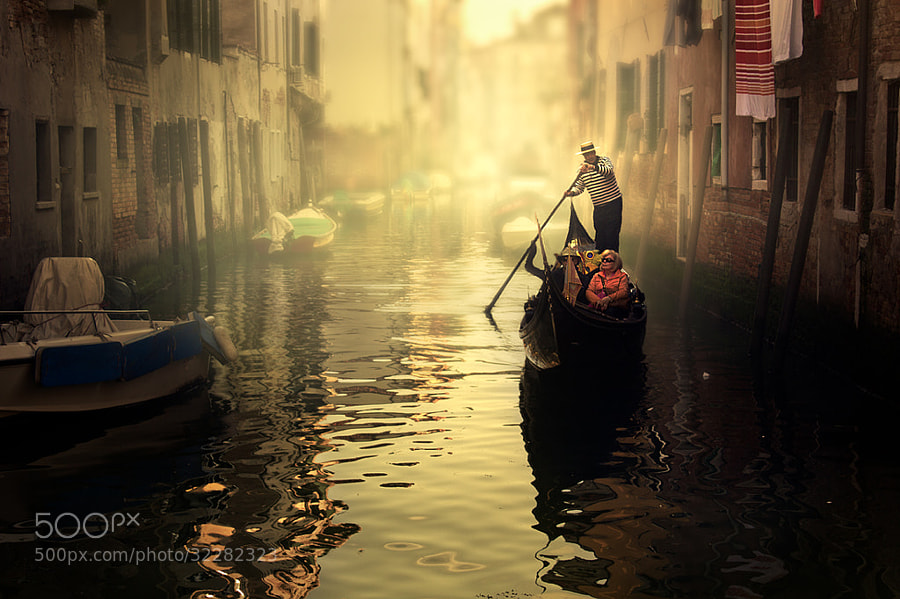
    Photograph Strolling Venice by Cristina Ramos on 500px

    Strolling Venice by Cristina Ramos on 500px

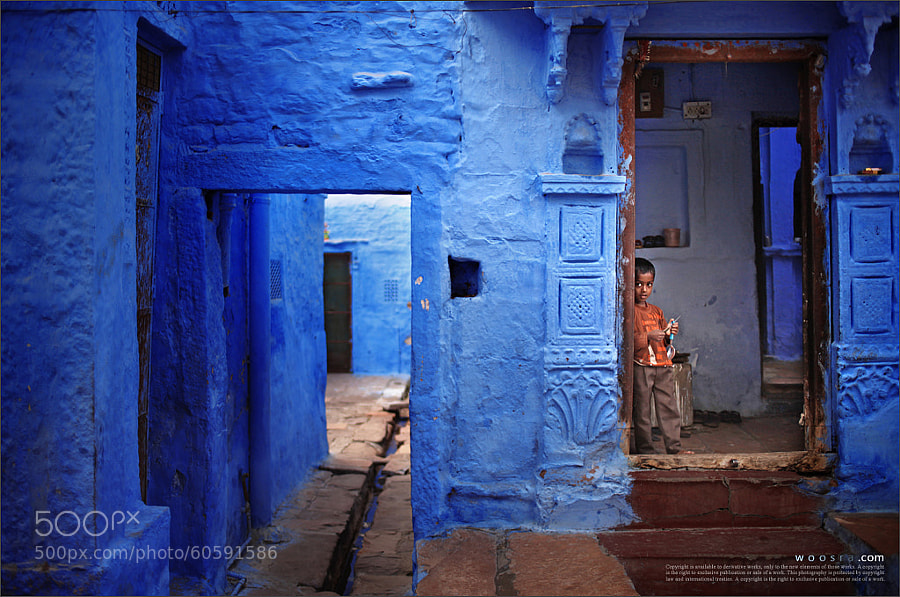
    Photograph Blue City by Woosra Kim on 500px

    Blue City by Woosra Kim on 500px

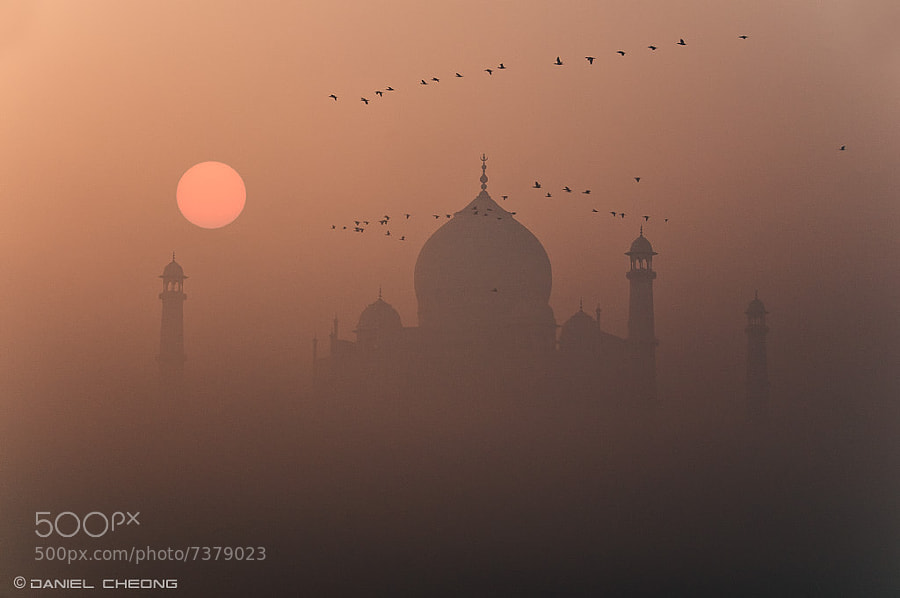
    Photograph Misty Taj by Daniel Cheong on 500px

    Misty Taj by Daniel Cheong on 500px

    Photograph The Trench Run by peter stewart on 500px

    The Trench Run by peter stewart on 500px

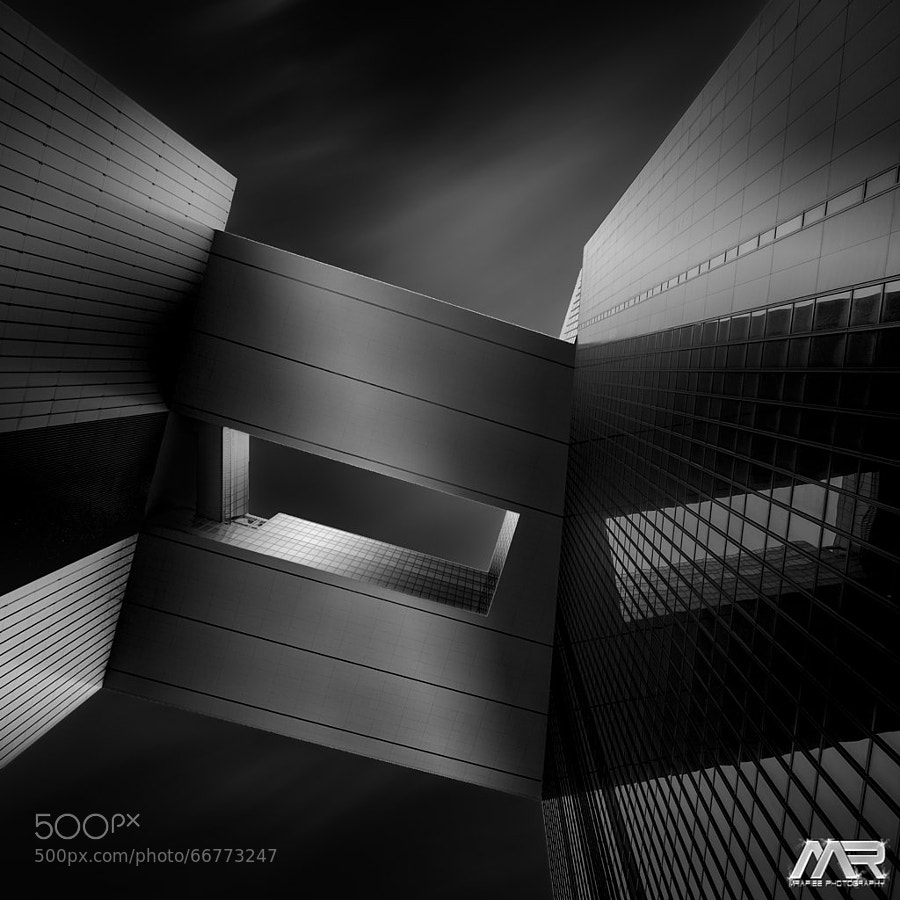
    Photograph The Aperture by  M. Rafiee on 500px

    The Aperture by M. Rafiee on 500px

    Photograph Golden Sunrise by Andi Andreas on 500px

    Golden Sunrise by Andi Andreas on 500px

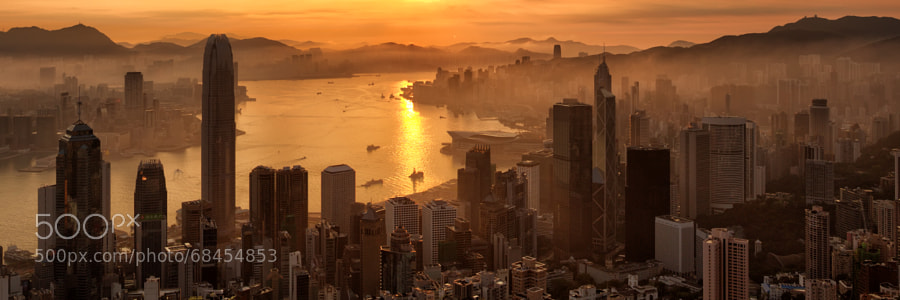
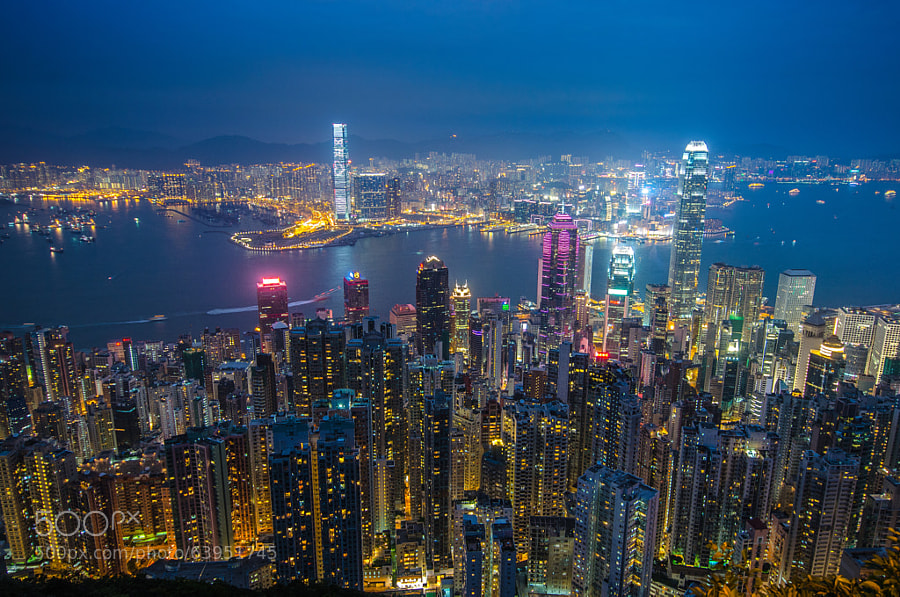
    Photograph Hong Kong by César Asensio Marco on 500px

    Hong Kong by César Asensio Marco on 500px

    Photograph The Twilight Hour by Marc Perrella on 500px

    The Twilight Hour by Marc Perrella on 500px

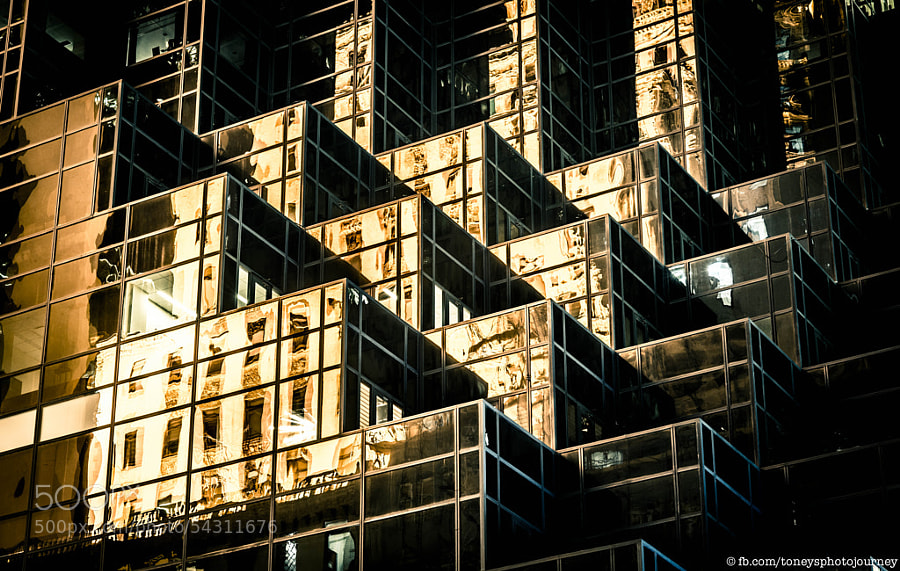
    Photograph Golden Bricks by Toney's Photo Journey on 500px

    Golden Bricks by Toney's Photo Journey on 500px

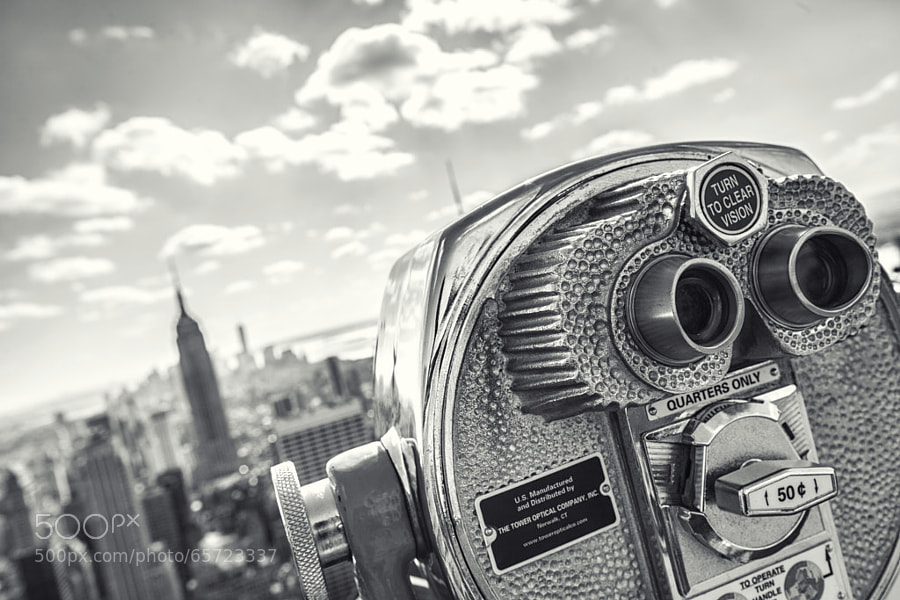
    Photograph quarters.only by Robert Pfeuffer on 500px

    quarters.only by Robert Pfeuffer on 500px

    Photograph On the bridge II by Roland Shainidze on 500px

    On the bridge II by Roland Shainidze on 500px

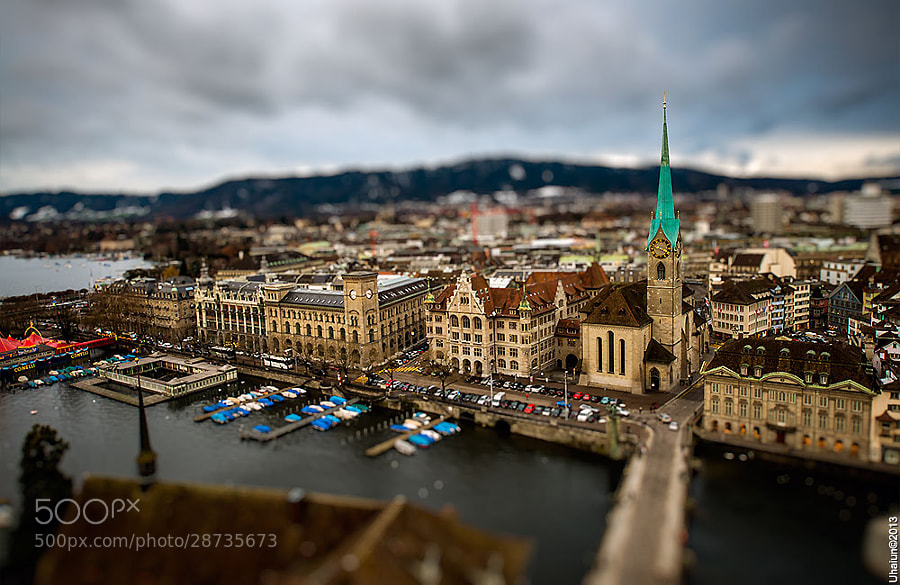
    Photograph Microzurich by Vladimir Popov / Uhaiun on 500px

    Microzurich by Vladimir Popov / Uhaiun on 500px

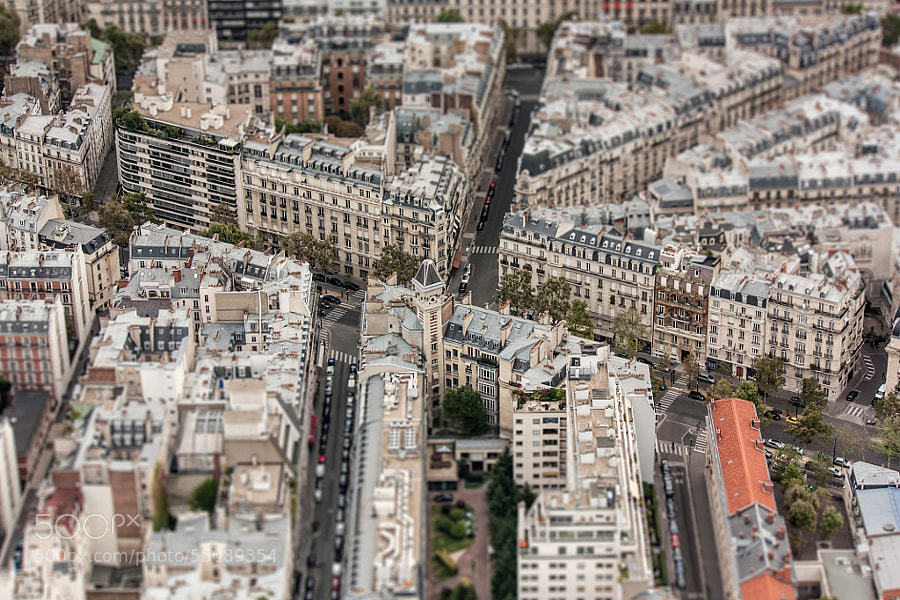
    Photograph Paris TS by Federico Venuda on 500px

    Paris TS by Federico Venuda on 500px

    Photograph Still Morning by Tristan O'Tierney on 500px

    Still Morning by Tristan O'Tierney on 500px

    Photograph twilight arcs by Sven Fennema on 500px

    twilight arcs by Sven Fennema on 500px

    Photograph Roman Forum (Rome, Italy) by Domingo Leiva on 500px

    Roman Forum (Rome, Italy) by Domingo Leiva on 500px

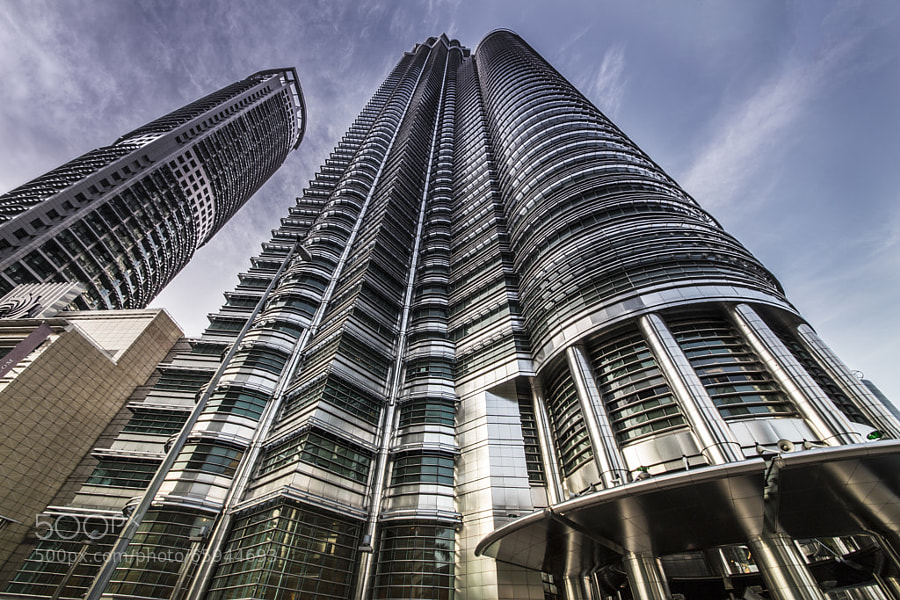
    Photograph The Petronas Tower. by sk teh on 500px

    The Petronas Tower. by sk teh on 500px

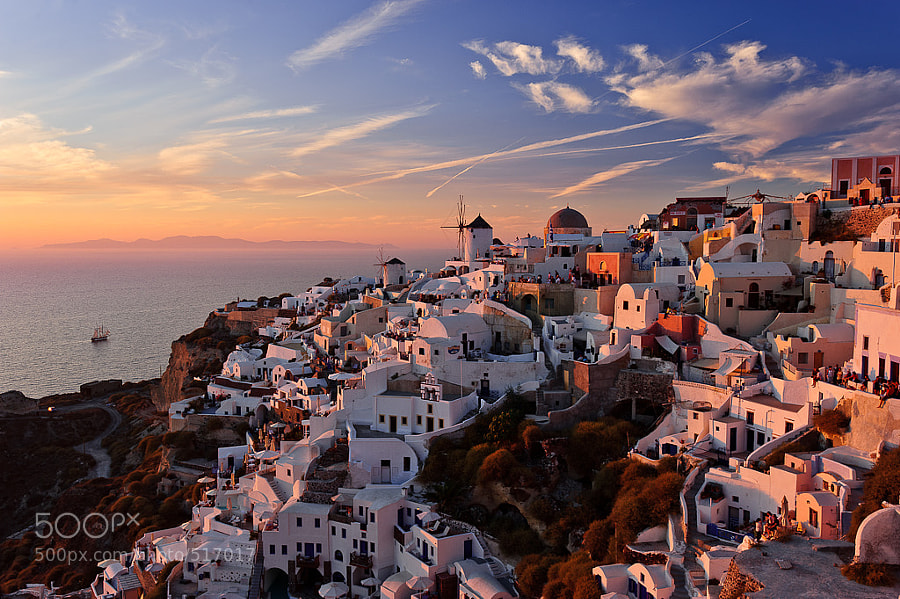
    Photograph Sunset in Oia by Slava Mylnikov on 500px

    Sunset in Oia by Slava Mylnikov on 500px

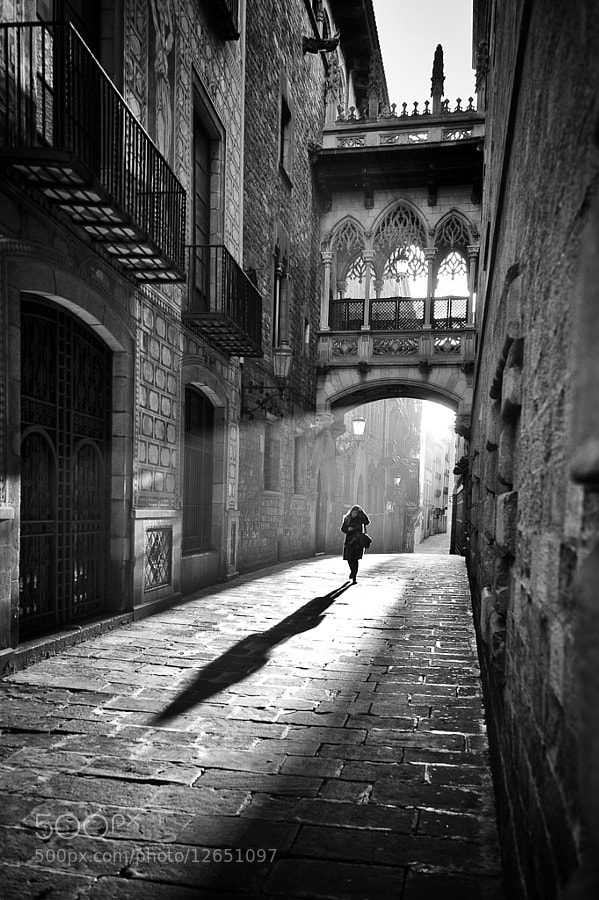
    Photograph Gothic Quarters - Barcelona by Frank van Haalen on 500px

    Gothic Quarters – Barcelona by Frank van Haalen on 500px

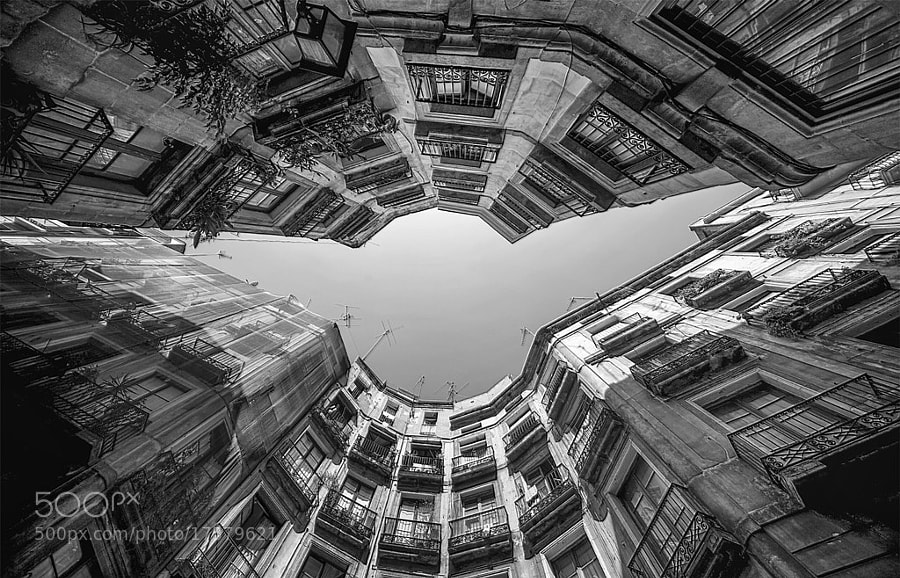
    Photograph Colmenas II by Rosa M.  Font Regí on 500px

    Colmenas II by Rosa M. Font Regí on 500px

    Photograph Clash of the Titans by Alfon No on 500px

    Clash of the Titans by Alfon No on 500px

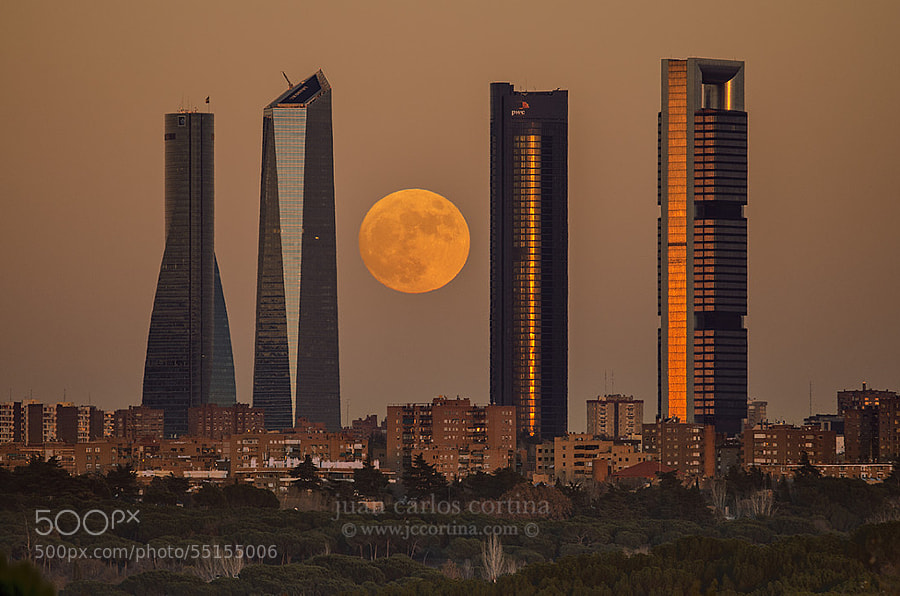
    Photograph Madrid full moon by Juan Carlos Cortina  on 500px

    Madrid full moon by Juan Carlos Cortina on 500px

    The post 35 Cityscape Images to Take Your Breath Away by Darlene Hildebrandt appeared first on Digital Photography School.


    Digital Photography School

  • How to Take Relevant & Pretty Photos for Your Blog

    If you love photography and have a blog, then it’s a no-brainer to put them together. I’m betting you can probably take some kick-ass photos too (especially if you follow the tips here. 🙂 When you know how to take photos for your blog, you become more powerful than ever. Unfortunately, while beautiful photos can get you bunches of “likes” Continue Reading

    The post How to Take Relevant & Pretty Photos for Your Blog appeared first on Photodoto.


    Photodoto

  • Newbie Tips for Working with a Model

    Fashion photography model tips

    If you’ve ever tried taking pictures of someone (or something) that isn’t extremely cute and fluffy like a baby or a puppy, you’ll know it can sometimes be difficult to capture people in a flattering way. Some people are extremely shy or don’t like getting their picture taken. Others really do like having their pictures taken. Some even make a living getting their picture taken. They are called models, and today we are going to consider what it is like working with models.

    Where can you find a model to practice with?

    There are two ways to go about working with a model.

    One way to find a model to work with is by going to a model website like Model Mayhem that connects models, photographers, makeup artists, etc. In fact, Model Mayhem is the best resource for up and coming photographers to find models, because a lot of beginning models are on there looking to build their portfolio and will trade their time for pictures (see section below). Check it out today and see who is in your area, ready to shoot. Be clear and specific about times, what you want to shoot, and what they will be receiving. Some sites have a lot of models to choose from, and if you are courteous and professional through correspondence, you can connect with a model and set up a shoot.

    Fashion photography model tips

    Another way to find a model is to ask around your town or city. There is a good chance there is someone in your town who has the looks or aspirations to do some modeling, whether it’s on a national scale or a local one. If you don’t know someone directly, simply ask around or a make a call out on Facebook. I remember when I was taking a lighting class and needed someone on short notice due to a cancellation. I put out a request on Facebook for a model as replacement and I had two subjects willing to step in within an hour. Some people really love having their pictures taken, it’s simply a matter of putting yourself out there.


    Either way, if you have someone who is interested in posing for you, now you have to decide what arrangement benefits both of you.

    Trading Time for Pictures or Prints

    There is a great rule of thumb that goes something like this – if the model is benefitting the photographer’s portfolio only, the model should be getting paid. If the photographer is benefitting the model’s portfolio only, then the photographer should be getting paid. But if you are both benefitting each other, meaning you both are trying to build up a portfolio of images and you are both more at less at the same stages in your career, then you can do what is called Time for Prints, or TFP.

    Fashion photography model tips

    Time for prints means the model is giving up his or her time in exchange for images at the end of the collaboration. This could be called a “trade” or, in the commercial modeling world a “test shoot.” It is not expected that you are actually printing images and delivering them to the model. I believe that is a term left over from the glory days of film.

    Model Release

    When working with a model, it would be wise for you to obtain a model release form. You can find them easily on the web (here’s a PDF you can download immediately), and there are even a few great apps that you can download. I use an app called Easy Release, which is powerful and lets you and the model sign right on your smart phone or tablet.”

    A model release form, when signed by the model, grants you the photographer legal permission to use the photos online or in advertising.

    If you don’t get a model release, the model has the right to ask you to remove images from websites and even sue you if you end up making money using those photos without permission. I’ve personally never had issues when I’ve forgotten to bring along a model release, but it is always better to be prepared.

    Fashion photography model tips

    Picking a Location and an Outfit

    Now that you’ve done all the prep work, where do you shoot? What should the model wear? This is where the fun begins!

    It makes the most sense to either start planning with an outfit or with a location (assuming you aren’t shooting in a studio). If you start with an outfit, say a summery dress on a girl, then the location should probably match the outfit. Maybe think about shooting in a field, or the beach, or in the forest. If you have an amazing location in mind, like a great old building with Victorian architecture, then think about what outfit would match that setting best, in terms of colors, shape, patterns, etc.

    Just to give you a few ideas about location, I’ve shot in abandoned buildings, under piers, in wheat fields, in flower fields, at vineyards, against brick walls, yellow walls, graffiti walls, in studios, in parks, on carousels, in casinos, and more.

    fashion photography model tips

    Working with a Model

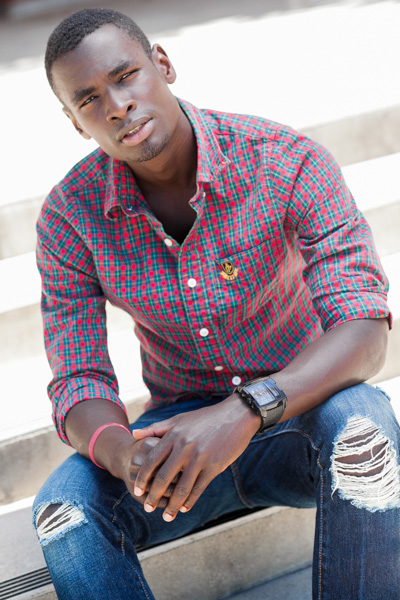
    The next (and final) step in working with a model is to simply begin shooting. If you have an experienced model, you won’t have to say much to them in terms of posing, because they will already know what to do. The best models I’ve worked with will actually change poses or expressions every time they hear the camera click, so you’re never getting duplicate images.

    If you have an inexperienced model consider getting some posing inspiration from sites like Pinterest,fashion magazines, and right here on dPS. Do your homework. Look at lots of images, practice those poses yourself so you can articulate what you want from your model. Here are a few to get you started:

    • Striking the Pose – dPS eBook
    • 67 Portrait Posing Printables – a PDF you can print and take with you to go with the eBook above
    • Posing guide for women part one – 21 different pose ideas
    • 8 Posing guides – for women, men, children, groups

    A fun and easy rule to remember is “make triangles with the body” (see photo below). How many triangles can the model make using legs, arms, and body? This advice works better on women than on men, by the way. Sometimes working with models means stretching them in ways that might not feel natural but can look awesome. The best thing you can do is practice, practice, practice. The more you shoot, the easier directing models becomes.

    Fashion photography model tips

    Now let’s see some of those model photos, please share your images in the comments below and if you have any questions please ask.

    The post Newbie Tips for Working with a Model by Phillip VanNostrand appeared first on Digital Photography School.


    Digital Photography School

  • 5 Tips for a Powerful Picture Every Time

    Play-At-First.jpgYou see plenty of landscape, portrait and commercial photographs every day on the web and in magazines. You can tell by the lighting, staging and seemingly overall perfection of everything in those pictures that days, maybe even weeks of planning were needed to pull of such amazing photographs.

    With that much planning, all that is left to do when it is time to take the picture is press the shutter. The photographer behind the lens probably even knew exactly what time she was going to press the shutter. In short, the photographer did everything necessary to prepare for the picture.

    But what about the other side of photography?

    You have also seen equally powerful pictures that captured something spectacular in the spur of the moment. These are the kind of photographs that you may think you could never plan for because they present themselves with no prior notice or warning.

    Van Wreck

    Have you ever heard the saying that “luck favors the prepared”? No truer statement could ever be said about photographers and photography.

    It’s true that luck can find anyone at any given time, but if you want to be able to pull off amazing photos with just a moment’s notice you need to be as prepared as a studio or commercial. But this approach to photography takes a completely different type of preparation.

    Here are five photography tips for a powerful picture every time. These tips will help prepare you to perfectly capture once in a lifetime pictures time and time again.

    1. Always have a camera

    A prepared photographer needs to have a camera close by at all times. It sounds elementary, but any good top five list is going to start off with the basics first. If you don’t have a camera with you, you will not be able to capture that picture of a bald eagle in your backyard. Without your camera, you are left only with your story of a bald eagle. Odds are you have already have a camera on you or near you right now. Your phone! The first tip in photography preparation; always have your camera (any camera) close by.

    Eagle

    2. Study light

    Photography is all about light (and having a camera). Without light there is no photography. But there is so much more to light than just having it. As a photographer you must become a student of light. What color is the light? How strong is the light? Where is the light coming from? How long until the light changes? Where can you find more light right now?

    Cowboy Lights Up

    As you move through your day (camera at your side), take the time to notice the light sources around you. If you are in a meeting, look around the conference room. Is there light coming through the window? What kind of lights are in the ceiling? Are there desk lamps? What about the light coming from everyone’s computer screens? Could you open the curtains to let in more light?

    By reminding yourself throughout the day to recognize and understand your lighting situation you are learning how to master light rather than have it master you. Then you are on your way to taking better pictures at a moment’s notice.

    3. Visualize

    While you are studying the light around you take a moment and pretend that you are taking a picture. While in that same theoretical meeting, look across the table at your colleagues. Imagine taking a picture of them. Which side of their face has more lighting? Are they backlit? How would you overcome that? Would your picture be better if you moved across the room? Is there a ray of sunlight that, if you could, you would ask your boss to step into because it would highlight her hair color so well?

    By taking the time to play pictures out in your mind you are actually training your mind to think like a photographer. You are preparing your mind to be ready. It’s called visualization and athletes do it all the time. Ever wonder why a golfer takes so long to hit the ball? It’s because he is envisioning his swing, and the ball going where he wants it to go before he hits it.

    Photographers and photography are no different. Train your mind by constantly imagining that you are taking a picture.

    4. Think ahead

    This tip goes hand in glove with tip number 3. You should always be thinking ahead, be it five seconds, five minutes or five hours. To be ready to take a photo at the drop of a hat you have to put yourself in a situation that has yet to happen.

    Fire Chief On Truck

    It’s like the pre-flight safety instructions you hear before a plane takes off. It does no one any good to get that information when the plane is in distress. Knowing where the exit doors are ahead of time saves lives. Knowing what ISO setting you will need if your kids break out in a song and dance routine for the grandparents can save Christmas.

    Always be thinking ahead and absorbing your surroundings to better anticipate action that hasn’t yet taken place. Sports photographers may do this better than anyone. The better they understand how the sport is played the more likely they will be to capture the key moments in a game. A photographer covering a baseball game recognizes that there will be a play at first base and he will instinctively put his focus on the first base bag and wait for the play to get to him.

    Play At First

    To always be ready to capture a picture at the drop of a hat you have to be a student of life, and a student of movement and moments. Learn to anticipate and not just react.

    5. Practice

    The final tip is one that combines the other four and that is to practice being ready at all times. It may sound silly, but why do you think golfers, baseball players and airplane pilots practice? So that when it comes time to hit the ball, catch the ball or avoid a crash they have already placed themselves in that situation and performed the needed mind and body movements over and over again. Come game time (or in an emergency) instincts take over.

    Luck favors the prepared and trust me, if my plane loses an engine I want a pilot who has already thought through what needs to be done to prevent the plane from crashing. I don’t want him fumbling over buttons and dials trying to figure out how to keep the plane in the air. I want him to instinctively know what must be done to save the plane.

    As a practical matter, have a friend change your camera settings so that you have no idea how your aperture, ISO and shutter speed are set. Have your friend point at something (it doesn’t matter what because this is practice).Then quickly grab your camera and adjust your settings to best capture that object. Then, do it again with another object or person or passing car. Take your camera on walks with you and have your friends constantly test your skills. Make a game out of it until you instinctively know what to do.

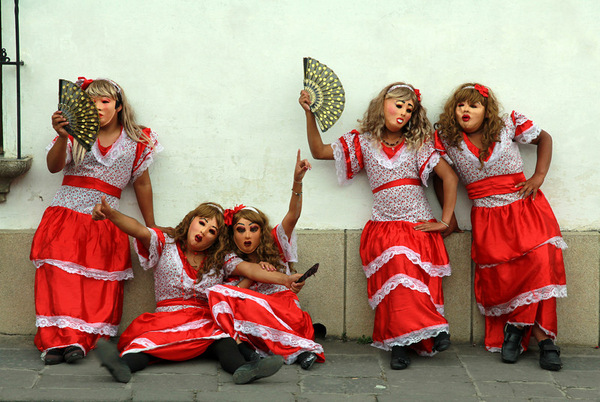
    Men In Dresses

    To be ready to take a powerful picture at any moment you literally have to be ready to take a picture at any moment. Keep a camera near you at all times. Be aware of your light because it is always changing. Constantly visualize taking pictures. Always be aware of your surroundings to better anticipate action, and to perfect all of this, practice.

    Remember, luck favors the prepared. Luck is not a strategy. Do you have any other tips you’d like to share? Please do so on the comments below.

    The post 5 Tips for a Powerful Picture Every Time by Scott Umstattd appeared first on Digital Photography School.


    Digital Photography School

  • Greater Storytelling Images by Shooting Collections

    IMG_5794.jpg

    You hit the export button and now your shot is ready for your website, blog, Facebook photography page, or an email attachment to a client. Be honest with yourself. Why is it a great image? Many photographers fall into the trap of thinking an image is stellar because of its textbook perfection. Beware. “Regular Joe” isn’t as interested in technical precision as they are the story in the frame.

    Many photographers concentrate on leaving a shoot with that one glorious image. However, it is rare that a single picture is powerful enough to tell a larger story. Regardless of the technical expertise of a photograph, most people find storytelling images more captivating. Viewers want to attach themselves to a photograph and invest in a greater narrative. Considering this, you would be wise to ease up on the quest for the “money shot” and begin to devote energy to the search of multiple frames that can be pieced into a collection that relates a much more interesting overview of your subject.

    In his article “Telling Stories With Photos” Digital Photography School founder Darren Rowse likens a captivating image to a short story. If you are like me, you would rather use your time for reading a whole novel, than to flirt with a short story. When your single image isn’t potent enough or you fail to capture the impressive shot you initially intended to get, shoot variations of a scene and present them as a cohesive collection. Similarly, learn to view each shoot or location as an opportunity to create a visual essay that presents a grander tale.

    Possible Variations in a Collection

    The following are common types of photographs included in a multiple image collection. While it is not necessary to have each type of photo in your compilation, it is important that your variations have a logical sequence and rhythm.

    Setting the Scene

    This is the image that creates a sense of place. The scene setter is typically a great opener for your collection. It identifies location and introduces subject matter to your audience.

    IMG 6039

    Mid-Range Shots

    Pull back a bit and give more information to the viewer. Using a wider focal length includes some of the larger scene. By doing so, the collection starts to take shape and you have prepared your audience for the action of your story.

    IMG 6054

    Portraits

    Most collections will have a human element. The reason why portraiture is so popular is because, as viewers of photography, we personally connect in some way to every other human. People identify with others and by including a portrait in your collection, your audience can emotionally leap into your narrative.

    IMG 5794

    Detail Shots

    There is small detail in every scene that most overlook. Whether it is the trampled confetti on a dance floor or the untied lace of a child’s shoe, the magic is often captured in the minutia. Detail shots also make great transitions in a multiple image collection.

    IMG 6208

    Differentiation Shots – get outside the box

    Have you ever been to a tourist hotspot and seen a clump of photographers pointing their 70-200mm lenses in the same direction, from the same height? Even after the individual photographers edit, I am willing to bet that photographs taken from the “clumps” are, you guessed it, the same. To make your photography stand out and to improve the interest of your collection, shoot variations that other photographers fail to notice.

    IMG 6015

    IMG 6235

    Action Shots

    Action shots are a great way to identify what is commonly thought to be the crux of any story. However, the action shots are just the gravy on the mashed potatoes. The real story lies in the elements surrounding the action. Think about a wedding. The pinnacle of action of a wedding involves the words “I do” and a kiss. However, the best shots are captured before and after that moment. Many photographers concentrate on the action shot and are left without time or energy for anything else. My advice is to shoot every other variation first so that there is the scaffolding on which to build a larger story.

    IMG 5931

    IMG 5997

    Closing Shots

    How does your story end? To finalize a collection, think about what lasting image you would like to leave with your audience. Make sure that the concluding shot offers your audience a sense of closure.

    IMG 6381

    The Greater Story

    When you pack your gear for a shoot, remind yourself that a single stellar image is not always the greater story. There is photographic gold to be mined if you give yourself time and allow yourself to break from the paralyzing tunnel vision that plagues most photographers. The next time you hit the export button, make sure that you are telling a greater story by producing variations and presenting them as a collection.

    Gear tip: quite often, a scene unfolds rather quickly. Whether it a sporting event, party or field trip, photographers should be at the ready to capture the larger story quickly. While many telephoto zoom lenses do not have the character of their prime lens counterparts, they are extremely useful when attempting to create a collection in a short amount of time. Try a 24-105mm (or comparable) lens to capture both the wide and tight elements needed in an effective storytelling collection.

    For more on creating storytelling images read these: 

    • Documentary Photography – Six Tips for Creating a Legacy
    • The Secret of Creating a Strong Image – 5 Tips for Creating a Story in Your Image
    • Interview with Jim Mortram – Small Town Inertia
    • 8 Photo Projects in Your Own Backyard

    The post Greater Storytelling Images by Shooting Collections by Andrew Faulk appeared first on Digital Photography School.


    Digital Photography School

  • Lens Review Tamron SP 150-600mm f/5-6.3 Di VC USD
     

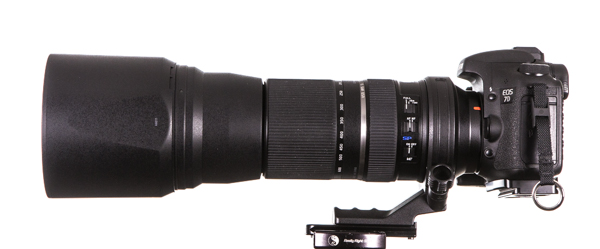
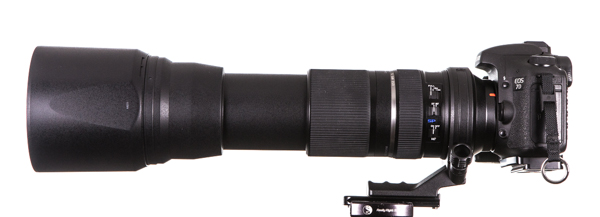
    Tamron SP 150-600mm

    Tamron SP 150-600mm f/5-6.3 Di VC USD was tested in April 2014.  The version of the lens tested is for the Canon DSLR mounts and it is compatible with both crop and full frame sensor bodies. The lens is also compatible with Nikon and Sony bodies.
    On a Canon crop factor camera body the lens provides a field of view equivalence of 240-960mm. The lens has fast, silent focusing, Vibration Compensation and eBAND (Extended Bandwidth and Angular-Dependency) lens coating in addition to the conventional BBAR (Broad-Band Anti-Reflection) coating. These coatings are designed to reduce flare and ghosting, and to increase contrast. The lens has a moisture-sealed construction, and has 20 lens elements in 13 groups including three low dispersion (LD) elements and an iris diaphragm with nine rounded aperture blades.

    What is in the box

    The lens, a large lens hood, a removable tripod mount collar and a large fold out guide  or manual.

    Specifications of the lens tested

    • Focal Length (full frame): 150-600mm
    • Aperture Maximum: f/5.0-6.3 Minimum: f/32.0-40.0
    • Camera Mount Type: Canon EF Format
    • Compatibility: 35mm Film / Full-Frame Digital Sensor, Canon (APS-C), Canon (APS-H)
    • Angle of view: 16° 25′ – 4° 8′
    • Minimum focus distance 8.86 ft (2.7 m)
    • Maximum reproduction ratio: 1:5
    • Lens elements/groups 20/13
    • Diaphragm blades: 9
    • Filter thread front: 95 mm
    • Dimensions (DxL): 4.16 x 10.15 in (105.6 x 257.8 mm)
    • Weight: 4.30 lb. (1.95 kg)

    Handling and Features

    This is a fairly large lens compared to the Canon 100-400 f/4-5.6 push-pull L series lens, and weighs 4.3 pounds as compared to the Canon 100-400 at 3.2 pounds. Tamron have used high quality plastics for the lens barrel in order to keep the weight down. Had this lens been made as an all metal construction, it would be much heavier and would not be as well balanced.

    Tamron SP 150-600mm extend to 600 mm

    The lens extend to 600 mm

    The lens was tested using a Canon 5D Mk III and a Canon 7D. I found the lens reasonably well balanced while hand holding. It does get to be a bit of a strain during extended shooting so a tripod with a smaller gimbal style tripod head is advisable.

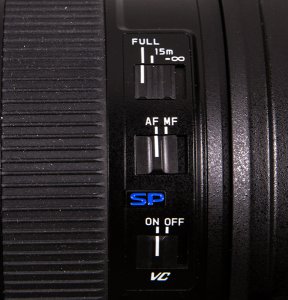
    Switches on the Lens Barrel

    Switches on the Lens Barrel

    The lens is equipped with tripod mount, footed lens collar. An Arca Swiss style long lens plate was mounted for all tripod based testing.

    The lens has three switches; each is a two position switch which is flush mounted on the lens barrel. The switches have a positive click and an audible feedback when operated. The switches are for: Autofocus/Manual focus, Vibration Compensation on or off, and focus limit. A lens lock at 150mm is also provided.

    Lens Zoom Creep

    The lens barrel tends to zoom creep over an extended period of time when positioned at an acute angle downward .  There is also some zoom creep when pointed directly upward.  The greater the angle the greater the creep. Extending an index finger to grip the lens barrel just beyond the zoom ring prevents any creep when the lens is handheld. Tamron has provided a lens barrel lock that will keep the lens locked in the 150 mm focal length position.  This is good during transport but Tamron should have considered making the lens lockable at all the major focal length positions.

    Focusing

    The autofocus is fast and fairly accurate. The lens uses a USD (Ultrasonic Silent Drive) focusing motor. The lens barrel has a two-stage focus limiter switch with a full and a 15 meter (49.2 feet) to infinity limited range. This is a very nice feature that prevents the lens from hunting through the whole focus range particularly when the subject is beyond 15 meters.

    Manual focusing is reasonable as the focus ring is damped and very smooth. The position of the manual focusing ring could be improved as the lens collar comes in the way. For hand held operation it is preferable to rotate the collar 180 degrees or remove it entirely. Manual focus adjustments can be made in Auto or Manual focus modes as Full Time Manual is fully supported. The minimum focus distance is 8.9 feet/2.7 meters provides a magnification of 1:5. A focus window provides distances in meters and feet from the minimum focusing distance to infinity.

    The front filter tread is 95mm and the front element does not rotate while focusing. This is a welcome feature, particularly for polarizing and split/graduated ND filter use.

    TESTS

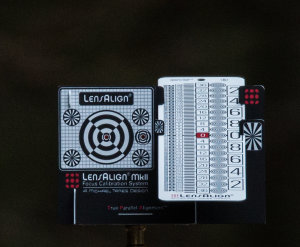
    Micro Focus Calibration Tool

    Micro Focus Calibration Tool

    I set up the lens to test auto focus accuracy. Using a LensAlign Mk II micro focus adjustments were made at 150mm and 600mm. At 150mm no adjustment was needed while at 600mm a -5 was needed to correct for some back focusing.

    The Ultrasonic Silent Drive (USM) motor in the lens is very quiet when focusing and the speed is comparable to the Canon 100-400mm f/4.05.6 IS L lens. At 600mm the lens first retracts to the closest focus distance before extending to the focus on the distant subject. Overall it does not affect the focus speed, as this phenomenon is controlled by the camera body. This issue was prevalent using both camera bodies.

    Manual Focus

    As mentioned earlier the manual focus ring is in an awkward position for my liking. The total rotation is 120 degrees and very manageable at shorter focal lengths but is not as well tuned at focal lengths greater than 450mm, and focus appears to have a slight lateral shift.

    Once focus is established on a subject, varying the focal length does not maintain focus. Refocusing is required for any change in focal length.

    Autofocus

    The lens was tested using the most accurate center focus point on the Canon 5D MarkIII as well as the focus assist group.

    With both bodies the “One Shot” (AF-S on Nikon) and “AI Servo” (AF-A on Nikon) focus methods performed well from focal lengths of 150mm to 400mm. At 500mm through 600mm the lens did not track well in AI Servo mode due to the high magnification, but was fine in One Shot (AF-S) mode. The lens was erratic, and if it dropped focus lock on the subject it rarely recovered to lock on again. Re-focusing was the only way to track a moving subject again. The loss of tracking is more apparent for subjects that are approaching the lens and less problematic for subjects moving left to right, or vice versa.

    Vibration Compensation

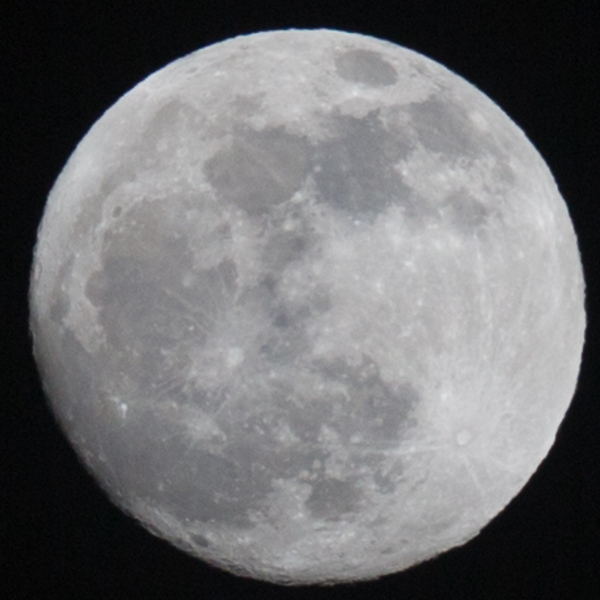
    Overall performance of image stabilization was very good. At focal lengths of 150 through 500 the lens maintains stability 2 to 3 stops below the hand held shutter speed guideline of 1/focal length as the minimum shutter speed. Hand holding at ISO 200 while looking through the viewfinder, one notices an image shift when the VC (IS) motors kick in.

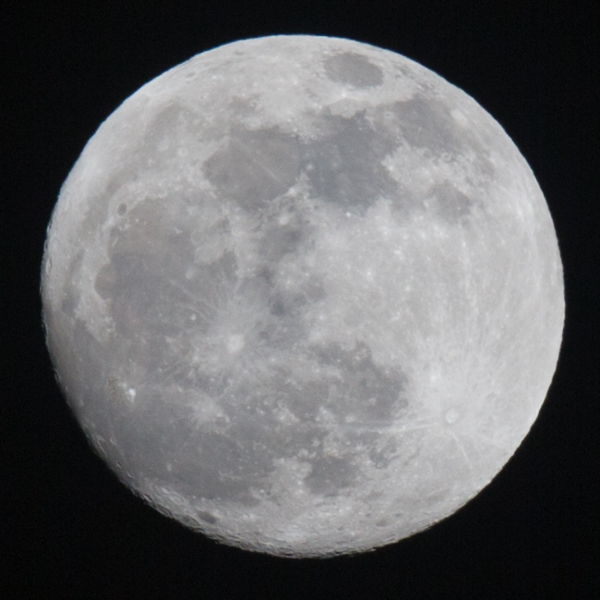
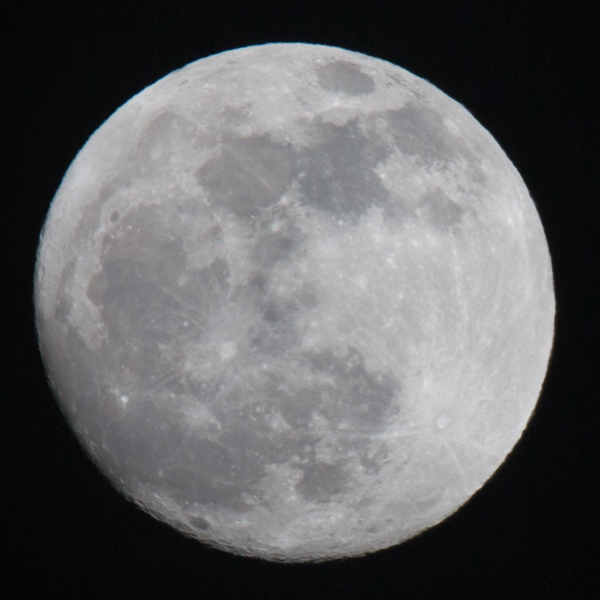
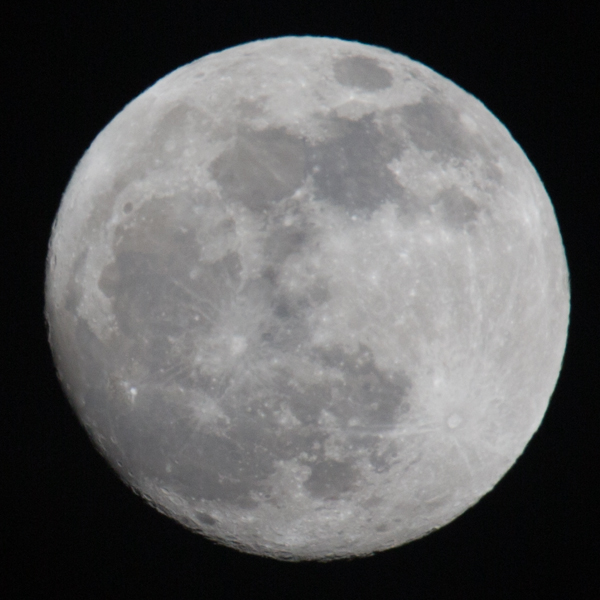
    Here are some images of the full moon (cropped and sized to the same frame size) Settings used were: ISO 250, f/6.3, at 1/400th of a second, at focal lengths of 600mm, 500mm, 400mm and 300mm. The VC (IS) functions very well and is a pleasure to use.

    Focal length 300 mm

    Focal length 300mm

    Focal length 400 mm

    Focal length 400mm

    Focal length 500 mm - some chromatic aberration is visible

    Focal length 500mm – some chromatic aberration is visible

    Focal length 600 mm - some chromatic aberration is visible

    Focal length 600mm – some chromatic aberration is visible and there is a slight drop in sharpness

    Test Results

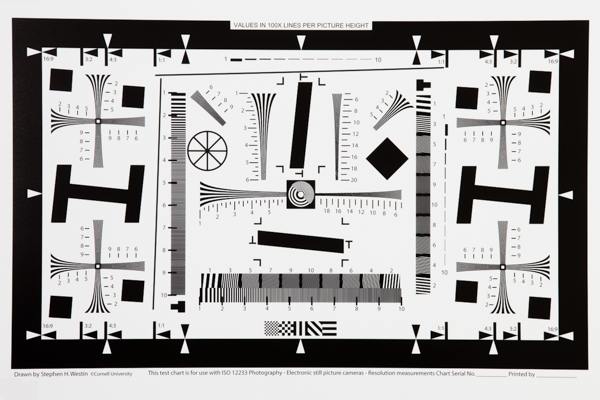
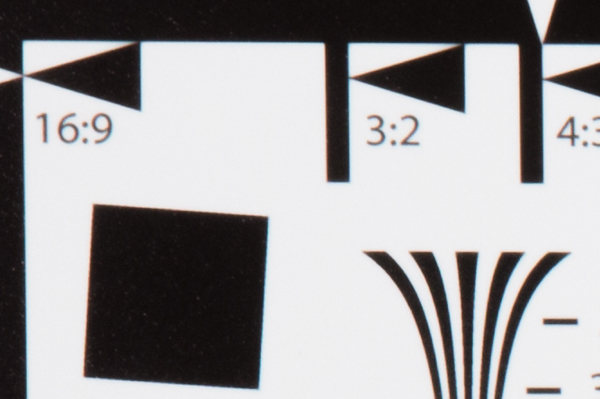
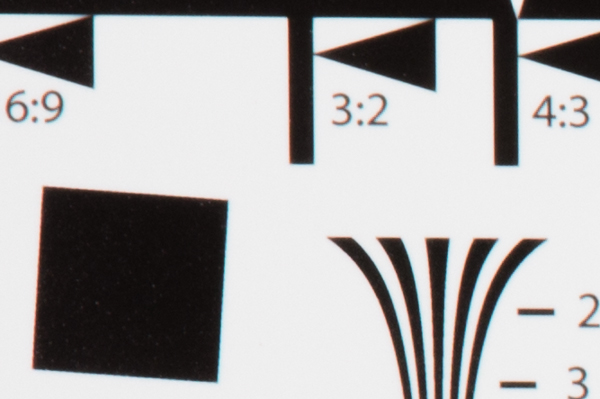
    All controlled environment testing was done in the studio with constant lights and and a test chart as shown below.

    lens sharpness chart

    The Sweet Spots

    f/8.0 from 150-250mm:  at 300mm there is a loss of sharpness both in the center, as well as on the edges. At 400-600mm the center is sharp with some fall off toward the edges.

    During tests, f/11 was found as a good aperture from 300-600mm. At 600 mm the edge fall off is pronounced, but that is also a factor of chromatic aberration. At the widest aperture in the 150-300mm range the lens has better overall sharpness from 200-300mm than at 150-200mm.

    Aperture settings of f/8 through f/11 provide the best performance across the frame on a full frame sensor. f/5.6 through f/6.3 are good in the center. On a crop factor camera like the 7D the edge sharpness is acceptable in the f/6.3 to f/8.0 range at focal lengths of 300mm and higher while f/5.6 to f/6.3 is acceptable at focal lengths 300mm and below.

    Pincushion Distortion

    There is a slight amount of pincushion distortion through the entire focal length range of this lens. This distortion however, is minimal and very easily corrected using lens correction in Adobe Camera Raw or in Lightroom.

    Edge Exposure Fall Off

    Only visual testing was conducted for this test. The lens handles light fall off very well. It is most noticeable at f/22 but does not pose a problem at f/20. On the 7D body the frames captured at f/22 were acceptable with no cropping applied. f/20 is a very safe aperture for maximum “Depth of Field” and minimum edge fall off.

    Chromatic Aberration

    There is fringing at apertures of f/16 through f/22 at focal lengths of 400-600mm. Progressively getting pronounced as the focal length increases, it should be noted that though there is chromatic aberration it is not bad compared to other lenses in this class and could be considered low.

    Chromatic aberration at 300 mm

    Chromatic aberration at 300mm

    Chromatic aberration at 400 mm

    Chromatic aberration at 400mm

    Chromatic aberration at 500 mm

    Chromatic aberration at 500mm

    Chromatic aberration at 400 mm

    Chromatic aberration at 600mm

    Pros and Cons

    Pros

    • Great value for the price point
    • Very good build quality
    • Well damped focusing
    • Center sharpness throughout the range
    • Very quiet operation
    • Very good Vibration Compensation (Image Stabilization)
    • Low distortion and chromatic aberration

    Cons

    • Position and rotational direction of focusing ring
    • Image shifting when VC (IS) engages
    • Edge sharpness fall-off at 600mm on a full frame body
    • Focus speed decreased at longer focal lengths

    Conclusion

    You might conclude from this list of cons, and some of the criticism, that the Tamron 150-600mm is not exceptional, but that would be very wrong. There are very few perfect lenses and the issues should be taken under consideration based on their significance for type of photographer who will use this lens, and the type of photography they do with it. This lens is a great performer, and the price point just can’t be beat. Used properly, and keeping its small limitations in mind, this lens will deliver excellent images and is a highly recommendable lens. It is an ideal hand holdable lens for nature and sports photographers.

    Sample Images

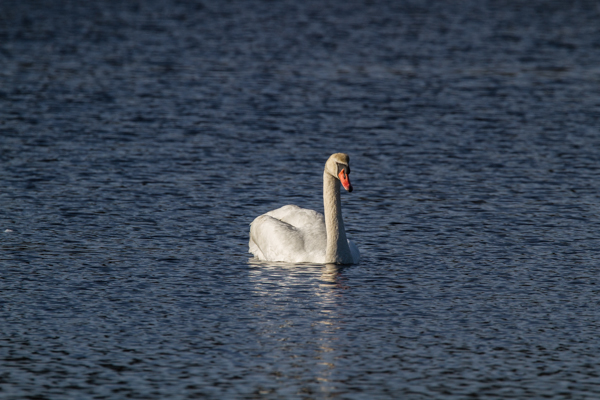
    Canon 7D, Tripod, ISO 250, f/9, 1/640 sec. As shot.

    Canon 7D on tripod, at 600mm, ISO 250, f/9, 1/640th. As shot.

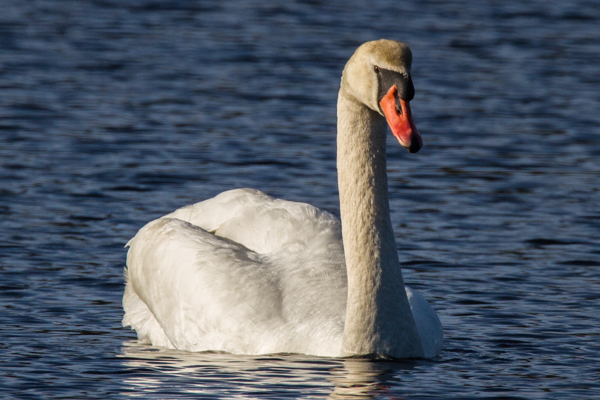
    Image as above cropped to fill frame.

    Image above, cropped to fill the frame.

    Same image cropped to show head detail - crop size 280 x 187 pixels then zoomed to 600 pixels (Greater than 2X magnification)

    Same image cropped to show head detail – crop size 280 x 187 pixels then zoomed to 600 pixels (Greater than 200% magnification)

    _MG_8911-5

    Canon 7D, at 500mm, hand held, ISO 2000, f/6.3, 1/125th

    _MG_8801-2

    Canon 7D, at 450mm, hand held, ISO 250, f/6.3, 1/1000th

    _MG_8808-3

    Canon 7D, at 600mm, on tripod, ISO 250, f/6.3, 1/200th

    Image as above cropped to fill frame.

    Image above, cropped to fill the frame.

    Canon 7D, at 600 mm, hand held, ISO 250, f/6.3, 1/800 sec.

    Canon 7D, at 600mm, hand held, ISO 250, f/6.3, 1/800th

    A recent press release from Tamron announced  – TAMRON WINS TIPA AWARD 2014 FOR SP 150-600MM F/5-6.3 DI VC USD (MODEL A011) “BEST EXPERT DSLR LENS” These awards are presented each year by the Technical Image Press Association (TIPA) to top photo and imaging products.

    The post Lens Review Tamron SP 150-600mm f/5-6.3 Di VC USD by Shiv Verma appeared first on Digital Photography School.

    Digital Photography School