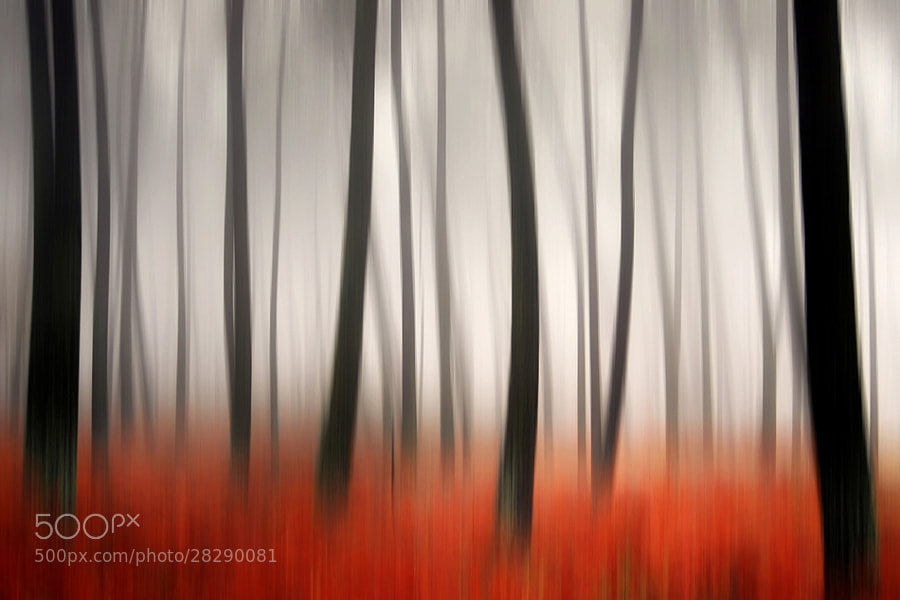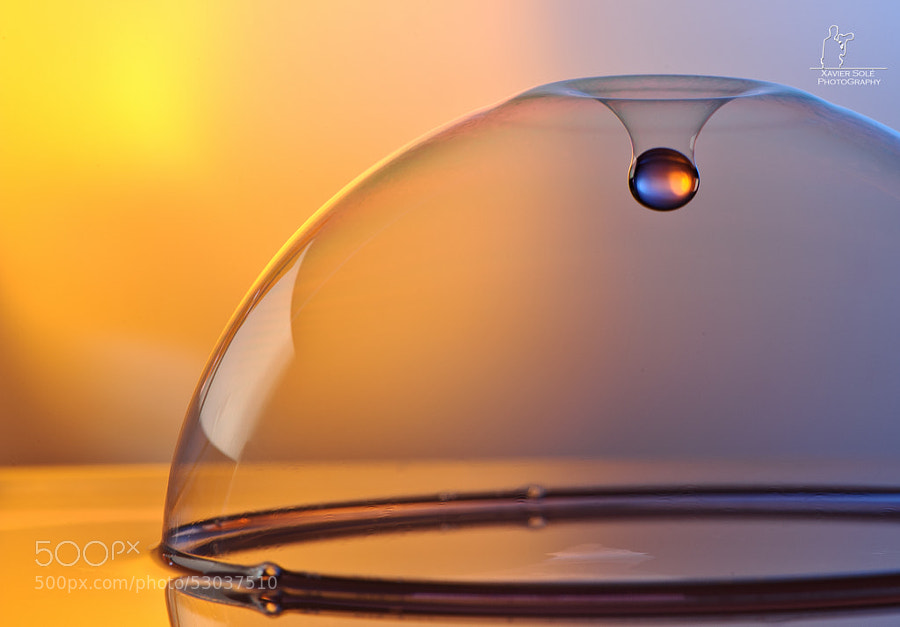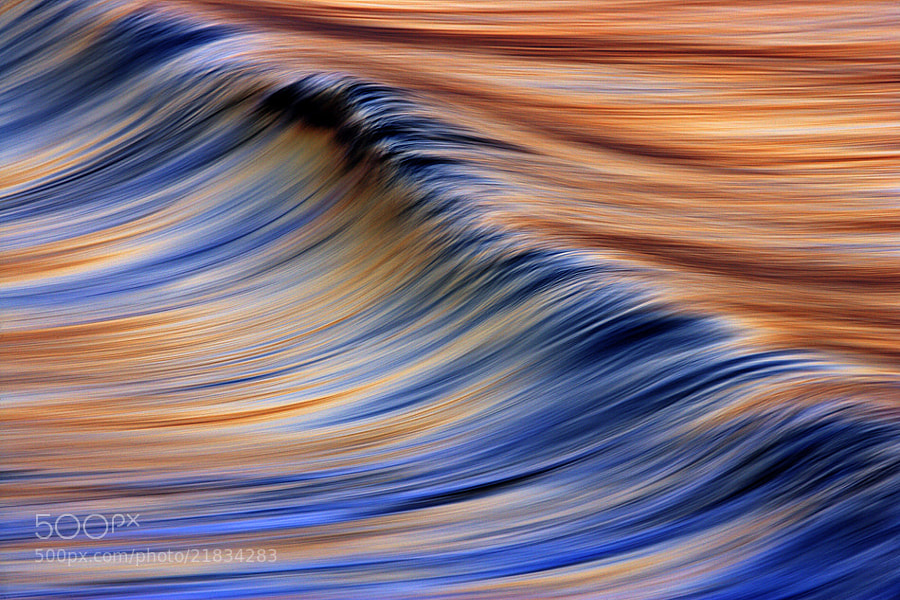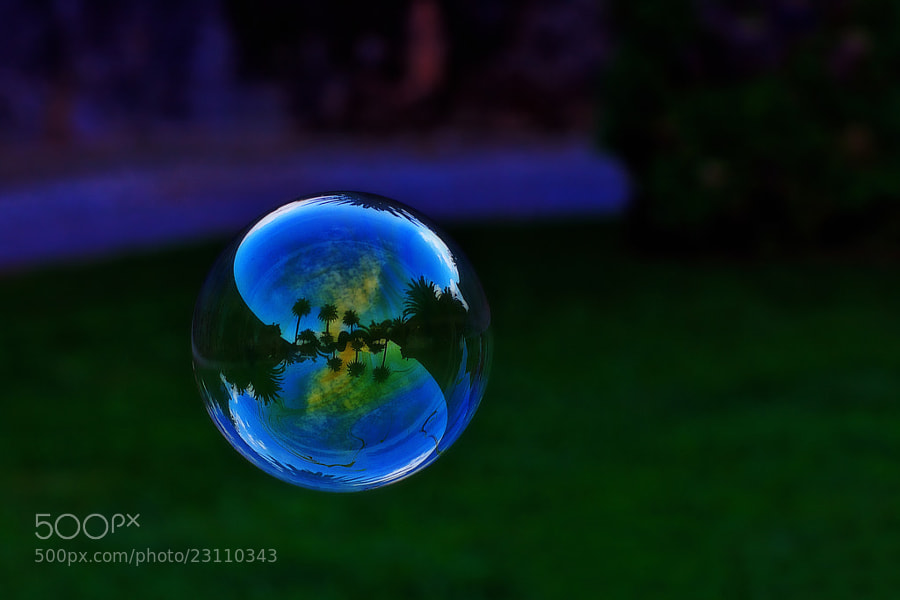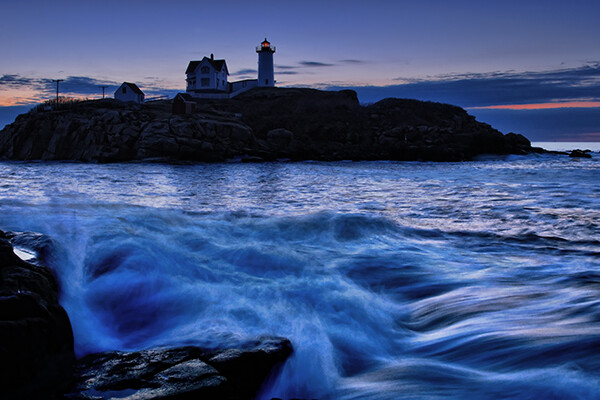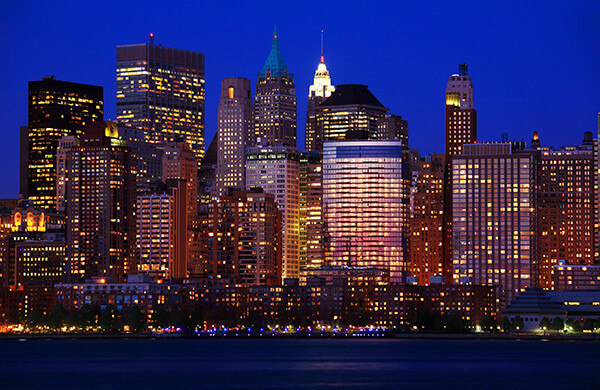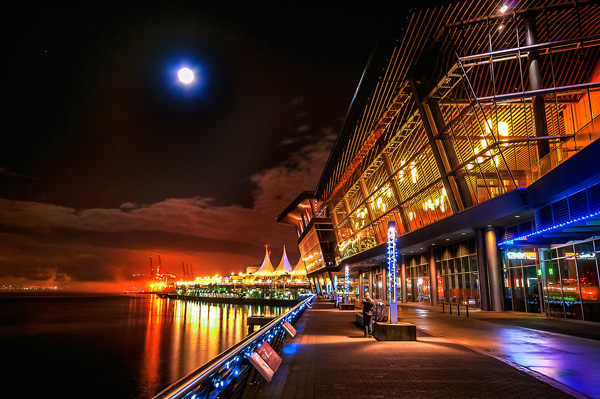
Category: Photography

  • Ecosystems 101: Play the Long Game

    Every day when I sit down to eat, there is a choice. I can eat clean protein, and fruits and veggies. Or I can have a some pizza and maybe a shot of Mountain Dew.

    What do I want? I want the pizza. Because that is what I want right now, and it is delicious and an easy choice. That's my 'now' perspective.

    A better way is probably to consider my future perspective of 20 years from now. As in, what do I wish I had been eating 20 years ago?

    Read more »
    Strobist

  • How to Change your Photography by Simply Changing your Perspective

    Perspective…it is a central component of photography, although it’s one that you probably don’t actively consider when composing a shot.  For our purposes, perspective can be described as the dimensions of objects within a scene and the measurements between them as they correspond to the viewpoint of the camera.  This simply means how things appear in a composition from the camera’s point of view. Continue Reading

    The post How to Change your Photography by Simply Changing your Perspective appeared first on Photodoto.


    Photodoto

  • Beginner Tips for Posing People with Confidence

    How to pose models

    In earlier articles I gave you advice about planning a portrait shoot and some reasons for using natural light. Now it’s time to take a look at something that many photographers find difficult – posing.

    The reason posing can create problems is because inexperienced models will look to you for direction. If your model is waiting for you to tell her what to do and you freeze up or don’t have any decent ideas you will struggle to create good photos. It’s up to you to take charge and tell the model how to pose. The key is preparation – you need a set of poses you can suggest to the model.

    Before the shoot

    Here are some points to think about before the shoot:

    What kind of shoot is it? The posing requirements for a family portrait are very different than a fashion shoot. You can think about posing once you’ve decided what type of photo you are going to create.

    Look for inspiration online. Chances are you have a few favourite photographers you follow on websites like Flickr and 500px. You will find some good poses in their portfolios. Download your favourites to your smartphone (or use Pinterest to create a mood board, covered in more detail in my article How to Plan the Perfect Portrait Shoot). Then you have something you can show to your model. Don’t try and commit the poses to memory – you will forget them under pressure.

    Match the pose to your model. This is important. You’ll see some wonderful poses in fashion magazines. But many of them need a professional model to carry them off. Your model may not be able to do that, especially if she has a different body type than the people in the magazine.

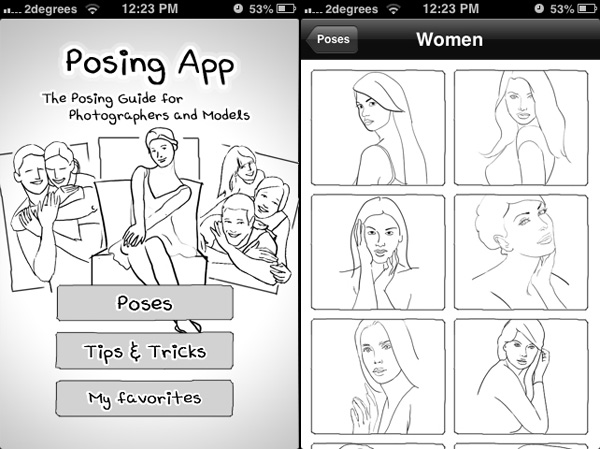
    Buy the Posing App. It gives you over 300 poses that you can access on your smartphone. The best way to use it is to select five to ten and make them your favourites. Then you can show them to your model so she understands the what you’d like her to do.

    How to pose models

    Screen shots from the Posing App. The line drawings are easy to understand and follow.

    The author of the app has written several articles about posing for Digital Photography School you will find useful (click the link to see a list).

    During the shoot

    No matter how experienced or inexperienced your model is, here are some tips to help you find the perfect pose during the shoot:

    Build rapport. This is essential. If your model likes you and sees what you are trying to achieve she will work harder. If you talk to her about things she likes you will see more life in her eyes and get better expressions, including natural smiles. She will be more relaxed. If your model is tense, you are going to struggle to get natural looking portraits. Take the pressure off her and bring it back on yourself. Assure her that if the photos don’t work out that it’s your fault, not hers. Build her confidence.

    Look for natural expression. As you talk to your model you will notice natural expressions and mannerisms that you can use. Don’t be afraid to say “hold that pose” or “do what you did just now again”.

    How to pose models

    I noticed the model had a interesting mannerism so I asked her to repeat the gesture. This portrait is one of her favourites

    Adapt poses. When you suggest a pose, such as one used in another photo or from the Posing App, treat it as a starting point, then adapt it to suit your model. If she looks unnatural in a certain pose, then adapt it so it suits her body and the clothes she’s wearing.

    How to pose a model

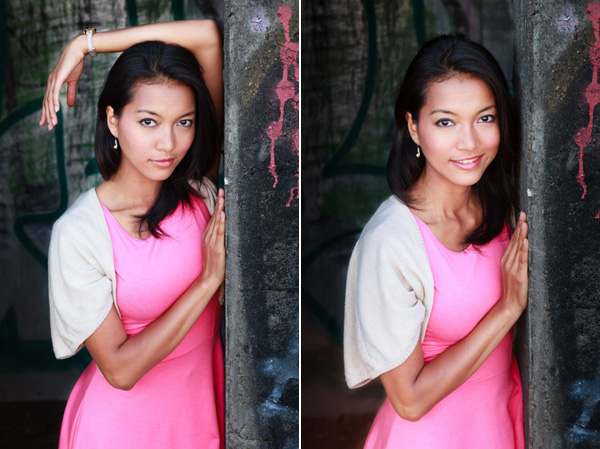
    The pose on the left is one I found in the Posing App. For the second portrait I asked my model to drop her left arm so I couldn’t see it. Don’t be afraid to tweak poses, sometimes a small change makes a big difference.

    Simplify. Keep everything as simple as possible. That applies to composition and the clothes and jewellery worn by your model. If she has too much jewellery on, ask her to remove some. It will improve the composition. If you’re struggling to find a good full-length pose, move in closer and shoot from the waist up, or do a head and shoulders portrait. The background will go more out of focus, and there will be less of the model in the photo.

    How to pose models

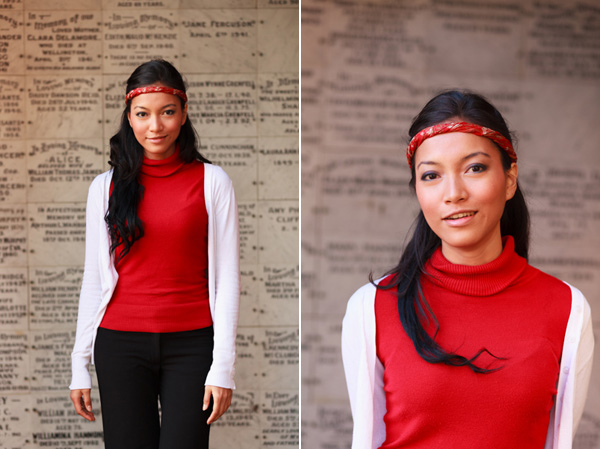
    Simplification in action. The closer you crop, the easier it is to pose your model. This is a good technique to use if you are struggling to make a certain pose work.

    Pay attention to detail. Especially hands, which often look better side on to the camera. Look at photos where the model’s hands look elegant or are otherwise well posed, and ask your model to do the same. Check her hair to make sure stray strands aren’t blowing across her face or eyes. Look at her clothes to make sure they aren’t wrinkled or creased in a strange way.

    Find something for your model to lean on. This makes it much easier to find a natural looking pose.

    How to pose models

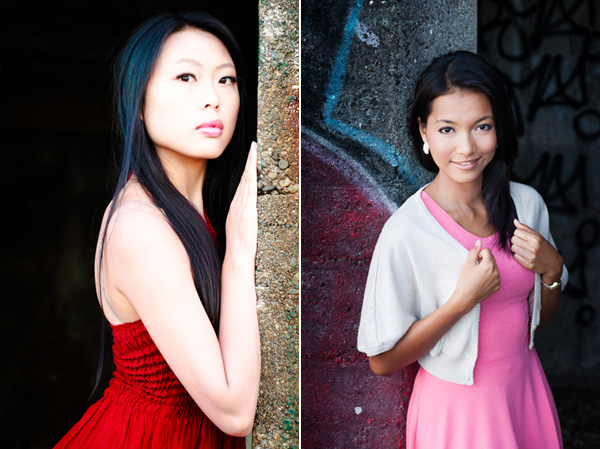
    Two different ways to use a wall to give a model something to do. The Posing App has lots of poses for leaning.

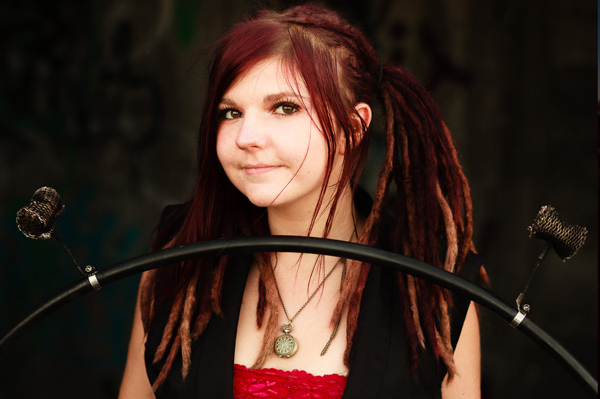
    Use props. If the model has something to hold or otherwise interact with, it gives her something to do. If she is having fun you’re more likely to get a great expression.

    How to pose models

    The model in this photo is into hooping. Using the hoop as a prop gave her something to hold and added interest to the portrait.

    How to pose models

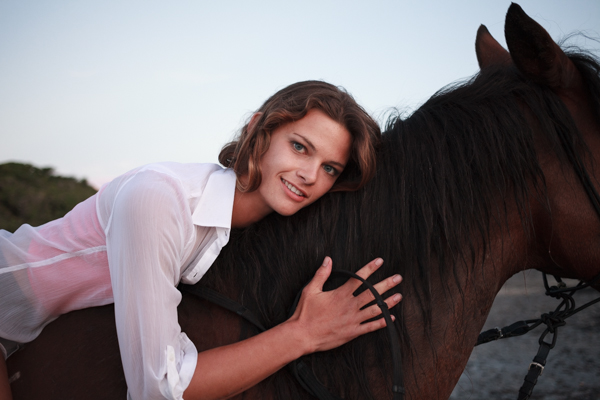
    I suggested the model bring her horses along to the shoot. The horses are a natural prop and her interaction with them led to photos like this one.

    Over to you

    Do you have any tips for our readers about posing models? What has worked for you? Tell us about your experiences in the comments.


    The Natural Portrait photography ebookThe Natural Portrait

    My ebook The Natural Portrait teaches you how to take beautiful portraits in natural light. This 240 page ebook, published by Craft & Vision, takes you through the entire process of natural light portrait photography through from finding a model, deciding where to shoot, working with natural light and post-processing your images. Click the link to learn more or buy.

    The post Beginner Tips for Posing People with Confidence by Andrew S. Gibson appeared first on Digital Photography School.


    Digital Photography School

  • Equipment for Macro Photography – Video Tips

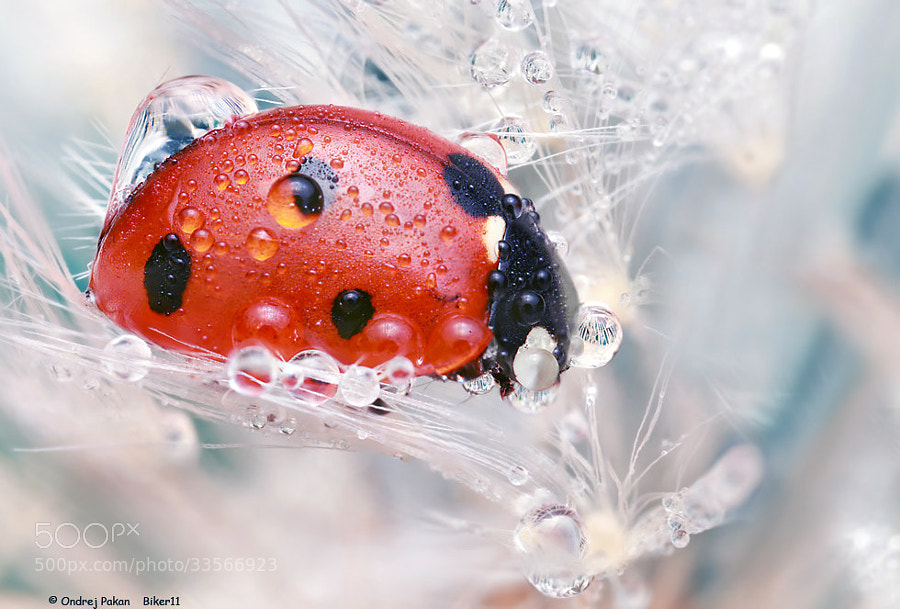
    Photograph Dreaming by Ondrej Pakan on 500px

    Dreaming by Ondrej Pakan on 500px

    Macro photography has become really popular lately and there are many tutorials available on how to do it, including these on dPS:

    • How to Focus-Stack Macro Images using Photoshop
    • 6 Tips for Near-Macro Photography with a Telephoto Lens
    • The Wonderful World of Macro Lenses: Close-Up Photography Lesson #4

    But let’s talk a little about the gear needed to do macro photography. Here’s a couple video that walk through some of the options to help you get started. In this video from Tamron see: How-To Macro Photography: Equipment, Lighting Tips and More

    In this second video by Anthony Morganti you can learn: What You Need To Get Started In Macro Photography

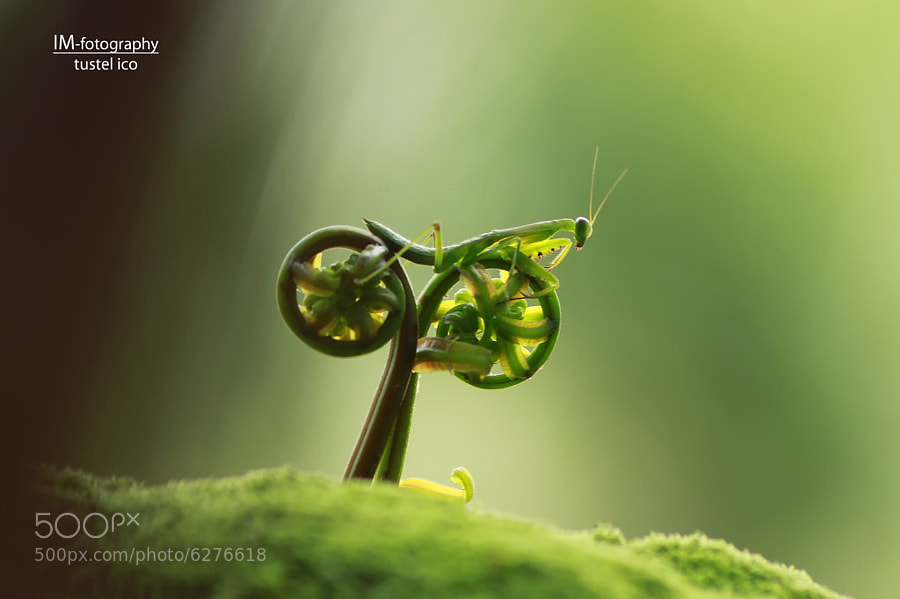
    Photograph rate my bike by tustel  ico on 500px

    rate my bike by tustel ico on 500px

    By Jagadeesh SJ

    By Alexey Kljatov

    By Julien REBOULET

    The post Equipment for Macro Photography – Video Tips by Darlene Hildebrandt appeared first on Digital Photography School.


    Digital Photography School

  • Live Google+ Hangout at 10AM PST This Morning About How to Maximize Your Photos Through Social Media

    Daniel Krieger
    The Smoothest Dude Alive, Daniel Krieger.

    My good friend Daniel Krieger (aka smoothdude), along with MacPhun’s Laurie Rubin, and I will host a live G+ hangout this morning talking about ways to promote your photography through social media. We’ll record the episode to my youtube account as well in case you can’t make it live and want to watch later.

    Come join the show here if you can make it.


    Thomas Hawk Digital Connection

  • Getting Real with HDR – a Step by Step Tutorial for Realistic Looking HDR

    Try to make your HDR images look as realistic as possible

    Try to make your HDR images look as realistic as possible

    If you have been photographing for more than a year or two, you will have heard about HDR (which stands for High Dynamic Range). We have probably seen them, the “overcooked”, over processed HDR images that float around the photo websites. For some photographers, the process seems to force them to overdo their images and after a while that seems to be the only result they are trying to achieve. Do a Google search on “bad HDR” and you will see what I mean. The images have halos,  the colours are surreal and look metallic, the contrast is off and in short, the image is really messy.

    When I first shot HDR, I fell into this trap too. These results caused many photographers to say that HDR is not a useful technique and is really gimmicky. That perception is partly true. HDR in the hands of someone who cannot use it effectively can result in some weird looking images, however, HDR done properly can produce some incredible results. To see some good examples of HDR done properly, visit the website HDR Spotting and take a look at the editors picks. There are some astounding images there. The colours are amazing, the contrast is perfect and the detail in the shadows and highlights, sublime. That is what HDR should be. It should be the best combination of the highlights and the shadows properly exposed, the image should look as real as it can. So, how do you get this right you might be asking, read on to find out.

    What is HDR?

    As I said earlier, HDR stands for High Dynamic Range. Your cameras sensor has the ability to capture light and colour. The extent to which your camera can do this is called the dynamic range. More specifically, if your camera can render lots of details in the shadows and the highlights in the same shot, then it has a high dynamic range. Over the past few years, digital sensors have become so much better at capturing more detail. This is a huge benefit for photographers and of course for HDR photography. This means that we can get more details out of every image and as a result, the HDR images will be that much more detailed.
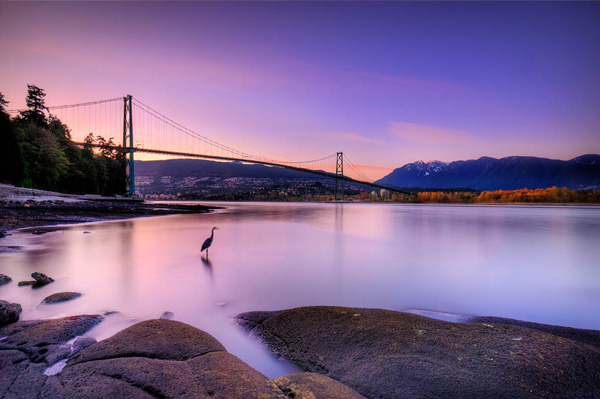
    Lions Gate Bridge Vancouver - HDR image

    Lions Gate Bridge Vancouver – HDR image

    How do I shoot HDR?

    Making an HDR image involves 3 distinct and separate processes. I will go into detail on each one, but at a high level, they are as follows:

    1. Image Capture
    2. HDR Processing
    3. Image editing in Photoshop

    Lets start with image capture first. This is the photography part of this process. It’s pretty simple really. Set up for your shot as you normally would. Make sure you have your subject well composed and you are ready to go. The difference between HDR and normal photography, is that with HDR you will take either three to five bracketed images of the same scene. The reason for the number of images is that you will blend these images together in a dedicated HDR product.

    My recommendation for HDR software is Photomatix Pro. It is a programme that has been around for many years now and has some really good editing functions. It’s probably the most widely used software when it comes to HDR. Photoshop also has an HDR function, but in my opinion, its not as refined as the Photomatix Pro yet. Don’t get me wrong, I am a huge Photoshop fan, it is an incredible tool, I am sure that Photoshop will have something within their functions that will be competitive in time, but for now, I still use Photomatix.

    Step #1 –  Image capture

    These are the steps I follow when I intend to do an HDR shot. They are not rules, nor are they inflexible, they just work for me. You need to find what works for you and gives you the best results, this method has helped me get my best results, so try it out. Tweak it and change it as you need.

    1. Use a tripod – it is a good idea to put your camera on a tripod for HDR, especially if you are shooting in low light. I have done some handheld HDR but only in bright conditions. The tripod will also help you get your composition right.
    2. Put your camera into Manual mode “M”
    3. ISO Settings – it is a good idea to keep your ISO settings at 100 or as low as your camera will go. That way you will avoid introducing unnecessary noise into your images. The process of HDR allows you to capture the dynamic range of light and colour in the scene. Using high ISO settings is great when you are trying to shoot a low light scene and capture it in one shot, but for HDR you will want to keep it as low as possible.
    4. Set your aperture to anywhere between F/8 and F/ 11 and don’t adjust your aperture between shots.
    5. Adjust your shutter speed so that you are exposing the scene perfectly according to your cameras light meter.
    6. Capture one image at this reading
    7. Underexpose by one or two stops (depending on the scene) and capture another image by adjusting your shutter speed.
    8. Do this twice on either side of the perfectly exposed image.

    This will result in five images being captured.

    Below are the three images I used in making the HDR image you see above. Take a look at how the colours and exposure don’t look good at all.
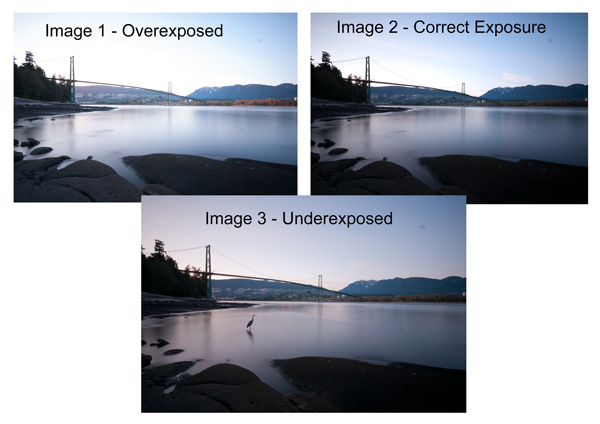
    3 Different exposures for the HDR image above

    3 Different exposures for the HDR image above

    Some photographers use five shots for their HDR shots, some use seven or up to nine. I have found that three to five shots seem to work best for most scenes. I have only used nice shots on a few occasions, but have not been happy with the results. The colours seem to be “muddy” and unclear once processed. If necessary, shoot seven images and see how that works.

    Once you have completed the shoot, download the images to your computer. It is important NOT to edit the images before blending them into an HDR image. Some of the shots might look over exposed or under exposed, thats OK, in fact they must look like that. The software will deal with these issues, so don’t be concerned that the images look bad out of camera, they need to be processed and then the magic begins.
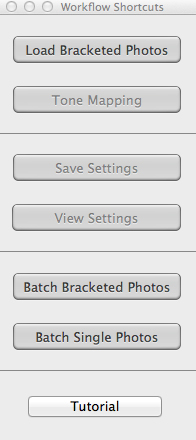
    Click on - Load Bracketed Photos

    Click “Load Bracketed Photos”

    Step #2 – HDR processing

    I will be explaining the Photomatix software in this article. I have tried HDR with each new version of Photoshop and I am still happier with the results I get from Photomatix Pro. You can download a trial version of Photomatix from their website. It is fully functional, the only thing is that the trial version puts a watermark on the image. This is OK for trying it out, you will see exactly what the software can do, if you think it is worth it, then you can buy it. Ok, so here is how you take your images into Photomatix Pro

    1. Open Photomatix Pro (or if you’ve set it up as a Lightroom plugin, select your bracketed images, right click and choose “edit in” and Phototix Pro)
    2. Click  ”Load Bracketed Photos” and then click on “Browse” and select the images you have taken (you can also drag and drop them into the box)
    3. Click OK once the images appear in the box
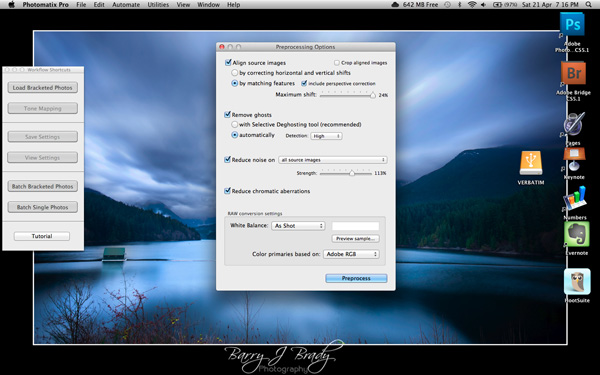
    Select the options displayed on the screen above

    Select the options displayed on the screen above

    Preprocessing options are available.  Make selections on the box as shown in the screenshot above. Then click preprocess and Photomatix Pro will begin to tone map the images into a composite 32-bit image. This process is generally quite quick, between 30 seconds and a minute.  Once complete, click on the Tone Mapping button.

    Use the “Remove ghosts” function if you have people or moving objects in your images. If you don’t have this, then you wont need to use this function.

    The HDR editing screen

    On this screen, you are able to select a variety adjustments that will create an overall change to the image. There are no absolutes here. Each adjustment makes minor or major differences to the image and the combination of the adjustments provides diverse options.
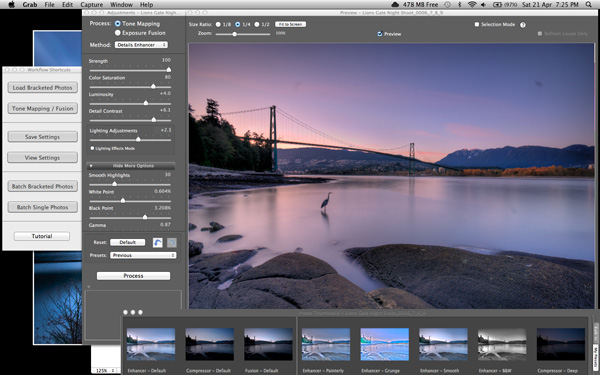
    HDR-Screen-600

    At the bottom of the screen you will see different “treatments” (or presets) which you can use as a starting point to your image editing process. I would avoid using these as they are generally overdone. Try and use the functions on the left hand side to edit your image.

    Below are the details about each function on the left hand side of the screen and what each does. One of the best ways to see what a function does is to slide it all the way over to the left and then to the right and see how it affects your image, but here are the details:

    General Settings

    • Strength – affects the degree to which contrast and detail are enhanced in the image. A value of 100 gives the maximum amount of enhancement. To get a more natural effect, move the slider to the left. The default value is 70.
    • Color Saturation – controls the saturation of the RGB color channels. The greater the saturation, the more intense the color. Move the slider right or left to change the setting. A value of zero produces a grayscale image. The value affects each color channel equally. The default value is 46.
    • Luminosity – controls the compression of the tonal range, which has the effect of adjusting the global luminosity level. Move the slider to the right to boost shadow details and brighten the image. Move it to the left to give a more “natural” look to the resulting image. The default value is zero.
    • Detail Contrast – controls the amount of contrast applied to detail in the image. Move the slider to the right to increase the contrast of the details and give a sharper look to the image. Note that increasing the contrast also has a darkening effect. Move the slider to the left to decrease the contrast of details and brighten the image.
    • Lighting Adjustments – affects the overall ‘look’, controlling the extent to which the image looks natural or surreal. When the Lighting Effects Mode box is unchecked, move the slider to the right to make the image look more natural and to the left to make it look more ‘painterly’ or ‘surreal’. Use this carefully as it can have an unpredictable effect on your image.
    • Lighting Effects Mode – the checkbox lets you switch between two modes for the Lighting Adjustments setting,where each mode produces slightly different results. Checking the box tends to produce results with a type of ‘Magic Light’ effect.

    More Options

    • Smooth Highlights – reduces the contrast enhancements in the highlights. The value of the slider sets how much of the highlights range is affected. This control is useful for preventing white highlights from turning grey or uniform light blue skies becoming dark blue-grey. It is also useful for reducing halos around objects placed against bright backgrounds. The default value is zero.
    • White Point and Black Point – these sliders control how the minimum and maximum values of the tone mapped image are set. Moving the sliders to the right increases global contrast. Moving them to the left reduces clipping at the extremes. The White Point slider sets the value for the maximum of the tone mapped. The Black Point slider sets the value for the minimum of the tone mapped image.
    • Gamma – adjusts the mid-tone of the tone mapped image, brightening or darkening the image globally. The default value is 1.0.
    • Temperature – adjusts the color temperature of the tone mapped image relative to the temperature of the HDR source image. Move the slider to the right to give a warmer, more yellow-orange colored look. Move the slider to the left for a colder, more bluish look. A value of zero (default) preserves the original color temperature of the HDR source image.

    Advanced Options

    • Micro-smoothing – smoothes local detail enhancements. This has the effect of reducing noise in the sky, for instance, and tends to give a “cleaner” look to the resulting image. The default value is 2. Important note: The Loupe may not properly show the effect of the Micro-smoothing setting when the area magnified is uniform. If you want to see the effect of the Micro-smoothing setting at 100% resolution on a uniform area such as the sky, you will have to select an area that contains an object in the scene in addition to the sky.
    • Saturation Highlights – adjusts the color saturation of the highlights relative to the color saturation set with the Color Saturation slider. Values higher than zero increase the color saturation in the highlights. Values lower than zero decrease it. The default value is zero.
    • Saturation Shadows – adjusts the color saturation of the shadows relative to the color saturation set with the Color Saturation slider. Values higher than zero increase the color saturation in the shadows. Values lower than zero decrease it. The default value is zero.
    • Shadows Smoothness – reduces the contrast enhancements in the shadows. The value of the slider sets how much of the shadows range is affected. The default value is zero.
    • Shadows Clipping – the value of the slider sets how much of the shadows range is clipped. This control may be useful to cut out noise in the dark area of a photo taken in a low-light situation. The default value is zero.

    Once this part of the process is finished, then it is time to take the image into Photoshop. Save the tone mapped image and then re-open it in Photoshop.

    Step #3 Image Editing in Photoshop

    This is a very basic workflow. It will enhance the lighting and tonality in your images. These techniques are discussed here at high level.

    Shadows and Highlights

    Photoshop has a function called Shadows and Highlights. Use this tool to bring out detail in the shadows of your image. Use it carefully, if you overdo the treatment on the shadows, there may be some unsightly image degradation or “noise”. This function is not great for adjusting highlights, so use it for the shadows only. This tool is found in Photoshop as follows: IMAGE > ADJUSTMENTS > SHADOWS AND HIGHLIGHTS. The adjustments of AMOUNT, TONAL WIDTH and RADIUS should all be kept aligned close to one another to ensure that the adjustment looks realistic.
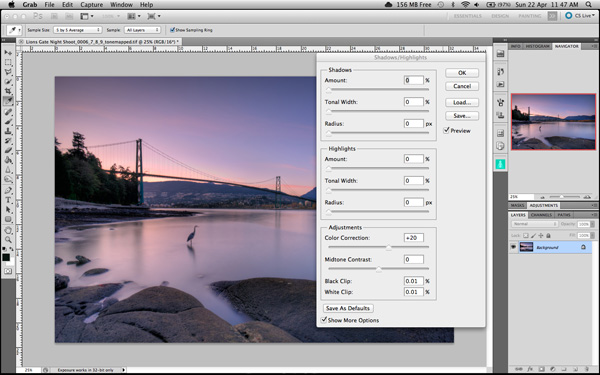
    Shadow and Highlights function in Photoshop

    Shadow and Highlights function in Photoshop

    Levels Function

    The levels function in Photoshop is for adjusting the lighting in an image. This means that if your image is a little dark you can push up the exposure slightly and see more details in the image. The levels function shows a representation of a histogram. Move the sliders in to touch the edge of the histogram as a general rule. This will ensure that your image has a good representation of highlights and shadows.
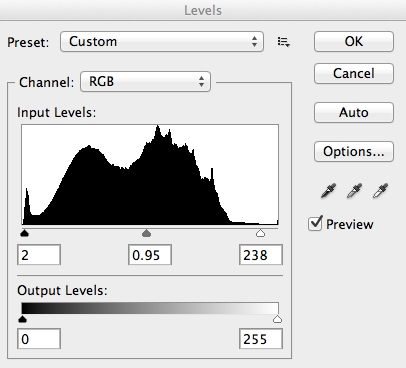
    The Levels functioning Photoshop

    The Levels functioning Photoshop

    Hue and Saturation

    Once the exposure and lighting has been adjusted and looks correct, then you may begin adjusting the colour in the image. The tool to use will be the Hue and Saturation tool. The important tip here is not to adjust the master channel but rather to adjust by each channel independently. To do this, click on the top toggle button that says “default”. A drop down menu will appear and each colour channel will be available from there. Slide the Saturation Slider to the left to desaturate (remove colour) or to the right to saturate. That way you have the best control of the colour in your image.
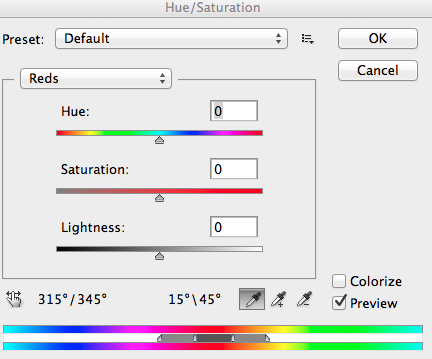
    Hue and Saturation Function in Photoshop

    Hue and Saturation Function in Photoshop

    Dodging and Burning

    These functions are localized adjustments. By using a brush tool, you are able to make certain areas of the image darker and other areas of the image lighter. This is useful for adding the finishing touches to your image. There is also the sponge function which is a saturation tool which can saturate colours at a local level.

    Sharpening

    Almost every image that comes out of a digital camera requires sharpening of some sort. The easiest and quickest tool to use is the Unsharp Mask tool and it works effectively.
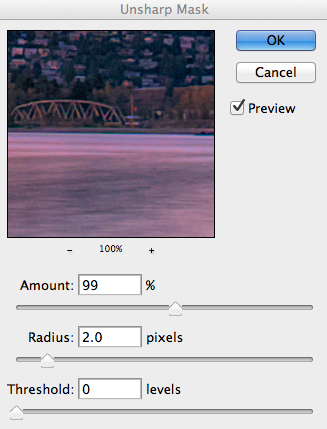
    Unsharp Mask Tool in Photoshop

    Unsharp Mask Tool in Photoshop

    The Unsharp Mask has three separate sliders: Amount, Radius and Threshold. As a general rule you can keep the Amount anywhere between 80 and 120%, Radius can be set between 1.0 and 3.0 pixels and Threshold is generally at zero. Adjust the sharpness of the image according to each image requirement and beware of degrading the image by over sharpening. You will easily notice if an image is over sharpened by the appearance of a “halo” around certain edges in the image. The idea is to sharpen the image but not make it overly sharp and lose image quality.

    Once you are done, save your image and thats it! Have a go, try different settings in different light, let me know what you think and how your images turn out. If you have any questions, drop them into the comments box below.

    Please leave your comments and questions below. If you want more HDR tips, try some of these articles:

    • HDR Vertorama Photography – How to Create Mind-bending Images
    • Five Minutes to Realistic HDR using Lightroom and a 32-Bit Plugin
    • The 10 Steps Every HDR Photographer Goes Through
    • Exposure Blending Using Luminosity Masks Tutorial

    The post Getting Real with HDR – a Step by Step Tutorial for Realistic Looking HDR by Barry J Brady appeared first on Digital Photography School.


    Digital Photography School

  • Abstract Photos to Inspire You

    This week I want to get you thinking outside the box, and looking at ordinary things differently. Earlier in the week James Maher wrote How to do Great Photography Even When Your Surroundings are Boring so continuing on that path is some abstract photography which is a great way to photograph around home to create something different. 

    So here are a few abstract photos to give you some ideas and inspiration

    Photograph Color Explosion 1 by Margaret Morgan on 500px

    Color Explosion 1 by Margaret Morgan on 500px

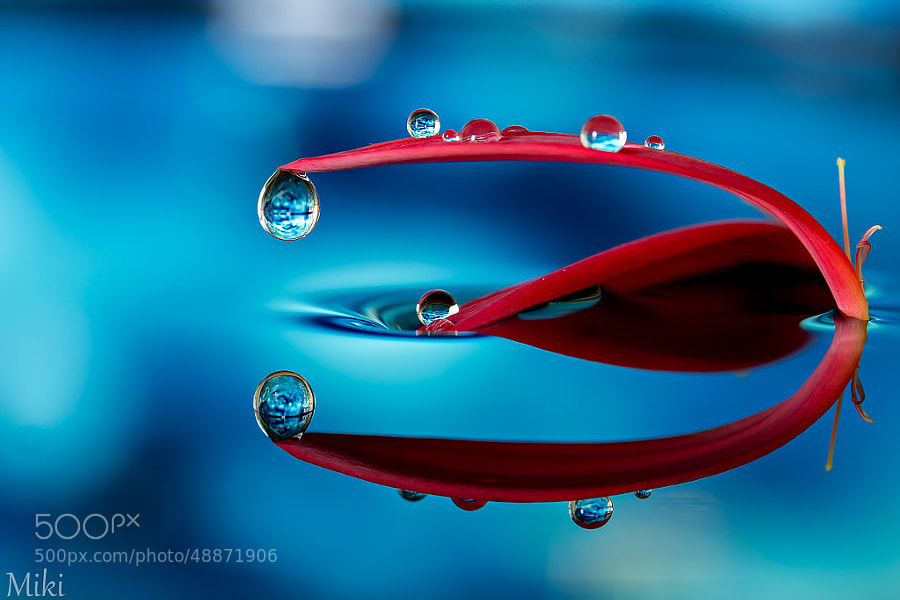
    Photograph Abstract Red & Blue by Miki Asai on 500px

    Abstract Red & Blue by Miki Asai on 500px

    Photograph layered ripples by Mazin Alrasheed Alzain on 500px

    layered ripples by Mazin Alrasheed Alzain on 500px

    Photograph Watercolours by Whatshisname  on 500px

    Watercolours by Whatshisname on 500px

    Photograph Rang Barse by Rahul Tripathi on 500px

    Rang Barse by Rahul Tripathi on 500px

    Photograph Jumping Colors by Markus Reugels on 500px

    Jumping Colors by Markus Reugels on 500px

    Photograph Hidden Sapphire by Ganjar Rahayu on 500px

    Hidden Sapphire by Ganjar Rahayu on 500px

    Photograph Fushimi Inari Shrine by César Asensio Marco on 500px

    Fushimi Inari Shrine by César Asensio Marco on 500px

    Photograph Paper by Peter Simonides on 500px

    Paper by Peter Simonides on 500px

    Photograph Pale love story by Shihya Kowatari on 500px

    Pale love story by Shihya Kowatari on 500px

    Photograph Abstract. by Santopietro  Ciro on 500px

    Abstract. by Santopietro Ciro on 500px

    Photograph Apart ... by Ahmed Abdulazim on 500px

    Apart … by Ahmed Abdulazim on 500px

    Photograph Soap Film by Markus Reugels on 500px

    Soap Film by Markus Reugels on 500px

    Photograph Untitled by Xavier Solé Guimerà on 500px

    Untitled by Xavier Solé Guimerà on 500px

    Photograph Cøøking Art by Silver Paul on 500px

    Cøøking Art by Silver Paul on 500px

    Photograph C6J7799 Abstract Wave #3 by David Orias on 500px

    C6J7799 Abstract Wave #3 by David Orias on 500px

    Photograph Bokehlism by Suradej Chuephanich on 500px

    Bokehlism by Suradej Chuephanich on 500px

    Photograph Garden Bubble by Ricardo  Alves on 500px

    Garden Bubble by Ricardo Alves on 500px

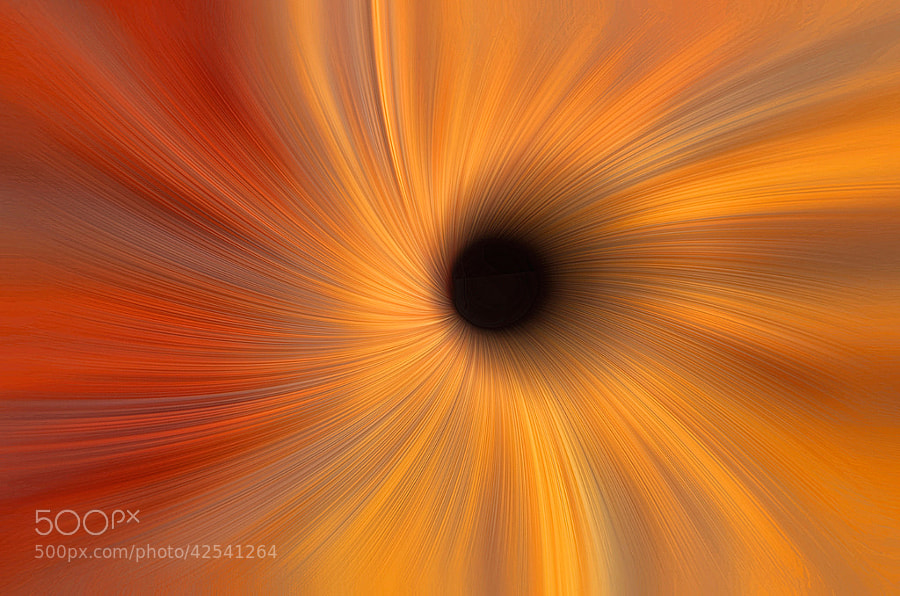
    Photograph Black Hole Abstract by Alan Borror on 500px

    Black Hole Abstract by Alan Borror on 500px

    Photograph Abstract by Samir Salim on 500px

    Abstract by Samir Salim on 500px

    Photograph Shells by Jared Lim on 500px

    Shells by Jared Lim on 500px

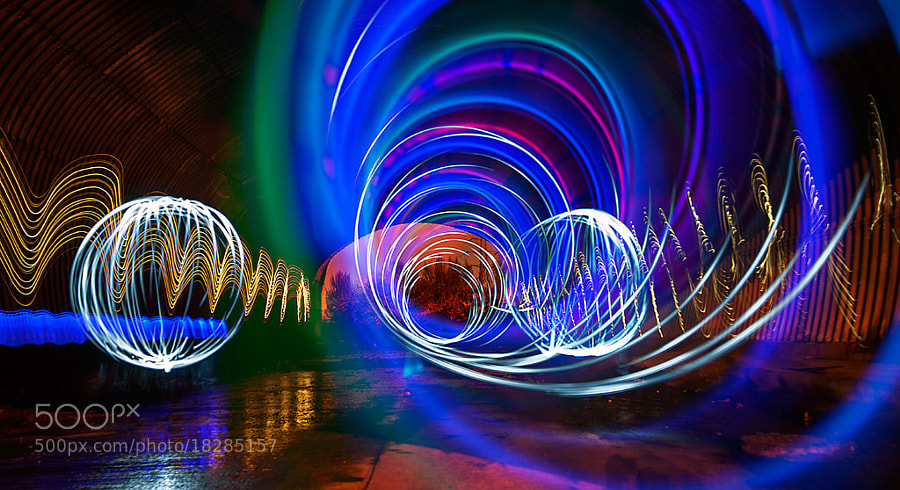
    Photograph Painting with light by Mike Pearce on 500px

    Painting with light by Mike Pearce on 500px

    Photograph Hola {CERO} by Uxio  on 500px

    Hola {CERO} by Uxio on 500px

    Photograph Painted Water ... by Ewa Frye on 500px

    Painted Water … by Ewa Frye on 500px

    Photograph Reflection by Yonko Dikov on 500px

    Reflection by Yonko Dikov on 500px

    Photograph Whirl by Shihya Kowatari on 500px

    Whirl by Shihya Kowatari on 500px

    Photograph 70/365 Fork((((s)))) by Mark DeCamp on 500px

    70/365 Fork((((s)))) by Mark DeCamp on 500px

    Photograph A Singular One by Eleonora Di Primo on 500px

    A Singular One by Eleonora Di Primo on 500px

    Photograph Curved Bench by Peter Crock on 500px

    Curved Bench by Peter Crock on 500px

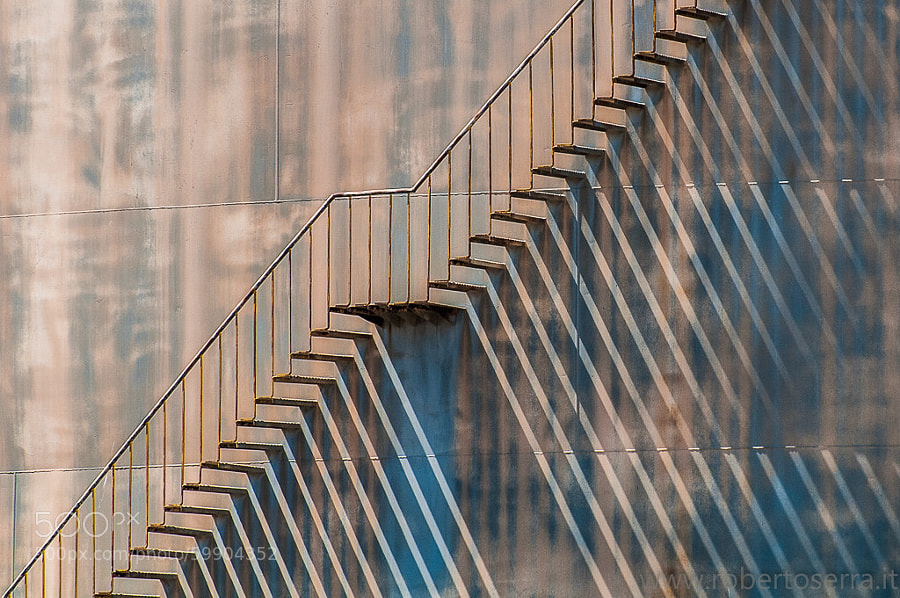
    Photograph shadow of the stairs by Roberto Serra on 500px

    shadow of the stairs by Roberto Serra on 500px

    Photograph Where shadows go by Olga Bekker on 500px

    Where shadows go by Olga Bekker on 500px

    Photograph Moden Camping by Toby Harriman on 500px

    Moden Camping by Toby Harriman on 500px

    Photograph Shadow play by Guru Nandha on 500px

    Shadow play by Guru Nandha on 500px

    Photograph green tsunami by Wael Massalkhi on 500px

    green tsunami by Wael Massalkhi on 500px

    Photograph Warp:tree by Fahad Abdulhameed on 500px

    Warp:tree by Fahad Abdulhameed on 500px

    Photograph Like a mica by kazumi Ishikawa on 500px

    Like a mica by kazumi Ishikawa on 500px

    Photograph 50 days 50 shots - File 17 by Carlos Silva "Avlisilva" on 500px

    50 days 50 shots – File 17 by Carlos Silva "Avlisilva" on 500px

    The post Abstract Photos to Inspire You by Darlene Hildebrandt appeared first on Digital Photography School.


    Digital Photography School
  • Weekly Photography Challenge – Abstract Photography

    Earlier I shared some inspiring abstract photos to help get you motivated and give you some ideas for this week’s photography challenge:

    Abstract Photography

    By Dagny Mol

    Definition of abstract in relation to art

    1ab·stract  adjective \ab-?strakt, ?ab-?\

    • expressing ideas and emotions by using elements such as colors and lines without attempting to create a realistic picture
    • A trend in painting and sculpture in the twentieth century. Abstract art seeks to break away from traditional representation of physical objects. It explores the relationships of forms and colors, whereas more traditional art represents the world in recognizable images.

    Basically what that means if you’ve never done any abstract photography is shoot your subject in a way that it is either somewhat or totally unrecognizable. Concentrate on shapes, colors, and form and less on the thing in the photo. Shooting for abstract is a great exercise to help you train your eye to see “photographically” and get more creative.

    So if you tend towards technically perfect images, it’s time to get outside your comfort zone and do something different. Make ones that are out of focus blobs of bokeh, under or overexposed, shadows, reflections, zoomed images, focused on patterns, macro photography or close-ups, and other crazy ideas. The whole idea here it to play around and see what you get. The key phrase for this challenge is:

    What if I . . . ?

    Need some more ideas? Here are a few images to get you started.

    By Riccardo Cuppini

    By @Doug88888

    By Kevin Dooley

    By @Doug88888

    By @Doug88888

    By Hector Lazo

    By Tony Hall

    By Geraint Rowland

    By Claudio.Ar

    Share your abstract photos!

    Simply upload your shot into the comment field (look for the little camera icon in the Disqus comments section as pictured below) and they’ll get embedded for us all to see or if you’d prefer upload them to your favourite photo sharing site and leave the link to them.

    The post Weekly Photography Challenge – Abstract Photography by Darlene Hildebrandt appeared first on Digital Photography School.


    Digital Photography School
  • 20 Awe-Inspiring Photographers to Follow on Behance

    Behance is an awesome place to find creative photography portfolios and to draw inspiration from. But with so many of them to browse through, it’s really hard to find a place to start. That’s why I’ve collected 20 awe-inspiring photographers to follow on Behance. Here you’ll find fabulous fashion photography and breathtaking landscape shots. Scroll down to enjoy these brilliant Continue Reading

    The post 20 Awe-Inspiring Photographers to Follow on Behance appeared first on Photodoto.


    Photodoto

  • Sweeten Your Photos by Shooting During the Blue Hour

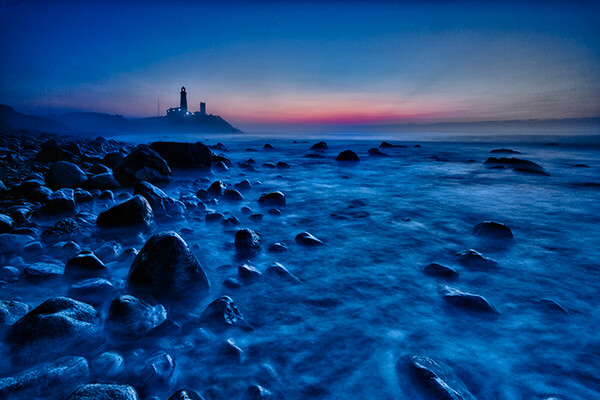
    Montauk Point, NY. EOS 5D Mark II with EF 17-40 f/4L. 15 seconds at f/11, ISO 800.

    Montauk Point, NY. EOS 5D Mark II with EF 17-40 f/4L. 15 seconds at f/11, ISO 800.

    There is a period of time each day, just before sunrise and just after sunset, when the sun is below the horizon, when the light is known as “sweet light.” This period of time is known as “The Blue Hour.” This is a period of time each morning and evening when there is neither full daylight, nor full darkness. The light is almost ethereal, with a soft blue glow bathing the scene. The Blue Hour happens in tandem with the Golden Hour, making the beginning and end of the day exceptional for photography, providing two very different types of light within a single time span.

    Equipment and settings

    The Blue Hour is a prime time for landscape photography. Subjects that have their own lighting, such as city buildings or lighthouses, tend to look especially good, as the yellow glow of their lights cuts through the blue.  A tripod will be necessary to capture these scenes, unless you’re willing to raise your ISO to the point you can hand hold your exposures.  Setting a proper white balance is one of the keys to Blue Hour photography.  When set to AWB (auto white balance), the camera will try to correct for the blue tone the light has, which can result in flattening your image. If you shoot RAW, you can correct for this in pos- processing, to get just the right white balance for your taste. If you’re a JPEG shooter, you may want to try setting a custom white balance, or you can use your camera’s Live View setting to preview what different white balance settings will do to the scene.

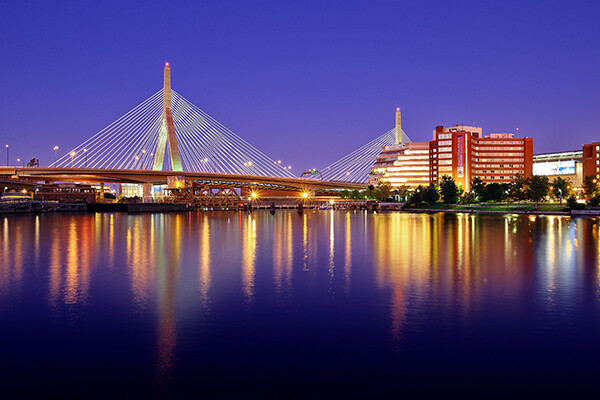
    Boston's Zakim Bridge. EOS-1D Mark III with EF 24-105 f/4L IS. 30 seconds, f/11, ISO 100.

    Boston’s Zakim Bridge. EOS-1D Mark III with EF 24-105 f/4L IS. 30 seconds, f/11, ISO 100.

    I prefer the time during the Blue Hour when the sun is close enough to the horizon that there is a soft orange glow along the horizon. This adds an extra quality to the image, especially when you consider that orange is blue’s complementary color.  You may want to bracket your exposures, as this will vary the intensity of any light in the image, be it the orange glow remaining from the sun, or artificial lighting on buildings.  Blending exposures for HDR images may not be necessary, but it will be possible if you use a tripod and decide to try some HDR.

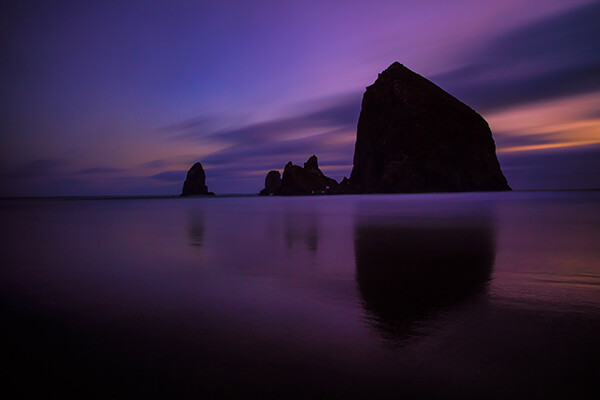
    Cannon Beach, Oregon. EOS 5D Mark III with EF 24-70 f/2.8L II. !20 seconds, f/11, ISO 640.

    Cannon Beach, Oregon. EOS 5D Mark III with EF 24-70 f/2.8L II. !20 seconds, f/11, ISO 640.

    The window of opportunity for Blue Hour shooting is small, and probably much shorter than during the Golden Hour. You’ll want to be at your spot ready to go well in advance of the Blue Hour. To plan your time, you can visit The Blue Hour Site to find out when the Blue Hour starts and ends at your location.  If you don’t have access to the internet, a good rule of thumb is that the Blue Hour starts about 15 minutes after sunset, and ends around an hour after sunset.  For sunrise, it will start roughly an hour before sunrise and end 15 minutes before sunrise.  When I plan to shoot landscapes, be it at sunrise or sunset, I always plan to shoot both the Golden Hour and the Blue Hour.  I tend to get a lot of variety due to the change in light, and it makes the time spent that much more worthwhile.

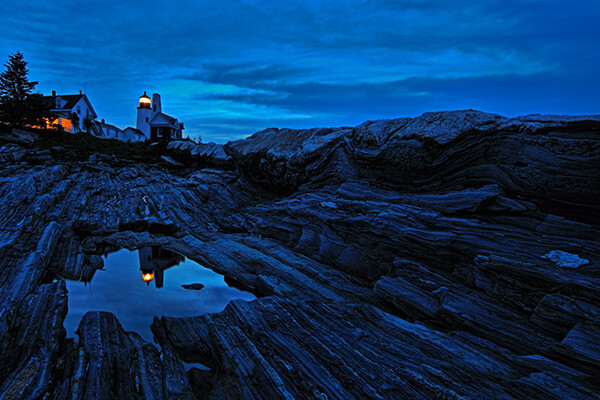
    Pemaquid Point, Maine. EOS 5D Mark II with TS-E 17mm f/4L. 8 seconds, f/11, ISO 400.

    Pemaquid Point, Maine. EOS 5D Mark II with TS-E 17mm f/4L. 8 seconds, f/11, ISO 400.

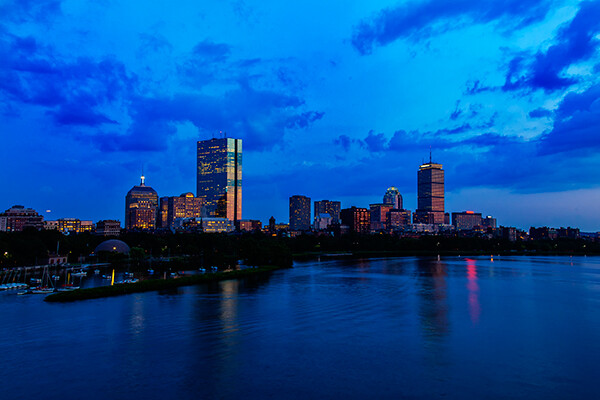
    Boston Skyline. EOS 5D Mark II with EF 24-105 f/4L IS. 1 second, f/11, ISO 100.

    Boston Skyline. EOS 5D Mark II with EF 24-105 f/4L IS. 1 second, f/11, ISO 100.

    Cape Neddick, Maine. EOS-1D Mark III with EF 17-40 f/4L. 0.4 seconds, f/8, ISO 400.

    Cape Neddick, Maine. EOS-1D Mark III with EF 17-40 f/4L. 0.4 seconds, f/8, ISO 400.

    _MG_0306

    Please share your Blue Hour photos and comments below.

    The post Sweeten Your Photos by Shooting During the Blue Hour by Rick Berk appeared first on Digital Photography School.


    Digital Photography School