Category: Photography

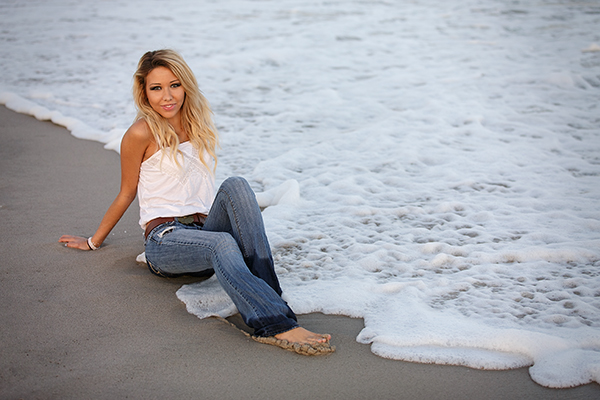
  • 40 Inspiring Save-the-Date Photography Examples to Amaze Your Friends

    With so many adorable and romantic Save-the-Date announcement photos floating around Facebook and Pinterest these days, it could be a challenge to create something new. Save the date is the first correspondence with your guests, and it serves more functions than just letting them know about the date and location. It sets the tone of the whole wedding, giving the Continue Reading

    The post 40 Inspiring Save-the-Date Photography Examples to Amaze Your Friends appeared first on Photodoto.


    Photodoto

  • Improve Your Images with the Lightroom Graduated Filter Tool

    Using the Graduated Filter in Lightroom

    The Lightroom Graduated Filter is a versatile tool for making local adjustments to your photos. Don’t be fooled by the name – it may be named after a type of filter used for making skies darker in landscape photography, but its uses go far beyond that.

    Before we look at how you can use the Graduated Filter tool to improve your images, you may want to think about the style in which you’d like to process the photo. What is your ultimate aim? My article Finding and Achieving Your Style in Lightroom will give you some advice on figuring that out. Once you know what you want to do, the rest falls into place.

    How to use Graduated Filters

    Using the Graduated Filter in Lightroom

    This is how you apply a Graduated Filter in Lightroom

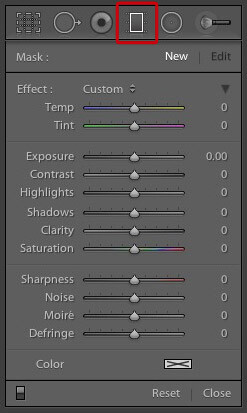
    1. Click on the Graduated filter icon underneath the Histogram (the keyboard shortcut for it is “M”). The Graduated filter panel opens up beneath, revealing the sliders that you can adjust.

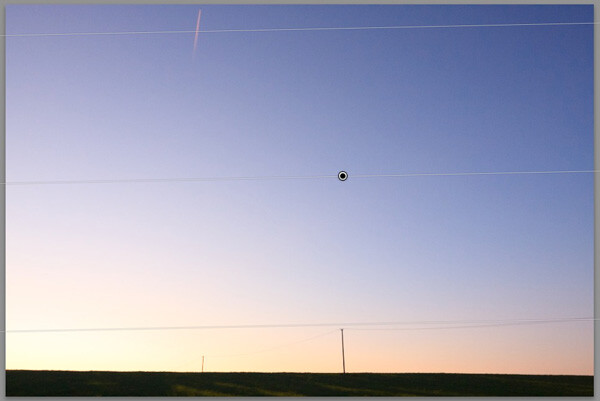
    2. Hold the left mouse button down and drag the mouse across the image to place the Graduated filter. In this example I held the mouse button down while I dragged to create a wide Graduated Filter. There is a lot of space between the lines making up the filter, indicating that it will create a smooth graduation.

    Using the Graduated Filter in Lightroom

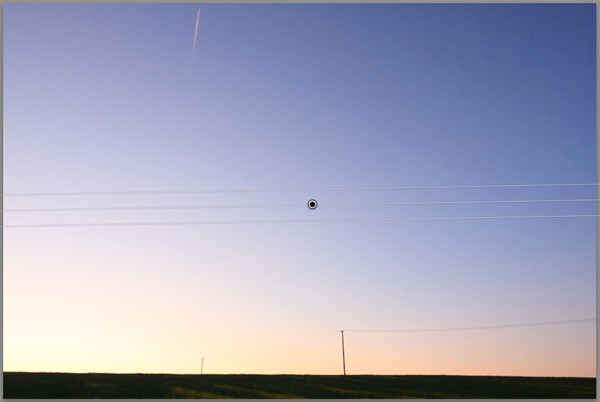
    3. If you let go of the mouse button early, you create a narrow Graduated Filter that gives a harder graduation. Drag the pin to position the Graduated Filter where you need it.

    Using the Graduated Filter in Lightroom

    Here, I set Exposure to -4.0 to show you the difference between the two types of Graduated Filter:

    Using the Graduated Filter in Lightroom

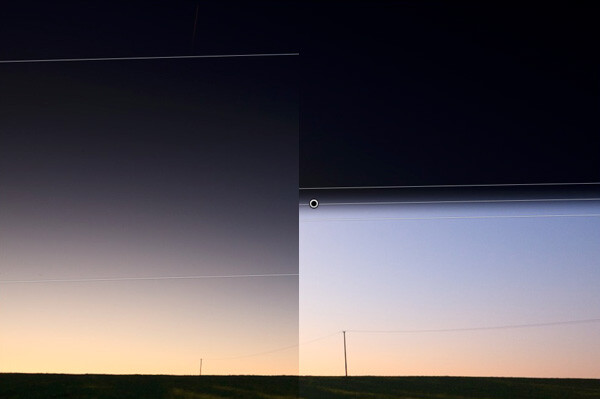
    This illustration shows the difference between creating a wide Graduated Filter (left) and a narrow one (right). Experiment with both to see how they affect your photos.

    Now you know how to use the Graduated Filter tool, here a few ways you can make your photos better with it.

    Note: you can reposition the placement by dragging the pin, or widen the gradation any time even after applying the filter. Just reactivate it, select it (the dot will be black) and adjust. To adjust the gradation just hover the mouse over one of the edges, click to grab it, hold down the mouse button and pull to widen or narrow the spread. 

    1. Making skies darker

    Let’s start with the obvious application of using the Graduated Filter to make the skies in landscape photos darker. Note that the Graduated Filter can’t rescue you if the sky in your photo is so overexposed that detail is lost – you may still need to use a neutral density graduated filter when you take the photo in the first place.

    Using the Graduated Filter in Lightroom

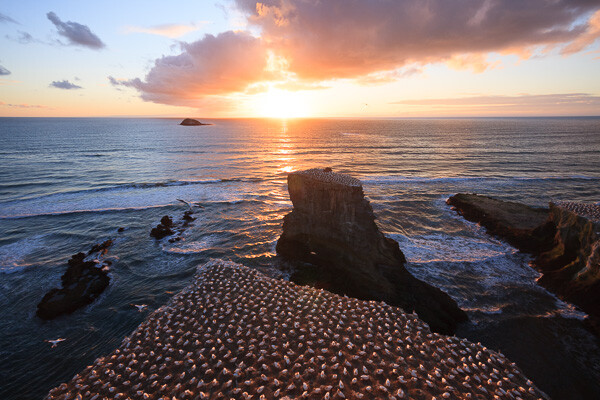
    Starting image

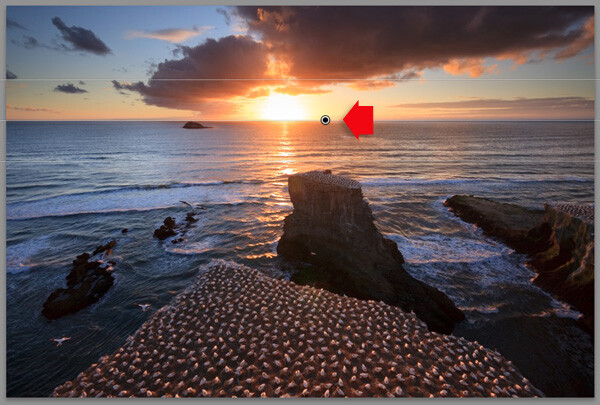
    The first step is to make the sky darker. I did this by adding a Graduated Filter and pulling back Exposure to -1.81. Every photo is different, so use your eye to judge the Exposure adjustment required on your photos.

    Using the Graduated Filter in Lightroom

    Exposure -1.81 applied using the Graduated Filter

    2. Adjusting Contrast and Clarity locally

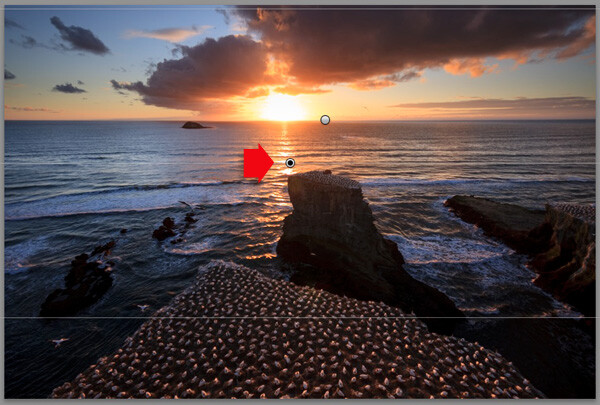
    My aim with this landscape was to make the foreground darker and sharper, directing the viewer’s gaze towards the horizon. I achieved this by adding another Graduated Filter from the bottom. But this time, as well as adjusting Exposure to -0.79, I increased Contrast to +20 and Clarity to +27:

    Using the Graduated Filter in Lightroom

    Bottom Graduated Filter applied, Contrast +20 and Clarity +27

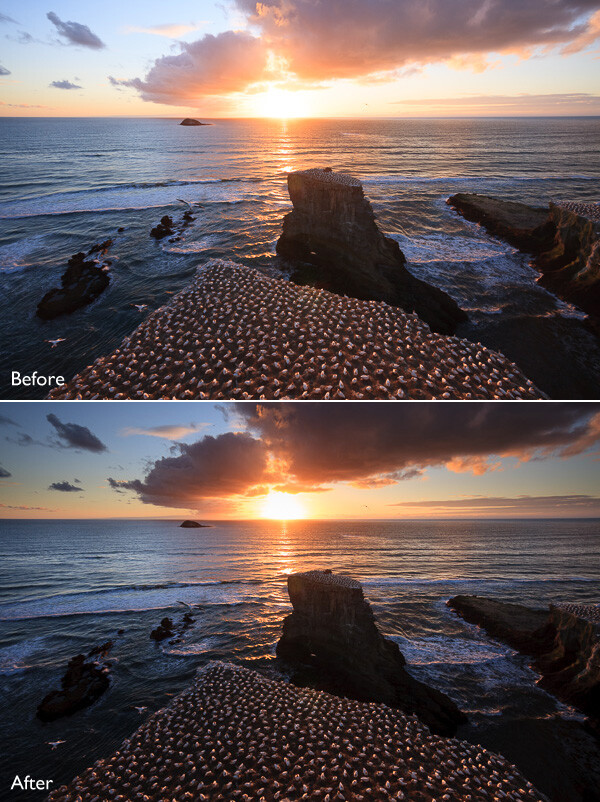
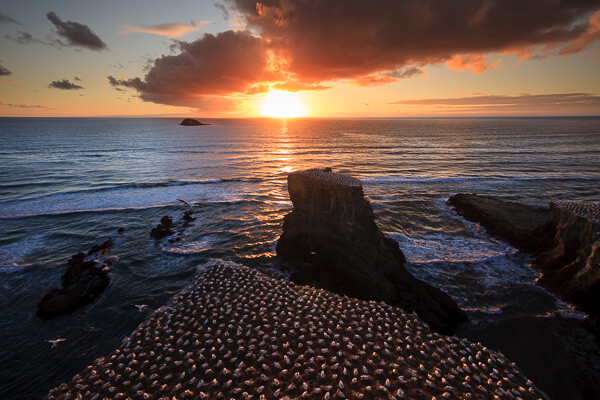
    Here’s a before and after comparison, so you can see the difference adding the Graduated Filters has made. The two simple adjustments have transformed the photo.

    Using the Graduated Filter in Lightroom

    3. Adjusting White Balance

    Another use of the Graduated Filter is to adjust colour temperature in part of the image. Sticking with the same landscape photo, I selected the top Graduated Filter to activate it and set Temp to 30. This warmed up the sky, emphasising the deep orange and red colours of the sunset:

    Using the Graduated Filter in Lightroom

    Be careful with adjusting Temp. If you push the slider too far the results may not look natural.

    4. Making edges of your image darker

    Moving away from landscapes, Graduated Filters are a handy way of making the edges of your images darker. This helps direct the viewer’s attention towards the focal point.

    Using the Graduated Filter in Lightroom

    This diagram shows roughly where I placed the three Graduated Filters. The benefit of using individual Graduated Filters (instead of the Radial Filter or Adjustment Brush) is that you can adjust each one individually.

    Using the Graduated Filter in Lightroom

    5. Adding a colour wash

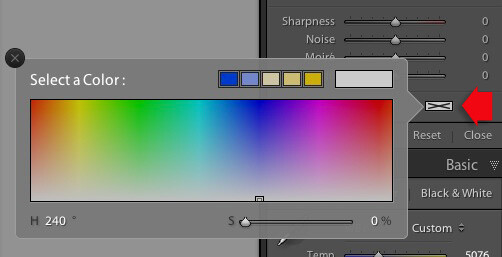
    The Color setting at the bottom of the Graduated Filter panel lets you add a tint. It is laid over the filter in addition to the effects created by whichever sliders you choose to adjust. To select a colour, click on the colour picker icon at bottom of the Graduated Filter panel (the white rectangle with black cross inside indicates no colour has been selected) and select the colour you wish to add:

    Using the Graduated Filter in Lightroom

    Slider below is for adjust the Saturation of your selected color

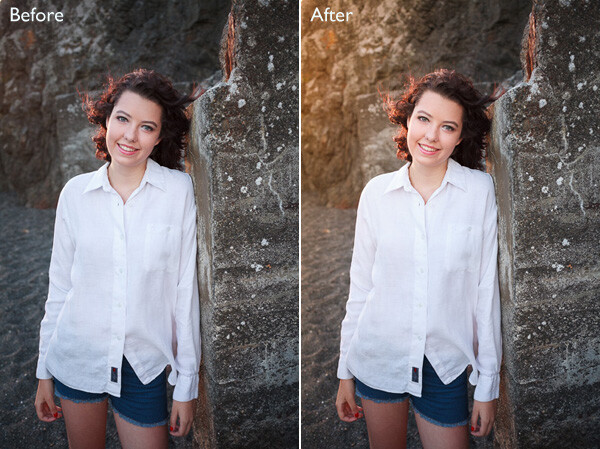
    One use of this is to add a colour wash to a photo, to make it look as though the subject is lit by the light from the setting sun. This technique works best when the subject was genuinely shot during the golden hour, and you use the Graduated Filter to emphasize that. In this example I selected an orange hue to imitate the sun and set Exposure to +1.16 to lighten that side of the image.

    Using the Graduated Filter in Lightroom

    6. Lens blur effect

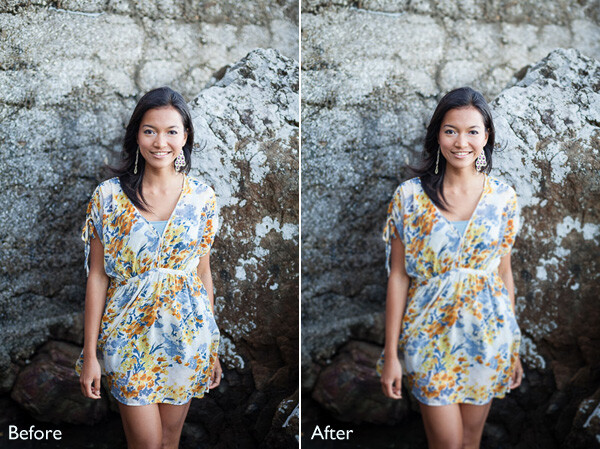
    The Sharpness slider in the Graduated Filter panel is dual purpose. From zero to -50 it reduces sharpness. From -50 to -100 it creates lens blur. This lets you replicate the effect of using a tilt-shift lens or large format camera to create a photo with a tilted plane of focus. This is what it looks like. You may have to look closely – the model’s head is sharp but the areas at the top and bottom are not.

    Using the Graduated Filter in Lightroom

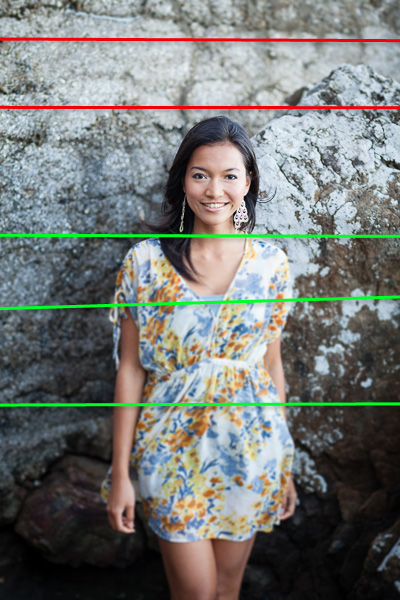
    I created this effect by adding five Graduated Filters, two at the top, and three at the bottom, their position shown by the coloured lines. The effect works best with a narrow Graduated Filter.

    Using the Graduated Filter in Lightroom

    The red lines indicate where I added Graduated Filters with Sharpness set to -100 at top. The green lines show you where I placed three filters at the bottom. Spacing the Graduated Filters mean the effect is strongest at the edges, replicating the true effect of using a tilt-shift lens.

    Hopefully these tips will help you use the Graduated Filter more creatively. Lightroom is great for processing your photos and understanding how its tools work will help you use it more effectively. If you’re new to Lightroom, then my article Seven Pieces of Advice for New Lightroom Users will help you get started. Once you’ve mastered the Graduated Filter, I suggest you read Four Ways to Improve Your Photos With the Clarity Slider in Lightroom or 3 Uses for the Radial Filter Tool in Lightroom 5 to learn how to use more of Lightroom’s fabulous tools. Have fun!

    By the way, I’m curious to hear how you use Graduated Filters in Lightroom. What techniques have you come up with? Please share them with other readers in the comments.


    Mastering Lightroom: Book One and Two
    mastering-lightroom-bundle-1

    My Mastering Lightroom ebooks are a complete guide to using Lightroom’s Library and Develop modules. Written for Lightroom 4 & 5 they take you through every panel in both modules and show you how to import and organise your images, use Collections and creatively edit your photos.

    The post Improve Your Images with the Lightroom Graduated Filter Tool by Andrew S. Gibson appeared first on Digital Photography School.


    Digital Photography School

  • The Magic Light of the Golden Hour

    EOS-1D Mark IV with EF 24-105 f/4L IS. 1/500 at f/4, ISO 200.

    EOS-1D Mark IV with EF 24-105 f/4L IS. 1/500 at f/4, ISO 200.

    What is Golden Hour?

    My absolute favorite time to photograph anything is a time of day called the Golden Hour. The Golden Hour occurs during the time just before sunset, and just after sunrise. When the sun is lower in the sky, near the horizon, it must travel through more of the atmosphere, reducing the intensity of direct light and thus reducing the contrast in the scene. More blue light is scattered, so sunlight will appear reddish and shadows won’t be as deep as when the sun is higher in the sky. In addition, the lower angle of the sun creates longer shadows, which can add interest to images.

    EOS 5D Mark II with EF 24-105 f/4L IS. 1/15 at f/14, ISO 100.

    EOS 5D Mark II with EF 24-105 f/4L IS. 1/15 at f/14, ISO 100. The low sun casts a longer shadow, creating foreground interest for this shot.

    The Golden Hour does not necessarily last an hour. The closer to the equator you are, the shorter the Golden Hour is. The further from the equator, the longer the golden hour lasts. For instance, in Alaska during the summer, there is a period of several hours of Golden Hour light later in the evening, and during the winter, nearly all daylight hours have a Golden Hour quality to them.

    EOS 5D Mark II with EF 24-70 f/2.8L. 1/2500, f/4, ISO 200. The sun was placed over the boy's shoulder to camera left, and a reflector to camera right.

    EOS 5D Mark II with EF 24-70 f/2.8L. 1/2500, f/4, ISO 200. The sun was placed over the boy’s shoulder to camera left, and a reflector to camera right.

    Golden Hour light is so good, I find it hard to convince myself to photograph at other times.  It’s excellent lighting for any subject, but especially lends itself to portraits and landscapes.

    Portraits at Golden Hour


    For portraits, I use the light in a couple of ways.  First, I will position my subject so that the sun is shining on their face directly, as in the image at the top of this article.  The light tends to be so soft, I can put down my reflector and just let the shadows fall and create depth.  Simply position your subject so the sun is full in their face, and ask them to turn back and forth to watch the way the shadows fall. Move around your subject to watch how the light changes.  Shoot from multiple angles. It will end up being like you changed your lighting setup for each shot.

    The only portrait angle that will be difficult to shoot at the Golden Hour will be when your subject is completely backlit. In this case, I will use a reflector. Since the light already has a warm temperature, I use the white side of the reflector, or silver if the reflector has no white.  I will position my subject so the sun is behind him and over his shoulder, and will position the reflector in front of him on the opposite side. The effect is similar to having two lights, a hair light, and a fill. Again, move around your subject, and have them turn as well, placing the sun at different angles to them. Do the same with the reflector to see the ways you can make the light fall on your subject’s face.  The beautiful thing about Golden Hour light is that it comes from such a low angle, you can hold the reflector higher and position it just above your subject’s head, to get those pleasing downward shadows from the nose and other facial features.

    Golden Hour for Landscapes

    The Golden Hour is also perfect for shooting landscapes.  The light creates depth by casting long shadows and defining the character of the landscape.  I will often try to put the sun to my side when shooting Golden Hour landscapes. This allows the light to rake across the landscape and create shadows where the surface changes, or create greater detail in grasses, or trees, creating more apparent detail and sharpness than if the light was from the front. This is apparent in the two images below.

    EOS 5D Mark II with TS-E 24mm f/3.5.  1/1250 at f/3.5 ISO 100.  The sun coming from camera right creates definition in the sand and dune grass.

    EOS 5D Mark II with TS-E 24mm f/3.5. 1/1250 at f/3.5 ISO 100. The sun coming from camera right creates definition in the sand and dune grass.

    EOS 5D Mark III with EF 70-300 f/4-5.6L IS. 1/13 at f/16, ISO 100. The low angle of the sun and warm golden light creates definition in the foreground trees.

    EOS 5D Mark III with EF 70-300 f/4-5.6L IS. 1/13 at f/16, ISO 100. The low angle of the sun and warm golden light creates definition in the foreground trees.

    In addition, landscapes shot during the Golden Hour have more color in the sky, especially if there are clouds picking up the warm reddish light. However, shooting directly into the sun, capturing a sunset, creates a very contrasty scene. In cases like that, I use graduated neutral density filters to darken the sky and bring it down so that the foreground and the sky both fall within the dynamic range of the camera, as with the image of the crashing wave and rocks (below). A graduated neutral density filter (ND Grad for short) is half darkened glass, half clear. You can position the filter so the darker area covers the sun and sky, and the clear is over the darker foreground.  This helps bring the color back to those sunsets or sunrises, whereas without the filter, the sky would appear washed out and lifeless.

    The Golden Hour offers plenty of opportunities for great photos, and the really beautiful thing is that it happens twice a day!

    EOS 5D Mark III with EF 24-70 f/2.8L II. 1/6 at f/14, ISO 200.  A 4-stop ND grad was used to darken the sky and match the foreground exposure.

    EOS 5D Mark III with EF 24-70 f/2.8L II. 1/6 at f/14, ISO 200. A 4-stop ND grad was used to darken the sky and match the foreground exposure.

    EOS 5D Mark III with EF 24-70 f/2.8L II. 1/15 at f/16, ISO 100.

    EOS 5D Mark III with EF 24-70 f/2.8L II. 1/15 at f/16, ISO 100.

    EOS 5D Mark II with EF 24-105 f/4L IS. 1/1000 at f/4, ISO 100.  In this case, the sun was positioned more to the side with a reflector bouncing light back into the subject's face.

    EOS 5D Mark II with EF 24-105 f/4L IS. 1/1000 at f/4, ISO 100. In this case, the sun was positioned more to the side with a reflector bouncing light back into the subject’s face.

    EOS 5D Mark III with EF 70-200 f/2.8L IS II. 1/1000 at f/2.8, ISO 100.

    EOS 5D Mark III with EF 70-200 f/2.8L IS II. 1/1000 at f/2.8, ISO 100. The soft, warm light of the Golden Hour was perfect for this shot.

    More tips on working with light in the Golden Hour:

    • The Golden Hour – Perfect Times for Portraits
    • Finding and Working with Available Light
    • 5 Reasons for Doing Natural Light Portraits
    • 10 Reasons to Shoot Portraits During the Golden Hour [Illustrated]

    On sale now at SnapnDeals – Golden Hours eBook + Exposure Blending eBook – grab the pair now before the sale is over! 

    The post The Magic Light of the Golden Hour by Rick Berk appeared first on Digital Photography School.


    Digital Photography School

  • A Glimpse of Ancient Egypt by Jayant Neogy

    It is almost impossible to compress the history and architecture of ancient Egypt into a brief travel blog. Perhaps, that is why it is an audacious and an exciting challenge. So, here is a highly compressed whirlwind tour of Egypt from the Nubian desert in the South to the Northernmost part of this ancient land […]

    The post A Glimpse of Ancient Egypt by Jayant Neogy appeared first on dslrBlog.

    dslrBlog

  • Off Camera Flash for Your Travel Photography

    The creative use of artificial light in travel photography is a powerful tool that can take your images to the next level. While there’s a myriad of information available on getting started with off camera flash, the tutorial here is tailored for you. It will give you a start using these techniques with relatively cheap and portable equipment while on the road. The tutorial will cover the basics of gear you will need, along with real world examples of different techniques you can use to make your images pop.
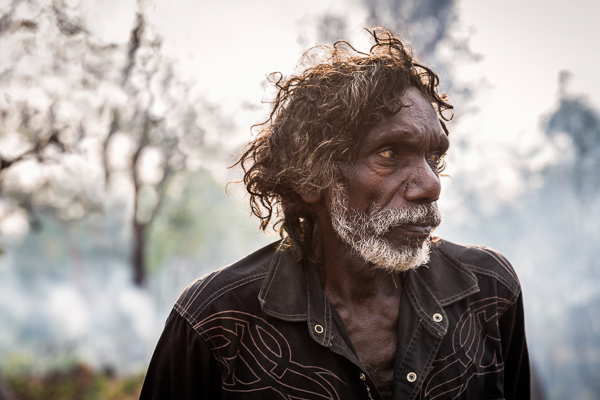
    Image 4 Tom Arnhem Land

    It is assumed here that you have a full understanding of how to use your camera in manual mode, and some experience with the basics of flash photography. The techniques covered here are not overly difficult, and with some practice at home you will be able to approach your next trip with a new set of options to inspire your photography.

    You may know, that images shot with on camera flash do not usually produce flattering results for your subjects. Moving your flash off camera often means an investment in more gear, though it doesn’t have to be super expensive or add too much bulk to your travel kit. The resulting images you get from this investment will be well worthwhile.

    For this tutorial I’ll be covering some different options for putting together a basic one light setup that can be fired off camera remotely and modified through a small softbox or umbrella. This sort of setup is a practical way to travel, especially if you are on the road for an extended period, and don’t have help lugging around more elaborate studio style setups.

    There are potentially many elements to your setup, each with wide ranging options in price, bulk and results. These bits of gear can be added to virtually any DSLR with manual functions and used with any lens that suits the type of images you want to produce.

    Gear for Off Camera Flash Travel Photography

    1. Flash gun or speedlight

    There has never been a wider amount of choice when it comes to speedlites, or flash guns on the market. From the top of the range Canon and Nikon speedlights that cost upwards of $ 500.00, to excellent third party options, it can be a difficult choice to make.

    Using off camera flash is best practiced via manual control of both the flash and camera, so higher end options like TTL (Through the Lens) flash metering are not essential, though this is increasingly an option with even cheaper third party flashes.

    For a long time I’ve used a Canon 430 EX II, the mid-range option in the Canon Flash line-up, and a relatively affordable bit of gear. When starting out almost any flash will do, as even the cheapest can be fired off camera, and be modified to give you great quality light.

    2. Flash Triggers

    Once you have decided on which flash or speedlight fits your budget, then comes the maddeningly wide array of choices available to fire your flash remotely.

    Radio triggers, which can be set to fire the flash from a small unit that slides into your camera’s hot shoe, and another attached to the flash itself, are amongst the easiest and cheapest way to get started.

    You might hear many professionals touting the ownership of expensive ‘Pocket Wizards’ as something of an exclusive way into the mysterious world of off camera flash. They are great products but the market has changed. Cheaper options from Yongnuo or Photix cost a fraction of the price, and will work just as well.

    I’m currently using a set of Yongnuo YN-622C Triggers, which have worked perfectly through some very tough travel. These also have the option on my Canon 5D3 of adjusting the flash power through the camera menu, which is really useful, though not essential.

    3. Modifier

    While bare flash can produce interesting results, this ‘hard light’ is not always desirable for the type of portraits most people will be looking to produce in their travel photography.

    A ‘soft light’, produced by using a flash modifier, is the more common way to shoot, as it produces more flattering results for your subjects. Again, there is an endless array of options here. A small softbox or umbrella are the easiest and most versatile ways to get shooting.

    A plain white shoot through umbrella is a cheap and compact option, and throws a fairly wide soft light that can be used for a range of portrait shots. The limitation with these umbrellas is that, as a travel photographer, you will more often than not be shooting outdoors. Any kind of wind while shooting with these might have you uttering expletives at the sight of your gear tipping over or the umbrella folding itself inside out.

    A more easily managed item is a small softbox. While not as compact to transport or as simple to set up, these stay sturdy and produce a great, soft light that is useful in most portrait situations. I currently use the small Photoflex Light Dome XS, which has lasted a few years now without any damage. There are many similar options, and even DIY projects that you can find online.

    4. Light Stand

    This is an optional piece of gear that has the potential to be a lifesaver, or just a heavy metal rod in your bag. In most situations you will be able to get somebody to hold the flash or softbox, and roping in friends and family of your subjects to help can be a great way to help people relax.

    If you do decide to bring a stand with you, it’s worth spending more over the cheap generic Ebay numbers, which from experience don’t last much past being taken out of the box. The Avenger range of stands are compact and sturdy.

    5. Flash Gels

    CTO (Colour Temperature Orange) gels are simply bits of plastic that you can place over your flash to vary the color temperature of light that reaches your subject. Use of these, or not, is according to personal taste. Strips of this plastic are cheap and easy to purchase online, with the sample packs offered by many companies a great way to experiment. Attaching a bit of velcro to the sides of the plastic and the flash to keep the gel in place is one way to keep things simple.

    6. ND filter

    Another optional piece of gear. The use of ND (Neutral Density) filters with off camera flash adds another tool to your creative arsenal. Using ND filters makes it possible to add more drama to your images with underexposed backgrounds and/or shallower depths of field during the day.

    I use a range of ND filters, with the Lee 3 stop Solid ND filter, mounted with the Cokin Z Pro Holder the most common choice. Again, this is not an essential part of a flash setup, and something that can be added once you are more comfortable with the basics.

    Shooting Off Camera Flash Travel Photography

    Once you have your setup sorted it’s worthwhile practicing to get it all working in the quickest time possible. Without treating it like a frantic pit stop, it’s really handy to be able to get everything in order as fast as you can. On the road you don’t want to monopolize somebody’s precious time more than necessary. Being confident with your gear and shooting style, helps put your subjects at ease as well.

    The following examples from recent shoots are broken into two rough styles of shooting with off camera flash. The first is the technique of balancing flash with ambient (available light), producing images where the light from your flash is subtle, and blends with the background of your subject. The second is the technique of underexposing the ambient or background light, and using shallow depth of field to add more drama to your images.

    The golden rule to remember with flash photography is that your aperture setting, combined with your flash power, controls the amount of artificial or flash in your photos. Your shutter speed will control the ambient, or background, light.

    Technique #1 – balancing flash with ambient

    Image 1 Natarajan India

    Natarajan, Little Andaman Island, India

    I had met this elderly gentleman a few days prior to the shot taken here. At the time of our meeting he was the oldest living man in a remote part of the Andaman Islands Chain which was devastated by the 2004 Tsunami. I wanted to take his picture for a magazine feature I was putting together. By the time I got to his place to take a few shots one evening, it was right on dark, with only dim ambient light left to work with. This was a great time to break out the flash for a simple portrait.

    After setting up a small softbox and attaching the radio flash triggers to fire the flash, I first exposed for the ambient light, setting my shutter speed and ISO to ensure a sharp image. I then chose an aperture of f/4, which combined with a telephoto lens, helped throw the background out of focus.

    At these settings, without the use of flash, Natarajan’s features were dark and flat. Adding in the flash, fired remotely, allowed for a better portrait by emphasizing his strong features and throwing pleasing catch lights into his eyes (the reflection of the flash in your subjects pupils).

    Image 1 Natarajan

    I asked my friend Stephan to hold the flash at a downwards 45 degree angle camera left, just out of frame, aimed at the left side of Natarajan’s face (see lighting diagram above). I usually start with the flash in manual mode, set to 1/16 power and work from there. If the flash is too strong you can power down or vice versa.

    In this simple portrait, the flash light lends some shape to the subjects face without its use being so obvious.

    Image 2 Laura Dance Festival

    Laura Dance Festival, Cape York, Queensland, Australia

    The picture above was taken of a young boy from the Injanoo tribal group from the far north coast of Queensland, Australia. At the bi-annual Laura Dance Festival, tribal groups gather to dance and celebrate their ancient culture with outsiders.

    After shooting the dance action for a few hours I wandered off to find some kids practicing their routines, with light from the setting sun filtering through the eucalyptus trees around the camp lighting up their moves.

    With a small army of enthusiastic helpers I broke out the softbox and triggers, working quickly to keep the setting sun as an element to the shot. For this image a fairly heavy CTO gel was used over the flash to give the light the look of the setting sun. It’s not exact but lends a nice warmth to the light that would have otherwise looked more out of place at this time of evening.

    I asked the boy to stand with the setting sun positioned behind his head, and then exposed for the background, ambient light. I chose to shoot from a low angle, as this usually works to emphasize strength in your subjects.

    The flash was again set to manual and 1/16 power, which was close to the right flash exposure for the subject. This time the flash was held by another young dancer, just over my shoulder camera right (see lighting diagram below).

    Image 2 Laura

    In the final image the highlights needed some recovery in post, and a slight vignette was added.

    Backlighting your subjects this way (with the sun behind the subject) adds some dramatic effect, with the flash exposing a subject that would otherwise have been in near darkness without it.

    Technique 2 – Underexposing with ND Filters for Dramatic Effect

    Image 3 Adrian Marrinyama Mob

    Adrian, The Marrinyama Mob

    The image above is from a shoot in a remote part of Queensland, Australia. For part of the year the guys live a traditional lifestyle, hunting, dancing and performing tough initiations on younger boys. It was the height of summer, and I was working alone with searing desert temperatures and strong winds whipping up dust from the red earth around the camps which the group called home.

    In these situations being comfortable with your gear, and confident with what you are trying to achieve is really important. A flimsy umbrella or larger modifier for the flash shots would have been difficult to manage on my own. I chose to use my ever reliable little softbox setup, mounted on a decent light stand, and worked towards creating images that I had envisaged before the shoot.

    For this shot of Adrian, a slightly more advanced setup was used. I wanted a shallow depth of field and for the portrait to look dramatic. This was achieved with the help of a 3 Stop ND filter to underexpose the background while keeping a shallow depth of field a f/2.8.

    Image 3 Adrian

    The flash was set to full power camera left, set just out of the frame (see diagram above). The result is that the flash is more noticeable than usual, with the background underexposed and blurred nicely for effect.

    The video below is from a recent shoot in remote Arnhem Land, Northern Australia. The softbox – flash – trigger setup mentioned throughout the article is shown towards the end of the footage. Again, the flash setup was used to help out during less than ideal lighting situations on this trip.

    The sun filtering through the smoke of a slow burning bush fire behind Tom helped to add some drama to the image, with the flash providing the correct exposure for his face. The flash was held close to Tom, camera right, and fired at 1/16 power.

    Hopefully this tutorial has given you a starting point to work from with off camera flash for your travel photography. There’s many tutorials available for every aspect of what has been mentioned here. Happy shooting.

    Image 4 Tom Arnhem Land

    The post Off Camera Flash for Your Travel Photography by Brook Mitchell appeared first on Digital Photography School.


    Digital Photography School
  • 9 Top Tips for Shooting Waterfalls, Creeks and Streams

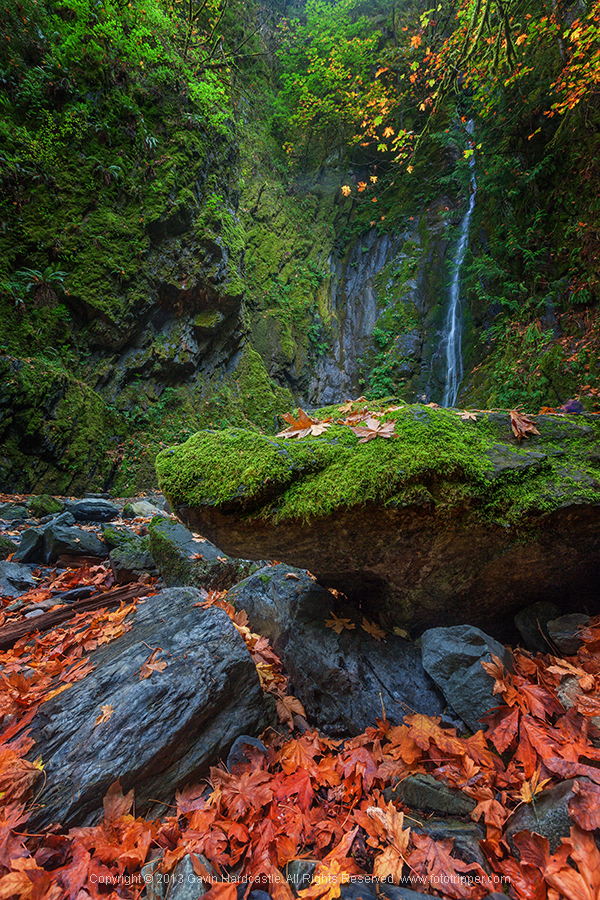
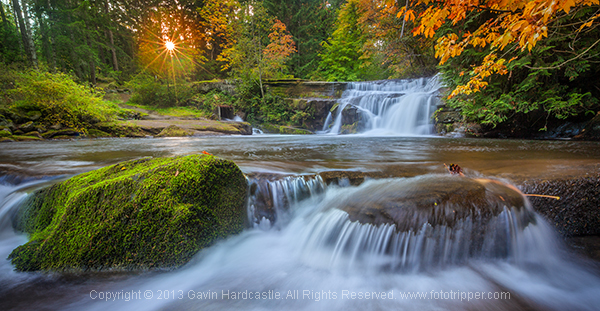
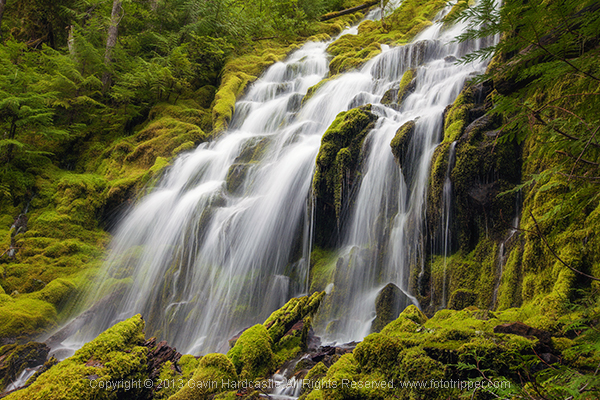
    Waterfalls, creeks and streams are something of a photographic specialty for me. Aside from the fact that there are thousands of them at my Vancouver Island Headquarters, they’re also really easy to photograph and often result in magical images that stand the test of time. Whether it’s a moss speckled trickle or a colossal roaring deluge, moving water seems to be irresistible to photographers and when it’s done well, can be utterly gorgeous. Let me share with you my top tips on how to shoot waterfalls, creeks and streams.

    Learn how to shoot waterfalls and creeks

    1 – Shoot in all weather

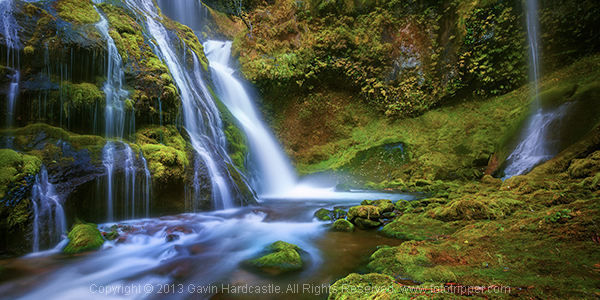
    I’ll shoot in any kind of weather except for sideways rain. With waterfalls, creaks and streams I have a silly little motto ‘The Wetter the Better’. When everything is drenched you’ll find that your shadows are nicely saturated to deliver powerful blacks. I also prefer the look of wet leaves over dry ones because they looks so much more vibrant and rich.

    Rainy or overcast days will also give you softer light with lower contrast, meaning you won’t usually need to bracket in order to capture the dynamic range. If you’re lucky enough to get a cold spell and things get icy you’ll find your local waterfall turns into an enchanted winter wonderland overnight, just watch your footing.

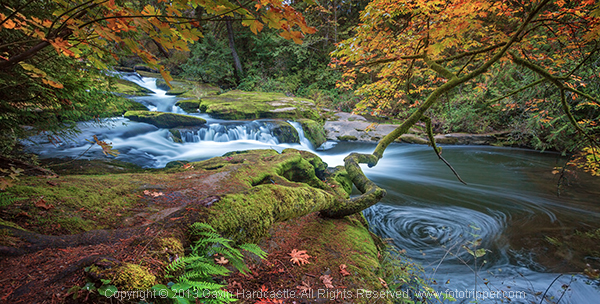
    bowen-park-nanaimo-gavin-hardcastle

    2 – Don’t always choose a slow shutter speed

    Sure, it’s nice to get those silky water shots and capture the motion blur of moving water, but there are times when it’s nice to also capture a frozen moment of action. I’ll usually take two exposures with different shutter speeds and then blend them in Photoshop to create a good mixture of frozen and blurred motion. A four second shutter speed will usually be enough for silky water shots and you can achieve that easily with just a polarizer and a narrow aperture like f/16, unless your scene is in harsh, direct sunlight.

    For a quicker exposure that has less motion blur I’ll try and keep the shutter speed under one second by using a slightly wider aperture of f/11 and rotating the polarizer to allow in more light. It’s rare that I’ll require the use of an ND filter. My shot below is a single exposure of about a half second during a rainy day. I tried longer exposures but preferred this one because you can still see some individual water drops in motion instead of just a mushy blur.

    How to shoot waterfalls

    3 – Explore dark canyons

    Don’t just explore those sun dappled streams that catch the light beautifully, that’s just too easy. Often it’s the darker, sun starved slot canyons that yield the most beautiful scenes. Armed with a study tripod you can shoot anything you want without caring about direct sunlight illuminating the scene. This opens up a new world of photo opportunities if you’re only used to shooting handheld.

    4 – Bubbles turn into spirals

    Whenever you see a river that produces a current of bubbles on the surface of the water, you’re in for a treat. With a shutter speed of four to six seconds (depending on water speed) those bubbles will create beautiful spirals in your long exposures. Be careful not to slow things down too much though as a ten second shutter speed will probably blur the motion too much to capture any definition. Here’s an example I shot last fall in Nanaimo, Vancouver island.

    How to photograph waterfalls, creeks and streams

    5 – Slap that polarizer on

    I know I harp on about this all the time as you’ve no doubt read in my ‘Why You Must Use a Polarizer‘ article, but it really does make a huge difference when you’re dealing with wet rocks and reflections caused by water. Your polarizer will allow you to use longer shutter speeds, reduce reflections and make your colours POP!

    6 – Avoid the sky

    Do you really need a white triangle at the top of your image? Didn’t think so. Almost all of my workshop students suffer from some compulsion that dictates all images must have sky. I think I did the same thing when I was starting out. By omitting the sky completely, you’ll create a more intimate scene that dedicates the entire frame to what matters most and eliminates the triangle of pointlessness.

    How to Photograph streams and rivers

    7 – Go abstract

    This is where you will have an advantage if you don’t have a full frame sensor camera. Rather than trying to fit the entire scene into your frame, it often pays to hone in on a smaller area of a waterfall or creek which removes the viewers sense of scale and direction.

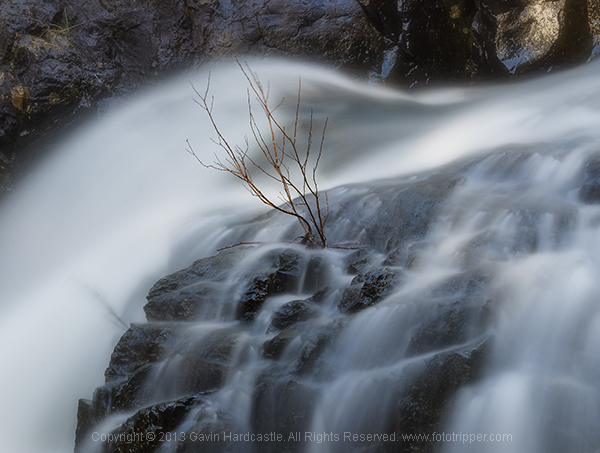
    Instead of a river flowing over some rocks and tree stumps, you’ll create an abstract scene of natural beauty that hypnotizes the viewer with an atmospheric study in motion and colour. Just like removing the sky, omitting the top and bottom of a waterfall from our frame leaves room for imagination.

    gavin-hardcastle-abstract-waterfall-photography

    8 – Perfect the “shoot ‘n swipe” technique

    I’m not going to lie to you, shooting waterfalls, creeks and streams WILL result in a wet lens. When dealing with the spray from waterfalls, you’ll need to practice and perfect the “Shoot ‘n Swipe” method that requires a measure of patience. To do this well you’ll need a ball head with just ONE position clamp. If you’re rocking one of those ‘many handled’ tripods that look more like a tower crane control panel, forget it. Here’s how it works.

    1. Compose your shot and dial in all your camera settings to capture the shot. By now your lens will be well coated in spray from the airborne water particles of your waterfall.
    2. With everything perfectly in place and all setup, unwind the ball heads position clamp and point your camera to the floor, being careful only to allow vertical movement.
    3. Using a good quality lens cloth, wipe the lens thoroughly to remove the spray. If you have a filter in place be sure to rub in the opposite direction to the filter thread of you’ll be picking that filter up off the floor.
    4. Once dried, unwind the position clamp on the ball head, lift up the camera back into its previous position for your composition, tighten the clamp and take the shot. You’ll only get a few seconds before you’ll be all fogged up again.

    Repeat this procedure until you get a shot that doesn’t have a fogged or water splattered lens. You have now perfected the “Shoot ‘n Swipe” technique (Patent Pending)

    9 – Processing – go monochrome

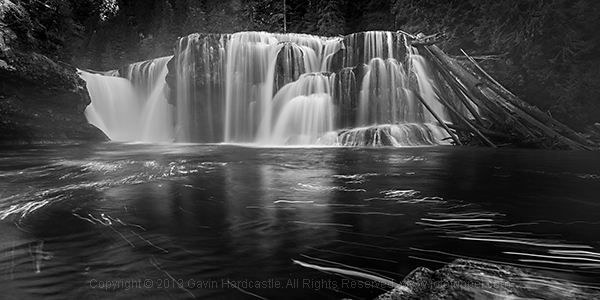
    Sometimes it’s nice to convert images of moving water to black and white because often they feature a lot of white. If you find that your waterfall, river or stream shot is lacking punch because of boring light and a lack of colour in the scene, try converting it to black and white then get freaky with the Curves slider in Adobe Camera Raw to pop the contrast. Nice.

    Black & White Landscape Photography

    So there you have it, all you need to get out there and capture some lovely images of waterfalls, creeks, rivers and streams. Get creative and don’t be afraid of wet weather, just be careful on those slippery rocks.


    The post 9 Top Tips for Shooting Waterfalls, Creeks and Streams by Gavin Hardcastle appeared first on Digital Photography School.


    Digital Photography School
  • Graphic Stock’s 7-Day Free Download Extravaganza

    As a photographer—whether an amateur or a pro—you know that you can more than appreciate having a huge supply of stock images ready to use. You usually never know when they can come in handy, but you know well how they can come in handy, more than you think. That’s why it’s a comforting thought to realize that Graphic Stock Continue Reading

    The post Graphic Stock’s 7-Day Free Download Extravaganza appeared first on Photodoto.


    Photodoto

  • Updating your Camera’s Firmware – What is it and Why it’s Important

    Canon 2 firmware page

    Does your camera have the latest firmware?

    This topic is one that I often find myself explaining in more detail, and one that many people aren’t even aware that they can update their camera’s firmware, and how this may affect their digital camera. An analogy is to updating the version of software on your smart phone.

    What is firmware and why is it important?

    Inside your camera is a microprocessor (small computer), that uses software stored on non-removable flash memory inside your camera. This is called firmware and is the operating system of your camera which allows you to control the features and functions, with the camera’s menus and buttons. Firmware also controls autofocus, exposure, image processing, noise reduction and other important functions within your camera. Without firmware your camera would not be able to operate.

    Why check for firmware updates?

    Updates generally contain fixes or feature enhancements. Firmware updates aren’t always necessary – some cameras never have updates.

    When a new camera is assembled the manufacturer loads the firmware that was designed at that time. After the camera has been released to the public, people may find that there are bugs or problems with the way the camera operates. The manufacturer investigates these problems and produces fixes for them in the form of firmware updates. Some of these fixes can be minor, but some of them fix more serious issues such as autofocus problems, battery-draining issues, or the camera unexpectedly locking up.

    Other reasons why firmware updates are released is to include new camera features such as added languages, or to have manually adjustable settings that were once solely automatic. Some updates are to support new optional accessories for your camera (e.g. wireless functions or GPS modules, etc.). I like to think of them as free upgrades to your camera.

    When to check for firmware updates?

    I recommend checking for updates on a semi-regular basis, every few months or so, and after you purchase a new camera is also a good time to check. There will likely be fewer firmware updates for older cameras but still worthwhile checking, perhaps on an annual basis. If you have never checked your camera for a firmware update then now is a good a time to do so.

    Does your camera have the latest firmware?

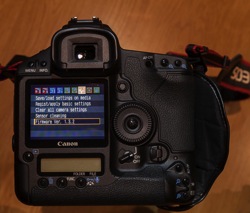
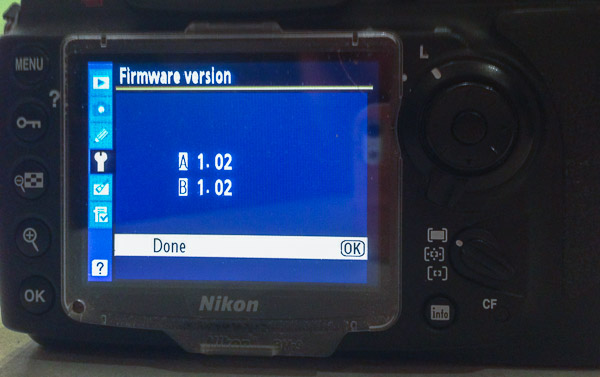
    First check what version of firmware your camera is running. This information is found within one of your camera’s menu options. Finding it is different on every camera and not always obvious. Your instruction manual will help you find where to look in the menus.

    Canon 1 firmware page

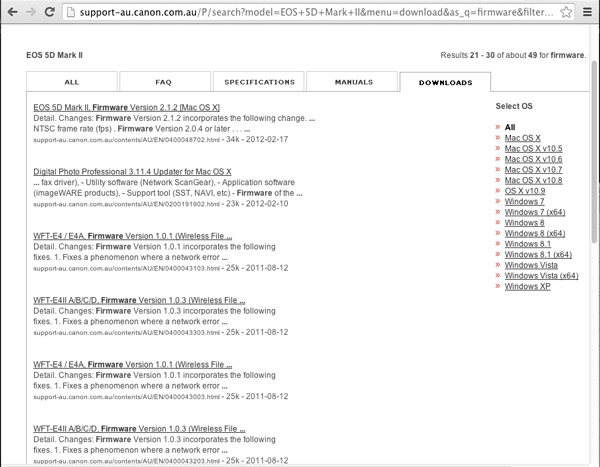
    You can check for the latest firmware by looking at the manufactures support and downloads section of their website for your brand and model of camera. Look for higher version numbers than the one found on your camera. If the version numbers are the same, there is no need to perform an update. Please note that some camera models never had new or updated firmware released and therefore new firmware updates may not be listed at all.

    Important: You need to know the model of your camera and only use the firmware that is specific to your model.

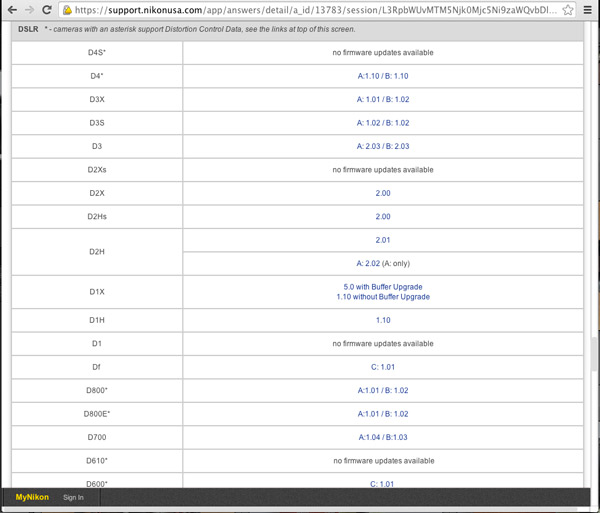
    Nikon firmware image

    The following links were recently current for the major camera manufacturers and may be of help when checking for releases of newer versions of firmware for your camera.

    • Canon
    • Nikon
    • Olympus
    • Sony
    • Pentax
    • Panasonic
    • Fujifilm
    • Leica

    Canon firmware page

    Why read the instructions carefully before updating your cameras firmware?

    Read the instructions very carefully before updating the firmware on your camera – you don’t want to end up having a dead camera! If the battery fails during the firmware update or the update is interrupted in some manner, the risk is having a camera without usable software. Meaning you have a dead camera that you have to take to the manufacturer to fix!

    How to find out what has been fixed or updated with the new firmware?

    Check the release notes that come with the firmware updates. Usually you will find included a list of the fixes or updates in earlier versions of the firmware too.

    Typical steps to update your cameras firmware*

    * Sample only – Please read your own firmware update instructions for your camera model

    1. Check the firmware version on your camera – it will be shown on one of the menu options
    2. Check to see what the latest version of firmware is available for your camera on the manufacturers web site
    3. Read the instructions carefully
    4. Download the firmware
    5. Install a fully charged battery into your camera
    6. Format a memory card in your camera (read your manual if you aren’t sure how to do this)
    7. Place that memory card into a card reader connected to your computer (do not connect via a cord from the camera)
    8. Copy the firmware update file into the top-level (root) folder of the cameras memory card
    9. Safely eject the card on the computer
    10. Place the memory card back into the camera (remember to power off the camera any time you remove a card or open the slot door)
    11. Follow the instructions to update the cameras firmware
    12. Unless instructed to do so, don’t touch any buttons, or switch the camera off during the process
    13. Check to see that the camera is running the newly installed firmware version – as per the first step

    If you have a Nikon

    Nikon firmware image

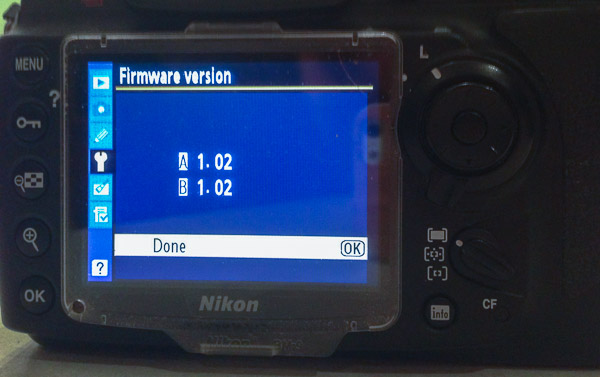
    Some Nikon DSLR cameras may have A, B and L firmware – what are these? Nikon A-firmware is for the I/O (Input/Output) processor, B-firmware is for the Control (“Expeed”) integrated micro-controllers and L-firmware is for lens specific updates such as correction for lens distortion. You need not know why they have this scheme, just know what version is the latest for your camera model and use that to keep your camera up to date. Other camera manufacturers generally have just one firmware version to install.

    Nikon firmware page

    Want more features on your camera – try Magic Lantern! (Canon EOS only)

    Believe it or not some people wanted more from their cameras and the only option was to team up with other smart people and write their own firmware! This started back in 2009 after Canon first released the 5D mark II, a full-frame (35mm) sensor body that was also capable of recording full HD video. The users (film makers) wanted to be able to have more control over the 5D mark II for video functions. The camera was much cheaper than buying a $ 25,000 commercial video camera to do the same thing.

    Since then, there have been various updates to this firmware that include support for other Canon EOS cameras while also including useful still photography features such as: an intervalometer, custom bulb timer for long exposures, motion detection, voice tags for photos, etc. This firmware runs from your CF or SD card, instead of the factory firmware inside your camera. The Magic Lantern software is only available for certain Canon EOS camera models. For a full list of supported cameras, to find out what it can do and how it works, you may like to visit Magic Lantern’s website.

    Please note: running third party firmware is not supported by the manufacturer and may void your warranty. So unless you are very comfortable with what you are doing, using this firmware may not be a good idea, especially if you are new to photography or just bought a brand new camera.

    What to do if something goes wrong?

    Check the manufacturers instructions again, have you missed a step or misunderstood what is required?

    If something is still not quite right after you have done all the troubleshooting you may like to contact an authorized service centre for your brand of camera and ask for their advice and support.

    I hope that you are now much better informed about firmware for your camera. Let me know if you have enjoyed reading this article and leave any comments below.

    The post Updating your Camera’s Firmware – What is it and Why it’s Important by Roy Vieth appeared first on Digital Photography School.


    Digital Photography School
  • Interview with Jim Mortram – Small Town Inertia

    Jim-Mortram-interview-12

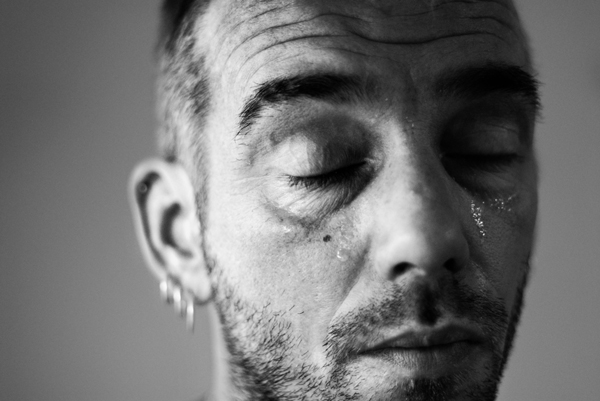
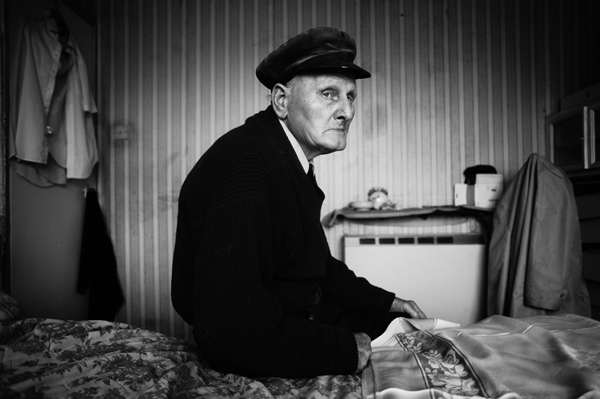
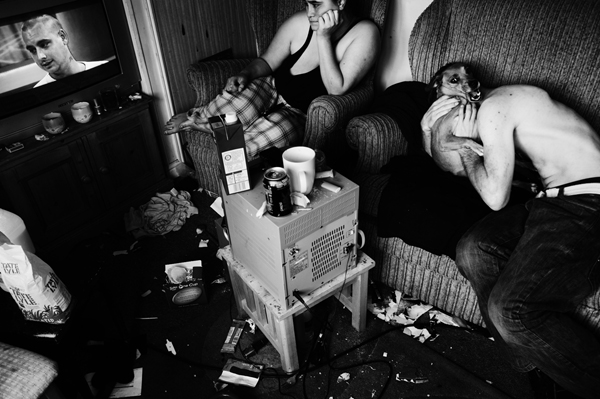
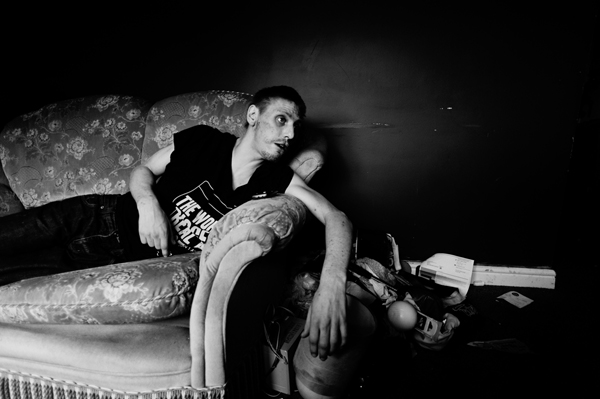
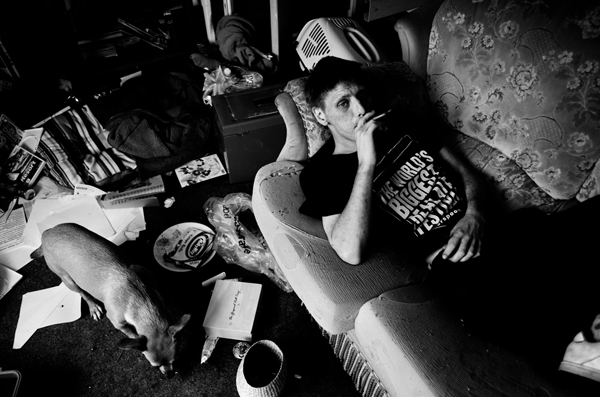
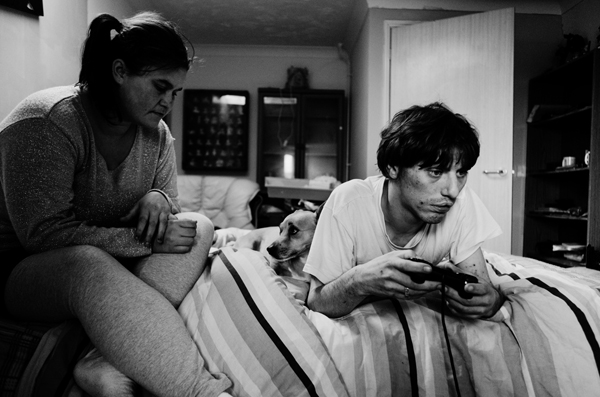
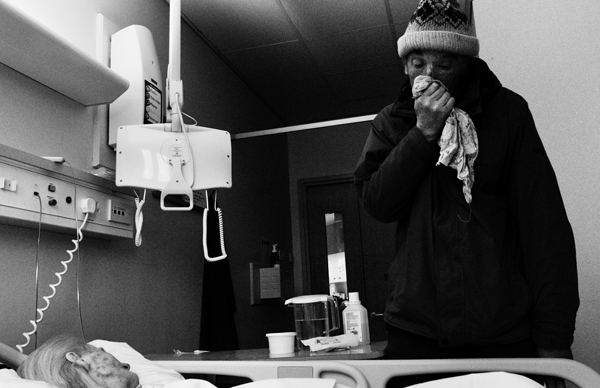
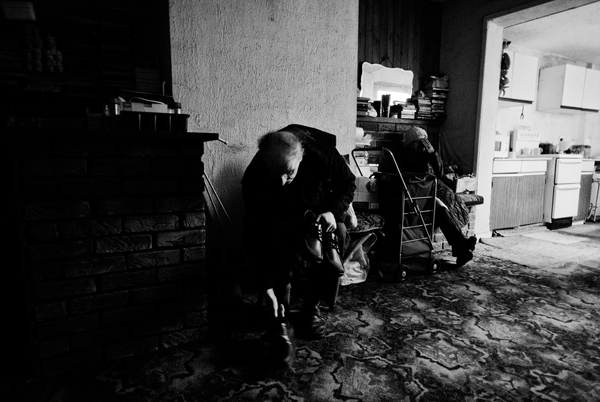
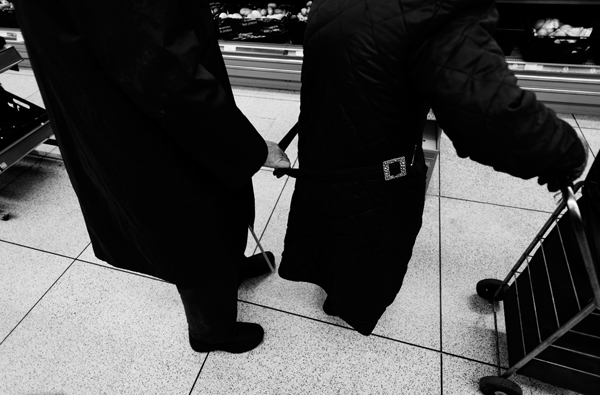
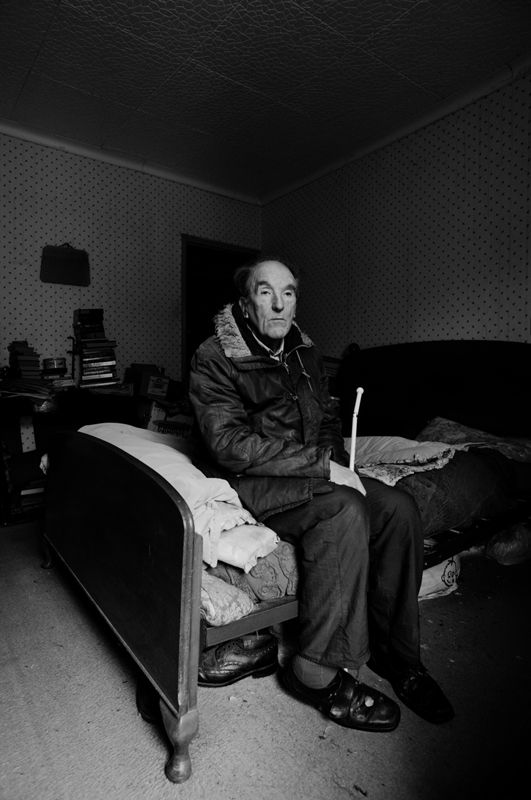
    Recently Darren brought to my attention a guy in the UK doing something extraordinary. A project with images so emotion filled and powerful, images that reach into the souls of the people in the photographs and brings them out in the image. I reached out to him and asked him for an interview and he was most gracious to agree!

    So I’m proud to share this with you. Jim Mortram and his Small Town Inertia project. The interview is a bit long, but I promise you it’s worth it as we cover a gamut of topics and look through many of his images. If you want to learn about doing photography not as a technician, but as a human being. Photography for the sake of just doing photography and capturing people’s stories – I encourage you to listen.

    Jim-Mortram-interview-07

    Watch and learn as Jim and I discuss a ton of different photography related things, and a few more deeper philosophical, life things. There’s some good lessons in here – make sure you watch the whole video. Tell me what nugget of information you get. Here are a few of the topics and highlights of our chat:

    • shooting with your heart first and your camera second
    • listening to people, “shut up and listen”
    • creating a legacy of the people in your photos (not subjects, listen and find out why I’m not using that word)
    • how he defines himself not as an artist but as a conduit or facilitator to get people’s message across
    • that it’s about mutual trust between photographer and person being photographed, trust is key to the afore mentioned success
    • thoughts on gear and why Jim believes everyone should be forced to start with a crappy camera – by law
    • get a bad camera and learn to get the best out of it, then advance – cameras are just tools
    • a camera doesn’t give you any special rights or power – the rules of behaviour still apply

    “be nice, be attentive, give a damn, listen”

    Jim-Mortram-interview-05

    More nuggets from Jim Mortram:

    • be really interested in people, their hopes and dreams – otherwise you’re just going to get a picture of someone looking at a camera
    • motives –  if you start looking for accolades it will change the relationship with that you do – photography
    • the story doesn’t stop when you’ve pressed the shutter or edited the images
    • why posting photos on Facebook just to get likes isn’t why he does photography, he just wants to be himself and why you want to do the same
    • think about the things that matter to you the most before starting any long term projects, especially if it involves another person

    “I talk more than I shoot and I listen more than I shoot” – Jim Mortram

    We reference a guy named Simon in the video – here are some images of Simon. You can read about his story on Small Town Inertia here.

    Jim-Mortram-interview-06

    Jim-Mortram-interview-24

    Jim-Mortram-interview-25

    Jim-Mortram-interview-21

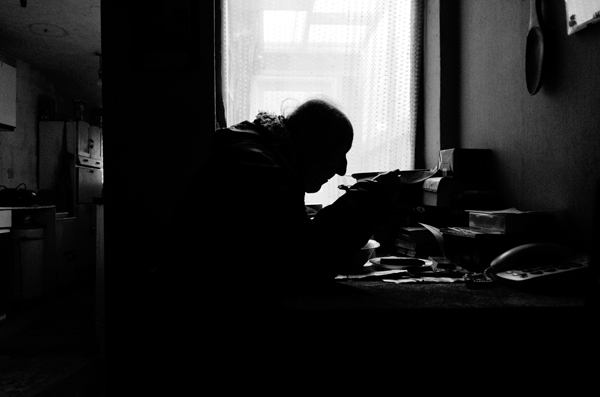
    Another one of the stories on Jim’s site that touched me was that of David. A man who lost his eyesight in a tragic accident and depended entirely on his elderly mother for everything, and then suddenly she was gone. The story of his struggles are very real and gut wrenching and I was pulled in to read more. Obviously others have too as a fundraiser was done to buy David a book scanner so he could “read” again. See if his image and story speak to you as well – read more on David here (he is in the image the top of the article also)

    Jim-Mortram-interview-14

    Final goodbye

    Final goodbye

    Jim-Mortram-interview-18

    Following Mother

    Following Mother

    Jim-Mortram-interview-20

    Find Jim online and connect with him. Tell him is his images spoke to you as they did to me.

    • Twitter @JAMortram
    • Flickr for more photos by Jim
    • Small Town Inertia for more stories and photos
    • Small Town Inertia blog on Tumblr

    Links to other interviews with Jim:

    • Out of the Blackness – United Nations of Photography
    • BBC News in Pictures

    Read more about respecting the people you photograph here on dPS.

    Trailer that we mention in the interview where Simon talks about wanting a camper van (RV) and his eyes light up, bringing me and Jim to tears.

    Small Town Inertia : A Prison Without Walls : Teaser_Full from J A Mortram on Vimeo.

    A PRISON WITHOUT WALLS

    Si shares, in his own words, his ADHD, his experiences of life confined by parameters and self medication, and his endurance, fears and dreams whilst living on the fringe.

    ‘A prison without walls’ was one of a selection of short documentary films commissioned The New British and screened Friday, 27th of September, 2013 at the Victoria and Albert Museum, London, United Kingdom.

    The post Interview with Jim Mortram – Small Town Inertia by Darlene Hildebrandt appeared first on Digital Photography School.


    Digital Photography School
  • Why Prints Matter to You as a Photographer

    wall-prints-02

    Digital has done wonders for our industry – it allows us to learn faster, it gives us technological opportunities that we could have only wished for in the “film” days and it has made completely new styles of photography possible. There’s no doubt that the digital shift has been a positive one.

    While we embrace all of this change that digital has brought and explore the new depths of technology, I think it’s important to keep one foot in the “analog” world, at least one area – the physical print. The print versus digital discussion is a very controversial topic among professional photographers, and certainly everyone will have their own opinion. Regardless of where you fall in this matter, I’d like to share some thoughts and explain why I feel prints matter for us as photographers and for our clients as consumers of photography.

    There are three topics of discussion that I will explore:

    1. Why printing is important for you as a consumer of photography
    2. Why offering printed products as a professional photographer is crucial to your long-term success
    3. How printing your work is the best way to grow as an artist

    The Nostalgia of prints

    Forget about the fact that you’re a photographer and take your attachment to professional quality imagery out of the equation. Printing as a medium is one of the most meaningful ways that you can enjoy photography. Here are a few reasons why the printed image is so important to you as a consumer of photography.

    Importance printing products 01

    A print will always be there

    Digital media go out-of-date and out-of-style, and the files that you have stored in these digital formats will also go out-of-style and become unaccessible. Imagine having your vacation photos from 1995 on a 3.5″ Floppy Disk – how might you access those “digital files” today? Of course this is hard to imagine because digital photography wasn’t around in 1995. More recently then, consider the fact that for years you have used DVDs and CDs to store digital files and now that Apple has decided not to install optical drives into their computers anymore, that medium is slowly starting to disappear. You’ll soon have a generation of images that were stored on discs that may not even be (easily) accessible. On the other hand, if you made prints as well, then these changes in technology wouldn’t have a negative impact on you being able to continue to enjoy your images.

    A print doesn’t need to be enjoyed on a screen

    Being “in the moment” and away from technology is not a luxury that you get to enjoy all that often in today’s digital world. There is something nostalgic and romantic about being able to curl up on the couch with your children and look back at a wedding album, or old family photos, without having to flip open a laptop and press the “next” button dozens of times. When you look at a picture that is printed, you are free of distraction. There is no e-mail bouncing up in the bottom of your screen and no Facebook “dings” going off in another window. You can enjoy the picture and the story it tells in a quiet, distraction-free moment.

    A print lasts a lifetime, and often even longer

    Physical prints give you heirlooms to pass down as you move on in your life. Often you are not recording (capturing a moment) and printing (preserving the moment) for today, but instead for tomorrow, for your children and your children’s children. Passing down a box of hard drives doesn’t exactly have the same appeal, does it?

    Professional photography – why printing is important

    Importance printing products 02

    As a professional photographer or aspiring professional, it’s important to consider offering printed products to your clients. Besides the nostalgia, the emotional and logical reasons for enjoying the printed image as described above, there are also many business benefits to being a full-service photographer. Here are a few:

    • Prints can separate you as “great” photographer, apart from the “ok” photographers. It’s easy to make an image look nice at a low-resolution on the web, but to make an image look great in print involves a whole other skill set.
    • Printing your images increases your perceived value as a photographer. Everyone has digital files sitting on hard drives or memory cards. To offer a beautifully finished printed piece shows that you care about your photography and that you put effort into the presentation of your imagery for your clients.
    • Making prints for your clients shows that you care about their customer experience and in delivering their images in their finished form, It also shows that you are a full-service photographer, when many these days are not.
    • As a photographer, if you are trying to make a living with your camera, offering printed products gives you the opportunity to make additional income as opposed to just making your money from your session fees.
    • When you make a print for a client, it means that you control the output quality and the finished product and you don’t leave it up to them to produce their own prints from a consumer-grade lab. Quality control is important for a professional!
    • Ultimately, when you offer prints and other professionally produced physical products, you are supporting the industry (i.e. the labs, the album makers, etc.) who are constantly supporting photographers by providing educational opportunities, sponsorships, trade shows and so on.

    Printing as a teaching tool

    Importance printing products 03

    We’ve explored why printing is important for you as a consumer of photography and how you must consider offering printed products to ensure long-term success as a professional photographer. But, now I’d like to take another side of the argument: how printing your work can actually be the best learning tool to help you grow as a photographer and artist.

    A print will always be the most realistic representation of an image as it is the only medium that is truly tangible and actual. This will ultimately be the best way to judge your work as an image isn’t truly finished until it’s in printed form.

    It’s easier to judge an image when it’s printed – you can examine it closer, look at it longer, and see it in different contexts. I have been taught that a great way to judge and find improvement in an image is to print it, display it somewhere that you pass by frequently, and look at it often. Try changing its orientation and displaying it upside-down for a while. You will often see things that you wouldn’t otherwise notice if you didn’t analyze it to that extent. This is a much more effective exercise than staring at a computer screen for hours on end.

    Importance printing products 04

    Consider that the process itself of creating a print will help you grow as a photographer because it gives you a greater appreciation for the bigger picture. At the same time, the exercise of getting in close, fine-tuning and perfecting an image for print will show you a lot about your work that you may otherwise have missed if you were just putting together a quick online gallery or contact sheet.

    Lastly, a print is easier to pass around and get objective feedback from others. There is no limitation or interpretation that makes digital photography subjective – variations in monitor size, calibration, room lighting and so on. You ultimately can’t argue with print quality – it is either a good print or not – so the discussion and feedback ends up being more about the image than about the presentation.

    Becoming a full-service photographer

    When you offer a printed product to your clients as a photographer, you make yourself about more than just pictures. You are now about the preservation of moments and in ensuring that your work, and your clients’ memories, will be guaranteed to last a lifetime.

    wall-prints-04

    My next article and discussion in this series will be geared towards the mechanics of exactly how to actually sell prints and make your photography business a full-service studio as opposed to being a shoot-and-burn photographer. Check back soon!

    The post Why Prints Matter to You as a Photographer by Bryan Caporicci appeared first on Digital Photography School.


    Digital Photography School