Category: Photography

  • Using Focus Creatively with Food Photography

    There are ways to use selective focus, or shallow depth of field, to completely control how you look at an image. Selective focus is using a large aperture, like f/4.5 or wider, to show only a small part of your image in focus. You can control where you want your viewer to look in your image by using this technique.

    Eliminate Distracting Elements

    If you have a potentially busy scene or environment, you can use selective focus to calm things down a bit and get your viewer to look where you want.
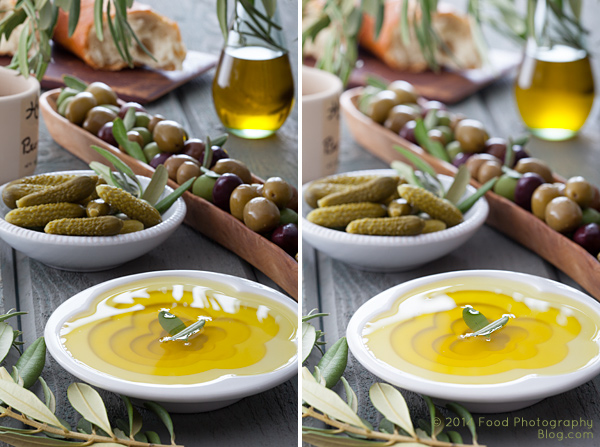
    Selected Focus Olives

    The left image was shot at f/16 while the right image was shot at f/5.6

    When you compare the two images above pay attention to what you are looking at first, and how your eye moves around the images. There’s a lot going on in the image on the left. You really don’t know where to look at first. In the image on the right your eye goes right to the olive oil in the front, which is exactly where I wanted you to look. I wanted to make sure you didn’t get distracted by the text on the jar on the left side, so I focused on the garnish in the olive oil and blurred everything else out. I wanted the first read to be the olive oil, then all other items become secondary. Your eyes naturally look at what is in focus in an image.

    Which Element is the Hero?

    You can use focus in some shots to clearly show which element the image is about – this element is your hero element. In food photography we call this the hero food.

    Who Is Your Hero

    In each shot the focus is shifted to change which jar of pickles is the hero jar, the one I want you to look at.

    Here are some pickles that I made. You can use selective focus to tell the viewer where they should be looking. If this image was for a recipe of dill pickles, then you would use the image on the left. If this image was for a recipe on golden pickled beets, then you’d use the image on the right.

    Pick Your Focus Point

    Pick Your Focus

    The image on the left was shot at f/8 while the image on the right was shot at f/4.5

    I focused on the dill pickle laying on top of the cut pickles. In the left image you really can’t tell where my focus point is so your eye goes all over the place. In the image on the right, it’s a little more obvious. My hero food is the cut dill pickles.

    All the images including pickles were styled by my good friend and prop stylist, Amy Paliwoda. We work on a lot of jobs together. Amy is always talking about using props to tell your story. It’s my job as the photographer to make sure I use the proper aperture to have the props help with the story, not cause distractions. With everything in focus, a simple prop can take away from your story. Once you pick your focus, take several shots at different apertures to see which one works the best to tell your story.

    When One Aperture Isn’t Enough

    Now I’m going to show you a technique I use a lot. I take two images at different apertures, with different depth of fields and then I composite them together in Photoshop by using layer masks. I use this technique when I want the background to be more out of focus, yet keep the food or product in focus.

    I have to mention that I ALWAYS shoot with my camera on a tripod. This type of compositing would be very difficult with files that were handheld.
    Two Images for Composite

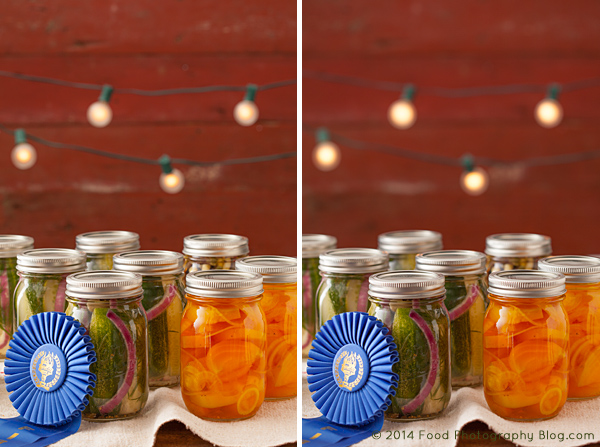
    The image on the left was shot at f/8 and the image on the right was shot at f/4.5

    For this image I really like how the jars look at f/8, but I prefer the background shot at f/4.5, so I’m going to put the two together in Photoshop by creating a layer mask and put the best background, on top of the preferred foreground.

    Making a Layer Mask

    There are many ways to do the same thing in Photoshop. My favorite way to do a composite of multiple images is to use layer masks.

    In the final composite I will be putting the background of one image onto another image, and also making a duplicate of one light bulb and pasting it onto the background.

    I first open both files that are to be put together in Photoshop.

    Next, I copy the image with the desired background and then paste the entire image into the file with the jars that I like. Now I have one file with two layers.
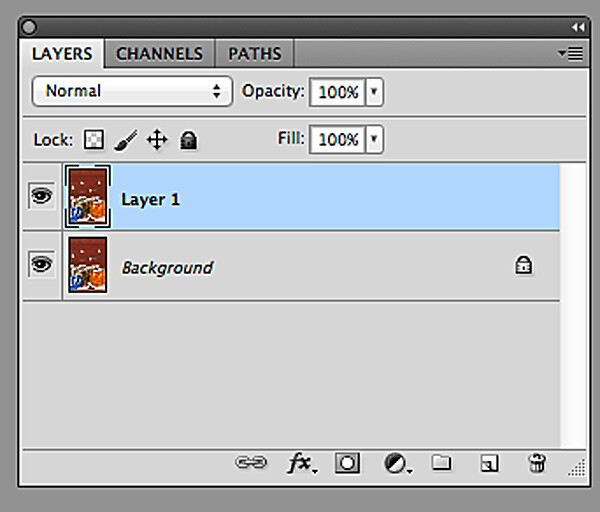
    Two Layers

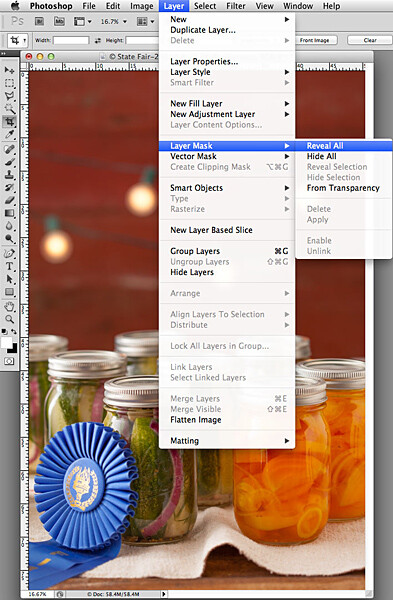
    Now I need to make the top layer into a layer mask:

    1. Go to the top menu
    2. Click on “Layer”
    3. Scroll down to “Layer Mask”
    4. Scroll over to “Reveal All”

    Converting Layer Mask2

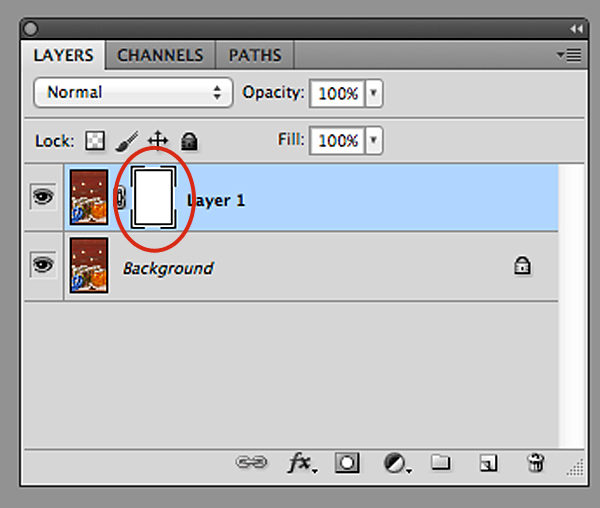
    Now, look in your layers palette. Your image should look similar to what you see below – the two files, with the top one having a white box next to the image. That is the layer mask.
    New Layer Mask

    You can see the new layer masked circled in red.

    To start working inside the layer mask, you have to use the brush tool. Then make sure your color palette is set to black on top of white for masking through the image. If you mask too far in one area, you can correct it by reversing the color palette to white on top of black and then go back over the area.

    In this image I am using a soft edge brush (brush set to a hardness of “0″) for masking through the foreground of the top layer so that only the red background with the lights are left. The image below is how my layer looks mask work completed.

    Background Layer Mask

    This only took me a few minutes to create in Photoshop.

    Now for the final composite below. I also added some text, then copied and pasted an additional light bulb in Photoshop to balance things out in the background.

    The additional light bulb was also turned into a layer mask so that I could blend the edges of the image I pasted on top of the file.

    Final Composite

    Final Layers

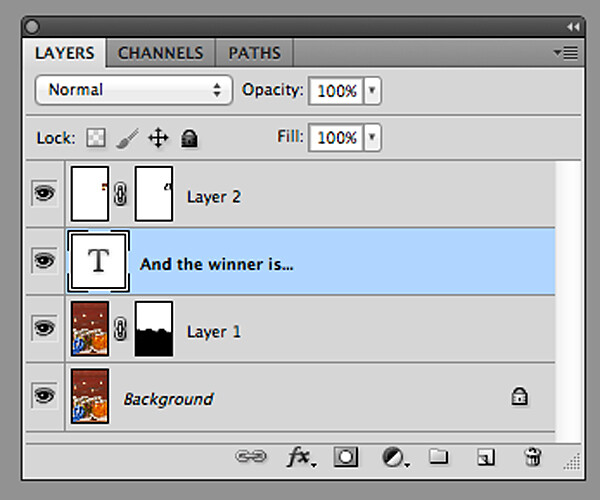
    Here is what all the layers look like. Layer “2″ is the extra light bulb. If this was a file with a lot of layers, I would name each layer so that I knew what they were. In this case it’s easy to figure out, so I didn’t do that. You can see in the mask of layer “1″ that the bottom half of the frame is black. This is the part of the image that I masked.

    So, next time when shooting on a tripod, experiment a little and take your shot with multiple apertures to bracket your depth of field, and maybe you’d like to composite a couple of files together.

    The post Using Focus Creatively with Food Photography by Christina Peters appeared first on Digital Photography School.

    Digital Photography School

  • The Contest Winners of the Tamron Lenses Are…

    SP 17 50MM F

    Tamron SP-17-50MM F/2.8 Di II VC

    18270VCPZD

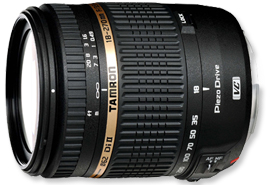
    Tamron 18-270 Di II VC PZD

    70300VC

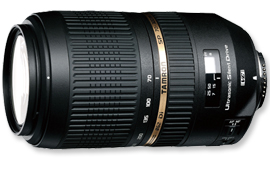
    Tamron SP 70-300 Di VC USD

    A HUGE Thank You to everyone who entered our recent competition to win one of three lenses from our friends at Tamron.

    The response was absolutely AMAZING with over 1,300 entries! In fact, it was so great that we here at Digital Photography School decided to add a new category of winners – Honorable Mentions – and provide each Honoree with a dPS eBook of their choice. But now, on to the winners.

    Here are the 3 winners of the competition:

    • Caleb Ward wins the Tamron SP-17-50MM F/2.8 Di II VC
    • EthanKPhotography wins the Tamron 18-270 Di II VC PZD
    • Patrick Kulwicki wins the Tamron SP 70-300 Di VC USD

    A note to each of our winners:

    Caleb, we value your service and do hope that you can and will change the lives of those in need.

    Ethan, keep up the great work, and we also hope that you will become a professional photographer.

    Patrick, hopefully, this is the beginning of much good luck.

    Honorable Mentions:
    Bartosz Szkatula, Juli Vz, Igor Danajlovski, Dylan Balagtas, Todd Carpenter, Joseph MacDonald, Randi Willett, Aniqe, Henry Greyner, Jennie Hallock, Bram Smits, Ioan Stoev, Aly Wonderland, Michelle F and Dana.

    On a side note: Alison Hopkins, we hope you’ll take this little mention as a sign and follow your dreams.

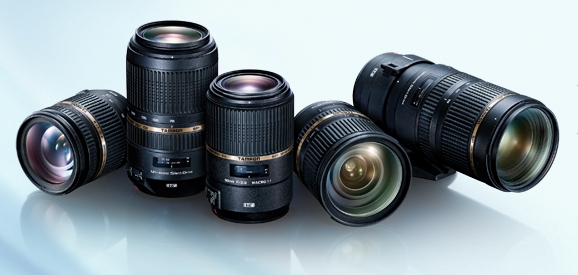
    Tamron Lenses for Post Graphic  Cropped

    We were all thrilled with the entries – you tugged at our heartstring, made us laugh, made us smile, but most importantly, you made us keep wanting to do more of what we are doing; providing you quality information and guidance to become a better photographer. We were so pleased to see that you came from every part of the world, young adults to grandparents, and everyone in between. Thank you all for your entries.

    Now, for those of you that didn’t win, Tamron has invited ALL dPS readers to download their new eBook series! You can find those HERE.

    For all of you residing in the USA, when you do purchase your next select Tamron Lens, please make sure to take advantage of the Tamron Rebate. Find additional information HERE.

    *Current offers end June 30, 2014. US RESIDENTS ONLY.

    Winners will be emailed with details of how to collect their prize. Please make sure to look for our email. Thanks you again for all the wonderful submissions and to Tamron for sponsoring this competition.

    Tamron logo

    The post The Contest Winners of the Tamron Lenses Are… by Darlene Hildebrandt appeared first on Digital Photography School.

    Digital Photography School

  • Are You Guilty of these 5 Over-Processing Sins?

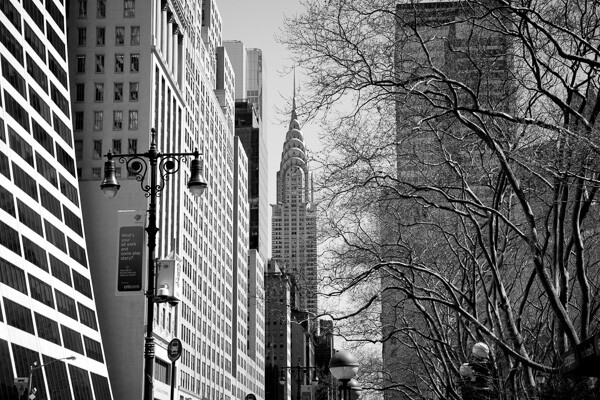
    Chrysler Building

    Chrysler Building

    My most common critique when looking at digital images is that they look over-processed. It is so easy to do this and such a common mistake, that it is important to understand the main mistakes that photographers make when retouching their images.

    Keep in mind that I am not referring to images that purposely are made to look like fairy tales or use creative color for a specific purpose, but I am referring to heavy handed post-processing when it is not necessary.

    Good photographs do not make you notice the post-processing first. Good post-processing is subtle, aims to stay out of the way and not become the focal point of the image. But you need to be careful not to overdo it. With a program like Adobe Lightroom, it becomes so easy to move the sliders and increase the contrast and saturation significantly, and before you know it the image does not resemble a photograph anymore.

    So here are the most common mistakes that I see when people over-process their images.

    **This article is assuming that you shoot in RAW. If you don’t, I highly suggest that you do. Yes, it makes the files larger, but to get the highest quality image and have the most latitude to process your images well, it is necessary to shoot in RAW.

    1. Over sharpening

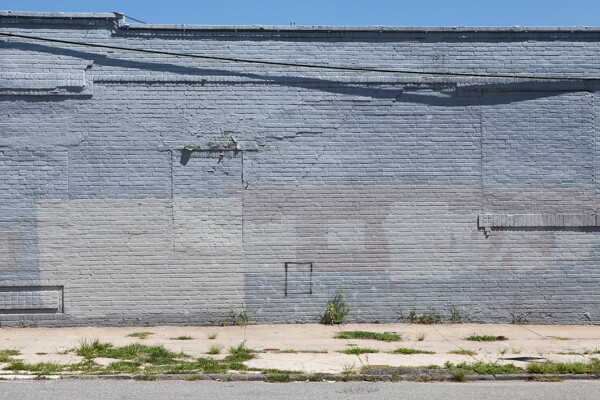
    Wall, Gowanus

    Wall, Gowanus.

    Over sharpening is one of the most rampant problems for digital photographers. The reality is that most digital photographs need very little sharpening, if any. If the image is sharp when it is captured, meaning there is no handheld camera shake, the correct aperture is used, and the most important element is perfectly in focus, then you are a majority of the way there for sharpness.

    You do not want the sharp areas to look like they are jumping off the print. You want them to be sharp, but more importantly you want them to look realistic. The second that your sharpening makes the photo even slightly unrealistic, then you’ve gone overboard. When in doubt, always keep in mind that it is much better to be slightly under sharpened than over sharpened.  I have many images that were taken with a good digital camera and sharp lens with the perfect settings, and they don’t need any sharpening at all. None. This is not every image, but some.

    Also, always make sure to sharpen your image after you have sized it to the final print size. It is a bad practice to sharpen your image and then convert it to a different size.

    2. Over colorized images and heavy-handed White Balance changes

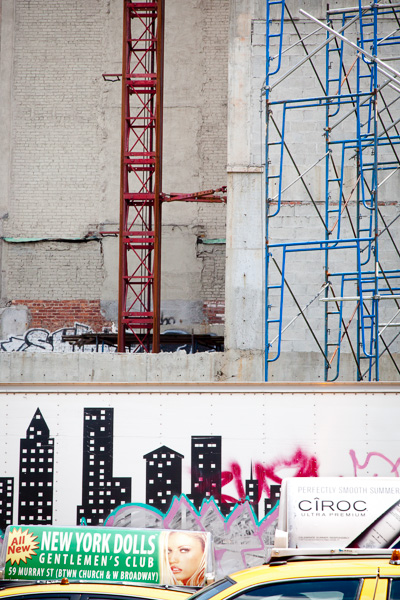
    Layers of a City.

    Layers of a City. Strong colors but not too strong or unrealistic.

    In my opinion, color is the toughest aspect to get correct in digital photography. It takes a lot of experience to become skilled at working with color.

    To be able to do good color work, it is vital to have a solid monitor and a color calibrator. You should calibrate your monitor every few weeks. If your monitor’s colors are off, then what looks good to you is not how the image will look to others when you share it on the web or when you create a print.  While there are a lot of great options for monitors in every budget, I prefer the NEC SpectraView line and an X-Rite i1 Display calibrator.

    Color is subjective. I might prefer realistic and subtle colors, while another person might prefer dreamlike and surreal colors. That is fine, but always be careful about overdoing it with color. Over saturating an image might make it more noticeable at first, but it can easily look heavy-handed and fake.  Always use caution when pushing the saturation slider to the plus side. Sometimes this can work when done a slight amount, especially in hazy light, but too often it will make the colors in the image look unrealistic.

    In addition, some people also frequently go overboard with tinting images. It’s the Instagram effect. For instance, if all of your images have a warm or red tint, then there’s a good chance you are being too heavy-handed.  This is not true for all cases, of course, but it is important to keep this in mind. Tinting, especially slightly, can be very important, but not every image should look red. Always pay attention to the White Balance of an image and fiddle with it. See how the image will look both without a tint and with one, and print out test images. This will train your eye to see  color.

    Also, when you do a lot of editing to an image, such as when increasing the contrast, that can make the colors look too strong. It often helps to pull back the saturation slightly in these cases.

    3. Too much contrast

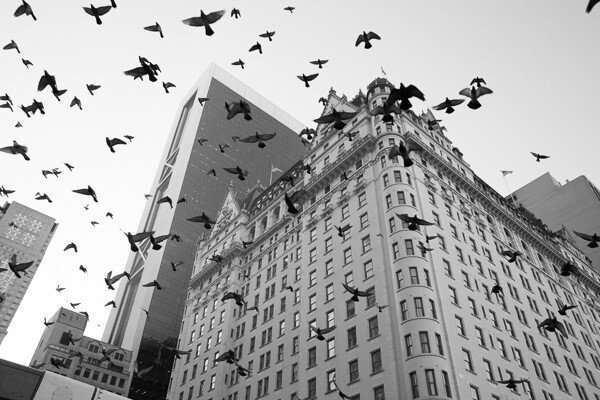
    Plaza Hotel

    Plaza Hotel.

    Most cameras will purposely capture images with flat contrast in RAW settings, so often some contrast increase is needed. However, it can be easy to overdo it and add too much contrast to your images. This is a problem that I have frequently, and I often have to catch myself and pull back the contrast.

    This is another issue where balance is important. There is a very small range where the contrast is perfect. Too little and your image will look flat; too much and it will look fake. Creating images with too much contrast is a very frequent problem, especially with black and white images.

    Sometimes, instead of increasing the contrast, you really just want to turn the darkest grays into black by lowering the blacks slider. You will find that this will give you the effect that you want without overdoing the general contrast of an image.

    Finally, pay attention to the light sources in your image, because they will determine how much contrast is needed. If the sun is shining directly on your scene, then much less contrast will be needed, because the natural light will be providing the contrast. If the sun is behind your image, then you will often need to darken the blacks or increase the contrast, unless you want to emphasize the haziness of the scene. Shooting into the sun, then not increasing the contrast much is how many of those gorgeous, hazy engagement and wedding photographs are done.

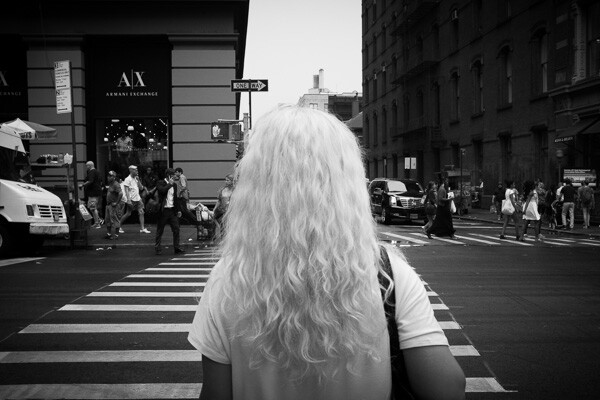
    4. Too much vignette

    White Hair, SoHo

    White Hair, SoHo.

    I love vignettes. They can look great and be very important to keep the eyes within the scene. However, be careful about overdoing it, because it can easily look fake and over-processed. That being said, some photographers use harsh vignettes as a style and it looks fantastic, so take this tip with a grain of salt. Use it when needed, but be aware of overdoing it.

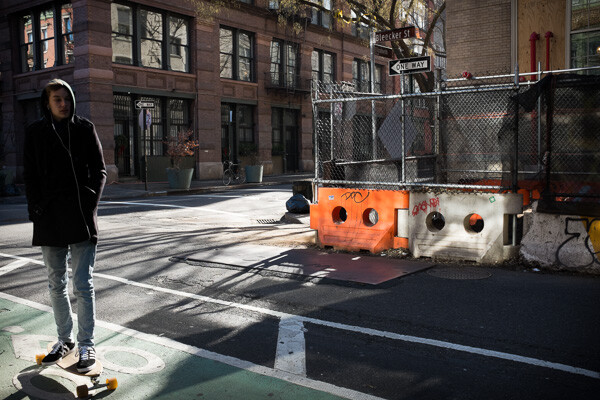
    5. Not getting the photo right in the camera

    Skater, Bleecker Street

    Skater, Bleecker Street

    I find that the most common situations where over-processing occurs is when the image was not taken correctly in the camera. Perhaps the lighting at the time of the capture wasn’t ideal or the exposure was off. It’s easy to think you can just fix this in post-processing, and sometimes you can, but it’s hard and it’s not the same as getting it right in the camera. The image will look different if it is captured perfectly versus captured with the wrong settings and then fixed. I find that in their quest to fix poorly captured images,  this is when photographers will most often get heavy handed with post-processing.

    If you go out to capture the image at the right time of day, in the right lighting, and get the exposure and sharpness correct, then you will only need to do a very subtle amount of processing to get the image perfect. This is the recipe to create a gorgeous print, and while it’s not always possible, it is what you should be aiming for. It is so much easier to create a good image this way.  If you are spending an hour to fix an image then most likely something was wrong with the image to start with.

    True photography starts with the camera and post-processing is meant to improve the image, not fix it.

    How do you feel about this topic? Are you or have you been guilty of any of these? Do you have others you’d add to this list? Please share in the comments below.

    The post Are You Guilty of these 5 Over-Processing Sins? by James Maher appeared first on Digital Photography School.


    Digital Photography School

  • Fujifilm X-T1 Mirrorless Camera Review

    Supplied by Fujifilm

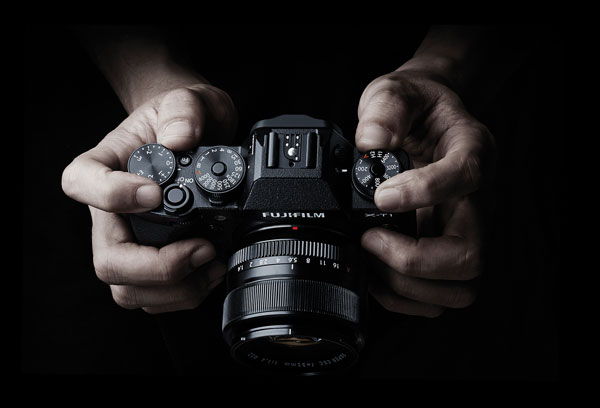
    The weather resistant Fujifilm X-T1 Mirrorless Camera

    I was thrilled when Fujifilm Canada sent me their brand new X-T1 to play with just over a month ago. Along with the camera body itself they sent me three lenses including the XF 55-200mm F3.5-4.8 R LM OIS, the XF 35mm F1.4R and the XF 60mm F2.4 R macro lenses. Upon removing these items from the box I was immediately impressed with the professional fit and finish of the camera body, lenses and lens hoods. Larger companies like Canon could learn a thing about lens hood design from Fujifilm. While the camera body is weather resistant, none of the lenses currently available at the time of this review shard that characteristic.

    Electronic viewfinder

    Mirrorless cameras seem to be all the rage these days and for good reason. Leaving the mirror out of the light path allows for smaller, lighter, less mechanically complex cameras to be built. But, without a mirror to reflect light into the viewfinder, mirrorless cameras are dependent on providing a viewfinder image via an electronic viewfinder (think of a tiny monitor). Past attempts at electronic viewfinders by Fujifilm and other manufacturers has generally resulted in sub-standard results due to laggy (slow to respond) electronic viewfinders with hard to view results.

    Supplied by Fujifilm Canada

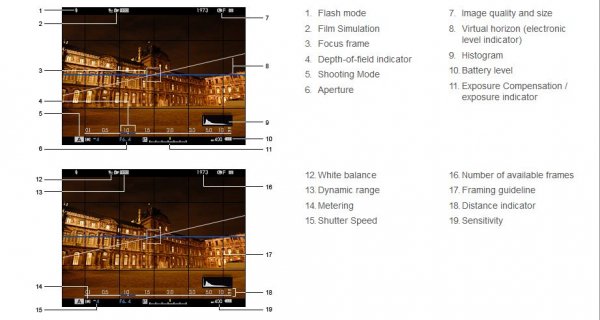
    Fujifilm Viewfinder Layout

    The X-T1’s viewfinder suffers from none of these problems. The viewfinder is large, bright and very responsive. I normally shoot with one of Canon’s pro cameras and the X-T1’s viewfinder was, surprisingly, a tiny bit larger. An advantage of the electronic viewfinder is that extra information can be superimposed over the image, allowing photographers to make real-time adjustments to exposures before the image is made by glancing at a histogram, instead of having to wait until after the photo is made as is the case on a standard digital SLR camera.

    Autofocus

    Another issue plaguing many mirrorless cameras has been their autofocus performance. Fujifilm has tackled this head-on by providing 49 focus points spread out across the entire image and those focus points are adjustable in size so that you can customize them based on the type of subject you are photographing. Where most mirrorless cameras rely on a type of autofocus system detecting contrast to determine whether the image is in focus or not, the central nine focus points on the X-T1 use the faster, more accurate phase modulation focus system for superior results.

    Image quality

    I found the images produced by the sensor of the X-T1 to be especially nice; low in noise and more resolution than I was expecting from a 16 megapixel APS-C sized sensor. That could be due to the fact that the X-Trans CMOS II sensor in the X-T1 uses a unique arrangement of colour filters which supposedly eliminate the need for an optical low-pass filter thereby resulting in increased resolution and perceived sharpness.

    © Paul Burwell Photography

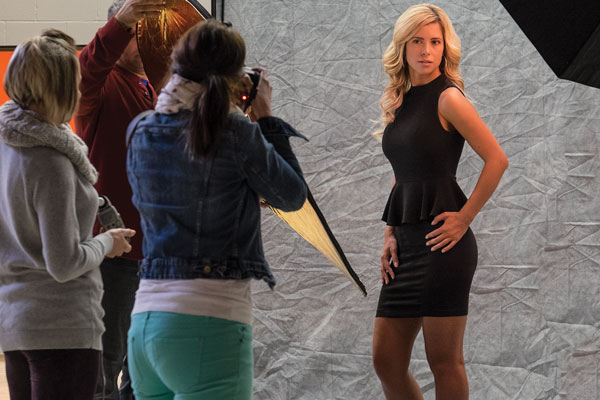
    Students photographing model – ISO 3200 – XF55-200mm F3.5-4.8 R LM OIS Lens
    1/25 at F6.4, ISO 3200, 95mm

    WiFi

    The X-T1 also has built in WiFi capabilities that allow you to download a free app for your smart device. This app allows you to remotely control your camera from a distance. A nifty application that requires additional hardware on most other current cameras to achieve similar results.

    Supplied by Fujifilm

    Controls on top of the camera

    Camera controls

    What I became especially fond of while working with the X-T1 is the controls for aperture, shutter speed, ISO and exposure compensation. Aperture is controlled by rotating a ring on the lens, just next to the body. ISO, shutter speed and exposure compensation are all controlled via dials on the top of the camera. Reminded me of some of my old-school SLR cameras, but it took me virtually no time to adapt from the Canon cameras I’ve used for the last 20 years or so.

    Size and weight

    The camera body itself is extremely light-weight but fit comfortably in my somewhat gigantor hands. I suspect adding the optional battery grip and/or hand grip would make it even better and of course battery grips always help with the making of vertical photographs. That said, most of the controls were easily accessible and with the body itself weighing in at just 440g (15.4 ounces), it is a camera that I could easily carry and shoot with for extended periods of time with little or no hand/shoulder/arm fatigue setting in. Even with the 55-200mm lens attached, the weight was just 1020g (36 ounces).

    Customization

    Another pro-camera feature I was thrilled to find on the X-T1 was a total of six different completely configurable multi-function buttons. This allowed me to fine-tune access to features like selecting focus points, depth-of-field preview, macro mode, autofocus mode and white balance so that I could program the buttons most convenient for me to the functions I use most.

    © Paul Burwell Photography

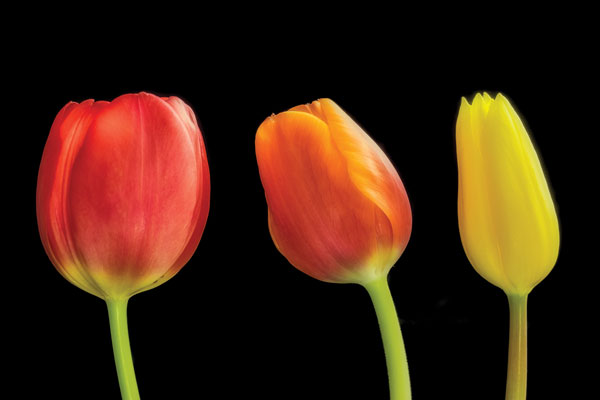
    Studio Tulips – XF60mm F2.4 R Macro Lens
    5.3 Seconds at F8.0, ISO 200, 60mm

    Dislikes

    If you’re wondering if there is anything I didn’t like about the camera, there is. I strongly dislike the four-way controller on the back of the camera. Where the other buttons on the camera offer tactile feedback when pressed, that feedback is absent on the four-way controller. Since I needed to use the four-way controller to select different focus points, I was constantly using (or trying to) the four-way controller. I found it virtually impossible to use without glancing towards it (thus removing my eye from the viewfinder and missing a chance at retiring via a photo of a brief appearance by Sasquatch if that circumstance had occurred) and continually frustrated by it. Living where I live in Canada and therefore in cooler temperatures, it is absolutely impossible to use with any sort of gloves in conjunction with the four-way controller, and on a mostly professional-feel camera like this, it was a bad design or manufacturing decision.

    Another quality issue on the camera body is the door that slides opens to allow for the removal of the SD memory card. It feels ridiculously flimsy and I felt lucky to be able to send the camera back to Fujifilm with the door intact because it always felt like it was about to break off.

    © Paul Burwell Photography

    Red-breasted Nuthatch – XF55-200mm F3.5-4.8 R LM OIS Lens
    1/800 at f4.8, ISO 800, 200mm

    Overall

    Overall though, this camera is a gigantic win for Fujifilm in my opinion. I’m a wildlife photographer by nature and for the most part, that’s the type of shooting I did with the camera. I was suitably impressed with the autofocus, and was thrilled with the quality of the lenses and sort of images that the sensor produced. Regardless of the situation (high or low ISO), the images were always impressive and the camera did a great job at judging the white balance although I always shot in RAW mode just to give me that extra flexibility in case the camera got in terribly wrong.

    Need for longer lenses

    For a wildlife photographer though, Fujifilm’s biggest weakness is the lack of larger lenses. The biggest lens I could get my hands on was the 55-200mm (84-305mm equivalent on a full-frame camera). While that’s okay for casual wildlife photography, it stops well short of “real” telephoto focal lengths. For instance, just a couple of days ago I was out at my favourite marsh with my camera, 500mm lens with two teleconverters attached (2.0x and 1.4x) for a grand total of 1400mm of image magnification. However, Fujifilm representatives tell me they have plans for bigger glass in the future and if that comes to be, I know that it would make a tempting package for me to have in my kit.

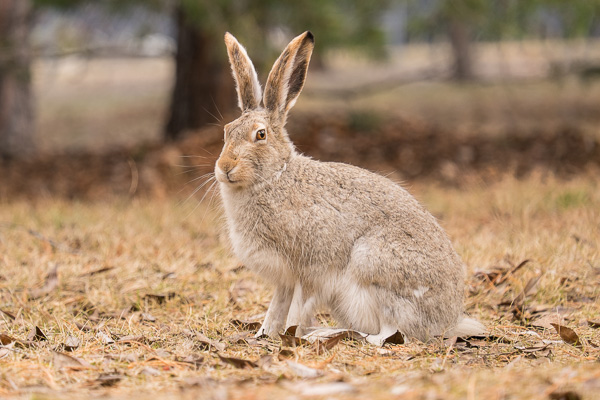
    Snowshoe Hare - XF55-200mm F3.5-4.8 R LM OIS Lens 1/200 at f 4.8, ISO 400, 200mm

    Snowshoe Hare – XF55-200mm F3.5-4.8 R LM OIS Lens
    1/200 at f 4.8, ISO 400, 200mm

    Room for improvement in some areas

    Another area that still needs some work is the autofocus system. While the X-T1 is a great improvement over other mirrorless systems I’ve tried, it still suffers from performance issues with moving subjects rapidly changing distances between shots. Theoretically, the X-T1 can shoot 8 frames-per-second in continuous drive and focus modes. However, if the subject you’re focused on is rapidly moving towards you, the camera’s processing slows down and I was lucky to get 2 or 3 frames per second.

    An additional improvement I’d like to see is an expansion in the number of phase-detect autofocus points. Nine out of forty-nine isn’t a bad ratio, but more would be better. I love the control over the size of focus points, but having more of the high-performance phase-detect points would help a lot too for composition on moving subjects.

    For accurate exposures, I love having a live histogram overlaid on my image in the viewfinder. However, it was frustrating to have that histogram disappear when I half-pressed the shutter button to focus on my subject. While in continuous focus mode, having the histogram remain visible would help me make better exposures overall.

    © Paul Burwell Photography

    Red-breasted Nuthatch – XF55-200mm F3.5-4.8 R LM OIS Lens
    1/800 at f5.6, ISO 400, 200mm

    Final word

    Overall, I highly recommend this camera. I teach hundreds of photography students each year the basics of operating their interchangeable lens cameras. I can confidently state that a student with this camera system would probably find learning the basics a bit easier than with a standard digital SLR camera system if for no other reason than the live histogram available in the electronic viewfinder and the easy to access, logically laid out controls. Further, for the seasoned user, the X-T1 body and lenses make a great combination for producing high-quality professional results.

    The post Fujifilm X-T1 Mirrorless Camera Review by Paul Burwell appeared first on Digital Photography School.

    Digital Photography School

  • How To Finish the Photography Project You Started

    It’s inevitable that, at some point, your motivation will lag on that photography project you started. Whether you’re working on a popular photography project, such as taking a photo every day for a year (the 365-day project), walking the streets shooting strangers (the 100-strangers project), or working on a custom project you dreamt up…no matter what, one day you can Continue Reading

    The post How To Finish the Photography Project You Started appeared first on Photodoto.


    Photodoto

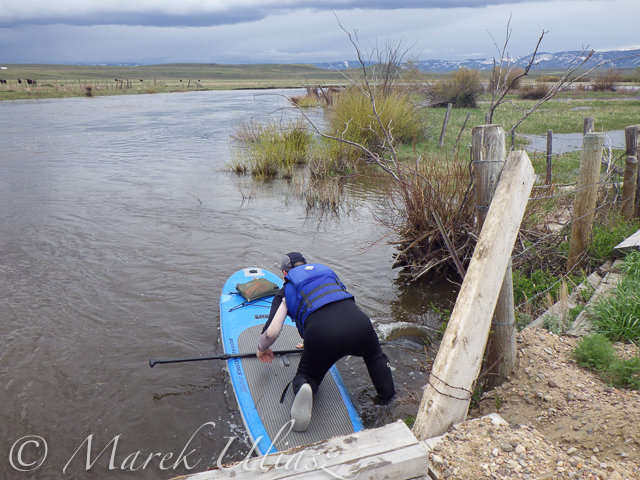
  • Exploring the Upper North Platte River in Colorado by SUP

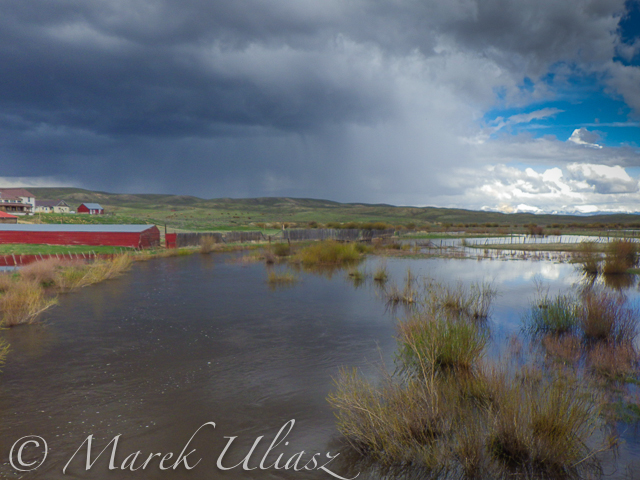
    beginning of the North Platte River

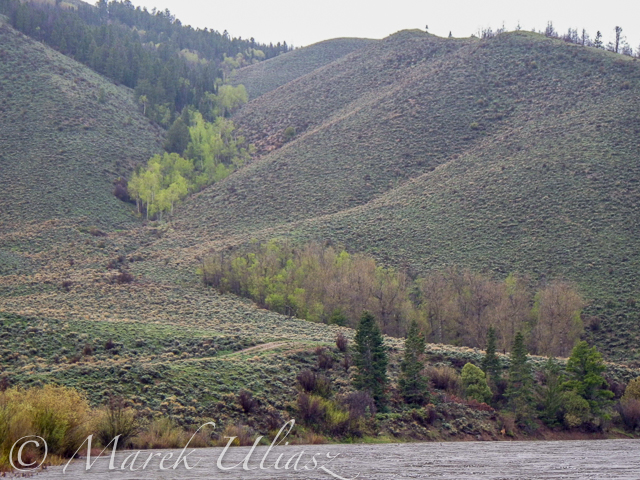
    Confluence of two Grizzly Creeks 10 miles SW of Walden, CO – the beginning of the North Platte River

    North Platte River is one of my favorite paddling destinations. Usually, I paddle various flatwater river sections in Wyoming above and below Saratoga. However, there is a 45 mile long river stretch in Colorado’s North Park before the North Platte enters the Northgate Canyon.

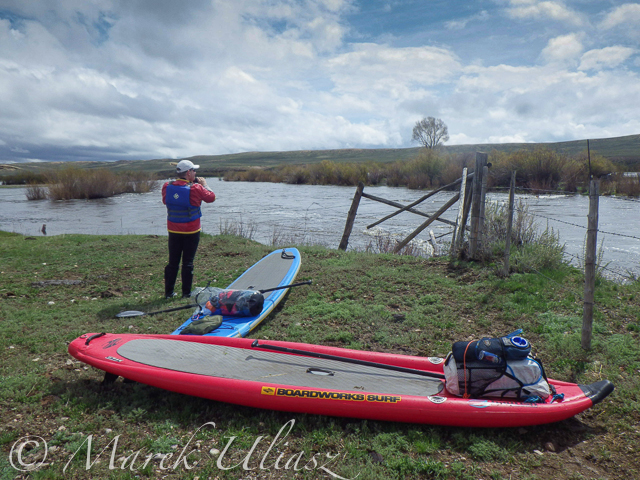
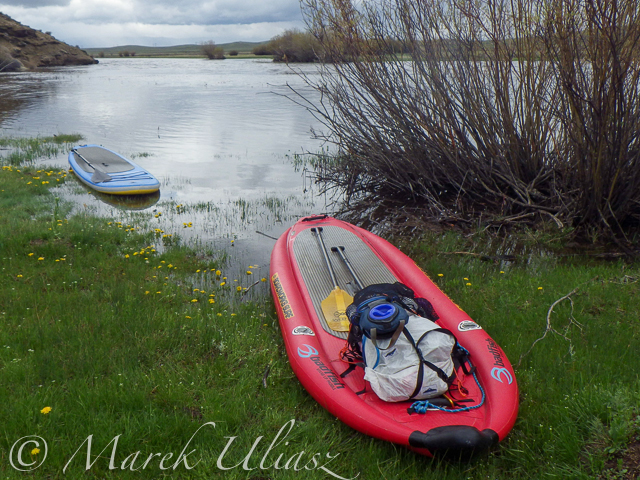
    After some fall and winter scouting and a lot of time spent on Google maps, the exploration of the upper North Platte River finally took place during the Memorial Day weekend. Rob Bean joined me to paddle our inflatable Bordwarks SUPs: Shubu and Badfish.

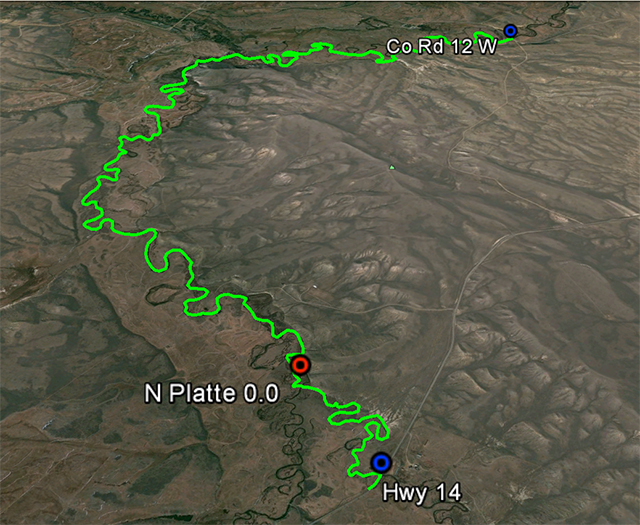
    Upper North Platte River on Google maps with some waypoints for access points and diversion dams.

    North Platte River near Walden, Colorado

    14 miles of the upper North Platte River near Walden with the river beginning
    as a confluence of Grizzly Creek and Little Grizzly Creek

    May 24, 2014
    Put-in: Grizzly Creek at highway 14, 10 miles south of Walden (not much room for off road parking)
    Take-off: Co road 12 W, 8 miles west of Walden (official fishing access, parking near bridge, another fishing access with parking ~0.5 mile below the bridge).
    GPS milege: 13.8 miles, time: 2:50 hours.
    North Platte River in Colorado near Walden

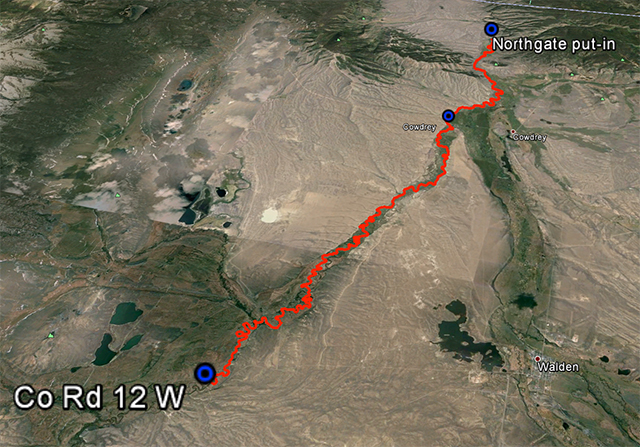
    31 miles of the North Platte River from Walden to the Northgate Canyon put-in

    May 25, 2014
    Put-in: Co road 12 W
    Take-off: put-in for the Northgate Canyon run, 9 miles north of Cowdrey
    Alternative put-in for a short 6 miles run: Co Rd 6, 2 miles west of Cowdrey (that run is described in Paddling Colorado book by Dunbar Hardy).
    GPS milege: 31 miles, time: 6:49 hours.

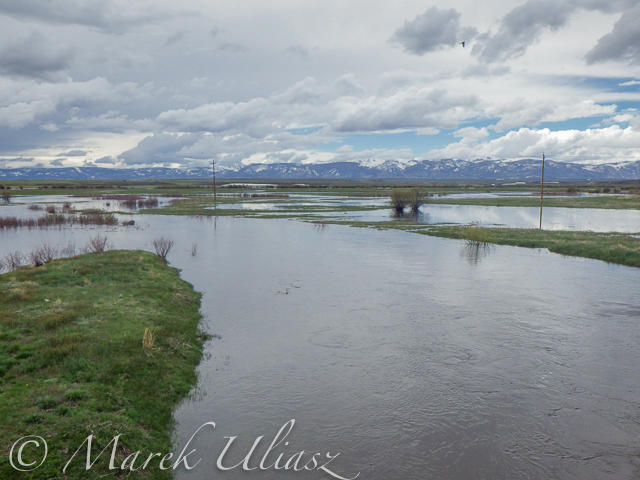
    River flow was rising from 3000 to 4000 cfs at Northgate during our two days of paddling. A lot of meadows in the river valley were flooded. Paddling speed: up to 9 mph.

    The weather was challenging. We had a lot of thunderstorms around us during the first day followed by ~8 hours of heavy rain. We were lucky to finished our paddling before the rain. A beautiful weather on second day lasted till noon, then we experienced a storm with a small hail followed by heavy rain for the rest of the day. Strong afternoon headwinds put us on our knees, especially, during the second day.

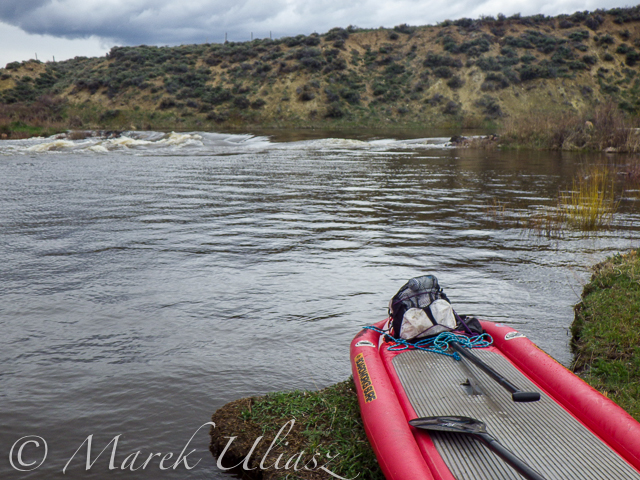
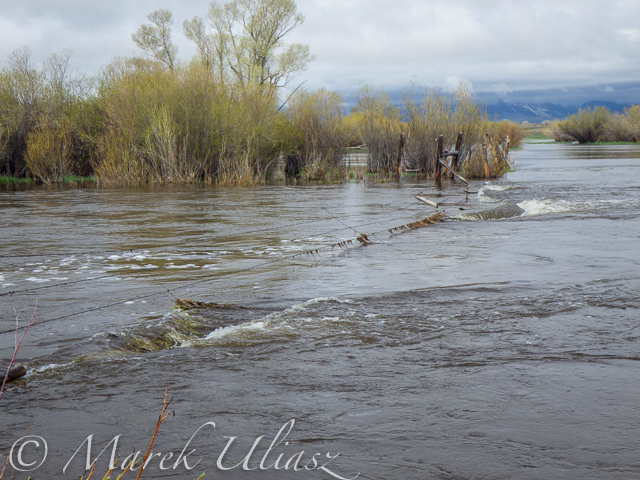
    Obstacles: diversion dams, fences across the river, low bridges depending a water level. No trees. No rapids (except dams). The river is wide and open, so you can see or hear all incoming obstacles well in advance. We never run into any troubles.

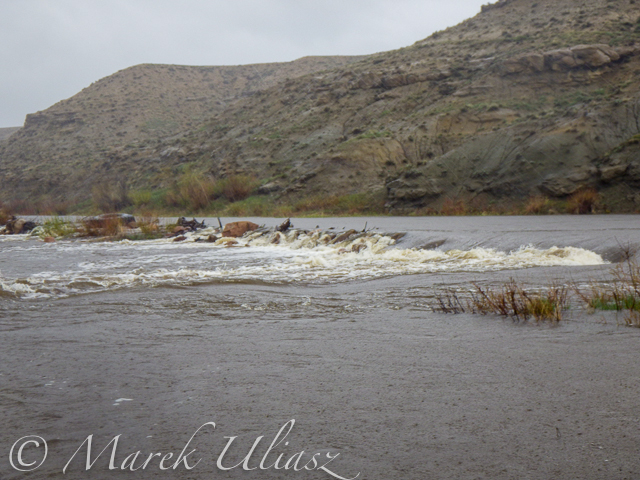
    Most of the dams can be seen on satellite pictures. The dam a few miles below Co road 12 W is pretty big and always requires portaging (not comfortable on right). Other dams are primitive rock dams and often can be run. We portaged most of them to avoid big waves, but I would run more of them in a canoe. We managed to paddle around a few of them. It is easier to select a correct river arm on a map than in practice on the river.

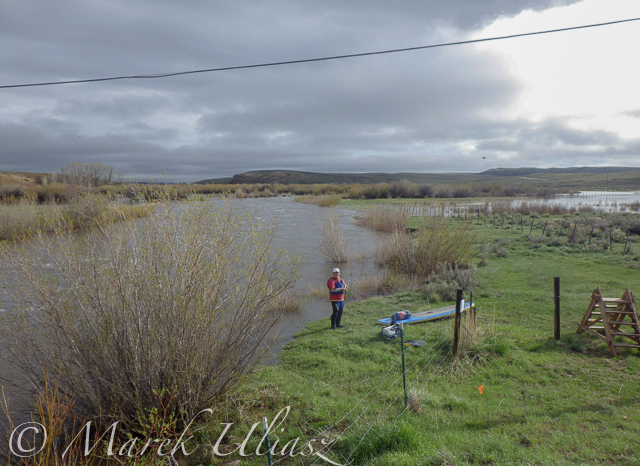
    We had to portage numerous barbed wire fences crossing the river. Some were in water and could be safely run over in a canoe, but we played safe in out inflatable SUPs. A few fences had only a single wire across the river and was possible to paddle under them. Always watch for these fences! You can notice stronger and taller posts on the shores and, sometimes, stairs over them, before seeing the actual wires over the river.

    One or two low farm bridges in the upper section required portaging. All bridges in the lower section have a high clearance.

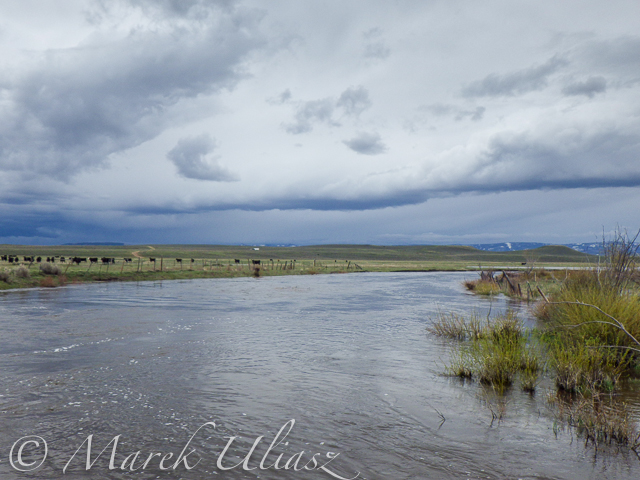
    Wildlife: moose, bighorn, deer, elk (a herd was swimming across the river several times just in front of us), bald and gold eagles, pelicans, geese and other waterfowl, numerous smaller birds, curious cows.

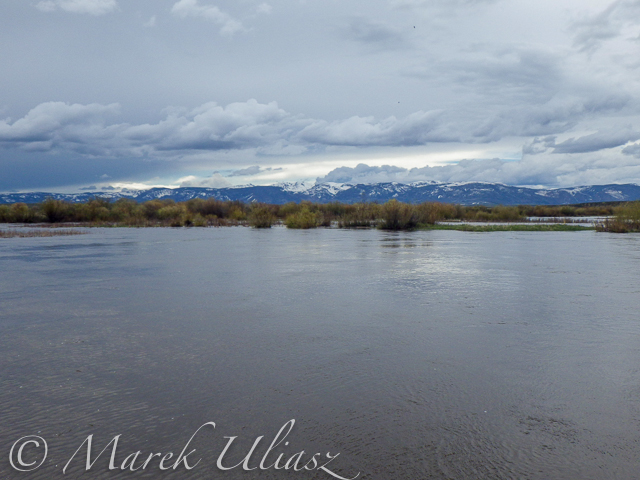
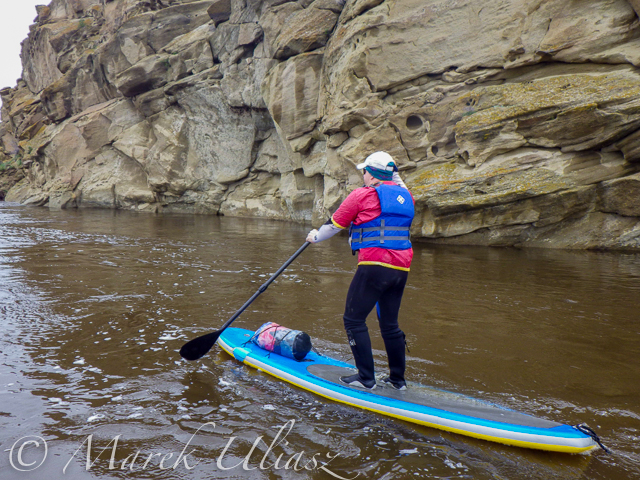
    Scenery: a wide valley surrounded by snowy mountains, crazy river meanders in the upper section, cliffs and rock outcroppings, just a few trees (often with eagle nest), higher hills with some forest in the lower section, a lot of water flowing around and flooding meadows, but, usually, not difficult to find a dry place to land.

    Grizzly Creek near Walden

    Grizzly Creek looking upstream from highway 14

    Grizzly Creek near Walden, CO

    Grizzly Creek looking downstream from highway 14 – start of our adventure

    North Platte River near Walden

    North Platte River meandering near Walden

    North Platte River

    One of high cliffs

    North Platte River - portage

    Going over a low farm bridge

    North Platte RIver near Walden

    One of diversion dams

    North Platte River at Co Rd 12 W near Walden

    North Platte River at Co Rd 12 W near Walden – the finish of day 1 and the start of day 2

    North Platte River below Walden

    Barbed wire fence across the river

    Another fence across the  river

    Another fence across the river

    North Platte River below Walden

    And another cattle fence to portage

    SUPs on North Platte River

    Lunch break – last minutes of nice weather

    North Platte River diversion dam

    Hail storm over diversion dam

    North Platte RIver above Northgate

    The last river section between Cowdrey and Northgate

    North Platte River - Northgate Canyon

    Finishing in rain at the Northgate

    North Platte River - Northgate Canyon

    The last look at the river – still raining

    North Platte River - Northgate Canyon

    Ready to go home …

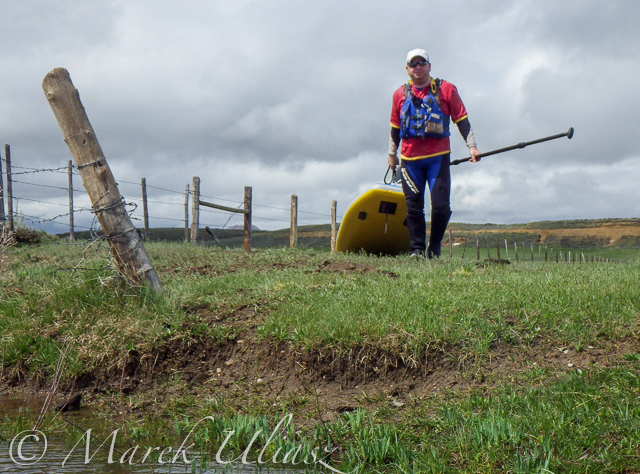
    All pictures were shot with my current paddling camera on duty – Pentax Optio WG-2. I have been using waterproof Pentax Optio cameras for paddling and other outdoor activities since their first original model was released in 2005. The newest model from that series is available now as Ricoh WG-4.

    Your browser does not support iFrame.

    Related posts:
    – North Platte River in Colorado above Northgate Canyon
    – Sun, Snow and Wind on the North Platte River in Wyoming
    – Bennett Peak to Pick Bridge on the North Platte River, Wyoming


    paddling with a camera

  • Tips for Great Beach Sunset Portraits

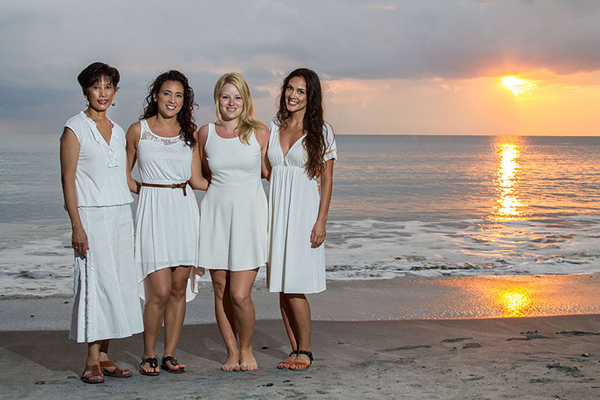
    Beach sunset portraits are always so beautiful; they make for a unique backdrop as each sunset is a little bit different from the next. With an hour long portrait session photos with the sunset over and over can sometimes get a little repetitive. This article will show you how to create diverse images out of a beach sunset session, and also explain how to use off-camera flash to expose for the background and capture the true colors that you see.

    IMG_9507-600

    To plan this right, you first need to know exactly what time the sun dips behind the ocean horizon. The time and date website allows you to look up this exact time for different cities all over the world. For an hour long session, have your clients meet you at the beach 45 minutes before the sun goes out of sight. The lighting at this time is just perfect for photos, it is known as the golden hour because of the warm hues it casts.
    The 15 minutes immediately after the sun sets also offers a wonderful soft light.

    Before you begin posing your subjects you need to get your exposure right. Turn off all flashes, set your camera to Manual Mode, and simply expose for the sunset. If you take a picture of your subject in front of the background like this you will see that they are very underexposed, if not a silhouette. In order to get a proper exposure for the sunset, and for your subject, we need to add light to the subject. Since the sunset is so far away, your flash will not affect the exposure of the background.

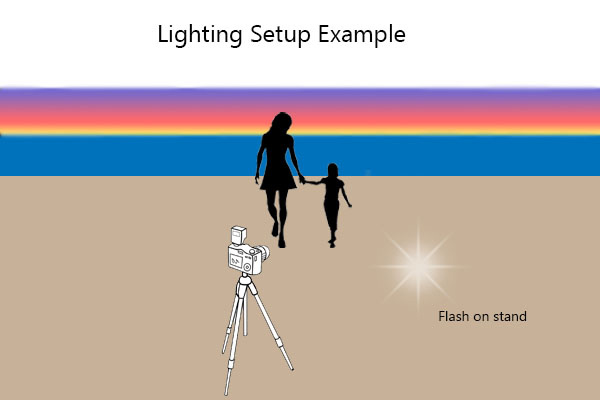
    You can use an on-camera flash for this, but an off-camera flash will make the lighting look more natural and is therefore the ideal. To setup an off-camera flash you will need a flash, a light stand, and a way to trigger the flash. There are many different ways to do this, but I would suggest wireless radio triggers. Once you have your light setup, place the stand about 10-15 feet away from where your subject will stand, and about 4-5 feet to the right of the camera position. This will have the light coming at your subject from the side, instead of straight on which will create a much more flattering picture.

    diagram-600

    Turn your flash on and switch it to manual mode. Set the flash strength to half power and take a test shot. If your subject is too bright try moving the flash back a few feet. If the face is too dark increase your flash power or move the flash a little closer to the person. Adjust the flash power and distance from your subject until they are nicely exposed. Your flash can be bare, without any modifiers, or with a shoot through white umbrella for a softer light.

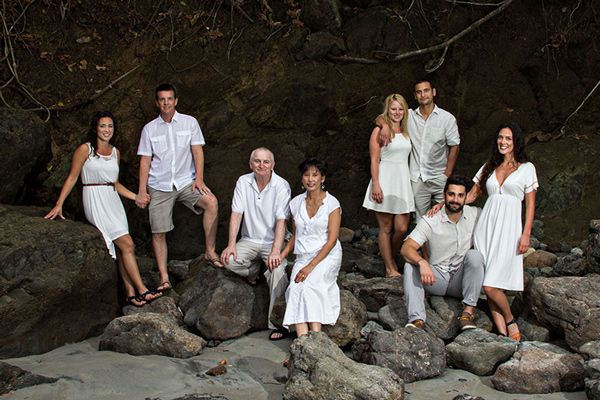
    Once everything is setup you can pose your group or subject, facing away from the sunset, and take a set of images. Vary the pose and take a few more. Next look around and see what else is available to use as a backdrop. Large rocks, palm trees, sand dunes or greenery all make for diverse images. A boardwalk leading up the beach can also be a great spot. Aim to use two to three different backgrounds.

    015-600

    IMG_9360-600

    By this time the sun has gone down quite a bit, and the colors have changed a lot from your first set of photos. Adjust your lighting and exposure to match the new conditions and take a few more portraits in front of the ever changing sunset.

    IMG_9393-600

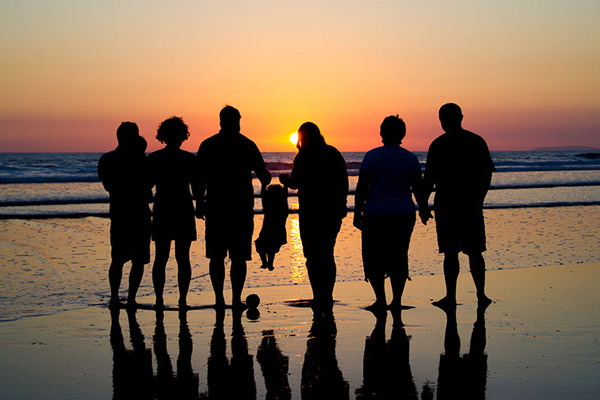
    Turn your flash off, adjust your exposure and take some beautiful silhouette images of your subjects.

    048-600

    Just after the sun dips down below the horizon, turn your subject towards the sunset and capture the beautiful soft light that spills onto their face. Make sure your flash is off for this, as the natural light is perfect, and adjust your exposure as needed. This is a great moment for candid shots of the group walking along the beach and laughing, or of parents tossing their children up in the air.

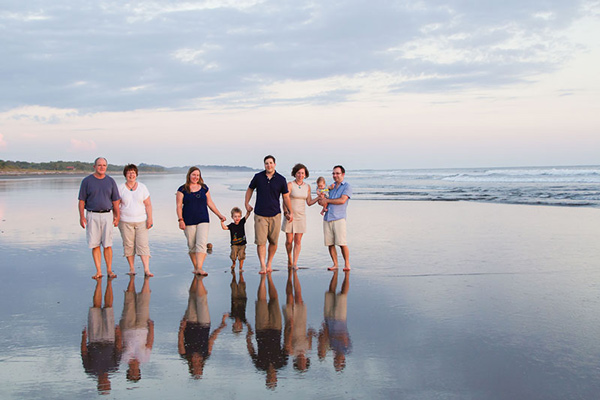
    Lastly, try to look for where your subject’s reflection falls on the water when the tide pulls out. Capture an image with your subject and their reflection, or just their feet and the reflection.

    042-600

    During a one hour session, at only one location, you can capture a diverse set of images for your customers (or friends) that they will love. Just remember to always be on the lookout for a different background, or unique area of the beach. Also if you will be taking pictures that will get them sandy or wet, make sure to save those for last so they their clothes aren’t wet or full of sand in the rest of the photos.

    IMG_9522-600

    Have you done any beach portraits? Do you have any other tips you can share, please do so in the comments below.

    The post Tips for Great Beach Sunset Portraits by Madison Baltodano appeared first on Digital Photography School.

    Digital Photography School

  • 5 Advanced Tips for Light Trail Photography

    If you’ve never shot light trails before, start with Darren Rowse’s excellent article How to Shoot Light Trails. Once you’re comfortable with the basics, here are five advanced tips for creating your own unique light trail photography.

    1. Go big or go home

    Smith 1

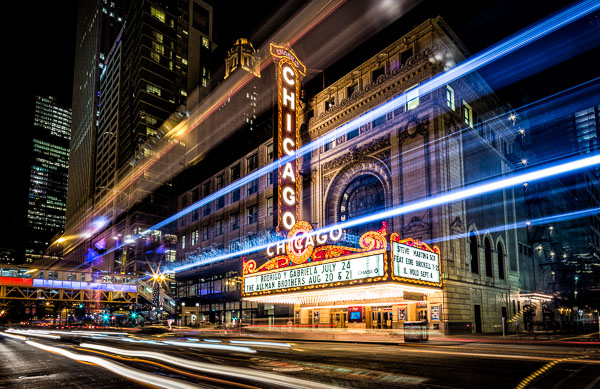
    You don’t want an image with tiny light trails. You want big, Texas-sized, light trails streaking across the photo. As with any subject, if you want the subject to appear large, get close to it. Exaggerate the effect by using a wide-angle lens. Another way to add a sense of size to a subject is to shoot it from below. Shooting a person from a low point of view makes the person appear larger and more powerful. The same is true with light trails.

    Get as low as you can, and as close as you can safely, to the traffic. If you’re shooting along a busy street, place two of your tripod legs barely into the street so that they are resting against the curb. Lower your tripod as far as you can and point it up. By getting as low and close as I could in the Chicago Theatre image (above), the top trails of the bus appear taller than the theatre marquee.

    2. Visualize and compose for the light trails

    Look at any of the images in this article and picture them without the light trails. You’re left with a boring composition that doesn’t work. When photographing light trails, you need to visualize how the trails will look in the image and compose your image with them in mind.

    Treat light trails as if they were a river meandering through your image. You wouldn’t compose the shot so that the river moved straight across your frame, so don’t do it with light trails either. Pay attention to where the trails enter and leave the frame. Your eye will be drawn to the spot in the frame where the cars are beginning as it will have some of the densest and brightest trails. Place this location as you would place a main subject using the rule of thirds. The trails should move across your image and end at either the corners of the frame, or a vanishing point. Place this vanishing point in the opposite third of the frame. If the light trails enter in the lower left, have them end in the upper right. This lends a sense of movement to your composition.

    Smith 2

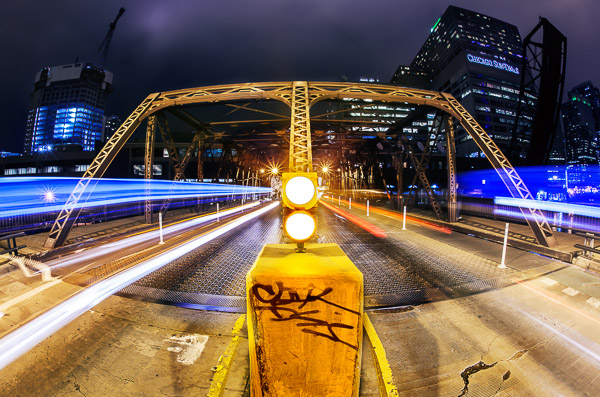
    If you can get to the middle of the road with traffic on either side of you, consider going for a perfectly symmetrical shot. You’ll need an interesting subject to go along with the trails, so look for a bridge or interesting buildings on the side of the road. Wait to hit the shutter until you have traffic on both sides of you to create a balanced composition. More importantly, make sure that you’re in a safe position. Stand in the median, or off the street. Never set up in the middle of a busy street.

    Smith 3

    3. Isolate the light trails from the scene

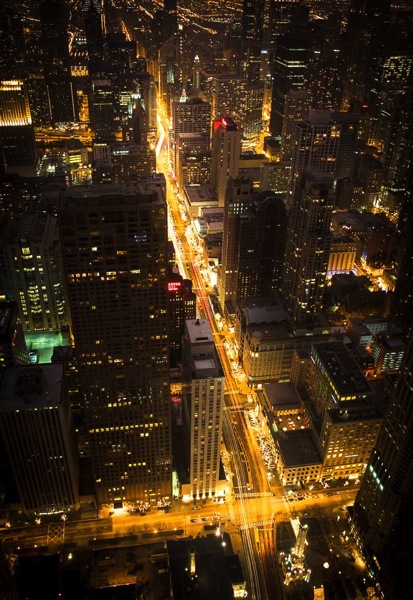
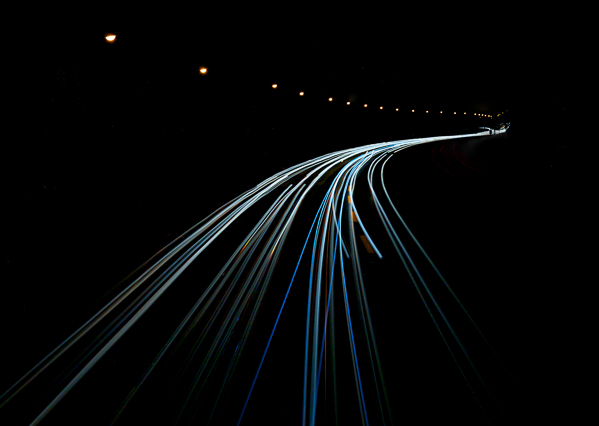
    To create an interesting abstract image of light trails, put yourself in a position where the lights from the cars are the only light source. An expressway overpass is an ideal location. You don’t want any buildings or other light sources in the frame. Find a location where the road takes an interesting path and underexpose the scene so that the only things that appear are the light trails and streetlights.

    When you open the photo on your computer, increase the exposure of the light trails while keeping the black areas black. You can increase the exposure of just the trails by increasing the whites slider in Lightroom, lowering the white point, or making an adjustment to the tone curve in Lightroom or Photoshop. You’ll be left with an image that shows only the path of the trails that makes for a unique abstract image.

    Smith 4

    4

    . You don’t need cars for light trails

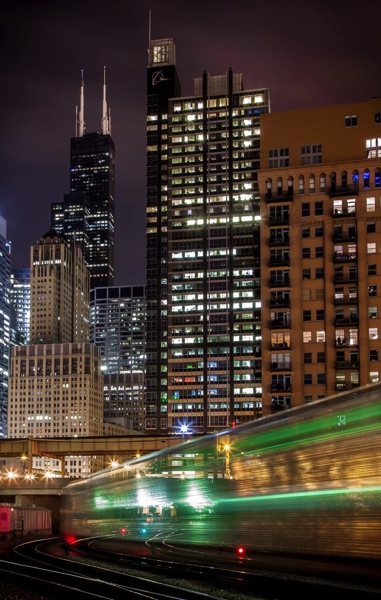
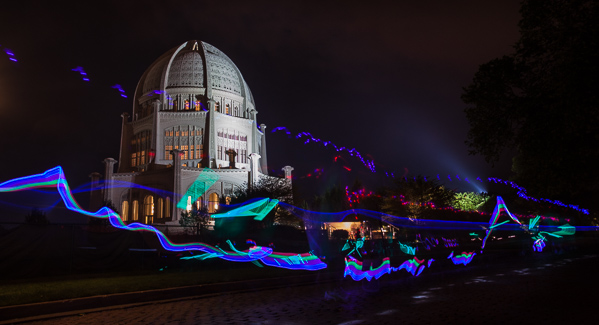
    You can create light trail images at night by shooting anything that is moving and emitting light. If you’re photographing a city like Chicago, you’ll mostly shoot cars and buses, but don’t forget about trains, bikes, horse-drawn carriages, or even a bunch of kids walking by swinging glow sticks. The rules for photographing any of these is the same as with cars, but you’ll be able to shoot them in locations that cars don’t drive, and the trails that they leave are different than your standard cars.

    Smith 5

    Smith 6

    5. Make your own light trails

    Who says that you need to stand around and wait for something to drive by? If you’re in a more remote location, set up your tripod, set up a long exposure, use the 10-second delay feature in your camera, jump in the car, and drive around in front of your camera. You can drive in any path that you think might be interesting. Experiment until you find something you like. You’re essentially light painting with your car lights. This technique works even better with a friend. One person drives while the other shoots! Find an empty parking lot or a winding road and make your own light trails.

    Smith 7

    What do you do to spice up your light trail shots? Have you tried any of these techniques? Tell us in the comments below.

    The post 5 Advanced Tips for Light Trail Photography by Chris Smith appeared first on Digital Photography School.

    Digital Photography School

  • Create Art with your Photos Using Topaz Simplify

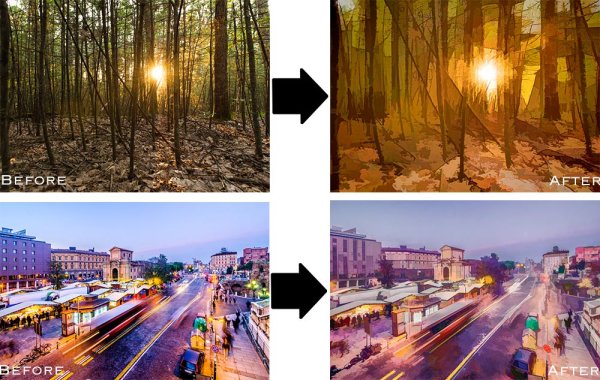
    Simplified-after-1

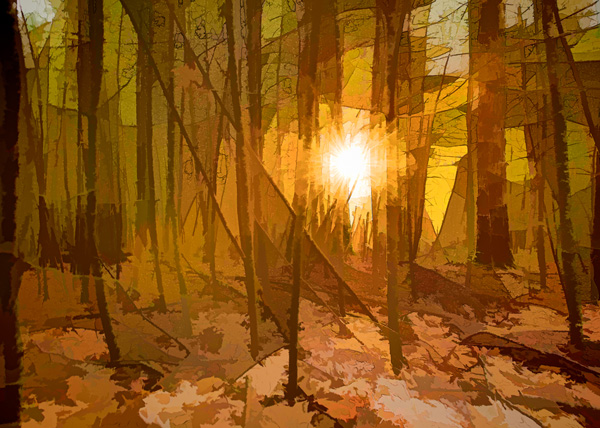
    Topaz Simplify is designed in a way that allows you to transform your photography into something that resembles painted or drawn art. There are a ton of different styles of art packed into Simplify, from line and ink, to oil and watercolor painting; so it should provide some great creative opportunities for you. Today I’m only going to do a basic walk through on a couple of different photographs in order to introduce the product to you.

    TopazSimplfiy-Beforeandafter

    Before getting started I do want to mention that while I’ll be using Topaz Simplify as a Lightroom plugin today, it also works with Photoshop, Aperture, iPhoto and others so you don’t have to have Lightroom to use it. Find out all the info and get the free trial of Topaz Simplify here.

    Topaz Simplify Basic Walkthrough

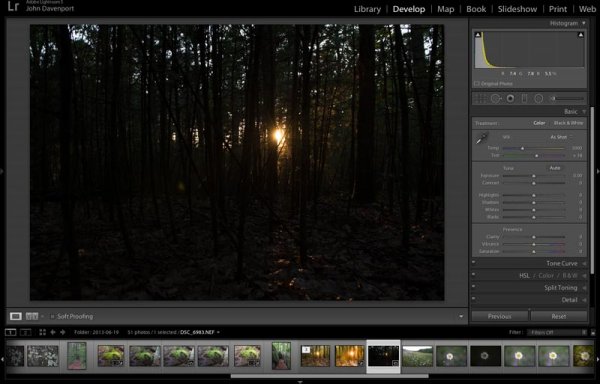
    As you can see from the original RAW file below this photograph is in some serious need of help. It’s basically just an underexposed shot of the sun setting through the forest, without much of a focal point or anything interesting going on. Now I don’t want you to think that Simplify will solve all your terrible miss-fired shots, in most cases it won’t. But here I think it does a remarkable job at making lemonade out of lemons.

    Do Lightroom basic adjustments first

    TopazSimplify-Original

    Original RAW file in Lightroom

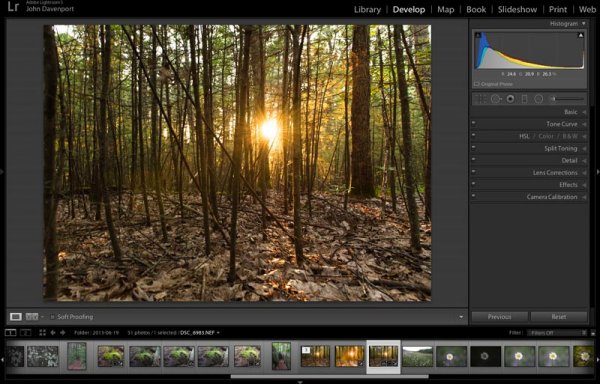
    Before we can use Simplify however, we do need to get the photograph into some sort of usable shape. For this photograph I’ve got to really rely on Lightroom’s power of saving an underexposed image which it handles without too much of a problem.

    After some adjustments in Lightroom 5 using a combination of sliders in the basic tab, you can see that the photograph is at least now in a condition that Simplify will be able o handle.

    TopazSimplify-LightroomCleanupCrop

    After some basic Lightroom adjustments

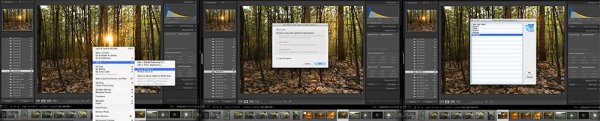
    To use Topaz Simplify in Lightroom you’ll also need the free Fusion Express plugin (download it here) which is what launches all of the Topaz products. Once both programs are installed launch Topaz Simplify by right clicking on your photo. Navigate to EDIT IN > FUSION EXPRESS 2.

    TopazSimplify-LaunchSequence

    You can see this in more detail in the video below

    Next, a dialog box will open up asking you to select how you’d like the photograph to be brought into Topaz Simplify there are three options here – I always choose ‘create a copy with Lightroom adjustments’ as the other two work off the original file in Lightroom. Note: if this is an area of confusion for you, you’ll be able to see this process in more detail in the video below.

    TopazSimplify-AdjustmentForest

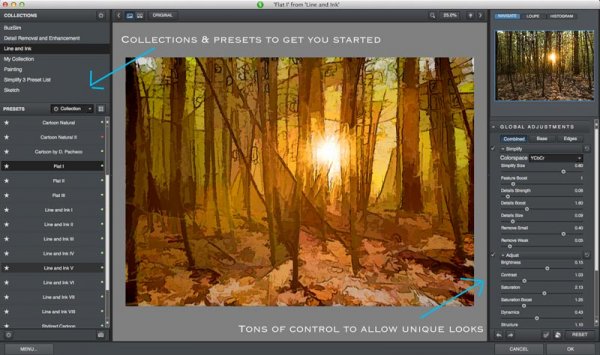
    Topaz Simplify preset and adjustment options

    Next try the ready-made presets that come with Simply

    Once you’ve launched Topaz Simplify you’ll be brought into a new editor screen with a bunch of prepackaged collections filled with different presets.

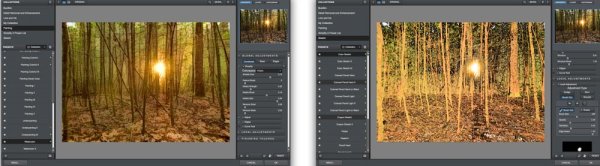
    On the left-hand side, as you can see from the screen shot above, the Line and Ink collection is currently selected. There are a handful of other collections, each one containing a different set of presets, all of which are great when you’re just getting started with Topaz Simplify. I highly recommend just playing around with them to find out which ones suite your own creativity best, before getting to involved with the rest of the program. Here are a couple more variations on the photograph above that I achieved with just a few mouse clicks using presets.

    TopazSimplify-Forest2

    A couple more Topaz Simplify variations.

    Customize and play

    However, once you have gotten used to the presets and found the ones you like, you also have a lot of control to make the images your own through various adjustment options.

    The right-hand panel offers the ability to control things like the overall intensity of the Simplify effect, the ability to determine which edges are drawn in harder or removed entirel,y and the ability to modify how much overall detail is pulled out from the scene.

    You also have access to some options for basic image adjustments should you need to do some minor contrast, brightness or saturation modifications (though I’d suggest waiting on these until you get back into Lightroom).

    Finally – one of the best parts of Simplify – is that Topaz decided to include bunch of great local adjustment options allowing you to burn, dodge, smooth and/or brush out the effects of Simplify in specific areas of your photograph.

    Simplified-after-2

    For a look at Topaz Simplify in action watch the video below where I run our second photograph from the two before and after images above through Simplify.

    Topaz Simplify Basic Video Walkthrough

    What do you think? Have you simplified a photo?

    So after this basic walk through I’d love to hear your thoughts on the software. If you do go ahead and use it, or have done so in the past, how about a sharing one of your favorite before and after image sets in the comments below – I’m curious to see what you’re able to come up with.

    The post Create Art with your Photos Using Topaz Simplify by John Davenport appeared first on Digital Photography School.

    Digital Photography School

  • 20 Cool Things You Can Do With Nik Software’s New Analog Efex Pro 2

    I’ve been playing around with Nik Software’s new Analog Efex Pro 2 photo processing software (brought to you by the good folks at Google) all weekend long and I’m super impressed. The purist film photographers out there are probably going to hate this new software, but for you digital photographers who dig an analog look and feel, you are going to love this.

    I shot film exclusively for about 15 years before switching to digital in the early 2000s. While there is an absolute undeniable romance with rolling your own film, hanging out in a darkroom with your college girlfriend, and licking the fixer off your own prints you made yourself, it’s not something I think I’ll ever go back to — unless and maybe when my hipster buddy Daniel Krieger finally convinces me to buy a film Hasselblad.

    I used to joke around with anyone who asked me what camera I shot and tell them a Holga. Now it’s like I really am shooting a Holga, just with my Canon 5D Mark III. ;)

    Anyways, check out 20 different looks you can create with Analog Efex Pro 2. I’m a fan. You can buy it here if you want.

    Motion Blur. It’s like owning a lensbaby without having to actually use one of those horrible awkward things. Just kidding, lensbabys are great!

    How did I ever get a double exposure of this classic neon sign? I’ll never tell.
    Hey It’s Amanda Morgan shot with my cool Toy Camera #9.
    Wet plate photography, without all the sticky wet plates.

    Jenna Jamieson shot with Toy Camera #1.

    Every respectable concert photographer brings their Toy Camera #2 to the photo pit these days. Chvrches rock!

    Instant triptychs.

    Classic Camera #7 has such a nice warm film feel, doesn’t it?

    Hey tilt shift and I didn’t even have to buy the $ 2,500 Canon TS-E 17mm f/4L Tilt-Shift Lens! Which is a totally awesome lens by the way that I actually will buy someday. Canon L lenses are the best. I cannot say enough positive things about all my Canon glass. I’m not being sarcastic there, I’m being serious.

    One of my neon signs that I took back in 1972 while on a photography junket across America with Stephen Shore.

    Motion blur with Jeremiah Owyang. It’s just like Star Wars only better because it’s got Jeremiah in it.

    Colorcast #2 makes butterflies look so pretty.

    Colorcast #2 makes models look so pretty too, but this one was already pretty to begin with. :)

    I think this painting from the Met in New York City looks better this way, don’t you? I could totally print this up and hang this in my house. So can you too, because I licensed it Creative Commons non-commercial. Friends share right? ;)

    Oopsie, a little light leak thing happened in my Holga again.

    Doing wet plate photography in Holbrook, Arizona.

    Love the authentic real life colors from Classic Camera #2 on this San Francisco victorian in the Mission District. A couple million in stock options and this too can be yours.

    Smoothdude let me borrow his Hasselblad to make this photo on our Route 66 trip last year.

    I took a photo of my Kodak Instamatic with my Kodak Instamatic. Get it?

    More Seattle fun with Toy Camera #2.


    Thomas Hawk Digital Connection