Category: Photography

  • How to do Long Exposure Photography and Light Trails at Night

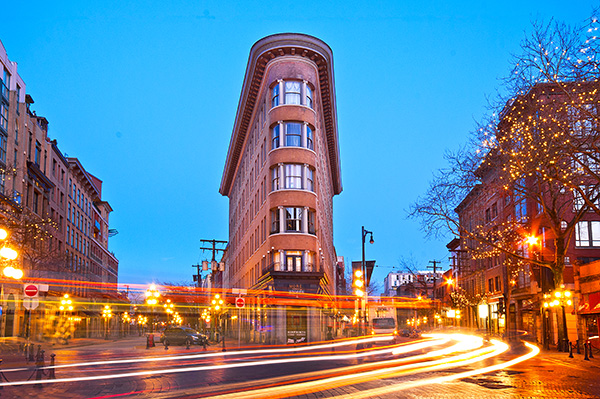
    Gastown Light Trails

    Gastown light trails, Vancouver, Canada

    Before I understood how photography worked, I was always intrigued by light trails in images. I never understood how that happened. When I began to study photography, one of the first assignments I did was an advanced course on night photography. I decided I would try and capture some light trails. I set up my camera, made sure the settings were correct and waited. A few cars went past, but my timing was off and the shots were not great. I continued to wait. After about an hour of trying and experimenting, I got the shot I was looking for. It was like magic to me. The car was not in the shot but the lights seemed to float in mid air. I was hooked. This was something that mystified me for a long time and, I had managed to get it right.

    What was so mesmerizing for me was that the image I saw on my LCD screen was not what I saw in real life. The camera had managed to capture a scene that my eyes could not capture in the same way. This seemed amazing to me. I soon realized that the camera was able to “see” things differently to the way my eyes saw them. I spent many nights trying to capture light trails in various locations. I was also doing lots of reading and research and came across a technique called long exposures. This too was amazing. It had the ability to alter a scene in such away that it looked totally different to the way our eyes normally see it. Again I was hooked and still, to this day, long exposures and light trails are some of my favourite techniques in photography.

    Long exposure photography and light trails have similar techniques, it is the subject matter that differs, so I will discuss each technique separately and tell you how to get the best results in both.

    How to do long exposure photography

    Shooting long exposures effectively requires that you should be shooting in Manual mode as much as possible. If you are not sure how to shoot in Manual, take a look at Getting off Auto – Manual, Aperture and Shutter Priority modes explained to learn more about these modes. To be able to get sharp and effective long exposure images, here is a checklist of item you will need.

    1. What equipment is needed to shoot long exposures?

    • A tripod – this is a good piece of equipment to have in most instance, but is a critical piece of equipment for shooting long exposures. Make sure your camera is properly mounted onto the tripod before you start shooting.
    • A camera – obviously you will need a camera, but many people assume you can only do this type of photography with an SLR. Some advanced point-and-shoot cameras can also do long exposures if they have a Shutter Priority function. Take a look in your camera’s manual to see if it has this function, you may be surprised.
    • Cable release – your camera will be on a tripod, so it should be very still, however, sometimes the action of pressing the shutter release button can cause the camera to move slightly and this movement can cause your image to blur very slightly. You may not notice this on the LCD screen, but when you open the image on your computer, it will be evident. I recommend getting a cable release (also called a remote trigger). It is simply a cable that attaches to your camera and acts as a shutter release button. Using a cable release means you can set up your camera, step away from the tripod and press the button without touching the camera. Cable releases can be wireless too. If you don’t have a cable release or don’t want to buy one, you could use your camera’s self-timer function to trigger the shutter.
    • Warm clothes and comfortable shoes – depending where you live, and the time of year you plan to be shooting, you may need to dress warmly. Long exposures work well after dark and it may get cold, so be sure to wear warm clothes. Be sure that you have comfortable footwear too as you may be standing for a few hours.

    2. What subjects are best for long exposure photography?

    Long exposures work well for certain types of subjects like seascapes, landscapes and cityscapes. The key to getting a successful long exposure image is to have something in your image that is perfectly still and something that is moving. Water, clouds and trees blowing in the wind all work well if the rest of the scene is stationary. This difference between the elements in the scene will create drama and will add significant value to your image. The viewer will be seeing something that cannot be seen with the naked eye. The reason why long exposure images are so compelling is that they warp time. Water looks like a soft mist, trees look like a dull blur and clouds become long and streaky. This is what makes a familiar scene more compelling.
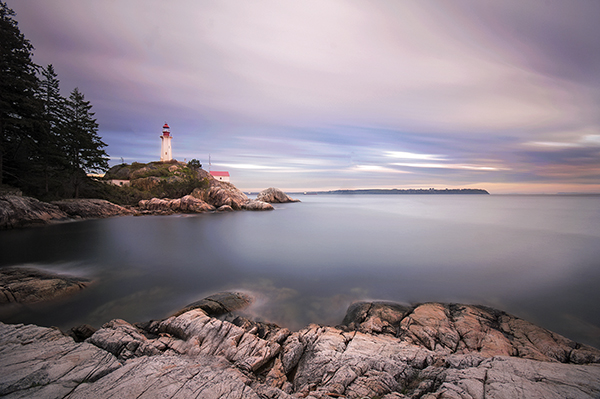
    Long Exposure scene in Vancouver BC

    Long exposure scene in Vancouver, Canada

    3. What camera settings should be used?

    Long exposures are ideally shot on Manual mode. If you are not sure how to shoot in Manual mode, you can use one of the other semi-manual modes such as Aperture priority or Shutter priority. Here are some quick pointers on the settings:

    • Shutter speed – depending on the light in your scene, your shutter time will need to be at least a 10 to 15 seconds, or longer if necessary. If you are doing a seascape and the water is moving quickly, then a few seconds may be long enough to make the water look misty.
    • Aperture – you will want to have your aperture set at anywhere between f/8 and f/16. This again, will be determined by how much light is in the scene and how long you want to expose for.
    • ISO – keep your ISO settings as low as possible, ISO 100 is what I use for long exposures.

    4. When is the best time of day to shoot long exposures?

    It’s normally a good idea to shoot long exposures as the sun is setting, or just after sunset. My suggestion is to be on the scene an hour before sunset. That way you can test some shots, make sure your composition is good and be sure all your settings are correct. Then wait. Personally, sometimes I will simply sit there and enjoy the scene, other times I may listen to some music, but I like to be relaxed and ready for when the light starts to work. Normally you will want to start shooting about 15 minutes before the sun has completely set and up to an hour after it is below the horizon.

    The important part is to be willing to experiment. Each time you decide to shoot long exposures will be a little different. The light may be brighter than you think, the sunset may not be as dramatic as you hoped, or the shot may not be just as you imagined. Be patient and experiment. I will sometimes go back to a location two or three times to try and get the shot I am looking for. Once I have it though, the sense of reward is fantastic and the patience and effort is paid off!
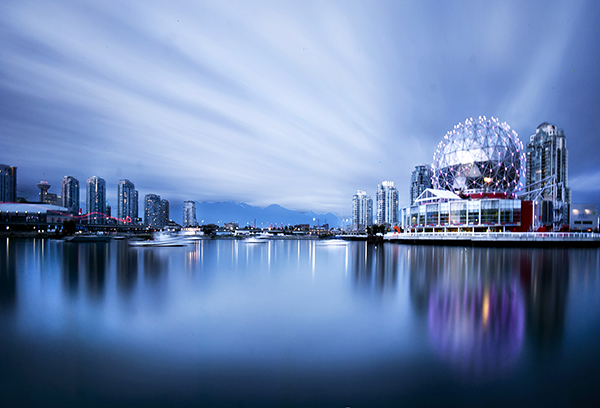
    Long Exposure of Science World in Vancouver

    Long exposure of Science World in Vancouver

    How to shoot light trails

    Much of the advice for shooting light trails is very similar to the tips above. The key difference is in the timing and location of your shoot.

    1. What equipment is needed to shoot light trails?

    • Same as above 

    2. What subjects are best for light trails?

    For light trails to work, you need to have something with lights moving through your scene. A car, a bus, a train and even an aircraft can work. Be sure to be out of the direction of the vehicle you are photographing. Please do not stand in the middle of the road, or on train tracks. Position yourself in a safe place to make this work. Always be aware of your surroundings. It is easy to become immersed in what you are shooting and lose sight of where you are standing. Be safe, first and foremost!
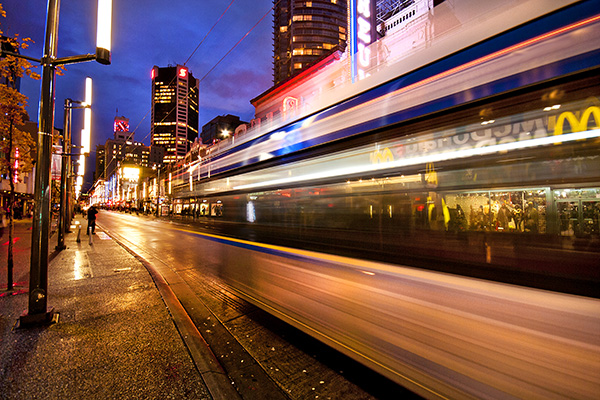
    A moving bus in the scene made this shot more dynamic

    A moving bus in the scene made this shot more dynamic

    3. What camera settings should be used?

    Light trials, like long exposures are ideally shot in Manual mode.

    • Shutter speed – depending on the light in your scene, your shutter time will need to be at least 10 to 15 seconds, or longer if necessary. Make sure that your shutter speed is long enough to capture longish light trails. You don’t want to cut them off too soon as you will have some short trails in your image that may look strange.
    • Aperture – you will want to have your aperture set at anywhere between f/5 and f/11. This again, will be determined by how much light is in the scene and how long you want the exposure.
    • ISO – keep your ISO settings as low as possible, ISO 100 is what I use for light trails. If your ISO is set to 500 or higher, your exposure will be shorter and you run the risk of overexposing the highlights ESPECIALLY when shooting car headlights.

    4. When is the best time of day to shoot light trails?

    Light trails can be shot in the early evening, or after the sun has set. Each scene will be different, but sometimes it is too light to get effective light trails just after sunset. You may need to wait until 30 minutes after the sun has set to get longer light trials.

    The important part, once again, is to be willing to experiment. Try different times after sunset and see what works for you. Spend time behind your camera perfecting your timing. Scout locations during the day that you will think will work for light trails and then go and try it out.
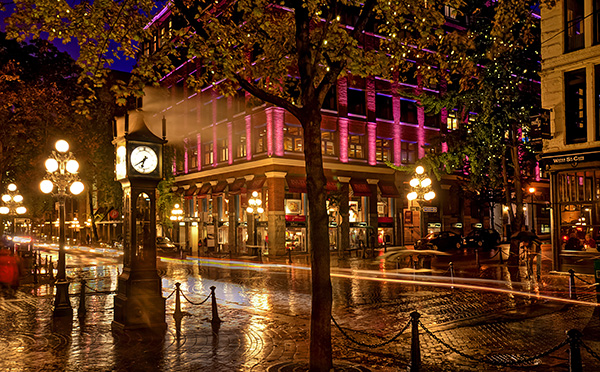
    Steam Clock in Gastown, light trails on the road

    Steam Clock in Gastown, light trails on the road

    Photographing after dark can be very rewarding. It is worth the effort to learn how to use these techniques to bring new images into your portfolio, and to have new skills which will enable you to shoot under any lighting conditions. Experiment and enjoy! Happy shooting.

    The post How to do Long Exposure Photography and Light Trails at Night by Barry J Brady appeared first on Digital Photography School.
    Digital Photography School

  • Step By Step How to Make Panoramic HDR Images

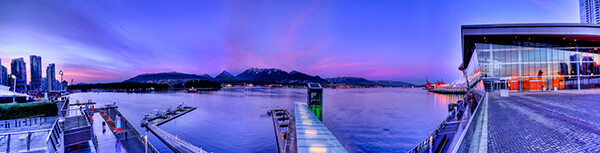
    Panoramic HDR image of Coal Harbour - Vancouver BC

    Panoramic HDR image of Coal Harbour – Vancouver, Canada

    I am convinced that digital photography has changed so many aspects of photography forever.  HDR and photo stitching are just two of those aspects. In the film era you could achieve a lot in the darkroom with blending, dodging and burning, but not to the extent that HDR allows us to achieve now. Photostitching has also allowed us to produce images that were not possible a few years ago. In the days of film, panoramic images were possible, but required a camera made for that purpose, nowadays we can shoot panoramic shots with any digital camera, they can even be shot using an iPhone. So the merging (excuse the pun) of the HDR and Photostitching was inevitable.

    This process is a little time consuming and needs to be planned beforehand, but the results can be really spectacular and make your images very dramatic. This article will give you a starting point into exploring the world of bringing HDR and Photostitching together.

    What is a panoramic HDR image?

    A panoramic HDR is quite simply a series of HDR images that have been stitched together using photo stitching software. It is an image comprised of any number of images, sometimes up to 60, depending on how you plan your shots. Sounds complicated right? It’s really not. If you follow a simple plan, it’s actually pretty easy. It is all in having the correct workflow, so here it is.

    The panoramic HDR workflow outlined

    The quick process we will be running through is as follows:

    1. Plan and shoot your HDR and panoramic images
    2. Edit your HDR images
    3. Stitch your HDR images together
    4. Edit the final image in Lightroom or Photoshop

    That’s it, simple and we will do it in small steps, so it is easy to follow.

    Step 1 – plan and shoot your HDR and panoramic images

    HDR Images

    I have written Getting Real with HDR – a Step by Step Tutorial for Realistic Looking HDR. Take a look at that if you need a refresher on how to get your HDR images into good shape. Normally, when you shoot an HDR image, you will be using between three and seven images of the same scene to create the HDR. In panoramic HDR shots, you will repeat that HDR shot across the scene for five to seven shots that will capture the panoramic. The key point to remember when shooting a panoramic image is your subject matter. Choose a scene that works in the panoramic format; i.e. a seascape, mountain range, forest or a cityscape from a distance. If you are too far away from your subject, the stitched photo may lack impact, so choose your scene with that in mind.

    Panoramic Images

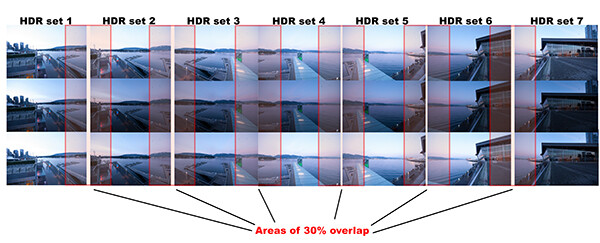
    Of course, it’s up to you how many images you want to shoot for your HDR shots. In the example shot at the top of the article, I used three shots per HDR set and used a total of seven images to capture the scene panoramically. Keep in mind that you may want anywhere between three to seven shots per HDR image and use as many images as you need to capture the scene.

    Here is a visual breakdown on how this shot worked. I have broken the shots I took into sets. Each set consists of three HDR images. So, Set #1 consists of three HDR images, Set #2 consists of three HDR images. Set 1 and Set 2 overlap by 30%. Set 2 and Set 3 overlap by 30% as well, and so on.

    HDR sets and flow for the image of coal harbour. Note the overlaps

    HDR sets and flow for the image of coal harbour. Note the overlaps

    What you will notice is that you must take your HDR images and complete the set before moving your camera for the next set. This ensures that you will get the best possible HDR shots, and that they will blend properly. Once you have your HDR shots done on Set #1, move your camera over to frame and shoot Set #2. With panoramic photography, you must overlap your images by at least 30%. It’s not necessary to overlap much more than this, but less than 30% could cause the software to struggle to find linking points in the images. If you have a scene that has lots of detail in it, 30% will be good, if you have a scene that is not very detailed (let’s say a beach scene with sand, water and sky) you may need to overlap more to make sure that the photos can stitch. Continue this process until you have captured your scene in the sets you have decided on.

    Some quick tips to remember when you shoot Panoramic HDR images

    1. Choose a preset white balance setting that works well for the scene, avoid using auto white balance. If you use auto white balance (AWB), your overall colours in the scene may change as you shoot your panoramic and this could cause some unusual colour  shifts in your image
    2. Keep your aperture between f/8 and f/11. Once you have chosen your aperture, don’t change it throughout the sets.
    3. Use a tripod to make sure that your images are sharp. Also, as you move the camera onto the next set, be sure to overlap by 30%.
    4. Be sure not to allow the camera to move up or down as you shoot the images. If it does, the result will be that the images might stitch but the resulting shot will be dropping down or sweeping up and you may not be able to get it right afterwards.
    5. The best idea is to use a tripod and keep the focal plane as flat as possible, to avoid distortion, particularly with a wide angle lens.

    Step 2 – edit your HDR images

    Edit your images by set. Start with Set #1 and take them into an HDR product such as Photomatix Pro. You could used Photoshop too, but my preference is Photomatix Pro. For more details on making your HDR images, take a look at my HDR article to get into the details of the editing process in Photomatix.

    Save each set and name them chronologically. I will name my images as follows: SCENENAME – HDR PANO 1, SCENENAME – HDR PANO 2 etc. Once you have taken all your sets through the HDR process and named them in order, the photostitching part is pretty easy.

    Step 3 – stitch your HDR images together

    For the photostitching part of this process, you can use the photo stitching function in Photoshop or any other photo stitching tool of your choice. I have used Photoshop in the past and it works well, but for more complex stitching I find that Autopano Pro works extremely well. It has been rated as one of the best stitching packages available. I have used it to stitch some pretty crazy panos together and almost anything I have thrown at it, it has been able to process.

    Lets look at how this process works in Autopano Pro:

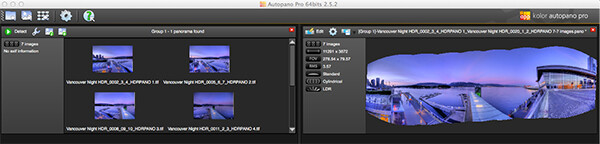
    1. Open Autopano Pro and on the first screen that you see, click on the second icon from the left to select your images to be stitched
    2. Navigate to the HDR images that you have processed and select them
    3. Click on “detect” on the top left hand side of the screen
    4. Autopano will now scan your images and do a preliminary stitch, this preview stitched image will be displayed on the right hand side of the screen that is open. This process may take a few minutes.
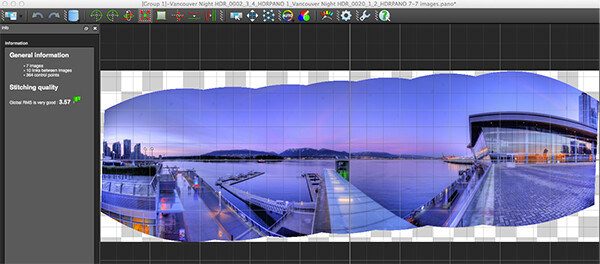
    5. Once the preview image is displaying, click on the “edit” button (Right hand side of the screen) this will open the image in the Autopano edit screen
    6. There are a number of options here, below is a high level overview of the most important functions
    Autopano Pro - Images selected for the pano stitch on the left and a preview of the stitched image on the right

    Autopano Pro – images selected for the pano stitch on the left and a preview of the stitched image on the right

    Autopano edit screen with preview of stitched image

    Autopano edit screen with preview of stitched image

    Autopano functions on the edit screen:

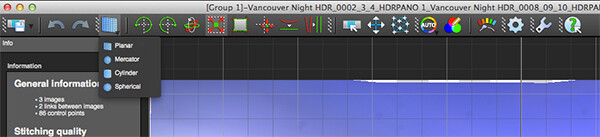
    Autopano has a number of options you can use to render your panoramic image. These projections help with distortion and skewing. Below is an explanation of the most commonly used projections.

    • Spherical – the spherical function allows any panorama to be assembled. It is a commonly used function for building panoramic images.
    • Planar or rectilinear projection – this is a good choice if the angle is low, It’s recommended for architectural shots because it is the only mode that does not curve lines that are deemed to be straight lines. Sometimes if the angles are too extreme there may be a loss of sharpness, so be aware of this.
    • Cylindrical projection – this projection can be used up to 360° (horizontally).
    • Mercator projection – the mercator projection can also be used up to 360° (horizontally). The effect of stretching up and down the image may seem to become distorted.

    The key factor in choosing a projection is in how the projection affects your image visually. Does it work for the subject matter? Does the image look correct? Ask yourself these questions as you experiment with the projections.

    Once you are happy with your projection and the way the image looks, you can now save the image to a folder on your computer.

    Choose the projection that works best for your image

    Choose the projection that works best for your image

    Rendering

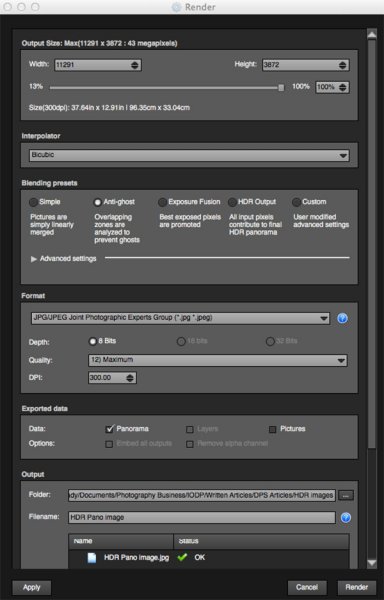
    Render screen and options

    Render screen and options

    This is the process of saving your panorama.It is called rendering because the software needs to perform the final stitching and edits to your image. On the rendering screen, you will need to take note of the following:

    Interpolator – the interpolator is the method used to assemble the pixels of your panoramic image  and will determine the quality and sharpness of your image. There are a few different options here, but the most commonly used options is Bicubic. The other options are useful for advanced stitching.

    Blending settings – the purpose of the blending settings is to allow the combining of the overlapped sections of your panoramic to look smooth and seamless. You will notice  the following presets:

    • Simple – this is fast, but it is possible that defects are seen where the areas overlap
    • Anti-ghost – conserve the image’s strong characteristics (stops, lines, curves) when mixing while automatically removing objects that have moved
    • Exposure Fusion – to be used if the panorama was created with a bracket shoot. Keeps the best of different exposures.
    • HDR output – to be used by users who wish to create a “.hdr” format file in order to create post-production or special effects. Don’t use this on these images as they have already been processed as HDR images.
    • Custom – this is enabled when you manually change the parameters and they no longer correspond to a profile.

    On the advanced settings, I generally leave that on the default.

    Format

    This section allows you to determine what the format in which you want your image to be saved. The two formats I use most are TIFF and JPEG. TIFF is an uncompressed file (which means all the information is still in the file, this is great if you are planning to print the image out large) The downside to TIFF is that the files are big. JPEG is a compressed format, that means that some image information has been discarded, the quality will still look the same to the naked eye, but if you print a JPEG image up really big, you may notice some image degradation. Depending on your final output and your space constraints you can choose the format that works best for you. Take the quality up to 12 and set the DPI to 300. This will ensure that you have the best quality image saved.

    Output

    On this screen, the software needs to know where to save your panoramic and what you want to call it. Choose your destination folder and name the file. Once this is done (it sounds more complicated than it is) click on the render button and the software will begin rendering your image. Depending on the size of the files being stitched, this rendering process can take a few minutes. Once complete, a screen will pop up to let you know that the image is now rendered.

    4. Edit the final image in Lightroom or Photoshop

    Your image is now stitched together, but the final step in the process is to edit the image in your choice of image editor (Lightroom, Photoshop, Gimp or any other) You will want to follow the basic workflow I outlined in a previous article.  Once that is done, you will now have a fantastic Panoramic HDR image. Not too many photographers attempt these images as they take some time to get right, but the results can be spectacular. Give this a try, let me know where you struggled or any insights you had during the process, above all go out and have fun with it!

    Panoramic HDR image of Coal Harbour - Vancouver BC

    Panoramic HDR image of Coal Harbour – Vancouver BC

    The post Step By Step How to Make Panoramic HDR Images by Barry J Brady appeared first on Digital Photography School.

    Digital Photography School

  • Is Visiting the Racetrack Playa in Death Valley Worth It?

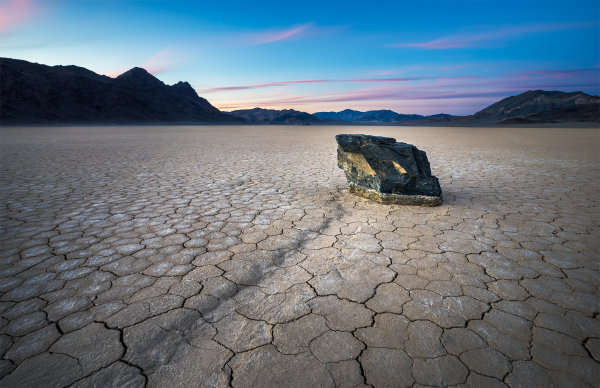
    racetrack-playa-workshop

    I probably won’t ever go again. That’s how bad it’s gotten. Not unless something changes.

    If you’re into travel and landscape photography you’ve likely either been to or have on your bucket list the Racetrack Playa in Death Valley National Park. I’ve been twice now, which is really a lot harder than it sounds if you haven’t been before. In this article, I want to go over my current thoughts on this peculiar and incredible place and the impact that tourists and photographers are having on it. I think it’s an important dialogue to open up, so I hope you’ll join in the conversation once you’ve read the article.

    What is the Racetrack Playa?

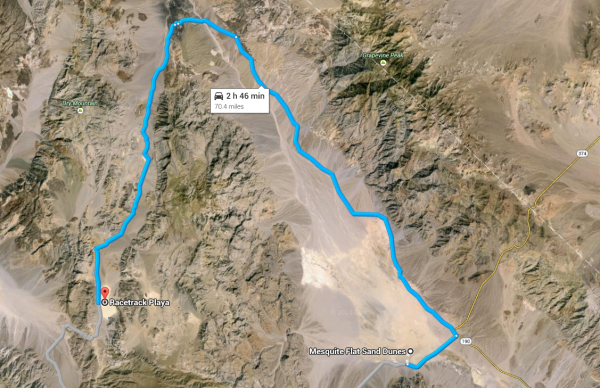
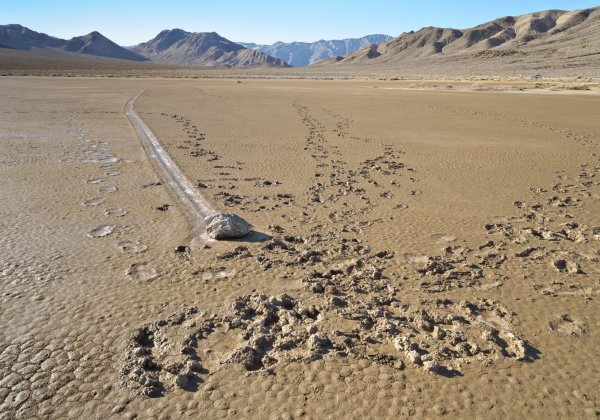
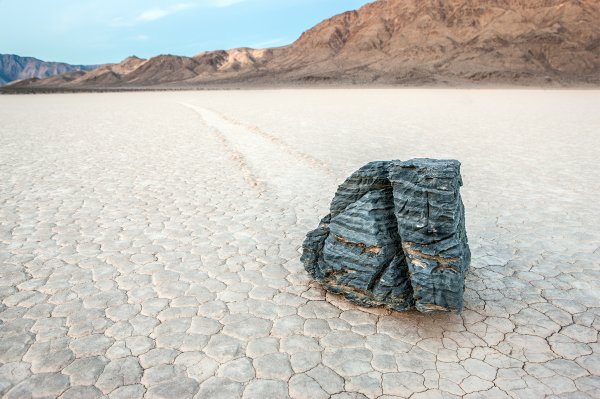
    Perhaps you’ve never heard of the Racetrack Playa, or maybe you’ve heard of it but just don’t know much about it? The Racetrack Playa is a remote location deep within Death Valley National Park. It is a massive playa (dry lake bed) that measures 2.8 miles long by 1.3 miles (4.5 km by 2.1 km) wide. The playa is famous amongst tourists and photographers because of its mysterious “sailing rocks” that leave trails behind them on the playa. It’s said that nobody has ever witnessed the rocks moving. Because of that, there is no shortage of theories about how they move about the playa. While the Racetrack Playa is incredibly remote, in reality it’s really not all that far away from the main attractions at the park like the Mesquite Sand Dunes. The problem is that a mountain range sits in-between the two (so you have to drive all the way around).

    Screen Shot 2014-05-19 at 3.53.48 PM

    Getting there

    Once you’ve driven the two hours on Scotty’s Castle Road and stopped at Ubehebe Crater, you still have a daunting 27 mile washboard gravel road to contend with. From Furnace Creek to Racetrack Playa, you’ll be driving uphill the entire way and will gain around 3,500 feet in altitude. The gravel road is fine in a few areas, but absolutely frustrating most of the way. The entire time you’re dodging large rocks and boulders in the middle of the road, pulling over to let oncoming traffic pass by and trying to ride that balance between going safe and slow to avoid a flat tire, and fast and dangerous to avoid the washboard style road and all the bumps and vibrations.

    Both of my trips into the Racetrack Playa had potentially horrendous outcomes but both also produced some great images for my portfolio. The first trip in was with my buddy Cliff Baise in his VW Toureg. We made it in just fine, but on the way out the road just proved too much for the SUV. His drive train got damaged at some point and we had to limp into Las Vegas for three days while the car got repaired. The second trip was during the first of two photography workshops I led inside the park with Mike Mezeul II back in February of this year. During that workshop, we took another SUV in and got a flat tire when we pulled into Tea Kettle Junction. Luckily we had a spare tire and got out fine (but it could have ended a lot worse if we had gotten another flat on the way out).

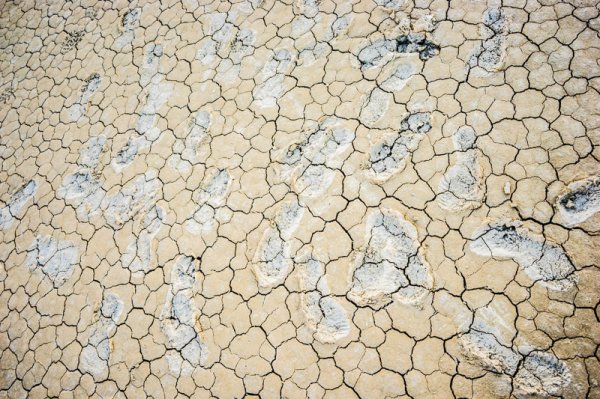
    All of this to say that by the time we actually got to the playa parking lot–after 3 hours of driving and a flat tire–I wasn’t in the best of moods, and I was doing my best to stay calm and happy for my workshop students. After all, this place is a bucket list item for most photographers and just being here is a huge blessing. So if just getting to the Racetrack isn’t bad enough, here’s what we were greeted with as we walked out onto the playa…

    racetrack-damage

    We anticipated this, but had no idea the extent of how bad it was. The Death Valley National Park Facebook page had shared a similar photo at the beginning of the month but we had heard rumors that the photo was taken well off the beaten path of the playa. Here’s that photo:

    Image originally posted on the Death Valley National Park Facebook page. Used with permission.

    Image originally posted on the Death Valley National Park Facebook page. Used with permission.

    This is what happens when logic flies out the window. This is pure stupidity and selfishness at it’s worst. Matt Kloskowski wrote an article that somewhat defended the actions of whoever did this. He wasn’t by any means saying it was ok, just that they didn’t know any better and that it’s just dirt. I respectfully disagree. When I took my workshop group out onto that playa, it was plenty dry enough to walk on without leaving any trace. If it was still damp or muddy, we would have turned right around and left (the group knew that going in). As we explored the Racetrack during sunset, it was virtually impossible to find a good composition that didn’t have footprints littering the scene. It was far, far worse than I had expected. Nobody could have done this without at least thinking to themselves that maybe they shouldn’t be doing it. I refuse to believe otherwise.

    But it’s just dirt – who cares?

    It matters because the playa, and the park as a whole, only get around one to two inches of rain per year. That means that these footprints will likely be on the playa for years and years. Unfortunately, that’s not where the problem ends.

    Childish playa mischief

    Another thing that becomes painfully obvious while exploring the Racetrack Playa is the increasingly high amount of mischief going on. The very first rock trail that I came to on the playa had no rock at either end. The next trail I came to was around 15-20 inches wide (quite large for the playa) but only had a tiny rock (maybe 6 inches) at the end. Yet another rock trail I found was just the opposite; around 6 inches wide but with a much larger rock at the end. There were trails with no rocks, trails with rocks at both ends, rocks with far too extravagant trails behind them and so on.

    It’s quite clear that people tamper with the rocks at Racetrack Playa. Unfortunately, the likely source of this mischief is other photographers. It takes a LOT of walking and a LOT of patience to find the perfect rock, with a perfect trail behind it, with a perfect backdrop behind that. The problem is, some people don’t have the amount of patience it requires to get a shot like that. My guess is that photographers are finding good trails and good backdrops, and then replacing the rocks in front of them with larger rocks from somewhere else. I talked to one photographer out there who heard a rumor that another photographer took a picture of a rock and then move it as far away as he could, ensuring that nobody else would ever get the same photo.

    There have also been tire tracks both times I visited the playa, leading out toward the rocks. So who’s responsible for that? Is it tourists, or photographers who just don’t want to make the hike out to good rocks? Is it people who take their trucks out on the playa to drag the rocks around? Who knows. Either way, there are plenty of signs prohibiting driving onto the playa.

    So what can we do?

    I think the most important thing we can do is just get the word out. I’m convinced that the overwhelming majority of photographers are good people and respect the things they photograph. It’s just unfortunate that the small percentage of people who don’t fall into that category can completely ruin a good thing like the Racetrack Playa.

    I hate to say it, but at this point I think I would totally support Death Valley National Park changing the Racetrack Playa to a permit only destination and even making it a lottery system much like Vermillion Cliffs National Monument. Those who get accepted to go in will be educated on the playa, how to take care of it and precautions to take when going out. The footprints would disappear, the mischief would go away and photographers everywhere would rejoice.

    racetrack-playa-rock-james-brandon

    Conclusion

    My experience with the Racetrack Playa has been a frustrating one to say the least. That’s why I really want to get the word out about the shape that it’s in and get people talking about it. What do you think about all this? What’s your opinion? How should we fix it? Let me know in the comments below!


    Editor’s note: I think this is an important topic for discussion. Some photographers like Ansel Adams were key in the conservation of National Parks in the US and he was a big advocate for leaving nature natural. So how have we gotten so off track since Ansel Adam’s time? If photographers of his era were as careless and selfish there might not even be parks for today for us to enjoy. So what legacy will be leave our future generation? How can we make a stand and make a difference? I just used this quote on someone else and thought it appropriate to share here also:

    I am only one,
    But still I am one.
    I cannot do everything,
    But still I can do something;
    And because I cannot do everything,
    I will not refuse to do the something that I can do.

    Edward Everett Hale (often wrongly attributed to Helen Keller as she has used it in her writing as well)

    So what will you do?

    The post Is Visiting the Racetrack Playa in Death Valley Worth It? by James Brandon appeared first on Digital Photography School.

    Digital Photography School

  • 4 Steps to Photoshop Artistry Using Fine Art Grunge Techniques

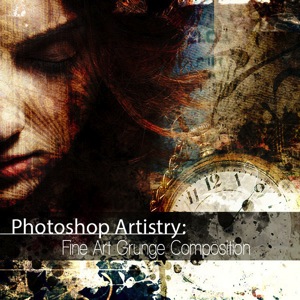
    PhotoshopGrunge600x600

    Image by Sebastian Michaels

    Sebastian Michaels has the course Photoshop Artistry: Fine Art Grunge Composition which is current on sale for 67% off at SnapnDeals.com for a limited time only. Grab it now before the deal is over.

    One question. Do you sharpen just about all your images? If so … you should stop. As photographers we tend to want our images to be perfect: perfect exposure, perfect white balance, perfect sharpness. But aren’t you a little tired of being so perfect all the time? Let me clue you in. Art doesn’t always have to be so darn pretty. What if instead you let yourself RELAX a bit, lighten up, and have some fun? What if you let yourself get a little messy? Maybe not full-blown grunge. But how about “fine art grunge”?

    Start here: a little more blur, a little more noise, an unexpected angle or crop, perhaps some striking effect of light combined with a subject you never would normally have thought to consider.

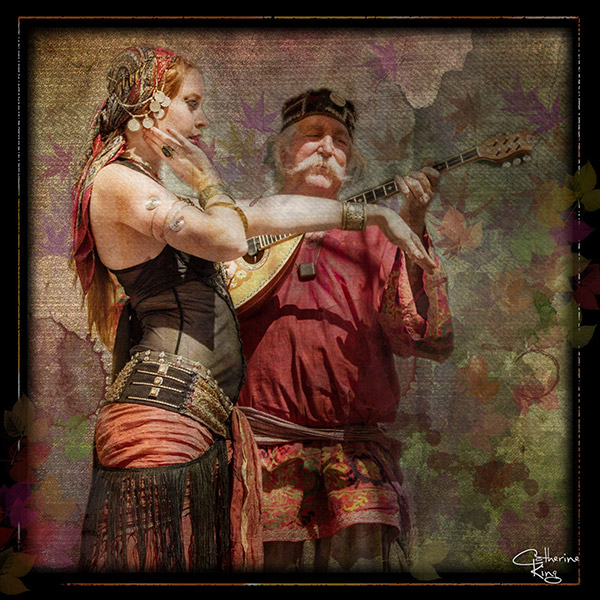
    BellyDance

    Photo credit: Catherine King (course student)

    Sometimes we forget that at our core we are ARTISTS. Owning a Canon 5D Mark III rig and enough lighting gear to stage a Pink Floyd reunion tour doesn’t change that. Just because we spend so much time trying to capture the perfect shot doesn’t mean that we can’t switch it up now and then and treat our images (even our mistakes, even our botched shots) as nothing more than the starting point in more elaborate artistic compositions.

    Here’s a mental trick to get you started. Think of some of your favorite shots. But instead of imagining your photos all printed pretty and perfect, imagine them layered-in and composited with other images and rendered as a painted canvas.

    Think paint on canvas. Not that you need to simply run a paint filter on your photos. That’s not going to cut it here. Think instead of paint on a canvas in the sense of a wild-eyed painter with oil paint in his hair, brushes sticking out of his pockets and one clenched between his teeth – attacking a canvas in a frenzy of creativity and passion. When was the last time you approached your photography with that kind of intensity? When was the last time you let yourself step outside of your serious photographer role and actually felt like an ARTIST creating a great canvas?

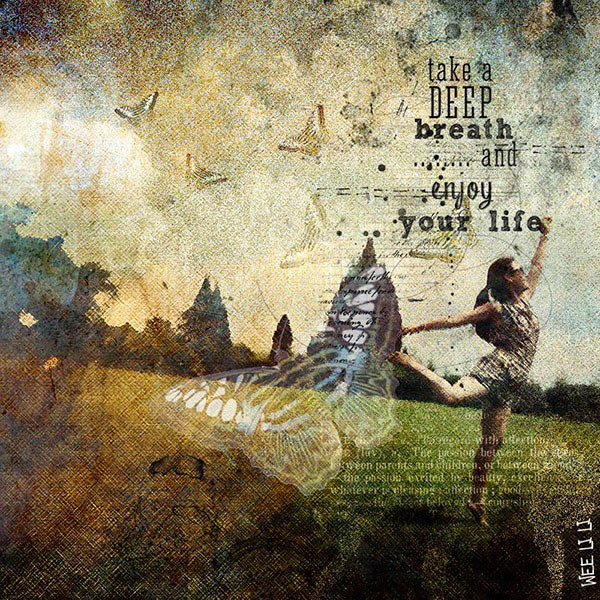
    EnjoyYourLife

    Photo credit: Li Li Wee (course student)

    That kind of artistry is in you. Let’s look at how you might begin tapping into it.

    STEP ONE: Take More Chances With Your Photography

    I mentioned a little of this earlier. You might already have some shots that you would otherwise delete out of hand just because they are blurred or the contrast is screwy. Give those a second look. Maybe there’s something artistic you could do with them. Maybe you could crop them in a creative way.

    When you are shooting, try some angles you normally wouldn’t even attempt. For that matter, try shooting some subjects outside of your usual comfort zone. Take a walk down a dark alley (or a woodland trail) and see what you come out with.

    Maybe enlist some models you normally wouldn’t have chosen, or stockpile some odd objects and lug them out to quirky locations. In other words: experiment more. Get out of your comfort zone and try something new. Take some chances for your art.

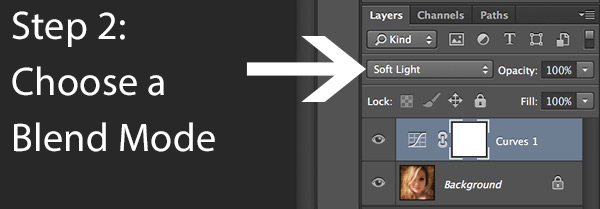
    STEP TWO: Throw In Some Blend Modes (and Maybe Some Textures)

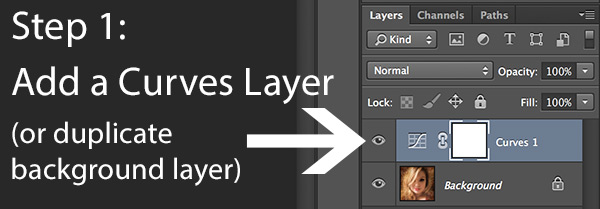
    It’s surprising how much more interesting an image can become simply by slapping a Curves layer on it (or even simply duplicating the background layer) and assigning that layer a Blend Mode. Give it a try and see.

    BlendModes1

    BlendModes2

    Your best bet is almost always with Multiply or Screen blend modes, or alternately with Overlay, Hard Light, or Soft Light. I recommend memorizing the keyboard short cuts for those so you can toggle through them quickly and pick the best. You might also want to lower the opacity of the layer (or you might want to duplicate that layer with Cmd/Ctrl+J, doubling up the effect, or giving that duplicate layer a different Blend Mode of its own).

    You might also want to stick a Layer Mask on there and paint in precisely where you want that effect to show. Every image is different, and layer Blend Modes can create rich results.

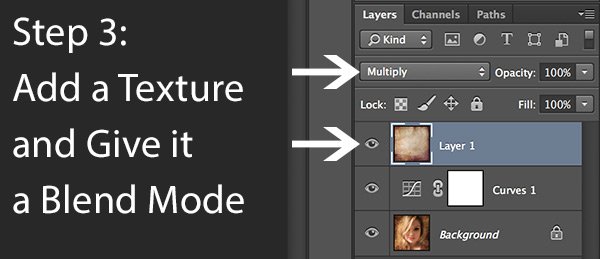
    I recommend also trying out some textures combined with Blend Modes and Layer Masks. A texture or overlay might be as simple as a photo of a grungy patch of concrete, or it might be a scanned watercolor wash. It could also be an intricately layered piece in and of itself, comprised of scanned swatches of paint, scratched up paper with coffee stains on it, colorized with a Hue/Saturation layer and given a dark vignette. When you decide to explore photo-artistry, you begin collecting a lot of these kinds of textures and overlays.

    Texture

    But whatever you use, you drop it in over the image and give it a Blend Mode; again, you might tweak the opacity or employ a Layer Mask. Already your image is likely looking more dramatic and artistic. It’s probably a bit “grungy” at this point, and that’s okay. Embrace it. You might already find yourself astonished; discovering something in the image you never quite knew was there until this moment.

    STEP THREE: Get More Dramatic With Your Lighting or Experiment With Some Filters

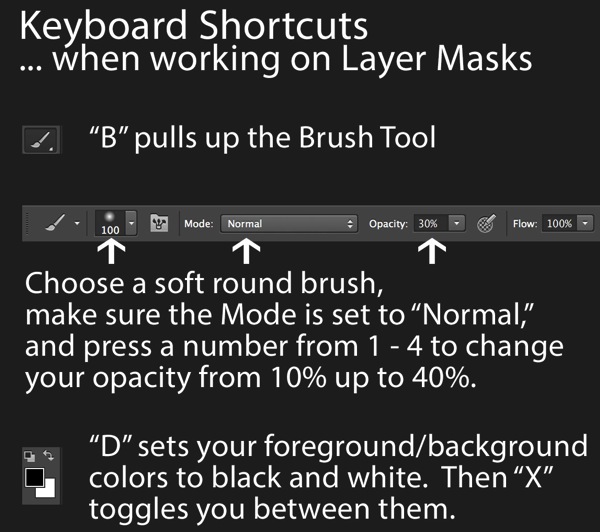
    You never know where an image is going to take you. All you can do is try a few things and see if one of them looks especially cool. One approach you may want to try is to slap another Curves layer on top of the image (or Brightness/Contrast if you’re working with Elements) and deliberately darken the entire image. Go back in with the Brush Tool to paint over the Layer Mask at a low opacity and, in essence, paint in the lighting where you want it. Be sure to use a soft-edged round brush at only about 20% opacity, layering your strokes while using black and white and toggling between the two by pressing the “x” key.

    Here you are painting in where you want light. But you can do something very similar with any of the effects in the Filter Gallery. Here’s how:

    1. Go to the top layer of your layer stack and execute what has come to be known as “The Move”: Cmd-Option-Shift-E on a Mac (or Ctrl-Alt-Shift-E on a PC) to “merge everything visible” onto its own new layer.
    2. Select the new layer you just created and press Cmd/Ctrl+J to duplicate it.
    3. Run a filter from the Filter Gallery on that layer. Go ahead and try out one or more of the painting filters, but experiment with the others as well, and how they interact. LayerMaskShortcuts
    4. After you apply the filter to your duplicate layer, stick a Layer Mask on it and again use a black or white soft-edge brush at low opacity to paint the effect in or out as you like. Try masking out the effect a bit in the areas of greatest focus, leaving everything on the edges more enhanced. Experiment and see where the image takes you.

    STEP FOUR: Go Ahead and Add an Edge Effect and a Signature

    Now that you have an interesting artistic image, it’s nice to give it some kind of artsy edge treatment. There are half a dozen ways to do this (you can even pick up OnOne Software specifically built for the task of creating edge effects), but we can leave the pure Photoshop methods for the next tutorial.

    You might even want to stick a more artistic signature on the corner of the piece, because you’re likely excited at this point, since you are now looking at a work fit for canvas.

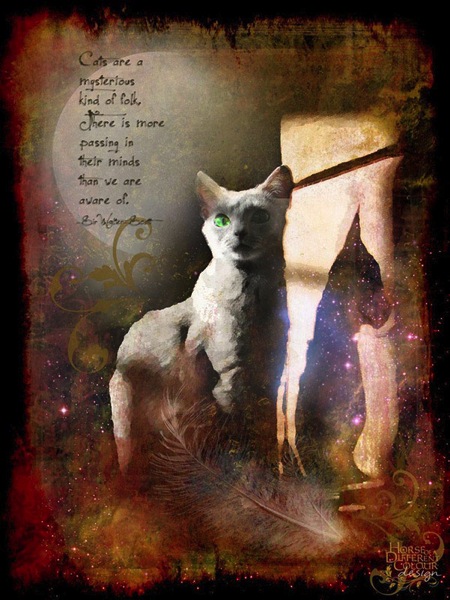
    Cat

    Photo credit: Irene Hofmann (course student)

    You took some chances and it paid off. Next time maybe you’ll get even grungier, because by now you’re seeing that “grunge” is just another way of saying “artistic.” Above all else, whatever your tools, and whatever your approach, you are first and foremost, an artist.

    For walk through of this process and a better idea of what the course is like, check out this video:

    // < ![CDATA[ _evpInit('dHV0b3JpYWwxMjgweDY5MndlYi0xLm1wNA==[evp-f593aa84764ec0c7dba0fa770e9114bc]'); // ]]>

    Sebastian Michaels has the course Photoshop Artistry: Fine Art Grunge Composition which is current on sale for 67% off at SnapnDeals.com for a limited time only. Grab it now before the deal is over.

    The post 4 Steps to Photoshop Artistry Using Fine Art Grunge Techniques by Sebastian Michaels appeared first on Digital Photography School.

    Digital Photography School

  • Rhino Slider PRO 4ft Review – Camera Rail System for Time Lapse and Video

    If you’re into Videography or time lapse photography, chances are you’ve either already got yourself a slider or are considering making that purchase. Smooth camera movement can really add major production value to your footage and the key word here is ‘smooth’. Having your camera glide through space like it’s floating on air gives a huge boost to any kind of footage.

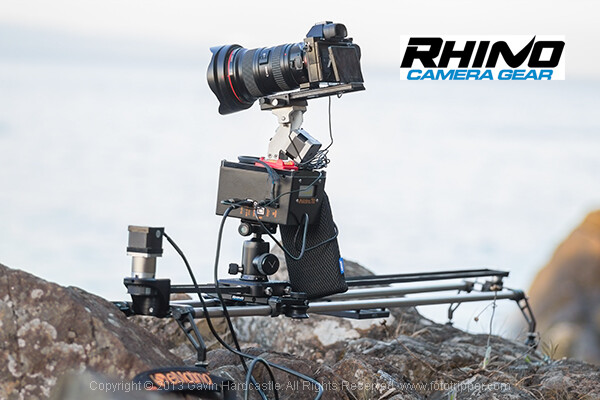
    Enter the Rhino Slider Pro 4ft from Rhino Camera Gear, currently priced at $ 550. As the name suggests, this is a four foot wide slider, onto which you can attach your camera or take things a step further and add a robotic tripod head for a three axis solution of motion control awesomeness.

    Rhino Slider PRO 4ft

    How Smooth is the Slide?

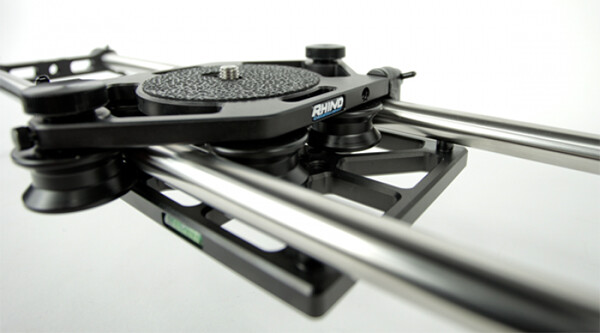
    The most important thing to consider when thinking about buying a slider is the smoothness of the sliding action. This is where the Rhino slider excels. The sliding motion of the carriage on to which you place your camera is as smooth as silk. Once you’ve set the tension on the outer wheels of the carriage, you’re good to go and you can rely on a super smooth slide every time.

    Rhino Slider Pro Review

    Build Quality

    There is a huge difference between the build quality of a sub $ 300 slider and what you’re getting with the Rhino. This is a sturdy, well built unit, that performs well in all kinds of conditions. Sliders are a bit like tripods, if you buy a really cheap one –  it’ll probably end up in the trash. Spend a little more and you’ll get a unit that delivers the goods and lasts a long time. All of the Rhino slider parts are well machined and have that solid, reliable feel to them.

    Rhino Slider Review PRO 4ft - Gavin Hardcastle

    Heavy is Good Right?

    Of course, all of that stability comes at a cost of added weight. The product page on the Rhino Camera Gear web site says that the Rhino Pro 4FT Slider weighs around 10 pounds (4.54 kg). That might not sound like much but by the time you’ve strapped on your camera bag, tripods and any other gear, you’ll be carrying the Rhino slider in its case and holding it in your hand. Talk about a forearm workout. Turns out you can’t have your cake and eat it.

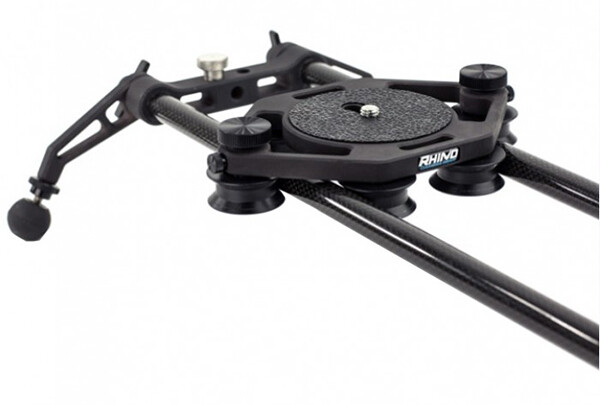
    For those concerned about the weight, you might want to consider the carbon fibre rails or two foot rails to keep things more portable on long bush hikes.

    Rhino Slider Carbon Legs

    Rhino Slider Pro shown with Carbon fibre rails which weigh much less than the stainless steel ones.

    The Rhino Gear Carry Case

    The test unit I received from Rhino Camera Gear came with the Rhino Armor – Slider Carrying Case 4ft, which is an additional $ 100. Let’s be honest, you’re not very likely to be dragging a 4ft slider into the bush without the carry case so you might as well consider it a foregone conclusion that your total cost will be $ 650. On the plus side, the carry case has space for extra rails so that you can extend the length of your slide. Having more rails means more weight, so I’d definitely opt for the carbon rails.

    I found the case to be just a little too short. It was difficult and fiddly to fit the slider back in the case due to the four legs on the ends of the slider. If the case had been an inch longer I reckon this would have been much easier. I’m guessing they make it super tight so that the slider doesn’t shift in the case during transport but there’s tight, and then there’s this.

    Rhino Armor Carry Case

    Pros for the Rhino Slider PRO 4ft

    • Super smooth sliding action
    • Build quality
    • Value for money
    • Ease of use

    Cons against the Rhino Slide PRO 4ft

    • Carry Case could be an inch longer to make it easier to pack the slider
    • Stainless steel rails are heavy – consider buying carbon rails if you are going on long hikes
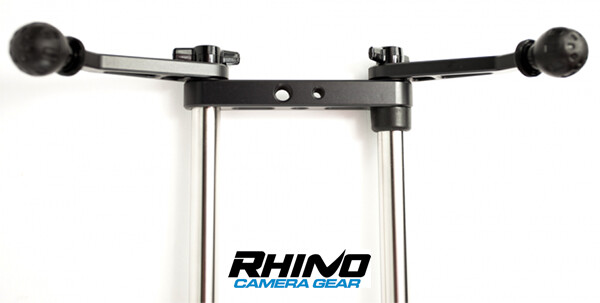
    • End plates could have been taller. I found that the carriage hit my tripod plates long before it hit the rubber brakes.

    Rhino Slider PRO Review

    Would I Recommend It?

    Having looked at the prices of similar sliders that boast the same build quality, the Rhino slider is looking like a bargain at $ 550 (+ $ 100 for the carry case). Before shelling out the dollars though I’d like to test out the carbon fibre rails to see if they perform as well. If the whole rig could be made lighter, that would eliminate my worst grumble and make this a near perfect product. If you’re not too bothered about the weight of those stainless steel rails, I think you’ll be extremely satisfied with the build quality and smooth sliding action of the Rhino Slider Pro 4ft from Rhino Camera Gear.

    The post Rhino Slider PRO 4ft Review – Camera Rail System for Time Lapse and Video by Gavin Hardcastle appeared first on Digital Photography School.

    Digital Photography School

  • Tips for Shooting and Processing Better Black and White Photographs

    Photography, as you know, is fundamentally the capturing of light; you are not taking pictures of objects as much as you are recording the light that is bouncing off of them. In the early days of photography, the only medium available to capture this light was monochromatic film, commonly known as black and white. In the 1930s, the invention of Kodachrome, the first successfully mass-produced color film, ushered in an age of color to the art form.

    Bw article3 NEW

    Instead of fading away, however, black and white photography remained throughout the birth of color, and even increased in popularity in the following decades, due to its simplicity and ability to display tones more dramatically than color usually can.

    What makes black and white photography retain its timelessness? A compelling picture is always based on the same fundamentals; lighting, tonal range, shapes, patterns and textures. A black and white photo breaks these fundamentals down to their basics, and is not hindered by the distraction and complexity that color can sometimes contribute. It is truly an art form. The reality of a scene depicted in color is transformed into an artistic interpretation when shown in shades of grey.

    So what do you need to understand in order to produce a great monochrome photo?

    Visualize in Black and White

    One of the most helpful things you can do is something that takes place before you even click the shutter button. Training yourself to envision a scene in black and white will help determine if it will work in that state, or if it would be better left to color. Since you won’t have color in the final shot, you’ll need to visualize the core of the scene instead:

    • How is the light behaving on the objects in the scene?
    • What forms are involved?
    • Are there lights, darks, and shades in between, giving you a good tonal range?

    Scenes that contain contrast and texture will usually provide a good end result when converted to black and white. Fortunately, you can apply monochrome to almost any type of photography, including landscape, portrait, and street photography. The resulting feel of the image depends on the subject; landscape shots of the ocean will have more highlighted textures of the waves, and street portraits done in black and white can have a grittier, more dramatic feel.

    031814 siestaguarshack2 sized

    Taking the Shot

    Many of the basic principles of photography apply when shooting for black and white as well. You’ll need to compose the scene properly, utilizing the rule of thirds where applicable, and properly expose the shot. As always, you’ll want to shoot in RAW, so that any necessary adjustments can be made such as exposure and levels before you begin post-processing.

    When composing, pay special attention to the lines and shapes in the image. These components are even more important when the photo is desaturated.

    Finally, you may benefit from using a polarizing filter. This lens attachment will reduce, or remove, reflections that may be apparent in water or other shiny surfaces. Since these reflections could take away focus from your subject matter, it’s best to do this during the shooting process rather than post-production.

    040613 siesta feet sized

    Post-production

    The most important step in this process is actually converting the shot into black and white. While almost all DSLRs have the ability to shoot in black and white initially, you’re losing an important advantage; the photo will permanently be monochrome. Photographers sometimes think that a poor image can somehow be “saved” by being converted into black and white; this is not always the case. If you shoot in JPG format and the black and white (monochrome) setting on your camera, you’ll be producing a black and white JPG image, and lose the ability to convert to color or take advantage of RAW adjustments. BUT if you shoot in RAW in this mode you will still have all the colour data but have the advantage of seeing a black and white preview on the camera screen.

    Black and white conversions in an image editor such as Photoshop can usually be categorized in two ways; destructive, and non-destructive. Obviously, destructive methods actually modify pixels and cannot be easily adjusted. Converting directly to greyscale is a long-used example of this method. Preferably, you want to use a non-destructive method that will allow you to make continued adjustments to the image until you have the tone and shading desired.

    The easiest method (and the one that I prefer) is to use the Hue/Saturation/Luminosity tab in the RAW importer in Photoshop (the HSL panel in Lightroom also does the same thing). Alternatively, you can accomplish the same thing (albeit with a bit less control) by using a Channel Mixer adjustment layer after you’ve imported the RAW file into Photoshop.

    Converting to Black and White with the RAW HSL Controls

    Not only does this method offer more control than simply desaturating the image, it keeps the color profile loaded into the RAW (.CR2) file, allowing you to reopen and adjust it as you see fit. To convert using this method follow these steps:

    • Select the RAW file you wish to convert and open it. The file will open within Adobe’s RAW import dialog.

    Bw article ps1 FINAL

    • Click the HSL/Greyscale tab on the right side of the dialog box (this should be the 4th tab).

    Bw article ps2 FINAL

    • Tick the “Convert to Greyscale” box.

    Bw article ps3 FINAL

    • You will be presented with eight color sliders. Adjust these sliders individually (ensure the “Preview” checkbox is ticked near the top) to see real-time changes in those color channels, and how those changes impact your desaturated image. With a color image, moving the “yellow” slider would modify the yellow in your image, but here, it will make the portions of the image that were yellow change in shading, either lighter or darker depending on which direction the slider is moved.

    Bw article ps4 FINAL2

    That’s it, you’re all done. Few accomplishments in photography are as satisfying as producing a well-done black and white image. You have discarded color, and envisioned your story instead with shapes, lines, shadows, and textures. You’ve opened up a new world of imagery to yourself, and exponentially expanded your repertoire.

    Now…what will you do with it? Share in the comments below if you have anything to add or would like to show us your new black and white images.

    The post Tips for Shooting and Processing Better Black and White Photographs by Tim Gilbreath appeared first on Digital Photography School.

    Digital Photography School

  • What Life Lessons Can Teach You About Photography

    family-600x400b

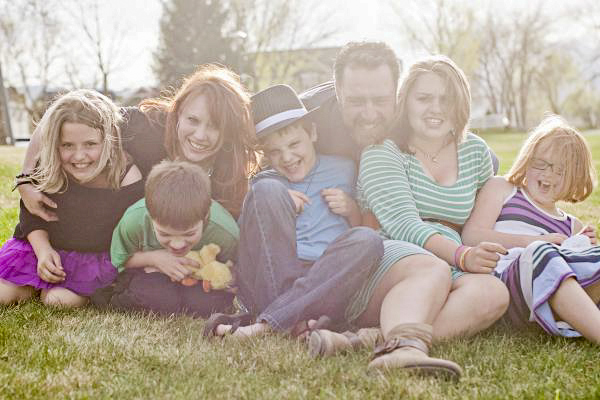
    Image of my new crazy family by Mia McCloy

    A few months ago I got married. (Confetti! Streamers! Cake if you have it!) In doing this, I took on a gorgeous husband and three darling stepdaughters. Add my two adorable sons to the mix and you end up with a total of seven people sharing a couple of bathrooms, a kitchen, and the lion’s share of my patience. All of a sudden things like meal planning and buying in bulk have gone from concepts I’ve heard about to the only thing keeping me out of an inpatient treatment facility. To spare my sanity and enable me to do a hundred loads of laundry each day, everything in my life has been streamlined either by necessity or default including my photography business.

    While it’s a continuous progression I realized the other day, when I was folding a mountain of clothes remembering a simpler time, that I am turning-out some of my best work in over a decade of being a professional photographer. I have to assume this is partly from streamlining everything from my shooting style to my editing process, and partly because my personal life changes have forced my professional life to adapt as well. So far, all for the better if you don’t count the laundry thing. I love them madly but having five children isn’t for everyone. In the event you don’t want to take on a small army of kids as a social experiment just to see if it improves your photography, here are some lessons I’ve learned recently and how you can apply it to your own photography.

    What life lessons can teach you about photography

    IMG_8899b

    Work is more meaningful and balanced

    This sounds so lovely but really it’s just a byproduct of my continuous lack of time. In the past, any image that caught my eye for any reason at all would be subjected to editing and delivery to the client. This would add hours to each job I took on. Now only the really, really good stuff ever sees the light of day, or my client’s eyeballs. Images that once would have gotten ten minutes of editing just because I saw one tiny bit of pretty in it, are now trashed because I know they will only bring down the finished product as a whole. I shoot with more purpose because I am on time constraints I never had before.

    Are my clients suffering? No. They are getting quality over quantity.

    Also, hearing “BUT THAT’S NOT FAIR!” roughly a thousand times a day puts fairness in a whole new perspective. It also puts having children in a whole new perspective, but that’s another ball of wax–unidentifiable and likely stuck to my kitchen floor.

    It used to be that I had no real office hours. I shot when my schedule allowed and when the clients needed. I edited late at night after kids were asleep. I answered emails when I got around to it. I took every advantage of working from home one could. Don’t get me wrong–spending all day in yoga pants is still a giant perk, but now I have office hours. I return emails as soon as possible, even if that means from my phone, while waiting in the carpool lane at one of the three different schools at which I drop-off and pick-up children. I don’t see the sunrise at the end of my workday anymore because frankly I’m way too tired to stay up past 10 p.m. now. My clients are getting every ounce of me they deserve. But my photography business is no longer claiming my very soul. It’s fair for everyone.

    TIP: Don’t let photography take over your life.

    This goes for hobbyists and professionals alike. The work/life balance has always been a tough one for me, but as cliché as it sounds, we all need to reevaluate honestly and often. Shoot what you can, edit when you can, deliver where you can. Contrary to every photography quote I’ve ever heard, shots can be missed–there are a million more opportunities for an amazing picture tomorrow.

    IMG_8688b

    Learn how to say no

    It used to be that if you asked me nicely, I would take on about any assignment. Taking pictures of houses even though I don’t have the equipment, or know-how, real estate photography requires? You bet! Do some product photography for your best friend sister’s boyfriend’s cousin? Sign me up! You want a professional photographer to hang-out with on Saturday mornings for your kid’s little league games? Of course I will! Now, not so much.

    Not only do I not have that kind of time, I don’t have the desire. I’m spending all of the “doing-something-I-don’t-want-to-do” time I can spare chaperoning middle school field trips and taking kids to dentists, doctors, play dates, and street corners with “Free To Good Home” signs. I don’t want to do real estate, product, sport, or a dozen other types of photography. I want to do the kind of photography I’m good, at and the kind that I enjoy doing. On the flip side of that coin, I just can’t do favors like I used to. The line for a minute of my time now starts here and goes back quite a ways. I allow people to cut the line all the time, so you’ll be there a while waiting.

    TIP: Just say no!

    When in your gut it doesn’t seem like a job you want or can do, when the idea isn’t exciting or fun on any level, when you have to work with people that make you miserable, say no. When you are overwhelmed, behind and feel like taking on one more thing may break you, say no. When you are asked to do something that offers you no benefit, not even warm, fuzzy feelings, say no.

    IMG_1674b

    Say “Thank You” more often

    I’ll be honest–I have no idea where this comes from; perhaps me attempting to model good manners for five kids who are all allergic to the word “please”. Regardless it’s a great lesson. It used to be that when I was complimented for my photography I would immediately detract; it’s not that I’m a good photographer, it’s that I have really beautiful clients. It’s not that an image is exceptional, it’s that I got lucky. It’s that I have an amazing lens. It’s that I have a great camera. It’s that perfect light just happened. It’s anything but me. It has taken 10 years but I am finally able to just say, “Thank You”.

    The truth is that I do have a great camera, live in a beautiful place of the world that allows for ideal background settings, and have really beautiful clients. But I’m also a really good photographer. I can find light, work a complicated camera to my every advantage, put people at ease, and edit a diamond in the rough (image) to perfection. As uncomfortable as it still is for me to say that, it must be true because I’ve been doing this a while and people continue to hire me. Lots of photographers have these same talents, and more, and it’s important that we (you as well) start realizing that they are in fact talents and not just random acts of luck.

    TIP: When someone compliments your work say, “Thank you!” with a big smile, and nothing more.

    If this is something you’ve struggled with, it will feel unnatural. Keep doing it anyway. Saying an honest thank you is one of the nicest things you can do in the face of a compliment. Explaining why you think you are not deserving of it is one of the rudest.  

    IMG_9640b

    Play to your strengths

    Having so many people need me (and only me) has redefined my objective. Much like saying no to photography jobs that are not well suited for my skill set, I have been pickier taking on jobs that are in my wheelhouse. Family photography falls into my lap often and most of the time it’s a perfect match for me. My love-hate relationship with weddings however has finally come to a close; weddings are no longer something I will do. Neither is endless editing to achieve fancy vintage (and similar) toning. My clients get a fun and spontaneous shooting atmosphere and final images in straightforward color or black and white. It’s my very best, and most honest work.

    TIP: Try new things when it makes sense.

    Challenge yourself when necessary, but play to your strengths–you’re good at them for a reason.

    IMG_1010b

    Charge what you’re worth

    Just like having a business partner forces accountability, having a personal partner makes me look at the big picture. At the end of the day, photography is my job. It’s how I make my living. There are glamorous and fun sides (though not near as many as people think), and there are dirty and gloomy sides too, just like any job. I can’t work for free. Granted I have pro bono projects I take on (my heart, it bleeds), although I now do them much more selectively, and when I know it will benefit me in the long run either with new business or free marketing.

    Gone are the days when I could take on a very low-paying project with no other benefit just because it seemed like fun. I’m finally charging what I’m worth, I’m no longer part of that deadly middle ground of charging too much to be a good deal, and not enough to be considered any good. I read a while back that as soon as you could no longer afford yourself, you were charging enough. At the time I passed it off as greedy and mean-spirited but I have to say: friends, I’ve come to the dark side and the water is fine. The clients that can afford me, do. The ones that can’t? They save up until they can, or they are careful to take advantage of my rare sales. I haven’t lost clients and bigger than that, my work has more value.

    TIP: Evaluate your pricing.

    Consider everything from wear-and-tear of your equipment to your electric bill that keeps your computer running into the wee hours of the morn. There’s a good chance you aren’t charging what your are worth, if only because it’s hard to make that jump and put a dollar figure on something that used to be a hobby, or something people consider art. I promise you though, if you’re not going to charge, someone else will. So while I consider my business as personal as it comes, it’s still a business. Besides, it takes a lot of laundry detergent to keep my new family of seven in clean clothes.

    What other things have you experienced in life that have helped you learn something about your photography? What other tips do you have? Please share in the comments below.

    The post What Life Lessons Can Teach You About Photography by Lynsey Mattingly appeared first on Digital Photography School.

    Digital Photography School

  • Weekly Challenge Silhouette Photography

    Earlier today I shared some stunning silhouette photography to give you some ideas. If you’ve never done any of this type of photography here’s your chance because it’s also the weekly photography challenge.

    To give you some ideas on how to create a great silhouette here are some articles and tips:

    • Create Powerful Silhouettes by Telling a Story
    • 5 Tips For Photographing Silhouettes
    • How to Photograph Silhouettes in 8 Easy Steps

    Here are a few images to help you get started

    By Hani Amir

    By Rama V

    By Jens Schott Knudsen

    By Easa Shamih

    By Bill Gracey

    By eNriKeFot?

    By Joey Yee

    By Geraint Rowland

    By Kevin Dooley

    Share your silhouette photography

    Simply upload your shot into the comment field (look for the little camera icon in the Disqus comments section as pictured below) and they’ll get embedded for us all to see or if you’d prefer upload them to your favourite photo sharing site and leave the link to them. Okay, ready to impress us?

    The post Weekly Challenge Silhouette Photography by Darlene Hildebrandt appeared first on Digital Photography School.

    Digital Photography School

  • The World of Fantasy: 40 Surreal Abstract Photography Examples

    The concept of abstract photography is what appears to the eyes as random swathes of color and shapes tossed into a scene. A photographer takes an otherwise ordinary shot and takes it at just the right angle or focus to create a masterpiece of colors, patterns and textures. Abstract photography is totally based on your photographic eye. It’s when you’re Continue Reading

    The post The World of Fantasy: 40 Surreal Abstract Photography Examples appeared first on Photodoto.


    Photodoto

  • A Collection of Great Silhouette Photos

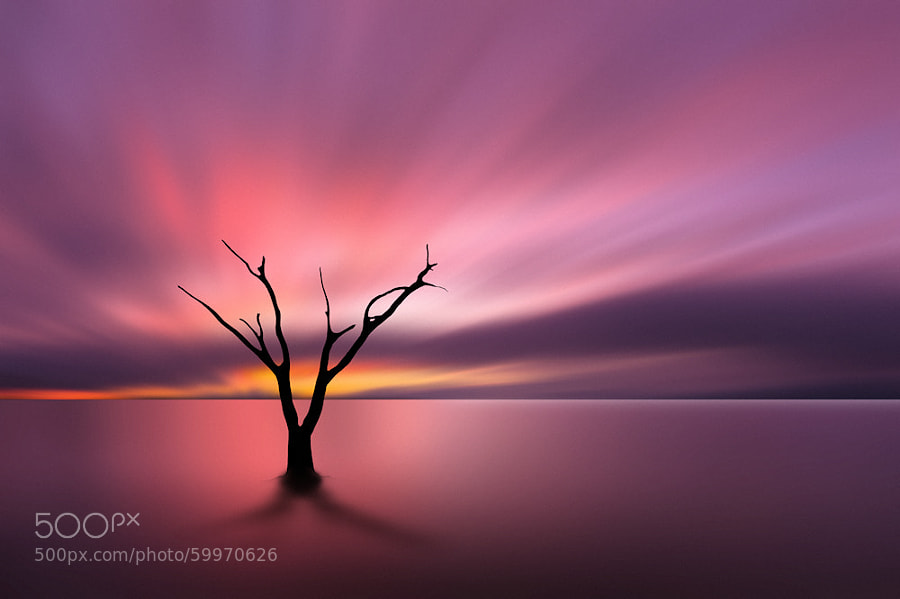
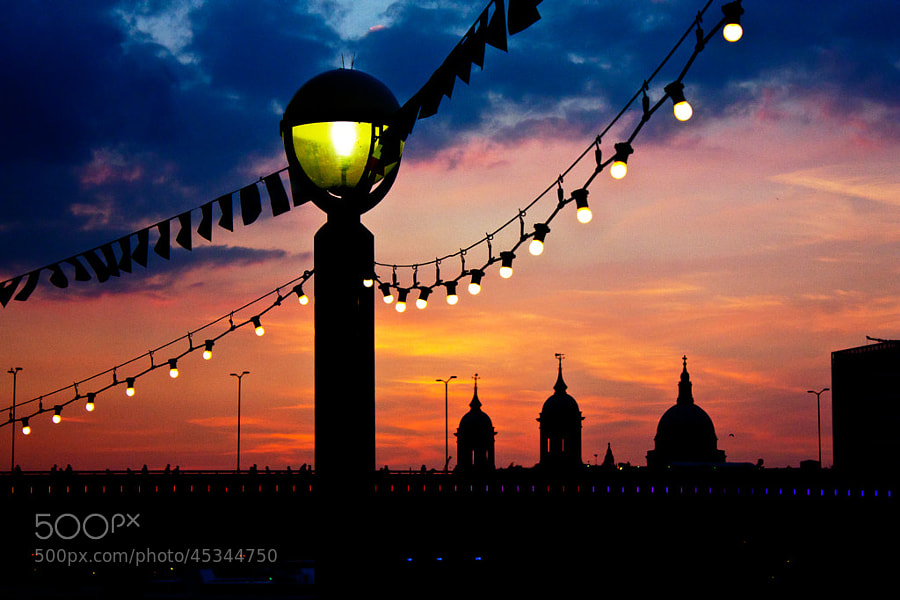
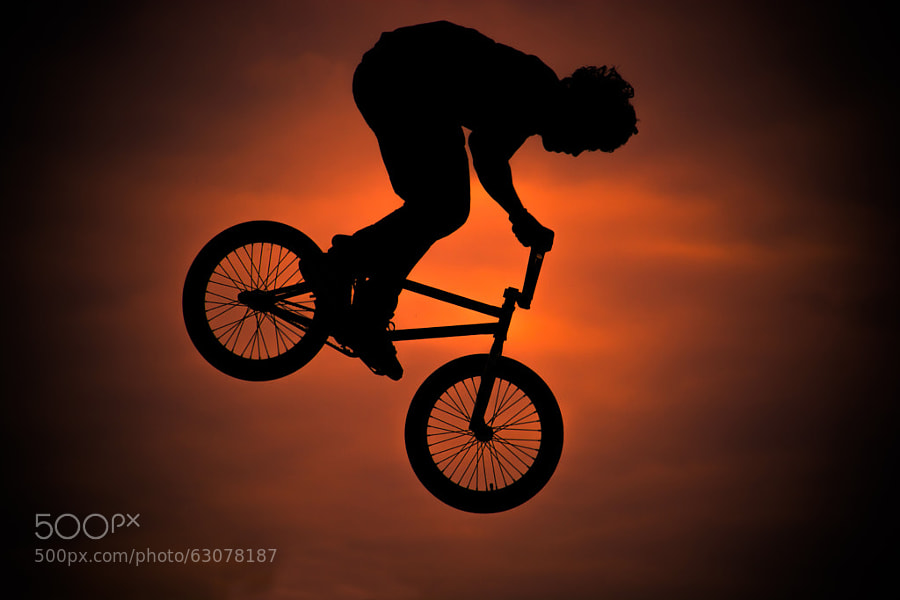
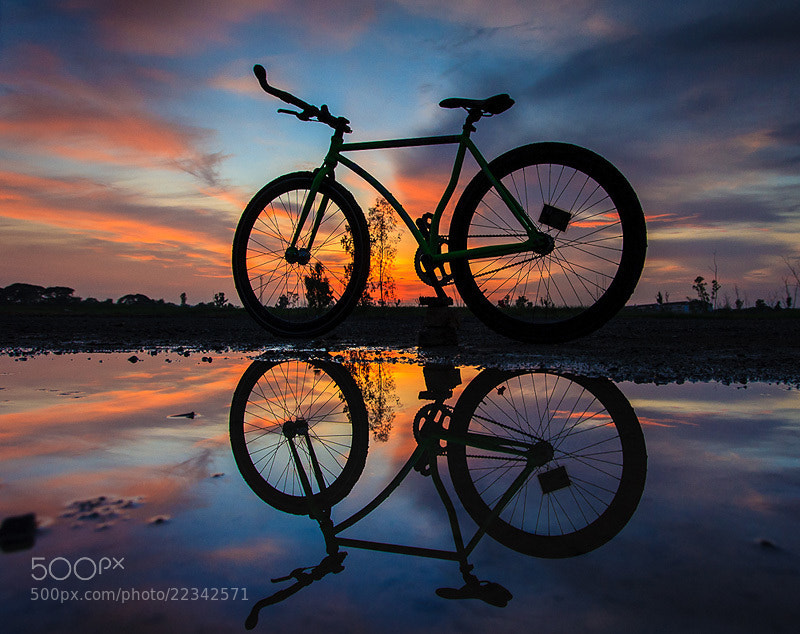
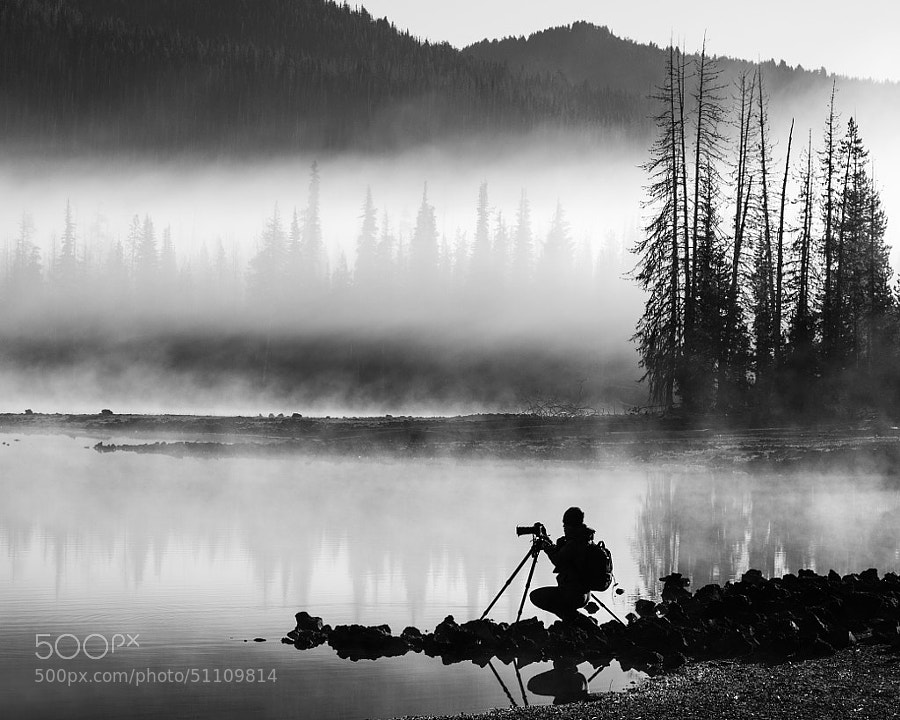
    The Merriam-Webster dictionary defines silhouette as: a dark shape in front of a light background. It is a dramatic way to use backlighting to create stunning photos. Silhouettes are often associated with portraits but there are many other forms as well. 

    Here’s a selection of a variety of silhouette photos  – enjoy!

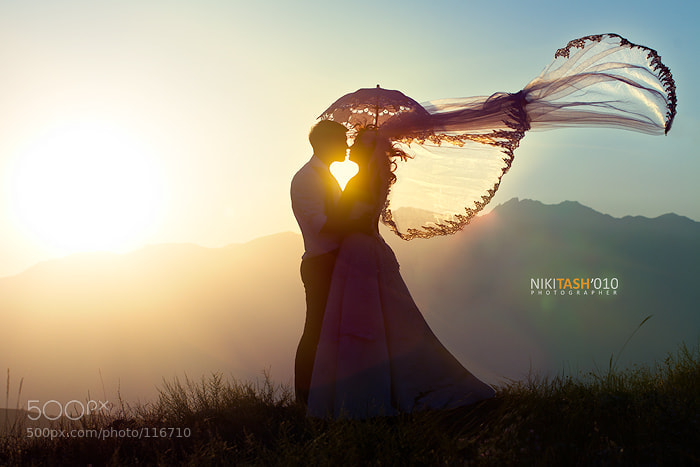
    Photograph re....magic by Marco Petracci on 500px

    re….magic by Marco Petracci on 500px

    Photograph *** by Nikita Shirokov on 500px

    *** by Nikita Shirokov on 500px

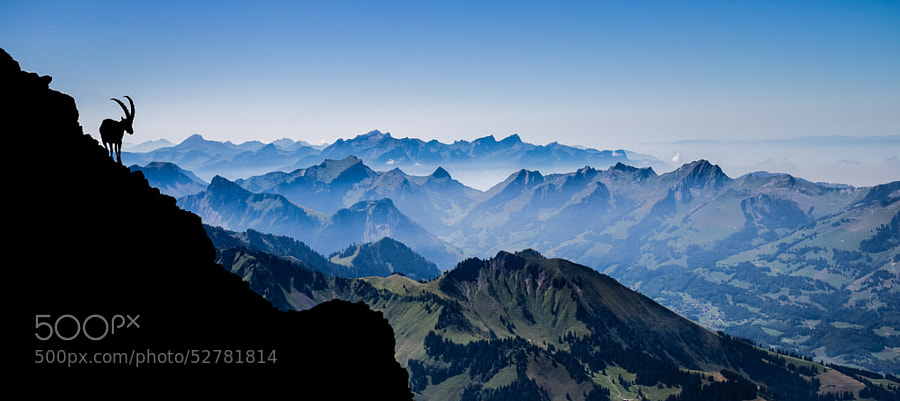
    Photograph Shadow of the Ibex by Gilles Baechler on 500px

    Shadow of the Ibex by Gilles Baechler on 500px

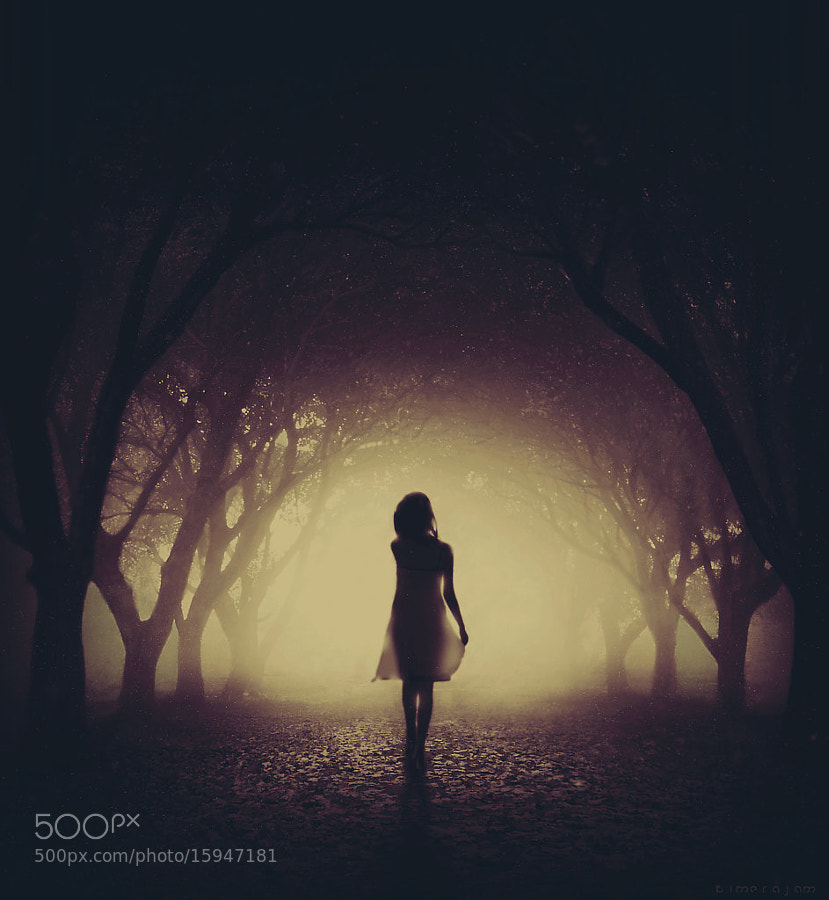
    Photograph the dark alley by kimera jam on 500px

    the dark alley by kimera jam on 500px

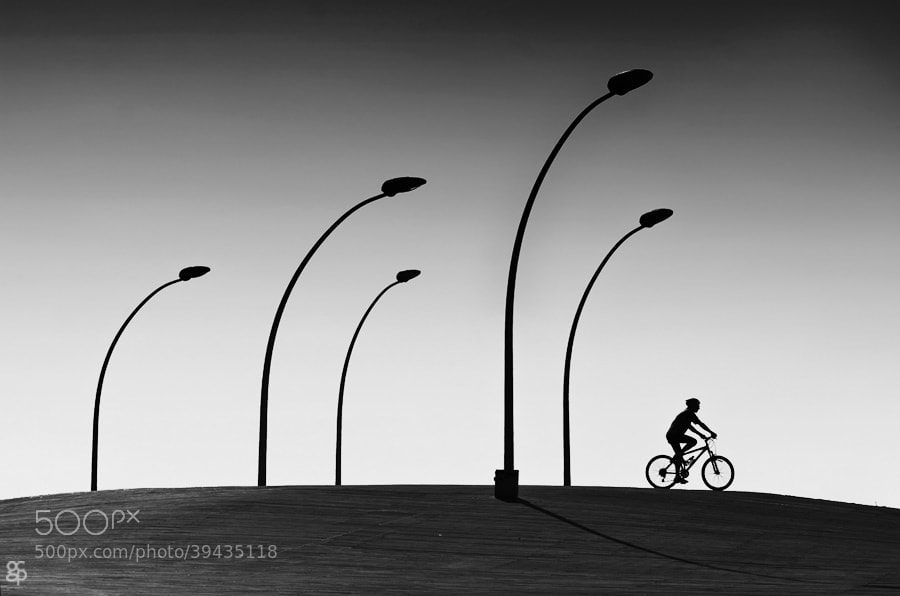
    Photograph Right by Guy Cohen on 500px

    Right by Guy Cohen on 500px

    Photograph Life and Death by Carlos Gotay on 500px

    Life and Death by Carlos Gotay on 500px

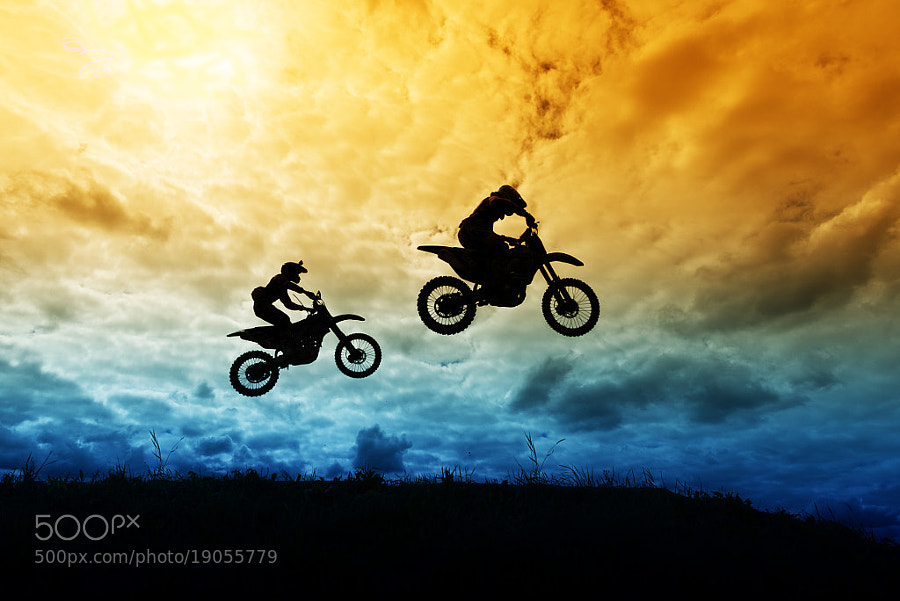
    Photograph Motocross by Daniil Lebedev on 500px

    Motocross by Daniil Lebedev on 500px

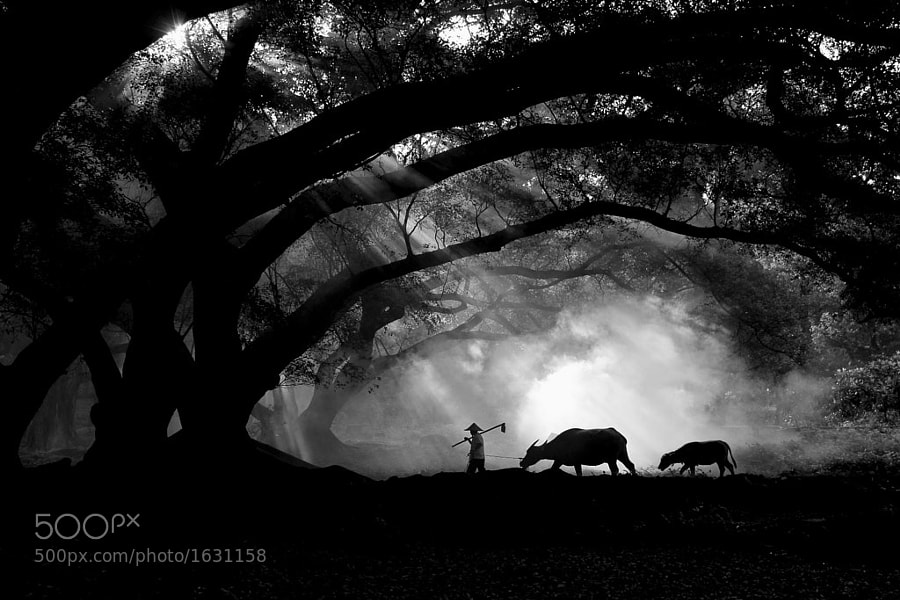
    Photograph Farmer with his buffalos by Jinny Tan on 500px

    Farmer with his buffalos by Jinny Tan on 500px

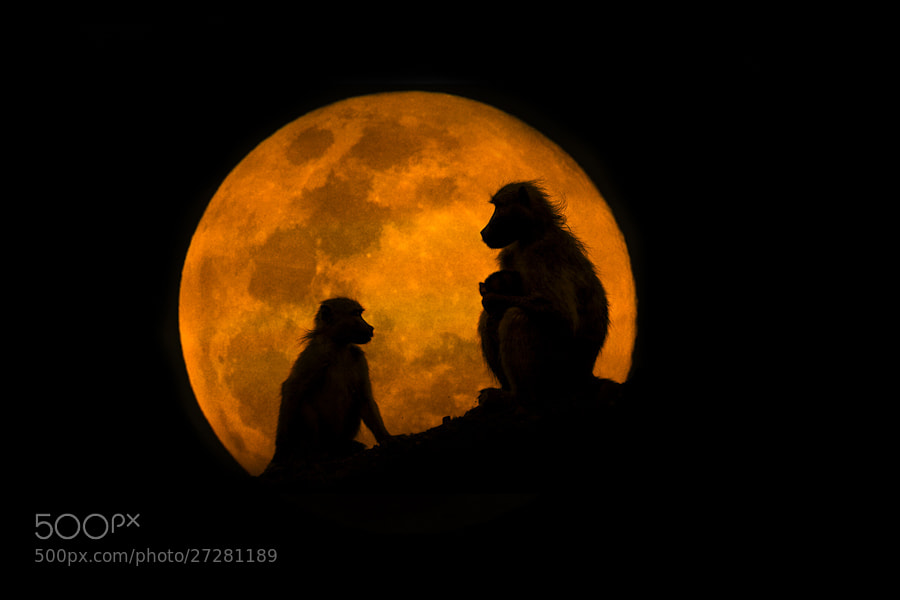
    Photograph The Baboons & The Moon by Mario Moreno on 500px

    The Baboons & The Moon by Mario Moreno on 500px

    Photograph Sunbathing Gekko on Leaf by Leon Dafonte Fernandez on 500px

    Sunbathing Gekko on Leaf by Leon Dafonte Fernandez on 500px

    Photograph Dont debase and stop,success is not so far...... by Krishna Kumar on 500px

    Dont debase and stop,success is not so far…… by Krishna Kumar on 500px

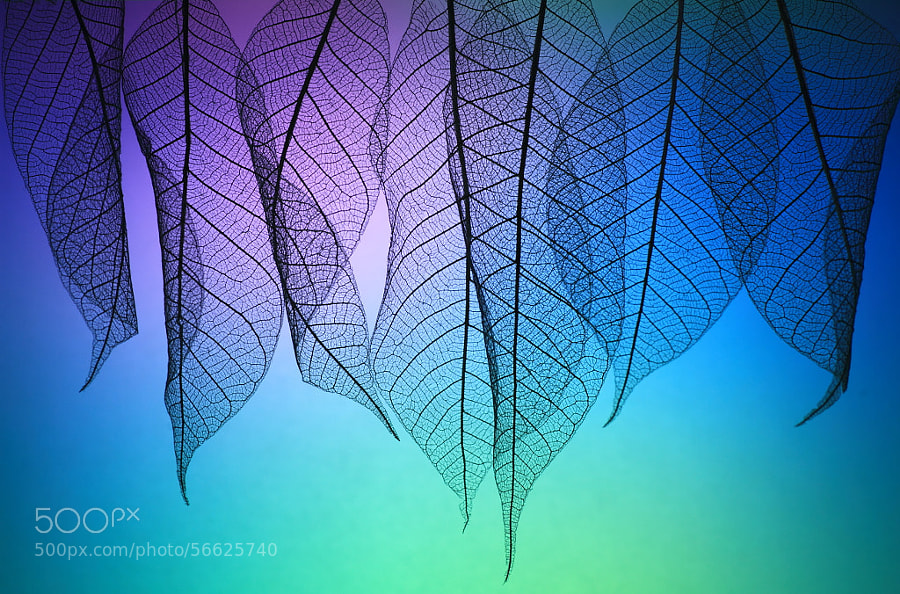
    Photograph Prismatic leafs by Shihya Kowatari on 500px

    Prismatic leafs by Shihya Kowatari on 500px

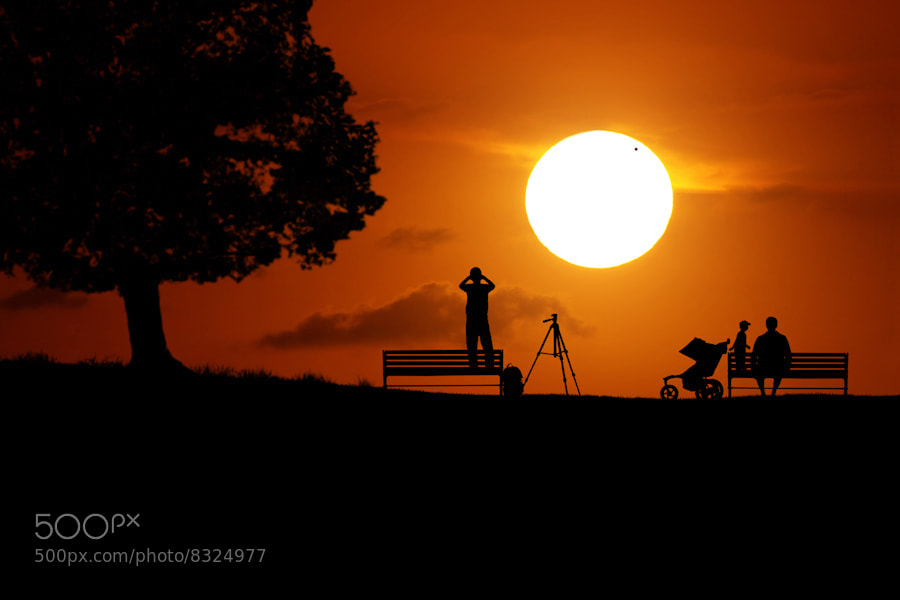
    Photograph Venus Transit by Carlos Gotay on 500px

    Venus Transit by Carlos Gotay on 500px

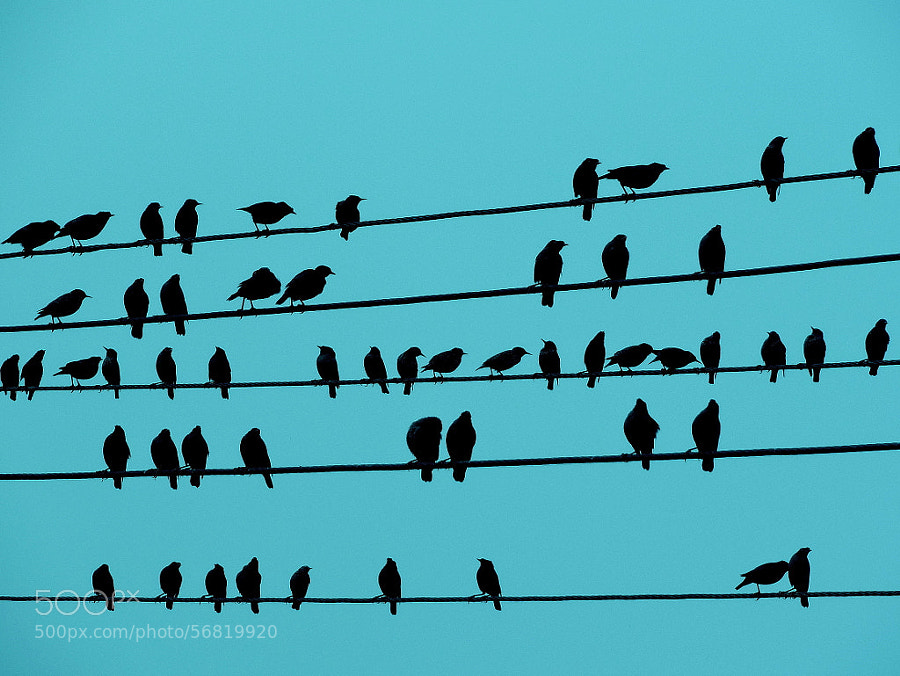
    Photograph Music Notes by Rahul Tripathi on 500px

    Music Notes by Rahul Tripathi on 500px

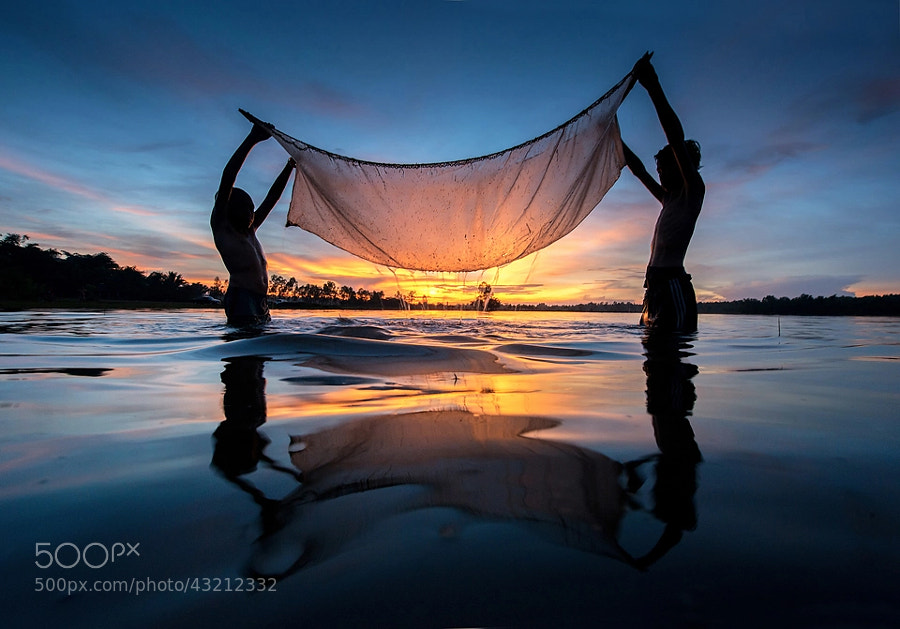
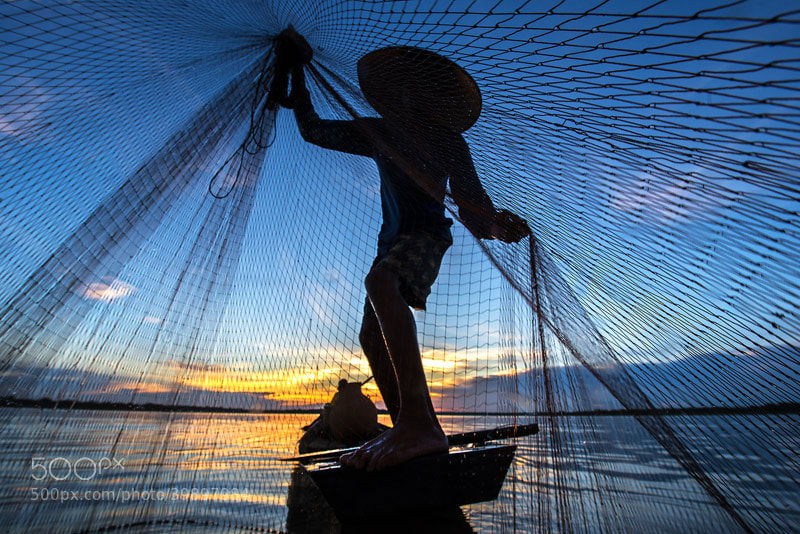
    Photograph Young fishing by sarawut Intarob on 500px

    Young fishing by sarawut Intarob on 500px

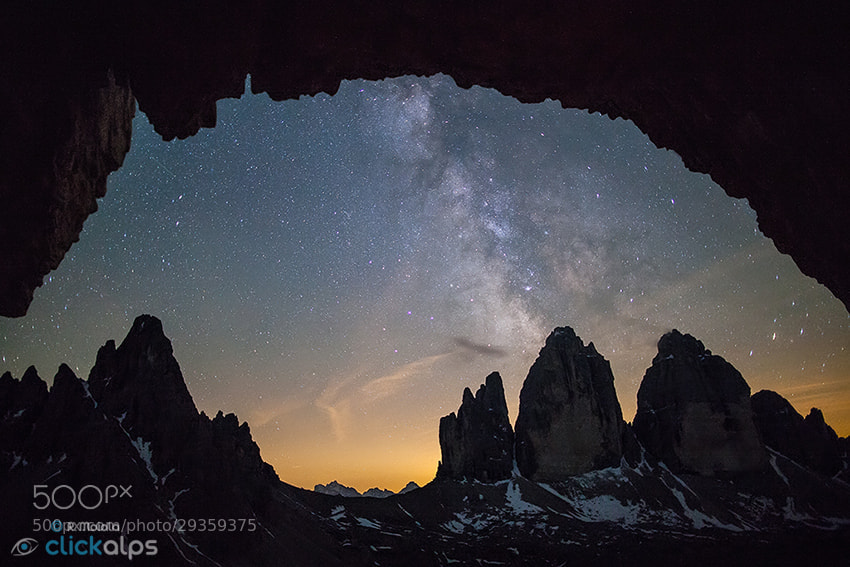
    Photograph Dolomites Postcard by SysaWorld Roberto Moiola on 500px

    Dolomites Postcard by SysaWorld Roberto Moiola on 500px

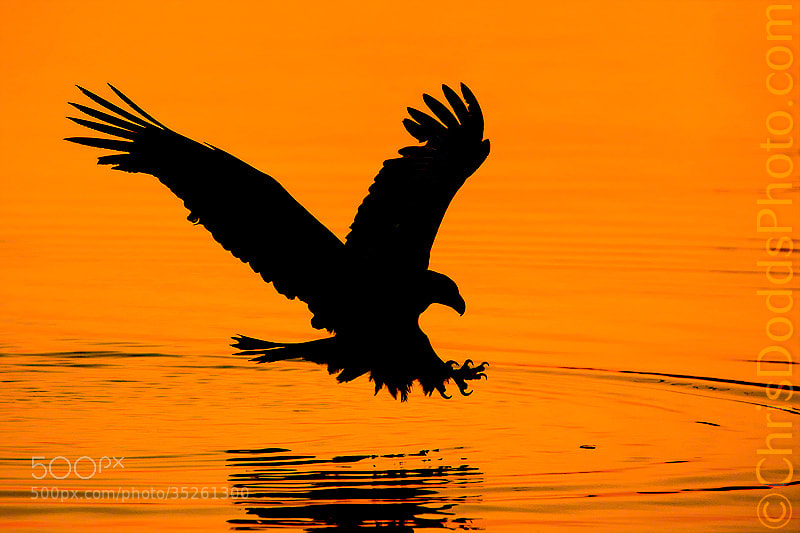
    Photograph Bald Eagle Silhouette by Christopher Dodds on 500px

    Bald Eagle Silhouette by Christopher Dodds on 500px

    Photograph Lunar Landing by Adrienne Elliot on 500px

    Lunar Landing by Adrienne Elliot on 500px

    Photograph Pale love story by Shihya Kowatari on 500px

    Pale love story by Shihya Kowatari on 500px

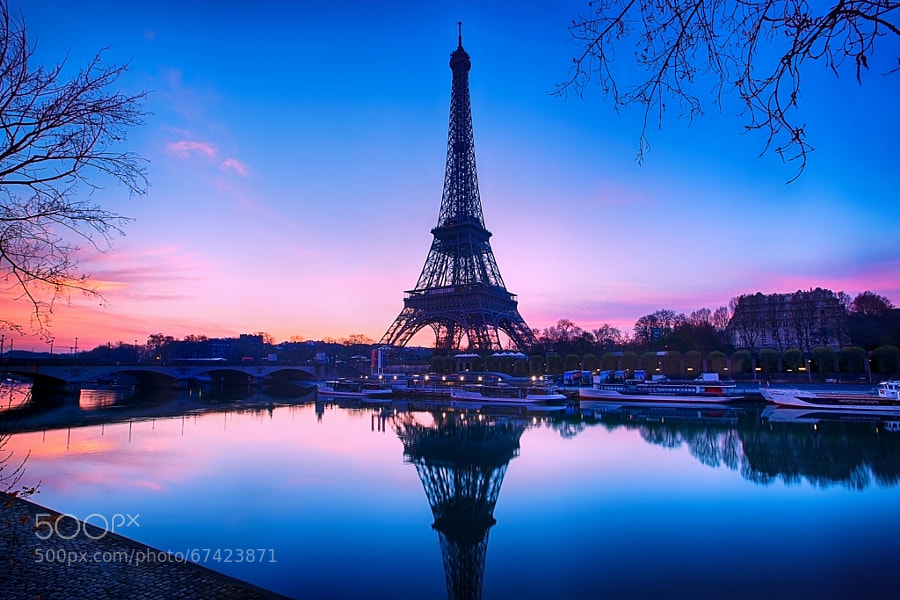
    Photograph Pink Paris... by Charlie Joe on 500px

    Pink Paris… by Charlie Joe on 500px

    Photograph The Silhouette of an Icon by Alister C. on 500px

    The Silhouette of an Icon by Alister C. on 500px

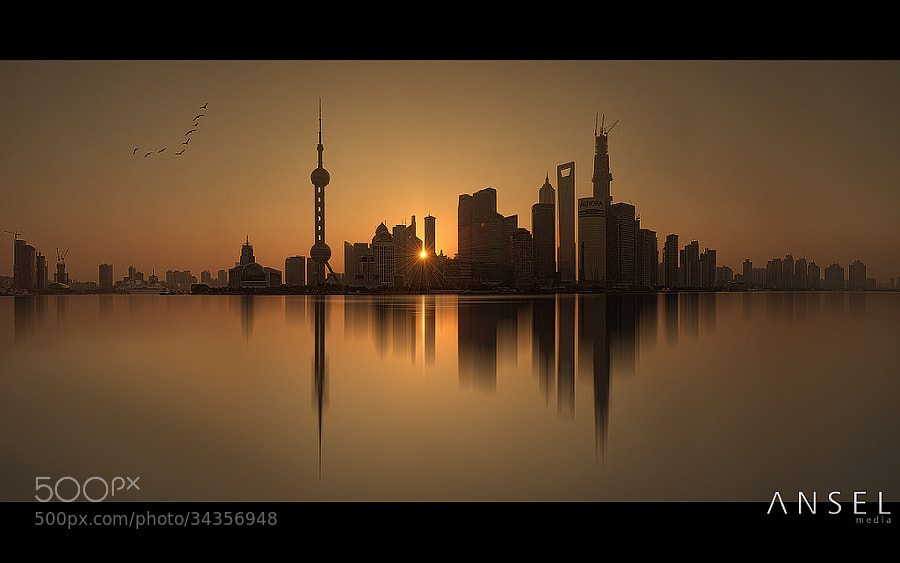
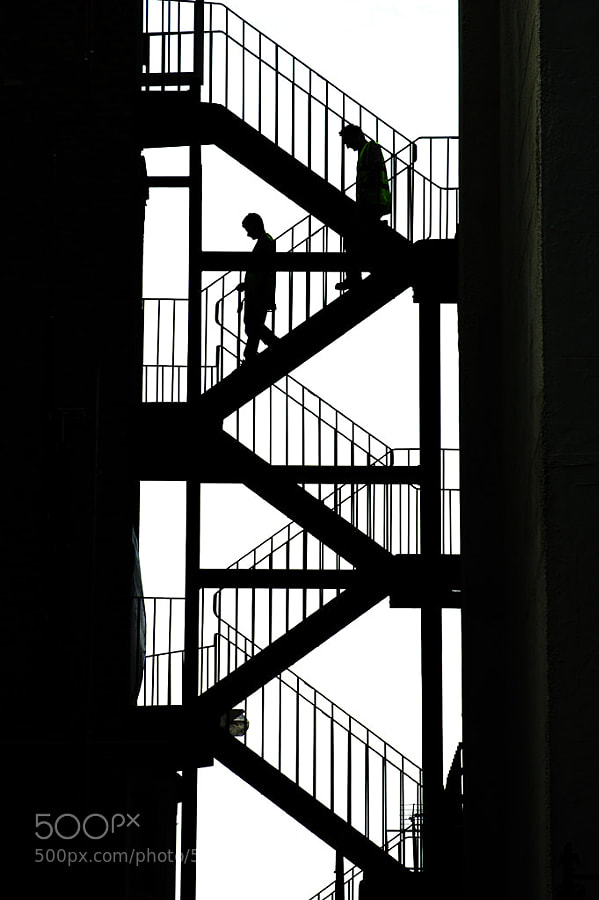
    Photograph Shanghai Silhouettes by Jonathan Danker on 500px

    Shanghai Silhouettes by Jonathan Danker on 500px

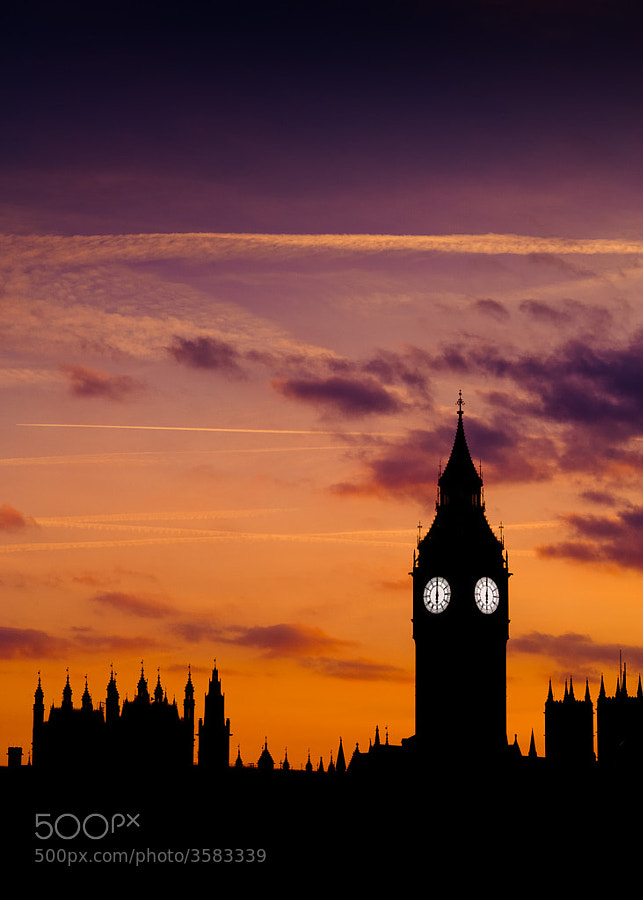
    Photograph London by Sémaphore  on 500px

    London by Sémaphore on 500px

    Photograph Six O'Clock by Sean Molin on 500px

    Six O'Clock by Sean Molin on 500px

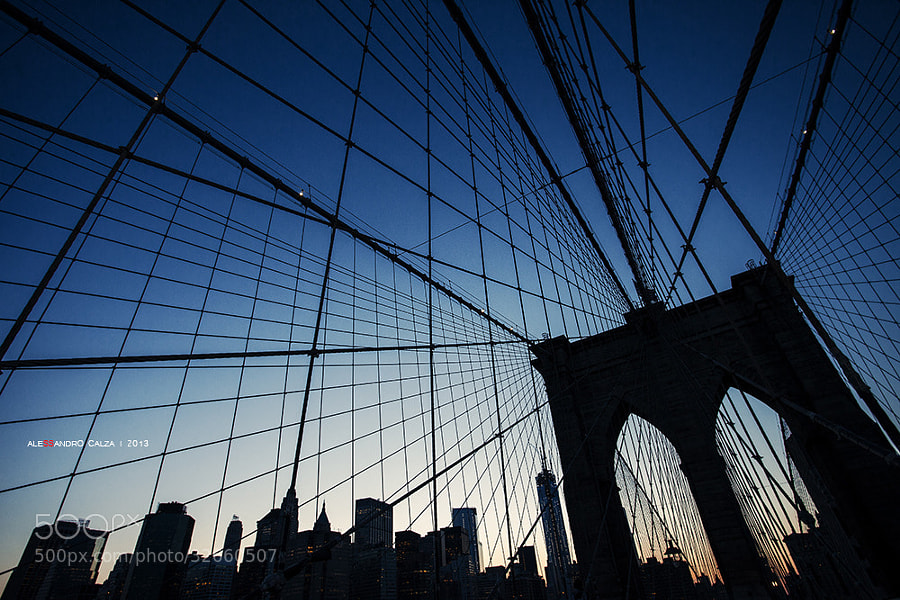
    Photograph Brooklyn Bridge by Alessandro Calza on 500px

    Brooklyn Bridge by Alessandro Calza on 500px

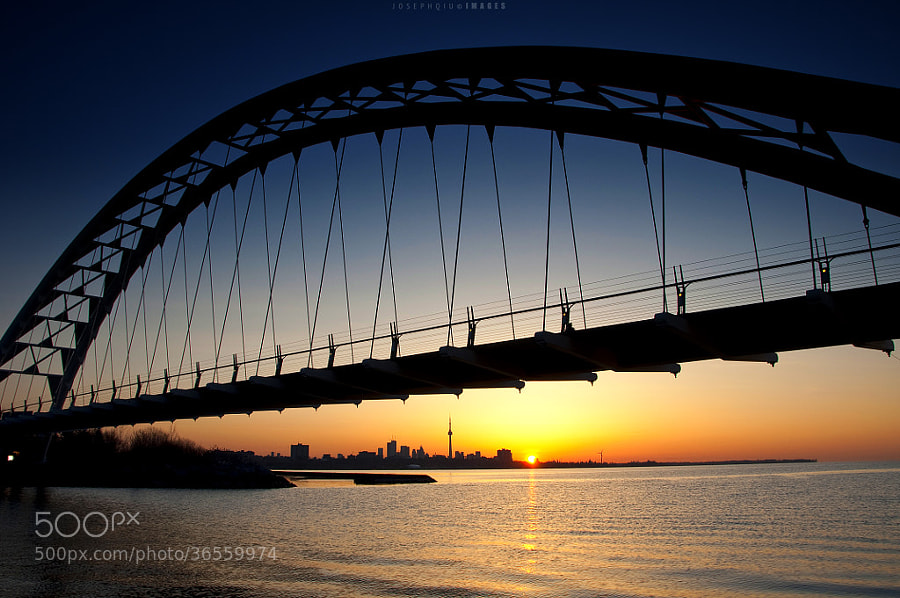
    Photograph Bridge the Day and Night by Joseph Qiu on 500px

    Bridge the Day and Night by Joseph Qiu on 500px

    Photograph London Bridge at sunset by Rob Dawkins on 500px

    London Bridge at sunset by Rob Dawkins on 500px

    Photograph The Legend by Milonean Vlad on 500px

    The Legend by Milonean Vlad on 500px

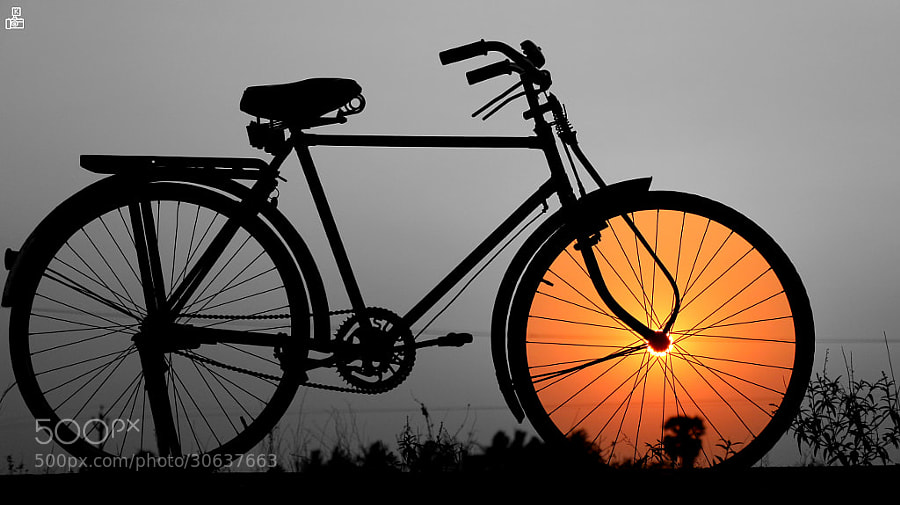
    Photograph ?Bike. by Khatawut J on 500px

    ?Bike. by Khatawut J on 500px

    Photograph Moment by Majeed Badizadegan on 500px

    Moment by Majeed Badizadegan on 500px

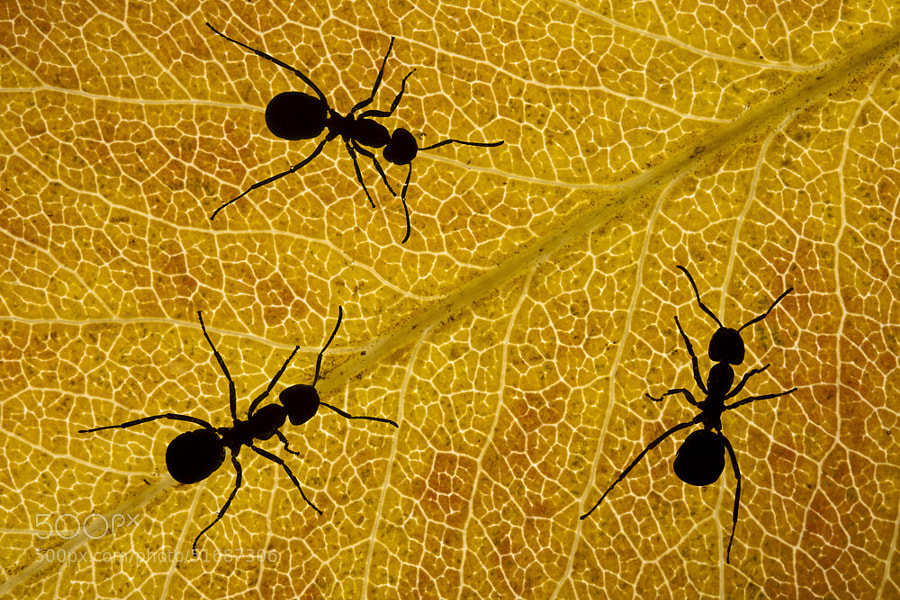
    Photograph Ants silhouette by Barni Buslig on 500px

    Ants silhouette by Barni Buslig on 500px

    Photograph Goodnight by Luke Strothman on 500px

    Goodnight by Luke Strothman on 500px

    Photograph Whale shark silhouette off Mexico by Simon Pierce on 500px

    Whale shark silhouette off Mexico by Simon Pierce on 500px

    Photograph Sundowners by Adrian Furner on 500px

    Sundowners by Adrian Furner on 500px

    Photograph A Kiss Before... by Ray Sanduski on 500px

    A Kiss Before… by Ray Sanduski on 500px

    Photograph Summer by Bodhi Connolly on 500px

    Summer by Bodhi Connolly on 500px

    Photograph Photographer is fish by sarawut Intarob on 500px

    Photographer is fish by sarawut Intarob on 500px

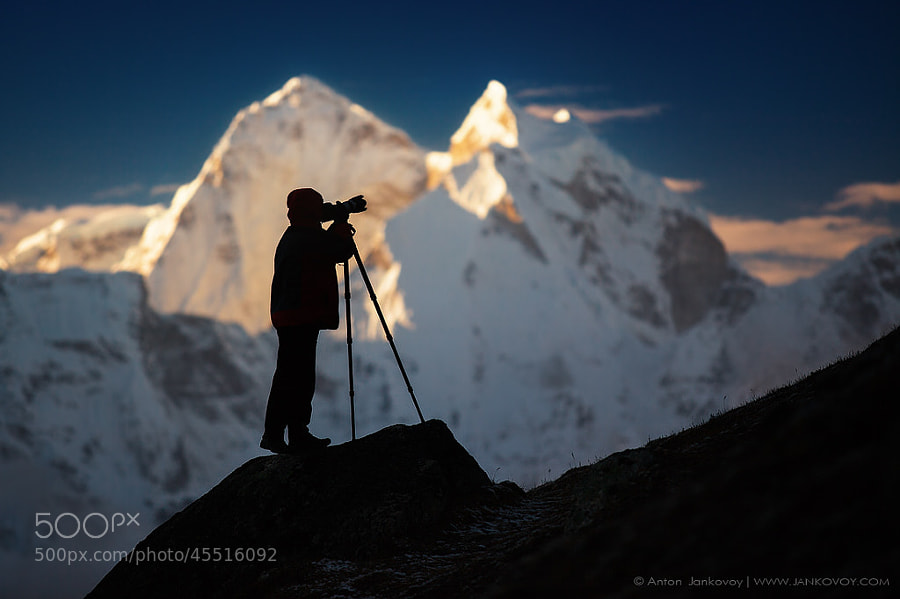
    Photograph Photographer and Mountains by Anton Jankovoy on 500px

    Photographer and Mountains by Anton Jankovoy on 500px

    Photograph Freedom by Prakash singh on 500px

    Freedom by Prakash singh on 500px

    The post A Collection of Great Silhouette Photos by Darlene Hildebrandt appeared first on Digital Photography School.

    Digital Photography School