Category: Photography

  • Take your Photos from Blah to WOW with Lightroom and Photoshop

    Would you like to get started with black and white (or color) fine art photography, but don’t really know how to get the results you want? I will give you some insight in the process to take your photos to the next level and let you see how you can make the most of the not so ideal situation. I will explain how you can take your ordinary photo and transform it from this . . .

    Img1

    to this!

    Img final

    Take your Photos from Blah to WOW with Lightroom and Photoshop

    For the creation of this photo I used both Adobe Lightroom and Adobe Photoshop (Note: any program that handles layers will also work including GIMP or Photoshop Elements). The beginning photo is just a black and white conversion of the color photo, as shot. It is important that when you go out and shoot, you have an idea of the final image in your head. If you are at a location, take a moment and think of what you would like to see as a final result. This way, it will take you less shots to get your winning photo.

    First step the photography, how was this photo created?

    This photo was shot with a Nikon D3000, Tokina 12-28mm f/4 (IF) DX AT-X PRO and Haida ND3.0 (10 stop neutral density filter). That’s right, it’s not a full frame camera! With good light conditions you don’t need one, spend money on lenses instead. I was aiming at an exposure time of minimum 25 seconds, to make the clouds and water smooth. I metered 1/60th at f/14, 100 ISO, so that would give me the 25-27 second exposure (with the ND3.0) I wanted.

    You can find exposure tables online, and sometimes you get them with the filter you buy. If all the conditions were perfect (which wasn’t the case) I wanted to shoot until sunset, expanding my exposure time to over 1 minute. But clouds rolled in (wasn’t forecast) and ruined the light. After a few shots, I got what I wanted and was heading home.

    Next step, post-processing your image

    First load the photo in to Lightroom and give it some minor adjustments to contrast and clarity. Increase the contrast a bit and reduce the clarity of the bottom part of the photo (the water). This can be done with a graduated filter (keyboard shortcut “M”) and moving the clarity slider to the left.

    Now move over to Photoshop to take care of the sky (you can export it directly from Lightroom, right click on the photo and select edit in Photoshop). I was aiming for a nice movement in the sky, but the clouds weren’t going fast enough for my maximum exposure time. So we are going to replicate that with the help of photoshop.

    Duplicate the image and select the sky, using the magic wand selection tool (W). Use the current layer and a brush seize of 30 pixels. When you’ve got your selection (it won’t be perfect but that is fine), click on the add layer mask symbol. (below the layers on the bottom right side of the screen).

    You can make the layer mask more accurate with the pen tool (p). Click on the edge of a building (and later on the bridge) and work your way around the skyline, by clicking on every corner. The pen too will automatically draw a straight path from one point to another. When complete (you have to get all the way back to the first point you made), right click on the image and select “make selection” (feather 0, and make new selection) hit OK in the new window. Now fill your selection with black and you have a nice and clean layer mask of the sky.

    Add motion blur to the sky

    Now you can add a zoom blur to the sky layer, so you get a nice washed out cloud formation. Here is how to do that:

    • Select the duplicated sky layer then select Filter -> Radial Blur
    • In the menu select Blur Method -> Zoom, Quality -> good and amount 70 (you can add more, but that depends on the photo) – don’t hit OK yet!
    • Nest select where the Blur Center is positioned in the right window by clicking and dragging it around (somewhere in the middle for this photo)
    • Hit OK
    • After this you need to clean up the layer, because it now runs over the buildings
    • Hold CMD (alt on win) and click on the layer mask for the sky. Click -> selection -> inverse (you now have everything but the sky selected and hit delete.

    Now you should have something like this:

    Img2

    As you can see the sky is now very pleasing, full of movement. When you look closer you can see that all the wires from the bridge are gone. We will have to fix that next. The wires aren’t straight lines, so the selection process of these is a pain – but worth the effort.

    Using the pen tool (P) you can select all the wires on the background layer (which took me quite some time). You can do this one by one. Select one complete wire and duplicate the selection into a new layer. When you have all of them, merge all of these layers to one and place it above the duplicated sky layer.

    You could also use the Magnetic Lasso Tool (L) to select all the wires but because of the low contrast in some places it won’t work, and you have to correct it later on.

    Using the pen tool is a complete chapter, and I’m feeling that explaining how to use the tool takes too much focus away from this tutorial. It can take some time to master but I highly recommend reading tutorials on how to use the pen tool. You will need it for this image, but for the most of the images you can just make straight selections.

    Here is my selection of the wires:

    Img3

    Now you can add some adjustments to the contrast in the wires and bridge, using a Brightness/Contrast adjustment layer. I used: Brightness +3 and Contrast +24

    Img4

    Final adjustments in Lightroom

    From this point we leave Photoshop and continue in Adobe Lightroom. You could, however, do the same in Photoshop with dodging and burning, but I like the workflow of Lightroom more and used it to get to the final stage of the image.

    From here it is basically just adding and removing light (exposure, contrast, white point) to selective places in the photo and checking for some dust particles. I can go into the details here, but it’s your vision of what you would like to achieve with the photo. Use the gradient filter (M) and the adjustment brush (K) in Lightroom to add and remove light to selected areas of the image. You have to “color” the photo to your wishes and crop it when needed. You are in fact painting with light.

    Here is what I came up with for the final image:

    Img final

    “Catch  the light” – Rotterdam (The Netherlands)

    Do you have any additional tips for processing for that wow factor? Please share in the comments below.

    The post Take your Photos from Blah to WOW with Lightroom and Photoshop by Martijn Kort appeared first on Digital Photography School.


    Digital Photography School

  • Weekly Photography Challenge – Lens Flare

    Earlier I shared a set of images using lens flare as an element of the photograph. In most cases you want to avoid the sun hitting the lens, but sometimes it can be used to your benefit to create an image with warmth and depth.

    So now is your chance.

    The weekly challenge this week is lens flare!

    Need some help? Here are a few articles to give you some lens flare tips:

    • How to use Lens Flare to Your Advantage
    • 5 Tips for Achieving Artistic Lens Flare: How To
    • Using Sun Flares and Starbursts to Create Stunning Images

    Here are a few more lens flare images to get you started:

    By Sean Molin

    By Brian Wolfe

    By Frank Wuestefeld

    By Seth Rader

    By János Csongor Kerekes

    The post Weekly Photography Challenge – Lens Flare by Darlene Hildebrandt appeared first on Digital Photography School.


    Digital Photography School

  • 30 Lens Flare Images to Inspire You

    Well summer is almost here finally (if you live in the northern hemisphere like me)!

    So I thought some sunny images using lens flare for effect would help inspire you to get out and shoot something. So please enjoy these lens flare images I have hand picked just for you.

    Photograph Brooklyn Bridge Sunset by Philipp Klinger on 500px

    Brooklyn Bridge Sunset by Philipp Klinger on 500px

    Photograph Juno by Petr Brodík on 500px

    Juno by Petr Brodík on 500px

    Photograph City Sunset by Ina Gat on 500px

    City Sunset by Ina Gat on 500px

    Photograph Kids days by Sidney Bovy on 500px

    Kids days by Sidney Bovy on 500px

    Photograph Sea beams by Scott Morgan on 500px

    Sea beams by Scott Morgan on 500px

    Photograph Astri cont' by Thomas Crawford on 500px

    Astri cont' by Thomas Crawford on 500px

    Photograph Smeared by Abhishek Vanamali on 500px

    Smeared by Abhishek Vanamali on 500px

    Photograph All bark and some glitter. by Daniel Poon on 500px

    All bark and some glitter. by Daniel Poon on 500px

    Photograph Light by Rich Kolasa on 500px

    Light by Rich Kolasa on 500px

    Photograph Let there be light!! by kathy towe on 500px

    Let there be light!! by kathy towe on 500px

    Photograph New Day by Chaluntorn Preeyasombat on 500px

    New Day by Chaluntorn Preeyasombat on 500px

    Photograph Parasol by Tula Top on 500px

    Parasol by Tula Top on 500px

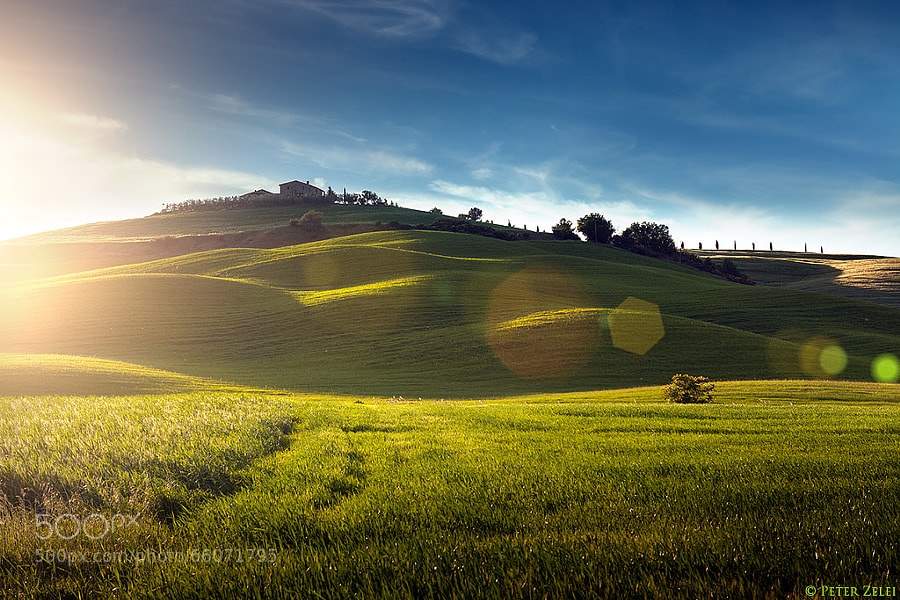
    Photograph Sunset in Tuscany by Peter Zelei on 500px

    Sunset in Tuscany by Peter Zelei on 500px

    Photograph The Magic Of The Redwoods by Steve Belovarich on 500px

    The Magic Of The Redwoods by Steve Belovarich on 500px

    Photograph Enjoying the Sunset at Hanalei Bay by Ian Frazier on 500px

    Enjoying the Sunset at Hanalei Bay by Ian Frazier on 500px

    Photograph Sunset Field by Stitch Jones on 500px

    Sunset Field by Stitch Jones on 500px

    Photograph Flaring Midnight by fegari  . on 500px

    Flaring Midnight by fegari . on 500px

    Photograph Mesa Arch Sunrise 4 - Canyonlands National Park - Moab Utah by Brian Harig on 500px

    Mesa Arch Sunrise 4 – Canyonlands National Park – Moab Utah by Brian Harig on 500px

    Photograph *spring by Nadine Lotze on 500px

    *spring by Nadine Lotze on 500px

    Photograph Yellow Monster by Jack Were on 500px

    Yellow Monster by Jack Were on 500px

    Photograph Charlotte's Web by Malena Fryar on 500px

    Charlotte's Web by Malena Fryar on 500px

    Photograph Lavender Bees by Nicole S. Young on 500px

    Lavender Bees by Nicole S. Young on 500px

    Photograph One Day in Autumn. by Sabrina Rohwer on 500px

    One Day in Autumn. by Sabrina Rohwer on 500px

    Photograph Carpatian cow by ????????? ????? on 500px

    Carpatian cow by ????????? ????? on 500px

    Photograph Heather by Josh Lyon on 500px

    Heather by Josh Lyon on 500px

    Photograph Man of the Mohawk! by Nathaniel Dodson on 500px

    Man of the Mohawk! by Nathaniel Dodson on 500px

    Photograph Brownie by Ryan Logan on 500px

    Brownie by Ryan Logan on 500px

    Photograph Pencils by Felipe Nobre on 500px

    Pencils by Felipe Nobre on 500px

    Photograph Sun Shine by Abdullah Rhwanjy on 500px

    Sun Shine by Abdullah Rhwanjy on 500px

    Photograph classic car on country road by Steve Shepherd on 500px

    classic car on country road by Steve Shepherd on 500px

    The post 30 Lens Flare Images to Inspire You by Darlene Hildebrandt appeared first on Digital Photography School.


    Digital Photography School

  • How To Shoot Unique Travel Photos Like You Wouldn’t Believe

    In our world of digital photography, it’s tough to take one-of-a-kind travel photos. For example, let’s say you’re visiting the Leaning Tower of Pisa in Tuscany, Italy. With your camera around your neck, you stroll into the Piazza dei Miracoli and are struck by the strange bell tower’s architectural beauty. But you also notice the crowds of tourists snapping pictures like the paparazzi at Continue Reading

    The post How To Shoot Unique Travel Photos Like You Wouldn’t Believe appeared first on Photodoto.


    Photodoto

  • 10 Great Photography Lessons You Can Learn From a 2 Year Old

    Child

    Nowadays, fancy shmancy cameras can blast you with gazillion frames per second, but non of these can beat the time honored tradition of observation.

    If there is one skill that has safeguarded my butt many times it’s the simple act of observing. If you don’t believe me, ask my wife. Observation is not only good when making images, it’s also good for insights. Well I’ve observed my son since day one, literally, and now that he is 2 years old, he is the one who is offering me great insights into photography.

    I’ll make sure he never sees this article. Imagine when he’s 10 and says “You’ve learned so much from me at two, imagine how much more you can learn now that I am 10″. I’ll never hear the end of it. Anyway, here are:

    10 great photography tips I’ve learned (and you can too) from my 2 year old, nicknamed Yoki

    1) Be amazed at everything
    Bathroom window

    I was outside a restaurant waiting for the rest of the family, it was raining. Laplwie! (“Rain” in french) Laplwie! Yelled my son. A woman walked in with an umbrella, my son bent his feet and pointed all exited “Bwella!!! Bwella!!!”

    An oh-so-cute scene. But it got me wondering. I’ve probably seen a million and a half umbrellas yet look at this kid jumping up and down because of an umbrella. Both of our eyes saw the same thing but our mindset was different.

    Humans are by nature creatures that get used to things. When it comes to photography, the location is only interesting after a few days, beyond that it’s boring. If you go out and shoot the same area over and over again, you know what I mean. To freshen things up, the solution is to either seek new locations or things to do – or see things in a new way.

    In the first case the transformation is external, in the second case it’s internal. I keep the scene of my son and the umbrella in my mind to remind me to always see things in a new way. Every location eventually gets boring, shooting the same kind of pictures over and over again can get boring, so the solution is to see things in a different way.

    There’s the true story of an old woman, she was going completely blind but had an operation that restored her sight. She talks about how much she loves doing dishes and looking at the beautiful colors of the bubbles that get formed when she puts in the soap. How many times do we loathe doing our dishes? What is to be learned from this lady?

    If you feel your photography is boring, see things in a new way, always tell your mind to see things as if you see them for the first and last time. Yoki does so, and so does that woman who regained her sight. Light and life is beautiful everyday, but to appreciate it takes a conscious effort. There’s a nice saying I like “Everyday is a new day to a wise man”.

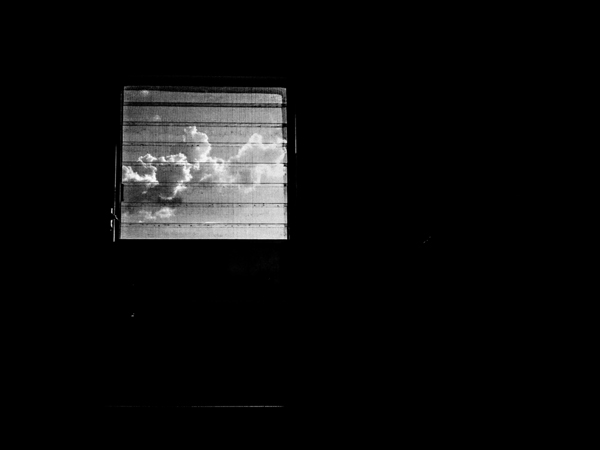
    Every time I find myself saying Photography is boring (not often but it happens), I remind myself of my son and the rain. Speaking of which, do you notice how rain can transform a scene? The lower contrast between the sky and the rest of the earth? How reflections of the puddles create interesting shots? Or how the rain hitting the ground makes interesting shapes? Or how a window in a bathroom can be a symbol of being locked in? Or how…

    2) Kids enjoy themselves because they are in the present
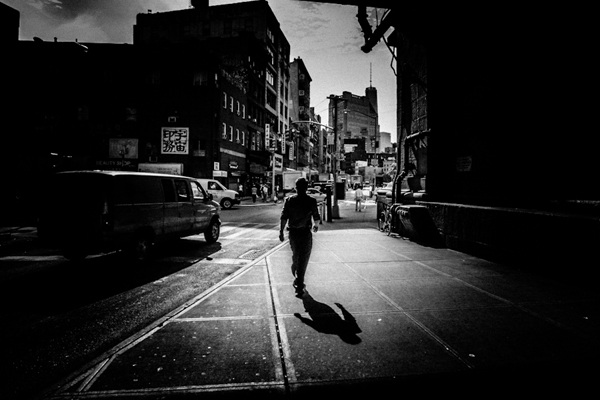
    Dark man

    I like watching Yoki play, especially with his blocks. He looks so happy. This got me wondering, why don’t photographers have this sort of joy? Isn’t it as simple as enjoying what you do? I observed him even more and looked for what he was doing that photographers were not doing.

    The main thing is that kids enjoy what they are doing, all that they care about for the time being is playing with the toy. I’ve been out on the street thinking about what to do the next week, I’ve been on assignment while doing mental financial calculation – exactly what Yoki isn’t doing.

    Can you walk a mile? How much less enjoyable would it be if I gave you two nice pieces of luggage to drag while you walk that mile? Unfortunately we do the same thing mentally when it comes to photography. We bring our “stuff” along when shooting and just like dragging real life luggage around, it diminishes the enjoyment of photography.

    When shooting, be like a kid with a toy; focus on what you are doing and nothing else. Minor White was adamant about clearing the mind before the act of photography. I listen to music and zone out to zoom into photography. Find what works for you, the important thing is to be lost in what you are doing.

    3) Kids enjoy themselves because they don’t care about being the best

    Haiti boat

    From time to time Yoki comes in with something he’s done. Bravos, hugs and all around congrats are thrown his way. But you know what? I’ll continue doing so until he is older.

    I remember doing my best for grades as a kid and all I could feel from my mom was how short I fell from top of the class. When kids are kids it’s all about doing their best, but as they grow older it’s all about how short they fall of being THE best. How can Yoki enjoy himself doing crafts if all that he thinks about is being better than somebody else?

    What matters for kids is to do the best they can and enjoy what they do. That is also valid about photography, all that matters is that you do their best and enjoy making pictures. To enjoy your photography it’s all about enjoying what you are doing, as simple as it sounds. The moment you start ranking yourself is the moment you stop being content, because being in first place will be only thing that will matter at that point. Plus there’s always someone better than you, and someone better than them ad infinitum.

    4) Kids enjoy themselves because they don’t care about comparisons
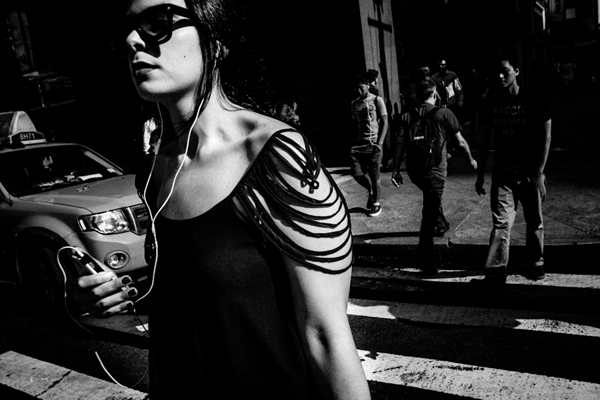
    New york woman

    I was watching my son finger painting. What came to mind was the fact that compared to how I can draw, his drawings are absolutely bad. But does he care that his dad can outdo him in drawing? No.

    He’s too happy with his own stuff to even bother to compare with others. Take any photographer you respect, that person has another photographer they feel jealous of. But very few of them are genuine enough to admit that. When you tend to compare yourself with others, the answer to all this is do like children do – stop it, and focus on your own stuff.

    When your work is your focus, everything others do might be better, but it sure won’t affect you. Photography is all about enjoying what you do and not about comparing to others all the while doing your best. Actually, I’ve found that the more you focus on your stuff the better you get. But, the more you compare the worst you get, because it sucks the life and joy out of photography. It’s all about loving what you do, and doing what you love.

    5) Don’t get sidetracked
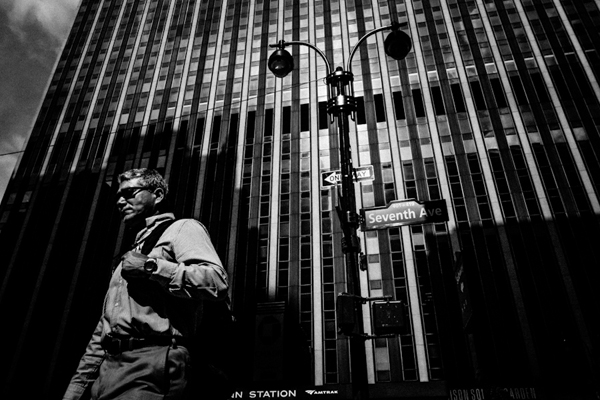
    Penn station

    One of the parenting tricks I have is to distract my son when I don’t want him to have something. If I don’t want him to use the computer, I pick up his alphabet phone toy and start playing with it. He never fails to forget about the computer. That taught me how easy it is to get sidetracked in photography.

    One of the easiest traps of photography is the camera. So many get sidetracked by the camera that photography gets completely lost. I’ve been there, and lost 1000s of $ $ $ . I was addicted to the gear. But that’s a story for another time. If you find yourself googling for accessories instead of going out and making images, you might have a problem.

    The second way to get sidetracked is by focusing on other’s photography, and that includes the Masters. I know a few folks that have such powerful photographs, yet instead of developing their own voice they continue copying another photographer’s work. Such a waste – they are distracted from their own photography by copying someone else.

    You can also get sidetracked by being too much into the masters. Do you want to be known for knowing the masters, or known for actually making images? One thing that is rarely stated is that no matter how great the masters were, doing your work is more important because it’s your own work.

    To recap: photography is not about having the most cameras, that only shows you’ve got plenty to spend. Photography is not about collecting photobooks, that only shows you appreciate art. Photography is about making photographs, that’s when you are a photographer.

    If anything has a bigger place in your life than your own photography, you’ve been sidetracked.

    6) Pattern recognition
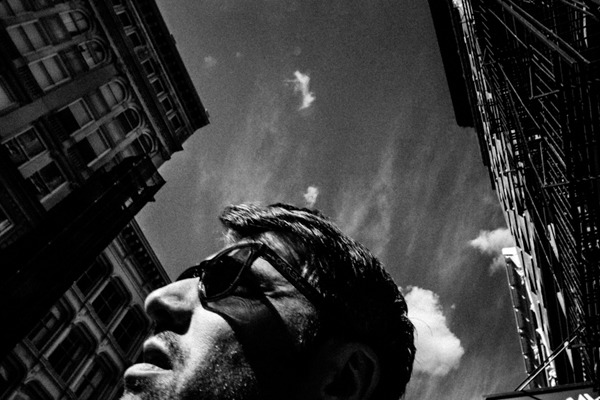
    Man surreal

    When Yoki was born, I resolved to always observe him, and more importantly to observe how he learns. I was fascinated by my son playing with a particular toy, this one called a shape sorter (see image right)

    Shape sorter

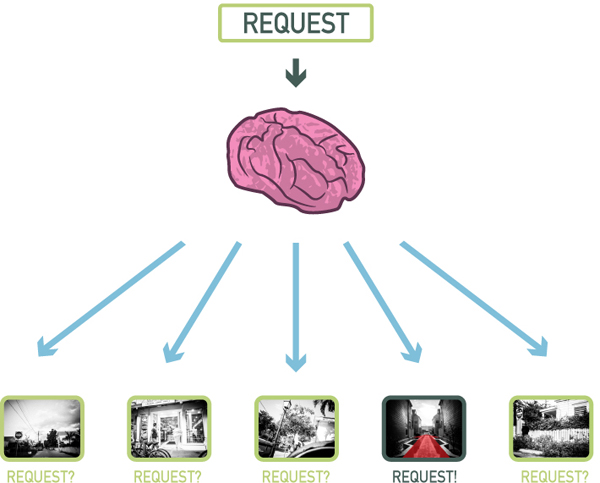
    How did his little brain work to put the shapes in the appropriate holes? The answer is patterns. The brain is wired to recognize patterns, so when Yoki took the star shape, his brain said “seek star shape” and ordered the eye to look around for that shape. When Yoki is out and starts saying letters and numbers, his brain is not really actively searching for the letters and numbers, the brain compares what he sees with the brain’s database of shapes and alerts itself that it’s a recognized pattern.

    The first example is called the top-down mode (Where the brain actively seeks a pattern) and the second the bottom-up (where the brain is in a more receptive mode).

    I was struck when I realized that photography on the compositional level was a huge, glorified “shape sorter” toy in real life. Here’s an illustration:
    Top down

    In my son’s mind the request was “seek star shape”. In my photographer’s mind, the request might be “seek vanishing point“. In the illustration above, I was on the street, but my brain only alerted me when it recognized the pattern I asked for (vanishing point). That is the top-down mode. It’s the process that happens when you are seeking a particular type of image. Here’s another illustration:
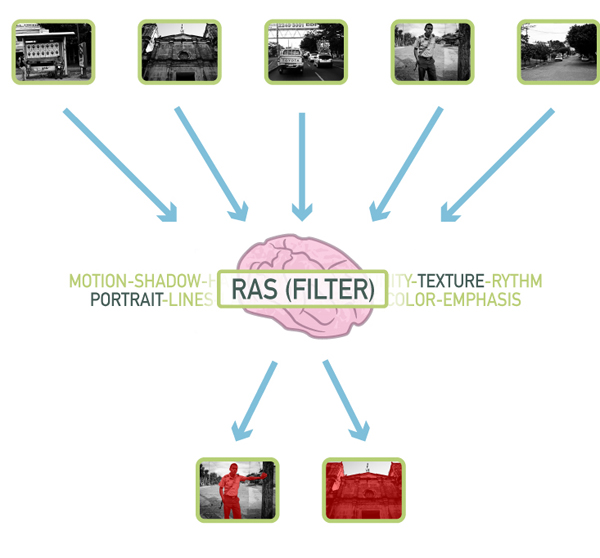
    Bottom up

    At the base of the brain there’s something called the Reticular Activation System (RAS), or as I like to call it the Really Awesome Secretary. A secretary’s role is to cut the fluff and only alert you when something is important, and that is what the RAS does. What’s important is relative and defined by each person.

    What is important to my son Yoki? Letters and numbers, he’s going to see them everywhere, at least it’s going to appear to him that way. For me as a photographer what is important is what I want to see in my photographs. So I was in the streets not looking for anything in particular, but more than once my brain processed what my eye saw and it alerted me when it recognized a pattern (in the case above texture and portrait). That’s called the bottom-up mode.

    It’s a frighteningly beautiful system that allows my son to play with his shape toys and me to recognize stuff when I am shooting.

    7) You can’t recognize what you don’t know
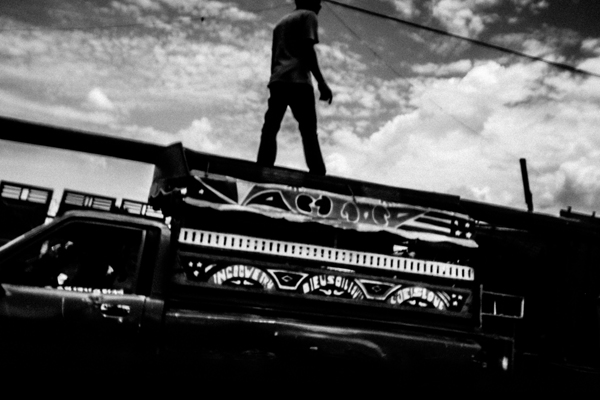
    Man haiti standing

    Pattern recognition has it’s limits though, you can’t recognize patterns that you don’t know. Take my son for example, he will cry out “Circle! Oval! Sqwawe.”, but it will be quite a while before I hear him say “Hexagon! Trapezoid! Pentagon.”.

    His palette of patterns are limited: square, circle, oval, square, star, heart. My palette is much more expanded to include a bunch more. So in a scene where there is a square and a pentagon shape, he will see the square only, but I will see the square and the pentagon. It’s the same principle at work when two photographers see different things in the same location.

    When people who don’t know photography see the kind of pictures that can be produced out of a regular scene, they immediately credit the camera. But fact is that the photographer recognized a good picture (trained to look for certain patterns) whereas the non-photographer (not trained to look for certain patterns) could not see anything. So what’s a pattern? It can be anything from certain compositional types (Golden ratio, etc.), shapes, color, types of pictures (landscape, portrait, etc.), themes that interest you (people, animals, etc.) and more.

    8) Everything is basic shapes
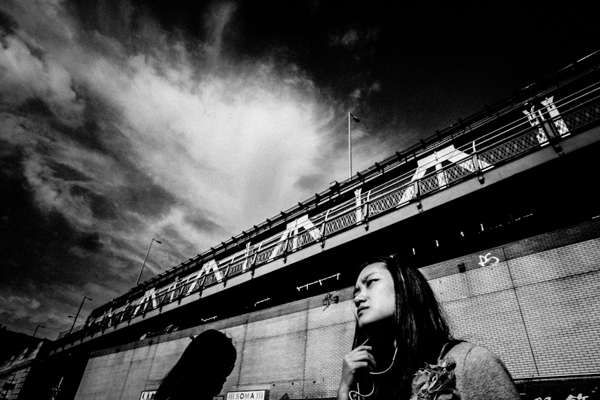
    Under bridge

    I was on my bed when the kiddo starts saying “S!” “S!” “The wetter S!” Hoho… I was sure he was seeing things because I never saw a prominent S in my room. But the kiddo was right, there was an S in the room, here it was:

    By Mathew Bajoras

    It was the light bulb. That reminded me how the world is like a glorified “shape sorter” toy. Absolutely everything visual can be broken down into line, shapes, space, color and texture.

    It’s something that painters and artists understand at a fundamental level; everything can be broken down into basic elements. As a graphic designer I also understand this at a basic level because you can break down designs into simple elements. Here’s an example with a shot I made:
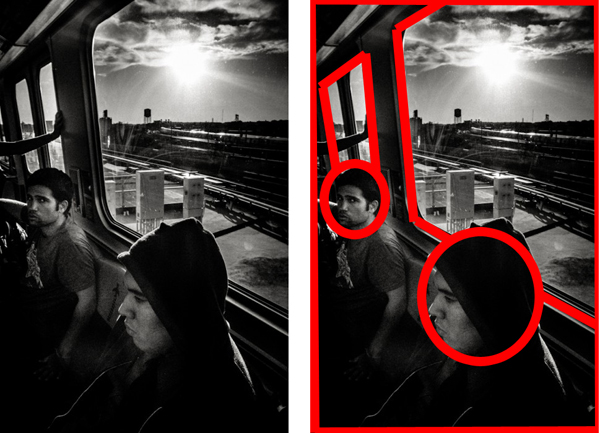
    Simple elements

    All of a sudden a window is a trapezoid, and people’s heads are ovals. This is due to the Gestalt law of perception called “Pragnanz”. Simply stated it says that we perceive complex shapes as simple ones (a face as an oval for example). Yoki recognizing the “S” out of the light bulb always reminds me of that, so I look for basic, broad shapes in my photographs, and more importantly how to arrange them.

    9) People are aware of the camera
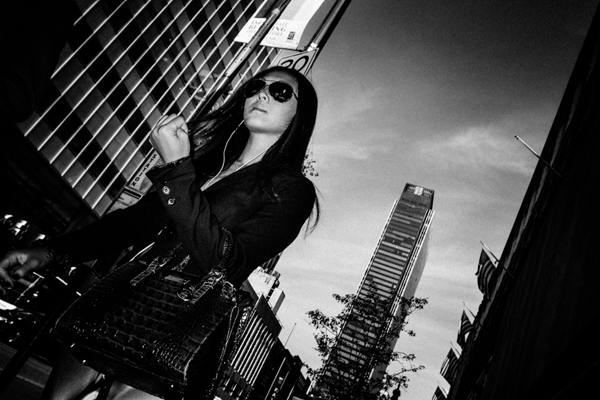
    Lady power

    My kid is not even five and he already knows to pose. It’s nuts. How does he know when the camera is up to strike a pose? Are we spoiling our genuineness by asking kids to say “Cheese”? I think so because it teaches kids to stop what they are doing to say cheese and look at the camera. But whatever the case, very early in life kids are aware of the camera. The result? Absolutely everybody in today’s world is aware of the camera.

    That pretty much means no one is genuine when a camera is present. For pros this means you have to learn to relax your clients. For everybody else it means you have to be quick to get a genuine pose. The best moment is the split second before the person realize you are photographing them.

    One interesting tidbit about the genuineness of the subject when faced with a camera, is that it is proportional to the type of camera. Pull out a point-and-shoot camera in the streets and people won’t care much, you’re probably a tourist in their minds. Pull out a double battery DSLR with 55-200 zoom and people will start acting differently. Pull out a Polaroid camera and people will react as if you are an “Artiste”.

    People are conscious of the camera because they are conscious of their image, it’s ingrained since the start. If you can make people believe all you want is a snapshot, they won’t give you a second look. That, my friend is why I can only recommend a point-and-shoot lookalike for the streets.

    10) Complacency hinders growth
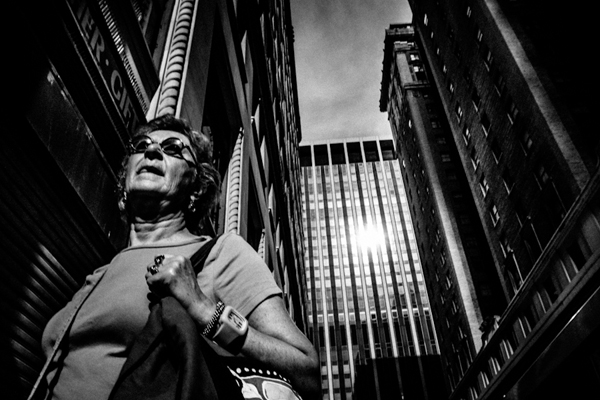
    Older lady

    What’s that? I asked pointing to a square in a book. “Square!!!” “Carré” (Square in French) my son said. Good I said, now what’s that? I was pointing a rectangle, he looked at it and then pointed to the square “Square!! Carré!!”. Yes but what’s that? I asked pointing at the rectangle once more. He pointed at the square once more and named it again. Instead of taking a risk at trying to name the rectangle he pointed at what he already knew.

    I was quite surprised at what happened, not because of how my son reacted but because I saw myself in it. It’s easy to get complacent in photography, I sure did. It happens when you do something over and over again and don’t challenge yourself. I largely abandoned longer than 35mm focal lengths because of that. The best thing I ever did photographically is to get a 28mm because it’s much harder to deal with.

    I could go out with a longer lens and not challenge myself, but I would not grow and I would become complacent. When Yoki did this with his shapes, it taught me to never become complacent and always challenge myself. I’ve grown so much when I decided to go wide angle. Try it, it will not let you make an image without a fight.

    To each his comfort zone, for me it was always sticking to fast apertures at 50mm, for you it might be something else. Find where you are too comfortable photographically, then challenge yourself. It’s the trick that pole jumpers use, they put the bar higher every time.

    Finals comments

    I love my kid, and I love watching him. I love to see how he works and how he thinks. He’s learning from me hHopefully a good thing) but I am also learning a lot from him, as you can see from the 10 tips above. But that stays between me and you, ok?

    Be yourself, stay focused and keep on shooting.

    Have you learned any photography lessons from your kids? Please share any additional tips in the comments below.

    The post 10 Great Photography Lessons You Can Learn From a 2 Year Old by Olivier Duong appeared first on Digital Photography School.


    Digital Photography School

  • 3 Easy Steps Using Photoshop to Making your Images POP

    Image Post Processing Techniques

    Having taught in-depth image post-processing workshops for Photoshop users, I’ve found that three of the simplest techniques are the ones that people love the most. These are quick and easy tricks that work for most image processing situations.

    If you’ve got your exposure, aperture, focus and white balance all correct during shooting, you’ve got all that you need for a great image, but with these three easy steps using Photoshop we’ll add some serious POP to the colour, contrast and sharpness of your images.

    I’m going to assume that you’ve already corrected your image in Adobe Camera Raw to fix any blown out highlights and shadow detail. This can sometimes leave you with a low contrast image that lacks lustre. HDR users will often find that a full HDR image lacks some punch once it has all the dynamic range fixed for highlights and shadows. Here’s how to add some pizazz to images.

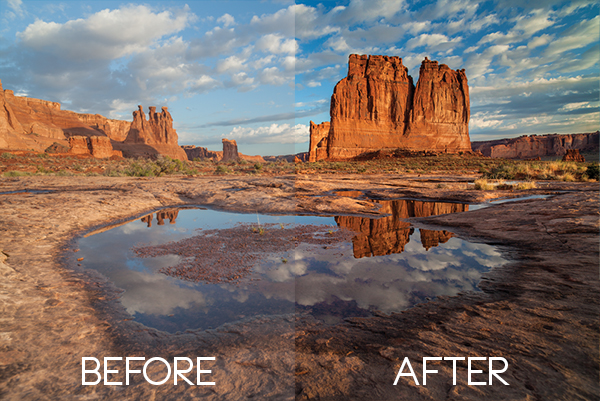
    I’ll start with a RAW file from last year’s trip to Moab, Utah.

    Unprocessed RAW file

    I was more than happy to get this shot of Courthouse Towers in Moab, Utah but the RAW file was total Blandsville.

    Step 1 – Make Those Colours POP

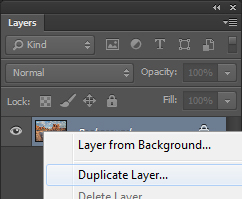
    Open the image in Adobe Photoshop. With the image on the background layer of Photoshop, right click on the layer (in the layer window) and choose ‘Duplicate Layer’ (see screenshot below left).

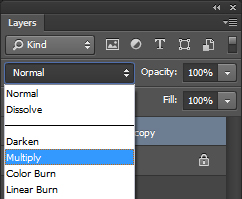
    Duplicate Layer Multiply Layer

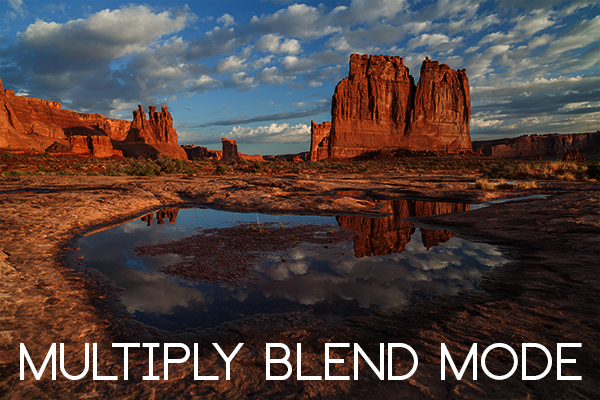
    Now click on the newly duplicated layer and change the blend mode to ‘Multiply’ (see screenshot above right).

    Multiply Blend Mode

    Right away you’ll notice that all of the colours are more striking and the contrast is extreme. It’s also way too dark so we’ll fix that next.

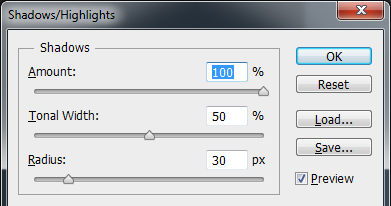
    Next go to Image > Adjustments > Shadows/Highlights and drag the shadows slider all the way to right then hit OK (see screenshot below left).

    Photoshop Shadows / Highlights Photoshop Layer Opacity

    By doing this, you’ll reduce the darker parts of the image ONLY in the duplicated layer. It’s still a little too dark, so in the layers window reduce the opacity of the duplicated layer until it’s at about 58% (see screenshot above right). This percentage will be different for all of your images so use your judgement and don’t overdo it. Usually I find that a setting of 28% works best in most cases.

    Step 2 – Selectively Boost Colours and Brighten

    I think that some of the colors need a little encouragement. For this example you want to boost the blue sky so combine the two layers that you’ve been working on so that you can make changes to that. You can do this ‘none destructively’ by pressing ctrl+alt+shift+e which will now combine the two layers you have selected, and create a new layer from those. The original layers are still intact underneath this new one.

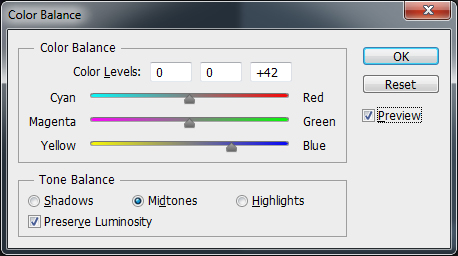
    Next, go to Image > Adjustments > Color Balance > and bring up the RGB sliders. As I mentioned earlier, you’re going to be boosting the blues in my sky so click on ‘mid-tones’ and then pull the blue slider up to about +42.

    Photoshop Color Balance

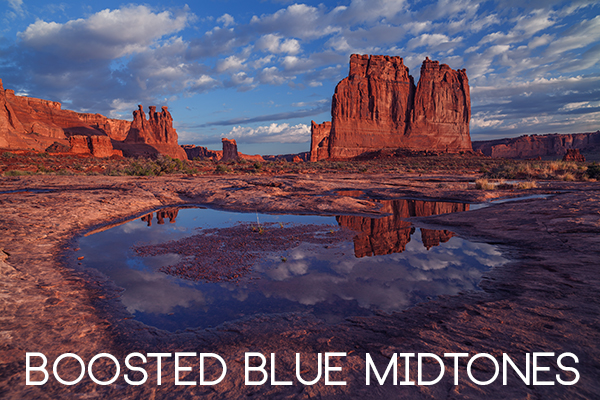
    Boosted Blue Midtones

    Ooooh, now that sky is looking vibrant but I’m not too sure about boosting the blues in the land area. Let’s fix that by erasing the land in this blue layer so that the layer underneath is revealed, where the blue mid-tones have not been boosted. You can also do this with ‘layer masks’ but this method is much easier to understand.

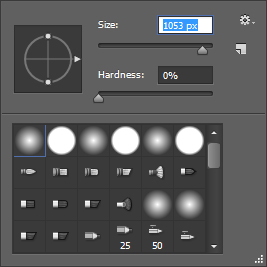
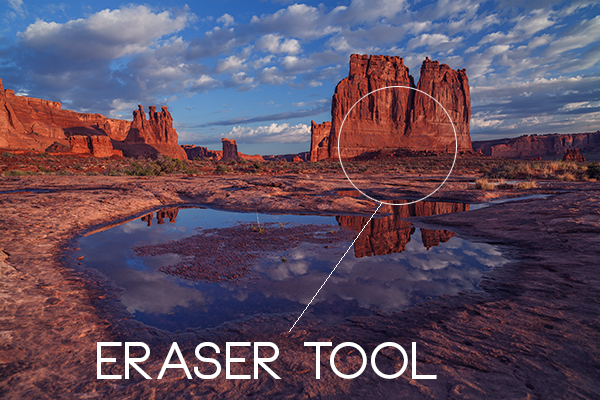
    Do this with the eraser tool and select a brush size that fits inside the land area of the image. In the layer with the boosted blue mid-tones, erase a large area of land at first and then choose a smaller brush size for tighter control. To do this, simply click inside the layer you want to erase. The settings below show a brush size of 1053 pixels and a hardness of 0% which gives a soft, feathered edge.

    Photoshop Easer Tool

    Erase Bruash Tool

    Click in the area you’d like to erase to reveal the layer beneath. In this case the layer beneath won’t have the boosted blue mid-tones that you want only in the sky.

    Now you’ve managed to selectively boost the blue colour in the sky without ruining other parts of the image that didn’t need that blue boost. Here is an image of how the ‘sky’ layer looks after the land has been erased out, and below you can see how it looks in the layers panel.

    Erased Land

    This is what’s left of the ‘boosted blues’ layer. The layers under it are temporarily switched off so that you can see the isolated sky.

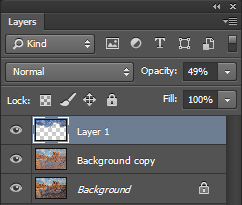
    Photoshop Layers Palette

    Layers panel showing the partially erased boosted blue sky layer

    Notice that the opacity of the sky layer has been reduced to 49% so the effect is more subtle when laid over the top of the lower two layers. Again, you’ll need to use your own judgement for your own images as they won’t all be the same. Maybe you have red clouds and would like to boost the red highlights? You can do this procedure multiple times with multiple layers to tweak the colours selectively. There are more accurate ways to do this but if you’re new to Photoshop, this is the easiest method to understand and has hardly any learning curve.

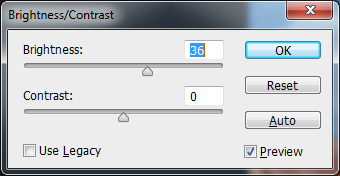
    Lastly, all this tweaking has made the image a little too dark so a boost the overall brightness by 36 has been done.

    Photoshop Brightness

    Step 3 – Let’s Resize and Get Sharp

    Sharpening is often something that I leave to the end of my image processing, depending on the medium I’m using to display the image. I’ll use different sharpening settings for a high resolution print than I will for the web, so it’s always a good idea to save an ‘unsharpened’ version of your processed image for safe keeping.

    Assuming that you wish to display your images online, here are some fairly universal sharpening settings that I use for sharing my images online. Before we sharpen, let’s flatten and resize our image for the web. You can decide how large your image should display on screens but for the purposes of this tutorial let’s go with 1200 pixels wide.

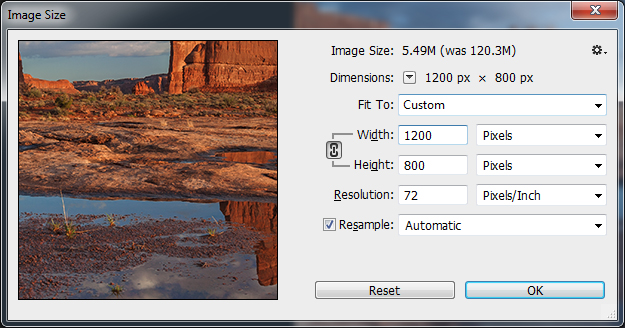
    Go to Layer > Flatten Image so that you’re now just dealing with one complete layer that has all of the changes. Next go to Image > Image Size and tell Photoshop that you’d like your image to have a resolution of 72 dpi which is standard for web images. Next, specify the width by entering 1200 pixels in the ‘width’ window. The height should auto adjust if you have ‘constrain proportions’ checked by default (the little chain icon).

    Photoshop Image Resize

    Next open the Filter > Sharpen> Unsharp Mask tool.

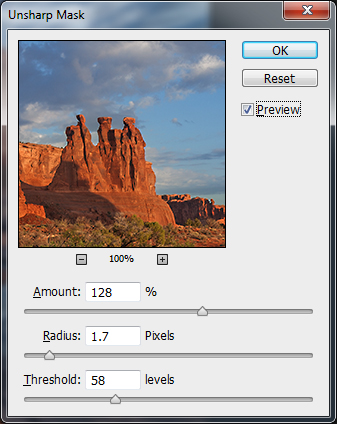
    Use some fairly safe sharpen settings for web so that you don’t over it. It’s worth noting that ‘sharpening’ deserves an article as a separate topic but for now these basic settings should get you going. Try: Amount > 128%, Radius > 1.7 pixels and Threshold > 58 Levels.

    Photoshop Unsharp Mask

    The Final Result

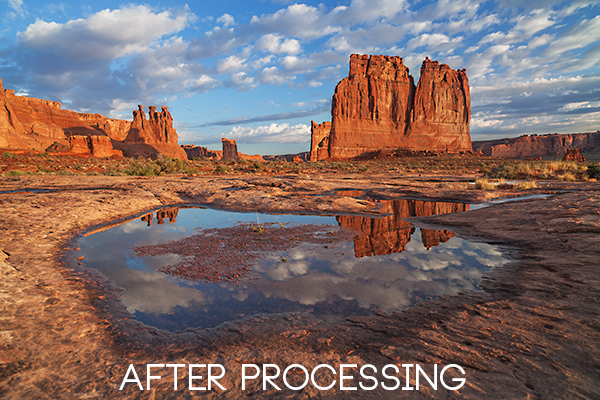
    POP! There you go, three easy steps an you’ve now got an image with plenty of punch. There are many different ways to achieve the same results, but for this tutorial, I wanted to give you an easy to understand process to introduce you to some of Photoshops most powerful tools. Try these three simple techniques for your image post-processing and let me know it works out for you.

    After Processing

    IMPORTANT NOTE: Backup your files before editing or saving your edits.

    The post 3 Easy Steps Using Photoshop to Making your Images POP by Gavin Hardcastle appeared first on Digital Photography School.


    Digital Photography School

  • Contest – Win One of THREE Photography Courses from New York Institute of Photography

    Over the last few years here at dPS, wNYIP Logoe’ve run some incredibly popular competitions with one of our partners – the New York Institute of Photography – to give away to lucky dPS readers some of their great photographic teaching.

    Due to popular demand – we’re doing it again this week.

    For this competition, NYIP is giving away THREE prizes.

    Each will be won by a different dPS reader. Here’s what you could win:

    Complete Course in Professional Photography – worth $ 1,499

    This is NYIP’s most popular course. It teaches everything an aspiring photographer needs to know about the art, technique, and business of photography. Want to become a better photographer? Then this course is for you.

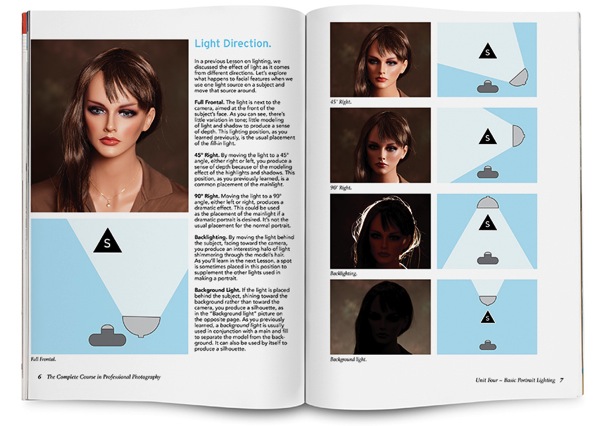
    NYIP spread Light Direction

    All courses include comprehensive and illustrated lesson books, CD audio guides, DVD video training, photo projects, professional evaluation and personal student advisers.

    How to Win

    To win this competition you’ll need to:

    • Watch the video below
    • Leave a comment below and tell us why you’d like to enrol in New York Institute of Photography. Please note: there is a limit of 1 entry per person.
    • Do this in the next 8 days and on June 12th, 2014, the team at NYIP will choose the best three answers and we will announce the winners in the following days.

    Deadline is June 11th, Midnight PDT. Comments left after the deadline will not be considered.

    By “best” – we’re looking for people who have an understanding of what NYIP is, what the course offers, and how it suits their needs. There’s no need to write essay length comments to win – but we’re looking to hear what you like about NYIP, the course and how it would help your development as a photographer.

    This competition is open to everyone around the world no matter where you live, but there is only one entry per person please. To enter – simply leave your comment below.

    Don’t forget to share this post with your friends! Like NYIP on Facebook for special offers and announcements on all of the NYIP Courses!

    Disclaimer: NYIP is a paid partner of dPS.

    The post Contest – Win One of THREE Photography Courses from New York Institute of Photography by Darlene Hildebrandt appeared first on Digital Photography School.


    Digital Photography School

  • 8 Tips to Get You to Take Better Smartphone Pictures

    Sometimes the best camera is the one you have with you, and most of the time, this will be your phone camera.  This doesn’t mean your photos have to be terrible; it just means you must work on your picture-taking process a little more, as smartphones have limited capabilities. Besides accessibility, one of the main advantage smartphones have is that Continue Reading

    The post 8 Tips to Get You to Take Better Smartphone Pictures appeared first on Photodoto.


    Photodoto

  • Phottix Mitros+ Review – the Best Flash System You Have Never Heard of

    First dance

    Photo taken using the Phottix Mitros+ system

    As a professional wedding and portrait photographer, I would say the most important accessory in my kit bag besides my main camera and lenses would by my flashes. So when it came to making a decision on what flash system use, I did a lot of research and in the end I opted for the Phottix Mitros+/ Odin system. I don’t normally write gear reviews as I think the internet has enough top quality content. I realized however in my research that the Phottix Mitros+, although sold internationally, is comparatively less well known and not well documented on the web.

    Phottix Mitros 107

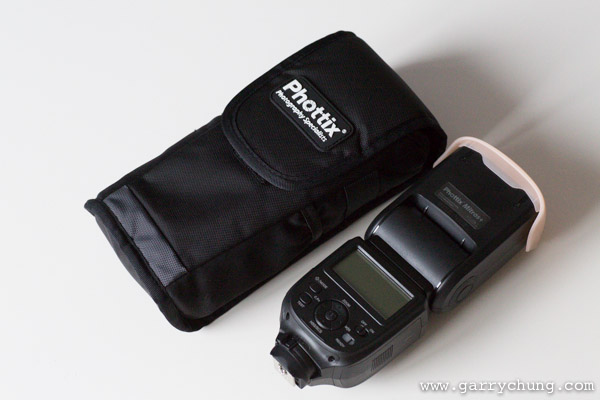
    Phottix Mitros+ – comes with carrying case and accessories

    I am a big fan of using off-camera flash and as a Canon shooter and have previously been using Canon 580 EX II / Pocket wizard combination for the last 4 years. The Canon 580 EX IIs in all fairness have served me well. They have been dropped many times, and rained on, but never skipped a beat. The problem occurs when I take them off camera. Using the PocketWizard Mini TT1 and TT5 trigger and receiver I have experienced a whole host of reliability problems that eventually was the catalyst for me to look for alternate solution.

    I started by looking at the Phottix Odin TTL triggering system, which I have used before and has had excellent reviews. That was when I realized Phottix also sells the Mitros+ flash, that includes the wireless transceiver built into the unit. The “+” denotes that it has radio transceiver built in as they also do a non “+” version with no transceiver. The Mitros+ flash is great for a number of reasons;

    • It’s one less piece of equipment to buy and worry about
    • There is so need to carry more batteries or worry about connection issues between your radio receiver and your flash
    • The Phottix Odin trigger system is also a tried, tested, reliable market leader and so I was confident it would work well

    Review – Phottix Mitros+ Flash System

    First impressions when you take the Mitros+ out of the box; it comes in a nice pouch and feels solidly built to take a few bumps, which is essential as I will put it though the rigours of professional use. The first thing you notice is that it makes a beep, like studio lights, to tell you the flash is recycled and ready for use. This is especially useful if you are firing at full power, and can be turned off using the custom functions if you don’t like it. I fired off a few successive frames and it seems extremely quick to recycle. This is by no means a scientific test but I set the flash in manual mode 1/2 power and fired consecutive bursts. It seems to recycle at least as fast, if not faster, than a Canon 580 EX II. In the real world, it holds up very well; I tested it all day in different lighting situations and the ETTL worked consistently. The battery consumption seems about the same as the 580 EX II, I did a full day shoot and didn’t need to change batteries, so all in all I am very happy.

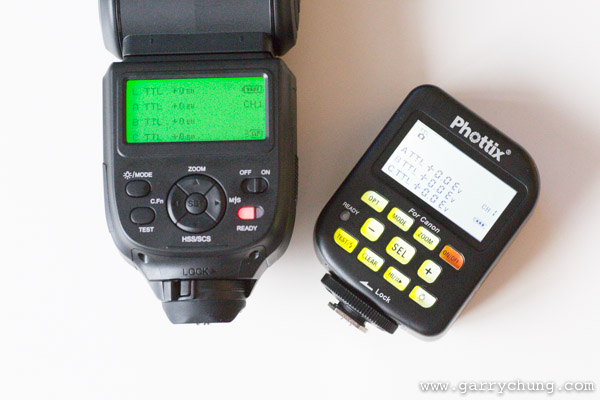
    The real benefit of the unit however, is taking it off camera. It’s an absolute joy to use; no having to set up the PocketWizard receivers, and no misfires. I don’t have to do my usual five minutes of troubleshooting if the flashes aren’t firing. It just works like it is supposed to. With this system you can also control everything directly from my Odin transmitter, or using another Mitros+ flash. You can alter settings remotely such as TTL exposure compensation, manual power, high-speed sync and even flash zoom level. You can configure three groups of flashes and adjust each one individually. This basically allows you to control everything you need from the camera so no need to walk up and down making adjustments.

    Phottix Mitros 101

    Hands on it’s a quite a large flash as you can see here next to the Canon 580EX II

    Features (as listed on the Phottix website)

    • E-TTL, M, Multi (Stroboscopic) modes
    • Auto/Manual Flash Head Zoom with 180 degree rotation and 97 degree tilt
    • High Speed Sync and Rear Curtain Sync
    • Flash Exposure Compensation: Manual, Bracketed
    • Fast Flash Mode: with 0.1-2.5 sec. recharge times
    • USB port for upgrades
    • 3.5mm Sync port
    • Canon-compatible IR Wireless Triggering with Master and Slave mode
    • Optical Slave Sync Mode
    • Uses 4 AA batteries
    • Port for external battery pack
    • Compatible with Phottix Odin TTL Flash Triggers for Canon
    • Battery Compartment for 4 AA batteries (below left)
      Phottix Mitros 103 Phottix Mitros 102
    • Rubber seals around metal hot-shoe for weather sealing (above right)
    • Mine also came with a plastic diffuser and 1/2 CTO which will come in handy (below left)
      Phottix Mitros 104 Phottix Mitros 100
    • Swivel and tilt head great for bouncing in all directions (above right)
    • Connections for USB power, 3.5mm jack for sync and external power the kit also comes with an adapter to convert the head for Canon’s CP-E4
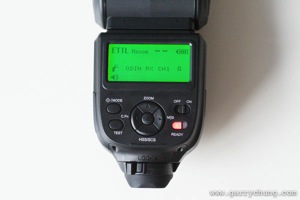
    • The display a the back is large backlit and clear
      Phottix Mitros 106 Phottix Mitros 108
    • Menu System identical to Phottix Odin when set to Trigger Mode

    Phottix Mitros 109

    The litmus test for me to judge how intuitive a menu system is; if I need to read the manual, it’s probably not that intuitive. I very quickly figured out how switch from ETTL to Manual, activated high-speed sync and got the radio trigger system working. I actually think the menu system is better than the Canon 580 EX II, which took me a long time to figure out. Like the Canon speedlite, you can also control flash exposure compensation from the Canon 5D Mark III’s menu, although this is not recommended by Phottix. An advantage of the Mitros is that it has an indicator to see how much battery life left, which is absent in the Canon 580 EX II.

    I recently took the Mitros+ system for an intensive four day shoot on Tinian Island and I am glad to report it has been flawless. I was asked to do a beach shoot at 1 p.m. in the blazing afternoon heat and managed to overpower the sun with three of Mitros+ flashes set up in cluster.

    Mitros 100

    Final image

    Mitros 101

    Lit with three Phottix Mitros+ flashes

    The determining factors for choosing the Phottix system were twofold

    Firstly, it is an open system. Odin can be used to trigger not just the Mitros+ but other studio lights as well. In comparison the latest Canon 600EX–RT flash and Canon ST-E3 trigger are only compatible with each other. I have also bought Phottix Odin receivers to bolt onto my old Canon 580s, so can use them with the Mitros+/Odin system together.

    Another positive for Phottix is that it’s more backwards compatible than the Canon 600 EX-RT, which is not fully compatible with pre-2012 models, such as Canon 5D Mark II, which I also own. I read reports that you lose features like HSS, (High Speed Sync) and the sync speed is lowered to 125th/sec but I haven’t tested it myself. It seemed very odd to me that a third party company can get their flash working with older Canon cameras but Canon can’t. I have tested the Mitros+ system with both the Canon 5D Mark II and 5D Mark III. It works fine and it is even compatible using infrared with the Canon 580 EX IIs, so you can use the Mitros+ to trigger the Canon flashes and vice versa. The Mitros+ also has optical slave which is something Canon never put on the 580 EX for unknown reasons.

    The final factor is the Phottix retails at $ 399 USD, which offers a significant saving to the Canon equivalent. At time of print, the Mitros+ is $ 150 USD cheaper than the Canon 600EX–RT flash.

    I talked about comparisons with Canon in my review as I am a Canon user, but the Mitros+ is available for Nikon now also. It should be quite attractive to Nikon shooters as I think Nikon have yet to release a flash with a built-in radio transceiver.

    Conclusion

    Things really have moved on for third party flash manufacturers in the last few years. When I first researched into non-proprietary flash systems, they were generally cheaper, but vastly inferior product to the brand name equivalents. The Mitros+ is a great quality product, at a great price. It’s well built, easy to use and packed with features. Phottix as a company feels like they are selling products designed by photographers, and have really listened to their customers. Looking back at reviews of the original Mitros when it came out, customers were just saying “if only it had the Odin radio system built in that would be fantastic”, not long after the Mitros+ was released.

    The Phottix Odin radio trigger system fully deserves all the praise it gets. PocketWizard, which has historically commanded such a market dominance in this sector, should be well aware of the new competition – which I think is a good thing. I remember paying nearly $ 500 USD for a PocketWizard TT1 Trigger and TT5 receiver, but had to as there was just no competition at the time. I experienced range issues, reception/connection problems, broken hot-shoe and general unreliability which is unacceptable for such a premium priced product.

    The Mitros+ / Odin combination so far has been solid as a rock in terms of reliability. Time will tell if the build quality is as good as it looks but at least Phottix shipped with a two year warranty peace of mind. For those of you looking to either buy your first flash, or add to existing flash system, it’s worth keeping an eye out for products from third party manufacturers such as Phottix. Light is light at the end of the day, and I don’t care what brand name it says on the side as long as it gives me consistently good results and so far my Mitros+ has done exactly that.

    Here are a few more images created with the Phottix Mitros+

    Buggy 100

    Food

    Outdoor off camera flash

    The post Phottix Mitros+ Review – the Best Flash System You Have Never Heard of by Garry Chung appeared first on Digital Photography School.


    Digital Photography School

  • Guide to Attracting Critters to Your Garden for Backyard Wildlife Photography

    9783923464 5e8518e1f9 o
    Wildlife photography brings with it some natural challenges. One of the greatest being that it is often difficult to have regular access to wild animals to photograph. Many of us are guilty of looking further afield for our subjects, but our own back gardens are prime locations for attracting, and photographing wildlife.

    Live in the city suburbs? Doesn’t matter. Your area is likely to be bustling with bird life that you aren’t aware of yet. This guide will run you through a few of the best ways you can attract birds and animals to your garden for easier wildlife photography.

    Provide Supplementary Food

    Animals are suckers for food. They’re often hungry and looking for their next meal. The best way to get them to come to your garden is to provide nutritious, supplementary food. There are a variety of different methods you can use to feed wild animals.

    Bird feeders are available in many different sizes and shapes. A normal tube system with various feeding holes is available from your local pet shop or garden centre. They’re inexpensive, and can be filled with many different varieties of seed. You can buy wild bird food from the same place, and get anything from mixed seeds to solely sunflower hearts. I use the latter, and to great effect.

    For attracting mammals, you can get a variety of ground feeders. Squirrels, for example, love peanuts, hazelnuts and other nutty foods.
    Robin in Snow

    Don’t Forget the Ethics

    By providing supplementary food to animals, you must not overfeed them. Fill the feeders maybe 2-3 times per week, so that they do not become dependent on you as a food source.

    Make sure what you are feeding them is suitable. Ask a garden centre for advice if you need help. If using peanuts, they must be completely natural (not roasted) and unsalted!

    If you decide to stop providing food, you must do so gradually. Slowly reduce the amount you are feeding over a month or so, allowing the animals to adjust naturally. Otherwise, you could end up unintentionally starving some individuals.

    Getting Close for Photography

    Many garden birds will allow you to sit quietly near the feeders, as they will eventually get used to you. However, if you want more freedom to move without scaring them away, get yourself a small tent hide (blind). These are available on Amazon at relatively cheap prices. A shooting blind will do the job perfectly.

    Hide

    Making an Area Photogenic

    So by now you have the wildlife, but you still need to capture those stunning shots. A bird on a feeder isn’t the most attractive of images, but there are some neat tricks to avoid this.

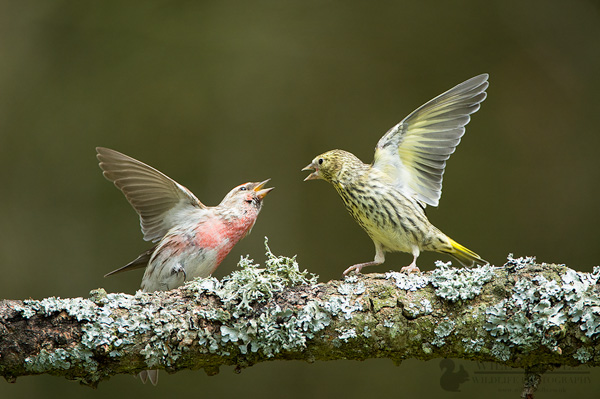
    Place some gnarled twigs and sticks around the feeders. If you need to, strap them to a pole so they are held horizontally. Birds will use these as queueing platforms for the feeders, waiting their turn to feed. You can utilize this moment to capture some lovely portraits of the birds on these photogenic branches. If you’re lucky, you may even get two birds fighting for pride of place.

    You should also be wary of your backgrounds. If you are photographing with a messy backdrop, it will likely come out in the image and be distracting. If there’s no choice of positioning next to something plainer, then consider hanging a dark green sheet at a distance behind your subjects. This will create a pleasing bokeh for your photographs.

    Red Poll and Siskin Fight

    Be Patient

    The key to wildlife photography is patience. Changes won’t just happen overnight. Provide food and wait, and eventually you’ll see results. It shouldn’t take too long, but birds don’t have a radar which tells them as soon as food is available – they have to find it first!

    That’s just about it. Fine-tune your feeding stations overtime, adding or subtracting elements depending on what works and what doesn’t work. Good luck!

    The post Guide to Attracting Critters to Your Garden for Backyard Wildlife Photography by Will Nicholls appeared first on Digital Photography School.


    Digital Photography School