Category: Photography

  • Macphun Intensify Pro Software Review

    MacPhun Intensify Pro review

    Intensify Pro (currently on 20% off for dPS readers here) is a Mac only image editing program from MacPhun. With apologies to Windows users (I really wish this software was available for PCs as well) let’s dive in and see what this software can do.

    One of the reasons that you buy plug-ins is to take advantage of the ways you can use them to increase mid-tone contrast and enhance detail. Indeed, this is the main reason to buy Intensify Pro because it allows you to do this quickly and easily and with far more functionality than is offered by Photoshop or Lightroom.

    Process in Lightroom first

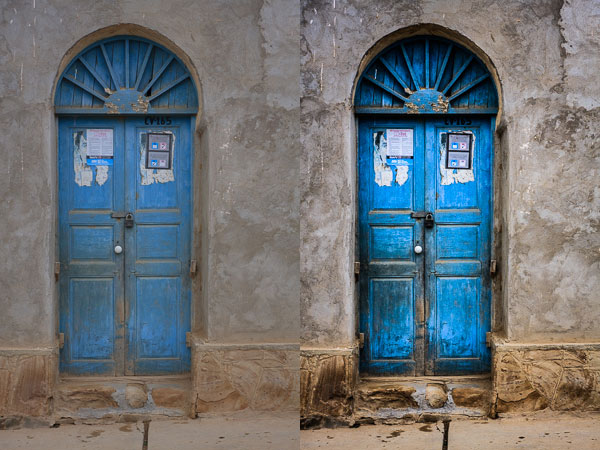
    To demonstrate the power of Intensify Pro I’ve selected an image that is very flat but has a lot of texture in the image to work with. You can see it below. The version on the left is more or less straight out of the camera. The version on the right was created by increasing Exposure, Contrast and Clarity in Lightroom’s Basic panel, and adding a slight vignette in the Effects panel.
    MacPhun Intensify Pro review

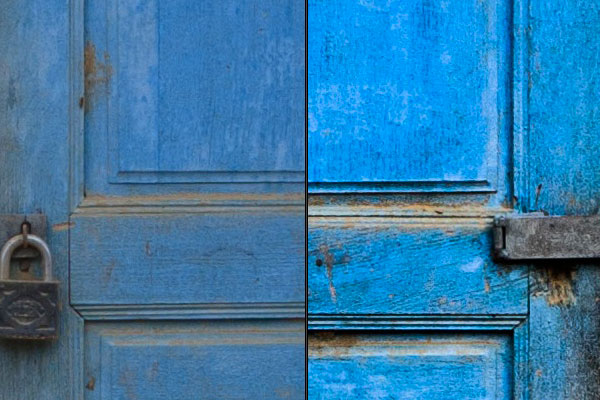
    Here’s a close-up so you can see the effect that increasing Contrast and Clarity has had on the texture and detail.
    MacPhun Intensify Pro review

    Bring it over to Intensify Pro

    Now let’s open the photo in Intensify Pro and see what we can do with it in comparison to what is possible in Lightroom.

    First, the layout. Your photo is displayed in the centre, there are various tool buttons along the top, and the controls for working with Presets and making adjustments are on the right.
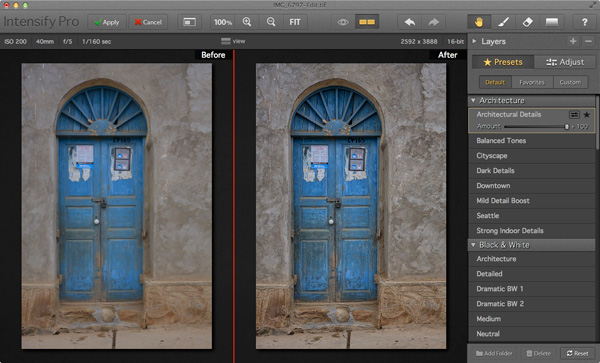
    MacPhun Intensify Pro review

    Presets

    There are 68 presets in total (yes, I counted them) and you can select any one of them to use as a starting point or click the Adjust button to go straight to Adjust mode.

    One of the problems with presets, and indeed with any program that lets you make adjustments to contrast and detail like Intensify Pro, is that it is very easy to create an image that looks over-processed.
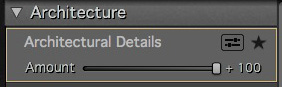
    MacPhun Intensify Pro reviewIntensify Pro provides a simple solution to this. Each preset comes with an Amount slider that lets you adjust the strength of the preset on a scale from zero to 100, much like the Opacity slider in Photoshop layers. So if you like a preset, but feel the effect is too strong, you can adjust the strength until you are happy with the result.

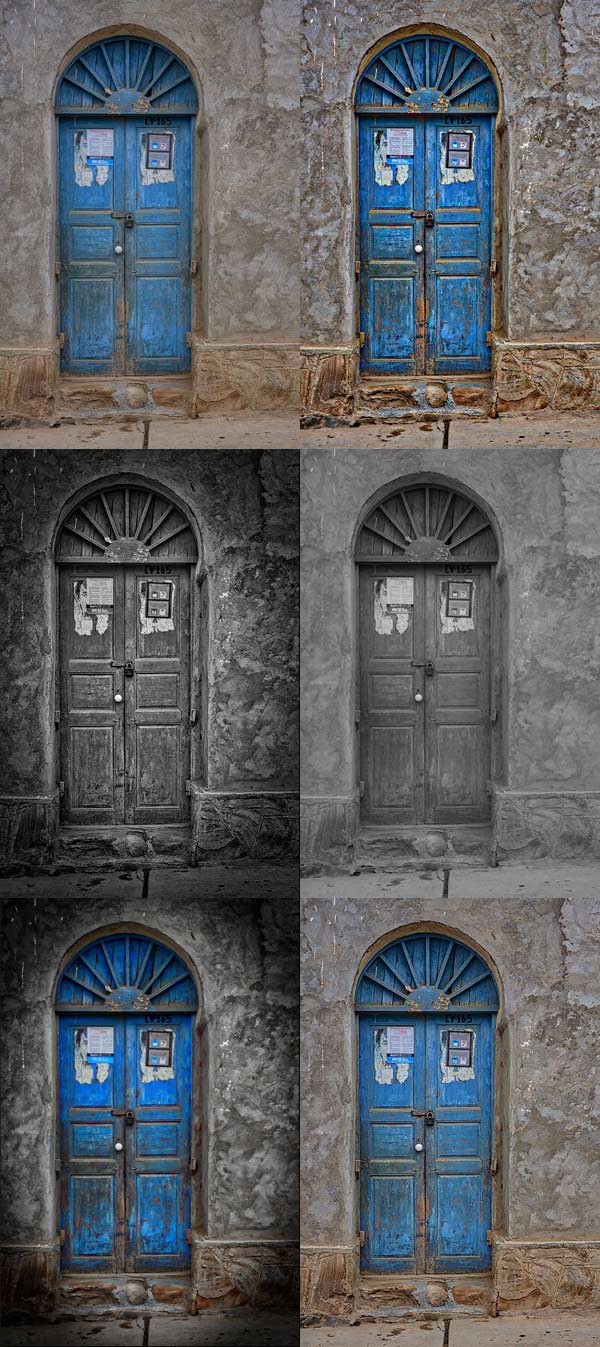
    Here are some of the presets in action. All of them were applied to the original photo at full strength without any further adjustments.
    MacPhun Intensify Pro review

    Adjust

    After selecting (or perhaps not selecting) a preset you can move to Adjust mode. This is where you take control and use sliders to apply adjustments and enhancements to your photo.MacPhun Intensify Pro review
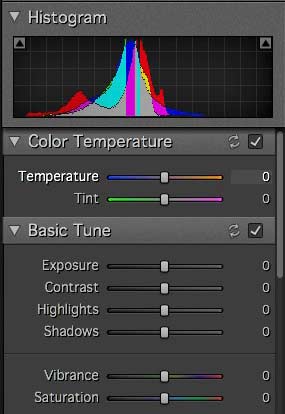
    The first three Adjust panels echo the sliders found in Lightroom and Adobe Camera Raw. There’s nothing new here, these are for making adjustments to the photo before you get to the sliders that are unique to Intensify Pro.

    You’ll notice the absence of a Clarity slider. It is replaced by the Pro Contrast, Structure and Detail panels. These allow you to much the same thing, but with far more control and versatility.

    Pro Contrast

    The Pro Contrast panel is where Intensify Pro starts to get interesting. Pro Contrast increases contrast without losing detail, and there are three sliders so you can apply it to the highlights, mid-tones and shadows individually. Under each of these is an Offset slider, which works in tandem with Pro Contrast sliders to control the brightness of the image. So, for example, if you increase Pro Contrast in the shadows and find that the image becomes too light, you can increase the Offset to make it darker.
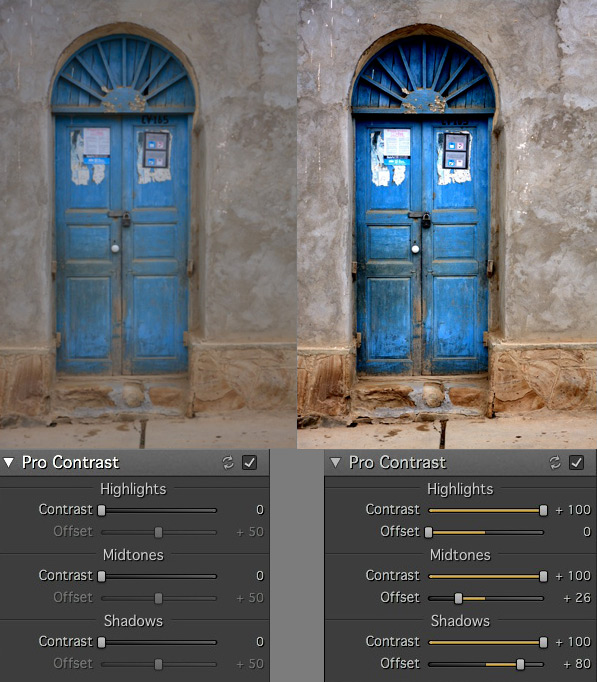
    MacPhun Intensify Pro review

    Structure

    The Structure sliders are for enhancing areas of low contrast, revealing texture and details. There are two levels: Global (targeting small areas) and Micro (targeting really small areas).MacPhun Intensify Pro review
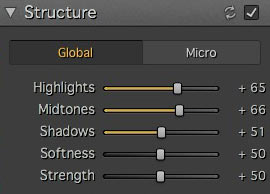
    There are three sliders, enabling you to target the highlights, mid-tones and shadows respectively. The Strength slider gives you control over the strength of the effect and Softness slider control over the crispness.

    It is really easy to overdo the effect and create something that looks completely unnatural, similar to some of the presets I showed you at the beginning of the article. Care is required, and I found that the Structure sliders worked best when I used the Pro Contrast sliders first.

    These enlargements show you the effect of the Structure sliders.
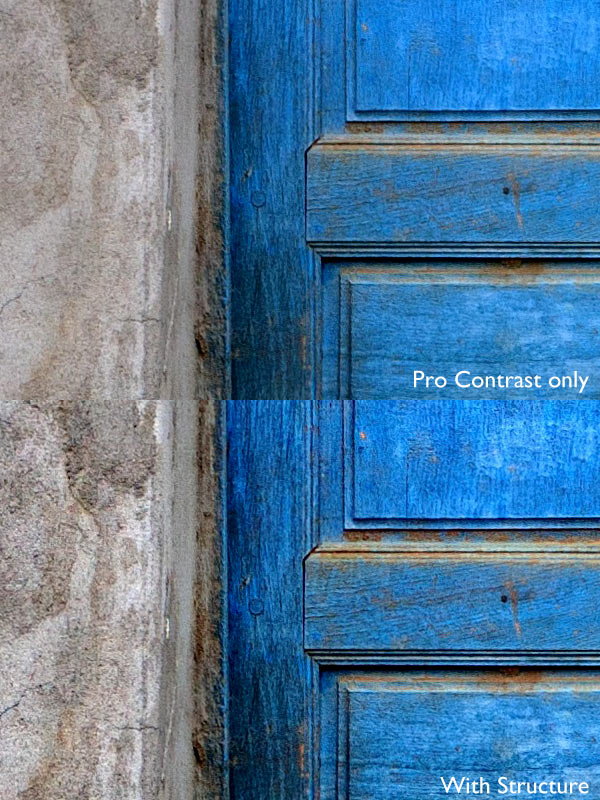
    MacPhun Intensify Pro review

    Detail

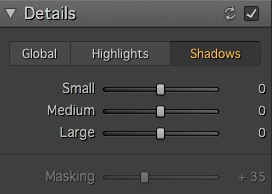
    MacPhun Intensify Pro reviewThe Detail sliders are for enhancing detail. The three sliders (Small, Medium and Large) control the size of the details affected. The Large slider has the greatest effect on the image and the Small slider the least. The tabs at the top let you apply it as a global adjustment, or to the shadows or highlights.

    Like Structure, the Detail sliders require care as it is easy to overdo the effect. There is an additional Masking slider to help keep it under control. If the effect is too strong, you can move the Masking slider right to limit the areas affected.

    Micro Sharpness, Vignette and Opacity
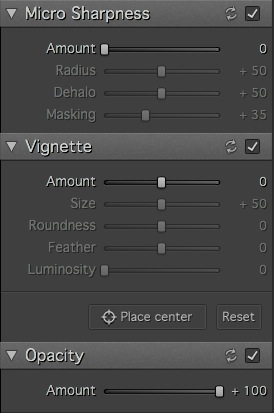
    MacPhun Intensify Pro reviewThe final three sets of sliders let you make other adjustments, such as sharpening or adding a vignette. The Opacity slider lets you reduce the strength of the effect you’ve created. This does the same job as the Amount slider in the Presets panels. Use it if you realize that you’ve overdone the processing.

    Local adjustments and Layers

    So far I’ve looked at all the sliders in the context of global adjustments (adjustments that affect the entire image). But Intensity Pro also lets you create masks to apply the effects to a smaller area (local adjustments).

    Local adjustments are important because most of the time you will want to emphasize texture and detail in certain parts of the image, but not others. A subtle touch is often key to effective post-processing, and local adjustments help you achieve that.

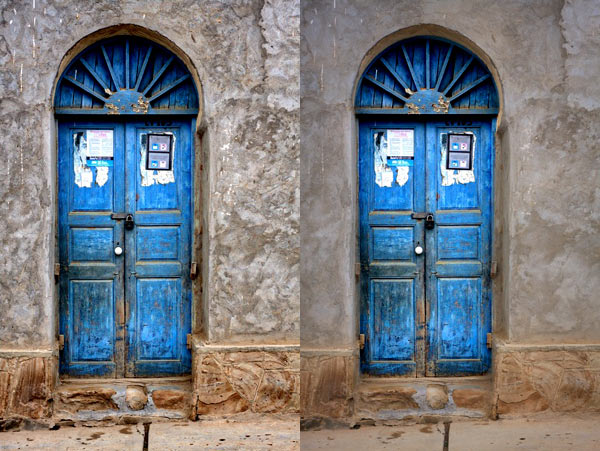
    Here’s the final example (below). The image on the left shows the result of a series of global adjustments. I like the effect on the door, but the effect on the surrounding wall is overdone.

    The image on the right was created using masks and layers. I used the mask to limit the adjustments made in the first image to the door. Then I created another layer and applied a softer level of adjustment to the wall. Finally I added a vignette to make the sides of the image darker. The result is a more subtle increase in contrast and detail that emphasizes the texture and detail of the wooden door.
    MacPhun Intensify Pro review

    Conclusion

    Intensify Pro is an excellent program, and I’m looking forward to working with it more. I feel I’ve only touched upon its capabilities in this short review, as like all plug-ins it takes time to explore the features and learn how to get the best from it. Hopefully I’ve given you a good idea of what it can do. The best way to see for yourself is to go to the MacPhun website and download a trial of the program (look for the grey Try for Free button above the menu).

    There are two versions of the program. Intensify is a standalone app aimed at casual photographers. Intensify Pro also works as a plug-in with Photoshop, Photoshop Elements, Lightroom and Aperture and contains a few more advanced features aimed at professional photographers. The details are on the MacPhun website.

    New features

    For those of you who are interested, Intensify Pro was recently upgraded by MacPhun and contains the following new features. If you already own the software, go to Intensify Pro > Check for Updates to download the update. This list is from the press release:

    Macphun Print Lab – Intensify photos can now with a few clicks be turned into personalized products like postcards and notecards, delivered direct to recipients. Affordable, high quality gallery frames and canvas prints can also be ordered, perfect for gifts to friends and family. The Macphun Print Lab is powered by MILK Books.

    Integration with SmugMug – SmugMug is one of the world’s leading photography communities with millions of users worldwide. Images can be exported directly from Intensify to SmugMug portfolios for viewing, sharing and printing.

    RAW Updates – Intensify now supports RAW formats from all the most popular cameras. The native RAW processor supports 16-bit images and opens files faster than in any other app.

    Mavericks Support – Intensify is now taking advantage of all the powerful features of Apple’s latest OS, Mavericks. Support for the new Notifications feature will enable more timely communications with customers about updates, new features, free presets and more.

    UI improvements – Additional shortcuts to the user interface provide quick access to the most important tools and features.

    The post Macphun Intensify Pro Software Review by Andrew S. Gibson appeared first on Digital Photography School.

    Digital Photography School

  • Creative Reasons to use Intentional Camera Movement

    One of the earliest lessons you likely learned as a photographer was the importance of keeping your camera steady and stable. You wanted tack-sharp focus, so you learned to tuck in your elbows and support your camera properly. But why limit yourself when there are so many creative reasons to move your camera?

    intentional camera movement, ICM, blur, motion blur, how to, sunrise

    Try Intentional Camera Movement or ICM

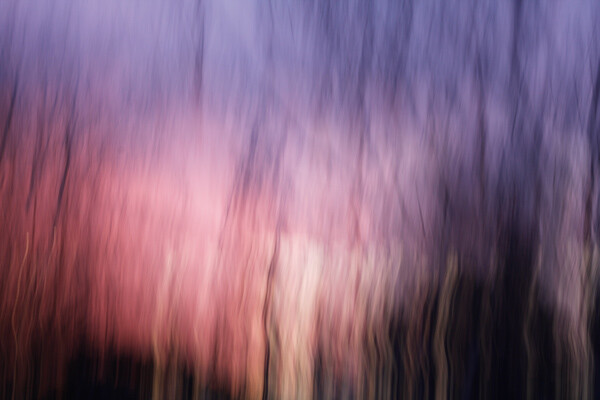
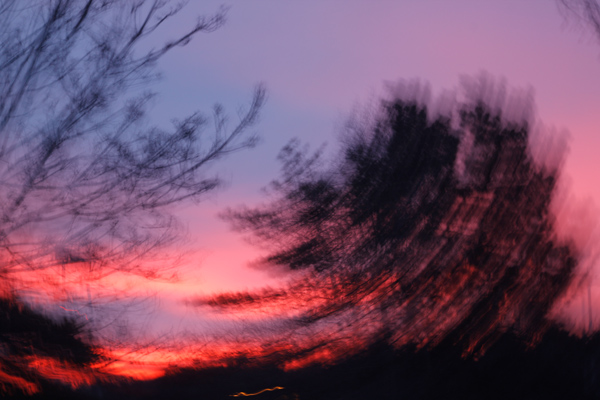
    ICM is the abbreviation for Intentional Camera Movement, a term that covers a wide range of photography situations. What brings these different situations together is the fact that rather than remaining still, the camera itself is moving while the photograph is being taken. This creates a wide-range of creative effects and abstract images, like the sunrise image above.

    In order to capture recognizable blur, you need to shoot at a slow enough shutter speed to capture significant motion. A quarter to a half-second or longer is a good place to start. Shooting in Shutter Priority mode allows you to set a longer shutter speed, and your camera will choose an appropriate aperture. If the picture is too light or too dark, you may want to consider dialing in all of the settings in Manual mode. You can also achieve ICM style shots with a point-and-shoot camera in darker situations, where your camera will select for a longer shutter speed. (Both of the panning shots, below, were taken with a point-and-shoot camera in Program mode.)

    Try Panning

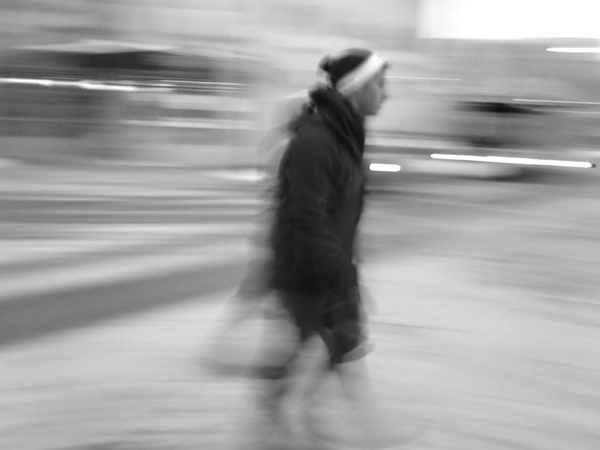
    Panning is one specific type of intentional camera movement. Rather than being random movement when panning, the movement of the camera mimics the relative movement of the subject. This results in an unusual composition where a moving subject appears frozen and the background of the image becomes blurred and conveys the sense of motion.

    intentional camera movement, ICM, panning, people, motion, blur, blackandwhite

    Panned at 1/4 of a second – if you want less blur use a slightly faster shutter speed like 1/30th

    The tricks behind panning are in the focus and the follow-through. A moving subject and a moving camera can confuse your camera’s autofocus, so you will get better results if you use back-button focus or pre-focus the camera to the right distance and then switch it into manual focus mode. Either technique will keep the camera focused at the right distance, and you will not waste time waiting for your autofocus to lock on to your subject.

    The second trick for panning is in the follow-through: both before and after you take the shot. Just like in golf or baseball, the smoothness of the swing comes from continuing the motion before and after the point of contact (hitting the ball or hitting the shutter). If you want smooth motion blur in your panning image, you need to be moving and following your subject both before and after hitting the shutter.

    intentional camera movement, ICM, panning, motion, blur, car, vehicle

    Panned at 1/8th of a second

    The best way to get a feel for the mechanics of panning is to practice the movement without actually hitting the shutter and taking a photograph. Practice keeping your subject in approximately the same place within your viewfinder as it moves past you. For example, if you are trying to capture a panning shot of a car, begin by locating the car in your viewfinder when it is a short distance away from you. Swing the camera to follow the motion of the car as it approaches, passes, and zooms away from you. Once you have been able to successfully track a few cars and keep them in the frame, try repeating the same process but press the shutter button midway through the motion. Continue to follow the car with the camera as the shutter closes, and you will find you have a much smoother feel and flow to the final image.

    Shooting a few successive frames using High Speed or Burst mode can help get a successful panning image also.

    Try a Zoom Burst

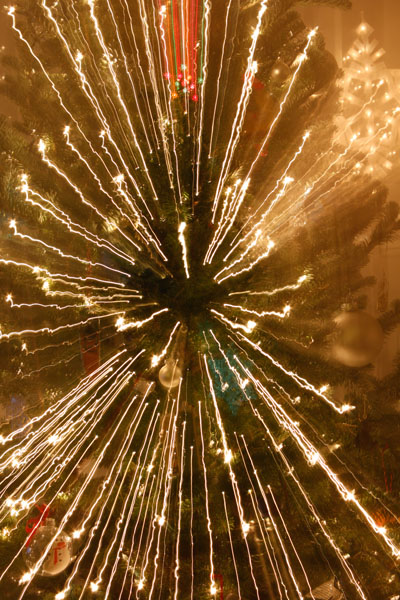
    A zoom burst is another specific type of intentional camera movement. Rather than moving the entire camera, during a zoom burst shot you move the lens and zoom it in or out while the photograph is being taken. The more focal lengths covered by your camera lens, the greater the zoom effect will appear to be.

    intentional camera movement, ICM, zoomburst, zoom, motion, blur, christmas lights, abstract

    18-270mm lens, 4 seconds at f/13, ISO 100 on a tripod

    The bright points of light on a Christmas tree provide an excellent subject for a zoom burst shot, as each individual light renders as a bright streak across the image, making for a feeling of achieving warp speed and rocketing forward into the photograph. This shot had a shutter speed of four seconds and was taken hand-held, with one hand holding the camera and the other rotating the zoom lens during the shot. The slight bumps and jumps in the lights are a result of the movement of the camera body due to camera shake and the added motion from zooming the lens.

    intentional camera movement, ICM, zoomburst, zoom, autumn, leaves, abstract, motion, blur

    10-24mm zoom lens, ISO 100, 1/25th at f/22

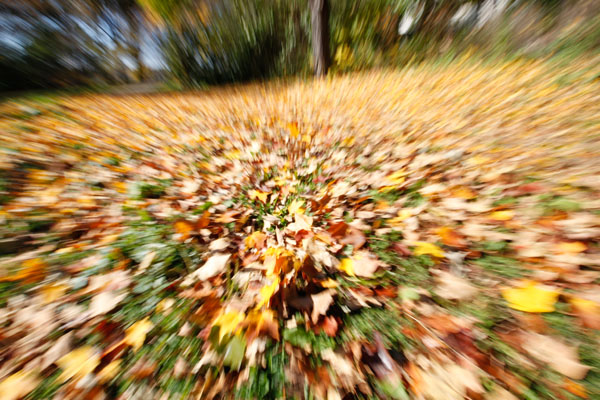
    Zoom burst shots can be of any subject, not just bright points of light. Here, the variations in color of the fallen leaves provide a colorful backdrop for the motion and lines of the zoom burst effect. This shot also demonstrates that you can achieve a zoom burst effect with a smaller range, as this image was shot hand-held using a 10-24mm lens.

    Conclusion: try Intentional Camera Movement

    There are many, many ways to use Intentional Camera Movement to capture creative and unusual shots, and these different techniques are just the tip of the iceberg. Don’t let yourself be locked in to only stable, tack-sharp photographs.

    intentional camera movement, ICM, blur, motion, abstract, sunrise

    ISO 100, 0.6 seconds at f/11 done hand-held by rotating the whole camera when shooting (took several tries to get that smooth)

    Experiment with intentional camera movement, and you might surprise yourself! Share your results in the comments below.

    The post Creative Reasons to use Intentional Camera Movement by Katie McEnaney appeared first on Digital Photography School.

    Digital Photography School

  • Weekly Photography Challenge – Black and White

    Earlier today I professed my love of black and white photography and shared a collection of some powerful B&W images and some articles on tips for making your own B&W images.

    So now it’s your turn to show us your images. The weekly photography challenge this time around is black and white.

    A few images to inspire you

    By Marco Calabrese

    By Yasin Hassan – ????? ???

    By Chris JL

    By { pranav }

    By Simon & His Camera

    By gato-gato-gato

    By gato-gato-gato

    By Greg McMullin

    By i k o

    By i k o

    Need help converting to Black and White?

    • How to Convert Photos to Black and White in Lightroom
    • 3 Tips for Better Black and White Conversion using Lightroom
    • Converting Images to Black and White Properly
    • Tips for Shooting and Processing Better Black and White Photographs
    • An Adjustable Black and White Conversion in Photoshop Elements
    • How to Create a Black and White High Contrast Sky from a Colour Image

    Show use your Black and White images

    Simply upload your shot into the comment field (look for the little camera icon in the Disqus comments section as pictured below) and they’ll get embedded for us all to see or if you’d prefer upload them to your favourite photo sharing site and leave the link to them. Okay, ready to impress us?

    The post Weekly Photography Challenge – Black and White by Darlene Hildebrandt appeared first on Digital Photography School.

    Digital Photography School

  • On Traveling With Your Camera

    In January Strobist was restructured from a standard, 2x/week blog into a core knowledge archive. Rather than publishing all of the time, we made the 2,000-post archive more organized and accessible. Now, Strobist only updates when there is something meaningful to say.

    I did this to flip the signal to noise ratio (seriously, who needs to read that many photoblog posts every day) and to create some time for two significant projects. The first of which, The Traveling Photographer, has just dropped.

    Read more »
    Strobist

  • A Collection of Powerful Black and White Images

    I have a background in black and white photography – using actual film and processing in a darkroom. The entire first year of my two year college photography program was spent doing black and white photography only, nothing else. I came to love working in the darkroom and seeing the image appear on the paper was magic.

    Now in the digital age, making black and white is a choice you can make after you shoot the images – which gives you options we didn’t have in the film days. So I wanted to share some B&W images to get you thinking about the possibilities.

    For some some tips on shooting and converting to B&W try these:

    • Tips for Shooting and Processing Better Black and White Photographs
    • Black and White Conversions: An Introduction to Luminosity
    • 3 Tips for Better Black and White Conversion using Lightroom
    • How to See in Black and White [and how HDR can be a Powerful Tool for the Monochrome Photographer]

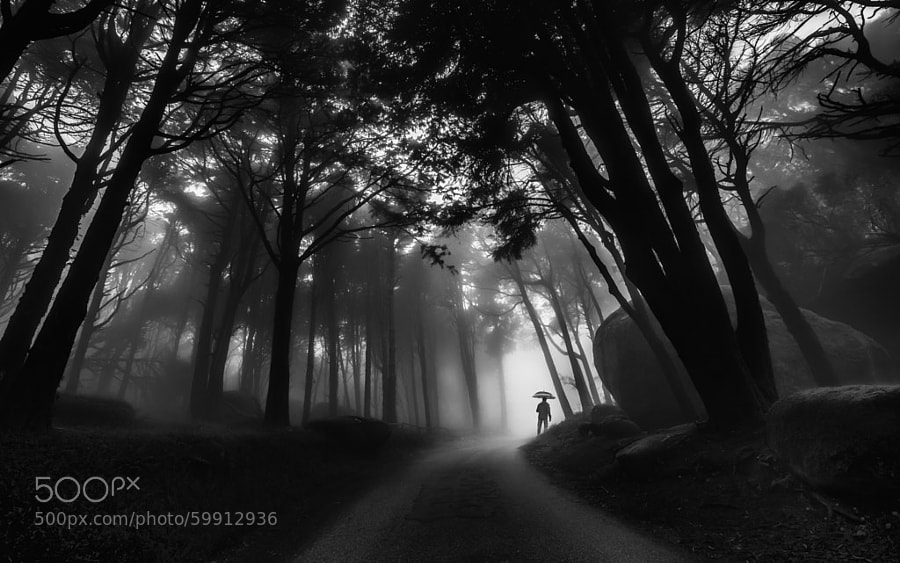
    Photograph Through the mist by Paulo Mendonça on 500px

    Through the mist by Paulo Mendonça on 500px

    Photograph The Old Bridge by Mostafa Hamad on 500px

    The Old Bridge by Mostafa Hamad on 500px

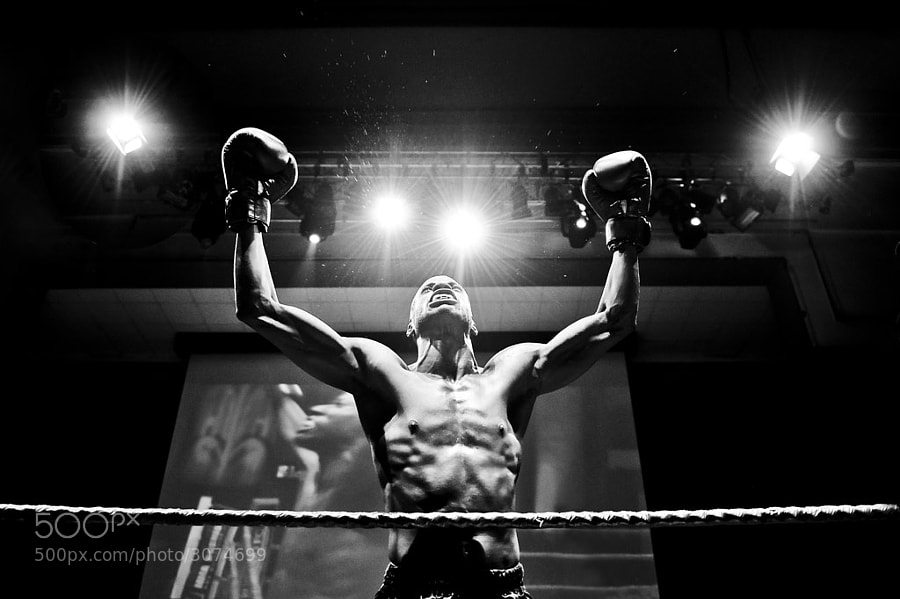
    Photograph The Winner by Andrius Petrucenia on 500px

    The Winner by Andrius Petrucenia on 500px

    Photograph Untitled by enzo farina on 500px

    Untitled by enzo farina on 500px

    Photograph City of Fog by Johannes Burkhard on 500px

    City of Fog by Johannes Burkhard on 500px

    Photograph Winter in the Ore mountains II by Daniel ?e?icha on 500px

    Winter in the Ore mountains II by Daniel ?e?icha on 500px

    Photograph Milford Sound, Fiordland National Park, Southland, New Zealand by Russell Pike on 500px

    Milford Sound, Fiordland National Park, Southland, New Zealand by Russell Pike on 500px

    Photograph Darkness Peaks by Simon Pouyet on 500px

    Darkness Peaks by Simon Pouyet on 500px

    Photograph La Familia by Luis Beltrán on 500px

    La Familia by Luis Beltrán on 500px

    Photograph Fisherman Wanderer by Joel Santos on 500px

    Fisherman Wanderer by Joel Santos on 500px

    Photograph Corpus Christi at Night by Joe V on 500px

    Corpus Christi at Night by Joe V on 500px

    Photograph Ancient Light of Wisdom by Joel Santos on 500px

    Ancient Light of Wisdom by Joel Santos on 500px

    Photograph *** by Ann Nevreva on 500px

    *** by Ann Nevreva on 500px

    Photograph Black is my colour.. by Marianna Roussou on 500px

    Black is my colour.. by Marianna Roussou on 500px

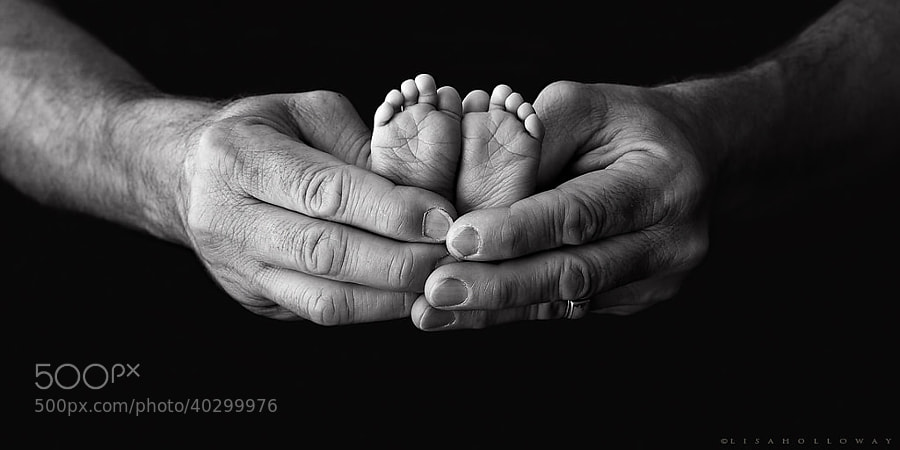
    Photograph Tiny Feet by Lisa Holloway on 500px

    Tiny Feet by Lisa Holloway on 500px

    Photograph A Sea of Stars by Lisa Holloway on 500px

    A Sea of Stars by Lisa Holloway on 500px

    Photograph Daisy codera by Rainer Ressmann on 500px

    Daisy codera by Rainer Ressmann on 500px

    Photograph Almost closed by Kimhwan SEOULIST on 500px

    Almost closed by Kimhwan SEOULIST on 500px

    Photograph Paint Noir by András Sümegi on 500px

    Paint Noir by András Sümegi on 500px

    Photograph shielded from the danger of the outside world by David Mar Quinto on 500px

    shielded from the danger of the outside world by David Mar Quinto on 500px

    Photograph Alone by Ana Grama on 500px

    Alone by Ana Grama on 500px

    Photograph Go, go by Edwin Leung on 500px

    Go, go by Edwin Leung on 500px

    Photograph Breakfast by La Mo on 500px

    Breakfast by La Mo on 500px

    Photograph 77.2013 - Canary Wharf ... by Pawel Tomaszewicz on 500px

    77.2013 – Canary Wharf … by Pawel Tomaszewicz on 500px

    Photograph Building in the Building by Roman K on 500px

    Building in the Building by Roman K on 500px

    Photograph Mantis by Arnaud Bratkovic on 500px

    Mantis by Arnaud Bratkovic on 500px

    Photograph Hammer by Enrico Panina on 500px

    Hammer by Enrico Panina on 500px

    Photograph BB King by Ken Stewart on 500px

    BB King by Ken Stewart on 500px

    Photograph Rocks JK by Daniel Czerwinski on 500px

    Rocks JK by Daniel Czerwinski on 500px

    Photograph Recursion by Frank Wijn on 500px

    Recursion by Frank Wijn on 500px

    Photograph A monochrome end of fall by Felicia Simion on 500px

    A monochrome end of fall by Felicia Simion on 500px

    Photograph Behind the old Window by Adrian Limani on 500px

    Behind the old Window by Adrian Limani on 500px

    Photograph Havana Life by Liban Yusuf B&W on 500px

    Havana Life by Liban Yusuf B&W on 500px

    Photograph Broken B&W by Liban Yusuf B&W on 500px

    Broken B&W by Liban Yusuf B&W on 500px

    Photograph M o t i o n   BW by Liban Yusuf B&W on 500px

    M o t i o n BW by Liban Yusuf B&W on 500px

    **I just love this guy’s images of Cuba, inspires me to do more night shooting when I go back in January. So I had to share a few of his shots.

    Photograph Kissed by light by Bipphy Kath on 500px

    Kissed by light by Bipphy Kath on 500px

    Photograph Angel....please give me your light... by Ines van Megen-Thijssen on 500px

    Angel….please give me your light… by Ines van Megen-Thijssen on 500px

    Photograph No sigh, immured tears by regis boileau on 500px

    No sigh, immured tears by regis boileau on 500px

    Photograph Ballerina III by Vanessa Paxton on 500px

    Ballerina III by Vanessa Paxton on 500px

    Photograph Ex ospedale psichiatrico di Mombello by PierSparrow  on 500px

    Ex ospedale psichiatrico di Mombello by PierSparrow on 500px

    The post A Collection of Powerful Black and White Images by Darlene Hildebrandt appeared first on Digital Photography School.

    Digital Photography School

  • Top 10 Blogs Wedding Photographers Must Follow in 2014

    There are a lot of wedding photographers, or just amateurs who shoot weddings, but there are also many who would like to brush up their photography skills. Along with skills and photography level, that would be awesome if a photographer may give some tips their clients on floral arrangements, invitation designs, wedding dress ideas, wedding color palettes, poses, and more. Continue Reading

    The post Top 10 Blogs Wedding Photographers Must Follow in 2014 appeared first on Photodoto.


    Photodoto

  • 8 Reasons to Use Silver Efex Pro 2 for Your Black and White Conversions

    Silver Efex Pro 2 review

    You can convert colour photos to black and white in Photoshop and Lightroom (or your Raw conversion software of choice). But the last few years have also seen an increase in the number of plug-ins built to do nothing else, other than convert photos to monochrome.

    Today I’m going to look at what many people consider to be the best black and white plug-in around – Nik Software’s Silver Efex Pro 2. Rather than provide a comprehensive review of the software, I’m going to look at some of the things you can do with it that you can’t (or would be much more difficult) in Photoshop or Lightroom.

    1. Presets

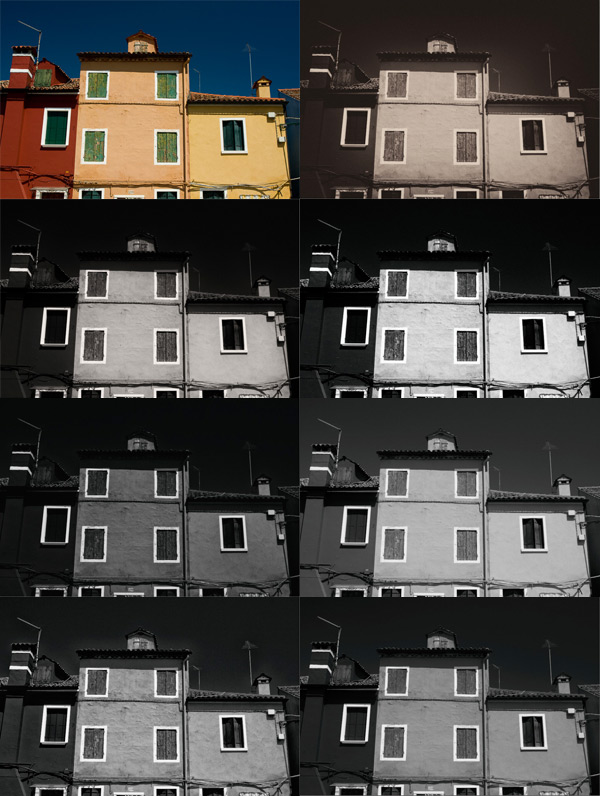
    Silver Efex Pro 2 has 38 presets that you can use as starting points for your processing work, including vintage looks as well as modern ones. This places the plug-in ahead of Photoshop, and probably ahead of Lightroom too. You can buy Develop Presets for Lightroom, but it will be difficult to find some that give you as many options as those in Silver Efex Pro 2.

    Here’s a sample of some of the presets. The original colour photo is shown top left.

    Silver Efex Pro 2 review

    2. There are more tools for enhancing texture

    Silver Efex Pro 2 review

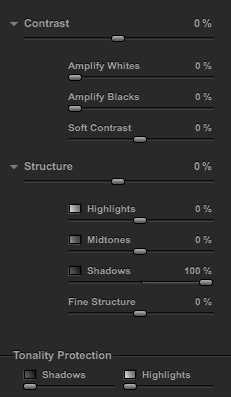
    The full set of Contrast and Structure sliders in Silver Efex Pro 2.

    One of the elements that makes black and white photos so effective is texture. You can enhance texture in both Photoshop and Lightroom (the Contrast and Clarity sliders are my favourite tools for this) but Silver Efex Pro 2 takes it several steps further.

    The Contrast sliders

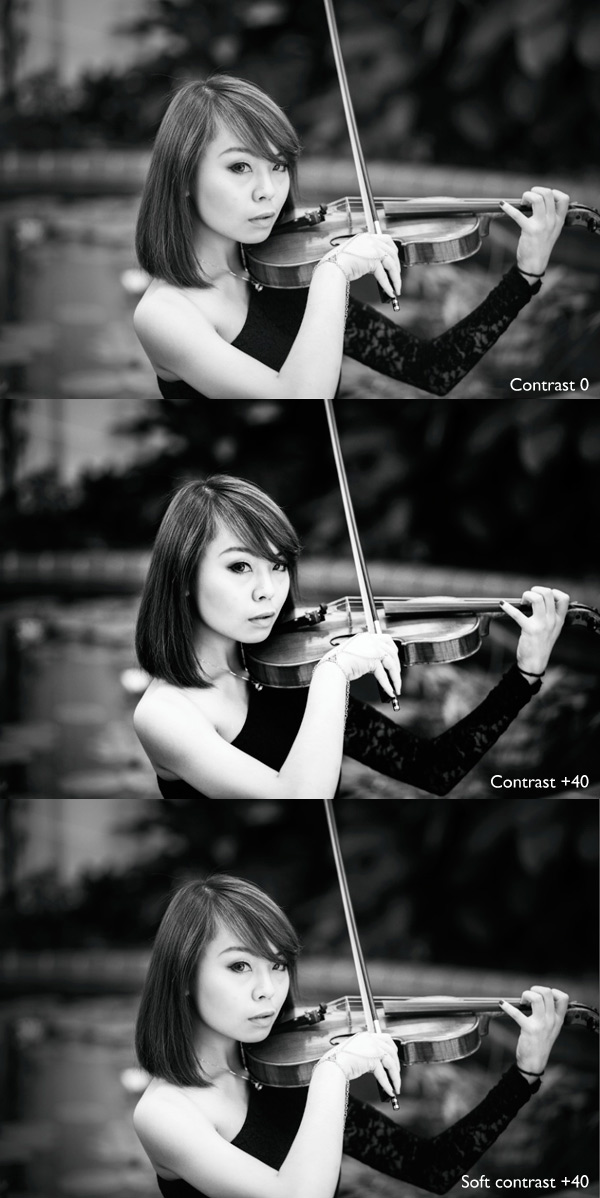
    Silver Efex Pro 2 has four sliders for adjusting contrast. The Contrast slider is the same as the one in Lightroom or Adobe Camera Raw. The Amplify Whites and Amplify Blacks sliders let you increase Contrast in the highlights and shadows respectively. There’s also a Soft Contrast slider that increases contrast but in a less aggressive way, almost as if there is an overlay of gaussian blur. This slider is very useful for portraits.

    If you get carried away with the Contrast sliders you can lose detail in the highlights and shadows. So, in addition to the four sliders already mentioned, there are two Tonality Protection sliders used to bring back detail in clipped areas.

    Silver Efex Pro 2 review

    These portraits show the difference between Contrast and Soft Contrast. Soft Contrast is ideal for portraits, while Contrast is better for subjects like architecture and the landscape.

    The Structure sliders

    Structure slider is similar to Clarity in Lightroom and Adobe Camera Raw. But while in those programs the Clarity slider affects all the tones in the selected area, in Silver Efex Pro 2 you can choose to adjust Structure independently in the shadows, midtones and highlights. There is also a Fine Structure slider for increasing mid-tone contrast in areas of fine detail.

    Silver Efex Pro 2 review

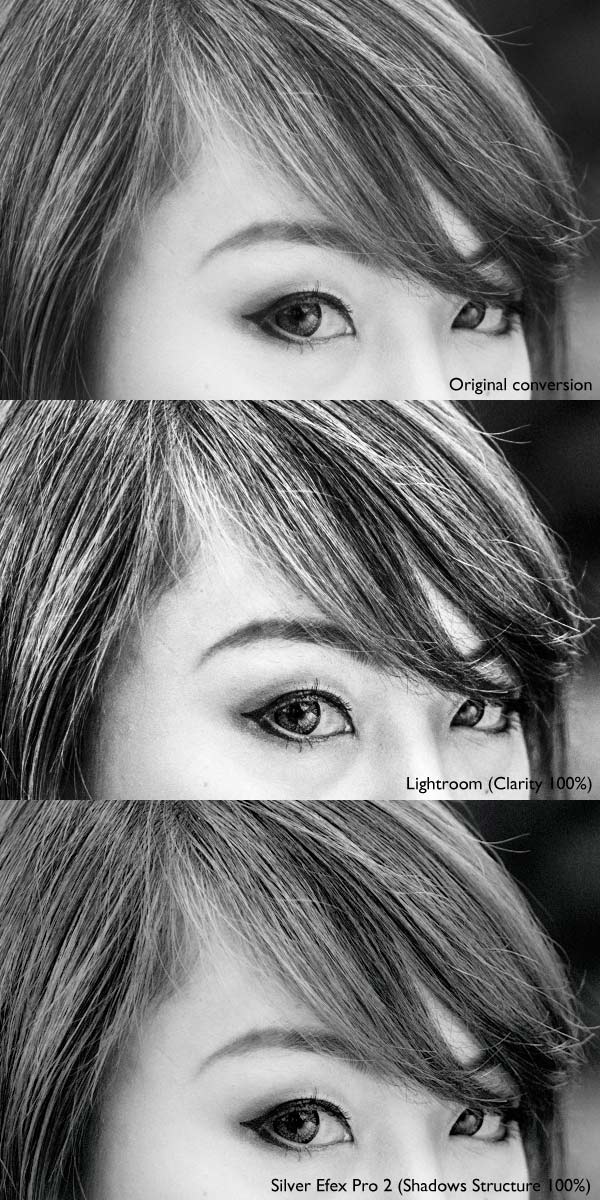
    The above photo shows three close-ups of the same portrait used earlier.

    Top: A neutral black and white conversion, with no increase in Clarity.

    Middle: This is what happens when you increase Clarity to 100% in Lightroom (note that you wouldn’t normally push it that far for a portrait, I did it here to show you the effect). Clarity is increased uniformly across the frame, affecting the skin tones as well as the hair.

    Bottom: Shadows Structure set to 100% in Silver Efex Pro 2. Only the shadows are affected, leaving the midtones and highlights alone. This brought out the detail in the model’s hair and eyes, but left her skin untouched. You would have to use a selection or a mask in Photoshop or the Adjustment Brush in Lightroom to achieve the same effect.

    3. Control Points make local adjustments easy

    Just like in Photoshop and Lightroom you can apply adjustments locally as well as globally, using a system called Control Points.

    A Control Point is the centre of a circle within which you can make tonal adjustments. The adjustment is applied to tones similar in brightness and colour to the pixels underneath the Control Point itself. For example, if you place a Control Point over a dark tone, then increase the brightness, only the dark tones within the circle are adjusted. Light tones remain untouched.

    Silver Efex Pro 2 review

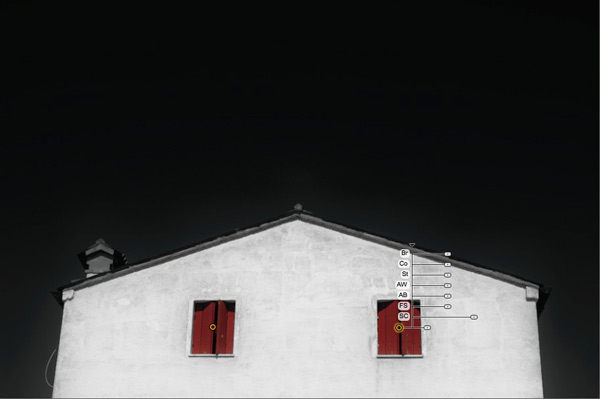
    The yellow and black dot marks the Control Point. Adjustments are made to pixels matching the colour and brightness of the pixels underneath it. There are seven sliders you can adjust: Brightness (Br), Contrast (Co), Structure (St), Amplify Whites (AW), Amplify Blacks (AB), Fine Structure (FS) and Selective Colorization (SC).

    It may sound complicated but it only takes a little practice to understand how it works. You can use as many Control Points as you want in an image, and group them together to cover areas that don’t conform easily to a circular shape.

    4. Selective colouring is easy

    Selective colouring is the technique of converting an image to black and white while leaving part of it in colour. This is easy with Silver Efex Pro 2 as all you have to do is place a Control Point over the area where you want to retain colour.

    I used two Control Points in the following example, one on each coloured shutter:

    Silver Efex Pro 2 review

    5. The History panel is excellent

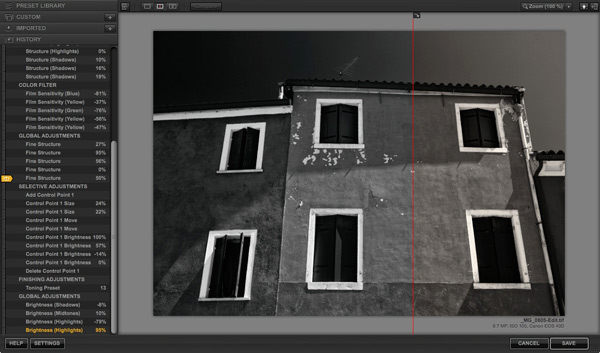
    Silver Efex Pro 2 has the best History panel I’ve seen in any software. Every adjustment you make to your photo is listed.

    Silver Efex Pro 2 review

    The History panel works together with the Compare view. The yellow tab on the left indicates the photo used for the Before view, and the entry used for the After view is displayed in yellow text. This simple method lets you compare any two entries in the History panel.

    6. The Zone System

    Silver Efex Pro 2 can show you where the tones in your photo fall within the eleven zones of the Zone System. One useful application of this is that you can use it to see which areas of your photo may block up in print because they are too dark or too light.

    This screenshot shows the tones which fall into zone 3. They are indicated by the brown diagonal lines.

    Silver Efex Pro 2 review

    7. Black and White film emulation

    The Film Types panel gives you a choice of 18 different black and white films. When you choose one the plug-in emulates the tonality and grain structure of the selected film. It’s an easy way to get the film look without having to shoot, develop, and scan black and white film.

    8. Silver Efex Pro 2 comes bundled with other software

    Silver Efex Pro 2 is part of the Nik Collection, which includes seven applications and costs $ 149. That works out to less than $ 25 a plug-in.

    Note: If you’re on a tight budget, the standalone version of OnOne Software’s Perfect Photo Suite 8 represents even better value at $ 79. Click the link to learn more.

    Further resources

    You can learn more about Silver Efex Pro 2 at these links:

    • Silver Efex Pro 2 official page
    • Silver Efex Pro 2 tutorials
    • Silver Efex Pro 2 videos on YouTube

    Your turn

    What software do you use for black and white conversions? Do you prefer Photoshop, Lightroom, another Raw conversion program or a plug-in? Let us know in the comments – what would you recommend to other readers?

    The post 8 Reasons to Use Silver Efex Pro 2 for Your Black and White Conversions by Andrew S. Gibson appeared first on Digital Photography School.


    Digital Photography School

  • 3 Tips on How to Approach Photography as a Hobby

    Recently, I gave you a look inside the bag of a hobby photographer on a budget, and after reading all the comments on that post, I got to thinking about a topic that doesn’t really get all that much attention…

    approachphotographyhobby-5

    There are technical posts that detail things like getting sharper images and even plenty of advice on going pro, but what I have not found in my search, is any solid advice on how to approach photography as a hobby.

    Sure you’ll need to learn the technical stuff in order to make quality photos, but there’s more to approaching this craft than just learning, you have to have the right mindset going in or, more than likely, your camera will be collecting dust-bunnies in your closet next month.

    First what’s the difference between hobbyist and professional?

    I thought about this for a while and really only two standout differences come to mind – money and time.

    • Money – The professional needs to make money from their photography – it’s how they pay bills and put food on the table. As a hobbyist, while you could still make money on the side from time to time, the vast majority of your money comes from another source (i.e. a typical desk job, the retirement fund, spouse, etc.).
    • Time – The professional, by nature, is required to invest time into photography as it directly effects how much money they will make in the end. However, as a hobbyist you’re more likely to have other priorities more important than photography and as a result will spend less time behind the camera than a professional.

    Notice that quality is not one of the two differentiating factors. As a hobbyist you can certainly still make great photographs, there are many hobbyists that do just that, but it’s not something you can do overnight. Professional or not – photography is a journey.

    Three steps for approaching photography as a hobby

    approachphotography-4

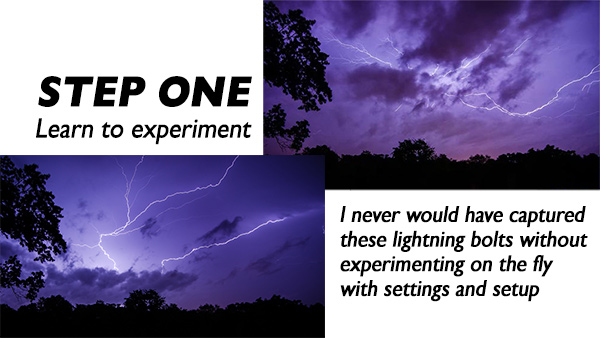
    Step one – learn to experiment

    One of the best parts of being classified as a hobbyist is you don’t have anyone paying you to take their photos which means you can take your photos.

    You can experiment with different styles of photography like HDR, light painting, black and white. You can photograph people or landscapes. I’ve always believed that the best way to learn how something works is to just get out and start using it. After you’ve played around with a camera a bit and done some own experimentation – the tutorials, guidebooks, and even the camera’s manual will make more sense, allowing you to learn even more.

    Take action today

    One of the best ways to force yourself to experiment is by joining various communities. Digital Photography School runs a weekly challenge in which you are given a theme to photograph for the week and share your result in the comments of the week’s post. It’s fun and really can get you thinking about new ideas.

    approachphotography-step2

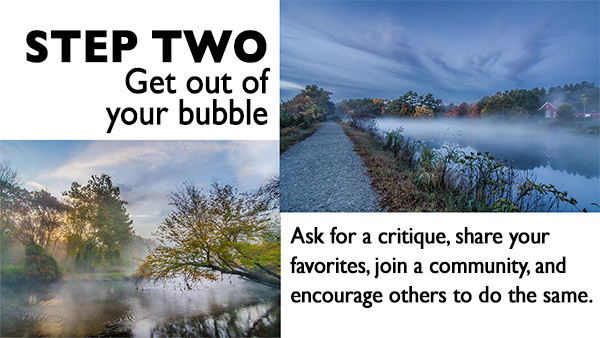
    Step two – get out of your bubble

    Join a community and share your work. There’s no shame in asking others for help, but it can be a bit scary to do so, especially when you’ve hit a personal breakthrough and are afraid someone might tear your photograph apart.

    Making friends – both through the virtual worlds of social media and internet forums, and the real world photography club that meets in the basement of your local town hall – is a great way to gain support and keep the motivation flowing.

    Take action today

    dPS has a huge forum with thousands of people sharing and critiquing each other’s photography daily. Google+ and Facebook also offer groups specific to various genres of photography. If all else fails you could always start your own website and start sharing your work on a regular basis there or find a local club that will give you a more real world experience. The key is to get yourself out of the bubble.

    Step three – invest in yourself

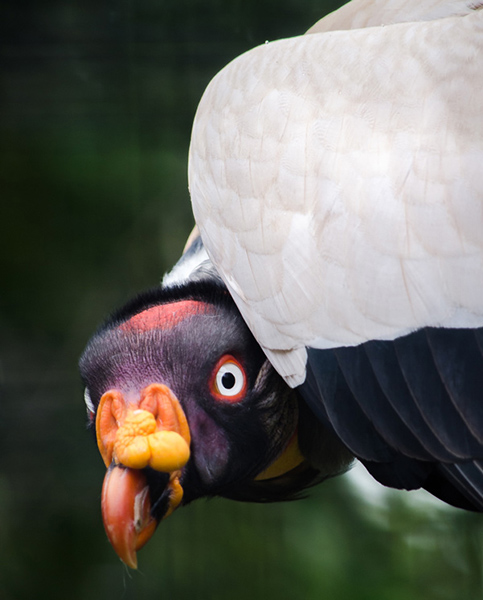
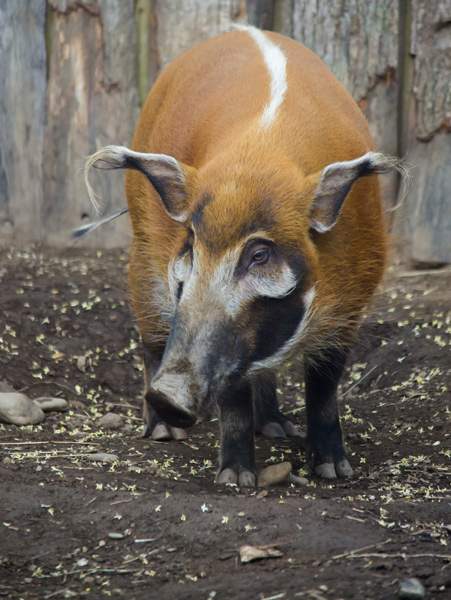
    Whether you’re photographing pets or at the zoo

    approachphotographyhobby-8b approachphotographyhobby-7b

    Or on vacation, or in your backyard. The more you’re willing to invest the more it will show in your work.

    approachphotographyhobby-3b

    approachphotographyhobby-4b

    Yes, this still about photography as a hobby, but it’s an expensive hobby and not just at the wallet, but in time as well – so be prepared to invest both if you want to succeed.

    I’m not saying you need to buy pro gear, an entry level camera and kit lens can take you far and get you some great photographs – it may be all you ever need in terms of camera gear. But don’t forget about the accessories – tripods, filters and software are all part of the package as well.

    Make sure you’re not only investing money into your hobby though, invest time. Quality gear and software will not fix a lack of experience, so get out and start taking photographs by following step one. Stay motivated by sharing your work and asking for critique by following step two. Then, as finances and time allow, invest both into improvement and you’ll have a winning recipe for success.

    Take action today

    Block out some time this weekend and try and complete the weekly challenge here on DPS.  Start a ‘photography fund’ even if it’s only five or ten dollars a month. This will go a long way in allowing you to invest in better accessories and new gear which, can’t make you better alone, can certainly improve your images when you combine them with the more experience behind the camera.

    How have you approached photography as a hobby?

    Finally, I’d love to open this post up for discussion. How have you approached your own photography as a hobby? Or how would you recommend others approach theirs?

    The post 3 Tips on How to Approach Photography as a Hobby by John Davenport appeared first on Digital Photography School.


    Digital Photography School

  • Macphun Contest Winners Announced

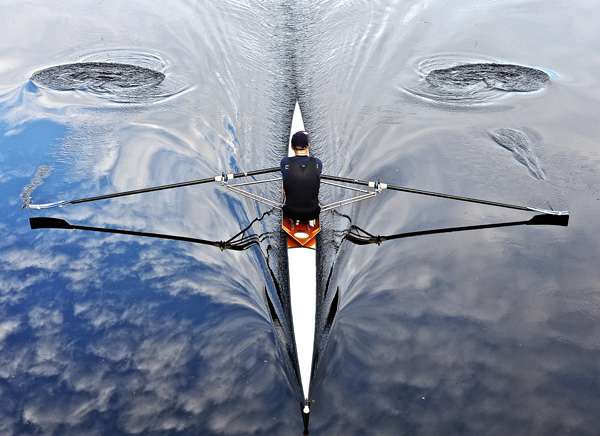
    MacphunWinner

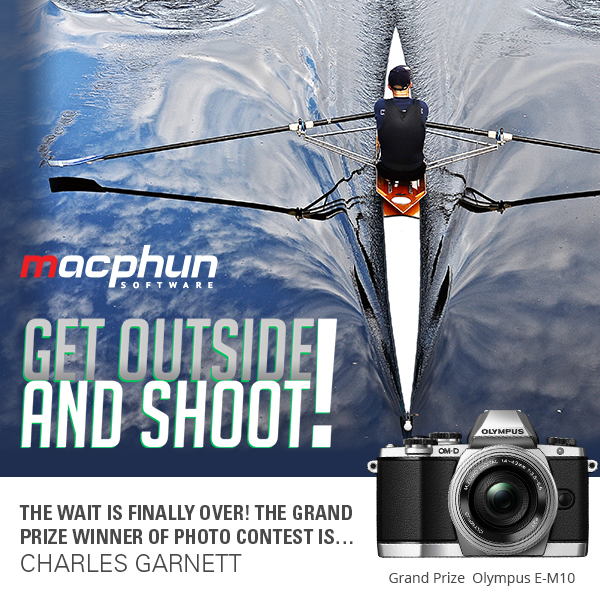
    The wait is FINALLY over! The Grand Prize Winner of Macphun’s Get Outside and Shoot! Photo Contest is:

    Contest Image Get Out and Shoot 600

    A HUGE thank you to everyone who entered the recent Get Outside and Shoot! photo contest. The Grand Prize winner receives an Olympus E-M10! Weekly contest winners received their photo on canvas, and all runners-up received the Macphun app of their choice. EVERY entrant received a FREE copy of ColorStrokes for Mac.

    The response was wonderful with so many amazing entries. It was so great that the team at Macphun wants to invite ALL of the Digital Photography School readers to take advantage of a very special offer available only to dPS readers! Receive Intensify Pro – a leading stand-alone or plug-in application photo editor – for only $ 47.99, 20% off the regular price! To purchase Intensify Pro now, click HERE.

    Now, here are the winners of the competition. Thank you again to all who entered.

    Grand Prize Winner of the Olympus E-M10: Charles Garnett

    Charles Garnett Grand Prize Winner 600

    Weekly Winners of their photographs on canvas:

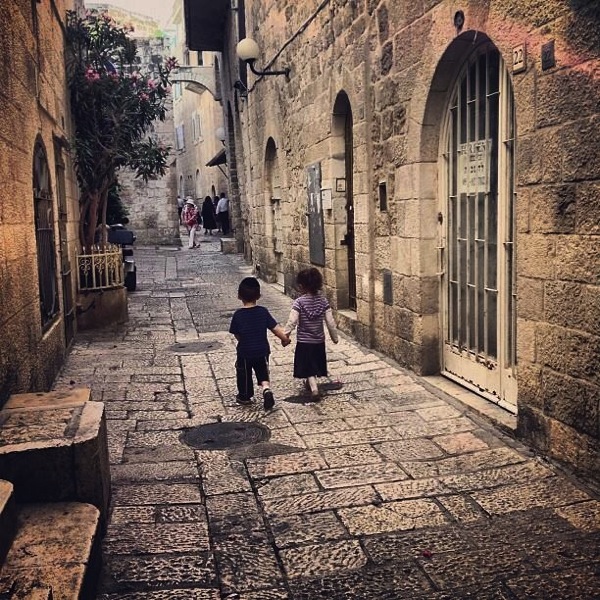
    Michael

    Weekly Winner Michael

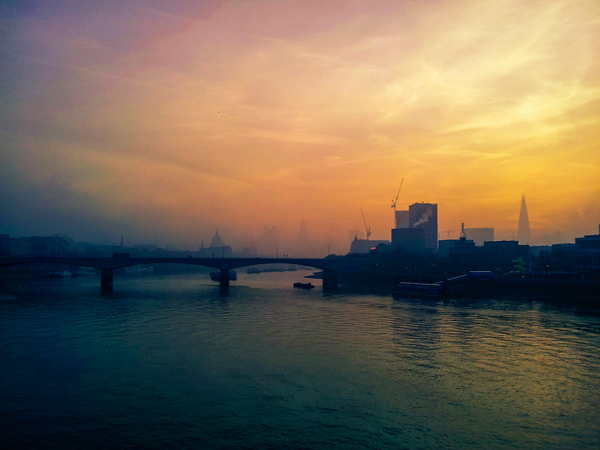
    Christian Costantini

    Weekly Winner Christian 600

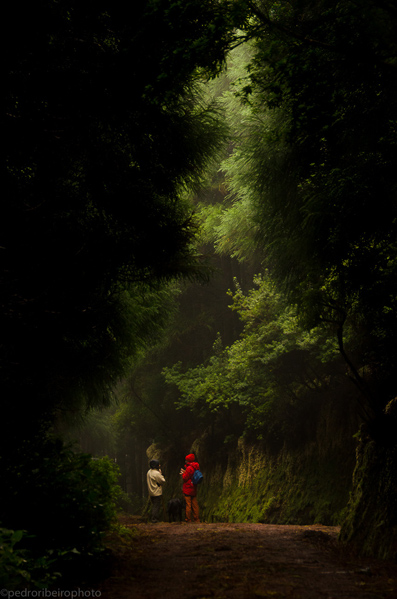
    Pedro Ribeiro

    Weekly Winner Pedro 600

    Marzena Wieczorek

    Winner Marzena 600

    Also, a BIG congratulations to all of our runner-up winners.

    Thanks again to everyone for entering and to Macphun for sponsoring this competition!

    Don’t forget that the team at Macphun has invited ALL of the Digital Photography School readers to take advantage of a very special offer available only to the dPS audience! Receive Intensify Pro – a leading stand-alone or plug-in application photo editor – for only $ 47.99, 20% off the regular price. To purchase Intensify Pro now, click HERE.

    Macphun-Logo-for-Contest-Front-Graphic.jpg
    Learn more about Macphun HERE

    The post Macphun Contest Winners Announced by Darlene Hildebrandt appeared first on Digital Photography School.


    Digital Photography School

  • How to Relax Your Photography Subjects

    Do you ever pull out your camera and point it towards your friends, just for the thrill of watching them tense up? Or is that just this pseudo-sadistic guy? 🙂 There’s something about the dark depths of a camera lens pointing in your direction that can intimidate even the most seasoned, confident individuals. If you’re a photographer trying to capture their essence Continue Reading

    The post How to Relax Your Photography Subjects appeared first on Photodoto.


    Photodoto