Category: Photography

  • Overview of Some of the New Features of Photoshop CC June 2014

    Photoshop_CC_icon.pngRecently Adobe announced their newest incarnation of their flagship product, Photoshop Creative Cloud (CC). Some of the new things look really interesting and I can see a lot of applications for them.

    In this video French photographer Serge Ramelli goes over some of the new features that you may find useful including:

    • selections based on focus area
    • new spin blur and path blur
    • content aware fill improvements (added color tone consideration)
    • warp tool improvements

    For a more extensive list of the new features let’s hear what Adobe instructor Julieanne Kost has to say in this official video from Adobe:

    For a full list of all the new features and changes visit the Adobe website.

    When Adobe first introduced their Cloud membership program there was a lot of backlast from photographers. You can no longer just buy Photoshop, you have to buy into the monthly option, and many photographers found it more expensive ($ 49 USD/month for the whole Creative Suite or $ 29.99 just for Photoshop) than simply upgrading once every two years, or every second version.

    Adobe’s listened and responded with the Photoshop Photography program, which at the time of this article is $ 9.99/month USD and as of June 18th is available to anyone, amateur or pro. That price will get you both Photoshop CC and Lightroom 5 (the current version).

    Where do you you stand on this?

    Do you use Photoshop?

    Have you upgraded to the Cloud or are you hanging on to an older version? Is there a new feature that puts it over the top for you to take the plunge?

    Let us know where you stand on this issue and what software you plan to use moving forward.

    More Photoshop tips

    • 5 Creative Ways to Process Infrared Photographs in Photoshop
    • 3 Easy Steps Using Photoshop to Making your Images POP
    • 4 Tips for Post Processing Efficiency in Photoshop
    • How to Make a Signature Brush in Photoshop
    • 5 Easy Photoshop Tips for Beginners

    The post Overview of Some of the New Features of Photoshop CC June 2014 by Darlene Hildebrandt appeared first on Digital Photography School.


    Digital Photography School

  • Thecus N2560 NAS storage for photographers – review

    This will be an overview of the N2560 and also a little bit of practical advice for people that have a computer with almost zero disk space remaining, and no clue what to do about it!

    Let’s start with the Thecus N2560 network attached storage (NAS) that we were sent to try out.

    Thecus N2560 NAS on Amazon

    The N2560 is a relatively small (when compared with the Synology 1512+) NAS device that holds two 3.5″ SATA disk drives, and sits quietly (20db) in the corner of your home office serving your images, document, media – whatever. When idle, the little guy only uses 9W of power and 14W under load, so it’s also reasonably electricity efficient.

    simon pollock photography melbourne

    Let’s look at what a NAS is if you have never used one, or considered using one. Lets say you have a wireless (or non-wireless) router in your home that you use to connect to the internet and that router has a spare network port (the rectangular looking one) Well, in very basic terms, you connect the N2560 to that spare port and with a little configuration, you’re able to access the drive space from your home network without being physically attached to the NAS itself. With the Thecus, and many other brands, you can also use their configuration service to set up your NAS to allow you to connect from outside the house, on the go.

    The Thecus is a multi-award winning device and has shown me great performance with 2GB of memory and the 1.6Ghz Intel Atom processor, and while I tried to run a small Lightroom catalogue, raw image library on the N2560. While it was a bit slow across my network (wired, 1Gb cat6 network via an Apple Airport Extreme )  it was useable for smaller Lightroom libraries, and adds a load of flexibility, too. With the T On The Go, iOS app (there are Android versions of Thecus apps, too, rejoice!) you can upload (you can auto upload photos you take with your iPhone, you can also turn it off and ask it to only upload via Wifi etc – well thought out!) download, manage, stream media etc. (audio types will like the Thecus’ ability to playback FLAC audio files).

    Thecus N2560

    There’s really not a lot to say about the device aside from it can be a bit tricky to configure if it’s your first time – I had a handful of IP Address issues (What’s an IP Address? They’re the things inside your network that tell other things where everything is, basically – kinda like digital street numbers) Once configured though, it’s not skipped a beat and I’ve been running it alongside my beautiful direct connected Promise R8 and my primary Synology NAS for just over a month.

    The Thecus N2560 performs really well, with good speeds for a network connected device at this price point, and I have no complaints with it. If you’re interested, you can read all of the tech specs on the website and learn all you need to know about the N2560 but I thought I’d take this in a slightly different direction and talk about some of the things you can do with a NAS in a photographic environment.

    Your computer is FULL and you need to do something!

    So you’re at that point where your computer is almost full up with your data, there are multiple paths you can go down to sort this out, but let’s focus on two – direct connected external disk drives and NAS.  But first, a couple of things about your computer being FULL!

    Some people might say “my computer is out of memory!” There are two things they could be talking about:  (1) HD space (hard drive or hard disk, both are acceptable) is where the stuff you load onto your computer, like programs, music, photos etc go to live, or (2) Memory or RAM on the other hand is the stuff that your programs all load into and run.

    An analogy if you will.Disk space are the seats in your car – when they’re full, you need a trailer or a bus (external disk or NAS). Memory is like the engine in your car, it makes the car run and you can upgrade it to make your car go faster if you need to. (Mmmm – turbo!) – If you’re still confused, ask questions in the comments, I don’t bite!

    So, why would you want to buy an NAS?

    With a traditional external disk drive, you can plug it into your computer, load things onto it and download things from it. In most cases this is the quickest way to backup, aside from having a disk physically in your computer, directly connected to your computer’s brain – so to speak. There are multiple ways you can connect drives these days, too, just to add a splash of confusion to your choices – USB, Firewire, Thunderbolt being a few of the ways. They have different benefits and speeds.

    So, why would you buy an NAS? (and sure, with some external drives you can do these things, too)

    • Use Windows or Mac where most direct drives are one or the other
    • You have the ability to connect from outside your house (personal cloud – on the go)
    • You can use iOS / Android apps to view the contents of your NAS (photographs!)
    • Cloud backup / USB3 backup to the Thecus (USB one touch button) Backup people, I’ll say it again – backup!
    • Media playback on your TV / Audio playback on your Hifi.

    Here’s a scenario where my NAS came into its own recently – I was showing a client some portraits for the set of images I’d taken. They were the images I’d chosen that worked for what she wanted. We came to the end of the viewing which was via my iPad in her house, and she asked if there was another specific photograph that she had in mind from the shoot – turns out there was. As I’d put the entire unedited folder into the “working directory” on my NAS, I connected to the internet via my iPhone hotspot and browsed the NAS to show her the set of images that I’d not chosen. We found her photograph and everyone was happy!

    The one thing that the NAS is not is a 100% foolproof backup – you must remember this. Sure, the Thecus is a two-drive unit and depending on how you set up those two drives (raid 0, 1 or JBod, I’ve talked about this before – not this time), you do get some redundancy, but always have multiple copies of important stuff – you don’t know the pain of losing a backup until you’ve lost client work that you can’t get back, or worse, family photos that mean a lot and are irreplaceable. If i’ve said it once, I’ve said it a thousand times – backup people! 

    It’s all too technical for me!

    It’s really not! You can see below the open door on the front of the little N2560, it takes two disks which are very easy to put in – you put the little slider bits on the sides of your disks and they simply pop straight in. The drives I’m using at the moment in all of my NAS devices are the WD Red NASware drives – I’m aware that all disks are either dead or dying from their first spin up (as my old boss used to say) and that any drive can and will completely fail when you need it the most, but so far I’ve had no problems with these disks. (I also use the WD My Passport Pro Thunderbolt external, all good there, too) With the drives in, you power her up after connecting your network cable (supplied) and follow the prompts basically. I mentioned I had a little trouble, and coming back from that trouble was slightly trickier than other devices (Synology, I’m looking at you) I’ve configured previously with slightly better graphical interfaces and directions. Once your config is complete, you’re set to use your Thecus as a local disk folder, media server, personal cloud, photo server etc.

    N2560 Raid

    You can see above the little blue USB port I mentioned in the points above. You can plug a USB 3 disk (also USB2 and 1 backward compatible) into the device and use the one-touch backup to take the content from that USB drive into the Thecus NAS, so if you are out shooting and backing up to an external USB drive, you can plug it into your NAS when you get home and with a button press, the data copies across – handy.

    N2560_ANGLE_LARGE5

    In conclusion, I’d say NAS isn’t for everyone, but if you’re looking for a well priced, entry level NAS to introduce into your digital workflow, this little Thecus N2560 would be a decent option. I’ve opted to give the NAS 4.5 stars because in my experience, the operating system could be a little easier to use – but then, maybe it’s just me!

    The post Thecus N2560 NAS storage for photographers – review by Sime appeared first on Digital Photography School.


    Digital Photography School

  • 5 Creative Ways to Process Infrared Photographs in Photoshop

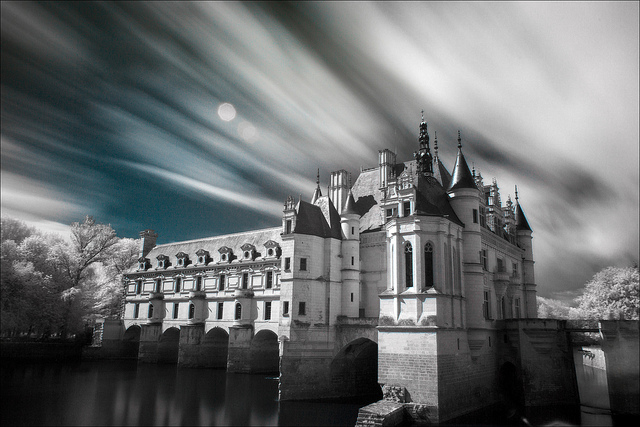
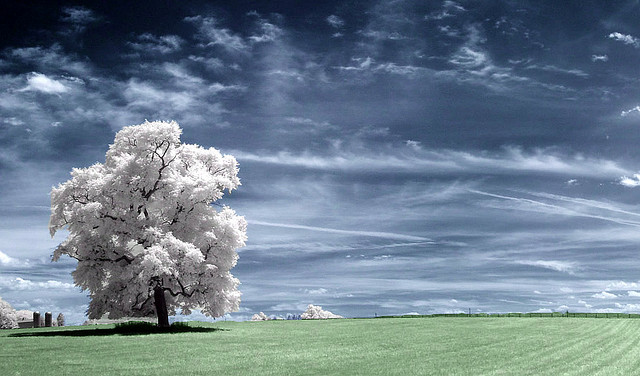
    Digital cameras have made the process of infrared photography relatively simple and very accessible, compared to the days of shooting with infrared film. No darkroom is required and all you need to get started is an infrared filter on your lens (click through to read my article on How to do Surreal Digital Infrared Photography Without Expensive Gear or Camera Conversions) and to mount your camera on a tripod. Maybe you’ve tried digital infrared photography already. You’ve learned all the correct infrared shooting and compositional techniques so you know you have great images in your camera, but how do you transform those strange looking red or violet frames into stunning infrared photographs?

    Here are 5 creative ways to process your digital infrared images in Photoshop to create arresting photos in color, and Black and White.

    1) Color infrared one-click post-processing method

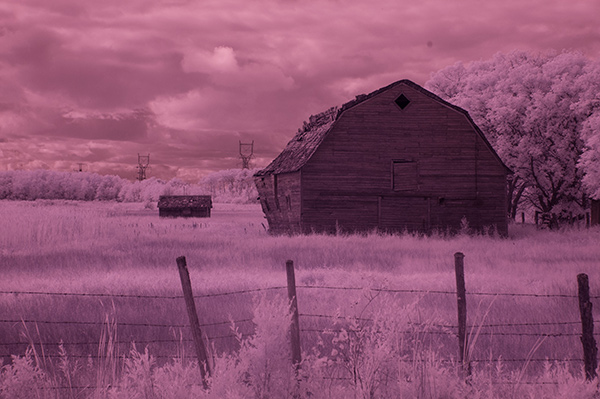
    _DSC5456AsShot

    As shot, before Auto Tone

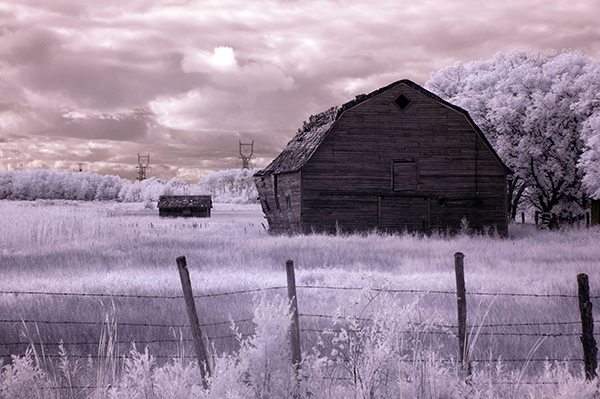
    This is the quick and instant method. Open your image in Photoshop and go to Image> Auto Tone. Look at the difference this one click makes! In fact Auto Tone should be the first thing you do to all your infrared images.

    infrared image with autotone applied

    Same image after Auto Tone has been applied

    This has become a perfectly delightful infrared image. It has a variety of textures and colors for interest. However you may want to further process it to add more WOW and impact. The next step adds a few more tweaks that will help you do this.

     2) Color infrared gradient method

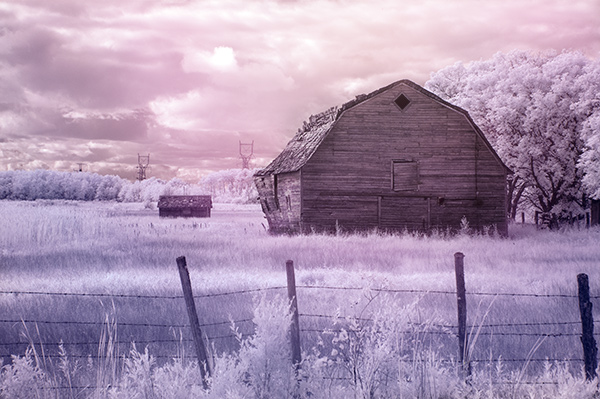
    After you apply Auto Tone, you can also apply a Gradient Layer and set the blending mode to Soft Light, or Hard Light – you’ll need to experiment a bit depending on the tonal qualities of your original image. You can also adjust the opacity of this gradient layer.  If you are familiar with layer masks, you may want to mask out any areas where the gradient might be too strong.

    Here is the same image with the Gradient Layer added. Can you see how it adds a little more depth and drama?

    infrared image with post processing added.

    Infrared Image with a Gradient Layer Added

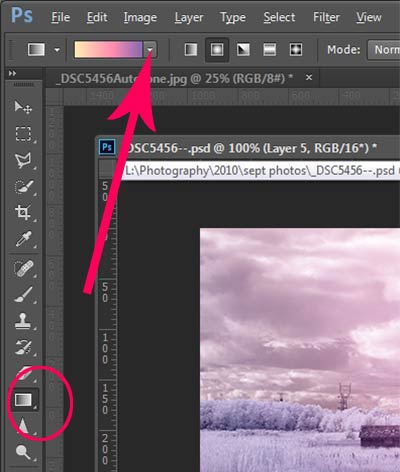
    gradient-toolTo add a Gradient Layer, go to your Layers palette, and click on the new layer icon at the bottom (it’s the one that looks like a sheet of paper with the corner turned up) or you can use  the keyboard shortcut Shift+Ctrl+Alt+N.  I find it quicker to use the icon in this case. While this new layer is active, go to the Tools palette and select the Gradient tool. On the context menu on top of the window you’ll see the Gradient library and you can select your pre-set gradient from there.
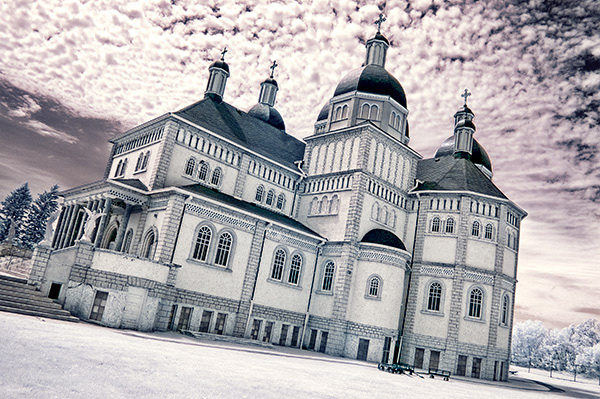
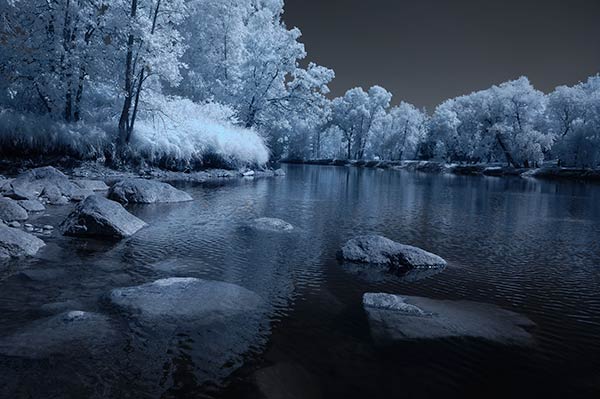
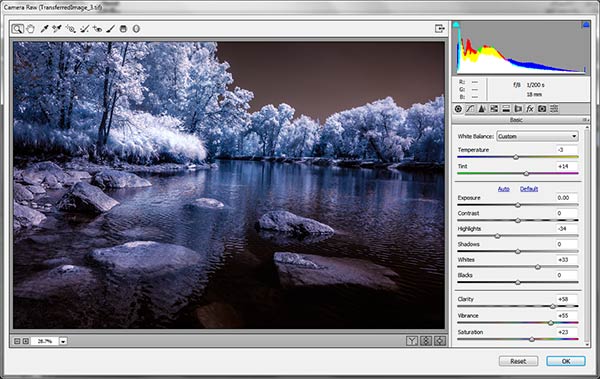
    Now, back on your layer, drag your mouse to get the gradient on your image.  Select the blending mode to soft light or hard light and then adjust the opacity. This is where your artistic eye comes into the picture.  Play around with these settings until you have something you like.

    Here is another infrared image processed the same way. You don’t have to use the same gradient each time – experiment a bit and see how things turn out. It’s art after all!

    infrared image with a gradient texture.

    3) Using the Camera Raw filters and the Channel Mixer

    One of the key concepts in infrared photography is to have a very distinct separation of color tones between the sky, and your high infrared reflecting subjects. This is usually the grass and foliage in your scene, or it could be buildings or other subjects that reflect infrared light because of their paint or construction materials.  But it’s important to have this separation because you need the sky to be dark, and you’ll want the foliage to be light, if not pure white.

    Happily, in Photoshop you can give a tonal boost to your images in a couple of way,s in addition to the Auto Tone setting.  After you’ve applied Auto Tone, look for the Camera Raw Filter under Filters. If your image is not a RAW file you can still use these adjustments, although it is best to shoot RAW when capturing infrared photos.

    In the Camera Raw Filter, to get this color separation between the light and dark areas of your image, use the the Basics filters and  HSL/ Greyscale Slider to adjust the colors until you get a clear difference between the cyan and red shades.

     Original image as shot:

    1as-shot-infraredimage

    After applying Auto Tone and Using the Camera Raw Filters:

    2cameraraw

    Notice how these adjustments bring out the red in the sky and the blue in the leaves.

    Now to the Channel Mixer

    Go to Image>Adjustments>Channel Mixerchannelmixer

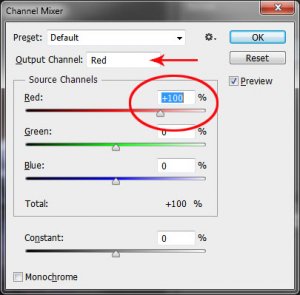
    Here we will “swap” the channels to get a nice  blue sky and red or purple, and in a few quick steps, white foliage. Your Channel Mixer will look like this:

    In the Red Output Channel, change the Red slider from +100 to 0, and the Blue slider from 0 to +100. Change the Output Channel drop-down to Blue, and make the Blue slider +100 and the red slider 0.  Your image will look something like this:

    3infraredwithchannelmixer

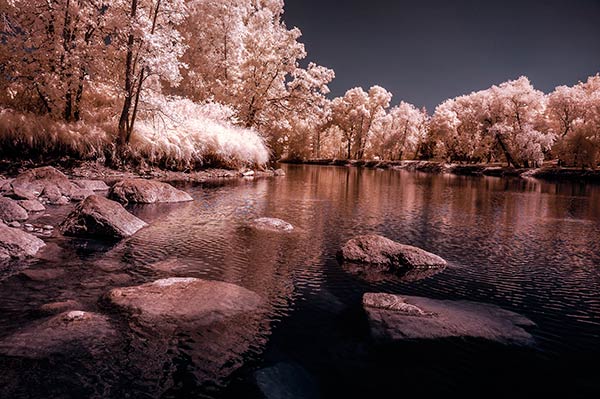
    There is a clear color difference now between the blue sky and the red foliage.  It doesn’t matter if the foliage of your image is purple and  the sky blue, as long as you can see a clear difference in colors with the sky having some shade of blue.

    Now the last part. Go back into your Raw Filters, and in the Basic panel, move the White Balance Color Temperature slider to the left to get a nice blue sky.  In the HSL/ Greyscale tab, use the sliders in the Saturation tab to desaturate the colors of your foliage.  Your image should have a blue sky and white leaves and grass. Gorgeous!

    The final image

    4infraredwithcameraraw2-FINAL

     4) Instant Black and White infrared processing

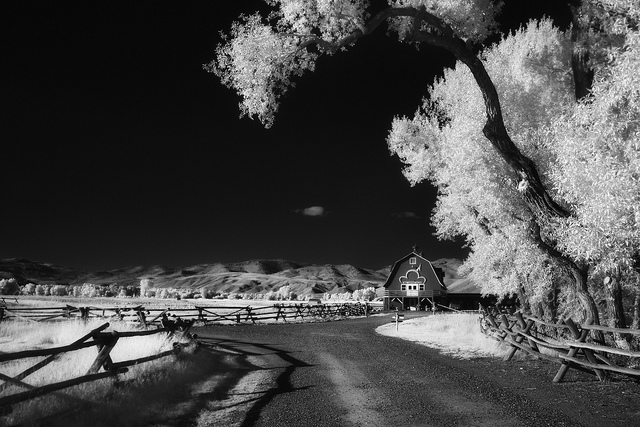
    This is a “quick and dirty” method for getting the classic infrared look from your captures. You’ll get the tell-tale light colored foliage, and dark skies. For best results your image should have a clear sky with some clouds for effect. Overcast skies detract from the image, leave things without enough contrast, and very flat. No clouds make the sky seem like a vast black void – not too interesting.

    2StepprocessingblackandwhiteinfraredClassic black and white infrared images tend to be non-contrasty, so from an artistic perspective a blue sky with wispy or puffy clouds can really add interest to your image, create a powerful story, and keep that soft contrast intact.
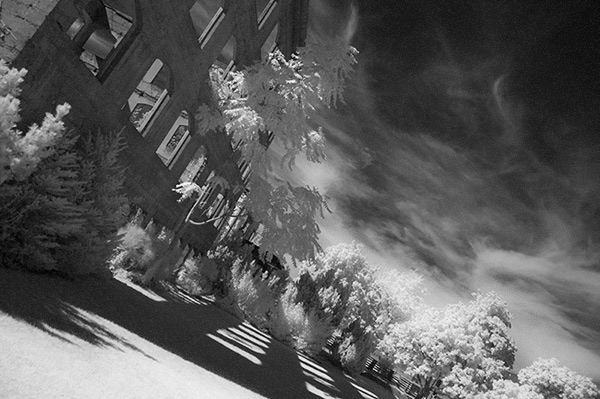
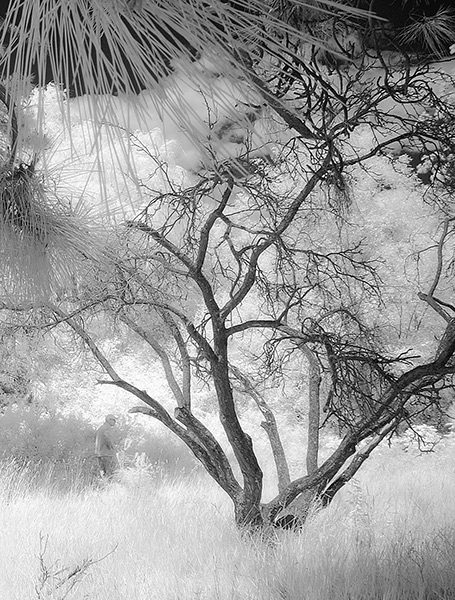
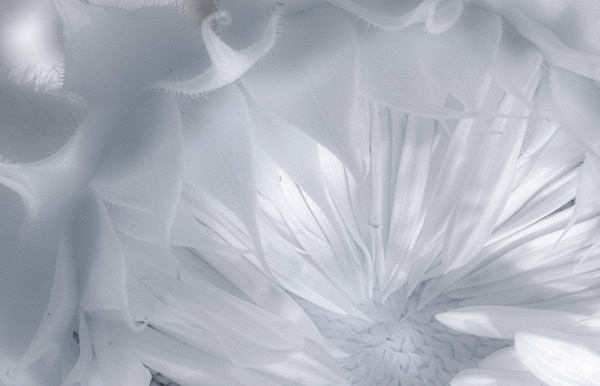
    1. Open your image in Photoshop
    2. Go to Image>Auto Tone
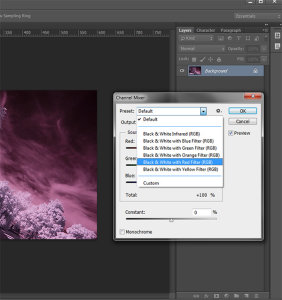
    3. Next go to Image>Adjustments>Channel Mixer>Black and White with Red Filter (From there you can adjust the sliders to get the effect you want)
    4. To get the classic infrared glow, check to make sure that in the Tools palette the colors are set to the default – black foreground and white background. To be sure, a simple way to set this is to hit the letter D to reset the colors to the default state.
    5. Then duplicate your layer (Ctrl J), and go to
    6. Filters>Filter Gallery>Artistic>Diffuse Glow
    7. In the Diffuse Glow filter, set the sliders so you can see some halo glows around the white areas of your image. You will have to adjust these to suit your image but it will create the classic graininess and glow of film infrared photos.

    If the glow amount is too strong and you’re getting blown out highlights, you can decrease the opacity of your glow layer in the Layers Palette. A little experimentation goes a long way. Remember your History palette in case you want to go back a few steps.

    4blackandwhiteinfraredFianlwithglow

    5) Advanced Black and White infrared processing

    This is the method I use most for processing Black and White infrared images. It’s easy and it gives you far more control of your final result.

    1. Open your image in Photoshop
    2. Go to Image>Auto Tone
    3. Now create an adjustment layer for Color Balance.
    4. Layer> New Adjustment Layer> Color Balance

    Again, the idea is to get as much color distinction between the sky and any foliage. Color Balance provides an addition method of doing this – in Black and White processing, as well as for color.

    • Move the sliders for Midtones, Shadows and Highlights until you have a nice, distinct separation of your color tones betweeb your foliage and your sky.
    • Finally add a new adjustment layer for Black & White
    • Layer> New Adjustment Layer> Black & White
    • Now use the sliders to get the full range of Black and White tones, paying special attention to maintaining detail in the white highlights in the trees, while making sure that the dark areas also have some detail
    • To apply the infrared glow, follow from Step 5 in the first method.

    This image is called CREEP. Can you see why?

    blackandwhiteinfrared

    flowerheartCW

    I love the softness and translucency of Black and White, infrared photography. Post-processing really brings out all the infrared characteristics that draw viewers in, and gets the emotions flowing. Using these five processing techniques will get you off to a fine start, but these are only five of many ways you can process your digital infrared images in Photoshop. If you have a favorite post processing formula I’d love to see how you do it. Post your infrared shots too.

    The post 5 Creative Ways to Process Infrared Photographs in Photoshop by Alex Morrison appeared first on Digital Photography School.


    Digital Photography School

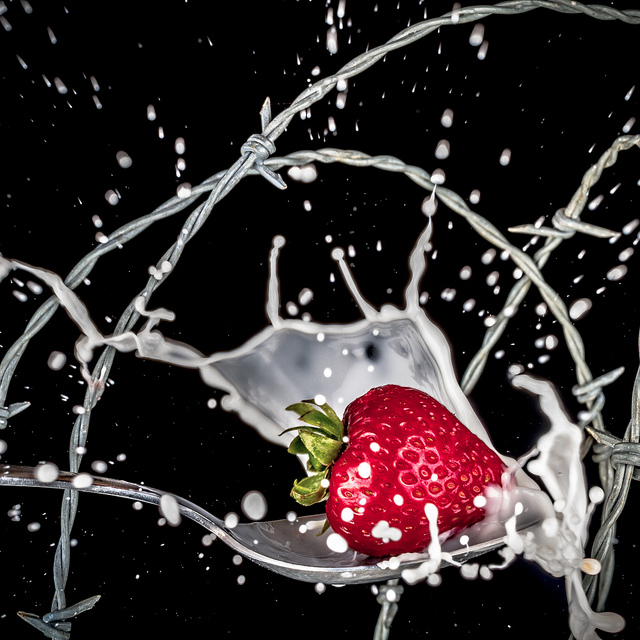
  • Weekly Photography Challenge Outside the Box Creativity

    This time around the weekly photography challenge is a little bit different than our usual topics. This one is pretty wide opened because I want you to get out there and get crazy creative!

    By Holger Ejleby

    If that is you – get out of there and try something different! Outside the box creativity is this week’s challenge.

    Earlier today I shared some images I found for you to stir up some ideas – take a look at those if you haven’t already done so.

    Need ideas? Try these articles to get you started:

    • 6 Ways to Enhance Your Creativity
    • Kick Your Creativity Up A Notch
    • 5 Cheap and Easy Ways to Re-inspire Your Photographic Creativity
    • 7 Photography Projects to Jumpstart your Creativity
    • Get Your Creative Juices Flowing with Different Focal Lengths

    Need more inspiration? Here are a few outside the box ideas and images:

    By Alexey Kljatov

    By Bernat Casero

    By Spreng Ben

    By Toby Keller

    By sharyn morrow

    By Matthias Weinberger

    By Alice Popkorn

    By Tim Hamilton

    By Tc Morgan

    So it could be a new shooting technique, post-processing magic, or a subject you’ve been meaning to try. Whatever it is that gets you thinking a bit, and results in a different finished product – do it!

    Show use your Creative Images

    Simply upload your shot into the comment field (look for the little camera icon in the Disqus comments section as pictured below) and they’ll get embedded for us all to see or if you’d prefer upload them to your favourite photo sharing site and leave the link to them. Okay, ready to impress us?

    The post Weekly Photography Challenge Outside the Box Creativity by Darlene Hildebrandt appeared first on Digital Photography School.


    Digital Photography School

  • A Set of Imaginative Images to Spark Your Creativity

    This week’s theme seems to be all about sparking up the fires of creativity. A few articles this week have touched on this theme including:

    • Creative Reasons to use Intentional Camera Movement
    • Don’t Know What to Shoot? These 4 Photography Exercises Will Keep You Motivated
    • 5 Ways To Break Out of a Creative Photography Rut
    • How to do Surreal Digital Infrared Photography Without Expensive Gear or Camera Conversions – a little bit out of the box, try something new IR photography. Watch for the follow up on processing IR images tomorrow!

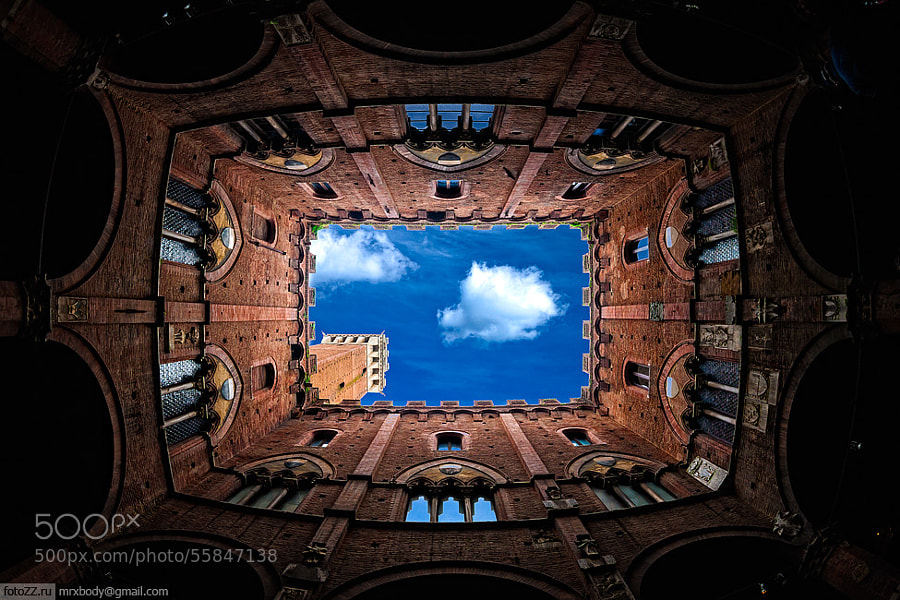
    So I dug around 500px and Flickr for some super creative and inspiring images to spur you into action. Enjoy!

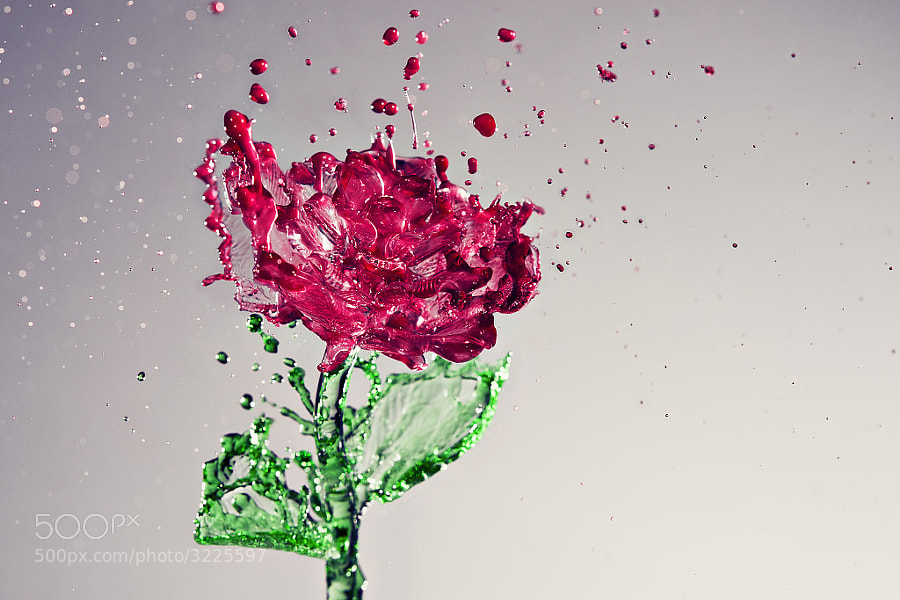
    Photograph A Splash of Rose by Anthony Chang on 500px

    A Splash of Rose by Anthony Chang on 500px

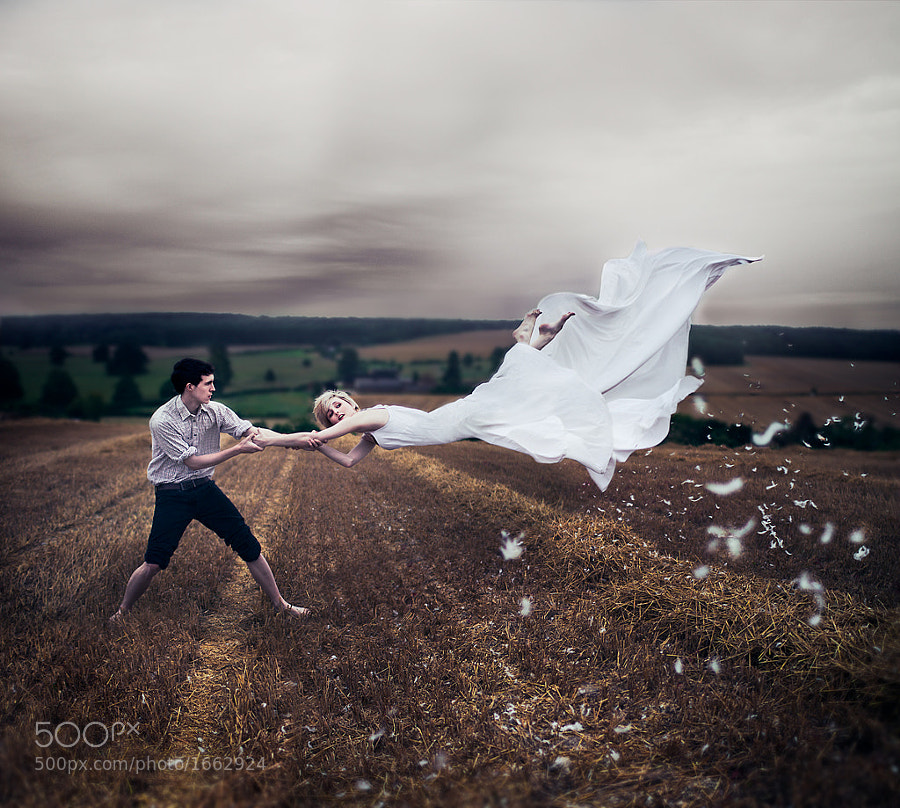
    Photograph The Parting ii by Luke  Sharratt on 500px
    The Parting ii by Luke Sharratt on 500px

    Photograph Frankenstein by Escalonilla PixeL a PixeL PasO a PasO on 500px

    Frankenstein by Escalonilla PixeL a PixeL PasO a PasO on 500px

    Photograph Coffee Portrait by Jatuporn Khuansuwan on 500px
    Coffee Portrait by Jatuporn Khuansuwan on 500px

    Photograph Swing Me by Steven Butler on 500px

    Swing Me by Steven Butler on 500px

    Photograph Tie by Anil Akkus on 500px
    Tie by Anil Akkus on 500px

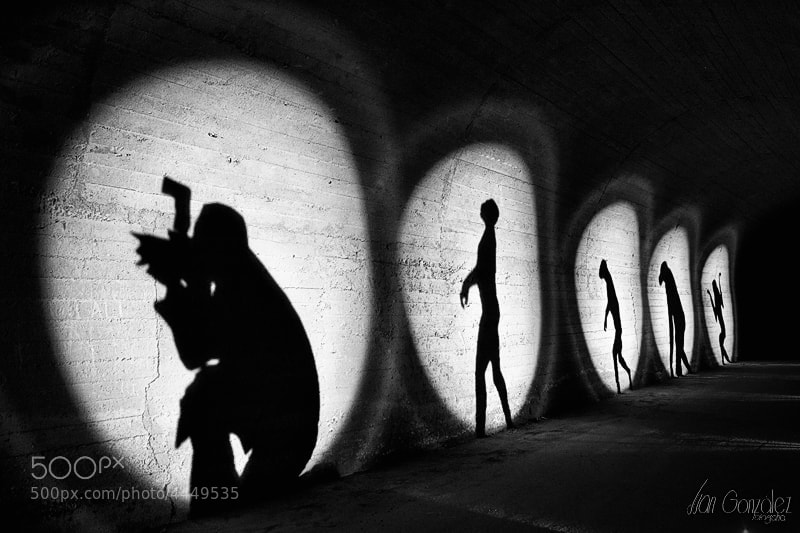
    Photograph Evolución Noctámbula by Juan González on 500px

    Evolución Noctámbula by Juan González on 500px

    Photograph Pencil Vs Camera - 73 by Ben Heine on 500px
    Pencil Vs Camera – 73 by Ben Heine on 500px

    Photograph Customized Exhibition Uniform by Ben Heine on 500px

    Customized Exhibition Uniform by Ben Heine on 500px

    Photograph Light driver by Peter Majkut on 500px
    Light driver by Peter Majkut on 500px

    Photograph OK, I'm not seeing you!! by Christopher Riestajuana on 500px

    OK, I’m not seeing you!! by Christopher Riestajuana on 500px

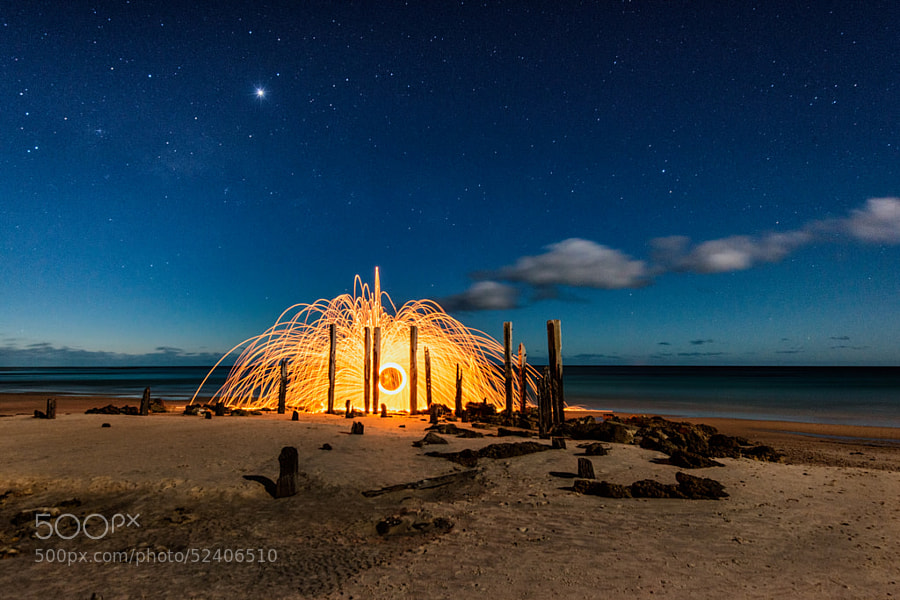
    Photograph Willunga Shining by Bipphy Kath on 500px
    Willunga Shining by Bipphy Kath on 500px

    Photograph Daisy by Kunal Prasad on 500px

    Daisy by Kunal Prasad on 500px

    Photograph What's my motivation? by Max Ellis on 500px
    What’s my motivation? by Max Ellis on 500px

    Photograph Flurry II. by Christopher Chung on 500px

    Flurry II. by Christopher Chung on 500px

    Photograph You make my head spin.... by Sander Van den Berg on 500px
    You make my head spin…. by Sander Van den Berg on 500px

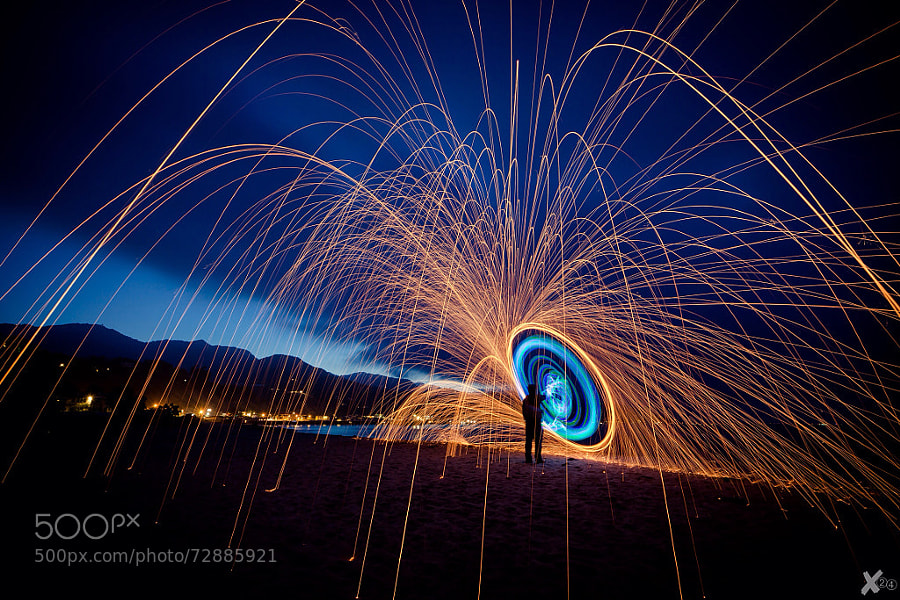
    Photograph The Spin by Bipphy Kath on 500px

    The Spin by Bipphy Kath on 500px

    NOTICE from the editor

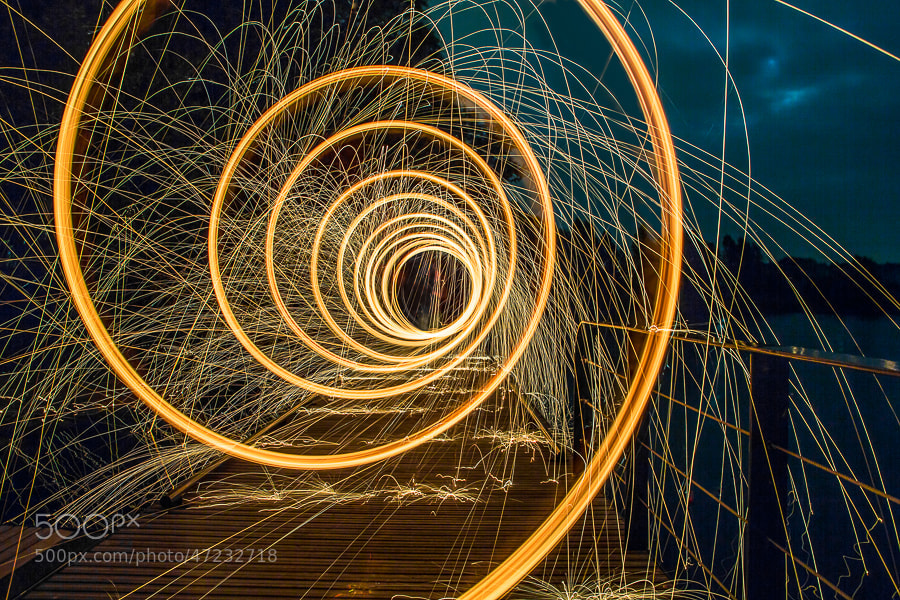
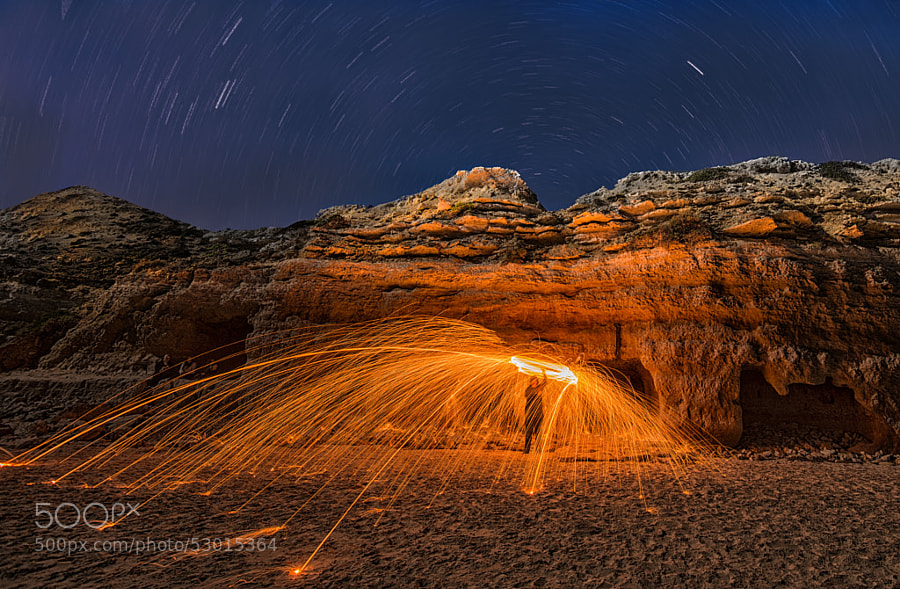
    Please practice full precautions and safety measures if you plan on attempting fire spinning. I have done it and can tell you the steel wool molten, burning bits fly a long way! Read up on this technique before you go to it or risk setting something on fire or burning yourself. This is real molten (melted) steel, do not mess around it is dangerous.

    Photograph transient happiness by Beauty   on 500px
    transient happiness by Beauty   on 500px

    Photograph Feelin Blue by Alistair Campbell on 500px

    Feelin Blue by Alistair Campbell on 500px

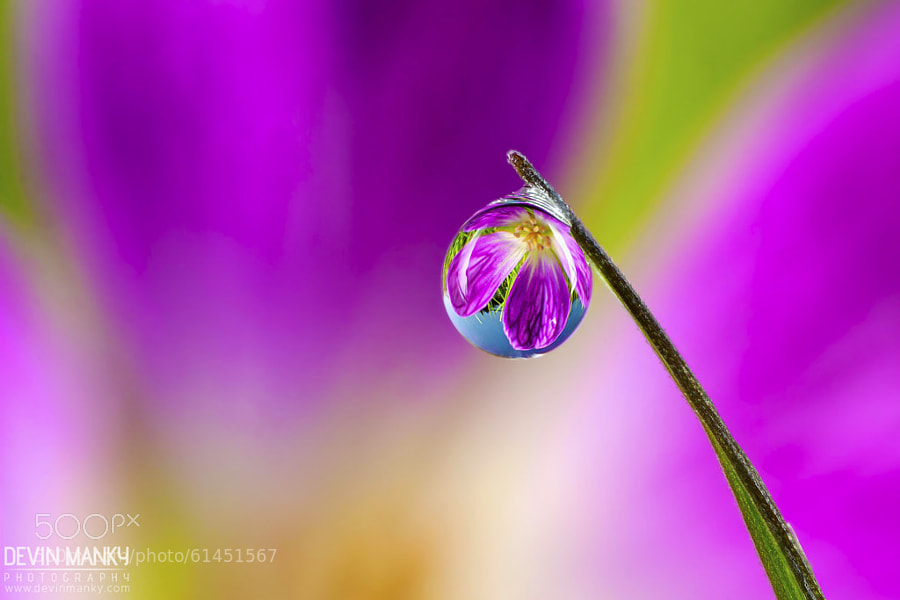
    Photograph Violet Vision by Devin Manky on 500px
    Violet Vision by Devin Manky on 500px

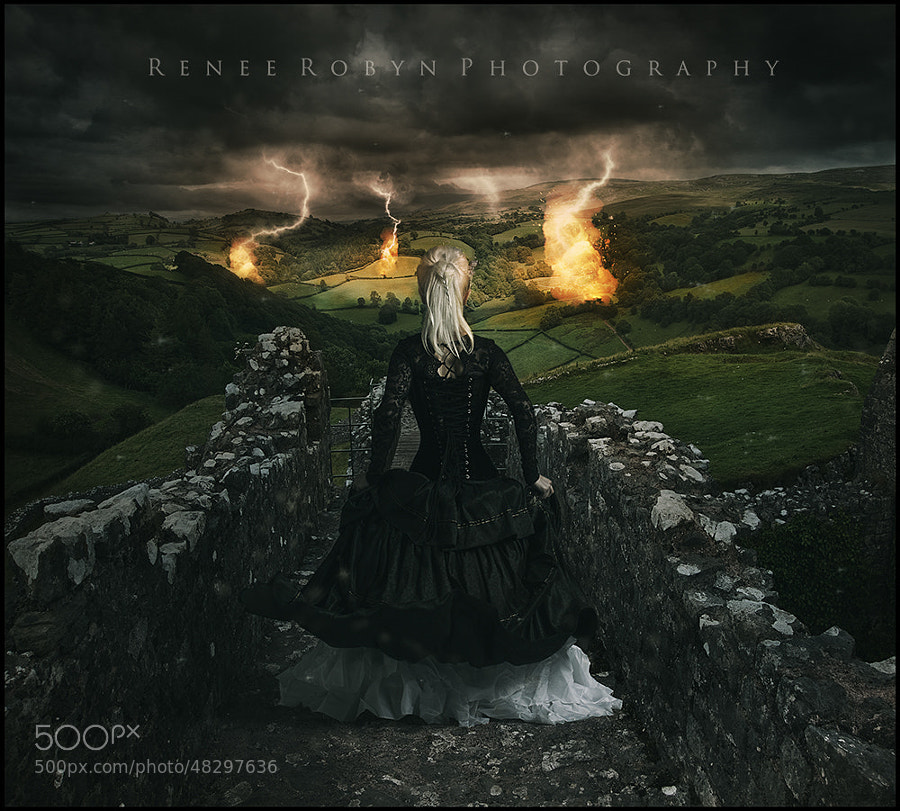
    Photograph Wishmaster by Renee Robyn on 500px

    Wishmaster by Renee Robyn on 500px

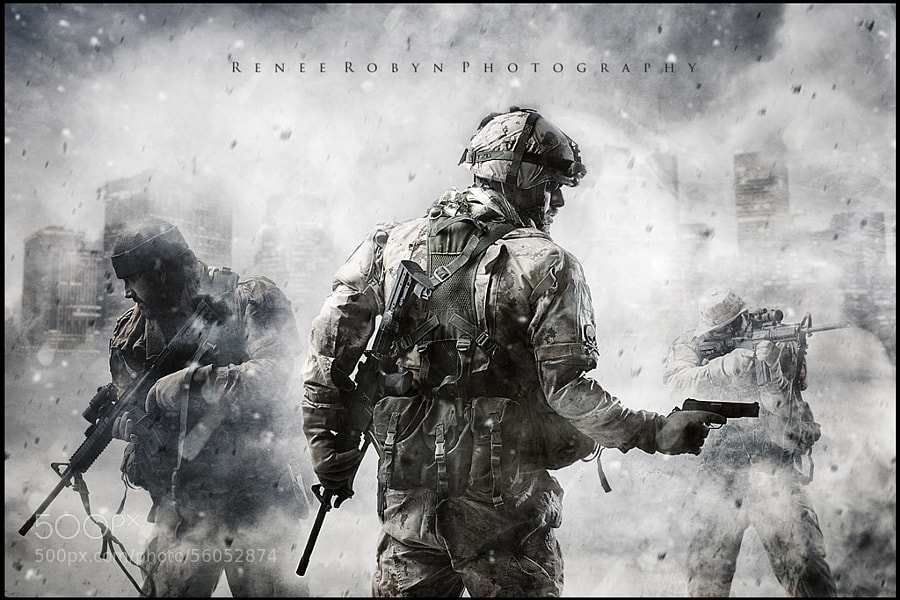
    Photograph Call of Duty by Renee Robyn on 500px
    Call of Duty by Renee Robyn on 500px

    Photograph Beginning of the End by Renee Robyn on 500px

    Beginning of the End by Renee Robyn on 500px

    Editor’s note: Renee is a personal friend of mine, in fact she took my own headshot! Her work is amazing. Most of them are composites of several images, and hours spent in Photoshop. The one above “Wishmaster” is a self-portrait. I couldn’t do a collection on creative images without including some of her work. I don’t have it in me to create this kind of photography, but it sure is fun to admire.

    Photograph First time under by Neil Kremer on 500px
    First time under by Neil Kremer on 500px

    Photograph Fly by Tina Terras & Michael Walter on 500px

    Fly by Tina Terras & Michael Walter on 500px

    Photograph Deliverance by Benjamin Von Wong on 500px
    Deliverance by Benjamin Von Wong on 500px

    Photograph afterglow by Beauty   on 500px

    afterglow by Beauty   on 500px

    Photograph Homage to Escher. by Alexei Sovertkov on 500px
    Homage to Escher. by Alexei Sovertkov on 500px

    Photograph Ground Perspective II by Vadim Za on 500px

    Ground Perspective II by Vadim Za on 500px

    By Victor1558

    By Andrea

    By ?ethan

    By Tc Morgan

    By Julian Evil

    By Victor1558

    By Adrien Sifre

    By Zach Stern

    By Kenny Louie

    By Bjørn Giesenbauer

    By greg westfall

    The post A Set of Imaginative Images to Spark Your Creativity by Darlene Hildebrandt appeared first on Digital Photography School.


    Digital Photography School

  • The Internet Cookbook: Top 10 IFTTT Recipes for Photographers

    There are never enough minutes in a day. If only you could hire an assistant, limit your directions, and crank out more work, your photography business would benefit, right? Unfortunately, we’re not robots, so you’ll never be 100% productive. But online technologies could help you out! Today I’m going to tell you about a crazy-cool, online tool called IFTTT that Continue Reading

    The post The Internet Cookbook: Top 10 IFTTT Recipes for Photographers appeared first on Photodoto.


    Photodoto

  • 4 Tips for Taking Better Photographs of Trees

    Can’t see the wood for the trees? I’ve often struggled with the challenge of photographing trees in a way that captures the imagination and takes the viewer on a journey. I’ve learned that for me, there are two very effective ways to consider and photograph trees. Try asking yourself these two questions:

    • Which tree is the leading actor?
    • Which tree/trees are the supporting actors?

    I have to thank my mother for this interesting perspective. As a boy I was dragged to many a theatrical play and so I tend to look at my images as a stage on which there are certain characters that play out a scene. There’s always a lead character, some supporting roles and some cool props. Understanding the hierarchy of your characters will really help to improve your compositions in general.

    How to Photograph Trees

    1 – When a single tree grabs your attention

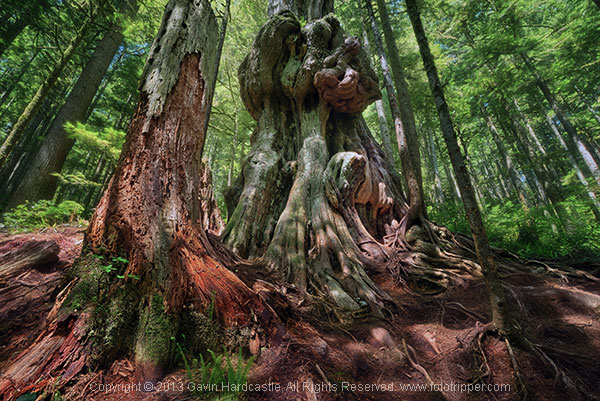
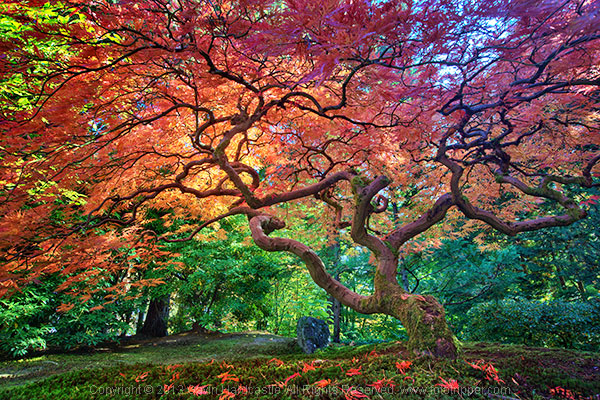
    Decide who is the lead and make that your most important subject. With the image above, it’s pretty obvious who the lead character is in this scene. That huge knotted cedar tree is my leading actor, so I place him centre stage and place all other trees around him.
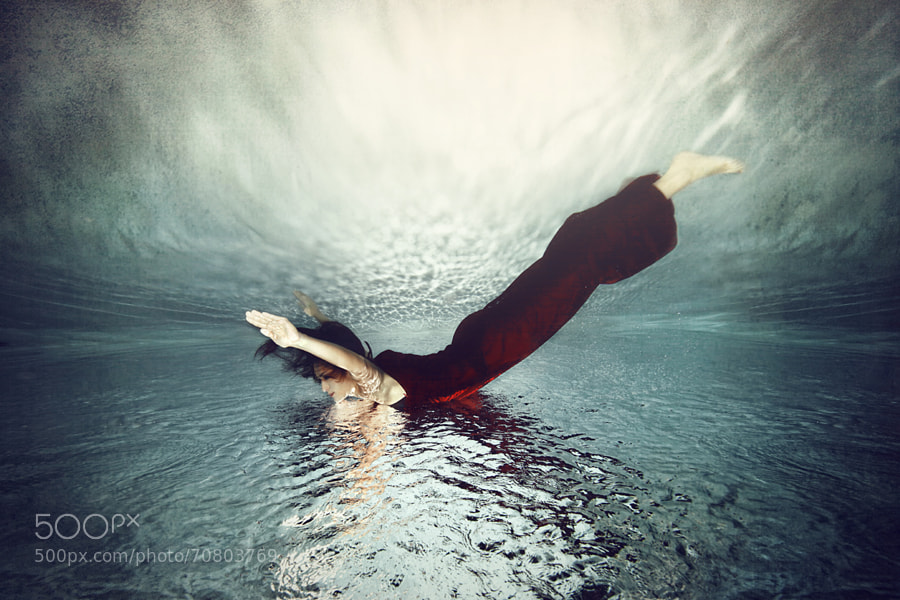
    Using an aperture of f/22 means that my entire image (stage if you will) is in focus and the only reason I can get away with this is because my central character is so obvious that I don’t need to accentuate his presence with shallow depth of field.

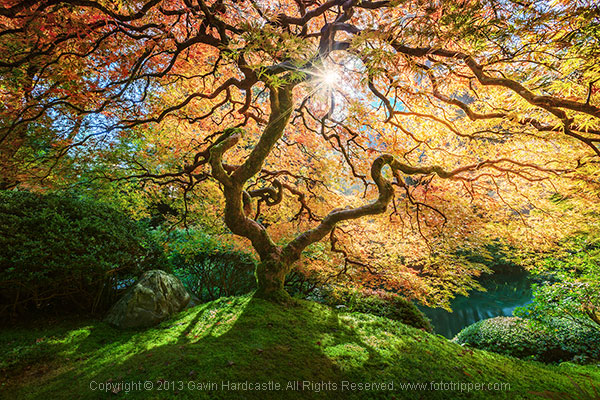
    Here’s another example of a very obvious leading actor in my scene. It’s pretty much ALL one tree with the supporting actors being a sun flare, the shadows on the foreground and the Koi Carp gliding through the pond in the background. Again, I used a very narrow aperture of f/16 to ensure maximum focus throughout the image.

    How to Photograph Trees - Gavin Hardcastle

    2 – When trees play supporting roles

    Let’s face it, not all trees are A-list actors, but they don’t need to be. You can use trees to frame another, more interesting character, in your image. When you’ve found an interesting subject such as a waterfall, lake reflection or sea stack, take a look around and see if there are any trees that would make a nice frame or leading line that directs the eye towards your main subject. If there are, place them in your foreground.


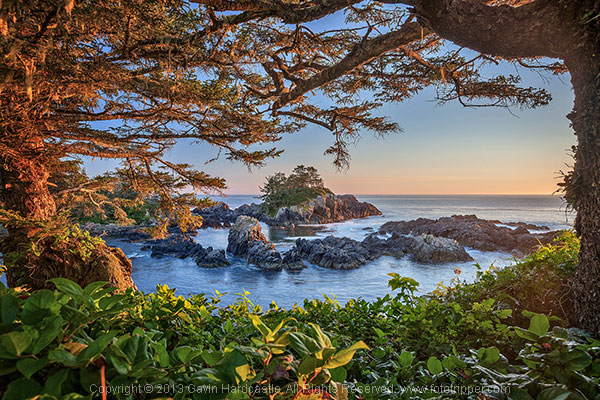
    In the image below, I used the trees and shrubs to create a frame for my sea stack. I used an aperture of f/8 to create a subtle bokeh effect in the foreground shrubs because I wanted to draw the viewer’s eye towards the central sea stack.

    How to photograph trees

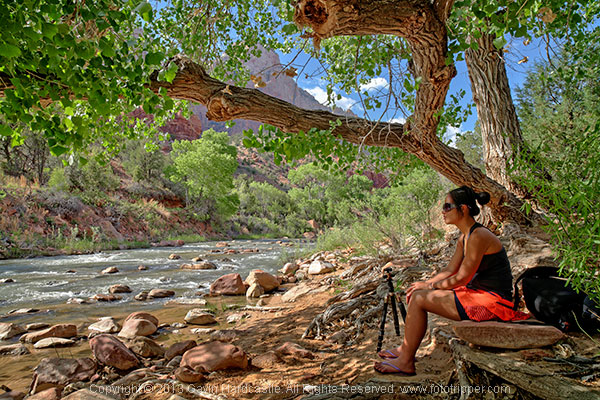
    Here’s another example of where the tree was used as a supporting actor in my scene. Once again the tree creates a frame, and although we don’t see the entire tree, the image would be nothing without it.

    Tree Photography

    3 – When NOT to include people for scale

    How to photograph trees in landscape photgraphy

    How big do you think that tree above is? Well, let’s just say that only a toddler would be able to stand under the canopy.

    There’s often a temptation for photographers to get a person to stand in their tree photograph for scale. That’s a great idea if your tree is massive, it really emphasizes the immense size of your subject. For smaller trees such as the maple shown above, it would have been a disaster to include a person for scale because that tree is tiny. In fact, it’s so small that I was laying prone on the ground in order to get the shot.

    4 – When to use shallow depth of field

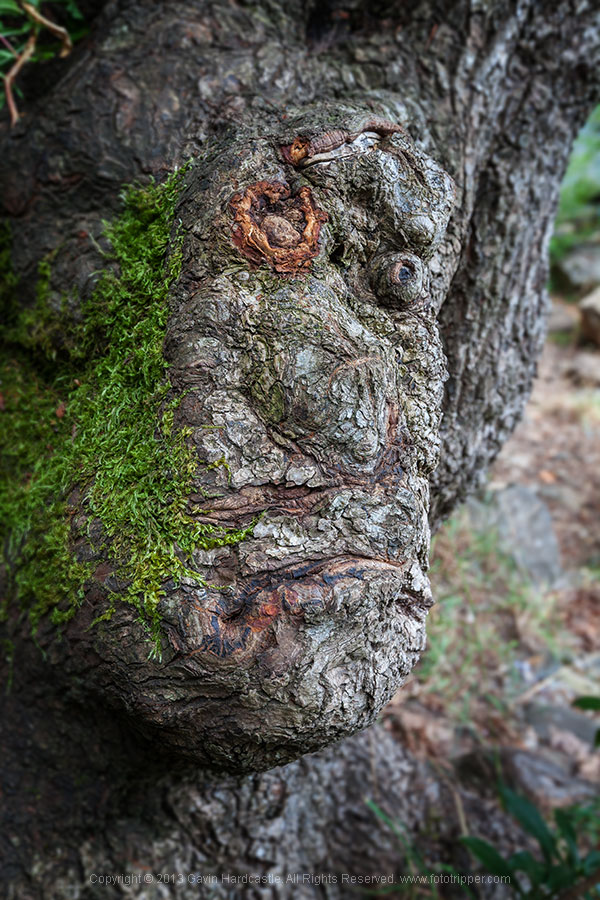
    Sometimes it’ll be really obvious that in order to accentuate and bring attention to a certain tree or feature of a tree, you can use a wide open aperture like f/2.8 to create shallow depth of field. This is a creative decision, there’s no right or wrong, only what works for your vision. I rarely use shallow depth of field in my landscape photography, but occasionally I’ll want to bring attention to a certain feature of a tree like this guy below.

    Photography tips for shooting trees

    Whether you shoot huge landscapes or intimate nature scenes, using these four tips should improve that way that you photograph trees. Try them out and capture your own beautiful tree photographs.

    The post 4 Tips for Taking Better Photographs of Trees by Gavin Hardcastle appeared first on Digital Photography School.


    Digital Photography School

  • Don’t Know What to Shoot? These 4 Photography Exercises Will Keep You Motivated

    Whether you’re just getting into photography, or if you’ve been at it for years; you can keep yourself rejuvenated, and keep the creative juices flowing by always trying new things.

    If you’re feeling uninspired photographically, that’s a sign that you need to shake things up by trying something completely different, or at least something that isn’t your usual style. You might be surprised at how small exercises can boost your creativity while teaching you new techniques and solidifying old principles in your mind.

    Who knows, you might even discover a new passion!

    To give your brain a little kick in the butt, challenge yourself to try some of these photography exercises. Even if they aren’t new to you, going out shooting with a new purpose feels refreshing and may lead to something completely new.

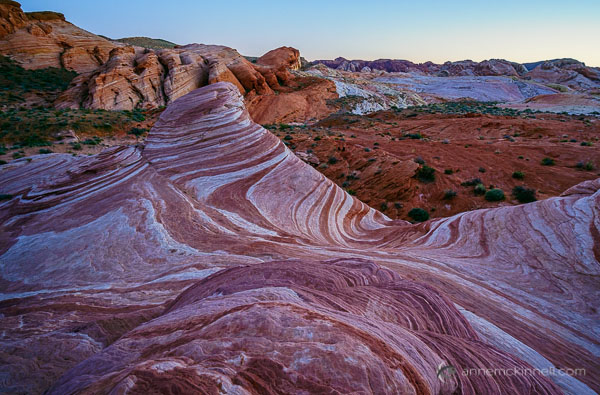
    Fire Wave at Valley of Fire State Park, Nevada, by Anne McKinnell

    Fire Wave at The Valley of Fire State Park, Nevada, taken from a high perspective on an opposite hilltop

    1. Change your perspective

    Photographers often get in the habit of shooting at eye-level which tends to make photos repetitive and somewhat common. We know this, and so we take the odd shot on our knees or even occasionally lying on the ground.

    But is this really enough? Aren’t there other vantage points?

    Challenge yourself to go out shooting and never shoot from eye-level for a whole day. Instead, find a new vantage point any time you take a picture. Get yourself up high above your subject, and crouch and shoot from a low angle. But that’s just the beginning. Ideally, you should try shooting your subject from a variety of angles.

    Take one shot from below and one from above. Then, take one even lower, and one even higher, if possible. Then, step back a bit. Then step forward. Move to your right, and move to your left. Taking the same picture from many positions adds variety and will help you understand it better. Plus, you may discover a way of seeing something that you didn’t expect.

    If you resolve to do this with every picture you take, you’ll begin to really understand the subtle effect that perspective has on an image, which points of view work for which subjects, and how this can inform your shooting style from here on out.

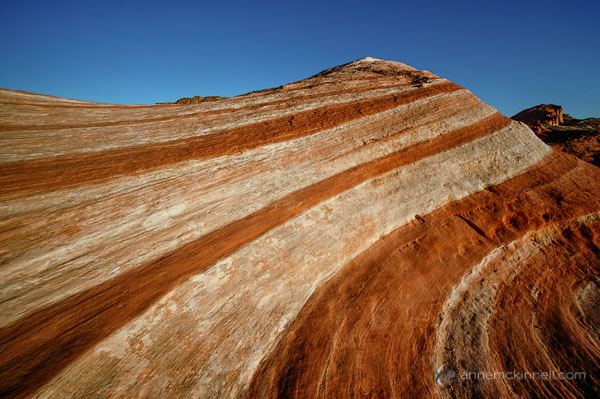
    Fire Wave at Valley of Fire State Park, Nevada, by Anne McKinnell

    Another perspective on Fire Wave, this time taken up close, from a low angle.

    2. Create a story

    Rather than trying to capture your subject in one single image, try doing a series instead. Create what LIFE Magazine coined a “photo essay” – a series of images surrounding a single subject or group of subjects, each of which pinpoints a different aspect of its nature. This can be as simple as zooming in on its finer details, or photographing it in different contexts. This method of doing things defines the subject not only by how it appears in a single moment, but also by the way it changes (and the way it stays the same) over several moments. It also helps to craft your visual storytelling abilities.

    Choose one subject and cover it completely, the way a journalist would. Do this either by photographing every aspect of it you can think of, photographing it through the course of a day, or by revisiting it over and over throughout a week. Include shots at different distances and using different focal lengths – include some close-up details and some wide compositions – and whittle all the shots down to around ten final images, making sure that no two photos are alike. When you have your picks, try to organize them in an order that tells a coherent story, whether it’s narrated or implied.

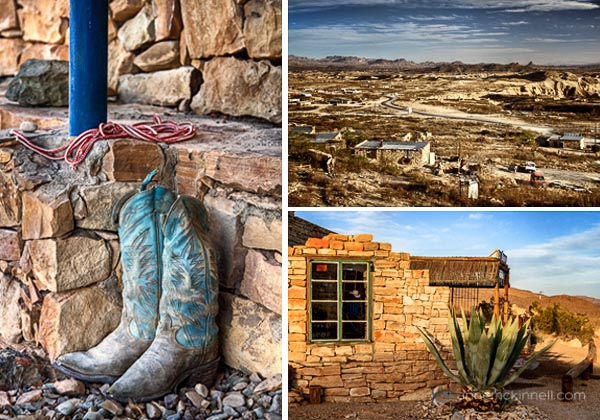
    Terlingua Ghost Town Texas by Anne McKinnell

    These three photos are from Terlingua, a ghost town in Texas.

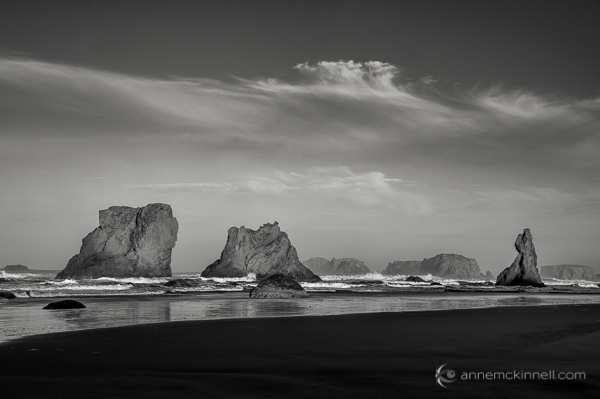
    3. Shoot in Black and White

    For a whole day, turn your camera to Black and White mode and don’t take it off. Of course, you can convert your RAW images to black and white after-the-fact in post-processing, but as an exercise, try shooting them in Black and White.

    At first the limitation may seem frustrating, but Black and White photography requires a completely different way of seeing the world in terms of shape, form, and contrast, rather than through the common visual cues that you’re used to. Composing your photos in this way will invariably improve your compositions in colour photography, too. You can play with contrast settings in-camera or in post-processing to perfect the highlight to shadow ratio which defines a good monochrome image.

    Bandon Beach, Oregon, by Anne McKinnell

    Bandon Beach, Oregon.

    4. Make manual long exposures

    For this exercise, you’re going to take full advantage of digital photography’s instant feedback, and use it to play with making manual long exposures.

    With your DSLR mounted firmly on a tripod, set the ISO to 100, set the aperture to the smallest opening (the largest f number like f/22 for example), and set the shutter speed to Bulb mode. When the camera is to Bulb mode, the shutter will stay open for as long as the shutter button is held down, but it’s a better idea to attach a wired remote shutter release to prevent camera shake.

    Once you have your composition and your focus set, press and hold the button on the remote to hold the shutter open for a few counted seconds. Just guess how many seconds will be required based on the light level. Then, check your results. If the image is too bright, try again, but count half as many seconds. If the image is too dark, count twice as many seconds – or more, if necessary. Do this over and over again, in different scenarios and lighting situations. This practice will hone your ability to read the levels of light present at any given time.

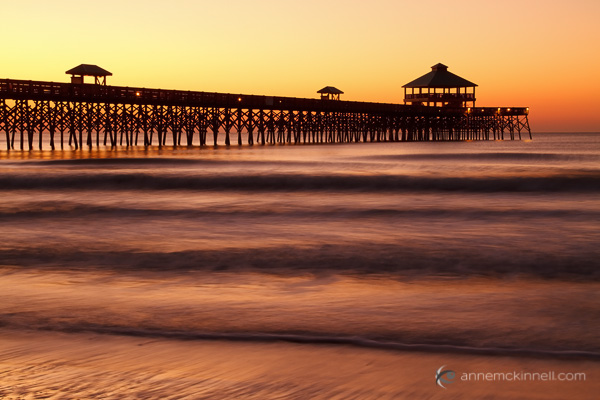
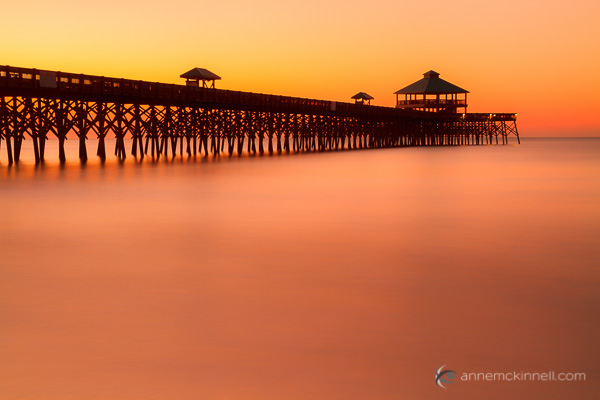
    You’ll get the most interesting results if there is a certain amount of movement in your frame, such as drifting clouds in the sky, crowds of people, or running water. The longer your exposure is, the more blurred that movement will appear to the point where water may seem like nothing more than mist, and people will disappear from the image altogether. If you have a solid neutral density filter your exposures can be even longer, creating more extreme effects.

    Folly Beach Pier, Charleston, South Carolina by Anne McKinnell

    Folly Beach Pier, Charleston, South Carolina – 2 second exposure.

    Folly Beach Pier, Charleston, South Carolina by Anne McKinnell

    Folly Beach Pier, Charleston, South Carolina – 30 second exposure.

    Don’t wait until you start feeling uninspired to try these exercises! Keep your photography energized and creative by trying something new on a regular basis. Even if it doesn’t turn out to be your “thing”, it’s fun and you’re bound to learn something.

    The post Don’t Know What to Shoot? These 4 Photography Exercises Will Keep You Motivated by Anne McKinnell appeared first on Digital Photography School.


    Digital Photography School

  • The Epic Bundle and Another Giveaway Demand Your Attention

    Remember Inky Deals? We’ve been telling you about them from time to time now, always when they have some type of amazing deal, bundle or giveaway for you. Hey, we wouldn’t waste your time in any case! Guess what time it is, this month? That’s right…it’s yet another too-good-to-be-true deal from Inky Deals. This time, Inky Deals doesn’t just have Continue Reading

    The post The Epic Bundle and Another Giveaway Demand Your Attention appeared first on Photodoto.


    Photodoto

  • Kids Posing Guide: Early Bird Discount Ends in 36 Hours

    NewImageA few weeks ago we launched a brand new Kids Portraiture Printables collection in the dPS store with a 25% off Early Bird Discount (40% off if you get it with the companion eBook).

    This post is just a quick note to let you know that that discount ends in just over 36 hours.

    The printables collection is just $ 14.99 and gives you access to five kids posing models that cover all ages – Babies, Toddlers, Little Kids, Bigger Kids and Tweens.

    Each of the 5 modules includes:

    • a tutorial to help you master posing kids of that age
    • a printable version of the poses that you can print out and fold up to take with you
    • a digital version that you can keep on your phone or tablet to use when photographing kids

    NewImage

    As an optional extra you can bundle this posing collection with our previously released Kids Portraiture eBook and save 40%.

    The collection and eBook have been getting fantastic reviews from other websites like Two Days in Dublin who writes:

    “If you want to improve your photography and capture those special moments, I recommend this e-book for those already in the business, just starting out in picture-taking, or for moms looking to capture great photos of their own kids!”

    The Early Bird special ends in just over 36 hours so grab yours today here and start taking gorgeous photos of your kids.

    The post Kids Posing Guide: Early Bird Discount Ends in 36 Hours by Darren Rowse appeared first on Digital Photography School.


    Digital Photography School