Category: Photography

  • Three Uses for High ISO you Might Not Know

    You may already know that the ISO setting is used to control your camera’s sensitivity to light. When you use a high ISO setting essentially you are telling your camera to become more receptive to the available light. This is most often used when you are photographing in low light situations in order to maintain a proper exposure. However, there are at least three other reasons you might consider using a high ISO setting when you’re either in a good light situation or on a tripod.

    Freezing fast motion

    when to us high ISO

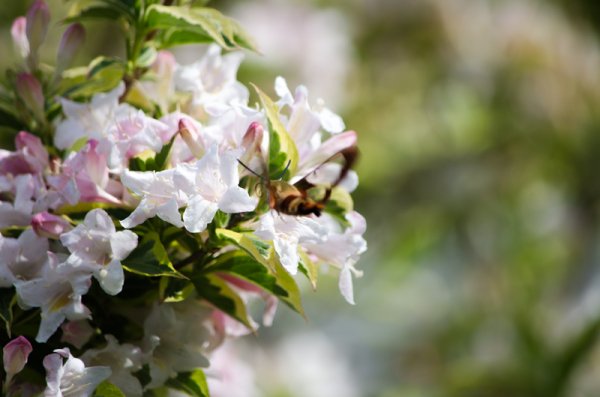
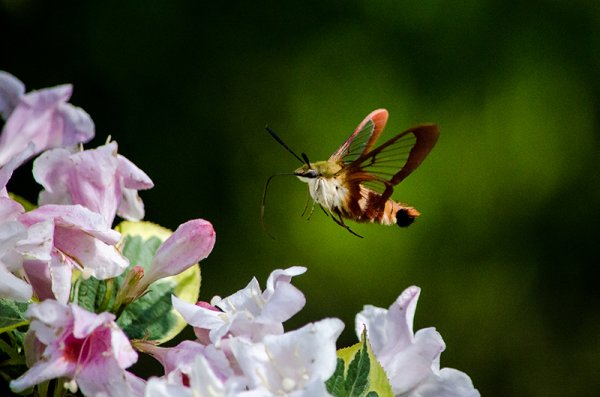
    Use a high ISO setting to freeze fast motion – 1/8000th ISO 1,000

    The only way to freeze fast motion, like the wings of a hummingbird moth, is to shoot with an extremely fast shutter speed. The above photograph was shot with a shutter speed of 1/8000th of a second in order to freeze the insect’s wings. However, even in the bright mid-afternoon sun, a shutter speed that fast required bumping the ISO setting on the camera to 1,000 to maintain an even exposure.

    Below, is an example of why shooting at 1/8000th of a second was necessary. Even at 1/800th of a second the insect’s wings were barely visible. In order to ensure that the motion was frozen it meant that more light was needed in a shorter amount of time and the only way to get this (without a faster lens) is to bump up the ISO on the camera.

    when to us high ISO-4

    ISO 500 1/800th – even at that speed the wings are blurry.

    Night sky photography

    when to use high ISO 4

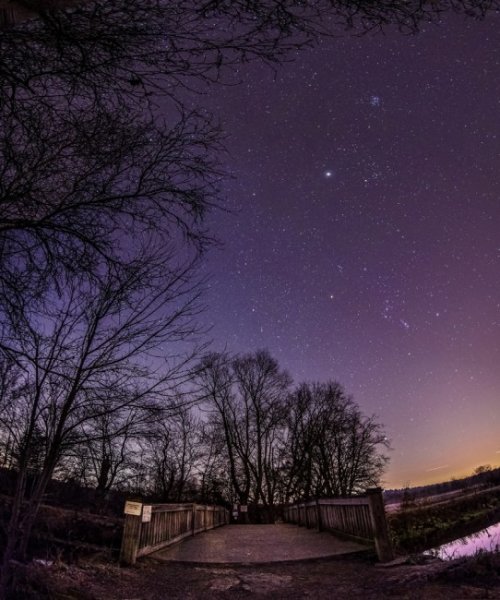
    Use high ISO to capture the stars

    Many different techniques come into play when you want to photographing the stars, but one of the more important things to remember is to increase that ISO setting. The reason you want to photograph the stars with a higher ISO, even though you’re using a tripod, is that as the earth rotates, the stars move across the sky and you don’t want to capture that movement in your photograph (unless you are doing star trails)

    By using an ISO in the 800 to 1,000 rang,e with a fast wide-angle lens, you will be able to capture enough stars to fill the sky.  For more on photographing the stars check out: How to Photograph the Stars.

    Hand-holding a long lens

    when to us high ISO-3

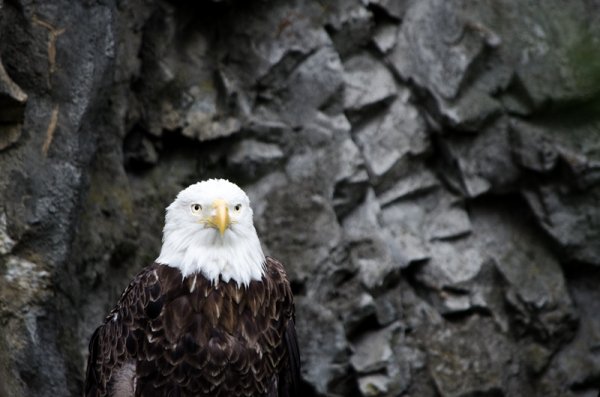
    Use high ISO when shooting handheld with a long lens

    If you’re shooting handheld with a long lens, you have to remember the shutter speed rule: 1/focal length (35mm equivalent).  This rule basically means that if you’re using a 300mm lens on a 1.5x crop factor DSLR then the minimum or slowest shutter speed that you can use is 1/450 (1/300 on full frame).

    The bald eagle above was shot at a 450mm equivalent focal length using a shutter speed of 1/500th of second and an ISO of 1,000. Any slower on the shutter speed and you begin to run the risk of introducing camera shake.

    What other uses can you think of for high ISO?

    Do you ever shoot with an ISO of 800 or higher? What’s the highest you’ve ever shot? Share with us some examples and of course, if you have any other uses for high ISO that you think I’ve forgotten please share those below as well!

    The post Three Uses for High ISO you Might Not Know by John Davenport appeared first on Digital Photography School.


    Digital Photography School

  • How to Take Pretty Photographs in Bars & Nightclubs

    There’s something about a dimly bar that gets my muse excited. The old guys hunched over their beers, talking about the weather. The tattoo-covered dudes confidently working over the pool table. The colorful ladies, often wearing their most eye-catching clothing and makeup…For most people, it’s the highlight of their week. Whether they are kicking back, cutting loose with friends, or Continue Reading

    The post How to Take Pretty Photographs in Bars & Nightclubs appeared first on Photodoto.


    Photodoto

  • Three Exercises to Limit Yourself and Grow as a Photographer

    Today’s digital cameras are marvels of modern technology, allowing even the most inexperienced photographer access to state-of-the-art imaging systems that were the domain of supercomputers, and research institutions only a few decades ago. With prices plunging continually lower, and more devices equipped with cameras than ever before, photography has reached the point of ubiquity: cameras are everywhere, and anyone who wants to take photos can do so. But sometimes, the best thing you can do to grow as a photographer is to take the opposite approach and set some strict limits for yourself. By operating within the bounds of some simple constraints, you will often find yourself exploring new photographic possibilities that you had never realized were there before.

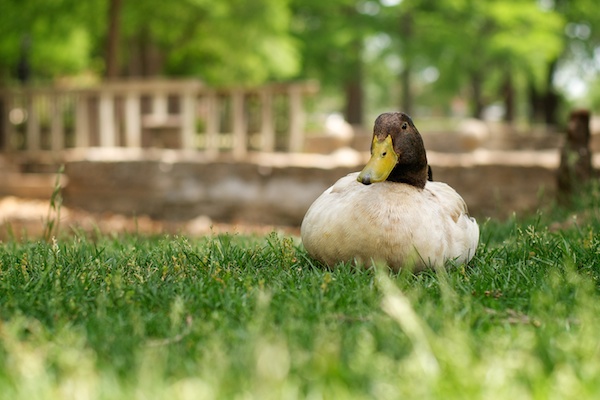
    Duck pond

    1. Limit the number of shots you take

    Memory cards are extraordinarily cheap. It’s tempting to buy the biggest card you can afford in order to ensure you can fill it with thousands of pictures and not worry about running out of space. But not too long ago, photographers were limited to just a handful of pictures at a time. Each roll of film (i.e. memory card) could hold 36 shots at most, and they were crazy expensive by today’s standards. Imagine paying four dollars for a memory card that could only hold a couple dozen photos and only be used once! Nevertheless, for decades our photographic forefathers were able to churn out amazing images by working within these limits, and so can you.

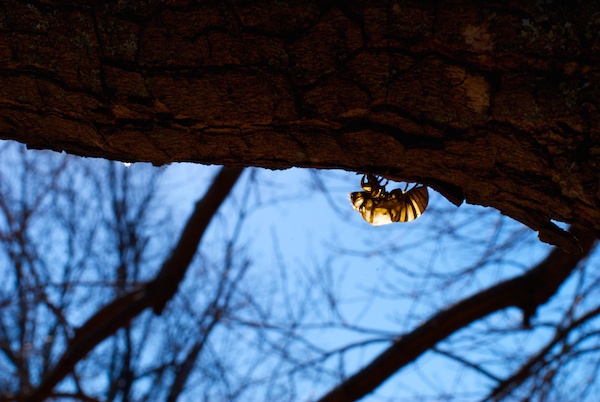
    Cicaida tree

    The next time you go out to shoot, limit yourself to only a handful of pictures–set the number beforehand, and stick to it. In doing so, you will have to be much more purposeful about what you photograph. Rather than take the “spray and pray” approach where you shoot hundreds of photos now and find the good ones later, take a more measured and intentional approach by really studying your subjects and finding the best shots through careful planning. You might be frustrated at first, but will soon find that you develop a much more intimate relationship with your subjects, the lighting, the composition, and other elements of photography. Limiting yourself to only a few pictures will help you make each shot count, and help you shoot for quality instead of quantity.

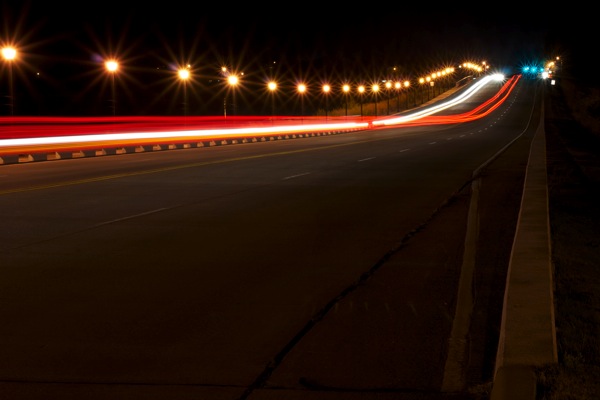
    Night lights

    2. Limit your focal length

    Zoom lenses are a wonderful thing, and are a great way to help you get closer to the action or take in a wide angle of view on a given scene. But zoom lenses on consumer cameras are a fairly recent invention, and not long ago every camera shipped with a simple prime lens, meaning it could not zoom at all. Imagine not being able to zoom in and out! You would have to physically move yourself to get closer to the action–not at all what people expect nowadays. But by limiting your focal length you can, ironically, find yourself stretching your photographic muscles in ways you never thought possible.

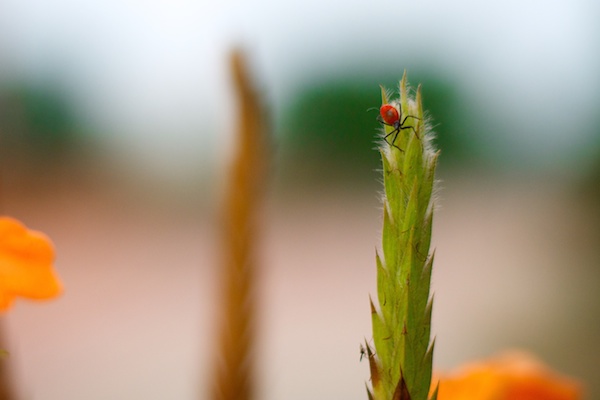
    Flower bug

    When you allow yourself only one focal length, it forces you to look at the world with a different perspective and see new opportunities for pictures. Let’s say you are out with your kids at the park, but instead of standing on the side and zooming in, try locking your lens at one focal length such as 24mm or 35mm and physically walking around to get closer. You will soon discover new perspectives that you overlooked, because you were relying on the zooming capability of your lens. Or if you normally like to take photos of nature or architecture at a wider settings like 18mm, try setting your focal length to something like 55mm and see what happens.

    True, the pictures you take will look nothing like what you are used to, but you will see the world from a new perspective and find all sorts of different photographic opportunities you never realized were there. If the temptation to start zooming in or out strikes, don’t give in. Move yourself around and look for ways to work within the limit you have set, and you will be surprised at what you can accomplish.

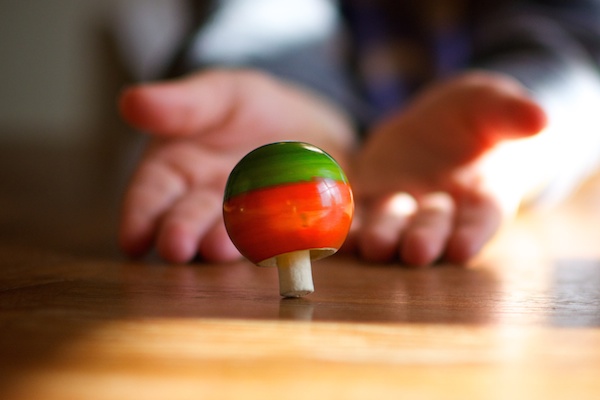
    Toy top

    Of course the best way to limit your focal length is to buy a prime lens, which I highly recommend. Not only will you learn to maximize the possibilities afforded by a single focal length, but you will get other benefits like a much larger aperture which means better photos in low light, and nice blurry backgrounds too.

    3. Limit your subject

    We’ve all heard people tell us to take time to stop and smell the roses, but what about taking time to photograph them? Or, specifically, one single rose. That’s the idea here: rather than taking pictures of many roses, trees, buildings, sculptures, or people – focus on just one subject and look for new and interesting ways to capture it on digital film. Study it from every possible angle, and find ways of positioning it (or yourself) that might not seem so obvious. Try returning at different times of day, or seasons of the year, and see how it changes. You might end up with dozens or even hundreds of pictures that are boring, uninteresting, or just not all that good. But you will also likely end up with some gems that are far beyond what you thought you could accomplish before.

    Tree perspective

    Limiting yourself, in a world with limitless photographic opportunities, might seem counter productive at first. But if you give it a try, you will find that putting some constraints on your photography will help stretch yourself in new ways and find interesting picture opportunities that you might have overlooked hundreds of times before.

    The post Three Exercises to Limit Yourself and Grow as a Photographer by Simon Ringsmuth appeared first on Digital Photography School.


    Digital Photography School

  • Winners of the NYIP Photography Courses Announced

    The Winners of the NYIP Photography Courses Are:

    NYIP spread  Light Direction

    A BIG thank you to everyone who entered our recent contest to win one of three photography courses from our friends at NYIP.
    The response was terrific with over 650 entries. In fact, it was so great that the team at NYIP decided to offer a special 15% discount off any of the courses (details below).

    But first – here are the three winners of the Complete Course in Professional Photography:

    NYIP Logo for Front Graphic 2

    • Shannon Moseley
    • Douglas Quintanilla
    • DoctorDW

    A Message from NYIP (and a 15% discount)

    Wow! Here at NYIP we were thrilled with the quality and the quantity of the responses we received for this contest. As always, the dPS community came out in full force looking for quality photography education. Unfortunately, not everyone can win. But for those of you who did not win, we’d like to extend a special discount on the NYIP course of your choice.

    The discount code ‘BU3′ can be used when you enrol online, or by phone, to take 15% off either payment plan on any of NYIP’s courses. Simply get started by visiting www.nyip.edu.

    Thanks again for all the wonderful submissions,
    The NYIP Team

    The winners of this contest were chosen by the Admissions Team at the New York Institute of Photography based on how well the commenters understood NYIP’s programs and how NYIP could help them as photographers. All three winners will be emailed by our team to collect contact information and notified by NYIP with details of how to collect their prize.

    NYIP Logo

    Thanks again to everyone for entering and to NYIP for sponsoring this competition.

    The post Winners of the NYIP Photography Courses Announced by Darlene Hildebrandt appeared first on Digital Photography School.


    Digital Photography School

  • How to See in Black and White

    Andrew’s book Mastering Lightroom: Book Three – Black & White is on sale now at Snapndeals for 40% off. This is a limited time offer, so grab it while it’s available.
     
    How to see in black and white

    In my previous article I showed you how to convert colour photos to black and white in Lightroom. However, no matter which technique you use, good monochrome photography starts in your mind. If you can learn to see in black and white, you can create beautiful monochrome images. Here are some tips to get you started.

    Understand the appeal of Black and White

    Colour photography is very literal. It depicts the world as it really is. Black and white, on the other hand, gives us a new way of seeing. Removing colour takes us a step away from reality and towards creating an artistic interpretation. Shape, form, tone and texture are revealed to the eye, rather than overpowered by colour.

    But the appeal of black and white photography goes deeper than that. The monochrome image, at its best, is beautiful. It’s art. It captures the beauty and soul of the subject. It moves people. It’s powerful and it endures.

    Learn to see tonal contrast

    Tonal contrast happens when there is a clear difference in brightness between your subject and the background. Here are two examples.

    How to see in black and white

    The photo on the left shows a white sticker pasted on a door. There is tonal contrast between the light and dark tones. In this image you find a light tone (the sticker) surrounded by dark tones (the door), a type of tonal contrast that works very effectively in Black and White.

    The photo on the right shows a dark statue against a near white background. This is the opposite type of tonal contrast, where a dark toned subject is shown against a light background.

    Tonal contrast is the basis of many successful black and white photos. Images that make good use of tonal contrast convert to monochrome with little effort. Let’s take a look at a couple of practical examples.

    How to see in black and white

    In this portrait I positioned the model against a dark background to take advantage of the difference in brightness between the light falling on her and the light falling on the trees behind her (which were in shade). If you want to create powerful black and white portraits, this style will serve you well.

    How to see in black and white

    Here I took advantage of the difference in brightness between the twigs in the home-made broom and the dark stones. You can see the same principle in action as in the portrait, a light toned subject against a dark toned background. I knew this would make a strong black and white image because it contains two things that look good in monochrome: texture and tonal contrast.

    You can learn more about tonal contrast in my article Improving Composition with Tonal Contrast.

    Simplicity and negative space

    All the photos I’ve shown you so far have two more things in common. One is that the composition is very simple. I’ve deliberately moved in close to the subject and framed it in such a way to eliminate distracting elements. An added benefit is that the tonal contrast becomes much stronger when the composition is simplified.

    Here’s another example.

    How to see in black and white

    I moved in close to crop everything but the vendor’s hand and the Chairman Mao pocket watch in this photo taken in an antique market in Shanghai. The simple composition emphasises the texture of the watch and hand as well as the difference in brightness between them and the background.

    Negative space is the area surrounding your subject. It is negative space if it doesn’t contain much detail. In black and white, it would be an area of white, black or grey that creates a kind of frame for your subject, giving it room to breathe within the composition.

    How to see in black and white

    This portrait is a good example of using negative space. The model’s face (a light tone) is surrounded by an area of dark space that contains just enough detail for you to see what it is (his shirt and the wall behind him). In this portrait you can see the principles of tonal contrast, negative space and simplicity of composition working in harmony together.

    My article Composition and Negative Space goes into this topic in more detail.

    Monochrome previews

    How to see in black and white

    So far we’ve looked at some of the elements that contribute to strong Black and White images, but that may not be a great help when you’re faced with a colourful subject and the colours are so strong that you can’t visualize how it will turn out in Black and white. Don’t worry if this happens to you – it takes time and practise to learn to see in monochrome.

    One thing you can do to help you visualize the subject in Black and White is switch to your camera’s monochrome mode. The key is to select the Raw format, so that the image is recorded in full 12 or 14 bit colour (essential for good Black and White conversions).

    But when you play back your images on the camera’s LCD screen, they will be presented in Black and White. If you have a camera with an electronic viewfinder it may even display the scene in black and white as you look through it. This helps you see how the colours in the scene translate to the grey tones that make up a monochrome image. If the image is a little flat, which will happen if you’re not shooting in bright sunlight, increase the contrast to add some pop.

    My article Mastering Monochrome Mode goes into this in more detail.

    Over to you

    Hopefully these tips will help you see in black and white and create better monochrome images. Do you have any tips for seeing in black and white? Please add them in the comments below.


    Mastering Lightroom: Book Three – Black & White ebook coverMastering Lightroom: Book Three – Black and White

    Andrew’s book Mastering Lightroom: Book Three – Black & White is on sale now at Snapndeals for 40% off. This is a limited time offer, so grab it while it’s available.

    The post How to See in Black and White by Andrew S. Gibson appeared first on Digital Photography School.


    Digital Photography School

  • Sunrise at the Yellowstone by Aleksey Khmyz

    My wife and I had the opportunity to visit Yellowstone Park last fall. It was a wonderful experience and I highly recommend visiting if you have the chance. Primarily, I am a wedding and portrait photographer based out of the Buffalo, NY area, but it’s always nice to take a couple images of wildlife and […]

    The post Sunrise at the Yellowstone by Aleksey Khmyz appeared first on dslrBlog.

    dslrBlog

  • 5 Tips for Creating a Photo Essay with a Purpose

    As a photographer, you are a storyteller. The nouns are your subject matter; the verbs are the color and contrast that keep the story moving. A cast of characters all working together to get your point across. Instead of proper grammar, you ensure proper exposure. Instead of spelling errors, you watch for tack-sharp focus. For those times when the story is especially important and meaningful, or for when one image doesn’t say it all, there is the photographic essay. With blogging and social media, photo essays are more popular than ever: humorous or emotionally relevant, sparking debate or encouraging compassion, each with a story to tell.

    melanie1

    I’ve mentioned before that taking on a photo project is one of my favorite ways to reignite my love for photography, but beyond that, it’s a great way to get your message across and have your work seen by a larger group. A photo essay is intriguing; it’s something to talk about after people hear that you’re a photographer and want to know about the glitz and glamour of it all. It’s the perfect thing to tell them after you’re done going on and on about all of the red carpets, the celebrities, the fame, and the fortune. It also can be extremely satisfying and kick-start your creative wonderment.

    By definition, a photographic essay is a set or series of photographs intended to tell a story or evoke emotions. It can be only images, images with captions, or images with full text. In short, it can be almost anything you want it to be. Which is where I struggle most–when the options are limitless. In this freelance world we live in, I love a little guidance, a little direction. Ideally, someone to tell me exactly what they want and promise to be thrilled with whatever I produce, for my fragile artist ego can’t take any less. While I continue my quest for that, I offer you these 5 tips for creating your own, completely without bounds, photographic essay:

    1) Let it evolve on its own

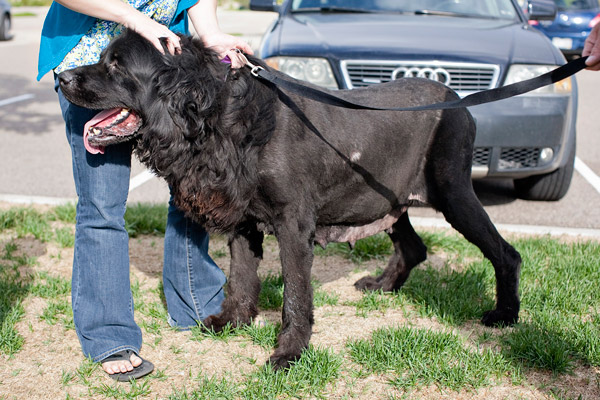
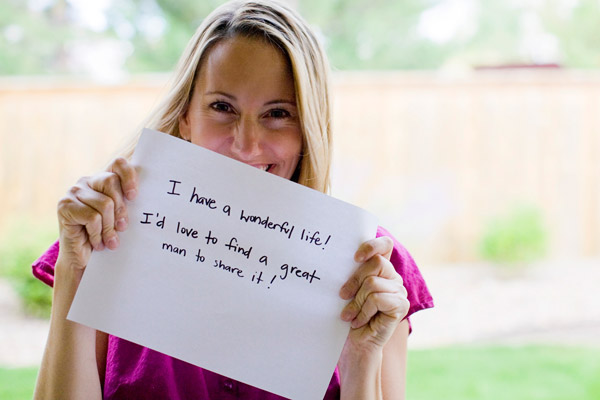
    Each time I’ve had a very specific concept in mind before I started shooting, it’s never been the end result. An example: for a hot minute, I offered a “day in the life” session to my clients. I was photographing so many of the same clients year after year that I wanted to be able to offer them a different spin on the portrait sessions I was doing for them. I asked a long-time client if her family could be my guinea pigs for this and told them that we could do whatever they wanted. We went out for ice cream, had a mini dance party in their living room, and I photographed a tooth that had been lost that very morning. Then, very last, I photographed the two young daughters with notes they had written, which to be honest, I’m not even sure how they had come about. I rushed home after the session and edited those last note pictures first just because they were so different from what I usually shoot, and posted them on my personal Facebook page the heading Notes Girls Write.

    sarah

    gracie

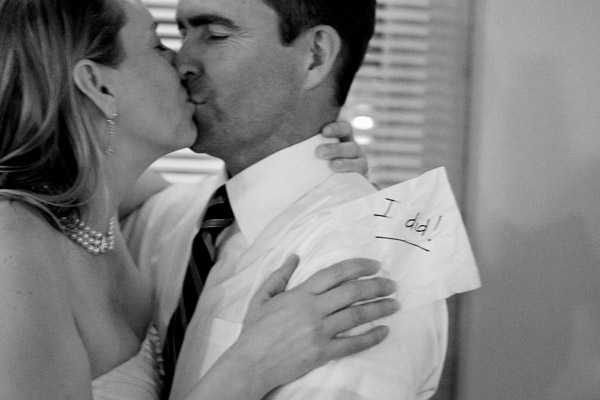
    Within minutes a dear friend, and fellow photographer, commented that this was big. Bigger than just the two pictures. She and I would spend the next year working on a photo essay that became a blog, that in turn became a book entitled Notes Girls Write. We photographed hundreds of women of all ages with their notes, each one later expressing having their portrait taken with their own words was an extremely powerful moment for them. Beyond my beautiful children, the fact that I can make a bed with hospital corners like no one’s business, and the award I won in the 4th grade for “Most Patient”, Notes Girls Write is one of my proudest accomplishments. It evolved on its own, starting from a few similar photographs that struck a cord in viewers and becoming a large and powerful project, one of the biggest markers in my career so far.

    lindsay1

    IMG_6287b

    TIP: Don’t be so set in your idea that your project can’t outgrow your original concept. Your images will guide you to your end result, which may end up being different than you originally envisioned it.

    2) If you think there’s something there, there’s likely something there

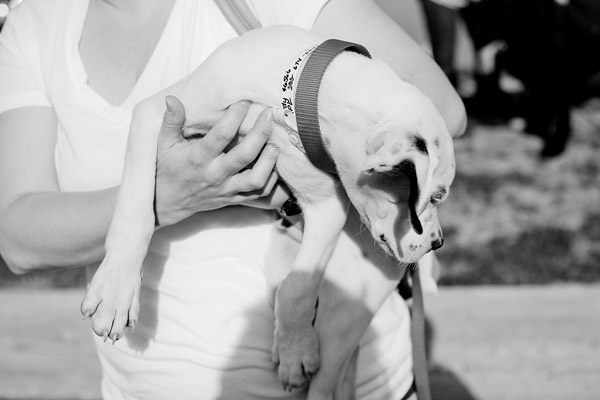
    For the last year I have been a “foster mom” with a dog rescue group. Volunteers transport dogs that would otherwise be put down from overpopulated shelters, or seized from terrible situations, to my area, where dog adoption rates are much higher. These dogs live in foster homes while they receive medical care and basic training so that they can be adopted out to loving homes. It’s incredibly rewarding. Especially when I had hardwood floors.

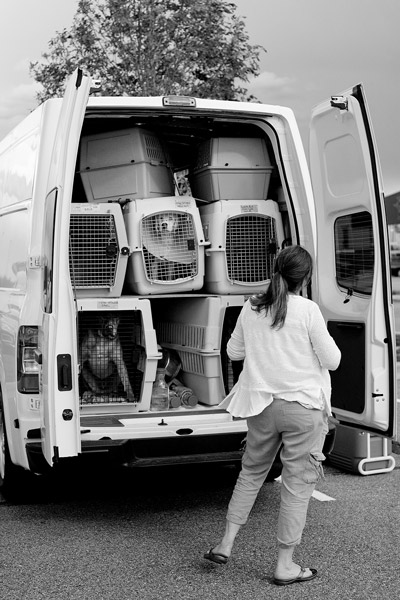
    I knew from the first time I met the transport van I wanted to document what it looked like: a van full of dogs that just narrowly escaped death arriving to temporary homes where they will experience a level of love and care which they’ve likely never known. I tear-up every time I see it. I am also put to work every time I am there, so taking photos while holding onto a 100 pound German Shepard is tough. It’s going to take me several trips to have enough images to do anything with, but that’s fine. I have no idea what I will be doing with these photos. I know they will find a home somewhere: maybe with the rescue group to raise awareness, or to help bring in volunteers, or maybe they will do nothing more than document my own story with volunteering, or perhaps something more. I’m not sure yet, but the point is that I have the images, ready for their time, whenever that is.

    dog1

    dog2

    dog3

    TIP: If you think there is something to it, there likely is. Even if it’s just a personal passion project. Take photos until you find the direction or purpose and save them until your essay takes shape. You may not end up using all, or any of the images, but in continuing to take photographs, your project will be defined.

    3) Shoot every single thing

    I’m the “World’s Worst Over-Shooter”. Need one image? Let me take a hundred so we know we have it. Luckily for my bad habit, the photographic essay needs over shooting. Whether you know what your plan is, or have no idea want your end result will look like, the more coverage you have, the better. This is one of the few times I push my luck and ask my subjects to work for me until they never want to see me again (I only photograph people though, so if you are photographing mountains or something, you have the added advantage of not pushing people until they cry or yell). Don’t be shy. Shoot everything you know you don’t need, just in case you need it. Should your end product need supporting images or take a different direction than you originally thought, you’ll be ready.

    Take advantage of digital (if that’s how you shoot) and fill a memory card. You may end up trashing everything, or you may not. I had no idea that my Notes Girls Write project would span for as long as it did, but because I didn’t turn down anyone who was interested in the very beginning I ended up with some shots that told complete stories and expanded on the original concept.

    sarah2

    sarah3

    TIP:  Think big. If you are shooting an essay where mountains are your subject matter, see the mountain in pieces and photograph the surrounding trees, rocks, and whatever else. This will save you having to return to the beginning of the project for supporting shots, or having to reshoot if your essay takes a different turn than you planned.

    4) Ask for help with image selection

    I struggle with this one–I let my personal feelings get involved. Throughout our Notes Girls Write project I was constantly picking images based on my personal feelings–the subjects that I had connected with more, and the girls that I knew were most interested in the project. This is where it is so helpful to have someone else help. Someone who has no personal feelings towards the images and will help you pick based only on the strength of the image and not your own feelings. Even if people were not involved as subjects, you tend to have personal feelings toward images that the general public may not see the power behind.

    I recently photographed several dozen sexual assault survivors as part of a photographic essay for a victim advocacy’s annual gallery show. This event is meant to put faces on the survivors and raise awareness, and has been a large local event for years. I was thrilled to be selected to be the exclusive photographer, though this was one of the hardest projects I’ve ever taken on. The photo sessions themselves, whether five minutes or 30, were extremely emotional for the survivors and in the time I spent with them, I often learned a lot about their journey and experience. This made it difficult for me to pick which final images would be used for the show, based only on the power of the image and not my personal feelings. In the end several select friends helped me narrow each survivor’s images down, and the subjects themselves selected which would be the final image used, as ultimately this is their story.

    SAVA1

    SAVA2

    SAVA3

    TIP: All creative work is personal, and looking at photographs we take ourselves is incredibly hard to do with clear eyes. We see the mistakes, the personal feelings, the shot that could have been better. It’s impossible to always set these aside so when working on a project that is incredibly important to you, or large in scale. Have others help you decide what images to use for your final pieces. Bring in people who are interested in photography and people that aren’t. People that know about your subject matter and people that don’t understand it at all. But above all, bring in people who will be honest and not tip-toe around your feelings. Lastly, also bring a thick skin.

    5) Tell your story, in fact shout it from the rooftops if you can

    Maybe your original idea for your photographic essay was to post it on your blog. Awesome, nothing wrong with that, but are you sure it can’t be more? Shop it around, who can it help? Does this benefit a group, an organization, or a person? Could it inspire people? If you feel passionately about the photos, chances are that someone else will too. Your photographic eye doesn’t stop when your shooting is done. If you felt compelled to take the time to create a photographic essay, there are likely “readers” for your story.

    img_6359b

    TIP: This isn’t the time to be humble. Taking on a photo essay is a large endeavour. While there’s nothing wrong with having it be something you only did for your own personal growth, showing it around can be helpful both in experience and longterm benefit. Post it on social media, find appropriate places your essay could be displayed, and think about how it helped you. Every single photo essay I have done has led to an outstanding connection, or more work, and there is nothing wrong with getting those things along with the personal gain of accomplishing something you’re proud of.

    The ideas are truly for a photographic essay are limitless. Truly.

    Want a few more ideas for projects, try these?

    • Using a Photography Project to Spark your Creativity
    • Photography projects that make you feel alive
    • Jumpstart Your Photography – Start a 365 Project
    • 8 Photo Projects in Your Own Backyard

    Have you ever done a photographic essay? What is your experience? Share with in the comments if you have, or have considered it. If you haven’t, what are you waiting for?

    The post 5 Tips for Creating a Photo Essay with a Purpose by Lynsey Mattingly appeared first on Digital Photography School.


    Digital Photography School

  • The Photodoto Library: Your One-Stop Shop for Pure Photography Awesomeness

    Are you sick and tired of photography sites claiming that they can provide you with a wealth of photography resources that’ll make you a much better photographer…only to be lied to and disappointed each and every time? We hear you and feel your pain, too! That’s why we at Photodoto have come up with something that’s bound to turn your Continue Reading

    The post The Photodoto Library: Your One-Stop Shop for Pure Photography Awesomeness appeared first on Photodoto.


    Photodoto

  • Using Off-camera Flash to Fix Lighting Problems for Outdoor Portraits

    Model holding flash better

    When you’re taking pictures of family and friends outdoors, you are often not in control of the light, and that can lead to poor portraits.

    A few of the possible problems include:

    • Raccoon eyes – deep shadows in the eye sockets (and other the nose) caused by bright overhead sunlight or light overcast skies
    • Bright background obscuring the subject’s face – although some cameras automatically compensate for it, if you’re shooting in the shade and there’s a really bright background, that can mislead your camera into underexposing the image, leaving your subject’s face too dark.
    • No control over direction of the light – the sun is here, and you are there. You can move around the person you’re photographing to get better light, but then you may lose the desired background.

    With a wireless flash, these problems can be overcome, and it’s surprisingly easy. Canon’s Rebel line, D-series DSLRs and advanced G-series compact cameras let you control off-camera flash wirelessly, which opens up many possibilities when it comes to changing the quality and quantity of light that you use to photograph someone outdoors.

    Raccoon eyes – below (left) is a typical portrait shot under direct midday sunlight with our model, Leanne. The sun, almost directly overhead, casts deep shadows over eye sockets, below the nose and chin, and wherever hair blocks the light. Gear: Canon EOS 70D, 85mm f/1.8 USM Canon lens. Exposure: 1/320 second at f/4.5, ISO 100.

    Raccoon eyes before 600 Raccoon eyes after 600

    Raccoon eyes fixed – (above right) the flash was mounted on the camera’s hot shoe and provided enough fill light to blow away the shadows, but the light is flat. Gear: same as above plus Canon 430 EX II Speedlight. Exposure: 1/250 second at f/10, ISO 100.

    Raccoon eyes, cloudy skies (below left) the clouds move in and soften the light. Better, right? Well, sort of. Leanne’s eyes are still in the shadows. Gear: Canon EOS 70D, 85mm f/1.8 USM Canon lens. Exposure: 1/250th at f/3.5, ISO 100.

    Raccoon lightcloud before 600 Raccoon lightcloud after 600

    A lighter touch with light – (above right) in this case, less light was required to lighten the shadows, so I used the on-screen flash intensity control (on the Canon 70D, press Q and then touch the flash power icon to access this feature) and reduced the flash output. Determining the right amount of flash output is often a matter of trial and error. In this case, the default setting was too dark, +2 was too bright, but +1 was perfect. Gear: same as above plus Canon 430 EX II Speedlight. Exposure: 1/250th at f/7.1, ISO 100.

    Balancing light when shooting in the shade

    The ideal way to take a portrait in the shade without flash is to shoot with the bright area behind you (behind the camera). This will give you a wide light source and with nice, flattering light. However, you may not have this option, or you want to include interesting background elements that are, alas, drenched in sunlight.

    While an on-camera flash will add enough light, you can add more dimensionality and features to your subject’s face by taking the flash off the camera and moving it around. By combining ambient (existing) light with your off-camera flash, you introduce infinite creative portrait-taking possibilities.

    (Not sure how to use wireless? Scroll down to read our primer)

    It’s best to have what flash guru Joe McNally calls a “voice-activated light holder” (also known as a human being, a friend, relative or cooperative stranger) to move around and hold the flash wherever you need it. If it’s just you and your model, however, an inexpensive light stand and shoe-mount flash adapter, such as the Flashpoint Heavy Duty Lightstand and Adorama Universal Swivel Holder, will do the job. Total cost? Less than $ 50!

    Fixing harsh backlighting without flash

    Exposed for the background – in the photo below (left), the background is perfectly exposed but Leanne, standing in the shade of a large Maple tree, is in deep shadow. Gear: Canon 70D, 85mm f/1.8 Canon Lens mounted on a Velbon GEO E535D Carbon Fibre Tripod. Exposure: 1/320 second at f/4, ISO 100.

    Exposed for background Exposed for openshade

    Add one stop of exposure – (above right image) better, but Leanne’s face is still too dark. Gear: same as above. Exposure: 1/200th at f/3.2, ISO 100.

    Spot meter on the subject – by taking a spot meter reading you can eliminate the misleading bright background from the exposure equation and get a pretty good exposure on the face (below left). But the eyes are still too dark, and the background is getting blown out. Gear: same as above. Exposure: 1/160th at f/2.8, ISO 100.

    Exposedforface Exposed for shadows

    Exposed for the eyes – now you can see Leanne’s eyes clearly (above right), but overall the image is too bright, especially the background. So let’s introduce a flash and balance things out. Gear: same as above. Exposure: 1/125th at f/2.5, ISO 100.

    Adding flash to balance with the ambient light

    Balanced light, image below left. Now the exposure is spot on! If you hold a flash up a foot or so above your camera while shooting, you should get this kind of light. The slight angle gives Leanne’s face a bit of dimensionality. Gear: Canon 70D, 85mm f/1.8 Canon Lens, Canon 430 EX II Speedlight flash mounted on Flashpoint Heavy Duty Lightstand via an Adorama Universal Swivel Holder. Exposure: 1/200th at f/5.6, ISO 100.

    Balanced flash background Balanced flash 45degrees Left

    Flash at a 45 degree angle (image above right). By moving the flash (now mounted on a light stand) further to the left of the camera and about a foot above eye-level you get this classic Loop pattern portrait lighting. Note how Leanne is turned slightly towards the light, and how the light falls off her left cheek, creating a more flattering, dimensional look. Same gear and exposure as above.

    Flash at 90 degree angle (image below left). Now the flash is directly to camera left, and her face is divided into light and dark halves (also known as Split Lighting). This is a more dramatic look. Same gear and exposure as above.

    Balanced flash 90degrees Left Backlit flash with refl

    Backlighting (above right) – even though the sun was to the right of the camera, after placing the flash above and behind and slightly to camera left, it looks like she is backlit by the sun. These are the kinds of effects you can get by moving the light around. Same gear and exposure as above.

    Add a reflector

    If one additional light source isn’t enough, you can easily, and inexpensively, add a second by using a reflector. The Glow 5-in-1 32-inch Reflector Kit, for $ 26, is a versatile option. This dramatically increases the possibilities for controlling and shaping the light, and bringing out the contours in your subject’s face.

    One problem – running out of hands. The solution? Have your subject hold the reflector and compose a nice tight headshot.

    Balanced flash 45 degree refl2

    The reflector adds a new dimension. Here Leanne is holding a silver reflector to her left, which is bringing light back to her face in an approximately 2:1 lighting ratio (the reflected light is half that of the direct light from the flash). Notice how the more angular cross-light brings out her facial features. Same gear as above plus Glow 5-in-1 32-inch Reflector Kit. Exposure: 1/160th at f/7.1, ISO 100.

    What if you take away the reflector and put a flash in the model’s hands?

    Model holding flash better

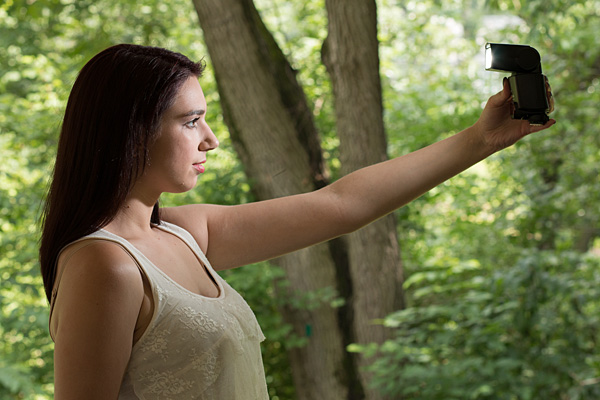
    Flashie? In another setup, Leanne is holding the flash to her side as the sole light source. This is kind of like a “selfie” but with a flash.

    Model holding flash vertical

    She’s holding the light. In this tight headshot, Leanne is still holding the flash in the same position as above, but with a reflector to camera left adding light on the other side of her face.

    Adding an umbrella

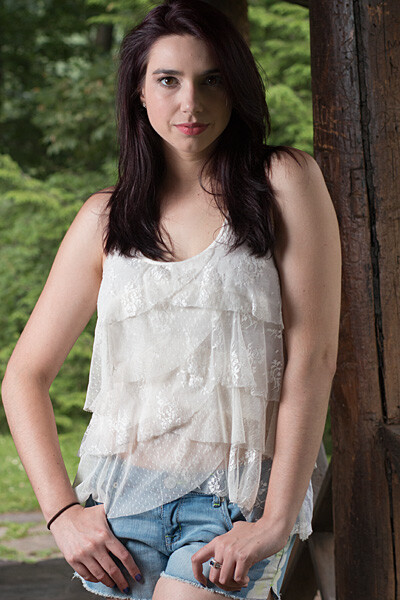
    While a stand-alone flash (or one used in tandem with a reflector) is great for close shots, light falls off quickly and may not illuminate the person in a longer shot. To solve this, consider adding an umbrella to your arsenal. This will enlarge the light source and will result in more even illumination when shooting a full body or ¾ length portrait. Using an umbrella is worth an article of its own.
    Umbrella sidelight modelfull

    While a stand-alone flash (or one used in tandem with a reflector) placed near a subject can be great for close shots, it won’t evenly illuminate your portrait subject in a wider shot such as this one. Normally, the solution is to move the flash farther away, but in this scene, an outdoor porch, there was a wall immediately to the left of the camera. In this situation, bounce the flash off an umbrella. This will enlarge the light source to create more even illumination. Be sure to increase flash power approximately one stop to compensate for the light loss that results from bouncing the flash into the umbrella. (Using an umbrella is worth an article of its own!)

    Step-by-step instructions on how to trigger Canon off-camera flash wirelessly

    Here are the step-by-step directions for triggering a Canon 430 EX II wireless Canon flash from the Canon 70D. If you’re using another camera, check your manual for wireless flash instructions. Among other Canon systems, the directions will be similar.
    flashsettings

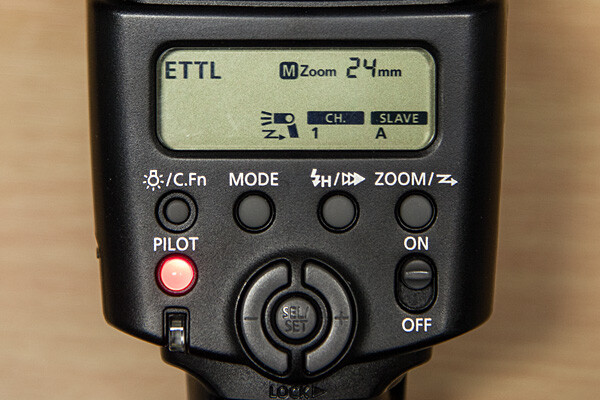
    1. Turn the flash on, then press and hold the Zoom button for a second or two. You’ll see a new flash icon and Ch 1 Slave A appear in the LCD screen (see photo above).
    2. Turn the camera on and pop up the flash
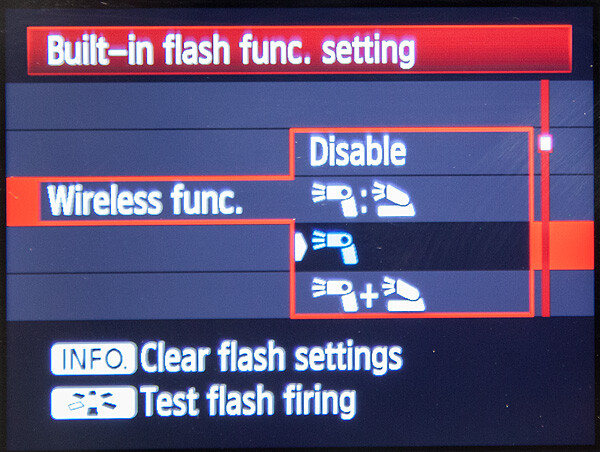
    3. Go to Menu; in the first tab (camera operation), choose Flash Control, then scroll down to Built-in flash function setting, select “Wireless Func.” and choose the middle setting of the single flash (see below) Note: Although the on-camera flash is flipped up, it will not fire during the exposure. Rather, it will flash a split-second before the exposure, which triggers the off-camera flash to fire during exposure, so your only source of flash illumination during exposure will be the off-camera flash.
    canon-built-in-flash-function-setting

    Hopefully you can take these off-camera flash tips and apply them in your photography to help you make better portraits outdoors. If you have any additional questions or tips please share in the comments below.

    The post Using Off-camera Flash to Fix Lighting Problems for Outdoor Portraits by Mason Resnick appeared first on Digital Photography School.


    Digital Photography School
  • Getting Your Foot in the Door as a Freelance Assignment Photographer

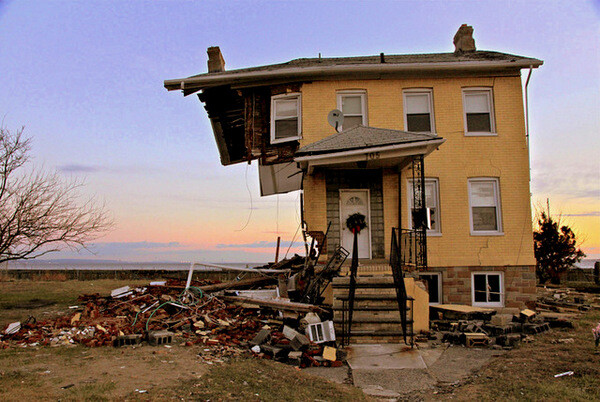
    Hurricane Sandy

    One of the biggest changes photography has seen over the last 10 years is in photojournalism and documentary photography. Some will see this change as good while others will see this change as bad. The improvements made to consumer DSLR cameras, lenses and editing software have opened the doors for many photography hobbyists to engage in documentary photography.

    Gone are the days when having a good camera and access to a darkroom separated the professional photographer from the amateur photographer. The playing field has been levelled and it is open season for anyone to take part. Within this new landscape there is an abundance of opportunities for you to possibly earn a little extra cash by taking photos for your local paper, magazines or online news outlets.

    The assignments will always vary. You may be asked to cover a government meeting or the opening of a new business. You may be taking pictures for a human interest story about a unique person in your town. You could be asked to cover a local high school football game or be asked to rush to the scene of an accident. You may find yourself taking pictures of a festival or a gala dinner featuring some movers and shakers.

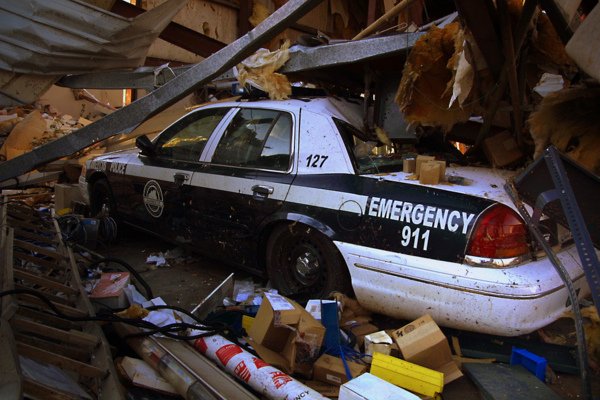
    Police Car

    Below is a list of tips that will help you be a better assignment or documentary photographer, and possibly get your foot in the door to get some jobs.

    PRACTICE. KNOW YOUR GEAR.

    In many regards, photography starts with the gear. It is important to know the limitations of your equipment. It is equally important to know the areas in which your equipment performs well. No matter what camera and lens you are working with, your equipment will have limitations. Don’t spend time wishing for, or wanting a different lens or camera. Use what you have to the best of its ability. A better lens in some warehouse, is not going to help you now.

    ASK QUESTIONS OF YOUR ASSIGNMENT EDITOR

    As an assignment photographer you should be prepped before you go out by the editor of the publication, or the writer of the story. If you have any questions, ask them! I have never had an assignment editor react poorly to me asking questions about a piece they are asking me to cover.

    Ignorance can be overcome by asking questions. Overcoming stupid is more challenging. Don’t be stupid. If you are not clear about what is expected of you, ask questions until you and your editor are on the same page.

    WHO? WHAT? WHEN? WHERE? WHY? HOW?

    Speaking of questions, do your pictures answer the ones above? Try to take pictures that answer as many of these questions as possible. While it will be very challenging to capture one picture that addresses all of them, shoot with the idea that your pictures are answering as many as possible.

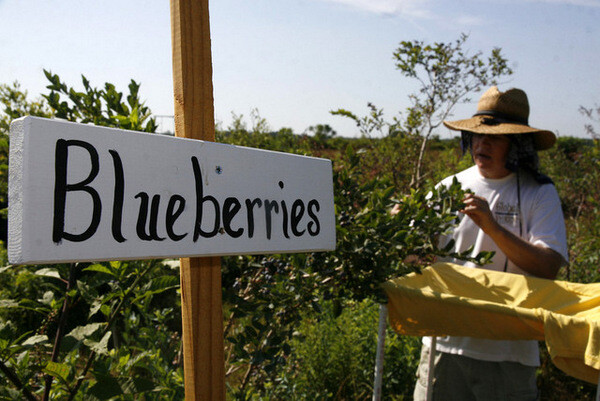
    Blueberry Season

    DO YOUR OWN RESEARCH

    After you have asked the necessary questions of your assignment editor, do your own research on the subject. This will help you develop ideas, understand how events may unfold, or which images will be more important than others. Don’t expect your editor to tell you exactly what picture to get. They are hiring you, in part, because of your vision. Conducting a little research before you go out will help you find your vision.

    COME WITH AN IDEA IN MIND

    After researching your subject, think of shots that you want to capture and work toward those pictures when you are in the field. But don’t knock yourself too much if you don’t get “the” picture you wanted. Documentary photographers have little (or no) control over what happens. Come with an idea that will keep your mind centred, but be prepared to adjust your ideas accordingly as the events unfold before you.

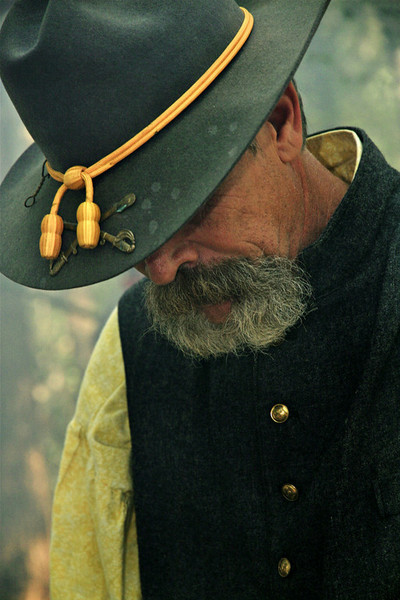
    Civil War

    START BY PLAYING

    Once you arrive, begin by playing with your exposure settings and shooting styles. This will ensure that you, and your camera, are properly set up when the moment arrives. In the same way athletes warm up before a race or a game you need to begin by getting your mind and your gear in proper condition before the event begins.

    BE INVISIBLE

    Remember, you are there to document what others are doing. The story is not about you. Do what you can to stay out of the way to allow events to unfold naturally. If you are too intrusive your subjects will not relax and you will not be documenting natural events. Stay out of the way and let events unfold in front of you.

    TIGHT. MEDIUM. WIDE.

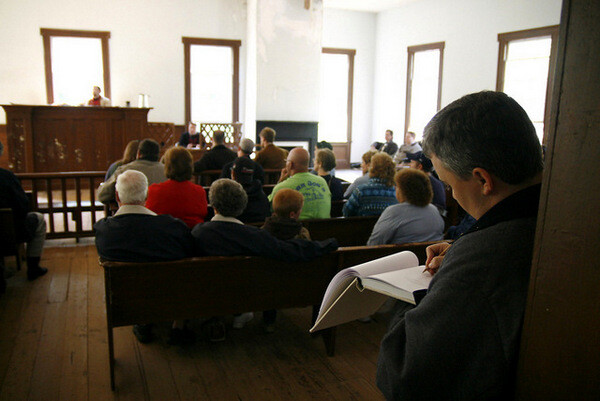
    Take wide, medium and tight shots of what you are covering. As an example, if you are covering a town hall meeting be sure to get a wide shot that shows all of the filled, or empty chairs, in the room. A medium shot may be a waist-up shot of someone at the podium. A tight shot would be a head shot of someone expressing emotion as they discuss the subject of the meeting or as they listen to the presenters speak.

    Westville Meeting

    FOCUS

    Proper focus is critical in all photography. It is essential in documentary photography and photojournalism. Your focal point tells the viewer what they should be looking at. If you are still taking pictures at that town hall meeting you can have two very different pictures of someone at the podium if one picture is focused on the speaker and another picture is focused on all of the microphones that the presenter is speaking into. One picture shows who was talking and the other picture shows how many people (news outlets) were there to cover the event. Each picture has its own meaning and that is derived from the focal point.

    ANTICIPATE

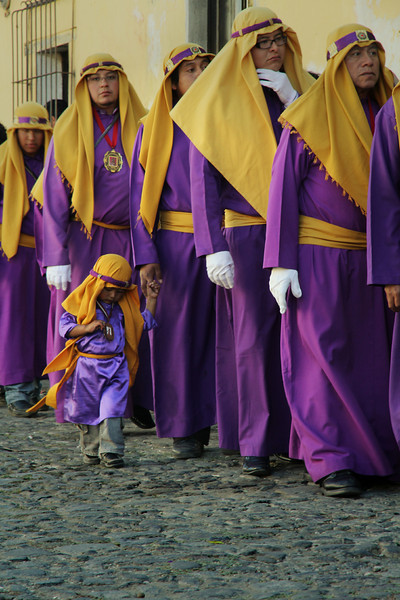
    I make a lot of sports analogies when talking about documentary photography because, in many regards, photojournalism and documentary photography is a sport. Just as a quarterback has to read the defence as he stands behind the centre, a documentary photographer has to have his eyes and attention in several places at once. By keeping a constant vigil on your surroundings you will see a picture developing in the same way a quarterback sees a play developing. The great ones always seem to be a few seconds ahead of the action.

    Semana Santa

    BE PROFESSIONAL

    A professional attitude will help to guarantee two things. One, it will help to ensure that those around you understand that you have a job to do and they will permit you to do your job as long as you maintain a professional demeanour. The other thing a professional attitude will bring to you is another assignment. If word gets back to your editor that you were forcing people to behave in a certain way or that you interfered with the event to get a shot, you may not get another chance to work for that editor again because you have embarrassed them (and yourself) in your attempts to get a great picture.

    BACK UP YOUR WORK

    Once you get back home or to the office, back up your pictures. It doesn’t matter if you put them on a second hard drive, upload them to the cloud or put them on a disk. Make sure that you have copies of your pictures in more than one place in the event that the originals become damaged, destroyed or lost.

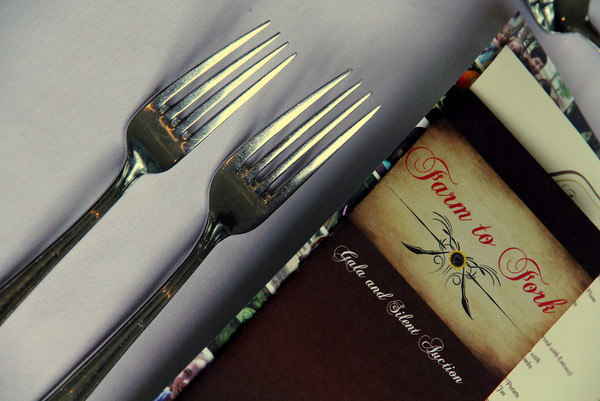
    Farm to Fork

    CAPTION YOUR PHOTOS

    Your job as an assignment photographer doesn’t end when you back up your pictures. More times than not you will be asked to caption your photos. Your assignment editor will have no idea of the names of the people in your pictures. It will be up to you to write a brief description for each picture you are turning in. An easy way to do this is to answer the questions, who, what, when, where and why when making captions. “How” may not always be relevant.

    DON’T OVER EDIT YOUR PICTURES

    If you are asked to turn in edited pictures, don’t over-edit your work. Photojournalism and documentary photography are about the real world. In a strict sense you should only adjust the contrast of your picture. Some news outlets shun adding too much color and all news outlets shun the removal or addition of elements into a picture.

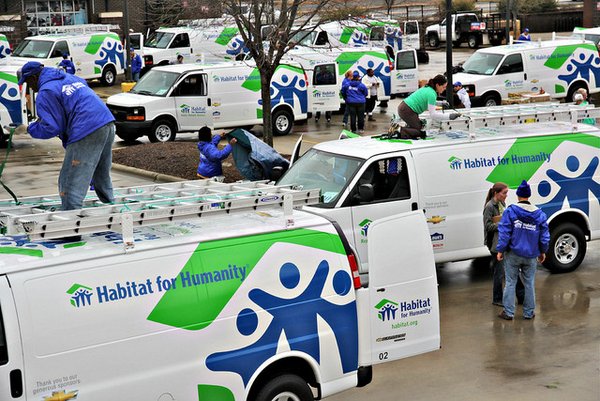
    Habitat Vans

    BE EASY TO WORK WITH

    Being easy to work with is incredibly important in today’s freelance assignment photography landscape. It is becoming easier and easier to take quality pictures with less than professional equipment. Photographers are becoming very replaceable as there are more and more people with photo skills itching to get a little credit and maybe even a little money. Make sure you have an easy payment process. Make sure it is easy to get in touch with you, and that you respond quickly to emails and phone calls. Make sure you are open to your editor’s suggestions and that you are willing to go the extra mile to make them happy. Make it a no-brainer for them to rehire you because there are more photographers behind you just waiting for their chance.

    This is a great time to get your foot in the door as a freelance assignment photographer. It’s not easy work and it’s not always sexy. But with hard work, a good eye, a professional attitude and determination you can find yourself on a short list of photographers that assignment editors want to use again and again.

    The post Getting Your Foot in the Door as a Freelance Assignment Photographer by Scott Umstattd appeared first on Digital Photography School.


    Digital Photography School