Category: Photography

  • Why Aperture Priority Mode Isn’t Always the Best Choice

    There are a lot of common mistakes to make in photography, but possibly the most frequent is to shoot in Aperture Priority mode when it’s not the best choice.

    There are many situations where shooting in Aperture Priority is ideal, such as when you are using a tripod and your shutter speed does not matter, when you are in strong sunlight, when you are shooting a scene with a wide-angle lens and nothing is moving, or when you want a very shallow depth of field for aesthetic purposes.

    However, in most other situations it is beneficial to shoot in Shutter Priority mode (or manual mode).

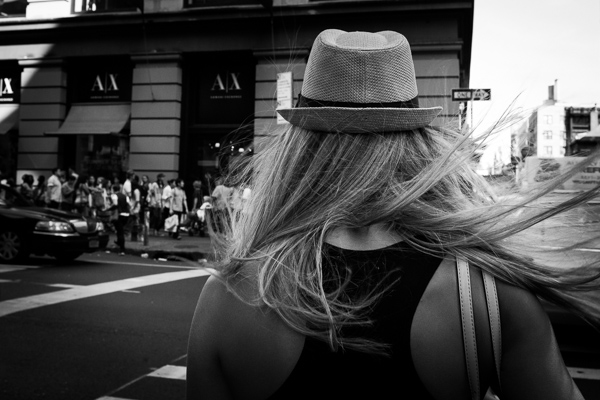
    Lamborghini, SoHo

    Lamborghini, SoHo – Shutter Speed priority can be much more effective for Street Photography, where spontaneous shots occur frequently, and freezing motion is very important.

    I see this problem most often when people are traveling. They will stick their camera on Aperture Priority for the entire day, forgetting that the light sometimes will not be strong enough to yield a shutter speed fast enough to offset camera shake or to freeze moving subjects, particularly if their lens aperture does not go below f/4 or f/3.5.

    The result is that they will come home and many of their images will be blurry, when they didn’t have to be.

    Your shutter speed is the first line of defense for creating a sharp image. The rule of thumb is that the shutter speed should be at least one over the focal length of the lens to offset handheld camera shake. I like to add a little extra speed to that to be safe, so if you are shooting at 50mm on a full frame camera, I would keep the shutter speed at least at 1/80th. On a cropped sensor however, such as an APS-C camera, a 50mm might be the equivalent of an 80mm view, so I would shoot at least at 1/100th of a second.

    You can see, especially if you are using a telephoto focal length, how quickly and easily your shutter speed can go below this threshold when on Aperture Priority and not in strong, direct light.

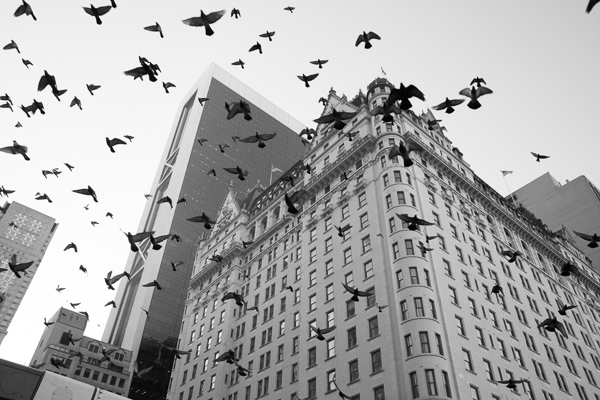
    Plaza Hotel

    The Birds and Plaza Hotel. A spontaneous shot on Shutter Priority at 1/500th and ISO 800.  On Aperture Priority there is a much stronger chance that I would have yielded too slow of a shutter speed, especially since it was overcast and late in the day.

    When there are moving subjects in a scene such as people, 1/320th or 1/250th is often a good shutter speed to freeze their motion. So when traveling, I use 1/320th as my baseline shutter speed and will lower it for the situations where there is no motion or when the light is extremely low. This guarantees that no matter what I capture, it will be sharp, including the spontaneous moments. Often, because I shoot this way and prefer to also shoot with an aperture of f/8 or above, I will raise the ISO to 800, 1600, or even 3200 in areas with very low light. This will add more grain/noise to the image, but especially on the newer digital cameras you will quickly notice that the technical quality and sharpness of your images will actually be improved, despite this grain.

    Now you might be saying that you are able to shoot in Aperture Priority mode (or Manual mode) all of the time and can pay attention to the corresponding shutter speeds so you never have a problem. That’s great, and in that case, please keep shooting in Aperture Priority. I do not want to stop you from shooting in a way that works well for you. If you know your camera settings well then you can effectively shoot in any situation with any of these modes.

    However, I teach a good amount of students and I would guess that about 80 percent of them come in shooting in Aperture Priority. Then, when I look at their photos, for a good portion of these students, way too many of their photos turn out blurry, or have some sharpness issues. They will pay attention to their aperture but then zoom for a shot and not notice that the shutter speed is lower than their focal length, or not notice that is too low to freeze the motion of a subject. I find that switching them over to Shutter Priority for these situations puts the shutter speed in their mind first and then they can pay attention to the corresponding aperture to achieve the largest depth of field possible (if you are purposely looking to create a shot with a shallow depth of field, then Aperture Priority would be ideal.)

    Particularly for travel photography in cities or in areas with people, often when I explain to students to try photographing around 1/320th of a second and a higher ISO, they quickly remark about how much sharper their photos become.

    Give it a try and see if yours do too.

    The post Why Aperture Priority Mode Isn’t Always the Best Choice by James Maher appeared first on Digital Photography School.


    Digital Photography School

  • 5 Photoshop Tools to Take Your Images from Good to Great

    Seascape image - Before and After image editing

    Seascape image – Before and After image editing

    We hear it all the time, “That photo has been Photoshopped”. Sometimes it sounds like the photo has caught a disease or that Photoshop is some undesirable effect that has been added to the image. Photoshop is the KEY to making your good images look spectacular. Yes, I said “good” images. Photoshop is not about fixing mistakes or trying to rescue a bad shot. It is more about refining your images and making them look amazing without overdoing it. Photoshop is a fantastic tool when it is used effectively but can be your enemy when you overdo it. Depending on what you want to achieve with your photos, this quick guide to five Photoshop tools will help you adjust your exposure effectively and make the colour really pop out of your image.

    NOTE: the examples in this article simply show you how to make the adjustments on a separate layer. You could also use an adjustment layer which gives you much more control over the adjustment. The only tool that can’t be used with an adjustment layer is Shadow and Highlights. I will go into more details about adjustment layers in upcoming articles, for now, if you follow these guidelines, your images will look compelling and rich without looking overdone.

    1. Shadow and Highlights Tool

    This tool will be used to get more detail in the shadow areas of your image. Modern cameras can capture lots of detail, but depending on the light in the scene you are shooting, the shadows may be a little dark. The Shadow and Highlights tool will bring back some of the details in those areas.

    Open your image in Photoshop and go to:  IMAGE > ADJUSTMENTS > SHADOW AND HIGHLIGHTS.

    Finding the Shadow and Highlights tool

    Finding the Shadow and Highlights tool

    The tool will pop up and you will see this (as shown below), if you don’t see all these sliders, click “more options” to expand the box. You will use this tool to bring detail back into the shadows and you won’t be making any adjustments to the highlights. I find that the highlights part of this tool does not do a really good job, so I don’t use it at all.

    Making adjustments to the Shadows in the image

    Making adjustments to the Shadows in the image

    The best way to work with the tool is to slide the Amount slider under the Shadows box to about one third across (33%). Then slide the Tonal Width slider to directly under the Amount slider. Lastly  bring the radius slider to directly under it. In most cases, you will want to have these sliders directly under each other (see screenshot below right).

    shadows-highlightsThe important thing to remember here is to make the adjustments and take careful note of your image has been affected. Click on the preview button on the right hand side of the tool (you can do this with all the tools in this article) to see the “before and after”. You will be able to see at a glance how your changes are working. If you need to extract more detail from the shadows then slide the Amount slider to the right even more but make sure you line the other two sliders underneath it.

    The amount that you decide to adjust the shadows is up to you. Be careful not to overdo it. Once you start seeing a “glow” around certain parts of your image, you may have gone too far. This glow is often referred to as a halo which can be avoided by watching carefully how your adjustments are affecting your image. If you see them appearing, simply drag the sliders back to the left until they disappear. Once you are happy, click OK.

    2. Levels Tool

    With your image open and the shadows adjusted, you will now adjust the overall exposure in the scene. If your image is a little over or under exposed, the levels tool can fix that. Go to: IMAGE > ADJUSTMENTS > LEVELS on the menu bar (or using the keyboard shortcut Command/Control+L). You will see the LEVELS dialogue box pop up and it will have a graph in it. This graph is called a histogram.

    histogram

    A histogram is simply a graphical representation of the pixels in the scene. If the graph is pushed over to the left side it means that your image has more darker tones in it, if the graph is over on the right side it means that your image has more brighter tones. There is no right or wrong histogram, it is simply a representation of the light in your scene. There are some great articles about histograms on the dPS site, so if you want to learn more about them, click on one of the links above.

    Using the Levels tool to enhance the exposure and boost contrast

    Using the Levels tool to enhance the exposure and boost contrast

    The important thing to remember when working with levels is to make sure you don’t adjust your image so much that it causes the image to become under or over exposed. Thankfully, Photoshop gave us a way to see if that is happening, which I will explain shortly. Firstly, you will notice there are three sliders on the bottom of the histogram. The slider on the right is white (adjusts highlights) the slider in the middle is grey (adjusts mid tones) and the slider on the left is black (adjusts shadows). The levels tools will help adjust contrast and colour in your image. You can start the process by clicking and dragging the white slider in (move it to the left) to touch the edge of the histogram. Do the same for the black slider (drag it to the right). Your image will already look better.

    Using the ALT key to see where the highlights are being overexposed

    Using the ALT key to see where the highlights are being overexposed

    Then you can move the middle slider to the right or the left to see which works better. Small changes always work best, so don’t make extreme changes on each slider. If you want to see how your adjustments are affecting your image, hold down the ALT key (PC) or OPTION key (Mac) while you click on the white or black slider. When you click ALT and hold down the white slider, the image will go black. As you slide to the left, you will see some red areas in your image (see above). When you see this, Photoshop is showing you which parts of the image will be overexposed, or clipped. The opposite is true for the the black slider. If you hold down ALT and click on the black slider, the screen will go white and as you slide to the right, the areas that come up on the screen will be underexposed, or clipped. It is a good idea to use this function if you are not sure if you have overdone your adjustments in Levels.

    3. Colour Balance

    This is a good tool to use to change the overall colour in the image. If your image is too blue and want you want it to be warmer, then you can do that by pulling up the red tones. Also, if your image has an undesirable colour cast, maybe the overall colour of the scene seems too green, then you can correct that by using this tool. The colour balance tool is found in the top menu bar under IMAGE > ADJUSTMENTS > COLOUR BALANCE (or using the keyboard shortcut Command/Control+B).

    color-balance

    Once the dialogue box is open, you will see three sliders (as above). The sliders represent the visual colours in the image, and are set in the middle by default. By moving them to the left or the right you will be able to change the colour in the image. The top slider affects Cyan/Red, the middle slider works on Magenta/Green and the bottom slider is Yellow/Blue. The colour will change according to which slider you choose and how far left or right you move it.

    Note: you can also choose which area of your image to affect as in the Shadows, Midtones or Highlights but selecting the appropriate button in the Tone Balance section below the sliders.

    You will want make small adjustments here too. A big adjustment can make your image look over saturated with a particular colour and that will look unnatural. The idea is to enhance your image by boosting certain colours in the scene. So, if you have a sunset image (as below) you may want to boost the reds, yellows and magentas. That will make your image look warm and will give the scene some colour boost.

    Using Colour Balance to boost the colours in the image

    Using Colour Balance to boost the colours in the image

    4. Hue and Saturation

    One of the most powerful colour tools in Photoshop is the Hue and Saturation tool. To open it go to: IMAGE > ADJUSTMENTS > HUE/SATURATION (or using the keyboard shortcut Command/Control+U). This tool can be used very effectively to adjust all the colours in your image. When you open the tool, you will notice that there are three sliders again, namely Hue, Saturation and Lightness.

    hue-saturation

    Hue means colour, this is not used very often as it will reassign the colours in your image, what you want to use this tool for is saturation. Saturation controls the richness or intensity of the colours in your image. Above the three sliders you will see a drop down box called Master. If you click on this, you can choose the colours that you want to saturate. This gives you very fine control over each colour in your image. You can select each colour individually and adjust it according to your preference. You may want to saturate the reds and yellows more than the blues, as an example, this tool allows you to do that. It is good to know that you are not adding colour to your image, you are saturating the colours that are there. Again, incremental adjustments are key. Don’t overdo it, small adjustments throughout this process will make your image look more natural and more dramatic

    Getting the most out of the Hue and Saturation tool by saturating colours by channel

    Getting the most out of the Hue and Saturation tool by saturating colours by channel

    5. Vibrance

    vibranceThe vibrance tool is found under IMAGE  > ADJUSTMENTS > VIBRANCE (no shortcut). It effectively saturates colours that are not completely saturated. This is a good finishing touch to your image editing to make sure your image gets a final boost. There is no real guideline as to how much you should adjust on this tool, but be aware of how it is affecting your image. Once this step is complete, your image should look remarkably different and if done correctly, the viewers won’t be saying those dreaded “Photoshopped” words.

    The final step, boosting the vibrance to get that extra pop in the image

    The final step, boosting the vibrance to get that extra pop in the image

    In Conclusion

    These five tools will help you make your good images spectacular. The important thing to remember in Photoshop is to make adjustments incrementally. As you can see from this process you slowly and incrementally make changes but the overall effect is dramatic without looking overdone. There are many other tools in Photoshop that can add even more enhancement to your images (I will be doing articles on those over the next few months) but start with these and get comfortable with how they work. To summarize, in Photoshop, slower is better and many small adjustments make a more dramatic impact on your image than a few large adjustments. Enjoy and experiment and as always, let me know what you think in the comments below.

    The post 5 Photoshop Tools to Take Your Images from Good to Great by Barry J Brady appeared first on Digital Photography School.


    Digital Photography School

  • 5 Disastrous Mistakes to Avoid When Starting a Photography Business

    While starting a photography business, people don’t always understand how to turn their hobby into a full-time job properly. Most newbie photographers make the same mistakes when starting out that they wish to go back and change. Knowing about these mistakes in advance could help you to avoid them. As they say, “wise men learn by other men’s mistakes; fools Continue Reading

    The post 5 Disastrous Mistakes to Avoid When Starting a Photography Business appeared first on Photodoto.


    Photodoto

  • eMotimo TB3 Review – Robotic Tripod Head and Time-lapse Movie

    I’d forgotten all about my childhood dreams of achieving world domination using my very own robot army until I switched on the TB3 from eMotimo. As soon as I synched up the wireless remote and started panning and tilting this robotic tripod head, I was transformed into a grinning 8 year old boy who believed he could do anything.

    I expect that the eMotimo exhibit at trade shows is usually ringed by a troupe of grinning time-lapse photography nerds like myself, who just realized they stumbled upon a truly legendary tool for photographic creativity.

    My example footage

    The short time-lapse movie above was made entirely using the TB3 with my Sony A7R Camera mounted on the Rhino Slider Pro 4ft. What started out as a couple of quick test shots turned into a fully fledged trailer when I realized what I could achieve with the TB3. Once I stuck it on a slider, things got awesome real quick.

    What does the TB3 do?

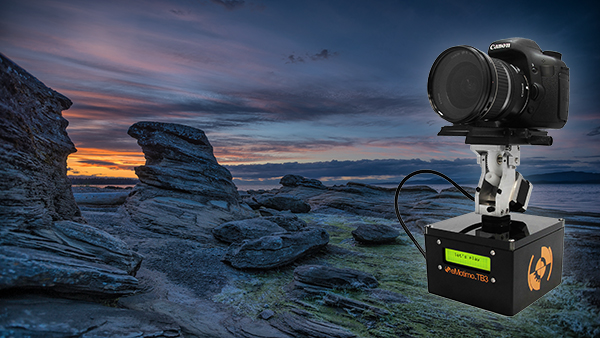
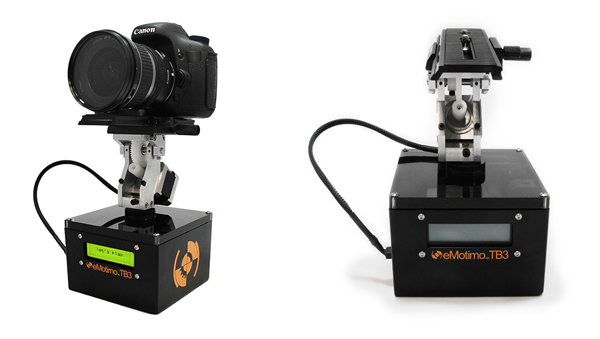
    Emotimo TB3 Review

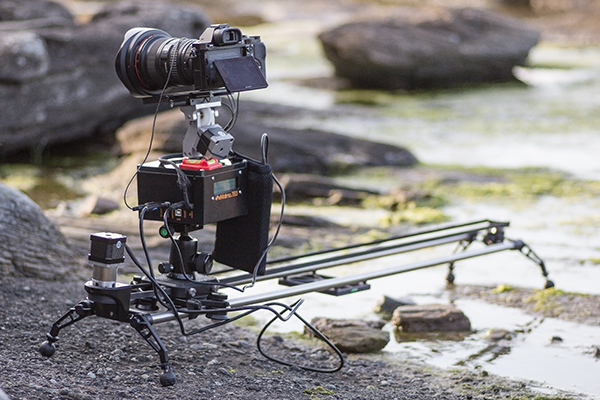
    Pictured on the left with a Canon DSLR

    For those of you who have no idea what’s so great about a device like this, let me throw the term ‘Motion Control’ at you. If you want to shoot videos or time-lapse movies that offer the viewer a more captivating perspective than just a plain old dolly/slider shot, you’ll be wanting one of these TB3′s.

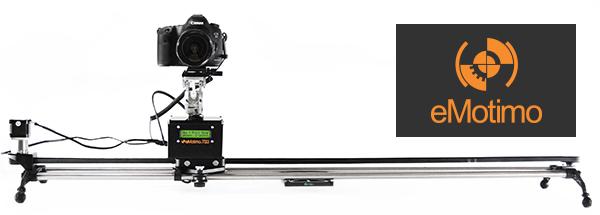
    The TB3 from eMotimo allows you to add high production values to your footage by moving your camera along two axes while shooting. It can pan AND tilt all at the same time. Combine this device with a slider and you’ve got yourself a powerful three axis rig for making fascinating cinematography and time-lapse photography. Your footage will appear to have been shot with a camera that magically floats through the air.

    Motion Control Timelapse- TB3 Review

    The TB3 shown here with a Canon DSLR and a Rhino Slider Pro 4FT.

    Create multi-gigapixel panoramic photos

    It’s not just about time-lapse and video. The TB3 also allows you to take multi-gigapixel images such as panoramas. For landscape shooters who want wall-filling image resolution, this feature is a major bonus. When you add in the awesome time-lapse and video shooting capabilities, you’re getting a lot of functionality for just under a $ 1000 USD.

    Programming interface

    Programming the movement of the TB3 requires a small learning curve. The interface is a very basic LCD screen with abbreviated titles and you navigate through this by using the included remote control joystick. It takes a while to get used to but if you’ve ever used a video game joystick you’re already half way there.

    Emotimo TB3

    Two-point or three-point movement and reverse moves

    You can decide how many points of location your film sequence will have. If you want a simple A to B movement you select a two-point move. You tell the TB3 where you’d like to start and where you’d like to end, and the TB3 fills in the blanks.

    With a three-point move you can get more creative by adding a less obvious direction to your movement. You could even program the TB3 to go into reverse after you’ve reached point two, or point the camera in the opposite direction, whatever you like. This is great for taking your audience on an unpredictable ride through your scene.

    ‘Reverse’ moves come in really useful when you’re using a slider and need to save valuable battery life by cutting out the ‘return to start’ move that the TB3 has to do once you’ve programmed in your move. You basically work backwards and tell the TB3 to start shooting from your last position. This is essential when doing vertical ‘jib’ shots on a slider which sucks a LOT of battery power.

    The TB3 by eMotimo

    At the beach shooting a Timelapse sunset with the TB3 from eMotimo on a Rhino Slider.

    Ramp

    When I first saw the word ‘Ramp’ in the interface I thought it referred to Bulb ramping or ‘Bramping’ for time-lapse, but it actually refers to the degree of acceleration used when the TB3 moves to its start and end points. This is a really cool feature as it gives your camera motion a very smooth, but dynamic movement, as the TB3 gradually speeds up and then slows down to its end point. Most of the scenes in my video feature a ramp setting of 70.

    Lead in-out

    Another great feature of the TB3 is that you can specify a static ‘no movement’ period to either end of your shooting sequence. This is great if your sequence ends and you then fade up some titles in your video but want to keep the movie playing in the background.

    Emotimo TB3 shooting a timelapse

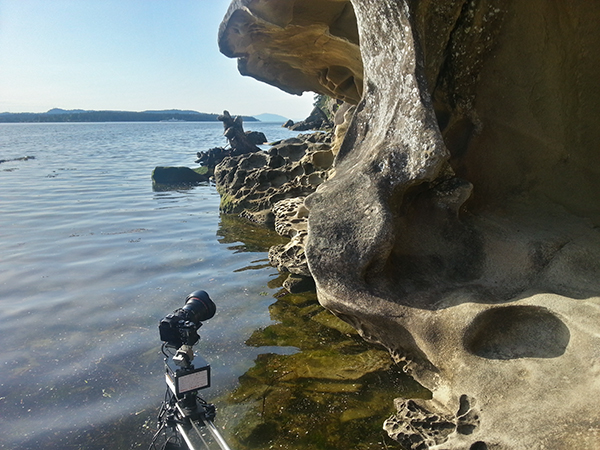
    Smartphone shot. The TB3 almost going for a swim while shooting a time-lapse at Jack Point, Nanaimo (Canada).

    Build quality

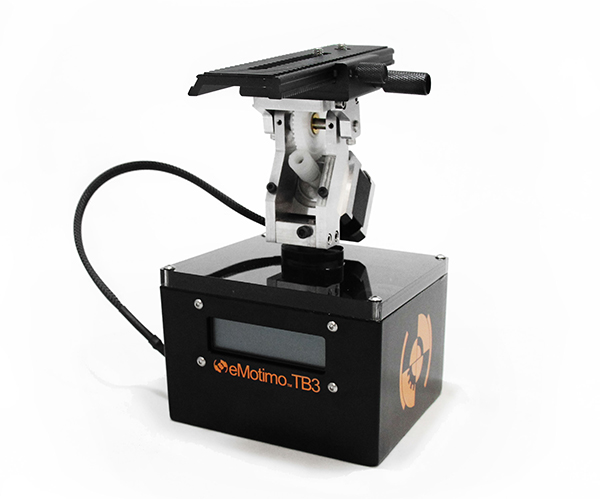
    This is a sturdy unit. It kind of looks like something you’d expect to find under the skin of a young Arnold Schwarzzeneger during his debut as the world’s favourite cybernetic assassin. It’s built for functionality, not looks, and I expect it will appeal to the gadget geek in all of us due to its no nonsense appearance.

    As well built as the TB3 is, I wouldn’t want to drop it. There are lots of exposed moving parts so it’s best to handle it with the care and attention it deserves. Encasing it in rubber would perhaps give it more protection but would add more weight. The interface cable that connects the moving parts to the brain of the unit could be more rugged as it’s already started to fray after light use.

    Rugged Build Quality on the TB3

    Smartphone shot. Semi-vertical jib style shots like this require more battery power so the TB3′s reverse 2-point move helped save me a little battery life.

    Weight and size

    Lets face it, if you’re doing serious time-lapse movies or cinematography, you long ago accepted that you’d be lugging heavy gear around. The TB3 isn’t that heavy in itself but it’s yet another bag to carry along with your camera bag, tripod(s) and slider. For what this gadget does, I think they’ve packed a lot of tech into a relatively small device but I can’t wait to see a ‘Sonyfied’ future version that won’t add to my chiropractor bills. Till then, just deal with it.

    Battery pack required

    Yet another essential accessory for the time-lapse and video shooters – the external battery pack. eMotimo were kind enough to lend me the ‘Anker Astro Pro’ battery pack which powers the TB3 and many other devices such as your phone and camera. Although this adds yet more weight to carry, it’s great to know that when my Sony A7R battery inevitably lets me down (which it does daily), the battery pack will allow me to recharge in the field.

    Shooting a timelapse with the Emotimo TB3

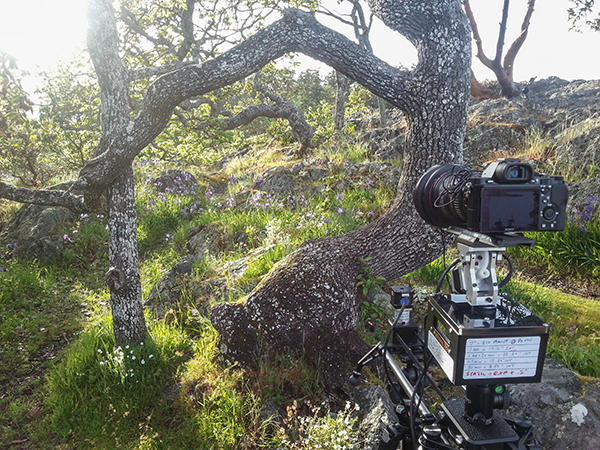
    Smartphone shot. You can see I’ve written down all my interval settings for the 7 second sequences featured in my film.

    Compatibility

    The TB3 is compatible with most major camera systems but as you’d expect, the best compatibility is reserved for the two major giants Canon and Nikon. I’m a Sony shooter so this posed somewhat of a problem for my plans to shoot the time-lapse movie shown above. eMotimo managed to get around this problem by providing a simple IR (infrared) transmitter cable that I taped to the IR receiver port on my Sony A7R. Not as slick as the Canon/Nikon cabled version but it did the job. I’d like to see a wired solution from eMotimo pretty soon though as it looks like Sony is starting to gain traction with their new range of cameras.

    For time-lapse shooters that use advanced bulb ramping devices like the ‘Promote Control’, you’ll be glad to know that this can be integrated with the TB3. eMotimo also provides motor accessories for various popular sliders so you have some different options for the 3-axis motion control shown in my example video.

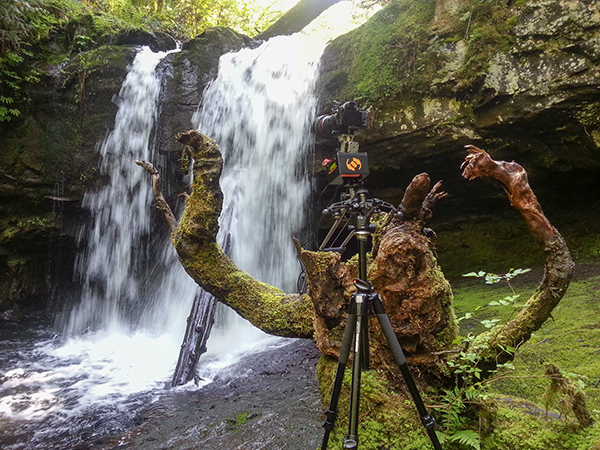
    Waterfall timelapse with the TB3

    Smartphone shot. My favourite angry tree stump gets the time-lapse treatment with the TB3 carefully balanced on the stump.

    Things I love about the TB3

    • Super smooth motion – this really is the most important part of any motion control device. It may not look like it in my video, but before the dreadful internet compression butchered my film, I can assure that the footage is buttery smooth. Not all motion control devices are made equal and eMotimo have totally nailed this most essential aspect.
    • Rugged, no-nonsense construction. I filmed time-lapse sequences in all kinds of weather, even heavy rain. The TB3 handled it all with indifference.
    • The cool little sound effects that it makes while you pan/tilt the head using the joystick.
    • Tech support – eMotimo is a small company in San Francisco with a very hands-on approach. All of my foolish newbie questions were answered with patience and resolved quickly.
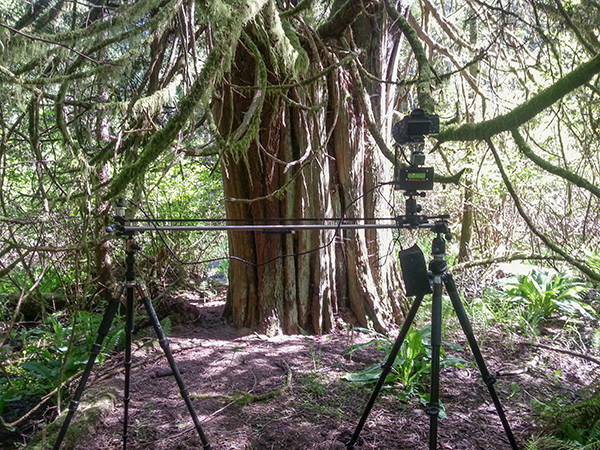
    Forest timelapse movie

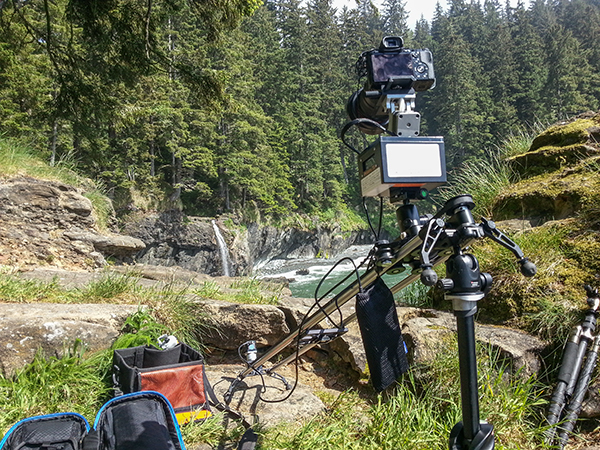
    Smartphone shot. I found that hanging the battery pack off the slider caddy gave the best results.

    Things I don’t love about the TB3

    • The carry case seemed like an afterthought. It doesn’t fit very well and I was forever worried about accessories falling out. I’d rather buy a larger all-purpose camera bag and put the TB3 in that.
    • The programming procedure could be more accommodating. The TB3 has a cool ‘repeat/reverse’ function that you can set off immediately after your time-lapse sequence is finished. Sadly, I couldn’t figure out a way to edit the settings, which is essential after the sun has gone down and the light has changed. Maybe a firmware update could fix this?
    • The ‘Fotomate’ mounting plate onto which you attach your camera was a little fiddly.

    Emotimo TB3 Review

    Would I buy the TB3?

    Absolutely. The TB3 has enjoyed something of a cult following among the rockstar time-lapse and DLSR video shooters. It’s not just because eMotimo were there during the early years of the time lapse video phenomenon, it’s because they make a very versatile and rock solid product. When you factor in the sub $ 1,000 price point and the awesome tech support, I really don’t see any other contenders.

    My star rating

    Our rating system doesn’t allow for a 4.9 so I’m forced to give the TB3 5 stars. I could have given it 4.5 stars but that just wouldn’t be enough. If eMotimo can fix my two main gripes of having a better carry case and some form of improvement on the Fotomate mounting plate, the TB3 would be perfect and fully deserving of 5 glorious shining gold stars.

    Want some time-lapse tips? Try these:

    • Timelapse Photography Tutorial: An Overview of Shooting, Processing and Rendering Timelapse Movies
    • Capturing the Northern Lights in Timelapse Video
    • Discover the Wonder of Time-Lapse Photography

    The post eMotimo TB3 Review – Robotic Tripod Head and Time-lapse Movie by Gavin Hardcastle appeared first on Digital Photography School.


    Digital Photography School
  • Double Exposure Portraits by John Williams

    At April and John’s Wedding at Consall Hall we tried something a little different from our usual bride and groom portraits and combined two photos in Photoshop to create a cool double exposure portrait effect. Here is a brief tutorial explaining the technique behind the effect. First of all, you need to choose your starting […]

    The post Double Exposure Portraits by John Williams appeared first on dslrBlog.

    dslrBlog

  • 5 Hot Tips For Improving Your Summer Photography

    TopImage

    We aren’t going to talk about cleaning your lenses (although you should), I’m not going to tell you to use a tripod (you should know that), and I’m definitely not going to tell you to compare last year’s photography to this year’s (but that’s not a bad idea). No, I’m going to suggest you get out of your comfort zone and do something new.

    If you open up your Flickr, 500px, or wherever you store your thousands of kitty cat photographs you might notice that there may be a lot of similar shots. Different subjects, but a similar style perhaps? Different styles, but the same type of subjects? Most of us have done it, it sounds like this: “I only do portraits”, “I only shoot landscapes”, or “I never use a flash”.

    So, in an attempt to bust out of your comfort zones I’m going to share 5 tips with you to use this summer that have helped me overcome my own creative plateaus over the years.

    Interesting fact: 77% of all photographers have at least one cat photograph in their portfolio. Another interesting fact: I have no idea if that is true, but there is a 50% chance that it is.

    Five tips for improving your summer photography

    Tip 1 – Same Place, Different Time

    It’s time to master light, your photography will improve leaps and bounds with the mastering of one specific element – timing. Mastering the light means many different things in the art of photography; mastering your manual settings, mastering the flash, or mastering your timing. All of these things impact one another but the one that I want to focus on is timing. Besides, they say timing is everything.

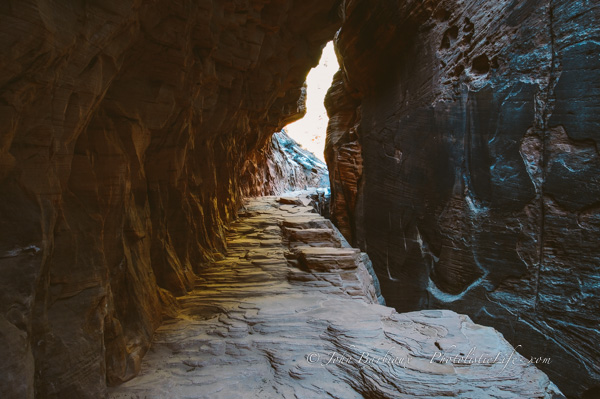
    ZionTrail

    Knowing when and where the light will be gives you a huge advantage over other photographers. Knowing that at around 2:30 p.m. the sun will be at an angle that paints light into the pathway is priceless if you are visiting this place and may not return in the future.

    Knowing where the sun sets, where the sun rises, and how the light will illuminate various subjects during different times of the day will help you master your timing. The sun rises in the east and sets in the west, if you know which direction you are facing when the sun is directly above you you’ll have a better idea what time of the day to photograph any interesting subjects or scenes you may find.

    There are apps and websites all over the Google machine that can assist you when you are traveling to new and exotic places. There is a program you can download onto your phone, computer, watch (not yet but maybe someday) called The Photographer’s Ephemeris that allows you to input a location and figure out exactly where the sun will be at a given time. You can plot your position on top of a topographical map and determine what direction the sunlight will fall, and then plan accordingly.

    *Topographical maps are helpful when planning a photography trip where mountains raise up high enough to throw large shadows on areas you may be planning to photograph. The topographical map gives you the height and depth of the contours of the landscape of your location.

    Tip 2 – Be Specific, Don’t Spray And Pray

    Do you need a fresh 16GB SD card every time you take a photo walk? Maybe you take 100 photographs in the hopes that one ends up being acceptable. Before you take a photograph ask yourself if it’s really that interesting. Is it throwing a unique shadow? Does the light hit it in a way that will catch viewers eyes? Will it cause viewers to ask a question (other than “Why would you photograph that?”)?

    Taking a great photograph doesn’t generally happen by accident. Ansel Adams once said a great photograph is one that fully expresses what one feels, in the deepest sense, about what is being photographed. How many of the thousands of photographs squirrelled away on your hard drive were taken with the type of forethought Ansel Adams described?

    This summer, challenge yourself to contemplate each shot, think about whether or not the subject is interesting enough to take the time to photograph. What you will find is that if you take the time to contemplate a shot before you press the shutter you’ll have less overall shots but more “keepers”.

    Tip 3 – Use A Different Focal Length

    Get out of your comfort zone and force yourself to use a different focal length this summer. If you don’t have multiple lenses then use a different focal length on your zoom lens. By using a different focal length you’re forcing yourself to think before you shoot. You’re forcing yourself to compose the image in your mind before ever putting the viewfinder up to your little peepers.

    Renowned photographer Henri Cartier-Bresson used a 50mm lens almost exclusively when he wasn’t on assignment. By using the 50mm lens so frequently he was able to see, and compose, an image without putting the camera up to his eye. If you focus on a single focal length long enough you’ll learn what will be in or out of the frame without having to take the shot.

    Tip 4 – Roam Free Like Buffalo. You know, before we shot them all.

    Get off the beaten path. Literally, get off of the trails, paths, and otherwise marked walking areas to find hidden gems buried in hard to reach places. The summer’s dry weather creates safer hiking conditions as well as the longer days which allow you to venture further off the beaten path without worry of being eaten by wolves in the dark.

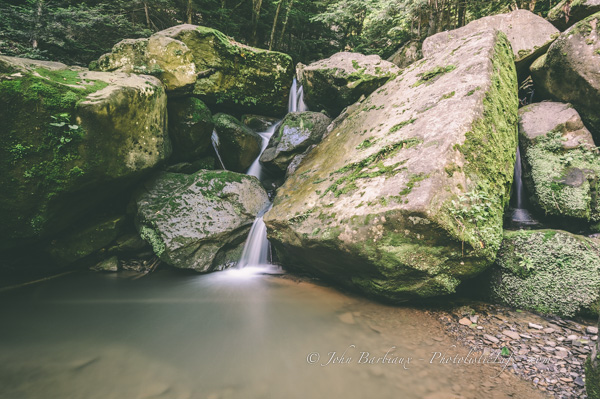
    OffThePath

    This shot was taken with the Nikon 16-35mm at 19mm, ISO 100, f/10, 15 seconds.

    There are a couple of ways to find hidden gems around where you live, searching the internet is the easiest. Flickr is a great resource, you can search the name of your home town and once you find an interesting area you can check the photographs info for a location (assuming the photographer included it). The other way is to grab a hand held GPS (or your phone) and venture off into areas you have not explored before, like Indiana Jones minus the whip and man-purse.

    Tip 5 – Photograph In Bad Weather

    Bad weather can be a bummer, moods get bent and plans are spoiled. Most people pack up their gear and head home (or don’t go out at all) if the weather is anything but perfect. Take advantage of the warmer weather and plan a photo outing next time the weather looks foul.

    Plan to visit places that are normally bustling with people for an opportunity to capture unique shots. When bad weather strikes you’ll have an opportunity to capture people scrambling for a dry place or reflections in puddles. Alternatively, you have an opportunity to capture photographs of places that are normally busy, void of life (think empty sidewalks in the city).

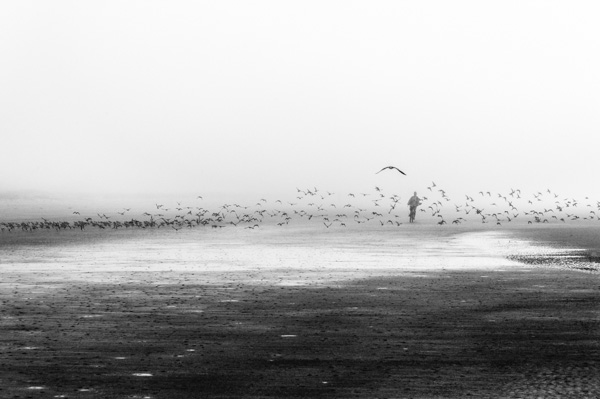
    FoggyDay

    Beaches are a great place to go right before or after a storm, the ominous clouds and rolling fog create dramatic scenes. Be sure to be prepared for rain and/or strong wind, Adorama has cheap covers for your camera that will keep the water and sand from damaging your precious gear. Try not to change lenses in sandy, windy, and wet conditions, there is a good chance that you’ll end up with debris inside your camera or lens.

    Summer photography offers hundreds, if not thousands, of opportunities to practice photography morning, noon, and night. The weather is warmer and the days are longer, there are festivals for everything almost every weekend. If you’re having trouble coming up with something to photograph check out local towns websites for their calendar of events, there is a good chance something is going on near you.

    The post 5 Hot Tips For Improving Your Summer Photography by John Barbiaux appeared first on Digital Photography School.


    Digital Photography School
  • dPS Mid Year Sale – 7 Hot Deals In 7 Days

    For some of us it’s summer time,  for most of us it’s the middle of the year, for all of us it’s time for a huge dPS sale!

    If you’ve been a Digital Photography School reader for a while, you probably already know about our huge end of year sale (don’t worry that’s still happening). But the team got talking recently and we all agreed that it seemed such a long time away.

    So it’s with excitement that I can announce we’re going to have a mid year sale – dPS style.

    See the sale page here for each deal as it goes live.

    For the next 7 days we’ll share with you a special offer on some of our own products as well as some hand picked products from our partners.  Each deal will be available for only  24 hours, so if you see something you like you might want to act quickly.

    Over the 7 days there will be a mix of eBooks and courses that have been specifically chosen to help give your Photography a mid-year boost.

    The First Deal – Save 66% on our Landscape Photography Bundle

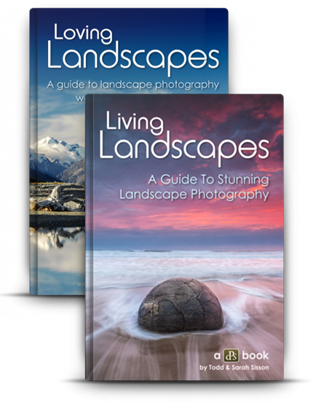
    imageWe thought we’d give our servers a good wake up call and start BIG.

    Save 66% on our two best-selling Landscape Photography eBooks.  Living Landscapes and Loving Landscapes.

    These two eBooks have been two of our best-selling eBooks of all time and for a limited time you’ll save 66% of this Landscape Photography twin pack.

    Summer is a great time to get outside and start capturing some amazing landscape photo’s of your own these two ebooks will be a huge help!

    Normally these two eBooks would cost you $ 29.99 each but today only you can pick the two of them up for just $ 19.99 USD as a bundle!

    That’s a 66% saving – but be quick, the clock is ticking.

    … and today’s deal is just the start of a great week.  There’s 6 more great deals to come and discounts up to 80%.

    To make sure you don’t miss a deal keep you can sign up below to get an email notification, or connect with us on Facebook and Twitter and we’ll share the detail with you.

    Also keep an eye on the sale page here – it has a counter to let you know how long each deal has to run.

    We look forward to having lots of fun and sharing some great deals in the dPS Mid Year Sale.

    The post dPS Mid Year Sale – 7 Hot Deals In 7 Days by Darren Rowse appeared first on Digital Photography School.


    Digital Photography School
  • Using Depth of Field and Perspective for Better Composition

    We all know this problem. You take a picture of a beautiful scene but it just doesn’t turn out the way you want. Something is missing. It usually isn’t a matter of your camera or the settings you are applying. But what is it then? The question at hand is how do you get from a snapshot to an interesting, unique, and well composed photograph.

    To answer this, we have to move away from the technical aspects and go more into the creative and artistic aspects of photography. You might say that this is a very subjective matter and that beauty is in the eye of the beholder, but there are a few building blocks that will help to improve your photography and also develop your own unique visual language.

    Depth of field for a more three-dimensional Look

    An important aspect of photography is that we want to capture a three-dimensional reality by taking a two-dimensional image. When we are out in the field, our eyes in collaboration with our brain create very complex images within split seconds. The most important factor in this context is that our eyes are constantly moving while focusing on different subjects. The focal plane is shifting with a subject in focus and everything in front or behind appearing to be blurred. This “Depth of Field” is one the most important techniques we can utilize to simulate depth and three-dimensionality.

    Begginner photography tips 06

    Utilizing depth of field to create a more three-dimensional look

    In order to play with depth of field, we need a scene with a defined foreground and a background. Whereas the background is usually a given, a lot of images lack foreground which makes an image appear flat and boring. Choosing a defined foreground will enable us to actively compose an image and become creative.

    Once you have chosen a background and a foreground you like (ideally both complementing each other), you have to find the right position for you and your camera in order to combine both for an appealing overall image. To find the right position, you should try different angles, move around, get low to the ground and don’t solely rely on your zoom. By using a large aperture (small f-stop number) and a selective focusing, we can isolate the foreground from the background by making the foreground objects sharp and the background blurry (or vice versa). This will convey a sense of depth and three-dimensionality.

    Begginner photography tips 10

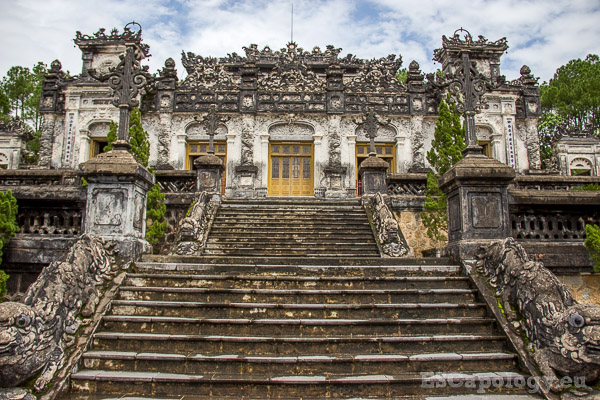
    No foreground. Lack of depth and composition.

    This image (above) of one of the ancient tombs around Hue, Vietnam looks flat. There is no depth, no three-dimensionality and it lacks a clear composition. Because a foreground is missing, the image is too busy and distracting.

    Begginner photography tips 04

    Foreground and background nicely isolated to create a sense of depth.

    Above an image of the same subject but with a much better composition. The focus is on the eye of one of the dragons, making it our foreground. The rest of the tomb is our background, slightly blurred and nicely separated. It generates a sense of depth and also appears much calmer and structured than the first image. The viewer is being led into the picture. You can use this technique when photographing very popular places like for example the Eiffel Tower, Angkor Wat or other monuments. Instead of taking the same shot as every other tourist, experiment with different backgrounds and foregrounds, get creative, move, and I am sure you will end up with an original and authentic image.

    Begginner photography tips 03

    Cambodian Fighter. Focus on the subject, still including the environment.

    You can also apply this technique to your people and portrait photography. It not only helps to really put emphasis on your subject, but also to incorporate some of the environment, which will help to tell a story. In the picture above, the focus is on the weary fighter, catching his breath during a fierce Khmer Boxing fight in Cambodia. We are at eye level with the fighter and again, the foreground is nicely separated from the rather blurry background. Yet, we can still see parts of the surrounding environment which is the ring and the crowd in the back. The focus however always remains on the main subject.

    Leading lines for a sense of perspective

    Of course depth of field is not the only means to create a sense of depth and three-dimensionality. The concept of leading lines is another one of those building blocks that you can apply. The viewer of a photograph usually associates diagonal lines which are leading into an image, to a vanishing point perspective. This means that objects which are farther away also appear smaller. This context automatically and unconsciously gives the viewer an impression of three-dimensionality.

    Begginner photography tips 02

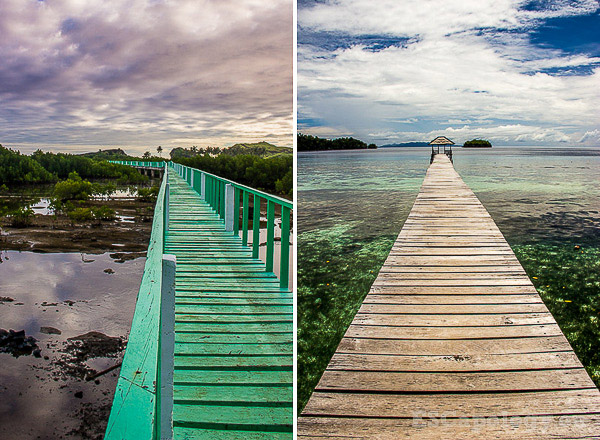
    Two images with a clear vanishing point perspective.

    As you can see in the images above, a shallow depth of field is not necessarily needed to convey that sense of depth we are looking to achieve. Here it’s all done by using a jetty as lines, which connect different layers of the picture – the image becomes much more plastic and complex.

    Begginner photography tips 01

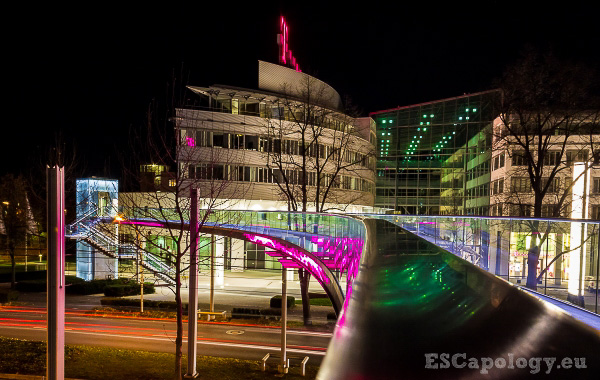
    Night Scene: The bridge leading into the picture.

    Similarly the image above becomes three-dimensional because the pedestrian bridge is leading into the image. It also appears to become smaller and smaller as it leads into the background. This way the image has that sense of depth even without applying a low depth of field. The bridge as a leading line is connecting our different layers, the foreground and the background.

    Begginner photography tips 07

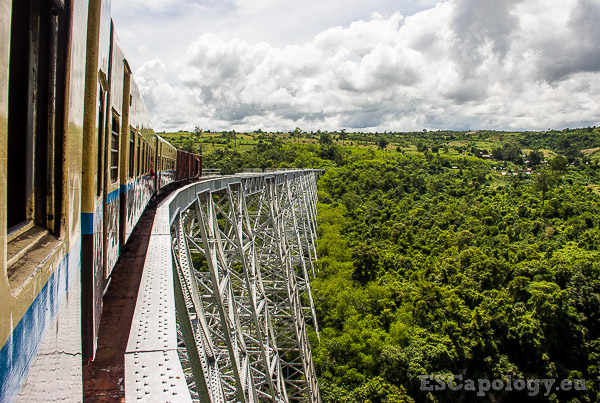
    The bridge and the train convey a sense of depth.

    Providing a relationship in size

    When regarding a picture, the viewer often needs a reference point in order to correctly interpret the information our two-dimensional images provide. We can do this by establishing proportions and providing a relationship in size. Often this isn’t needed as we know a lot of the subjects we are capturing. In the image above we were dealing with familiar objects like a pedestrian bridge, a street and a commercial building. It was easy to put everything into context. But a lot of times, when we are confronted with unfamiliar things, this isn’t as easy.

    Begginner photography tips 09

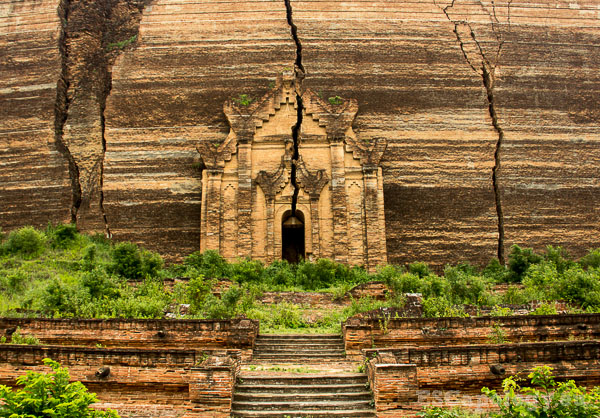
    Mingun Pahtodawgyi in Mingun, Myanmar. Can you tell how big it actually is?

    In the picture above is Mingun Pahtodawgyi, a temple in Mingun, Myanmar. Left unfinished, this huge construction was planned to become the world’s biggest stupa with a height of 150 meters. It is huge and impressive but the picture above somehow doesn’t manage to convey this. Just by looking at this image it is impossible to gauge the sheer size of the temple. A reference is missing.

    Begginner photography tips 08

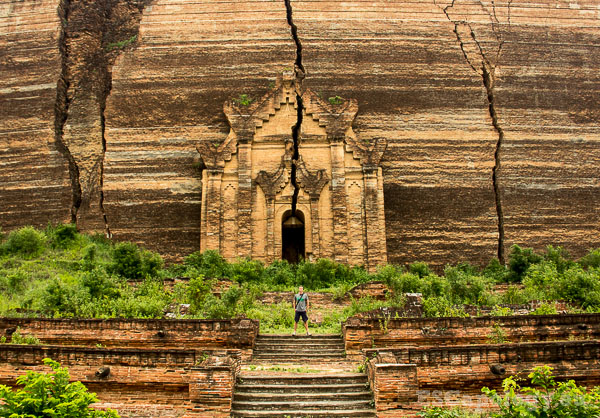
    Mingun Pahtodawgyi. Are you getting a better sense of dimension?

    Here I have added myself to the picture and despite my rather stupid pose, it instantly provides a point of reference. This relationship in size helps to categorize the stupa and establishes a sense of dimension. To achieve this effect and to provide a relationship in size, you can also use other elements which help the viewer to better comprehend an image.

    Begginner photography tips 05

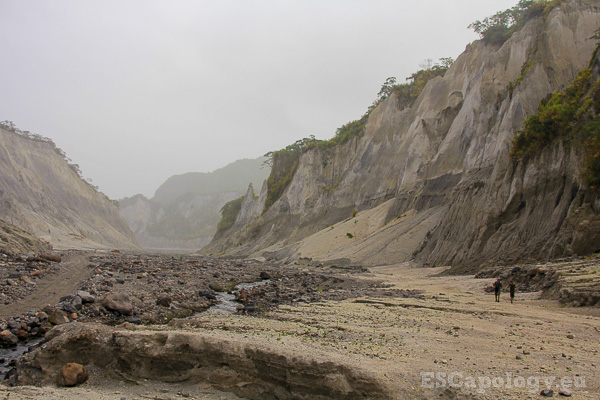
    The hike up Mt. Minatubo, Philippines. Another example of relationship in size.

    Try to practice, and utilize, these three building blocks to improve your photography. You can also try combining two of these techniques to generate an even greater sense of depth. Of course these concepts are by far not the only factors that make for a good and well composed image. There are many more things to take into account but for now, it should give you a good starting point.

    Begginner photography tips 11

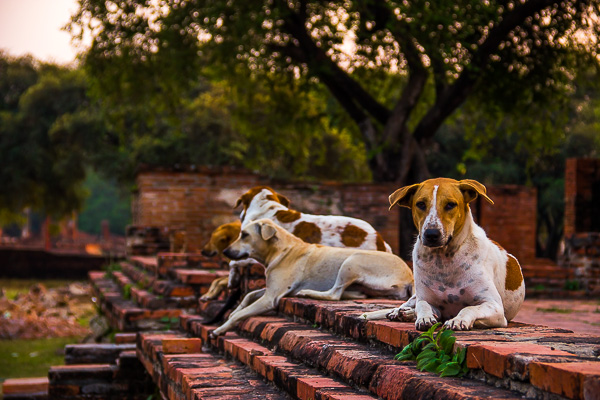
    Temple dogs – a shallow depth of field and leading lines combined.

    I hope you liked this article. Feel free to comment below and let us know what other techniques or concepts you found helpful on your quest of becoming a better photographer.

    The post Using Depth of Field and Perspective for Better Composition by Philipp Dukatz appeared first on Digital Photography School.


    Digital Photography School
  • How to Create a Sun-shower Photo on a Cloudy Day

    Flowers rain CTObackflash

    Yes, You Can Change The Weather!

    You just brought home a bunch of beautiful flowers, and you’d love to get an interesting photo of them. You take them outside, but it’s a dark, cloudy day. The light is boring, and the forecast is for several days of overcast weather. By the time the sun finally comes out, your flowers may have wilted.

    What should you do? Well, you can change the weather. Really, you can by using your off-camera flash and a simple garden hose to create a sun-shower. Thanks to Canon’s wireless flash system you can, in the words of the Temptations, have sunshine on a cloudy day.

    Here’s how to create a sun-shower photo on a cloudy day:

    Equipment used:

    • Canon EOS 70D
    • Canon 85mm f/1.8 USM lens
    • Canon 430 EX II Speedlight flash
    • Flashpoint Heavy Duty Lightstand
    • Adorama Universal Swivel Holder
    • Velbon GEO E535D Carbon Fiber Tripod
    • Expoimaging Rogue Gel Universal Lighting Filter Kit

    The idea here is to use a wireless flash to recreate the effect of direct sunlight, and adjust the light so it looks natural. Then, to simulate rain, just add water. The flash will create dynamic specular highlights as the water sprinkles through the image. The goal is to go beyond a simple “record” shot of your flowers (or whatever it is you are photographing) and load up your photograph with visually interesting elements.

    Step 1: Waterworks

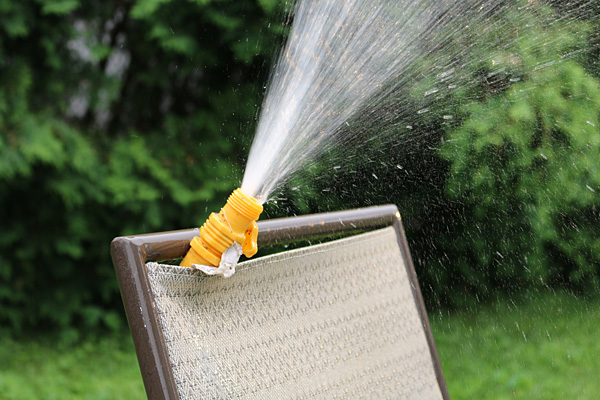
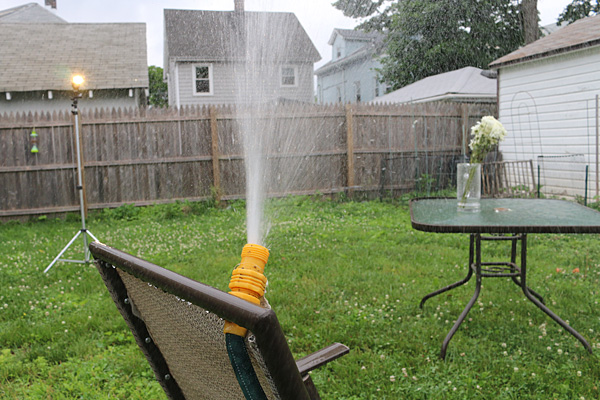
    To make this happen, you’ll need a garden hose and sprinkler, with either a nozzle at the end of the hose, or an oscillating sprinkler. If you live in a home with a yard, you most likely already have these. In this example, a hose with a built-in, controllable nozzle was available, so that’s what was used. Make sure the nozzle or sprinkler head is placed in a fixed position, either to the side of or behind the flowers, with the water hitting the flowers but not falling where the flash or camera will be placed.

    Caution: Don’t bring your camera gear out yet, it might get wet during this phase.

    Setup rainmaker

    Be prepared to improvise. In this case, a lawn chair was pressed into service as a way to hold the hose nozzle in place.

    Once you’ve adjusted your “rain,” turn off the water and bring out your photo gear.

    Choose a longer focal length lens (medium telephoto) and shoot with a wide aperture. This will help blur the background and create separation between background and foreground. An added benefit: the farther working distance between camera and subject will hopefully allow you to position the camera at a safe distance from the path of the water.

    Step 2: Composition

    Set up your camera (a tripod is highly recommended), focus on the flowers, and compose. Find a dark background to maximize contrast from the “rain,” and leave some room at the top of the image to show the water drops. Just for fun, take a few “before” pictures for future reference.

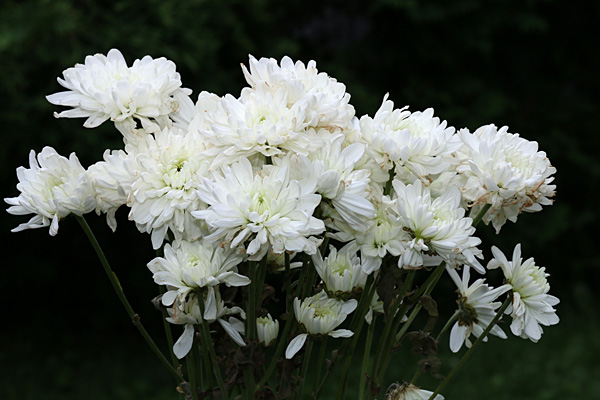
    Flowers noflash

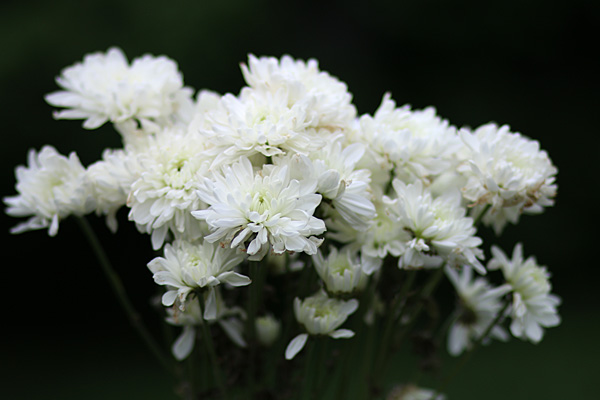
    Before – here is the composition, with no added light. It’s okay, but not terribly exciting. Exposure: 1/1000th at f/1.8, ISO 400.

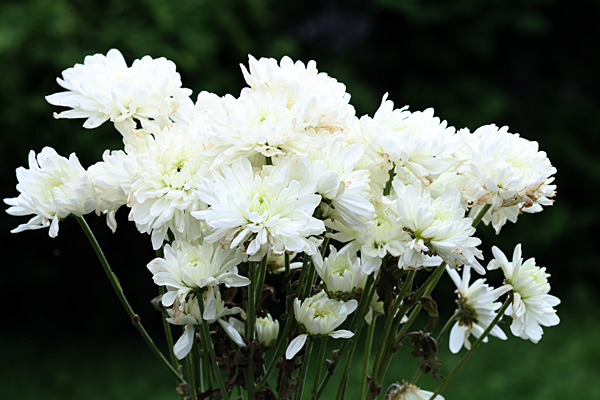
    Flowers oncameraflash

    Same composition, with the 70D’s built-in flash turned on. You can see more detail, but the lighting is flat and still uninteresting. 1/250th at f/13, ISO 400

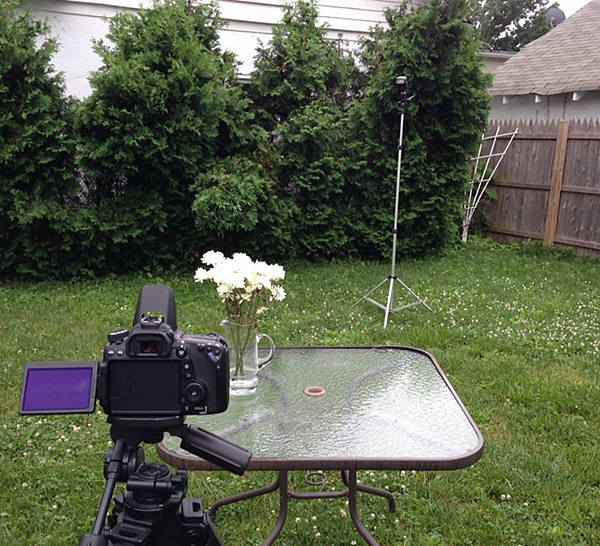
    Setup behindcamera

    All lined up – with the hose aimed at the flowers off to the left, the camera (in this case, a Canon EOS 70D with a Canon 85mm f/1.8 lens) was brought in, and a flash on a light stand was moved behind and slightly to camera right of the flowers. The dark shrubs behind the flowers provide a good contrast.

    Step 3: Cue the “sun”

    Turn on the flash. Don’t know how to operate a Canon DSLR or G-series compact? Scroll to the end of my article on Using Off-camera Flash to Fix Lighting Problems for Outdoor Portraits to get step-by-step instructions on how to trigger Canon off-camera flash wirelessly. You can control the flash intensity and, through trial and error, find the best exposure for illuminating the flowers.

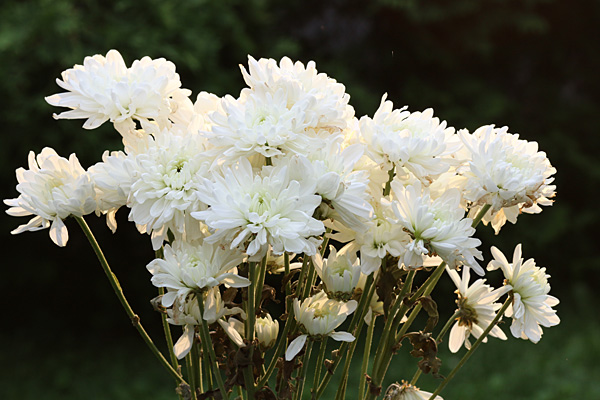
    Flowers plainbackflash

    Now we have the backlight flash turned on, but the lighting ratio of ambient to flash light is wrong, and the flowers are overexposed while the effect of the backlighting is barely visible. You may need some trial and error, adjusting the EV and flash intensity settings until you get the right combination. Exposure: 1/250th at f/11, ISO 400

    Hint: When adjusting the exposure and flash intensity, check your results in the LCD monitor, but also turn on the histogram to make sure the light is not falling off the chart.

    Step 4: Warm up the light

    While overhead sunlight is fairly neutral, sunlight in the early and later part of the day takes on a pleasing warm tone. That’s why they call this time of day the Golden Hour. You can emulate this light by using full CTO Orange gel, available in the Expoimaging Rogue Gel Universal Lighting Filter Kit. Now it looks like you’re shooting in late afternoon or evening.

    Flowers CTObackflash

    Sunset? Nah, it’s the middle of the day. But thanks to the cloud cover and a Full CTO Orange gel over the backlight, it looks like sunset. Exposure: 1/250th at f/11, ISO 400. (make sure to set your shutter speed no higher than your camera’s sync speed)

    Setup all

    Flowers are placed, flash is gelled, and the “rain” is on. You’re ready for the final shot.

    Step 5: Make it rain

    Now that the composition and exposure are set and the light is gelled and in place, it’s time to turn on the water.

    Flowers rain CTObackflash

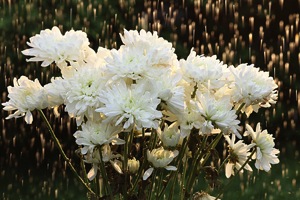
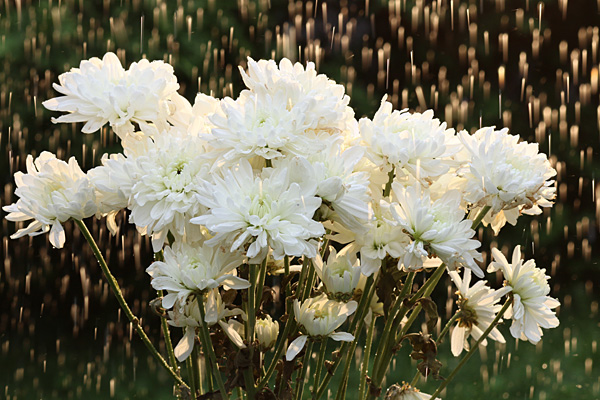
    It’s a late afternoon sun-shower. This is what your final result could look like. But wait, the drops seem to be going up. Why is that? See below. Exposure: 1/250th at f/11, ISO 400.

    In this final shot, the flowers drenched in a sunlit downpour in the middle of a dark, dreary day. There’s one thing that would make this shot better, and that would have been switching to rear-curtain flash sync. In the final example here, the drops appear to be going up because the flash is triggered at the beginning of the exposure. Change your flash settings to rear curtain sync and the drops will be going in the right direction. (There wasn’t time to make the change here because it had started to rain for real, ending the session.)

    Have fun transforming your backyard into an outdoor set and creating all kinds of weather.

    The post How to Create a Sun-shower Photo on a Cloudy Day by Mason Resnick appeared first on Digital Photography School.


    Digital Photography School
  • 5 Steps to Shoot a Simple-ish Time-Lapse Video With Your DSLR

    If you have a new-ish DSLR, then you can probably “train” your camera to make a little movie for you. I’m talking about a time-lapse video, and while it might not be the next Hollywood blockbuster…it could spread like a virus on the Youtubez. 🙂 Read on to get started, and if I’ve done my job well (and you have the Continue Reading

    The post 5 Steps to Shoot a Simple-ish Time-Lapse Video With Your DSLR appeared first on Photodoto.


    Photodoto