Category: Photography

  • Ebook Review – From Basics to Fine Art Black and White Photography

    Ebook Review: From Basics to Fine Art

    If you’re interested in black and white photography, the names Joel Tjintjelaar and Julia Anna Gospodarou will probably need no introduction. The work of both photographers has helped define, and push the boundaries of long exposure photography, a relatively new genre in the fine art world.

    Julia and Joel have joined forces to write a new ebook called From Basics to Fine Art: Black and White Photography – Architecture and Beyond. It is principally aimed at photographers interested in using long exposure techniques to photograph buildings, with some chapters being more general and having a wider appeal.

    Ebook Review: From Basics to Fine Art

    The contents

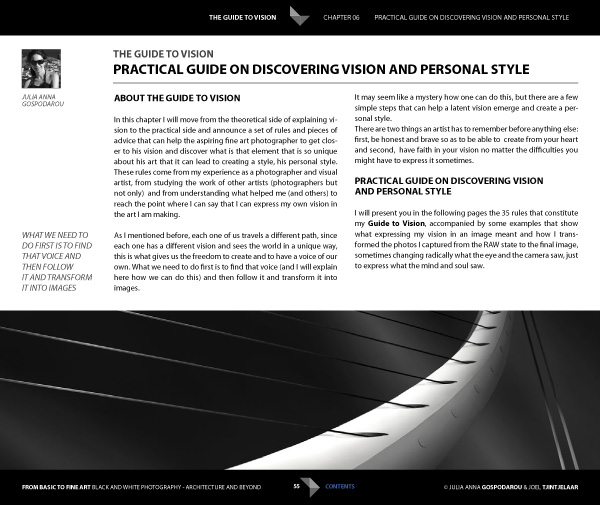
    The ebook starts with personal statements from the authors exploring their interpretations of the word vision as it relates to architectural black and white photography. For me, the most interesting concept here is expressed by Joel. He talks about long exposure black and white photography as being several steps removed from reality. It is an interpretation, not a reproduction. The intent is not to capture the scene as it looked to the eye, but to present it in a way that represents the artist’s vision.

    This theme is continued in the later chapters where Joel explains his post-processing techniques. Take a good look at his photos (follow the link to see some) and think about whether you could achieve similar results. The likely answer is no, because Joel has developed his processing techniques beyond the level that most photographers achieve. Be warned – Joel takes a long time to process his photos and this section of the ebook reflects that. If you’re looking for quick fixes or shortcuts you will need to look elsewhere.

    Ebook Review: From Basics to Fine Art

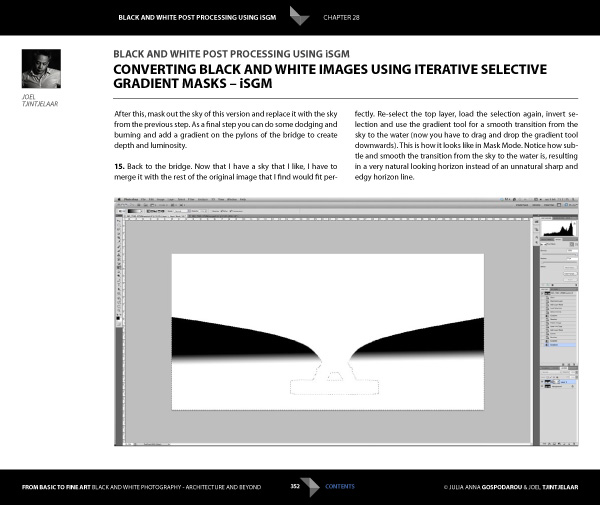
    But if you’re looking for a detailed explanation of black and white post-processing techniques that you won’t find anywhere else, then you’re in the right place. Joel explains his workflow, demonstrating how he uses Lightroom and Photoshop, along with plug-ins such as Silver Efex Pro. Most importantly, he shows you how to use what he calls Iterative Selective Gradient Masks, a technique he developed himself, to create the unique look of his black and white images.

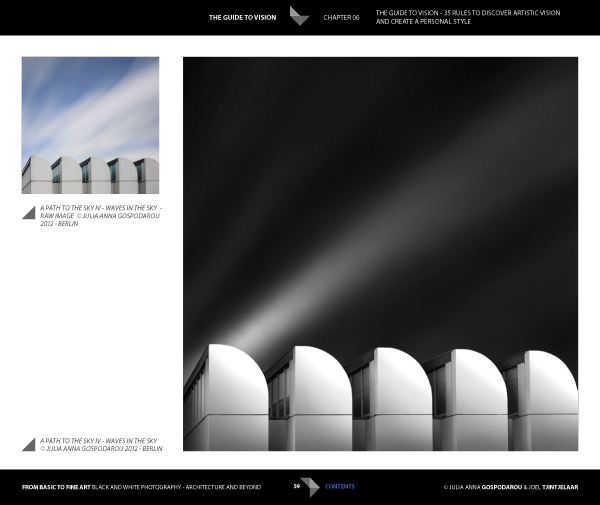
    He also explores fairly complex techniques modelled on what the calls: the 10 monochromatic commandments for good black and white photography. The idea is that you can create presence and depth in photographs by altering contrast, tonal relationships and defining edges in a way that adds volume, depth and luminosity to the subject.

    Don’t be surprised if you don’t understand what this means as it’s an intricate topic that represents a fairly new way of looking at black and white photography. Joel is ahead of everybody else in this respect so you won’t find this information anywhere else. However, the examples in the ebook, and the clear presentation, makes it simple. By the way, the 10 monochromatic commandments I just mentioned are essential reading for anybody interested in black and white photography, regardless of genre.

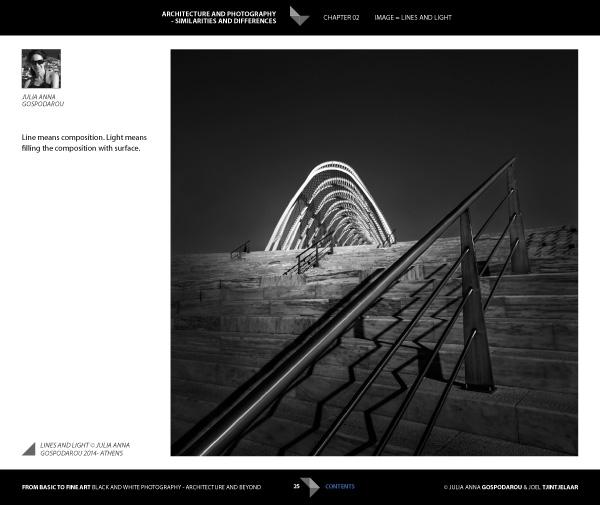
    For me, the aspects covered in the previous paragraphs are the most interesting part of the ebook. There’s more, including some interesting thoughts from Julia (a trained architect) on using light to render the form and volume of buildings. She draws on techniques used in drawing and applies them to photography to get you thinking in a new way about rendering three-dimensional objects in photography.

    Ebook Review: From Basics to Fine Art

    There’s also an extensive chapter from Joel about long exposure photography, and the equipment (including a detailed look at neutral density filters) and techniques required to get results.

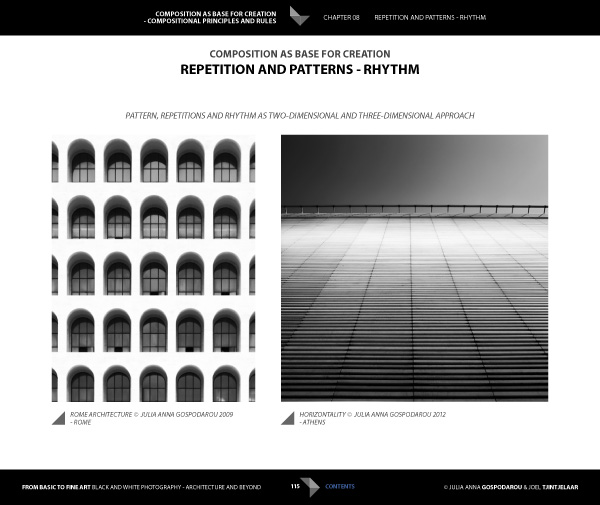
    Included is more of the usual stuff that you would expect from a book about architectural photography, including composition, the practical aspects of photographing architecture and a chapter on using tilt-shift lenses. There’s also a useful chapter on pricing your work that will be of interest to professionals (or aspiring professionals).

    A niggle: the discussions about composition contain a heavy emphasis on rules that continues throughout the ebook. I’m always suspicious of anybody that claims a certain way of things is a rule, and I’m certainly not convinced of the veracity of using (just to give an example) Fibonacci spirals and then stating that there’s a rule attached to it. I’m a strong believer in principles, rather than rules, and I don’t think Fibonacci spirals are going to help readers improve their composition. This minor complaint aside, there is plenty of good and practical information in this ebook.

    Ebook Review: From Basics to Fine Art

    Conclusion

    I came away from reading this ebook with mixed feelings. On one hand, you have two photographers whose work I admire immensely explaining how they create their images, from their general philosophy to the specifics of long exposures and post-processing.

    If you’re ever looked at their photos and wondered how they achieved the results they do then this ebook has the answers. It’s a tremendous act of generosity and sharing. No one else seems to be doing this stuff yet, or at least doing it and teaching it, so that makes some of the content unique. If you’re a fan of either of these authors, and want to learn the secrets behind their work, then it’s a must buy.

    Ebook Review: From Basics to Fine Art

    My main misgiving comes from the price. It’s an expensive ebook and it would be a shame if this information reaches a limited audience because of that. I realize that expense is a relative concept; the ebook is much cheaper than taking a workshop and you will learn things here that you wouldn’t from any other source. It’s a unique resource, and ultimately the buying audience will decide whether it has a fair value.

    I have to admit that what I’d really like to see is a print version of this ebook, properly designed to give precedence to the photos of both authors. Their images would be better enjoyed on the printed page, and a book has the potential to become a lasting testament to their body of work and teachings.

    From Basics to Fine Art: Black and White Photography – Architecture and Beyond

    You can learn more about or buy From Basics to Fine Art: Black and White Photography – Architecture and Beyond by clicking the link. The price is €49 for those of you in the Eurozone, £39 for anybody in the UK and $ US59 for the rest of the world.

    The post Ebook Review – From Basics to Fine Art Black and White Photography by Andrew S. Gibson appeared first on Digital Photography School.


    Digital Photography School

  • The Importance of Having a Photographic Style

    Every art form that we as humans enjoy all have a common thread: They all have differing styles that set each apart and make them unique. Photography is no different. Our art form has countless styles, forms and genres for us to explore. But why is it necessary for us to understand style? The simple answer is having a well–defined style allows Continue Reading

    The post The Importance of Having a Photographic Style appeared first on Photodoto.


    Photodoto

  • A Different Kind of Photo Tour to Israel with Vibe Israel

    I was recently invited on a photo tour called Vibe Israel by a non-profit organization called Kinetis, I wanted to share my experiences of the trip with you.

    Who are Kinetis?

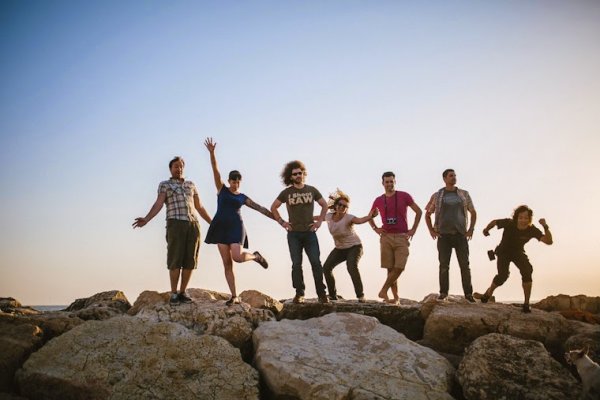
    Six of us were on this tour of Israel, a tour to show what Israel has to offer to photographers, to show a different side to Israel compared with the one you might typically see in the news. The different styles and personalities of the six photographers on the tour made for a fantastically fun and inspirational few days.

    simon-pollock-melbourne-kinetis-tour-israel

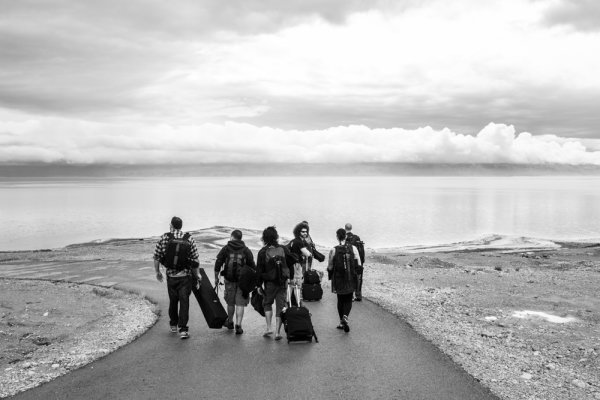
    Heading down to the Dead Sea with the crew

    Travelling with the specific purpose of photography can be a daunting thing, especially with the ever present fear of having your precious camera gear gate checked when you’re about to embark your flight. Is my bag overweight? Will ground crew single me out? Do I look like I’m struggling with this bag? All of these things play through my mind on every flight I’m about to catch, sometimes even when I’m not travelling with a heavy bag! I’ve been very fortunate thus far to have not been stopped for a heavy, or overly large, camera bag at the gate and this trip was no different (although I did have my backpack sent through the Xray machine four times).

    I was travelling with a MindShiftGear Panorama camera backpack, the beauty of the Panorama is that you can use both the belt section and the top insert section to put your gear – if you get stopped and asked to gate check your bag, you can pretty much break it down into sections and nine times out of ten you’ll get it through, onboard with your camera gear. The few basic pointers for trying to get you and your camera onboard that I quietly recite to myself every flight are:

    • Smile, but not so much that people think you’re up to something
    • Don’t carry your bag like it’s about to rip your arms off – if it is, you should perhaps rethink anyway
    • Have a plan to take your heaviest camera and heaviest lens out of your bag and hang it around your neck if asked to gate check due to weight – a camera, 99% of the time, will become a personal item and won’t be included in the bag weight
    • Be polite – ground crew have a job to do, so don’t go off at them, it won’t help – I promise you this
    • Insurance really is a good thing! (I’m insured with PPiB if you’re in Australia / were interested)

    There’s a lot to be said for only packing what you’re going to need – will I need to take a 100mm macro lens to Israel? Will I use my 5.8mm fisheye? As it happens, I used both of those lenses and I’m glad I packed most of my gear, but I did use a two bag strategy/ Doug Murdoch, president of thinkTankPhoto camera bags writes about it on his blog, a quick interesting read. I had a small laptop bag with my Apple MacBook Air 13″, a WD My Passport Pro 2TB drive for content and all the cables, pens, paper, passports, tickets, etc. Then my camera backpack and my roller bag with my tripod, clothes and another flattened out camera shoulder bag (for short wanders down through markets where I didn’t want to take a backpack) and this combo proved to work really well for me.

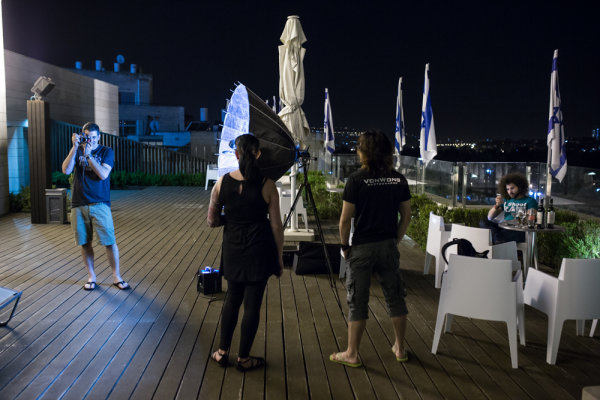
    So we’re packed, we’re flying, we’re there. I’ve been to Israel once before and was very excited to go back. Arriving into Tel Aviv quite late, then driven to Jerusalem to meet up with the others, we stayed at this great place called Abraham Hostel on the first night (if you’re travelling on a budget, it’s a great place to stay) before travelling across to the hotel we were all meeting at, Dan Boutique Hotel. Thankfully they were totally fine with us setting up Ben’s Broncolor and blasting away on the roof!

    On the roof playing with light...

    On the roof playing with light…

    A quick introduction to the people on the tour: Adam Lerner, Mike Kelley, Rebecca Litchfield, Benjamin Von Wong, Jared Polin and Simon Pollock (me – Hi!). Mike isn’t in the photo above as he likes to go to bed at 8 p.m. every night hehe. The next day, after a tour of the old markets and surrounding area in the old city of Jerusalem, we headed for the Dead Sea, each of us with different ideas for what we wanted to do when we arrived there – fashion, portraits, landscape, it was set to be an epic adventure.

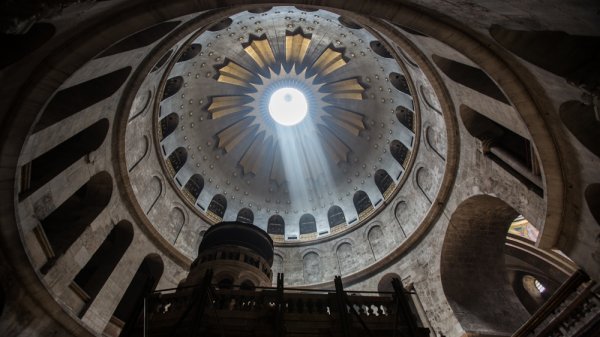
    Church of the Holy Sepulchre at 16mm

    Church of the Holy Sepulchre at 16mm

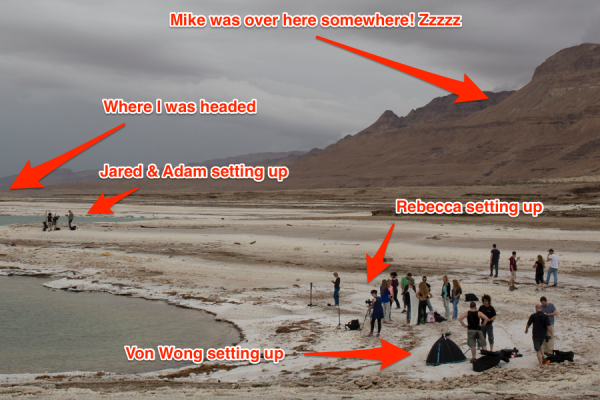
    Arriving at Ein Gedi, the rain was starting to set in and with a call time of around 4 a.m., it was pretty much a quick dinner and directly to bed – poor Eyal had to put up with my snoring, sorry Eyal! The rain hadn’t stopped the next morning, and we were told that with the Dead Sea clouded in, it was something people rarely get to see. As it turned out, the road was washed away in a couple of places and we had a pretty hard time getting the models, stylists and hair and makeup folks into the area of the Dead Sea that we were using for the shoot – thanks to some handy local wrangling and a police vehicle, we were all set to go once the weather cleared, and clear it did. Here’s a setup shot and a few photographs from the shoot day at Ein Gedi.

    Dead-Sea-Kinetis-Israel-Tour-Simon-Pollock

    To give you an idea of where we were…

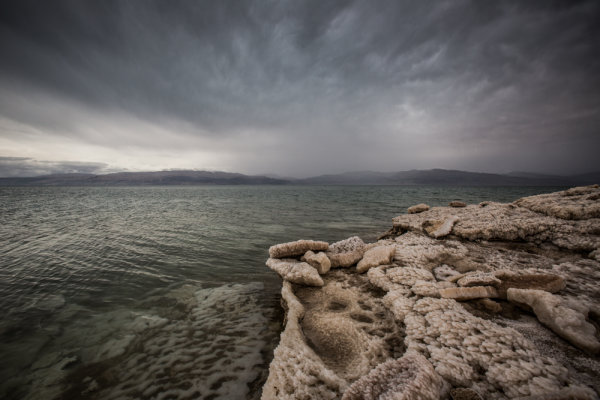
    I was very fortunate to essentially have my own personal guide from epic photo tour company, PhotoTeva which was fantastic as I’m certainly no landscape photographer, but had an amazing time taking in the amazing scenery unfolding before me.

    The-Dead-Sea-PhotoTeva-Simon-Pollock-Kinetis

    The storm rolled through…

    Protecting your gear and keeping it off the deck was pretty important. The water is ultra salty (1/3rd salt, someone was saying) and the ground we were on was all salt – very sharp salt (see, I used the macro lens).

    dead-sea-salt-kinetis-simon-pollock-israel

    The salty residue was super sharp and happy to cut you up!

    dead-sea-salt-kinetis

    Anything that didn’t move fast enough was essentially ‘salted’

    We only had a day at the Dead Sea and were supposed to head out into the desert to stay together in a big tent. The weather had other ideas and we all piled in the super bus and headed back to Tel Aviv for an impromptu camp out on our new friend, Adi’s floor. A highlight of the trip – impromptu awesome. When you’re travelling on a holiday, and things don’t go to plan, you do your best to make the best of the situation that you’re placed in – this was certainly the case and we had a fantastic evening before checking in to The Diaghilev Live Art Boutique Hotel (which I highly recommend if you’re travelling to Tel Aviv).

    The next couple of days were filled with amazing food, adventures and people – rather than bore you with my musings, I’ll tell this part of the adventure in photographs.

    Jared, Adam and I visited a fish market where the fish come off the boats and are snapped up by people waiting on the dock.

    Adam Lerner, a portrait...

    Adam Lerner, a portrait…

    The fish market...

    The fish market…

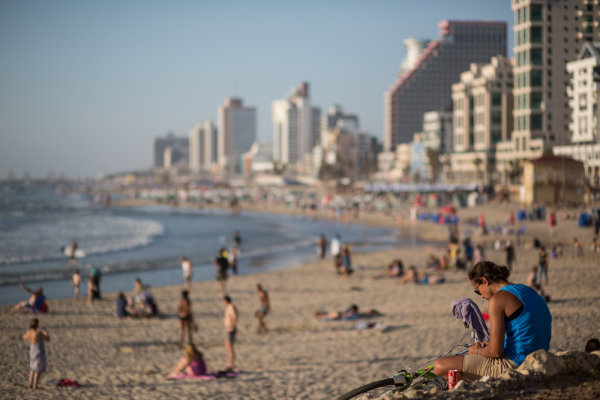
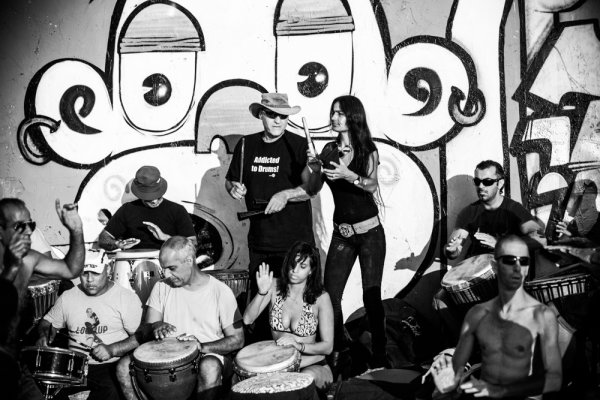
    We managed a little beach time and happened across a great drum circle!

    A Tel Aviv beach...

    A Tel Aviv beach…

    Addicted to drums...

    Addicted to drums…

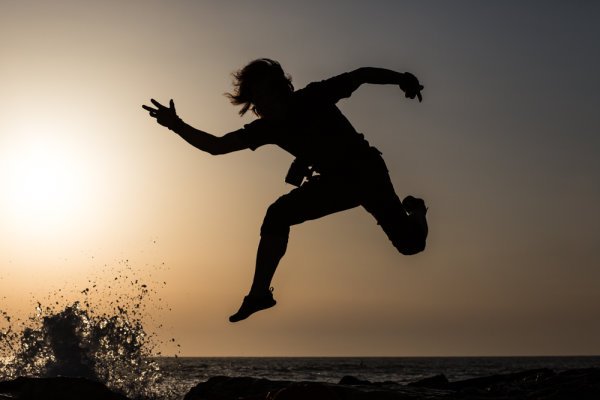
    Von Wong takes flight...

    Von Wong takes flight…

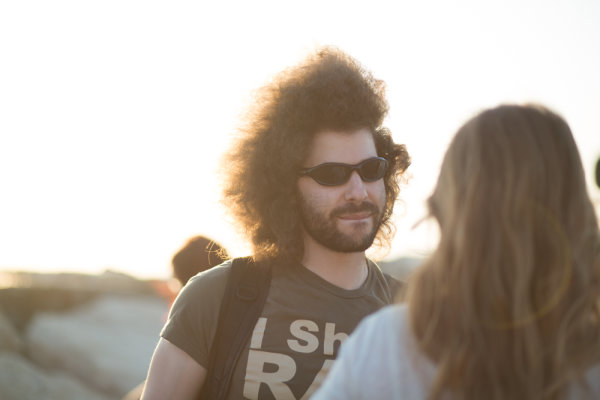
    Fro Knows...

    Fro Knows…

    The fish market...

    The fish market…

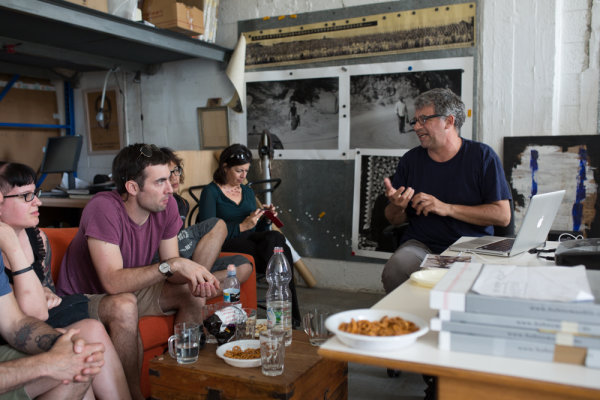
    With only a day or two left to run, we had a load more to pack into our schedule, a visit to Israeli photojournalist and Canon Ambassador, Ziv Koren. We spent some time talking to Itzik Canetti, who has developed a nifty laser focus system for photographers, and we were hosted by Wix on our last evening, for drinks on the roof of their building – stunning.

    Simon-Pollock-Kinetis-Israel-Ziv-Koren

    Simon-Pollock-Kinetis-Israel-Ziv-Koren

    Simon-Pollock-Kinetis-Israel-Ziv-Koren

    Simon-Pollock-Kinetis-Israel-Ziv-Koren

    That was essentially the tour

    kinetis-simon-pollock-israel-tour

    The point of the photo tour was for us to see a different side of Israel, a creative and vibrant side – and that was exactly what we saw. Lots of tech startup, lots of art and culture, some great coffee and amazing food. If you’re thinking about going somewhere on a photo tour, I’d certainly put Israel on your list! Big thanks to Kinetis and the whole team that made this trip possible. You can learn more about the not for profit work that Kinetis do on their website.

    The post A Different Kind of Photo Tour to Israel with Vibe Israel by Sime appeared first on Digital Photography School.


    Digital Photography School

  • Photo Shoot Ride-along – Photographing Cocktails

    In this article you are going to join me on a real client photo shoot photographing cocktails and learn how we created the final images. You can see a previous ride-along doing head shots on a white background here.

    Hacking_Photography_cocktail_photos-8911

    Client brief

    The client is a 1960′s Tiki themed cocktail bar in downtown San Diego. They just revamped their cocktail menu and needed photos for advertising, marketing, social media, and PR.

    Setting up

    The bar is to the left of some foldable colored glass windows. I decided to open these windows to let in some natural light to the bar top. I didn’t get a photo with the windows open as I was in a rush, but here is the bar setup:

    Hacking_Photography_cocktail_photos-8951

    With these windows open there was nice soft, indirect lighting.  I decided quickly that I wanted to use the back of the bar as the background.

    Selecting the aperture

    I grabbed a glass with pineapple leaf garnishes for a quick test. I set my camera on the bar, selected aperture priority, set the glass in front of it, shot at f/20, and got this:

    Hacking_Photography_cocktail_photos-8701

    Meh. After seeing this I decided I didn’t want to see all the details in the background because it was competing with the glass. I dialled the aperture to f/3.5 and took another test shot:

    Hacking_Photography_cocktail_photos-8700

    Much better. The glass was being lit from the natural light coming through the windows to the right of the glass. The problem was that the back bar was too dark.

    If I overexposed to get the background brighter then the glass would have been overblown. The solution? Use a strobe to light the background.

    Lighting the background

    Now that I had the cocktail the way I wanted it, I needed to throw some light on that background. I recomposed the photo and got this:

    Hacking_Photography_cocktail_photos-8705

    I grabbed an Alien Bee 800 strobe and popped on a 40 degree grid to keep the light beam tight.  I didn’t want the light to spread over the whole area, just the back bar. I placed the light on the far left side of the bar and popped the flash.  Note: I didn’t end up using that umbrella.

    Hacking_Photography_cocktail_photos-8735

    You can see the back bar was now lit up.

    Hacking_Photography_cocktail_photos-8706

    Much better! It wasn’t quite there yet, but we were getting closer.

    The light from the strobe wasn’t evenly spread across the background. See the hot spot of highlights on the top left side in the photo above?  That needed to go.

    I angled the strobe so the light would cast across the background instead of just the left side.  I grabbed another garnish glass and took a test shot:

    Hacking_Photography_cocktail_photos-8711

    Much better. Now I had the background the way I wanted it. From there it was simply a matter of composition.

    Composition

    I had been planning on filling the frame with each cocktail vertically until the client mentioned they wanted space to the side of each photo to write editorial content.

    Instead of shooting with my 100mm f/2.8 macro lens I shot this all on a 24-70mm f/2.8 lens.

    Hacking_Photography_cocktail_photos-8730

    How cool is that garnish? A dolphin playing with a ball in its mouth – awesome. This left some room off to the right for editorial content.

    Hacking_Photography_cocktail_photos-8751

    I decided to switch this up and leave some space on the other side. This is helpful for magazines that alternate left and right pages.

    Hacking_Photography_cocktail_photos-8847

    Sometimes breaking the rules is fun.  Shooting this cocktail straight down the middle clearly makes it the focus but still leaves room off to the sides for editorial.

    Hacking_Photography_cocktail_photos-8875

    The “hero” shot

    Sometimes shooting from a low angle and slightly angling the camera upward can give a cocktail a ‘big’ appearance.

    Hacking_Photography_cocktail_photos-8876

     Wrapping up

    All in all it was a pretty straight forward shoot. I had to do a little problem solving with balancing natural light and artificial light, as well as how to best compose the cocktails.

    The client is happy with the images and so am I.

    Did you find this helpful?

    If so, let me know in the comments. I would love to take you on more client photo shoots with me and show you how they come together. Now I’m off to enjoy a nice Tiki cocktail!

    The post Photo Shoot Ride-along – Photographing Cocktails by Mike Newton appeared first on Digital Photography School.


    Digital Photography School

  • Weekly Photography Challenge Reflections

    Earlier I rounded up a set of reflection images. Now it’s your turn!

    This week’s photography challenge is reflections

    Reflections are great for learning to train the eye to see photographically. Start looking for them everywhere, in windows, doors, car panels, wet pavement, puddles, ponds, or icy surfaces. Rules of composition still apply to make a strong image, as does lighting.

    Here’s a few more examples to get you started on the photography challenge:

    By Éole Wind

    By Denis Collette

    By DCSL

    By Denis Collette

    By Anirudh Koul

    By Kevin Dooley

    By Trey Ratcliff

    By jenny downing

    By Taro Taylor

    Need some composition tips?

    • Using Balance in Your Landscape Photography Composition
    • A New Photographer’s Guide to Composition
    • Composition and the Power of Line

    Show use your reflection images

    Simply upload your shot into the comment field (look for the little camera icon in the Disqus comments section as pictured below) and they’ll get embedded for us all to see or if you’d prefer upload them to your favourite photo sharing site and leave the link to them. Okay, ready to impress us?


    The post Weekly Photography Challenge Reflections by Darlene Hildebrandt appeared first on Digital Photography School.


    Digital Photography School

  • Email Insiders Only: 2014 SEO Guide for Photographers

    Your portfolio website could be the most beautiful, functional and user-friendly site in the world, but if no one ever sees it, then what’s the point? If no one visits your precious site, it wouldn’t do you any good. So you have to make search engine giants like Google, Yahoo or Bing notice you and send loads of targeted traffic Continue Reading

    The post Email Insiders Only: 2014 SEO Guide for Photographers appeared first on Photodoto.


    Photodoto

  • Reflection Photos to get you Motivated

    A puddle in the road, plate glass windows, or a shiny car – what do they all have in common? They provide great opportunities to get reflection photos.

    This set of images of reflections is to give you some ideas to go shoot your own reflection photos.

    Enjoy!

    Photograph Black Lotus by Mathijs van den Bosch on 500px

    Black Lotus by Mathijs van den Bosch on 500px

    Photograph Arc de Triomphe Etoile Water Mirror Reflection by Loïc Lagarde on 500px Arc de Triomphe Etoile Water Mirror Reflection by Loïc Lagarde on 500px

    Photograph Dawn by David D on 500px

    Dawn by David D on 500px

    Photograph In the Morning Light by Teguh S on 500px In the Morning Light by Teguh S on 500px

    Photograph Louvre at dusk by Tomáš Vocelka on 500px

    Louvre at dusk by Tomáš Vocelka on 500px

    Photograph Reflections by Marco Britto Photography on 500px Reflections by Marco Britto Photography on 500px

    Photograph Louvre Pyramid by Night by Csilla Zelko on 500px

    Louvre Pyramid by Night by Csilla Zelko on 500px

    Photograph brooklyn.bridge.two by Robert Pfeuffer on 500px brooklyn.bridge.two by Robert Pfeuffer on 500px

    Photograph St. Peter's reflection by Daniele Forestiere on 500px

    St. Peter’s reflection by Daniele Forestiere on 500px

    Photograph Watercolours by Whatshisname  on 500px Watercolours by Whatshisname on 500px

    Photograph Atmaniksepa by Josep Sumalla on 500px

    Atmaniksepa by Josep Sumalla on 500px

    Photograph Blue Honey by Lorenzo Cassina on 500px Blue Honey by Lorenzo Cassina on 500px

    Photograph Who?... by Ewa Frye on 500px

    Who?… by Ewa Frye on 500px

    Photograph Positive Vibes by Josep Sumalla on 500px Positive Vibes by Josep Sumalla on 500px

    Photograph My Sky... by Ewa Frye on 500px

    My Sky… by Ewa Frye on 500px

    Photograph Surreal by Lorenzo Cassina on 500px Surreal by Lorenzo Cassina on 500px

    Photograph Huntington Beach Pier at Sunset by Nhut Pham on 500px

    Huntington Beach Pier at Sunset by Nhut Pham on 500px

    Photograph illusion by Vasilis  Athanasopoulos on 500px illusion by Vasilis Athanasopoulos on 500px

    Photograph Dreamworld by Matt Payne on 500px

    Dreamworld by Matt Payne on 500px

    Photograph Couple by Joanna Lemanska on 500px Couple by Joanna Lemanska on 500px

    Photograph Kad?köy Vapuru by Hakan Akkuzu on 500px

    Kad?köy Vapuru by Hakan Akkuzu on 500px

    Photograph The Biking Dutchman by Roeselien Raimond on 500px The Biking Dutchman by Roeselien Raimond on 500px

    Photograph Ride on Mirror by Praveller B.S on 500px

    Ride on Mirror by Praveller B.S on 500px

    Photograph Captured Clouds by Petter Lidbeck on 500px Captured Clouds by Petter Lidbeck on 500px

    Photograph Flipping Lifestyles by Drew Hopper on 500px

    Flipping Lifestyles by Drew Hopper on 500px

    Photograph En el calor de la noche by Gemma  on 500px En el calor de la noche by Gemma on 500px

    Photograph reflection in the water by Ali ilker Elci on 500px

    reflection in the water by Ali ilker Elci on 500px

    Photograph Back to the HotRod by KAMERAKIND  on 500px Back to the HotRod by KAMERAKIND on 500px

    Photograph two ropes by Brian Denton on 500px

    two ropes by Brian Denton on 500px

    Photograph trio . . . by Brian Denton on 500px trio . . . by Brian Denton on 500px

    Photograph 'Cuda by Brian Krouskie on 500px

    ‘Cuda by Brian Krouskie on 500px

    Photograph Hot Air Reflection by Gladner  on 500px Hot Air Reflection by Gladner on 500px

    Photograph Reflection by Gavriela Marantidi on 500px

    Reflection by Gavriela Marantidi on 500px

    Photograph Morning Glory by Samuel Sharpe on 500px Morning Glory by Samuel Sharpe on 500px

    Photograph Car Reflections by Simon Cresdee on 500px

    Car Reflections by Simon Cresdee on 500px

    Photograph GT Sunset by Simon Brown on 500px GT Sunset by Simon Brown on 500px

    Here’s some ideas on using reflections:

    • How To Photograph Reflections In Water
    • 5 Reasons Why Bad Weather Days are the Best Times for Photography

    The post Reflection Photos to get you Motivated by Darlene Hildebrandt appeared first on Digital Photography School.


    Digital Photography School

  • 40 Creative Examples of Photography Business Card Designs for Inspiration

    What do a graphic designer, an owner of a local cafe, a hairdresser and a photographer have in common? It’s a business card, of course! Tons of similar, ordinary business cards made on a white piece of paper with black lettering on them overload the market. These days, you need to have a really creative business card to impress your Continue Reading

    The post 40 Creative Examples of Photography Business Card Designs for Inspiration appeared first on Photodoto.


    Photodoto

  • 36 of the Best Online Tools to Boost Your Photography Business

    As a beginner photographer, I put most of my time and energy into the product side of my business. I need to practice, improve my shooting and post processing skills, and just grow as a photographer. However, I have a strong intention to make photography my full-time job and be successful in it, which is hardly possible without a business strategy. Besides, with over five years of experience in social media and content marketing, I know for sure that establishing a sound online presence and effective marketing channels may not show you the money today, but it will shape your business in the long run.
    35 photography marketing tools

    In this article, I’m sharing the results of my recent research on the online marketing and workflow organizing tools for photographers. I use some of these services on a daily basis; others are carefully stored in my bookmarks, eagerly waiting for the moment to come in handy. Each tool category includes several noteworthy options (both big players and lesser known tools), so that you can use this article as a catalog to refer to in your marketing pursuits.

    Photography Website Builders

    1. MotoCMS

    Since I was looking for a self-hosted solution with no additional costs for the tools I don’t need just yet, this one worked perfectly for me. For $ 139, I got a modern website template based on the quite powerful MotoCMS. Among the key features are advanced drag-and-drop website editor, SEO & social media tools, e-commerce widget, etc.

    2. Squarespace

    Squarespace offers 25 modern-looking templates with e-commerce integration, custom domains (no self-hosting, though), mobile-ready websites and support. There’s no free plan, but prices start from $ 8 per month, and you have 14 days to give it a try for free.

    5. Portfoliobox

    There’s a free account option allowing you to select a clean template and fill it with up to 40 images. A $ 6.90/month Pro plan (paid yearly) with Portolfiobox includes more design and marketing options, as well as a custom domain name and email.

    6. Wix

    The free plan includes a wide gallery of templates, unlimited pages and hosting. Premium plans start from $ 4.08/month, but your website will carry Wix brand ads both on desktop and mobile.

    7. Pixpa

    Pixpa offers hosted portfolios with private galleries, ec-ommerce with Fotomoto, custom domains, social media sharing and other features. All-inclusive plans start from $ 4.00/month (billed annually) with a 50% discount available for students.

    8. Portfolio Lounge

    A custom domain is included in Portfolio Lounge’s free plan, which is nice! Upgrading to the Pro ($ 7.99/month) and Max ($ 16.99/month) will get you extra storage space. This is quite a simple service with no pricing gimmicks and overwhelming feature sets.

    9. Folio Websites

    Folio Websites templates are based on WordPress, which is quite a benefit these days. There’s just one plan available – $ 175/year, and your decision to sign up may only be based on examples and promises since there’s no trial period offered.

    10. Carbonmade

    Carbonmade is a kinda hipster among portfolio builders – its design is funky, the words are fun, and the service is on trend. Opting in for the free “Meh” plan, you get a 35-image portfolio on the carbonmade.com domain. Upgrade to the $ 12/month “Whoo!” plan, and you get 500 images and 10 video slots, domain binding, ad-free site, private projects and tech support.

    10b. Zenfolio (added by the Editor)

    Editor’s note: I personally use Zenfolio for my portfolio, and have for several years. The benefits of choosing something like Zenfolio over just a portfolio site is that they also offer a way to sell your images, preview them for clients, have locked or private galleries and even a blog element. Their Basic Plan is only $ 30/year but if you want unlimited uploads, and the ability to price your own work go for the Premium at $ 140/year. This can also act as you backup as well with unlimited storage of images. They do offer a free trial.

    By DAVID MELCHOR DIAZ

    Have you ever wondered why crappy photographers do better than you? It’s because they know that both creative and business sides of photography are critical for success.

    Cloud Storage and Media Library

    11. Flickr

    With a colossal 1TB of free storage on the table, Flickr remains a first-class service for photographers of all levels. I’m using it to store my photos, too. However, I really hope their sluggish interface will be updated very soon.

    12. Streamnation

    Streamnation supports a pile of photo file formats, including RAW and C2R – a feature any photographer would appreciate. 20GB of storage is free. The price varies from $ 4/month for 100GB to $ 19/month for unlimited space biled annually.

    13. Dropbox

    While Dropbox’s experience for photographers still feels half-baked, it’s definitely a solution to consider since, unlike your average cloud hosting startup, the established service provides welcome peace of mind.

    14. Google+

    You can store up to 15GB in Google+ Photos, Gmail, and Google Drive for free and then pay for additional storage (up to 16TB) as your account grows. A neat thing about Google’s offer is that, unless your photos exceed 2,048 pixels by width, Google won’t count them against your total amount of available space.

    15. Crashplan

    A neat feature about Crashplan is that you can recover a deleted file no matter how much time has passed. Prices for unlimited online backup to the Crashplan cloud start at $ 5/month with annual billing.

    16. Zoolz

    Unlike most cloud hosting services, Zoolz is a long-term storage unit designed for storing your data on the cloud for a lifetime. With a 5-year subscription you can have your photos reside on reliable Amazon AWS servers for as low as $ 2/month.

    16b. Zenfolio

    Editor’s note: see above for Zenfolio info under the website section, also works for image backup.

    By Anca Mosoiu

    Image Proofing and Selling Prints

    17. Pixieset

    Pixieset is my number one tool to create beautiful client galleries. It has all the key features to help you deliver, proof, and sell your work (unlimited galleries, proofing system, instant download, password protection, audio, just to name a few). The best part is that all this is available in their free plan. If you’d like more space and a custom domain, you can upgrade your plan (prices range from $ 8/month for 10GB to $ 40/month for 1TB).

    18. Nextproof

    Nextproof a pay-as-you-go service with a $ 0 plan (1GB of space and a 15% transaction fee) on the table and a free 30-day trial available for every paid plan (ranging from $ 9-99/month).

    19. OnlinePictureProof

    There’s a single, $ 29/month plan you can buy. Among the key features are slideshows, mobile app and a shopping cart. Online Picture Proof is a simple yet professional picture proofing and sales solution.

    20. ProofBuddy

    If your website runs on the WordPress platform, you can make use of this free WP plugin, ProofBuddy, to activate a fully-functional proofing system built to show your proofs and accept orders from clients.

    21. ShootProof

    With ShootProof, you can create public or private galleries that work equally well on desktop and mobile devices. The great feature is that each visitor’s activity is displayed in detail to you. ShootProof has a flexible payment plan (commission-free $ 10-50/month) as well as a free plan allowing up to 100 uploads.

    20b. Zenfolio

    Editor’s note: see above for Zenfolio info under the website section, also works for image proofing and sales.

    By zizzybaloobah

    Scheduling

    22. Setmore

    Getting started with Setmore is very easy thanks to a clean, intuitive interface and wizard-like design. Standard features are free to use and include unlimited appointments, services and customers, as well as the ability to add up to 20 staff members to your account. Upgrading to $ 25/month brings you to the premium level with Google Calendar sync, unlimited SMS (text) reminders and recurring appointments.

    23. Ubooq

    Ubooq makes it easy for clients to schedule an appointment with an easy-to-use, online reception page. Appointment ticket and reminders help avoid no-shows. You can schedule up to 30 appointments in Ubooq for free, and then, if you like it, pick a plan that suits your needs. There is a 5-grade plan system, with prices starting at $ 19 for the monthly service.

    24. BookedIn

    A pretty cool feature in BookedIn, that I didn’t see on similar services, is that you can add a booking app to your Facebook timeline. Payment plans include a pay-as-you-go model (you purchase a block of booking for 50 cents each) and a monthly plan costing $ 20/month. You can try out the complete set of features for free during 30 days.

    Note: other free options: Calendly and TimeTrade (also have a paid version for more appointments)

    By keso s

    CRM (Customer Relationship Management) System

    25. Simply Studio

    For $ 29/month (billed annually) with Simply Studio you get a full-fledged, web-based CRM system with client-money task management, accounting, invoicing and bookkeeping, online proofing, polls and email marketing. All features are included in a free trial version available for 15 days. My workflow of a newbie obviously does not require such software yet, but I surely love the features-price ratio of Simply Studio, as well as the simplicity of its interface. So Simply Studio is already in my bookmarks waiting for my photography business to grow and call for it.

    26. StudioCloud

    StudioCloud is free desktop software for photography studios. Standard features include cloud syncing, a client database, scheduling, billing, order management and other business-management tools. While the basic functionality (which is quite rich, though), is free to download, some extra tools, such as multiple users, online proofing and automatic client reminders, will cost you between $ 10-60 per month.

    27. ShootQ

    ShootQ offers the most comprehensive list of management tools, which naturally reflects in pricing. There are three all-inclusive and monthly plans to choose from, and prices range from $ 39.95 to $ 79.95 depending on the desired number of users, pages and amount of storage.

    Organization and Automation

    28. IFTTT

    This brilliant service saves me lots of time for shooting. Using IFTTT’s straight-forward formula, you can automate a variety of tasks, such as tweeting your new blog posts or notifying you of the latest dPS posts.

    29. Buffer

    A dead simple, yet useful tool, to schedule your social media posts. If you’re a heavy social network user, Hootsuite might work for you better, but if you just don’t want your Twitter and Facebook get dusty while you’re on vacation, Buffer has you covered.

    30. Nutcache

    Nutcache enables you to easily create unlimited number of invoices, do estimates, and track time. Great tool to operate your photo business in the cloud. It’s also multilingual.

    By Staffan Scherz

    You won’t believe how many tasks you can manage with some organization and system put in the process.

    Mobile Client Galleries

    31. Myphotoapp

    Myphotoapp boasts the widest library of tools among mobile photo gallery builders. Client email collection, integration with MailChimp and advanced app analytics are some really neat features that make this service my number one choice. I hope, though, the usability of the administrative panel will be soon revised towards a simpler and more intuitive interface.

    32. StickyAlbums

    Create mobile photo apps that your clients can save on their iPhones, iPads and most Android devices using Sticky Albums. Features include custom branding, built-in Facebook sharing, password protected albums, photo album hosting and sharing via SMS. Prices start at $ 19/month with a free, 14-day trial available.

    33. ProImageShare

    If you’re a Lightroom diehard, it’s an easy winner here. ProImageShare lets you publish and host your own web app that can be downloaded on iOS devices with the appearance of a custom app. With a one-time payment of $ 69, you can publish as many apps as you want to your own unlimited, shared-web host.

    Photograph Rings on her toes by Vanessa Kay on 500px

    Rings on her toes by Vanessa Kay on 500px

    Brides will definitely appreciate a custom app with their wedding pictures. Expect referrals to come your way!

    Multi-platforms and Services

    34. Photoshelter

    I bet you’ve heard about Photoshelter, as it’s one of the industry’s “big dawgs”. Portfolio websites, integrated e-commerce, cloud storage and client-proofing system are the tools you can find under this shelter. Prices vary from $ 9.99/month for the basic feature set, to $ 49.99/month for the premium toolbox.

    35. Zenfolio

    Zenfolio is another giant in the field of digital marketing for photographers. The number of features here is impressive, too. One of the recently added ones is Photo Books (order and sell). Prices start from $ 30/year with a free, 14-day trial on hand.

    36. Queensberry Workspace

    Built around Quensberry’s range of print products, Workspace enables you to create, organize, and market your online presence, as well as order and sell photo books, albums, frames, etc. Its basic version is available for free and you can upgrade from $ 4 monthly.

    Editor’s note: once upon a time I was a consultant for Queensberry Albums (for 9 years) and I can attest to their dedication to quality albums, products and software. They also make Photojunction, a powerful album design tool.

    Another biggie in this area is SmugMug. Slightly more than Zenfolio with many of the same features.

    Last Click

    Defrozo

    I didn’t include Defrozo on the round-up because currently it’s a private beta, but the features listed on the “coming soon” page make it so worth mentioning.

    Website builder, Media Library, Image Delivery and Proofing, Scheduling, E-commerce, CRM system, and Websites for Clients make the initial toolbox Defrozo is going to deliver from the start. Moreover, photo book design tools and retouch services are scheduled to be added to the products’ following updates. How do I know that? Well, I subscribed for early access and received an invitation from the Defrozo team to join the focus group of photographers from 30 countries worldwide. I recommend that you sign up, too, since a new player on the market will likely offer something extraordinary to attract users. There are good chances that it’s gonna be a freemium or at least offer extra benefits to early adopters.

    By Pascal

    Defrozo seems to have a potential to be the ultimate weapon for your business to reach zen.

    What’s in your digital toolbox?

    I hope my research will come in handy, and I’m sure there are a lot of other tools and services worth mentioning here that I missed. What do you use to manage your photography workflow and business? Is there any all-in-one tool out there you could recommend? Please share your suggestions and experience in the comments below.

    The post 36 of the Best Online Tools to Boost Your Photography Business by Julia May appeared first on Digital Photography School.


    Digital Photography School

  • Review Domke Chronicle Camera Bag

    The new Chronicle is part of Domke's Next Generation line of camera bags.

    The new Chronicle is part of Domke’s Next Generation line of camera bags.

    There’s a new line of camera bags on the market, but they come from an old, familiar name. Originally founded in 1976 by photojournalist Jim Domke with the introduction of the F-2, the Domke brand has been synonymous ever since with low-profile, high-quality bags geared towards photojournalists, travel photographers, and anyone else looking for a bag that does a great job protecting their gear without drawing unwarranted attention to the thousands of dollars worth of kit hanging from their shoulder.

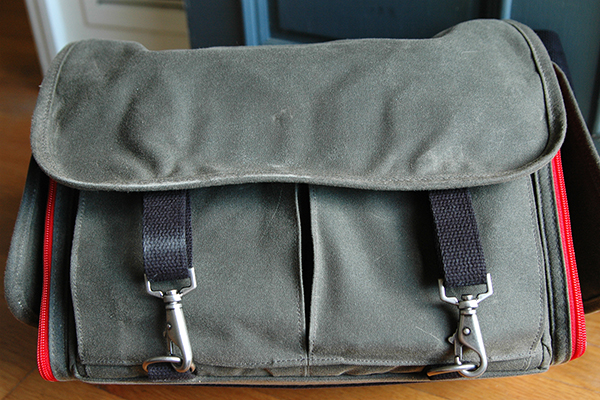
    Domke’s “Next Generation” consists of eight new bags, each available in different choices of materials and equipped with Domke’s new GearProtex™ and PocketFlex™ systems of customizable dividers, inserts and storage pockets. I recently had the chance to spend some time putting The Domke Chronicle (J-Chron) through its paces. One of three bags in the Journalist Series (alongside the Ledger and the Herald), the Chronicle– described as the grandchild of that original F-2– is obviously designed with the working photojournalist in mind, but would also be a great bag for any photographer, professional or otherwise, looking for a low profile or a classic retro look.

    domke-chronicle-review-digitalphotographyschool-009

    First Impressions

    Fresh out of the box this bag brought a smile to my face. My dad was a truly amazing photographer. Wanting to make his hobby my own, when I was a kid, we spent countless hours together in the darkroom. This is a bag my father would have loved. Not getting too lost in its retro appeal, though, it’s abundantly clear that a lot of thought and attention to detail went into the design and production of this bag. Available in four different color options, I opted for the Ruggedwear Military/Black. All materials, both inside and out, appear to be of extremely high quality, yet they don’t add any unnecessary bulk or weight. This keeps the bag comfortable on your shoulder, even when fully packed.

    domke-chronicle-review-digitalphotographyschool-008

    domke-chronicle-review-digitalphotographyschool-006

    Dimensions and Specs

    • Exterior:  15.75″ (L) x 7″ (W) x 10″ (H)  (40 cm x 17.8 cm x 25.4 cm)
    • Interior:  12.25″ (L) x 6.5″ (W) x 9.25″ (H)  (31.1 cm x 16.5 cm x 23.5 cm)
    • Weight: 4.2 lbs.  (1.9 kg)
    • YKK brand zippers
    • Top access double zipper
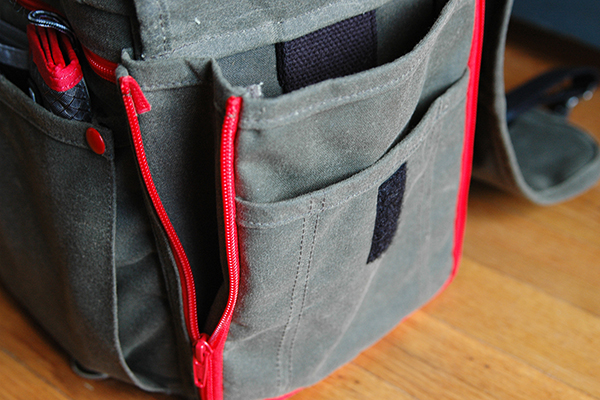
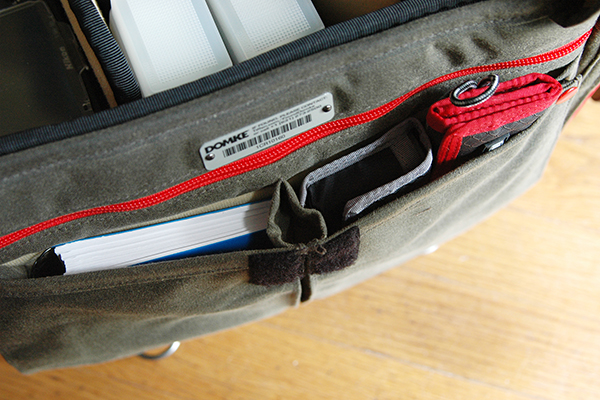
    • Expandable zippered side pockets
    • Expandable front pockets
    • Rear zippered pocket
    • Padded zippered tablet pocket (fits up to 11″ x 8″)
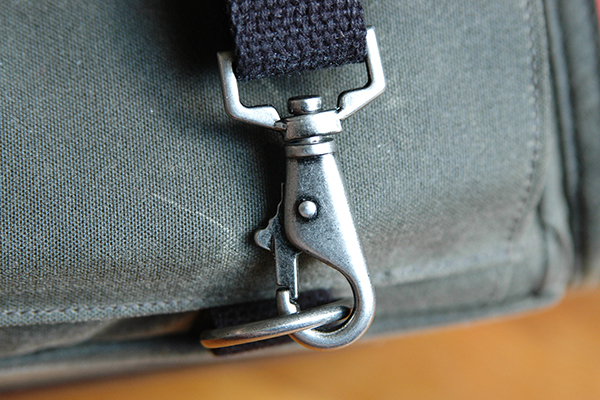
    • Antique steel hardware exterior flap fasteners
    • Detachable shoulder strap
    • Detachable hand strap
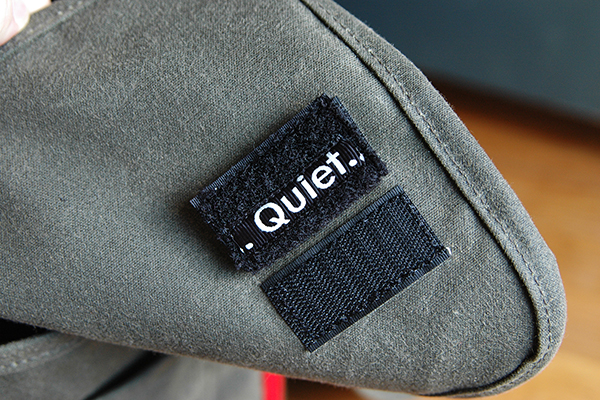
    • Velcro silencers
    • Numbered identity plate

    domke-chronicle-review-digitalphotographyschool-003

    What I Packed

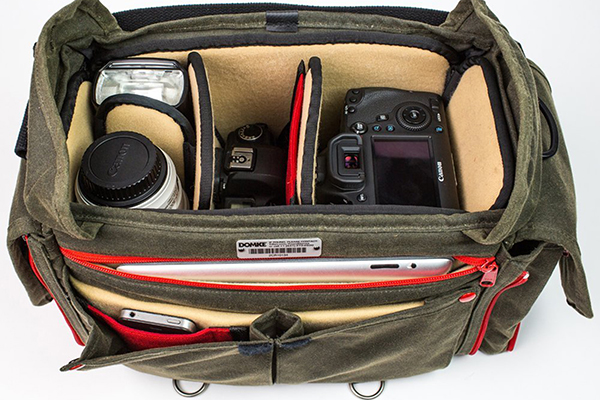
    • Nikon D300s with 35mm prime lens attached
    • Nikon 70-200 mm f/2.8 lens
    • Two SB800 speedlights
    • Flashpoint Blast Power Pack
    • Think Tank PPR with extra CF cards
    • Think Tank DSLR battery holder
    • Light Meter
    • Gaffers tape
    • Notebook/pens/business cards
    • Client contract, model releases, and paperwork
    • iPad

    It’s well worth pointing out here that the Chronicle could have easily handled several additional items, but I’ve been trying to travel a little lighter these days.

    domke-chronicle-review-digitalphotographyschool-007

    Dividers and Inserts

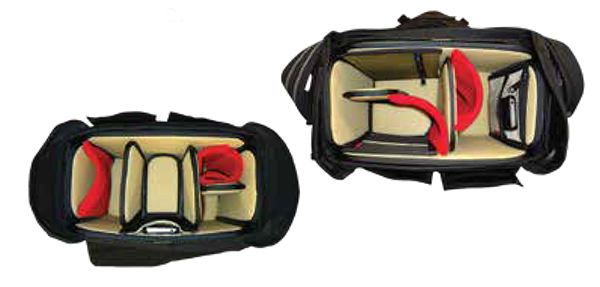
    Domke’s new GearProtex system of dividers allows you to fully customize the inside of the bag with dividers that can attach to any interior surface, not just corresponding Velcro attachment points. The PocketFlex system is a collection of pockets and pouches that can also attach to any interior surface of the bag. If I had to pick one area where this bag fell slightly short it would be here, with the dividers. While many companies seem to give you way more dividers than you could ever possibly need, I found the number of included dividers to be a bit lacking for my taste. With only three included dividers and one included pocket patch, if I want this bag to be 100% in line with my needs, I’m going to have to order a few more dividers. Considering the cost of this bag ($ 349 USD), it might have been nice of them to include a few more dividers. On the up side, however, the flexibility of the dividers, combined with almost limitless attachment points, does help create sections of sizes and shapes I’ve never been able to get with standard dividers.

    domke-chronicle-review-digitalphotographyschool-002

    Domke PocketFlex SS

    Fabric Choices

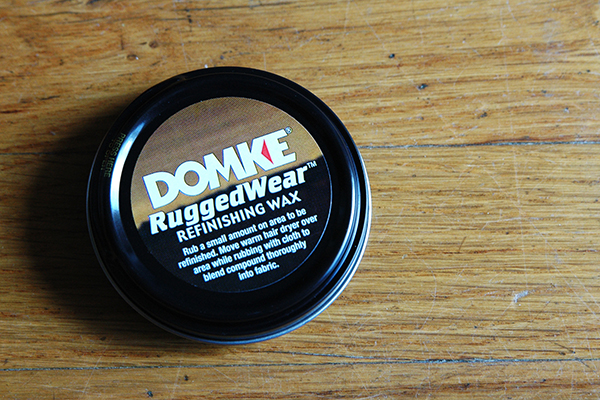
    Here is an option you don’t often see when choosing a camera bag. The Chronicle, as well as every bag in the Next Generation line, is available in a choice of materials and colors. As noted, the bag in this review is the RuggedWear Military/Black option. Also available are Cordura Black/Black, Canvas Khaki/Black, and RuggedWear Black/Sand. While it’s obvious from a quick inspection that the exterior materials are of a high quality and built to withstand the regular challenges our bags face on a daily basis, let’s face it, it’s material and eventually it’s going to get dirty or show some wear. In what was a first for me, I was pleasantly surprised to find a tin of Domke Ruggedwear Refinishing Wax in the bag for those inevitable occasions when parts of the bag exterior might need a little attention.

    domke-chronicle-review-digitalphotographyschool-010

    Wrap-up and Recommendations

    I really love this bag, particularly its classic retro look. I’ll most likely end up using it more for personal photography than commercial work, but it’s a bag that is well-suited for both. Even though it is the smallest bag in the Journalist series, I never felt limited in terms of what I could or couldn’t pack. This bag should appeal to a wide variety of photographers, from photojournalists and nature photographers, to hobbyists and travel photographers, as well as every photographer in between. The price may be a bit steep for a bag this size, but I think you absolutely get what you pay for in terms of quality, longevity, and adaptability. I’ve given it a 4.5 out of 5 due to not enough dividers.

    The post Review Domke Chronicle Camera Bag by Jeff Guyer appeared first on Digital Photography School.


    Digital Photography School