Category: Photography

  • 5 Bad Photography Habits You Need To Keep Doing

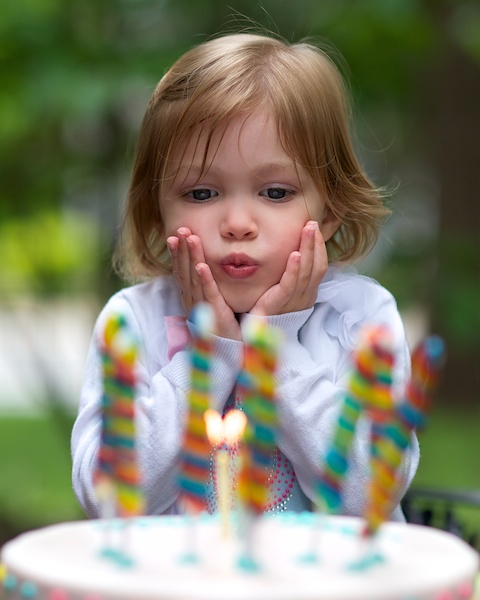
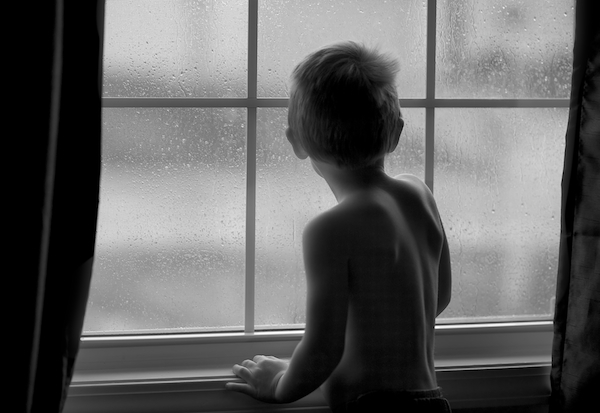
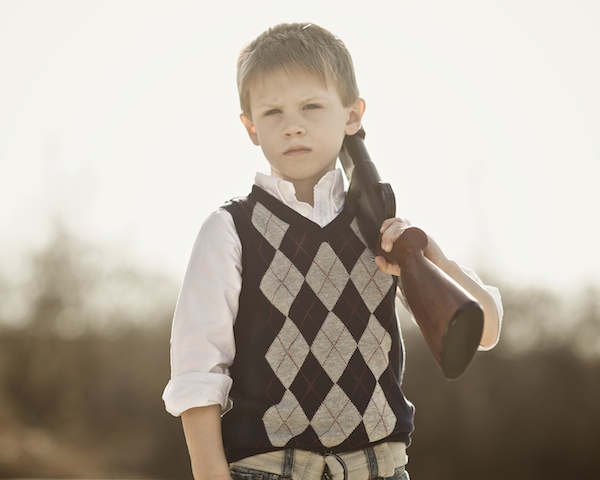
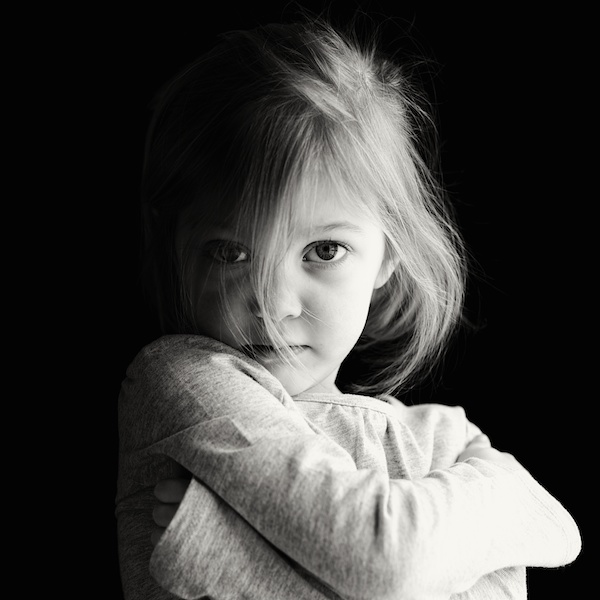
    I don’t floss every day. I still use the word “rad” as an adjective and not in the cool retro way, but in the I-don’t-have-another-word-for-it way. The driving speed limit and I have a love/hate relationship. And I have been known, on particularly hard days, to let my kids eat cookies for breakfast and ice cream for dinner. These are all terrible habits that I need to work on. My “bad” photography habits though, the ones that people say you shouldn’t do or should just get over already, those are actually helping me. They might be helping you too. Here are five habits, that most people would say are things we should move past, and why I think you shouldn’t.
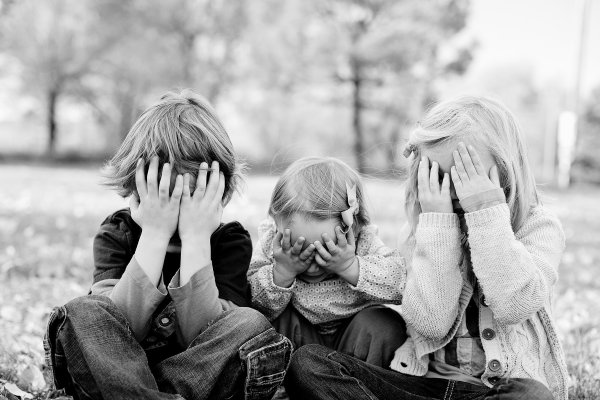
    lmattingly6

    #1 Not pushing for the shot

    By day, I’m a photographer. By night, I’m a psychotherapist. Well, sometimes it’s opposite. Point is: there are a few basic lessons that work in both of my jobs. One of them is not trying to own someone else’s reaction. If I tell you that it’s sunny out and that upsets you, there is nothing I can do about that. I could have told you different, but providing it was actually sunny, I would have been lying. Your reaction is yours. Just like if I try to have a portrait client do something the way I would do it and it doesn’t work, they are not to blame. If I tell them a joke to make them relax and smile that they don’t think it is funny, I can’t force them have to have an authentically positive reaction.

    One of the most valuable lessons I’ve learned as a photographer is to know when to let something go. If you are fussing with a shot, be it portrait, landscape, food, whatever, and it’s just not working out like you want it to, let it go. Chances are if you are struggling that hard to get the shot, even if you do get it, you won’t like it. Patience is one thing, but pestering is another; by grasping so tightly to a specific concept, you are setting your expectations far beyond what is logically possible. In life and in photography.
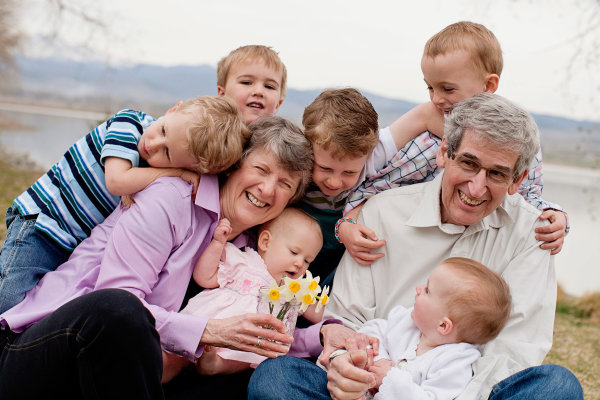
    lmattingly2

    #2 Taking your time

    Ask any one of my clients and they will tell you that I’m fun, but I take a while to return finished images. They will also tell you that I’m flaky about emails, never answer my phone, and happily scream and yell and laugh way more than needed on a photo shoot. There’s not a lot a I can do about being a loud talker and easily excitable, and so long as there is text I’m just not going to answer my phone unless I have to. But I make no apologizes for taking a while to edit shoots. I mean, I do apologize every single time to my clients, but I know it will never get better. I am not able to force editing.

    Unlike data entry for example, I am just not able to just sit at my desk and do it nonstop until it’s done. I need to be in the mindset to do it, and once I start I’m really only good for an hour or two before I realize I’m just not producing quality work anymore. Being the extremely flakey artist that I am, this mindset sometimes comes at 10 a.m. in the morning and sometimes at three, in the morning. When my insomnia truly kicks in, and my husband isn’t all that interested in talking about our feelings and hopes and dreams. The flip side of this coin: I have never given a portrait client images that I’m not completely proud of. When I deliver images to a client (extremely later than I said I would), I feel that they are truly the best of my abilities and completely indicative of my style. I feel my photography is worth the wait and I’m proud of that. Don’t push it just to be timely. No one recommends a photographer because they turn-around images really fast – they recommend the photographer that produces the best work.
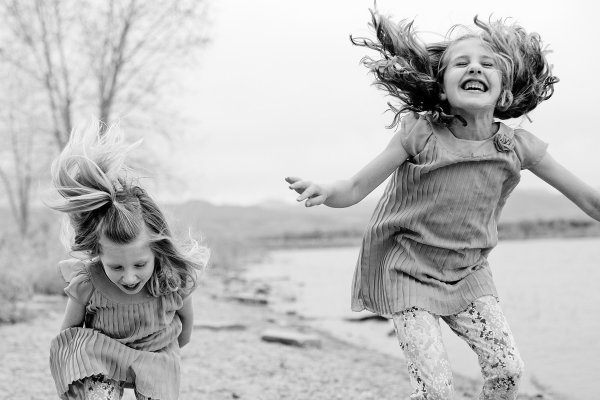
    lmattingly5

    #3 Chimping

    “Chimping” is the fine art of checking the back of your digital camera after every shot. It’s obnoxious and time-consuming and what it will show you is the difference between a dream shoot and having to redo the whole thing. Don’t check every time, but do check – often. You can’t count on chimping to give you amazingly accurate results – a screen that small is showing you much too sharp of an image than it will actually end up being. But it will show you  is if your settings are off. It will show you if you are not in as good of a spot as you think. There is no embarrassment in it and there is nothing wrong with taking a minute to readjust.

    I have to assume that when NASA puts astronauts in a space shuttle, they give them a few minutes to get everything adjusted how they want. Most photography situations are in constant motion – the sun is always going up or down, the people are always moving, the food is always – slipping? (I’m not sure. I don’t do food photography. But I would assume there are struggles.) The world moves, and as photographers we have to constantly double check to see that we are moving with it. When you are viewing the world from a lens, it’s a good idea to make sure the lens is seeing it the way your eyeballs are.

    lmattingly1

    #4 Being nervous

    The first time I ever photographed a child (for portfolio building), I didn’t have a memory card in. I shot for 30 minutes, thinking I was getting cute stuff and I happened to try and chimp and it said “no CF card” because at that point, I hadn’t learned the setting where my camera doesn’t shoot without a card (learn this setting!). I was mortified but didn’t want the clients to think I had just wasted their time so I just wrapped it up and went home. To this day, they don’t know as I just told them I was unhappy with the shots and gave them a new session. Ten years later and I still check to make sure that I have cards, an extra battery, lollipops and my camera a solid 20 times before I leave my house. I have been known to use the opportunity of a red stoplight to check my bag a 21st time. You know, just in case. I have never forgotten anything I couldn’t shoot without. But I have also never gotten past being nervous before every shoot. It doesn’t matter if I am photographing one of my dearest clients that I have photographed ten times before or if I have been hired by a national publication to shoot a celebrity – I arrive nervous as all get out. Eventually I forget to be nervous and I start being myself and it works out. But being nervous is good. Nerves mean you want to do a good job and you are humble about your talent. Don’t ever stop being nervous.
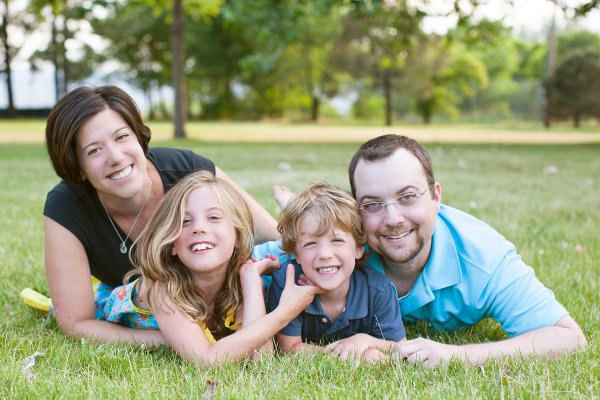
    lmattingly4

    #5 Being a one trick pony

    I’ve written before about my various attempts at real estate photography, product photography, and landscape photography. I’m terrible at all of them. Not only do I not have the right equipment for any of those, I don’t have the right eyeballs, the right personality, or the right style. A few years ago I decided to only photograph people, no matter what money I was offered to shoot something else, or what friend needed a favor. Earlier this year, I specified even more that I don’t do weddings, though those generally involve people, they just aren’t for me at this time in my life (I’m still holding on to the dream that a dog wedding job is in my future though). I am a portrait photographer. It’s where I shine and it’s how my clients know me. It’s my one trick.

    There is nothing to be ashamed about when not being the jack of all trades. If you love shooting landscape and that is your true passion, you are a landscape photographer. You may moonlight, by taking the occasional family portrait for a friend, and that’s fine. However sticking with your passion will keep photography interesting, fun, and your spirits high. There is no worse feeling than having done a poor job and when you take on jobs that are out of your wheelhouse, you bash your own confidence. Challenge yourself, but stay true to your passion as well.
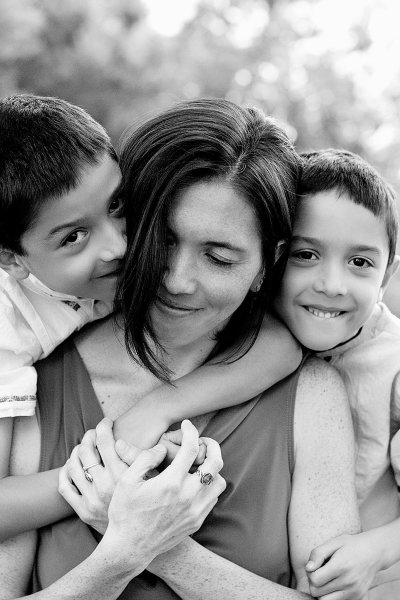
    lmattingly3

    A photograph is more art and intuition than process and procedure. Above all else, make the images you take your own. You can read a thousand different articles offering ideas and information, but take those only as suggestions in the hope of beginning and strengthening your own creative process. Photography is a form of expression and as such, is only interesting when you are exploring your own personal style and challenging yourself with your natural skills and ability. If your bad habits are working for you, don’t give them up.

    The post 5 Bad Photography Habits You Need To Keep Doing by Lynsey Mattingly appeared first on Digital Photography School.
    Digital Photography School

  • Photography Trip of a Lifetime to the Canadian Rockies for Your Bucket List

    With thousands of awe-inspiring and exotic places in the world, you have no shortage of places to visit and photograph. If you’re like me and have a bucket list of adventures you just have to shoot before you hang up your camera, allow me to add one more trip to your inventory.  This excursion not only includes heart-pounding scenery, but also what is probably the most expensive piece of photographic equipment you’ll ever get the chance to use – all for the price of “admission”.

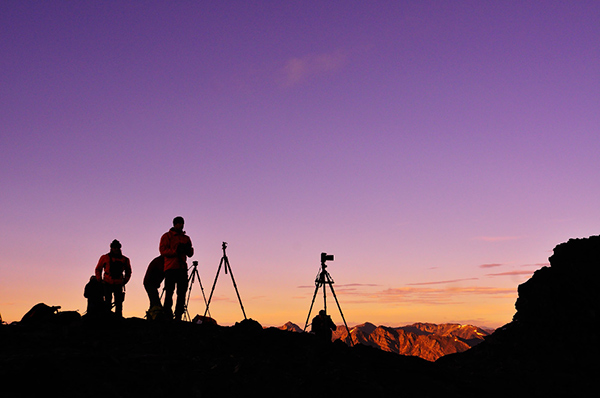
    _2DS1286W

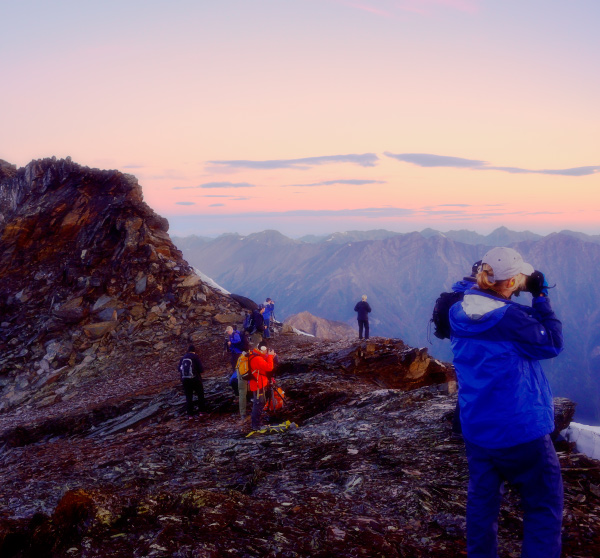
    Photographers waiting for the right moment.

    The adventure is heli-hiking, in the Bugaboo Mountain Range in Canada but with a twist for photographers. I signed up last September for a trip sponsored by the Canadian Geographic Society Photography Club, and I was so enchanted a friend and I are going back this year to do it again, this time with world renowned Canadian nature photographer John Marriott heading the trip. I wanted to share this photo adventure with you because it’s almost the perfect photographer’s dream destination.

    This trip has it all:

    • Rarely seen mountain vistas so your images won’t soon become cliches
    • Soul-soothing Mother Nature everywhere to inspire and energize your imagination
    • All the gourmet food you can eat
    • Genuine, fun and extremely knowledgeable staff
    • First class accommodations
    • Yoga and massages
    • Affordable budget
    • And helicopters

    Yes, helicopters – that’s the pricy bit of equipment I was mentioning.  Let’s talk about photography and the helicopters first, then I’ll go into the logistics of the trip and what you need to know if you decide to go.

    Mountain Landscapes Like You’ve Never Seen Before

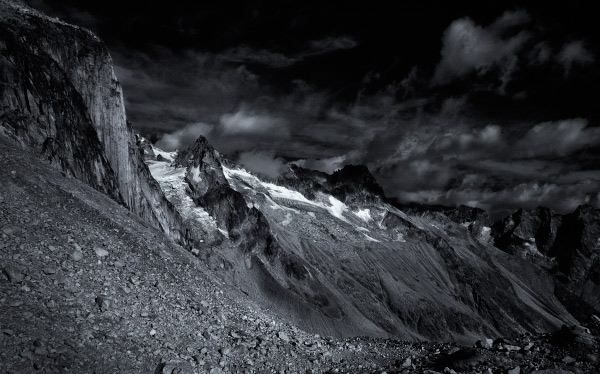
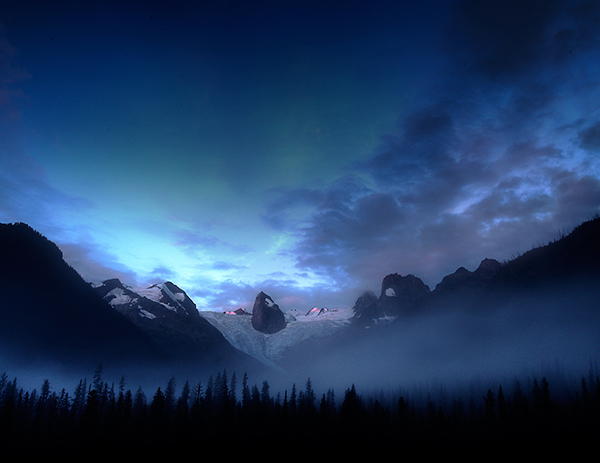
    In the Purcell Mountains (generically referred to as the Canadian Rockies), in eastern British Columbia, Canada, just west of the famous town of Banff,  is a remote mountain range known as the Bugaboos (PDF map). It’s not easily accessible, and the rugged terrain limits visits to only those die-hard outdoor adventurers. There are almost no roads into the area, and climbers and hikers are warned that it is a “wilderness area, without supplies or equipment of any kind”. Fortunately for us photographers, the helicopters allow easy travel to the most photogenic locations, and the company that runs the trips also has two first-class lodges high up in the hills, so all your creature comforts are taken care of.

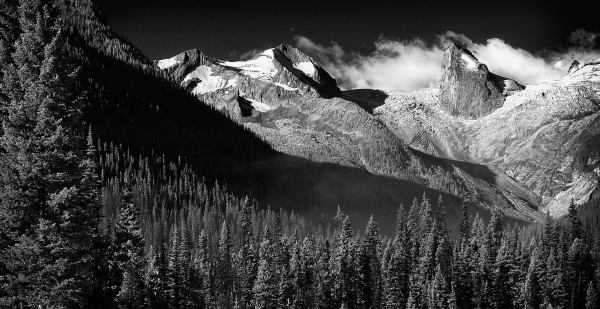
    Bugaboo mountains for photographers

    The Bugaboo Spires, as viewed from the Lodge.

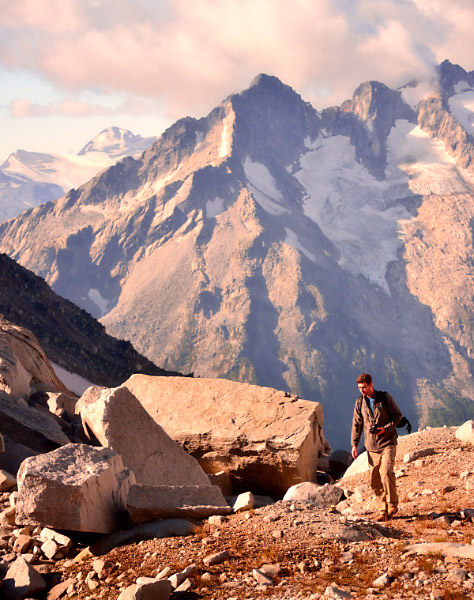
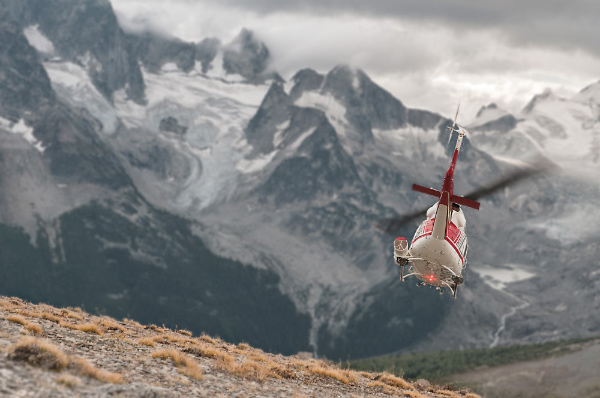
    Each morning the helicopter, transports you high into the alpine meadows, glaciers, hanging valleys and azure blue mountain lakes, that very few people ever get to see. I visited several locations last year that were around 9000 feet in elevation. All the views were heart-stopping!  Each day is like this, the tour guides – specialists in interpreting mountain environments, safety, and photography – along with an expert professional photographer, provide advice, help and expertise in shooting mountain landscapes. From selecting the best locations for the day, to determining when to set out in the morning to get the sweet light, all the hard stuff is taken care of for you. It allows you to devote your creative energy to capturing what your imagination perceives. Imagine being immersed in beauty, with ten other photographers, and having an expert photo instructor at your side for four days – what could be better than that?

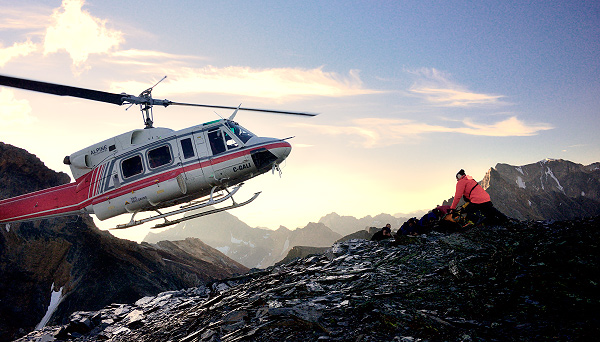
    _DSC7249

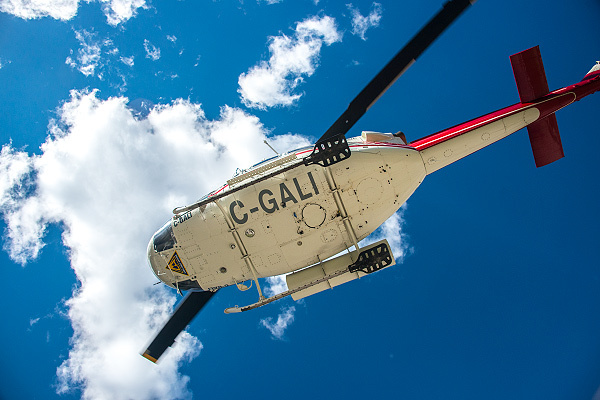
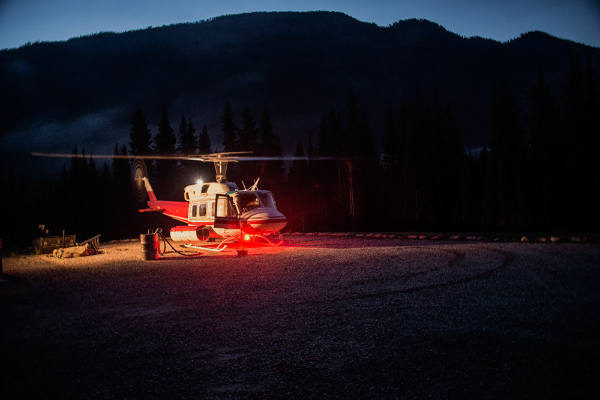
    Your ride for the weekend – transporting you to the peak.

    Photographic Tips and Advice from a Pro

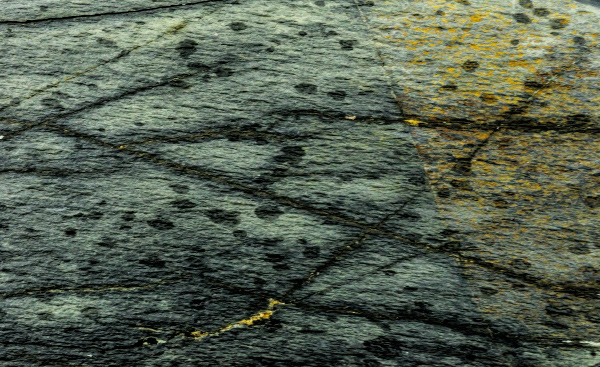
    It’s an education like no other, in a real world classroom. It’s camaraderie and fun with other photographers who think like you do. At every location, the tour photographer will help you set up, explain the best lenses to try, what settings you should start out with and generally give you some direction to ensure you shoot some great frames. But at the same time, there’s plenty of room for innovation and your own individual shooting and subject preferences. One thing that I kept having to remind myself of is that the alpine environment is also prime scenery for macro photography too. It’s not just the “big picture”. When I was there in September, the wildflowers had already finished flowering, but between craggy rocks all sorts of vegetation was making an appearance. This year I’m going back at the beginning of August – the peak of wildflower season. There are spectacular details in everything. Don’t forget to look down.

    Alpine Abstract

    Alpine Abstract

     Spend Every Minute Immersed in Your Passion

    No time is wasted on a photography heli-hiking trip. At least once, you’ll be up before dawn to fly off to a place where sunrise will be dramatic.  Even if no pre-dawn flight is planned on that day, sunrise from the lodge is always a wonder. The coffee is always ready for you no matter when you roll out of bed, so there’s no excuse for sleeping late. After your sunrise shots, a full breakfast will be waiting for you, hot eggs, healthy grains, whatever you could imagine is all there. Back on board your helicopter ride and it’s off to another location. You even get gourmet picnic lunches on the mountain, where you can take a break and compare notes and images with your group, or just keep shooting.

    The wh-early bird gets the worm.

    The “wh-early” bird gets the worm. 

    _DSC7151

    On top of the world at sunrise.

    _DSC6180crop

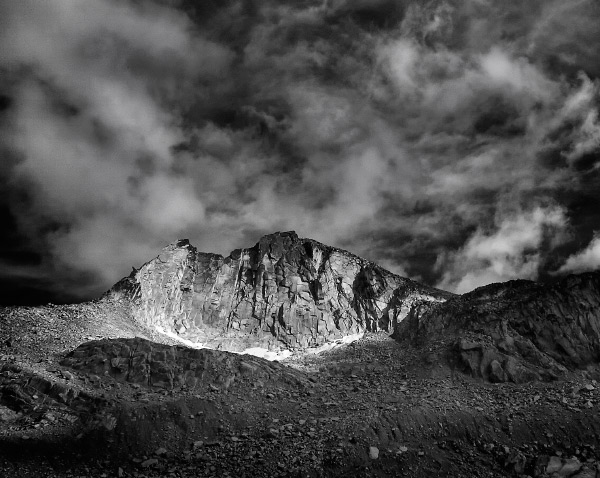
    Would Ansel Adams approve?

    Sunrise over the Spires, view from the Lodge

    Sunrise over the Spires, view from the Lodge

    More Photography, Food, and Fun

    When the day is done, your helicopter will bring you back to the lodge where you can have a massage for your tired body before the gourmet dinner. Depending on your program, you may have a photo class after dinner, a show and share session, or another helicopter trip to catch the golden hour on a mountain lake or peak, for that once in a lifetime shot.

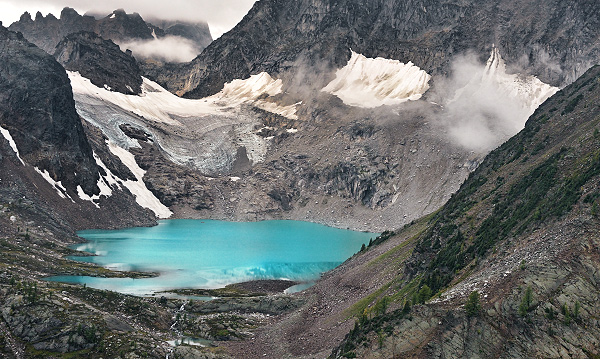
    Aptly named Cobalt Lake

    Aptly named Cobalt Lake

    In fact one of the more delightful aspects of these trips happens back at the lodge. Not surprisingly, the staff are the coolest and most genuinely friendly people I have come across in any of my travels anywhere in the world. Everyone sits together for dinner, family style. Your helicopter pilot may be serving your wine, and the person who made up your room in the morning might be handing out the appetizers. Everyone pitches in where needed, although only the pilots ever fly the helicopters. The atmosphere is encouraging and supportive; informative and humorous.

    Fun, whether in the field or at the lodge, is definitely a key item on the overall agenda. So besides sharing photo tales and techniques with your fellow photogs, the guides and staff will keep you more than amused with stories of their adventures in the Bugaboos (and if you’re like me, you’ll also be planning your next visit).

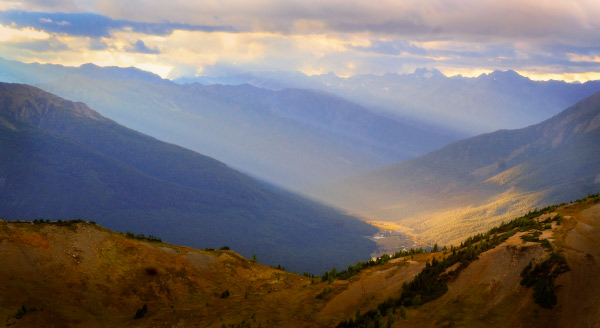
    Sunset godrays

    Sunset godrays

    What You Need to Know

    You’ll want to seize the experience up there in the mountains so a bit of basic preparation will go a long way. You don’t want to be lugging 40 pounds of gear up those trails, and despite loving the helicopter rides you won’t want to have to make an extra trip back to the lodge because of an injury. The company that runs the tours has all the info you need as far as mountain safety and fitness is concerned, and they will provide you with all the hiking gear you’re likely to need.  But as a photographer who’s made this trip, I have some recommendations based on my mistakes.

    Making great images on a trip like this requires that you’re fully prepared, energized, and organized. You’ll spend some time walking and perhaps hiking (depending on your group), and you don’t want to be all tuckered out before the end of your day.

    _DSC7324

    The air is thin up here. Pack light.

    Pack Light

    Bring the minimum amount of gear necessary, and be strategic. Remember you have to pack your lunch and water as well, and a tripod is a must. If one of your telephoto lenses has macro capability bring that one, rather than two separate lenses.

    For my trip last summer, I bought a light-weight Sirui carbon fibre tripod and ball head. That was a smart move. The dumb move was bringing three camera bodies and five lenses. I’m a girl from the prairies and hiking with all that gear at 9000 ft was just plain dumb! What was I thinking? If you sign up for the John Marriott workshops, he will send you information regarding the equipment you should bring, but I recommend a wide angle, a small macro and a telephoto (70-200mm range) plus polarizers, and a neutral density filter. Less stuff challenges you to be a more creative photographer.

    A little exercise before you leave home won't hurt.

    A little exercise before you leave home won’t hurt.

    Get in Shape

    Even though there is little serious hiking on the photo tours, a short uphill climb can feel like a marathon with a backpack full or gear, thin air, and an out of shape body. You don’t have to be an athlete, but again every little bit of fitness helps. My dumb move – last year I did nothing, plus I was in a car accident the week before I left and fractured two ribs. Walking to the bathroom was painful, never mind an uphill climb with too much stuff in my backpack. This year I am so far not injured, so I am running flights of stairs, walking around with my full backpack and doing the 7-minute-workout three times a week. I have five weeks to go, and I know I won’t win any gold medals, but my time in the mountains will be a little more enjoyable this year because of my preparation.

    Just sit and enjoy the experience for a few minutes.

    A little uphill walk can feel like a marathon.

    Take a minute enjoy the moment.

    Take a minute enjoy the moment.

    Try Not be be Overwhelmed

    It’s so very easy to be completely blown away the first time you get off the helicopter. You’ve never seen anything like this before, and for many, you won’t have a chance to see it again. But when you get to a location, put all your gear down. Rest for a minute. Take a few deep breaths. Snap a few iphone photos at first so you have the memories, but just sit and  feel how you are feeling. Take a few minutes to let it all settle in your brain. There’s no need to rush, trying to capture everything. Relax, you’ll be at this spot for a while, and the day is long.

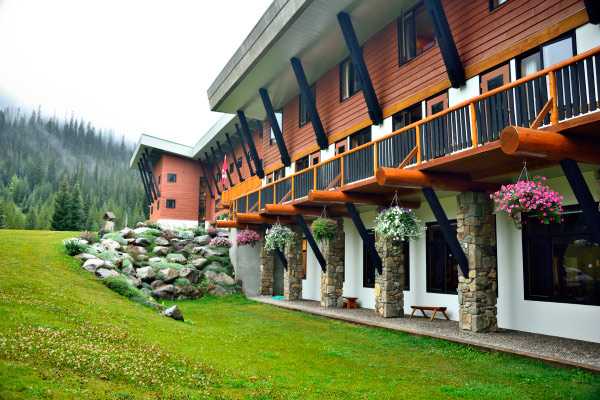
    The CMH Bugaboo Lodge

    The CMH Bugaboo Lodge

    The Logistics

    I tend to rave about this trip for many reasons but what was outstanding was how thoroughly well organized everything was. Everything! Given all the complexities of booking and moving so many people (about 40 guests are participating in various heli-hiking tours along with the photography groups) to a remote lodge, and planning flights around weather, and light, and all those people, the fact that nothing went awry was such a huge surprise. All the details from making my reservation, taking care of answering any questions, call backs if needed, were handled so well. If someone said they’d call back they did. They send extremely detailed emails containing everything I needed to know from packing lists to travel insurance.  Everything is taken care of.  If you decide to embark on this adventure, you just have to get yourself to Banff, Alberta. That’s it.

    _2DS1192W

    You’ll need to spend at leat one night in Banff, because your trip to the helipad starts very early. Most people fly to Calgary, Alberta, and take the shuttle bus to the hotel in Banff or Lake Louise. In the morning you take a cab to the bus depot where you meet the coach that will take you to the helipad. The tour company pays your fare for the cab and the bus. Once on the bus you’re served coffee and breakfast, and you’ll get a lively and comical conversation from your bus guide. It’s about a two hour trip.

    Once you arrive at the helipad, the helicopter will transport about 8-10 people at a time to the lodge, about a ten minute flight. When you arrive at the Lodge, you get lunch, a safety orientation, get fitted for your hiking equipment, and then before you know it, you’re on your first helicopter ride to the mountain tops for the perfect photography experience of a lifetime. It just gets better and better after that!

    _DSC7575

    The company I went with is CMH – Canadian Mountain Holidays. They’ve been doing this for years and the founder was the person who invented heli-skiing so they know the mountains. There is one more photo trip in September this year (2014), but my friend and I got the last to spots for the August photo trip with John Marriott.  The cost for the heli-hiking photo tour is about $ 3280 CAD + taxes, and it includes everything except alcoholic beverages and your massage treatments.  Photography in the Bugaboos – the perfect photography trip.

    What was your favorite bucket list photo trip?

    There’s a good chance I’ll be back again next year – I’d love to take a group of photographers to this magnificent place to experience a real Canadian photography bucket list trip.   Anyone keen on joining me?

    The post Photography Trip of a Lifetime to the Canadian Rockies for Your Bucket List by Alex Morrison appeared first on Digital Photography School.

    Digital Photography School

  • Preview of the Slide and Clutch Camera Carrying System from Peak Design

    With Peak Design launching another set of products via Kickstarter, we’re very fortunate to get our hands on the new, as yet unreleased, Slide and Clutch camera carrying system prior to launch for a little dPS preview!

    You can see the Kickstarter here and pre-order if that’s your thing!

    As a Peak Design pro, I’ve been using “Capture” since it was released along with Leash and Cuff. The video below of Pete and Adam will give you a great idea of what the team at Peak Design are doing with this new gear and why they’re passionate about what they do – they love this stuff we do called photography.

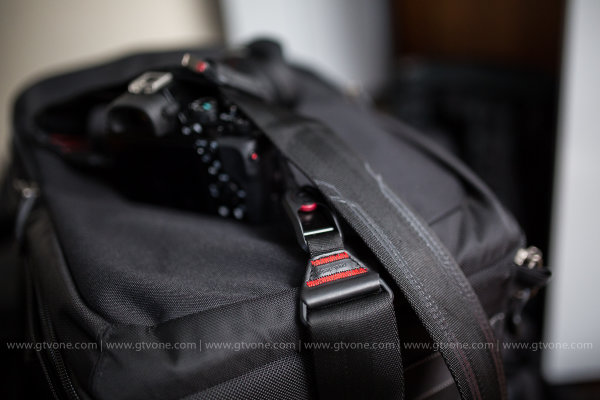
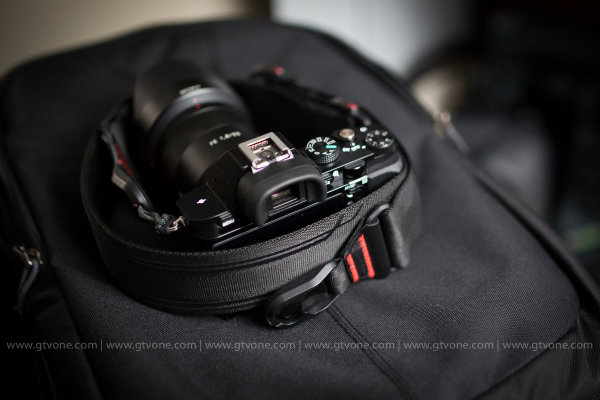
    The Kickstarter is already funded, 450% funded, which says a lot about what they’ve built and the products they’ve created in the past. The new strap, Slide, is building on that, and after using it for a week (no, they don’t pay me to say this) it really is worth picking up now via the Kickstarter campaign. If you don’t, and you see it afterwards for more money, you will think to yourself “you know, Simon was right”. The strap sits really comfortably on my shoulder, it allows quick attachment to my camera through Peak Design’s unique anchor system, it literally slides around to where you want it and is so super easy when you’re wearing it, to make the strap shorter or longer as you can see in the video.

    I’ve also been using Clutch, a hand strap system that keeps your camera firmly in your big greasy paw when you’re out and about shooting. I have used it with a gripped Canon 5DMK3 and without the grip – it’s quick to attach, quick to tighten and very quick to loosen off, too. When shooting portrait, I’d slide my hand out of Clutch and shoot my portrait photographs and then slide my hand back in. I didn’t really notice any loss of speed and after a few goes I was a veritable wild west camera slinger. I used Clutch on the weekend for a cycling event and loved the flexibility of being able to not worry about dropping my camera in the rain, and boy did it rain! It stayed firmly in my hand and allowed me to drop the camera into Capture to use the other body with my long lens and Slide attached – once done, I could let the long lens slide around to my hip / back and grab body number one back to continue shooting. Lots of bodies, no time to stop (over a thousand cyclists to grab a portrait of while they cycled past) and it worked perfectly (aside from when I tried to drink soup and shoot at the same time, but that’s another story).

    Back in my office now and this is what the Slide strap looks like attached to a Sony A7, (granted, at f/1.4 which doesn’t show you much A7 at all, but you get the picture) to give you a vague idea of scale.

    peak-design-slide-preview

    peak-design-slide-kickstarter-dps-preview

    In conclusion, I’m super impressed with this, the next iteration of the Peak Design strap – Slide. (Leash being my first Peak Design strap) and from me, it’s highly recommended! I give it a healthy FIVE stars.

    That said, I’m sure you have questions! So, as I have the Slide with me, and I’m taking it on a quick trip to China tomorrow, please feel free to ask any questions in the comments section below, I will answer as best I can. Another great product from Peak Design. Well done guys.

    –Sime

    The post Preview of the Slide and Clutch Camera Carrying System from Peak Design by Sime appeared first on Digital Photography School.

    Digital Photography School

  • How to Become a Photography Icon: Inspired by Henri-Cartier Bresson

    On the 30th of January in 1948, Mahatma Gandhi was killed by three bullets fired at close range. And while the world lost one of its greatest men (arguably), one man gained even more status as one of the most important photographers in the world.  Henri-Cartier Bresson had photographed Gandhi just about an hour before his tragic death. He also Continue Reading

    The post How to Become a Photography Icon: Inspired by Henri-Cartier Bresson appeared first on Photodoto.


    Photodoto

  • 4 Ways Self-Critique Can Improve Your Photography

    Self-Critique-PhotoLearning how to analyze and judge your own artistic work correctly is a valuable skill that can be a bit tricky to learn properly. I’m sure you’ve heard the saying “I’m my own worst critic” thrown about, you may have even said it yourself in reference to your own photography. However, there are ways that you can harness this self-criticism and learn from it rather than allowing it to consume you and destroy your self-confidence.

    Learning how to constructively critique your own photography can not only help you make better photographs each time you pick up a camera, but it will also build your confidence as a photographer, and prepare you for the inevitable critiques from your peers and colleagues.

    This article is a bit different in the sense that the images that I’ve used to illustrate the post showcase one particular case of how I used self-critique to iterate a photograph over the course of a shoot. I will cover the benefits of self-critique and how it can help you become a more confident photographer – so read both the article and the captions of each photograph as you continue along.

    #1 Reinforces your knowledge of the craft

    improve-photography-self-critic-2

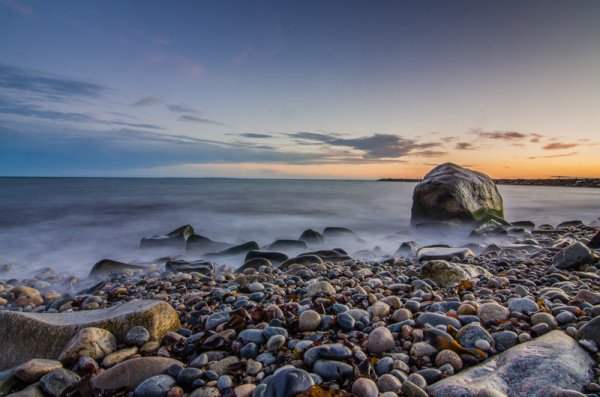
    After looking at what I’d captured here on the LCD of my camera I decided that the prominent features of this landscape wasn’t the sky or the foreground, but the large boulder along the right side of the frame.

    You read eBooks and tutorials to learn all the technical skill required to make stunning photographs, but in the heat of the moment technique will often slip, especially when you’re just learning. That’s okay, but it’s important to learn how to notice when this is happening and correct for it along the way.

    Providing yourself with a thoughtful self-critique from time to time can really help you locate the most common faults in your photography. After performing a few of these critiques you may notice that you commonly forget to double check your settings leading to poorly exposed photographs or improper Depth of Field, or you may notice that you commonly struggle to compose a photograph with purpose resulting in a photograph that doesn’t capture the emotion that you had intended.

    #2 Teaches you how to look at a photograph critically

    improve-photography-self-critic-3

    A second setup left me with a feeling that I was on the right track, but now the scene felt too cluttered and confined.

    The ability to articulate what it is about a photograph that makes it special and what needs improvement, as specifically as possible, can drastically improve your photography. This is something that is learned over time and can be difficult at first, especially when looking at your own work.

    Eventually, you’ll get to the point where this sort of critical analysis will come naturally. You’ll find yourself fine-tuning your composition and settings in the field, as I’ve done with the photographs that illustrate this point. You probably won’t even be consciously aware of the fact that you’re doing this.

    #3 Helps build your confidence

    improve-photography-self-critic-4

    Now, I had the composition that I wanted. Something that featured the boulder prominently, yet allowed there to be enough room to breath in the foreground., but the water just wasn’t right. Time to adjust the settings to allow for a longer shutter speed.

    No one enjoys being told what’s ‘wrong’ with something that they’ve created, but it’s going to happen, whether you ask for it or not. Even the best photographers have their critics so it’s not a matter of skill, it’s simply the way the world works.

    By finding the ability to critique your own photography you’ll have an idea of what people might say when they are viewing your work, and as a result, you’ll be more prepared to defend the choices you made to create the image.

    #4 You’ll become better at offering advice to others

    While this might not directly affect your skill as a photographer, it does help to reinforce the other three points listed above. When you are able to offer constructive feedback to someone who’s just starting out you’ll not only feel great by helping them improve, but you’ll be more confident going forward with your own work at the same time.

    improve-photography-self-critic-5

    The longer exposure sealed the deal for me creating that milky water effect around the base of the boulder that I was featuring in the shot.

    The post 4 Ways Self-Critique Can Improve Your Photography by John Davenport appeared first on Digital Photography School.

    Digital Photography School

  • Photography Hunting – Play the Waiting Game with Kids

    What is photography hunting?

    I am a hunter. My prey, however, does not scurry through the woods, fly through the sky or swim in the streams. My trophies are instead moments, which I stalk, camera at the ready. When the time is right, the target is placed squarely in my sights. Click.

    I’m constantly on the hunt for that fraction-of-a-second gesture, facial expression or scene that takes an ordinary photograph to the next level. Hunting can be tiring and a little like war, in that there are long periods of boredom interspersed with brief moments of excitement. But those moments of excitement and the superior images they provide are well worth this mental approach to photography.

    Halloween

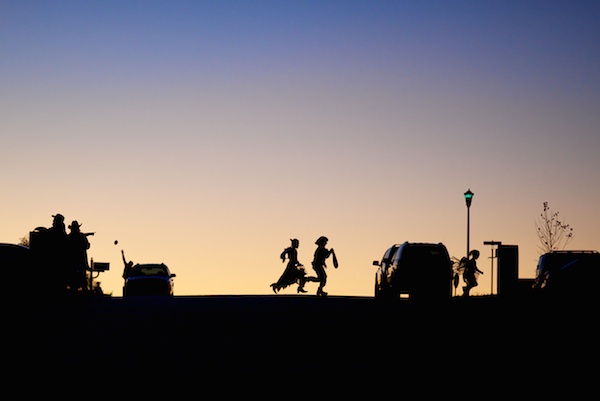
    Seeing the potential for a nice Halloween silhouette, I waited at the bottom of the hill for several minutes until the perfect moment presented itself.

    When I first began the journey of documenting my children’s lives, my methods for doing so were ineffective. Whether the scene was ‘created’ for the purpose of the photograph, or I caught my children in a natural setting, I would go after the end-result with a rapid-fire intensity, hoping one of the many images captured would result in success. Sometimes I would get lucky and catch the optimal moment with one of my stray shots. Other times, I would realize immediately before, or after, I’d pressed the shutter that the best frame had evaded capture. What an awful feeling it is to have your prize slip through your fingers, never to be seen again.

    I would also try to control my subjects, in the hope they would appeal to reason and take requests from the man behind the camera. Sensing dad’s genuine desire to capture the moment, the little darlings would naturally do everything in their power to ensure I was unsuccessful.

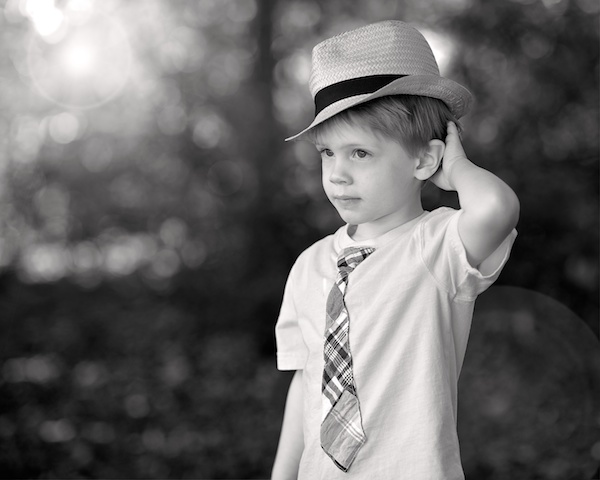
    Hat & Tie

    Over time, my approach to photography evolved. Instead of aggressively spraying bullets into the woods, I now calmly sit back and monitor the scene. Rather than attempting to control the scene and my subjects, I now try to take the best photos the situation will naturally allow, without my overt intervention.

    3

    As with real estate values, photograph hunting hinges on location, location, location. Make sure to set up shop in the ideal location, so that when the moment arises, you’re not scrambling to get into position.

    Know your subject

    The first rule of photograph hunting is to know your subject. My subjects are two energy-filled kids, interested in anything but sitting stationary and smiling for dad. They have other things on their to-do lists and, if I ever hope to make decent photographs, my approach has to be the yin to their yang. If they are constantly moving and unpredictable, I have to be patient and watchful. If they refuse to pose, I have to fabricate poses using their natural movements and expressions. Essentially, I have to become a hunter, constantly focused on the situation.

    Lower quantity – higher quality

    Getting used to this alternative strategy may take time, but the transition can be relatively pleasant. Eventually, you won’t get as frustrated when that perfect moment slips away. But more importantly, because you’re strategically lying in wait for the right moment, fewer moments will slip by you in the first place. The days of rapid-fire documentation will gone, which means lower quantity, but higher quality. This reduction in the number of images produced has secondary benefits, in terms of processing time and data storage. Simply grab your camera, get into position, and wait patiently with the camera to your eye for that special moment when the stars align and the shutter goes click.

    When the subject has no awareness of the photographer’s presence, the results tend to be more intimate.

    A few photography hunting tips:

    Camouflage

    Become the wallpaper, so as to not influence your subjects’ movements and actions. You want them to be immersed in their own little worlds, as once they become aware of your presence and intentions, the entire situation can quickly unravel. Remaining an observer of the scene, as opposed to a participant within it, results in a more relaxed shooting environment, which fosters superior results.

    Know your weapon

    Know your camera and know the basics of photography so that you can quickly adapt to new light, positions and situations – without having to take the camera down from your eye. Too often, you will find that it is during those few seconds when you are not ready to take a photo, that the best photo opportunity will come and go.

    The Hunter

    Don’t fall asleep in your tree stand

    Always maintain your mental focus. If you’re personally invested in the opportunity, and if the chance for a trophy photo exists, be ready. It’s amazing that such fleeting moments, which last mere fractions of a second, can have such long-term impact when viewed again and again. Stay focused on the subject so that when that split-second gesture, facial expression or scene presents itself, you’re there ready to capture it.

    RMP_3336 - Version 2 (2)

    Don’t spray and pray

    Take fewer shots, with more precise aim. Put down the fully automatic in exchange for a nice, simple single-shot. Taking fewer photographs, that are each precisely timed and focused to hit the target, will result in more trophies hanging proudly on your wall, and will remove some of the post-process burden associated with sorting, editing and storing images.

    Newsie

    Photos don’t have to be 100% natural to employ the hunting technique. If I notice a scene with nice light, I’ll place my kids in the right position and watch them play until I see the ideal look or gesture.

    Do you have any other tips for photography kids? Please share in the comments below, and show us your images as well.

    Happy hunting!

    The post Photography Hunting – Play the Waiting Game with Kids by Ryan Pendleton appeared first on Digital Photography School.

    Digital Photography School

  • Create Better Black and White Photos Using Local Adjustments in Lightroom 5

    Local adjustments in Lightroom

    I showed you how to convert your photos to black and white in Lightroom in an earlier article. But, considering it dealt purely with global adjustments, the piece only gives you half the story. Global adjustments get you started, but in order to get the best black and white conversion possible you need to make local adjustments as well. This article will show you how to do this.

    First, a couple of definitions:

    Global adjustments: Any adjustments (to brightness, contrast etc.) that affect the entire image.

    Local adjustments: Adjustments that affect only part of the photo.

    Before I show you how to make local adjustments, let’s think about why you would do so. Certain things pull the eye more than others. For example, when you look at a photo with people in it, your eye will go straight to them, even if they are small in the frame. This is probably down to human curiosity more than anything, but it works.

    Two other things that pull the eye are highlights and contrast. The idea behind making local adjustments is that you can alter the brightness or contrast of certain areas in the frame to influence where the eye goes. This creates a better, more beautiful photo.

    Dodging and burning

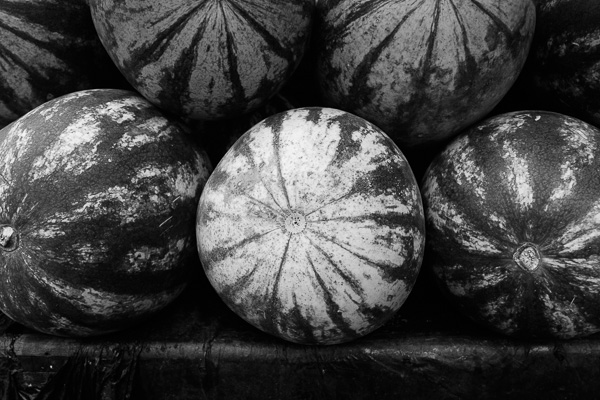
    Here’s the photo we’re going to work with in today’s article. I’ve already converted it to black and white using global adjustments.

    Local adjustments in Lightroom

    As you can see, it lacks a focal point. It also contains lots of beautiful textures which will look great in black and white if we can bring them out.

    In order to make effective local adjustments you need to decide what you want to achieve before you start. Here, I decided to make the central watermelon the focal point of the composition. Decision made, it’s just a question of how to achieve it.

    Dodging and burning

    Although Lightroom itself doesn’t use these terms, you will find them referred to time and again in post-processing. Dodging is the act of making part of the photo lighter, and burning is the act of making it darker. They originated in the chemical darkroom and are also done in photo editing programs like Photoshop.

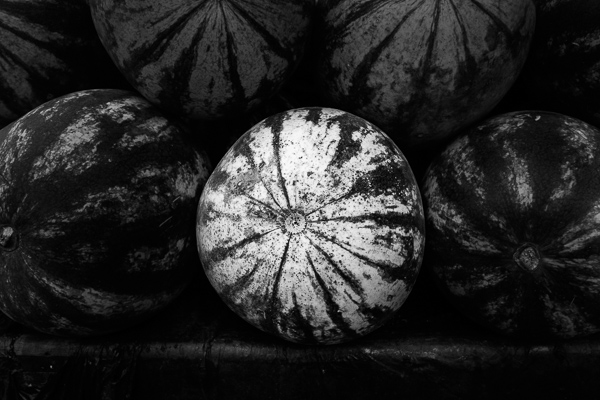
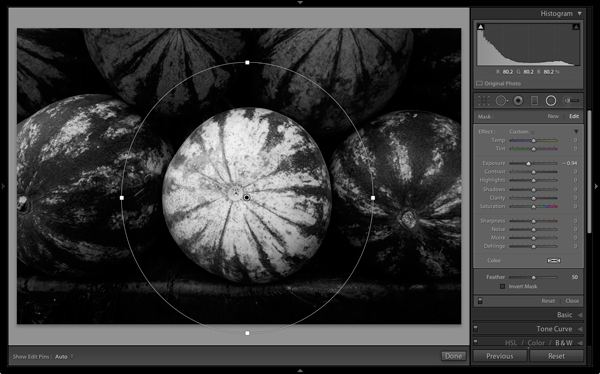
    The first step to achieving my aim of making the central watermelon the focal point, is to make the rest of the photo darker. I did that by placing a Radial Filter over the central watermelon and moving the Exposure slider left.

    Local adjustments in Lightroom

    Note: The Radial Filter is new to Lightroom 5. If you have an earlier version of Lightroom, you can use either Post-crop Vignetting or the Adjustment Brush instead.

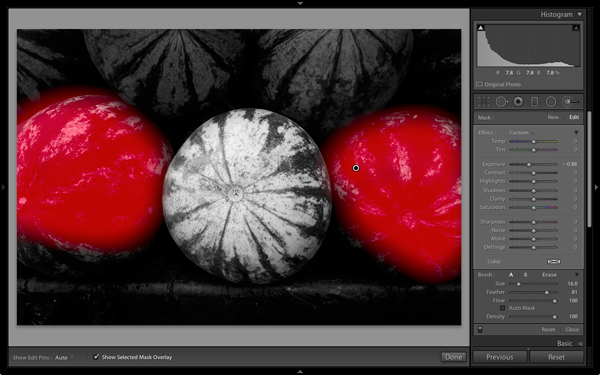
    The two watermelons either side of the central one are a little too bright. So I used the Adjustment Brush to select (mask) them and moved the Exposure slider left to make them darker. The screenshot below shows the area covered by the mask. Note how I only painted the top parts of the watermelons as the bottom part was already dark.

    Local adjustments in Lightroom

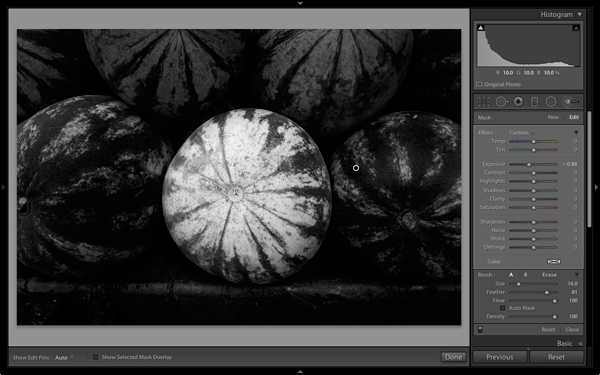
    This is the result of the local adjustment.

    Local adjustments in Lightroom

    Contrast and Clarity

    The next step is to improve the appearance of the central watermelon. I can do that by increasing contrast to bring out the beautiful textures of its skin.

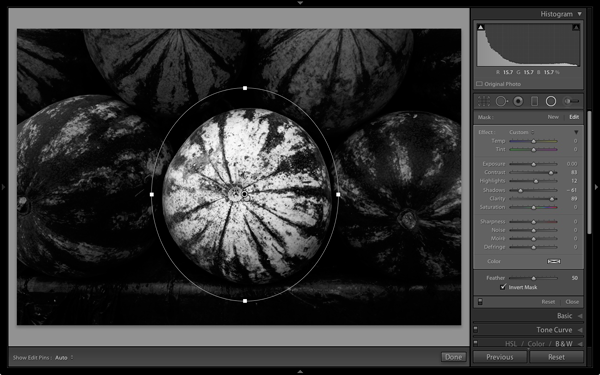
    I placed another Radial Filter over the watermelon (you could also use the Adjustment Brush) and ticked the Invert Mask box so the adjustment was applied inside, rather than outside, the filter. Then I increased Contrast and Clarity, and moved the Highlights slider right and the Shadows slider left. The result is a big increase in contrast, bringing out the texture of the watermelon’s skin. Here’s the result.

    Local adjustments in Lightroom

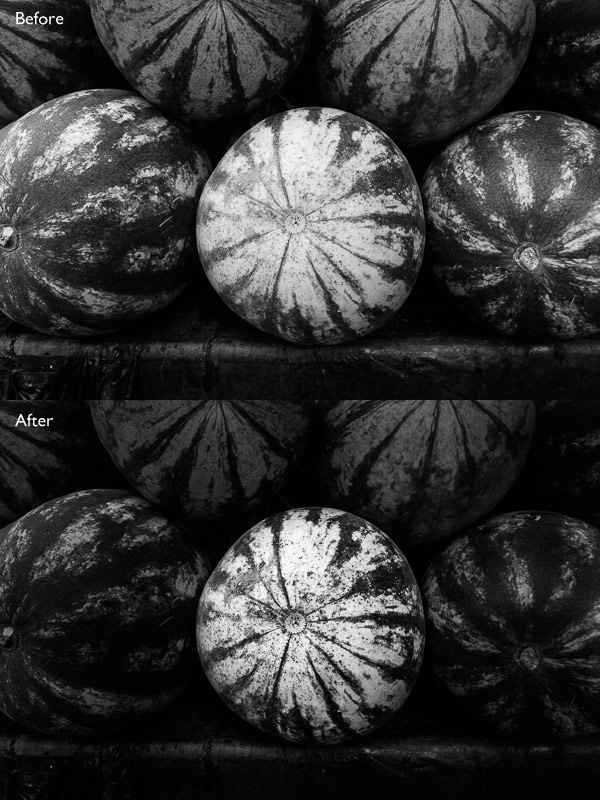
    Here are the before and after views so you can see the difference, which is entirely down to the local adjustments.

    Local adjustments in Lightroom

    That completes my overview of using local adjustments in Lightroom. As you can see, the local adjustments turned an average photo into a much stronger one. There is nothing overly complicated about it, it’s more a matter of training your eye to see in black and white and then deciding how to use the tools that Lightroom gives you to realize your vision.

    I’m curious to hear how you use local adjustment when you convert your photos to black and white. Please let us know in the comments.


    Mastering Lightroom: Book Three – Black & White

    Masterlng Lightroom: Book Three – Black & White by Andrew S GibsonMy ebook Mastering Lightroom: Book Three – Black & White goes into the topic of black and white in depth. It explains everything you need to know to make dramatic and beautiful monochrome conversions in Lightroom, including how to use the most popular black and white plug-ins. Click the link to visit my website and learn more.

    The post Create Better Black and White Photos Using Local Adjustments in Lightroom 5 by Andrew S. Gibson appeared first on Digital Photography School.

    Digital Photography School

  • Avoid These 10 Mistakes That Can Ruin Your Image Quality

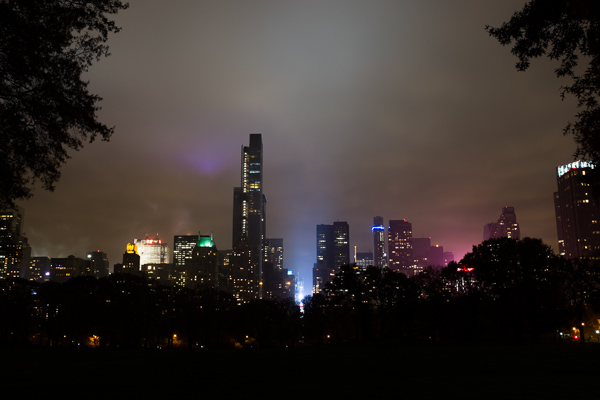
    Central Park South.

    Central Park South.

    How many times have you captured an amazing image only to view it on your computer, or as a print, and realize that you screwed something up along the way.

    Unfortunately, the only way to stop doing a lot of these easy-to-make mistakes is to have an image ruined by them.  Once you screw up an image you’ll quickly learn not to make the same mistake again.

    Here are the most frequent ways I see photographers ruining their images. Avoid these 10 mistakes that can ruin your images

    1. Leaving Image Stabilization on when using a tripod

    Everyone learns this tip too late. Image stabilizers (in your lens) usually make your images sharper by reducing camera shake. However, when your camera is on a tripod and perfectly still, the motor can actually cause shake! I know a few of you are shaking your head right now as I did when I learned this. If you couldn’t figure out why your tripod images weren’t perfectly sharp, this is usually the reason, although a strong wind or touching the tripod or camera while shooting can do this as well.

    2. Not using a fast enough shutter speed

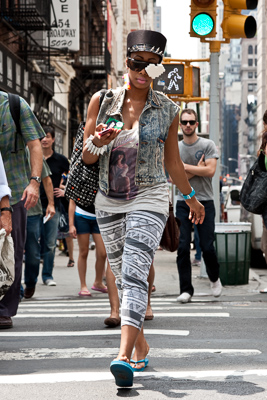
    Lego Girl, SoHo.

    Lego Girl, SoHo.

    Unless you are on a tripod, to achieve a sharp shot your shutter speed needs to be at least 1 over your focal length.  So if you are shooting at 50mm your shutter speed needs to be at least 1/50th of a second (and I like to add a little leeway to that to be safe).  If you are on a cropped sensor, remember that a 50mm lens might be the equivalent of an 80mm or 100mm view, so make sure to adjust for that.

    For moving subjects, 1/320th of a second is my ideal speed to freeze motion.  For fast moving objects such as cars or sports, I prefer an even faster shutter speed.

    Be especially careful when shooting on Aperture Priority mode or in the auto settings, because it is easy for the camera to set the shutter speed to a setting that will introduce blur into your image without you noticing.  For this reason I frequently like to shoot in Shutter Priority mode.

    3.  Not focusing exactly on the most important object, especially when shooting with a large aperture

    If you are shooting with a small aperture, such as f/8 and above, you will often have leeway, but especially when shooting with a large aperture (like f/2), you need to make sure that the most important element in the image is the sharpest.  If this is not the case, it might not always be noticeable on the monitor, but it will show up when you make a print.

    This is especially important when doing portraiture. Missing the sharpness on the eyes often means ruining the image.

    Be especially careful when the element you are focusing on is small, because it will be very easy for the camera to focus on the area behind it instead. This is a mistake that is frequently made by newer photographers. In these tricky situations you need to pay attention to whether the autofocus is picking up the small element.

    4. Not raising your ISO up higher when needed

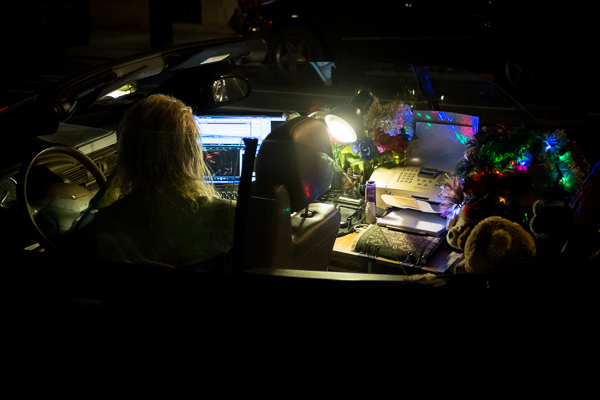
    In situations where the light is not strong and you need a fast shutter speed and a large aperture, don’t be afraid to raise your ISO. I see too many people afraid to go above ISO 200.  I use ISOs of 800, 1600 and even 3200 a significant amount. Many digital cameras, especially ones made within the last four years, can handle these ISOs.  Yes it will add noise to your photos, but in many cases you will notice that despite the noise, the technical quality of your images will be better. Noise can look very pleasing, especially on the newer digital cameras.

    Mobile Office, Midtown.

    Mobile Office, Midtown. ISO 3200

    5. Moving while you shoot

    This is my biggest pet peeve, by far.  I am normally a very calm person, but when I see this it makes me want to grab the photographer and shake them silly.  I see so many people that take photos without breaking their stride.  Stop your motion every time you take a shot, if even for a second!  Keep your hands still!  It’s not difficult.  Respect every image that you take enough to stop and think about it for a second, and your images will ultimately respect you when they turn out well in print.  Sorry, that is the end of my rant for the day.

    6. Over-sharpening

    Be careful of over-sharpening your photos. I see this happen all too often. Particularly with high resolution cameras with the right settings, your images often will only need a minimal amount of sharpness. If you overdo the sharpness it will actually have the reverse effect, making your image look fake or as if it was blown up to a larger size.

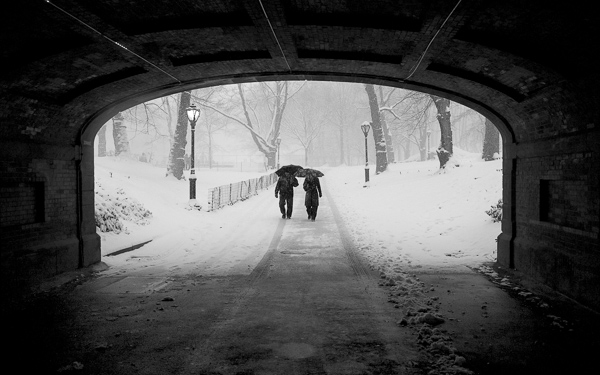
    Couple in Snowstorm, Central Park

    Couple in Snowstorm, Central Park

    7. Resizing your images after you sharpen them

    Sharpening should be the last step after you have sized the image to your final print size. If you sharpen your image and then resize them it will negatively affect the quality of your photo.

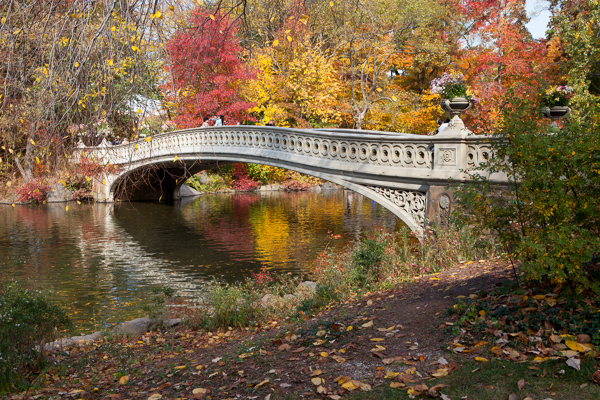
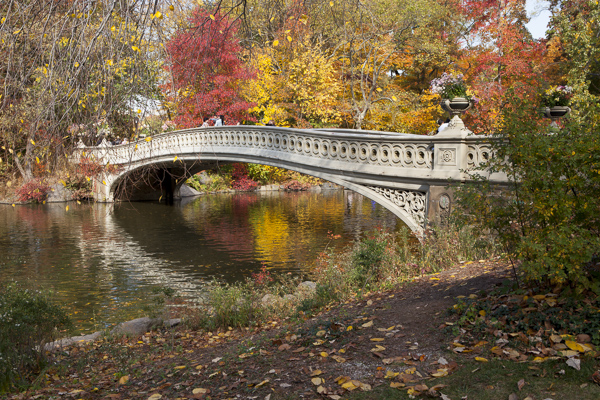
    8. Not using the correct color space: ProPhoto RGB > Adobe RGB > sRGB

    You should always keep your digital photo in the largest colorspace possible. While digital printers cannot yet print all of the colors in ProPhoto RGB, and many printing services prefer you to send them your files in Adobe RGB. When processing my RAW images to Tiff files I always convert them to the ProPhoto colorspace because it is the largest. Why not save your files with the most amount of color information possible?  Many cameras will allow you to set this in the settings.

    However, did you know the sRGB is the best colorspace to show your images on the web? Yes, when printing your images it is best to keep them in ProPhoto or Adobe RGB, but when rendering them for viewing over the web, convert them to sRGB.

    When you convert an image to a different colorspace, always make sure to do it as a copy of the original image. If you convert a ProPhoto image to sRGB and save it, you will not be able to retrieve that color information if you then convert it back to ProPhoto.

    Bow Bridge in Fall, sRGB

    Bow Bridge in Fall, sRGB.

    Bow Bridge in Fall, Adobe RGB

    Bow Bridge in Fall, Adobe RGB. A subtle but noticeable difference.

    9. Not using exposure compensation (+/-)

    When shooting in overly light or dark situations in Aperture Priority or Shutter Priority mode, the light will fool the camera’s sensor.  For instance, if you photograph in a dark alleyway, your camera’s sensor will try to overly brighten the scene, while if you capture an image with a lot of bright sky or white snow, the camera will try to overly darken the scene.

    This is where your exposure compensation comes in.  It is a vital tool for any photographer, especially in tricky lighting situations.

    10. Not resetting your camera

    Take a look at your camera settings at the beginning of the day and frequently throughout a day of shooting. Some of the most common settings to forget to reset are a high ISO from the night before, your exposure compensation, your white balance setting, and checking your autofocus switch.

    Final thoughts

    A few final notes that must be mentioned.  With digital images, you can always fix many problems later in post-production. However, there is still no substitute for getting the image perfect in camera.  Processing is necessary in some way for every digital image, but the more extreme, the more you can damage the quality of your images.

    It is tough to notice the effects of many of these mistakes when viewing the images on the web or on a monitor, but when you zoom in close to the details or make a print, especially a print of a decent size, these effects with be very noticeable.

    The post Avoid These 10 Mistakes That Can Ruin Your Image Quality by James Maher appeared first on Digital Photography School.

    Digital Photography School

  • Do This: Sara Lando in US for Workshops in August

    Whatcha doing in mid/late August? If you are within striking distance of Baltimore or Atlanta, you have a one-off chance to do something cool and fun that will change the way you approach your photography: spend a day (or two) with Italian conceptual portrait photographer Sara Lando.

    After spending a couple years convincing her to come to the US, Zack Arias and I are this summer hosting Sara for two weekends of seminars and workshops in Atlanta and Baltimore. We are doing this because A) it's an awesome experience (trust us on that) and B) it's a lot easier than getting all you guys over to Dubai for Gulf Photo Plus.

    Read more »
    Strobist

  • Video Tutorial How to Manage Your Lightroom Catalog While Travelling

    Last week I shared one of Serge’s videos on some of the new features of Photoshop Creative Cloud (CC). Serge is a French photographer in Paris and was recently doing a workshop with our very own dPS writer Valerie Jardin. So I’ve approached Serge and hopefully he’ll be doing some videos just for you on dPS shortly.

    Until then he has many helpful videos already, you can search through his YouTube library. I found this one and thought I’d share it as this is something that comes up a lot on my travel tours and workshops about travel photography. How to manage your Lightroom catalog while travelling or on the road. You should get some good tips from this – have a watch.

    Need more Lightroom help? Try these:

    • How to Convert Photos to Black and White in Lightroom
    • Mastering Color in Lightroom using the HSL Tab
    • Save Tons of Editing Time with Lightroom Presets
    • The Triangle of Color Adjustments in Lightroom

    The post Video Tutorial How to Manage Your Lightroom Catalog While Travelling by Darlene Hildebrandt appeared first on Digital Photography School.

    Digital Photography School