Category: Photography

  • How to Create Amazing Reflection Photos using Puddles

    People are captivated by reflections, and photographers eagerly seek out still bodies of water in order to capture stunning reflection shots. But a perfect reflection may be closer than you think, especially if it has just been raining.

    puddle, reflection, symmetry, how to

    Puddle reflection

    Photographing puddle reflections

    Puddles are an incredibly useful if perhaps surprising source for reflections. Puddles are generally shallow and found in protected areas or depressions, which means that they are likely to hold smooth, still water. They can also be found in many different locations, providing a variety of options for subjects and compositions. Finally, puddles are so mundane and small that they are often overlooked, so you can create unique and surprising images that others likely missed.

    The trick with capturing amazing reflection photos using puddles, is to get down low. You want your camera to get as close to the surface of the puddle as possible. This will make even a small puddle appear expansive in your final image. I recommend putting your hand or a finger under your camera to steady it and keep it out of direct contact with the water. It is also useful to have a small bubble level attached to your camera to judge whether your composition is level.

    puddle, reflection, symmetry, how to

    This puddle reflection technique works equally well whether you have a DSLR camera or a point-and-shoot. I often use my point-and-shoot for these types of shot, as it is much easier to simply lean down and hold it near, or over, the puddle when shooting, and I am much less worried about it getting wet. When shooting puddles with my DSLR, I am much more likely to squat down to better support the camera with both hands and keep it out of the water or mud.

    puddle, reflection, symmetry, how to, sunset

    puddle

    Puddle used for the reflection above

    Puddles do not need to be very large for such photographs, but an ideal puddle would be at least a foot or more, long and wide. Puddles that have formed naturally on roads, or on the ground, provide a better transition from subject to reflection than puddles that are surrounded by a set boundary like a curb or a bank. You can also think beyond traditional puddles and try the same technique with wet roadways or stone pillars, which often become highly reflective when wet.

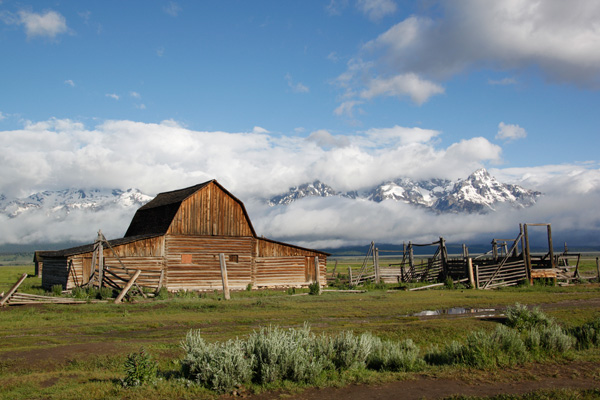
    An example: puddle versus puddle reflection

    Grand Teton National Park, Tetons, Mormon Row, mountains, landscape, barn

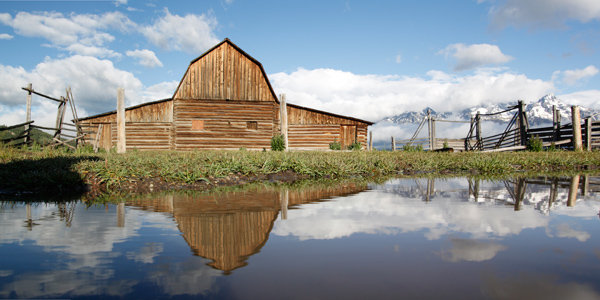
    Above is one of the classic scenes from the Grand Tetons: the abandoned houses of Mormon Row. It had rained the previous day, and much of the night, and in the lower right-hand section of the photograph, you will notice a fairly unassuming puddle remaining in the mud.

    Grand Teton National Park, Tetons, Mormon Row, mountains, landscape, barn, reflection, puddle

    Getting down low and holding my camera just above the surface of that puddle allowed me to capture this shot. Despite the slight breeze and rippling of the water, this reflection clearly highlights both the abandoned building and the incredible mountain view behind it. Merging three different compositions provided the panoramic view below.

    McEnaney-Tetons-panorama-final

    Seek out puddle reflections

    Next time you find yourself in a wet situation, make the most of the puddles around you. Get down low, and you may be surprised at what your camera captures compared to what the scene looks like to you standing up higher. Do not limit yourself to taking the same shots as everyone else – try something new!

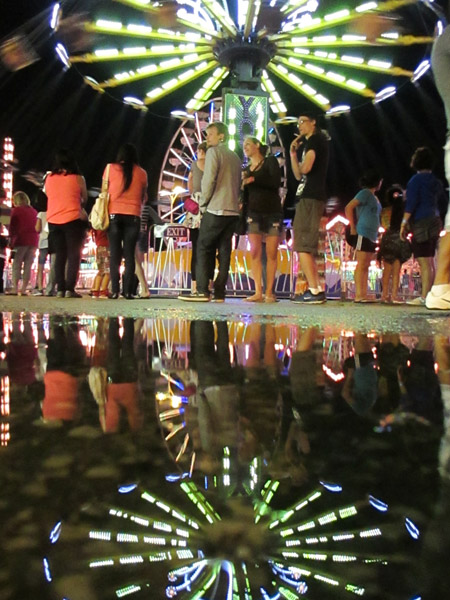
    puddle, reflection, how to, carnival, night, street photography

    The weekly photography challenge a little while ago was reflections. If you’re still working on that one try these tips out. Want to see more reflections – try this collection.

    The post How to Create Amazing Reflection Photos using Puddles by Katie McEnaney appeared first on Digital Photography School.


    Digital Photography School

  • 5 Ways to Create Better Images Without Buying More Gear

    You are a photographer. You love getting out there and doing your best to create great images. Photographers also love something else. Camera equipment. Sometimes you may find that you spend more time searching for a new lens, filter or accessory than actually photographing with it. When you meet other photographers you will hear them talking about the latest piece of equipment that has just launched.

    Why is this? Why are some photographers obsessed with equipment. My personal opinion is that we fall into the marketing trap. Sometimes we really do think that a new lens, or new camera body, will improve our images simply because it is a better piece of equipment. That might be true, but it’s only half true. A new lens might make your images a little sharper or have better bokeh, but the best way to get better images is to improve your ability as a photographer. Here are some thoughts that may help you create better images.

    The key ingredient in any image is light

    The key ingredient in any image is light

    1. Become a light snob

    Light is the key to every image you make. If you want a good image, shoot in good light, if you want a dramatic image, shoot in dramatic light. There really is no such thing as bad light, there is simply better light for creating images.

    Light is the all important component of great photography. You may feel that shooting in the middle of the day is best because it is bright, and all the light you need is in that shot. Yes, there may be lots of light, but there is also a lot of contrast (bright highlights and dark shadows). The resulting shot may be unappealing because the light is flat or uninteresting.

    How do you overcome this tendency to photograph at any time? Become a light snob. What does that mean? I mean in a good way, try this next time you go out with your camera. Make a point of shooting in the golden hours. Think about the light you are shooting in, go out in the early morning or early evening. Choose your subject carefully, compose your scene purposefully and shoot it with intention. Don’t shoot the same scene twice, work with the light, make sure you think about the exposure, try your best to get the shot and walk away from the scene. Make sure you expose for the light the results will speak for themselves.

    2. Become more flexible – in more ways than one

    POV2

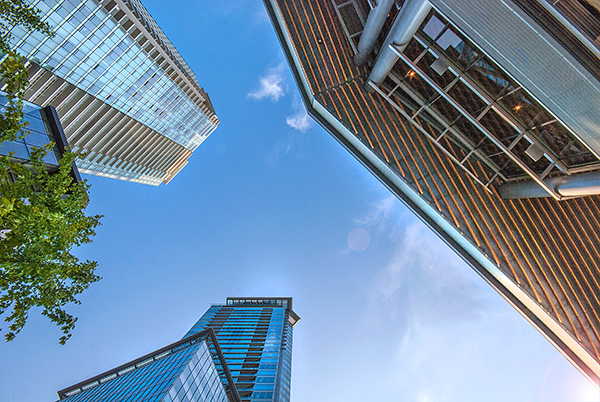
    How often do you photograph from your standing height and mostly in landscape orientation? I know I do, it is natural to do that, we shoot they way we feel comfortable. Change this up a little. Look for unusual angles and vantage points. We have all seen the photographs of children looking up at the camera. Change that, kneel down or even lie down in front of a child you are photographing. Turn your camera to portrait orientation, that changes the scene immediately. If you are photographing a street scene, maybe get to a higher vantage point on a balcony. If you are in a city, shoot straight up! The key thing here is, change your viewing angle and you will change the view of your image. You will give your viewers a unique perspective on a familiar topic and that can make for some very dramatic images.

    A unique point of view can make for dramatic images

    A unique point of view can make for dramatic images

    3. Time it right

    You have probably heard this about many things, particularly sports:  “its all about the timing”. This is true in certain genres of photography too. In street photography, timing can be crucial to making or breaking the image. The famed street photographer Henri Cartier-Bresson spoke about “The Decisive Moment”. What he was saying was this, if you take the shot a moment too soon, the scene has not yet unfolded, if you are a moment too late, the scene has passed, you have to release the shutter at the precise moment.

    This is not easy to get right. It requires lots of practice and the ability to sense or anticipate what will happen next. With practice you will get better and better, and in time, you will find that you will “time” the shot better. When is the right moment? It is different for every photographer and every photograph. It might be the moment before a smile, or the moment the first tear appears, the moment of surprise or elation. Each moment is different and each photographer will shoot it differently. You will know when you get that moment captured because the image will be memorable. The moment will come, but you have to be ready and you may have to be patient.

    Photographing fireworks is often about timing.

    Photographing fireworks is often about timing.

    4. Get your exposure right

    We all know this one, it’s an old one, but exposure is all important. How do you affect exposure? You take control of your aperture and your shutter speed. This alone is a topic for another article, but what is important is that you, as the photographer, need to take control of your image exposure and not let the camera do that. If you still shoot on Auto and hope for the best, now might be a good time to start venturing into the world of shooting on manual or even aperture priority. Learning how the aperture and shutter speed affect your images will help you make stronger images in just about any light. This is what makes the difference between a good image and a spectacular image, the exposure.

    Mastering exposure will make a big difference in your images

    Mastering exposure will make a big difference in your images

    5. Use what you have

    You have a great camera, seriously, you do! If your camera is less than five years old, it is perfect for taking astounding images. A new camera body will take pictures with more megapixels or better noise reduction, but I am pretty sure, in fact I am CERTAIN, that you can get some amazing images on your current camera. One key element in getting great images is choosing the right lens for the scene. The lens is the eye to the camera. If you are going to invest in any equipment, save up and buy good lenses. Buy some prime lenses and see the results.

    First though, use the current lenses you have, make sure you know how each lens affects a scene. A wide angle lens has the effect of making everything in the scene seem far away and spread out, a telephoto lens (say a 200mm) has the effect of compressing everything in the scene (bringing the elements closer together). If you were to photograph a mountain scene with a wide angle lens and switch to a long (or telephoto) lens and shoot the same scene, the elements in that scene would look really different. The perspective and viewing angle changes on each lens, so make sure that you use your lenses and understand the effect that they have on your scene.

    Exposure2

    Putting it all together

    By using these techniques with light, composition, timing, exposure and current equipment, your images will improve. You need to practice, constantly. Keep pushing the boundaries, do the weekly challenges that dPS puts out, try different techniques. Only buy new equipment if your current setup is limiting your photography. The best way to create better images is by practicing and spending hours and hours behind the camera.

    I heard a story that a professional golfer who was one of the top three golfers in the world used a very unique way of practicing. Before playing a golf course in an upcoming tournament, he would book the whole course for a week. He would then take 300 golf balls and set up on the first tee. He would tee off from there, hitting each ball from that tee. He would then play each ball from where it landed. He did this on every hole of the golf course. By the end of the week he knew every inch of that course and he knew exactly which clubs he could use from where on the course. Try this in photography. Shoot 100 shots on aperture priority or shoot 100 shots with your 50mm only. Don’t change lenses until you have 100 shots with that lens. Then move to your next lens and do the same. Try each lens with different subject, use a 500mm and shoot some sports, landscapes and macro photos. Mix it up, but learn how that lens works and learn how your camera works and pretty soon, you will be making great images with all your equipment and that shiny new camera will not seem so tempting!

    Look for the light, work with the scene and practice, practice, practice.

    Look for the light, work with the scene and practice, practice, practice.

    I will end off with a quote from the actor Will Smith, which sums it up in a good way:  “The separation of talent and skill is one of the greatest misunderstood concepts for people who are trying to excel, who have dreams, who want to do things. Talent you have naturally. Skill is only developed by hours and hours and hours of beating on your craft.” – True enough!

    Have you put in the hours? Do you have any other additional tips? Please share in the comments section below.

    The post 5 Ways to Create Better Images Without Buying More Gear by Barry J Brady appeared first on Digital Photography School.


    Digital Photography School

  • 33 Inspiring Websites of Landscape & Travel Photographers

    Landscape and travel photography are closely intertwined with each other. Travel photography, as many sub-genres of art and photography are, is largely undefined and encompasses a wide range of people, locations, cultures and ideas, including landscape photography. Such kinds of photos express the feeling of time and place, its mood and atmosphere without geographic limitations. The borders between amateur and Continue Reading

    The post 33 Inspiring Websites of Landscape & Travel Photographers appeared first on Photodoto.


    Photodoto

  • The Secret to Capturing the Best Image Quality with Your Digital Camera

    Many modern digital cameras boast incredible ISO speeds. Where ISO 400 or 800 was the top speed in the film era, usually accompanied by grain the size of golf balls, today’s digital cameras can give you top ISOs of 6400, 12,800, 25,600 or even higher. Camera makers boast of these high speeds and use this information to increase camera sales.
    Photodune 2896107 digital camera xs

    Inexperienced photographers will be tempted to jack up the ISO on their new cameras, and keep it there. However, just because the feature is there doesn’t mean you should use it all the time. In fact, the best practice is to keep your camera set at its lowest ISO setting by default so you will capture the best possible image.

    With experience you will learn that higher ISO settings are more appropriate when shooting sports, street photography, photojournalism, and low-light situations where you need to stop action. Low ISO images will be cleaner (no digital noise), have a wider dynamic range (more shadow and highlight details), and produce better color depth (smoother color transitions). This is a better choice for travel, landscape and portrait photography, where good detail and accurate skin tone are important.

    Let’s geek out

    There are two ways you can understand the effect of low versus high ISO on digital images: by reading lab test results, and by looking at sample images. DxOMark Labs is a great resource for sensor tests. It’s an independent lab that tests most current digital camera sensors and publishes the results on their web site. For sample images, you can make your own. Continue reading to learn more.

    Digital noise

    Run any number of digital cameras through a battery of image quality tests and you’ll see a clear pattern emerge. At the lowest ISO setting, the signal to noise ratio, expressed in decibels (dB), is highest. That’s good, it indicates the lowest digital noise. As you increase ISO, the dB level decreases. The lower the dB level, the higher the digital noise, which degrades the image.

    By lmvphoto

    Example: If a Canon EOS 70D has a 41dB result at ISO 100, 30dB at ISO 1600 and around 17dB at its top ISO of 25,600, the image with the higher dB will have less noise than an image with a 17dB measurement.

    Note: keep in mind that most images when viewed at the recommended distance will appear clean as low down as 30dB.

    Dynamic range

    Similarly, the dynamic range of a digital camera is widest at its lowest ISO. Depending on the camera, that range can be anywhere from 9 stops to around 14. Typically, with DSLRs, it is around 11-12 stops. In carefully exposed high-contrast scenes, both highlights and shadows will have more detail at low ISOs than at high speeds. In test result charts, dynamic range starts to decrease in more of a curve than a straight line; typically the first few ISO settings are acceptable, but once you pass ISO 800 or 1600 (depending on the camera) the range becomes more limited.

    Dynamic range is acceptable at 10 stops or higher. Below that number shadows and/or highlights will become blocked up, especially in contrasty scenes.

    Tip: RAW image capture is best for dynamic range. You can use the shadow and highlight sliders in your RAW image editor to reveal even more details in both the shadows and highlights, effectively stretching your camera’s dynamic range. The better your image’s dynamic range is, the more information you can reveal this way.

    Tone and color

    You may have noticed that some images that show the sky or other areas that should have smooth, subtle transitions, instead show subtle strips of color as the shading changes. This is called banding, and that’s what happens when the tonal range is limited. This is usually an artifact from compressing an image too much when preparing it for web use, but it happens in a more subtle form in photos that come straight out of the camera and, as above, this phenomenon is more apparent in high ISO images, but is imperceptible in low ISO photos.

    A camera’s ability to capture subtle changes in tone and color (both expressed in bits) is best at its lowest ISO, and decreases steadily throughout the ISO range. Most DSLRs have a 21-24-bit maximum for color sensitivity, and it can degrade to half of that. Tonal range usually peaks at around 8-10 bit.

    Testing your camera in the real world

    Enough of the geeky stuff, let’s look at some pictures to see how this plays out in the real world. While the images here were shot with a Canon 7D, you can run your own tests:

    • With the camera on Program mode, take a sequence of photos
    • Start with your lowest ISO and work your way up to the highest
    • Mount the camera on a tripod to avoid shake, which is an unwanted additional variable, and turn off the anti-shake feature (Image Stabilization IS on Canon or VR on Nikon)
    • Shoot both landscapes and people pictures so you can see the effects ISO has on each
    • Make prints at your largest print size and see if you notice the distance at a typical viewing distance

    Here are two image comparisons at a range of ISO settings.

    Portraits show the difference

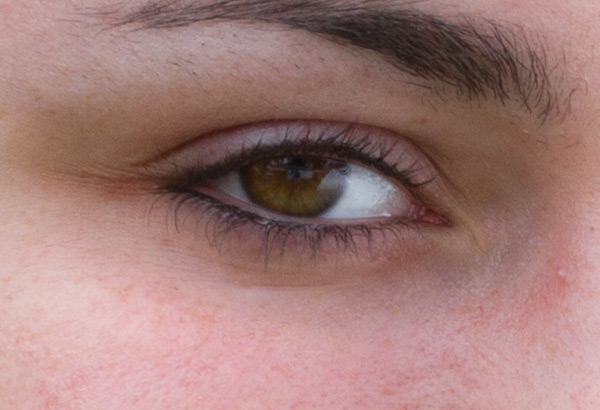
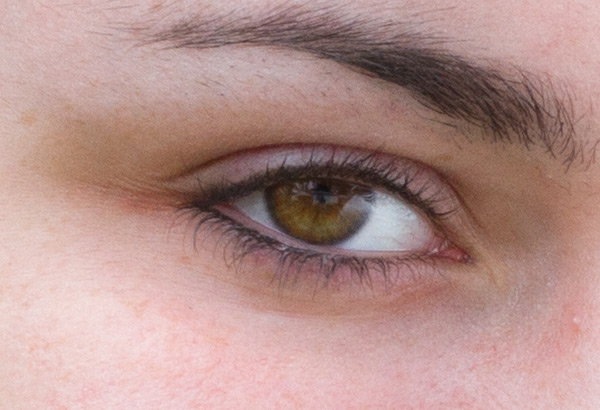
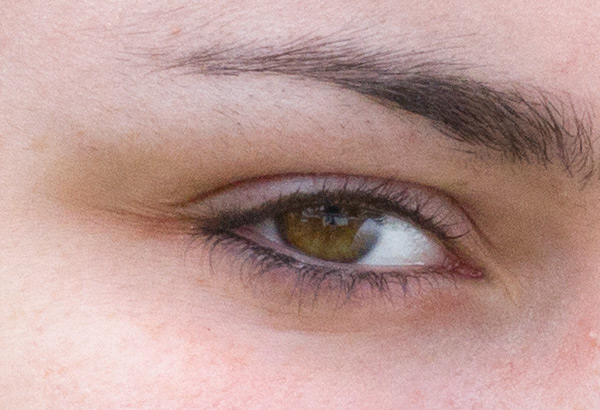
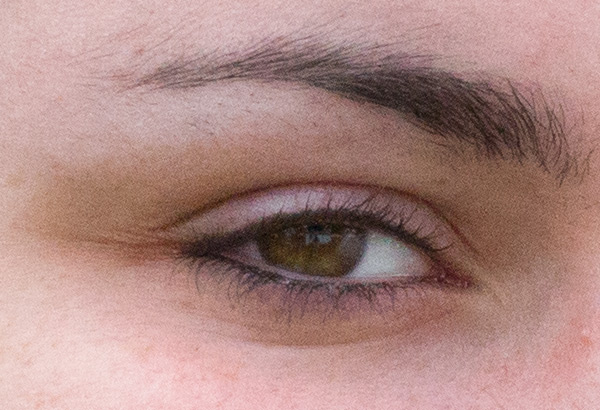
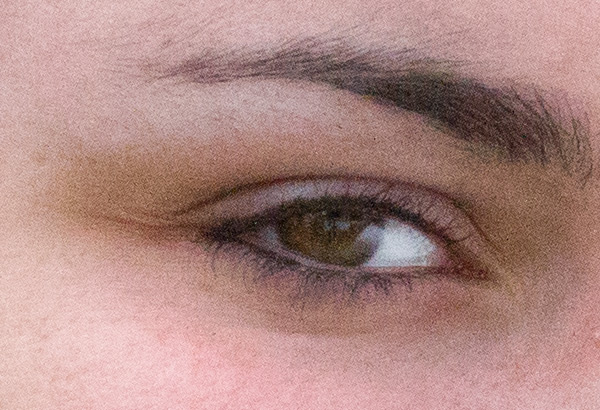
    The effect of changing ISO is most obvious when you photograph people. In this example, the model was photographed on a sunny day while holding a reflector, against a low-key (darker) background. As the ISO setting is raised, the effect on her skin becomes obvious. Camera: Canon 7D with Canon 85mm f/1.8 lens.

    ISO100 portrait full 600

    ISO 100

    ISO100 portrait detail 600

    ISO 100

    At ISO 100 (above), skin tone is accurate, with good contrast. In the 100% detail shot, there’s good, natural falloff of light, showing a wide range of tonality and good detail in the darker areas. You can especially see this in the eyes.

    ISO800 portrait full 600

    ISO 800

    ISO800 portrait detail 600

    ISO 800

    At ISO 800 there is a subtle increase in contrast, an indicator that dynamic range has decreased slightly. Noise has not yet become apparent in the detail photo.
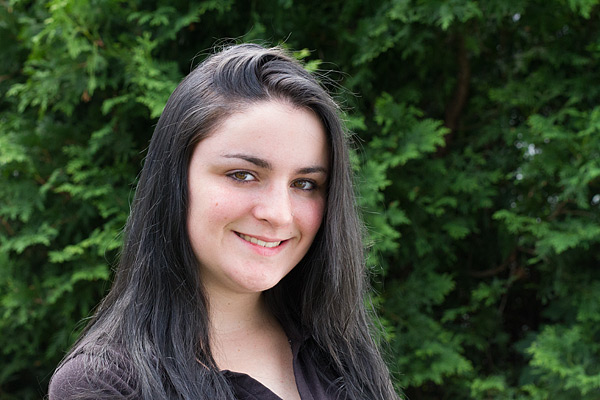
    ISO1600 portrait full 600

    ISO 1600

    ISO1600 portrait detail 600

    ISO 1600

    By ISO 1600 there is a little more contrast, but again, it is a subtle change. However, you can see the noise in the blow-up, and the smooth gradation from light to shadow is starting to become a bit rougher, indicating that the tone has degraded.

    ISO3200 portrait full 600

    ISO 3200

    ISO3200 portrait detail 600

    ISO 3200

    ISO 3200, at screen resolution it may still be hard to see the change when you compare this image to the one shot at ISO 100, but by ISO 3200 there is a pronounced decrease in highlight and shadow detail, and rougher color and light transitions.
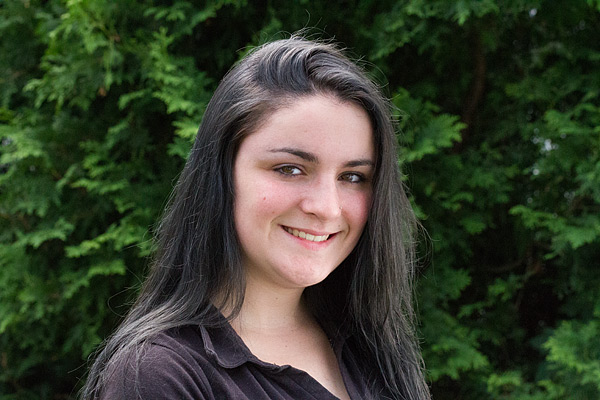
    ISO6400 portrait full 600

    ISO 6400

    ISO6400 portrait detail 600

    ISO 6400

    By ISO 6400, the Canon 7D’s highest resolution setting, even at screen resolution a difference is visible. If you look in the details of the shirt and hair, you can see that shadows are more blocked up. A quick glance at the 100% detail is all you need to see the graininess and reduced range of color and tone.

    Bonus pointer: The advantage of shooting RAW
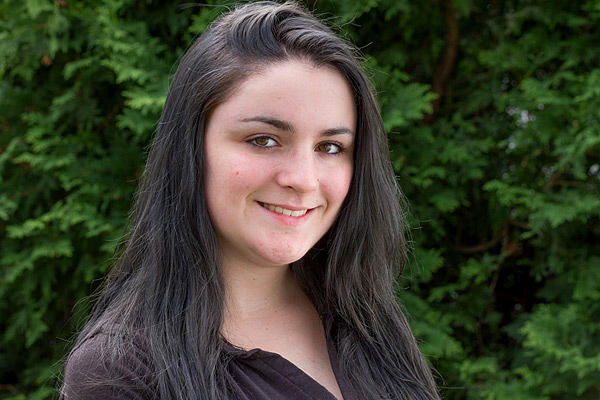
    ISO100 portrait optimized 600b

    Optimized

    You can increase an image’s dynamic range by using your RAW image editor’s shadow and highlights sliders, which reveals more information in the highlights, and especially in the shadows. Compare this version of the ISO image with the ones above and notice how much more detail is visible in the shadows, thanks to tweaks done in the RAW image editor.

    Landscape subtleties

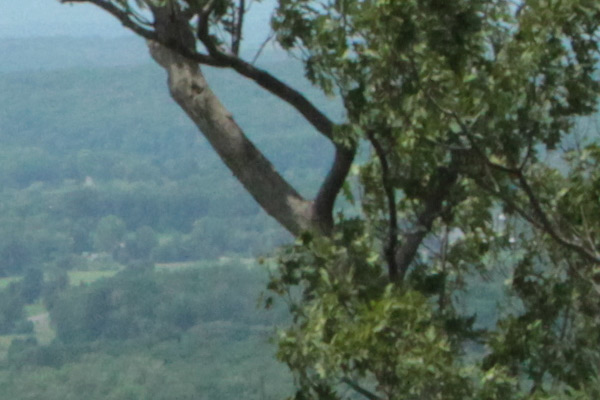
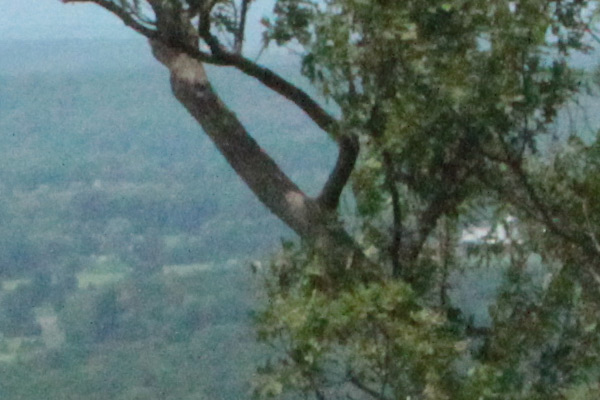
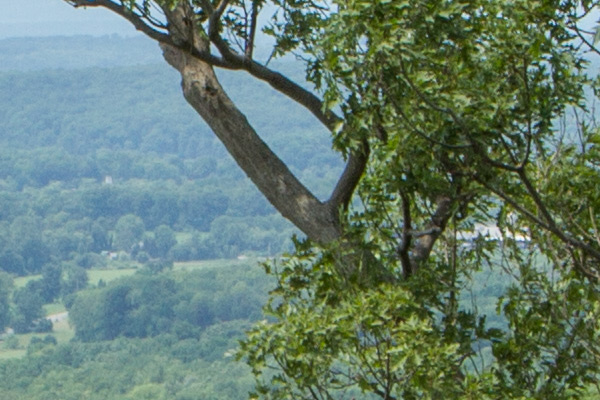
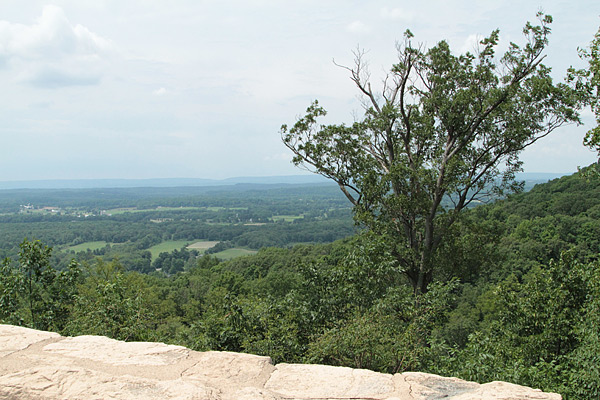
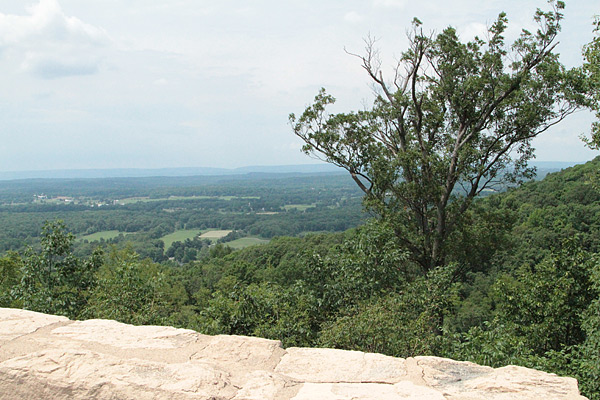
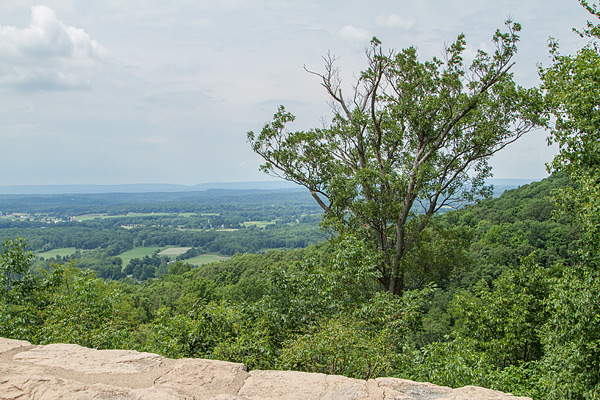
    A scenic lookout in western New Jersey, shot in the middle of the day, at ISO 100, 800, and 3200 with a Canon 7D and Canon 24-70mm f/2.8L II USM zoom lens. While the dynamic range, tone and color only show minor differences here, the level of noise deteriorates at the faster speeds. After looking at these examples, you may wonder why anyone in their right mind would want to shoot above ISO 100 on a bright, sunny day. All samples are straight out of the camera.
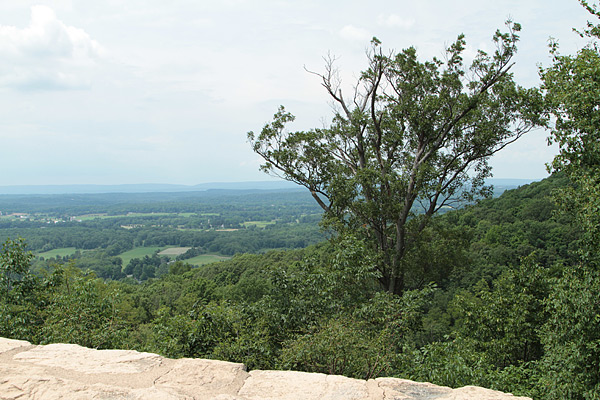
    ISO100 landscape sooc 600

    ISO 100

    At ISO 100, this is the full scene.
    ISO100 landscape detail 600

    ISO 100

    In this detail of a 100% blow-up of the ISO 100 image, there is no apparent digital noise, as expected.
    ISO800 landscape sooc 600

    ISO 800

    ISO800 landscape detail 600

    ISO 800

    At ISO 800, digital noise has started to become apparent in this 100% blow-up detail.
    ISO3200 landscape sooc 600

    ISO 3200

    ISO3200 landscape detail 600

    ISO 3200

    By ISO 3200, digital noise is obvious, and the overall image quality has deteriorated. The graininess covers up the loss of color quality and tonality somewhat.
    ISO100 landscape raw 600

    While the samples above are unadulterated JPEGs, what happens if you try to coax more detail out of a shot in RAW? You get more detail in the shadows and highlights. Compare this shot to the original and you’ll see more detail in the sky (highlights) and in the bark and branches of the tree (shadows) on the right.

    Bottom line

    The bottom line? There may be times when you must pump up your ISO settings, and it’s nice to know that you have that option. But when you are shooting in daylight under normal shooting conditions, you will bring back higher quality images when you shoot at, or near, your camera’s lowest ISO settings.

    The post The Secret to Capturing the Best Image Quality with Your Digital Camera by Mason Resnick appeared first on Digital Photography School.


    Digital Photography School
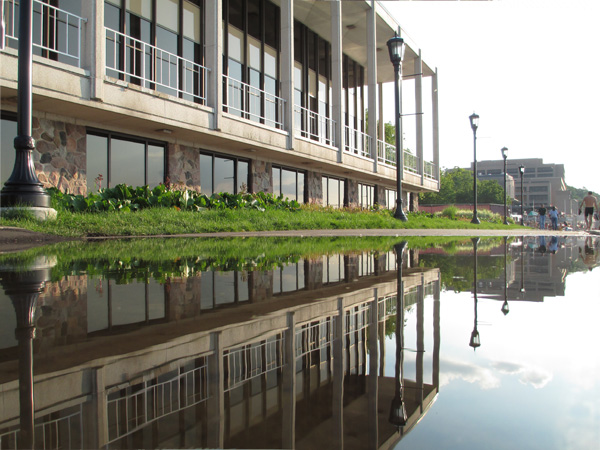
  • Raw Versus JPG – Why You Might Want to Shoot in RAW Format

    If you have ever shared a photo by email, or posted one online, you might have seen a three or four-letter extension at the end of the file name that looked like “.jpg” or “.jpeg”. Almost every camera – from cell phones to point and shoots to expensive DSLRs takes pictures in this format – with good reason. You can fit thousands of JPG photos on a memory card, and they are generally good quality and easy to view on a computer or mobile device. You don’t need any special software to open a JPG file, and if you do want to edit one, almost any application from iPhoto to Photoshop can do it. However, all DSLRs, and even some point-and-shoot cameras, are able to shoot in another format called RAW which has some incredible benefits for you. Some people swear by the RAW format, others use JPG, and some use both. There is no correct answer in terms of which one is better, instead it’s important to find a solution that works for you. To illustrate why you might want to show in RAW format, here are a few reasons I use it instead of JPG.

    Sapstring

    1. Adjusting the White Balance

    Different types of light (such as sunlight, fluorescent bulbs, or a camera flash) affect how colors show up in real life. Our brains are aware of these differences and adjust our perception of the colors accordingly, but your camera doesn’t always know what to do in these various situations. To fix this, it has something called a White Balance setting, which usually contains values like Auto, Daylight, Cloudy, Tungsten, and Flash. Unless you set the White Balance properly, your photos will often have a yellow or blue tint that is not always easy to fix. This is an important limitation of the JPG format, which tosses most of the data it deems unnecessary for a given photo and can make fixing the White Balanc a little tricky. Fortunately, in RAW the White Balance can be easily adjusted to suit the photograph because all the color data is saved.

    When you snap a photo in RAW mode, the camera uses one of its White Balance settings as a starting point, but you are free to adjust it however you wish on your computer. Programs such as Lightroom, Photoshop, and Aperture have simple controls for adjusting the White Balance, and even though modern cameras are much better at getting it right on their own I still find myself tweaking the white balance quite often. For example, my camera calculated a White Balance for this photo of a child’s lamp at a value that I thought was far too yellow. Shooting in RAW gives me the flexibility to fix this, and with a few adjustments, I was able to get an image that was much more pleasing to me than the one my camera originally produced.

    Little one original

    My camera applied a White Balance setting to the RAW file, but I didn’t really like it.

    Little one fixed

    Using editing software I was able to change the White Balance to a cooler tone that was much more pleasing to my eye.

    2. Fixing the exposure

    Shooting in RAW not only gives me the freedom to adjust the colors you see, but also to adjust the colors you don’t see. When a JPG photo is too bright or too dark (i.e. overexposed or underexposed), there is not much that can be done to save it because much of the data that was captured by the image sensor no longer exists. Cameras have all sorts of ways to help us get the right exposure when we take a picture, but sometimes things just don’t work out, and you might find that some of your most precious memories were either too dark or washed out. Since RAW keeps all the data when an image is captured, you have much more leeway in adjusting images after the fact.

    Tree flowers original

    The original photo was way too dark to be usable.

    Tree flowers fixed

    RAW allowed me to boost the exposure significantly to create a much better photo.

    When I shot this picture of some flowers on a tree, I noticed after I got home that it was far too dark to be usable. If this was a JPG I would have been mostly stuck with the results. But, because I shot in RAW I was able to brighten the dark areas and produce a much better image. In JPG, the data from the dark areas would have been just that, dark. The same can be done for overexposed images too; if a picture is too bright or washed out, it can often be saved if it was shot in RAW.

    3. General color adjustments

    A third reason I shoot in RAW is that I often like to make adjustments to specific colors in a photo. JPG stores 8 bits of information per color for Red, Green, and Blue–each of the three primary colors of light that make up every pixel in a given photo. Don’t get too caught up in the math here–all you need to know is that those 8 bits (2 to the power of 8, or 2x2x2x2x2x2x2x2) really mean that a JPG stores information for 256 individual shades of each of the primary colors. RAW, on the other hand, stores 4096 or 16384 shades of information per color, depending on whether your camera supports 12 or 14-bit files. These numbers might not mean a lot, but it’s easy to see that either of the latter numbers is far greater than 256. This means that since RAW gives us so much more information to work with, we have a lot more flexibility when editing the colors of our image.

    This photo of a family friend (below) turned out fairly well, but I was not happy with a few elements. Her eyes were too dark and and the colors were not as vibrant as I would have preferred. Thankfully, RAW gave me the freedom to edit the picture in order to create an image that was not only more pleasing to look at, but more accurately reflected what I saw when I captured it. This is much more than simply throwing a filter over an existing image; RAW gives you access to the original color data, which allows for far greater control over the finished product.

    Garden portrait original

    The original is not bad, but not as good as it could be.

    Garden portrait fixed

    Shooting in RAW meant I had so much color data available that I was able to adjust the colors to create a more pleasing final picture.

    Of course shooting in RAW has downsides too, most notably the file size. RAW files can easily take up 10 times as much space on your memory card as JPG files, which seems like a lot of wasted space if you don’t do a lot of editing or post-processing. To be honest, if you are just shooting pictures of a nature hike or your kids in the park, RAW might be overkill. It’s not that JPG files can’t be edited–they certainly can, as anyone who has ever used an Instagram filter will attest. They can be manipulated in Photoshop and other image editing programs as well, and there is enough color information in most JPG files for some editing wiggle room. But RAW gives you much more freedom to work, and even though the file sizes are much greater, the tradeoff is worth it, in my opinion.

    You will have to make the decision for yourself, but whatever you decide, try to resist getting drawn into a RAW versus JPG debate–neither format is objectively better. The important thing is that you find a workflow that fits your shooting style and goals. At the end of the day, as long as you are taking pictures you like, that’s all that really matters.

    Skateboarder

    I won a photography contest with this picture…and I shot it in JPG.

    You might be just fine with shooting in JPG, and if that suits you, then don’t let me or anyone else tell you different. But if you have ever wanted to experiment with more advanced editing techniques or just coax a little more out of your photos than you might otherwise be used to, RAW might be just the ticket to a whole new world of photography awesomeness.

    The post Raw Versus JPG – Why You Might Want to Shoot in RAW Format by Simon Ringsmuth appeared first on Digital Photography School.


    Digital Photography School
  • Insiders Only: 70+ Best Online Marketing Tools for Photographers

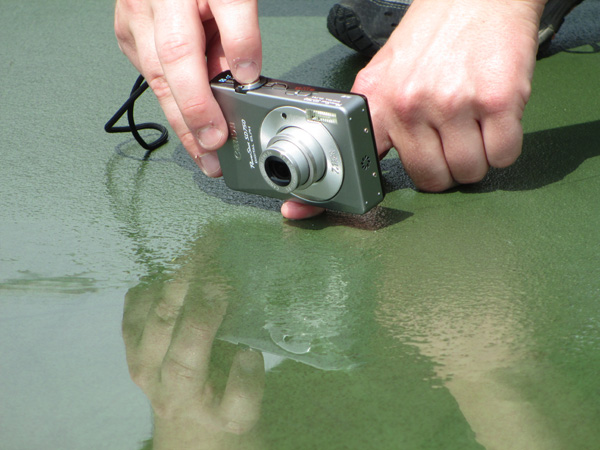
    As a beginner photographer with over 5-year background in the Internet Marketing, I understand the importance of establishing a firm online presence. I surely need to master my shooting and retouching skills, but I also pay attention to the business side of my hobby to ensure that there’s a market for my product and it’s growing along with the quality Continue Reading

    The post Insiders Only: 70+ Best Online Marketing Tools for Photographers appeared first on Photodoto.


    Photodoto

  • Using Slower Shutter Speeds to Show Motion in Your Images

    Changing shutter speed not only changes the amount of light that enters the camera, it also changes the way your images look. By changing the shutter speed, you’re allowing the film or digital sensor to be exposed for a longer or shorter period of time. That affects how motion is portrayed in your image. A short (or ‘fast’) shutter speed will freeze motion, whereas a long (or ‘slow’) shutter speed will allow you to show motion.

    Let’s take a look at a few examples using slower shutter speeds to show motion in your images:

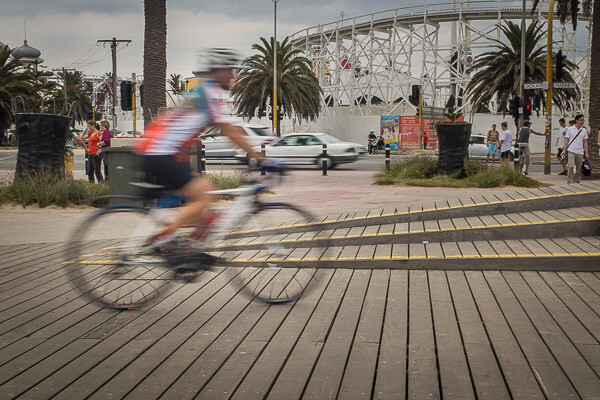
    Img 1 Cycling on the boardwalk Melbourne 600px

    Slow speeds – camera stationary

    The image above shows what happens when you use a slow shutter speed while holding the camera still. In this case the shutter speed was 1/40th of a second, which allowed me to hand-hold the camera while still showing some motion on the cyclist. The slower the shutter speed, the more movement in your subject.

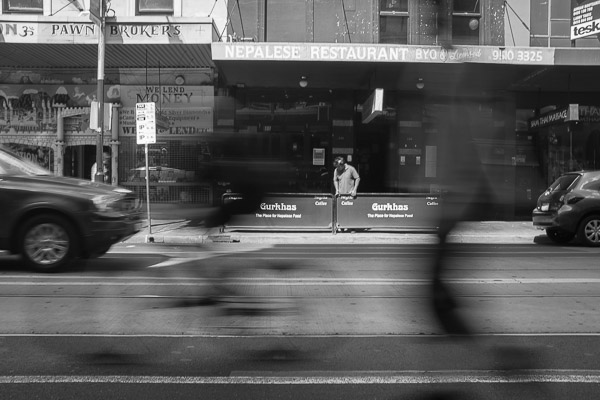
    The image below was made with a shutter speed of 1/15th of a second. That’s starting to get a little slow for hand-holding so I rested the camera on the top of a fence rail on the side of the road. The image shows a cyclist riding along the road, followed closely by a skateboarder. Both the cyclist and skateboarder are blurred quite a lot, but they’re still identifiable, while the rest of the image is still in focus. It gives a feeling of movement, without moving the camera.

    Img 2 Skateboard and bicycle Melbourne 600px

    Panning the camera to add motion

    Moving the camera while making an exposure is another way to show movement in an image. Instead of keeping the camera still and using a long shutter speed – you move, or pan, the camera with your moving subject as you expose the image. That way the subject remains sharp, while the background becomes blurred.

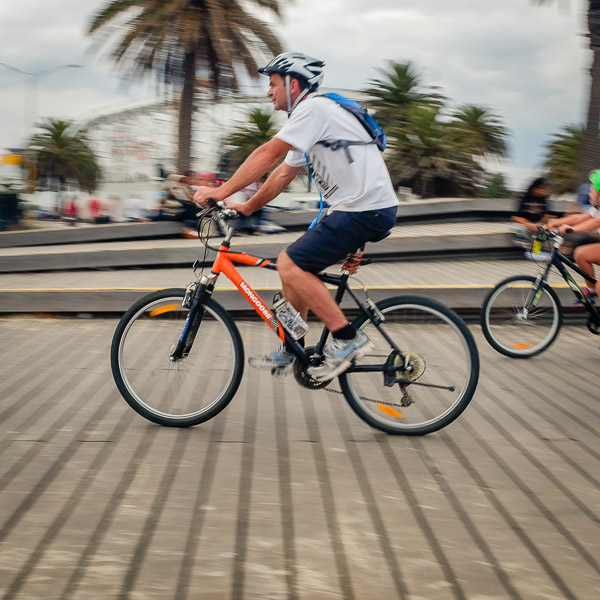
    This image of another cyclist riding along a boardwalk was also taken at 1/40th of a second, panning with the rider and following him from right to left as he passed by. The shutter speed was slow enough that the background is blurred, while the bicycle and rider are relatively sharp.

    Img 3 Orange bicycle Melbourne 600px

    Remember, the subject doesn’t have to be ‘tack sharp’ when you’re showing movement. Sometimes a little blur on the subject helps to enhance the feeling of movement in the image, as it does in this case. Notice the spokes of the bicycle’s wheels are blurry too, which also helps to show movement. Using a faster shutter speed while panning would have resulted in the background not being as out of focus and the wheels would have been frozen in time with the spokes clearly visible. In essence, the cyclist would have looked like he was stationary and balancing on the boardwalk, not moving as he actually was.

    Moving water

    Cyclists and other fast moving objects are not the only subjects for slow shutter speeds. What about shots including moving water. I think it’s fair to say we’ve all seen images of the sea or a river with water that looks buttery smooth. That smoothness is also achieved by using a slow shutter speed.

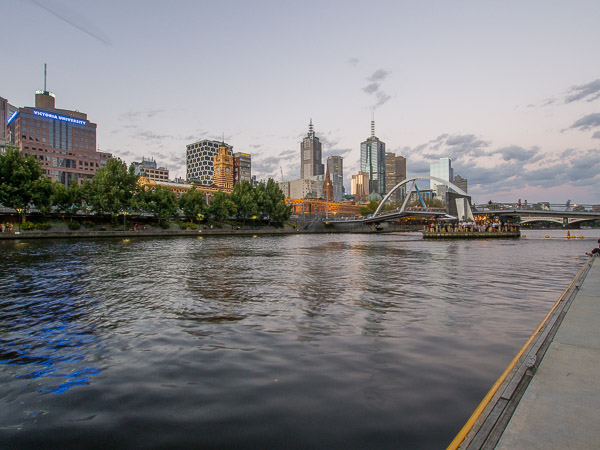
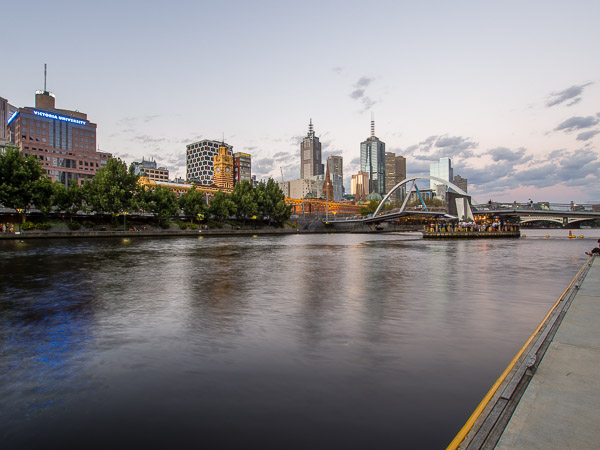
    The following three images were all taken from the same location on the side of the Yarra River in Melbourne, Australia. The camera was mounted on a tripod for stability and the images were made at different exposure values. The first image was made with a shutter speed of 1/4 of a second, which is relatively fast for this type of photograph. The individual ripples in the water are clearly visible. You can see some movement, but not much.

    Img 4 Melbourne skyline Melbourne 600px 2

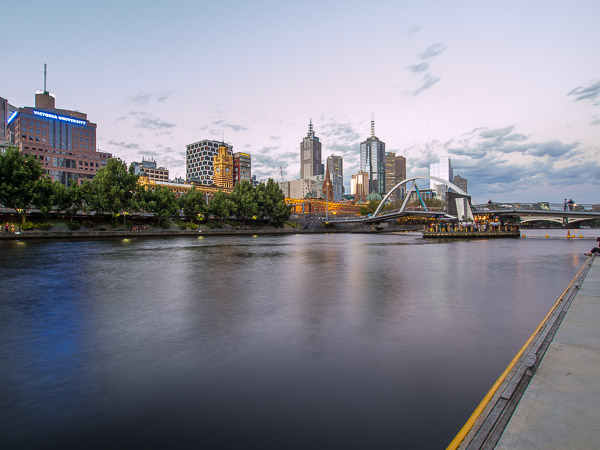
    The second image was made with a shutter speed of 2 seconds. The water is starting to get smoother due to the longer shutter speed. The individual ripples are starting to disappear.

    Img 5 Melbourne skyline Melbourne 600px

    The final image in this series was exposed for five seconds. The water has now become much smoother due to the movement while the shutter was open. Photography is an art form and there is no right or wrong way to photograph any subject, but for me, the third image with the smooth water is much more appealing than the first two versions.

    Img 6 Melbourne skyline Melbourne 600px 3

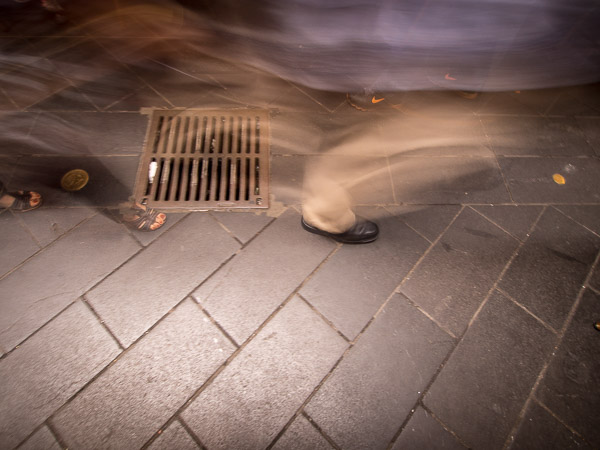
    Why not experiment with different shutter speeds next time you go out to make photographs. It’s a great way to add interest to an otherwise static and maybe boring subject! All it takes is a little imagination and patience and you can come away with some really interesting and different images – like this water drain for example, which was hand-held with a shutter speed of one second. The ghostly images passing over the drain make it a little more interesting than just the drain grate itself. The most important thing is to experiment – and have fun!

    Img 7 Ghostly legs Melbourne 600px

    The post Using Slower Shutter Speeds to Show Motion in Your Images by Ken Lyons appeared first on Digital Photography School.


    Digital Photography School
  • 7 Tips for Shooting Alluring Photos of Your Girlfriend

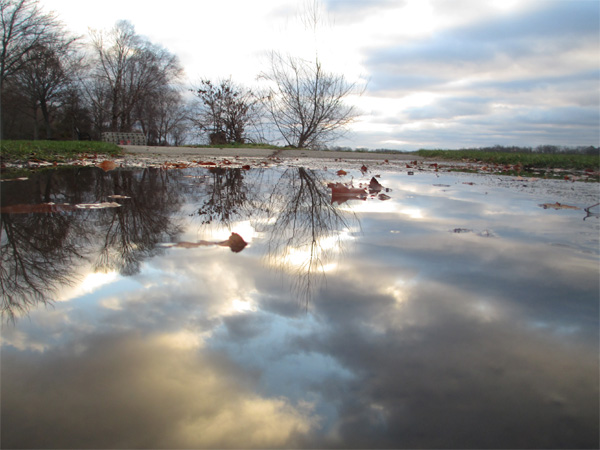
    What can I say…I’m a sucker for a pretty girl. Not so much the super-airbrushed models who look inhuman as much as real women in everyday situations, just being themselves. This is why I’ve often photographed the girl I was dating. At first though, I remember being to shy to ask. Too worried about offending her, making her feeling like Continue Reading
    The post 7 Tips for Shooting Alluring Photos of Your Girlfriend appeared first on Photodoto.


    Photodoto

  • Avatar

    My last head shot had been getting a little long in the tooth. So on a whim the other day, I redid it.

    Gotta keep things fresh, I always say. So I try to redo my head shot every seven years, whether it needs it or not.

    As photographers, we only get to see one side of the equation—and that does not involve looking down the barrel of the gun, either. So being on the receiving end is always a learning experience. Even more so when you are on the shooting and receiving end.

    Read more »
    Strobist

  • How to Choose a Great Portrait Photography Location

    There’s an expression in the photography world called ‘ESP’ which stands for ‘Expressions sell photographs’. It’s true, a lovely expression is the single most important thing in any portrait photo (unless it’s a silhouette).

    However, portrait photography isn’t as simple as teasing out a beaming smile, or haughty laugh from your subject. If your captivating expression is complemented by delicious light and an intriguing environment then you have all the ingredients for a cracking image.

    Whenever I photograph portraits these are some of the things I’m looking for when I scrutinize the location.

    How to choose a great portrait location

    Meaningful location

    Is it a meaningful location?

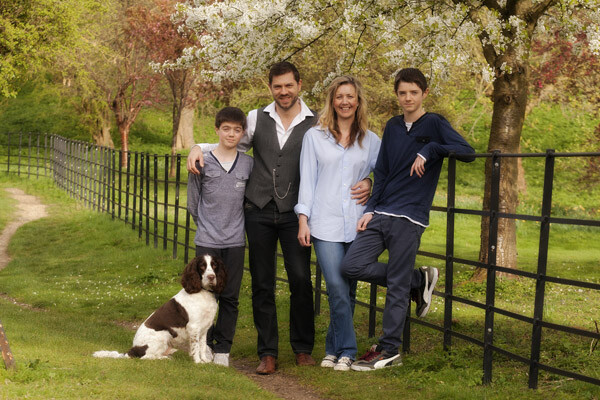
    The first thing to do is ask yourself if the location adds to the story you’re trying to tell. For example, when I’m hired to create family portraits I always ask the family if there’s anywhere they like to go, a location to which they have a strong emotional connection. Sometimes they’re proud of their home or garden and we do the session there. Other times it will be in a wood where they walk their dog, or where they go picnicking on lazy summer days. This is far more meaningful to them than some sanitized image on a white background.

    Your goal is to either choose a location that helps tell the story of the people in the portrait, or that gives the photo more emotional meaning to the people you’re photographing.

    Areas of open shade

    Open shade

    Every time a bride tells me they’re praying for a gloriously sunny wedding day I don’t have the heart to tell them I’m praying for some lightly diffused cloud cover with intermittent dashes of sunlight upon my express request.

    Glaring sunshine causes harsh shadows, particularly in the most important part of the portrait – the eyes.

    Open shade is ideal because it doesn’t have harsh sunlight falling directly on the subject, but because the shade is ‘open’ it means there’s still enough light to give the eyes some sparkle. A tree is a perfect example of open shade, so is window light. The subject is in shade but they’re not completely closed off as they would be in the centre of a room, or in a forest. Open shade offers you some nice, soft directional light that creates enough shadow on the face to create depth, but without being harsh.

    Lead in lines

    Lead in lines

    Lead in lines are just as helpful to portrait photography as they are to landscapes. They create depth to a photograph, lead you towards your subject and give the image a three-dimensional feel.

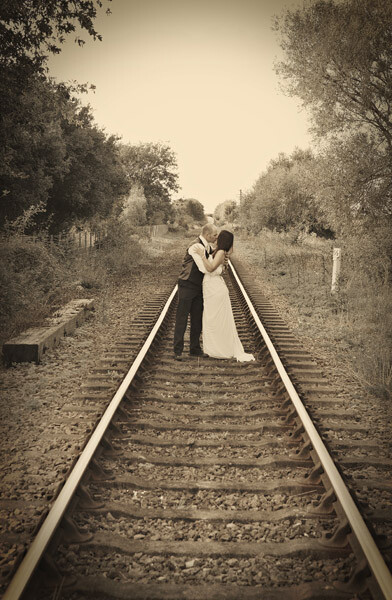
    You can use fences, paths, a long twisting tree branch, the lines in a cornfield – anything that draws the viewer’s eye towards your model.

    Lead in lines 2

    Twinkly leaves

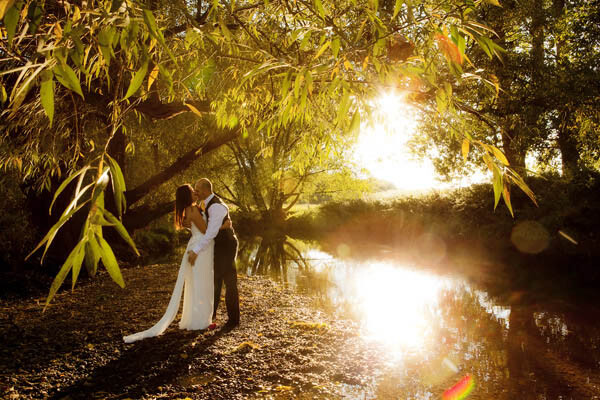
    If you position your subject so there are back-lit leaves behind them then you’ll get a beautiful mosaic of green twinkles behind your subject if you use a low f-number on your camera (like f/4 for example).

    With backlit subjects like this it’s often wise to use the spot metering mode to help your camera expose correctly for the face and avoid having a silhouette. Using a reflector to bounce some extra light into their face will help even more.

    Twinkly leaves

    Tantalizing textures

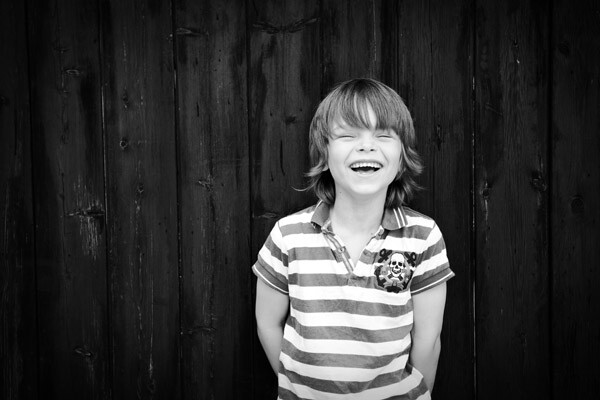
    A barn door may not sound like a very exciting background, but rough textures can help the smoothness of your model’s skin pop out of the photograph. I also like rustic walls, and the repeating parallel lines of reeds.

    Tantalising textures

    Geometric shapes

    Our brains like order. We like the pieces of the puzzle to fit together, which is probably why we get so frustrated when putting together flat-pack furniture! This is why our brains like the elements of a photograph to fit together like a completed jigsaw. I look for triangles, circles, rectangles and squares; and compose the image in a way that helps them fit together in harmony. This is also why we like clean, uncluttered hotel rooms that subtly use defined shapes, like the folded triangle of a bed sheet, or the repeating rectangles of a stack of towels.

    When you start looking for shapes you’ll see them everywhere. Geometric shapes are often the basis for modern art and when you deconstruct many great photos into line drawings they’ll often look like that.

    Geometric shapes

    Foreground, mid-ground and background

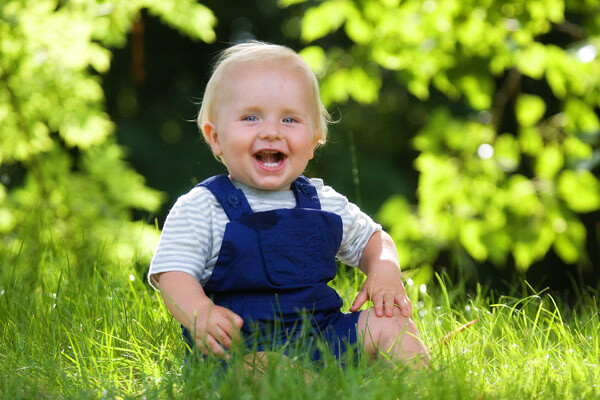
    To give your images depth and a three-dimensional feel you need the viewer’s eye to find interest in the front, middle and background of the photo. Diffused blades of grass could be the foreground, a smiling toddler can be the mid-ground and sunlight sparkling through a tree could be the background.

    Foreground midground background

    Avenues of trees

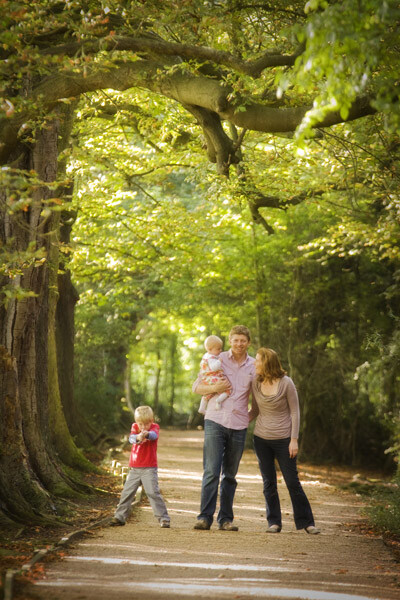
    I love the effect you get when photographing people in an avenue of trees, using a long lens, because it ticks nearly all the boxes in one go. The leaves provide the necessary shade while the path provides a lead in line and creates depth in the photo. The long lens helps produce a fabulous tunnel vision effect that draws you in and helps to frame the photo, along with the trees themselves.

    Long avenue of trees

    The next time you decide to photograph someone use these tips and place your subject in the best position to ensure great light and cracking composition. If you have any questions then I’ll be happy to answer them below.

    The post How to Choose a Great Portrait Photography Location by Dan Waters appeared first on Digital Photography School.


    Digital Photography School