Category: Photography

  • How to do Great Portraits with One Light

    When you first start experimenting with lighting it’s easy to become overwhelmed. Never has the old expression K.I.S.S. (keep it simple stupid) been more appropriate. The most important step is to master what you can achieve with one light source before you start adding others.

    1b

    Besides, what you CAN achieve with only one light source, used correctly, is quite remarkable.

    For this article I have delved into my back catalogue and sourced images that were shot with a single speedlight off-camera. I hate carrying tons of equipment and even now, for 80% of my commercial work, I will try to use one light source only when possible.

    2

    Shot with a Canon 600EX-RT Speedlite bounced into a 40” white Profoto umbrella

    In the below business portrait a diffused umbrella gives us nice catch lights in the subject’s eyes, while allowing for rapid fall away to bring out the shadows. The portrait is shot against a pop-up Westcott black background. A diffused umbrella is a great low-cost investment that massively improves the quality of light from your speedlight, and is easily set up and transported.

    3

    Lit with a Canon RT600 Speedlite into a Phottix Para-Pro diffused umbrella

    To create the image below I had to expose for the blue sky and then pump as much light into the subject as possible – this is a speedlight at the limit of its capability – the umbrella helps to increase the size and evenness of the light spread. The image was shot at 24mm so the umbrella is as close to the subject as possible without being in the frame.

    4

    Lit with a Sony HVL-F58 speedlight bounced into a 40” white Profoto umbrella

    It is entirely possible to create professional results without spending a fortune – this cropped cutaway headshot used a Sony SM58 speedlight with an Orbis ring-flash modifier handheld over the top of the speedlight. For this modifier to be effective you really need to be quite close into your subject, as the flash output is significantly reduced by the modifier. Used properly though it can create some great results.

    5

    Lit with a Sony HVL-F58 speed light and an Orbis Ring Flash modifier

    6

    Another example of a portrait shot with the same modifier, lit with a Sony HVL-F58 speed light and an Orbis Ring Flash.

    Notes for doing one light portraits:

    • When you are shooting single light setups, you need to remember to keep it simple
    • You can create some great shadows with a single light source
    • Watch out for hotspots created by undiffused light
    • Try blend your added light with the ambient light
    • Using large modifiers can help to spread your light more evenly
    • Move your subjects, not the light, to fine tune your images
    • Experiment by changing your position to the light source
    • Work with the distances, subject to light source, to change the hardness and softness of the light

    Below is an example of blending the ambient light with artificial light. The speedlight in this instance is to camera right on a light stand about six feet from the model, and slightly in front of her. Shot at full power with no modifier it is hitting the model and the tree. While by no means perfect the image does work as the over exposure on the tree gives a little separation.

    7b

    Lit with a Sony HVL-F58 with no modifier

    We can see the same model here closer to sunset; shot with a speedlight fitted with an orange gel, bounced into a 30” silver umbrella to emphasize and enhance the already warm available light.

    8

    Lit with a Sony HVL-F58 speedlight, gelled, bounced into a 30” Profoto silver umbrella

    Reflectors can also be used to great effect with a single light source, especially when mixing the ambient reflected light with flash fired directly into the reflector will give your images that extra pop. In the portrait below, the natural light and sun were not enough to light the model. A half-power flash from a speedlight helped to improve the overall lighting of the image, and really make the catch lights in the sunglasses stand out.

    9

    Lit with a California Sun Bounce gold/silver and a Sony HVL-F58 speed light

    Sometimes ambient light is almost enough. In the below portrait 95% of the light is coming from a window camera left. A thin white blind diffused the light beautifully and evenly but didn’t give the catch lights in the eyes. To fix this I used a diffused umbrella with a speedlight on ¼ power, slightly to camera right. Because of the low power setting the artificial light doesn’t really change the ambient light but does give the eyes that needed brightness to make the image.

    10

    Lit with natural window light a Sony HVL-F58 and a Phottix para pro diffused umbrella

    In conclusion

    Everything you see here was lit with a single speedlight, and reasonably priced, easily set up modifiers.

    Modifiers used – Silver and white umbrellas, a diffused umbrella and an Orbis Ring Flash all of which can be purchased for a few hundred dollars.

    Have you done any portraits using only one light? Do you have any additional tips or questions? Please share or ask in the comments below.

    For more portrait help try these:

    • Using Off-camera Flash to Fix Lighting Problems for Outdoor Portraits
    • Tips for Great Beach Sunset Portraits
    • 6 Portrait Lighting Patterns Every Photographer Should Know
    • Portrait – Lighting the Shot, a dPS ebook

    The post How to do Great Portraits with One Light by Leo Edwards appeared first on Digital Photography School.
    Digital Photography School

  • How to Master Your DLSR in One Afternoon a Beginner’s Guide

    As the Editor-in-Chief of CLARITY, I believe that photography is one of the most unique forms of visual art. As a photographer, you must possess an ability to express yourself visually and also be technically proficient with the tools of your craft.

    Thankfully, the technology is relatively simple to understand. Given a small amount of time, anyone can master the mechanics of their DSLR very quickly. I’m referring to the technical side of photography, or more specifically, how to use your camera.

    photographybb-pentax-k7

    I’m sure you’ll agree, digital SLR cameras are pretty appealing contraptions. They constantly evolve with new bells and whistles, and shiny attractive buttons and dials, but at their very essence, a camera is quite simply a box that captures and records light through a small opening. Light enters the camera and hits a sensor for a certain period of time, and that’s it. Too much light and the photo will be over-exposed (too bright). Not enough light and the photo will be under-exposed (too dark). By the end of this article, if feel stuck in Automatic Mode you will be able to break free and let your true creativity reign!

    So how do you know when you have the optimal amount of light? Thankfully, when you are shooting in Manual mode, your camera has a built-in light meter to show you if your exposure is going to be too dark, too bright, or just right. You simply need to know how to control the amount of light that enters your camera, and for how long the sensor is exposed to that light.

    Start Right Here – learn how to master your DSLR

    There are three ways to control the amount of light that enters your camera, and all three are used to make your photograph either brighter or darker.

    The Exposure Triangle

    The first is the size of the opening through which light enters, called the aperture of your lens. The next is the duration of time that your camera sensor is exposed to the light, referred to as the shutter speed. The final option controls how sensitive the camera is to light, known as the ISO. These three controls all interact with one another in a give-and-take relationship, and the following “Exposure Triangle” is a great tool to help you understand the dynamics of these relationships.

    Now, the trick is to balance these three options to achieve a perfect exposure. Typically, you will choose two ways of controlling how light enters the camera, and then compromise on the third. The two choices you make are solely dictated by the aesthetic you would like to achieve. Aperture size, shutter-speed, and ISO all have individual benefits, but they also produce side-effect consequences that lend an aesthetic component of their own. Let’s explore how they work in more detail.

    Part One – Aperture

    The size of the “hole” through which light enters your camera is called the aperture. Mechanically, the aperture is a little diaphragm inside the lens that you can widen or narrow by telling your camera what f-stop you would like to use. The f-number is a funny measurement because a small f-number (like f/2.0) equates to a wide opening, whereas a large f-number (like f/22) equates to a small opening. As you would imagine, a large opening allows more light to enter the camera resulting in a brighter photograph, and a small opening lets in less light resulting in a darker photograph. Pretty straightforward stuff so far right?

    Side Effect of Aperture

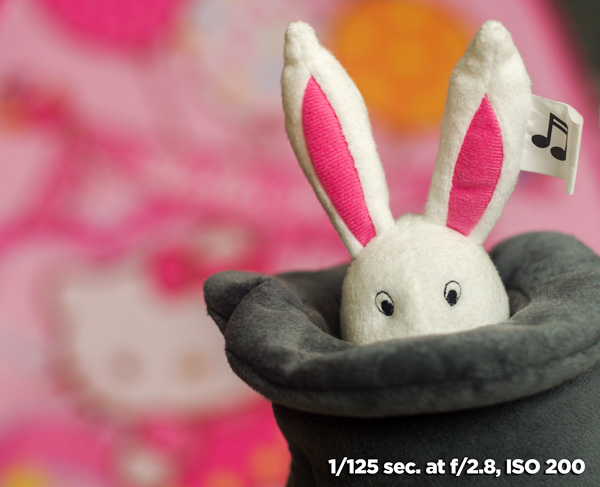
    The aesthetic effect of varying the aperture is that light entering a wide aperture translates into less focus between the foreground and the background in the photograph. This is how photographers blur out the backgrounds in their photos. When you want to isolate a subject by blurring out the background, you would use a wide aperture.

    DOF f2 8 Dave Seeram

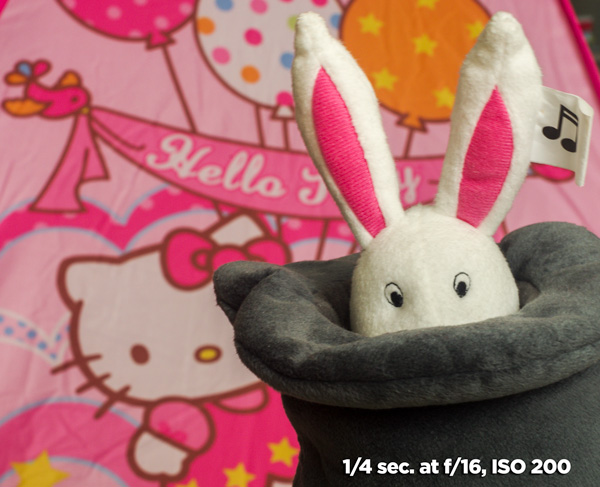
    Light that enters through a smaller, tighter, aperture is more focused than light entering a wide aperture, and light that is more focused translates into sharper focus through the foreground-to-background depth in a photograph. So if you want everything as sharp as possible through the depth of your scene, you would want to use a narrow aperture.

    DOF f16 Dave Seeram

    Part Two – Shutter Speed

    The shutter is basically a little curtain that opens and closes behind the aperture. It can be open for a long amount of time (like seconds, minutes, or even longer), or a short amount of time (like quick fractions of a second). As the shutter stays open longer, more light is captured by the sensor resulting in a brighter image. The shorter the shutter speed, the less light is captured resulting in a darker image.

    Side Effect of Shutter Speed

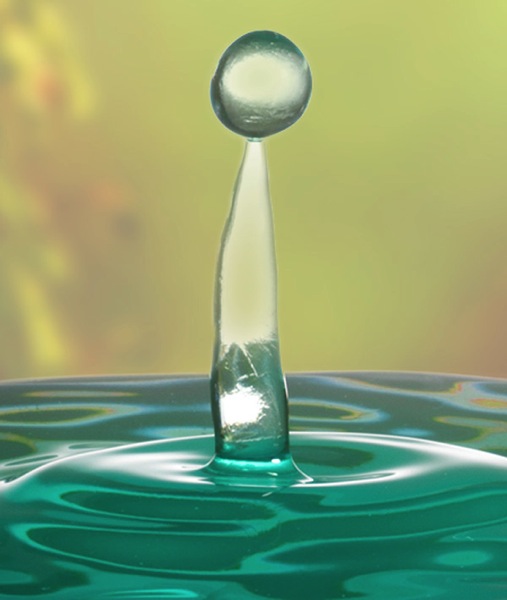
    The aesthetic effect here is that a fast shutter speed allows you “freeze” any motion in the scene, whereas a slower shutter speed blurs any motion. Imagine taking a photograph of a falling water droplet. If your shutter speed was set to 1/1000th of a second, the shutter is open for such a brief fraction of time that the drop would appear frozen in mid-air when photographed.

    Fast ss dave seeram

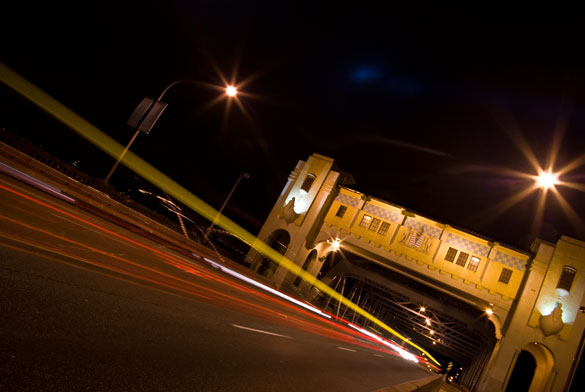
    Alternatively, if you set a much slower shutter-speed such as half a second, then the movement of the falling drop would be captured as a blur.

    Photographybb traffictrails1

    Give-and-Take

    Typically, fast shutter speeds require a larger aperture for the sensor to capture enough light to produce a well-exposed photograph. Conversely, slow shutter speeds tend to require a smaller aperture to limit the amount of light coming in over the longer duration. You can see how these factors are all starting to work together.

    Part Three – ISO

    The third way of adjusting the overall brightness of your photograph is the ISO, which controls how sensitive the camera sensor is to light. A low ISO (like 100) results in a darker photograph, while a high ISO (like 6400) results in a brighter photograph.

    Side Effect of ISO

    Of course, there is a trade-off here too. The aesthetic compromise of using a higher ISO means that while you will produce a brighter image, a higher ISO also introduces more grain (or “noise”) into a digital photograph.

    Usually, you will first decide upon your aperture and shutter speed based on the combination of their aesthetic effects to your vision for the final image, while aiming to keep your ISO as low as possible. If you know that you need a certain shutter speed along with a certain aperture and the resulting image is still too dark, that’s when you increase the ISO.

    Generally speaking, when you’re shooting in an environment that is dark or dimly lit, you’ll want to raise the ISO to make the sensor more sensitive to light. When the lighting conditions are bright, you can keep the ISO low.

    It’s all about finding a balance between these settings to achieve the best exposure. Once you decide upon one or two of these settings, the camera will require some compensation on the other.

    Photographybb exposure triangle

    The Exposure Triangle is a great reference to demonstrate how increasing or decreasing any one of these three settings affects the exposure of the image. This stuff can be learned quite quickly, but it’s best to experiment with these settings to see how they operate in the real world. This will help you gain a technical understanding of how to use your camera, but there’s still a long way to go with regards to making photographs that communicate. Remember, photography is a visual language. Once you learn how to use the camera, you can then learn to translate your vision into captivating photographs.

    Both the technical and artistic aspects play important roles in the making of a beautiful photograph. At CLARITY, we show our readers how to quickly learn the technical side, but we go even further to teach the importance of developing your creativity. We’ll show you step-by-step techniques to making stronger photographic compositions, and what to do when you feel like your vision and results don’t line up. Join other DPS readers, and we’ll give you everything you need to know to make great photographs with ease, in any situation. Get a subscription to CLARITY on sale now at SnapnDeals.com.

    SNAPNDEALS CLARITY BANNER

    The post How to Master Your DLSR in One Afternoon a Beginner’s Guide by Dave Seeram appeared first on Digital Photography School.

    Digital Photography School

  • How to use Lightroom Develop Presets to Learn Processing Tips

    Learn Lightroom from Develop Presets

    In my previous article you learned how to create a vintage effect using Lightroom. I started by showing you some Lightroom Develop Presets you can use as a shortcut, and finished by demonstrating some techniques you can use yourself. The hidden message in the article was that one way to learn how to use Lightroom is to buy some Develop Presets (or download some free ones) and analyze them to see how they work. You can then apply the same techniques to your own photos, and even create your own Develop Presets.

    Today I’m going to give you some tips on analyzing other people’s Develop Presets. I’m going to do it using some presets I downloaded from onOne Software. These are free presets that anyone can download and use themselves (just follow the link), so it is easy for you to follow along.

    Preset: onOne Instantastic – Daisy

    The Daisy preset, part of the onOne Signature Collection Presets (Vol. 2), gives an Instagram filter effect. There is a slight matte effect and a blue colour cast.

    Learn Lightroom from Develop Presets

    A. Original photo B. Daisy preset

    Vibrance and saturation adjustments

    This preset uses two techniques to create the colours. The first is applied in the Basic panel. The preset increases Vibrance to +20, and reduces Saturation to -20.

    Learn Lightroom from Develop Presets

    To understand the effect of these tweaks you need to know the difference between Saturation and Vibrance. Saturation affects all colours in the photo evenly. Reducing Saturation to -20 has a uniform effect on all the colours within the frame.

    Vibrance, on the other hand, affects the least saturated colours in the photo the most. The net effect of decreasing Saturation and increasing Vibrance is that the strongest colours in the frame are desaturated while other colours are not desaturated nearly so much.

    Learn Lightroom from Develop Presets

    A. Vibrance 0, Saturation 0 B. Vibrance +20, Saturation -20

    Tone Curve adjustments

    The rest of the colour adjustment is carried out in the Tone Curve panel, with two adjustments to the blue and red Tone Curves. Here’s what the adjustments look like.

    Learn Lightroom from Develop Presets

    Raising the blue curve on the left creates a matte effect and a blue colour cast. Pulling the right hand side of the curve down adds yellow (the opposite of blue) to the highlights. This comparison shows the difference.

    Learn Lightroom from Develop Presets

    A. Blue curve lifted on left. B. Blue curve lifted on left and pulled down on right.

    The red curve adjustments are also a subtle colour and tonal adjustment. Moving the bottom left corner to the right adds cyan and makes the shadows a little darker.

    Moving the top right corner to the left adds magenta and makes the highlights a little brighter.

    This comparison shows the difference the red Tone Curve adjustment makes. The difference is subtle, so you may have to look closely.

    Learn Lightroom from Develop Presets

    A. Blue Tone Curve adjustment only. B. Blue and red Tone Curve adjustments combined.

    Preset: Nicolesy Matte 3

    The Matte 3 preset, part of the Nicolesy Matte Presets for Adobe Lightroom 5 set, creates a subtle matte effect and a red colour cast.

    Learn Lightroom from Develop Presets

    A. Original photo. B. Matte 3 preset.

    The Develop Preset does its work in the Tone Curve and Split Toning panels. Let’s take a look at each.

    Tone Curve adjustment

    The Tone Curve adjustment combines two adjustments in one to the RGB curve (the colour curves haven’t been touched). First, the bottom left corner has been moved upwards to create a matte effect. Second, the center of the RGB curve has been pushed gently upwards, making the mid-tones brighter. The net effect of this Tone Curve adjustment is to add a matte effect and make the mid-tones brighter at the same time. This comparison shows the difference it makes.

    Learn Lightroom from Develop Presets

    A. Linear Tone Curve. B. Adjusted Tone Curve.

    Split Toning

    The colour has been added to the photo using the Split Toning panel. The preset adds hot pink to the Shadows, and a luminescent green to the Highlights, with the Balance slider pushed to the right to give prominence to the green tone. This comparison shows the difference the split tone makes:

    Learn Lightroom from Develop Presets

    A. No Split Tone. B. With Split Tone.

    Putting it all together

    In my last article I wrote that buying Lightroom Develop Presets made by other people (or downloading free ones) is a shortcut to creating effects like these. One benefit of using other people’s presets is that you can take advantage of their knowledge and hard work and use the presets for yourself.

    But the main advantage is that other people’s presets can introduce you to new and creative ways of processing your photos, using techniques that you may never have thought of by yourself. The real benefit comes when you take a close look at the settings altered by the preset and take the time to understand how they work. Your understanding of Lightroom will become deeper as you do, so that you can use these techniques in your own photos.

    For example, in this article you have learned how to use the Tone Curve panel to create a matte effect and change the colours in your photos. You have also learned how to use the Split Tone panel in combination with a Tone Curve adjustment to create another type of matte effect. The rest is up to you.

    Can you come up with ways to use these techniques creatively on your own photos? What Tone Curve adjustments can you make? What Split Tone combinations can you apply? Have fun, experiment and good things will surely follow.


    Mastering Lightroom: Book Four – The Photos ebookMastering Lightroom: Book Four – The Photos

    My new ebook Mastering Lightroom: Book Four – The Photos takes you through ten beautiful examples of photography and shows you how I processed them step-by-step in Lightroom. It explores some of my favourite Develop Presets and plug-ins as well as the techniques I use in Lightroom itself. Click the link to learn more.

    The post How to use Lightroom Develop Presets to Learn Processing Tips by Andrew S. Gibson appeared first on Digital Photography School.

    Digital Photography School

  • Dispelling the Myth of Good Light and Bad Light

    There is no such thing as bad light, there is just light. Take advantage of every situation.

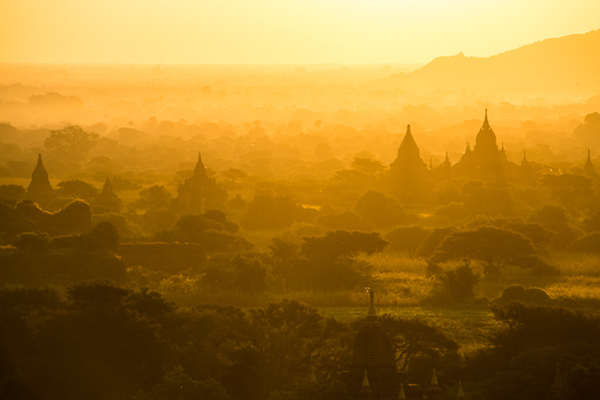
    20131206 Bagan 563b

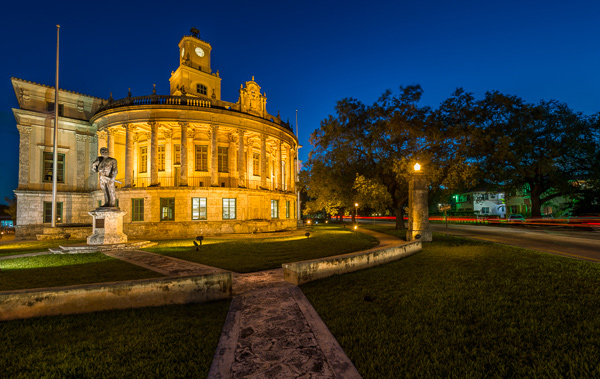
    Photography is all about the light. In fact, if there is no light hitting the sensor, there is no photo. Different times of the day, or weather conditions, can create different moods and situations. As you probably know, you can achieve amazing and compelling results by shooting in the early morning, or from late afternoon well into twilight. This is known as the golden hour and the blue hour, respectively.

    Coral Gables City Hallb

    However, there is no such thing as good light or bad light, there is just light. It is not always possible to shoot under ideal conditions, especially when traveling. Yes, you can wake up early; yes, you can skip dinner or eat it later. But what are you going to do the rest of the day or if there is bad weather? If anything, when you are on tour, chances are you’ll be wandering around at midday, in overcast conditions or even in the rain. Here are some tips and examples you can follow to make the most of the situation under any kind of weather or light conditions.

    Tips for using any kind of light to make great photos

    High sun, midday light

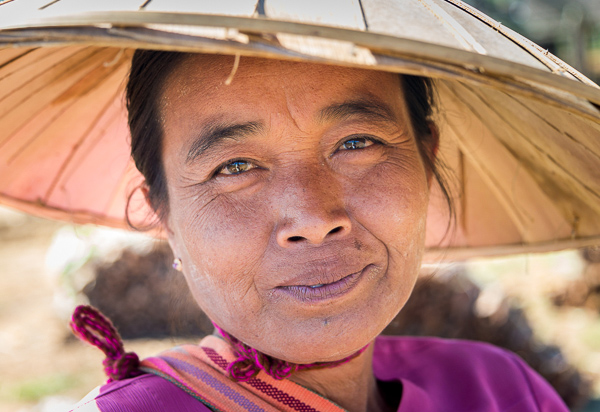
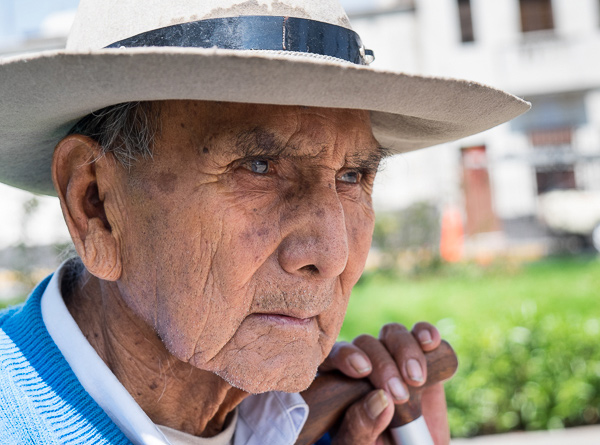
    In most cases you’ll be out exploring places during the daytime under midday light. This is not an ideal situation. Direct, harsh sunlight creates hard shadows that are not very flattering. Taking portraits of locals is one of the best ways to capture the essence of places; if you’re going after this, you can try to move your subject into the shade. If they are wearing a hat, you can also position them in a way where their face is under the brim. The key for this is to come close enough to the person and compose your shot right into them. Alternatively, use an off-camera flash to fill the shadows and compensate for the brightness in your background.

    20131212 Inle Lake 535b

    20140410 Arequipa 267b

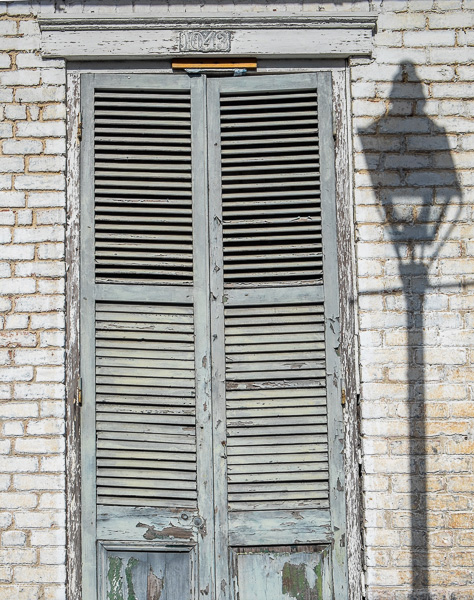
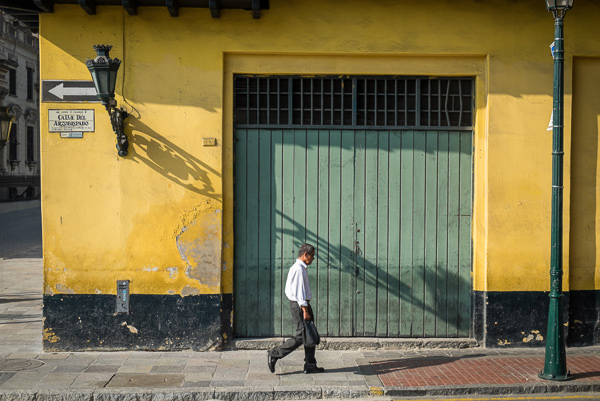
    If you are looking for street scenes or iconic locations, you can always use the hard shadows created by the direct sunlight to your benefit and arrange the image in a way that helps to create a compelling composition. You may have to wait for the right moment, waiting for someone to walk into your scene or simply using the shadow element intentionally as part of your photograph.

    20140222 untitled 0063b

    20140402 Lima 108b

    Clouds in the sky, overcast light

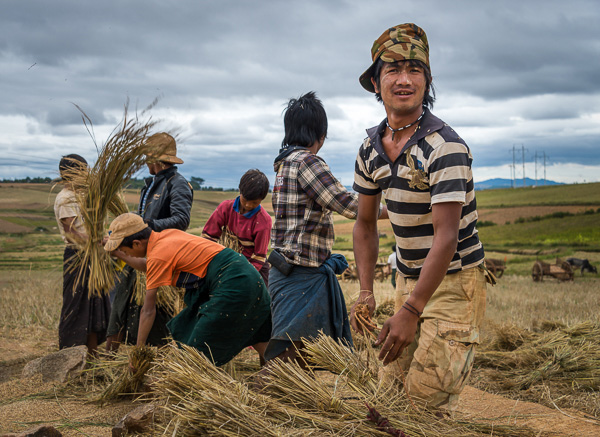
    Granted, this is not an ideal situation either; however, there is much you can do. In this case, contrary to the high sun, you have a very soft light. This is great for shooting portraits. The light will be even and very soft; throw in some stormy clouds and the effect could be very dramatic. Again, get close to your subject.

    Another technique is to avoid the sky. Look for locations and activities for which the sky is not an important element and simply avoid shooting it. A good example for this is local markets or similar indoor activities. By the way, local markets are fun to shoot, and moreover, they’re an excellent way to connect to and experience local culture.

    20131211 Inle Lake 13b

    20131208 Mandalay 362b

    Nevertheless, you can also work with landscape and exterior photos during these conditions. In fact, there are some places where it’s almost impossible to avoid. Due to local weather characteristics you may find that during certain seasonal periods you’ll encounter misty mornings, stormy afternoons, and so on. Go ahead and shoot it. What better way to capture a region the way you see it, the way you feel it?

    20140402 Lima 56b

    Rainy days

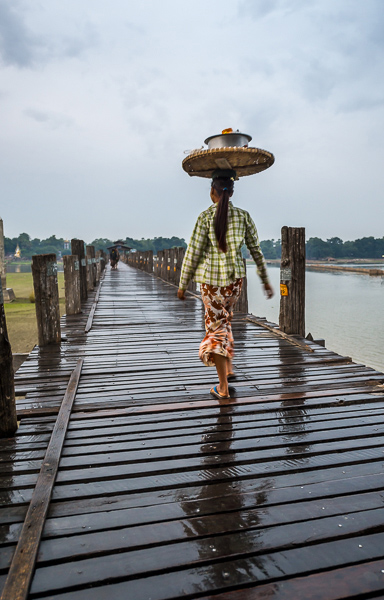
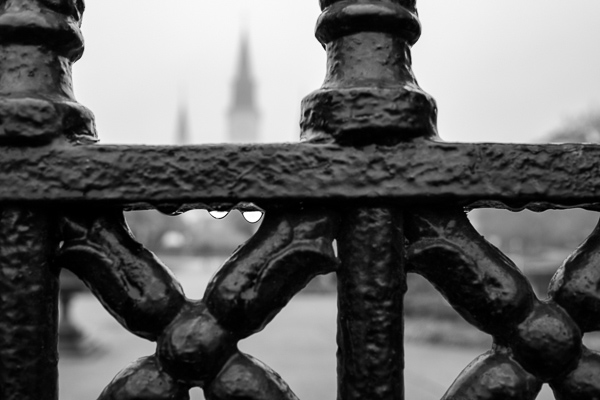
    This is the time when most photographers stay inside, but I’d strongly suggest you get out there. It can seem a little bit scary, we tend to overprotect our gear, but with some preparation there is nothing to fear and you’ll get fantastic results. When it starts to rain, good photographers head outside. Downpours bring life, a different look; in certain cases, some areas are just magical in the rain. Think about shooting reflections, ponds, and playing with water drops. The possibilities are endless and you’ll definitely love it.

    20131209 Mandalay 772b

    20140223 untitled 0022b

    As you can see, good light, bad light, is just a myth. There are certainly ideal situations where you can achieve exceptional photos, but it is not always possible to be out during perfect circumstances. So go ahead and take advantage of every condition, try to think how you can leverage and play it to your convenience. In the end, photography is fun, and great images can be obtained under almost any condition.

    The post Dispelling the Myth of Good Light and Bad Light by Daniel Korzeniewski appeared first on Digital Photography School.


    Digital Photography School

  • Meet Defrozo, the Free Marketing Platform for Photographers

    We here at Photodoto are excited to introduce you to our new awesome partner – Defrozo. Founded by Demetrio Fortman (the guy who also invented the mighty Moto CMS), Defrozo is the ultimate, online workspace enabling photographers to manage their workflow and business online, using a single login. Let’s take a closer look at this new player on the oh-so-crowded Continue Reading

    The post Meet Defrozo, the Free Marketing Platform for Photographers appeared first on Photodoto.


    Photodoto

  • Taking your DSLR into the Backcountry Safely

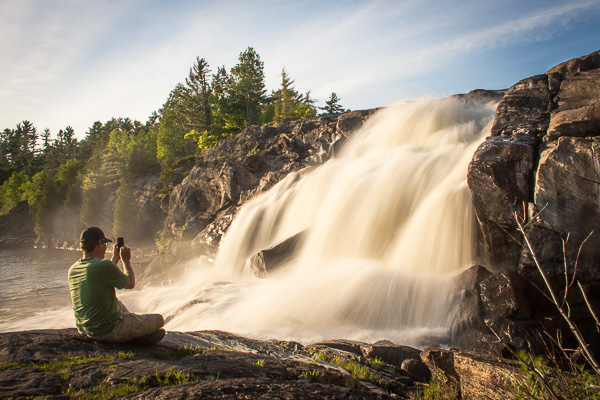
    In the Northern Hemisphere summer is finally here and that means it’s the beginning of camping season. It’s time to haul out the tent, the propane stove, the canoe, the bug hat and the DSLR. You visit all these beautiful places, gain a sense of peace and respect for Mother Nature, then come home and wish you were still there. Having beautiful, sharp images of the brutal trail you faced, the noisy bird that woke you at dawn, or the incredible sunset you experienced can make the experience all the more rich. The added bonus is you have some fantastic images you can hang on the wall and gaze at as you plan your next trip.

    Back country photography5

    Taking a DSLR into the back country isn’t as costly or as expensive as you would think. You don’t need the super high end gear. Your DSLR is fairly rugged, it can handle rain, heat, a few bumps, water, dust, campfire smoke, etc. It’s not as breakable as you might think. Whether you are hiking or canoeing/kayaking, taking your gear into backcountry is easy. I’ve been taking my DSLR into the backwoods of Northern Ontario for years and have never regretted the decision. It’s taken practice, but through trial and error, you too can find a system that lets you take your DSLR into the woods. When packing for a backcountry trip remember to consider the following.

    How will you pack and protect your gear but make it easily accessible?

    OPTION 1: A hard case

    These are easy to access, and when closed properly are airtight. Your camera and lenses will be completely safe using this method. They are easy to access on the trail, just lift the lid. Hard cases can be adapted to fit a camera and a lens by removing some of the foam padding from within. You customize the case to your gear. The drawback is the added weight you will have to lug and the cases are awkward. Picture yourself dragging a tired body, a backpack containing a tent, food, clothing and a suitcase like object through the bush. It’s not easy. But if you want the 100% protected guarantee then this type of case is for you.

    OPTION 2: A dry bag

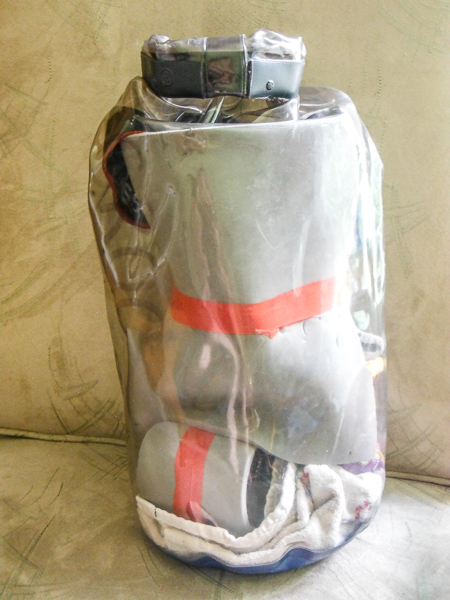
    This method doesn’t guarantee complete protection. If you capsize in a canoe or drop the gear into a river, dry bags don’t promise watertight protection. However, a dry bag is easy to strap to the canoe or kayak and can be packed into a standard tripping pack quite easily. The dry bag keeps it safe from the elements. The handle at the top makes it easy to carry. The trick is to create a padding system within the dry bag. I use an old foam mattress to pad my gear.

    Back country photography1

    Back country photography7

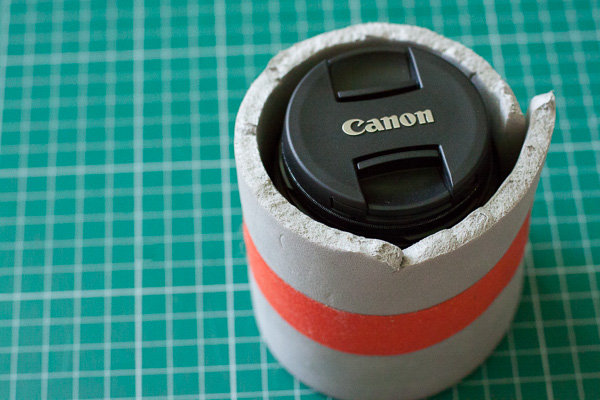
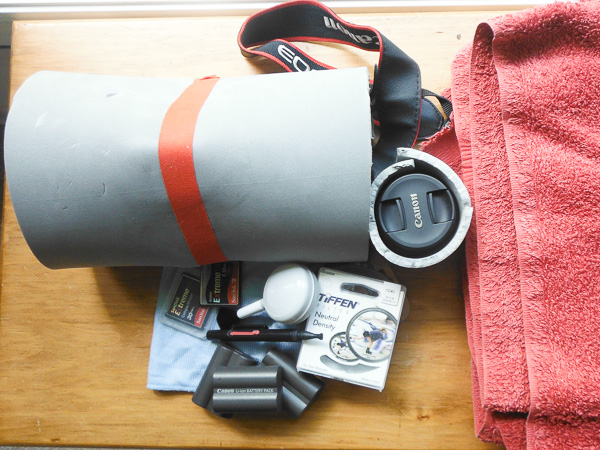
    Basically, cut up the mattress to fit your camera and bag. You can wrap spare lenses in the same foam and place them in the bottom of the bag. Dry bags can be purchased in varying sizes so you don’t have to buy a new bag for each combination of gear. This method is the cheapest, it’s fairly accessible and it’s certainly the easiest to carry.

    OPTION 3: A tripping pack designed for carrying camera gear

    There are several tripping packs that are designed to carry your tent, clothes, food and camera gear. These are excellent at protecting your gear and are designed for just such an outing. The problem is they aren’t very waterproof. They do come with a rain cover, but let’s face it, the gear is ruined if you drop the bag in a lake. If you are just hiking, then this is a fantastic option, these bags are designed for this job.

    The drawbacks come for those of us who are smaller in stature or female. Most of the overnight backpacking bags are huge and become difficult to carry, especially for women. Sometimes chest straps don’t sit where they should and can be very uncomfortable. Comfort on the trail is extremely important: you don’t want to be in agony. Whatever you choose, make sure the pack fits properly. The comfort factor is the key to an enjoyable hiking trip.

    How far will you travel? Can you really carry all that gear?

    Tripping in the back country is hard work. You have to carry everything you need. You want to make sure enjoy your trip. If you are crippled under the weight of carrying, or portaging your camera gear, it isn’t going to be fun. Pack light and smart. Try to limit yourself to a few lenses, a filter or two, a few batteries and memory cards.

    Back country photography6

    Make it a fun challenge, take along one lens. Do you really need your 85mm lens if your 70-200 range zoom will cover this focal length? Be frugal with what you carry. This will push you to be creative in the types of shots you take. Also, it’s important to take a tripod for super sharp shots. Investing in a lightweight model is a good idea. The lightweight versions are pricier but worth it.

    Use Common Sense

    If you are going on a trip and serious about taking some great photos then make sure you plan for it.

    1. Cut down the number of kilometres (miles) you cover in a day in order to build in some time for photography.
    2. Choose a route that has some beautiful photographic locations. Plan in advance and do your homework.Back country photography2
    3. If canoeing or kayaking plan a route that doesn’t contain huge multi-kilometre portages that will drain you of energy.
    4. Make sure you tie your camera gear to your canoe/kayak for added safety in the event you dump.
    5. Portage through challenging rapids to avoid soaking gear.
    6. If the weather is challenging, stay undercover. You can get moving tomorrow.
    7. Don’t take your gear out of its protective bag if the water is really rough, especially if you’re a novice paddler.
      Back country photography4

    Finally, there’s one essential piece of gear that weighs almost nothing but you are guaranteed to regret it if you don’t take it. Always take a lens pen, and a couple of microfiber cloths, they are a must. Your gear will get dirty. Accept this fact now and simply remember to book your camera in for a thorough cleaning after you return. It will feel like a new camera afterwards, that’s a bonus.

    It’s a little more work but it will be worth it. People will “oooh” and “ahhhh” at your photos, and who knows maybe you will inspire a friend to take same trip because they just have to visit the place they’ve seen in your photographs.
    Back country photography3

    The post Taking your DSLR into the Backcountry Safely by Erin Fitzgibbon appeared first on Digital Photography School.


    Digital Photography School

  • Overcoming the Fear – Creating Better Travel Photography Portraits

    Pick up Oded’s new Snapn Guide (a dPS sister company) Snapn Travel here for only $ 7. A lifetime of travel memories in a Snap.

    Traveling is fun and rewarding, but sharing memories of your journeys with friends, family and the world through your own beautiful images can be even better. Especially rewarding are images of the interesting people you meet along the way, because creating travel photography portraits can be an amazing addition to your portfolio.

    But, if taking pictures of strangers while interacting with them makes you uneasy, maybe even feeling a bit of fear? GOOD! Then this article is for you.

    F11A1011

    The world of photography is divided between two groups of people: those who enjoy creating portrait photography and those who do not. Through discussion with my own students I have realized that only about ten percent of those who avoid portrait photography actually do not like it. The remaining ninety percent, so I discovered, are hiding, deep down inside, a photographer who really desires to shoot portraits, especially when he or she travels to interesting and distant places, meeting people from other cultures.

    But it is not that easy. Let’s be honest, sometimes it’s super hard. So what we do is we wrap ourselves with excuses like: “I do not feel comfortable with this”,”I do not want to invade a person’s privacy” and as the “golden excuse” we used that one story of someone who shouted at us at some market in Morocco.

    Blue guy

    First, from my experience, getting yelled at (and all kinds of other problems) only starts when you take photos of someone from a distance and they catch you in the act.

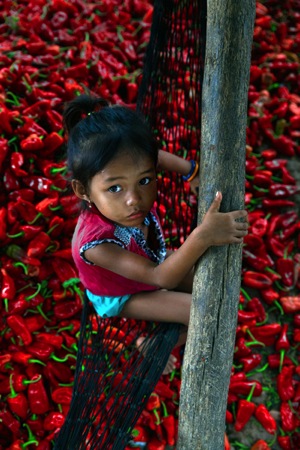
    Paprlika princeBut here is another fact: there is nothing like photographing someone from a close distance. The eyes, the feelings and the huge visual story potential within. Besides, when we work from a close distance while interacting with the person, we gain control of our tools as photographers: composition, background, the “decisive moment” and we also have that amazing ability to tell the photographed person: “you know what, let’s take one more shot”.

    In 99% of my travel photography work with magazines, I photograph portraits from a close distance, without hiding myself or hiding the fact I am taking a photo. Now, some will say that when a person sees a camera, it affects the authenticity of the moment. I will address this issue later.

    First rule: tell, do not just show

    This is the # 1 mistake of bad travel photography: trying to show a story, instead of telling it. Creating a diary instead of evoking feelings. Here is the unpleasant truth; apart from our family and close friends, no one cares where we travel and who we meet along the way. If you want to succeed in exciting your viewers, you need turn to a different approach.

    10

    Before the digital era, it was enough if you traveled to the other side of the world and came back with images of people from some exotic tribe. You know, those “colorful” images, of people with a bone stuck in their nose. Today, when almost every corner of our planet has been photographed, this is not enough anymore and we have to return to the basics; to that one element that hasn’t changed since the beginning of time – a story.

    We are just obsessed with stories. A person is not only clothes, a Cuban cigar or colorful sari; a person is an entire story. A story is a complex thing to create, so for the first step I will ask that your images be able to answer this question: how does the person in the image feel? Is it a comedy or a tragedy? Has he just finished a day of hard work or is he enjoying a vacation? Look at the person’s body language and listen to his voice. Try to convey the type of feeling you had while meeting this person.

    134.jpg

    Choose the right equipment

    Remember the following equation – if you have a telephoto lens, you will to use it, because that is the easiest way of shooting people, from a distance. Instead, go with a wide lens (up to 50 mm for full frame, 35mm for cropped sensor). Also, try to avoid complicated and sophisticated equipment like flash and tripods. This will attract unwanted attention in the streets and you will be busy handling the gear instead of focusing on the story in front of you.

    73 08

    Read about the culture

    Yes, in India they wear sari and in Cuba they smoke cigars. To get a more in-depth story of the culture, you have to learn about it first. Prior to your trip, do a brief study of the place you are about to visit. View images, read material and mainly, answer important questions like:

    • How will people react to the camera?
    • Do I need to pay for taking a picture?
    • Are there things that I should not photograph?

    In order to answer these questions you can ask someone who visited the destination or look for information on the web. If you do not know anything about the culture, you will fall into the cliché of photogenic tourist traps. But if you come with knowledge, it will affect your photography. My editor at the National Geographic Traveler magazine calls this “photographic intelligence”. Go the extra mile and read about the history of the place, the religious system, the food and the local music, which leads me to our next tip.

    F11A7455

    Use the local music to your advantage

    Recently I photographed a story on the Dominican Republic. It was the first time I worked on this side of the world and suddenly I felt as if I almost forgot how to take pictures. I did not approach anyone and at first, my photography did not come out well at all. So, I just listened to some local music on my headphones. I do not recommend staying with headphones all the time, because it cuts you off from the environment. But for the first day, it’s a great tip; it puts you in the groove and makes you feel good. In conclusion, on the first day of your trip, do not trouble yourself with approaching strangers. Relax, listen to the local music, get into the groove and warm up with easier image making: buildings, landscape, food, etc.

    71

    Get outside when the lighting is right

    The meaning of “Photography” is drawing with light. Even the most photogenic person will not look good in unsuitable light. There are no rules about lighting – no “good” or “bad”. There is appropriate and inappropriate lighting, because light has varying qualities: color, direction, strength, softness, etc. According to most photographers, the best light for most situations is within the “golden hours”: around sunrise and sunset. If this is your first time approaching people in order to photograph them, let the light be on your side. Try adjusting the correct time to go outside. If you cannot control the time (like when on an organized tour) try to photograph people in the shade.

    34

    Force yourself – get out of your comfort zone

    After a day of listening to the local music, getting the groove and warming up with easy shots, it is time to start working. Do not delay it, even if it is very hard for you. Just fake it until you make it:

    1. 72Choose: choose a person you would like to photograph. Don’t use excuses like: “I can’t find anyone special”. Just make the shot, even if it’s only for practice. It is very important that you choose a person who is not on the move, because you need to get ready BEFORE approaching him, so it will be easier in a static situation (a seller in market stand, or someone relaxing at the park)
    2. Get ready: know your lens and exposure. Think about the composition and background.
    3. Approach: ask the person if you can take their photo. You can ask verbally or just by lifting the camera and smiling, waiting for a smile back.
    4. Explain: it doesn’t matter if you are in NYC or Tibet; people want to know why you are taking their photo. You can tell them how much you liked their shop, pet, hair, etc., or just mention that you like portrait photography and you would like to take their photo. Usually this kind of good feedback will be enough.

    Now, you might get a NO for an answer. That’s okay! Say “thank you” and then just “get back on the horse”, move on to the next person. You might get a YES. That’s wonderful! Relax, think about the framing and make the image.

    F11A9627

    So what about the authenticity of the moment?

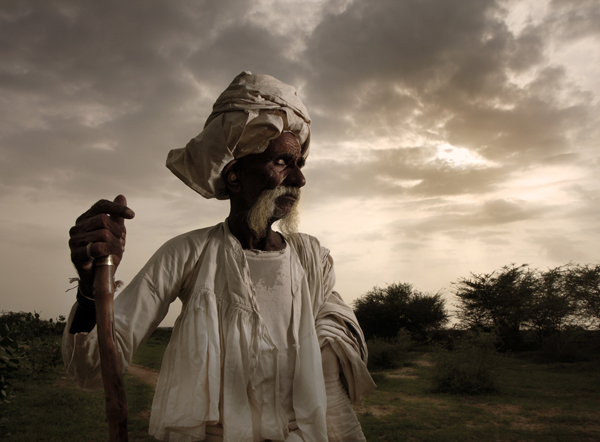
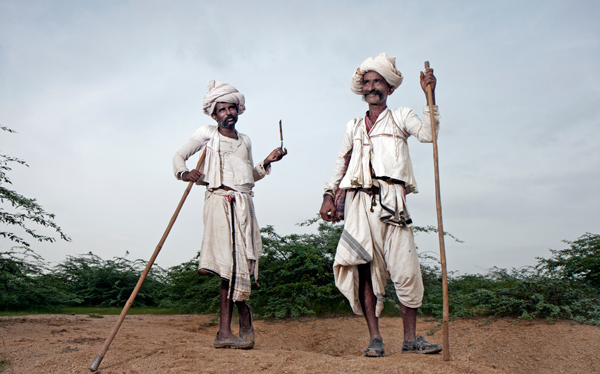
    It’s True. Usually when a person is asked to be photographed, they will put on a “mask”. You can call it their pose. Sometimes this pose might be the thing you are looking for. When photographing two men for a story I did in India for the National Geographic Traveler magazine, that pose (image below), which is so typical for the Rabari tribe men, was perfect for the story I wanted to tell.

    Page 29 b

    If you don’t want the pose, my solution – give your subject time and space. Do not stop him or her from making that pose. Give them a positive feedback and show them how nice the first photo came out. From my experience, after a minute or two, the masks fall. That is because someone eventually will enter your subject’s shop, or they will receive a phone call or anything that might make your subject forget you are still there. This is the moment of magic. This is when the best pictures happen.


    Pick up Oded’s new Snapn Guide (a dPS sister company) Snapn Travel here for only $ 7. A lifetime of travel memories in a Snap

    • Learn how to bring the emotion of your trip home with you, not just a memory card.
    • Become a travel photographer instead of a photographing traveller.


    The post Overcoming the Fear – Creating Better Travel Photography Portraits by Oded Wagenstein appeared first on Digital Photography School.


    Digital Photography School

  • How To Photograph Shy Adults

    Some people are not as comfortable in front of the camera as others. Perhaps they are shy, or perhaps they believe they have physical “imperfections”, so they aren’t at ease when it comes to having their photo taken. (I put quotes around that term because often these are not imperfections at all, but rather, beautiful parts of their body that they over-think.)

    Unless they are a professional model, most people fall into this category to some degree. If they don’t feel comfortable, it will show in the photos. Luckily, there are things you can do that may help.

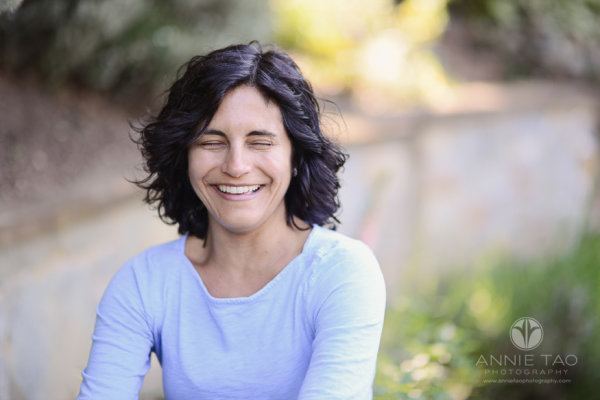
    Annie-Tao-how-to-photograph-shy-adults-article-shy-woman-2

    Give your subject something to do

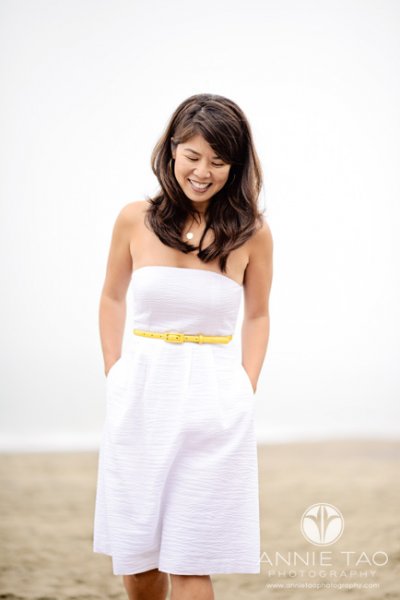
    Holding a pose will often garner an awkward expression. Thus, photograph them as they move. People are much more comfortable when they are in motion, than when they are still.

    They don’t have to do anything overly complicated. The movements can be subtle, like looking up from a head-down position or fixing something, like part of their clothes.

    Annie-Tao-how-to-photograph-shy-adults-woman-with-hands-in-pocket

    Do your social psychology homework

    Photographing people is part technical and part psychology.

    For most people, you cannot start shooting the second your subject arrives and expect them to look natural, so communicate with them before the shoot if they are shy or concerned. Children aren’t the only ones who need time to warm up!

    Make sure your subjects know how the shoot will go and what they need to do to prepare for it. If they are concerned about something, address it as quickly as possible. The longer a concern goes unresolved, the more it will grow.

    Perhaps they have a scar on their arm they feel self-conscious about. Once you know that, you can address it, like letting them know you will try your best to avoid shooting it. Maybe they aren’t sure what to wear that will flatter their curvy body, so you can give them clothing suggestions or reassure them that you will use certain angles and lighting to accommodate this. Or maybe they are just plain shy, in which case, you want to make sure you talk to them! Let them know a little about you. Talk about common interests.

    Making your subjects feel at ease is a very important and integral part of portrait photography.

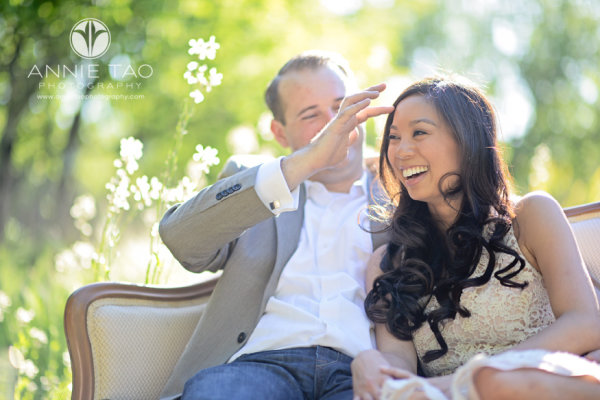
    San-Francisco-East-Bay-engagement-photography-man-helps-move-fiancees-hair-out-of-her-face

    Avoid silence

    When you have a shy or uncertain subject, being silent for a length of time can be unnerving for them.

    Talk to them during the shoot, but be careful not to bark orders at them (ie. “Sit there, look here, put your hand like this, move your body like that!”) because that will achieve the opposite of what you want.

    Rather, tell them what they are doing right, so they know to keep doing that, and explain what you are doing before you do it.

    The entire shoot doesn’t have to be instructional or too commentated, but a little bit of talking will make your subject feel more confident and “safe”. With these feelings, personalities and natural expressions will surface.

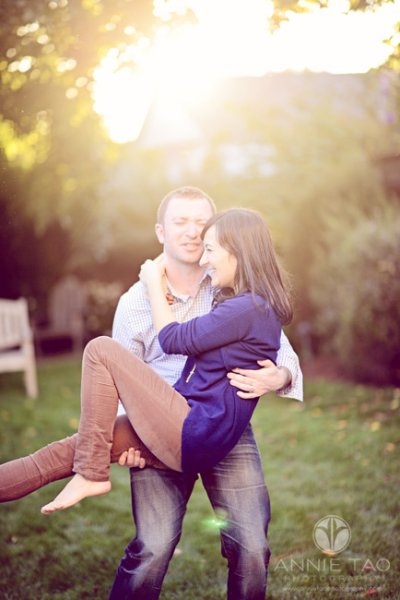
    Annie-Tao-How-to-photograph-shy-adults-article-man-carrying-woman

    If you are photographing children, you’ll want to read: How to Photograph Shy Children as well.

    Do you have any other tips for working with people? Please share in the comments below.

    The post How To Photograph Shy Adults by Annie Tao appeared first on Digital Photography School.


    Digital Photography School

  • Creating Abstract Images in Nature

    What is a working definition of “abstract” nature photography? Nature so easily lends itself to subjects realistic and dream-like, but what about abstract? You may have heard it said “If it is recognizable as an object – it is not an abstract,” but let’s challenge that notion.

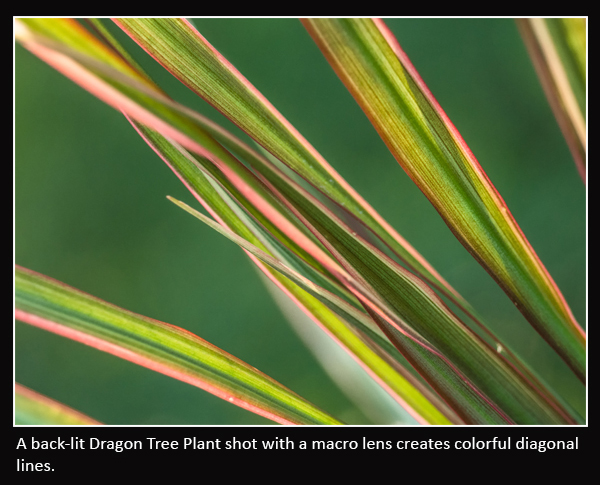
    Abstract pics_0006_Diagonal Lines

    There are no clear rules to abstract photography. The object of the photo may or may not be recognizable. Abstract images may contain a small portion of an object or multiple objects. An abstract will often concentrate on a limited area of a subject that reveals a shape, pattern, form, color or texture. Movement can also create abstract images, such as rushing water or the wind blowing a flower. To capture an image in nature as an abstract, you don’t need any special equipment – just a camera, and the most importantly, your own imagination. What matters most is that your photograph reveals an eye-pleasing image, whether you can identify the actual subject or not.

    In this article you are not going to find any magical camera settings to create abstracts, because you need to think “outside the box“. Discovering the right setting is often the key to a great abstract. Don’t be afraid to put your camera in manual mode, and experiment with different apertures and shutter speeds. Remember that your aperture will control your depth of field, and your shutter speed affects the sharpness or blurriness of the image. Likewise, normal rules of image composition do not always apply to abstract photography. The key is to become super-observant, looking for even the smallest of objects with which to create an abstract image.

    Where we look to other forms of photography to tell a story or record an event, abstract photography is about capturing an emotion. There are five key elements you want to consider in creating abstract images: lines, shapes, textures, patterns and colors:

    Lines

    Lines are the base element of design, and their uses are the fundaments of any artistic image.

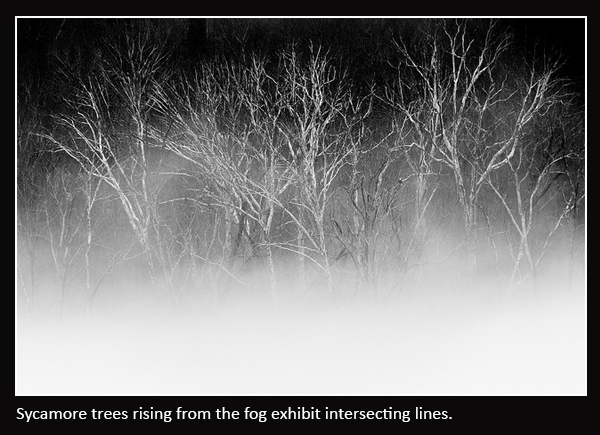
    • Lines that intersect are lines that come from different directions into and out of an image, which can give the viewer a sense of chaos.
    • Curved lines allow the viewer’s eye to explore the image in a smooth free-flowing manner, evincing a much calmer emotion than straight lines.
    • Repetitive lines or lines in repeating patterns manifest a sense of power and predictability, rhythm and movement in an image.
    •  Diagonal lines are more visually pleasing than verticals or horizontals and will lead the viewer’s eyes at a much slower pace than a straight up-down line. (By rotating your camera you can turn your verticals and horizontals into diagonals.)

    Abstract pics_0007_out of the fog

    Shapes

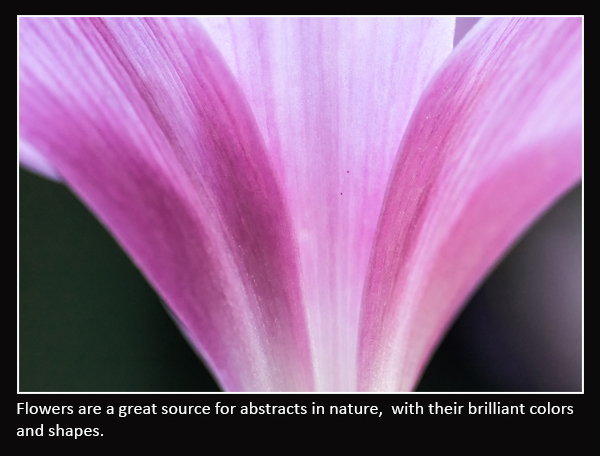
    Shapes are found everywhere in nature, and can be used to create visual meaning in a photo. To capture an abstract image, choose a shape that is interesting and pleasing to the eye. It’s very important that the shape creates an emotional response from the viewer; this is called the “wow” factor.

    • Circles evoke flow, continuity and sensuality.
    • Triangles create a sense of stability if set on their base, or precariousness if set on their point.
    • Squares exhibit stability and order.
    • Spirals create a sense of energy, flexibility and life cycles.

    pink flower

     Textures

    Texture is created by the roughness of a surface and may seem to be completely random. Textures are often a product of lines. Light and shadow create depth (a macro lens can be useful to capture textures).

    Abstract pics_0009_rocks

    Patterns

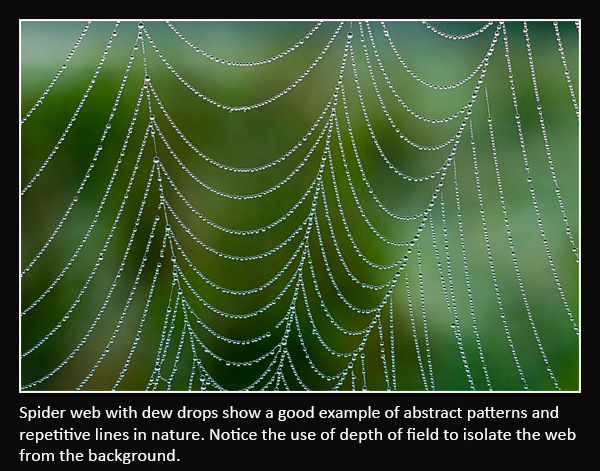
    Patterns are similar to textures, but are much more structured. Patterns can sometimes be mathematically composed by Mother Nature, for example; snowflakes and spider webs.

    Abstract pics_0001_spiders web

    Colors

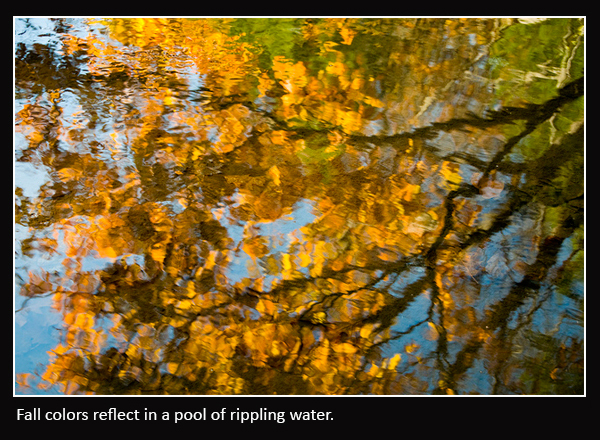
    Colors in abstracts are useful in catching your viewer’s attention.  Look for complementary colors as they will hold your viewer’s attention longer.

    Abstract pics_0000_fall colors

    Some other tips to get started on your photographic nature abstract project:

    • Photograph common objects. Trees, rocks, gravel, seashells, dew drops – even the most common of subjects can produce abstracts.
    • Use depth of field to capture the image you want. Change your F-stop (aperture) to control your depth of field.  This is especially useful when shooting textures, when you may need your entire subject to be tack sharp.
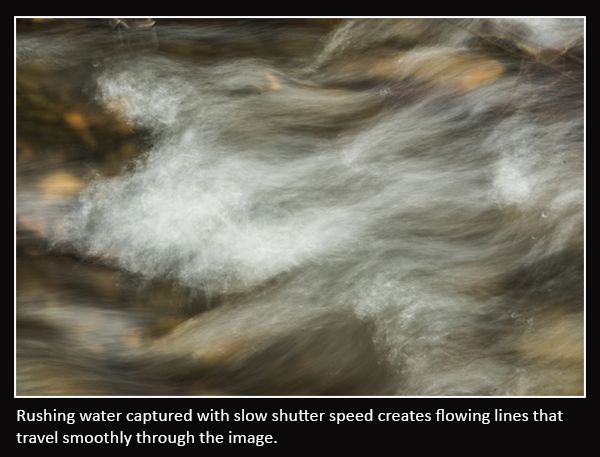
    • Use motion. Using a slow shutter speed to capture objects in motion can create some very interesting effects.
    • Experiment with your white balance. As mentioned earlier, in abstract photography you do not always need to follow the usual rules of   conventional photography and you are free to tweak your white balance to create interesting colors.
    • Adjust color saturation to create pleasing colors and look for complementary colors.
    • Look for creative uses of light for varying effects on your abstracts.

    Abstract pics_0005_rushing water

    Abstract Blurs

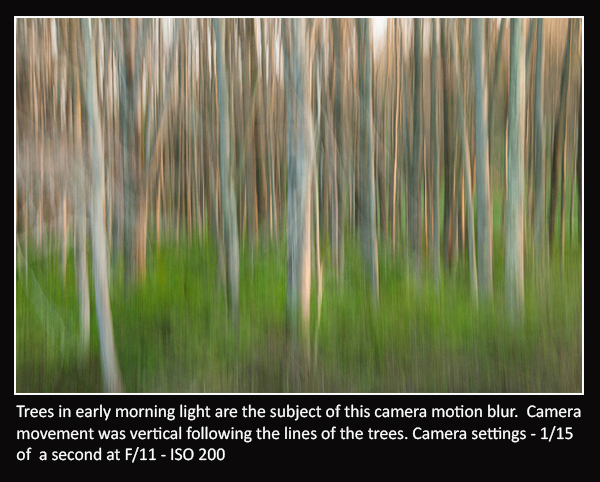
    Another method to experiment with uses camera motion to create abstract blurs. Motion blurs are perfect for those nature settings that lack creative inspiration. This method takes a lot of experimentation and you will throw away a lot more images than you keep, but the rewards are worth it when you finally capture that great image. Look for subjects with lines, bright colors and good contrast, like trees and flowers. Warning: this method can become addicting!

    Abstract pics_0003_first light

    To set up your camera for abstract blurs:

    1. Set the camera to manual or shutter priority, which ever you are most comfortable with using.
    2. Set your ISO as low as possible.
    3. Set shutter speed between 1/4 and 1/20, depending on what your subject is and how close you are to it. Far-off objects may require a slower shutter speed than closer ones to get the blurred effect.
    4. Adjust your aperture to get a good exposure as you would normally do for any image.
    5. Look for lower light conditions such as early morning or late evening which will allow for slower shutter speeds without the need of using a very small aperture. It may become necessary to use a Neutral Density filter if your scene is too bright.
    6. Set your Focus. It is important to focus your camera on the subject even though your resulting image will not appear to be in focus. Press your shutter release half way down to focus on your main subject (back button focus can be a useful tool here).
    7. Now with your subject still in focus, move your camera to follow the lines of your subject, depressing the shutter as you pass by your main subject, it is important to follow through after the shutter is closed. This will keep all your color tones consistent all the way through your exposure. Experiment with the speed of your camera movement to find the best result.
    8. Repeat, until you get a result that is pleasing.

    In conclusion, the next time you are out with your camera, be observant and look for visual details and interesting ways to express your emotional and artistic viewpoint with an abstract image found in nature. If you have any other ideas on how to make abstracts in nature, please share in the comments below.

    The post Creating Abstract Images in Nature by Bruce Wunderlich appeared first on Digital Photography School.


    Digital Photography School

  • 15 Influential Photographers Share Their Quotes for Inspiration

    Pursuing a career doing something you really love could be a terrifying thing, so people often look at the ones who already “made it” in their field as a source of inspiration. Having a chance to hear famous photographers talk about how exactly they made it and what it costs to be a successful photographer inspires us to work harder Continue Reading

    The post 15 Influential Photographers Share Their Quotes for Inspiration appeared first on Photodoto.


    Photodoto