Category: Photography

  • Product Review – Dixie Grip: Rotating, handheld, or mounted hotshoe grip

    What is it?

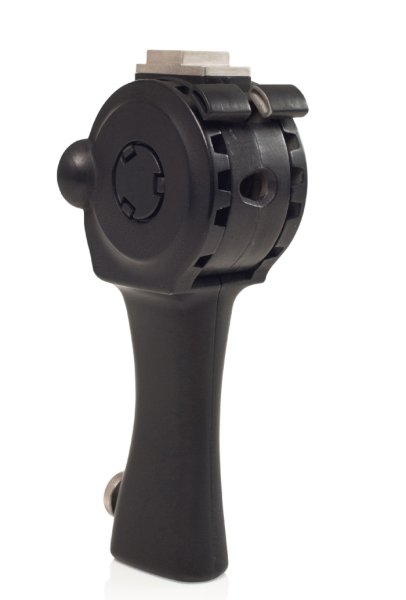
    The Dixie Grip

    The Dixie Grip is a product that doesn’t exist yet. It’s a Kickstarter campaign product, and it fills a gap in the street portrait world that desperately needs filling – a handheld Speedlite grip.
    Don’t believe there is a need for this kind of thing? Case in point: just days after trying the product out and thinking about whether I would have a need for it or not, I was walking with my mentor Payam in New York talking about photography. He was describing to me an engagement session he was shooting in Central Park. He was using a Canon Speedlite with a remote trigger, and his assistant had the flash on a monopod with a softbox mounted onto the unit. The reason for this crazy handheld setup is that having off-camera flash with a softbox is like having a portable studio wherever you go! And having an assistant hold it allows for great flexibility in movement. But there is a problem with this setup. It’s a workaround. The monopod is not an ideal piece of equipment for a Speedlite. It’s awkward, too long, and not ergonomically friendly. That’s where the Dixie Grip comes into play.

    What does it do? What’s it good for?

    This piece of equipment replaces the light stand with something much more flexible – your hands! Yes, you can mount the grip onto a light stand, but the best part is having the mobility and freedom of using it with your hands. As far as I know, there is no other thing out there that does that, exactly like this. And it holds an umbrella. It’s an ergonomic solution to the mobile problem of traveling light and easy. As my mentor was saying, his assistant was doing the same thing but with a monopod or a tripod, holding the whole awkward kit in their hands. That rig is unwieldy, heavy, and awkward. The Dixie Grip was created for exactly that situation, a light, perfectly sized grip for Speedlites. It’s so simple, it’s amazing it hasn’t been done before.The last part of the product which is pretty slick is that it is adjustable. You can “rotate” the head by simply squeezing these two units together and moving the Speedlite or umbrella up or down. This give you the ability to work with different angles.

    How I used it

    The Dixie Grip

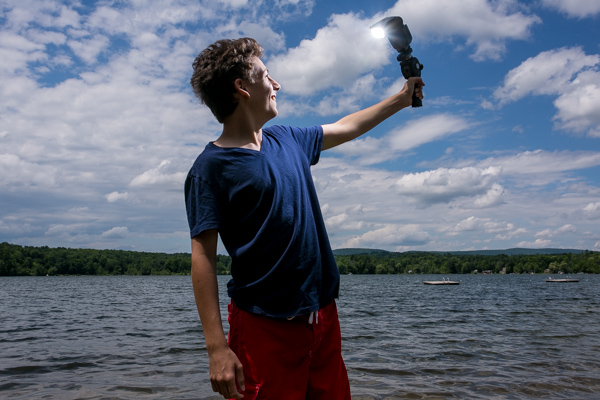
    I brought the Dixie Grip with me to the lakeside with my cousin when I didn’t have an umbrella, and we played around with the equipment to get a feel for it. I made him the assistant and the model. The feel of it was easy enough to use, and since we were standing on sand we didn’t have to worry about getting sand on light stands or moving things around on uneven ground. He just got to hold the grip and it worked exactly as expected.

    The Dixie Grip

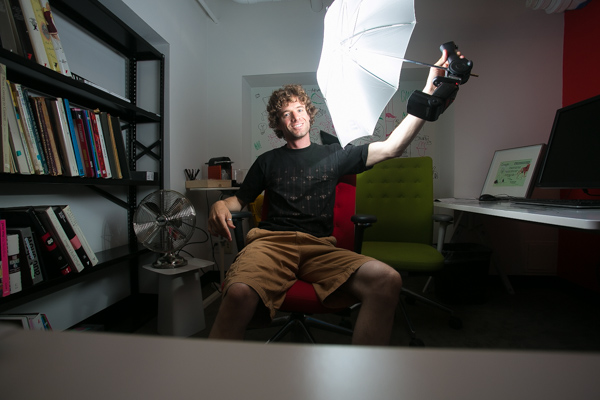
    I got back to the city and was able to use the Dixie Grip with an umbrella which is how it is best used. As you can see in the photos, the light looks great, it’s smooth, and best of all, we could shoot in very tight quarters without maneuvering an awkward tripod stand or monopod.

    The Dixie Grip

    The Dixie Grip

    Summary

    In conclusion, I would definitely recommend this product if you shoot on location in different conditions. I could see this being a tremendous asset to a wedding photographer who needs to run and gun with their bride and groom for a quick formal session. I could also see this on the streets of NY with a model in the city. There is no reason not to own one of these. It’s intuitive and easy and it works.

    The only drawbacks I found were when I tried using my cheap Yongnuo triggers to fit into the hotshoe. They don’t have tightening rings and just sit on whatever they are attached to. The hotshoe mount on the Dixie Grip was a bit too large for the trigger, so the trigger would slide out easy (which isn’t great when the Speedlite is attached to it). But that was an easy fix with a couple of pieces of cardboard. Or just use normal equipment like a Pocket Wizard and you’ll be fine.

    Adjusting the head by squeezing those two pieces together, and moving the Speedlite, was slightly awkward. It didn’t always click into place right away. But I was also using a prototype which I know has some kinks to be smoothed out yet. I expect that component to be rock solid when it comes to production. Which is where you come in!

    Kick Starter Campaign for The Dixie Grip

    This is the link to the product. The campaign ends July 28th, so help put this thing on the market, and be the very first person to own a Dixie Grip.

    I give the Dixie Grip product 4.5 stars out of 5.

    The Dixie Grip

    The post Product Review – Dixie Grip: Rotating, handheld, or mounted hotshoe grip by Phillip VanNostrand appeared first on Digital Photography School.


    Digital Photography School

  • Ten Go-to Editing Tips for Using Photoshop

    PS CC launch

    The recent release of Adobe Photoshop Creative Cloud (CC) 2014 (which is the 15th release of the product) got me thinking about my own workflow. Photoshop is an amazing piece of software. I have been using it commercially since version 5. However, I don’t necessarily think the latest version is the best one. I’ve just recently upgraded to CS6 and I’m loving it but I can’t see myself going the CC route just yet, as it doesn’t suit my business model.

    The beauty of this software is the power that it can bring to your images, but it is a complex piece of software and coming to grips with it as a beginner can be daunting. Time and practice will be your allies in learning Photoshop.

    As a photographer, Photoshop is the main editing software package I use in my photography workflow. Every photographer or designer has their own unique approach to editing images using Photoshop. I find this fascinating.

    I’m constantly refining, and tweaking my editing workflow. I get such a buzz when I find an alternative method or a shortcut, that I wasn’t aware of before, which makes things more efficient. Having said that there are a lot of the features in Photoshop I wouldn’t use, and there are some that I use more than others.

    Before I start editing my images in Photoshop, I open them with Adobe Camera Raw (ACR) since I shoot RAW format. I need to make basic adjustments such as exposure, white balance, correcting chromatic aberration and any lens distortion. From there, I take my images into Photoshop as Smart Objects.

    The following tips for using Photoshop are my regular editing techniques in no particular order. These can be used in most versions of Photoshop. These are a small set of useful tips. I could have extended it by a dozen more.

    Ten go-to editing tips for using Photoshop

    1. Duplicating Layer Masks for other Adjustment Layers

    To save time when you need a copy of a mask from one layer to another adjustment layer; when you’ve used the brush tool to create a mask. Simply hold down the Option key on a Mac or CTRL key on a PC, click on the layer mask and drag it to the adjustment layer in question. This makes a copy of the layer mask without having to redo the same again.

    Gorilla duplicating masks on other adjustment layers

    2. Add a Curves Adjustment Layer with a Difference

    Normally in the Curves adjustment, you adjust points on the curve line which affect the image’s tonal range. The S-shaped curve is a classic tonal tweak for boosting contrast and color saturation. However, if you add a curves adjustment layer, change the blend mode to Soft Light and reduce the Fill down to approximately 55% (the reduction amount will depend entirely on your image & preference), this gives a similar boost to color and contrast. For demonstration purposes, I have left the Fill at 100%, so that you can see a difference as outlined within the white square.

    Field in France curves softlight

    3. Dodge and Burn

    Create a separate layer, change the blend mode (Mode) to Overlay and fill the layer with 50% gray. Name this layer “Dodge and Burn”. The Dodge and Burn tools are my go-to method for making selected areas of an image lighter or darker. Dodge is for lightening and the Burn tool is for darkening an area. Use a soft Brush and set Exposure to between 6-12%. In most cases, I leave Range set to Midtones. If you find that you have overdone it in the specific areas, just reduce the Opacity on the layer. The image on the right (below) shows the areas where I used the Burn tool to darken his arm, his face, and the bright spots in the background, and also where I lightened his back shoulder.

    Secret Agent Dodge Burn

    4. Layer Comps

    I find the Layer Comps feature in Photoshop invaluable. It is a useful guide to the different editing stages as a before and after comparison. It is so easy to overdo it and get carried away with over-editing your image. This has five stages from straight out of camera, to the final image.
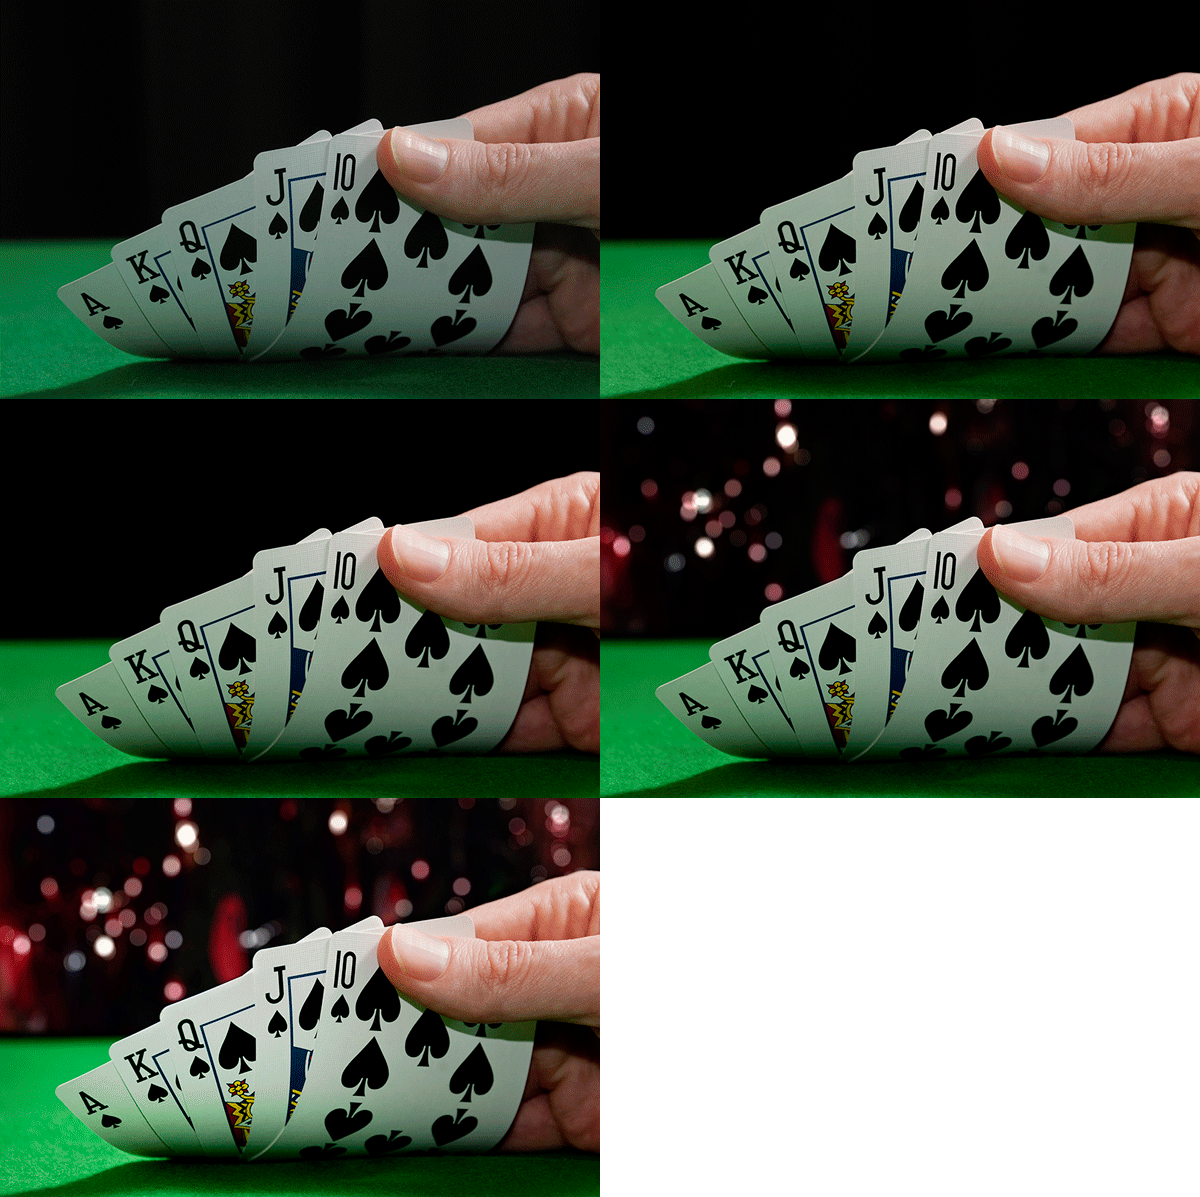
    Poker

    5. Stamp Visible

    Cmd+Shift+Alt+E (Mac) or Ctrl+Alt+Shift+E on a PC is the command to keep all the layers in a Photoshop file and make a merged copy on top of them. I find this particularly useful, especially at the end of my editing process, where I apply some sharpening or contrast by using a Topaz effect (plug-in for Photoshop).

    6. The “Place” Command

    This is found under File>Place. I normally work with multiple images in the same document. Therefore, I find using this method really handy as it imports the image as a Smart Object automatically, which is great for resizing the image without any degradation.

    7. Patch Tool

    The Patch Tool was my favorite of the Healing Brush Tools in Photoshop CS5. But now that I’ve upgraded to CS6, the Patch tool has just gotten even better. You can now use the Patch tool to fill using the Content-Aware on a new empty layer. I prefer to set the Adaption to Loose. Make sure Sample All Layers has been ticked. The Healing Brush also feels more intuitive to use than before.

    Ringbuoy Patch Tool

    8. CMD+T or Transform

    I seem to use this shortcut a lot. If I’m working on multiple images in the same document, I may need to resize one or two of the images accordingly. As I import my images using the Place command, this means they are converted to Smart Objects, so the resolution of the images isn’t affected when transforming or resizing.

    9. CMD+T+Warp Tool

    Similar to the above point, the Warp tool is great for fine-tuning an element of an image, especially if you are working on composites. In the image below, I was using my own stock photo of Heron’s talons to replicate the Owl’s talons for the purpose of realism.

    Owl Warp tool

    10. Opening a Second Window for the Same Document

    When you are retouching your image to get rid of dust and blemishes and so forth, you may need to zoom in as much as 300% or more. Open another window for the same document by Window>Arrange>New window for new_filename.PSD but keep it at 25% (or fit to window). This way, instead of zooming back out to see how the image looks and then zooming back in to resume your retouching, just click on the second window where you have the same document viewed at 25% (or fit).

    Do you have another other go-to Photoshop tools or tips you’d like to share? What is in your workflow? Please share in the comments.

    The post Ten Go-to Editing Tips for Using Photoshop by Sarah Hipwell appeared first on Digital Photography School.


    Digital Photography School
  • Get Intimate With Depth of Field: Using Depth of Field Creatively

    Controlling your camera’s exposure is not only a fundamental topic to achieve good photographs, but it also becomes essential knowledge to be able to explore the creative possibilities of photography. You might have heard of aperture, shutter speed and ISO. These are the camera controls that directly affect exposure and, finally, how the picture turns out. You can use many Continue Reading

    The post Get Intimate With Depth of Field: Using Depth of Field Creatively appeared first on Photodoto.


    Photodoto

  • When to Trick Your Camera to get a Good Exposure

    Hacking_photography_somerstyle-9526

    I bought the Sony A7 camera recently and have been taking it out quite a bit to get a feel for it.

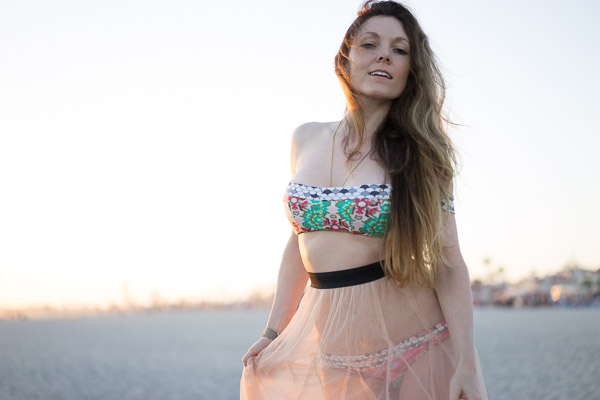
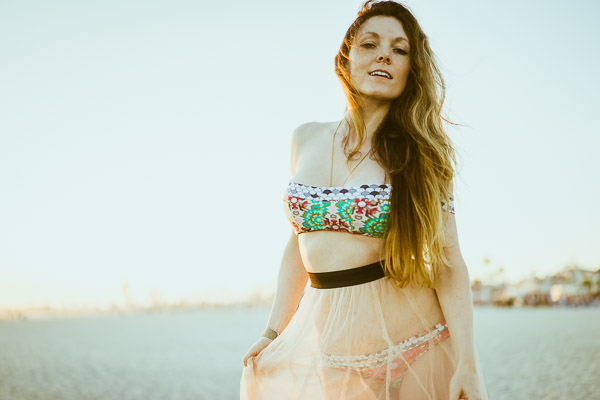
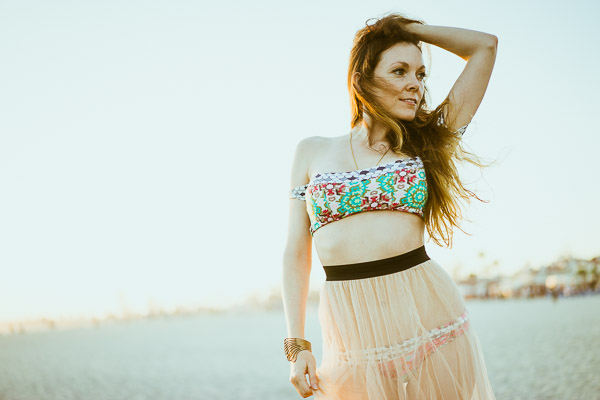
    My wife is starting a fashion blog so I thought I would take her out for a fashion shoot at the beach. I was shooting a high-contrast scene and realized. . .

    The camera doesn’t always know what’s best

    Your camera always has the best intentions, but it doesn’t always get it right. Sometimes the sensor will think you want to expose a scene one way when you actually want it to expose it another.

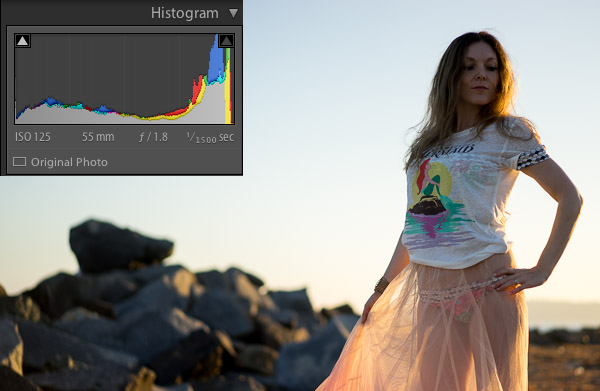
    I’ll show you an example. I put the camera on aperture priority and shot this:

    Hacking_photography_somerstyle-9425

    To most people, this image would be considered underexposed because the model is dark. This happens because the scene has a lot of contrast. In other words, there is a lot of bright pixels (the sky) and a lot of dark pixels (the rocks, ground, and model).

    Why doesn’t the camera always get the exposure correct?

    The camera sensor is trying to create an average of dark pixels to light pixels. The histogram shows the dark pixels on the left of the graph and the bright pixels on the right.

    A “properly exposed” photo means the balance between the blacks and whites is mostly even. The graph isn’t pushed into the left wall which would be very underexposed, or pushed into the right wall which would be very overexposed. The problem is that to expose properly for the model we need more bright pixels, we need to increase the exposure. Sometimes you will need to trick the camera to get a good exposure.

    Using exposure compensation

    Sometimes you just need a little bit more or a little bit less. In this case I had the ISO and the aperture exactly where I wanted them. I had my camera set up so the front dial controls the exposure compensation.

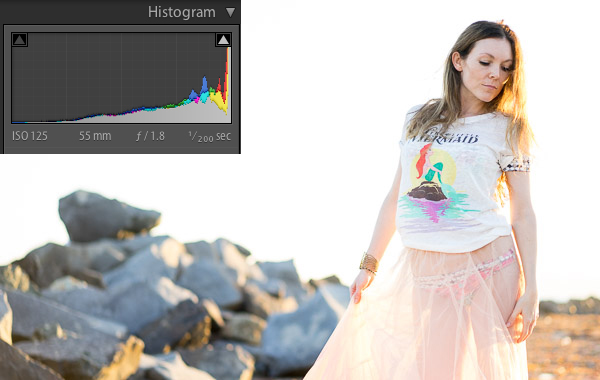
    In this case, exposure compensation is set up to slightly change the shutter speed to either increase or decrease the exposure. I twisted the exposure compensation dial until the image looked good which was a shutter speed of 1/200.

    Hacking_photography_somerstyle-9426

    This looks much better. The model is properly exposed now but the sky is now overexposed. Because the sky is now white, you can see the histogram is pushed to the far right.

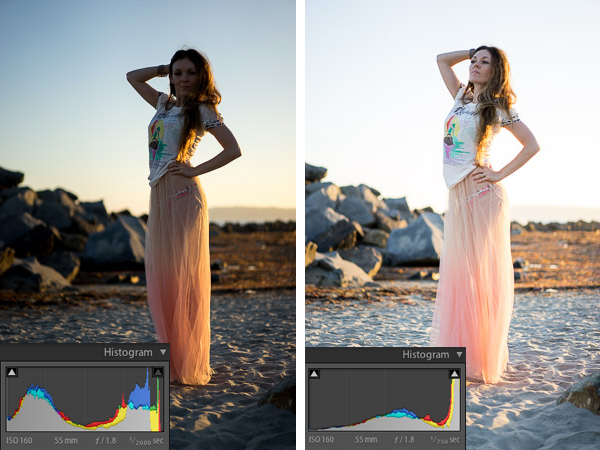
    This typically means the image is overexposed but in this case it’s simply because the sky has a lot of white pixels in it that register on the right of the histogram. Let’s see it in another example:

    Hacking_Photography_Somerstyle

    I just used the exposure compensation to bump up the exposure again so the model was properly exposed and the sky was overexposed in the image on the right.

    This happens a lot when subjects are backlit

    Hacking_Photography_somerstyle_diptic

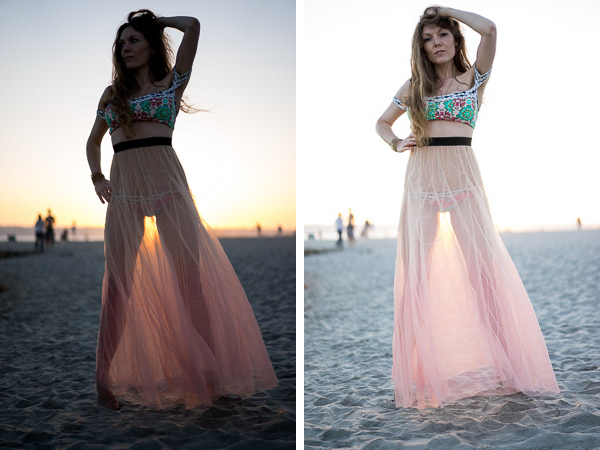
    When you shoot with the sun behind your subject, the camera will sometimes struggle to decide whether to properly expose the background or the subject. The camera is trying to figure out which one you want exposed.

    If you are shooting for a silhouette you can underexpose the subject to create a dark outline of their figure. If you want to properly expose the subject you will overexpose the background in high contrast light.

    Decisions, decisions

    Ultimately it’s up to you how you would like the image to look. I like the high-key look of some of these images. The final touch once you have the light and exposure the way you like it is to edit the image.

    Here is one of my favorite photos straight out of camera:

    Hacking_photography_somerstyle_pre-9523

    I used one of the 1-Click Hacking Photography Lightroom presets in the Old School Color set called “Warm Film” and came up with this final image:

    Hacking_photography_somerstyle_post-9523

    Overall it was a good shoot on the beach with my wife, I had fun running more tests on the Sony A7, and created some great images in the making!

    The post When to Trick Your Camera to get a Good Exposure by Mike Newton appeared first on Digital Photography School.


    Digital Photography School
  • How to Photograph Beverages – Video Tips

    Earlier I shared a collection of some great images of beverages. If you want to know more about how they may have been created, check out these video tutorials.

    Photograph I offer you another drink! by Ivan Gevaerd on 500px

    I offer you another drink! by Ivan Gevaerd on 500px

    This first video by Phlearn features photographer Rob Grimm, and walks you through how to photograph a beer bottle and glass of beer. I used to do food photography and beverages were part of that. It’s a very specialized, and highly detailed area of commercial photography that requires a lot of lights, reflectors, and patience. A shoot like this might take several hours to get it just right, and it’s a game of inches moving things into the right places.

    See more of Rob’s amazing drink shots on his website.

    This next video is by Phillip McCordall as we demonstrates shooting a bottle using a slightly different lighting setup and approach. It’s well done (aside from the slight echo in the audio) and has some good tips.

    This last one is by The Slanted Lens and go over how to photograph a bottle and combine it with a photo of a person for the final image. Lighting is key when photographing any kind of beverage. More good tips and a little fun at the end of this one.

    So if you are doing this week’s photography challenge, beverages have a watch of these videos and remember to share your images on the challenge page.

    The post How to Photograph Beverages – Video Tips by Darlene Hildebrandt appeared first on Digital Photography School.


    Digital Photography School

  • Three Tips to Help you Capture Beauty in the Everyday Moments

    When it comes to creating family photo albums, there can be a tendency to create a book filled with your family’s “greatest hits”, the best moments of the year, if you will. Of course, those special moments like birthdays, vacations, and that one perfect Christmas card photo are important to include, but for most of us, they really don’t do a good job of capturing the little moments that make up the majority of our lives.

    MeredithClark6

    The other day, I was looking through a photo album with my four-year-old daughter Lizzy. As usual she skipped right past all the formal photos of her and her sister, and went right to a candid snapshot of her crying on the floor when she was about two. She’s heard the story of why I took that photo a number of times, but she always asks to hear it again, and so I told her;

    “You were crying because I made us blackberry cobbler with whipped cream for breakfast one morning, can you believe that? I thought it would be a special treat, but you just wanted cereal like you had every day, and you were so mad at me that I’d made you something else!”

    We both sat on the couch long after that laughing, talking, and telling stories about what Lizzy was like when she was two. To her, those are the important pictures – not the sunset sessions, not the formal portraits of her and her sister, not the perfectly composed family photos (which carefully observe the rule of thirds). To her, the little day-to-day moments really are the big things in life. They are the things that she remembers, and the more I think about it, the more I have realized that they really do belong in our family photo albums, perhaps more than anything else.

    So, without further ado, here are my top three tips to help you capture the moments of beauty in the everyday:

    1. Tell a Story

    MeredithClark1

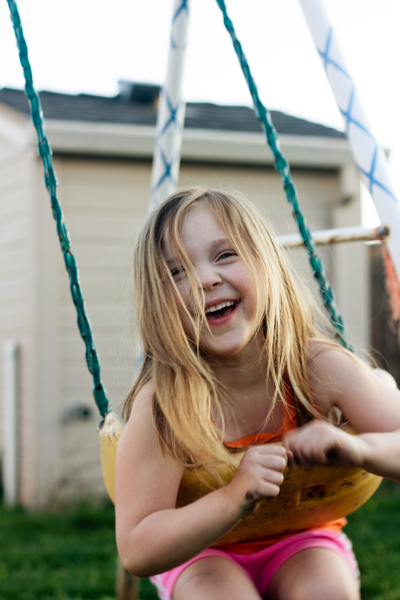
    Look through the camera with the goal of capturing what’s happening in your life right at this moment. Maybe it’s the way your girls are sitting together, heads touching, reading a book. Maybe it’s the collection of coffee mugs on your table that speak to late nights at work. Maybe it’s the dirty feet of your kiddos hanging off the swings that speak to summers spent playing in the backyard.

    MeredithClark2

    Maybe it’s the collection of bottles drying on the counter that you really wish would hurry up and dry so that you could put them away and not look at them again until tomorrow. I’ve been there. Trust me when I tell you to take a picture of them before you put them away today. Because in a few years, when your kids are older and bottles are the last thing on your mind, you’ll look back on that photo and instantly be transported back to what life was really like with a young baby, counter full of bottles and all.

    2. Look For Beauty Everywhere

    MeredithClark3

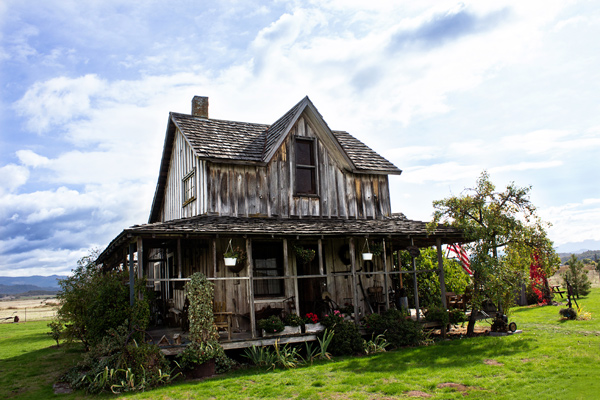
    It can be easy to overlook people, places, and things that you see every day, but there’s still beauty there if you take some time to look for it. Last fall, I was commissioned by a client to take some photos of the town that we live in. At first, I had a very difficult time thinking of any place that I’d want to photograph, because everything just felt ordinary to me. I wanted to do something unique and special, and had a difficult time thinking of how to make that happen. It took a few weeks of walking around town while holding my camera, shooting nothing, and sighing heavily before I started to be able to look at things with fresh eyes. I began to see color texture, and character, even in the old wooden house that I drive by all the time. It may be a normal and everyday thing for me, but that doesn’t mean there’s no beauty in it.

    MeredithClark4

    Is your dinner preparation particularly colorful? That can be beautiful. Are your kids holding hands on the couch one morning? That can be beautiful too. Is that homemade vanilla ice cream slowly dripping down a waffle cone? There’s beauty there. Those weeds outside that really need to be mowed, but in the meantime have grown into tall, prickly, textured creatures? I think they can be pretty beautiful as well.

    MeredithClark5

    3. Sit Back and Watch

    One of the best ways to make sure that your family photos truly capture your family’s personality is to make sure that you include many candid photos. But of course, capturing true candid shots can be easier said than done, especially with children around! My best tip is to spend a lot of time sitting, watching, and holding your camera. It may not happen the first time you bring out your camera (or even the second!), but as your family realizes that you’re not going to be saying “Look right here and say cheese!” over and over, they’ll start to relax and do their own thing, and that’s when the real magic happens. Quietly pick up your camera and start shooting. You’ll start to see their real smiles and expressions, and when it comes to photos of your family and friends, those genuine smiles are always the best ones!

    MeredithClark7

    For more family photo ideas and projects check out these articles:

    • 10 Ways Photography Makes You a Better Parent
    • How to Create a Family Photo Essay
    • Documentary Photography – Six Tips for Creating a Legacy

    The post Three Tips to Help you Capture Beauty in the Everyday Moments by Meredith Clark appeared first on Digital Photography School.


    Digital Photography School

  • Finding New Photography Locations Just Got Easier With ShotHotspot

    There are many ways to go about finding photography locations, but if you’re struggling to find new locations I’d suggest giving ShotHotspot a try.

    shothotshop

    Five Reasons to check out ShotHotspot?

    #1 Great search functionality

    shothotspot

    Search locations, keywords, and type of photography

    The standout feature of ShotHotspot has got to be the search functionality that they have built into the site. Much like Stuck on Earth the photographs they are using come from Flickr and Panoramio, but unlike Stuck on Earth and other outlets ShotHotspot allows you to search based on keywords, style of photography, location distance, and gives you full control over how strong the matching system should be.

    shothotspot4

    Search within a drawn box

    As if that wasn’t enough, it gets even better!. Say you’re not exactly sure what the location that you want to search is called, but you have a general idea of where it is located on a map, you can simply draw a box and search only within that box for photographs taken there and still have access to the various filtering options.

    By far they have one of the best search engines I’ve come across for finding locations to photograph, and with time it will only get better.

    #2 Crowdsourced corrections from all visitors

    One of the problems with pulling data from sites like Flickr and Panoramio is that you rely on the accuracy of the photographer’s location data and key wording. ShotHotspot occasionally will ask for your help in order to help make the location data better. It does this through a simple “Help us Out” box that asks for various information about the location that you are currently browsing.

    shothotspot5

    ShotHotspot asks for help from a human brain when it needs it

    #3 User generated hotspots and information

    On top of crowdsourcing for location corrections, ShotHotspot also allows its users to add hotspot locations to their database and edit information about current hotspots that they currently store. This allows for a massive worldwide approach to finding spots to photograph, and determining which ones are better than others. As a user you can add things like type of suitable photography, best time to visit, equipment required, cost of entry or even a general description of the location.

    shothotspot6

    Add information to locations to help make the database stronger

    #4 Integrated with The Photographer’s Ephemeris

    While the search functionality is probably the best feature of the site there are a couple of other cool additions that only add to the experience. The first of which is that HotShotspot is directly hooked into The Photographer’s Ephemeris. This allows you to get information on sunrise, sunset, anything else you’d like to know about the location with the click of a button.

    shothotspot7

    Clicking on the sun/moon calculator will open The Photographer’s Ephemeris

    shothotspot2

    Get all the details you need to plan for your shoot

    #5 Integrated with Wikipedia

    Finally ShotHotspot has also tapped into the gigantic database of Wikipedia for information about the locations it has in the database. Not every location has a wiki page so you’ll find some that are empty, but more popular locations will have a vast amount of information for you to browse through.

    shothotspot3

    Information from Wikipedia with a link to the Wiki page of the location makes it easy to find out more about where you’re going.

    It’s still early, but I think ShotHotspot is a winner

    In just a few minutes I found two locations I didn’t even know existed less than 20 miles from my house. I’m not saying that this will happen for everyone, but it’s a great sign for a site that’s only just getting started. Check out ShotHotspot and then come back here and let me know what you think.

    The post Finding New Photography Locations Just Got Easier With ShotHotspot by John Davenport appeared first on Digital Photography School.


    Digital Photography School

  • Weekly Photography Challenge – Beverages

    Earlier I selected and shared some photos of different beverages. There are many ways to photograph beverages and drinks including in the studio, in a restaurant, or outdoors on location.

    Your photography challenge this week is to photograph a beverage or drink of your choice, in a way that makes it appealing to the viewer. Make us want to taste that drink. Make us thirsty!

    Here are a few more to give you some ideas:

    By Thomas Hawk

    By Giuseppe Milo

    By Dennis Wilkinson

    By sakshi sharma

    By darwin Bell

    By Alyson Hurt

    By Roadsidepictures

    By Jonathan Cohen

    By Kirti Poddar

    By Jeremy Brooks

    Need some help?

    • Photo Shoot Ride-along – Photographing Cocktails
    • Editorial Restaurant Photography
    • Using Focus Creatively with Food Photography
    • 5 Tips to Seriously Improve Your Food Photography Techniques

    The last two are food articles but the tips apply to drinks as well.

    Show use your highways and byways photos

    Simply upload your shot into the comment field (look for the little camera icon in the Disqus comments section as pictured below) and they’ll get embedded for us all to see or if you’d prefer upload them to your favourite photo sharing site and leave the link to them. Show me your leading lines using pathways and roads in this week’s challenge.

    The post Weekly Photography Challenge – Beverages by Darlene Hildebrandt appeared first on Digital Photography School.


    Digital Photography School
  • Set of Photographs of Beverages to Quench your Thirst

    Everyone enjoys a good beverage, right? If you’re currently in the Northern Hemisphere and it’s summer a cold one on a patio with friends might be in order. Or if you’re down under and it’s a bit chillier perhaps a hot mug of tea or coffee will be your beverage of choice.

    Whatever your pleasure, here are some photographs of beverages for you to enjoy. Grab a cup or mug full first as you might get a bit thirsty!

    Photograph Cure of thirst by Mazin Alrasheed Alzain on 500px

    Cure of thirst by Mazin Alrasheed Alzain on 500px

    Photograph Vision by Tamás Mészáros on 500px

    Vision by Tamás Mészáros on 500px

    Photograph Hot coffee by Dean Saunderson on 500px

    Hot coffee by Dean Saunderson on 500px

    Photograph open your mind by bshayere th on 500px

    open your mind by bshayere th on 500px

    Photograph Rum's Suite 2 by Joan Roca Febrer on 500px

    Rum's Suite 2 by Joan Roca Febrer on 500px

    Photograph New morning by Ivana Vasilj on 500px

    New morning by Ivana Vasilj on 500px

    Photograph Smokey Splash by Joshua Geiger on 500px

    Smokey Splash by Joshua Geiger on 500px

    Photograph Devil's Cut - Inferno by Joshua Geiger on 500px

    Devil's Cut – Inferno by Joshua Geiger on 500px

    Photograph Beer by Ryan Carter on 500px

    Beer by Ryan Carter on 500px

    Photograph Blue Martini by John Adkins on 500px

    Blue Martini by John Adkins on 500px

    Photograph Scotch Whisky by Edward Leschinsky on 500px

    Scotch Whisky by Edward Leschinsky on 500px

    Photograph Jagermeister by Martin Urbánek on 500px

    Jagermeister by Martin Urbánek on 500px

    Photograph Butterfly Drink by Jackson Carvalho on 500px

    Butterfly Drink by Jackson Carvalho on 500px

    Photograph Fresh by Miguel Angel Oliva on 500px

    Fresh by Miguel Angel Oliva on 500px

    Photograph Wake me up by Kevin Clarke on 500px

    Wake me up by Kevin Clarke on 500px

    Photograph wine bottles and oak barrels in background by Christian Delbert on 500px

    wine bottles and oak barrels in background by Christian Delbert on 500px

    Photograph Pilsner Sunset by Ty  on 500px

    Pilsner Sunset by Ty on 500px

    Photograph Cookies and Cream Milkshake by Brent Hofacker on 500px

    Cookies and Cream Milkshake by Brent Hofacker on 500px

    Photograph Sunset cocktails by Ivanka Zagorska on 500px

    Sunset cocktails by Ivanka Zagorska on 500px

    Photograph Ginger tea by Ivana Vasilj on 500px

    Ginger tea by Ivana Vasilj on 500px

    Photograph It's a Party by Donna Corkum-Ivany on 500px

    It's a Party by Donna Corkum-Ivany on 500px

    Photograph Colors -2  by Mazin Alrasheed Alzain on 500px

    Colors -2 by Mazin Alrasheed Alzain on 500px

    Photograph Vintage Look by Ioana  Bogdan on 500px

    Vintage Look by Ioana Bogdan on 500px

    Photograph Honey Let's have drink 2gether.... by Ram Iyer on 500px

    Honey Let's have drink 2gether…. by Ram Iyer on 500px

    Photograph Thinking of you by elena timossi on 500px

    Thinking of you by elena timossi on 500px

    Photograph “Laughter is wine for the soul - laughter soft, or loud and deep, tinged through with seriousness -  by ieatstars on 500px

    “Laughter is wine for the soul – laughter soft, or loud and deep, tinged through with seriousness – by ieatstars on 500px

    Photograph hands preparing mojito cocktail by Luis Mario hernandez Aldana on 500px

    hands preparing mojito cocktail by Luis Mario hernandez Aldana on 500px

    Photograph Cocktails by Jeremie Montessuis on 500px

    Cocktails by Jeremie Montessuis on 500px

    Photograph Ice cocktails by Costin Lazarescu on 500px

    Ice cocktails by Costin Lazarescu on 500px

    Photograph Summer Cocktail by Maryam Al Nasser on 500px

    Summer Cocktail by Maryam Al Nasser on 500px

    Photograph BEER by Sergey Adamoff on 500px

    BEER by Sergey Adamoff on 500px

    The post Set of Photographs of Beverages to Quench your Thirst by Darlene Hildebrandt appeared first on Digital Photography School.


    Digital Photography School
  • How to Make Instagram Filters in Photoshop: Amaro & Mayfair

    With over 100 million users worldwide on both iOS and Android devices, Instagram’s success as a mobile platform and social network is clear to see. These days, it has an expanded web presence, so there are more opportunities than ever to show off your photography skills. Instagram’s 20 filters that fit a handy app are a great playground for photographers Continue Reading

    The post How to Make Instagram Filters in Photoshop: Amaro & Mayfair appeared first on Photodoto.


    Photodoto