Category: Photography

  • A Collection of Golden Images for Your Viewing Pleasure

    It’s that time again for me to find some great images for you to see and get inspired by. I have to say that this is one of my favorite parts of this role as Editor as I get to troll through dozens of outstanding images to curate the best for you. Really, it’s a hard job but somebody has to do it, right?!

    Without further ado, here is a set of golden images for you to enjoy. I’ll leave the “golden” part open for your interpretation.

    Photograph Yellow by Milad Haghighi on 500px

    Yellow by Milad Haghighi on 500px

    Photograph Yellow by Mariia Kudriashova on 500px

    Yellow by Mariia Kudriashova on 500px

    Photograph Panning.. by Selycan  on 500px

    Panning.. by Selycan on 500px

    Photograph Canola by Yusuf YAMAN on 500px

    Canola by Yusuf YAMAN on 500px

    Photograph Blue | Yellow by Syahrel Azha Hashim on 500px

    Blue | Yellow by Syahrel Azha Hashim on 500px

    Photograph Lead from the front by Maharajan Pounrajan on 500px

    Lead from the front by Maharajan Pounrajan on 500px

    Photograph Follow the line by Jiwan Mir on 500px

    Follow the line by Jiwan Mir on 500px

    Photograph Turban... by Savan Upadhyay on 500px

    Turban… by Savan Upadhyay on 500px

    Photograph Yellow by Ian Stuart on 500px

    Yellow by Ian Stuart on 500px

    Photograph Yellow by Marta Maseras on 500px

    Yellow by Marta Maseras on 500px

    Photograph yellow by Andrea Schuh on 500px

    yellow by Andrea Schuh on 500px

    Photograph yellow by Borni Merisoniom on 500px

    yellow by Borni Merisoniom on 500px

    Photograph Yellow by Jayanta  Kshirsagar on 500px

    Yellow by Jayanta Kshirsagar on 500px

    Photograph Bed of Melted Gold by Maybelle Dumlao- Sevillena on 500px

    Bed of Melted Gold by Maybelle Dumlao- Sevillena on 500px

    Photograph golden by Silke Roberts on 500px

    golden by Silke Roberts on 500px

    Photograph Golden by Annette Kelter on 500px

    Golden by Annette Kelter on 500px

    Photograph Midnight Rush by Michael Shainblum on 500px

    Midnight Rush by Michael Shainblum on 500px

    Photograph Golden by Ron Lancin on 500px

    Golden by Ron Lancin on 500px

    Photograph hypnotic golden by Danny Block on 500px

    hypnotic golden by Danny Block on 500px

    Photograph do you believe in magic? by Jessica Trinh on 500px

    do you believe in magic? by Jessica Trinh on 500px

    Photograph Shaking Dog by Lorenzo Patoia on 500px

    Shaking Dog by Lorenzo Patoia on 500px

    Photograph Monarch by Lorraine Hudgins on 500px

    Monarch by Lorraine Hudgins on 500px

    Photograph Baños Dorados by David Rodríguez Palomar on 500px

    Baños Dorados by David Rodríguez Palomar on 500px

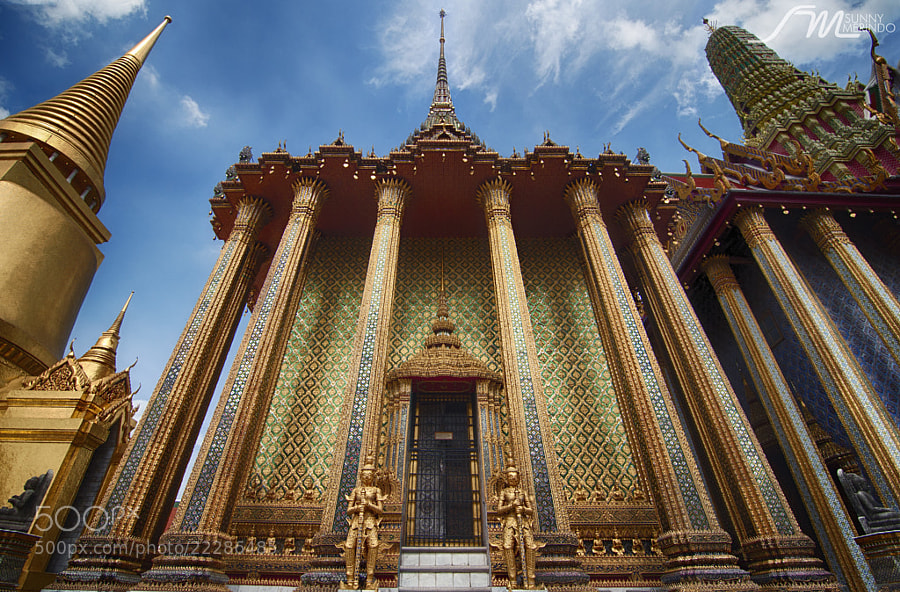
    Photograph Gold exterior of Phra Mondop by Sunny Merindo on 500px

    Gold exterior of Phra Mondop by Sunny Merindo on 500px

    Photograph Novice Monk praying to the Buddha by Sasin Tipchai on 500px

    Novice Monk praying to the Buddha by Sasin Tipchai on 500px

    Photograph Golden Temple by Phoomin Karagate on 500px

    Golden Temple by Phoomin Karagate on 500px

    Photograph Sunrise : The Golden Mount in Bangkok by noomplayboy  on 500px

    Sunrise : The Golden Mount in Bangkok by noomplayboy on 500px

    Photograph Pattaya Big Buddha by Mishel Breen on 500px

    Pattaya Big Buddha by Mishel Breen on 500px

    Photograph Golden crown by Jason Meng on 500px

    Golden crown by Jason Meng on 500px

    Photograph Flower Queen by Serg Tisso on 500px

    Flower Queen by Serg Tisso on 500px

    Photograph Golden crown by Chantal Pimparé on 500px

    Golden crown by Chantal Pimparé on 500px

    Photograph Taj Majal courtyard view by Soma Images on 500px

    Taj Majal courtyard view by Soma Images on 500px

    Photograph golden nugget by Sandra Oberer on 500px

    golden nugget by Sandra Oberer on 500px

    Photograph Golden Nugget Casino by Cameron Wendt on 500px

    Golden Nugget Casino by Cameron Wendt on 500px

    The post A Collection of Golden Images for Your Viewing Pleasure by Darlene Hildebrandt appeared first on Digital Photography School.


    Digital Photography School

  • 20 Superb Infographics & Cheat Sheets to Help You Grow Your Photography Business Fast

    You probably know that a picture is worth a thousand words. If a reader has a choice between 1000-word articles and the infographic that needs just a few scroll downs…he’ll obviously go with the infographic! Visual information is more likely read and understood than other types of data presentation. That’s why I collected helpful infographics and cheat sheets on photography for Continue Reading

    The post 20 Superb Infographics & Cheat Sheets to Help You Grow Your Photography Business Fast appeared first on Photodoto.


    Photodoto

  • Top 5 Tips for Wildlife Photography

    Wildlife photography is continually growing in popularity, thanks to the accessibility of digital cameras nowadays. I’ve been a wildlife photographer for almost seven years now, and a professional for the last few of them. Over time I have picked up some really valuable techniques and tips, specific to wildlife photography, gained from either experience or learning from others in my field.

    Here are some the top tips for wildlife photography.

    Black Headed Gull Splash

    #1 Get to Know Your Subject

    I cannot stress this enough – wildlife photography is all about time and patience, much of which should be spent studying and paying attention to your subject. Instead of just showing up at a location once, return time and time again to photograph it. Watch an animal’s behavioural traits and try to pick up on clues it gives as to its next movement. With practise, you’ll often be able to predict where an animal will move to next, or what it will do.

    Don’t believe me? I’ve photographed red squirrels for many years now, and I can now almost continually predict its pattern of movement, purely by watching for behavioural “ticks” it provides. For example, by watching where the squirrel is looking and the way it sniffs the air, I can often tell which direction it will head to next.

    Jumping with nut

    #2 Use Your Lens Hood

    That bit of plastic that comes with your lens isn’t just for decoration. It prevent stray light from hitting the lens, helping you produce clearer pictures, but it also provides physical protection for your lens. Too many times I see photographers with it on, but the wrong way round. Make sure you take a few seconds to attach it properly before shooting.

    Once, I was on an island photographing Atlantic seals. The rocks were slippery, and it wasn’t long before I fell over and landed with my whole body weight on the nose of my Nikon telephoto lens. Thankfully I had the lens hood on, and what was potentially an extremely expensive slip, was no more than two small screws broken in the hood.

    #3 Don’t Shy Away From Aperture Priority Mode

    Recently, I’ve found a lot of photographers are shooting in manual mode because they believe that anything else is “cheating” and makes a shot unworthy. I don’t know any professional wildlife photographers that don’t shoot in aperture priority mode – although don’t get me wrong, manual does have its uses in some situations. However, in general, aperture priority is great for wildlife photography.

    Light is often never evenly distributed in a woodland or similar environment. A moving animal will cross different areas of different light intensities. If you take a burst of photos of it moving through the area, aperture priority mode will adjust the settings and ensure your images are correctly exposed. In manual mode, there is simply no time to continually adjust the settings when shooting a constantly changing scene.

    By all means, you should understand how to use your camera in manual mode, but aperture priority is not the enemy. Adjust the ISO to increase or decrease your shutter speed, and use exposure compensation to fine-tune the exposure.

    Wavingseal

    #4 Be Prepared for a Wait

    I mentioned earlier that wildlife photography is all about patience. When starting out in this field, you need to remember that rarely do wildlife photographers get a great shot in just a few hours of waiting. You may need to return to a spot time and time again, waiting for hours on end, before you will capture a unique image.

    This may sound daunting, but it makes any images you capture that extra bit more rewarding. If you’re waiting in a hide, take a book with you, or a film on your smartphone to pass the time. Just remember to keep looking up and checking the scene in front of you.

    WTE Fight

    #5 Think Outside of the Box

    Finally, with so many people taking excellent wildlife images nowadays, it is important to think outside of the box. Look at images others have taken and think “how can I do it better”. If you want your images to be noticed and stand out, give them the wow-factor by taking a photograph that no one has ever seen before. I don’t mean a rare animal, but instead a rare style of shot.

    Don’t give up at the first hurdle, and keep clicking your way closer to the elusive perfect shot!

    The post Top 5 Tips for Wildlife Photography by Will Nicholls appeared first on Digital Photography School.


    Digital Photography School

  • How to Improve Your Portrait Photography in Five Minutes

    People often ask me for tips on taking better photos of their friends and family.

    After much thought on photography tips that can apply to various experience levels and equipment — from DSLRs to smart phones — I present to you a short article with tips you can learn in five minutes to help you improve your portrait photography. If you have more time and would like more specifics, I’ve noted additional articles on each tip that may interest you.

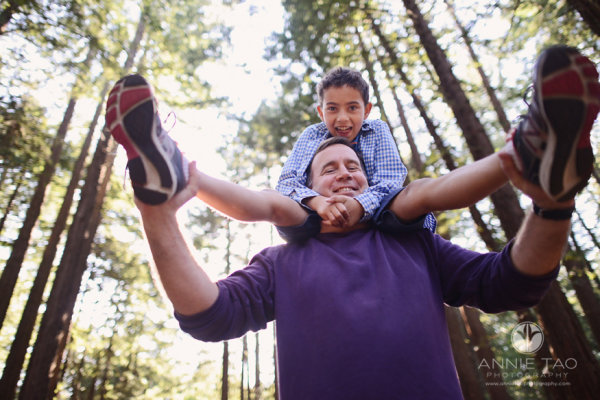
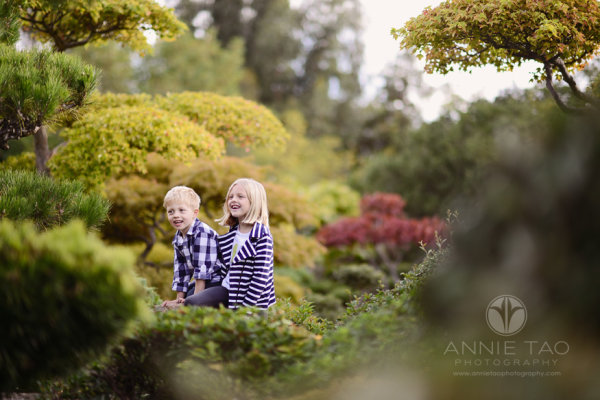
    Annie-Tao-Photography-DPS-article-Improve-Portrait-Photography-perspective

    Tips that will instantly improve your portraits:

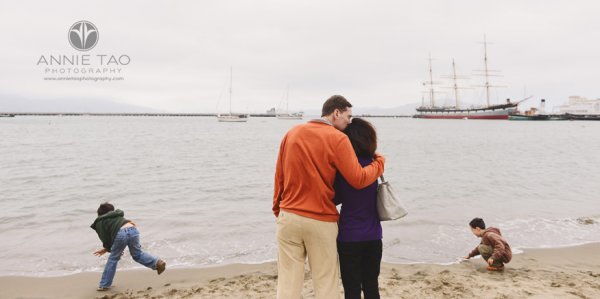
    1. Don’t put everyone in the center

    That person may be the center of your life, but they don’t always need to be in the center of all the photos.

    Aside from corporate headshots, positioning your subjects directly in the center of your frame for every image can be… yawn. And don’t just substitute it with the “rule of thirds” either. Think how boring everything would be if they were always in the same place, whether that is the center of every frame or at a third mark.

    Be adventurous once in awhile – mix it up!

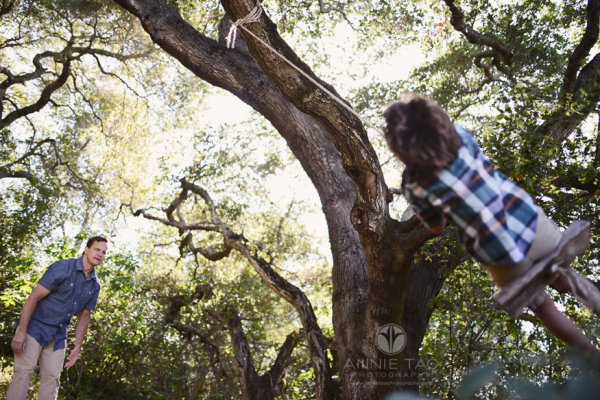
    Annie-Tao-Photography-DPS-article-Improve-Portrait-Photography-dont-center

    Annie-Tao-Photography-DPS-article-Improve-Portrait-Photography-dont-center-2

    If you can’t break the rules because you have never heard of the Rule of Thirds, you can read this article.

    2. Keep one eye on the background

    If your subject is right in front of a lamppost or a tree, reposition yourself or your subject, so it doesn’t look like he is growing a lamppost out of his head.

    Another example:  if your subject is wearing a green dress and sitting on the grass, have her move where the background is a different color, so she doesn’t look like a floating face in a sea of green.

    Also, be mindful of distracting elements behind your subjects, like a garbage can. The background can turn a good photo into a bad one, so keep one eye on the background.

    Annie-Tao-Photography-DPS-article-Improve-Portrait-Photography-background-2

    If you want to read more about the impact of backgrounds, check out Improve Your Background, Improve Your Photography.

    3. Capture the story, not just a smiling face

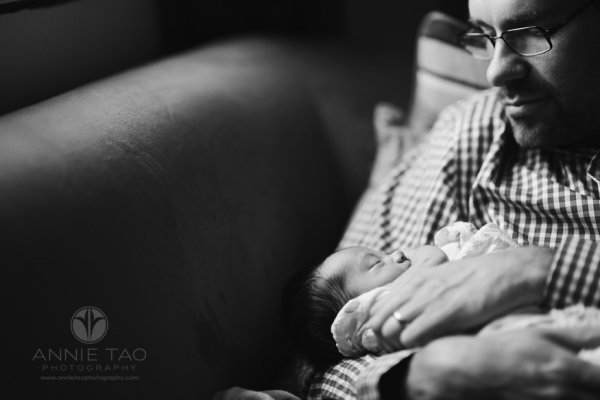
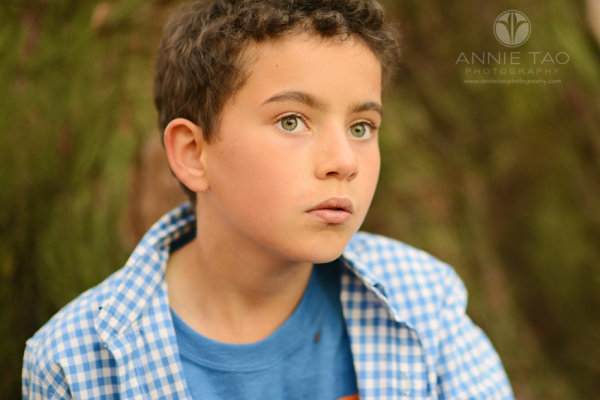
    Of course we all prefer a photo of someone smiling, but we aren’t always in a constant state of joy. Consider taking shots when someone looks pensive or serious, for example, or engrossed in an activity.

    Try to resist the “look at me and smile” routine. I guarantee that photo will tell more of a story than one where people stop what they are doing to flash a fake smile.

    Annie-Tao-Photography-DPS-article-Improve-Portrait-Photography-not-smiling

    Annie-Tao-Photography-DPS-article-Improve-Portrait-Photography-capture-story-2

    Annie-Tao-Photography-DPS-article-Improve-Portrait-Photography-capture-story

    For more tips on this, read: Don’t Wait For A Smile.

    4. Change your perspective

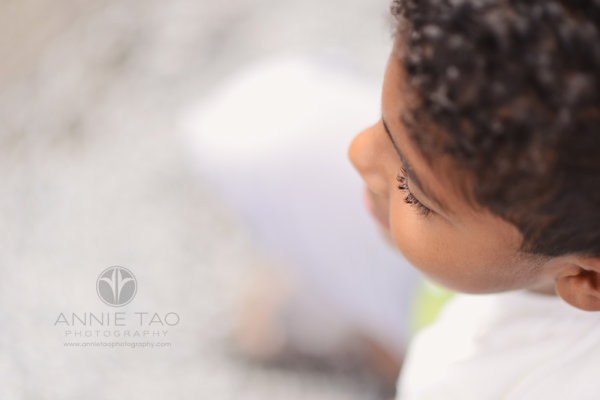
    Did you know you can create the tone or mood of an image by the angle of your camera and your closeness to your subject?

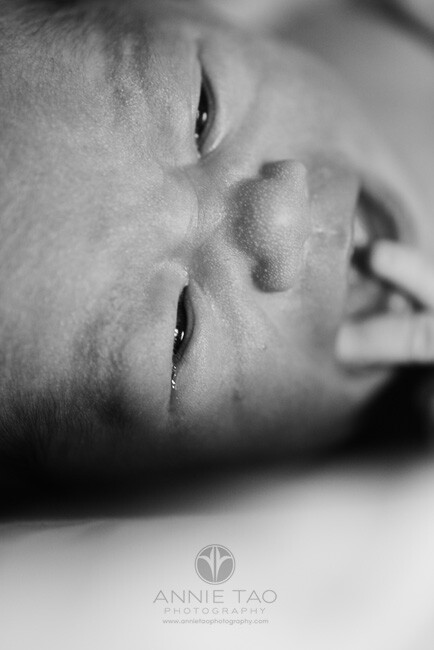
    Your perspective when you take the photo influences the viewer’s perception of the image. Taking a shot from the top, looking down can paint a picture that someone is small. A tight shot of a teardrop can provide a sadder tone than a shot that was taken from a distance.

    So next time, before you click the shutter button, think about what tone you want to give and what story you want to tell.

    Annie-Tao-Photography-DPS-article-Improve-Portrait-Photography-perspective-4

    Annie-Tao-Photography-DPS-article-Improve-Portrait-Photography-perspective-3

    To see examples of different perspectives and when you would use them, you must read The Power of Perspective.

    There are many things you can do to improve your portrait photography. I narrowed my list to four because these were the ones that came to mind first.

    Do you have a good tip to share? Please comment below. We’d love to hear it.

    The post How to Improve Your Portrait Photography in Five Minutes by Annie Tao appeared first on Digital Photography School.


    Digital Photography School

  • 4 Steps to Less Stressful and Easier Photo Editing

    Have you ever returned to your computer with a memory card full of photos and become overwhelmed at the idea of going through all of them?

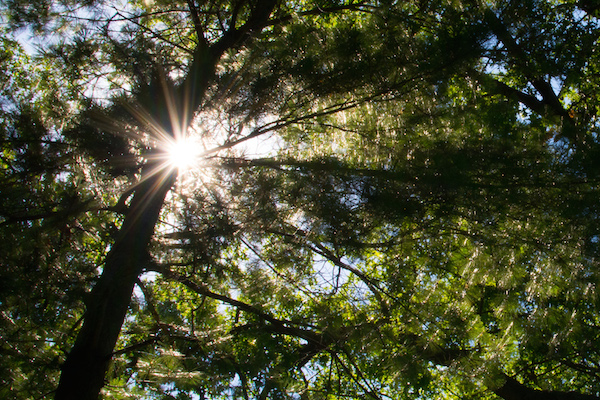
    Tree starburst

    The thought of sorting and analyzing so many pictures can seem so daunting it’s sometimes hard to even know where to start! Often we find ourselves copying the contents of our cameras to our computers and letting our precious memories collect digital dust, though we promise ourselves we will get around to organizing them – someday. Modern technology has made this task easier, with various software and cloud-based services even promising to find your best photos for you. And while these digital assistants certainly have merit, I like to take a different approach to dealing with all the images I capture.

    The following tips will help you streamline your photography workflow and make the task of sifting through your images not only easier, but a lot more enjoyable too. While I work mostly in Adobe Lightroom, these general practices will apply no matter which photo editing software you use.

    Step 1: Get rid of bad photos

    This is the first thing I do when sorting through pictures, and it’s a tough hurdle to overcome because I have a tendency to want to save everything. But this step will make all the difference in managing your growing photo library, especially if you have never done it before.

    Let’s say you went on a summer family trip to a national park, and you returned home with thousands of pictures to deal with. It might be tough, but as you look through them, try to think about what images will matter the most to you a year from now. You might have had a wonderful time at the Grand Canyon during your vacation, but will you really want 50 pictures of your child looking down at the great abyss? What about the ones where he is blinking, out of focus, or looking the other way? It is likely that two or three good pictures are all you need. In this first step, it’s up to you to find the ones that best encapsulate your experience as a whole, and ditch the rest.

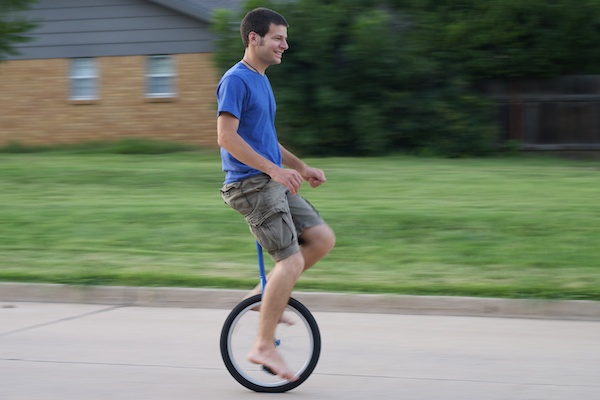
    Unicycling

    I captured close to 100 photos on my brother’s recent visit, but this is one of just a handful I really need to remember the day, and all the things we did.

    This approach might seem coldhearted and cruel, but it’s a necessary step in taming the photo-management beast. When you revisit the pictures from your summer trip a couple years from now, you won’t need a thousand of them to help you remember the experience. A tenth of that will probably be perfectly appropriate. If you hang on to every last one you might find that they become an albatross around your neck, weighing you down so much that you don’t even want to look back at your pictures because there are just so many of them.

    To put things in another perspective, think about a time when one of your friends wanted to show you photos from his or her family trip. How long did it take you to grow tired of looking at the same types of images over and over? You could have easily gotten the point with just a few pictures, and then spent time visiting with your friends about the events surrounding the photos.

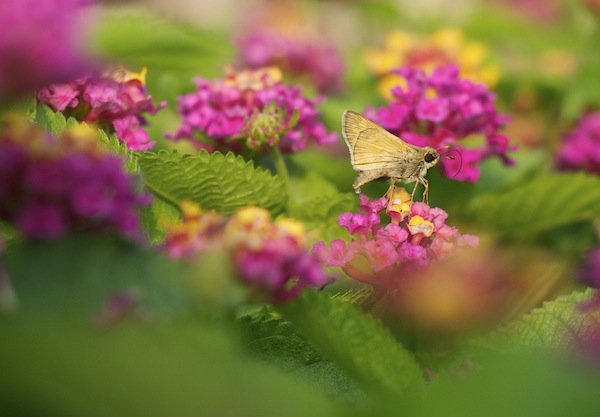
    Moth

    Of all the photos I took during this nature walk, this was one of only a few that I decided to keep. And in the years since, I haven’t missed the others at all.

    One nice advantage of using a photo management program is that you can remove unwanted photos without actually deleting them from your hard drive. In Lightroom, pressing the “X” key on a photo will mark it as rejected, so it will no longer show up in your photo library but will still exist on your computer. This helps soften the initial blow, and then you can go back later and actually delete the rejected photos if you so desire. Alternatively, you can press the “P” key to flag a photo as one of your favorites, or assign star ratings to the images you like best. Then you can instantly sort out your best shots later down the line, and delete the rest when you are ready.

    Step 2: Basic Editing

    After culling your pictures to find the ones you like most, the next step is to perform basic edits and save the real heavy lifting for later. After removing the duds from my most recent camera import, I typically go through each of the remaining images and apply the simplest of edits such as crop, straighten, and exposure. Not much else is needed at this stage, as you are essentially preparing your photos for any real edits that might need to be done later. These basic adjustments are very quick, and you can churn through your recent batch of vacation, birthday, or hiking photos in a manner of minutes or hours instead of days or weeks.

    You can also copy and paste adjustments, so if you have a dozen similar photos you can edit one and then apply those adjustments to the rest with a simple keystroke. This is also a good time to do apply some rudimentary organization to your photos as well, using tools like keywords, flags, categories, or star ratings. Be careful not to get caught up in editing any single photo in depth at this stage. The goal of Step 2 is to dig a little deeper into the photos you like, which will help you decide where to concentrate your efforts if you do need to do more intensive edits afterwards.

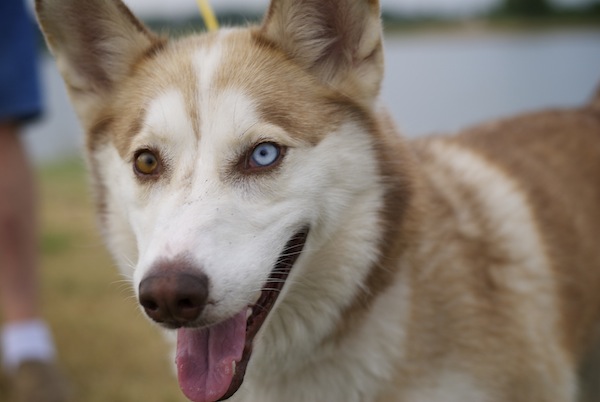
    Husky

    I had to crop this photo in order to draw the viewer’s attention to the dog’s eyes.

    Step 3: Advanced Editing

    By this point you should now have a curated set of photos that you really like, with some mild corrections applied to help them look a little more pleasing. Now it’s time to perform the types of more detailed edits that will help your images truly shine. Advanced adjustments to a photo’s white balance, color saturation, contrast, and other parameters, while also applying localized improvements like dodging and burning can take a long time, but the results are well worth it.

    It’s important to do this step last, or else you can easily wind up spending a great deal of time editing a single picture early in the process only to realize there are plenty of better ones that should have had your attention instead.

    Family

    This family photo turned out fine, but I had to do some color corrections and other enhancements to get it to look how I really wanted. By doing this step last I was able to devote more time to the editing process and not worry about processing hundreds of additional images.

    Step 4: Walk Away

    This might sound silly, but often the most useful activity you can do when editing your photos is nothing at all. Take a break, get a coffee, head out for a walk, or just go to bed and come back to your pictures the next day with a fresh set of eyes. I’m amazed at how often I stare at a photo performing detailed adjustments trying to get things just right, only to leave my computer and return after a short hiatus and realize the solution was much easier than I realized at first.

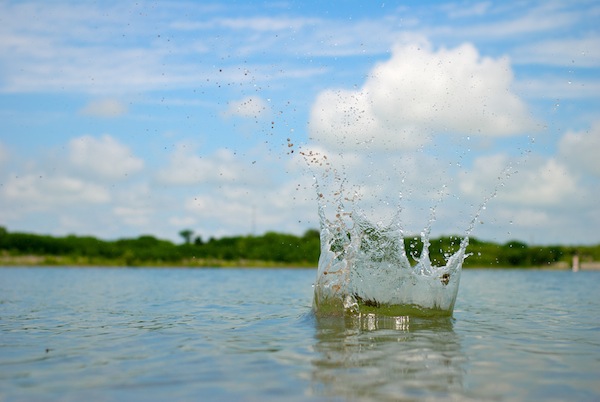
    As a case study in how all this works, let me share the following example. My brother and I recently I spent an afternoon at the beach trying to get pictures of a rock hitting the water. When I got back to my computer I found that we had over 50 of images to go through, and following the aforementioned workflow strategies helped make things much easier. After importing the images into Lightroom I went through and rejected about 35 right off the bat. That left me with a much more manageable set, so I cropped and applied some basic adjustments to the remainder. This helped me realize that I needed to reject more of them, now that I was looking at the cream of the crop in greater detail, and I ended up with three photos to edit more extensively. When I was finished, I ended up with exactly one photo from the afternoon that I really liked.

    Water splash

    Not only is this the best photo out of the many I shot that day, but looking at it allows me to remember many other things about the afternoon as well. I don’t need a hundred poorly-composed, out-of-focus pictures to remember a fun afternoon at the beach. Instead I have this one and just a couple others that all serve to bring back some amazing memories.

    Following this simple process, and adjusting it to suit your individual needs, can transform photo sorting from a tedious chore into an activity that is enjoyable, relaxing, and fun.

    The post 4 Steps to Less Stressful and Easier Photo Editing by Simon Ringsmuth appeared first on Digital Photography School.


    Digital Photography School

  • Tips for Photographing in Different Weather Conditions

    You’ve figured out that photography is awesome. You have your equipment. You’ve got the basics down. You know all about the “triangle” of ISO, shutter speed, and aperture. Now, you’re ready to put them to use. You’re ready to go outside and experiment. But wait. You haven’t yet considered the weather. This is a little side note to photography that we often forget about. If you’re not shooting in a studio, then the weather will definitely be a factor to consider when going out on a shoot.

    MDWeather 01

    There are a few basic weather scenarios that you will surely encounter as a photographer: cloudy or overcast, rain, bright sun, high temperatures, and snow to name a few. Each of these conditions has its benefits and limits. I’ll cover a few of those here as well as tips for photographing in different weather conditions.

    Cloudy or overcast

    These are some of my favorite conditions to shoot in for portraits. An overcast day brings about an amazing amount of diffused light. You can shoot in the middle of the day with little worry about harsh lighting or unwanted shadows. You do want to pay close attention to lighting the face. It’s great to have a reflector to bounce light into the face of your subject(s). Make sure you’re taking a look at the images, as this will help you know if you’re underexposing or overexposing. You’ll also be able to tell if you need to reflect more light on them. See portrait above.

    Shooting landscapes in overcast conditions can also be challenging. Overcast skies are gray and don’t usually add a lot of interest to that mountainscape, or field of cows you want to photograph. Look for stormy weather clouds, that add a sense of place and dimension. You can also crop your shot so that you don’t get those unwanted gray skies, but still get great lighting.

    Benefit: beautifully diffused lighting
    Limit: ugly gray skies

    MDWeather 02

    Rain

    So what happens when your cloudy day turns into a rainy shoot? Well, you make the most of it. A little rain never hurt anybody. One of the best ways to work with rain is to bring an umbrella. Try to keep a nice umbrella in your arsenal of supplies for shoots. Look for one of those clear umbrellas that comes down over your head. It looks amazing in photos. You can also get one that has a nice little pop of color. Try polka dots even. Make the umbrella part of the shoot. You don’t have to use it in every photo but don’t be afraid to incorporate it.

    Also look for areas that are shielded from the rain. Overhangs, alleys, even coffee shops can provide you with great areas for your photos. The rain can help you tell a story if you let it. At the end of the shoot, ask your subject if they’re okay getting wet. Work with that and see what you get. Try out different things as you’re learning to work in this condition.

    Of course the rain can work against you. You’ll want to make sure your equipment is protected. You don’t have to get fancy coverings if they’re not in the budget. Get a grocery bag and some tape and protect the main body of your camera. If the weather is horribly bad, reschedule your shoot for a less harsh day. Again, safety is key here.

    MDWeather 03

    Rainy landscapes tell an amazing story. Make sure you’re careful with setting focal points. Your camera will often try to focus on the rain drops and will blur out your landscape. This can be nice if it’s what you intended, if not, you’ll end up with a bunch of blurry photos.

    Benefit: added dimension and sense of story and place
    Limit: harsh on equipment and uncomfortable for subjects

    Bright sun

    Many people think that bright sun is the photographer’s worst nightmare for portraits. I beg to differ. Bright sun can create beautiful light and you can play with shadows if you wish. (Read Dispelling the Myth of Good Light and Bad Light for more on this topic.)

    When shooting in bright sun, you will find that your camera meter will want to expose for the super bright background or the subject that’s in front of you. This causes your subject to be super dark or your background to be blown out. Try shooting in “open shade”. This means that you’ll place your subject in the shady part close to the light, and bounce light with a reflector back at them. You can also use a flash to make sure your subject is lit without blowing out the background. A flash in the sun? I know it sounds weird but it works. Use your flash to light your subject while exposing for the background. You can also look for natural reflectors around you. Look for a white building or even a white sandy beach. These help reflect light on your subject without blowing out the background too much.

    Landscapes in bright sun are absolutely beautiful. Try shooting the beach in the full sun of the day. Practice exposing for the beautiful blue skies as well as the sand.

    Benefit: tons of light and the ability to play with shadows
    Limit: can create harsh lighting on your subject

    MDWeather 04 MDWeather 05

    High temperatures

    A lot of us shoot in the summer months. This can be beautiful for the late sunsets and beautiful skies, but the temperature can be brutal. It’s great to shed the coats and heavy clothing but the heat isn’t always fun. You want to make sure that you and your subjects will be comfortable and safe. The most important thing is safety. I like to limit my shoots to when the temperature or heat index is below 90f (32c). This may vary depending on where you are shooting. In Puerto Rico, 90 on the beach feels great. In Boston, 90 in the city feels miserable.

    Take note of how your subject is feeling on the shoot. If you notice that they’re becoming uncomfortable, ask them and schedule a reshoot if necessary.

    Benefit: you and your subjects can come out of limiting coats and clothing
    Limit: high temperatures can be draining and uncomfortable

    Snow

    Shooting in the snow is magical. It’s beautiful and the white stuff reflects light amazingly! Shooting in a blizzard, not so much. Shooting in 10f (-12c) degree weather, even worse. When shooting in the snow, pay special attention to ice and hazards under the fluffy stuff.

    MDWeather 06

    You can shoot while it’s snowing or once the snow has stopped falling. If you shoot while it’s snowing, treat your camera as if it is raining. The snow melts and water can get into the inner workings of your camera body and lens.

    Don’t be afraid to ask your subject to shed that coat. If you’re in an area that gets a lot snow then you know that snow doesn’t necessarily mean unbearable cold. Have your subject shed the coat and shoot for a few frames and then warm up a bit.

    Also, play around with capturing the falling snow. When it’s snowing, the sky is generally overcast. The white snow acts as a bit of a reflector so you’ll most likely be able to forgo that. Just go out and practice shooting and see what you’ll need. You probably don’t want to venture into a blizzard though.

    If the snow has stopped you’ll need to watch out for ice and hazards under the snow. It doesn’t hurt to protect your camera just in case you take a little tumble. Again, the snow reflects beautifully. Make sure you’re metering for your subject and paying special attention to not blow out the white snow.

    Benefit: it’s beautiful and shows a sense of time
    Limit: it’s cold and damaging to your equipment

    MDWeather 07

    Remember, take special care to insure safety at all times. Safety of you, your subjects, and your equipment are all important. Use the weather to your advantage and work with the lighting you have. Don’t be afraid to bring in flash or reflectors. Finally, just have fun with whatever condition you’re shooting in.

    The post Tips for Photographing in Different Weather Conditions by Monica Day appeared first on Digital Photography School.


    Digital Photography School

  • Create Your Own DIY-Style Photography Course

    If you have $ 160,000 or so and want to learn photography, then you can skip this post. Just head to Rhode Island, enroll in the School of Design (or another prestigious art school), and, in about four years, your photography will rock. It had better, right? 😉 Fortunately, with the Internet, you have accessible and inexpensive (or free) ways to educate Continue Reading

    The post Create Your Own DIY-Style Photography Course appeared first on Photodoto.


    Photodoto

  • Step-by-step Guide to Long Exposure Photography

    In the past few years, thanks to the diffusion of useful accessories and photographic filters with good quality and low prices, the technique of long exposure has become increasingly popular among photography enthusiasts. Even if this technique can be used both in studio and in a urban environment, the perfect playground of long exposures is landscape photography.

    Unfortunately often it happens that the result we get is far from our expectations, and we end up classifying the long exposure as a demoniacal technique. However, following this step-by-step guide to long exposure photography, you’ll see how easy it is to get a good result on the first attempt (or almost).

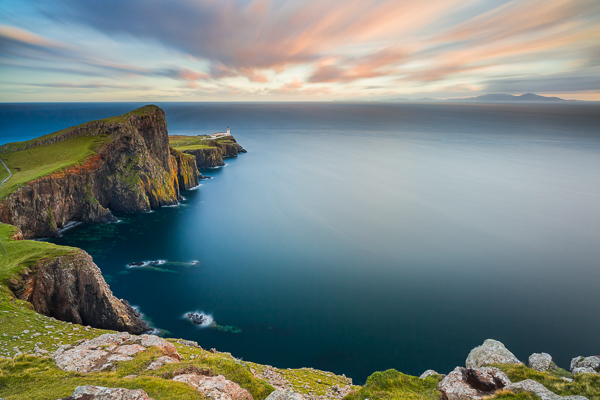
    Picture 1

    Step One: study the weather

    A day with a cloudless sky is a good day to drink a beer with friends, not to make long exposures. Likewise it cannot rain forever, so do not resign yourself to an afternoon with your PlayStation. You should study satellite images rather than the meteorological sites, trying to figure out if there is an incoming storm, or if the downpour is about to end.

    Step Two: visit the location well in advance

    Scout the location ahead of time, as you need a lot of time to find the perfect composition, or at least more than the time needed for a “short exposure”. In fact in a long exposure the world is completely different from how you see it with your own eyes. You have to try to see it with your mind, looking for a harmonious composition that includes moving subjects, trying to predict the direction of the clouds or the force of the sea. Try not to put the sun into the composition because its movement will ruin the shot and it will create area of overexposure that is not recoverable. If you cannot avoid the sun, wait for it to hide behind a cloud.

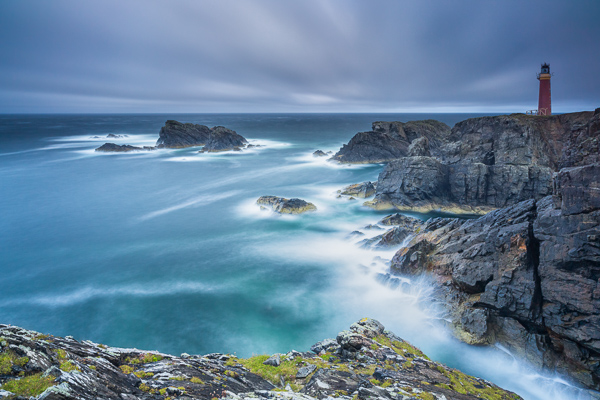
    Picture 2

    Step Three: use a tripod

    Mount your camera on a tripod and install all the accessories such as the remote shutter release and the filter holder (if you are using drop-in filters). However, wait to actually install the filters. Very important!

    Step Four: compose the image and lock focus

    Refine your composition, focus on the subject and lock the focus. If you are using manual focus, just do it. If you are using the autofocus mode, you should focus by half-pressing the shutter button, and once the focus has been made, while still holding down the shutter button halfway, push the lever from Auto Focus to Manual. In this way, your camera will maintain the focus (or alternately you could use back-button focus).

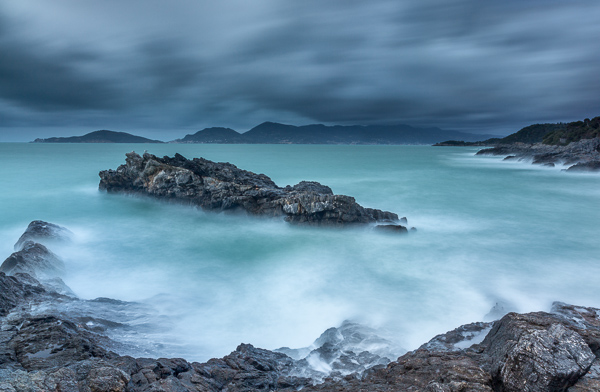
    Picture 3

    Step Five: set the exposure

    Now set your camera to Manual (M) mode or Aperture Priority (A/Av) mode. Then set the aperture to an appropriate value for the scene (for landscapes I suggest between f/8 and f/11) and take a “Test Shot”. The test is complete when you get a correct exposure. To determine if the exposure is correct, check the histogram (do not trust your display, it is too bright). It is true, there is no universally correct histogram, but there are histograms that are universally incorrect, namely moved completely to the right or left side (the image is respectively overexposed or underexposed). Once the test shot is successful, write down the shutter speed you used for that shot.

    Step Six: add your filter

    Now add your Neutral Density (ND) filter. If the filter is very strong, for example 10 stops, you will not be able to see through the viewfinder or the Live View. Do not worry, because if you have followed the guide up to this point you will notice that we have already made the composition and the focus too. You are blind, but your camera will see everything perfectly.

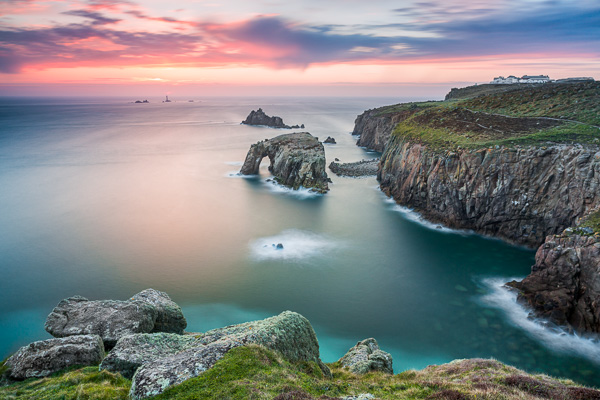
    Picture 4

    Step Seven: change to Bulb mode

    Set the shooting mode to Bulb (B) in order to take over the thirty second limit of the camera. Do not change any of the other settings (ISO and aperture) used in the test shot.

    Step Eight: take your long exposure shot

    It is finally time to take our long exposure shot. But how long will you to leave the shutter open? It is less difficult than you might expect. First of all, recollect the shutter speed that you noted down from the “Test Shot” you did in Step Five above. Now you must compensate by the number of stops introduced by the filter. For example, if your test shot was 1/15th of a second, adding 10 stops will get a shutter speed of approximately 60 seconds. There you have your shutter speed. No need to be stuck in the mathematics: on the internet you can easily find conversion tables and applications for your smartphone that will do the conversion for you.

    Picture 5

    Step Nine: check the histogram again

    Once you’ve taken the shot with the calculated shutter speed, check the histogram. If the new histogram is approximately equal to the one of the test shot, mission accomplished. If it is shifted too far to the right or to the left, repeat the shot again correcting the shutter speed.

    Easy, isn’t it? Now fill your backpack with your camera and filters and go to practice in the field. For any doubt or if you need any help, don’t hesitate to ask questions in the comments below. Please share your long exposure images as well.

    The post Step-by-step Guide to Long Exposure Photography by Francesco Gola appeared first on Digital Photography School.


    Digital Photography School

  • Capturing Busy Little Ones: Forget the Perfect Pose and Get Photos You Truly Love

    PHOTO 1

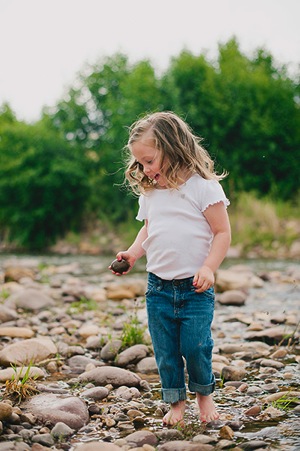
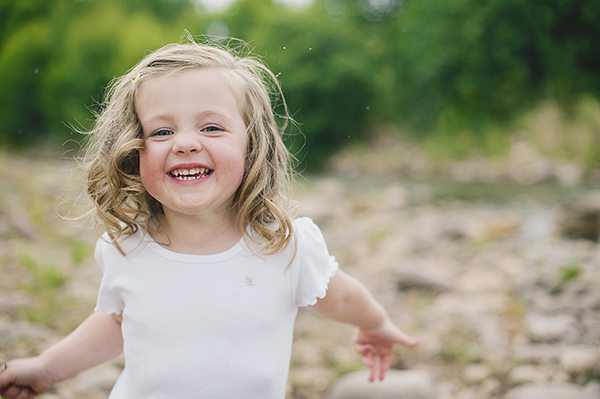
    If you have ever tried to get a three year old to sit still for longer than a nanosecond you know what a challenge it can be to get that “perfect” photo. Well, I’m going to be real here, who wants that perfect photo anyway? Okay, I know you may, but maybe I can convince you to let that go. My favorite photos are always the true ones; the ones that make you smile when you look at them, or maybe even cry a tear or two. Sure, it’s nice to get that beautiful portrait, but which photo is going to help you truly remember the fiery three year old who gave you model-in-the-making poses one minute, and wiped her muddy hands on her white shirt the next?

    The first thing you have to do, if you want this experience to be fun for both you and the little one, is to let go of expectations. If you have a certain Pinterest pose in mind, and are determined not to be happy until you’ve forced your little tot into it, you’re both going to be miserable. Sure, use those ideas as a starting point, but then go with what is happening in the moment. You’ll be surprised where your wee subject might take you, and you might like the results much better than what you had in mind in the first place.

    PHOTO 2 PHOTO 3

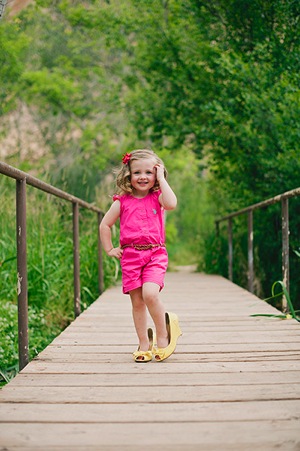
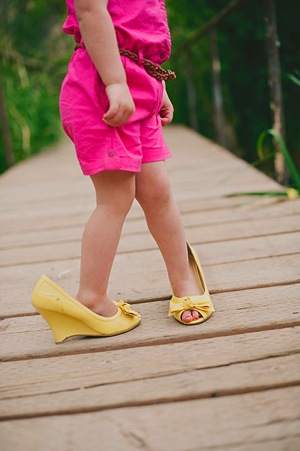
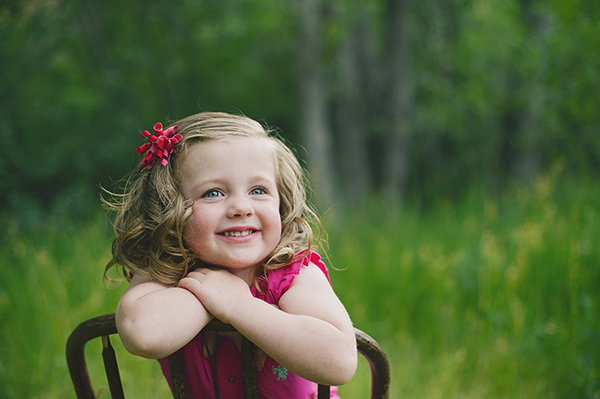
    Make sure your cute little one knows that you are on the same team. Most kids have no problem being obstinate, just for fun. If she senses that you really want something from her, she may quickly decide that she wants the exact opposite. I try to take the child by the hand often, even if it’s the first time we’ve met (they usually love this) and let them feel that they are part of where we are going, and what we are doing. If she decides that she wants to put on the pretty dress shoes next, then that’s what we capture next.

    PHOTO 4

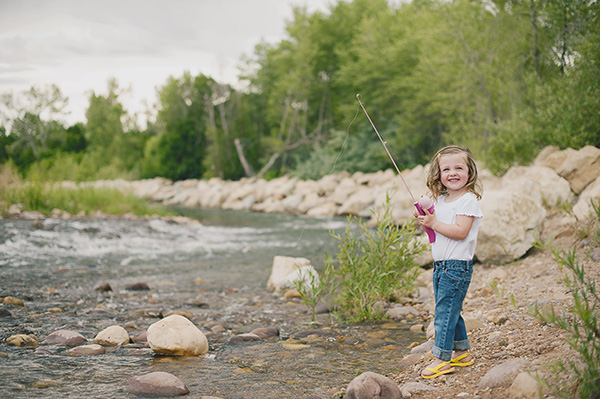
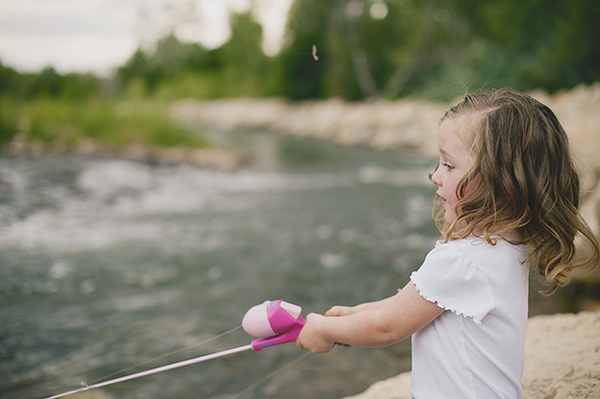
    Bring something for her to do. I prefer not to use props generally, but a few well-chosen, meaningful props can work wonders. This keeps her attention, plus you have the added benefit of capturing those hobbies that she is into at the moment. Let her share her passion with you. Instead of trying to pose her just so, and telling her how to hold the fishing pole, and where to look – ask her to show you “how she fishes with daddy”. Let her be the expert, and you just have your camera ready. Favorite dress-up clothes can bring out the model in lots of kids. Chairs or boxes to climb on, sit on, stand on, and peek through, can be great fun.

    PHOTO 5

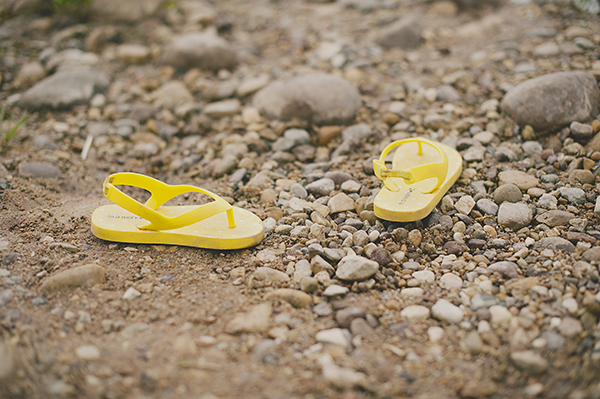
    Try not to give too much direction or commands. Kids start to tune you out pretty quickly if all they hear are orders barked at them: “Sit here, look there, smile, smile, smile!!!”. When I can tell that my little subject is about done, I’ll just let her totally do her thing, and have my camera ready for when the moment is right. If she wants to take her shoes off and splash in the water, throwing rocks, I see a perfect opportunity to capture her in her element. This is where you might get the most genuine joy shining through.

    PHOTO 6

    When your mini-model is done – you are done. Quit before the meltdown, before she decides that this is the worst form of torture an adult ever created. If you didn’t get everything you hoped to get, don’t sweat it. Sometimes when I look through the photos later, I find gems that I didn’t even remember capturing. You may be pleasantly surprised by how many great images you were able to get, even with truly “busy” little tots. You’re not going to get much worth keeping if you try to force more photos. When little ones are done, they are DONE. Try to keep your photo sessions short, even if you have an agreeable little model. I usually spend less than half an hour shooting if they are under five years old.

    PHOTO 7

    So, next time you are lucky enough to have an adorable, energetic, little one in front of your camera, remember to relax, breathe, and have some fun. You’ll find that those real photos will be your favorites in the end, and you won’t even miss that perfectly posed portrait with every hair in place.

    PHOTO 8

    For more tips on photographing kids check out these:

    • Photography Hunting: Play the Waiting Game Photographing Kids
    • Cut the Cheese: 5 Tips for Photographing Kids
    • CLICK! How to Take Gorgeous Photos of Your Kids – a dPS ebook
    • How to Photograph Shy Children

    The post Capturing Busy Little Ones: Forget the Perfect Pose and Get Photos You Truly Love by Melinda Smith appeared first on Digital Photography School.


    Digital Photography School

  • The Only Three Lenses You Need for Travel Photography

    The only three lenses you need for travel photography anywhere in the world are a fisheye lens, a 50mm, and a 135mm (or similar telephoto).

    You can agree and finish this article right here, or you can read on to see exactly why I would choose only these three lenses to take with me anywhere in the world.
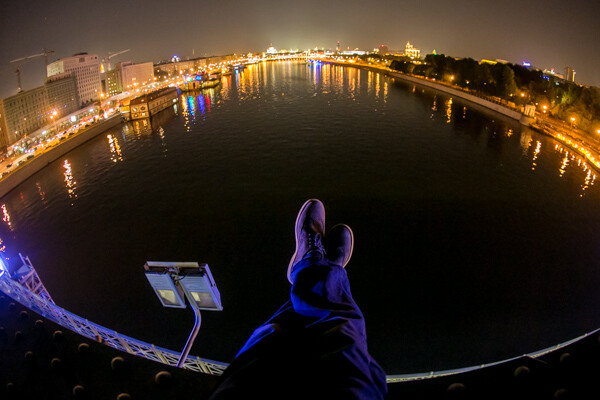
    Canon fisheye 15mm 2.8

    Night shot from atop a bridge in Moscow, using the Canon fisheye 15mm f/2.8

    Before I say anything else, the fisheye I have in mind has an aperture of f/2.8, the 50mm has an aperture of f/1.4, and the 135 has an aperture of f/2.0. Popular, cheaper variations on these lenses would be the 24mm f/2.8, 50mm f/1.8, and the 100mm f/2.8 Macro. I’d also like to address what I imagine a popular response to this article might be: “What about the 24-105mm?” This lens is weak for a couple of reasons. The maximum aperture on this lens is f/4, which ends up being very limiting if you are trying to travel light (and going without an off camera flash).  Also, prime lenses are always superior in quality to zoom lenses. There are less moving parts and the image quality is cleaner. If you think having just one lens to cover a greater range is easier, just remember what you gain in convenience (by having one lens) you lose in quality, weight, and ability to “see” in the dark.

    Each of these lenses are used for very specific reasons. Just as we wear different shoes for different purposes throughout our week, such as; sneakers for exercise, dress shoes for work, and slippers around the house – we use different lenses to convey different feelings, emotions, and to use as different tools to capture our experiences. Some lenses really are better than others for certain things. For example, portraits are best taken with lenses between 85mm and 135mm. The distortion to the face/ears is minimized and the truest proportions are found in this range.

    On the other hand, you wouldn’t normally reach for a lens like this when shooting a landscape scene (there are always exceptions to every rule, and it’s fun to see what happens when you break the general guidelines). Great lenses for landscapes tend to be a bit wider, somewhere between 15mm and 50mm. I recently took only these three lenses with me on the Trans Siberian Railway from Russia through Mongolia into China. Here are MY reasons for bringing the 15mm Fisheye, 50mm f/1.4, and the Canon 135mm f/2.0 with me on this trip of a lifetime.

    The Canon Fisheye 15mm f/2.8
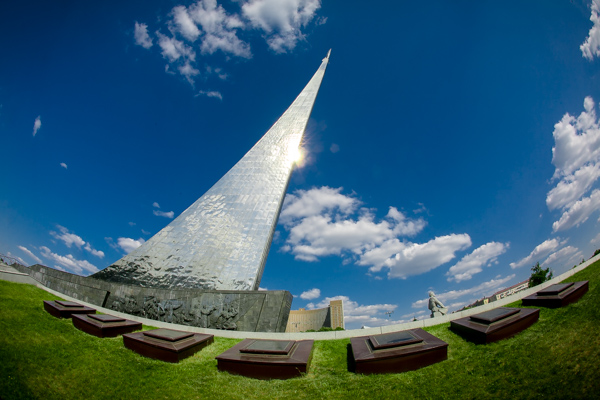
    canon fisheye 15mm

    From Moscow, Russia

    The Canon 15mm lens is my antidote to boring building pictures. When traveling abroad (or around your own town/city/village), interesting buildings are inevitably photographed. Oh, that old bridge with locks attached to it? Better take a picture. Oh, look at that old cathedral in the Kremlin, better take a picture. If it’s there, it must be important. Well, you can add your photo to 1.5 million other photographs right there on Flickr or Google images that look exactly like the one you just took.

    What will you do to differentiate yourself? How can you take a picture that will make someone pause for more than half a second?  Ad companies are excited when someone spends 4-8 seconds looking at a photo. Can you get someone to look at one photo for that long? What would it take? For me, I decided I would never take boring, straight photos of buildings ever again. I’d either edit them in unusual ways (like creating an HDR image, or process it in very contrasted black and white), at unusual times of day, or I would attempt to photograph it differently than every other tourist before me.

    canon fisheye 15mm

    The subways in Moscow, Russia

    Canon fisheye 15mm 2.8

    Selfies are easy with the fisheye lens. That bag on my shoulder could hold my camera, three lenses, my laptop, batteries, some magazines and a book.

    Shooting with a fisheye lens can be really fun, actually. Hold your camera up to your eye with a fisheye lens on, move the camera upwards and watch the horizon bend down sharply at the sides, creating a “globe” feel to your image. Tilt the camera down and watch the earth curve up like a big “U”. Buildings become warped and distorted in unusual ways, like a piece of Gaudi’s architecture. Stand in the middle of the street and point the camera straight upwards and watch the buildings on the side loom over you, like in a Dr. Seuss book.

    canon fisheye 15mm

    My bunkmates on the Trans Siberian Railway

    Fisheye lenses can capture an entire room, cabin of a train, or a bathroom easily. They make selfies on your DSLR incredibly easy. You can take incredible photos of the stars at night. And best of all, they are great for doing the Camera Toss. (I suppose I should recommend NOT trying this ever, anywhere). Fisheye lenses add an element of fun and whimsy to travel photos, which I find otherwise a bit boring and predictable. It’s also an incredibly light and compact lens to travel with, which is why I always bring it along on my trips now.
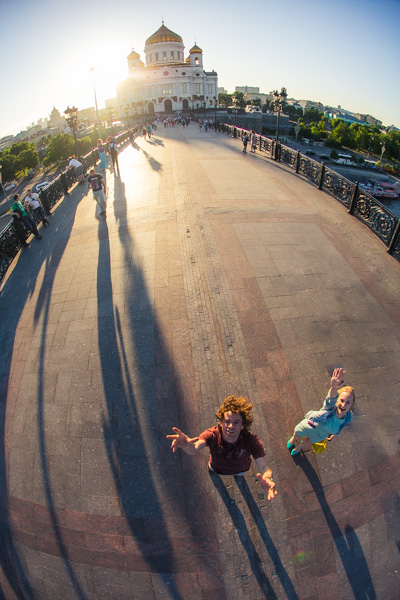
    canon fisheye 15mm

    My camera toss, where I throw my camera with a fisheye lens high up into the air to capture a scene like this

    The 50mm f/1.4

    The 50mm lens is a standard, go-to, all-around lens. And while the Fisheye lens brings a lot of whimsy and fun to my travel pictures, some scenes just don’t call for that. I’ve heard it said that the 50mm is the closest representation to what we see naturally with our eyes. This lens is my best choice of the three options for Canon 50mm lenses. For only about $ 300, this lens has fantastic optics and a powerful aperture. It’s made of real glass lenses unlike the cheaper, lower quality 50mm f/1.8. And it focuses fast, unlike the much more expensive 50mm f/1.2, which happens to be twice as heavy.
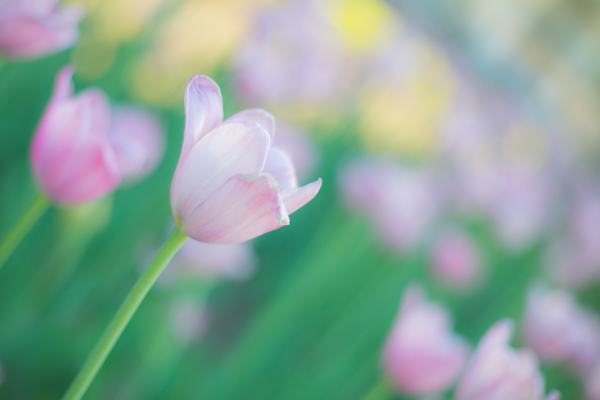
    Canon 50mm 1.4

    A garden scene in Moscow, Russia taken with the 50mm f/1.4. Such lovely bokeh!

    This is a great, inconspicuous lens on a camera body because it doesn’t stick out too much like a 70-200mm would, and the quality is just superb, as I’ve already said. It is extremely lightweight, and you could honestly walk around the entire day with just this lens. What I associate most with the 50mm f/1.4 lens is street photography. I love to take that lens and get lost down side streets and alleyways. I like to take photos of strangers on the street with this lens. The focal length is just right, so it feels as though the viewer is standing there by him or herself. It captures just enough of a scene to convey what is there.

    Canon 50mm 1.4

    A retired math teacher from Texas on the Trans Siberian Railway

    The 50mm f/1.4 is also a great lens for portraits (though I prefer the 135mm f/2.0). It produces lovely bokeh. It forces you to get up close to your subject, making the portrait more intimate. You can’t hide behind a telephoto like the 135mm or a 70-200mm. You are an arm’s distance away, and being that close sometimes shows up on the subject’s face in interesting ways.

    low light with the Canon 50mm 1.4

    My Mongolian host preparing milk tea in the yurt.

    The last thing that I think the 50mm f/1.4 does best, is capture images in low light situations. Trying to capture dinner in a restaurant at night using candlelight only? Totally possible. That light reflecting across the river at night? 50mm does it best! Sleeping in yurts for four nights in a row? Getting that delicious yurt light from the top of the tent is easy with the 50mm.

    Canon 50mm 1.4

    Taken in the back alleys of Beijing, China with my 50mm lens, my favorite street photography lens.

    Fun fact: of my top 200 images from the trip, 112 of them were taken with the 50mm.

    The 135mm f/2.0

    The granddaddy of all these lenses, the 135mm f/2.0 has a special POW feel to it. Because it is a telephoto, it pulls the background in for a nice compact feel to the images. It is a great portrait lens as it completely obliterates the background in a sea of dreamy bokeh. And one special fact about the Canon 135mm f/2.0: it has the ability to focus at a distance of 1 meter (3 feet), which makes it almost like a macro lens.
    Canon 135mm 2.0

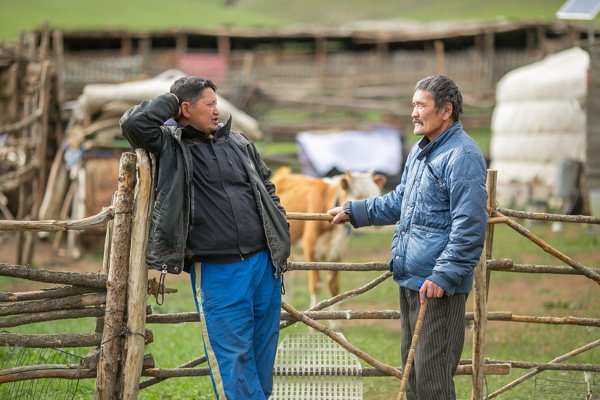
    My host on the left, after we road horseback from one village to the next, in Mongolia. Taken with the 135mm f/2.0

    This lens is fun for me because it has similar properties to the 70-200mm, but it weighs nearly half as much, which will save your back and shoulders after a long day of walking around. This is a fun lens to spy on people from afar, if you are afraid of the straight-on street style encounters you get with the 50mm. This is actually a really interesting lens to do landscapes with if you have enough room. Look at this side-by-side comparison of basically the two same scenes, and look what the 135mm does to the mountains and landscape in the background. It really pulls them towards you, the viewer and truly implies the scope of the scene.

    Fisheye versus 135mm

    The same view from the fisheye and the 135mm. Notice the mountain with the bright spot in the background of the fisheye; it’s almost non-existent. With the telephoto the mountain becomes a major player in the photo.

    Canon 135mm 2.0

    Taken on my way to the oldest and deepest freshwater lake in the world. Lake Baikal, in Siberia, Russia.

    canon 135mm 2.0

    In the Kremlin, Moscow, Russia. This is one instance where I enjoy breaking the rules and using a telephoto lens to capture an idea of a building, rather than the whole thing with a 50mm or Fisheye lens.

    I hope these images and words have inspired you. It’s really fun to limit yourself to prime lenses and feel how they work (and don’t work) in various situations. Being that close to just a few lenses over a month of travel really allows you to get to know the equipment well. So now let’s see some travel photos you’ve taken with prime lenses!

    The post The Only Three Lenses You Need for Travel Photography by Phillip VanNostrand appeared first on Digital Photography School.


    Digital Photography School