Category: Photography

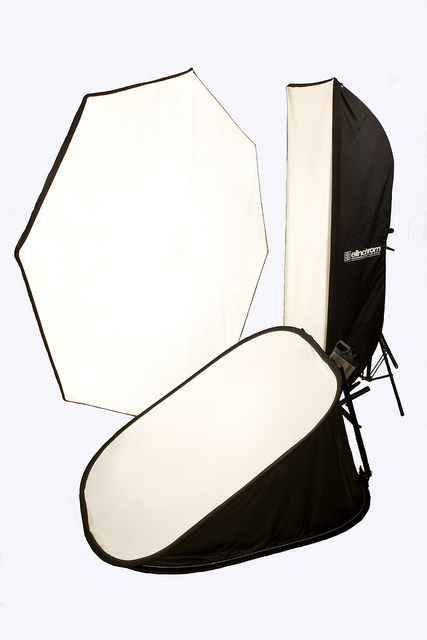
  • Umbrellas versus Softboxes – Which are Best?

    By Andreas-photography

    There are many different types of light modifiers on the market. The two most common are umbrellas and softboxes. So when might you choose each?

    These videos will give you a look at the umbrella versus softbox debate and information on the difference between the two, what they do, and which one to use.

    This first one by Phlearn shows a few options and talks about the relative size and distance to your subject as well.

    Next up is Michael from Smoking Strobes with a video from an outdoor workshop where he talks about the pros and cons of umbrellas versus softboxes when working on location outdoors.

    If you want to check out some options for both head to Adorama.com:

    • Umbrellas
    • Softboxes
    • Light stands
    • For you DIY folks, how to do it on a budget

    So which do you use? Do you use them both? Why? Tell us in the comments below.

    The post Umbrellas versus Softboxes – Which are Best? by Darlene Hildebrandt appeared first on Digital Photography School.


    Digital Photography School

  • Weekly Photography Challenge – All Things Green

    Earlier I posted a set of photos with a green theme.

    It’s summer in the northern hemisphere and with summer comes lots of green. Green grass, trees, all over nature we see green. It happens to be my favorite color so it makes me happy.

    This week I want to see your Green photos. Look around in your world, what do you see that’s green? How many shades can you find? Natural things and man-made. Big and little things. Show us your green!

    Weekly photography challenge this week is – all things green!

    Here are a few more images of green to get you started:

    By John Clare

    By Nomadic Lass

    By Dandelion Salad

    By paige_eliz

    By Barb Dunn

    By Miikka H

    By Parée

    By premier-photo.com

    Can you tell I picked those before eating dinner?

    Now it’s your turn!

    Share your Green photos

    Simply upload your shot into the comment field (look for the little camera icon in the Disqus comments section as pictured below) and they’ll get embedded for us all to see or if you’d prefer upload them to your favourite photo sharing site and leave the link to them. Show me your leading lines using pathways and roads in this week’s challenge.

    The post Weekly Photography Challenge – All Things Green by Darlene Hildebrandt appeared first on Digital Photography School.


    Digital Photography School

  • 7 Pet Photography Tips to Capture Your Furry Friends’ Personality

    For millions of people worldwide, no family is truly complete without a furry friend. Cats, dogs and all the critters in between are quick to crawl their way into your heart, and it’s no wonder why people want to capture their personality – forever. One of the best ways to do this is through snapshots. Like children, though, pets can Continue Reading

    The post 7 Pet Photography Tips to Capture Your Furry Friends’ Personality appeared first on Photodoto.


    Photodoto

  • A Selection of Photos with a Green Theme

    Last week I shared a collection of golden images so to continue on the theme of colors today I present:

    A selection of photos with a green theme

    Quite fitting for summer in my part of the world. What else do you think of when I say green? Here are a few ideas:

    Photograph Sunbathing Gekko on Leaf by Leon Dafonte Fernandez on 500px

    Sunbathing Gekko on Leaf by Leon Dafonte Fernandez on 500px

    Photograph Green tea field by Jaewoon U on 500px

    Green tea field by Jaewoon U on 500px

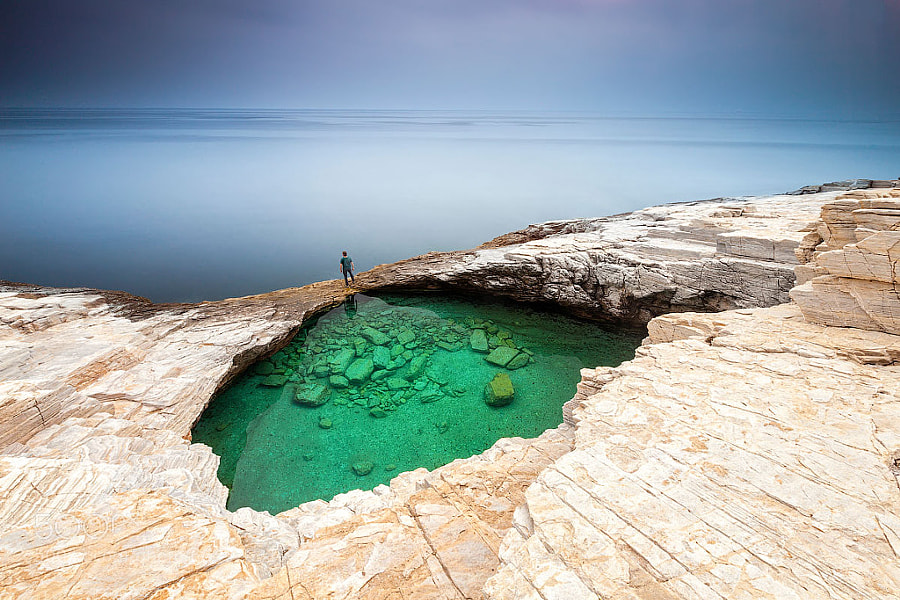
    Photograph Green Hole by Evgeni Dinev on 500px

    Green Hole by Evgeni Dinev on 500px

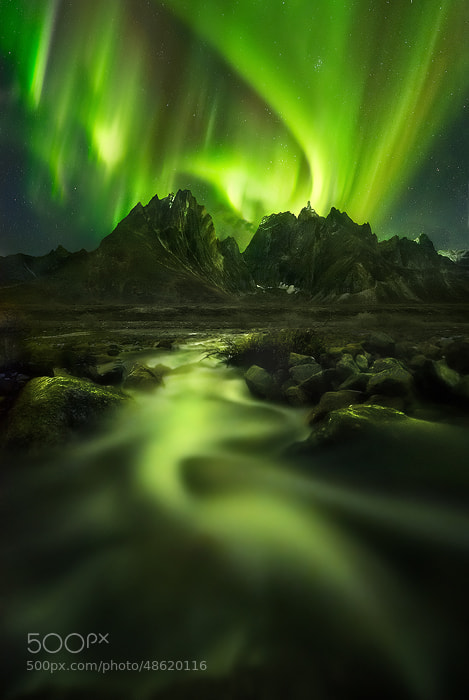
    Photograph Peaks of the Lights by Marc  Adamus on 500px

    Peaks of the Lights by Marc Adamus on 500px

    Photograph *** by Dmitry Marchenko on 500px

    *** by Dmitry Marchenko on 500px

    Photograph *** by Laura Pashkevich on 500px

    *** by Laura Pashkevich on 500px

    Photograph Portrait of An Alien 1 by Nhut Pham on 500px

    Portrait of An Alien 1 by Nhut Pham on 500px

    Photograph Hidden Waterfall by Danny Seidman on 500px

    Hidden Waterfall by Danny Seidman on 500px

    Photograph Light Beams by Javier Acosta on 500px

    Light Beams by Javier Acosta on 500px

    Photograph .... by ????????  ??????? on 500px

    …. by ???????? ??????? on 500px

    Photograph Night bamboo by Ryusuke Komori on 500px

    Night bamboo by Ryusuke Komori on 500px

    Photograph Path of life by Janek Sedlar on 500px

    Path of life by Janek Sedlar on 500px

    Photograph well wrapped by Sonja Probst on 500px

    well wrapped by Sonja Probst on 500px

    Photograph The Green Lantern by Nagesh Mahadev on 500px

    The Green Lantern by Nagesh Mahadev on 500px

    Photograph fighting !!! by Itamar Campos on 500px

    fighting !!! by Itamar Campos on 500px

    Photograph kiwi bubbly by Tommy Gamboa Flores on 500px

    kiwi bubbly by Tommy Gamboa Flores on 500px

    Photograph 90/365  How Many Ways Can You Slice a Kiwi? by Monika Bigelow on 500px

    90/365 How Many Ways Can You Slice a Kiwi? by Monika Bigelow on 500px

    Photograph Grasshopper Green by Lorraine Hudgins on 500px

    Grasshopper Green by Lorraine Hudgins on 500px

    Photograph Little Green Tree Frog by Lorraine Hudgins on 500px

    Little Green Tree Frog by Lorraine Hudgins on 500px

    Photograph Gorging On Grasshopper by Lorraine Hudgins on 500px

    Gorging On Grasshopper by Lorraine Hudgins on 500px

    Photograph Rose-ringed Parakeet by Doron Hoffman on 500px

    Rose-ringed Parakeet by Doron Hoffman on 500px

    Photograph Hidden Mode by Suradej Chuephanich on 500px

    Hidden Mode by Suradej Chuephanich on 500px

    Photograph Mojito by Natasha Breen on 500px

    Mojito by Natasha Breen on 500px

    Photograph Green apple by Alex Koloskov on 500px

    Green apple by Alex Koloskov on 500px

    Photograph Green Apple by Alexander Zachen on 500px

    Green Apple by Alexander Zachen on 500px

    Photograph Self shadow | Laser by Xavier Paillard on 500px

    Self shadow | Laser by Xavier Paillard on 500px

    Photograph Jagermeister Shot by Andrew Jack on 500px

    Jagermeister Shot by Andrew Jack on 500px

    Photograph Laser through a glass  by Emil Eddie Andersen on 500px

    Laser through a glass by Emil Eddie Andersen on 500px

    Photograph My Greeny Eyes..... by Vincent Budi Darmawan Sinaga on 500px

    My Greeny Eyes….. by Vincent Budi Darmawan Sinaga on 500px

    Photograph I'm Lucky Because I Have You by Niko Vass on 500px

    I’m Lucky Because I Have You by Niko Vass on 500px

    Photograph Clovers by Redcup2 on 500px

    Clovers by Redcup2 on 500px

    Photograph Denisa by Vladimir  Dumbrava on 500px

    Denisa by Vladimir Dumbrava on 500px

    Photograph Al otro lado. / The other side. by Miguel Ángel Sánchez-Guerrero Ros on 500px

    Al otro lado. / The other side. by Miguel Ángel Sánchez-Guerrero Ros on 500px

    Photograph ## bicycle | | by Paolo Giraudo on 500px

    ## bicycle | | by Paolo Giraudo on 500px

    Photograph Door by Maria Muhtarova on 500px

    Door by Maria Muhtarova on 500px

    The post A Selection of Photos with a Green Theme by Darlene Hildebrandt appeared first on Digital Photography School.


    Digital Photography School

  • Collaboration – 8 Ways to Work With Other Photographers

    In an industry where marketing strategy and professional branding are needed to survive and to “make it” fiscally, we are missing something that should define our artistic craft. Just like in any other industry, collaboration is not an ideal that limits photographers, but one that can propel us personally and professionally. Understanding that photography is not usually seen as a “team sport”, how can we collaborate with each other while retaining our individuality as visual artists?

    Here are 8 ways to work with other photographers

    #1 Photos – create something together

    Photos

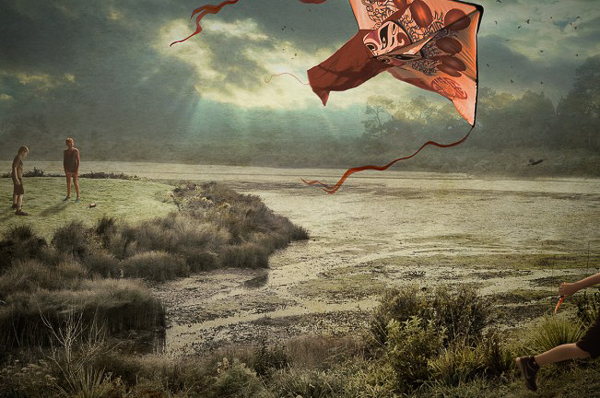
    The Kite (created by Francisco Diaz and Deb Young)

    To varying degrees, we are each protective of our images. We watermark. We utilize Google’s image search function to ensure that our work is not being borrowed. We even occasionally check to see that the photographer down the road is not emulating our brand, or photographic style. Yet, with a bit of deep thinking and reflection, we should understand that there is little in the photographic world that is fresh or new. Realizing this, we are able to detach a bit from our work and open our minds to the possibility of collaborating in the production of photographs.

    One example of collaborative creation can be found in the work of Francisco Diaz (USA) and Deb Young (New Zealand). The pair work continually on their appropriately titled The International Collaboration Project that crosses borders and photographic norms. Frank “wondered if disparate individuals from countries halfway around the world could work together in real time as a positive model for creation rather than destruction.” Diaz and Young’s project proves that not only a positive model of creation exists, but that photographers can work together to produce meaningful imagery collaboratively.

    #2 Assist another photographer

    Owning your own photography business has many perks. Yet, working for someone else does not mean that you have degraded yourself or your position as a pro shooter. Working for someone can be likened to helping. By assisting a fellow photographer, you not only have the chance to learn a new technique, you have the opportunity to give back to the photographic community. With the right attitude, experienced shooters can prove to be amazing assistants and can aid their comrades.

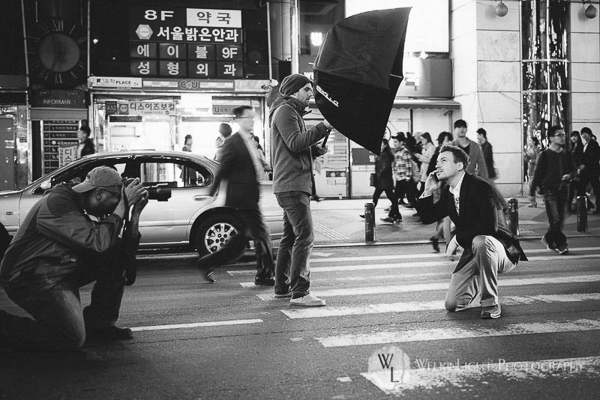
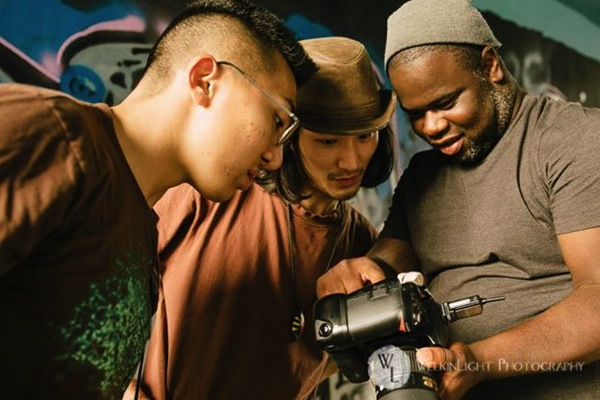
    Assist

    Photo courtesy of Welkinlight Photography

    #3 Pose for another photographer

    You don’t have to be a hundred pound, six-foot bombshell to be a model. Posing for a fellow photographer is incredibly helpful for both you and the shooter. Your collaborator will be able to test new techniques (such as posing and lighting) with a patient model. Moreover, as a photographer, you will be accepting, and let faux pas like chimping (reviewing the screen after every click of the shutter) slide. Perhaps the most important perk of modelling is that you get the opportunity to see how your own clients feel posing and being directed by a photographer. This empathetic exercise will have immediate benefit as you transition back to photographer.

    Model

    Glen Riley of GTR Photographic Images modelling

    #4 Constructive Critique

    Fairly regularly, friendly photographers and I sit down with a coffee or beer to share and critique our recent work. In addition, each participant shows work that they are currently inspired by. In this way, members of the group gain valuable feedback from their respected peers, and have the chance to view their work from an alternate perspective. Additionally, there is an opportunity to learn about inspirational industry professionals (or hobbyists). By constructively acknowledging one another’s work, we collaboratively prompt each other to improve our craft.

    #5 Trade services with another photographer

    Every weekend we clean and pack our kits to meet clients for sessions, or to head out to shoot personal work. Yet, when was the last time the camera was pointed at you and your loved ones? Sure, quality photographic services can be expensive (just check your own pricing guide). Why not reach out to other photographers and propose trades? Fellow photographer Dylan Goldby (Welkinlight Photography) and I do just that. We both receive portrait packages of our loved ones that would normally cost hundreds of dollars. Yet, with a collaborative mindset, those lifestyle packages become free.

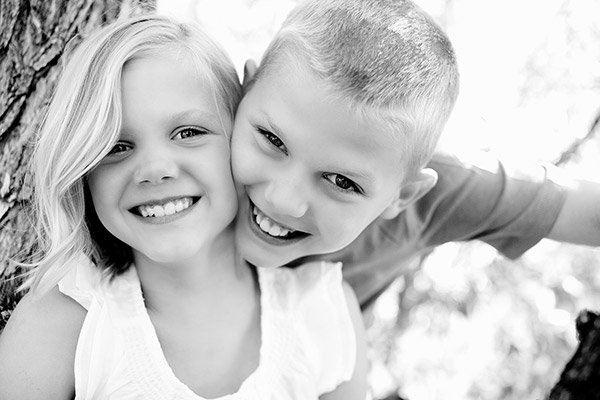
    Trade

    Photo courtesy of Welkinlight Photography

    #6 Send referrals to other photographers

    It is important to try multiple genres of photography (landscape, architecture, lifestyle, fashion, nudes, etc.). However, if you have already honed your craft and identified your photographic niche, don’t gobble up every assignment that comes your way. If approached by a client but your “competition” shoots the genre or project better than you, send the client their way. I repeat, send your competition assignments! I promise that practicing this habit will come back to benefit you in the end. Your competition will remember your kindness and return the favor. Generally speaking, those photographers who are considerate of their colleagues have an easier time filling their calendar.

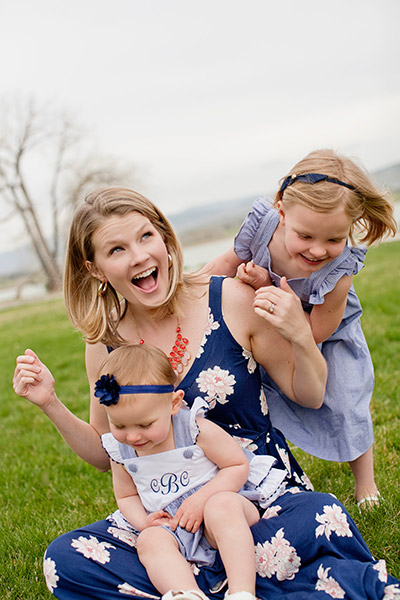
    You Are Soft

    Portrait of a client that was referred to me by a fellow photographer

    #7 Share – gear and links

    Gear is expensive and anyone with GAS (gear acquisition syndrome) can testify that it is easy to see a zero bank account balance with one trip to B&H or your local camera store. There is a more economical option of renting gear from a photographic supply store, or better yet, borrow gear from fellow photographers. Need a Wescott Apollo Orb for a studio session? Simple, ask a fellow photographer. Keep in mind that it will soon enough be your turn to lend.

    Hint: Under no circumstance should you lend gear to shooters you don’t trust or know well. Also, be sure to add extra care when handling gear that is not yours.

    Yet, sharing isn’t limited to material goods. From name-dropping in casual conversation, to displaying the work of others on your Facebook photography page, spread the work of others. By sharing the work of fellow photographers, you are helping generate camaraderie and showing that you are not solely self-interested. An excellent model of this practice can be found in the fine art photographer Mark Eaton. Pulling up Mark’s blog, it is immediately obvious that Mark cares just as much about supporting his fellow photographers, as he does his print sales.

    Vision Reduced by Mark Eaton

    Vision Reduced by Mark Eaton

    #8 Teach

    When was the last time you taught someone something? There is an indescribably satisfying feeling gained when you share knowledge. Let’s face it. Everything we know about photography, we were taught. There is no such thing as a “self taught” photographer. Learned about lighting on YouTube? Guess what, a fellow pro took the time to make that YouTube tutorial.

    We each have the responsibility to pay knowledge forward. Teaching photographic skills and strategies to others will not increase competition (remember, it takes more than technical expertise to distinguish an accomplished photographer). Take an amateur, or less experienced photographer, on a photo walk. Write a tutorial detailing a technique you use. Instruct a workshop at a local community center. Who knows, you might enjoy teaching so much that this aspect of collaboration becomes part of your business plan. Examples of photographers turned teachers can be found in the great workshops offered by Flash Light Expeditions or the tailored Southeast Asian tours led by fellow dPS contributor Etienne Bossot.

    Teach

    Students learning at a course offered by Flash Light Expeditions

    While many of us feel that photography and artistic creation are solitary actions, we should be careful not to isolate ourselves in our vast industry. No man (or woman) is an island. By collaborating with fellow photographers, the opportunity to grow, both personally and professionally, is limitless.

    Have you tried any of these things? Do you have other ideas of tips on how to collaborate? Please share in the comments below.

    The post Collaboration – 8 Ways to Work With Other Photographers by Andrew Faulk appeared first on Digital Photography School.


    Digital Photography School

  • Six Ways to Take Care of Your Creative Spirit

    I like photographers. Some of my favorite people and closest friends are photographers. In general, I find us to be a likeable bunch: witty, intelligent, wildly attractive. I also find that we reside in a grey area where we aren’t quite regarded as artists. We are the redheaded stepchildren of the art world, and I can say that because I both am a redheaded stepchild and have a redheaded stepchild. Truth be known, she is the easiest kid of the bunch. She pulls no punches, just tells it like it is. Much like photography.

    lynsey_mattingly_1

    But we are artists! As much as any painter or sculptor, or person that is covered in bronze paint and stands as still as a statue on a street corner. Have you seen these people? My eyes water just thinking of the shower they have to take every night when they get home from work. I have always been grateful that photography is fairly low on the mess scale. So instead of showering off bronze paint for hours, or ceremoniously ridding the clay from our hands, here are six ways you can care for and nurture your creative artist soul.

    Take care of your eyes

    When I get home from a long shoot, I always complain that my eyeballs hurt, and they do! It’s not that they are dry or that something is wrong with my vision, it’s just that after being on high alert for hours, my eyes are stressed out. So much so that I actually saw an eye doctor to make sure that I wasn’t going to need to have my eyeballs removed anytime soon. Do you know what the doctor told me? That I need to rest my eyes before and after a shoot just like a professional baseball pitcher would rest his arm before a game. For some reason having an actual doctor, with a high degree in medicine and lots of fancy initials after his name, telling me this, made me actually listen. I’ll save you the office visit; be good to your eyes. They are the only lenses you can’t replace.

    lynseymattingly_4

    Have other hobbies

    Like many pros, I started photography as a hobby. I am the classic “MWAC” (Mother With A Camera), having a career that’s spanned a decade, but rooted from pictures I took of my own children, with a fancy camera I didn’t know how to operate at the time. My former mother-in-law told me I took nice pictures and I figured if she said that, considering that she hated everything else I did, they must be fairly good.

    I then immersed myself in photography, reading every blog, shooting every single thing my kids did in hopes that it would be portfolio building. Photography was what I lived and breathed. It’s the only thing people knew about me, but it wasn’t enough. One day, pushed past the brink, frustrated and burnt-out, I sold all of my back-up equipment and extra lenses in a week and had convinced myself, and everyone else, that I was never going to do it professionally again. I kept my Canon 5D and 50mm f1.2L, thinking that I would want to take pictures of my kids someday with something other than the camera on my iPhone.

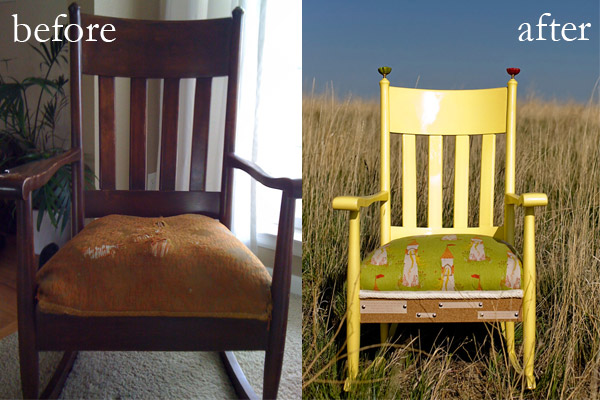
    One outlet is not enough for the average creative person. You owe it to yourself, and to your photography, to be great at something else. Or to be really horrible at something else, but regularly try something else. I make chairs. I find old chairs in flea markets or on the side of the road with “free” signs and I bring them home, let them sit in my garage for months or longer, and then rehab them with new ideas and fresh materials. Sometimes I sell them, sometimes I give them away, and sometimes they turn out really awful and I put them out in my yard with a “free” sign. The point is that this gets out all of my creative energy, and when I am stuck in a photography rut, I make a chair. When a chair frustrates me, I grab my camera.

    lynsey_mattingly_chairs

    Take Chances

    One of my first national publications only happened because I contacted a celebrity that lived a few hours away, who had just had a baby, and asked if I could take her pictures for free. I honestly thought she wouldn’t even respond, assuming she even got the email, because I did some crazy research to even find an email address that might be hers. Not only did she respond, and say yes, but she actually had two publications that were wanting to buy photos of her and her new family. There’s opportunity and there’s flat-out luck, and when you strike both you have a say in your own destiny.

    I had been taking pictures professionally for four years, but this was my first huge break and having an international publishing gig, and continuous contacts, has opened doors for me, no doubt. Put every cliche about trying: not knowing until you do, you’ve got nothing to lose, etc., into a pot, and stir. It turns out our parents were right, and all of those silly sayings are true.

    lynseymattingly5

    Stop Comparing Your Work

    When I first became interested in portrait photography I was obsessed with this one photographer’s blog. Not just because her images were beautiful, but also because I loved her words. We had similar backgrounds and a similar style, and when she talked about her life outside of photography, I understood. When she shot images that were different, I got it. Had she sent me a note before study hall, oh how I would have checked every single box. The only thing keeping me from hanging out on her front lawn confessing my profound crush was about a thousand miles. I was infatuated; with her photographs, her business, her life, her success. I wanted it for myself. And because of the similarities, I found myself doing things the way she did, hoping for, and sometimes even assuming, the same outcomes. I wasted a great deal of time trying to align my path with hers and holding her work in a higher regard than my own.

    A decade later and my business is, my by own account, every bit as successful as I thought hers seemed. But it is not the same. Until I realized that what worked for her wasn’t always going to work for me, and that perhaps her end goal was different than mine, I wasn’t in any way being inspired by her. My obsession with a woman I hadn’t even met at that point was my focus (and yes, I would later meet her, and boy what a disappointment that was, is best saved for another article). No one else’s tips, ideas, or work can be your focus. Be inspired, yes, but don’t let jealousy, or in my case, crazy obsession, get the best of you. Your images are yours, and they can be whatever in the world you want them to be, so long as you don’t run them through another photographer’s filter.

    lynsey_mattingly2

    Don’t Stop Taking Snaps

    When you are a professional photographer, or perhaps just a really good photographer, it’s easy to put extra scrutiny on your everyday snapshots. The pictures you take on your cellphone or with a Polaroid or point-and-shoot – a pretty landscape, a funny face of a friend, the loaf of zucchini bread you just baked that came out of the oven poofy and golden brown. Those shots are easy to over-think, to obsess over, or to give too much time and attention to, and miss the very point of taking them.

    I find myself checking the background when I take pictures of my cat. The world doesn’t need perfect pictures of my cat. I don’t need perfect pictures of my cat. The internet doesn’t even need perfect pictures of my cat (I checked). Let the snapshots be snapshots and view them completely different than your “work” so you don’t tire of doing the everyday picture taking that was likely what gave you a love of photography.

    lynseymattingly_halloween

    Respect Your Gift

    That’s what photography talent is – a gift. You have been entrusted to all its amazement whether you are just beginning, doing it professionally, or as a hobby that enables the creative piece of you to speak. You’re here on this very site, reading about photography, because photography calls to you in some way, due to your natural ability. Treat your gift with compassion, cut yourself some slack when needed, and allow yourself as many periods of rest as you do challenges. I was never a cheerleader and getting sappy kind of freaks me out, so when I say that you (yes, YOU) are a creative force to be reckoned with, you know I mean it.

    What’s something you do to take care of your creative spirit?

    lynsey_mattingly3

    The post Six Ways to Take Care of Your Creative Spirit by Lynsey Mattingly appeared first on Digital Photography School.


    Digital Photography School

  • The New Photographer’s Ephemeris Desktop Beta Version Announce

    The Photographer’s Ephemeris for Desktop: All Change!

    Some important news for users of The Photographer’s Ephemeris (TPE) for Desktop: on 2 September 2014, Google will switch off the Google Maps for Flash API. On that date TPE for Desktop will stop working.

    When TPE for Desktop was first launched in 2009, we still lived in a pre-iPad world and Steve Jobs had yet to write his thoughts on Flash. Building on Adobe AIR provided a convenient cross-platform technology that allowed users on Windows, Mac and Linux to run the same application.

    Since then, the popularity of Flash has declined significantly and Adobe AIR was repurposed towards mobile development. It has served TPE for Desktop well, but it’s time for a change.

    A New Photographer’s Ephemeris Web App

    01-new-tpewa-screenshot

    The new web app is already live

    Happily, this hasn’t come as a total surprise! We have a new TPE for Desktop ready to step into the breach. The new TPE web app is already live and available at app.photoephemeris.com. You can start using it right now. We’re keeping it in Beta until September 2nd, and will continue to refine it over the coming weeks as you send us your feedback.

    The web app runs in a variety of modern browsers. It has been tested in the current versions of Safari, Chrome, Firefox, Internet Explorer (11) and Opera. As with the old TPE, it is designed for use on desktop computers or laptops equipped with a mouse or track pad.

    One advantage of the web app: you no longer need to install additional software or to continually update to a new version of Adobe AIR. You get the latest version automatically each time you visit the site.

    New Features

    TPE has a loyal following and this is going to be a big change for some. The user interface may look different, but the new web app includes the same functionality as the old desktop version and comes with a number of enhancements.

    Celestial events for the day are displayed in the events timeline below the map. At a glance, you can see the day’s information chronologically.

    A chart of the sun, and moon’s, journey throughout the day is displayed at the bottom of the screen. Scrolling the time slider changes sun and moon information relative to your selected pin position and date.

    02-600x373-tpewa-graphic

    Same features as the old desktop version, but with some great additions.

    New features include:

    • Sharing: look up locations; set date and time, then share the URL of the web page
    • Saved locations can be used to set the grey pin position as well as the red – great for planning both camera and subject placement
    • Six degree shadow circle: this new feature shows sun and moon shadows, and highlights, when the sun or moon sit between +0° and +6° above the horizon – times when there’s often good light (so-called “golden hour”) or when the moon can be photographed against features in the landscape
    • Use Google Street View directly from the map
    • Timeline and chart toggle on and off to increase map “real estate” – great for users with small screens
    • Support: you can submit feedback or a support request directly from the app

    Look after your locations!

    Locations stored in the old desktop version can be exported and saved as a KML file, and then imported into the new web app. We’d encourage you to do this now ahead of the September 2nd deadline.

    Once imported, the web app saves locations in your browser’s local storage. In order to ensure you don’t inadvertently lose your locations, we advise exporting and saving the KML files as backups. Look after your saved locations the way you look after your photos.

    It’s time to switch

    03 old tpe desktop screenshot

    Say goodbye to the old TPE desktop app, it’s time to switch (caption)

    Just like the original TPE for Desktop, the new desktop web app remains free to use.

    You can send feedback to TPE at any time using the support tab in the web app. TPE is used by so many professional and amateur photographers around the world, and this is a great opportunity for you to help shape this useful tool.

    We’re adding updated tutorials to the TPE website in the weeks leading up to September 2nd. There is also a Quick Start Guide you can download directly from the web app page. It outlines the major functionality along with a list of useful keyboard shortcuts.

    Go ahead and try it out today!

    Get The Photographer’s Ephemeris available free of charge. Tutorials are available.

    Here’s a few dPS articles that mention TPE so you can try it out:

    • It’s all about the light: The Photographer’s Ephemeris
    • Finding New Photography Locations Just Got Easier With ShotHotspot
    • 8 Simple Guidelines for Capturing Spectacular Sunrise and Sunset Images
    • 5 Hot Tips For Improving Your Summer Photography

    The post The New Photographer’s Ephemeris Desktop Beta Version Announce by Stephen Trainor appeared first on Digital Photography School.


    Digital Photography School

  • 10 Lessons From Steve Jobs for Your Photography Brand

    Steve Jobs forever will be remembered as a digital visionary – he was the one who brought poetry to the microchip. He is a legend these days. All of us can’t be Steve Jobs, but we can learn some lessons from his extraordinary life and career to parlay them into the photography business. Steve Jobs took a near-bankrupt Apple and Continue Reading

    The post 10 Lessons From Steve Jobs for Your Photography Brand appeared first on Photodoto.


    Photodoto

  • How to use the Art of Self Reflection to Make Better Photos

    Have you ever “hit the wall” with your photography? Do you sometimes get the feeling your images aren’t improving as much, or as fast as you’d like? Have you ever thought about what you must do to cross that chasm from being a pretty good photographer to being a WOW photographer?
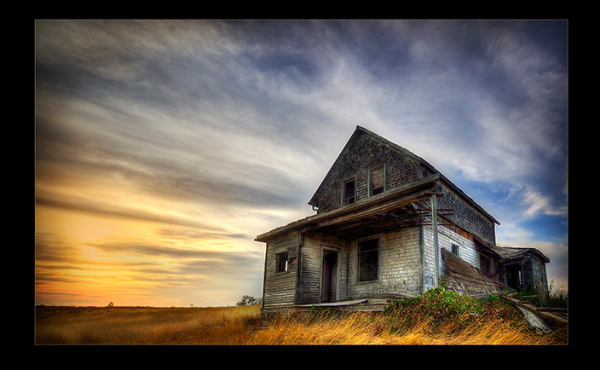
    Is this a WOW shot? How do you know?

    Is this a WOW shot or not? How do you know?

    ONE SKILL FITS ALL

    There’s really only one ability that you need to develop to help you advance your talents, and it will serve you well in any creative pursuit, not just your photography. This skill is reflection.

    No, not THAT kind of reflection (although reflections in images can be captivating), I’m talking about introspective reflection, the thoughtful self-analysis of your work.

    • What worked well in the image?
    • What is not working?
    • Was your vision translated accurately into your photo, did you achieve your goals?
    • Is it a WOW shot?
    • How can you tell?
    • How can you be objective about your own photos?

    Reflection is so important for improvement. Yet many aspiring and seasoned photographers alike, go out and shoot, come back to their computers and fire up Lightroom (or another image processor) and start editing. They edit until they have an image they like; save it, print it and share it. And that’s the end of the workflow. I’d like to encourage you to add reflection to your photographic post-processing methods.
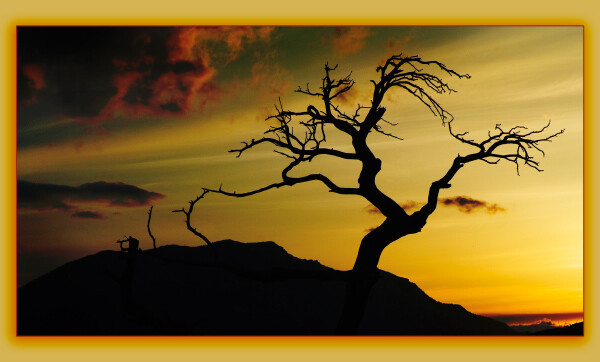
    dinosuar_sunset

    IT’S CRITICAL TO BE CRITICAL

    It’s not easy to be critical about one’s own creative work. Our hearts and souls are embodied in every shot we take and it can be difficult, if not almost impossible to be objective. But I have a handy and easy checklist, to help you critique your images. It’s fast, almost painless, and it works. You can use this checklist as well if your friends or other photographers ask you to critique their images. You can be objective, you can back up your opinion using the checklists items, it  works for almost all genres of photography and it will help you fully absorb new information, and rapidly advance your photography skills.
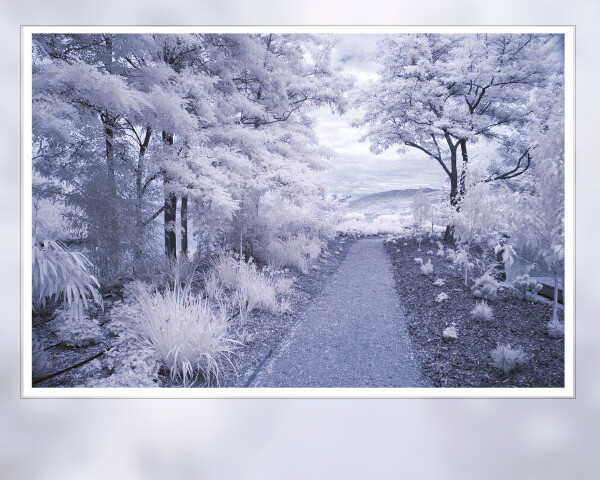
    PPOCMB_comp1-copy

    BEING OBJECTIVE – THE CHECKLIST*

    This checklist will help you evaluate your images, and those of other photographers in an objective way. It’s the prefect way to reflect on your shots and absorb those things you did well. It also allows you to understand why an image isn’t working.

    Ask yourself:

    Does the image have:

    1) Impact

    This is the immediate feeling the viewer gets when they first see the image. Compelling images evoke laughter, sadness, anger, pride, wonder or another intense emotion.

    Reality Check: When you show someone your image, what is their immediate reaction? Do they instinctively take a breath, or inhale quickly? This is a good sign your image has made an impact.

    2) Storytelling

    Storytelling refers to the ability of the image to evoke imagination. One beautiful thing about art is that each viewer might collect his own message or read her own story in an image.

    Reality Check: WHAT is the story your image tells? This need not be complicated but perhaps as simple as one sentence. For the image Prairie Sundown, the old house above, is there a story in that photo for you?

    3) Creativity

    This is the original, fresh, and outward expression of the imagination of the maker by using the photographic techniques to convey an idea, message, or thought. Does your image display something in a very creative and original way?

    Reality Check: Have you ever seen an image similar to yours? Why is yours different and better than the similar one?
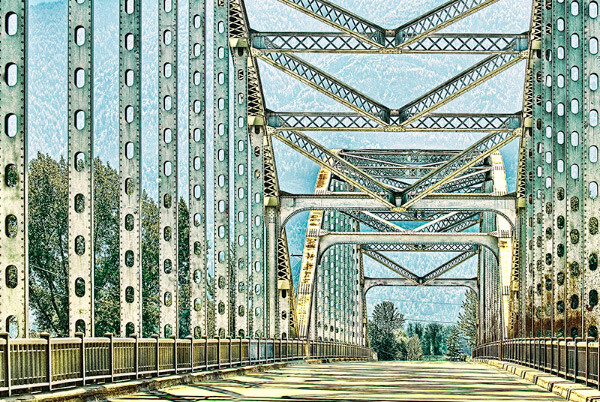
    dps_DSC4830W

    4) Style

    Style is defined in a number of ways. It might be a specific genre or simply recognizable as the characteristics of how a specific artist applies light to a subject.  It can impact an image in a positive manner when the subject matter and the style are appropriate for each other, or it can have a negative effect when they are at odds.

    Does your image show a sense of YOUR style? Describe your style? Look at the works of famous photographers and see if you can identify the elements that make up their style.

    Reality Check: What have you done in taking this image, or in post-processing it, that makes it uniquely YOUR image? Do you use a certain angle a lot of the time so people start to recognize certain images as being yours? This uniqueness is your style.

    5) Composition

    Composition is important to the design of an image, bringing all of the visual elements together in concert to express the purpose of the image. Proper composition holds the viewer in the image and prompts the viewer to look where the creator intends. Effective composition can be pleasing or disturbing, depending on the intent of the image maker.

    Does your image have leading lines that help the viewer come into your image? Is there enough contrast, pattern, white space, repetition, or tension to keep them looking once they are there?

    Reality Check: Have you used any rules of composition in this image (Rule of Thirds, Golden Triangle, etc.). Which one and why did you use this particular one? Have you purposely broken any rules? Which ones and why did you break them?

    6) Center of Interest

    This is the point, or points, on the image where the photographer wants the viewer to stop as they view the image. There can be primary and secondary centers of interest. Occasionally there will be no specific center of interest and the entire scene collectively serves as the center of interest.

    Reality Check: There is a clear and obvious centre of interest with no distracting elements; or the viewer can tell you in a second what is the point of interest. If they can’t then you must score yourself lower.

    7) Lighting (the use and control of light)

    Light is how dimension, shape and roundness are defined in an image. Whether the light applied to an image is man-made or natural, proper use of lighting should enhance an image.

    Have you used unique, or unusual lighting angles? Is the image taken at a time when the sun is NOT directly overhead or using flat light?

    Reality Check: The light is a key component of this image. If the light were different would the image be better or worse? If this image had been shot at sunset it would be a better image? If you could do better, score yourself lower for use of lighting.

    8) Subject Matter

    The subject is appropriate to the story being told in an image.

    Reality Check: Is your subject realistic for the story it is telling? Is the symbolism evident? Is there continuity between the logic of the elements you’ve used in your image?
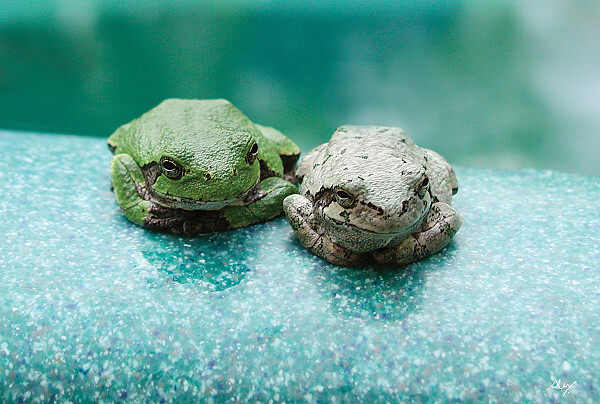
    frogbuddiesW

    9) Color Balance

    Color balance supplies harmony to an image.  An image in which the tones work together effectively supporting the image, can enhance its emotional appeal. Color balance is not always harmonious and can be used to evoke diverse feelings for effect.

    Reality Check: The tones and colors you have used in your image are coherent with the type of emotion you want to convey. Dark, shadowy, purples, blues, deep reds etc., evoke a different emotion than whites, pastels and semi-saturate tones. Is your use of color consistent with your story?

    10) Technical Excellence

    This is quality of the image itself as it is presented for viewing. Sharpness, noise, pixelation, exposure, printing, mounting, and correct color all speak to the qualities of the physical print.

    Reality Check: The extreme reality check for this is viewing your image at 100% in Photoshop or other image editor. Is your subject sharp at 100%? If so then it’s sharp. Is there visible noise in the shadows? If yes your exposure is off. Are there “blown-out highlights”, if yes your exposure is off. Check your histogram for clipping. If your images are of people, are the skin tones pleasing and natural?

    11) Technique

    Technique is the approach used to create the image. Printing, lighting, posing, paper selection (if printed) and other elements are part of the technique applied to an image.

    Reality Check: Is everything you have done to create and make this image technically good?

    CRITIQUE ME

    To help you get the hang of this, I would be delighted to accept your objective assessment of the images in this article, using the points from checklist of course.

    Here are a couple more for for you to reflect on, and critique:
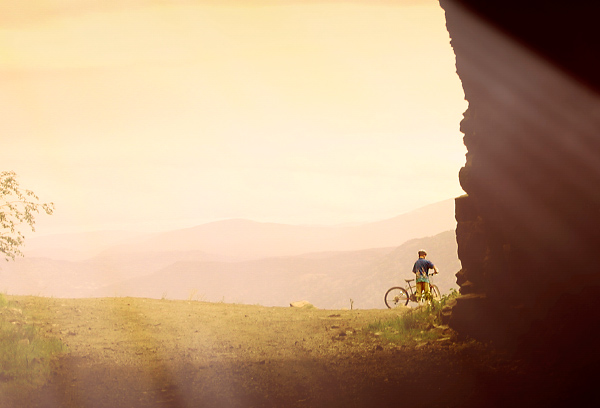
    cave-Ver-3-small

    What’s working in this image? What’s not?
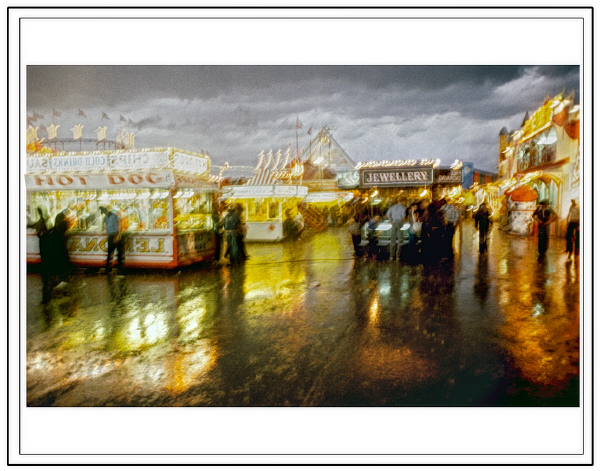
    Does this image have impact, storytelling, anything else? WOW shot or not?

    Does this image have impact, storytelling, anything else? WOW shot or not?

    Once you have the “feel” for this, give the Reflection Checklist a try on some of your images, and feel free to share your self assessment with us here. You can post your checklist results and images in the comments section.

     You can even download a PDF of the Photographer’s Reflection Checklist with a scoring guide here.

    * This checklist has been adapted from the PPA’s 12 Elements of  Merit Image and used with their permission.

    The post How to use the Art of Self Reflection to Make Better Photos by Alex Morrison appeared first on Digital Photography School.


    Digital Photography School
  • Step by Step how to Brighten the Walls in Your Indoor Photos

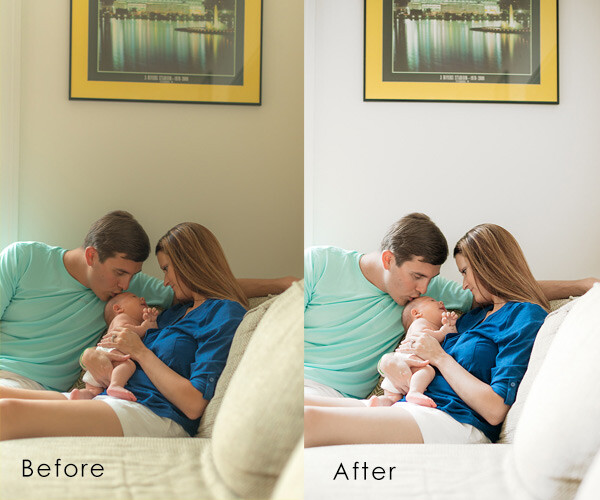
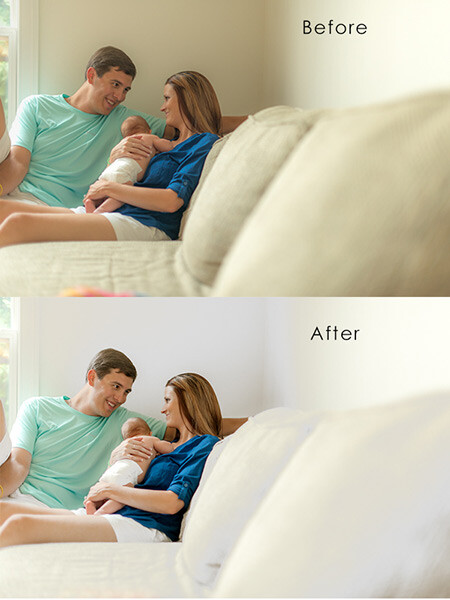
    “I swear, the walls were white!” you exclaim as you look through indoor photos taken from an earlier shoot, that now appear to have an annoying yellow tint over everything. Sound familiar? Don’t worry, you’re not crazy. This is a common frustration, photographers of all experience levels face due to what’s referred to as “color casting”. Color casting is simply the effect of light striking different surfaces and bouncing back other colors into your camera’s sensor. Though annoying, it’s also relatively unavoidable without careful calculation and additional equipment.

    Before.After2_.jpg

    Powerful photographs are created before, during, and after the click of your camera. Sometimes, especially when it comes to photographing wiggly, unpredictable children, you don’t exactly have time to calibrate with a gray card, adjust your camera settings, or take a test shot. If you’re not already bored by the thought of it, by the time you actually work through this process, the moment has passed, and you’re still fiddling with a camera instead of chasing after your little subject.

    Since some of the best natural shots occur in the comfort of your home, it’s important to make sure the walls surrounding you aren’t obstructing the emotion you could be catching with awkward color casts. Even though grasping skills like proper exposure, white balance settings, and other in-camera techniques are key to creating good photos, they are only pieces of the greater puzzle. Sometimes, it’s the things like communicating effectively with your subject, learning to naturally direct posing, and mastering basic post-processing tricks that truly take that in-camera image and reveal the emotion behind it. Luckily, correcting dingy-wall syndrome is a quick and easy way to improve your indoor shots. With just a few quick steps in Photoshop, you can restore brightness to your walls and subjects and drastically improve your shot.

    Before

    Above is the image I started with. The walls were white and the couch was tan, but the color cast over the image makes everything appear dingy. This is what we’re working towards:

    After

    How to fix this – steps:

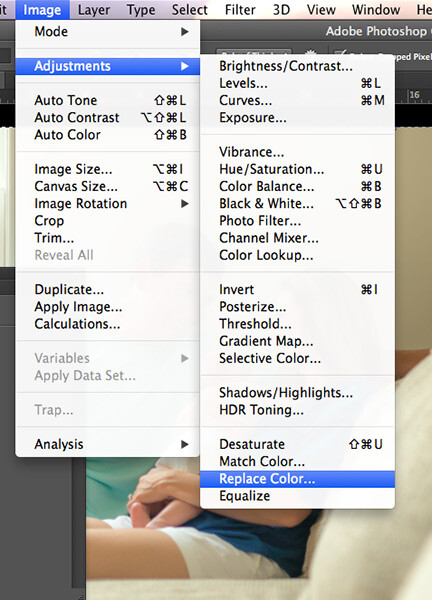
    Step one

    Operating on a new layer, navigate to the ‘Replace Color’ tool by clicking on Image > Adjustments > Replace Color

    ReplaceColorSS

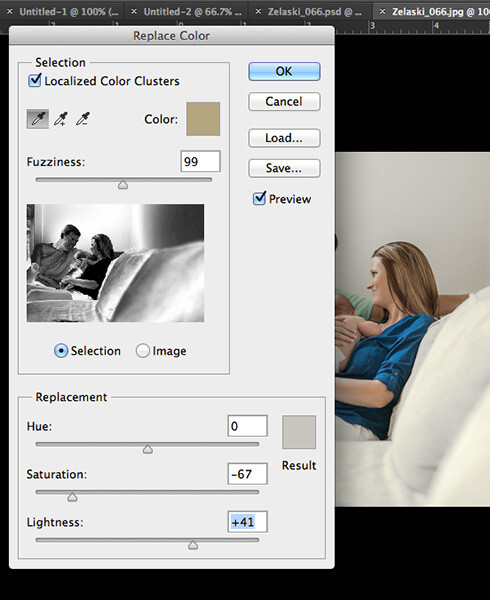
    Step two

    A dialog box will pop up. Make sure the ‘Localized Colors’ box is checked and the ‘Eyedropper’ tool is selected. Sample a section of the wall from the original image you want to adjust. With the ‘selection’ option active, your preview shows what color will be affected by with adjustment in white. Play with the fuzziness slider until your preview shows the best selection. It’s okay if it picks up some colors from other parts of the image you don’t want to adjust; we’ll go back and fix that later.

    Option: You can also select just the portion of the image you want to change by using the Quick Select tool.

    Step three

    Slide the saturation bar to the left to decrease the color tones, but not too far that it creates noise (grain) from the contrast. Slide the ‘lightness’ bar to the right to adjust the brightness of your white, but again, not so much that it creates unusual contrast. Use your judgment based your particular photo to determine the levels that achieve the best result. Click ‘Ok”.

    ReplaceColorSS2

    Step four

    If your fuzziness picked up any samples from areas that you did not wish to change, like faces for example, simply select the ‘Eraser’ tool and paint over those areas to restore the original color. You can adjust the opacity of your eraser to control the amount of color you wish to restore as well. (You can also use a layer mask to do this)

    That’s it! Now you can make any other changes or adjustments to the image. This one simple fix makes a huge difference in the impact of your images and takes less than a minute to complete once you get the hang of it. Normally, “I’ll fix it in post-processing” is not a great motto to adopt as a photographer and of course, you should aim to do as much in camera as possible. But hey, life is spontaneous! This quick little trick is an easy way for you to truly enhance the natural beauty of your indoor images and you’ll never have to worry about missing the shot again because of your in-camera white balance.

    Before After

    The post Step by Step how to Brighten the Walls in Your Indoor Photos by Leah O’Connell appeared first on Digital Photography School.


    Digital Photography School