Category: Photography

  • 10 Reasons Why a Pro is Using a Mirrorless Camera for Personal and Paid Jobs

    Image01

    Everyone can take a picture, but as photographers (professional or aspiring), we have the skill set and the tools to create great images in any situation. We have the ability to turn the ordinary into extraordinary through photography. As the saying goes, the shoemaker’s kids have no shoes, and similarly, we often don’t put the same emphasis on images for ourselves and our family as we do for others and their families.

    Personally I’ve always struggled with feeling like the “photographer” during personal affairs; I don’t feel right bringing a big DSLR, lens and flash to a family function, vacation or personal outing. Often this means that I either trust others to take pictures, or I take my own quick snaps with a point-and-shoot or with my iPhone.

    My wife and I welcomed our first daughter Ava last March, and as a photographer, I know the importance of documenting those young, tender moments, and how impactful it can be to tell the story of childhood through photography. At the same time, I didn’t want to be “that Dad” who is always lugging around a camera bag. Quick aside: if that’s you, that’s perfectly fine, it just doesn’t work for me personally. I wanted to get great pictures of Ava on vacation, I wanted to be in the pictures myself, I wanted to capture happy moments around the house and I wanted to document her first Christmas. All the while, I wanted to leave the “big guns” in the studio.
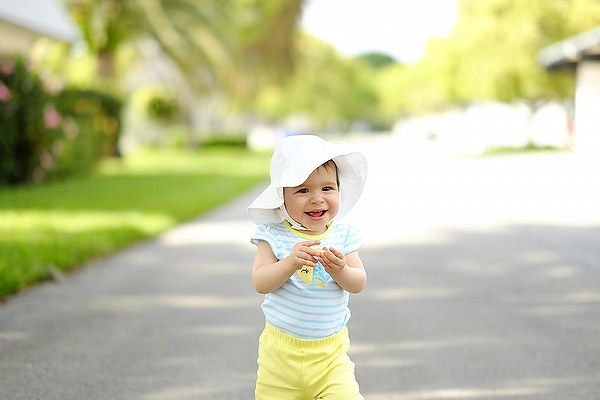
    Image02

    With my mirrorless camera (I use the Fuji X-T1, X-E2 and the X100S), I can still take those great images while not standing out as a photographer. In fact, all of the images in this blog post are taken with my Fuji mirrorless cameras, and you probably didn’t know the difference

    Creative Loop Versus Business Loop

    Let’s back-up to 9 years ago. My story of discovering photography is not all that different from most photographers. I got into it because I loved the creative side of photography: the art, the composition, the lighting and the medium’s storytelling ability. We all start out in a “Creative Loop” that is a cycle of being creatively inspired, practicing, educating ourselves, learning and then gathering feedback.

    Once you start out in business as a photographer, though, priorities often shift. As an entrepreneur, we have so many other aspects to think about outside of the creative process, such as marketing, pricing, branding, clients, workflow, customer service, and so on. We enter into the “Business Loop” that pulls our energy and attention away from the creative side.

    For me, after a few years of being a professional photographer, I was becoming recognized, awarded, and known for my skills as a photographer. I became comfortable with my creative abilities and therefore much of my focus shifted to the business side of being a photographer.

    Mirrorless Love

    In October 2013, I attended a workshop with world-renowned photographer David Beckstead where he taught his approach to light, shadows and composition. What inspired me the most though was David’s shooting style with his Fuji X-E1, and how it forced him to be purposeful, be intentional and slow down. From the moment I looked through the electronic viewfinder (EVF) and saw the ability to shoot in Black and White and see in terms of tone and mood. I was hooked.

    Fast forward to today and I am now shooting 60% of my professional work with my Fuji mirrorless camera, and 100% of my personal work with it. Here are the 10 reasons that I love shooting with a mirrorless camera.

    Mirrorless Photography Love #1: Intentional and purposeful photography

    I photograph mostly with my Fuji camera set to B&W mode and my Nikon full-frame camera set to colour, so when I am photographing, I am intentionally choosing to create an image in colour or B&W as I shoot. It is almost as if I am post-processing my images as I shoot. What I love most about this process is that it makes me think about these things before I press the button and it makes me photograph with greater purpose.
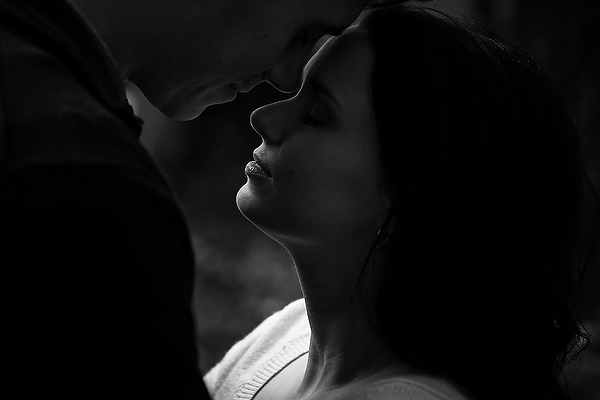
    Image03

    Mirrorless Photography Love #2: More thoughtful photography

    Admittedly, the processing and usage of most mirrorless cameras aren’t as “snappy” and quick as the high-end DSLRs, but I actually like that. My Fuji mirrorless cameras makes me more thoughtful and forces me to slow down and be more methodical about my compositions and timing. This has made me a better photographer with more intentional images and less “spray and pray” sequences.

    Mirrorless Photography Love #3: Seeing light, tone and mood

    The electronic viewfinder (EVF) in my mirrorless cameras opens up a whole new world of possibilities. You’re looking at a processed image as it’s happening, it’s “what-you-see-is-what-you-get”. This has several benefits:

    • You can see the image as you are capturing it, which means you don’t have to review and look at the screen (chimp) afterwards.
    • You can see the exposure as you’re creating it, so you can more accurately fine-tune your exposure and get it right in the camera with more accuracy.
    • In my case, where I shoot in B&W mode, it allows me to see that monochrome image as I’m making it so I am free from distraction of colour. It allows me to focus more on the light, tone and mood.
    • When I’m shooting in colour mode, I can see the image in its “enhanced” state – with saturation, contrast, tone and sharpening adjustments applied. Sometimes I’m seeing an image better than what it looks like in real life!

    Mirrorless Photography Love #4: Saves time

    It’s obvious to see how shooting with a mirrorless camera, and an EVF specifically, will save you a ton of time on the back-end of your workflow. Shooting with greater purpose, while seeing mood and light more effectively and making exposure adjustments as you shoot, will result in more refined images right out of the camera, which eliminates a lot of post-processing work.

    Mirrorless Photography Love #5: Low-profile presence

    The physical appearance of a mirrorless camera is closer to that of a point-and-shoot instead of a DSLR. This is a good thing if you’re a photographer, like me, who wants to “blend in” with a crowd and not stand out.
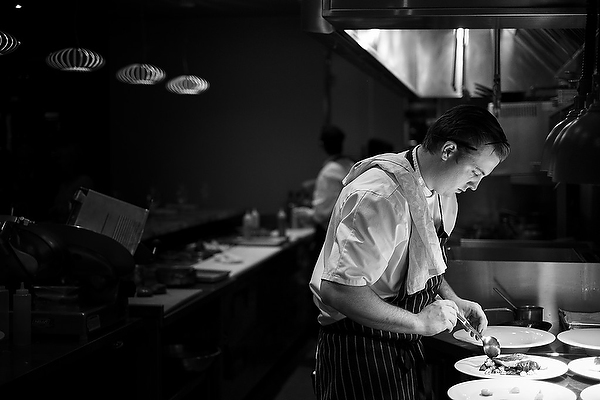
    Image04

    Mirrorless Photography Love #6: Lighter and smaller

    The smaller physical size also takes significant weight off of my shoulders and back, which I appreciate during a 12-hour wedding day. It also means that I can have a smaller camera bag. For the travelling photographer, you’ll appreciate the compactness as well.

    Mirrorless Photography Love #7: Being a part of the picture-making process

    This is highly subjective, but for me, the physical form factor of my mirrorless camera has a certain “feel” to it that makes me feel as though I am a part of the picture-making process. The raw, hard, mechanical and manual feel to my Fuji camera is so much more inviting and intimate. This inspires me to shoot differently and puts me in a different place creatively.
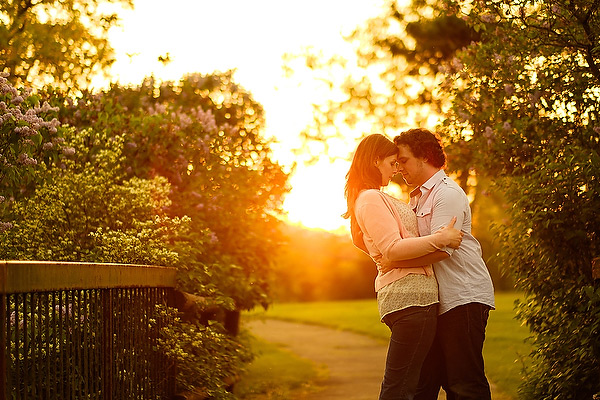
    Image05

    Mirrorless Photography Love #8: Improved autofocus

    The benefit of not having a mirror involved in the picture-making process means that there is less to go wrong in terms of autofocus. The accuracy of autofocus in mirrorless cameras is significantly better than DSLRs because of this. Secondly, because the mirrorless camera doesn’t have to rely on a separate phase-detection AF chip to focus, the focus points aren’t limited to the center of the frame. This means that your autofocus points have great coverage and more flexibility.

    Mirrorless Photography Love #9: Easier AF refinement

    The EVF in mirrorless cameras means a whole new world of possibilities with regards to manual-focus. Specifically, split-image and focus-peaking are huge benefits that make manual focus and AF focus refinement much easier with a mirrorless camera.

    Mirrorless Photography Love #10: More intimate subject engagement

    The LCD screen on a mirrorless camera is the same as the EVF, and therefore you can use them both interchangeably without limitation. Being able to use the LCD screen has a huge benefit in that it allows me to engage and have eye-contact with my subject when it’s needed.
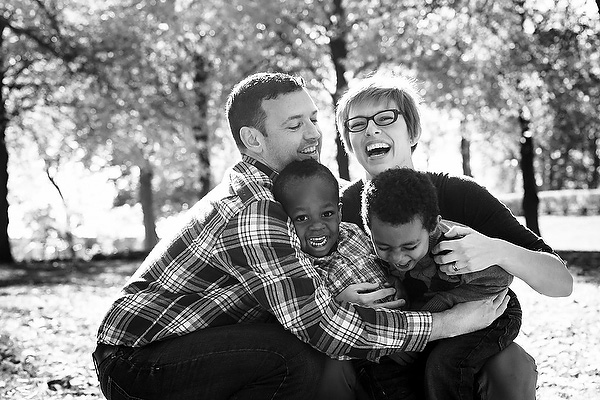
    Image06

    The Future of Photography

    What does the future of photography look like? Is mirrorless a part of it? I believe so. There are three main reasons why I feel that mirrorless cameras and the mirrorless market will shape the future of photography:

    Technology

    The technological gap between the mirrorless line-up and the DSLR line-up is narrowing. Already there are so many reasons that mirrorless cameras are better for many photographers, as I’ve outlined above. The remaining areas where DSLRs have the leg-up on the competition are diminishing. My estimate is that within the next two to three years, the mirrorless technology will have caught up, and in six to eight years, the only real option on the market will be mirrorless cameras.

    Innovation

    The attention that mirrorless cameras have been getting has done wonders for the photography industry. What I love most about it is that it’s no longer a monopoly, and competition ultimately fuels innovation. Every camera manufacturer needs to be thinking forward, and this will push the industry and the technology in a positive direction.

    Why Not?

    Lastly I ask – why not? Why shouldn’t mirrorless technology be a part of the future? Maybe I should ask this a different way – why do we need the mirror in cameras today? It’s an old technology that is clunky, outdated and unnecessary. If we can use the same sensors, have the same kind of processing power, have the same autofocus, and ultimately achieve the same kinds of images without the mirror, wouldn’t you just say that it’s one more thing to break or to worry about?
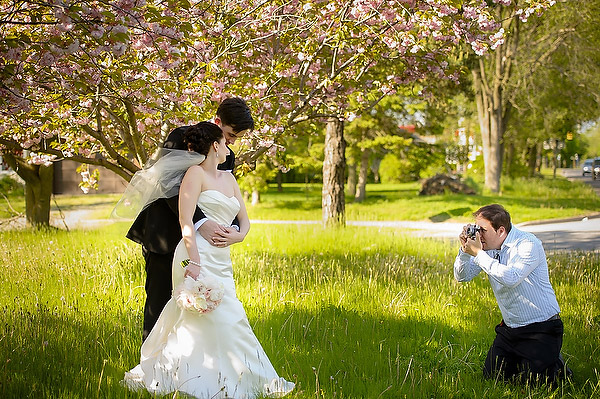
    Image07

    Further Discussion

    If the topic of mirrorless photography intrigues you and you’d like to further the discussion, I would love to talk! Please post your comment in the section below.

    The post 10 Reasons Why a Pro is Using a Mirrorless Camera for Personal and Paid Jobs by Bryan Caporicci appeared first on Digital Photography School.


    Digital Photography School

  • How to Convert Photos to Black and White in Lightroom

    Andrew’s book Mastering Lightroom III is on sale now at Snapndeals for 40% off. This is a limited time offer, grab it while it’s available.

    Black and white conversions in Lightroom

    Today I’m going to show you just how easy to use, and effective Lightroom is, for converting colour photos to powerful black and white images.

    The key to getting the best out of it is to use the Raw format rather than JPEG. The extra bit depth means they contain far more information for Lightroom to use. The end result is that you have more options and get smoother conversions.

    This article concentrates on global adjustments – those that affect the entire image (I’ll leave local adjustments to another article).

    There are two ways to convert an image to black and white in Lightroom:

    1. Set Treatment to Black & White in the Basic panel
    2. Go the B&W tab in the Color/HSL/B&W panel

    Let’s take a look at each of these in turn.

    Set Treatment to B&W in Basic panel

    A good way to start is with a colour image that has already been processed. Before you start, set Saturation and Vibrance to zero, and adjust the White Balance sliders to give a neutral colour balance (the Auto setting works well most of the time).

    Black and white conversions in Lightroom

    This preps the image for the conversion. Here’s my starting image.

    Black and white conversions in Lightroom

    And this is what it looks like with Treatment set to Black & White.

    Black and white conversions in Lightroom

    The next step is to refine the conversion using the Tone sliders. These are the most useful ones, working in order from top to bottom:

    Exposure – sets the overall brightness of the image. Adjust this first. If you started with a processed colour image, you may not have to.

    Contrast – sets the overall contrast. Most black and white images benefit from higher contrast than you would use for colour processing. Set Contrast second.

    Shadows – adjusts the darkest tones in the photo independently of the others. Use this to make the shadows lighter or darker.

    Highlights – adjusts the lightest tones independently of the others. Use it to make the highlights lighter or darker.

    With my photo I increased Contrast, moved the Highlights slider left to make the model’s skin darker, revealing texture, and the Shadows slider left to darken the shadows and add drama. Here’s what it looks like so far.

    Black and white conversions in Lightroom

    There are three other sliders you may find useful:

    Clarity – increases mid-tone contrast, emphasizing sharpness and texture. A side effect is that the image often becomes a little darker when you increase Clarity, so you may need to return to the Exposure or Shadows sliders to lighten the photo.

    My article Four Ways to Improve Your Photos With the Clarity Slider in Lightroom goes into the topic in more depth.

    White Balance – after you have used the other sliders, you can go to the Temp or Tint sliders and move them to see the effect they have on your conversion. These sliders change the colour balance in the original photo, which in turn alters the tones in the image. Experiment with these to see if they improve the tones in your image.

    These three images show the difference it can make. Moving the Temp slider altered the skin tones (see second image), and moving the Tint slider mostly affected the green background (see third image). The differences are subtle, you may have to look closely to see them.

    Black and white conversions in Lightroom

    Activate the B&W tab in the Color/HSL/B&W panel

    The second option for converting photos to black and white in Lightroom is to go straight to the B&W tab in the HSL/Color/B&W panel.

    Black and white conversions in Lightroom

    Again, it is a good idea to start with a processed colour photo with a neutral colour balance and Vibrance and Saturation zeroed.

    Black and white conversions in Lightroom

    The eight sliders under this tab let you make the tones corresponding to the colours in the original photo lighter or darker.

    For example, if you move the Blue slider left Lightroom makes any grey tones converted from blue darker. Move it right and it makes them lighter. The most obvious use of this slider is for making blue skies go dark and dramatic in black and white.

    Black and white conversions in Lightroom

    The other coloured sliders work the same way. Alternatively you can use the Targeted Adjustment Tool. To do so, click on the Targeted Adjustment Tool icon (see below red arrow on the left) and move the mouse over the grey tone you wish to adjust in the image. The Targeted Adjustment Tool icon and a cross-hair appear (see below, arrow on the right). Hold the left mouse button down and pull the mouse down to make the tones underneath the cross-hair darker, or up to make them lighter. Lightroom analyses the colours under the cross-hair and moves the appropriate colour sliders accordingly.

    Black and white conversions in Lightroom

    Be careful not to move the colour sliders too far or you will introduce unwanted artefacts and haloes into the image. The point at which this happens depends very much on the content of your photo. The best approach is to get in the habit of zooming to 100% and checking to make sure that there are no haloes around edges, and that the transitions are smooth in the affected colours.

    This screenshot shows what happens when you push the sliders too far (in this case the Blue slider to -58). The edge of the sculpture is marked by a thin halo that isn’t present in the original photo:

    Black and white conversions in Lightroom

    Note that the initial position of the colour sliders in the B&W tab depends upon a setting in the Presets tab in Preferences. If the Apply auto mix when first converting to black and white box is unticked, the sliders will be in their zeroed positions.

    If it is ticked, then Lightroom sets them according to what it calculates will make a good conversion. My preference is to have the colour sliders zeroed, and it’s what I advise you to do. If you’d like to see Lightroom’s conversion, you can press the Auto button at the bottom of the B&W tab at any time.

    Black and white conversions in Lightroom

    After you have finished in the B&W tab you can go to the Basic panel and make further adjustments with the sliders as explained above. Of course, if you elected to go to the Basic panel first, you can then go to the B&W tab to make changes there. In reality you may find yourself switching between the two panels as you refine the image.

    How do you know which panel to go to first? That depends on the image. If it’s a photo with strong colour, then the B&W tab will probably be the most useful. But if the colours are not so strong, then the Basic panel may be better. It’s a judgement call that becomes easier with experience.

    I’ve only touched on the topic of black and white conversion in this article. Now you have learnt how to make global adjustments. In my next article I will show you how to make local adjustments to really bring your black and white images to life.

    Andrew’s book Mastering Lightroom III is on sale now at Snapndeals for 40% off. This is a limited time offer, grab it while it’s available.


    Mastering Lightroom: Book Three – Black & White

    Masterlng Lightroom: Book Three – Black & White by Andrew S GibsonMy ebook Mastering Lightroom: Book Three – Black & White goes into the topic of black and white in depth. It explains everything you need to know to make dramatic and beautiful monochrome conversions in Lightroom, including how to use the most popular black and white plug-ins. Click the link to visit my website and learn more.

    The post How to Convert Photos to Black and White in Lightroom by Andrew S. Gibson appeared first on Digital Photography School.


    Digital Photography School

  • The Ultimate Photography Guide to Pricing That You Have to Read

    Setting the proper price for your photography business is one of the most important, thus challenging, things you may face in your photography career. Photography pricing determines your priorities, profit potential, competition niche and business style. Bad pricing lists could not only cost you money, but also destroy your business before you can say Jack Robinson, if you know what Continue Reading

    The post The Ultimate Photography Guide to Pricing That You Have to Read appeared first on Photodoto.


    Photodoto

  • How to Make Stronger Photographs Through the Process of Visual Design

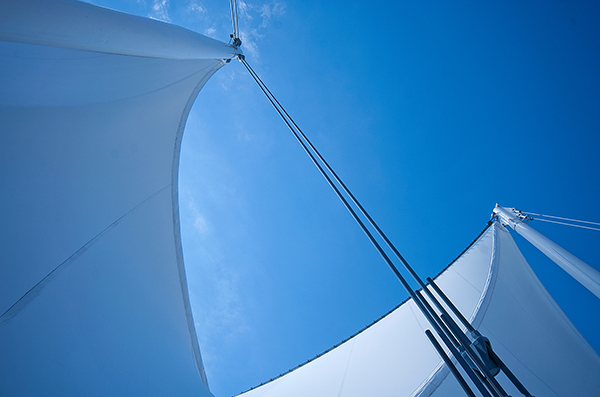
    Sails 600

    Photography is an art that relies on light. It also relies heavily on the visual message. You have no way of communicating anything to your viewer except through the visual language you use. If you use strong visual elements, your images will be effective and people will stop and look. If you want to convey a message, use the most powerful visual imagery you can: color to enhance your scene, light to punctuate it, and use shapes and texture to fill in the details. Doing this will not only be more satisfying for you as a photographer, but will make your visual language stronger and your message more compelling.

    It is right to assume that photography is about being able to see a scene, and then photograph it. I am going to challenge that assumption, and say that there is something vastly more important that comes after you “see” the scene, and before you photograph it. Most often, the next step is called composition.

    Loosely defined, composition speaks about how the image is put together, what the components are in the scene, and how they work together. Very often, the first thing that we think of when we hear composition is, you guessed it, the Rule of Thirds. I truly believe that the Rule of Thirds is a good place to start, but it is by no means the only compositional tool. In fact, some of the most iconic images of our time have broken this very rule. So, the next step after you have decided on a scene is not to just snap away. Put some serious thought into how you will visually design your image, and then capture that scene photographically. After that, grab the camera!

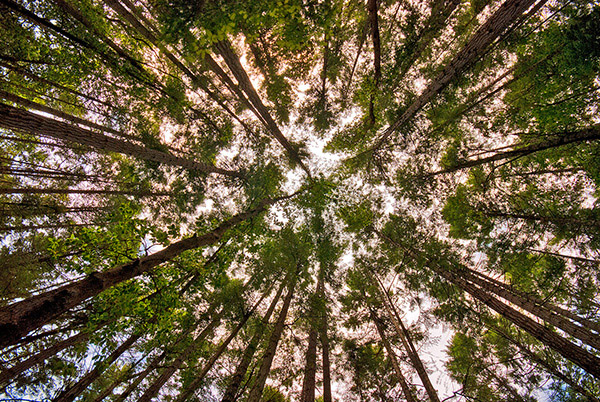
    Forest-Canopy-600b

    What is visual design?

    Visual design sounds like a fancy word for composition, but in reality it takes composition to the next level. It is not simply about making sure everything is aligned on a grid à la the Rule of Thirds. Rather, it is about working with the flow and dynamic elements in your scene. In this article I will discuss the nuances and tools you can use to improve your composition to get the most out of any scene.

    There have been many times when I have looked at a photograph and I could almost feel the wind in the scene or smell the salty sea air. The photographer captured the image in such a way that when I looked at the scene, it evoked my memory of similar scenes I had witnessed in real life. At a very high level, people relate to images in a few different ways.

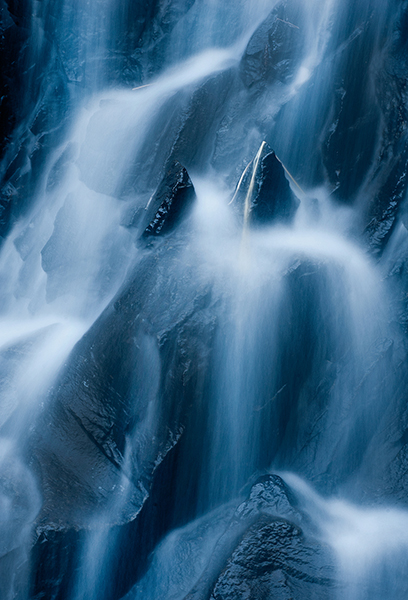
    Waterfall 600Photographs evoke emotions, memories or feelings based on what the person sees in the image. In many ways, the viewer’s perception is their reality. So, if the image is of a loved one, the person looking at the photograph will immediately be transported to a memory of that person, good or bad. That memory could cause them to be quite emotional. The reaction to the image could be utterly visceral depending on what emotion is recalled. The same is true in a landscape scene or a seascape scene. The goal of every photographer should be to visually translate the scene in such a way that the viewer can either relate to the scene or would like to be in that scene.

    The goal here is to change your perception on composition, to help you break out of the mental constraints of the Rule of Thirds, and open up new pathways to explore in photographic visual design. Don’t get me wrong, I am not suggesting that the Rule of Thirds is bad; it is still a very relevant and useful tool. All I am saying is that it should not be your only tool.

    What do we have to work with?

    Light, color, and shape all play an integral role in visual design. Using these tools is a good start; however, now we will discuss some details about making more powerful visual design choices. The idea here is to move your images from good to spectacular. The new elements we will be talking about are:

    • Form
    • Color and color relationships
    • Texture
    • Unity
    • Coherence
    • Balance and rhythm
    • Space (positive and negative)

    Form and texture

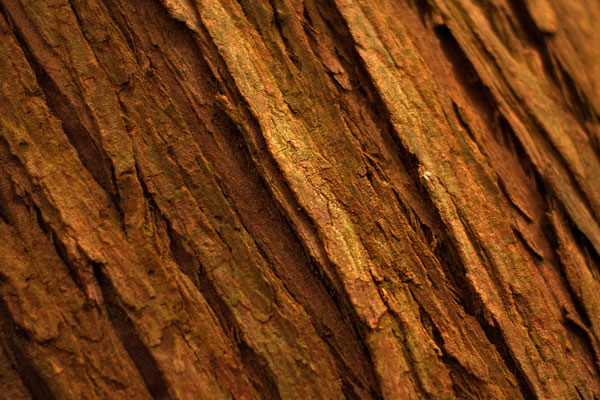
    Form is similar to shape, but in this context I am referring to form in a more three-dimensional sense. Form is enhanced when there is side light to emphasize the shape of the object in the image. When the sun lights a rounded, polished rock from one side, the rounded form of the rock is emphasized. This gives the viewer some critical information about the object. Side light also emphasizes texture and that too is a key piece of information. With side lighting, you can emphasize the object’s shape and form to the point that the viewer can almost “feel” the three-dimensional aspects of the image. This is a really strong way to communicate visually.

    009

    At a higher level, when you want to communicate form and texture, side lighting is your best friend; soft side lighting is even better. The important idea to remember here is that side lighting adds dimensionality to your image. Try this on your next photo shoot: take a look where the sun is and take a photo of the subject with the sun over your shoulder. Then move to the side of the subject and take another shot. The difference will astound you. If you do this in the soft glow of sunrise or sunset, your results will be that much better.

    Using color in your design

    We all know how important color is. Think of your favourite image in color, then strip that color out and somehow it is not necessarily as impactful. That’s not to diminish the fact that black and white photography can be equally impressive – it absolutely is, however, to keep this article in context, we’ll leave black and white for a future article.

    004

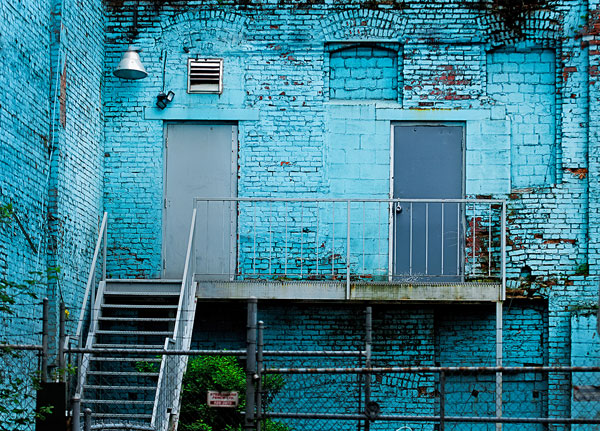
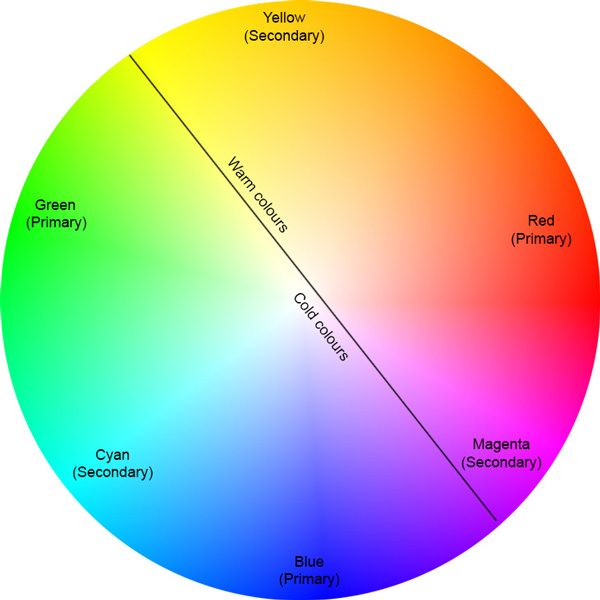
    color gives the viewer crucial information about the scene. The warm colors of a fiery sunset or the cold blues of a glacier convey critical information about the scene. The overall color in your scene can determine how the viewer interprets it, so be purposeful with your use of color. If you want to convey warmth, choose reds, oranges, and yellows for your scene. If you want to convey cold, use blues, grays, and greens in your scene. You can see which colors are warm and which colors are cold if you look at the visual color wheel.

    Colour Wheel

    Certain colors draw the viewers’ eyes into the scene. Reds and yellows in particular cause the viewer to look at those colors (it’s not arbitrary that emergency vehicles are painted red and yellow warm colours,as they demand your attention). Be careful when you see anything that is red or yellow in your scene. It can either add value to the scene, if it is the subject of your image, or it could be distracting if it is not the subject of your image (in the background).

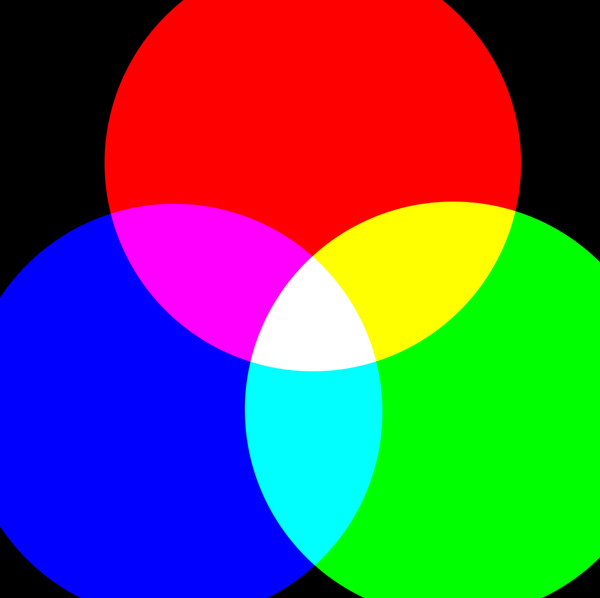
    Rgb cmy

    Let’s talk about color theory briefly. This is by no means an exhaustive guide to color theory, rather a quick introduction into it. Your camera can “see” three colors: Red, Green and Blue (RGB). These three colors are the primary colors in the visual color wheel (different to the color wheel used when painting). There are secondary colors too, namely, Cyan, Magenta and Yellow. These six colors and their combinations make up the visual color wheel. The hue (color) and saturation (richness or intensity) of all of these colors give us multitudes of combinations of colors. Understanding this aspect color theory will help you make better choices about color when photographing.

    Using primary and secondary colors together makes your images compelling. So, looking at the color wheel, images that have red and yellow in the scene make very interesting photographs. Images with red and green in the scene work well too. The next time you look at a scene to photograph, try and look at what predominant colors are in the scene and try to photograph those colors only. This alone can make your images much more striking and visually interesting.

    Take some time to practice intentionally composing your images using these techniques.

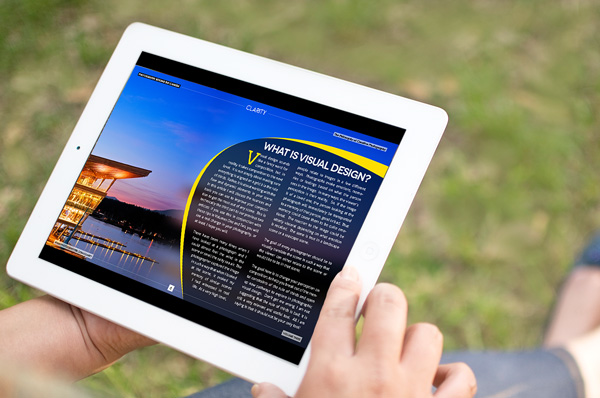
    Ipad 005


    The preceding article is a full-length excerpt from the CLARITY eBook series. Join other dPS readers today and dramatically improve your photography by learning the step-by-step process of visual storytelling and techniques for making stronger photographs. Get your CLARITY photography eBooks today!

    The post How to Make Stronger Photographs Through the Process of Visual Design by Barry J Brady appeared first on Digital Photography School.


    Digital Photography School

  • How to do Surreal Digital Infrared Photography Without Expensive Gear or Camera Conversions

    Photos made with invisible infrared light, rather than visible light, yield wildly strange and eerie photographs that always have the “WOW Factor.”  For landscapes or scenic imagery, infrared (IR) photography is highly regarded as fine art. But back in the days of film photography, shooting infrared was complicated, expensive and the results were often not great. For those with determination though, that one image that did ‘work” was always worth the trouble.

    But now the complexity of capturing infrared photos has changed – digital cameras have made the technique almost foolproof, inexpensive, and a lot of fun! All you’ll need is a tripod, a special infrared filter, and any camera that is sensitive to infrared light. With a few easy steps you’ll be shooting infrared photos in no time at all.

    But before I get into the process, it’s not my intention in this article to delve into the physics of infrared light, and all the scientific mumbo jumbo that goes along with understanding WHY infrared light creates amazing images, but rather to give you some simple steps to get you started in this super creative technique.

    _DSC1747W

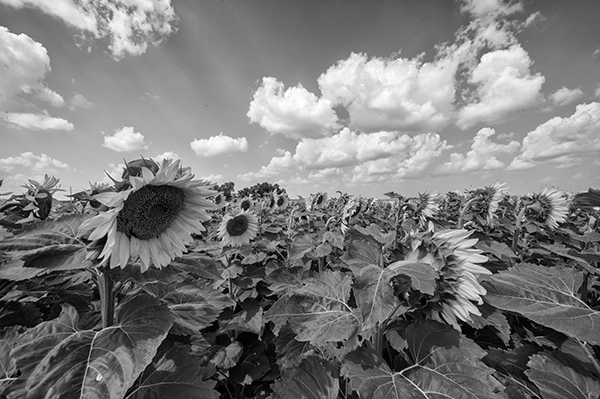
    Visible Light Black and White Image

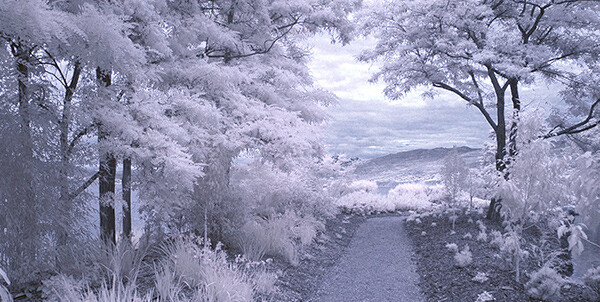
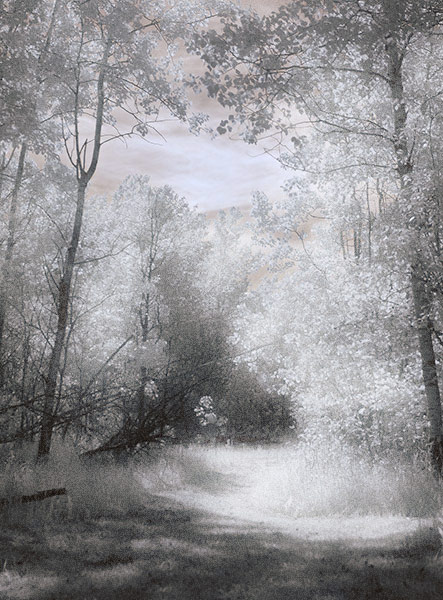
    Just know that anything that is alive will reflect a greater amount of infrared light than inanimate objects. Leaves, foliage, and grass, along with skin, reflect the greatest amounts of infrared light, and so will be the whitest objects in your image. Stones, concrete, mountains, water and sky tend to absorb infrared light and so appear as darker objects in your images.  The tonality is very different from that of visible light black and white photography though. Notice how the tones of the leaves, seeds and sky are quite different in the infrared image below.

    Digital Infrared Image

    Digital Infrared Image

    Okay, are you ready to give this a try? Here are the simple steps you need to follow so your images will turn out into hauntingly beautiful, surreal infrared photographs. The first steps deal with equipment and settings, and the last steps are all about how to best capture beautiful infrared light.

    Step 1: Test your Camera

    Before you go out and buy an infrared filter test your camera to make sure it’s sensitive to infrared light.  Not all digital camera sensors are able to “see” infrared light. In fact the newer the camera, the less sensitive to infrared light it may be. Try this simple test to see if your camera will give you good results.

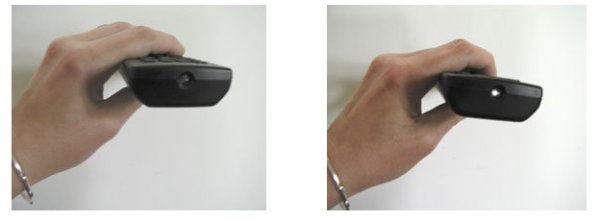
    Testing your camera for infrared sensitivity.

    Testing your camera for infrared sensitivity.

    Hunt down a TV, VCR or DVD player remote control. Look at the end that points to the TV (or VCR etc), and you’ll see a little bulb or flat back plastic window. This is the transmitter that sends the signal from the remote to your device. That signal usually uses infrared light. You can see that it is invisible light – i.e. when you look at the remote with your eye, you can’t see anything when you press the buttons. But just wait until you do this looking through your camera! You’ll be able to see invisible light – the infrared spectrum that makes such cool photos.

    If you have a point & shoot camera look through your LCD viewer while pressing any button on the remote. If you see the bulb light up, your camera can see infrared light.  If you have a DSLR you’ll have to take a photo to see the results, or if you camera has a live view feature, you will be able to see the the results on your LCD as well.

    The whiter and brighter the light you see from the remote, the more sensitive your camera is to infrared. If the light is more purple or red your camera may not be a good candidate for shooting infrared photos.

    Step 2: Equipment

    If your camera passed the sensitivity test, you’ll need two more pieces of equipment before you can shoot infrared photos, a tripod and an infrared filter. The tripod will help you take a sharp shot, as your exposure times will be quite long. The filter will  block most of the visible light from reaching your camera sensor, but will allow the beautiful infrared light to pass through.

    When I first started shooting infrared images, I used  a Hoya R72 screw-on infrared filter. B+W, Tiffen and other manufacturers also have equivalent infrared filters.  If you are using a slide in filter system, such as Cokin or Lee, they also make infrared filters to work with their holders. If this is the filter you’ll be using, make sure to slide it into the slot closest to the camera to prevent unwanted visible light from sneaking in. The R72 refers to the amount and type of infrared light that passes through to your sensor and I recommend using this to start. It allows some visible light to pass to the sensor so it will allow you do to all sorts of creative post processing with your images.

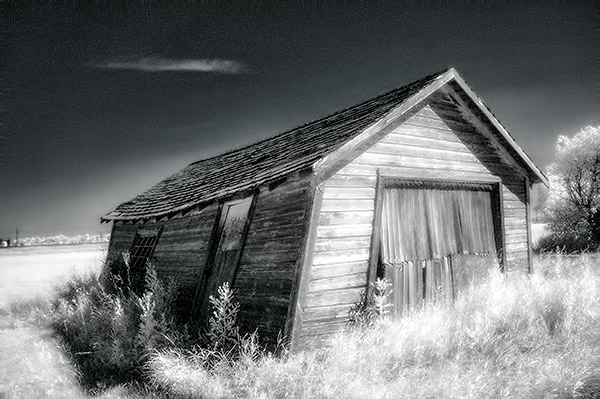
    Infrared Image with creative post processing.

    Infrared Image with creative post-processing

    Step 3: Camera settings

    Because the infrared filter blocks out most of the visible light, your exposures will be quite long. You’ll have to adjust your camera settings to ensure you get a good exposure, while keeping noise to a minimum.  Set up your camera on your tripod and make these adjustments:

    1. Set your ISO between 200 and 400, keep it as low as you can
    2. Set your Long Exposure noise reduction to ON
    3. Set your camera to shoot in RAW mode
    4. Set your camera to Aperture Priority (Av mode on a Canon), and your aperture to around f/8 for maximum sharpness
    5. If your camera does auto bracketing (refer to your owner’s manual), set your bracketing to +/-1 EV.  Your series should be -1 EV, 0 EV, good exposure, and + 1 EV. You can also bracket manually.

    Shooting in RAW will give you a bit more latitude for processing and adjusting.  Bracketing will help you find the sweet spot for exposure at your preferred aperture and ISO.

    I’m not going to go deep into the White Balance setting, as this could be an entire article on its own. But for now set your White Balance to the Sunny or Daylight preset.

    Step 4: Composition

    Just as in regular light photography, composition is a critical component of infrared photography. However there are a few additional considerations to keep foremost in your mind when planning your infrared composition.

    A variety of textures make the image more dynamic.

    A variety of textures make the image more dynamic.

    Infrared photography is similar to black and white photography, in that you are dealing with a limited number of tones. To add more dynamism and energy to your infrared shots, add contrasting elements. By this I mean using dark and light objects in close proximity to each other. But also use smooth and textured objects together. You can mix and match for artistic composition and design.

     COLUMN 1  COLUMN 2
    • light
    • white
    • smooth
    • large patterns
    • light with fine textures
    • light with large textures
    • dark
    • black
    • textured
    • small patterns
    • dark with fine textures
    • dark with large textures

    In every infrared shot you make, include at least one element from Column 1 with the corresponding one from Column 2. You can add as many elements as you want, but it’s best to keep your composition simple. You can use light and small patterns, with dark and large patterns and so on. Foliage and clouds will always be a light element in your image; the sky, stones, bark, water  and concrete will be darker. Leaves from a distance are a rough texture, with many small elements appearing rough and textured; while human skin is very smooth.  This should give you a great starting point for infrared compositional considerations.

    Step 5: Shooting Infrared

    There is only one critical thing to remember when shooting infrared – you must shoot when there is lots of sunshine, and in the summer when there is lots of deciduous foliage. Overcast days won’t give you great results, and because living things reflect the most infrared light, snowy winter days are usually devoid of anything that reflects infrared.  If there are clouds in the sky these can add an element of interest, but don’t make your capture until the sun is out, and shining on your subject.

    Find a great place to shoot and adjust the settings on your camera. I like graveyards, parks, and old abandoned buildings. The contrast between the stones, the pathways, the old wood and leaves and grass provides outstanding tonality for infrared images. If you can get a few wisps of cloud in your sky all the better.

    Put your camera on your tripod, and compose your image. Place the infrared filter on your camera, and use your autofocus as usual. Yes, it works just fine for infrared photos! Your light meter will work too but be sure to bracket on either end to make sure you have at least one usable exposure. Then click the shutter.  You’ve just made an infrared photograph.

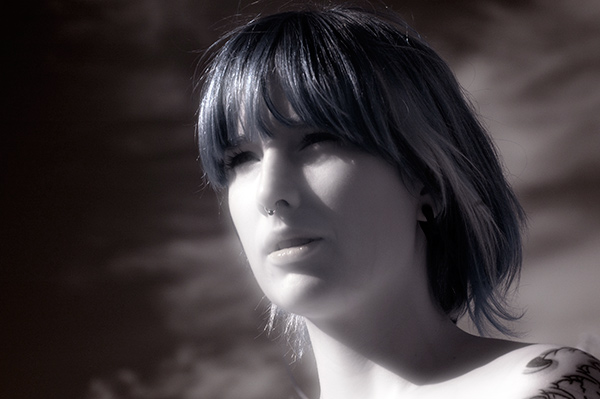
    Skin looks like alabaster when shot using infrared light.

    Skin looks like alabaster when shot using infrared light

    For techniques and ideas for post-processing our infrared images, watch for my article on post processing infrared photos coming soon!

    The post How to do Surreal Digital Infrared Photography Without Expensive Gear or Camera Conversions by Alex Morrison appeared first on Digital Photography School.


    Digital Photography School

  • 5 Ways To Break Out of a Creative Photography Rut

    Ironside-1500px-2482

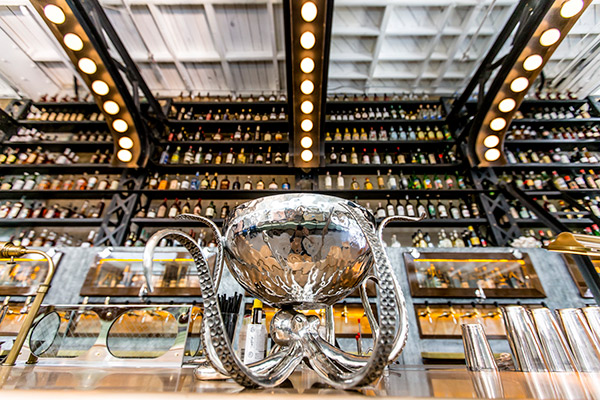
    I’m a full time photographer that concentrates on shooting restaurant and bar interiors, food, and cocktails. After strictly shooting that subject matter for long time I found myself uninspired, so I decided to do something about it.

    I’m going to share four tips I’ve used over the years to get back on track creatively, hopefully they will help you get out of your photography rut too.

    1. Get out of your comfort zone – physically

    Lake-Cayumaca-600px-5582

    I find that I loose inspiration when I’ve been in the same area too long. When things become familiar they become less exciting. If this happens to you there is only one thing to do: leave!

    There is huge value in leaving your area, city, or even state for a day or two. The process of traveling to an unfamiliar place jumpstarts the creative process.

    Lake-Cayumaca-600px-5430

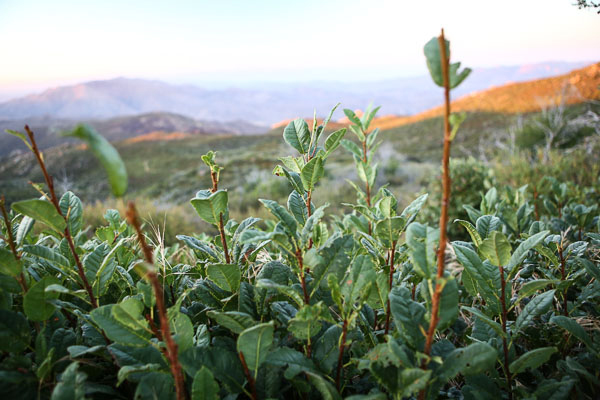
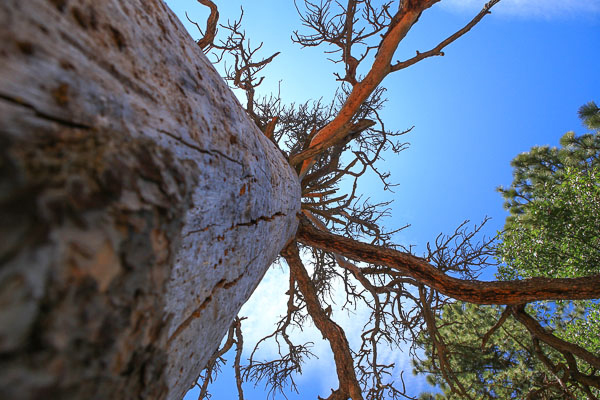
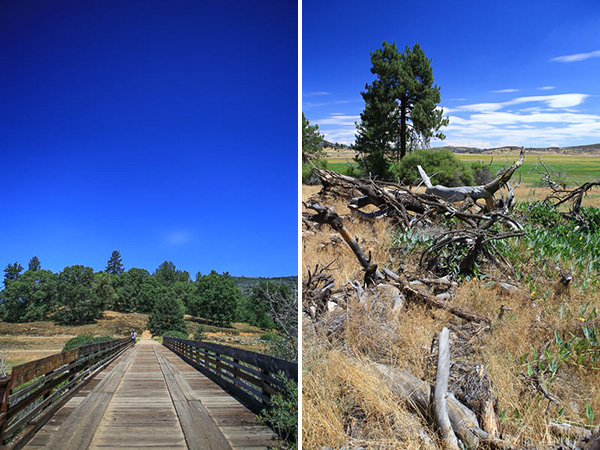
    My photography was becoming stagnant so I left downtown San Diego and took an hour drive to Lake Cayumaca. Being in a totally different geographic area afforded me new opportunities to shoot things I don’t see every day in downtown San Diego.

    Lake-Cayumaca-split

    2. Learn something totally new and uncomfortable

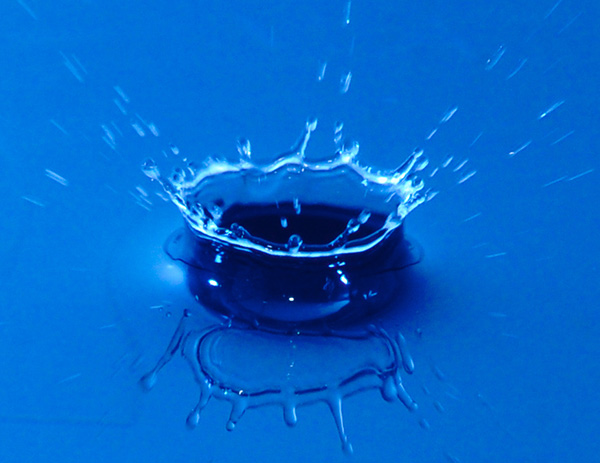
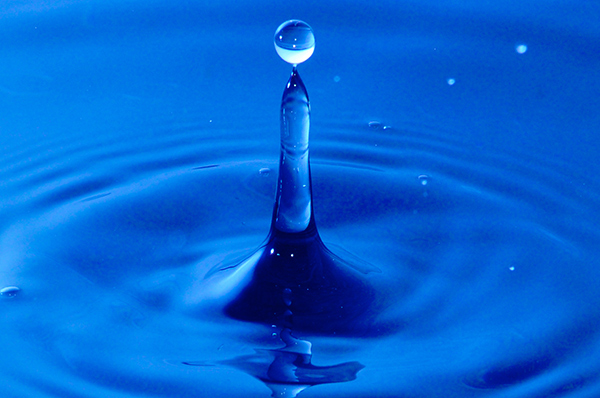
    A few years ago I had gotten in a photography rut while shooting a ton of portraits. I decided I needed to learn something new so I decided to learn how to photograph water drops.

    blue-crown

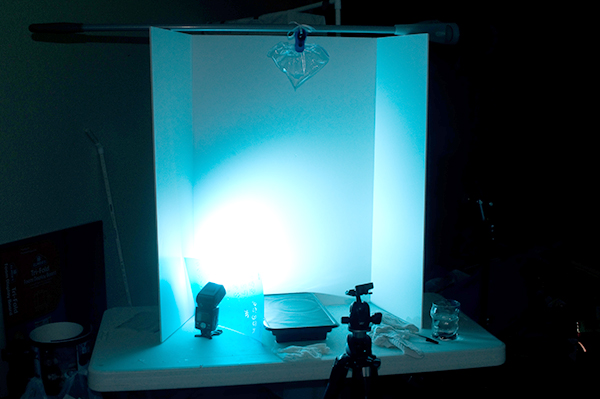
    I read a tutorial online and set up a little station in my garage. I didn’t have any experience with macro photography but was excited to try. Check out the setup below:

    blue-drop-setup

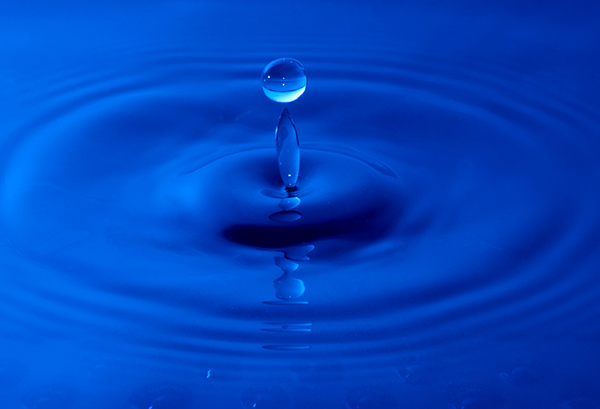
    It took me a while to start getting decent results but I found myself loving the learning process. I had a great time and came away with a new skill set and a revived creativity.

    blue-teeball

    If you find yourself in a rut, learn something new that is unfamiliar. While there are people who put my water drop photos to shame I’m still proud of these images and the rut they helped me get out of.

    blue-point

    3. Try a new style of shooting

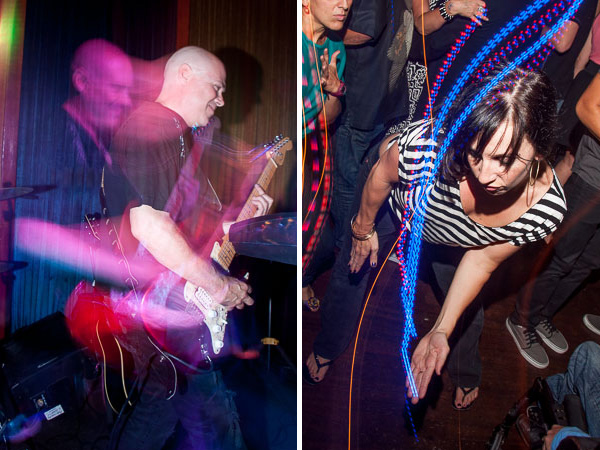
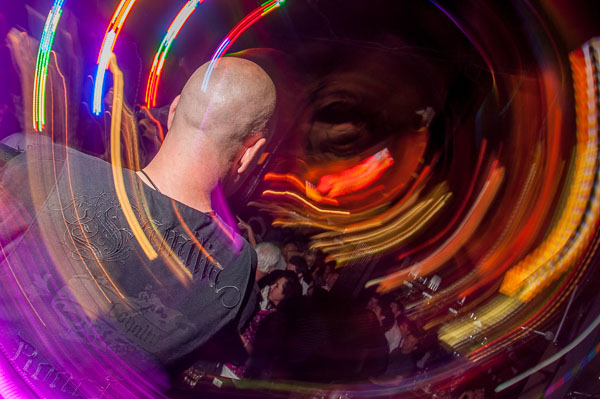
    A few years ago I was starting to learn about rear curtain sync on my flash. I had a few friends who shot really cool light trails in their nightlife photography. I felt a renewed surge of inspiration to try this during a rock concert.

    rear-curtain-sync

    I plugged an Alien Bees flash trigger into my speed light and put the receiver onto my camera’s hot shoe. This enabled me to hold the flash up, and to the left, with my left hand while holding the camera with my right hand.

    Jimmy-Loves-600px-80

    I put my camera and flash on manual. I used a one-second-long shutter speed and set the flash power to properly expose the musicians a few feet in front of me.

    Jimmy-Loves-600px-82

    I clicked the shutter to start the exposure and immediately tilted my camera around in circles or side to side. Moving the camera while the shutter was open captured all the lights in the concert hall in different shapes. In rear curtain sync the flash pops at the end of the exposure and the shutter closes.

    This combination of using a long exposure and rear curtain sync to create light trails taught me a new skill that I was excited to keep using in future shoots. It is important to master new skills to keep your creativity up.

    4. Start an ongoing project

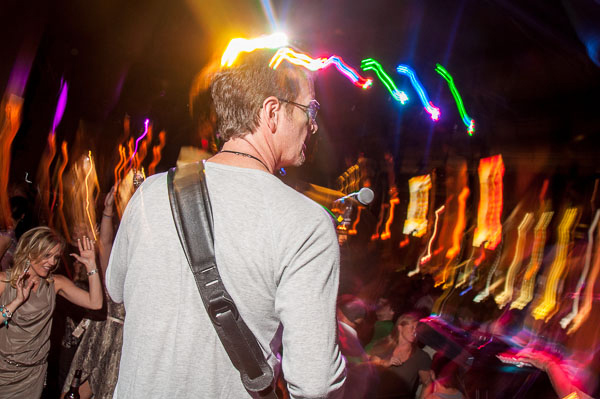
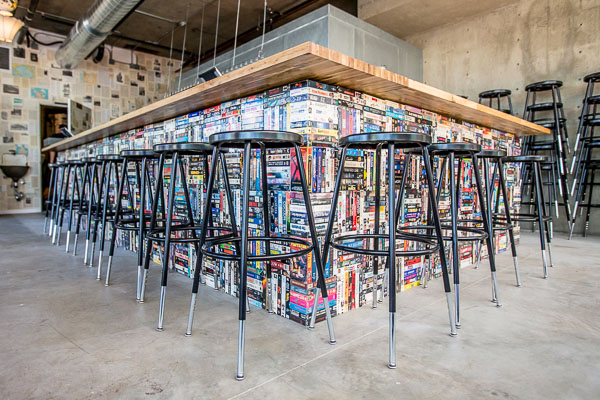
    How ironic that my initial rut that was caused by shooting the same subject matter would become a source of inspiration. After half a year of shooting tons of bars and restaurants I looked back on my photos and noticed my favorite photos from those shoots were the corner bar shots.

    Common Theory corner bar 600px-6605

    After realizing this I got really excited to get back out there to start a project and shoot more bars and restaurants to add to my collection.

    Modern Times corner bar 600px-6250

    I’m really excited about this now!  I’m already thinking about my next trip and what bars I’ll stop at to add to my project.

    puesto-restaurant-interiors-5084

    Getting in a rut happens to us all at one point or another. What ways have you guys found to kickstart your creativity? I’d love to hear your suggestions in the comments below.

    The post 5 Ways To Break Out of a Creative Photography Rut by Mike Newton appeared first on Digital Photography School.


    Digital Photography School

  • Spice-Up Your Outdoor Photos with Wireless Off-camera Flash and Gels

    Wireless off-camera flash is a great way to add a splash of light and give a scene an added dimension, or to fill in shadows in high-contrast scenes. The TTL (through the lens) exposure feature makes it easier than ever to get a well-exposed image without the need for a flash meter. However, there’s one more ingredient that you can add that will open up a new world of creative possibilities for your photography. That ingredient is easy to find, easy to use, and affordable: colored flash gels.

    What’s a gel?

    A gel is a piece of colored cellophane that you place over your flash head. Gels are available individually (expensive) or in more pocketbook-friendly multiple gel kits, which may contain anywhere from half a dozen to 20 or more different color variations. Gels come in primary (red, yellow, blue), secondary (green, purple, orange), and tertiary colors (Kelly green, red violet, pink, aquamarine, etc.).

    Rogue envelope 600

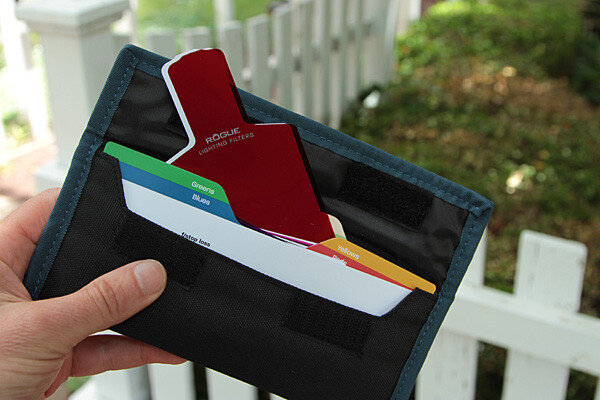
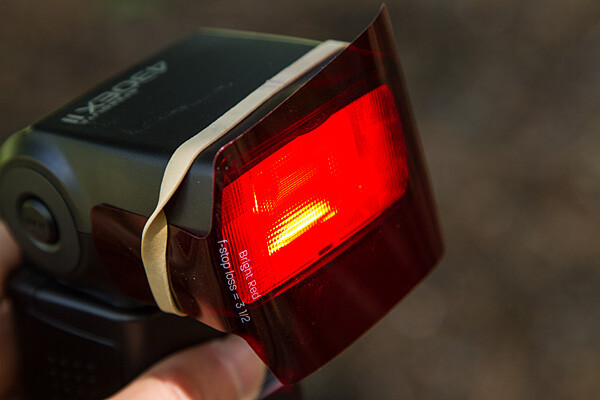
    The Expoimaging Rogue Gel Universal Lighting Filter Kit has 20 different gels that are: well-organized in tabbed compartments; housed in a handy-dandy holder; and divided logically into warm colors, cool colors, and color corrective gels. Each gel has information about how many stops of light it blocks, as well as White Balance values. This will help you determine appropriate exposure, flash output, and camera White Balance settings.

    Some kits include color correction gels, which are intended to balance the flash (normally balanced for daylight) with artificial light sources, such as incandescent or fluorescent lights. They can also be used to add elements of warm, or cool light, as more subtle effects. While individual gels are larger and can be cut to custom-fit your flash, kits gels are generally smaller but large enough to fit over nearly any shoe-mounted flash, and usually come with a band or fabric fastener strip that affixes the gel to the flash.

    Flash redgel rubberband 600

    Simple setup

    All you have to do is take the gel and affix it to the front of your flash. While Rogue includes a black band that will do the job with just about any flash unit, sometimes a forgetful author needs to make due with a MacGuyver-like solution, such as using a rubber band (see image above).

    The key to using a color gel to accent a scene is to use it with an off-camera flash. Fortunately, the cost of a TTL wireless flash is low. For instance, the Canon Speedlite 430 EX II currently costs under $ 260 USD, which is quite affordable. Whether you are using a DSLR, such as the Canon EOS 70D, or an advanced compact with wireless flash control, such as the Canon G16, you can fire the off-camera flash via a pulse from the on-camera flash.

    Let’s take a look at one example of gels in action

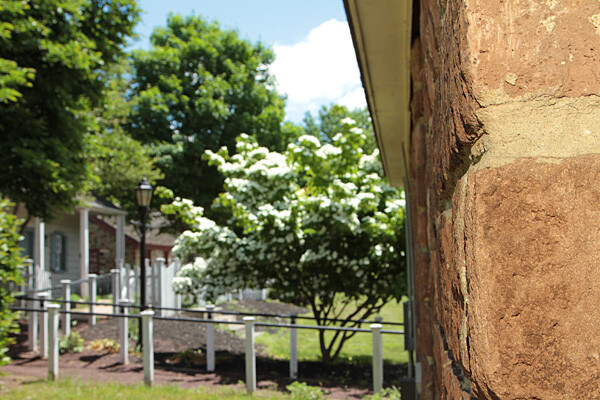
    Whitefence noflash 600

    Blah foreground – this white fence could be a unifying element in this photo of a restored colonial village in Piscataway, New Jersey, but because it’s in the shade, it’s just a boring grey. Gear: Canon EOS 7D, Canon 24-105mm f/4L IS USM lens.

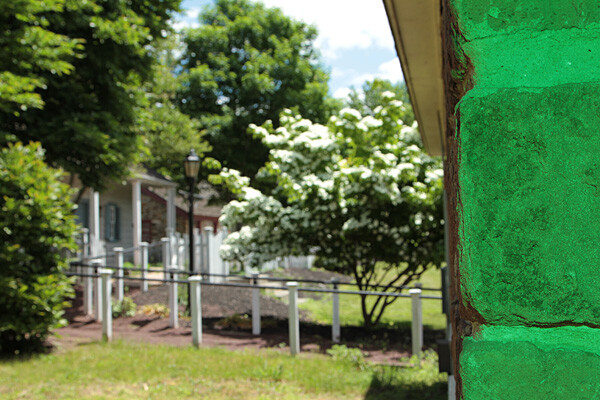
    Whitefence flash nogel 600

    A splash of flash – even if the fence had been more evenly lit, the plain white flash on the fence overpowers the image. Gear: Canon EOS 7D, Canon 24-105mm f/4L IS USM lens, and Canon Speedlite 430 EX II flash.

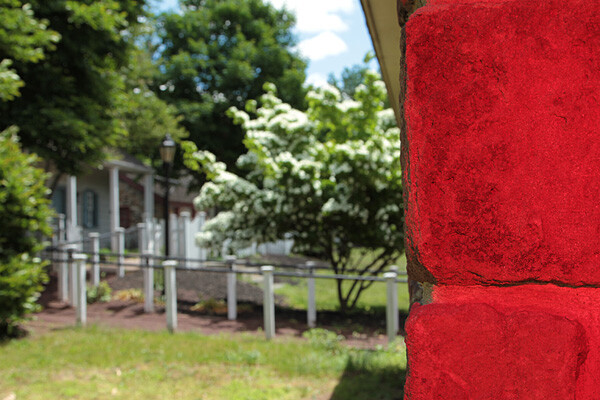
    Whitefence redgel 600

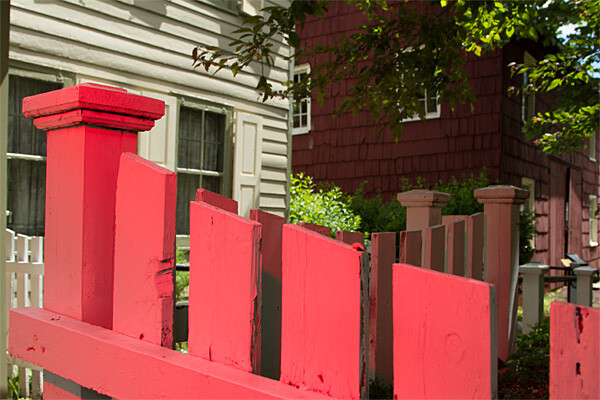
    Bright red adds interest – the idea was to pick up the red tones of the building in the background while leading the eye into the shot by adding a red gel, courtesy ExpoImaging Rogue Gels (read on). Reducing the intensity of the flash output would have changed the color from pink to red. Gear: same as above with Rogue Bright Red Gel added.

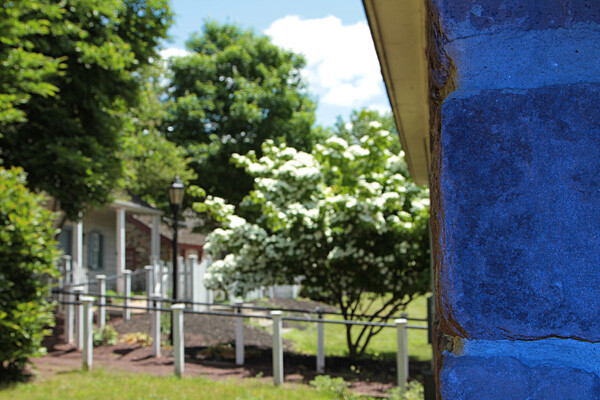
    Whitefence levendargel 600

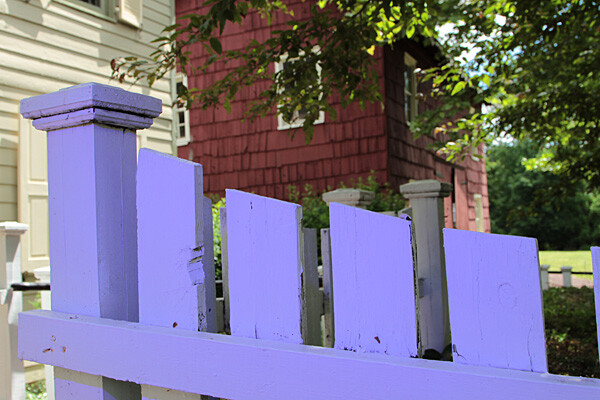
    Oops, wrong color! In this case, the lavender gel was a mismatch. A color wheel, available at art supply stores, will help you make better choices. Gear: Same as above with Rogue Special KH Lavender Gel.

    Step-by-step – how to trigger a Canon off-camera flash wirelessly

    Here are the step-by-step directions for triggering a Canon 430 EX II wireless Canon flash from the Canon 7D. If you’re using another camera, check your manual for wireless flash instructions. Among Canon bodies, the directions will be similar to the following:

    Flashsettings

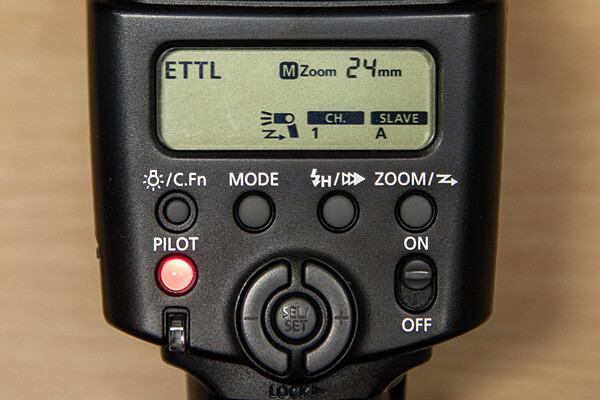
    1. Turn the flash on, then press and hold the Zoom button for a second or two. You’ll see a new flash icon and Ch 1 Slave A appear in the LCD screen (see photo above).
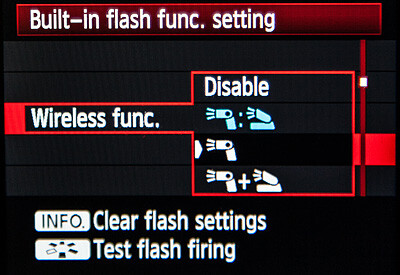
    2. Turn the camera on and pop up the flash.Wirelessfunc
    3. In Menu in the first tab (camera operation), choose Flash Control, then scroll down to Built-in flash function setting, select Wireless Functions and choose the middle setting of the single flash (see above)

    Take pictures!

    Although the on-camera flash is flipped up, it will not fire during the exposure. Rather, it will flash a split-second before the exposure, which triggers the off-camera flash to fire during exposure, so your only source of flash illumination during exposure is the off-camera flash. To the naked eye, it looks as if the two flashes are going off simultaneously, but they’re not.

    If you want both the on-camera and off-camera flash to trigger simultaneously during exposure, go back to Wireless Functions and choose the bottom setting, which shows the off-camera flash icon + a flip-up flash icon. In this setting, your off-camera flash is your key (strongest) light source, and the flip-up flash is a fill light. Choose the top setting (Off camera flash = flip-up flash) and both will provide equal power. We’ll explore these options in future articles.

    The other way to set off a wireless flash is by using a separate wireless transmitter such as the Canon Speedlite Transmitter ST-E2. The advantage of using a transmitter over triggering your off-camera flash via your camera’s built-in flash, is that the transmitter uses infrared signals, and can trigger the flash from farther away, and at greater angles. When using your on-camera flash, your flash sensor must always be within line of sight of your camera. If you’re using a full-frame DSLR, such as the Canon EOS-6D or 5D Mark III, neither of which has a built-in flash, you will need a transmitter to trigger off-camera flash.

    Let your imagination run wild! You can add crazy colors and transform a scene, or you can use a more subtle approach to improve a scene without overpowering it. Here are a few examples of both techniques.

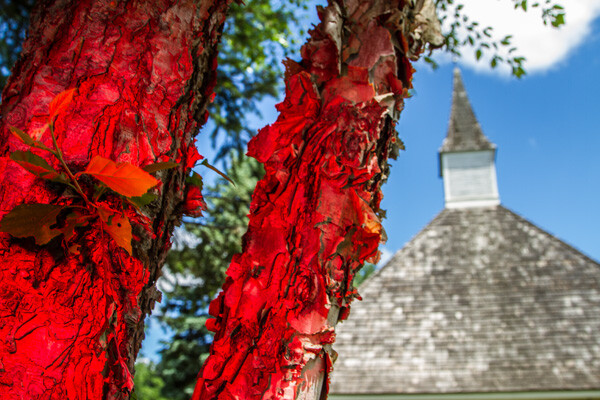
    Steeple redtree 600

    Wild and crazy – red tree adds primary color to offset the deep blue sky and add foreground interest. Too much? It’s a matter of personal taste.

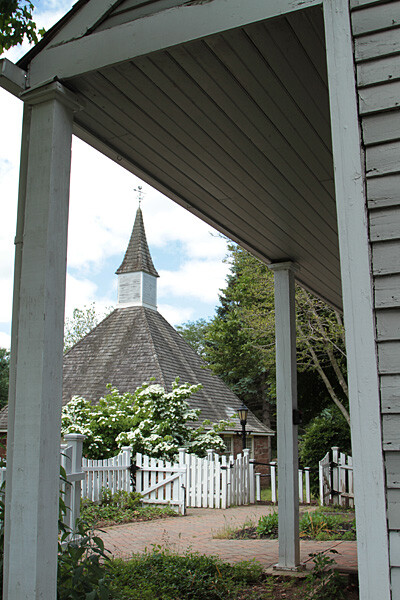
    Steeple noflash 600

    Before -this “frame within a frame” composition doesn’t quite work because the foreground is too dark, and the sun-drenched but interesting background is too light.

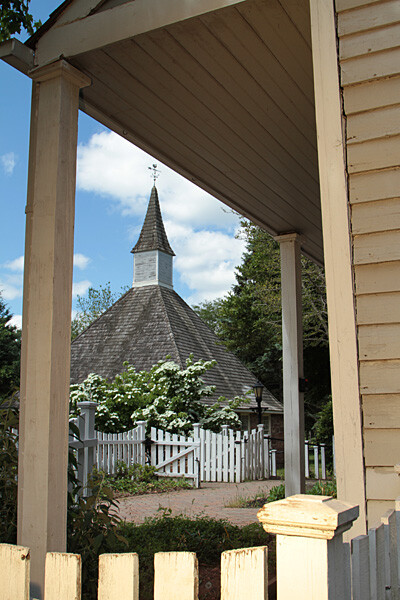
    Steeple fullCTO 600

    When lit with an unadorned flash, the foreground was uninvitingly cool. After adding a full CTO gel, the subtle splash of warmer light frames the background nicely.

    Experiment. Try different gels to see what they look like. Don’t like your result? Try another one. Here are several variations where different color gels were used against a foreground wall in the shade, to balance a bright, sunlit scene in the background. Camera and flash setup are same as above.

    Wall fullCTO flash 600

    Gel: full CTO, balanced for 3,200K ambient light

    Wall mossblue 600

    Gel: Moss Green

    Wall justblue 600

    Gel: Just Blue

    Wall red 600

    Gel: Red

    Wall nogel 600

    No gel

    Have you done any experimenting with colored gels and off-camera flash? Please share your results and comments below.

    The post Spice-Up Your Outdoor Photos with Wireless Off-camera Flash and Gels by Mason Resnick appeared first on Digital Photography School.


    Digital Photography School

  • Invent a Slogan and Win Some New HDR Software

    Whenever someone talks about HDR (High Dynamic Range) photography, it can either be with disdain or great appreciation, but as they say–different strokes for different folks. In any case, HDR photography has its roots in the 1850s when the French Photographer Gustave le Gray combined two exposures to render a seascape that contained large range of light, thus enabling a Continue Reading

    The post Invent a Slogan and Win Some New HDR Software appeared first on Photodoto.


    Photodoto

  • How to use a Gobo to add Depth to Your Portraits with Subtractive Lighting

    Mussell044FA

    It’s our responsibility as photographers to use the interplay of light and shadow on our subjects to create the third dimension in our two-dimensional media. When the shadows are absent, we should do our best to craft the direction of natural light with tools that do this organically–tools that do not call attention to themselves.

    One tool that I often see photographers using outdoors, typically in an attempt to counteract the effects of ambient light on a subject rather than simply crafting existing light, is flash fill. The problem, however, is that the use of flash fill outdoors (especially on-camera flash) frequently results in a very unnatural look and flat lighting—where all of the shadows are gone—which means that they lose the three-dimensional effect that we as artists seek to make our subjects look real. Very rarely is flash used in this manner subtle enough not to call attention to itself.

    The answer is subtractive lighting

    Subtractive lighting simply involves the blocking of unwanted natural light to create a natural three-dimensional quality to the lighting of people outside. The tools used to block unwanted light are called gobos or flags. Both terms are used in the world of cinematography, but are not used much the still photography world today.

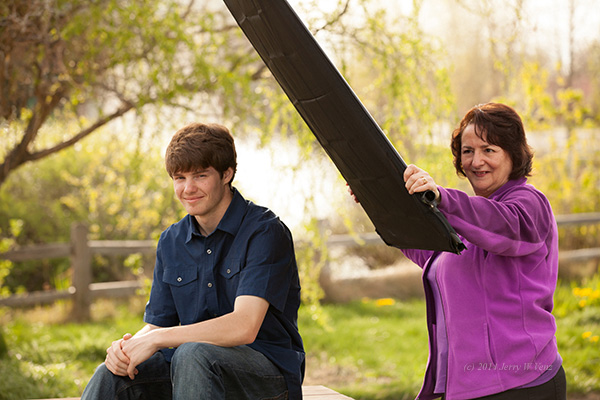
    A flag is generally black, opaque, flat, and refers to something you could hold by hand or mount to a stand. As shown in the images below, this tool is used when you have placed your subject in a less than desirable, very open location with flat lighting.

    Lopes102

    Image with no gobo used

    This is typically the lighting you’ll see with your subject out in the open. There’s strong light on both sides of his face, even though the sun is setting behind him. This is what’s referred to as flat lighting and it’s not very interesting.

    In the next image you see how this can be corrected. Kathi, my wife and partner, is holding a 42″ flag close to the subject to create a dimensional shadow on the subject’s face.

    Lopes112

    Showing how the gobo is used

    As you can see, just that simple modification of the natural light creates beautiful three-dimensionality.

    Lopes106

    Image with gobo used (notice the deeper shadow on his left cheek, camera right)

    In this next example, we have our high school senior model, Jasmine, in the popular “Freak Alley” in downtown Boise. The sun is setting on camera left and is reflecting off a tall, distant, mirrored building to camera right. We blocked the direct sunlight on the left with our 42″ black flag, creating a nice shadow side on her face. Removing the much brighter sunlight coming from camera left (over 2 stops brighter than the reflected light on the right) also meant that I could open up the lens and slow down the shutter enough to record the dim light in the doorway behind her.

    Mussell044FA

    ISO 400, F/5.0 at 1/125th

    If you don’t have a flag, you can accomplish similar results using a small natural light blocker, like a tree. This is where the generic term “gobo: (from go-between) comes into use. Gobos can be man-made things like buildings, houses, or a porch and they can also be something natural like a tree, forest, or hedges. Really, just about anything used to block light can be referred to as a gobo. The nice thing about a tree is that it can be in the picture, and act as a gobo to create the same type of lighting (called short lighting, where the shadowed side of the face is nearest the camera) that we used on Jasmine above.

    Nick, in the image below, is a big athletic guy so I wanted to create some short lighting to trim down his face. To accomplish this, I leaned him into a small tree for its gobo effect which created a nice shadow on his face. The key to making this work is finding a tree with a small canopy. Since he must be very close to the tree for it to make a shadow on his face, the tree can’t have a big canopy or it will block the main light (the sky) and eliminate my nice deep background bokeh (those nice de-focused specular highlights, that will be a topic for a future article).

    Connolly76

    200mm lens, f/4.5 at 1/250th, ISO 400

    Group portraits using subtractive lighting – more difficult but worth the effort

    The hand held flag or small tree works great on individuals, but you need a much larger light blocker when photographing groups. To this end, scout your location for any large groups of trees, hedges, buildings, etc., which could serve as your gobo and help add three-dimensionality to your group portrait.

    Again, to be effective, you must place your subject fairly close to the gobo so that you can see its effect (the shadow) on your subjects’ faces. Some photographers may have difficulty seeing this rather subtle effect with the naked eye, so I suggest to my students that they meter for the highlights on the subject’s face and take a test photo. It will be very obvious, when viewing the camera’s rear screen, if you have the shadows you’re looking for. How close, you ask, should the nearest member of your group be to the gobo? Usually about ten feet works for me. If you have a really big, tall tree line, then twenty feet may work beautifully.

    In this last example, which was taken about two hours before sunset, the family was placed about fifteen feet away from a large stand of trees on the right. On the left, serving as the main light, is a large patch of clear blue sky with no sun in it. The only direct impact of the sun should be in creating backlight for the background.

    Canode018

    145mm lens, f/6.3 at 1/100th, ISO 400

    Important caveat: Don’t stress if you can’t find the ideal location that will create the subtractive part of the natural lighting for groups, it’s not always possible. It’s perfectly acceptable to use soft, flat lighting when working with groups, especially large groups, one or two hours before sunset. Just make sure you have the other elements mentioned: keep the entire group in the shade, with the sun only touching the background, and that large patch of blue sky as your main light. We’ve used this technique to create many great portraits over the years.

    Using true natural light, modified with the subtractive lighting technique, will produce superior portraits that will always look more natural than any flash technique. In addition, with the money you save not buying speed lights, soft-boxes, stands, weights, and radio triggers, you can invest in a really nice portrait lens. How’s that for a win-win?

    If you have any other portrait lighting tips leave a comment below.

    For more portrait lighting tips try out these articles:

    • Lighting Ratios to Make or Break your Portrait
    • 5 Reasons for Doing Natural Light Portraits
    • Let’s Talk About Light – 3 Types of Lighting Conditions and how to Use Them
    • Portraits – Lighting the Shot – a dPS ebook


    The post How to use a Gobo to add Depth to Your Portraits with Subtractive Lighting by Jerry W Venz appeared first on Digital Photography School.


    Digital Photography School

  • Two Videos on How to Take Care of Your Camera Gear

    This week I found two different videos on how to take good care of your camera gear from two different perspectives (serious and more tongue in cheek). It’s important to take care of your equipment to make sure it keeps functioning properly and takes nice clean images with no dust spots.

    The first video by photographer Gregory Cazillo is the serious one. He goes through a list of a few things you can do to protect, clean and maintain your gear in good condition.

    He recommends jotting down all your serial numbers so when you are are travelling out of the country you don’t have any issues with customs coming back home. I suggest taking it one step further and actually register your gear with customs before you leave. Most airports have a customs area, just take your equipment in there and get a customs registration card from them. Make sure to arrive early to have time to do that.

    The second video is from DigitalRevTV (The most subscribed and viewed photography show on the interweb, presented by an asian dude with British accent – as they describe on their YouTube channel) and guest host Ultrasonic Dragon 88 (aka Ian Wong). Obviously this one is a little “cheeky” and is meant to be humorous. Take it with a grain of salt and have a little fun.

    Here are some links to other articles here on dPS about taking care of, and protecting your camera equipment:

    • Do you Clean your Own Sensor?
    • Tips to Protect your Gear in Harsh Weather Conditions
    • How to Protect your Camera in Extreme Conditions
    • Embrace the Weather with Your Photography
    • So You Want to Keep your Camera Safe? Here’s How
    • Readers: Lens Filters: To Use or Not To Use? Your 2 cents, if you please!

    The post Two Videos on How to Take Care of Your Camera Gear by Darlene Hildebrandt appeared first on Digital Photography School.


    Digital Photography School