Category: Photography

  • Lens Review Canon 300mm f4 Lens for Sports Photography

    Recently I went to a Little League baseball game and shot with my Canon 5D Mark III and my newly purchased, 300mm f/4 L IS. It was the first time shooting sports with my new camera, so I was eager to see how the body would perform as well as the lens.

    300mm lens sports 01

    The 300mm is touted as one of Canon’s best sports lenses, so I was counting on it to deliver some quality images. The 5D Mark III, while not specifically a sports camera, is often considered a viable option by sports photographers because of its new autofocus system. I was eager to try it out, and see if I could handle shooting sports on a full-frame camera.

    But this post is about the 300mm, not the 5D Mark III. So let’s get to the good stuff  – review Canon 300mm f4 lens.

    300mm f/4L IS – weight and handling

    When I first purchased the 300mm f/4L IS, I was surprised by how small and light it was. Bigger than my 70-200 f/4, yes – by a large margin. But it wasn’t a beast like I was expecting. If you’re familiar with the 70-200 f/2.8 IS, the 300mm is similar to that lens in size and weight. But it’s certainly not overwhelming, like the 300mm f/2.8. It’s actually comfortably hand-holdable.

    300mm lens sports 02

    I brought my monopod to the game, thinking I would use it with the 300mm, but I never needed it. I handheld the 300mm comfortably the whole game, and I’m not super strong. I was pleasantly surprised by how easy it was to handle the lens. It fits perfectly in my camera bag’s long-lens compartment, and I can carry it over my shoulder when I’m walking around. During the game, I ended up sitting on the ground (I explain why here), holding the camera and lens up to my eye, for most of the game.

    runnerTip: If your arms get tired from holding your camera up so much, a monopod will be your best friend.

    The feel of this lens is like all Canon L-series lenses – solid. It’s all metal construction, and feels substantial in your hand. It features a built-in lens hood that you can expand and twist to lock. The lens hood doesn’t come off – when you’re not using it, unscrew and slide it back onto the lens.

    Summary: Pleasantly surprised by the 300mm’s relatively light weight and easy handling.

    Reach

    300mm turned out to be the perfect focal length for the game I was shooting. As I mentioned above, reach was not a problem. I had anticipated wanting more reach than my full-frame sensor offered, so I brought along a Canon Rebel T3i too, but didn’t use it. For youth sports, 300mm was perfect. Of course, it depends on the sport you’re shooting – if you’re at a big soccer field, maybe you’d want to use 300mm on a crop sensor camera, while you might want a 70-200 if you’re doing something close like basketball. Could I have gotten lots of great shots with the 300mm on a crop sensor camera at this game? Of course. But many of the players were perfectly framed with 300mm on the full-frame.

    300mm lens sports 03

    Now, if you have a crop sensor (APS-C) camera, I would still recommend the 300mm f/4L IS, but it depends greatly on your sport. If you’re not sure, I might start out with a cheaper 70-300 zoom lens and see what focal lengths you use most. If you find yourself always using the long end of the zoom, then that’s a pretty good indication that the 300mm f/4L might be a great choice for you.

    At my game, I think 300mm on crop (480mm) would have been a bit long, but I could have always shot the farther action. If I had been using a crop sensor, a 70-200mm would probably have worked better. But the bokeh at 300mm f/4 was so nice compared to my 70-200 f/4, I don’t know if I could have gone back. The reach, power, and feel of the 300mm felt so far ahead of my 70-200 f/4L. I felt like a beast using it all night.

    Summary: 300mm on full-frame was perfect for closer subjects. It also definitely works if you have a crop sensor. Think about the sport you’re shooting and how far away you’ll be from the action.

    batter

    Autofocus

    The 300mm f/4L IS is an L-series lens, so it should come as no surprise that the autofocus is fast and snappy. The lens has USM, which stands for Ultra Sonic Motor – Canon’s fast autofocus motor. The USM autofocus on the 300mm is excellent, quiet and instant. Tracking is fast and it keeps up with the action.

    The fast autofocus at 300mm is sort of a luxury to me. I have a bad habit of setting up for a specific shot (like the pitcher throwing the ball), getting the shot, then putting my camera down to look for the next shot. When a play happens, my instinct is to put my camera down and watch (bad, I know). But during the game, when I realized this was happening, I made a point to try to shoot spontaneously during plays. There was one play where I put my camera down but then saw a shot about to appear. Thanks to the fast autofocus, I simply framed the shot, focused, and snapped the photo in a few moments. I came out with this shot:

    300mm lens sports 04

    Summary: I love the fast autofocus on the 300mm f/4. It responds to my every command, instantly.

    Image Stabilization

    I don’t have much to say on Image Stabilization (IS). I used it throughout the game, but I don’t think it was necessary. I was using a fast enough shutter speed to freeze the action. There’s really no need for IS when shooting action, because IS only helps with camera shake from your hands. You still need a fast shutter speed to freeze action, which means camera shake isn’t a problem at that point either.

    Summary: Next time I’ll leave IS off. It’s not a necessary feature for sports shooters.

    pitcher

    Final Thoughts

    Honestly, the 5D Mark III and 300mm f/4L IS was an amazing combination for shooting sports. The camera was nice and the lens performed flawlessly. It made sports photography a lot easier for me than previously, when I shot with the 70-200 f/4.

    Overall, I highly recommend the 300mm f/4L IS as a sports lens. It’s the perfect focal length for medium to far distances. The autofocus is snappy and reliable, and the lens is easy to handhold. If you need a new telephoto lens for sports photography, I can wholeheartedly recommend the Canon 300mm f/4L IS.

    The post Lens Review Canon 300mm f4 Lens for Sports Photography by James Trent appeared first on Digital Photography School.
    Digital Photography School

  • Single Image Star Trails – a Powerful Technique to Create Star Trails in Minutes Using Phototoshop

    10258929_1466264890276738_7906982947618430010_o

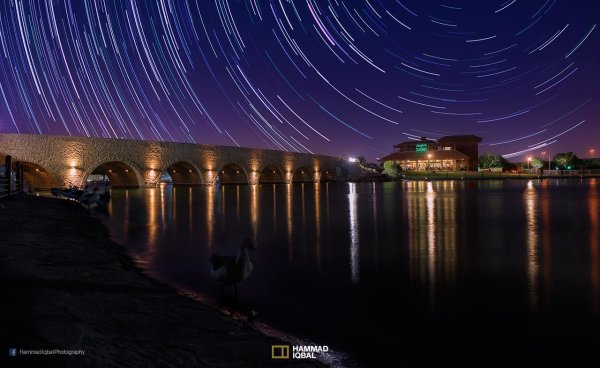
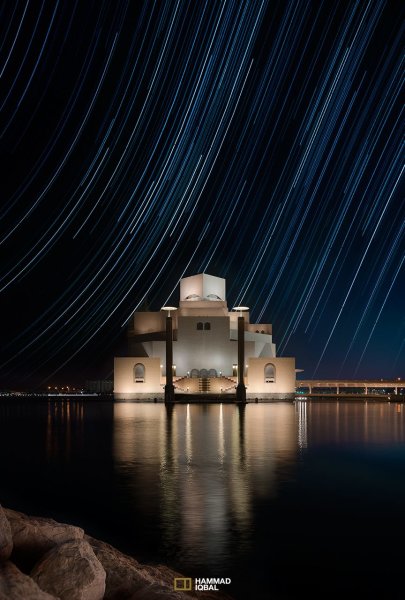
    If you are reading this, you must be among those who have a special place in their hearts for stars, galaxies and the wonders of the universe. With recent advancements in camera technology, many photographers have captured the beauty of the night sky in spectacular ways. The truth is that every photographer is fascinated by the glittering stars, and captivating night skies, that have the power to instantly teleport us to a world beyond our wildest imaginations. From a photographic perspective, star trails can add another dimension to an otherwise average shot and that is likely the primary reason for many photographers desire to learn how to capture star trails. If you are struggling to find out and learn about this rewarding effect, get your camera and computer ready. But before that, let me introduce you to star trails.

    10373061_1472036406366253_4127720884282225109_oWhat are Star Trails?
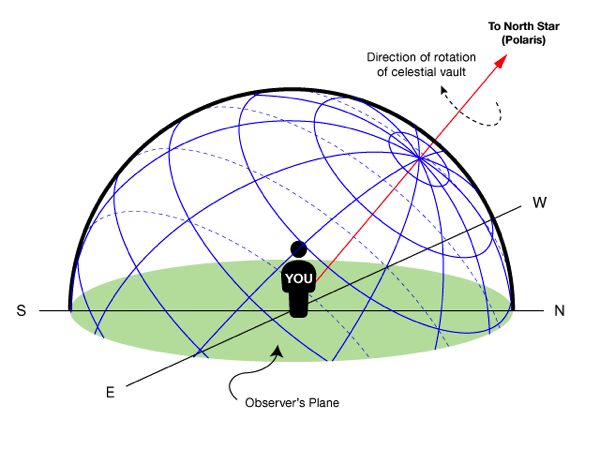
    Star trails is a photographic effect that gives an illusion of motion to the stars along a circular or an elliptical path. Technically, stars do not move when we observe them. They are quite stationary very much like our Sun. In reality, the circular motion of the stars we see in star trail images is a result of rotation of the Earth along its axis. For better understanding, please refer to the ‘equatorial grid’ figure under “Understanding Star Trails” section below.

    How are Star Trails captured?

    Traditionally, star trails are captured by taking multiple shots of the sky in succession over a period of many hours. Modern DSLR cameras also allow you to take a single exposure of an extended length of 30 minutes or more but many photographers prefer to take multiple shots at 30 seconds each and stack them together. Doing it this way eliminates any chances of shaky exposures that can occur due to wind or bumping into the setup while the shutter is open. If you are attempting to make almost a full circle star trails, then the number of shots required to create it can go in hundreds. Later, all those shots are stacked together in Photoshop or a free software such as StarStax to create a single image that shows the circular paths of the stars.

    Photographers have been using this method for years with great results. But if you do not have the option to return to the same location again, then the conventional method would feel limited, as it requires you to stay in one spot for hours, thereby limiting your options to take multiple shots and capture a variety of angles on location in one night.

    Understanding Star Trails

    Equatorial grid

    Equatorial grid from observer’s point of view

    Imagine that ‘YOU’ are inside a giant sphere (see above diagram). Now, depending on the direction you look at, the effect of the star trails will be as follows:

    Facing North: Star trails effect will appear to be circular with some stretching of the circular lines at the far edges of the frame.

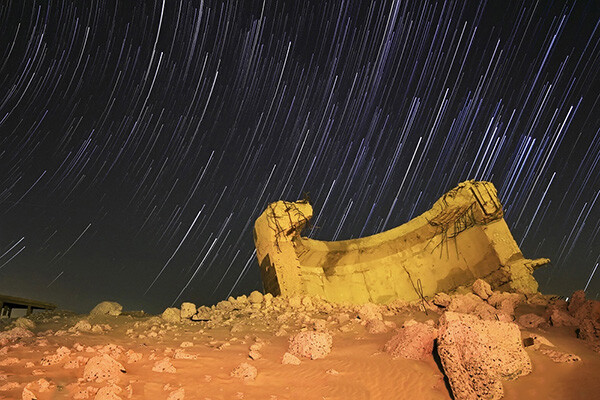
    Facing East: The trails will appear to be straight in the middle moving diagonally in an upward direction from bottom center to top center. They will also appear to be converging at both top left and bottom right at the far sides of your frame. See image below:

    East West Trails Umm ul Aish Kuwait

    Umm-ul-Aish, Kuwait – image shows the upward motion of East star trails

    Facing West: In this direction, the trails will appear to be the exact opposite of what you see when looking towards the South. Moving downwards and to the right from top to bottom in a diagonal line, they will also appear to be converging at both bottom left and top right at the far edges of your frame.

    Facing South: If you are facing South head-on, the star trails will appear to be moving from left to right in an upward curve.

    One-shot Star Trails – the Technique

    I have been developing a new method to create star trails in Photoshop. Unlike the ‘Star Trails’ Photoshop action that you might already be familiar with, this technique is much more than that. It eliminates all limitations associated with the traditional method of capturing star trails. Unlike the conventional method, this technique only requires a single shot, that’s right, only ONE shot of the night sky to create realistic star trails. Since this technique is a result of a joint effort between me and my friend Mobeen Mazhar, who is a great landscape photographer from Pakistan, we have named it the “HM technique” or “HM star trails”.

    When implemented correctly, this technique will open endless possibilities for you in your star trail adventures and is sure to spark new hope among photographers for all levels of expertise. Now, let’s take a look at different types of star trails and how you can use this new technique to create them in Photoshop with just one shot.

    Creating North Star Trails

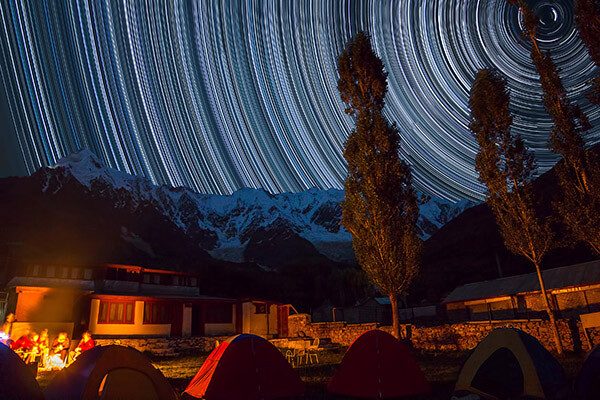
    North Star Trails Nanga Parbat

    Nanga Parbat-Trashing, Pakistan – North Star trails created with HM technique

    This is the most common and simplest type of star trails. Traditionally, it can be achieved by pointing your camera towards North with the focus set to infinity and then taking consecutive long exposure shots (30 seconds) at high ISO settings. Since the North Star remains almost stationary, the final effect is circular with the stars seeming to revolve around a pivot point, which is the North Star. Then at the time of post-processing, all shots are stacked using Photoshop or StarStaX.

    The downside to this approach is that it can take as many as 700 shots over a period of five to eight hours to get a full circle trail. Now watch the video below to learn to create North Star trails within minutes using just a single shot of the night sky.

    Creating Meteor Shower Trails

    Meteor shower AspirePark

    Aspire Park, Doha – meteor shower trails created with HM technique

    Meteor shower trails is by no means an official name. This is fundamentally a beautiful variation of the North Star trails. Instead of a long continuous streak of light, the trails seem to disappear at the origin which gives it depth and dimension. There is also another variation of the meteor shower trails in which the tip of the trail is thicker, brighter and looks like a blob or droplet.

    The underlying technique of the meteor shower trails is the same as shooting the North Star trails. The only difference is in post-processing. The meteor or comet effect is achieved by using the ‘Comet mode’ in StarStaX as shown below.

    ‘Comet Mode’ feature in StarStax

    But regardless, the traditional method still requires that you spend hours on a single spot to take hundreds of consecutive shots. Now watch the video below to see how you can create amazing meteor shower trails in minutes, and once again, all you need is a single shot of the night sky.

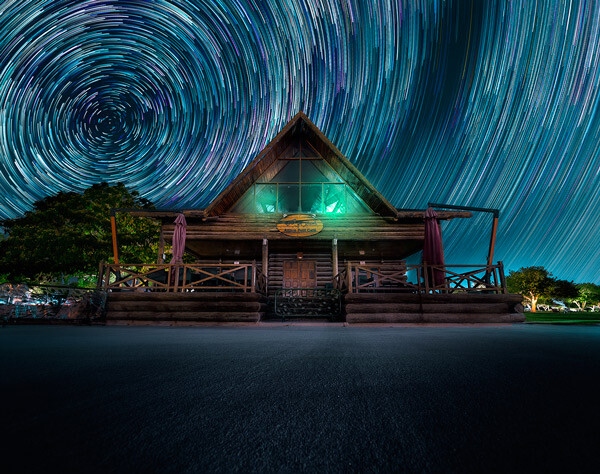
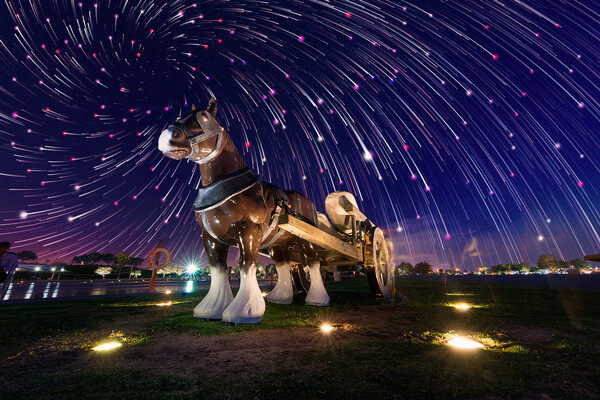
    Creating Vortex Star Trails

    Vortex Aspire Park Doha

    Aspire park, Doha – Vortex star trails created with HM technique

    This is by far my favorite kind of star trails and is quite complex to achieve. Unlike the previous two types of trails, vortex star trails require special equipment which can be costly and may prevent most photographers from trying it. The vortex effect is achieved by zooming in or out on the lens during the long exposure. It may sound simple at first but the trick is to avoid vibrations as you zoom during the 30-second long exposure. Hence it makes it extremely difficult, if not impossible, to do it with bare hands without shaking the whole setup.

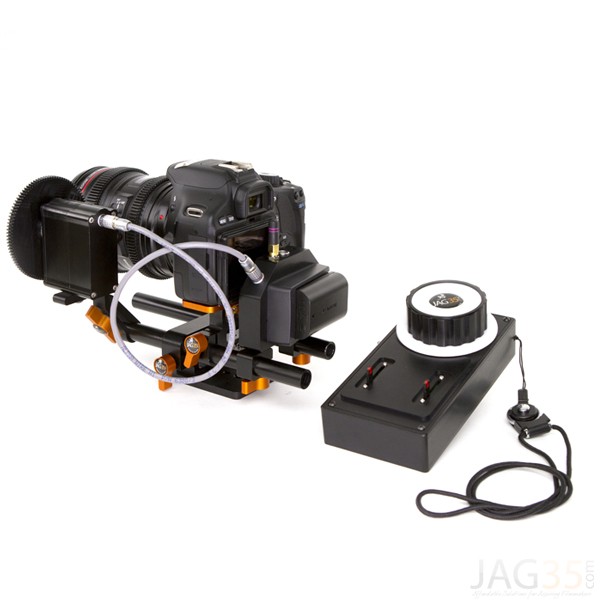
    But if you have plenty of free cash to burn, you can get the tools which would include a geared ring that goes on the zoom ring of your lens, a motor and a wireless remote for controlling the motor. The setup is basically what DSLR filmmakers use for focus racking, that is a motorized follow focus system as shown below. The system is very useful if you shoot professional video with your DSLR but for photographers, the cost might not be justifiable.

    Electronic follow focus

    Wireless electronic follow focus kit v2 by Jag35

    Do not worry because the following video will show you how to create vortex star trails in Photoshop. No cash required.

    Conclusion

    With the help of this powerful new technique, you will be able to maneuver on location, shift your focus towards making a variety of compositions, save countless hours, battery power and thousands of shutter actuations on your DSLR. Would you have thought that a single shot could give you such incredible flexibility in your star trail photography?

    Tip: Just make a note of the direction your camera is facing to help you create star trails in relation to the reference direction.

    I am sure that this tutorial will add a new skill to your photography arsenal. If you have any questions, post them in the comments below. Thank you.

    Technique developed by Hammad Iqbal and Mobeen Mazhar

    Mobeen Mazhar is a passionate traveler and has spent more than a decade exploring Pakistan and its natural beauty. Photography gives him a mode to express his love for nature and a medium to document his travel experiences. He is a landscape specialist, regular travelogue writer and travel expert for Pakistan. You can find his photographic work at Facebook, 500px and Flickr.

    The post Single Image Star Trails – a Powerful Technique to Create Star Trails in Minutes Using Phototoshop by Hammad Iqbal appeared first on Digital Photography School.


    Digital Photography School

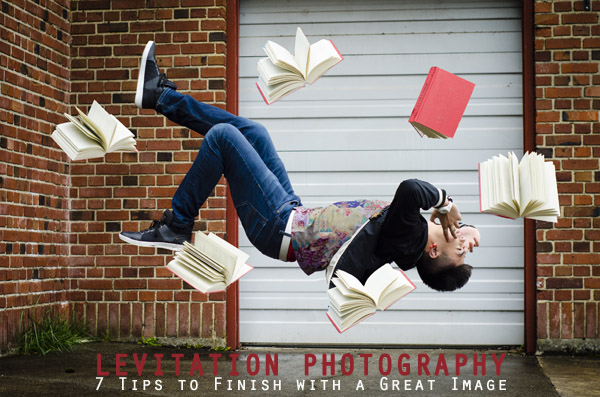
  • Levitation Photography 7 Tips for Getting a Great Image

    Image1

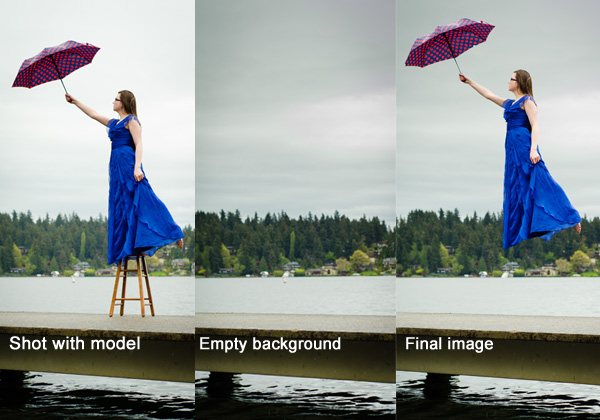
    Levitation images are magical! They draw the viewer in and make them think about what’s not quite right. If you search the internet for levitation photography, you will find amazing examples. However, levitation photography hasn’t become wildly popular yet. I assume it’s because levitation photography looks really difficult. I think most people would be surprised to learn that in its most basic form, it’s just compositing two or more images in editing software.

    Like most portrait photographers, I shoot what I’m good at, and mostly stay inside my little portrait box. Recently, I decided I needed to get my creative juices flowing again and get out of my comfort zone. Levitation photography caught my eye. I learned the basics of how to create such images from posts like this: How to Shoot a Mysterious Levitation Photo.

    My first levitation experiment was rough, to say the least. I knew the basics of how to accomplish a levitation photograph, but the images turned out mediocre. The best part though, was coming home after the shoot and writing down all the things I had learned to make my levitation images better for the next time. Below, you’ll see the lessons I learned, so you don’t have to learn the hard way.

    Preparing for the Shoot

    Tip #1 – Gather Your Equipment

    In order to create a levitation photograph, you must have: a camera (that has manual focus capabilities), a tripod, a willing model, a strong fan (if your model has medium to long hair), and something to prop your model up (a stool, chair, or ladder). If you have a camera remote, bring that along too.

    Tip #2 – Tell Your Model What to Wear

    Clothing can make or break a levitation image.

    • Solid color clothing is best. Prints and patterns can make it difficult if you need to clone out certain parts of clothing or liquefy fabric.
    • Tell your model not to wear a jacket or sweater. Anytime the model lays upside-down, or sideways, the garment should be hanging down. But if he/she is laying on a stool, the jacket won’t be able to naturally hang leaving the image looking less realistic.
    • If you’re going for a feminine levitation shot, long dresses, skirts, or extra flowing fabric can help create the look you’re going for.

    Tip #3 – Shoot on a Cloudy Day

    Sun and harsh shadows have the potential to create a lot of extra work for you in post-production. Editing out the stools and ladders, yet keeping a realistic shadow of your subject can turn into a job for Photoshop experts.

    During the Shoot

    Tip #4 – Shoot from a Low Angle

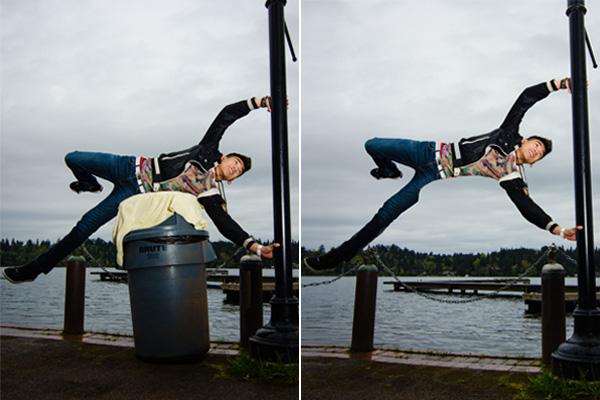
    You will want to shoot from a low perspective to give the illusion that your subject is high in the air. However, be mindful of how low you are. If you are lower than the prop your model is standing/laying on, the prop will block parts of his/her body. It is safest to shoot in line with the top of the prop your model is on. Having your model situated at the very front of the prop will also lessen the chance of cutting into the body.

    Image2

    When I erased the garbage can, parts of the model’s body looks like it went missing since it was hiding behind the garbage can.

    Tip #5 – Always Photograph the Empty Background

    When preparing to photograph the frames that will create your final levitation image, follow these steps.

    1. Set up your shot with your model in the frame.
    2. Plan the angle you are going to shoot from and set up your camera on the tripod.
    3. When your model is in place, choose the focus point on your subject.
    4. Set your camera to manual focus and don’t touch it!
    5. Take the different shots suggested below, in Tip #6, without moving your focus point or your camera.
    6. After you’re sure you’ve captured all the images you need with your model and props, remove EVERYTHING from the scene. Photograph ONLY the empty background. This is the most important image you will take.

    Image3

    Tip #6 – Take Multiple Shots to Create One Image

    The most basic levitation image is a composition of two or more frames. At the bare minimum, you will need at least a shot of the background and one of the model in that background.

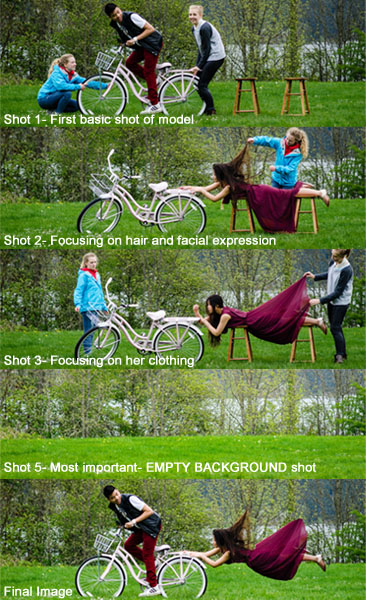
    Most great levitation images use a few more frames to add interest and make the final image more provoking. Here is a list of some shots you might want to take all without changing the focus and position of the camera:

    1. Model on the prop(s) – the focus of this shot is on what the arms, legs, and body are doing.
    2. Hair and facial expression – the focus of this shot is to capture the models expression and hair moving like it would naturally if the model was really in that position (floating straight up, blowing behind her, etc.). *Hair dryers and small fans are not strong enough to propel hair in specific directions. The longer and heavier the hair, the more powerful the fan needs to be.
    3. Clothing – the focus of this shot is to capture the movement of the clothing (if needed). If your model is being pulled one direction, what direction should the loose fabric be moving?
    4. Additional props – the focus of this shot is to photograph any extra props you want in the picture (if desired).
    5. Empty background – see Tip #5 above to learn more about the importance of this shot.
    Image4

    Shot 2 is a perfect example of how a strong fan would have made the shot more realistic with her hair blowing behind her instead of being held up by an assistant. We did not need to photograph additional props for this image, therefore, we did not do a “Shot 4″ for this composition.

    After the Shoot

    Tip #7 – Putting the Images Together

    Many levitation photographers use Adobe Lightroom and Photoshop to create their final images. Regardless of your software choice, it is recommended to first color correct the series of shots so they are all the same. Lightroom has a great “sync” feature to make sure the exact same settings are applied to the entire series of images.

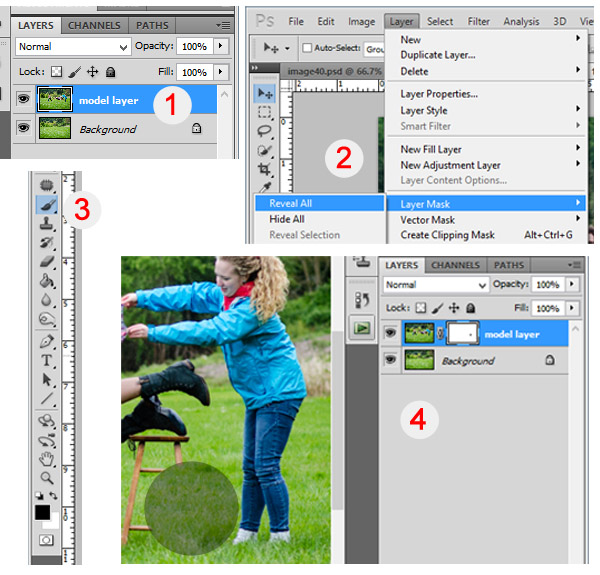
    Next, open the images in an editing software like Photoshop. Start with the empty background image. Next, add in the main image of your model as a layer with a “Reveal All” mask. Simply use a black paintbrush on the mask to remove the props supporting your model. The end of this article describes each step in more detail. Repeat those steps for each frame you’d like to add. Finally, you can merge your layers and put the finishing touches on your final image. Then voila, you have a gorgeous piece of levitation art.

    Image5

    1 – Empty background shot is the bottom layer, with the model image above it. 2 – Select the model image and go to “Layers”> “Layer Mask” > “Reveal All”. 3 – Select the paintbrush, make sure it is black. 4 – Simply brush over the props that you don’t want to show in the final image.

    Creating levitation images lets your fantasies become “realities”. Don’t let the laws of physics prohibit you from creating true art For more inspiration, search 500px.com for levitation images. You’ll be amazed.

    Your Turn

    Have you tried creating a levitation photograph? What was your experience? Do you have any additional tips that would help those getting started? Let us know in the comments. Also, feel free to include a link in the comments to your levitation work. We’d love to see what you create!

    The post Levitation Photography 7 Tips for Getting a Great Image by Danielle Ness appeared first on Digital Photography School.


    Digital Photography School

  • The Most Valuable Photography Tips Ever – Results of a Social Media Survey

    I recently asked the following question on social media: “What was the most valuable photography tip you ever received?” Needless to say, I received a plethora of really useful tips from the audience. Some were spot on, others were debatable. I thought it would be fun to post a few here and expand on them briefly.  Let’s get started with the most valuable photography tips ever.

    The best zoom lens is your own feet

    That is often true but please don’t try it if you are photographing a polar bear and her cubs or a bulky football player running for touch down. Get the right tool for the job! On the other hand, I must say that on any given photography workshop, the day my students do their best work is when they use a fixed focal length lens. I really believe in the power of limitations.

    Look for the light

    The day I understood how to see the light and how to harness it, is the day my photography took a leap forward. There is no bad light, learn to assess the quality and quantity of light and work with. It’s all about learning to use it to your advantage.

    See the light and use it to your advantage. ©Valerie Jardin

    See the light and use it to your advantage.
    ©Valerie Jardin

    Get close. Then Get Closer

    Okay, I had to smile because this one came from one of my former students. I could hear myself say that exact same sentence. Learn to see photographically and make stronger images. Photographers tend to leave too much ‘stuff’ around their subject. The viewer gets lost in the chaos and doesn’t know where to look. Less is often more. It’s important to learn to crop in camera and using a prime lens is a great way to learn to see photographically. Learning to remove distracting elements from your frame before your press the shutter is essential to improving your photography.

    Get close. Then get closer! ©Valerie Jardin

    Get close. Then get closer!
    ©Valerie Jardin

    Stop thinking and shoot

    Before you press that shutter you should know why you composed the way you did. Using the ‘spray and pray’ approach will certainly get you some lucky shots but not much satisfaction. You obviously stopped because you saw something that grabbed your attention, work the scene and follow your instinct. Don’t over analyze at the risk of making a technically perfect image with no story or feeling. Perfection is not always the goal.

    Never stop practicing

    There is no better way to improve your craft than by exercising those ‘visual push-ups’ daily. You don’t even need to leave the house. Experiment with anything, make an ordinary object look extraordinary. Go ahead and use your camera phone even. The tool doesn’t matter, your vision does.

    Don’t use the flash

    Okay, I have to use a ‘Sammonism‘* here and remind you to “Turn the darn flash off!” This tip applies to your camera or your phone.

    After you’ve taken the shot, look behind you.

    For sure! If you are photographing another sunset, the scene lit by the golden light behind you may be even more spectacular.

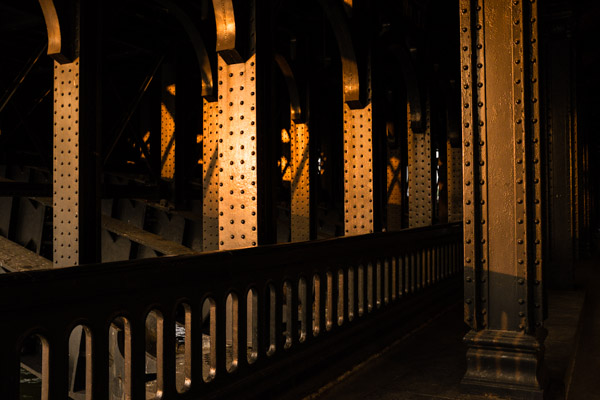
    Look behind you! Everyone was looking at the sun setting over the river Seine in Paris, I looked back and was struck by the beautiful golden light hitting the bridge posts.  ©Valerie Jardin

    Look behind you! Everyone was looking at the sun setting over the river Seine in Paris, I looked back and was struck by the beautiful golden light hitting the bridge posts. – ©Valerie Jardin

    Shoot in manual mode

    That may not always be your best choice. If you are shooting landscape then I would say yes, by all means, shoot in manual and take full control. If you are shooting street photography for example, shutter priority or aperture priority may be better choices. There is no coming back to get the shot again, so let the camera do some of the thinking for you or you’ll miss the moment.

    Lighten your load and expand you creativity

    A comfortable photographer is a happier photographer. Take one camera, one lens and let those creative juices flow.  It will save your back too.

    Shoot for yourself. Don’t try to get approval of others.

    So true, unless you need to please a client, of course. If photography is a hobby, why should you care what other people think of your pictures, as long as you like them? That said, having a critique of your work in order to improve on it is one thing, and I would highly recommend it. But, the need for gratification via ‘likes’ on social media is something you should try to learn to live without. If that is the goal then I would recommend posting a daily kitten picture to get your fix. Then just shoot what you love (if it’s kittens, then it’s a win-win). In all seriousness, not every genre of photography will get ‘Oohs and Aahs’ on social media. For example, street photography is not understood and appreciated by the general public like landscape photography. Is that a reason to shoot landscape if your heart is in street photography? I hope not or you’re a photographer for the wrong reasons. Follow your heart and your work will shine!

    Stop reading and start clicking

    It’s good to read about photography and get inspiration online and in books but that should not replace your time behind the camera. You are not going to get instantly better after reading an article or watching a tutorial. You are only going to get better if you shoot often. Period.

    Slow Down

    Having unlimited shutter clicks without a cost factor attached is both good and bad. Good for the learning curve. Bad because it tends to make us lazy. Start shooting as if you were shooting film, make every shot count and you will have more keepers at the end of the day. Slow down and know why you are about to press the shutter.

    Practice, practice, practice. Any ordinary object can be a great learning subject to exercise those 'visual push-ups' ©Valerie Jardin

    Practice, practice, practice. Any ordinary object can be a great learning subject to exercise those ‘visual push-ups’  ©Valerie Jardin

    Never pack your camera away until you are back home

    You never know what is going to cross your path. Keep that camera handy, and always on.

    Take the lens cap off

    Better yet: Leave it at home.

    Happy shooting!

    Please share some tips that made a difference in your photography in the comment section below.

    *In reference to our friend and photographer extraordinaire Rick Sammon

    The post The Most Valuable Photography Tips Ever – Results of a Social Media Survey by Valerie Jardin appeared first on Digital Photography School.


    Digital Photography School

  • National Park Photography Workshop Permits: Are They Really Necessary?

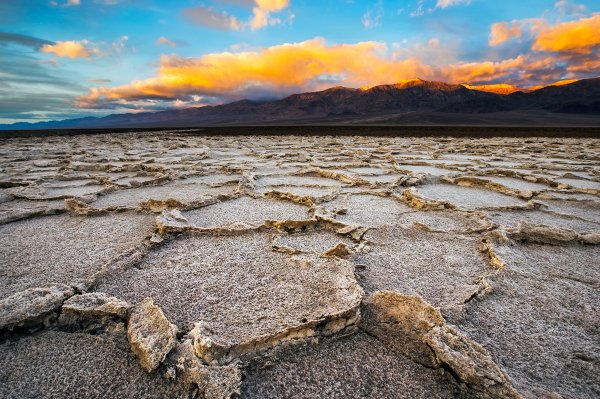
    badwater-sunrise

    Sunrise on the West Side Road at Badwater Basin, Death Valley

    Back in February of 2014, I led two back-to-back photography workshops in Death Valley National Park with my friend and fellow photographer Mike Mezeul. Planning workshops is a lot of work and takes a lot of love and dedication to do right. Before the process of getting everything set up (making sure the students had all booked their flights, hotels, rental cars, etc.) we needed to apply for a workshop permit. This is sort of a tough thing to do timeline wise. You can apply for it ahead of time before you even announce the workshop; but then you run the risk of paying the $ 210 (average cost) and the workshop falling through or something like that. Or you can wait until you book spots for the workshop and then apply for the permit; but then you run the risk of not getting the permit in time for the workshop. We opted for the latter because we had plenty of time to get the application in and get the permit back. We got our workshop permit in time and had nothing to worry about. We weren’t going to risk getting in trouble with the park in an effort to save a few hundred bucks.

    Now fast forward to the second workshop. We had just wrapped up a beautiful sunrise shoot at Badwater Basin on the West Side Road (Death Valley. The patterns at the main part of Badwater (by the parking lot) were in pretty terrible shape but we decided to take the group there after the sunrise shoot so they could see all the educational signs, walk around for a bit and get a picture of the “280 Feet Below Sea Level” sign. While we were there, a man came up to me and asked if we had found any good patterns. I’ve never been one to withhold secrets so I told him about the spot we found over on West Side Road. I noticed he had a van full of people and shortly after, they were on their way.

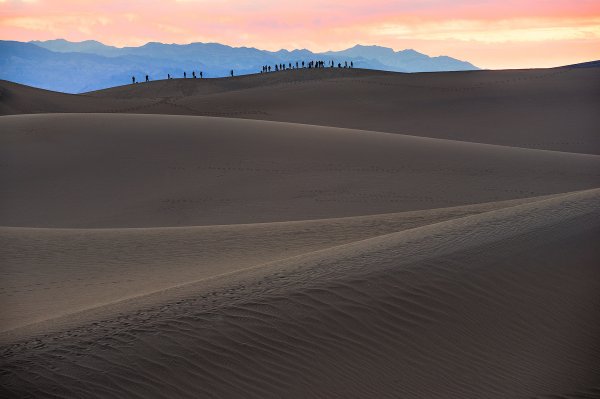
    Workshop students set up for sunrise at the Mesquite Flat Sand Dunes

    Workshop students set up for sunrise at the Mesquite Flat Sand Dunes

    Our group stayed at the Badwater parking lot for another 30 minutes or so before heading back into Furnace Creek for breakfast. When we got to the Forty Niner Cafe we saw a large table of around 20 people (all with their photography gear) sitting in silence. It was really strange. Nobody was really talking and everyone looked stressed out and upset. I went to use the restroom and that’s when I saw the same guy who I’d spoken to at the Badwater Basin parking lot.

    He told me that he was a workshop instructor and they were on day two (the first full day) of their photography workshop. He had taken my advice and driven his group down to the West Side Road but when he got there, a Park Ranger was waiting for him. As it turns out, the instructor and his partner had decided to forgo the workshop permit because they had applied for one the year before and never got asked about it at during that workshop. He figured, “Why not save the $ 210?” It’s not like Death Valley has much staff left after all the government cutbacks, right? Wrong.

    The Ranger asked for his permit and when the instructor said he didn’t have one, he was told to leave the park immediately. He was instantly given a $ 2,000 fine for conducting a workshop inside a National Park without a permit. He had to leave his group of around 20 students inside the park–students who had paid the tuition for the workshop, bought plane tickets into Vegas, rental cars to drive into the park and $ 200/night hotels within the park. On top of that, he had to appear before a judge in federal court in California three months later. That meant another flight to book, a couple nights in a hotel, a rental car and living expenses for the trip. Based on the outcome of the court appearance, he was facing upwards of $ 10,000 in fines and a lifetime ban from the park. I’m not sure what the outcome was with his group of students but I’m assuming they got their money back for the workshop.

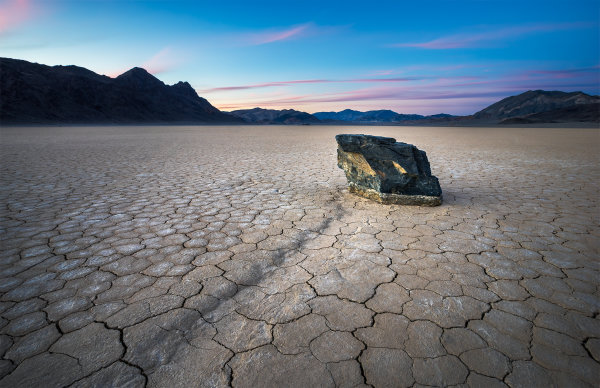
    A mysterious sailing rock during sunset at the Racetrack Playa

    A mysterious sailing rock during sunset at the Racetrack Playa

    The Lesson to be Learned

    The takeaway here is not to cut corners. If you are conducting a workshop inside of a national park, a national monument or even some state parks; get a permit. It’s not worth taking the risk and there are Park Rangers out there doing research. I talked to another photographer who was holding a workshop out in Zion National Park a while back. He had applied for a permit (and got one) to take his group into the Subway. When he got to the parking lot to start the hike, a Ranger was waiting there for him to check his permit. I’ve heard other stories of the Rangers looking up workshops on Google and then keeping track of the instructors on social media. They then try and pinpoint where the group will be and see if they can track them down to make sure they have the permit. All it takes is a tweet saying, “Beautiful sunrise at the Mesquite Dunes this morning.” To be honest, $ 210 is a very small fee to pay for holding a workshop inside of a national park. On top of that, you are supporting the park by paying the fee much in the same way you support it by purchasing park passes and entry fees.

    If you are a student and will be attending a workshop inside a park, make sure that your instructor has the right permits. In my opinion, an instructor that cuts corners to save their bottom line isn’t an instructor worth paying tuition for a workshop.

    For more information on choosing a photography workshop or tour, read these:

    • Taking a Photography Workshop; Why it is Different from a Photo Tour
    • Choosing a Photography Workshop Or Tour
    • Is that a Workshop, Tour or Seminar [Part I]

    The post National Park Photography Workshop Permits: Are They Really Necessary? by James Brandon appeared first on Digital Photography School.


    Digital Photography School

  • Highly Intelligent ‘About Me’ Page Tips for Photographers to Build Their Brand

    Crafting a compelling bio and writing the perfect pitch are quite challenging. Working in a service industry requires its own rules. Nobody wants to hire a person he doesn’t know, doesn’t trust or doesn’t like. That’s why talking about yourself is extremely important while creating your own brand. If you check your Google Analytics, you’d see that the ‘About Me’ Continue Reading

    The post Highly Intelligent ‘About Me’ Page Tips for Photographers to Build Their Brand appeared first on Photodoto.


    Photodoto

  • Lessons you can learn from master photographers – Minor White, Ansel Adams, and Syl Arena

    The reason I have put pen to paper (fingers to keys) is to share with you some simple tips and knowledge that can be gained from taking a look at some notable photographers. Some would even argue that these people are among some of the most creative and artistically idolized craftsmen who have ever captured light with a box. If you’re just starting out on your photographic journey these tips from some of the masters will hopefully help you along.

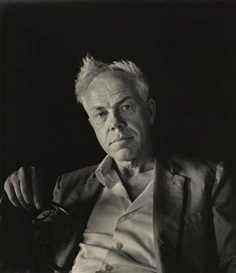
    Minor White

    Minor White by Imogen Cunningham

    Portrait of Minor White by Imogen Cunningham

    Born during the summer of 1908 in Minneapolis, Minor White held jobs as a waiter, bartender, and even worked in military intelligence during World War II. He was a very spiritual man and his beliefs spilled over into his photography. Co-founder of Aperture magazine along with Ansel Adams and other notable photographers, Minor was also an early advocate of the Zone System pioneered by Adams and Fred Archer. An early practitioner of infrared photography, White ventured into an array of subject matter but his work with the small, and often overlooked scenes and objects, such as frost on glass and dilapidated structures remain some of his most acclaimed.

    Lessons you can learn from Minor White:

    Make photographs all the time, even if you don’t have a camera.

    Minor said that he was “always mentally photographing everything as practice”. This is solid wisdom for any photographer of any skill level. Unfortunately, the realities of most of our lives limit the time we get to spend with a camera in hand. The good news is that our artistic mind is never absent. Think about which exposure would blur that passing train just right. What aperture would give me enough depth of field to put that entire table into focus? You’ll be more prepared next time when you have your camera handy.

    Don’t overlook small objects and details.

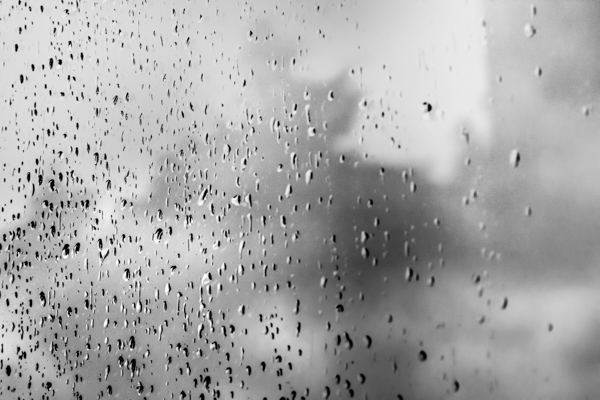
    Some of Minors’ most celebrated works were of seemingly mundane or otherwise less than notable subjects. Be on the lookout for details and textures of things that you see every day. This is especially useful if you have an interest in abstract photos.

    Drops of rain on my back door glass. Easily overlooked.

    Rain on glass small

    Simple occurrences made more interesting with a little creative thinking.

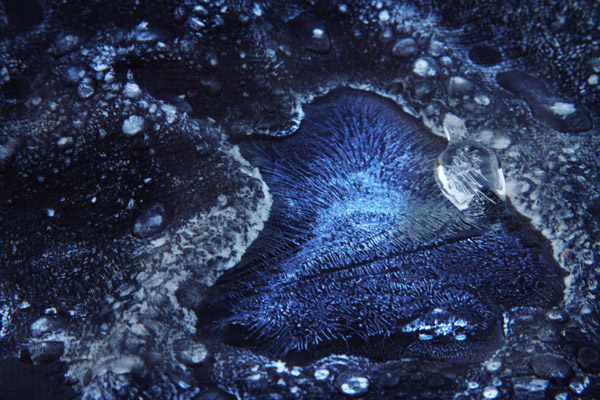
    Ice on Firepit small 1

    The early morning blue hour made this frost and ice on the cover of my fire pit look otherworldly.

    Ansel Adams

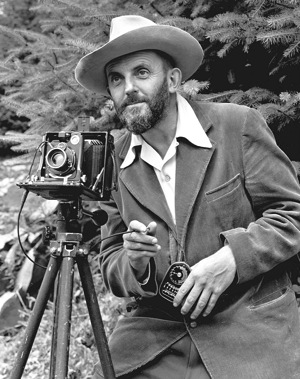
    Ansel Adams self portrait

    The portrait of Ansel Adams taken by J. Malcolm Greany around 1947

    Chances are, you have heard at least something about Ansel Adams, even if that something is that he was a famous early photographer. It’s true, he is considered by more than a few to be one of the best photographers of the twentieth century. There have been volumes filled with the ins and outs of this photographic master. Born on February 20th, 1908 into a well established family in San Francisco, Ansel Adams discovery of photography was unplanned. Ansel was a gifted piano player. An exceptional piano player in fact, so exceptional that he was set to become a professional concert pianist until he decided to commit himself fully to photography. Honestly, the next sections could be titled “What can Ansel Adams NOT teach you?”. The man was such a force in the early days of modern photography that it almost seems unfair to point out only a few practices that will help you improve your own work. However, I have managed to list some basic tips from Ansel Adams that you can put into action in order to make you a better photographer right now.

    Lessons you can learn from Ansel Adams:

    Slow down

    I’m sure you’ve heard this before and possibly have read about the importance of slowing down and making your photographs with more deliberate intentions. Our crushingly convenient modern era of virtually unlimited and relatively low cost film (i.e. digital photography) has lent itself to making us potentially sloppy in our shooting. We sometimes press the shutter button entirely too often in order to get a suitable image for processing. I will shamefully raise my hand and admit that I too am guilty of this spray and pray method of shooting, more so in my earlier photography days right after I made the leap from analog to digital.

    I did myself a favor, that I also encourage you to do for yourself, and decided to take things more seriously. Ansel would consider all aspects of his composition: from the elevation and tilt of his camera, the perspective of his lenses, the cast of shadows, even the future effects of the wind on the clouds. There will be times when you are racing against a sunset or you will be trying to catch some specific or fleeting moment and at those times you must shoot quickly and intuitively. Usually, however, we rush for no perceivable reason and often overlook or forget small changes that can make or break an image. So the next time the muse slaps you across the face to make an image, calm yourself down and work the problem. Think about what it is you are trying to do. Put yourself into the correct mindset to make better images and you might find, strangely enough, that your images become better also.

    Teach yourself to see the finished product before you make the exposure.

    The act of seeing or visualizing is another subject that has been touted by the photographic community many times. Visualization is one of those things that really can’t be brought about by technical instruction in the traditional sense; meaning there are no classes on visualization. Ansel Adams himself remarked that visualization cannot be taught, it is be learned. Think about that concept.

    It’s undeniably true that some people learn faster than others when it comes to visualizing finished prints. However, it is equally true that no one started out being able to see in their mind’s eye the final result of a photo. Like most things, it takes practice, as well as patience, and more than a healthy helping of sheer determination. When you begin to see the print before it is made, then really all that stands between you and your vision is the selection of techniques which, similarly, require just as much determination and commitment to master.

    Use a tripod

    To reiterate, please, use a tripod whenever and wherever possible. A tripod is one of the single most important tools you can use to increase the focal clarity and sharpness of a photograph. Minimizing camera shake and vibration is key to making crisp images, period.

    Colorflowersmall

    By using a tripod I eliminated the need to worry about vertical camera movement in the macro shot above. Ansel tells us that the ideal tripod is “a cubic yard of solid concrete with a 1/4″ X #20 bolt head sticking out of the top”. If you don’t have a huge block of cement lying around to attach your beloved camera to, then the next best thing is to obtain a quality tripod and use it.

    Having some way to keep your camera absolutely still is essential when working with long exposures like the image below.

    Cane Creek Cascades Star Trail Color3

    Exposure time: approximately forty seven minutes. This long exposure time would not have been possible without the use of a tripod.

    Using a tripod (correctly) also forces you to, again, slow down and think about the photograph you are intending to make. dPS has a superb article on tripod employment that can be found here.

    Syl Arena

    Syl Arena

    Photo by Vera Franceschi

    Syl Arena, is a uniquely humble and genuine person, author, teacher, lecturer, and a speedlite Jedi. He is a magician of sorts when it comes to creating and moulding light. Syl currently resides on the west coast around San Luis Obispo, California. His biography is brief and barely mentions any notable achievements of which there are many. The lessons I learned from him actually lean more towards the philosophical than the technical. That being said, you will find this section contains no real insight from Mr. Arena concerning artificial light manipulation or photographic technique in general. For that I would highly suggest you check out his blog or his new Q&A site for loads of information.

    My first introduction to Syl was through the gift of one of his books (thanks Mr. Veneman), “LIDLIPS: Lessons I didn’t learn in photo school“. In that book, this highly educated, highly skilled, highly successful, highly haired photographer simply and truthfully listed page by page the things he was never taught. They ranged from personal revelations on the photographic process to small background stories of some of his location shoots. He mentioned nothing about technique or gear really, just lessons from his life as a picture maker, unpretentious and sincere.

    Lessons you can learn from Syl Arena:

    Don’t be afraid.

    Your limited gear, your perceived skill level, your lack of obvious subject matter, your lack of confidence, fear of trying something new; don’t be afraid of any of these things, or anything else for that matter. You will never have the all of the best gear so don’t let it worry you. Instead, learn to make the best use of what gear you have. You will never learn all there is to know about making photographs so learn what you can, where you can. Feeling like you’ll never get an image just right? You are your own worst critic, so don’t hide your work from the world.

    Be inspired, not intimidated.

    This is one of the hardest things to overcome, especially if you are just beginning to learn about photography. It’s easy to feel envious or even jealous of other photographers work. This can sometimes lead to convincing yourself that your work has no merit. Chances are, that image you’re envying and ogling over is a product of hard work, patience, diligence, determination, perseverance, and many other great words that the thesaurus can produce.

    Viewing other artists work is one of the best ways to grow your own creativity.

    Take the work as seriously as you want, but not yourself.

    As you grow and learn as a photographer, remember that we all started out understanding absolutely nothing about photography; so keep that in mind the next time someone asks you a question about one of your photographs in a less than learned way. Most likely, you have learned something from someone who was nice enough to teach you. Please pay it forward.

    Have you learned any lessons from other master photographers? Who is your mentor? Please share in the comments below.

    The post Lessons you can learn from master photographers – Minor White, Ansel Adams, and Syl Arena by Adam Welch appeared first on Digital Photography School.


    Digital Photography School

  • Camera Basics 101 The Exposure Triangle

    One of the first things you will want to get your head around in photography is understanding exposure. To do that you will need to learn some camera basics and master:

    The Exposure Triangle

    If this term has of yet eluded you, or you’re not quite ready to claim full mastery here are 3 video tutorials to help you understand the basics of the exposure triangle including:

    • ISO
    • Aperture
    • Shutter speed

    In this first video the host Mark Wallace (with Adorama TV) goes through all three of these elements and explains each briefly, and how they work together:

    Mark also mentions this book in the video as a good starting point for learning more about exposure.

    Next up is Shoot in Manual Mode Pt. 1 – Aperture, Shutter Speed and ISO – by photographer Sean von Tagen

    Lastly is this video by a host whose name I couldn’t find. If you can get past his really monotone voice, the information is really good and should be easy to understand and follow.

    If you want more reading, try these:

    • Exposure Triangle – Not just about more/less light
    • Understand Exposure in Under 10 Minutes
    • Getting off Auto – Manual, Aperture and Shutter Priority modes explained
    • Photo Nuts and Bolts – Know your camera and take better photos – a dPS eBook

    The post Camera Basics 101 The Exposure Triangle by Darlene Hildebrandt appeared first on Digital Photography School.


    Digital Photography School

  • Homestead Restaurant, Oakland, California

    Homestead Restaurant
    Address: 4029, Piedmont Ave, Oakland, CA 94611
    Phone:(510) 420-6962
    Menu: homesteadoakland.com

    Tried Homestead Restaurant on Piedmont Avenue last night with @mrsth. Highly recommended. :)

    The restaurant has great light with an open air kitchen where you can watch the chefs work.

    The menu changes daily. The squid, duck and horchata ice cream were my favorites. Here’s what we had:

    date night.

    Great open air kitchen where you can watch the chefs work.

    First course, spicy pepperoni and meat plate.

    First course, little gems, avocado, fried onions, buttermilk dressing

    Second course, local squid, grilled summer beans, almond & sherry vinaigrette

    Third course, grilled duck breast, fried farro, fava beans, apricots, wild arugula

    Third course, poached egg, porcini mushrooms, sweet corn, thyme, watercress

    Dessert, horchata ice cream, strawberries, churros

    Dessert, brown sugar chocolate cake, toasted meringue

    I’ve never had madeira on ice before. It was really nice and refreshing with a twist of lemon.

    Homestead seasonal spritzer

    Fresh garden vegetables used by the chef.

    Wood fire grill in the open kitchen.

    Welcome to Homestead.

    We brought our own bottle of wine, a wonderful 1997 Altesino Brunello di Montalcino. Corkage was $ 20.

    Loved the colors of the kitchen.


    Thomas Hawk Digital Connection

  • Lens Review Tamron 24-70 mm f/2.8 Di VC USD

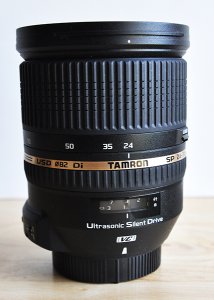
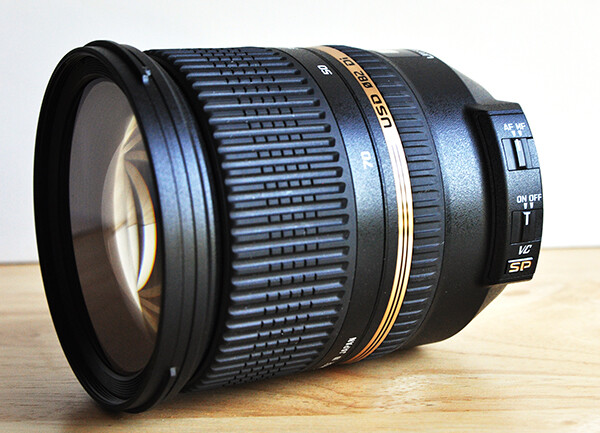
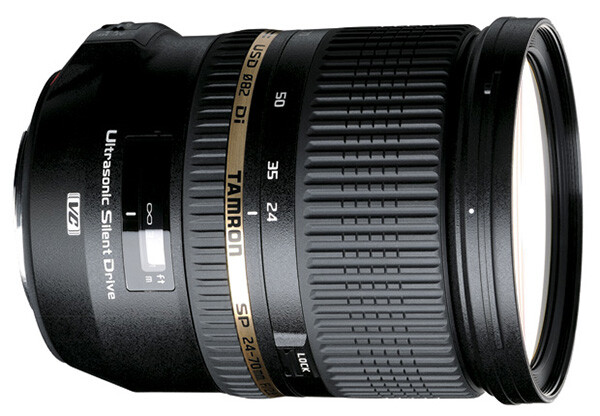
    The Tamron 24-70mm f/2.8 Di VC USD is a great lens choice for both professionals and enthusiasts.

    The Tamron 24-70mm f/2.8 Di VC USD is a great lens choice for both professionals and enthusiasts.

    I won’t make you wait until the end of the review for the verdict– this lens absolutely rocks. Plain and simple. Despite what I consider to be a huge and unfortunate misconception among many professional photographers, there are some truly amazing, high-quality lenses being designed and produced by companies other than Nikon and Canon. Dismissing them as being somehow inferior simply because their logos don’t match up with those on the camera would be a big mistake. The Tamron SP 24-70mm f/2.8 Di VC USD is just such a lens. I recently had the opportunity to put it through its paces, and this is where the test drive took me.

    The Specs

    Let me start with deciphering the alphabet soup. Designed for digital (Di), this lens includes Tamron’s proprietary Vibration Compensation (VC) for less camera shake and smoother image stabilization, as well as its Ultra Silent Drive (USD) motor, ensuring fast, virtually silent auto focusing. This Super Performance series (SP) lens includes 17 elements in 12 groups, which vastly reduces chromatic aberration.

    • Focal Length:  24-70mm
    • Maximum Aperture:  f/2.8
    • Lens Construction:  17 elements in 12 groups
    • Minimum Focal Distance:  0.38m (15.0 inches)
    • Maximum Magnification Ratio:  1.5 on APS-C sensor cameras
    • Filter Size:  ø82mm (3.2 inches)
    • Length:  108.5mm (4.3 inches)
    • Extended Length:    116.9mm (4.6 inches)
    • Diameter:  ø88.2mm (3.5 inches)
    • Weight:  825g (29.1 oz)
    • Diaphragm Blades:  9 (rounded diaphragm)
    • Standard Accessories:  Lens Hood
    • Cost:  $ 1,224 (USD), compared with $ 1,887 (Nikon) and $ 2,299 (Canon L Series)
    • Compatible Mounts:    Nikon, Canon, Sony (NOTE: The Sony version of this lens does not include the vibration compensation feature, since Sony DSLR bodies already have this functionality).

    First Impressions

    In some ways, I was sold on this lens before I even put it on a camera. Taking it out of the box for the first time, I was immediately impressed with the feel of it. It’s obvious that this lens was both designed and constructed with high-quality materials and great attention to detail. A common complaint among photographers about “off-brand lenses” (a term I hate, by the way), is that they just don’t have the same feel or build quality as lenses coming from Nikon or Canon. I’ve used several Tamron lenses over the years (the 28-75mm f/2.8 being among my favorites), and I can tell you that you’d be hard-pressed to find any flaws in the construction and build of this lens. As a matter of fact, this is Tamron’s first lens to include extra seals for moisture-resistant construction.

    tamron-lens-review-digital-photography-school-002

    Lens Creep

    Lens creep is a fairly common problem with zoom lenses of lower quality. If you have ever zoomed a lens all the way out, only to have it slowly slide back down on you when trying to shoot at a sharp, upward angle, you know what I’m talking about. The opposite can also happen, where a poorly crafted zoom can start sliding out all on its own when pointed at a downward angle. While lens creep usually manifests itself more readily with longer, heavier zooms, it can be an issue on shorter lenses also. I experienced no lens creep at all on this lens, regardless of where I was along the zoom range.

    Focus

    As noted in the specs above, this lens is equipped with Tamron’s Ultra Silent Drive (USD) motor, which is supposed to help ensure fast, virtually silent autofocus. This is particularly useful for wedding and event photographers who are trying to be as unobtrusive as possible. One of the things that helps me hide in plain sight is quiet autofocus. One word of caution is worth mentioning. While the USD is virtually silent on the outside of the camera, it is possible that additional noise might be picked up when shooting video.

    Autofocus was fast, accurate, and, as mentioned, quiet. There might have been a slight bit of focus lag in extremely low light situations, but I would expect that from just about any lens in dark conditions. My only complaint regarding the manual focus on this lens is the size of the rubber focus ring. I think it’s a little too small, even for average hands. Add my big Chewbacca hands into the mix, and manual focus ends up taking a little more concentration that it should actually need. As far as the actual manual focus mechanics, however, I have no complaints at all. There was no lag whatsoever on the ring, making it smooth, accurate and responsive.

    tamron-lens-review-digital-photography-school-009

    Chromatic Aberration

    Forgive me for a minute or two while I geek out on the science end of things. Chromatic aberration is a type of distortion in which the lens fails to focus on all colors to the same convergence point. It is also a type of distortion which appears more frequently in lower quality lenses. It occurs because different lenses have different refractive indices for different wavelengths of light. Before your eyes glass over too much, let me just say that chromatic aberration becomes visible as fringes of color along boundaries separating light and dark parts of the image (i.e., contrast). As a general rule, chromatic aberration is mainly an issue at the combination of a lens’ shortest focal length and its widest aperture. This particular lens was designed specifically to minimize chromatic aberration and those efforts appear to be successful. While the laws of physics make it practically impossible to completely eliminate chromatic aberration, this lens exhibited it so slightly that I actually had trouble finding it. To that end, I’d say that any chromatic aberration actually created by this lens is inconsequential.

    As long as we’re on the subject, let me offer one additional point regarding chromatic aberration that has nothing to do with this review. Colored fringes (often purple) around image highlights can be due to lens flare and have nothing at all to do with chromatic aberration.

    Sharpness, Vignetting and Distortion

    I found this lens to be very sharp in the center at all focal lengths and apertures. While stopping down a lens (moving to a smaller aperture) can sometimes result in an increase in sharpness and resolution, there was virtually no change in this lens between 24mm and 35mm. It wasn’t until I got between 50mm and 70mm that I think I might have noticed a very slight improvement by stopping down, but it was too slight to be of any real concern to me.

    On a full frame Nikon D800, the corners are slightly less sharp than the center–a fairly common issue in lenses of this focal length. Having said that, however, corner image quality improves at all focal lengths as the lens is stopped down. I found the optimum aperture for the corners to be around f/8. Taking both center and corner sharpness into account, I’d put the “sweet spot” for this lens to be around f/5.6, but don’t let this keep you from capturing great “wide open” shots at f/2.8. The big surprise for me came when I compared corner sharpness on the Tamron with a Nikkor 24-70 f/2.8 and found corner sharpness on the Tamron to be better than the Nikkor.

    While there is some visible distortion at the wider end of the lens, it does drop off quite quickly as you zoom in from 24mm. This is of most concern when shooting portraits. Making sure that faces are not distorted is an obviously valid concern, and is easily addressed by zooming the lens all the way in to 70mm.

    Putting it to the Real Test

    It’s easy to get passionate about lenses, regardless of brand name. It’s also easy, however, to get lost in the details. Look hard enough and you’ll find issues relating to chromatic aberration, sharpness, vignetting, and distortion in any, and every, lens you try. As pointed out earlier, we’re dealing with the laws of physics. That’s why the ultimate test of any lens has to be how it performs in everyday shooting conditions.

    The first thing I want to know about any lens is what it’s going to do for me. Like many photographers, I make a living capturing a wide variety of subject matter. Since most of us don’t have unlimited gear budgets, the best purchases are those that are going to fill more than just one function. This is one of those lenses that does a great job, regardless of whether I am shooting portraits, food, or architecture. The fact that it does a great job as an all-around, everyday lens for personal photography is a bonus for the professional and a necessity for the enthusiast.

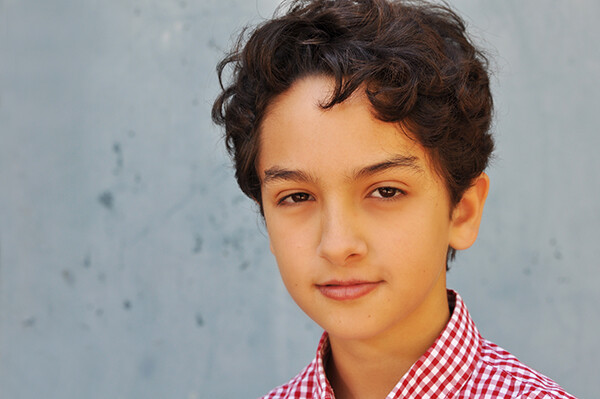
    First came outdoor portraits. This first image was taken in the shade with no direct sunlight. There was a single off-camera strobe in a softbox to the left of the camera, approximately three feet from the subject. I was impressed with the speed of the autofocus, as well as how this lens captured the fine details. As noted, the wrong focal length can sometimes distort a subject. Zooming a 24-70mm all the way in to 70mm, like I did here can prevent that.

    tamron-lens-review-digital-photography-school-003

    1/125, f/8, ISO 200, 70mm, off-camera flash.

    I was in the middle of a cookbook shoot when this lens arrived, and I was curious to see how it would do in an all natural light scenario. When we shoot food in the studio, we generally use a single natural light source (big window) to backlight or sidelight the dish, along with a bounce card for fill. Shooting from the shadow side of the food can sometimes pose a challenge for auto-focus, but this lens had no problems at all, even when I selected a focus point in the darkest part of the frame.

    tamron-lens-review-digital-photography-school-004

    1/80, f/5.6, ISO 400, 70mm, natural light.

    But let’s take low light a step further. Really low light. In the images below, the photo on the right was taken with only ambient light in order to show how the autofocus performs in very low light situations. For purposes of the test, I placed my focal point on the subject’s left eye- the one in shadow. The photo on the left was taken at the same settings, with a single speedlight in a softbox to the left of the camera. The autofocus obviously had to work a little harder than it might have in broad daylight, but not so much that it became a problem on the shoot.

    tamron-lens-review-digital-photography-school-006

    1/60, f/5.6, ISO 640, 70mm, off-camera flash.

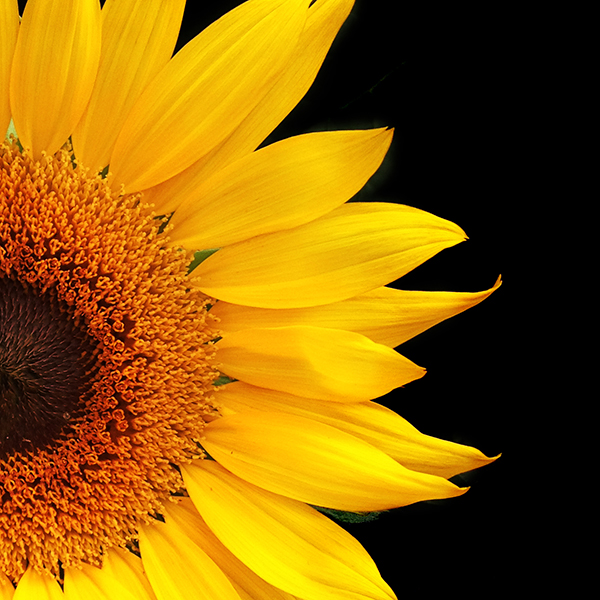
    If you read my article on How to Shoot Flowers, you know I spend a lot of time capturing flowers and their delicate details. Obviously,  I was excited to see how the lens would perform with flowers. Other than the crop, this image is straight out of the camera. The edges and textures are all very sharp. While not specifically a macro lens, it’s nice to know it can still capture fine details with precision.

    1/500, f/2.8, iSO 100, ambient light.

    1/500, f/2.8, iSO 100, ambient light.

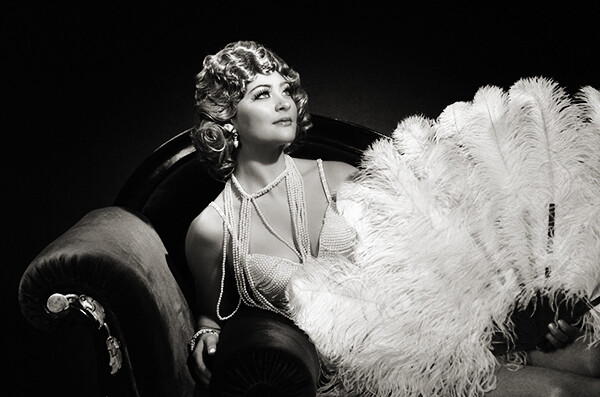
    While attending Photoshop World in Atlanta last month, I stopped by the Westcott expo booth, where models and lights were set up for the Westcott Shootout Contest. Since studio lights were already set for optimal conditions, it seemed like a great opportunity to test the lens for indoor portraits. Other than the black and white conversion, this image is straight out of the camera. The lens performed really well while trying to capture the glam look of 1940s Hollywood.

    tamron-lens-review-digital-photography-school-005

    1/200, f/5.6, ISO 1600, 70mm, constant LED studio lighting.

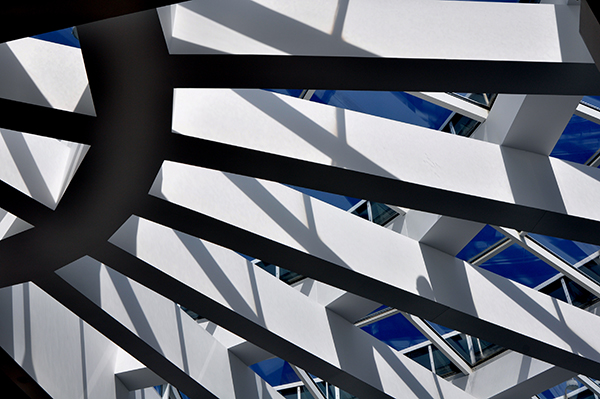
    The lens had performed extremely well with portraits, food, and flowers, so I decided to see how it would do on an architectural interior shoot before I had to box it up and send it back. I was thrilled with how it captured the color and contrast.

    1/160, f/10, 28mm, ISO 200, ambient light.

    1/160, f/10, 28mm, ISO 200, ambient light.

    Wrap-Up and Recommendations

    Like I said at the very beginning — this lens rocks. It performed flawlessly in a variety of lighting and shooting situations. While I didn’t have time to take it out on a landscape shoot, there was absolutely nothing about my experience with this lens to indicate that nature and landscape results would have been any different. An excellent lens for either full-frame or APS-C sensor cameras, if you’re looking for a really great lens that can handle just about any assignment, the Tamron 24-70 f/2.8 should be at or near the top of your list of choices. The only down side to this lens was returning it to Tamron when I was done.

    The post Lens Review Tamron 24-70 mm f/2.8 Di VC USD by Jeff Guyer appeared first on Digital Photography School.


    Digital Photography School