Category: Photography

  • Choosing Lenses

    If you date your cameras, you marry your lenses. That’s because, unlike digital cameras, a well-chosen lens can serve you for a very long time.

    I still have one lens that I bought thirty two years ago. And I bought it used. I doubt that will be the case with any of my digital cameras, ever.

    In the past, I was a lens speed freak and was willing to spend great sums of money to have very fast glass. I now realize that lust was misplaced. If I had it to do over again (and I do, and have) I would lean more on reasonably fast primes and here’s why.

    Moderately fast primes are (much) lighter, (much) cheaper and often just as sharp (or sharper) than their speedy siblings. For Nikon shooters, the Nikon 28, 50 and 85 f/1.8 trio of lenses are great examples of this. They weigh next to nothing in my bag and offer great performance. Also, I have moved away from primarily using fast zooms. Rather than a fast 24-70/2.8, I’d now opt for a trio of fast-ish primes and a decent, slower zoom to back them up.

    This way, you get a stop (plus) faster at each focal length, backups throughout the 24-70mm range and you lose the most daunting aspect of the speed zoom: an expensive single point of failure.

    In general, remember this when it comes to ultra-fast DSLR lenses: you pay through the nose for them when you buy them. And then you pay again, in weight, every time you lug them around. Remember that cameras have amazing high-ISO performance these days. And they are just going to get better as we go.

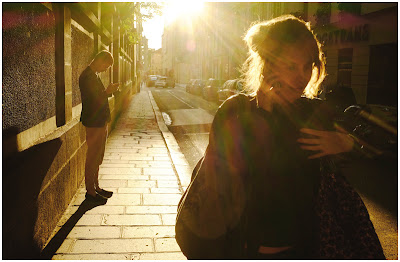
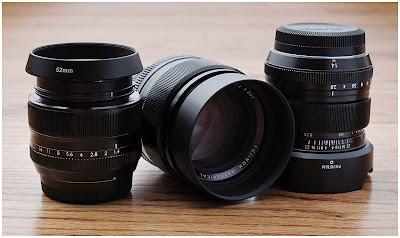
    As for my Fuji lenses, it is pretty hard to go wrong with their primes (although I’m not a huge fan of the 60mm macro…) But the others are small, gorgeous and fast. I love the built-in 23mm (35 equiv.) of the X100s. It’s sharp wide open and it has beautiful flare when you point it right into the sun as seen above. It’s my most-used lens. Which is a good thing, given that it’s welded to x100s.

    Along with that, the 35/1.4 (50mm equiv., seen at top on left) and 14/2.8 (21mm equiv., on right) are my go-to lenses on the interchangeable lens Fuji bodies. If I am shooting tight headshots, maybe the 56/1.2 in the middle.

    As a backup, I like the 18-55 kit zoom (not shown). Which, although not a speed lens at f/2.8->f/4, is great optically and has stabilization.

    Good performance from a kit lens (the zoom that often comes packaged with a camera) is not a given, as many of them are crap. If you are using a kit zoom as your main lens, know that it will be be sharpest near the middle of the aperture scale—let’s say around f/8. In fact, most lenses are great at f/8.

    If you like to hang out close to wide open, grab a (used, if necessary) prime at your most-used focal length. You’ll be a happy camper—and have a backup if needed.
    __________

    What to buy? And when? That should be driven by what/how you shoot.

    Here’s my thinking on lens progression, driven by how I shoot. Most of the time I am going to go out with a single, prime lens. I like the size, the weight, the speed and sharpness. Actually, I also like the discipline of having a single focal length. It helps me to see better.

    With a new system I’d build out my wide/normal/short-tele primes, then get a decent wide- to short-tele zoom as a backup or for times when I would want one-lens variability. Only then do I start going for more exotic lengths if needed.

    The reason is simple: most of my work will be done with the bread-and-butter focal lengths of moderate wide to short tele. So I want good quality, speed and backup in those lengths before I start to get crazy with a superwide or whatever.

    You can easily try out a lens for no risk. Buy a good example used, from someone with a good return policy. If the lens is a dog, return it immediately. If it is good enough to where you want to keep it and play, you can always resell the used lens for about what you paid for it within a year or two.

    So, very little risk. (In fact, if I was going to need to rent a lens for more than a week I’d do it this way. Your rental would be practically free.

    And obviously, if you love a lens and decide to marry it and keep it forever that’s best possible case.

    NEXT: Lights


    Strobist

  • Capturing Unenthusiastic Teens: Forget the Perfect Pose and Get Photos You Truly Love

    guitar

    I wrote an article recently sharing some tips for Capturing Busy Little Ones, and had a request for a similar article for photographing teens. Since I love photographing teens (who doesn’t??), I’m thrilled to share some tips. These aren’t tips for photographing the aspiring model teens. Those teens are usually pretty easy to photograph, they will pose for you until the cows come home, and love every minute of it. No, I’m going to let you in on some ideas for photographing those teens that aren’t so enthusiastic about being there.

    Sometimes they’re super shy, and they just feel uncomfortable with the attention on them. Sometimes they are self-conscious, and think that they aren’t photogenic, so they feel awkward. Sometimes mom made them get pictures taken, and they’d rather be shoveling manure than sitting there with you and a camera. Whatever their hang-up is, these tips will help you capture them in the truest way possible, and get through it with your sanity intact. You might even get through it with a new teenage friend!

    read

    Get to Know Them

    Here’s a newsflash: teenagers are people too. They have real feelings and ideas, and sometimes very strong opinions about what they like, and what they don’t like (if you have a teenager of your own, you didn’t need me to tell you that). Spend some time feeling them out, and finding what makes them tick. Watch for cues to let you know what they are going to be down with, and what they might roll their eyes at.

    For example, you might notice that they avoid eye contact, and act very uncomfortable when you talk to them a lot. In that case, you may want to do more photos where they are looking at something in their hands, or looking away from you, and ask for eye contact only briefly. Maybe you might notice that the photo shoot was all mom’s idea, and the teen is not at all happy about it. You could diffuse the situation by addressing it directly. “Hey, it’s a bummer to get pictures taken, huh? Moms are so annoying sometimes.”  Ask them questions about their life. Pay attention to more than just the words they say; their body language will give you cues about their personality too.

    fence

    Don’t Force a Smile

    Some kids just don’t like to smile, or they might be angry that they are getting their picture taken in the first place. Repeated requests to “smile” will only make things worse, and at best, get you a fake cheesy smile. Your goal during your session with an unenthusiastic teen, is to gain their trust. Let them know that you are on the same team, and that you aren’t there to torture them. Assure them, through your actions, that you aren’t going to try to make them into something they’re not. The easiest way to do this, if you haven’t picked up on enough cues, is just to ask them.

    I might say, “Sometimes people really love jumping pictures. Is that something you would do, or is totally not your style?” They’ll usually let you know exactly how they feel about it, in words or expression, and you can quickly move on if it’s not their thing. Sometimes those that resist the smile the most may actually give you a real, genuine, smile towards the end of the session when you’re best buddies, and they trust you.

    skateboard

    Photograph Their Passion

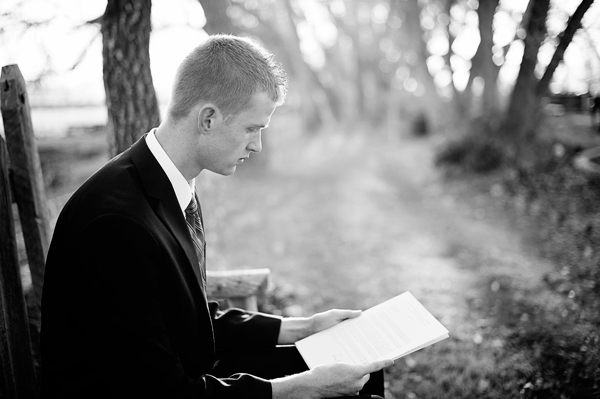
    Before your session together, encourage your teen subjects to bring things that are important to them. It’s fun for both of you to capture those “action” shots of things that they truly love to do. This also gives you opportunity to give them genuine praise, and puts them at ease. Help them think outside the box. If they are a writer, maybe they’d want to bring a few favorite journals to “write” in, as you photograph them. If they love to run, capture some action running shots, and then a few with them holding their track shoes, or a race medal.

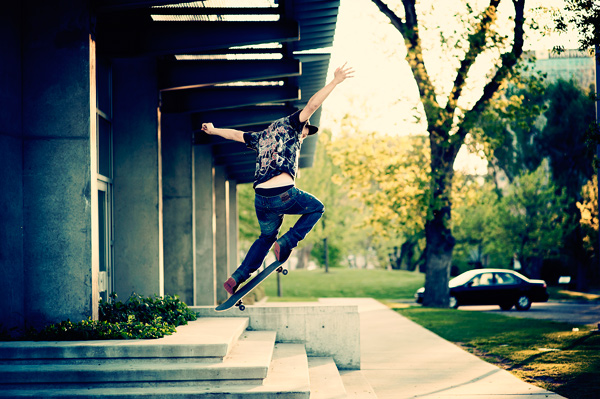
    Giving them something to do really helps the shy ones. If they play a musical instrument, you could take some photos of them holding it, but don’t forget those action shots too. Ask them to play something for you, or show you some tricks on their skateboard. If they’re hesitant to actually perform, remind them that the camera won’t capture mistakes, and you’re an expert at making people look really good. That might be enough to loosen them up, and let their passion show.

    grass

    Do the Unexpected

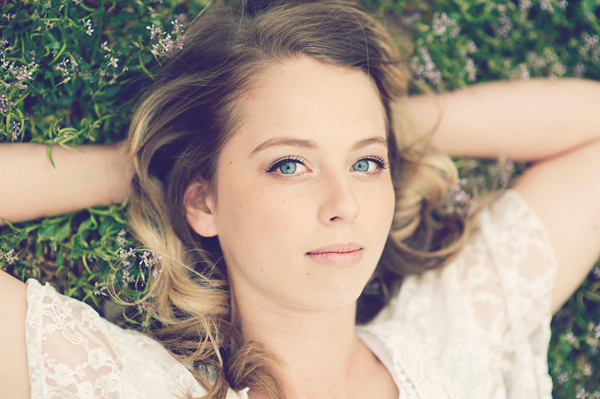
    Most teens will expect you to ask them to smile and look at the camera. They’ll expect you to ask them to “sit there”, “stand here”, “look at me”. Sometimes just shaking things up a little will help them loosen up. You could ask them to lie down in the grass, or climb on a big rock. Maybe a silly expression, or twirling in a field, will shake it up a bit. DO be careful that you watch for cues from your subject before you ask them to do crazy things. Remember to ask them first, like I mentioned before. Some teens will do whatever you tell them to, but they will become increasingly uncomfortable if they aren’t feeling like themselves. Also, sometimes it helps to explain to them WHY you are asking them to do an unexpected thing. You could say, “The sky does amazing things with your beautiful blue eyes when you look up into it. Would you be okay lying down in the grass so we could give that photo a try?”

    eyelashes

    Capture Something Different

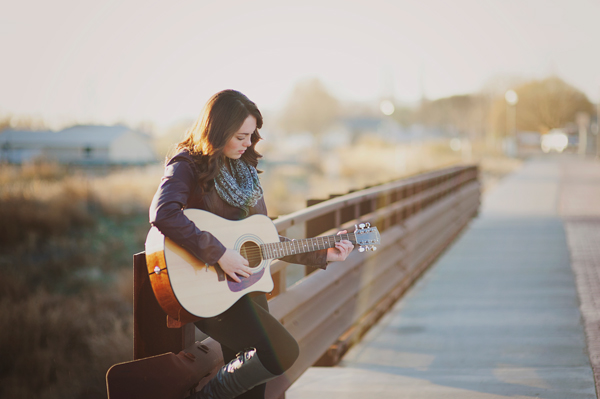
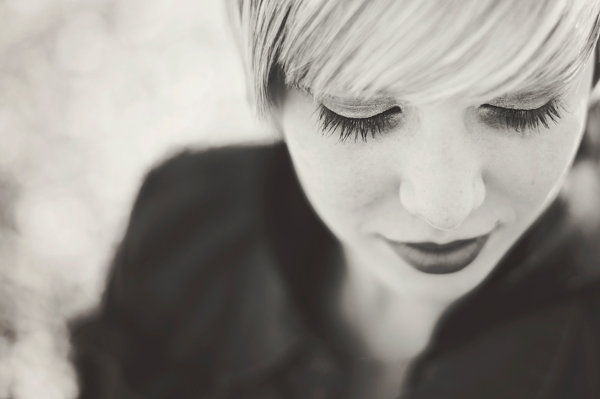
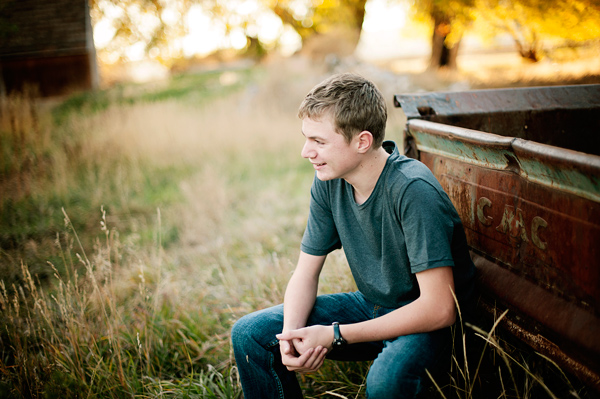
    Teens like to be unique. They like to have photos that their peers think are “cool”. You might be tempted to just snap the basic head shots when you have a teenager that isn’t super easy to photograph, just to get it over with. Instead of going into safe mode, use this opportunity to capture something unique. There are lots of details that you can capture without them needing to look at you and smile. Eyelashes sweeping the cheek, hands clasped at the knees while sitting down, profile looking at a distance, details of a guitar with their face blurred in the distance, a close-up of their favorite quote in a book as they read it; those details can tell more of the story of who they are, and sometimes give them a moment to relax. If I’m not taking a photo with their face in it, I’ll tell them that they don’t even have to worry about their expression right then, because it won’t be in the picture. Sometimes they breathe a visible sigh of relief when I tell them that.

    truck

    Be Yourself

    Teens know when you’re being fake. Don’t change your personality to try to be more like them, or to attempt to be “cool”. They’ll trust you more if your compliments are genuine. Look at them when you compliment them, don’t give a routine “you look great” while fiddling with your camera. If you’re a jokester, throw those zingers out. If you are quiet and thoughtful, let that thoughtfulness shine through. You won’t connect with every single person, but you will show your reluctant teen that you are sincere, and that means a lot to them.  Don’t treat them like little kids. They need to know that you recognize them as the almost-adults that they are. If you show them respect, they will usually show you respect right back.

    Whether you are photographing a teen who loves to pose and smile, or a teen who is less than enthusiastic about the whole thing, you are lucky. What a privilege to photograph a person at a time of experiencing such beauty, daily transformation, and figuring out the world! Now, go have some fun with your camera and a great teenager. I’d love to see your teen photos in the comments if you’d like to share!

    violin

    The post Capturing Unenthusiastic Teens: Forget the Perfect Pose and Get Photos You Truly Love by Melinda Smith appeared first on Digital Photography School.


    Digital Photography School

  • 25 Helpful & Free Lightroom Tutorials to Post-Process Like a Pro

    Adobe Lightroom is one of the most popular options for photo editing and with great reason. Thanks to a number of various Lightroom features, photographers may decrease the time spent processing and increase efficiency. Moreover, one of the greatest time-saving features of Lightroom is the ability to save your actions, which means creating presets. In this article, I’d like to share Continue Reading

    The post 25 Helpful & Free Lightroom Tutorials to Post-Process Like a Pro appeared first on Photodoto.


    Photodoto

  • Choosing Lights

    Because big lights and small lights each bring a different set of considerations to the party, I am splitting my recommendations into speedlights and “studio lights.” (Although I hate that term.)

    For speedlights, you have to decide if you wanna drive stick or automatic—AKA manual or TTL. I live in manual mode, which means I sacrifice some convenience for reliability and repeatability. It also means I can pay about a third as much for each of my flashes.

    If you live by TTL, you will die by TTL. Or, at least your wallet will die a small, unnecessary death every time you need to purchase a flash.
    __________

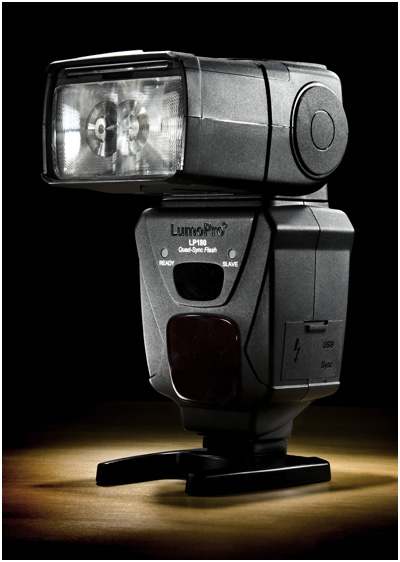
    For manual speedlights, I wholeheartedly recommend the LumoPro LP180, about which I go into far more detail here. It’s built like a tank, syncs four different ways, has a fluid and intuitive user interface, a built-in light-stand socket, a built-in gel holder and has a two-year manufacturer’s warranty. No other speedlight comes close to claiming all of those useful features.

    That it costs about a third as much as you would pay for an OEM branded flagship TTL flash is icing on the cake. If you can commit to shooting manually, this is your flash.

    If you need TTL (and remember, this is the gear acquisition equivalent of joining the TTL mafia) I would consider eschewing the OEM flagship TTL flashes. They can run north of $ 500USD, which is just nuts.

    The Phottix Mitros comes in Nikon and Canon variants and sells for about $ 300USD—with twice the warranty length. It does pretty much all the fancy stuff most of the OEM flashes do including the optical TTL triggering of other TTL units, be they other Mitros units or OEM units.

    I will say that for the lesser price you will give up some ease of user interface. But this may well be that I was used to the OEM flash user interface and that of the Mitros is pretty radically different.

    Finally, for some people the flagship OEM flashes will be just fine. For instance, if your name is Bill Gates they are a perfect choice for you.

    On the opposite end of the spectrum, there are a ton of flashes constantly hitting the market from the far east, from a variety of pop-up brands. Some of the brands are recognizable because they bought the rights to use familiar but now bankrupt brands that were formerly trustworthy. They have spotty track records for quality. Factory warranties are short to nonexistent.

    Many who read this will be tempted to go that route because of prices that are almost too good to be true. If that’s you, by all means knock yourself out. Some people need to be stung in the wallet to remember a lesson or bit of advice. I know I did when I was young. Good luck with that!
    __________

    As far as big lights go, there is a completely different set of variables to consider. Big lights are system-oriented, and you would do well to choose wisely in what will likely be a long-term relationship.

    I spent a lot of time and money auditioning big lights over the past 25 years. I am really happy where I am now, and would have loved to make this good of a choice from the get-go. I wrote about researching and choosing big lights a couple years ago and at the time settled on a Profoto/Paul Buff hybrid choice.

    I loved Profoto’s light mods and quality of light, but they were very expensive. And the battery options insanely so. So instead of battery versions of my Profotos, I went with Profoto plug-ins and a full Paul Buff Einstein setup for portable, battery-powered big lights. Sounds crazy, but for the price of just two AcuteB battery generators you can outfit yourself like an Einstein King.

    So for the last couple of years I have had two full systems in my gear closet: Profoto plug-ins and Einstein 640s with portable battery packs. (But they also plug in.) And even though the Profotos are far more expensive, rugged and “professional” (whatever) I found myself again and agin choosing the Einsteins to use.

    That’s because inexpensive or not, they are simply amazing flashes. And they come with a 2-year warranty (sensing a trend here?) and legendary factory service. Further, Paul Buff has finally taken some time to develop the modifier system that a good flash deserves. The reflectors and accessories are well-designed—and wonderfully inexpensive.

    The caveat here is, this is pretty much a US-based choice/suggestion. One of the main reasons Paul Buff lights are so inexpensive is that he only sells direct, and mostly in the US. There are a couple of dealers outside the US but that starts to erode the value proposition pretty quickly.

    So, to beginners looking for a great light at an amazing price in the US, I would suggest you strongly consider Einsteins. Not the similarly shaped and even cheaper AlienBees, however. They look similar, but are not in the same league as the Einsteins. Save your money and go Einstein. It is not that much more.

    If you are outside of the US, I am sorry that this choice will be either not available or not nearly as good a value to you. So I would suggest that you look at other reputable flash brands (Bowens, Elinchrom, Hensel, Profoto, etc.) and choose the brand that works best for your needs and your wallet. This advice also holds for people for whom the Einsteins aren’t a good fit.

    Again, I would suggest avoiding the temptation of the super-cheap mystery brands from the far east. Personal experience. But if you need some personal experience of your own to dissuade you in the future, by all means go right ahead.

    Next: Triggers


    Strobist

  • Choosing Light Stands

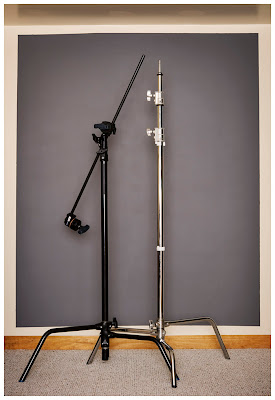
    Light stands are designed to oppose gravity. Pretty simple. And the designs are, for the most part, pretty similar. I think of light stands as being in three categories: normal stands, compact stands (seen just above) and specialty stands such as C-stands.

    For light stands I like LumoPro for many of the same reasons I like the LumoPro LP180 speedlight. Their stands are well-built, reasonably priced and guaranteed out the wazoo. LumoPro has good service, too, should you need to replace a broken knob or bolt or whatever.

    Honestly, it makes me wonder why other manufacturers don’t warranty their grip gear like this. Seems like a no-brainer, if you are making good stuff.

    For normal, full-sized stands, I like the 10-foot LumoPro LP608. It is air-cushioned, has a five-year warranty and costs $ 45. It is a solid value choice and you can certainly spend more but get less.

    Most stands are pretty interchangeable. That’s not to say that there aren’t some cool designs to be had. For a “splurge” light stand I’d consider Manfrotto stackers. They have a unique design that allows them to snap flat together for easy transport and space-saving storage. They are more expensive ($ 84 for 8-foot version and $ 115 for the 12-foot) so you’ll have to make that call. But they are a great upgrade if you frequently lug around a flock of light stands.

    If you don’t need all of that functionality, skip the stackers. In fact, many speedlight folks who don’t need a lot of stand height prefer to use “compact” 5-section stands. They rise to about 7 feet and collapse to about 21″.

    For that, my recommendation is easy and clear-cut: get the LumoPro LP605, seen above. It is the best-built of the five-section stands, includes ground spikes for more stability in wind and has LumoPro’s outsized warranty.

    For $ 40, it is hard to go wrong here. There are more expensive versions of this, but they are not as well-built, have no ground spikes and you won’t get a five-year warranty either. Done deal.
    __________

    As far as C-stands go (more on what they are, here) they are pretty much all built like tanks. Which is part of their weighty charm. LumoPro C-stands ($ 100 for the riser and another $ 35 for the arm—make sure to get both pieces) are a good value choice as they back up the build quality with their five-year warranty.

    If you want to get fancy, Kupo C-stands offer a quick-release mechanism for faster setup. But both are all but indestructable.
    __________

    While we are on the subject of stands, please do this: Take $ 20 and buy some sand bags. Get the bags from Amazon ($ 13 for 2, shipped). Get a few to start.

    And don’t fill them with sand but rather “pea gravel,” from your local home improvement store. It’s super cheap ($ 3.50 worth will fill three sets of sandbags) and way less messy than sand.

    You won’t need these cheap insurance policies until a stand comes down in the wind, breaking your flash or your mod or your subject’s noggin. Then you will have needed the sand bags retroactively.

    Start with three or four. You’ll probably end up getting more as you go. Cheapest insurance (and piece of mind) policy you’ll ever buy.

    NEXT: Soft Modifiers


    Strobist

  • Choosing Soft Modifiers

    Editor’s note: In 2011 I wrote a full post on my four favorite soft modifiers. No changes since then. These are still my go-to’s, for reasons explained below. So I am reprinting this in the gear selection module. -DH


    With the gazillion or so soft light mods out there, it is easy to be overwhelmed by the choices available. And while I have probably shot with more of them that I would care to admit, there are four soft mods that I go back to again and again.

    As it happens, these four are reasonably priced, too. (Which may well be what attracted me to them in the first place, of course.)
    __________

    Soft is Relative

    So, which of the light sources above is the softest? The one in the back, right?

    Not necessarily. The 60″ source in back is not as soft at 10 feet away from your subject as the 8×9″ source is at 10 inches away. A good rule of thumb to remember is that a light source is soft when it looks large to your subject. This nets out the two variables of size and distance.

    Example: Even a bare speedlight looks soft to a subject only a couple inches away.

    Long story short, if you want soft light you will have to consider the working distance at which you’ll be using it. The further back your light source, the larger your light mod will have to be.

    So front to back, here is the straight dope on the four mods pictured above.

    1. The LumiQuest Soft Box III

    At 8×9″, the LumiQuest SB-III can be very soft — as long as you are working the light literally right up next to the subject. Case in point, this headshot of Ben I did for an ad for the SB-III when it first came out.

    With a flat front edge, the light is easy to feather. This means you can work in the edges of the beam for more interesting (i.e. uneven) illumination.

    Pros: The SB-III is small, and folds flat. This means it travels great, hiding in the back flap of my Domke F3 or just about anywhere else. It is also pretty reasonable, at under $ 50. (Especially considering the SB-III has a lifetime guarantee, unique on this list.)

    Cons: It’s small size means it is literally soft in only in the knife-fight range. Back it up more than a couple of feet and it starts to get hard. Actually, I tend to use this to my advantage, making the light more versatile just by varying the distance. That is one of the reasons I use it so much.

    And speaking of that, most of the time I use an SB-III, I will do so in combination with a fill light. (Example here.) This gives a combination of both shape and detail.

    2. Beauty Dish

    The next step up, size-wise, gets us to a beauty dish. A broad, shallow reflector, it throws a modestly soft light at portrait distances. There is nothing particularly “beautiful” about it. The dish just has good PR, I guess.

    A light this size won’t wrap as much as a giant octa or umbrella when used at the same distance, which can be a good thing. So while some people may think of it as a beauty dish, I tend to think of it as a character dish.

    Again, I almost always use it with fill. The shot above (more here) is a good example.

    When used when a giant, on-axis fill light, as in this Martin Prihoda cover shoot, the beauty dish really starts to live up to its name. The shadows from a dish are distinct, and controlling their depth with another light source gives you a wide range of possibllity.

    Pros: A dish gives you soft(ish) light that can stand up to a breeze. Soft boxes and (especially) umbrellas can turn into a sail in even a light wind. The beauty dish will hold up in a moderate wind — especially when sandbagged. Also, the fact that the dish is circular gives a signature shape on the face as compared to a rectangular soft box. Some people prefer this, but I find it kinda arbitrary.

    Cons: Does not fold in any way, so travels like crap. Expect to have to buy a protective case for it. Which only adds to the next downside. Of the four sources listed here, the beauty dish is the most expensive.

    I have a few dishes, including one that I got for free from Profoto in a promotion that would have cost me north of $ 300. I did not know which I wanted (silver or white) so I chose silver for more efficiency. In hindsight I should have chosen white, which I now use far more often.

    But I was not gonna pony up for another full-price Profoto dish. So I ended up with the white FTX 22″ Beauty Dish ($ 105.00 – $ 130.00) shown above.

    Being an aftermarket universal fit dish (one dish, many mounts) it can be a little quirky in some ways. But overall I have been happy with it. They also do a grid for the dish ($ 85.00). So if you are into controlling the beam of the light, the price difference (OEM vs aftermarket) may be even bigger.

    3. Westcott Double-Fold 43″ Shoot-Through Umbrella

    Usually recommended as the first soft light mod for a space-conscious photographer, the double-fold umbrella practically disappears in your bag. It collapses down to 15″. (Best of all, they are just silly cheap.)

    I started out using it in typical fashion, 45 degrees up and over, as do most photographers. These days I am much more likely to fly it over the top of a subject, as in the falconer shot seen above (more here) or literally on the floor, as in this portrait.

    Pros: Hello … dirt cheap. Also, travels extremely well. If you are into guerilla lighting, this is your mod. Also can be very powerful, used right up next to your subject. This is something you cannot do with a reflected umbrella because the shaft can get in the way.

    Cons: They are pretty fragile. Between the double folding arms and the telescoping hollow shaft, expect them not to last too long. (A little breeze can get them, too.) Also, the light is hard to control — an umbrella spews out light like a frat boy puking at 2:30am after a party. Very little directional control. Raw light can spill past the edge, too.

    But for under $ 20, who can complain? I usually grab a couple to be safe.

    4. Photek 60″ Softlighter II


    Combining the best features of a shoot-through umbrella and a large soft box, I like to think of the large Softlighter II as a poor man’s octa.

    It is a convertible shoot-through umbrella that can double as a reflective one due to the removable black backing. And it comes with a very efficient diffuser screen, turning the umbrella into a wonderfully even light source. As a bonus, the umbrella shaft is segmented, so you can remove half of it after you open it. This makes it possible to use it in very close. It is large-octa light quality, for about $ 100.

    Actually, I have a 47″ octa, and it gets very little use compared to the Softlighter. Friends usually ask to borrow the octa, which is fine with me — I’d rather have the Softlighter on hand. (If you are an Annie Leibovitz fan, she frequently uses them as her key light, as seen in this video.)

    I own and use both the Softlighter II and the new Paul Buff 64″ PLM (with diffuser). The PLM is more efficient than the Softlighter because of its parabolic design, but that is lessened if you do not use the Paul Buff or Elinchrom mount. (They take advantage of perfect positioning.) For speedlights, I prefer the Softlighter, as it does not require a bare-bulb-type light source to be located at the focal point of the parabola. Just slap an umbrella swivel and a speedlight in there and you are good to go. If you primarily shoot WL or Elinchrom, I would suggest the PLM.

    Or if you use big and small lights, maybe get both at under $ 100 ea. That is what I did, and frequently use both together (PLM as a key and the less efficient Softlighter as a fill.)

    Pros: Way cheap, compared to the octa it largely replaces. Versatile as an umbrella, as described above. Gorgeous light with the diffuser. Very lightweight — easy to boom without expensive gear. Takes a speedlight well. (That’s how we lit the photo above, as detailed here.)

    Cons: They are not as heavy-duty as an octa — but to be honest I have yet to kill one. Also, the front is not a clean light source like an octa. You can see the strobe unit. So if you are shooting reflective objects (glass, etc.) this may not be for you.
    __________

    So those are my Four Horsemen of soft light. You could choose four completely different different mods, but those are the ones I keep going back to. I highly recommend each, for the reasons above.

    The main thing is to look at your working distance and see which light source will create the light you want at that distance. Fortunately, as you can see above, you don’t have to spend a ton of money to get versatile, soft light.

    NEXT: Hard and Specialty Modifiers

    Strobist

  • Everything You Need to Know About Lightroom and Colour Space

    Lightroom and colour space

    This diagram shows the three colour spaces that Lightroom works with. Photo from Wikipedia

    One of the key differences between Lightroom and Photoshop is their approach to colour management. In Photoshop, once out of Adobe Camera Raw, you can go to the Colour Settings menu option and tell Photoshop in which colour space you want it to work.

    How Lightroom works

    Lightroom works differently. When processing Raw files, Lightroom uses the ProPhotoRGB colour space the whole time, and there’s nothing you can do to change it. The benefits of this method are:

    • Less colour information is lost during the processing stage. ProPhotoRGB is the largest colour space, so it is the optimum one to work in.
    • You can export multiple versions of the same photo, each with a different colour space, if you have need to do so.
    • If future output devices (monitors, printers etc.) support ProPhotoRGB (they don’t at the moment) then your photos will be ready for them.
    • Colour management is greatly simplified. You don’t have to make any decisions about what colour space to work in until you export your photos. This is the biggest advantage of all.

    How Lightroom manages colour

    When processing Raw files, Lightroom (and Adobe Camera Raw in Photoshop) uses its own colour space based on ProPhoto RGB. It provides a large colour gamut to work with the wide range of colours that digital sensors are capable of recording.

    Note: Gamut is the term used to describe the range of colour values that fit in a colour space.

    Exporting photos in Lightroom

    When you export a photo in Lightroom it gives you the choice of three colour spaces.

    ProPhotoRGB: ProPhoto RGB is the largest of the three. It roughly matches the range of colours that a digital camera sensor can capture.

    Adobe RGB (1998): Adobe RGB (1998) is smaller than ProPhoto RGB, but larger than the next choice, sRGB. It roughly matches the colour gamut of CMYK printers used to print books and magazines.

    sRGB: sRGB is the smallest colour space of the three. It represents the colour space that most monitors are able to display.

    Comparing colour spaces

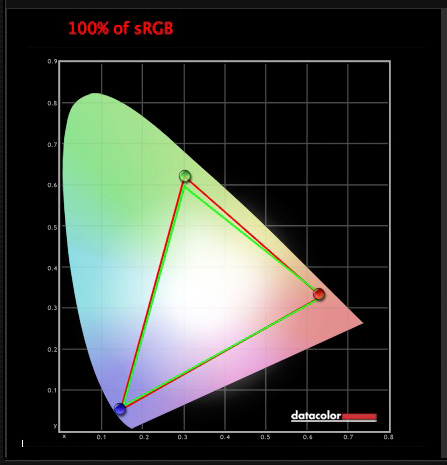
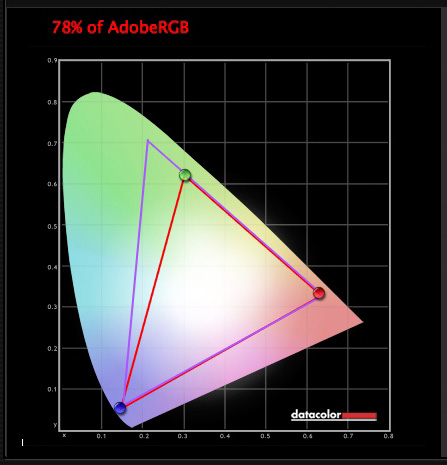
    These two graphs show how the colours my monitor is capable of displaying, compared to the sRGB and Adobe RGB colour spaces.

    Lightroom and colour space

    The green triangle shows the sRGB colour space, the red one shows my monitor’s colour gamut. The two are nearly identical.

    Lightroom and colour space

    The purple triangle shows the Adobe RGB (1998) colour space, the red one shows my monitor’s colour gamut. My monitor can’t display all the colours within this colour space. Only a select few high end monitors can display all the colours within the Adobe RGB (1998) colour space.

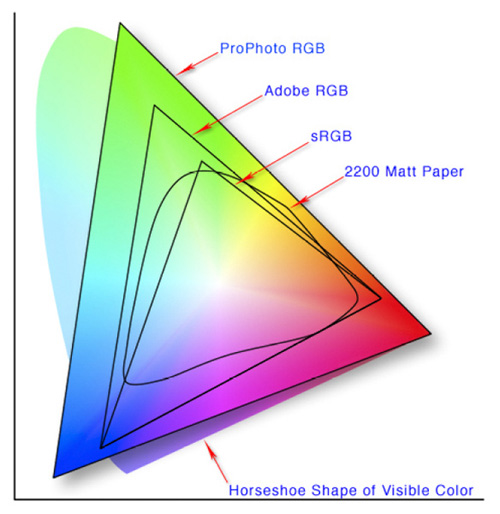
    This diagram compares the ProPhoto RGB, Adobe RGB (1998) and sRGB colour spaces. You can see that ProPhoto RGB is the largest.

    Lightroom and colour space

    Photo from Wikipedia 

    Keeping it simple

    Armed with this knowledge, here’s a guide to which colour space you should select when exporting your photos:

    sRGB: Use when exporting photos to be displayed online, printed at most commercial labs, or printed with most inkjet printers. In short, if in doubt, use sRGB.

    Note: Lightroom’s Web module automatically sets the colour space of exported files to sRGB.

    Adobe RGB (1998): Use only if requested. If you’re not sure, ask. If you’ve been asked to submit photos to a magazine, for example, then ask them which colour space is required. It will probably be Adobe RGB (1998). Submitting photos to a stock library? Again, it will probably be Adobe RGB (1998). It’s the colour space most likely to be used for commercial purposes.

    You would also use this colour space if you have an inkjet printer that utilizes the Adobe RGB (1998) colour space, or you are using a lab that accepts and prints photos with that profile.

    ProPhoto RGB: Use when exporting a photo file to be edited in another program such as Photoshop or a plug-in. The file should be exported as a 16-bit TIFF or PSD file. There is little point in using the ProPhoto RGB colour space with 8 bit files, as they don’t contain enough bit depth to utilize the full colour range.

    Note: If you import a JPEG or TIFF file into Lightroom, it uses the file’s embedded colour profile. If there is no colour profile attached, it assumes that it’s an sRGB file. If you choose an alternate colour space when you export the file, Lightroom converts it.

    Colour spaces and compression

    The reason that Lightroom uses a version of the ProPhoto RGB colour space, is that it is doesn’t compress the colours captured by your camera’s sensor.

    When you export a photo, if you select either the Adobe RGB (1998) or sRGB colour space, Lightroom compresses the photo’s colours to match the chosen profile. That’s why selecting colour space is best left for as close to the end of the post-processing workflow as possible.

    While Lightroom does its work within its version of the ProPhoto RGB colour space, your monitor isn’t capable of displaying all those colours. Instead, your computer’s operating system uses the monitor profile to convert the colours to ones that your monitor is capable of displaying.

    Note: All monitors have a colour profile, regardless of whether they have been calibrated. But your monitor will only display colour accurately if it has been properly calibrated. You can learn more about the calibration process in my article How to Calibrate Your Monitor With the Spyder 4 Express.

    Exporting photos with Lightroom

    To export a photo in Lightroom, select the photo (or photos) you want to export, then go to File > Export. You can do this from any module (use the Film Strip to select multiple photos if you are not in the Library module’s Grid View).

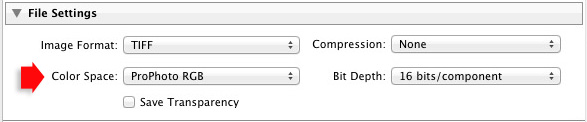
    Go to the File Settings section of the Export window and set the required colour space. If you select the ProPhoto RGB colour space set Bit Depth to 16 bits/component.

    Lightroom and colour space

    Transferring photos to Photoshop

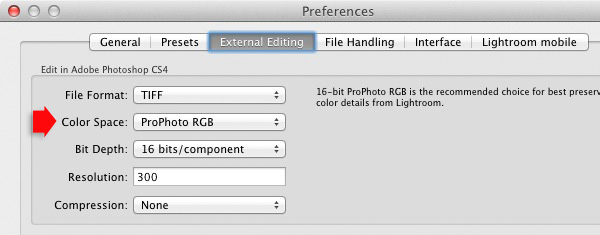
    To open a photo in Photoshop, right-click on the photo and select Edit In > Edit In Adobe Photoshop. Photoshop opens the photo using the colour space indicated in Lightroom’s preferences.

    To adjust this setting, go to the External Editing tab in preferences, and set Color Space to ProPhoto RGB. You can choose another colour space if you wish, but ProPhoto RGB is definitely the best one to use.

    Lightroom and colour space

    Opening photos in plug-ins

    To export a photo to a plug-in, right-click on the photo, go to Edit In and select the plug-in you want to use to open the photo.

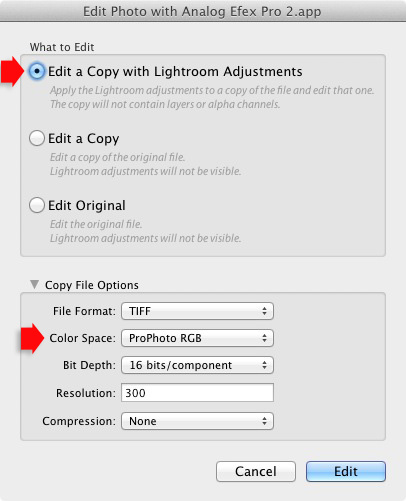
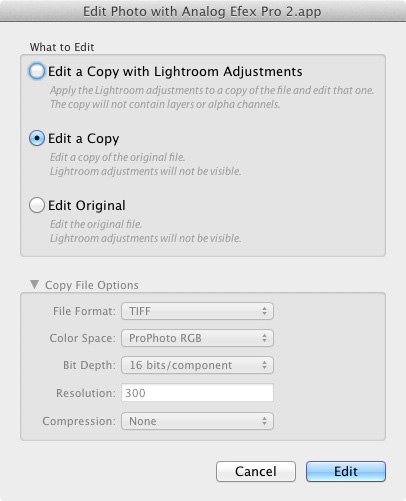
    In the Edit Photo window, if you select Edit a Copy with Lightroom Adjustments (the only option available if you are exporting a Raw file) you will be able to select which colour space you want to use. Again, go with ProPhoto RGB for the best results.

    Lightroom and colour space

    If you are exporting a JPEG or TIFF file, Lightroom gives you the option of selecting Edit a Copy or Edit Original in the Edit Photo window. If you do so, the option to select a colour space is greyed out and Lightroom opens the photo in the plug-in using the embedded colour profile.

    Lightroom and colour space

    But if you select Edit a Copy with Lightroom Adjustments, you can select any colour space and Lightroom will convert the photo to that colour space when it opens the photo in the plug-in.

    Conclusion

    Confused? I hope not, because colour management in Lightroom is really very simple. It’s essential to calibrate your monitor, but after you’ve done that Lightroom takes care of all colour related issues for you until you export your photos. Then, it’s just a matter of selecting the appropriate colour space.

    If you have anything to add to the article, or any questions, please post it in the comments.


    Mastering Lightroom: Book Four – The Photos ebookMastering Lightroom: Book Four – The Photos

    My new ebook Mastering Lightroom: Book Four – The Photos takes you through ten beautiful examples of photography and shows you how I processed them step-by-step in Lightroom. It explores some of my favourite Develop Presets and plug-ins as well as the techniques I use in Lightroom itself. Click the link to learn more.

    The post Everything You Need to Know About Lightroom and Colour Space by Andrew S. Gibson appeared first on Digital Photography School.


    Digital Photography School

  • Choosing Hard and Specialty Modifiers
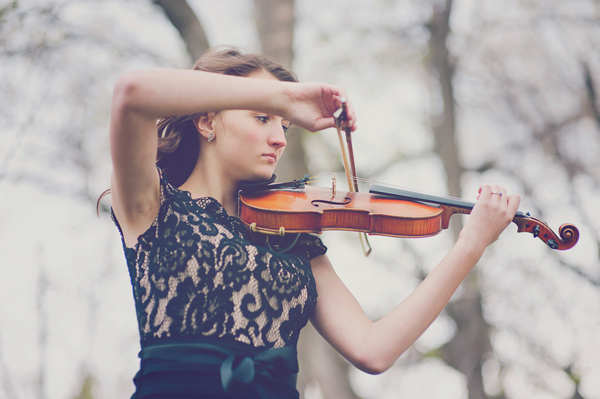
    We tend to start out using soft light at a 45-degree angle because it is an easy fix, and it’s hard to go seriously wrong doing that.

    But there are all kinds of light mods, and often choices other than default soft ¾ light can be more interesting. My favorites are snoots, grids and ring adapters.


    Snoots are like little tunnels you attach to your flash to block part of the light beam. Snoots are not rocket science — we are just blocking some light. And cardboard works just fine to create tight zones of light that you can use to create something like the photo above.

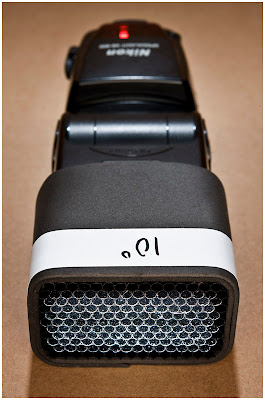
    For grid spots, which work like snoots but have a much more beautiful fall-off to the edge of the light, you can DIY them out of straws but it is a pain in the ass and not really worth the effort for many. My advice? Get a Honl eighth-inch grid and be done with it. They are indestructible, and they fit all speedlights.

    I’d nix the velcro mounting system, however. Mod it with elastic for quick changes and you’ll be good to go.
    __________

    A less expensive (but flash-specific) alternative are the DIY-ish grids from SaxonPC. (Seen above, more info on those here.)

    Also in the specialty mod category are speedlight ring flash adapters. They turn your small flash into a donut of light that can give you a beautiful, shadowless look for key or fill. My two favorites here are the Orbis. and the RoundFlash. Both have a very good quality of light. Both have advantages and disadvantages.

    For the record, I have owned five different commercial ring flashes (and adapters): Profoto, ABR800, Ray Flash, RoundFlash and Orbis. I use the Orbis more than all of the others combined.

    Whatever you do, avoid the Chinese knockoffs of the Ray Flash. They are light-sucking pieces of junk, and are rarely anywhere near color correct. But they are cheap!

    If you are that broke, you’ll be better off home-brewing a cardboard DIY ring flash adapter.

    NEXT: Cases and Carts


    Strobist

  • Cartier-Bresson and Stieglitz – Study the Masters of Photography to Become a Better Photographer

    There is an unnervingly common trait among photographers, image makers, picture people, etc. Sometimes we forget that the reason we have access to such awesome gear and techniques, is because those who came before us in our trade figured them out, practiced them, advance them, and then left us a legacy of knowledge. The further we go back through the history of photography, the more prevalent this apathy becomes. What do you have to learn from someone who used a camera less advanced than a garage door opener? Well, as it turns out, we stand to learn a lot. Maybe not from a technological standpoint, but rather in a more intangible way that’s more difficult to appreciate, and easy to miss.
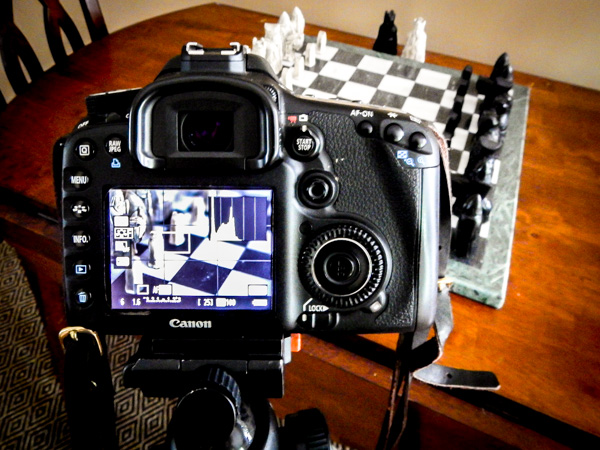
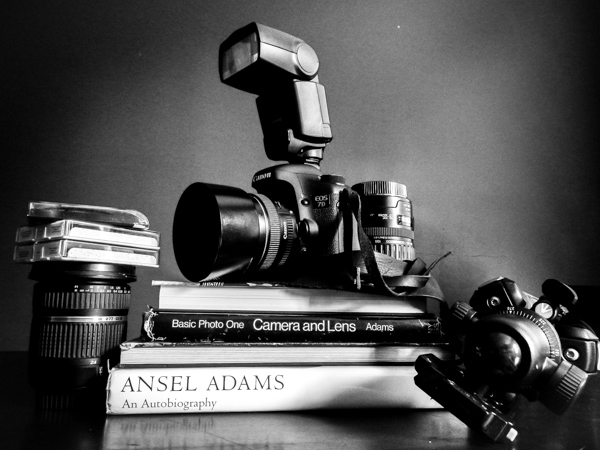
    This is not to say that you can’t improve your photography from studying the methods of some of the masters. Their gear was varied and less advanced, but that only makes their work more extraordinary, and their skill even more humbling.

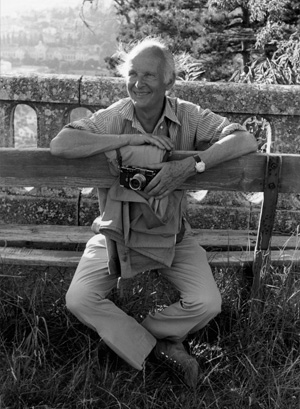
    Henri Cartier-Bresson

    Bresson

    Image by Gertrude Käsebier

    Even if the name doesn’t ring some little bell in your memory, chances are you most likely have viewed his work at some point. He was literally the inventor of the photojournalistic style… let that sink in for a minute or three. Before Cartier-Bresson, proper street photography as we know it and “still life reportage” as he called it was not a well practiced, or validated form of photography.

    Born into a relatively well placed upper-class French family in 1908, Cartier-Bresson, like so many well known photographers, didn’t start out intending to be such. Painting was his major pursuit before picking up a camera. That all changed in 1931 when he set his eyes upon a photograph made by Hungarian photographer Martin Munkacsi. It was an image of three young boys in the surf of a lake in Africa. Cartier-Bresson said that he “couldn’t believe such a thing could be caught with a camera” and that he “suddenly understood that a photograph could fix eternity in an instant.” The photograph drove him to relinquish painting, and start making photographs. He was thoroughly a recorder of the spontaneity of human experience. There is much you can learn from Henri Cartier-Bresson to improve all aspects of your photo making.

    Lessons you can learn from Henri Cartier-Bresson:

    Strive to be invisible

    When you’re working as a photographer it doesn’t take long to understand that humans tend to drastically change once they realize they are being photographed. Their mannerisms, expressions, and appearances all become noticeably different. Conspicuousness steals away realism very quickly if you are not careful. Cartier-Bresson understood this and moulded himself into somewhat of a photographic ninja. He shot with relatively small cameras, usually Leica 35mm Rangefinders. You have to understand that most photographers of his time were using larger format cameras which practically screamed “Hey, I’m making a photograph of you!!!” Anonymity allowed him to capture the essence of any scene in a way that was raw and unobtrusive.

    Cartier-Bresson went so far as to conceal all the shiny surfaces of his gear with black paint to further decrease his footprint as a photographer. You might not want to go that far, but it will help you to capture better images if you blend into your surroundings. Plan for your sessions in a practical way. Don’t take more gear than you need, and keep a low profile. Try to wait until you’re ready to make an exposure before you raise your camera. Practice using your camera’s controls and memorize their placement. Also, avoid using a flash if it will likely interfere with your subject. Cartier-Bresson supposedly never used a flash for his images as he saw them as impolite and distracting. Photography, especially photojournalism, depends on the earnest capture of life in all its beauty, and regrettably, its occasional misery. Try to keep it real, literally.

    Compose in camera

    I know, I know. You’ve probably heard this before, and are most likely tired of having that phrase hurled at you. I feel your pain. I would always roll my eyes any time a seasoned photographer or well intentioned writer would talk about the importance of getting things right in-camera. Let’s be real here. It’s so easy to crop an image on the computer instead of using the camera’s viewfinder. It’s so much more convenient to salvage a less than correctly exposed image than to think through your aperture and shutter combinations.

    Composeincamera

    Post-processing photographs is a wonderful thing. Completely changing a photograph, however, is not always ideal. Cartier-Bresson was absolutely anti photo manipulation and believed any photograph should be cropped in the viewfinder before it was captured. Nearly all of his photographs were printed full-frame and even included about one millimeter of the unexposed negative so that his finished prints sported a thin black border to further prove the absence of cropping.

    Any image is only as good as the ingredients put into its making. So try to put the best possible ingredients into your work so that your finished product will be something you will be proud to display and say “I made this”.

    Focus as much on the art as the science

    What we do as photographers would have been considered magic in an earlier time. Even at the basic level it is an amazing science. We record light that is completely unique and fleeting. You will never make the exact same photograph twice. The science of image making is an essential part of our creative process, but it must never be viewed as the only part.

    Artandscience

    Surprisingly, Cartier-Bresson expressed, on multiple occasions, his almost complete lack of interest in the more technical portion of making photographs. The developing and printing of his negatives, actions so carefully controlled and guarded by most serious photographers of the time, were valid only to him in the cases where they allowed more effective expression of his vision. He saw the camera as a tool, and development and printing as merely a means to a much anticipated end. He said “people think far too much about techniques and not enough about seeing”.

    You can lose your direction during the of making an image. Sometimes we let technical perfectionism overshadow our initial vision. Thorough knowledge of your gear is essential to grow as a photographer. However, like Cartier-Bresson tells us, don’t allow yourself to become so focused on your tools that you forget your craft.

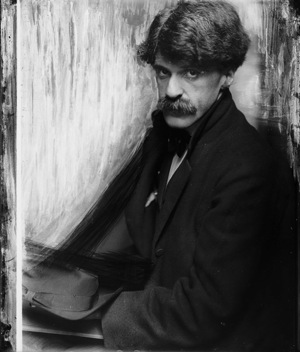
    Alfred Stieglitz

    Stieglitz

    Alfred Stieglitz was born into this world on January 1, 1864 and left it on July 13, 1946. Anything else that I can tell you about the impact of man’s life upon the world of photography and creative art will fall unbelievably short of the full measure of gratitude we owe him as photographers. That’s not hyperbole. Before Stieglitz, photography was not considered a form of artistic expression. There were no real schools of photography, and it certainly was not considered high art on the level of painting and sculpture. Stieglitz gave artists an outlet to show their work to the public, and was the catalyst that helped begin the careers of many celebrated artists including the paintings of Georgia O’Keeffe, and the legendary photographs of the great Ansel Adams. Stieglitz was always open to new techniques and innovative thinking towards art.

    His work is removed from our time by nearly a century, and many of the technical mechanisms he used are now obsolete. Still, there is much insight to be gained from Alfred Stieglitz, and his contributions. We can learn from his approach to the art world as a whole, to better ourselves as photographers.

    Lessons you can learn from Alfred Stieglitz:

    Express yourself when you can

    Stieglitz created a series of images called “Equivalents”. It is a collection of photographs that show a variety of different cloud formations. Each image was a self-reflection of the thoughts, emotions, and experiences that he was feeling at the time the frame was exposed. That made each image unique to only him. He was the only person who truly understood how he felt during each release of the shutter. So go out and photograph something that makes you happy. Share it with others if you want, or just keep it for yourself. Go and make photos of something that is only beautiful, or meaningful to you. The act in itself is very freeing.

    Expressyourself

    This spot has special meaning only to me. I made this photo for myself and no one else.

    You might be thinking “I express myself with all my work”, but really think about it for a moment. Do you ever make a photograph and immediately consider how it might be accepted or rejected by other people? Do you sometimes share an image that you personally think is outstanding but no one else seems to care about? We have all done it more often than we might comfortably admit.

    Break the rules if you want

    Simply put, any photograph that has ever been produced, resulted from of a combination of the following variables: size of aperture, shutter speed, depth of field, focal length, image receptor sensitivity and composition (film, digital sensor, ect) and that’s all. The key to making a great image is putting all those pieces together in such a way that they convert what was only visible within your own mind, into a photograph. Those are the only iron clad rules in photography. In the end it’s you who make the choices and operate the camera.

    Bendtherules

    Don’t be afraid to think outside the box!

    Some really great work has resulted from stepping outside the mainstream. There are many stunning images that completely ignore the rule of thirds, leading lines, horizons, and so forth. Never completely cast aside guidelines, but don’t convince yourself that you are permanently tied to them either. Learning, and practicing, the tested and proven building blocks of strong photography will help you greatly. Just remember that ground breaking work often arises from the bending of rules.

    Look for inspiration everywhere

    Stieglitz promoted all art forms. He opened galleries to display the works of painters, sculptors, and of course photographers. He didn’t limit himself to only photography, or painting or to works fashioned from stone and clay. Instead, he drank it all in. He recognized that it was all tangled together and intertwined.

    As photographers we are able to almost instantly project what sometimes takes other artists days or weeks, or even months to create. However, this relative ease of creation can gradually place blinders on our creative thinking. We can reach a point when we only look at other photographs for inspiration. That kind of thinking limits our scope as artists. This mindset is especially dangerous for new photographers and can lead to frustration, disappointment and even worse, emulation that festers into plagiarism.

    Don’t let yourself have artistic tunnel vision. Begin to look for inspiration everywhere to fuel your photography. Black and white sketches, paintings, wood carvings, architecture, kids finger-painting – everything has the potential to give you a smack of creativity that you can mould into photographic inspiration. The truth is that you really never know what will inspire you.

    Please share your questions and comments below. Have you heard of these two masters before? Have they influenced your photography?

    The post Cartier-Bresson and Stieglitz – Study the Masters of Photography to Become a Better Photographer by Adam Welch appeared first on Digital Photography School.


    Digital Photography School

  • Choosing Cases and Carts

    You can’t exactly put this stuff in your pocket. And what you get to carry it around will be largely driven by, well, what you care carrying around.

    Most of you will end up using two small lights with stands and mods and a modest bag of camera gear. Not that there’s anything wrong with that. You can do a ton of cool stuff with two speedlights. I have gone far past that level of gear in the past, and often to my regret.

    If that’s you, grab the shoulder-slung camera bag of your choice. Then augment it with this:

    The LumoPro Padded Lighting Case is cheap ($ 30), lightweight, protective and perfect for a two-speedlight lighting kit. It’ll carry two compact stands, speedlights, mods and various doo-dads perfectly.
    __________

    If you need to go beyond that, I’d take a serious look at ThinkTank bags for your fragile gear and whatever size sling bag you need for the stands/long mods.

    ThinkTanks are fantastic: well-built and well-designed (and frequently updated by the thinking photographers who design them.) I absolutely love mine and I recommend them without reservation.

    For a camera/laptop backpack (not a roller) I’d say go with the Airport Essentials case. It holds a good amount of stuff, very securely. It’s also the perfect size to curl up with on a plane in coach. Just put it on your lap, wrap your arms around it and rest your head atop it on that Toys-R-Us pillow they give you. That’s the best way I know to sleep on a plane.

    If you need more capacity (or wheels) step up to any of ThinkTank’s bigger rollers without hesitation. They are all solid choices. Capacity-wise, they go pretty much from “mirrorless cameras” to “I need to move a body.”
    __________

    I hesitate to even bring this up. But one day you may find yourself looking at a pile of bags and light stand slings and rollers and you may start thinking, “I need a cart to do all of this in one trip.”

    Let me first say that I do not envy you. And second, also say that I have been there myself. Not full-blown McNally-ladened, but too much to carry in one trip. By a long shot.

    When that day comes, you’ll start thinking about a folding cart. And rather than endure all of the mistakes (and wasted money) that I did, I am going to suggest you go straight to a Rock-n-Roller MultiCart.

    Why? Solid build, folding, expand to a big size if needed, can be a dolly, can hold a board to double as a digital tech’s desk on set—you name it. They rock. And roll.

    They make several sizes, but I recommend either the R-8 (smaller) or the R-12 (bigger).

    Designed for the music industry, they have been adopted by backache-plagued photographers everywhere. Either of these will likely be the last cart you ever buy.

    As a bonus, you will likely (and hopefully) use them more around the house than you even do for work. At least I hope so. Because it kinda sucks to travel with that much gear in tow every day.

    But if you are gonna, this is the cart.

    NEXT: Books and More


    Strobist