Category: Photography

  • Education: Gear for Your Brain

    Your brain is gear. Keep it in tune by providing it regular doses of education. A well-written and info-packed photo technique book is a screaming bargain in the long run. You’re essentially renting someone’s brain.

    I have dedicated an entire bookshelf page to my very favorite lighting (and other photo) books for your consideration. All are well-considered and are, I believe, the very best examples in their genre.
    __________

    But beyond that I would suggest you consider the occasional workshop. Nothing beats a hands-on, small class with a solid pro who knows things you would like to know. It is a super growth experience, and something you really owe yourself if you are passionate about learning to be a better photographer.

    At this point severe time constraints limit my ability to teach. But in the past I have taught many workshops and worked with many organizations. Having worked as an instructor for Gulf Photo Plus (held late winter in Dubai) and Santa Fe Workshops (held year-round in New Mexico and elsewhere). I can strongly vouch for both of these organizations. I have seen first-hand how students grow in leaps and bounds in the span of a week, all while making great new friends and having the experience of a lifetime.

    If you have ever toyed with the idea, you should definitely ask around, do your research and then take the plunge.
    __________

    That’s it, For Now

    That’s my two cents worth on gear. You may have other choices or priorities, but that is the best I can offer you with 25+ years’ experience behind it.

    If you want to chime in on your own, feel free to do so on Twitter via the hashtag #StrobistGear. If is it important that I see it, include an @Strobist in there somewhere and I will.


    Strobist

  • How to Secure Your First Music Gig Photo Pass

    The hardest part about gaining a photo pass for a large gig is in needing a strong portfolio of concert photos – getting a portfolio of works together when you can’t get access to shows makes things quite tricky. This article will explore how to build your first portfolio and in turn how to secure your first photo pass.

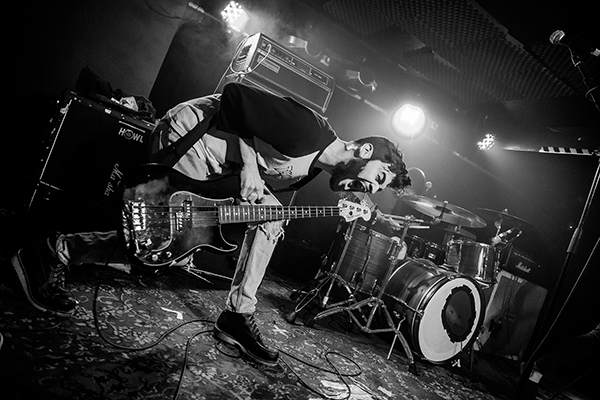
    While she sleeps will barnes

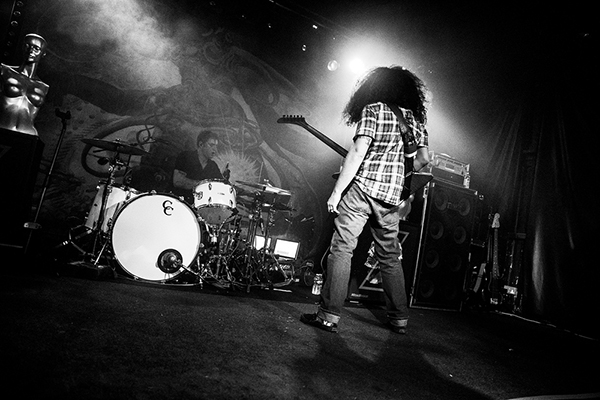
    While She Sleeps, shot for Brighton Noise

    Get the gear

    A lot of photographers will say it doesn’t matter which gear you have, and that it’s all about how you use what you’ve got. I completely disagree with this for music photography, you will need a fast lens – gigs are one of the darkest and dingiest places you will ever shoot, you will need something with at least an f/2.8 aperture. I highly recommend, for those on a budget, a 50mm f/1.8 – these can be picked up for around $ 100, and when shot with the aperture wide open will immediately put your work above those shooting with an f/3.5-5.6 kit lens.

    As you shoot more shows, you’ll find the style you want, and as such will slowly upgrade your kit. I find my current set-up a dream, the Canon 6D mounted with the Tamron 24-70 f/2.8, a coupling that is perfect for low-light gig photography.

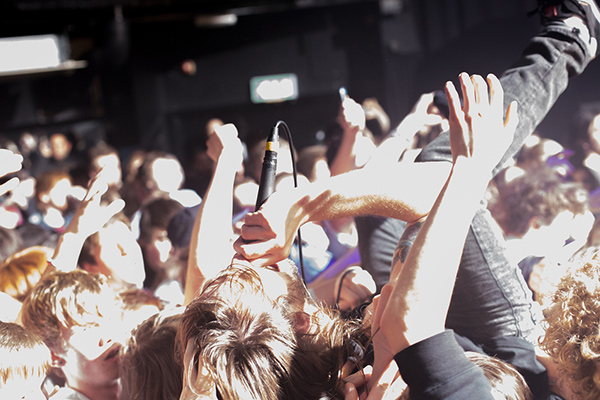
    Howls will barnes

    Howls, shot for Make a Scene Promotions

    Know the rules

    Before shooting any shows, it is important to know the rules. Unless you have explicit permission from the bands, managers or promoters, only shoot for the first three songs and don’t use a flash. These are rules you will have to stick to when shooting big shows so get used to them early. Learning to shoot in low light without a flash will push you as a photographer; while only having 10-15 minutes to cover a performance will make you think on your toes and focus on every opportunity.

    Start local

    Once you know the rules and have the right gear it’s time to start networking. A lot of photographers will just turn up to a gig and start shooting without knowing the bands, promoters or managers, or without asking. This can cause issues and I would not recommend it. Sometimes bands can be very protective about their image and might not actually want their photos taken, so always secure some sort of permission.

    The dillinger escape plan will barnes

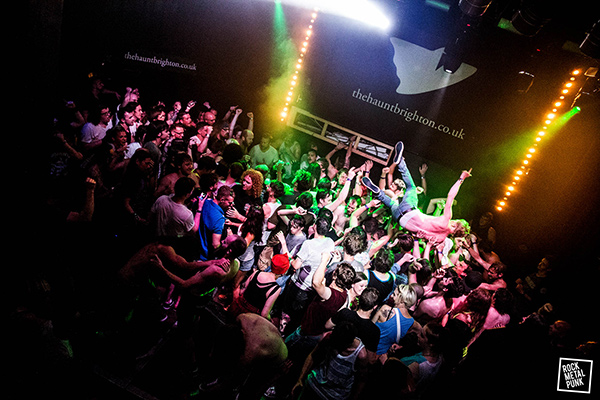
    The Dillinger Escape Plan, shot for Brighton Source

    The best way get in with the right people is to find a local venue and become a regular. Get to know the staff, the punters, the bands, and start networking. This isn’t to say push it in everyone’s face, but after you’ve watched a good band let them know you enjoyed it and mention that you’d love to shoot them live sometime, swap details, shake hands and continue drinking your beer while watching the next band.

    Starting locally will offer you a chance to network with bands that are eager for good photos of themselves. They are all after strong imagery to promote themselves and will often be keen to have a photographer cover their shows. They will also be pretty poor, so don’t expect to get paid for anything when you first start. Shooting locally, in this way, will spread your name and will help you to start building a strong portfolio – thus give you the starting blocks for talking to the larger bands, promoters, venues and even magazines.

    Once you’ve covered a good number of local gigs and have a variety of photos from different shows, it’s time to start looking for larger opportunities and looking at the bigger bands and venues.

    Aim big

    So now that you’ve got a portfolio of great photos from all the local shows you’ve covered, it’s time to market yourself. Chances are most of the people who have control of the photo passes have no idea who you are, so ensure you have an online presence. When talking shop you’ll need a simple way to show your work, so a website is best. You won’t need any big bands in the portfolio but simply proof that you’re an awesome band photographer. I’d also recommend getting a Facebook page, and a Flickr or 500px page that only shows your best work. You will be judged on the worst photo in your portfolio.

    Coheed and cambria will barnes

    Coheed & Cambria, shot for Brighton Source

    So the tricky part is now in finding a publication to work with, to get you your first major photo pass. I started by checking out all the gigs at the local major venues and Googling them a few days after the show to find out who covered it. Try something as simple as “Coheed and Cambria Brighton”. This will give you a list of publications to contact, and then simply drop them an email saying that you are looking to cover a few upcoming shows for them, and that they can see your work at your website. Chances are they will say that they already have it covered. However, it’s putting yourself in front of them so that when a photographer drops out of a show they will have someone to call, you.

    What if there aren’t any local publications covering shows in your area? Then it gets a bit trickier, but the methodology is the same, find shows you want to cover and find out who is running them. Email the promoters and the band managers, show them your work, and offer them high resolution copies of all the best photos for them to use to promote themselves. The promoters will likely want these to show how good their shows are – although it’s important to remember that these bigger bands probably already have an awesome collection of photos, so you have to really shine both in your conversation and your portfolio.

    Andrew wk will barnes

    Andrew WK, shot for RMP Magazine

    Success

    So it’s finally happened, the local publication got back to you saying they love your work and they want some coverage of the next big show in town, now it’s time to do your thing. Remember to prepare everything way before hand; charge your batteries, empty your memory cards, clean your lenses, prepare your photo pass (if this is simply an email print it out), arrive on time, be polite to everyone and abide by the first three songs, no flash rules.

    Once the show is over it’s important to ensure you get the photos to the relevant contact as fast as possible. I will normally edit all the photos as soon as I get home and submit them straight away. This is important because shows are time sensitive, people will be looking for the reviews and the photos the next day, so you need the photos with the promoters, bands or publications literally ASAP.

    At this point you will now have an even bigger and stronger portfolio, so now you can start to outreach with even bigger publications, bands and promoters. Before you know it you’ll be the centre-fold of your favourite magazine.

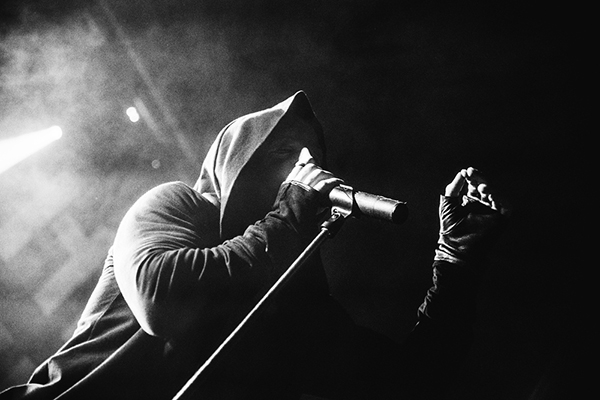
    Bleed from within will barnes

    Bleed from Within, shot for ALT.promotions

    A few tips

    You will likely get offered drinks at some point. Remember, don’t drink too much, you are representing either a promoter, a band or a publication, being a drunk photographer will not reflect well and will likely lose you access to the next show – drink Red Bull instead.

    Also don’t forget how you managed to get to cover that Dillinger Escape Plan or Andrew WK show, it all started locally with small bands – always remember those guys and continue working locally where you have time. It will improve your techniques, give you an even bigger portfolio and will make you feel good for creating great photographs for local talent.

    Are you ready to give it a go and get your first gig photo pass?

    The post How to Secure Your First Music Gig Photo Pass by Will Barnes appeared first on Digital Photography School.


    Digital Photography School

  • Choosing Triggers

    This is pretty simple and straightforward advice. First, start with a wire. Yep, a simple sync cable.

    It is cheap and reliable, and a great backup to have for when your wireless triggers decide to go all hinky on you. Which they sometimes will. Because, radio.

    If you chose your flash wisely, you’ll not be locked into expensive, proprietary PC-based cords. I live in a one-eighth-inch sync ecosystem and could not be happier with it. As such, my current favorite universal camera-to-flash cord is this little 16-foot baby from FlashZebra.com. I wish everything in my life was this simple.

    Next, promise me this: that you will never again buy a flash without a good built-in slave. Every flash I have recommended to you has one. Don’t be without it. That makes triggering multiple units much easier, whether you have wires or radios or whatever. Just makes too much sense. Friends don’t let friends buy flashes without built-in slaves.
    __________

    For wireless triggers, you can date or you can marry. If you just want to date, there is a new flavor-of-the-week appearing near constantly. They’ll be cheap, but they’ll likely not be long-term compatible with other triggers of the same brand.

    I tend to look at remotes as a long-term investment that I can safely add to over time as needed. Seriously, I have been using the same brand of triggers since the early 1990s. And by choosing wisely then, all of my triggers can work well together even though they were purchased over a span of 20 years.

    For those reasons I use PocketWizard. And because I am a manual shooter and am not chained to TTL, I can go with the simplest (but still rock-solid) PocketWizard triggers. So I recommend without reservation the ~$ 100 PocketWizard PlusX transceivers.

    Why: They are super reliable, simple to operate, run on AAs (huge thing if you have ever been left scrounging for batts in the wild) have ten channels, are auto-sensing receiver/transmitters, have a hard-shell-enclosed antenna, and have wonderful range. (More detail, here.)

    PocketWizard make a wide variety of increasingly complex and capable triggers. But if my son or daughter were starting out as a young pro photographer, the PlusX is what I’d buy them. I have owned nearly every model of PW trigger, and these are by far my favorite. For 90% of PW shooters, these will be the best choice.

    NEXT: Light Stands


    Strobist

  • Go Ahead And Call Yourself A Photographer, It’s All Right

    In the short time since I went pro (read: started making money) with my creative work, I’ve experienced a truly disheartening amount of judgment — snobbish judgment, most of it full of contradictions designed to place some creatives above others based on entirely arbitrary criteria that benefit the speaker and put up a wall of mystery and privilege between people Continue Reading

    The post Go Ahead And Call Yourself A Photographer, It’s All Right appeared first on Photodoto.


    Photodoto

  • Interview: Oded Wagenstein – Author of Snapn Travel Guide and dPS Writer

    Oded Wagenstein interview

    Oded Wagenstein is a travel photographer and writer. He’s built a reputation taking intimate portraits from around the world and is a regular contributor to National Geographic Traveler magazine (Hebrew edition).

    Regular readers will be familiar with Oded’s wonderful photography and articles. We’re interviewing him here at dPS because we have just published his new ebook about travel photography.

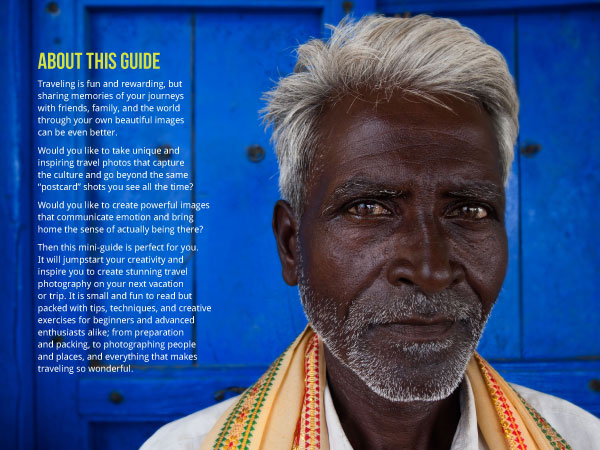
    Oded Wagenstein interviewIt’s called Snapn Travel – A lifetime of travel memories in a snap, and it’s available from our sister site Snapn Guides. It’s a fantastic ebook that will help any photographer who is planning a trip to another country to take better photos while they are there.

    In Snapn Travel Oded writes about the importance of creating images that tell stories. He explores the process that he undertakes on any travel assignment, from initial research to working in the field, to come away with powerful and evocative images. We’ll delve a little deeper into some of those topics in this interview.

    The Interview

    In your ebook you start by saying that travel photography is all about portraying the stories and emotions we find during our journeys. Can you elaborate on those ideas? How does one go from taking snapshots of places you see on your travels to taking photos that make full use of emotion and story?

    Oded: Travel photography is almost as old as photography itself. Magazines and commercial photo publishers used to send travel photographers like Francis Bedford and James Ricalton to “exotic” places in the east to bring back some of that “oriental flavor” that everyone in the west was so badly after in the nineteenth century. Even until recently, if you visited a remote tribe in Africa and got an image of someone with a bone through his nose, you got yourself a “worthy” image.

    But those days are over! We live in an era of digital photography, where cameras are so common, that even this tribe might have its own smartphone camera. Today, it is really hard to create fresh images that the world hasn’t yet seen. So, from my point of view, today, an image alone is not enough, as you must be able to tell a visual story. Don’t show me India, I know how India looks, tell me how traveling in India felt for you. If you want to sum up my philosophy: shoot what you feel and make your viewer feel the same.
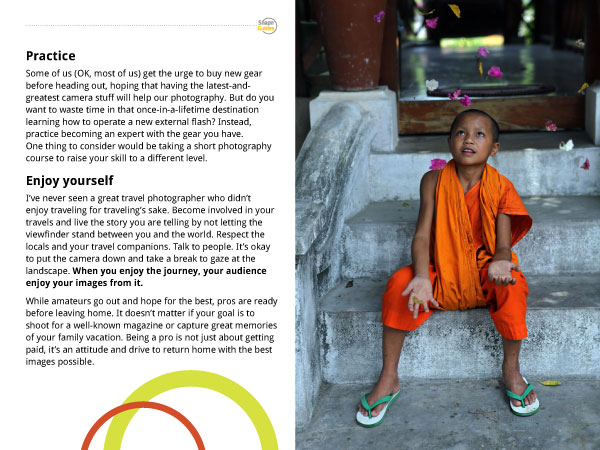
    Oded Wagenstein interview

    A lot of your photos are portraits. How do you find willing subjects for your portraits when travelling?

    Oded: Portrait photography is a “give and take” relationship, not “take and take”. I try to make it as fun as possible for the person I photograph. If he wants to tell me a story, I listen, and always do my best to send the photo to him. I make the process a conversation, and not a photo shoot. This lets my subject forget about the camera.

    One of the most important skills I learned is to ask a person a question, shoot while he’s answering, and while I’m thinking about the next question. This makes everything natural and “flow”. Portrait photography is so much more than controlling aperture and shutter speed.

    Oded Wagenstein interview

    How do you overcome obstacles such as language differences or suspicion of foreigners?

    Oded: I always travel with a fixer, who is a local that can serve as a guide and translator.

    How do you become involved with the people that you meet? How do you come across as a traveller who is genuinely interested in people rather than a tourist who perhaps sees the local people as little more than subject for photos?

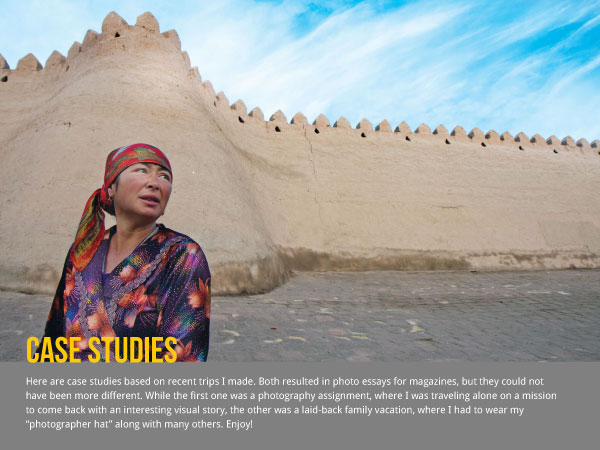
    Oded: First, as obvious as it may sound, I am really interested in them. The image for me is just a byproduct: a nice byproduct, but not the goal. I am an image maker because the camera helps me “see” the world in a better way. It lets me start a conversation with a stranger, and maybe have a cup of tea with them. The camera is my bridge to the world and besides being interested in the person’s story, I always try to get inside the story and not watch it from outside. For example, once I was invited to a local Tajik wedding. I took a few pictures but then put the camera down and got on the dance floor. The next time I took out my camera, the pictures were much better.
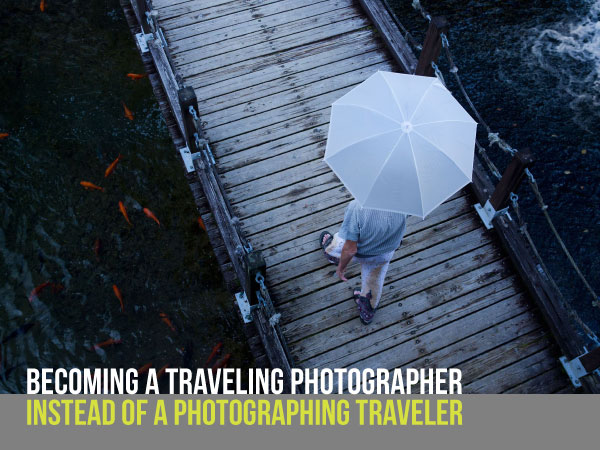
    Oded Wagenstein interview

    Can you talk us through the differences between working on an official magazine shoot and going to a location purely under your own initiative?

    Oded: I treat both scenarios exactly the same way. In both, the responsibility to come back with the best results is all on the photographer’s shoulders and no one can tell you exactly what to shoot and where to go. The magazine can help you with ideas or hiring a fixer (local guide), but you are your own boss, for better and for worst.

    I do my visual research and learn about the culture (history, food, music, religion, etc.). On the ground, I hire a fixer and do my best to come back with the best images, even if it takes me long days, hard walks, and enduring extreme weather.

    In my travel photography workshops, I always refer my students to the “client”. From my point of view, we all, professional and amateurs alike, have clients. Our clients are our viewers and friends, and I treat my Facebook viewers and my magazine editor with the same amount of effort and professionalism.
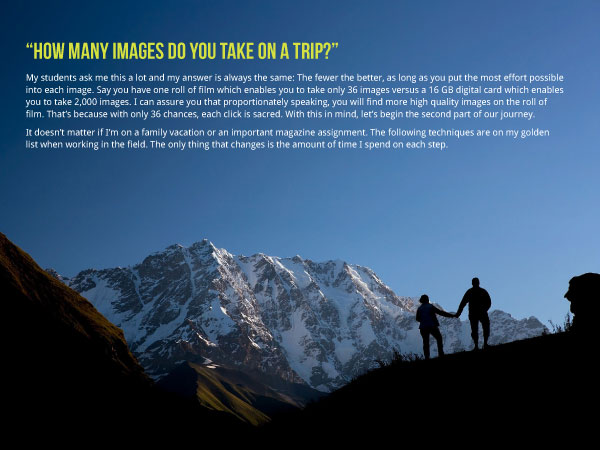
    Oded Wagenstein interview

    I like this piece of advice: “Discover things not commonly photographed and your stories will always be two steps ahead of the crowd.” Can you explain this in a little more depth? How do you find the things that are not commonly photographed?

    Oded: You don’t have to travel far, or trek for miles, to find those places. You just need to think outside the box. For example, I did a story not long ago on Bollywood. India is so complex and rich, but I think that we always see the same things about the country: poor people in really colorful clothes. So I wanted to show a different side of India: rich and glamorous.

    My students struggle to find interesting things to photograph in their own towns. And I tell them that one’s ordinary breakfast or road to work is another’s “exotic” country.
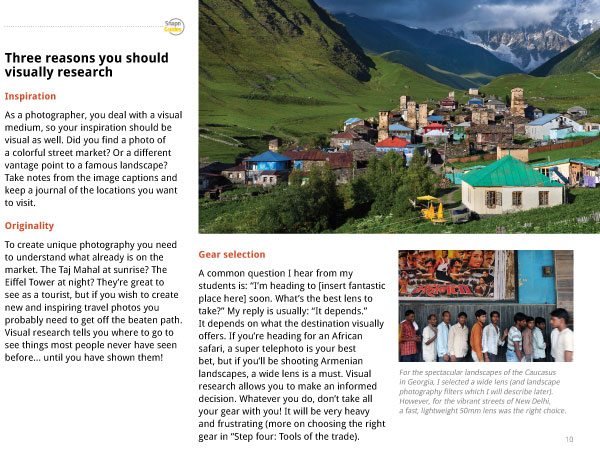
    Oded Wagenstein interview

    Last year I spent a week in the north of New Zealand’s South Island. I took some landscape photos but I wasn’t really happy with the results. It made me realixe just how hard landscape photography can be – you’re relying on the weather and light to do its part, and in many ways as a photographer, your hands are tied. You have to work with the landscape as it is, and (digital manipulation aside) there is nothing you can do to change it. Bearing in mind there isn’t much happening in a cultural sense in this part of the world, what advice would you give me if I was to go back to the same place and try again? How can I move from taking uninspiring landscape photos to finding and telling an interesting story?

    Oded: This is a good question. Here you have two approaches:

    The passive approach, or coming at the right time. Just come in the right season, the right day, at the right time. Say a cloudy winter day with golden rays of sunrise.

    The active approach, or creating the right time. Good lighting is always needed, but bring a tripod, a good looking hat, a backpack, and capture yourself enjoying the view. You will see how the image becomes better because you added a “main hero” to the image and because people love watching other people. Don’t avoid people in your landscape photography, that’s my advice.
    Oded Wagenstein interview

    Traveling to a distant and exotic location is one thing, but given that most people can only spend a short time of the year doing this, what about the idea of travel photography in your own back yard?

    Oded: Buy the Lonely Planet guide (or any other guide book) on your own country and travel by it. Take a silly tourist’s hat and view some postcards. See your own back yard as a tourist. Think of places you have special access to – maybe there is an interesting story or a person in your family (I have a few), maybe your job is not ordinary, and maybe your mother just cooked a local dish that I, as a foreigner, would love to see.

    Do you have any questions for Oded about travel photography? Please let us know in the comments. And don’t forget to check out Snapn Travel – A lifetime of travel memories in a snap.

    The post Interview: Oded Wagenstein – Author of Snapn Travel Guide and dPS Writer by Andrew S. Gibson appeared first on Digital Photography School.


    Digital Photography School

  • Understanding Masking in Photoshop

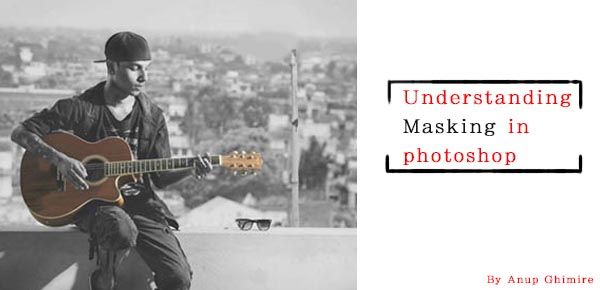
    Header

    Masking is one of those techniques that will change the way you use Photoshop. Understanding this technique can help you to jump from being a beginner level Photoshop user, to a more advanced one. In this article, I will explain how masking really works in Photoshop, its few key concepts, and how Masking helps you to perform non-destructive editing.

    The skills you need to get started masking in Photoshop are being able to use the brush tool to paint color, understand two colors black and white, and knowledge of how layers work in Photoshop, which I assume you have very sound knowledge on.

    What is masking what does it do in Photoshop?

    If you can relate the word masking with the mask, it may make some sense. Why do we use a mask, to cover the face, right? So why would we use masking on a layer, to cover or uncover the content of any layer. With a mask you can control the transparency of a layer. But that is what opacity and fill is for, right? Yes, opacity and fill do control the transparency, but it works for whole layer. What if you would like to have only the right part to be transparent and the left part to be completely visible? That’s when masking comes into play.

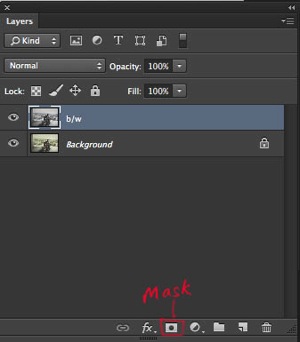
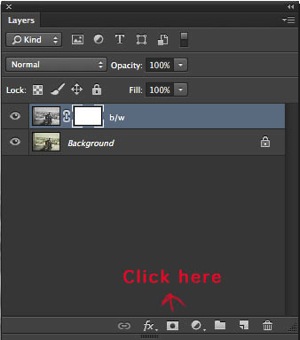
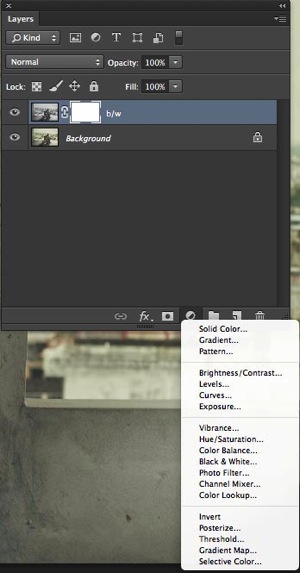
    Masking works in two ways. First, you simply add a mask on any layer by clicking the third option on the bottom of layer palette. The other way is by using adjustment layers, which always comes with a mask.

    Background without mask

    This image shows a layer with no mask applied. I have highlighted the third option on the layer palette. That is where you add a mask.

    Adding mask white

    Clicking on the mask option will create a white layer mask on the layer selected.

    Adjustment layer

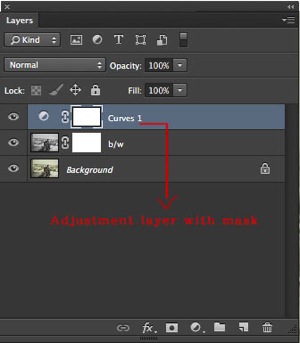
    This image shows an adjustment layer. They help you to perform non-destructive editing, and every adjustment layer created this way, comes with a white mask.

    Adjustment layer with white mask

    This shows that a new curve adjustment layer has been applied with the white mask.

    While working with masking please remember that white shows the content where as black hides. If your mask is white, the mask is transparent and the layer is fully revealed, whereas if the mask is black it is opaque and the layer below will show through. Below are a few examples that will help you to understand masking better.

    A handy saying to help you remember: white reveals, black conceals

    White mask

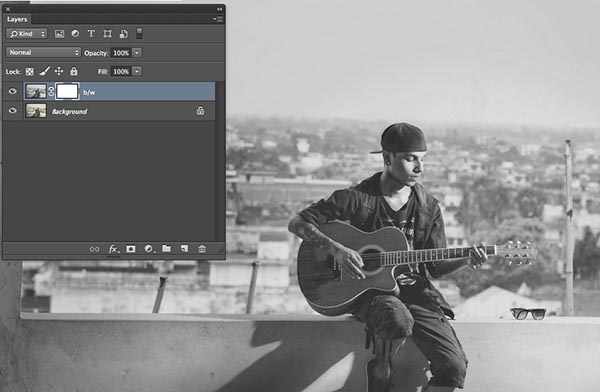
    The image above shows, that the white mask reveals the content of the layer it is affecting. I duplicated the background layer and desaturated it with Shift+Command+U on a Mac (Shift+Control+U on PC).

    Black mask

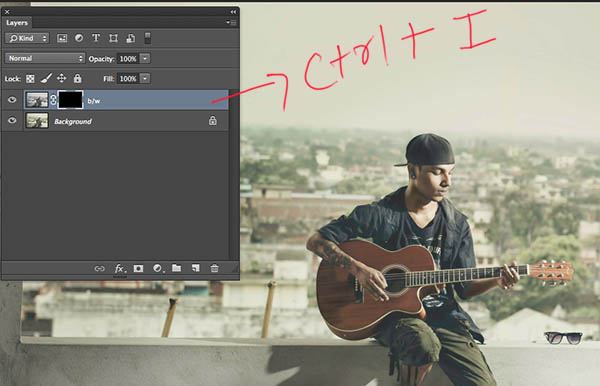
    With Ctrl/Cmd+I, you can invert the white mask into a black one. Since black hides the effects, the image has now been changed from back and white to color, from its original state (the layer below is now visible)

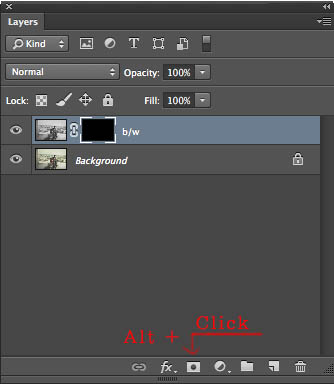
    When you first add a mask it will initially be white, but you can change it into black either by inverting the mask, Cmd/Ctrl+I, or you can fill with black or white. Alternately, by simply pressing Alt while clicking to create the mask would also result in a black mask.

    Creating black mask

    Additional tip

    • Step 1. First click D on your keyboard (default), which will fill your background color with white, and foreground color with black.
    • Step 2 Select the mask
    • Step 3 Press ALT+Backspace to fill with the foreground color (black) and Ctrl+Backspace for to fill with the background colour (white). You can use X to swap the foreground and background colors.

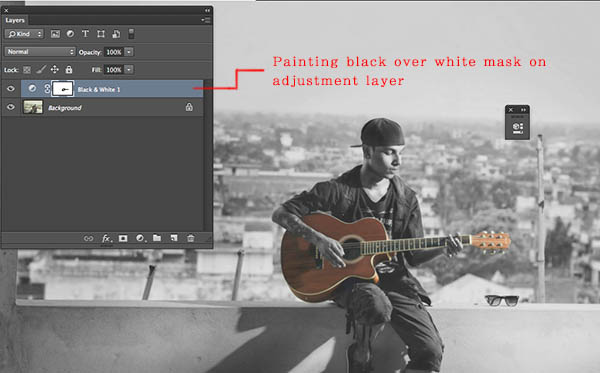
    You can now paint on the mask with the brush key selected. Make sure your foreground color is opposite to the color of the mask. If you are painting with black on a white mask, the content of that part of layer is becoming transparent while the white parts remain as is. If you are painting white over a black mask, then that part would be back to its original form. You can play around with the percentage of fill and opacity to get more control over your workflow.

    Painting with black on mask

    Here I painted the guitar with a black brush over the white mask, resulting in the visibility of color from the layer below.

    Additional tip

    Simply press your number on the number pad and your opacity will change as per. If you press shift plus the number, then its fill will change.

    • 4=40%
    • 4+9= 49%
    • 0+4 = 4 %

    Do you have any other masking tips and tricks? Please share in the comments below if you do, or if you have any questions.

    The post Understanding Masking in Photoshop by Anup Ghimire appeared first on Digital Photography School.


    Digital Photography School

  • Fuji X-T1 Versus X-E2 – Which Comes Out on Top?

    This video by Munetake Kayo over at BigHeadTaco compares some of the features of both of these popular Fuji mirrorless cameras.

    If you’re considering getting a more compact camera and downsizing from a DSLR, or maybe upgrading from a point and shoot camera – you might end up looking at one of these Fuji cameras.

    I know for me, as a previous film shooter, the X-T1 has a lot of appeal and it currently sitting on my list to get. So I was interested to see this comparison and it actually solidified my choice.

    Check out the Fuji X-T1 versus X-E2 in the video review and see what you think

    Not convinced? Here’s a review of the X-T1 by dPS writer Paul Burwell.

    So are you ready to get either of them? What are you shooting with?

    The post Fuji X-T1 Versus X-E2 – Which Comes Out on Top? by Darlene Hildebrandt appeared first on Digital Photography School.


    Digital Photography School
  • Four Under-Used Tools in Lightroom’s Lens Correction Module

    hacking photography, mike newton, architecture,

    Almost every lens changes the way your image looks by warping it in some way. Each lens can create barrel distortion, vignetting at big apertures, chromatic aberration, and more.

    Some lenses have more distortion than others. Let’s look at four tools in Lightroom’s lens correction module that are a lifesaver

    1. The easy button – lens profile corrections in one click

    Before lens corrections:

    lens corrections, lightroom

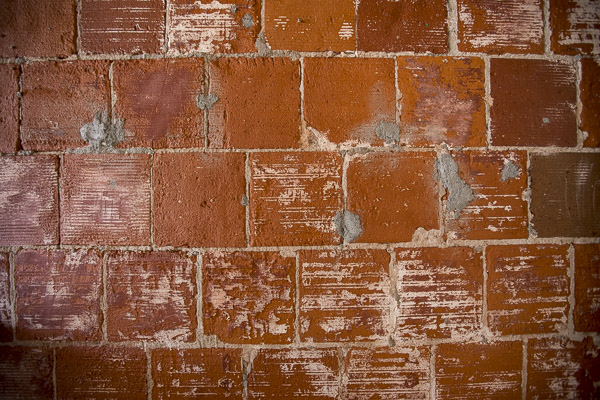
    Brick wall at 16mm, f/2.8, ISO 1250. You can see the ‘bulge’ in the middle because the horizontal lines are not parallel. Also notice the dark corner vignetting from shooting wide open at f/2.8

    After one-click lens correction:

    hacking photography, brick wall, lens correction, barrel distortion

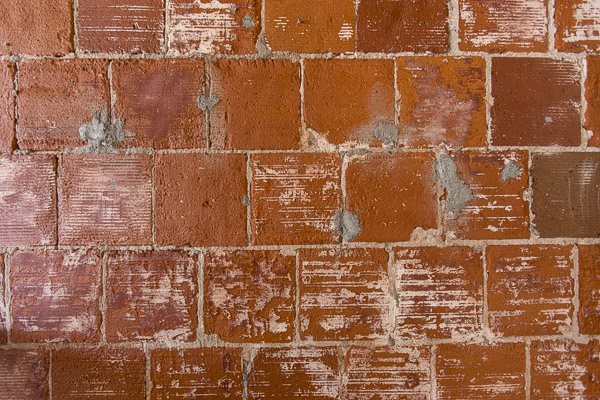
    Same settings as above but with lens profile correction applied. Note the parallel horizontal lines and no more dark corners.

    I shot this wall on a 16-35mm f/2.8 lens at f/2.8 to illustrate the ‘bulge’ in the middle and vignetted corners. These are distortions from the Canon 16-35mm f/2.8L II lens.lightroom 5 lens profile corrections,

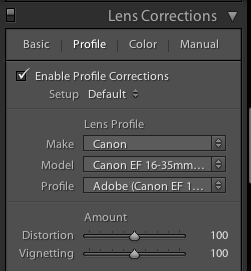
    Lightroom is already loaded with profile corrections for this specific lens! Just click “enable profile corrections” in the “Profile” section of the Lens Correction module and Lightroom will fix the distortion for the lens you used!

    Finding your lens profiles on older versions of Lightroom

    As Lightroom keeps rolling out newer versions, it rolls out profiles from newly released lenses. If you are using Lightroom 3 from 2010 but have a lens that hit the market in 2012, Lightroom won’t have it in there.

    You can go download Adobe Lens Profile Creator to look up your lenses, grab their profiles, and manually add them to Lightroom.

    I use the profile corrections on almost all of my images

    Unless you have a very specific reason to manually deal with it, I suggest that you just use Lightroom’s built-in profile corrections most of the time.

    While you can certainly change all these lens corrections manually, in most cases it makes more sense to let Lightroom do the hard work for you.

    2. The vertical slider

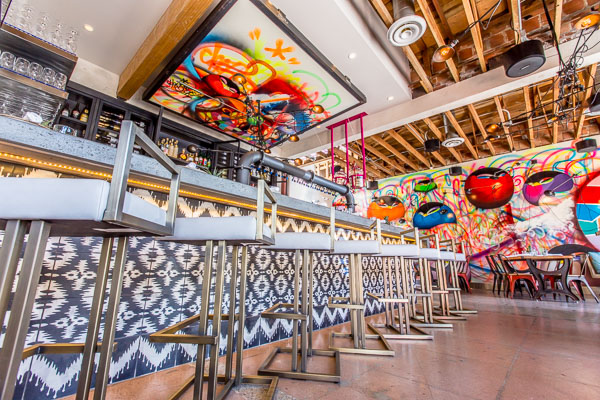
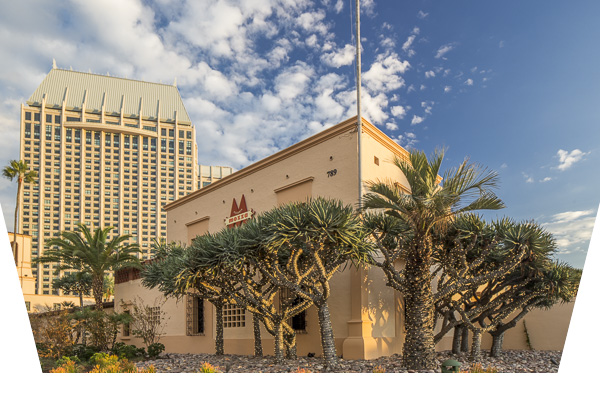
    Pizzeria Mozza San Diego, architecture photography, keystoning, hacking photography

    The problem

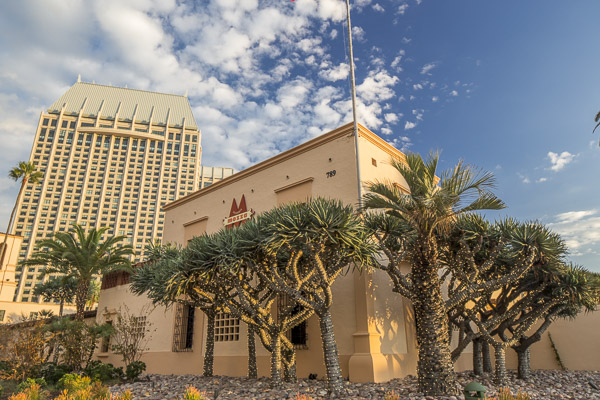
    I photographed this shot above for a commercial builder. Notice how the building in the back is falling over, and the one in front has vertical lines that aren’t parallel? Rather than repeat this excellent DPS article (Why are my Buildings Falling Over? A Short Guide to Perspective Distortion and Correction in Photography) that describes why this happens, I’ll show you how to correct it.

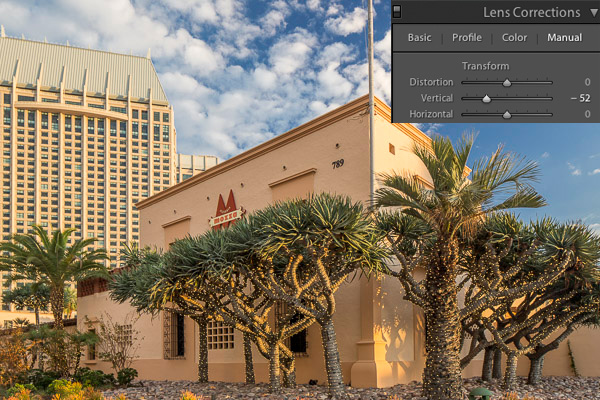
    The solution

    I pull the vertical slider to the left until the lines are parallel.

    hacking photography, architecture photography, pizzeria mozza, lens correction, lightroom 5

    Crop it

    Notice anything weird? When you shift the vertical axis you lose some of the image. Architecture photographers use tilt-shift lenses to correct this in camera without losing any of the image.

    Since I didn’t have one at the time, I corrected it in Lightroom by cropping the white part out.

    tilt-shift, hacking photography,

    3. The horizontal slider

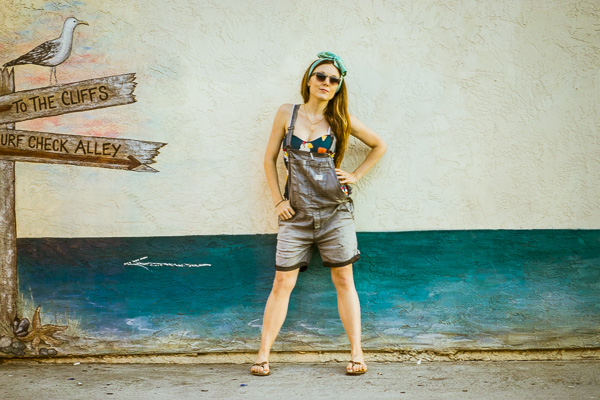
    Sometimes you might be in a hurry and shoot a photo that needs to be slightly shifted horizontally in post. I did this during a fashion shoot.

    Hacking Photography, model, horizontal shift

    The problem

    I took the photograph without realizing I was slightly positioned to the side of the wall vs. straight on. If you look closely, you can see the line where the wall hits the ground, and that it slightly angles from bottom left to top right.

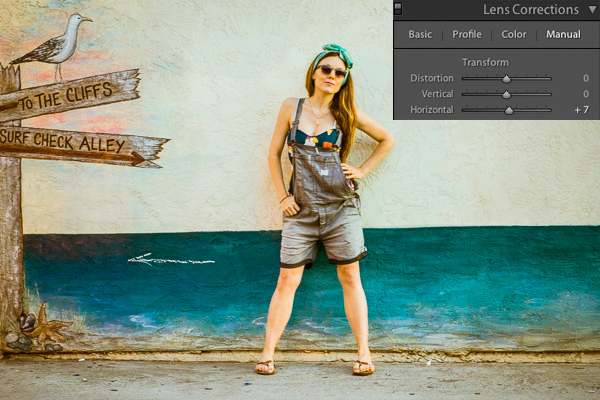
    The solution

    Using the horizontal slider and shifting it slightly to the right will tilt this photo so the right side appears to come closer to the viewer and the left side moves further away from the viewer. The result is that now the photo is perfectly square with the wall and the line along the bottom is level.

    hacking photography, lens corrections

    4. Vignette slider

    The problem

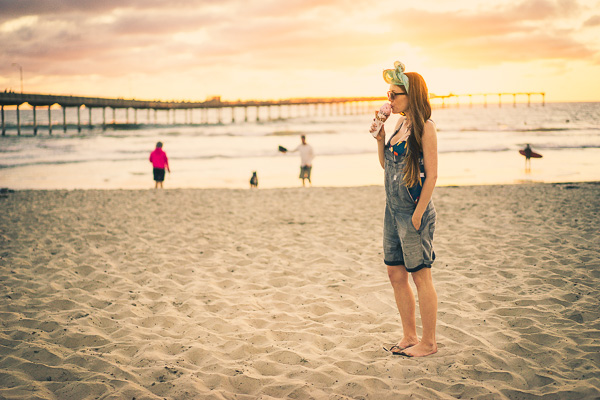
    When shooting at big apertures most lenses create some form of vignette, meaning dark corners in the photo. Sometimes these can be attractive, but sometimes you don’t want them.

    I shot this photo at f/1.8. Do you see the dark corners? I want to remove those.

    hacking photography

    The solution

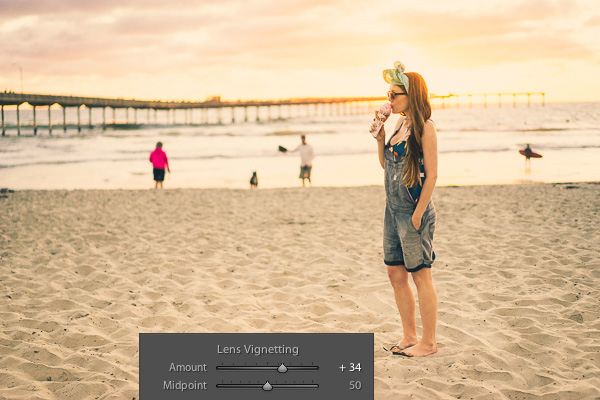
    Simply pull the vignette slider in the Lens Correction manual module to the right to reduce a vignette.

    vignette, hackingphotography.com

    Vignettes are a matter of personal preference. I don’t think the first photo looks bad with the vignette, I just wanted it without it. You can use the vignette slider to create or enhance a vignette by pulling the slider to the left.

    Pro tip: if you’ve cropped the image at all, you will want to use the post-crop vignetting tool in the “effects” dialog box. The vignette slider in the lens corrections module affects the original image size, regardless if you’ve cropped it.

    If you want to see these tools in action, check out the video below:

    I hope you found this helpful – happy editing!

    The post Four Under-Used Tools in Lightroom’s Lens Correction Module by Mike Newton appeared first on Digital Photography School.


    Digital Photography School
  • Some Punchy Black and White Landscape Photos to Oooo and Aaah Over

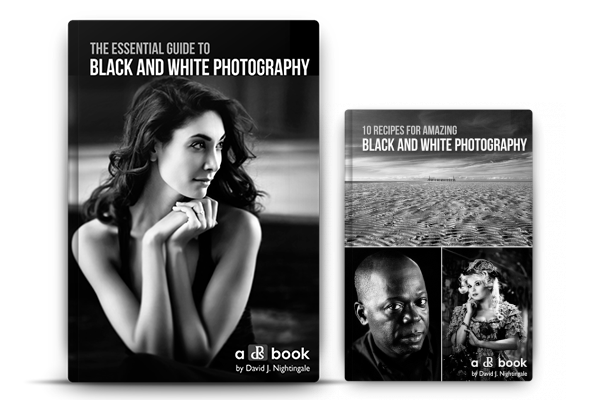
    Recently we released our newest dPS ebook The Essential Guide to Black and White Photography. 

    So I thought it would be fitting if we had a look as some great black and white images. I don’t know what it is but I’m really attracted to a great black and white image. It’s something about the contrast and the style and makes you really focus on the light and composition in the image – there’s no tricks it’s just an image is the simplest form.

    So in this set I’ve found some amazing black and white landscape photos for you to enjoy – please let the oooing and aaaahing commence!

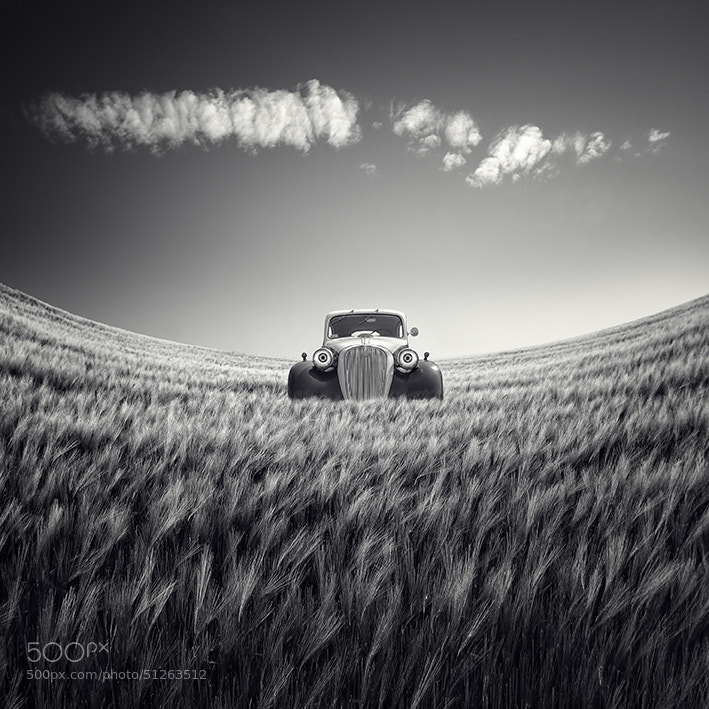
    Photograph The Last Ride by Rob Dweck on 500px

    The Last Ride by Rob Dweck on 500px

    Photograph Dignity by Martin Mattocks on 500px Dignity by Martin Mattocks on 500px

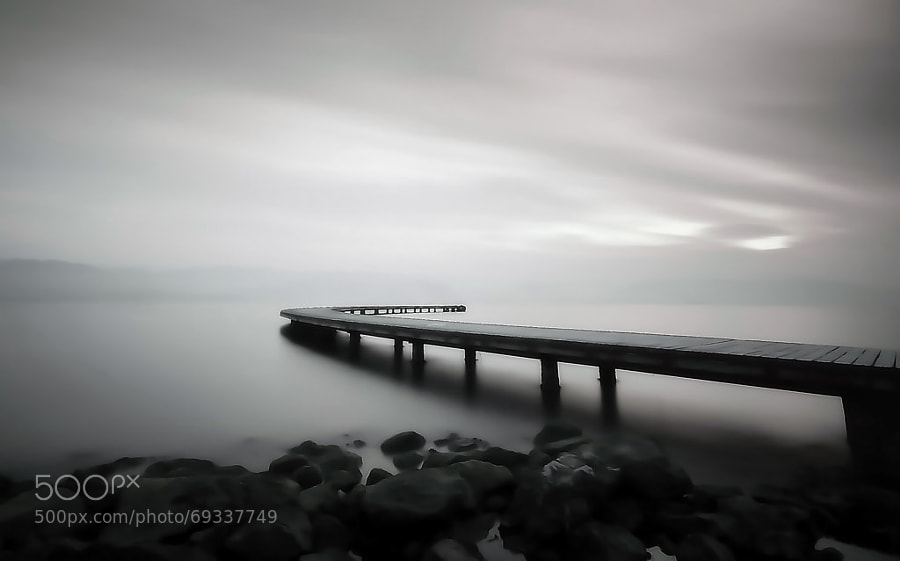
    Photograph road by ömer yücel on 500px

    road by ömer yücel on 500px

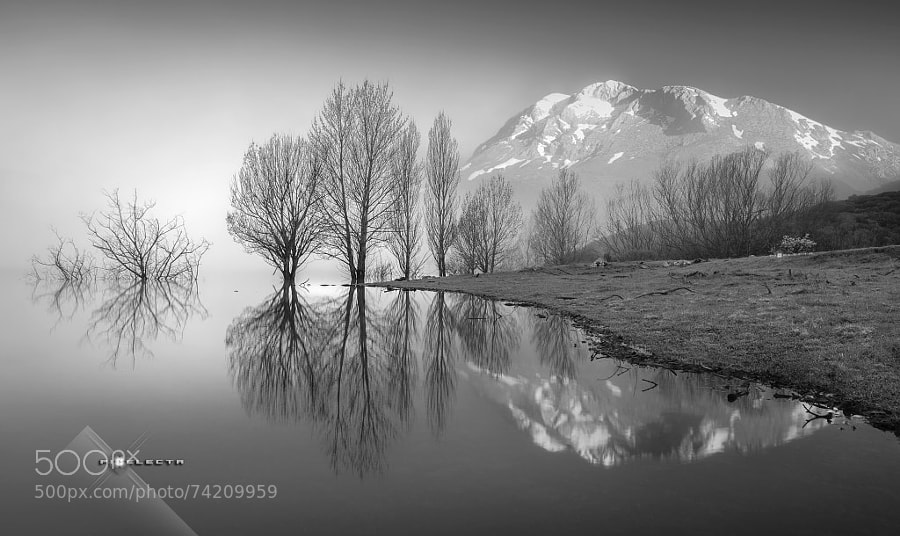
    Photograph "MAGIC IN ESPIGÜETE" / "MAGIA A LOS PIES DEL ESPIGÜETE" by Juan PIXELECTA on 500px “MAGIC IN ESPIGÜETE” / “MAGIA A LOS PIES DEL ESPIGÜETE” by Juan PIXELECTA on 500px

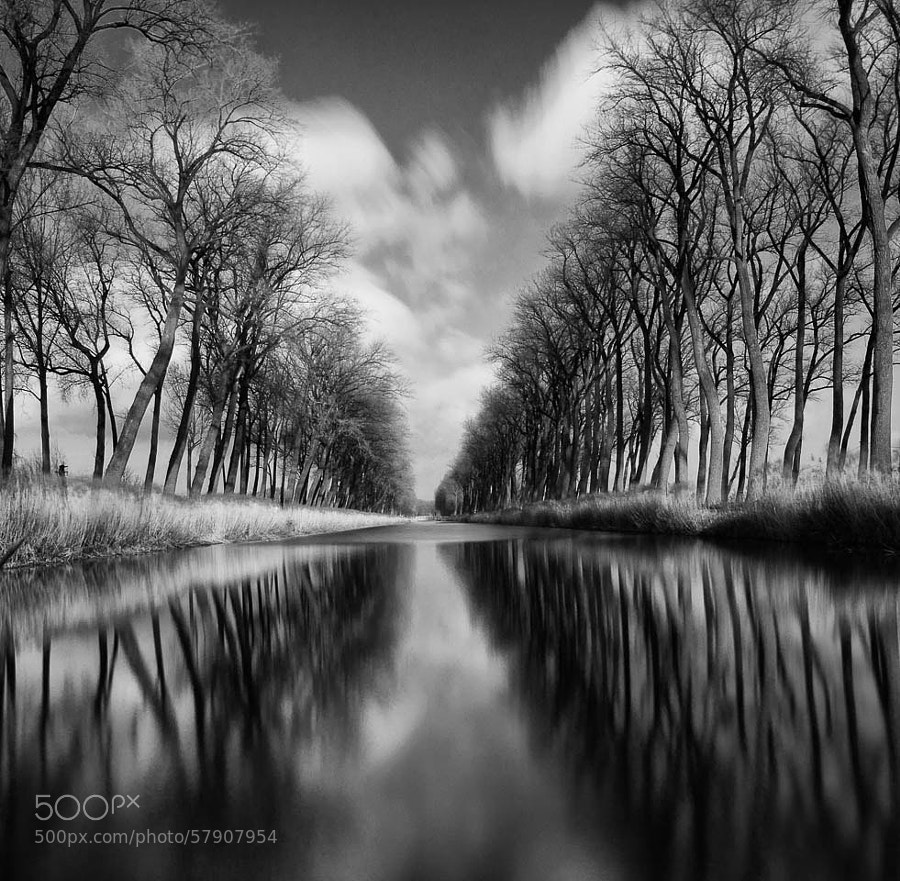
    Photograph Smooth River by Johan Vanreybrouck on 500px

    Smooth River by Johan Vanreybrouck on 500px

    Photograph Silver Reflections 2 by Joe V on 500px Silver Reflections 2 by Joe V on 500px

    Photograph Tree & Clouds by Carsten Meyerdierks on 500px

    Tree & Clouds by Carsten Meyerdierks on 500px

    Photograph Age Old by Chris Fletcher on 500px Age Old by Chris Fletcher on 500px

    Photograph Untitled by Luis Beltrán on 500px

    Untitled by Luis Beltrán on 500px

    Stop for a minute

    I’m going to stop you for a second. If you’re scrolling through these quickly, stop. Take the time to really look at each one – one at a time. Do you see the common thread here?

    • Simple
    • Clean
    • No distractions

        Okay, carry on!

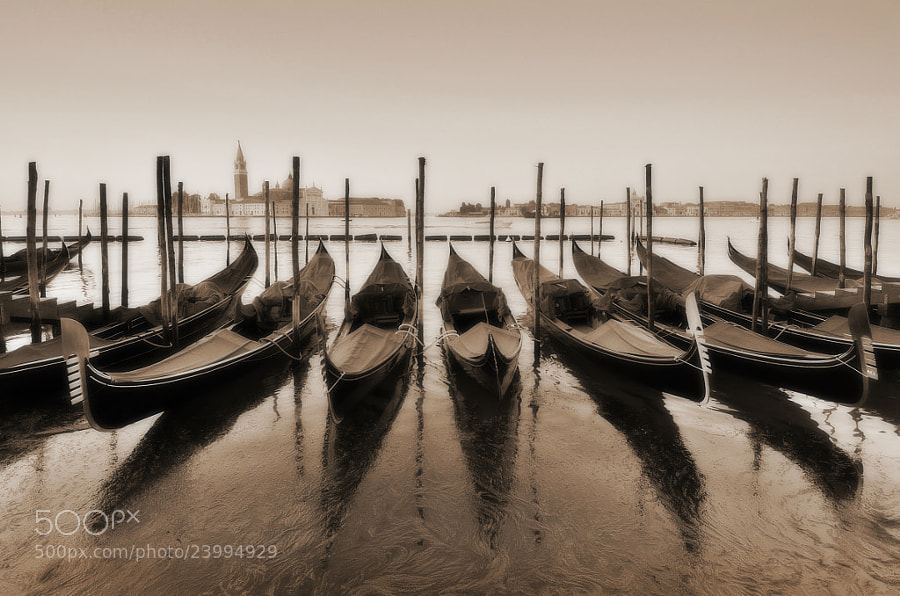
    Photograph Venice Nostalgia by Csilla Zelko on 500px Venice Nostalgia by Csilla Zelko on 500px

    Photograph In the Days Still Left by Rob Dweck on 500px

    In the Days Still Left by Rob Dweck on 500px

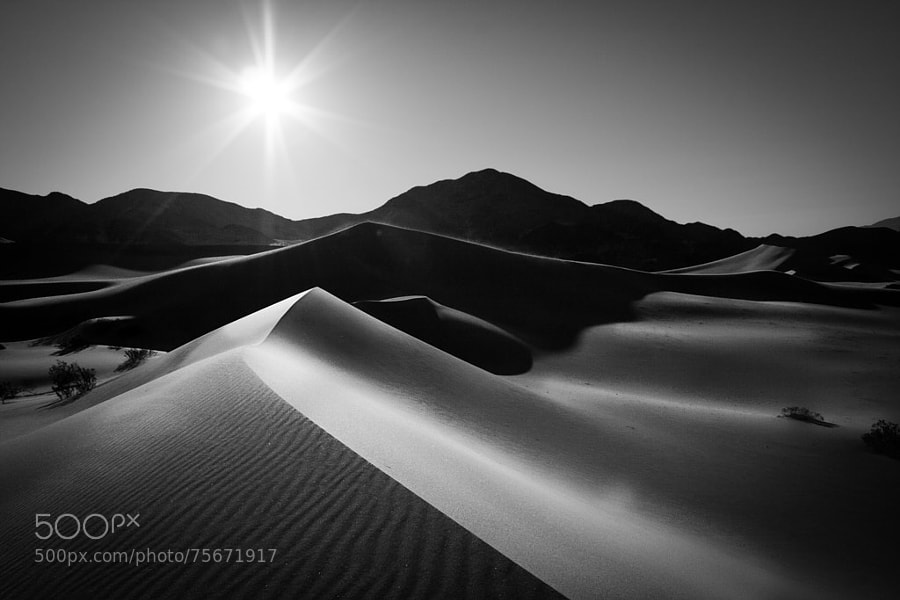
    Photograph Ibex Sunrise by Grant Thompson on 500px Ibex Sunrise by Grant Thompson on 500px

    Photograph Parched by James Crawford on 500px

    Parched by James Crawford on 500px

    Photograph Herringfleet by George Johnson on 500px Herringfleet by George Johnson on 500px

    Photograph Moment by Majeed Badizadegan on 500px

    Moment by Majeed Badizadegan on 500px

    Photograph --In Motion-- by Marek Kijevský on 500px –In Motion– by Marek Kijevský on 500px

    Photograph Tranquil Dawn by Majeed Badizadegan on 500px

    Tranquil Dawn by Majeed Badizadegan on 500px

    Photograph Tranquility of Morning by Abi Arga Hadityarista on 500px Tranquility of Morning by Abi Arga Hadityarista on 500px

    Photograph B e a c h e d by Chris Oliphant on 500px

    B e a c h e d by Chris Oliphant on 500px

    Photograph on the road by adam smigielski on 500px on the road by adam smigielski on 500px

    Photograph A rural morning by Margareta   on 500px

    A rural morning by Margareta on 500px

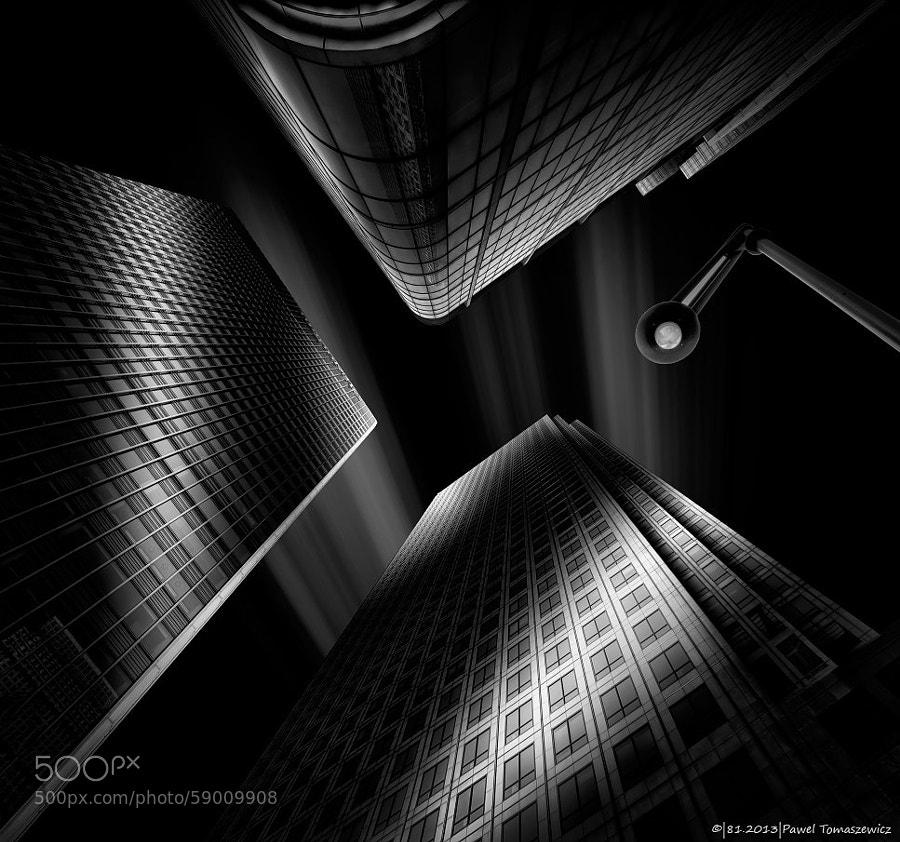
    Photograph 81.2013 - B&W- Light Reflections ... by Pawel Tomaszewicz on 500px 81.2013 – B&W- Light Reflections … by Pawel Tomaszewicz on 500px

    Photograph named by lennon baksh on 500px

    named by lennon baksh on 500px

    Photograph dark master´s crown by Ronny Behnert on 500px dark master´s crown by Ronny Behnert on 500px

    Photograph NYC thoughts by RACKHAM  on 500px

    NYC thoughts by RACKHAM on 500px

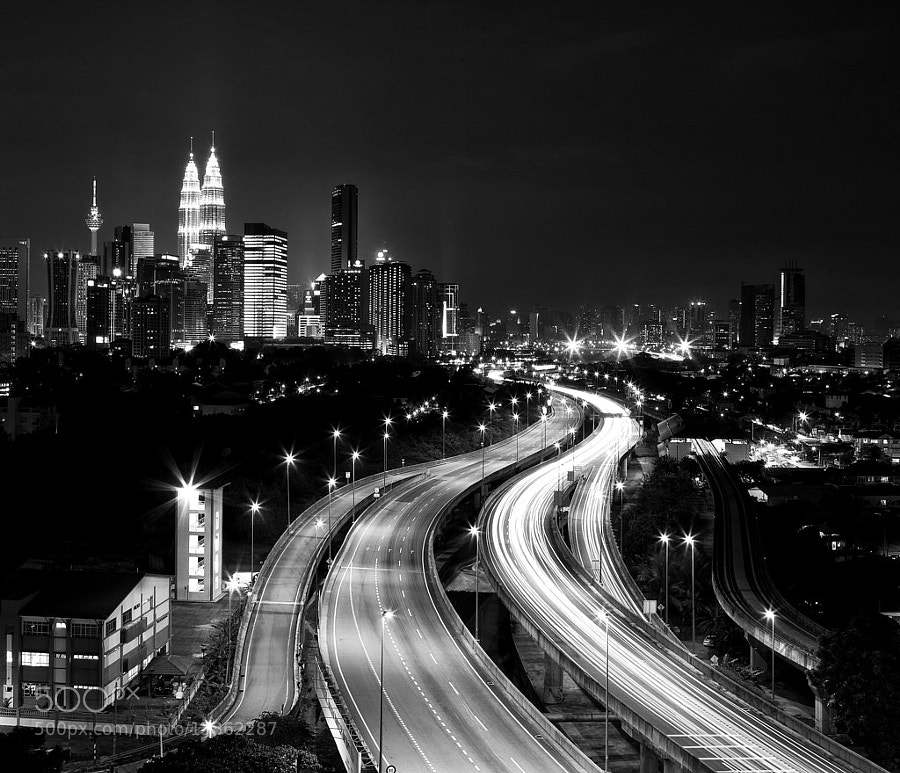
    Photograph Kuala Lumpur by Tashi_Delek Nakata on 500px Kuala Lumpur by Tashi_Delek Nakata on 500px

    Photograph Dark#04# by Andreas Paehge on 500px

    Dark#04# by Andreas Paehge on 500px

    Photograph SZEMPONT by Shady S. on 500px SZEMPONT by Shady S. on 500px

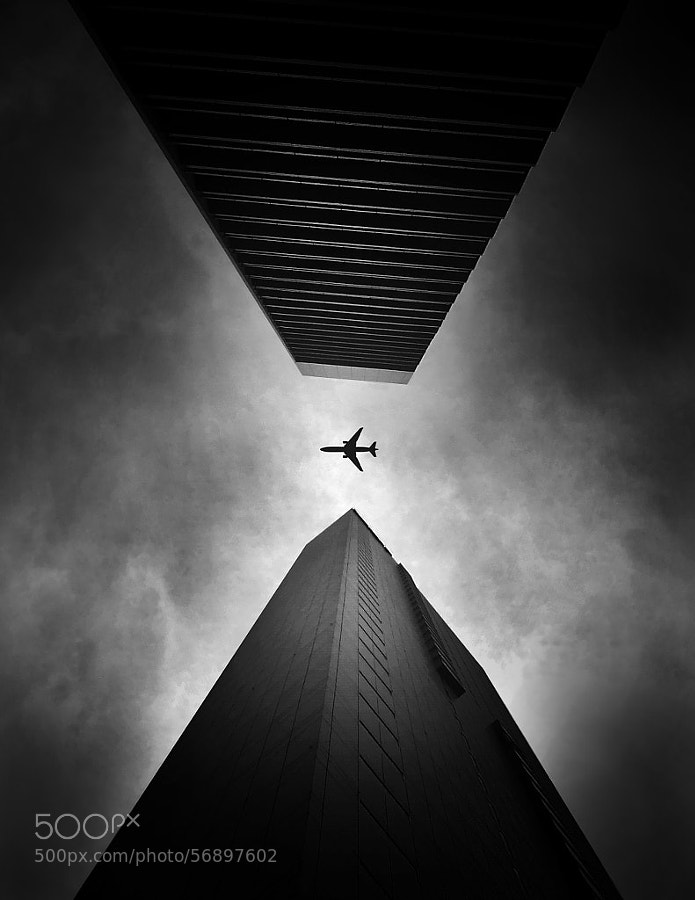
    Photograph Chrysler Building II by pixeldreamer  on 500px

    Chrysler Building II by pixeldreamer on 500px

    Photograph entrap by tet bautista on 500px entrap by tet bautista on 500px

    Photograph One Light Only by Sam Commarato on 500px

    One Light Only by Sam Commarato on 500px

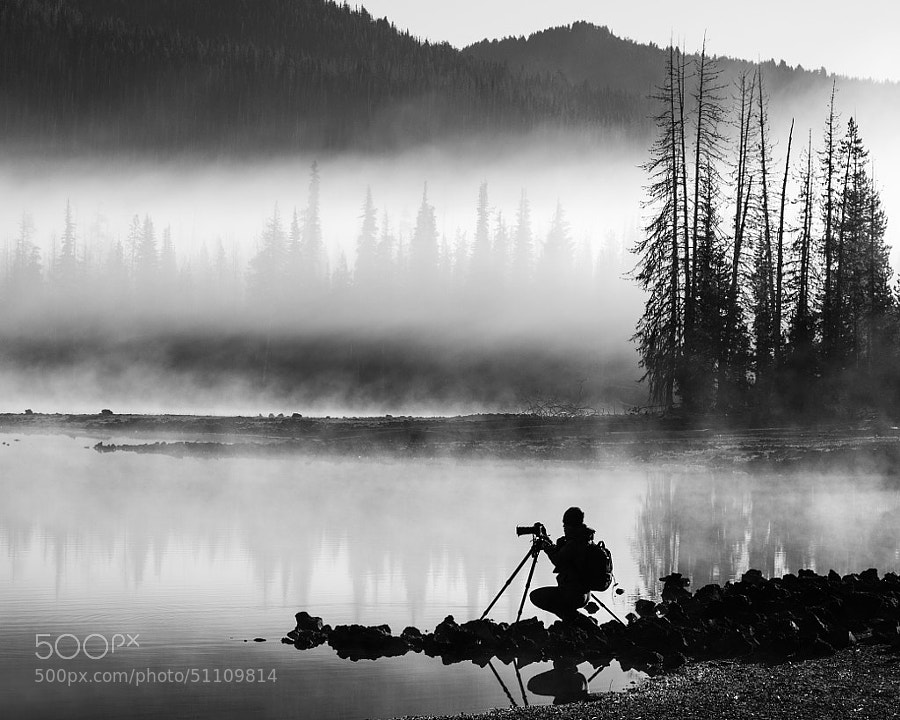
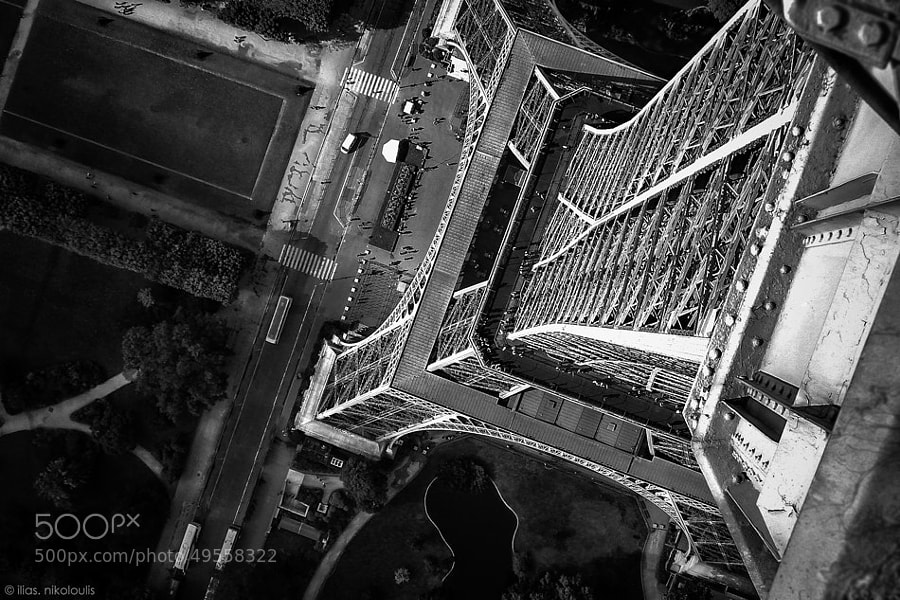
    Photograph ..on The 'Tripod' by ilias nikoloulis on 500px
    ..on The ‘Tripod’ by ilias nikoloulis on 500px

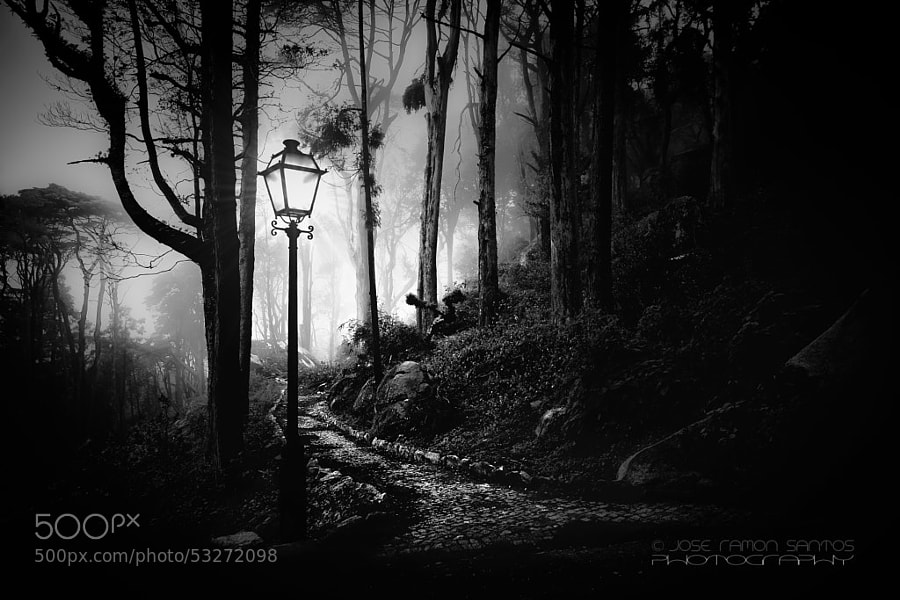
    Photograph Foggy path by Jose Ramon Santos Mosquera on 500px

    Foggy path by Jose Ramon Santos Mosquera on 500px

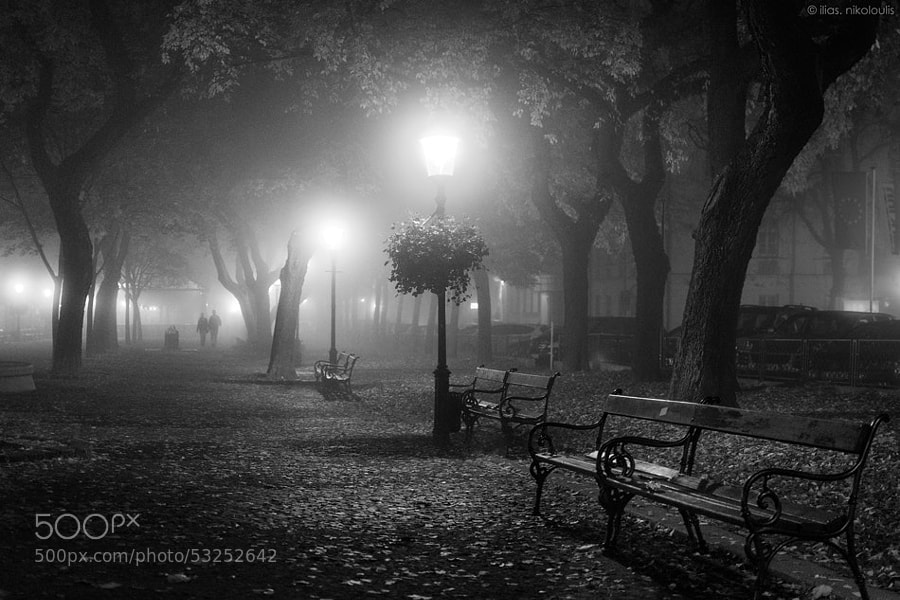
    Photograph Foggy Day by ilias nikoloulis on 500px
    Foggy Day by ilias nikoloulis on 500px

    Photograph Dark Beauty by Jayme Hagen on 500px

    Dark Beauty by Jayme Hagen on 500px

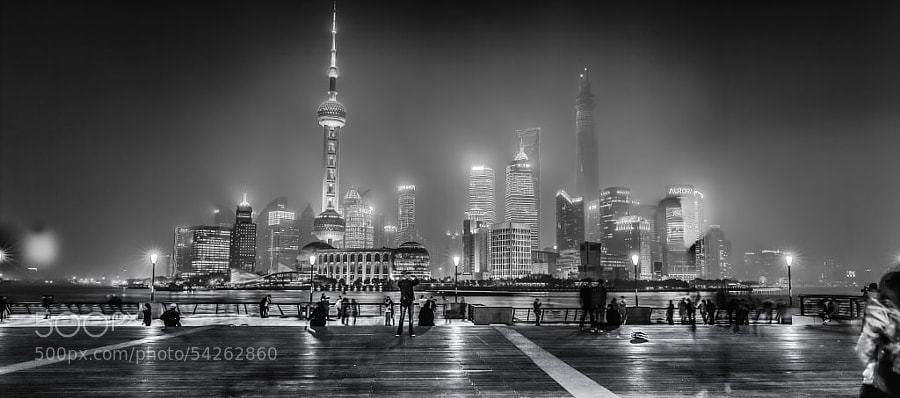
    Photograph Shanghai- Bund by Hill Gas on 500px
    Shanghai- Bund by Hill Gas on 500px

    Photograph Mutianyu by John Crux on 500px

    Mutianyu by John Crux on 500px

    The post Some Punchy Black and White Landscape Photos to Oooo and Aaah Over by Darlene Hildebrandt appeared first on Digital Photography School.


    Digital Photography School
  • Weekly Photography Challenge – Black and White Landscape

    Earlier today I shared a bunch of stunning black and white landscape images.

    Now I want you to show me what  you got in this week’s challenge:

    Weekly photography challenge – black and white landscape

    Here are few more to get your creative ideas flowing. Keep in mind a landscape can be urban or natural.

    By Wendell

    more words

    By Jason Mrachina

    By Nana B Agyei

    By Thomas Hawk

    By Jason Mrachina

    By Jason Mrachina

    By L.

    By howpin

    By Jesse Clockwork

    By Pam Link

    By Tiago Vidal Dutra

    By Mark Stevens

    If you check out last week’s collection – flowers – you’ll find some good black and white ideas in there too.

    Share your black and white landscape images

    Simply upload your shot into the comment field (look for the little camera icon in the Disqus comments section as pictured below) and they’ll get embedded for us all to see or if you’d prefer upload them to your favourite photo sharing site and leave the link to them. Show me your leading lines using pathways and roads in this week’s challenge.

    More tips – a new dPS ebook

    For more tips on shooting and processing great black and white images, check out our newest dPS ebook The Essential Guide to Black and White Photography.

    black-white-ebook

    The post Weekly Photography Challenge – Black and White Landscape by Darlene Hildebrandt appeared first on Digital Photography School.


    Digital Photography School