Category: Photography

  • 6 Ways to Take WOW Photos in Less Than an Hour

    If you’re like most photographers, nothing gets you more excited than a new tip or trick that can help you make your photographs more awe inspiring. The problem is that a lot of these processes can take some time to learn and execute correctly. Pretty quickly you realize that it may take you more than a few tries to master the new technique to become a better photographer.
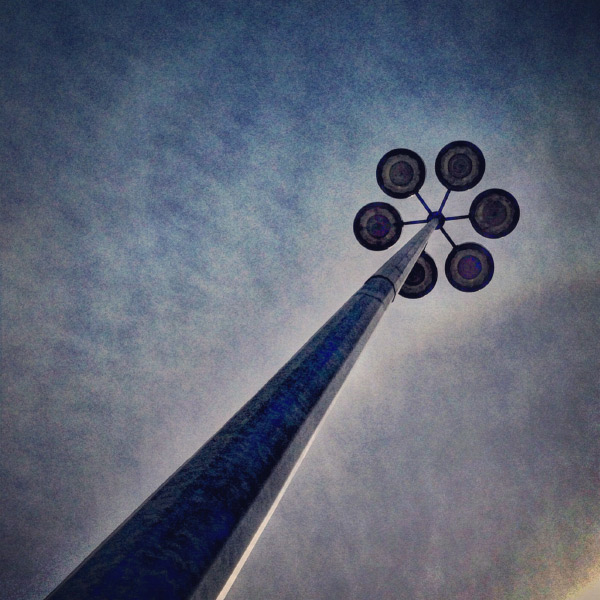
    IMG_6179

    A mundane parking lot light stand can become something wondrous.

    You’re also busy with more than just photography to take care of, and with instant gratification pervading all aspects of our lives, who wouldn’t appreciate a few SIMPLE photo strategies that provide immediate results?

    Forget about aperture and shutter speed, focal length, ISO, and all the technical stuff for now. If you use the techniques in this article, alone, or mix and match, I guarantee you’ll learn how to take WOW photos in less than an hour. I use my “Snapshots to WOW Shots” process with many of my photography classes, from grade one kids who’ve never seen a camera before, to seasoned professionals who need to inject a quick fix into their  photographic repertoire. It works for everyone, guaranteed. Give it a try!

    Method One: Bird’s Eye View

    In our day to day lives we see the world from a height of about five to six feet. To create a WOW shot you need to alter that perspective. Show your viewers a point of view they don’t normally see. Just about any subject can be transformed into a WOW if you shoot it with your camera pointing straight down. This is what is called the bird’s eye view.
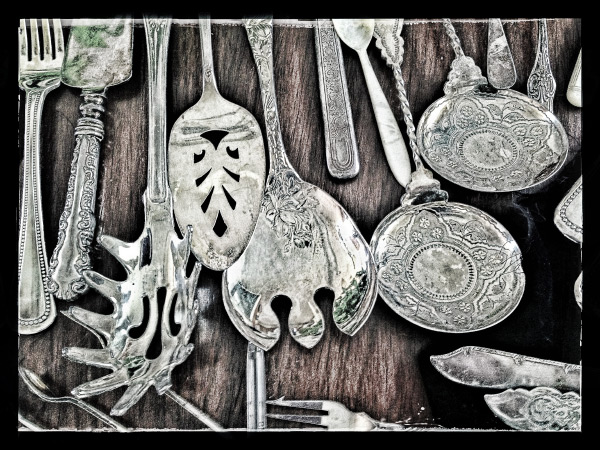
    IMG_3957.Wjpg

    Looking straight down on antique silverware – a different point of view.
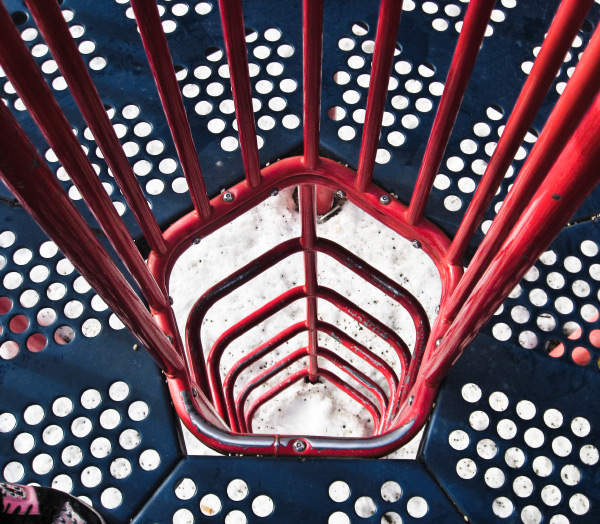
    IMG_4813W

    Shot by one of my grade 4 students – atop the play structure, pointing the camera straight down. 
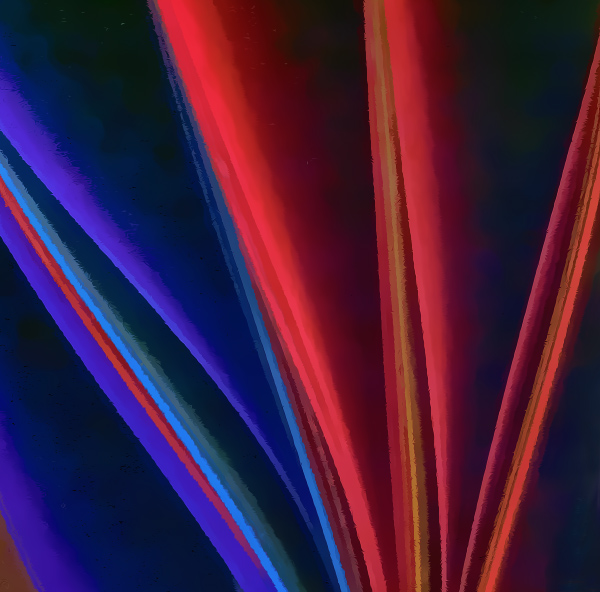
    Picture-197W

    A crazy abstract shot looking down at colored pages in a binder.
    Picture-366

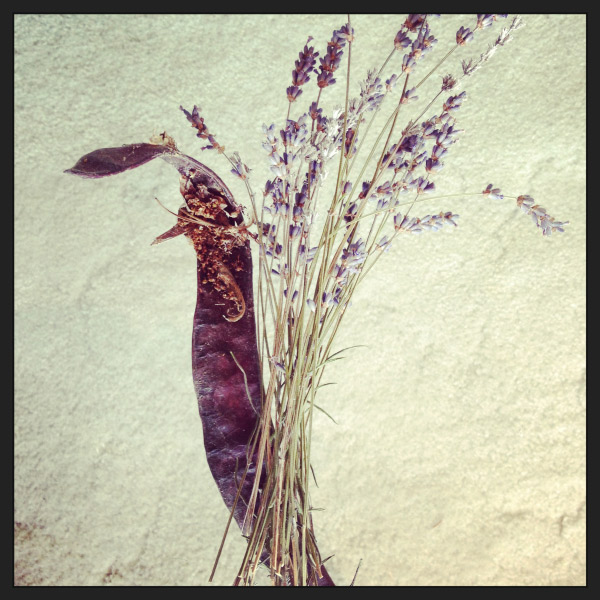
    An herbal still life shot through a glass coffee table, straight down.

    Method Two: Worms Eye View

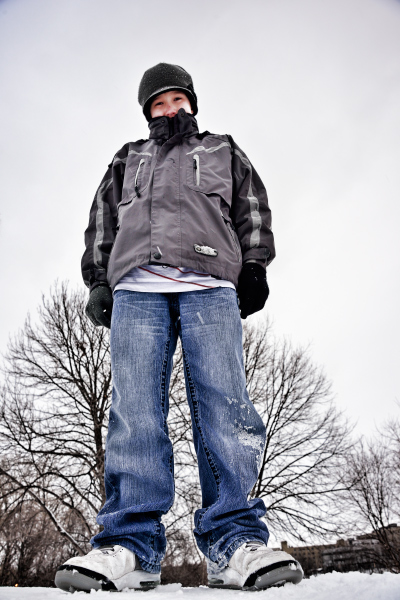
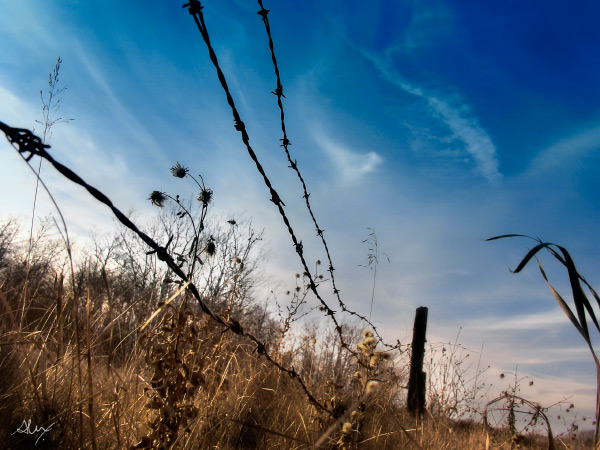
    Similarly, not too many of us spend our days down on the ground. So shoot from a very low angle, and point your camera up, or just explore the world from the point of view of a worm (down on your belly!) and mundane things look a whole lot more interesting. Instant WOW shots, from the worm’s eye view.

    These shots usually have the added benefit of helping to eliminate distracting backgrounds such as buildings, tree,s or other objects that you don’t want in your image. Bonus!
    _DSC7921W

    Feeling so small…the worm’s eye view.

    DSC04831-eyes

    One of my school students shot this one – taking the worm’s eye view literally, but it’s a very freaky WOW Shot.
    nat_fieldW

    nat_hamlton-bank-copy5W

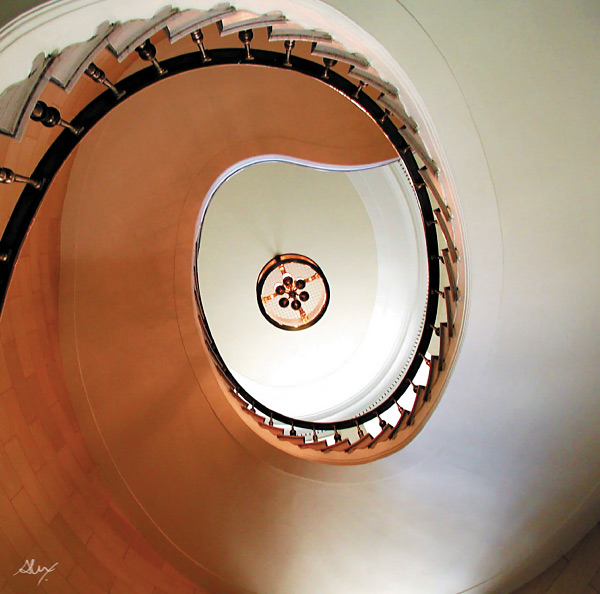
    Taken lying on the floor of the lobby looking up at the top of the staircase. 

    Method Three: Shoot at an Angle

    Just as our five foot world gives us a consistently average perspective, it also provides us with horizontal lines and vertical angles. We see the world this way 90% of the time, and there’s nothing particularly WOW in that. But give your camera a twist; a 45 degree angle can add dynamism and drama, instantly!  Just make sure that it’s a big enough angle that it’s clear you did it on purpose, and not by mistake.

    Buildings, trees, large objects, and even people look great with a bit of angular rotation when you want to make a point or add impact.
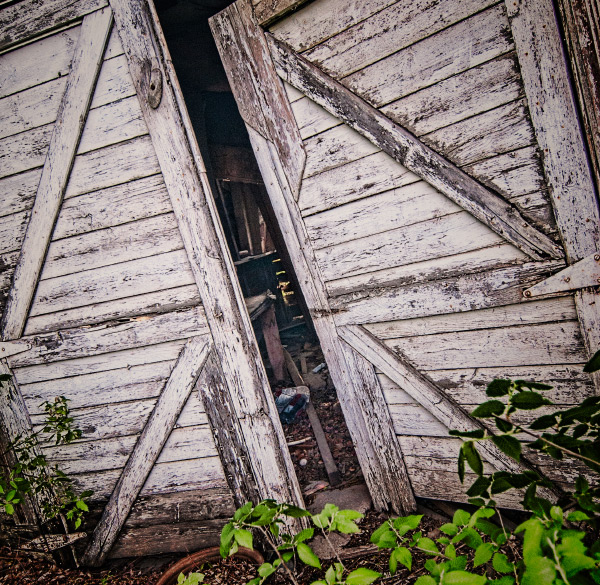
    A bit of an angle - on purpose, give the image a more dynamic feel.

    A bit of an angle – on purpose, gives the image a more dynamic feel.
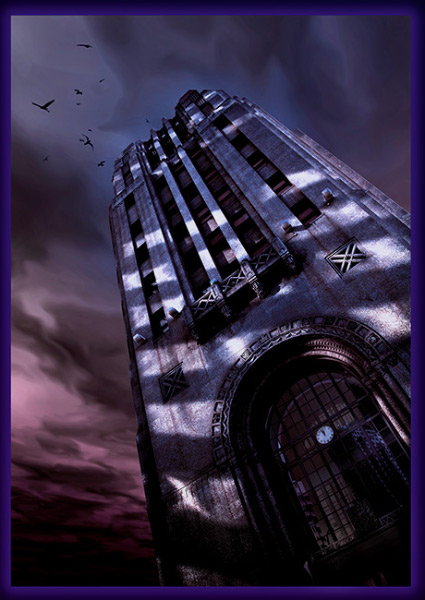
    A little "off kilter" makes us pay more attention.

    A little “off kilter” makes us pay more attention.

    Method Four: Get the Sun Behind Your Subject

    There are all sorts of fabulously detailed techniques for shooting silhouettes, rim lighting, and other back-lighting effects. But really all you need to get an instant WOW Shot is to either place your subject so that the sun or light source is directly behind them, with their head or body blocking the main point of light. Shoot in manual mode and be sure your flash is off.  Point and expose for the sun, then recompose with the sun directly behind your subject.  Whether it’s an animal or a person or an object, use that subject to block the sun, and you’ll have a winner.
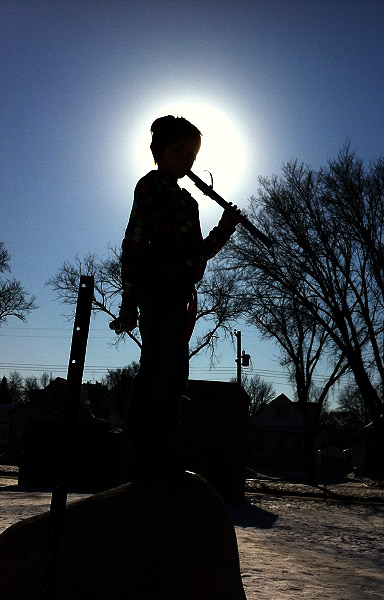
    Picture-053W

    Drama abounds in this simple shot – just a quick iPhone grab during a school photo class.
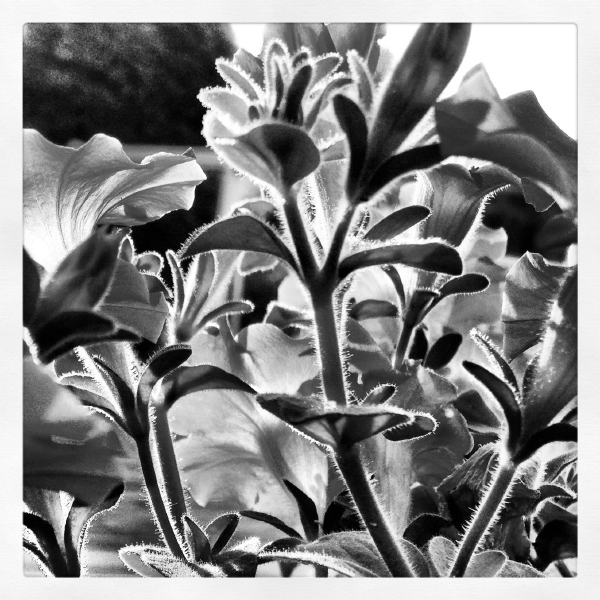
    Picture-388W

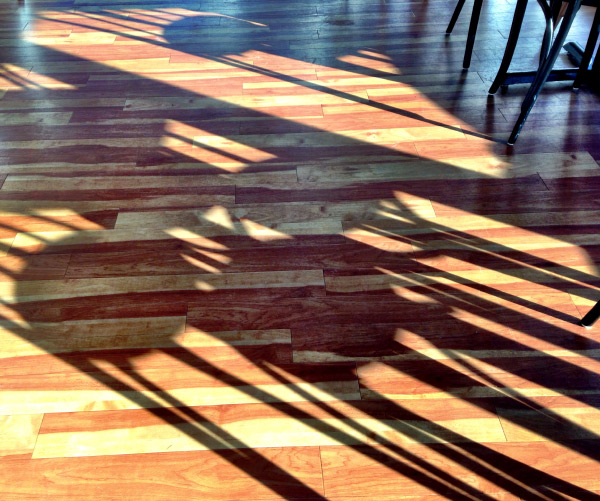
    Method Five: Use Shadows

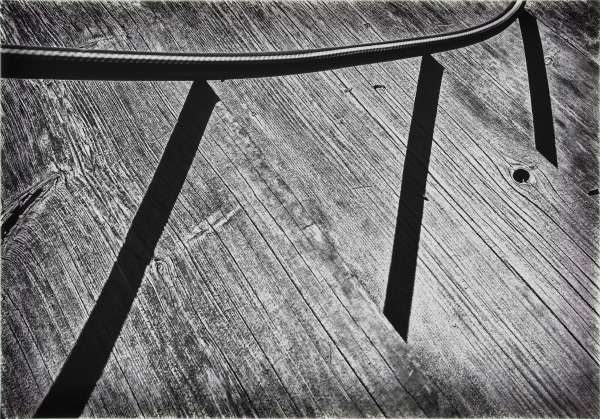
    Nothing tells a story more than shadows – they are ethereal, transient, and mystical. Incorporate shadows into your image, or shoot only the shadows. They always tell an intriguing story, and create a captivating image.
    Picture-955

    Abstract or editorial, the shadow knows.
    IMG_6203W

    Do you know what’s happening here – the shadows are a riddle and the answer.
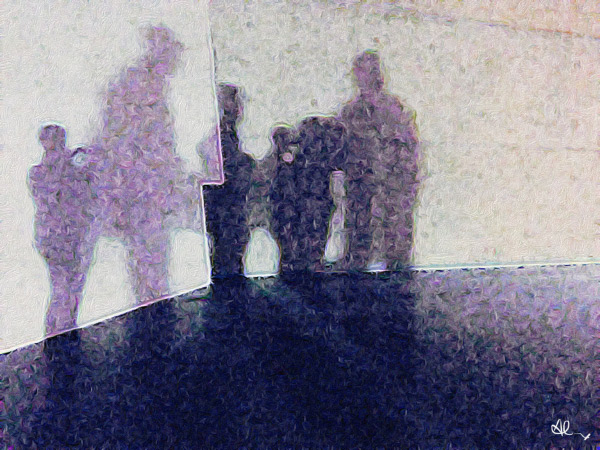
    photo-1

    The Ultimate WOW Shots

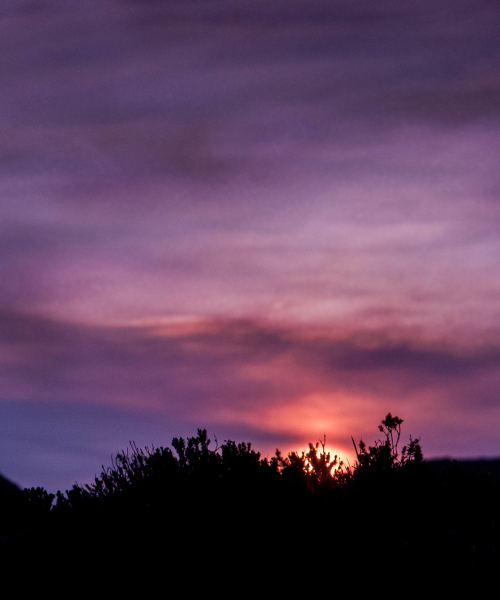
    The ultimate WOW shots are created when you use one of more of these techniques by combining elements, angles, and points of view.
    _2DS2507W

    Combining the worm’s eye view AND the sun behind the subject.
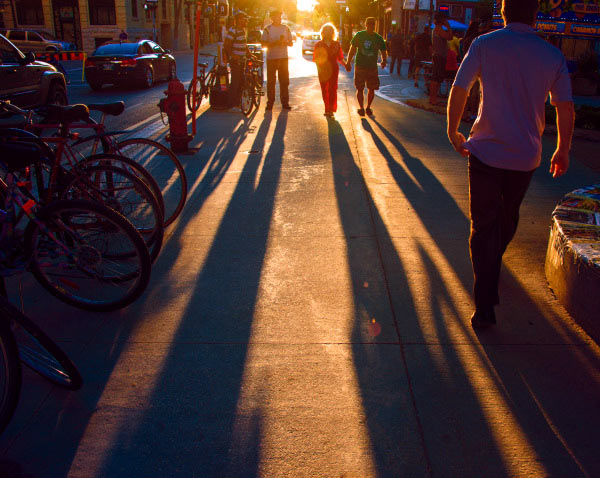
    A simple street scene is so much more dynamic with long shadows.

    Combine shadows with the sun behind the subject. A simple street scene is so much more dynamic with long shadows.
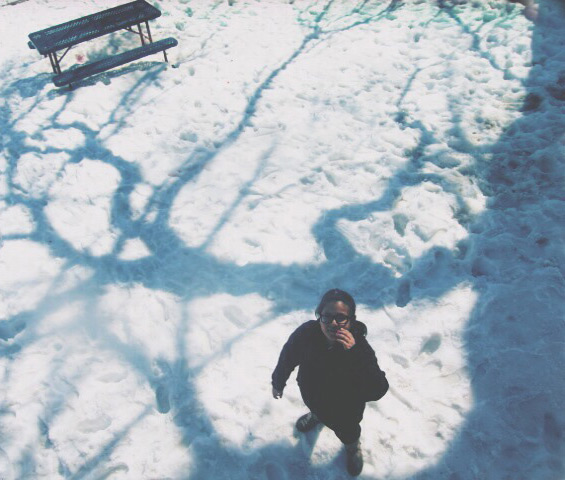
    Combine a bird's eye view with shadows. It adds interest and drama.
    Combine a bird’s eye view with shadows. It adds interest and drama.

    A worm's eye view and the sun behind the subject. Simple. Wow!

    A worm’s eye view and the sun behind the subject. Simple. Wow!

    Apply what you have learned

    To wrap it all up, these five easy methods will give you dramatic results, and if you’re already proficient with a camera and have a bit of knowledge about composition, color theory, and light, you’ll be shooting like a rock-star photographer in less than an hour –  including the time it took to read this article.  If you’re already a skilled shooter, give these a try and it will help simplify your photographic life while adding more finesse to your portfolio.

    Show me your WOW shots, I’d love to see how you put this into action! Share in the comments below.

    The post 6 Ways to Take WOW Photos in Less Than an Hour by Alex Morrison appeared first on Digital Photography School.


    Digital Photography School

  • How to use Program Mode to set Your ISO

    When I’m teaching my photography classes, the students and I are often neck deep into discussions of the exposure triangle; shutter speed, aperture size and sensor sensitivity (ISO). You can find great discussions and explanations of the triangle here on the dPS. I’d like to dissect the ISO corner of the issue, and give you a simple technique you can use to set the ISO to the best value for the situation. Understanding ISO is one thing but setting it correctly on the fly is another.

    Exposure triangle

    An equilateral triangle represents a well-exposed image. If any corner is too long, (slower shutter speed for example) the image would be brighter. If the corner is short, the image would be darker.

    First a definition of ISO:

    ISO is an acronym for International Organization for Standardization. It is a group that sets all sorts of standards for science and industry, but the meaning of ISO for photographers with digital cameras, is that it places a numerical value on the sensitivity of the camera’s imaging component, the sensor. Often compared to the film sensitivity rating called ASA (originally developed by the American Standards Association).

    ISO is often seen as numbers ranging from 100 to 6400 and higher. The lowest number your camera presents is the lowest sensitivity setting; the highest number is the most sensitive. So, you can use the ISO settings to help you shoot in a variety of situations; bright and dark. Often you are taught to boost the ISO when conditions get dark but the opposite might be true depending upon your intent.

    You are also told that high ISO settings degrade the quality of the image in the form of digital noise. Noise is a visual distortion of specks of light. Some is colored, and some just looks grainy. It is a similar look to the grain we would see in film negatives of higher ASA’s. Noise is worse in the shadows and appears more with higher ISO settings. This is true but the degradation of the image is gradual, and you can sometimes use ISO numbers that are quite high and get great, usable images.

    ISO setting in menu

    Select ISO sensitivity in the menu, via the Info screen, or sometimes with a dedicated button.

    You probably came to understand the concept of ISO as part of the exposure triangle, and then immediately asked, “What ISO should I set?” Hmmm, something is missing in the explanation!

    Here are some tips for setting ISO:

    First for tripod shooting, set your ISO to the lowest (thus highest quality) setting. There won’t be any camera shake if you practice good technique and your images will have the highest quality. This will hold true unless you need a shorter shutter speed for other reasons. If that is true, keep reading and use the handheld technique.

    When shooting handheld, you need to balance the quality you are getting with the ISO setting versus the shutter speed that you can use to get a sharp shot, with no camera movement. For example, if you have your ISO at 100 and you need 1/10th of a second to expose the shot properly, you are going to have some camera movement, and your image will not be sharp.

    Follow these steps:

    1. Make sure your camera is not set to Auto ISO.
    2. Set your camera’s exposure mode to Program (not Auto). Even if you need Shutter or Aperture Priority, set it to Program first.
    3. Next, note your present ISO setting.
    4. Now half press the shutter button to wake it up and point it around your shooting environment. Try several different directions. Maybe you are in a restaurant; point it at the tables, at a group of people, down the bar, etc.
    5. All the while, watch your camera’s information display. You can look through the viewfinder for the information, or turn on your INFO display on the back LCD display. As the camera’s meter evaluates all the different shots it will adjust the shutter speed. Program tries to keep both aperture and shutter settings in the normal ranges. Take mental note of those shutter speeds.
      ISO on Info screen

      Here the shutter speed is showing 1/3rd of a second. This is way too slow for handheld photography.

      Shutter apeture in viewfinder

      1/2 of a second shutter time as seen through the viewfinder.

    6. Your camera will go sleep in a few seconds if you don’t wake it up occasionally by half-pressing the shutter button. Let it focus, as that will give you a more accurate reading.
    7. If you are seeing shutter speeds that are slower than 1/60th or 1/80th of a second, then the ISO needs to be bumped to a higher number. Most people cannot hand hold a camera, and obtain sharp photos, at longer than 1/60th of a second. You need good solid technique to do hand hold at those speeds. NOTE: 1/60th is being used here as a typical situation that includes a lens with up to 55mm of zoom. If you are going to zoom further, see the note below on focal lengths.
    8. If your shutter speeds are really fast, (1/1000th or 1/2000th) then you can safely drop the ISO to a higher quality setting (lower ISO number).
    9. Keep repeating the above steps until you see shutter speeds that you are comfortable with using, for the image you intend to make. Now you have your ISO set correctly for handheld photography in your current location, lighting conditions, and focal length.
    Camera shake example

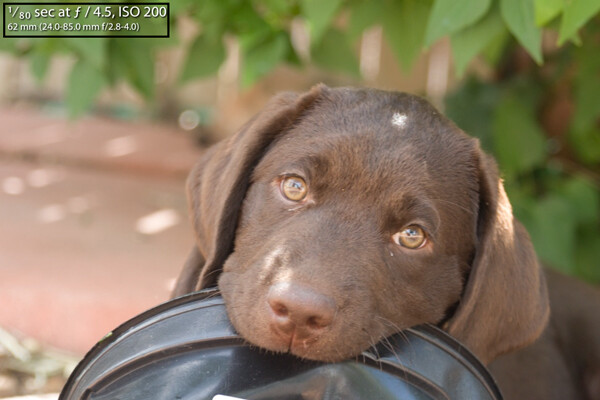
    An example of camera shake. Note the exposure information. This was taken with the lens zoomed to 62mm (93mm equivalent on a cropped sensor). 1/160th of a second would have been better, which I could have gotten with an ISO of 400 rather than 200.

    Focal length makes a difference

    The focal length of your lens makes a difference as well. The directions above assume you are using a lens that is typical to entry-level DSLR setups. For example the typical kit lens is a 18-55mm zoom. If you are using a longer zoom, say 200mm, then the slowest shutter speed you can hand hold is much shorter. The widely accepted rule states: one over the focal length (so 1/200th of a second in the above mentioned situation) is the longest shutter speed that you can hand hold for a sharp, no-shake image.

    However, this is an old rule that was based on 35mm film (and it applies to full frame digital sensor cameras). Many digital cameras have a crop factor, or multiplier effect, for focal length because their sensor is smaller. Yours might be 1.5x, 1.6x or even 2.0x – check your camera’s manual to be sure. Assuming a 1.5x multiplier for a 200mm zoom shot, you would need 1.5 x 200 = 300, so 1/300th of a second is your slowest shutter speed for an image that has no camera shake blur.

    What about Shutter and Aperture Priority?

    At this point you may be thinking that you actually need Shutter or Aperture priority – that is fine. But now you know the ISO range that will work. Perhaps ISO 400 was where you ended up, and the meter was telling you that the shutter speed of 1/200 was going to work. Now you can switch to the mode you want. Let’s say you need Shutter priority to stop some subject movement. Set your camera to Shutter priority, let’s say a shutter speed of 1/400th of a second, and repeat the process of aiming at some possible compositions. If your camera starts blinking the aperture, you will know your setting is out of range. It is telling you the aperture cannot be opened any wider, so you’ll know you need to increase the ISO to use that shutter speed.

    For Aperture priority, set the aperture you need for a desired depth of field and use the camera’s meter to evaluate the scenes as described above. If the shutter speed starts goes below your maximum for the lens you’ll know your settings are out of range. Then you will need to bump up the ISO.

    What about Vibration Reduction?

    Sometimes called Image Stabilization, this is technology that might be built into your lens or camera. It can allow you to shoot at speeds longer than normally recommended, since it counteracts the movement you introduce into the camera. Take the marketing information about how many stops longer you can shoot with a grain of salt. Do your own tests with your equipment, with your best steady technique. I find that most people can learn to get two extra stops of shutter speed latitude. So, in our scenarios above you could shoot at 1/15th and 1/50th of a second respectively.

    VR button

    Vibration Reduction switch on a Nikon lens.

    Try this process for a while with the Program mode to get comfortable, then you can use all of the exposure modes to set your ISO quickly and correctly. As your experience grows you will set your ISO quickly with intelligent estimates. You will never have to guess about your ISO again.

    No camera shake

    A higher ISO (3200) made little difference in quality here. The shutter speed of 1/250th assured a no-shake image and was fast enough to stop any subject motion.

    The post How to use Program Mode to set Your ISO by Steve Gandy appeared first on Digital Photography School.


    Digital Photography School

  • Black and White Portraits a Set of Images to Admire

    Last week we looked at a collection of stunning black and white landscape photos. This week it’s all about portraits in the same modality.

    Photograph So close together by Magda Constantin on 500px

    So close together by Magda Constantin on 500px

    For me there is something special about a portrait done in black and white, something about it that allows the photographer to exposure the subject’s very soul itself. The simplistic nature of being monochromatic means the focus is on light, shape, tone and emotion more so than with color, in my opinion anyway.

    Black and white portraits transport me to a time of the master photographers like Karsh, Hurrell and Newman. If you don’t know those names – I suggest you google them with the word “portrait” and learn from them, as they were truly some of the best in portrait photography, possibly ever.

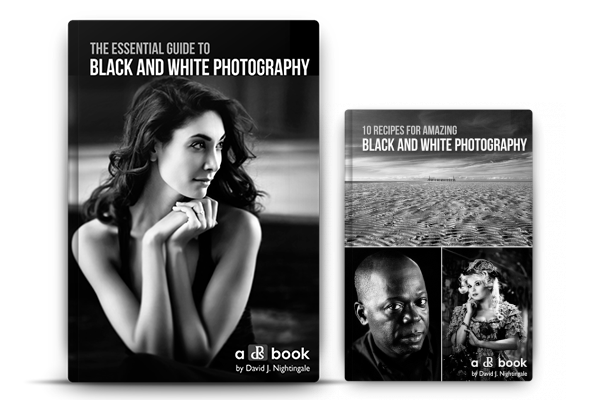
    Without further ado, enjoy this set of black and white portraits, and if you want to learn more about black and white grab a copy of the newest dPS ebook The Essential Guide to Black and White Photography at early bird pricing only until September 13th.

    Photograph K. by pkfruen  on 500px

    K. by pkfruen on 500px

    Photograph Fête de la musique by Jean-Paul Verjus on 500px

    Fête de la musique by Jean-Paul Verjus on 500px

    Photograph Sister love by Cathy Martineau on 500px

    Sister love by Cathy Martineau on 500px

    Photograph Rain by pkfruen  on 500px

    Rain by pkfruen on 500px

    Photograph Soul-division by Anthony De Faria on 500px

    Soul-division by Anthony De Faria on 500px

    Photograph David Hayman, King Lear by Tommy Ga-Ken Wan on 500px

    David Hayman, King Lear by Tommy Ga-Ken Wan on 500px

    Photograph FIlm Noir: Chris Botti by Brian Smith on 500px

    FIlm Noir: Chris Botti by Brian Smith on 500px

    Photograph second wind ,,, by Mete Ba?koçak on 500px

    second wind ,,, by Mete Ba?koçak on 500px

    Photograph my life... by Leila Raymond on 500px

    my life… by Leila Raymond on 500px

    Photograph Untitled by Lee Jeffries on 500px

    Untitled by Lee Jeffries on 500px

    Photograph shootout by David Mar Quinto on 500px

    shootout by David Mar Quinto on 500px

    Photograph Mans Best Friend by Drew Hopper on 500px

    Mans Best Friend by Drew Hopper on 500px

    Photograph Serge. by DrakSpirit on 500px

    Serge. by DrakSpirit on 500px

    Photograph Symmetry of Hate by Daniele Di Egidio on 500px

    Symmetry of Hate by Daniele Di Egidio on 500px

    Photograph Close-up portrait of a street by Mikhail Levit on 500px

    Close-up portrait of a street by Mikhail Levit on 500px

    Photograph A portrait of friend in a kitchen setting by Mikhail Levit on 500px

    A portrait of friend in a kitchen setting by Mikhail Levit on 500px

    Photograph Smoking Hot by Darcy Evans on 500px

    Smoking Hot by Darcy Evans on 500px

    Photograph Jill by Renee Robyn on 500px

    Jill by Renee Robyn on 500px

    Photograph Eye & Face by Andi Halil on 500px

    Eye & Face by Andi Halil on 500px

    Photograph The breath by Claudio L'Estremo Montegriffo on 500px

    The breath by Claudio L'Estremo Montegriffo on 500px

    Photograph mr thomas by Hegel Jorge on 500px

    mr thomas by Hegel Jorge on 500px

    Photograph When the soul cries(The true story of a tough life) by Silvia S. on 500px

    When the soul cries(The true story of a tough life) by Silvia S. on 500px

    Photograph Danka B&W by Gabor Jonas on 500px

    Danka B&W by Gabor Jonas on 500px

    Photograph Sometimes there are no words... just the moment by J.J. Taylor on 500px

    Sometimes there are no words… just the moment by J.J. Taylor on 500px

    Photograph thoughts by Danilo Veccia on 500px

    thoughts by Danilo Veccia on 500px

    Photograph Elusive by Federico  Ratano on 500px

    Elusive by Federico Ratano on 500px

    Photograph girl's eyes by marylexa on 500px

    girl's eyes by marylexa on 500px

    Photograph vamos bien by Angelo Tassitano on 500px

    vamos bien by Angelo Tassitano on 500px

    Photograph Master Monk by Anthony Pond on 500px

    Master Monk by Anthony Pond on 500px

    Photograph In the Brick Shed by Anthony Pond on 500px

    In the Brick Shed by Anthony Pond on 500px

    Photograph Three Prayers by Anthony Pond on 500px

    Three Prayers by Anthony Pond on 500px

    The post Black and White Portraits a Set of Images to Admire by Darlene Hildebrandt appeared first on Digital Photography School.

    Digital Photography School

  • Infographics 101: Selfie Boom – The Good, The Bad, and the Ugly

    Unless you’ve been hiding under a rock (or just never check social media), you’ve likely heard of, or even participated in, the selfie trend. Although the trend first started back in the MySpace days, things really took off when Apple released the front-facing camera on the iPhone 4 in 2010. Since then, elementary schoolers, teenagers, and young adults alike have Continue Reading

    The post Infographics 101: Selfie Boom – The Good, The Bad, and the Ugly appeared first on Photodoto.


    Photodoto

  • Weekly Photography Challenge Black and White Portraits

    Last week’s challenge was also black and white and in keeping with the them, earlier today I shared a set of black and white portraits. Your challenge this week, if you choose to accept it, is do photograph a real person and do a portrait in black and white.

    By Sean Molin

    There are lots of articles here on dPS to help you with that and get some inspiration including:

    • Create Better Black and White Photos Using Local Adjustments in Lightroom 5
    • How to Convert Photos to Black and White in Lightroom
    • How to See in Black and White
    • DISCUSS: When you Photograph People in Black and White, you Photograph their Souls

    Here are a few more example black and white portraits:

    By Sean McGrath

    By Ben Raynal

    By Neil Moralee

    By stephane

    By Ronn aka “Blue” Aldaman

    By Dietmar Temps

    By Nicolas Alejandro

    By Gustave Deghilage

    By Dietmar Temps

    By i k o

    By Fadzly Mubin

    If you want to learn more about black and white grab a copy of the newest dPS ebook The Essential Guide to Black and White Photography at early bird pricing only until September 13th.

    black-white-ebook

    Share your black and white portrait images

    Simply upload your shot into the comment field (look for the little camera icon in the Disqus comments section as pictured below) and they’ll get embedded for us all to see or if you’d prefer upload them to your favourite photo sharing site and leave the link to them. Show me your leading lines using pathways and roads in this week’s challenge.

    The post Weekly Photography Challenge Black and White Portraits by Darlene Hildebrandt appeared first on Digital Photography School.


    Digital Photography School

  • How to Photograph Fairground Rides

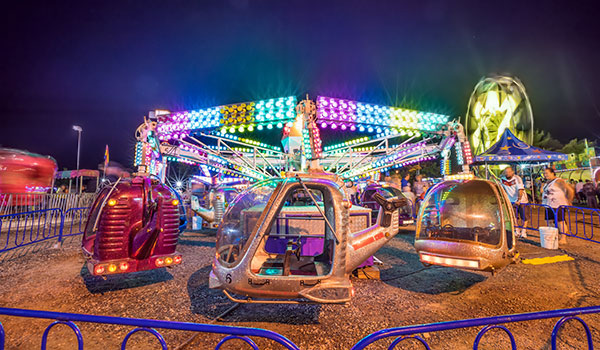
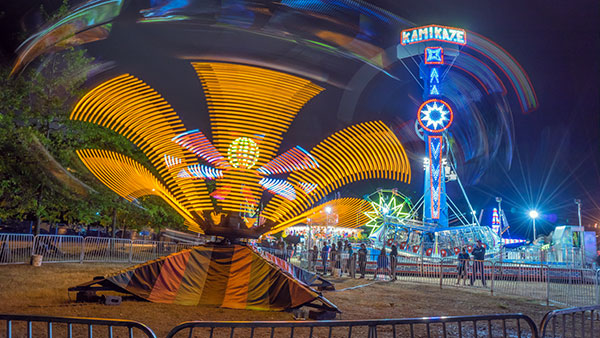
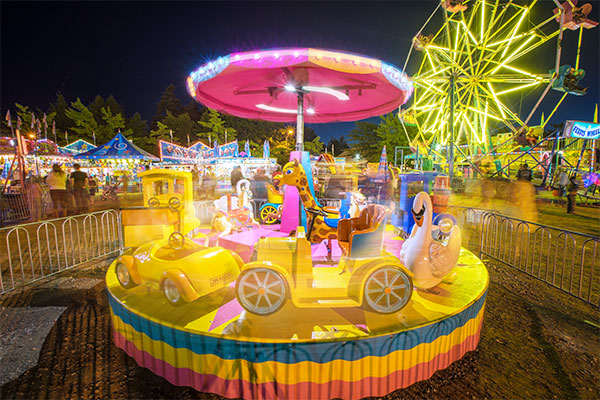
    Learn how to photograph the fairground at night

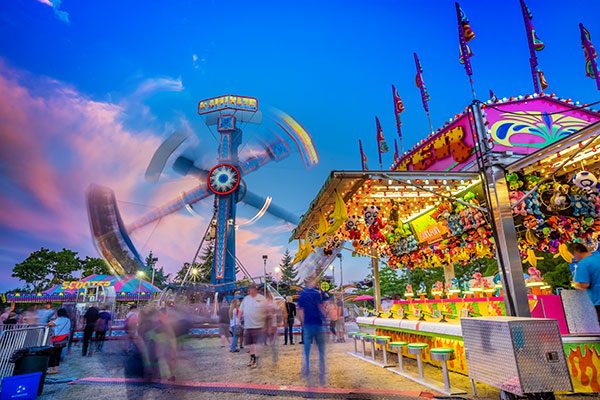
    When it comes to taking pictures of the fairground or amusement park, you’ll be amazed at just how easy it is to get super colourful, vibrant, and bright images of those awesome rides. Twilight is the best time to shoot, when all those mega-joules of artificial lights burst into action to give you amazing effects that aren’t possible during the day time.

    Here’s what you’ll need:

    • A tripod – essential for long exposures
    • A DSLR or Mirrorless camera with manual (M) mode
    • A wide angle lens
    • To shoot in RAW format (always)

    When is the best time to shoot?

    The optimum time is about 30 minutes after the sun has set. If you’re lucky, there will be a beautiful colourful afterglow in the clouds, but it will still be dark enough for all the artificial light to be the brightest parts of your image. When it gets fully dark you can still get stunning shots, but the sky may just be a dark blanket if there is cloud cover.

    How to Photograph Fairground Rides

    Harness the power of higher ISO

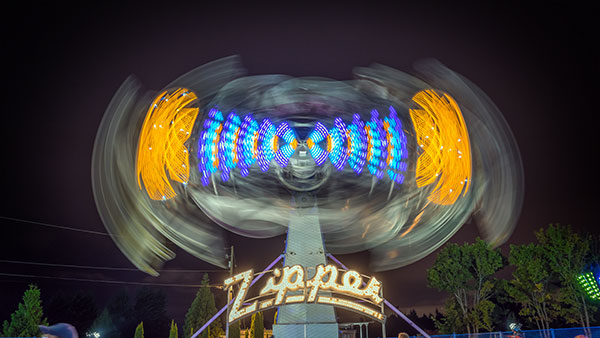
    By increasing your ISO settings to around 400,  you’re increasing the light sensitivity of your camera. You can try higher settings (larger ISO numbers) but your goal here is to achieve an exposure time of around one to two seconds so that you capture some motion blur in the people and in the rides. Using a higher ISO than 400 will speed up your exposure time and you don’t necessarily want that, unless you want to totally freeze all of the motion in your shot. There’s some trial and error involved, depending on the available light of your scene, so my number of 400 is approximate.

    When the rides are static, you won’t capture any motion blur but as soon as they start to move (and they usually move fast), you’ll find that the one to two second exposure time is ideal for capturing a lot of movement.

    Shoot in time-lapse mode

    By taking pictures every four seconds, you’ll end up with a huge variation of different motion blur as the rides progress through their cycle. It’s almost like shooting video, but by shooting time-lapse, you’ll ensure that every frame is a full resolution image – video can’t compete with that. This technique ensures that you capture lots of images at different stages of the ride. Here’s a one minute time-lapse movie I made while shooting stills at the fair using this technique.

    If your camera has a built-in intervalometer or time-lapse app, you’re in luck. Set your interval at four seconds, and your camera will take a picture every four seconds. If you’ve set your exposure time to two seconds that gives you a two second gap after your shot has finished before the next shot will be triggered. Make your time-lapse last for about a five minute duration, and you should be able to capture images of the rides while they are static and while they are moving – it depends on how busy the rides are and how long the ride cycle lasts.

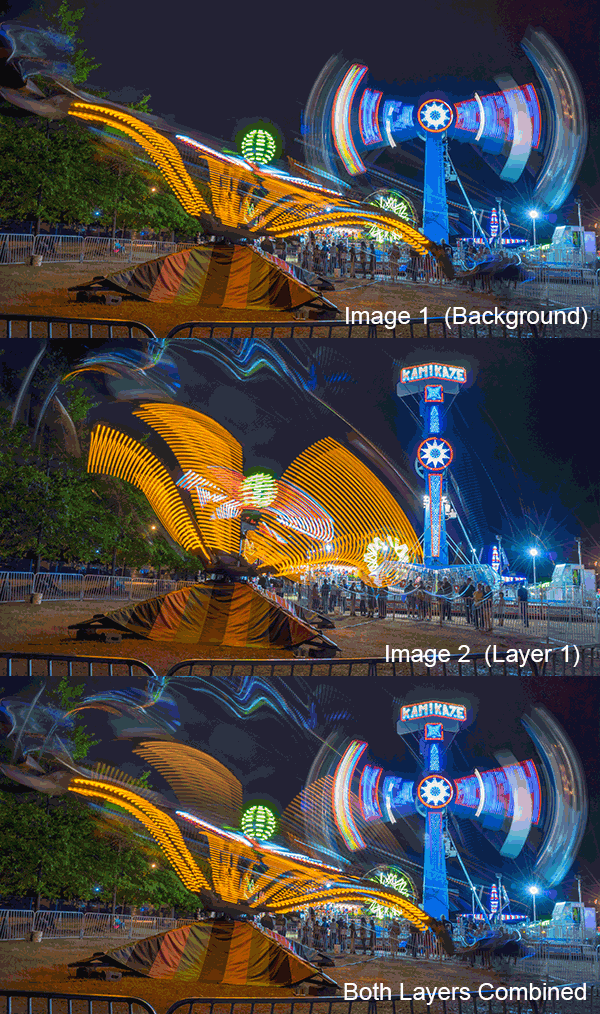
    You can then overlay those blurred images with the static images in Photoshop to create the ultimate composite of sharp static scenes, and motion blurred scenes.

    Don’t worry if your camera doesn’t have a time-lapse function, you’ll just need to take as many pictures as you think will capture your desired motion blur and static states. Alternatively you could buy an intervalometer which will connect to your camera and trigger the shutter for time lapse shooting.

    Top Tip: Be sure to switch off your built-in noise reduction as this will slow down your write times to the memory card, and will mess up your intervals.

    Photographing Amusement Parks

    Choose the right white balance

    It’s important to set the right white balance on your camera for this type of shooting. Don’t trust the auto setting because there are so many different light sources that your camera won’t know which setting to choose. For all of the shots I took with the Sony A7R, I used the Fluorescent Warm setting.

    Experiment to get the most pleasing looking white balance for your scene, try to avoid everything looking super orange. Look at the scene with your eyes, then look at your shot to try and get the most accurate colour temperature.

    It’s full of stars!

    Night time photography tutorial

    In shots like the one above, you can see a very pleasing looking blue star on the lamp post. All lenses produce their own characteristic stars, some are better than others. One thing you can do to get the best star out of your lens is to select a very narrow aperture like f/16 or f/22. This will also have the added benefit of forcing your shutter speed to be slower which gets you closer to the two second exposure time I mentioned earlier.

    Get up close

    Remember that wide angle lens I mentioned at the start? That lens will allow you to fill your frame with all the fun of the fair. Wide angle lenses create a pleasing looking distortion that adds drama and intensity to your shot. A 14-16mm shot on a full frame camera can cram in a LOT of action. By getting close to your subject and positioning yourself at a point that creates a nice looking distortion effect, you’ll really make your images POP!

    Wide Angle lens used for Night Photography

    Post-production

    Noise reduction

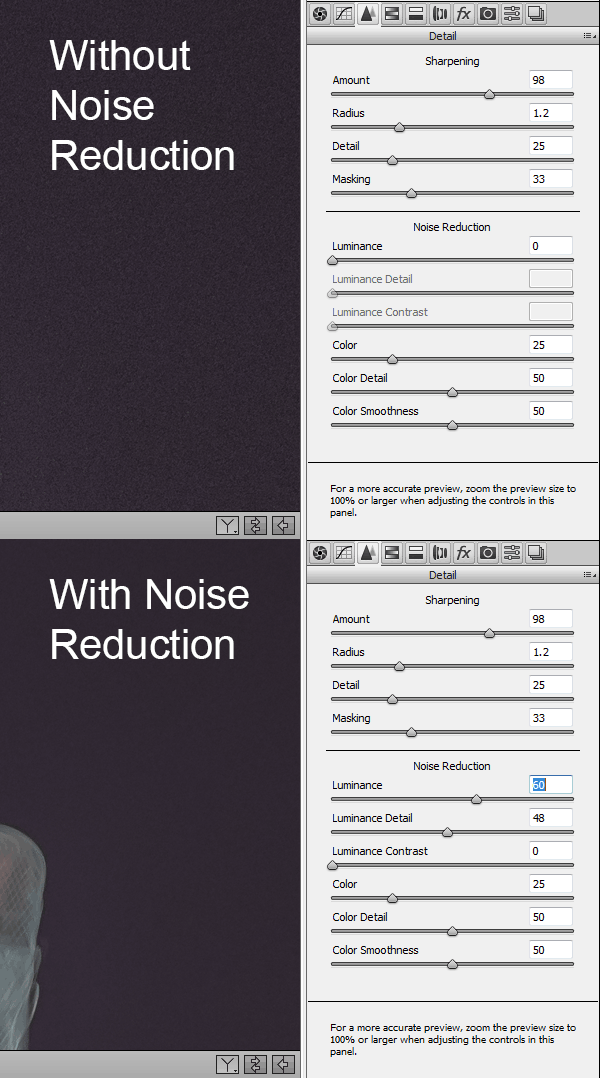
    What happens to your image quality when you use higher ISO settings? Noise, that’s what. We don’t like noise do we? No, so lets get rid of it using the brilliant noise reduction of Adobe Camera Raw. Your specific settings will depend on your camera’s sensor, as not all sensors are made equal. Here are the settings that I found gave me the best results for my pictures. Experiment with these sliders to get rid of as much noise as you can while still retaining image detail.

    Noise Reduction Settings

    Fix the shadows

    You’ll probably want to brighten up your shadows and blacks a little but don’t overdo it. We actually need those dark areas in our image to contrast with the bright lights, that’s what gives our image its PUNCH!

    Fix the highlights

    If the brightest parts of your image look a little blown out, pull them down a little with the whites and highlights sliders. Again, don’t overdo it or you’ll run the risk of ending up with a totally fake looking image.

    Clarity

    Increase the clarity a little to introduce some contrast to the mid tones.

    Vibrance

    Increase the vibrance a little to make the colours pop and give a subtle blue hue to the sky area.

    Use graduated filters in Adobe Camera RAW

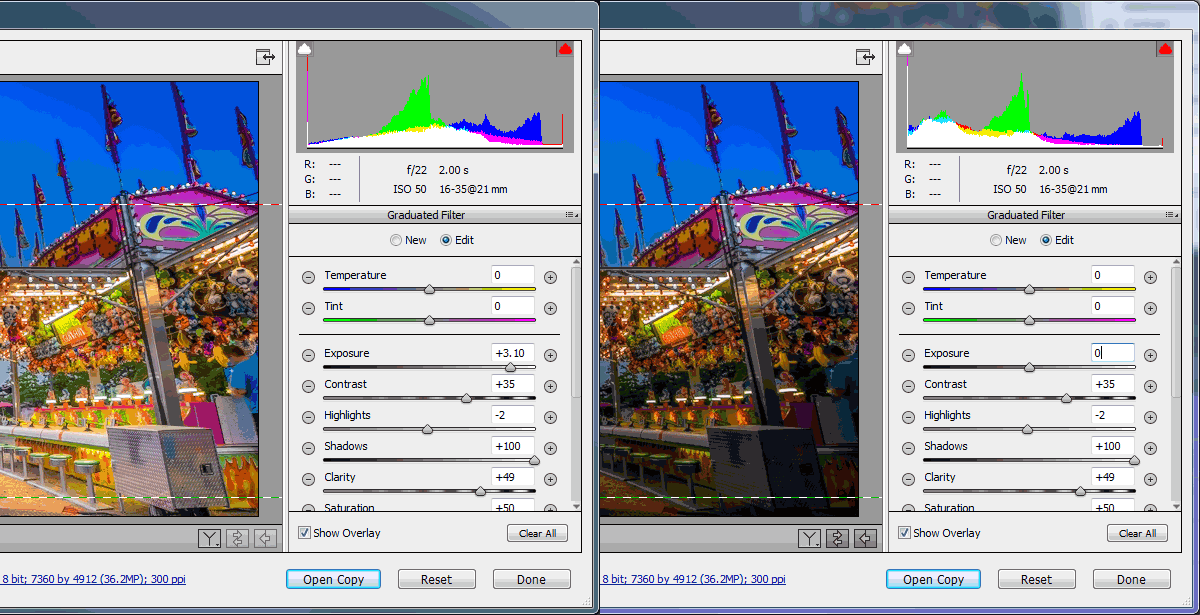
    The graduated filter simulator is a really powerful tool, but did you know it’s not just for making a part of your sky darker? You can use multiple graduated filters to selectively brighten or darken large parts of your image. If you want to brighten just your foreground, simply add a graduated filter and increase its exposure value like in the image below. You can further tweak just that selected area with the other powerful ACR tools like shadows, clarity, contrast etc.

    Using Grad Filters in Adobe Camera Raw

    Combine your images to make the ultimate composite

    Once you’ve finished tweaking your images in Adobe Camera Raw, it’s time to open them in Photoshop to make a composite image that captures the motion blur and the static state of your fairground ride. It’s worth pointing out that this is just a creative choice, if you’re happy with just a single image, that’s cool too.

    Step 1 – Choose and open your Images

    From your images, choose one that shows your ride in its static state. This could either be while it’s not moving or perhaps you took a super fast, high ISO shot while the ride was moving and managed to freeze the motion nicely. Either way, pick an image that you like, and open that in Photoshop.

    Step 2 – Copy and paste your images

    Next you’ll choose an image, or images, that perfectly capture the motion blur of the ride; maybe it’s a roller-coaster ride and you want to catch the long streaking lights of the carriage. Open this in Photoshop so that you’ve now got two tabs, each with their own image.

    With the motion blur image open, hit ctrl+a (or Cmd+A for Mac) on your keyboard to select the entire image. You should see the marching ants around the image. Next hit ctrl+c (Cmd+c) to copy that image on to your clipboard.

    Now click on the other tab to switch to your first image which shows the static or frozen motion shot, and hit ctrl+v (Cmd+v) to paste your clipboard image on to a new layer above the default (Background) layer. Photoshop will call your new pasted layer “Layer 1″.

    Step 3 – Blend your images

    Assuming that you used the exact same ACR develop settings for both images, just go ahead and change the blend mode of the motion blurred image (Layer 1) that you just pasted on to the new layer to “Lighten”. The blend mode lives in your Layers panel and defaults to Normal, so change Normal to Lighten.

    Now you should see both images combined to give you a lovely composite of both moments in time. If the effect is too pronounced, try turning down the opacity of the second layer to around 50%. For fun you could also try the Overlay blend mode or Screen, for a more intense effect. Remember to play with the layer opacity to get the look you want.

    Step 4 – Erase the parts you don’t like

    It’s likely that when you’ve blended both layers together by choosing the Lighten blend mode, you’ll want to erase certain parts of Layer 1 if the image gets too complicated. You can do that easily by choosing the Eraser tool and selecting a soft brush size, appropriate to the area you’d like to erase. Simply click on Layer 1 where you’d like to erase and bam – it’s gone (or use a layer mask for non-destructive editing).

    Combine Layers in Photoshop

    That’s it! You’ve now learned how to shoot and process your amazing images of those mind blowing fairground rides. Go out and have some fun with this, just don’t overdo it on the cotton candy and doughnuts like I did, ugh.

    If you have another other tips for photographing fairground rides, please share in the comments.

    The post How to Photograph Fairground Rides by Gavin Hardcastle appeared first on Digital Photography School.

    Digital Photography School

  • How to Edit Newborn Photos Using Lightroom

    Cole’s Newborn Photography Workshop is on sale now at Snapn Deals. Save 72% until September 16th, grab a seat now!

    BW.jpgNewborn photography requires a tremendous amount of patience, skill, a willingness to be okay with accidents, and even stronger photo editing skills as these precious little newborns often have numerous skin imperfections that can cause you to spend a significant amount of time editing and retouching the photos.

    Until recently, to truly excel at editing newborn photos you had to be quite proficient using Photoshop, but now with Lightroom 5′s newest tools you can get great results with far less time!

    Here are my top 6 tips for quicker and more effective newborn photo editing in Lightroom:

    1. Slightly Overexpose in Camera

    To get amazing final edited newborn photos you first need to focus on getting your exposures as close as you can in camera. Since newborns often have some redness to their skin, the best way to help minimize that is to slightly overexpose your photos while shooting. Doing so will help you achieve that soft, creamy and bright skin that we all love!

    Slight Overexpose

    2. Shoot RAW

    I always shoot in the RAW file format. There are many advantages of shooting in RAW, but for newborns which require a lot of touching up and white balance changes, shooting in RAW will help keep the color tones of your images as natural as possible – even when making big adjustments.

    3. The Magic “C” Sliders

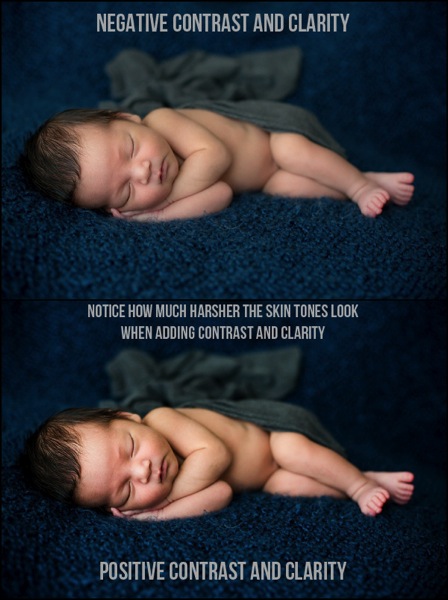
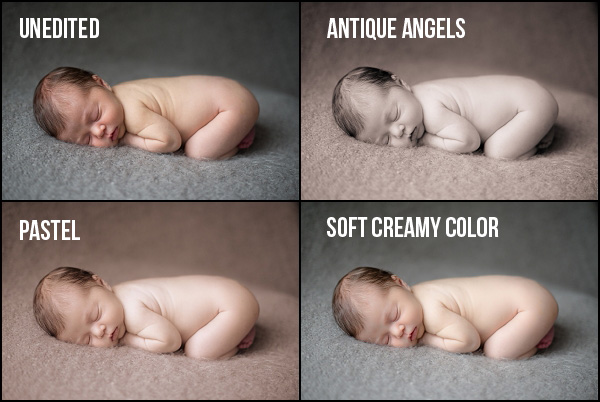
    If you’re after soft and creamy skin tones, the two sliders in Lightroom that will help you the most are the contrast and clarity slider. By reducing contrast you will smooth out the tonality of the image (just watch the histogram when you change contrast) and it will help remove the dark shadow areas or even bright highlights. Remember, for most of us, the goal with newborns is soft, airy photos – rather than edgy high contrast imagery. Adjusting the clarity slider downward a bit will help give you the “creamy” factor. Just be very careful to not remove too much clarity! I recommend somewhere between -10 to -20.

    Contrast and clarity sliders

    4. HSL Sliders for Adjusting Skin Tones

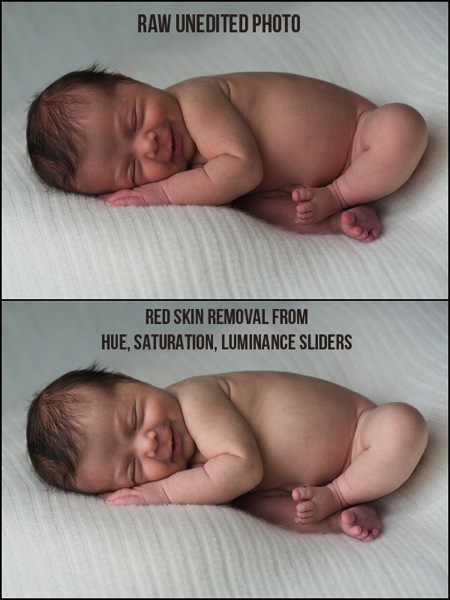
    Adjusting the white balance will only get you so far, sometimes you need some fine tuning on the skin tones and that is where the HSL sliders can really help. While you can manually adjust each color slider, the real trick is to use the targeted adjustment tool on each element (Hue, Saturation, and Luminance) to fine tune your skin tone corrections. Simply click on the targeted adjustment tool, go over a part of the image with the skin tone color you want to fix, click (and hold) then adjust with your mouse up or down and you’ll see the sliders adjust.

    HSL Sliders

    Tip: if you are trying to remove redness, click in the photo where there the skin is red, and follow this sequence with each slider using the targeted adjustment tool:

    Hue: move the mouse up and the red/orange sliders will move to the right
    Saturation: lower the mouse and the sliders will shift to left lowering saturation
    Luminance: raise the mouse to adjust the targeted color sliders to the right, raising the luminance (brightness) of those tones in the photo.

    See below for video tutorial of this technique if you are a visual learner.

    5. Choose Wraps, Blankets and Props Wisely

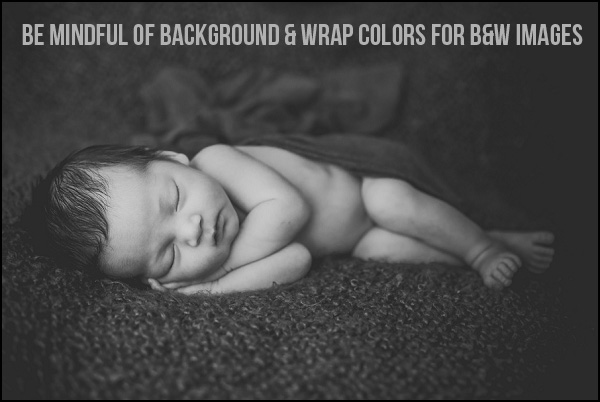
    Extremely light colored wraps or blankets can be so cute, and can look great with color images. But, if you are a fan of classic, timeless, black and white images I’d urge you to stay away from blankets or wraps that are too light, or even white in color. There simply isn’t enough contrast in color between the baby and the blankets for an effective, and attractive black and white image, and your photo will often look too washed out.

    B W

    6. Presets for Speed and Consistency

    Once you find an edit or a look that you love, make sure to save it as a preset so you can use it on other photos that were taken with similar lighting and settings. Not only are presets vital for saving you a ton of time while editing, but they also will help you create a consistent look to your photos.

    Specifically for newborn photography, I created a complete Lightroom presets collection that make soft, creamy and dreamy newborn photos with the simplicity of just one-click.

    Newborn Lightroom Presets

    I sure hope that you can put these six tips into use right away and start editing your newborn photos quicker, with better results. If you have any questions at all, just let me know down below, I’d love to hear from you.

    Cole’s Newborn Photography Workshop is on sale now at Snapn Deals. Save 72% until September 16th, grab a seat now!

    The post How to Edit Newborn Photos Using Lightroom by Cole Joseph appeared first on Digital Photography School.


    Digital Photography School

  • Viva Las Vegas with Keith Urban at the Cosmopolitan, iPhone Style

    This past weekend I shot my first iPhone only concert ever — Keith Urban at The Cosmopolitan Hotel in Las Vegas with Brett Eldredge and Jerrod Neimann.

    I was there with my wife mrsth for our 18th wedding anniversary. We’re both big Keith Urban and country music fans, so when I saw he was playing at the swanky Cosmopolitan (which is absolutely the best place to stay in Vegas these days), I booked us a room there for the weekend and we celebrated 18 years in style.

    A great show was made even better thanks to Jessica Northey who put us in touch with Keith’s management (thank you so much Rachel!) who were able to arrange a special meet and greet ahead of the show. There’s nothing like impressing your woman on her special day!

    I’ve shot a lot of live music over the years and always with a DSLR, but this time I went sans DSLR and shot only with my iPhone. You can check out what I was able to get with only an iPhone only here. iPhone shooting in low light can be tricky. I felt like I got some good shots though.

    At Coachella earlier this year my friend Sam Levin gave me an olloclip. That really came in handy for this show. If you like shooting concert photography with your iPhone, you absolutely *HAVE* to get one of these. It’s basically a telephoto lens for your iPhone and makes a huge difference in terms of getting closer than you could otherwise.

    Most shows I see I’m pretty much focused 100% on just shooting the show — so much that I don’t even really have the best time. This show though it was much more laid back without my DSLR and just hanging out as a normal fan with an iPhone. One of these days I would love to shoot Keith Urban with a DSLR, but the Vegas show was perfect just like it was with the iPhone.

    And about that show — WOW! if you haven’t seen Keith Urban play live yet you really should. In fact he’s in the Bay Area Saturday night in Mountain View if you want to check him out for yourself. He puts on a really rocking show digging deep into his repertoire with so many of his greatest hits. Keith has a ton of energy and he and his whole band really put on a super fun and kick ass live show — that man can play guitar!

    Both Brett Eldredge and Jerrod Niemann are great opening acts. My wife especially enjoyed the fact that in Vegas Brett played a bit of Sinatra’s Fly Me to the Moon, which was coincidently the first song that we danced to at our wedding 18 years ago.

    Keith’s got other dates coming up in Oregon and Washington if you live there. You can check out the remaining dates of his Raise ‘Em Up tour here.

    You can check out all of my live music concert photography here.


    Thomas Hawk Digital Connection

  • How to Clean Your Camera Sensor in 3 Easy Steps

    There is really nothing more frustrating for photographers than a camera sensor that is full of dust and specks. Dust on the sensor happens, it’s just a fact of digital photographic life. If you’re an outdoor photographer with a zoom lens, or one who changes lenses in the field, dust and particles will find a way onto your sensor on an almost regular basis. But even studio photographers experience the distress of a dirty sensor.

    _2DS3368Wjpg

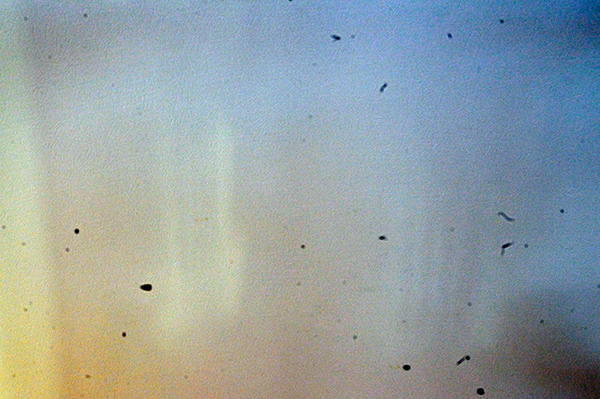
    The world’s dirtiest camera sensor. Yuck.

    A few weeks ago I was on a mountain photo tour, and was constantly changing lenses in the windy and dusty alpine weather. This is a photo taken to show you my sensor dust. All those black specks are fragments of airborne stuff that either gets sucked into your sensor when you use a zoom lens, or when you change your lens outdoors. The image above is the result.

    There’s not too much you can do about it if you’re out on a shoot, other than know that there will be many hours spent on your computer editing out those miserable spots from your otherwise beautiful photos. However, you needn’t stress once you get back to your home base, where you can easily take care of cleaning the sensor and removing the smudges in three easy steps.

    Is Your Sensor Dirty?

    Check to make sure your sensor needs cleaning. It’s quite possible that it does, but you may not know it. If you shoot wide open, or at larger apertures (smaller f-stop number, such as f/2.8) you may not really see any sensor gunk on your images unless you view them at 100% on your monitor. But one day you’ll want, or need, to set your aperture to f/8, or f/16; then sensor dust will become visible, almost as if from nowhere, to torment you, frame by frame.

    To see if you have sensor dust right now, so you won’t be surprised when you’re out in the field shooting, stop down to the smallest aperture on your lens (the largest f-stop number, f/32 for example) and take a photo of a white or light colored wall. What I do then, is open the image in Photoshop and click on Auto Tone (under the Images Menu item). Horrors! Do you see it? Hopefully your sensor dust won’t look as bad as mine, above. But if you see the dreaded black specs, read on.

    Step 1) Using the Auto Clean Function

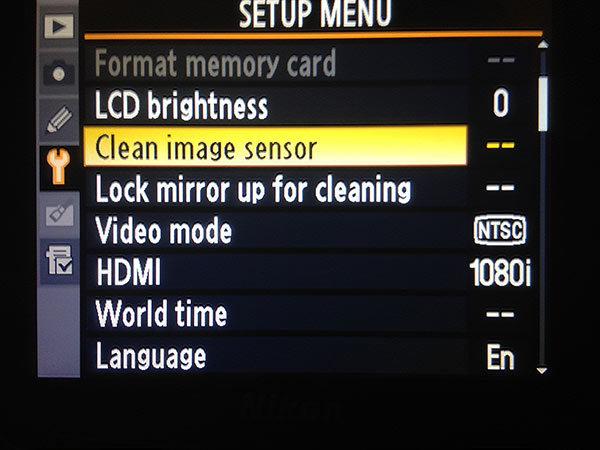
    Many newer DSLRs have a special function for automatically cleaning the sensor.  Look for it in the Tools menu on your camera. When you use this tool, the camera gives the sensor a series of micro-vibrations that “shake” the dust loose, in theory anyway. You may have to repeat this process several times. But with some patience, and providing your sensor is not as bad as the example in my image above, you’ll be relatively free of most of your sensor dirt in a few minutes.

    sensorclean-menu

    If you don’t have this feature on your camera, don’t worry, there is a way to manually clean your sensor. Sooner or later, even those photographers with auto-clean cameras will have to wash their sensors using this manual method, Step 2 below.

    Step 2) Using Sensor Swabs and Eclipse Fluid

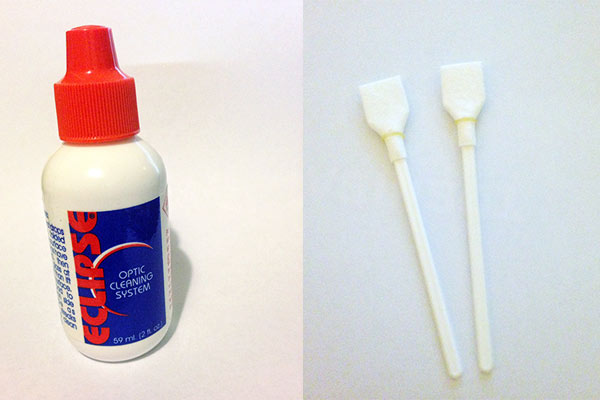
    Sensor swabs are specially designed cleaning pads for camera sensors. Used with a few drops of Eclipse cleaning fluid they will wipe you sensor clean. Think of it as a tiny Swiffer for your sensor. You can get the swabs in exactly the right size for your sensor, so one swipe in each direction could be all you need.

    comboW

    The procedure is easy. You’ll simply put 2 drops of the fluid on a pad, and then gently wide the swab across your sensor ONCE, ONE WAY. Then change directions and swipe the other way. Throw that swab away. If you need to repeat the process, use a new swab.

    Step 3) Power up, Mirror Up

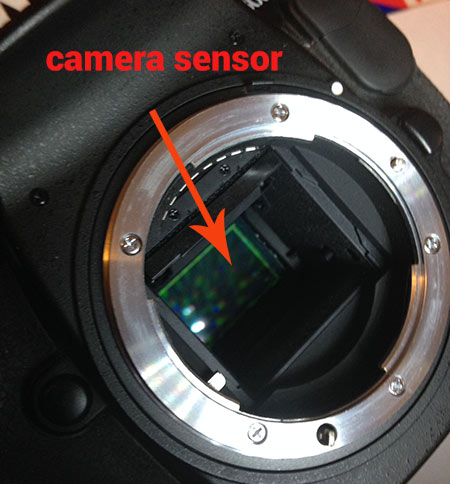
    To use the swabs you’ll need to keep your mirror up to give you access to your sensor. This is the tricky part – you don’t want your mirror to come down while the swab is still inside your camera.

    If you don’t have a setting for Lock Mirror Up for Cleaning, make sure your battery is fully charged, and set your camera exposure on Bulb. The Bulb setting will allow you to keep the mirror up until you release the shutter (use a locking shutter release to hold it not your finger). This way you can access the sensor, and do the quick sensor two-step, swipe left, swipe right.

    sensor1W

    Check your results: take another shot at the same stopped down aperture and take a look at the difference.

    _2DS3392w

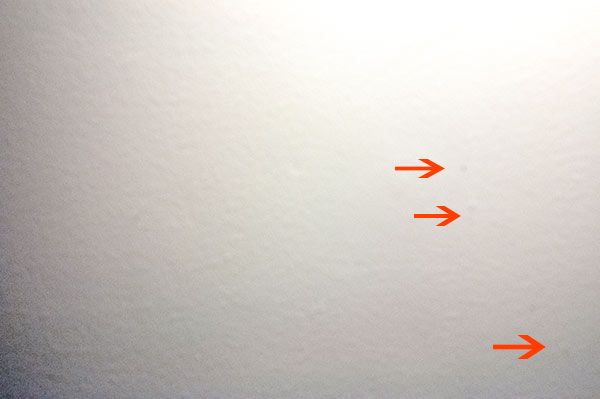
    Image of sensor dust after using Sensor Swabs. The main culprits are gone.

    There are still three spots but all the big blobs, and large dust particles are gone. Depending on your preferences, you may be happy with this knowing that it’s a few easy clicks of the clone tool to remove these small faint marks. Or you may want to give the sensor another round of swabbing. Either way the sensor is super clean compared to the initial test image.

    Cleaning your sensor is not difficult, you do need to be careful but it’s very worth the effort. Your photographs will love you for it.

    I’d love to see your sensor dust horror stories – post your before and after cleaning shots here.

    Editor’s note of warning: if you are terrified of damaging your sensor (it is delicate) you can usually find a local camera store that offers this service. You will pay a lot more for it than doing it yourself, but if they damage it, they have to replace it for you. The camera that is! If you damage your sensor there is no going back. So do follow the directions exactly, and do be cautious. Perform this procedure in as dust-free, windless room as possible. And remember to NEVER, EVER touch your sensor with your fingers. The oil from your fingers will do more damage and is much harder to remove (i.e. you’ll likely be sending it to the manufacturer to get that off).

    The post How to Clean Your Camera Sensor in 3 Easy Steps by Alex Morrison appeared first on Digital Photography School.


    Digital Photography School

  • Choosing a Camera

    There is no perfect camera. So get that idea out of your head right now. Far better to think of any camera as a set of compromises. Size, speed, image quality, low-light performance, price, etc., can all be features—and they can all be liabilities.

    You want image quality? Get an 11×14″ film camera. Great for detail and tonal range. But sucks for action sequences / portability / low light performance.

    Every camera is a compromise in at least one area. So to start, list your most important features on a sheet of paper and let that guide your choosing strategy.
    __________

    • If you want best-possible image quality, you might sell your car/house/plasma and buy a digital medium format camera.

    • If you need super long glass and/or FPS speed (sports, nature, etc.) maybe grab a fast Nikon (or Canon) and a super-telephoto lens.

    • If you shoot people, speed and high ISO performance might not matter as much as gorgeous color.

    • I you travel a lot you might put a premium on your cameras being small and lightweight, with good low-light performance.

    • If you are following a toddler around the living room, continuous AF performance may trump price.

    So think about what is important to you (and your budget, of course) and begin your search for cameras using that as a compass point.

    If you are old like me, you might be tempted to only consider cameras built around the dated form factor of film cameras to be the only cameras worth serious consideration. That’s an age bias. Have it if you like, but be aware of it. To a twenty-year-old that doesn’t matter any more.

    Speaking of age, if I were just dipping my toe into the water I’d strongly consider a late-model used digital camera and a used lens or two. If I was not happy, it would be a cheap marriage to unwind. Within a year I could probably sell the lot on eBay for a couple hundred less than I paid, max.

    And if I was happy it would be a great platform to build on. Once committed, my next body might something current and the original body goes to a second/backup. Either way, I would not expect to be using the camera after five or six years.

    Point is, you don’t have to jump in the deep end. Buy one body and a lens or two. Maybe buy used from a shutterbug friend, knowing the camera implicitly comes with ad hoc tutoring. (And a good outlet to borrow/lend lenses, bodies, etc.)

    I spent over 30 years with Nikon film and digital SLRs as my primary cameras. But the further I got away from shooting for newspapers (which at the time had included lots of sports photography) the more my priorities shifted. Here is what is important to me now: small, lightweight, good image quality, great in low-light and quiet/unobtrusive. That led me to move to mirrorless (Fuji) a couple years back.

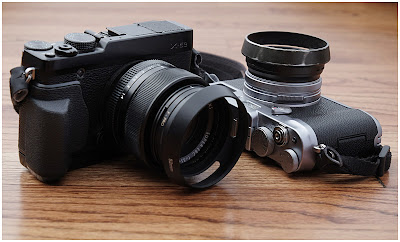
    Pictured at top are the cameras that currently get more use than anything else I have (save maybe my iPhone): a Fuji X-E2 and a Fuji X100s.

    Whatever camera style/brand you are considering, you can use the ‘net to easily scope out how other photographers are using it and what kind of image quality it has.

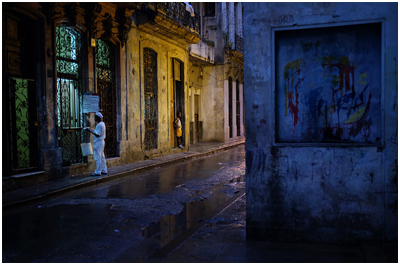
    For instance, try this: click on the night photo just above, which will take you to its Flickr page (in a new window). Scroll down beneath the photo’s page where it says “Fujifilm x100s” (or just click here) and you go to a page that will show you lots of different photos shot with exactly that model of camera.

    And here’s the thing: clicking on that link from just about any camera icon on a Flickr photo page will quickly show you that you can make amazing photos with just about any current camera. So don’t sweat it or pixel peep too much.

    Instead, focus on how you will be using the camera and what features are truly most important. Then let that drive your choices. And understand that the camera you use today probably won’t be the camera you are using in five years.

    NEXT: Lenses


    Strobist