Category: Photography

  • Mastering On-Camera Flash

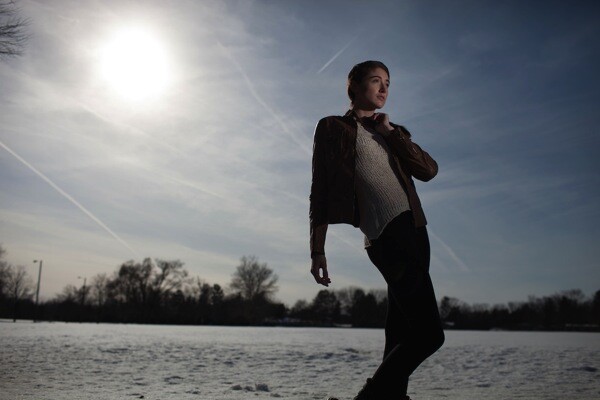
    You get caught off-guard with a photo assignment and you might not have time to set up additional lights or have the luxury of using a reflector. Maybe it’s an awards event in a large room and you don’t want the background to go completely dark. You see a celebrity, rock star, astronaut or maybe it’s the president of your company that you need to photograph (see image below), or maybe you just need to travel light, with a minimum of gear.

    Fig 1

    George Lucas: 1/180 at f/13, ISO 200

    Shoe-mount flashes are very portable and you CAN use them to get a great image. The key to getting that image is controlling the balance of camera, flash, and ambient light.

    TTL TYPES

    The automatic advantage to shoe-mount flash units is that they use TTL metering, which stands for Through The Lens. This type of flash metering is much more accurate than the thyristor technology that precedes it, and it’s also easier to use correctly.
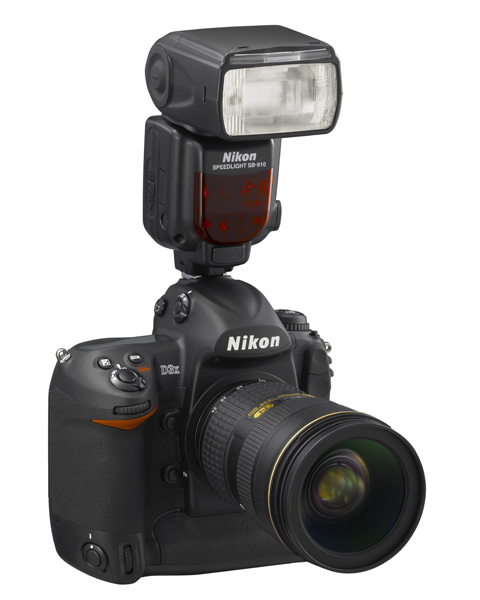
    Sb910 d3x frt34r

    Photo courtesy of Nikon

    Camera manufacturers have their own versions of TTL flash and the alphabet soup of lettering can be a bit intimidating. Different types include i-TTL, P-TTL, E-TTL, etc. So what is the difference or similarity in each of these? Canon calls their flash technology E-TTL (introduced in 1995) or the newer E-TTL2 (since 2004). Firing a low power pre-flash immediately before the shutter opens, this type of Through The Lens metering is very accurate because the flash unit actually fires very quickly. This brief pre-flash determines the correct power output of the flash unit. The camera body and flash communicate together on the exposure by means of additional contact pins in the hotshoe and in the foot assembly of the flash unit.

    Pentax’s P-TTL arrived in 2001 and it meters a low power flash with the lens wide open before opening the shutter. Nikon’s i-TTL has been available since 2003 and also uses a pre-flash to calculate the amount of light needed by the flash. Their TTL-BL is a separate mode for fill flash, with the idea of it giving you better balanced light, but for it to work accurately the subject needs to be darker than the background. So all of these systems are similar and no matter what brand of camera system you have, one of them will work great for you.

    All of this solves the problem of getting the correct amount of light on the subject, which is weighted with the area of focus that you and your camera have selected. What about the surrounding elements in your artistic composition? You are seeing a potentially great image in the viewfinder, and whether you’re indoors or out, you want the flash to match the scene just enough to make it look right.

    MATCHING THE LIGHT

    Let’s take the example of photographing indoors. The best way to do this that I’ve found is to meter the ambient light in the room first. The camera can be in any exposure mode to take this reading. If for example, your exposure is 1/30 at f/5.6, ISO 800 – you would then switch the camera to Manual mode and make those your camera settings. Note that some cameras have a slow sync setting, or you could also use shutter priority to get this same balance.

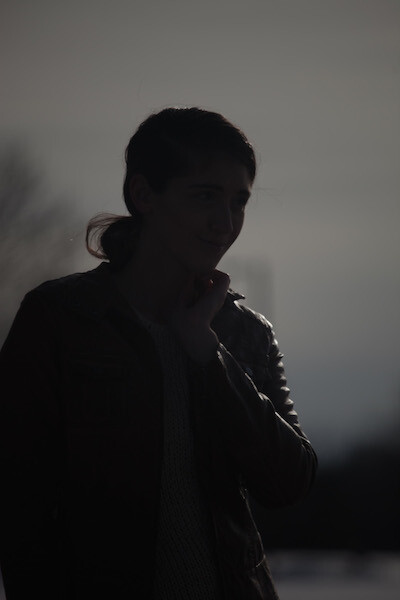
    Fig 2

    Paula and Cayden: 1/60 at f11, ISO 200

    You can leave the flash set on TTL mode and let it adjust its power output automatically. When you take the image you should have a remarkably balanced exposure. This can be further fine-tuned by adjusting the flash exposure compensation to add a little more, or a little less, fill light to the image. Flash exposure compensation can be added on the flash unit itself, or by adjusting the settings in the camera.

    If you find that you need a little more depth of field to get your subjects in focus you can bump up the ISO to 1600 and lower the aperture setting to f/8. If you can use less depth of field, do the opposite by lowering the ISO to 400 and opening your aperture to f/4. There are always tradeoffs to be made, and you might not be able to handhold that particular lens at 1/30 second to get a steady image. Try using a monopod or tripod to help with that issue. For a faster shutter speed you might want to try 1/60 at f/5.6 with 1600 ISO. If you need to get your depth of field back to f/8 then you might need to be daring and go to 3200 ISO. Digital noise levels are improving all the time so don’t be afraid to try a higher ISO.

    If you are photographing outdoors the opposite is true. Go to the lowest ISO to match your ambient light with your flash. There’s no way a flash can compete with the sun, so if you can select a lower ISO you will have a better chance of balancing ambient and flash at f/8 or f/11, rather than f/16 or f/22.

    DIFFUSERS
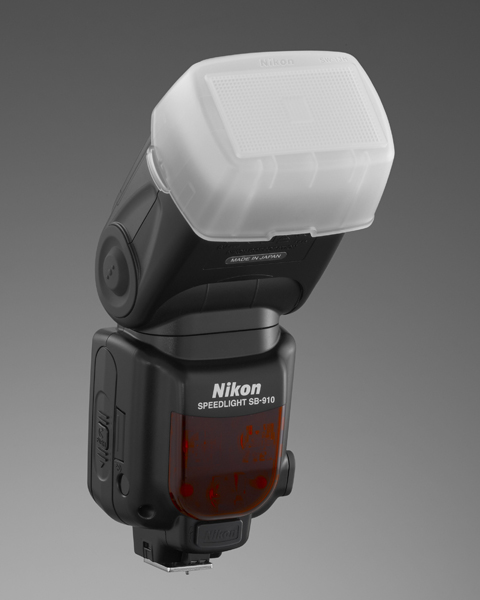
    Sb910 sw13hSome flash units come with diffusers and I’ve had good luck with those. These are usually plastic, and they snap on tightly in front of the flash. There are also many innovative aftermarket diffusers available. Some units are a card type that bounce the light and redirect it to a larger pattern. Some diffusers are of the softbox type with a diffusion panel that the light passes through.

    Some diffusers take the plastic design to a much higher level (such as the Gary Fong brand). All of these diffusers are variations on taking a directional light, such as an on-camera flash unit, and modifying the light to lower the amount of shadow
    that you would normally get from a harsh light source. My recommendation is that you try some of these for yourself and see what works best for you. Your flash, the environment you’re photographing in, and the type of photos that you take are
    all factors that could determine which is the best one for you. If you have a favorite please let us know in the comments following this article.

    Bounce flash is when you angle the flash head so that the light reflects off of the ceiling or a nearby wall to disperse the light. Due to light falloff less light will get to the subject, so having a low ceiling is helpful for this to work. Light falls off and can be accounted for using the Inverse Square Law – an object that is twice the distance from the flash head will receive one quarter the illumination – or two stops less light.Ttl cord
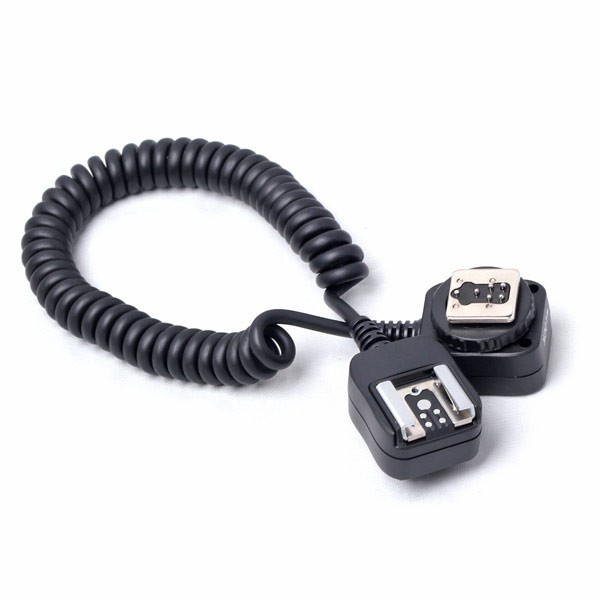
    TTL CORDS

    Off-camera TTL cords are another great option. I consider this to still be on-camera flash but the TTL cord allows you to be flexible with the direction of the light. Holding the camera in one hand, you can move the flash unit around with the other hand and try different variations of light on your subject. These cords are small, easy to carry with you, and they are relatively inexpensive. They’re a good item to keep in your camera bag.

    FILTERS
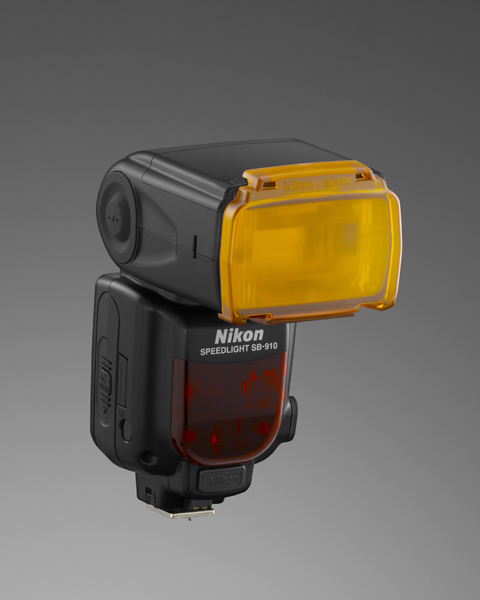
    Sb910 sz2tnFilters sometimes come with a shoe mounted flash, and they are also available from aftermarket sources. The most common filters are tungsten and fluorescent. These are a great, and often overlooked, option to match the color of light from your flash unit to the ambient light temperature of a room. Color temperature from a shoe mounted flash is similar to a daylight balance of approximately 5500 degrees Kelvin. Fluorescent lights are in the 4000K range and tungsten light is around 3200K, so using these filters will make quite a difference in the color of your final image. Give those filters a try the next time you’re in that situation.

    SUMMARY

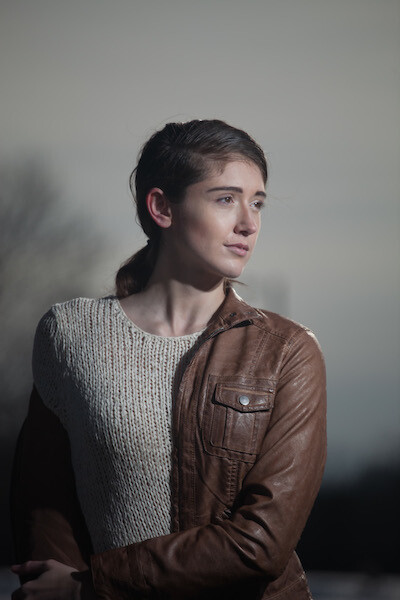
    Fill flash is a matter of finding the right amount of light to make the image appear to have been taken with natural light by using just enough flash to add catch-lights to the eyes, eliminate shadows, and give a more pleasing look overall to an image. You will be able to capture this balance using just your on-camera flash. It might sound difficult, but it doesn’t have to be.
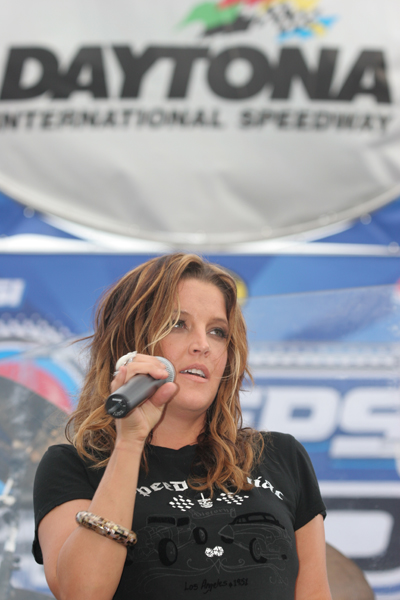
    Fig 3

    Lisa Marie Presley: 1/250 at f/4.5, ISO 200

    The post Mastering On-Camera Flash by Jim Wise appeared first on Digital Photography School.

    Digital Photography School

  • Macphun’s Tonality Pro Versus Lightroom 5 for Black and White Conversion

    Tonality Pro vs. Lightroom

    MacPhun Software recently released Tonality Pro (use this link to get 20% off, for dPS readers only), a powerful black and white converter for Mac. In this article I’m going to compare it to Lightroom so you can see how the conversion process differs between the two programs.

    Windows users please don’t stop reading now – I’ll look at some other black and white plug-ins at the end of the article, all of which are cross-platform.

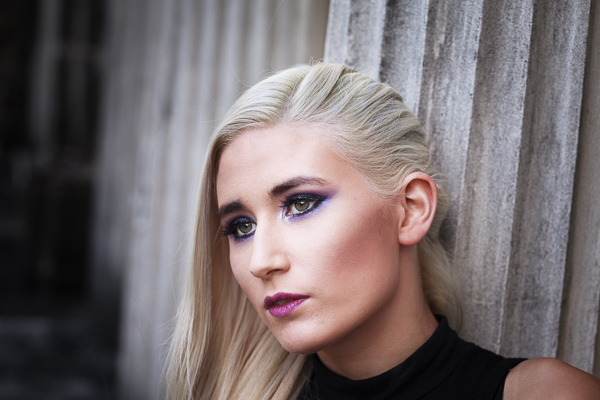
    To start, here’s the colour photo that I’m going to convert to black and white.

    Tonality Pro vs. Lightroom

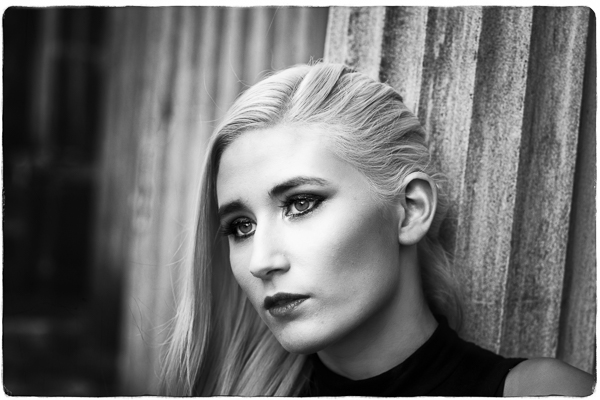
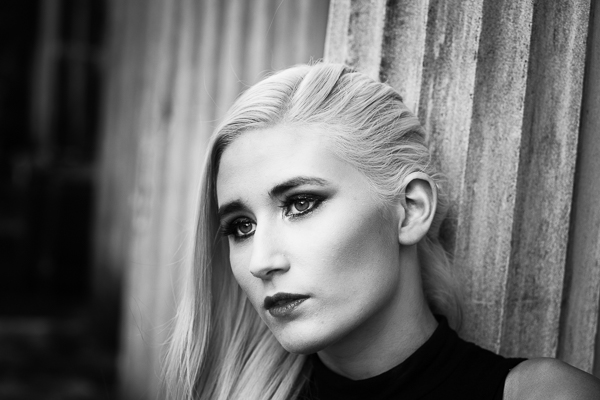
    Here’s the black and white version I created in Lightroom.

    Tonality Pro vs. Lightroom

    It’s a fairly straightforward conversion. I increased Clarity and Contrast, and added a vignette using the Radial Filter. I didn’t touch the Black and White Mix panel, and I didn’t add Split Toning.

    All these tools will be familiar to Lightroom users. So, how does Tonality Pro differ? Let’s take a look.

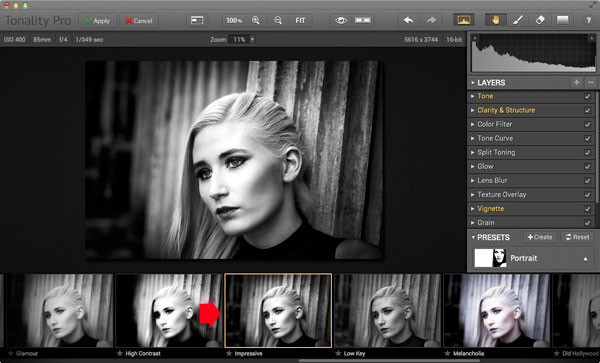
    Tonality Pro uses presets

    Tonality Pro’s presets give you a variety of ready made black and white conversions. Of course, not all of them will be suitable for your photo, but with over 150 to choose from, you are bound to find at least a few that do good things for your images. If you don’t like using presets, just skip them and go straight to the other panels to do your work.

    Tonality Pro’s presets are similar to Lightroom’s Develop Presets. The main difference is that Tonality Pro comes supplied with a full set, while Lightroom only has a limited range of built-in monochrome presets. If you want a decent set of black and white presets for Lightroom, you will have to buy them.

    Tonality Pro’s presets have two features that make them a very powerful and versatile feature.

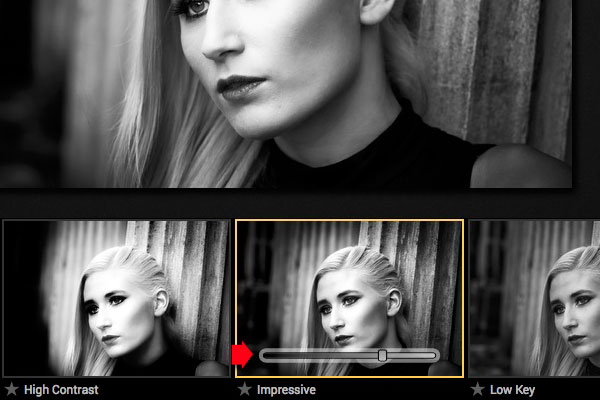
    The first is a slider that lets you adjust the strength of the preset. This is useful because the number one problem with presets of any sort is that they can be too strong. A subtle touch is better when it comes to post-processing and many presets are far from subtle. The opacity slider in Tonality Pro helps you deal with that. Let’s say you apply the Impressive preset to your photo. Here’s how it looks.

    Tonality Pro vs. Lightroom

    Too strong? It’s easy to reduce the strength of the effect until it looks just right.

    Tonality Pro vs. Lightroom

    The second feature (I’m really excited about this) is that Tonality Pro has layers. With layers, you can apply a preset on a new layer, then create a mask using Brush mode so that the preset is only applied to part of your image.

    Take a moment to think about what that means. For example, you could apply one preset to the subject (in this case the girl in the photo) on one layer, and another to the background on another layer. It’s got the potential to be very powerful, and it’s something that I haven’t seen in any other plug-in.

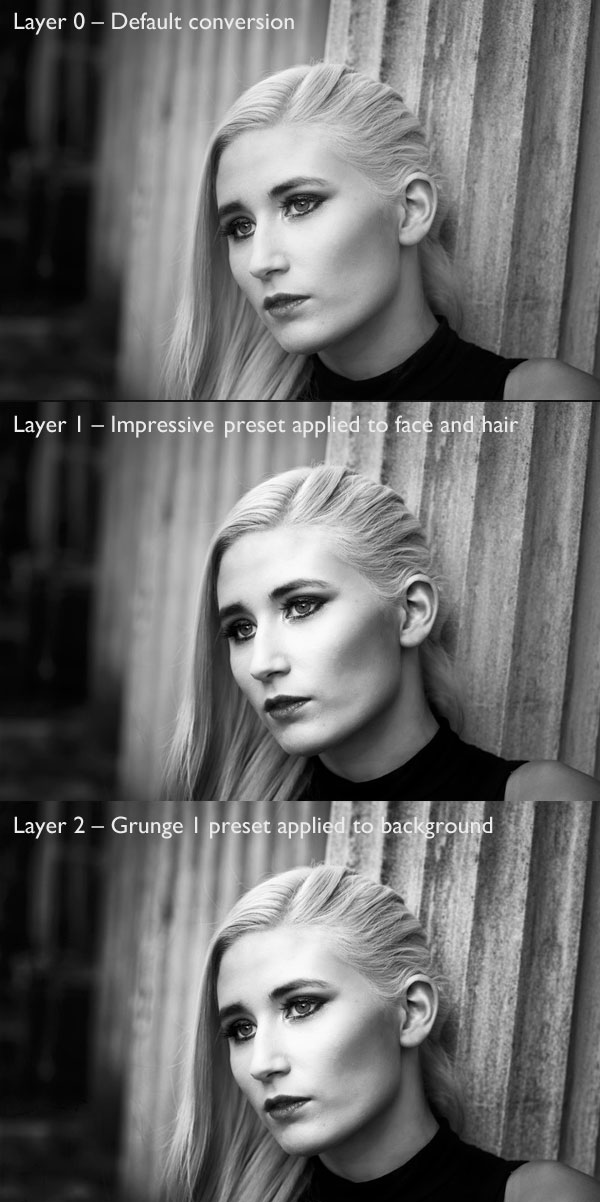
    Here’s how it works. In these examples I’ve applied the Impressive preset to the model’s face, and the Grunge 1 preset to the background using layers. I used the opacity sliders to keep the effect subtle. These three images show the result.

    Tonality Pro vs. Lightroom

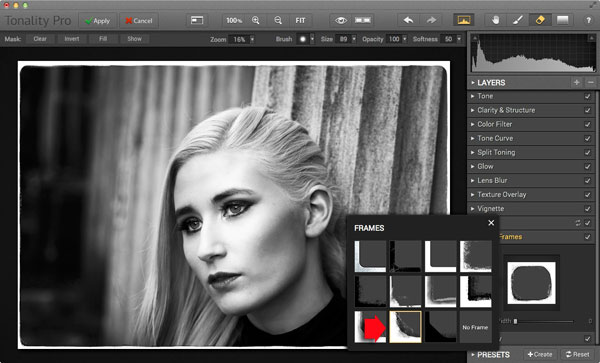
    Next I added a frame.

    Tonality Pro vs. Lightroom

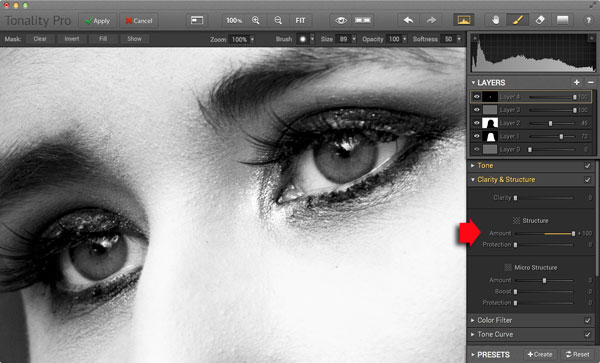
    Finally I added some Structure to the eyes, and increased Adaptive Exposure a little to compensate for the way Structure tends to make things darker as well as add detail. You can achieve a similar effect in Lightroom with Clarity, but you will be interested to know that you can adjust Structure in Tonality Pro as well as Clarity (Structure is better than Clarity for bringing out detail).

    Tonality Pro vs. Lightroom

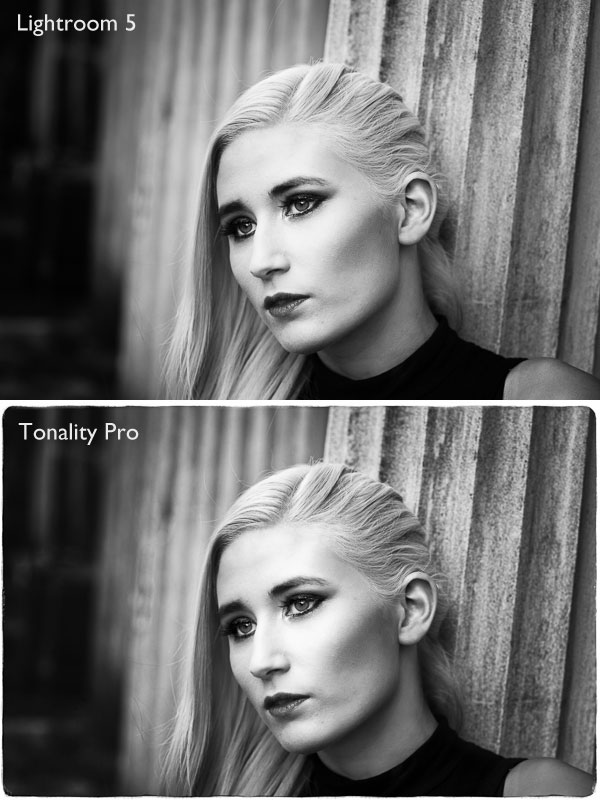
    Here’s the final comparison of the two versions of the photo.

    Tonality Pro vs. Lightroom

    As you can see, apart from the border, most of the differences are subtle. But the way I got there, the editing process itself, was very different.

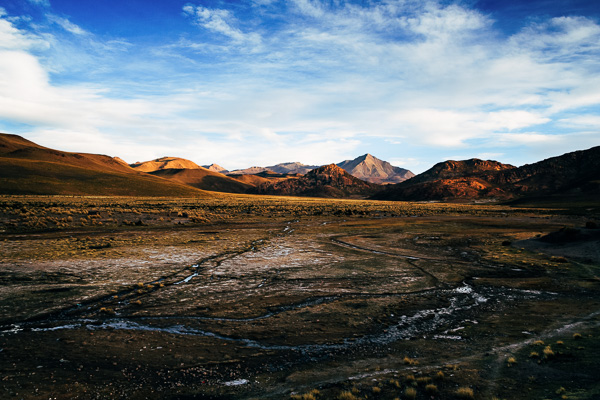
    Now I’m going to show you another application of Tonality Pro that you definitely can’t do in Lightroom. Here’s the original colour photo.

    Tonality Pro vs. Lightroom

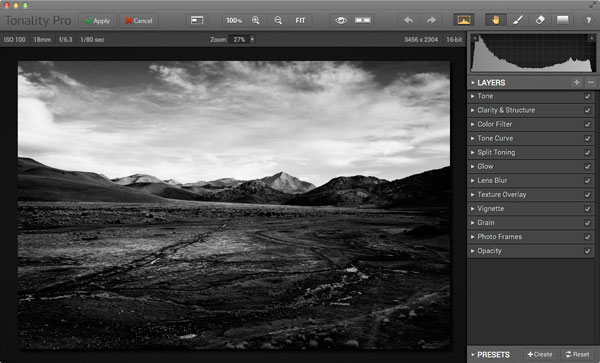
    Here’s the initial black and white conversion:

    Tonality Pro vs. Lightroom

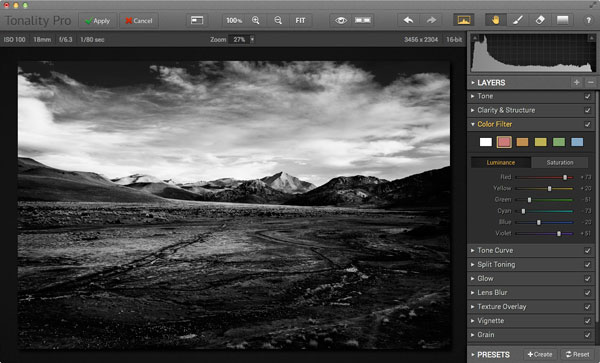
    This is the same photo processed in Tonality Pro with a red colour filter applied to darken the sky and add drama to the distant mountains.

    Tonality Pro vs. Lightroom

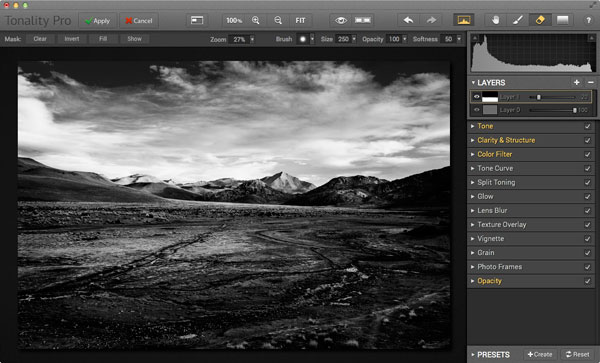
    Here I’ve added another layer and applied the El Captain preset, reduced the opacity of the layer to 20 (to keep the effect subtle), and used a mask to apply the preset to the foreground only, not the mountains or sky.

    Tonality Pro vs. Lightroom

    All this took just a couple of minutes to carry out.

    The verdict

    This is a simple demonstration but hopefully it’s given you a taste for what Tonality Pro can do, and how it compares to Lightroom.

    I’ve only scratched the surface in this article, Tonality Pro has lots more interesting features. Another dPS writer,  Phillip VanNostrand has done a full review here, it covers the software in more depth, so check that out also. In the meantime, if you want to test out Tonality Pro for yourself, or learn more about the program, then you can do so at MacPhun’s website (get 20% off for dPS readers using this link).

    How Tonality Pro compares to other plug-ins

    Tonality Pro isn’t the only black and white plug-in out there, and you may be interested to know how it compares to some of the others. Don’t forget they all have different features and strengths, and the best one for you depends on what you want to do with your black and white images. You can download trials of all the plug-ins to help you make your mind up. Here’s a brief guide:

    Silver Efex Pro 2

    Until Tonality Pro came along this was the single best black and white conversion plug-in you could buy. To be honest, I haven’t used Tonality Pro enough yet to say whether it is better than Silver Efex Pro 2. But, there’s no doubt that the layers feature in Tonality Pro means that it is a versatile program that gives Silver Efex Pro 2 a good run for its money.

    Silver Efex Pro 2 is more expensive (more than double the price) but it does come as part of the Nik Collection, so you do get the benefit of the other programs within it (Viveza, Color Efex Pro and so on). Silver Efex Pro 2 also has a powerful history function that Tonality Pro lacks.

    Alien Skin Exposure 6

    One of my favourite plug-ins, Exposure 6 is designed to give your digital photos an analog look. You can use it for both black and white and color photos, and in my opinion it’s stronger on the colour side than monochrome. But it’s still a powerful black and white converter.

    It’s more expensive than Tonality Pro, but you get the advantage of being able to use it to process colour photos too. It can be used as stand-alone program as well as a plug-in (as can Tonality Pro).

    Topaz Black & White Effects 2

    Black & White Effects 2 is a nifty black and white plug-in. Its main benefit is an extensive range of creative presets, including several sets that imitate old processes such as cyanotype, albumen and van dyke brown. It’s also good for emphasizing detail and texture.

    Perfect Black & White

    onOne Software’s Perfect Photo Suite includes the Perfect Black & White module. Like Silver Efex Pro 2, you get the benefit of the other modules in the suite. But unlike Silver Efex Pro 2, all the modules work together and you can switch seamlessly from one to the other.

    One of my favourite modules is Perfect Mask. I use it to blend two versions of landscape photos, one processed for the sky and the other for the foreground. Combined with Perfect Black & White it helps you create powerful and dramatic black and white landscapes. It also works as a stand-alone program.

    Discussion time

    In my review of MacPhun’s Intensify Pro one reader gave an opinion that photographers who use plug-ins instead of Photoshop are lazy. It’s an interesting topic for discussion, so please let us know what you think in the comments. Do you use plug-ins to process your photos? If you do, which are your favourites and why? Or do you agree with the view that plug-ins are for lazy photographers?


    Mastering Lightroom: Book Three – Black & White

    Masterlng Lightroom: Book Three – Black & White by Andrew S GibsonMy ebook Mastering Lightroom: Book Three – Black & White goes into the topic of black and white in depth. It explains everything you need to know to make dramatic and beautiful monochrome conversions in Lightroom, including how to use the most popular black and white plug-ins. Click the link to visit my website and learn more.

    The post Macphun’s Tonality Pro Versus Lightroom 5 for Black and White Conversion by Andrew S. Gibson appeared first on Digital Photography School.

    Digital Photography School

  • Weekly Photography Challenge: Animals

    Earlier I shared a bunch of images of wild animals for you to admire. There are some amazing shots out there and it takes a great amount of patience to be a wildlife photographer.

    So your challenge this week is to go out and photograph some animals. They don’t necessarily have to be wild, but if you can find some – bonus!

    By Massmo Relsig

    Your dog, the squirrel in backyard, or even a visit to your local zoo will work. Think about your lens selection (wildlife photographers usually use really long lenses, partly to keep their subjects from eating them), your camera settings to freeze or blur any action, and your timing. Will you use a tripod or a monopod? What time of day is best to find the animals and get the best light?

    These are all things I want you to consider as you go out to photography animals. Remember if you head out into nature:

    Take only photographs – leave only footsteps

    Photographing animals will require patience. They may not do what you want or expect them to do, so you have to be ready and anticipate their actions. Are you up to the challenge? Go!

    By jimmy brown

    By Silver Doctor

    By Tobias

    By Lumiere2005

    By Martin Fisch

    By Terry Chay

    By Humberto Moreno

    By Tetsumo

    By Marie and Alistair Knock

    By Ian Robertson

    Share your animal photos

    Simply upload your shot into the comment field (look for the little camera icon in the Disqus comments section as pictured below) and they’ll get embedded for us all to see or if you’d prefer upload them to your favourite photo sharing site and leave the link to them. Show me your best images in this week’s challenge.


    The post Weekly Photography Challenge: Animals by Darlene Hildebrandt appeared first on Digital Photography School.

    Digital Photography School

  • A Walk on the Wild Side: A Collection of Wildlife Photography

    Nature is an amazing thing. This week I share with you some images of wildlife, animals in nature. Some may have been taken on nature preserves or even in a zoo, but if the image is well done and we can’t tell kudos to the photographer.

    If you do any wildlife photography you’ll appreciate how difficult it is to get the perfect shot. So enjoy these and be inspired.

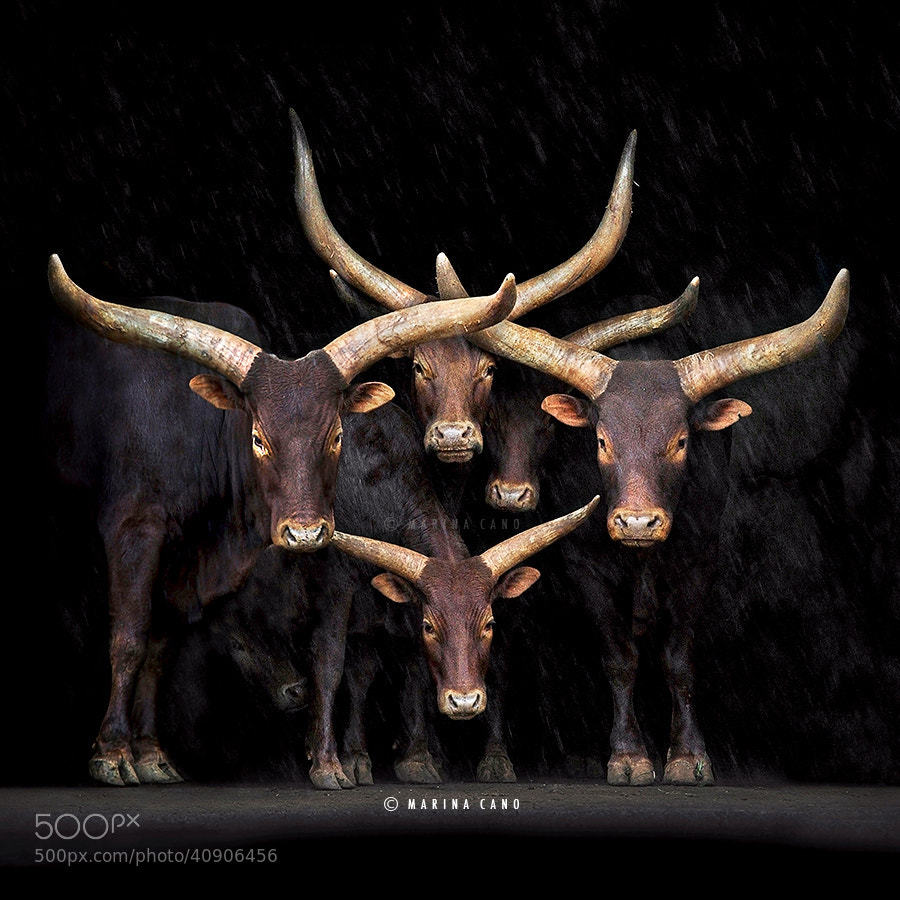
    Photograph ONCE in a LIFETIME by Marina Cano on 500px

    ONCE in a LIFETIME by Marina Cano on 500px

    Photograph beautiful dolphin jumping from shining water by Vitaliy Sokol on 500px

    beautiful dolphin jumping from shining water by Vitaliy Sokol on 500px

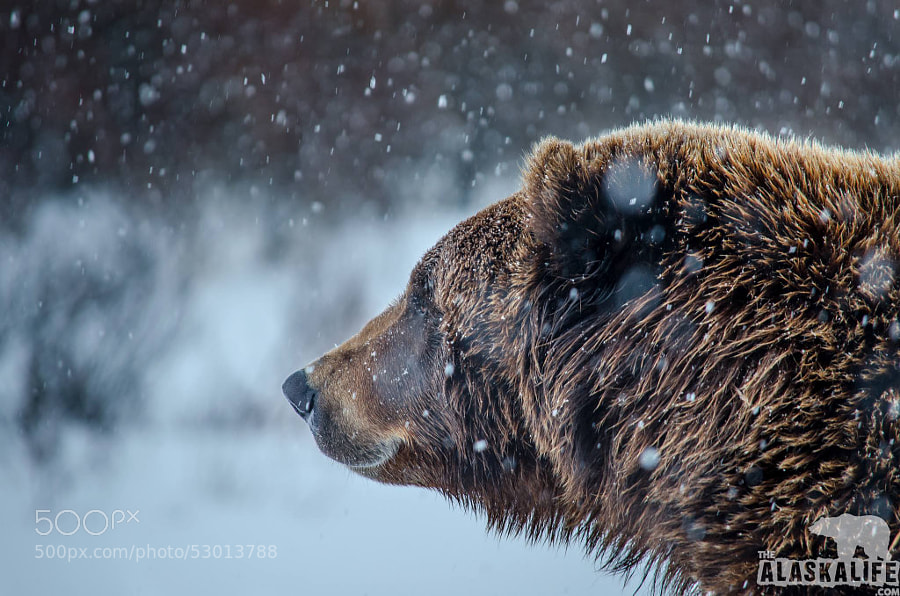
    Photograph Winter Ponder by Kyle Moffat on 500px

    Winter Ponder by Kyle Moffat on 500px

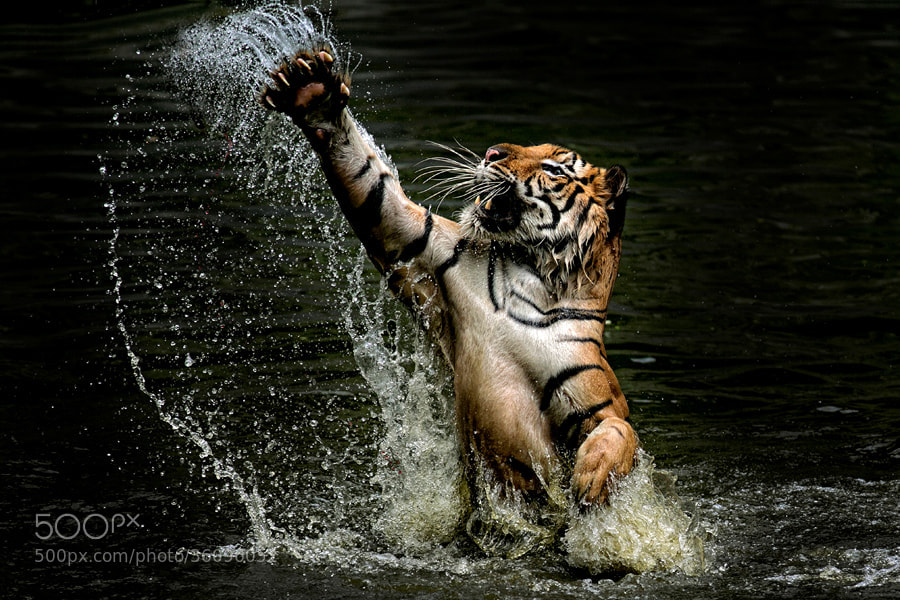
    Photograph Tiger C L A W S by yudi lim on 500px

    Tiger C L A W S by yudi lim on 500px

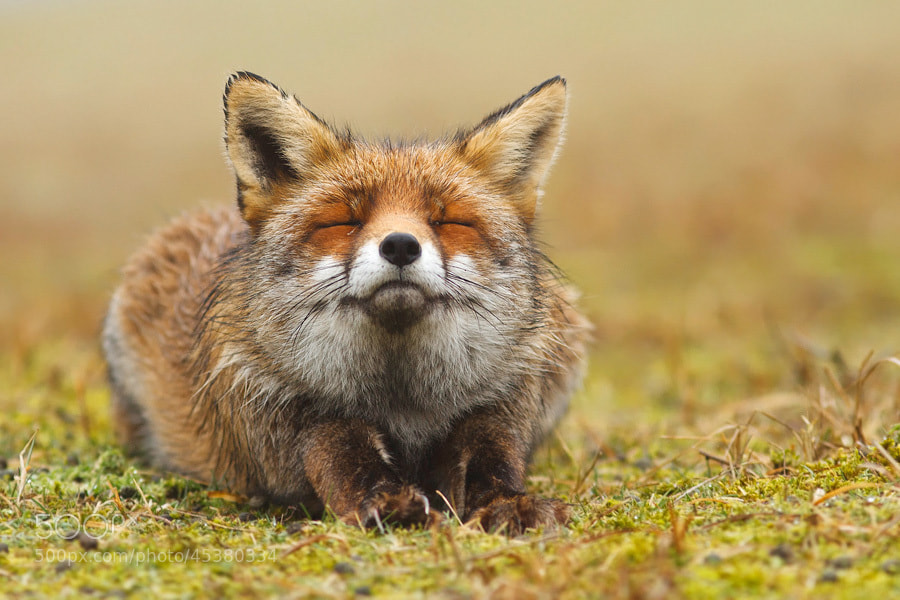
    Photograph Happy Fox by Roeselien Raimond on 500px

    Happy Fox by Roeselien Raimond on 500px

    Photograph Evil Dark Angel by Harry  Eggens on 500px

    Evil Dark Angel by Harry Eggens on 500px

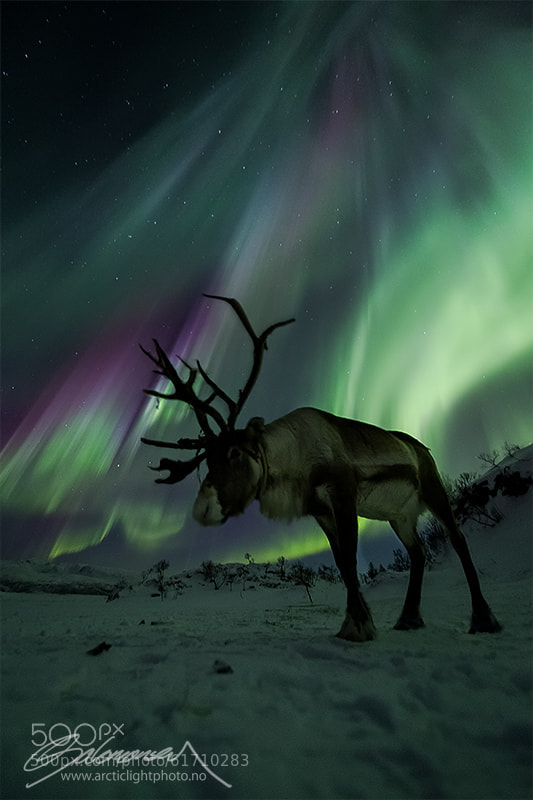
    Photograph Norwegian Caribou by Ole C. Salomonsen on 500px

    Norwegian Caribou by Ole C. Salomonsen on 500px

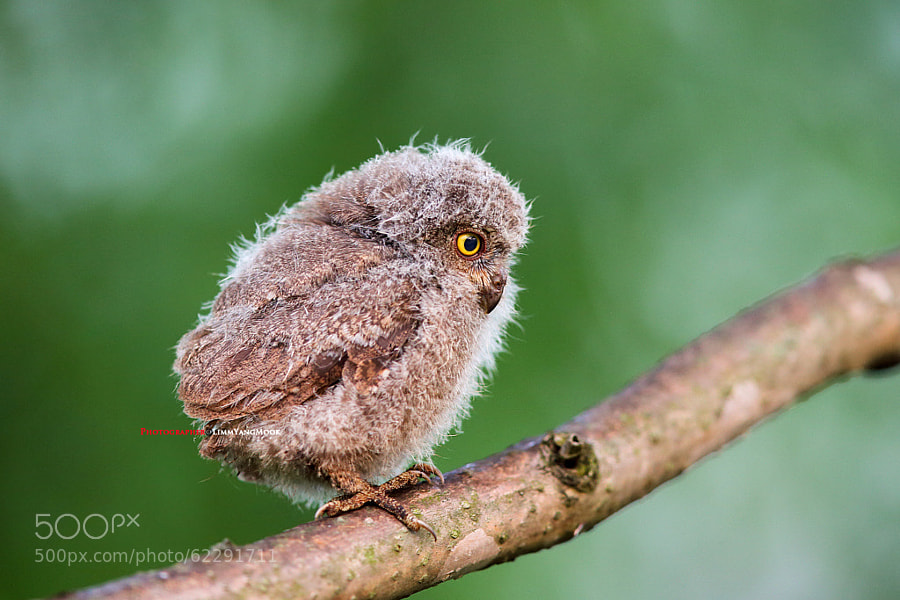
    Photograph Baby owl by Limm yangmook on 500px

    Baby owl by Limm yangmook on 500px

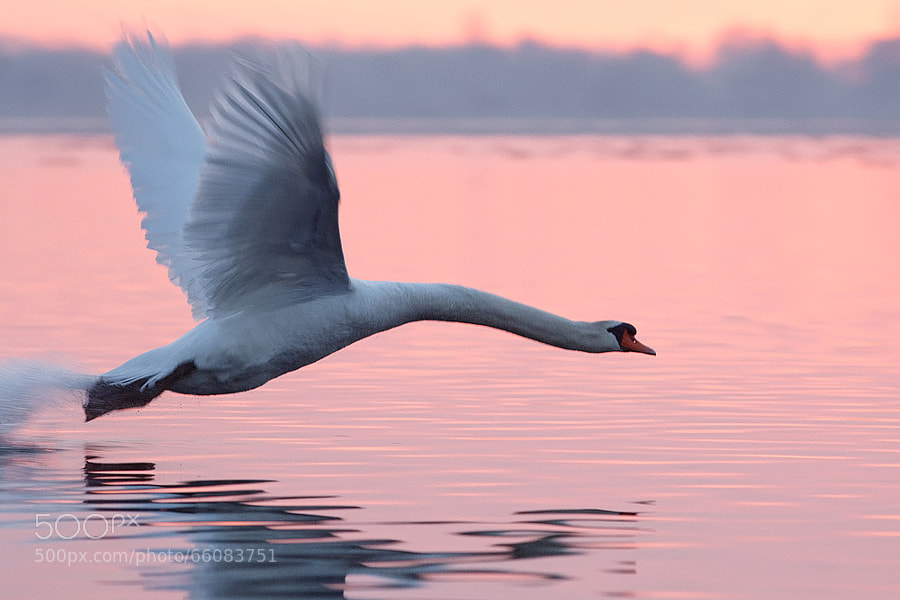
    Photograph Swan on a Mission by Roeselien Raimond on 500px

    Swan on a Mission by Roeselien Raimond on 500px

    Photograph Let me have a Smell first by Julian Rad on 500px

    Let me have a Smell first by Julian Rad on 500px

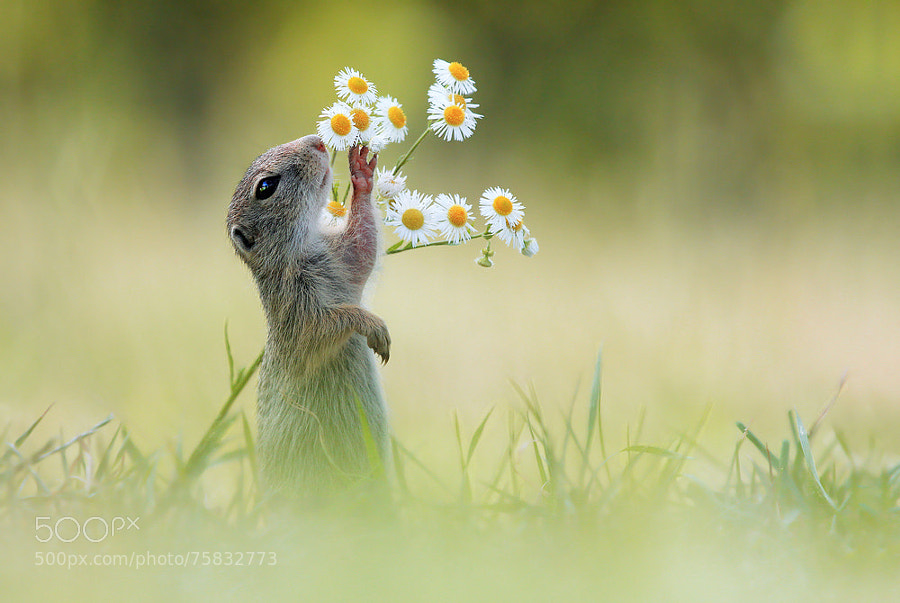
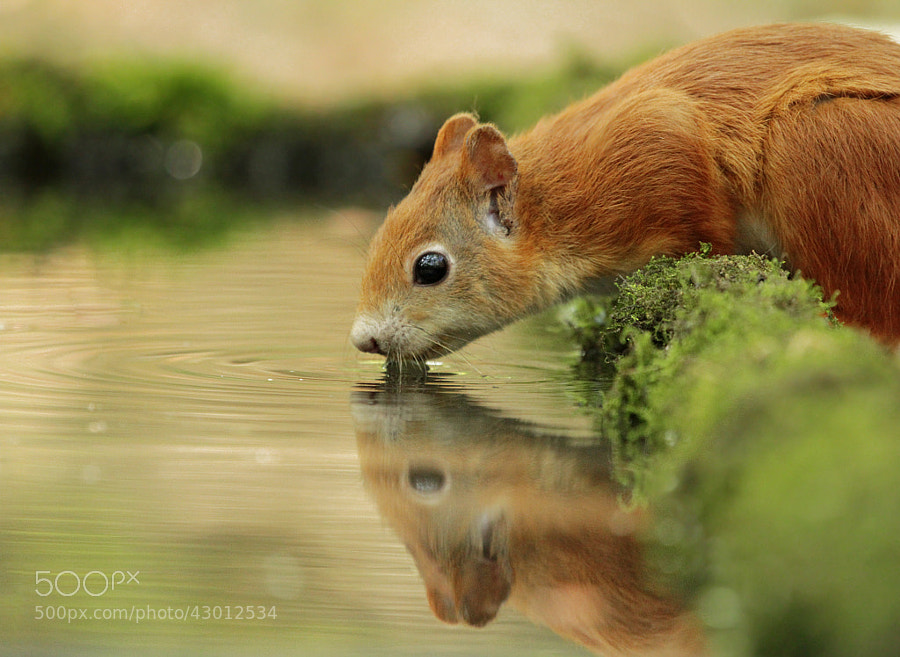
    Photograph Thirsty Squirrel by Julian Rad on 500px

    Thirsty Squirrel by Julian Rad on 500px

    Photograph Surprise! by Simon Roy on 500px

    Surprise! by Simon Roy on 500px

    Photograph Bye Bye by Massimiliano Orpelli on 500px

    Bye Bye by Massimiliano Orpelli on 500px

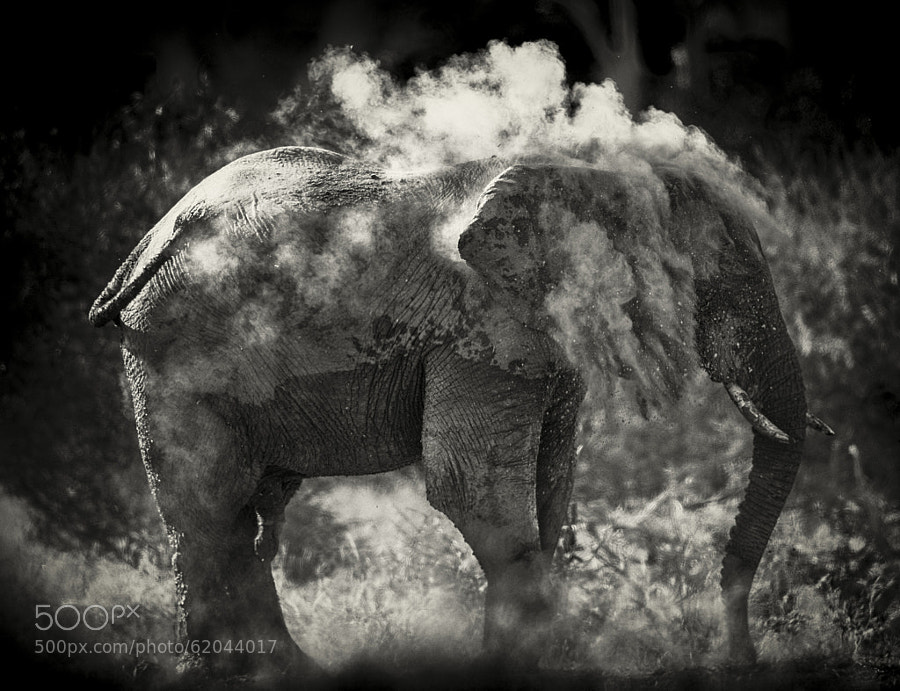
    Photograph Dust by Chris Fischer on 500px

    Dust by Chris Fischer on 500px

    Photograph Beauty by Chris Fischer on 500px

    Beauty by Chris Fischer on 500px

    Photograph Awful Close by Chris Fischer on 500px

    Awful Close by Chris Fischer on 500px

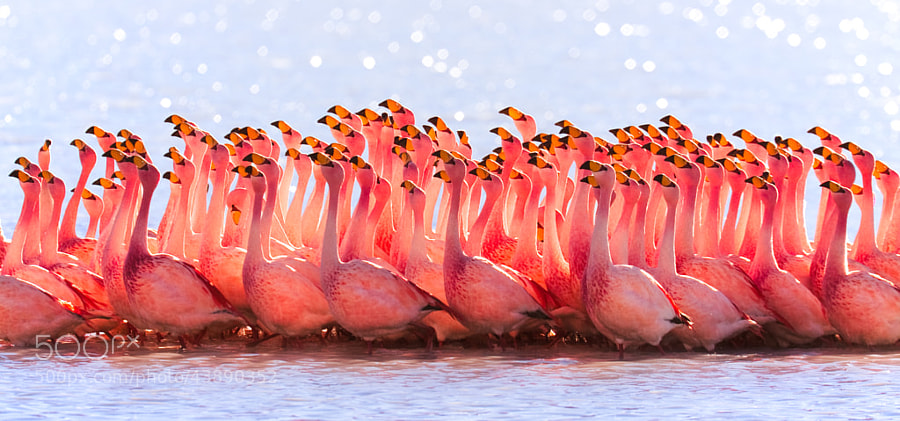
    Photograph Bolivian Flamingos by Pedro Szekely on 500px

    Bolivian Flamingos by Pedro Szekely on 500px

    Photograph Wild sunset. by Patrick Galibert on 500px

    Wild sunset. by Patrick Galibert on 500px

    Photograph for you by Gabriele Tenhagen-Schmitz on 500px

    for you by Gabriele Tenhagen-Schmitz on 500px

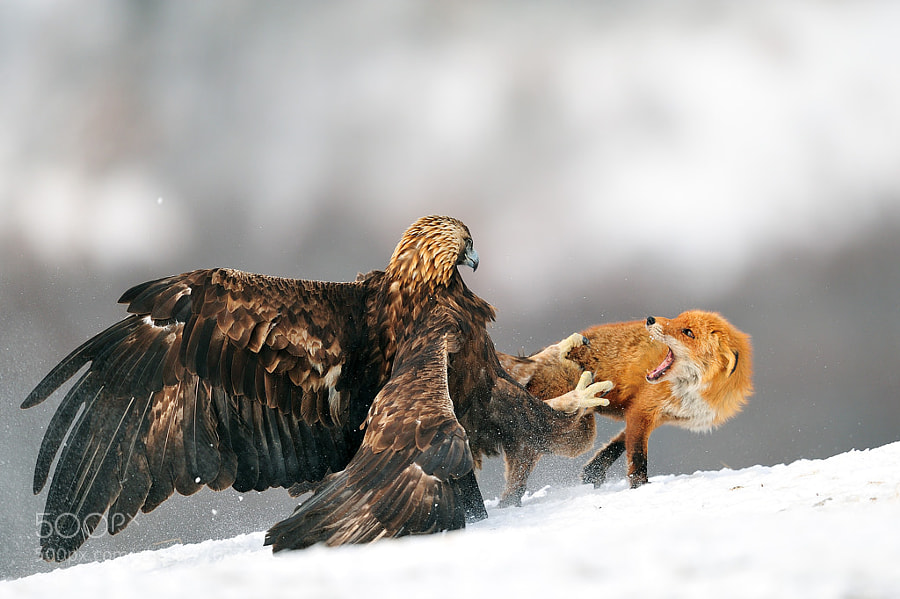
    Photograph Golden eagle having a discussion with Red fox by Yves Adams on 500px

    Golden eagle having a discussion with Red fox by Yves Adams on 500px

    Photograph Midnight in Svalbard by Yves Adams on 500px

    Midnight in Svalbard by Yves Adams on 500px

    Photograph Vulnerable by Marina Cano on 500px

    Vulnerable by Marina Cano on 500px

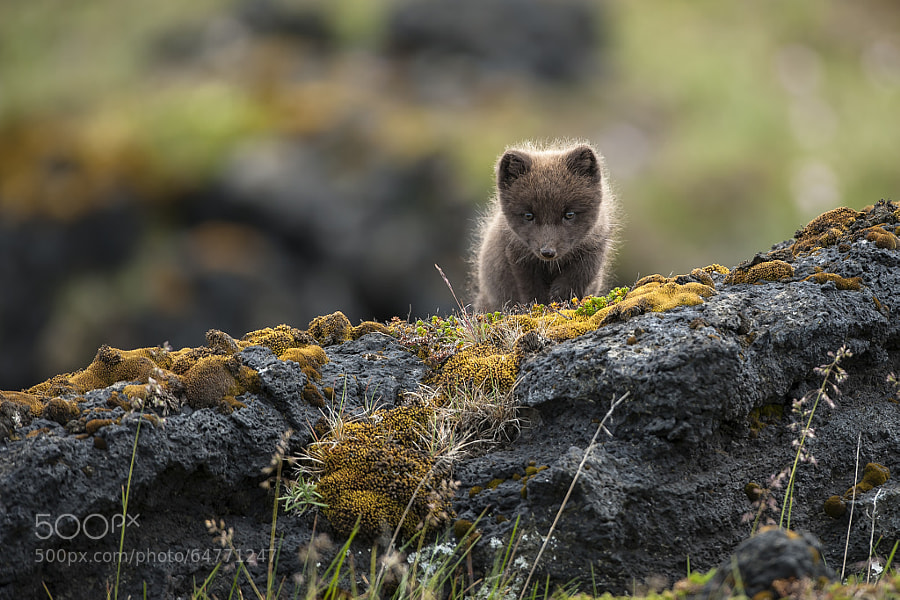
    Photograph Arctic Fox (Vulpes lagopus fuliginosus) by Einar Gudmann on 500px

    Arctic Fox (Vulpes lagopus fuliginosus) by Einar Gudmann on 500px

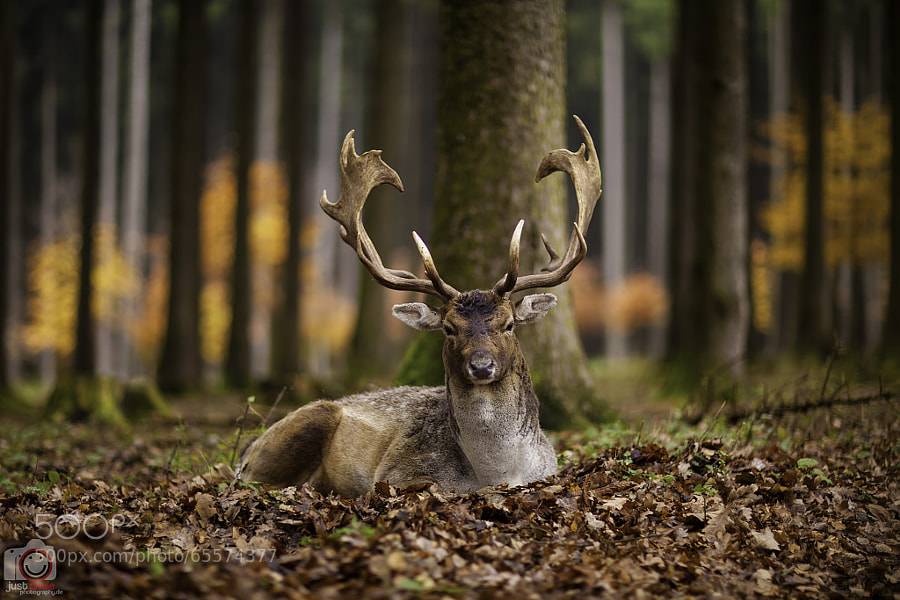
    Photograph Csodaszarvas by Just Smile Photography on 500px

    Csodaszarvas by Just Smile Photography on 500px

    Photograph Skua by Einar Gudmann on 500px

    Skua by Einar Gudmann on 500px

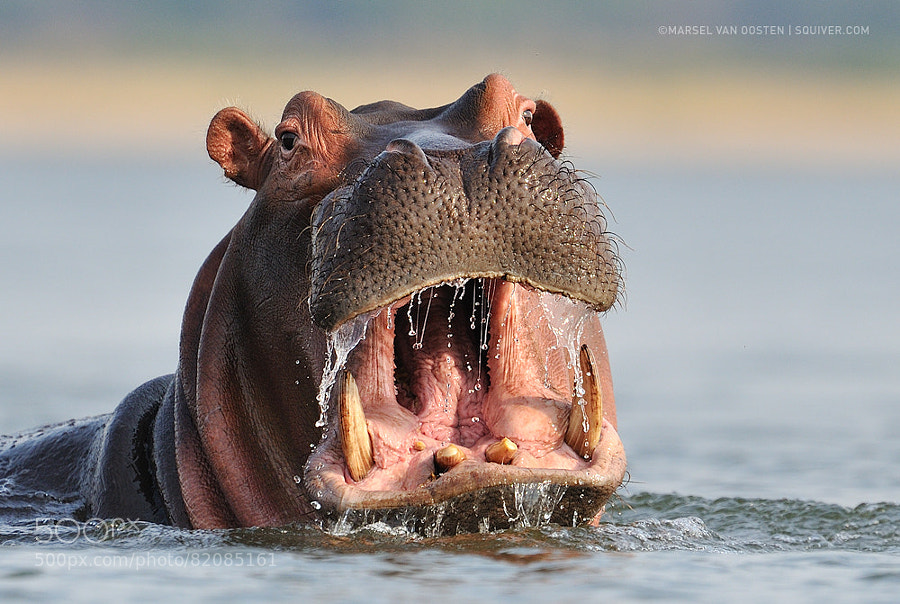
    Photograph African Perforator by Marsel van Oosten on 500px

    African Perforator by Marsel van Oosten on 500px

    Photograph Facebook Update by Marsel van Oosten on 500px

    Facebook Update by Marsel van Oosten on 500px

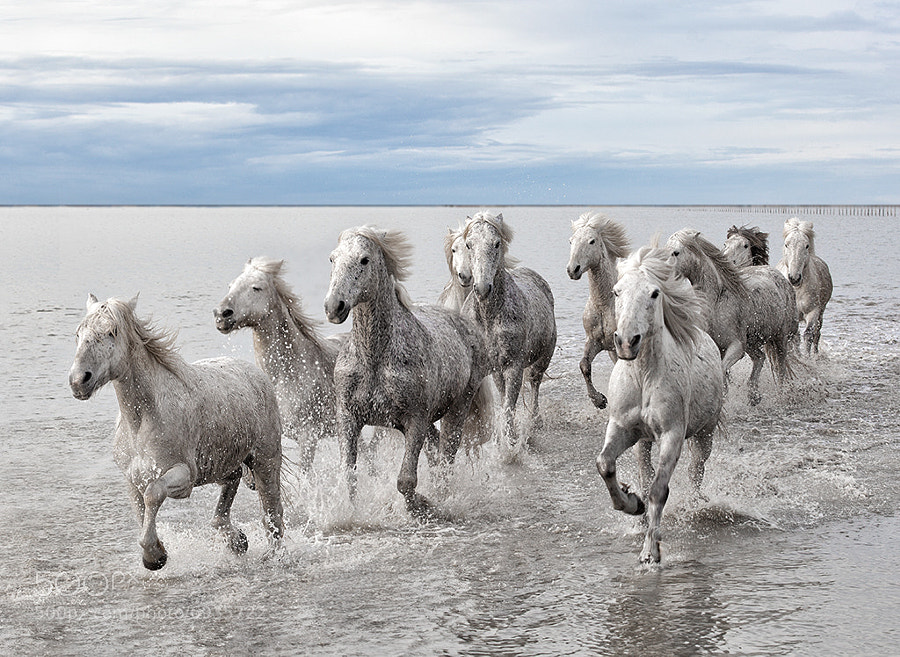
    Photograph Run on the water by Marco Carmassi on 500px

    Run on the water by Marco Carmassi on 500px

    Photograph King Of The Night by Marsel van Oosten on 500px

    King Of The Night by Marsel van Oosten on 500px

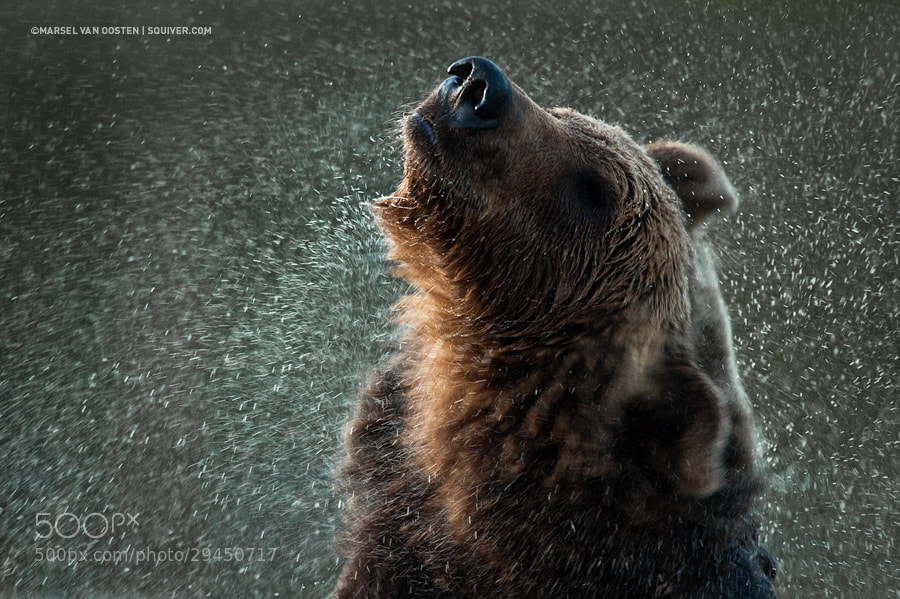
    Photograph Midnight Shake by Marsel van Oosten on 500px

    Midnight Shake by Marsel van Oosten on 500px

    Photograph Lions, Masai mara by pekka Järventaus on 500px

    Lions, Masai mara by pekka Järventaus on 500px

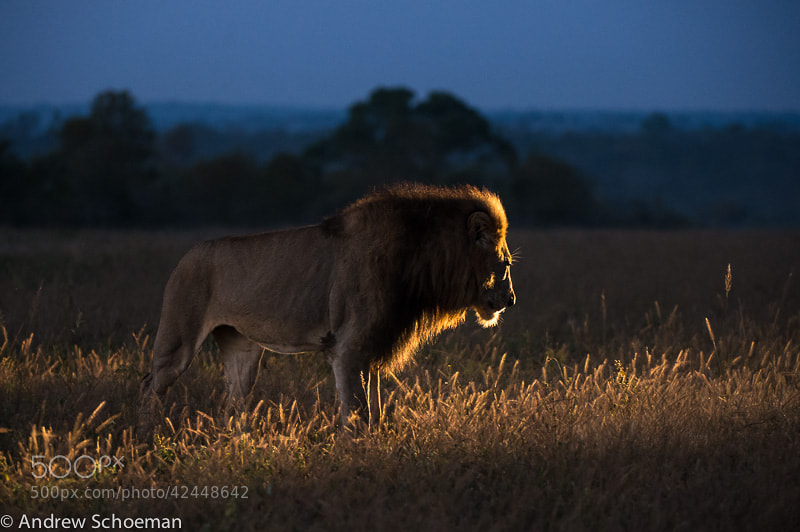
    Photograph Morning Lion by Andrew Schoeman on 500px

    Morning Lion by Andrew Schoeman on 500px

    Photograph Serengeti Sunset by Brian Tarr on 500px

    Serengeti Sunset by Brian Tarr on 500px

    The post A Walk on the Wild Side: A Collection of Wildlife Photography by Darlene Hildebrandt appeared first on Digital Photography School.

    Digital Photography School

  • Traveling Photographer_DUBAI has Ben Posted

    For those following The Traveling Photographer project (more info on the whole project here) the Dubai episode has just been posted.

    -30-


    Strobist

  • 10 Useful Guides on How to Shoot Cars Like a Superstar

    If diamonds are women’s best friends, than cars are certainly men’s. Cars are attractive in many ways: the interior and exterior style, the sounds they produce and speed they’re able to achieve. Car photography is not that easy task as it may seem from the first glance. Various techniques are used on whether car is moving along the street or Continue Reading
    Photodoto

  • 8 Tips for Creating an Online Photography Portfolio

    Dreaming about a career as a professional photographer? With the right guidance, practice, skills, network, and portfolio, you can make your dream come true.

    Developing the necessary skills required to be a professional photographer cannot easily be summed up in a single blog post, let alone many. And networking… well, if you are like most artists, that can be nightmarish, but nevertheless, is absolutely critical. As your referral network grows, so will your business. But that can take years.

    So, you may ask yourself, how do I start?

    BBB online portfolio

    Step 1 – create your portfolio. This is a great starting point to help launch your career as a photographer.

    Here are eight tips to get you on the right path to creating an online photography portfolio and securing those potential gigs.

    1. Show off your work:

    In other professions, people use their resumes to apply for potential jobs. However, as a photographer, your portfolio will act as the resume and will showcase the breadth of your work. It will give potential clients a deeper look into your particular forte and expertise.

    2. Organize:

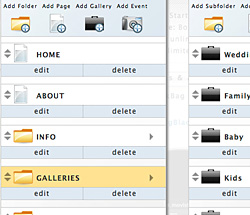
    Site organization

    Your breadth of work should be arranged according to theme or subject. If your work is presented in an organized and easy to navigate way, chances are, potential clients will appreciate the curation and level of professionalism that went into putting your portfolio site together. It also makes their lives a lot easier when looking through your work.

    3. Show your best work:

    Remember, this is your portfolio site, not your external hard drive. So, you want to make sure that only the best of the best goes up. No one needs to see every single thing you ever shot. Clients need to know what you are good at, so make sure to show only those images that truly count. You may also want to put your best work at the forefront of your site. Most clients are busy and don’t have the time to scan through every photo in all of your galleries, so make sure the work that you are most proud of is at the beginning of your photo galleries.

    4. SEO, SEO, SEO:

    Often times photographers create beautiful sites and then wait around hoping that clients will see them. However, they forget that they need SEO (search engine optimization). How will anyone hire you, if they can’t find you in a search? Use a portfolio service that enables you to take control of your SEO, and includes search engine friendly URLs, crawl-able content, and unique meta tags. These features will drive traffic to specific places on your site and build links to more than just your homepage.

    Seo friendly page names

    5. Website Builder Versus Custom Website:

    You may have good intentions to build your own custom portfolio site, wanting it to be a representation of your own unique brand. However, make your life easier and focus on your work, and leave the coding and technicalities to the professionals. Portfolio builder sites will take the guesswork out of the process and will allow you to quickly put together a working, professional site in a short amount of time, so that you can focus on creating and refining your photography.

    6. Choose a platform that makes your life easier:

    Nowadays, there are so many portfolio sites to choose from that it can be overwhelming. Some highlight cheap services, various levels of efficiency, and different features. For an aspiring photographer, you want a site that is easy to use, and has a large selection of customizable and flexible templates, so that the site you create truly reflects your personal branding and style. You may also want to use a site that includes unlimited photo proofing. As a professional photographer, you may find yourself uploading thousands of visuals, and you don’t want to be stuck paying for each upload. Stick to a platform that allows you to do this without charging exorbitant fees.

    7. Choose a platform that makes your client’s life easier:

    Look for a platform that makes it easy for potential clients to use. The platform you decide to go with, should make it easy for clients to navigate your portfolio using a desktop computer, tablet, or smartphone. Using a portfolio website service, with responsive design, will allow your clients to see your site perfectly formatted to their device. Also, if you plan a career as a commercial photographer, like focusing on weddings, kids, etc, you may want to give your clients the option to purchase certain images directly from your site. Look for a site that has a built-in e-commerce function that clients can use to easily choose and purchase the images they love.

    8. Marketing:

    Marketing

    Lastly, you want a site that helps you to connect all your social media pages with your portfolio site. This way, visitors can share your photos on social media platforms with just a click, allowing you to gain more visibility for your brand. You also want to look for a platform that helps you manage your client email list, so that you are ready and organized for sending mass emails.

    It may at first seem overwhelming all the things you need to do to get your portfolio together. However, if you really sit down and get your plan together and choose the right portfolio website builder, you can create a beautiful, professional site in days. Now get out there and start putting your site together!

    More tips on making a portfolio here:

    • Turning Pro Part I: Portfolio and Persistence
    • How To Build A Portfolio Without Clients
    • How to Present Your Photographic Portfolio and Get Photography Work

    The post 8 Tips for Creating an Online Photography Portfolio by Julian Dormon appeared first on Digital Photography School.

    Digital Photography School

  • How to Grow Your Photography Business with an Email Newsletter

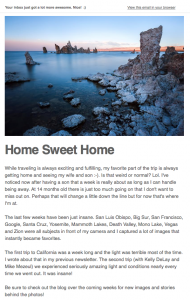
    Sample From My Newsletter

    Sample From My Newsletter

    Ready for some controversy? Well, here it goes: One of the most useless things I see a lot of photographers doing with their time is trying to get popular on social media. There, I said it! Now, please let me explain.

    There are certainly benefits of having a strong social media presence. I would be an idiot not to realize that. Just look up people like Colby Brown, Chris Burkhard, Nicole S. Young, Trey Ratcliff, Hilary Fox, etc. These people get flown around the world by large and small companies because of their social reach. The fact is, most of them either have unheard of work ethics or had some big breaks along the way to help kickstart their social media presence. And guess what…a lot of them have very successful and large newsletter (email) lists.

    So, how much time do you spend every week posting your images to Facebook, Twitter, Google+, 500px, etc? For a lot of you, it’s countless hours. Do you ever feel like you’re spinning your wheels? How much of your income have you earned from doing so?

    I started offering workshops through my photography business in January of 2014. I had done a couple local ones before, but never out of state. I started my (email) newsletter in January of 2013 and was fortunate enough to build it up to around 10,000 by the time I announced the first workshop.

    So here’s the rundown: At the time I probably had around 40-50,000 followers on Google+, 5-6,000 on Twitter, 1-2,000 on Facebook and of course the 10,000 on my newsletter. When I announced the first workshop I was pretty nervous (stepping out like that and going for something I hadn’t done before on this scale). To my absolute surprise, the workshop sold out in less than 17 hours!

    Here’s the crazy part; every single person that purchased a spot on my workshop came from my newsletter. I ran the workshop with my buddy Mike and he didn’t even have a chance to announce the workshop to his followers before it sold out! Not a single spot sold from my social media following, which outnumbered my newsletter numbers almost six-fold.

    You can find plenty of stats out there that say newsletter subscribers convert into sales at a rate of around 250% more than social media. In my case it’s much much higher.

    Where to Start

    Freddie_winkAs Lao Tzu said so eloquently, “A journey of a thousand miles begins with a single step”. I highly suggest making that first step by heading over to MailChimp (note from dPS use this link to get a $ 30 credit when you sign up, disclaimer: yes we get a credit also) and getting your first newsletter set up. Their account is 100% free up to your first 2,000 subscribers, which is quite insane if you ask me! That’s a LOT of free subscribers! After you exceed that 2,000 mark you will have to start paying. In fact, my newsletter is currently pushing well past the $ 160/month mark. That’s fine though, because it forces me to make sure I send out a newsletter on a regular basis to make sure I’m not throwing that money away. And trust me, that $ 160 monthly fee is well taken covered.

    MailChimp is, at least in my opinion, the absolute best newsletter engine out there. The design is fantastic, it’s easy and intuitive to use, and they recently updating their pricing methods which is saving me a ton of money. That isn’t an affiliate link to their website either, I just truly believe they are the best.

    How to Make Your Newsletter Successful

    This section is a bit difficult to address considering it’s a bit personal, but I’ll do my best. My experience has been that simply being open, honest, and transparent is what people want. I don’t have anything to hide, I wear my heart on my sleeve, and I think people appreciate that (at least the ones on my newsletter list do). If every newsletter you send out is selling something then you are going to start losing the trust of your subscribers. I don’t sell something through my newsletter unless I know it’s going to benefit my subscribers in some way. Instead of selling stuff at every chance I get, I fill my newsletters with free photo tips, free presets, updates on my life, my travels, my family, etc. I want to make sure that when they see my newsletter in their inbox, it will bring a smile to their faces.

    Don’t be irresponsible with it

    Another way to make your newsletter successful is by not doing anything irresponsible with it. Everything kind of black hat tactic to getting a bigger list in a faster manner, is shooting yourself in the foot. Subscribers cost you every month, so it would be really dumb to start trying to buy up lists of email addresses from folks who didn’t actually subscribe to your list. These will not be targeted subscribers, and your list’s health will reflect that. Even if the email addresses are industry specific, they won’t be people who actually wanted to be on your list.

    Your subscribers are not for sale

    Another thing you should never do is sell your subscriber list. You will get caught. There are plenty of people out there smart enough to use unique email address for your newsletter so they can track whether or not you sell their information (check this article out for more info).

    Be cautious with affiliate sales

    There were rumours going around a few years ago saying that including affiliate links in your newsletters (specifically with MailChimp) would get you banned. This ultimately was not true (here’s MailChimp’s response) but they suggest using caution with affiliate links. Some companies are very clear about doing this when people sign up for their newsletter (think Snapndeals, PhotoWhoa, PictureCorrect) but the basic premise is that when someone signs up for your newsletter, they are signing up to hear about you and potentially purchase things from you, not someone else. If this sort of thing gets abused and your list stats reflect spam, you could easily get your newsletter yanked. All that work, gone.

    Give your followers a reason to subscribe

    cover

    I’m very, very picky about which newsletters I subscribe to. I get enough email as it is already. I also read articles on plenty of websites, and have a tons of things to do for my photography business each and every day. So if I’m going to allow a person or business into my inbox, it had better be worth it. I keep that in mind every time I send out a newsletter. I ask myself, is this worth sending out for the people receiving it? I have deleted three or four entire newsletters when the answer was no.

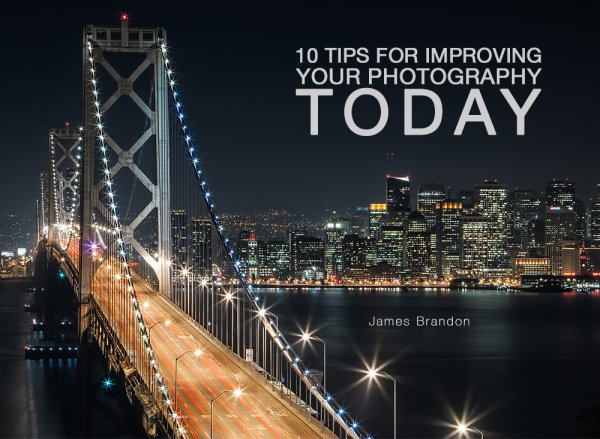
    That being said, how do you make your newsletter worth subscribing to? Well, the best way to entice subscribers is by giving away something free. I put together an entire ebook just for my newsletter subscribers called: 10 Tips For Improving Your Photography Today, and it has consistently gotten great feedback. It’s short, to the point, and each tip is truly something useful that they can put into practice immediately if they so desire.

    Another method is to use auto-responders (now called Automation inside MailChimp) to send out a multi-email campaign when someone subscribes. This could be a three part series, or three different ebooks, that get sent out at specific times after a successful subscription. For example, your first free gift could go out immediately after they subscribe. The second could go out a few days later and the third a few days after that. This gets the subscribers pumped up and happy to be part of your list. Just don’t set them up for a newsletter that is non-existent or not worth reading afterwards.

    Acknowledge that your subscribers are your #1 fans, and act accordingly

    When I click Like on a photographers Facebook page, I’m not really any more committed to them than I was before. I just want to keep up with them more. When I start reading their blog on a regular basis they have really struck a chord somewhere, and I am very interested in what they have to say. For me, to subscribe to their newsletter means that I am a huge fan of whatever they are doing. Be sure to remember that when you conduct your business!

    My newsletter subscribers are first in line for everything. They get access to workshops before I announce them publicly. They get exclusive discounts that nobody else gets. They get random free stuff like presets and video tutorials. They get a deeper look into my personal life and what drives me. Essentially, I make sure they are taken care of because I truly, honestly, appreciate and value their time and their willingness to follow what I do.

    So What Would You Use a Newsletter for?

    I sell products (ebooks, presets, textures, video courses, etc.) and workshops through my newsletter. I realize not everyone does that. But if you are in business (making anywhere from 1-100% of your income through photography) then you have something to sell. Use your newsletter to primarily keep in touch with your clients and keep them updated on the happenings of your photography business. This keeps you in their sights and makes sure they don’t forget about you. Clients love connecting with the people they do business with, and a newsletter is perfect for this. From time to time you can send discounts for photo sessions or on print orders, do giveaways where you send a winner a free print, and so on.

    Conclusion

    I’ve been wanting to write this article for a long time now. Having a good, healthy newsletter is almost like having this huge secret that nobody else seems to be pursuing. I see so many photographers out there grinding it out on social media while their efforts could be spent so much better at getting a newsletter started.

    I would be remiss if I didn’t invite you join my newsletter after writing an article about the importance of one. If you join through this link I’ll make sure you are taken care of handsomely! Not only will you get my standard free ebook and a discount code to my online store, I’ll also throw in my best selling ebook Tack Sharp as well as a set of 20 Lightroom presets – all totally FREE. On top of that, you’ll be able to read my newsletter that I work so hard on and extract some tips from how I use it.

    If you really want to brighten up your inbox, be sure to also sign up for the dPS Newsletter (sign up box at the top of every article). I’ve been subscribed years and love it!

    The post How to Grow Your Photography Business with an Email Newsletter by James Brandon appeared first on Digital Photography School.

    Digital Photography School

  • High Speed Sync Versus a Neutral Density Filter to Overcome Bright Sunlight in Portraits

    ND3

    For several years now I have used high speed sync (HSS) in order to light portraits in full sunlight at a wide aperture. If you’re unfamiliar with HSS, it allows you to shoot at shutter speeds that are higher than the native sync speed of your camera (usually 1/200 or 1/250 of a second, read your camera and flash manual to find yours) while still using speedlights. The reason this ability is so enticing is that you can shoot flash-lit images at wide open apertures in full sunlight, allowing for a shallow depth of field. Normally if you were using a flash, your maximum shutter speed would be at 1/200 or slower, meaning that you would need to close your aperture down in order to get a proper exposure in the sun.

    ApertureOnly

    Raw image shot at f/29

    How HSS works is that the flash will begin pulsing light, just before the shutter opens, since the exposure is so short. The problem with this is that much of the output of the light is lost in the pulsing process, meaning that you need more flash units to achieve a decent output. For example, when I am shooting at 1/8000th of a second, I need to combine four flashes, on one stand, in order to light a subject that is about five feet away. And that is without any modifiers, like an umbrella or soft box. The other issue with HSS is that not just any flash and trigger system will do the trick. You need to have gear that will communicate information from the camera to the flash.

    A couple systems that can do that are the PocketWizard Flex TT5 and Mini TT1, or the RadioPopper PX system. Since most photographers don’t already own one of these triggers systems, this means starting from scratch, which isn’t cheap. I personally opted for the RadioPopper system, since the PocketWizard Flex system for Canon was super glitchy. The RadioPopper system wasn’t perfect either. Just the amount of batteries alone, for four Canon Speedlites with triggers, including a ST-E2 transmitter for the camera, required 27 batteries. Even though they were mostly all rechargeable (the ST-E2 required the hard to find 2CR5 battery), imagine trying to troubleshoot a misfire. Did the batteries need changed in one of the transceivers or was the speedlite misaligned, obscuring the sensor? Or imagine that one of the speedlites’ batteries may be slightly more drained than another, causing only three of four lights to fire. This made the overall exposure fluctuate with every frame.

    HSS1

    Raw image unlit

    HSS2

    Raw image, 1/8000 @ f/2.8

    I recently decided to compare HSS against using a variable neutral density (ND) filter. ND filters screw on to your lens and cut down the light that hits the sensor, thus allowing for a wider aperture in bright light. This allowed my shutter speed to stay at or below the sync speed cutoff, allowing the full strength of the Speedlite to light my subject. This meant that I wouldn’t need to transmit ETTL information (sell the RadioPoppers) and it meant that I would need fewer Speedlites (less batteries).

    After setting my ISO as low as it would go (50), my shutter speed as high as was allowed (1/200th on the Canon 5D MarkII), and my Speedlites at their full output, I dialled down the variable ND until the ambient light perfectly balanced with the light from the flash.

    ND1

    Raw image unlit

    ND2

    Raw image, 1/200 @ f/4

    Some people have pointed out that there could be the issue of a color cast with certain brands of ND filters. I have not experienced any issues with the ProMaster brand. However, it’s important to keep in mind that if you are shooting directly in to the sun, there will likely be glare in your image, causing a possible color cast or the image to appear washed out.

    Note that this experiment was done using Canon 430EX Speedlites with RadioPopper PX triggers. I’ve since sold them all, opting for the cheaper, sturdier and more powerful LumoPro LP180 with PocketWizard PlusX triggers. Now with one bare bulb flash, and a variable ND filter, I can effectively cut the ambient light while fully lighting a subject at f/1.4 in full sunlight.

    The post High Speed Sync Versus a Neutral Density Filter to Overcome Bright Sunlight in Portraits by Nick Fancher appeared first on Digital Photography School.

    Digital Photography School

  • Inky’s Giga Bundle: $4,816 Worth Premium-Quality Resources for Only $69

    Do you remember InkyDeals? We tell you about them every time they have some amazing design and photography deal worth sharing. This time InkyDeals came up with Giga Bundle that includes vector illustrations, t-shirt designs, high-quality textures, Photoshop brushes, video tutorial for creating an old retro-style countdown timer, and 9 responsive premium Bootstrap 3 templates. Awesome Deal For Photographers As Continue Reading
    The post Inky’s Giga Bundle: $ 4,816 Worth Premium-Quality Resources for Only $ 69 appeared first on Photodoto.


    Photodoto