Category: Photography

  • Tips From a Landscape Photographer

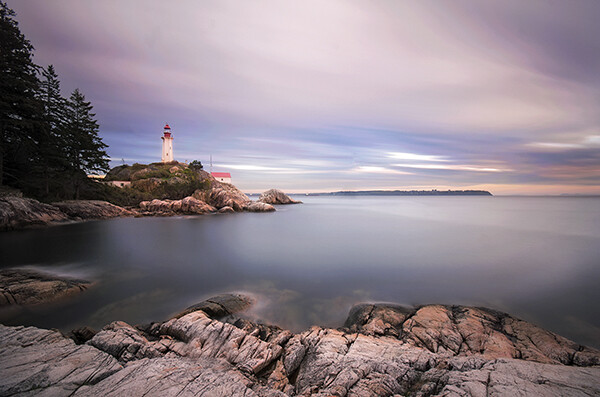
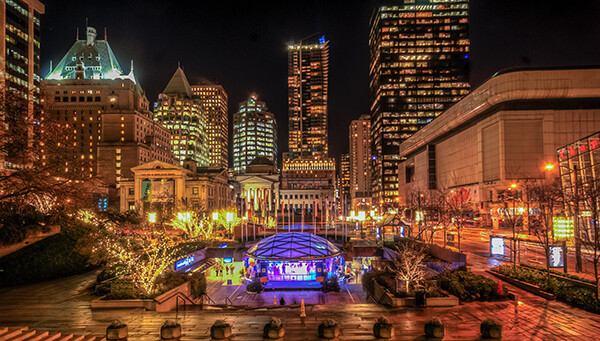
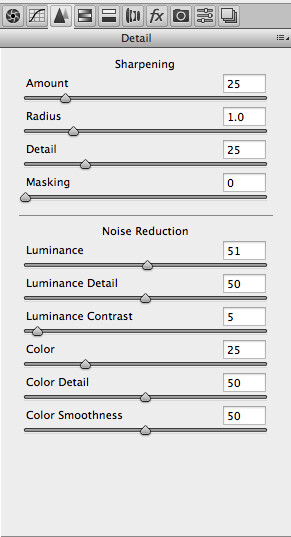
    B&H Photo Video is a huge mega camera store in New York City, but they also have a great selection of helpful videos. In this video Robert Rodriguez Jr. gives you some tips and insight into what it’s like to be a landscape photographer.

    • Capturing something that means something to you
    • Capturing emotion in photos is the essence of being creative
    • Compositions with layers to add depth
    • Why going back to one place again and again can help you take better photos of it
    •  The 4 a.m. filter
    • Printing your work, making it tangible

    “Before you can think out of the box, you have to start with a box” – Twyla TharpThe Creative Habit: Learn It and Use It for Life

    How will you get outside your box and be more creative?

    Check out Living Landscapes and also Loving Landscapes, two dPS eBooks on this subject!

    The post Tips From a Landscape Photographer by Darlene Hildebrandt appeared first on Digital Photography School.


    Digital Photography School

  • Step by Step Portrait Processing in Lightroom

    Andrew’s ebook Mastering Lightroom: Book Four – The Photos is available now at a special price of 40% off for a limited time from Snapndeals. It’s an advanced guide to processing photos in Lightroom’s Develop module, explaining how to use Lightroom’s powerful processing engine plus Develop Presets and plug-ins to create beautiful images. This photo is one of ten case studies from the book.

    Portrait processing in Lightroom

    The story

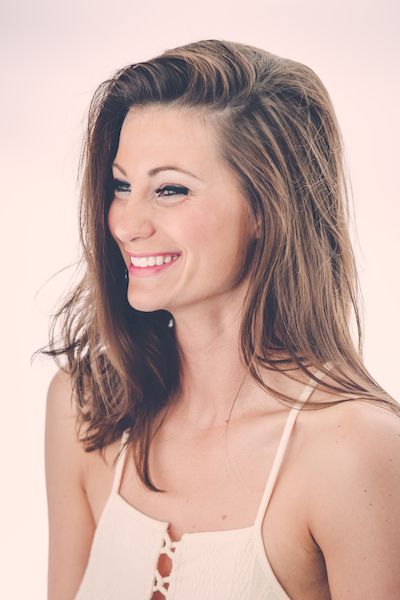
    When you are photographing someone who enjoys being in front of the camera, take advantage of it. This was a simple portrait to take and its strength comes from the model’s spirit, not fancy technique. I’ve worked with her before and know that she is good at creating different facial expressions. I asked her to give me a series and every time she changed her expression I took another photo. Experienced models will pose, pause until you take the photo, and then move onto the next one, making your job as a portrait photographer much easier.

    You can’t see it in this photo but the model was holding a silver reflector slightly beneath her shoulders. The reflected daylight created a wonderful clean lighting effect that made processing the portrait much easier.

    First steps

    Here’s the original portrait as it appeared straight out of the camera. It was taken with an 85mm lens set to f/1.8, throwing the background out of focus.

    Portrait processing in Lightroom

    I knew from the start that I wanted the model’s expression to be the focal point of the portrait. The use of a short telephoto lens and a wide aperture has partly achieved that, but the photo required more work. The first task was to tackle the background. Although out of focus, its brightness was a big distraction. My main job here was to make the background darker so the viewer’s eye goes straight to the model.

    My hope today is that by following this tutorial and applying the techniques I used to your own photos, you will learn how to create better portraits in Lightroom.

    Step 1: Basic adjustments

    I prepared the photo by going to the Camera Calibration panel and setting Profile to Camera Portrait. Next I went to the Lens Corrections panel and enabled Chromatic Aberration removal and Profile Corrections, setting Vignetting to zero.

    I wanted clean, neutral skin tones, so I went to the Basic panel and moved the Temp slider slightly (from 4850 to 4520) to remove the warm tint.

    Step 2: Add a vignette using the Radial Filter

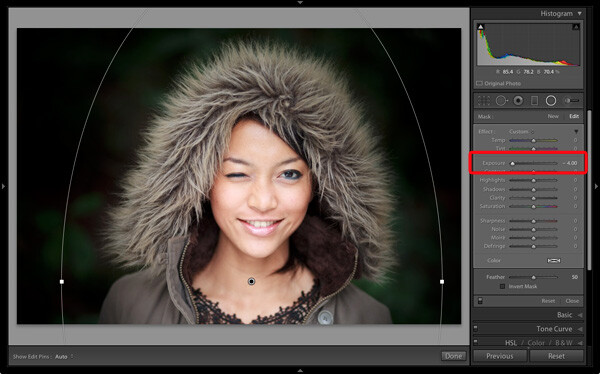
    Next I used the Radial Filter tool to make the background darker. I placed the filter so that the top half surrounded the model’s face and shoulders. In this position the Radial Filter can be used to make the area either side and above the model darker, without affecting the bottom part of the portrait. I set Exposure to -4.0 to see the area affected by the adjustment.

    Portrait processing in Lightroom

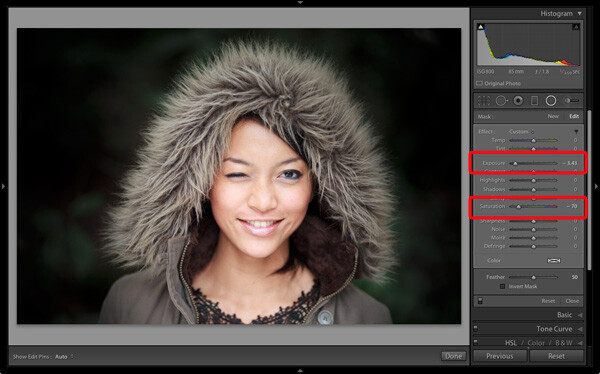
    When I was happy with the position of the Radial Filter I reset Exposure to zero, then reduced it until the background went quite dark. I also set Saturation to -70 to remove colour from the background. How much you push the Exposure slider in this situation is always subjective. Some of you will want to retain a fair amount of detail in the background, others will be content to make it go completely black.

    Portrait processing in Lightroom

    Note: Radial filters are new to Lightroom 5. In earlier versions the best way to achieve a similar effect would be to place a Graduated Filter on either side of the model, and use Adjustment Brush adjustments to fill in the gaps. An alternative technique is to use the Post-Crop Vignetting tool, and lighten any areas that are too dark (such as the model’s shoulders in this example) with the Adjustment Brush tool.

    Step 3: Refine the vignette with the Adjustment Brush

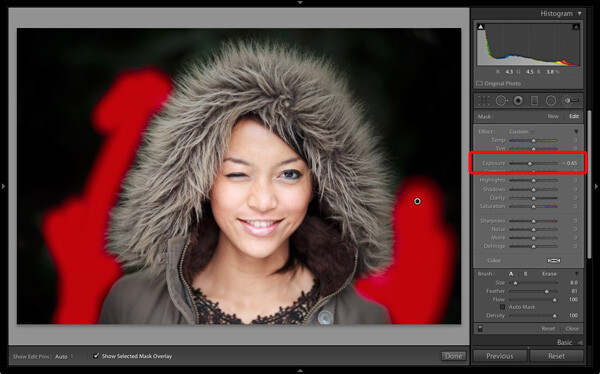
    While the Radial Filter is an excellent tool for making backgrounds darker, it’s not perfect. The feathering required for a gradual transition may leave some areas of the background close to the subject too light. In this case there were still areas around the hood that were a little bright.

    So I used the Adjustment Brush tool to select those areas and reduced Exposure (to -0.65) to make them darker. I didn’t have to be precise with the placement of the Adjustment Brush as the background was already quite dark and out of focus.

    Portrait processing in Lightroom

    Tip: If you find that the use of the Adjustment Brush is obvious, try setting Feather to 100 and Flow to 50%. This lets you build up the effect little by little instead of doing it all in one brush stroke.

    Step 4: Retouching with the Adjustment Brush

    This portrait didn’t need much retouching, but there were still a couple of things I wanted to do. The first was to minimize the lines under the model’s eyes. Note that I didn’t want to get rid of them completely, as they are a natural part of her expression. The lines were created by her smile and winking action, and removing them would look unnatural.

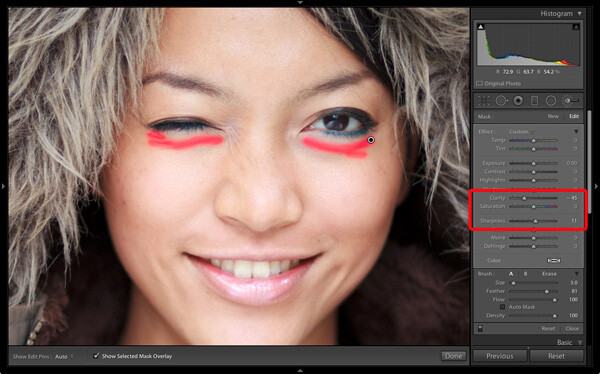
    I used the Adjustment Brush tool (zoomed in), and carefully painted over the lines under her eyes. I kept the brush size small so as not to affect the neighbouring areas.

    Then I selected the Soften Skin preset from the Effect menu. Lightroom applied the skin smoothing effect at full strength by setting Clarity to -100 and Sharpness to +25. This was too strong. To reduce it, I clicked on the pin that marked the Adjustment Brush, held the left mouse button down and dragged the mouse left. Lightroom reduced the intensity of the effect by moving the Clarity and Sharpness sliders in proportion (this technique works with any setting from the Effect menu). I stopped when it looked right (Clarity -45, Sharpness +11).

    Portrait processing in Lightroom

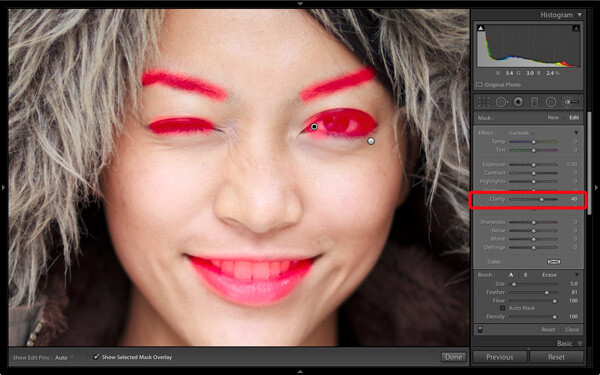
    I created a new Adjustment Brush to cover the model’s eyes, mouth and eyebrows. I pushed the Clarity slider to +40 to bring a bit of extra sharpness and contrast to those areas. The screen shot shows the areas covered by the Adjustment Brush.

    Portrait processing in Lightroom

    Step 5: Framing the portrait

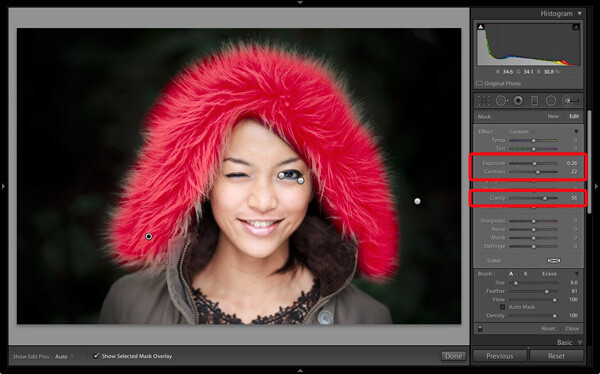
    The model’s hood creates a natural frame for her face and is an essential part of the composition. I decided to emphasize it by using Clarity to bring out the texture of the fur.

    I created another selection using the Adjustment Brush tool and increased Clarity (to 56), Contrast (to 22) and Exposure (to 0.26). The hood is a frame that draw the viewer’s eye to the centre of the frame, and these adjustments help to emphasize it. I needed to find the balance between emphasis and distraction; highlighting the beautiful texture of the fur lined hood without pulling too much attention away from the model’s expression. This screen shot shows the area covered by the Adjustment Brush.

    Portrait processing in Lightroom

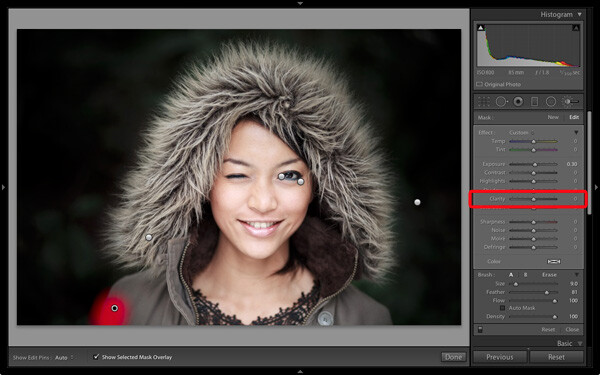
    Next I went to the Basic panel and reduced Vibrance to -14 to de-emphasize the colours a little more. Finally, I used a small Adjustment Brush to lighten the edge of the model’s right shoulder, which had been darkened by the Radial Filter adjustment earlier. The area covered by the Adjustment Brush is shown in the screen shot.

    Portrait processing in Lightroom

    Comparing before and after results

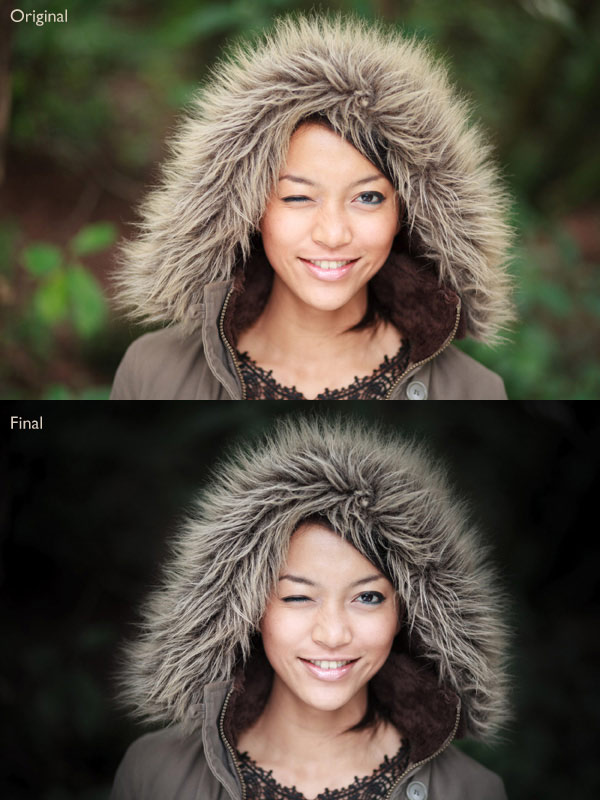
    Here are the original and final versions together so you can compare them.

    Portrait processing in Lightroom

    What do you think of these processing techniques? There’s more than one way to process most photos – do you have any suggestions for an alternative interpretation of the original Raw file? Please let me know in the comments.

    Mastering Lightroom: Book Four – The PhotosAndrew’s ebook Mastering Lightroom: Book Four – The Photos is available now at a special price of 40% off for a limited time from Snapndeals. It’s an advanced guide to processing photos in Lightroom’s Develop module, explaining how to use Lightroom’s powerful processing engine plus Develop Presets and plug-ins to create beautiful images. This photo is one of ten case studies from the book.

    The post Step by Step Portrait Processing in Lightroom by Andrew S. Gibson appeared first on Digital Photography School.


    Digital Photography School

  • Making the Most out of the Photography Stuff You Have Already

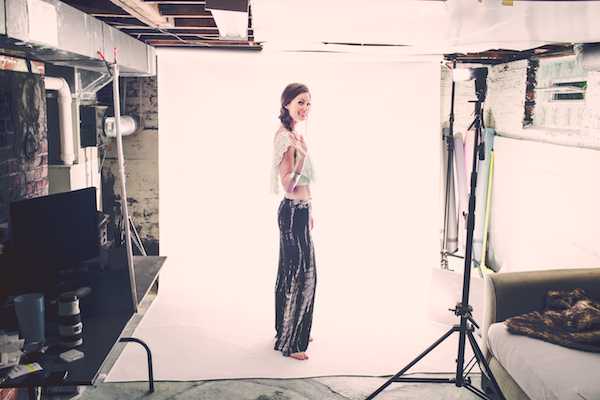
    Several years ago I had a studio for about six months. It was really nice to have a space that I knew was always there, waiting for me to shoot in, should the need arise. The problem was that most of my shoots took place outdoors or on location, and when my trial lease period was over, I couldn’t rationalize staying on at the monthly rental rate. What didn’t occur to me at the time was that I had a perfectly good, albeit small, basement at my disposal. Due to the low, 80″ (6.6 foot) ceiling, the narrow, 10’x20′ shooting area, and the generally dark ambience of an unfinished basement, the thought of shooting down there had never crossed my mind. It wasn’t until I moved out of my studio and no longer had a place to store my gear, that I even ventured down there with my equipment.

    IMG 8174

    The setup began simply enough, with me doing little more than editing at a table down there. Over the months that followed, I did the occasional head shot or product shoot, quickly realizing that I didn’t need as much space as I originally thought. Sometimes a problem would arise, like when I needed to shoot a full body portrait of a guy who was over six feet tall. I began modifying the space accordingly, such as adding white panels to the overhead joists to reflect light.

    I wanted a white seamless set up, but the backdrop stand legs were too wide to allow for the 8 foot wide white vinyl roll. Instead, I discovered that I could run a rod from the top of the air condition duct to a C-stand and just barely fit it in the space, pulling the sweep just out to the edge of my desk. This allowed a depth just long enough to light the subject and background separately, which meant I could accomplish a pure white background (if the space was any more shallow, the subject would be stepping in to the backdrop light, blowing them out with the light).

    Tumblr navcq2zXA81qzpmooo1 1280

    The other issue with a small shooting space is that you don’t have the space to back your lights off of your subject. As you may know, if you want soft light on your subject, you need to make your light source large and diffused or indirect. The problem was that if I added even an smaller umbrella to my strobe stand it meant that I’d have to lower the light the length of the radius of the umbrella, leaving my light at a max height of around five feet (too low). The narrow width of the shoot space also meant that I couldn’t simply hang up a white sheet and shoot through it, which is a common workaround in making a small light source larger.

    IMG 8294

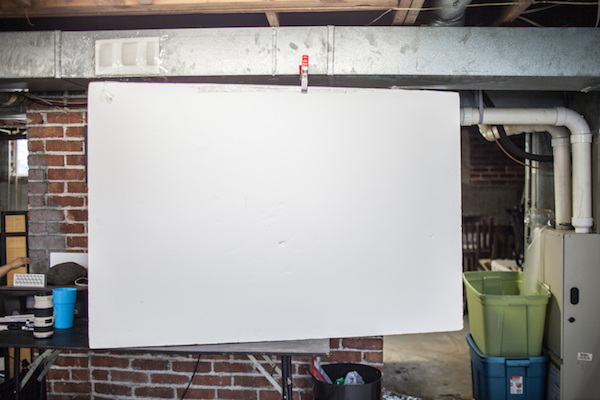
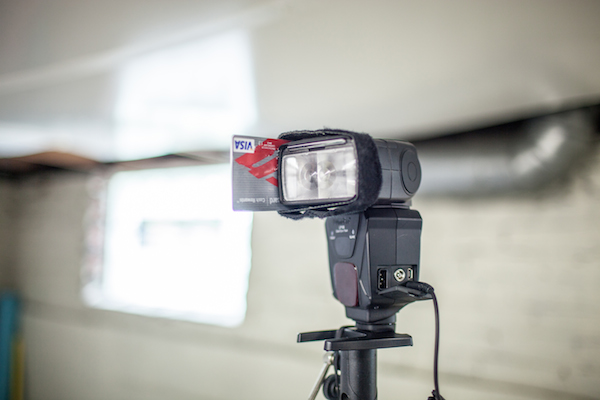
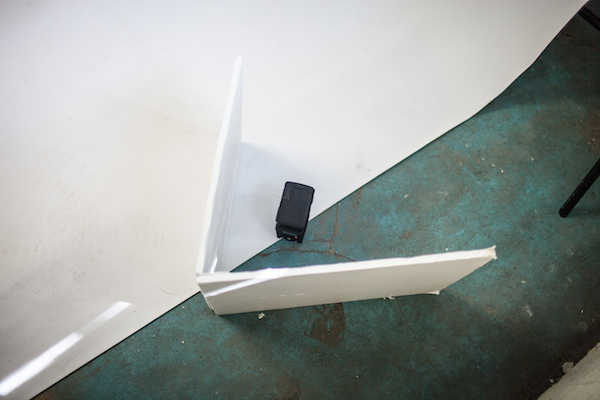
    I eventually figured out as a solution which was to place a 40″x60″ white board on my desk, beside where the subject usually stands, and shoot light into the board, several feet in front of the subject. By securing a credit card, or something of a similar size and opaqueness, to the side of the strobe, and zooming the flash in to 105mm, I was able to get my light stand out of my view of the subject as well as create a large, reflected light surface, that ran all the way up to the ceiling. This large light source was fantastic in creating a giant catchlight in the subject’s eyes, sunglasses or any reflective surface. I also added a small, white v-flat to hide the background light, which also served in reflecting some of the light onto the opposite white wall, helping to further light the subject.

    IMG 8288

    IMG 8290

    Keep in mind that within the small confines of this setup, the subject is pretty much fixed in one spot. If they were to move forward at all, the crosslight will create odd shadows on their face, or if they move backward, they would get caught in the harsh background light.

    Tumblr navcq2zXA81qzpmooo4 1280

    What sorts of innovations have you come up with to work within your space or equipment limitations? Share in the comment section below.

    Links to other DIY projects for you:

    • DIY How to Build and Use a Reflector to Take Better Portraits
    • Light Tent Comparison – DIY Versus Kit Tents
    • A project for the New Year: How to make a DIY Ground Pod
    • 27 Amazing Macro Snowflake Images Shot with a DIY Camera Set Up

    The post Making the Most out of the Photography Stuff You Have Already by Nick Fancher appeared first on Digital Photography School.


    Digital Photography School

  • Collection of Summer Sports Photography

    The part of the world where I live, we’re already starting to feel the changing season coming. Here that means summer is giving way to fall and cooler temperatures. This roundup of summer sports photography is to help those of us in the northern part of the world to hang on to it a little bit longer.

    What’s your favorite sport to watch or photograph?

    Maybe you’ll be inspired to go shoot some action or sports while the weather lasts.

    Ready?  Go!

    Photograph Unlimited playground by Tristan Shu on 500px

    Unlimited playground by Tristan Shu on 500px

    Photograph Buffalo race by Astro Mohan on 500px

    Buffalo race by Astro Mohan on 500px

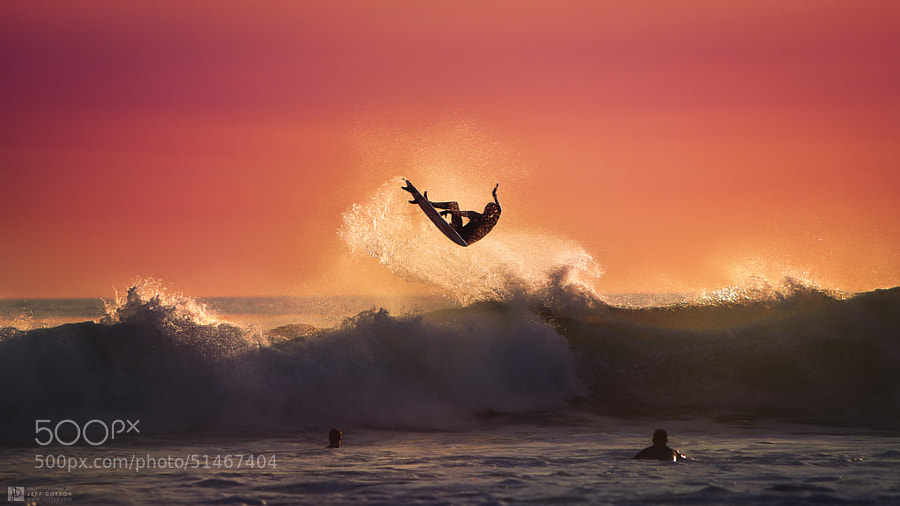
    Photograph Aerial by Jeff Dotson on 500px

    Aerial by Jeff Dotson on 500px

    Photograph Catch by Jessica Drossin on 500px

    Catch by Jessica Drossin on 500px

    Photograph [O] by Mariló Irimia on 500px

    [O] by Mariló Irimia on 500px

    Photograph Where are the brakes on this thing? by Christopher Martin on 500px

    Where are the brakes on this thing? by Christopher Martin on 500px

    Photograph Slam Dunk by Tripleasy on 500px

    Slam Dunk by Tripleasy on 500px

    Photograph Frontside Nosebone by toddf on 500px

    Frontside Nosebone by toddf on 500px

    Photograph Fs Air- Aaron Lewis by David Gutierrez on 500px

    Fs Air- Aaron Lewis by David Gutierrez on 500px

    Photograph The Pitt by Andrew Cooney on 500px

    The Pitt by Andrew Cooney on 500px

    Photograph C6J00010 Pipeline Blur by David Orias on 500px

    C6J00010 Pipeline Blur by David Orias on 500px

    Photograph Motorcross by Faiz Baig on 500px

    Motorcross by Faiz Baig on 500px

    Photograph Motocross by Sanjay Pradhan on 500px

    Motocross by Sanjay Pradhan on 500px

    Photograph  Swimming Championships by MOHAMMED KHAMIS on 500px

    Swimming Championships by MOHAMMED KHAMIS on 500px

    Photograph Making the Turn by Tim Tadder on 500px

    Making the Turn by Tim Tadder on 500px

    Photograph Final Effort by John Hartman on 500px

    Final Effort by John Hartman on 500px

    Photograph Sliding in by John Hartman on 500px

    Sliding in by John Hartman on 500px

    Photograph Jump! by rarindra prakarsa on 500px

    Jump! by rarindra prakarsa on 500px

    Photograph Soccer-2 by Jaredd Bell on 500px

    Soccer-2 by Jaredd Bell on 500px

    Photograph Up and Down by Matt Johnson / EMJ Fotografi on 500px

    Up and Down by Matt Johnson / EMJ Fotografi on 500px

    Photograph Untitled by Hai Thinh on 500px

    Untitled by Hai Thinh on 500px

    Photograph Notre Dame vs. Michigan State by Scott Kelby on 500px

    Notre Dame vs. Michigan State by Scott Kelby on 500px

    Photograph Strength! by Henrik Spranz on 500px

    Strength! by Henrik Spranz on 500px

    Photograph Speed by Jos Didden on 500px

    Speed by Jos Didden on 500px

    Photograph Sun Skiier by Florian Feuchtner on 500px

    Sun Skiier by Florian Feuchtner on 500px

    Photograph Bouldering top out by Martyn Castens on 500px

    Bouldering top out by Martyn Castens on 500px

    Photograph Rock Climbing by Regy Kurniawan on 500px

    Rock Climbing by Regy Kurniawan on 500px

    Photograph I Want to Ride My Bicycle by Charles Kachmarsky on 500px

    I Want to Ride My Bicycle by Charles Kachmarsky on 500px

    Photograph Barrel racing by Gabor Monos on 500px

    Barrel racing by Gabor Monos on 500px

    The post Collection of Summer Sports Photography by Darlene Hildebrandt appeared first on Digital Photography School.


    Digital Photography School

  • Weekly Challenge – Sports Photography

    Earlier today I shared a collection of sports images. Now as usual it’s time for the challenge. I throw down the gauntlet and urge you to accept it and play along (pun intended).

    Sports photography is a tricky subject. Fast moving subjects, quickly changing lighting conditions, and restrictions on where you are allowed to stand. All these things can be overcome and conquered – with practice!

    Now is the perfect time to get out and do just that. Try out your high speed shooting mode, or borrow a lens. Find a local sporting event and get out and take some action photography shots. Here are some examples to get you started:

    By Jim Larrison

    By Javier

    By Rahul Bhattacharyya

    By USAG- Humphreys

    By Todd Fong

    By brent flanders

    By Devon Christopher Adams

    By David Humpohl

    Need some help with some sports photography tips? Try these:

    • Catching The Action: Photographing Youth Sports
    • Catch that Shot! 10 Tips for Weekend Warrior Sports Photographers
    • Sports Photography – An Introduction
    • Tips for Indoor Sports Photography – Part 1

    Share your sports images

    Simply upload your shot into the comment field (look for the little camera icon in the Disqus comments section as pictured below) and they’ll get embedded for us all to see or if you’d prefer upload them to your favourite photo sharing site and leave the link to them. Show me your best images in this week’s challenge.

    The post Weekly Challenge – Sports Photography by Darlene Hildebrandt appeared first on Digital Photography School.


    Digital Photography School

  • 25 Fresh & Free Portfolio WordPress Themes 2014

    Give your photography the online showcase it deserves. In this collection, I handpicked 25 best and free WordPress portfolio themes to build your photography website or blog on. There is no need to spend money to create your presence online. If you’re seeking for a free solution to create your first portfolio website, these WordPress themes are the best choice Continue Reading

    The post 25 Fresh & Free Portfolio WordPress Themes 2014 appeared first on Photodoto.


    Photodoto

  • 3 Tips to Help Keep Your Photography Passion Alive

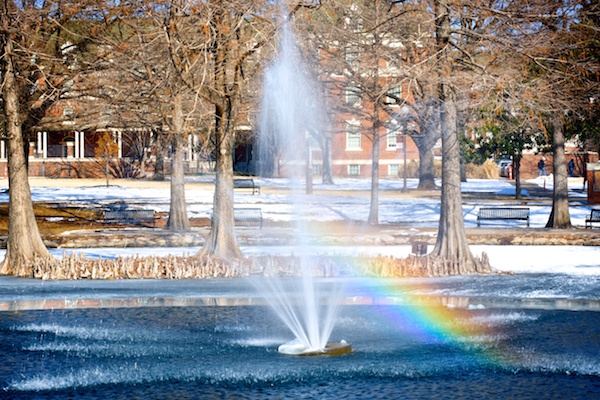
    Fountain rainbow

    Photography is like any other pursuit in life, in that it requires a great deal of time and practice. Unless you make a living as a professional photographer, you might find that you simply don’t have enough hours in the day to devote to taking pictures. With work, family, school, and plenty of other obligations in our lives, it’s easy to let photography take a back seat to everything else. So, unfortunately we often find our expensive cameras gathering dust on the shelf, and our vibrant photo libraries growing ever more stagnant as the months and years pass. How in the world is it possible for hobbyist or enthusiast photographers, much less beginners who are just entering this brave new world for the first time, to find chances to learn, stretch, and grow, or just do what they enjoy doing? Thankfully there is hope, and I’d like to share a few tips that have worked for me.

    1. Hold yourself accountable

    When most people get their first camera, or upgrade to a better one, they go through a similar process. Initially it seems like anything and everything is worthy of a photograph – kids, pets, food, cars, flowers, clouds, friends, skylines – nothing is off limits. There’s a newness and excitement to the whole endeavour that seems almost childlike. People in this early phase never seem to have an issue with finding time to indulge their new infatuation, and often they find it hard to stop taking pictures! But soon the veneer wears off, the pressures of life start to add up, and cameras often end up spending more time on shelves and dresser drawers.

    Leaves rain

    There is beauty all around, but sometimes you have to stop and look for it.

    If this sounds like you, one of the best things you can do is find a way to hold yourself accountable for keeping your photography passion alive. Some people decide to take a picture every day or each week. Others join an online photo community and start posting on a regular basis. Most cities have photography clubs where members gather to discuss techniques, photo opportunities, and gear. dPS, and plenty of other sites, have weekly assignments or challenges that are a great way to try something new, while also keeping your photography hobby alive.

    When I was in this rut a while ago I started my own blog, Weekly Fifty, where I post one photo each week taken with a 50mm lens. Doing this has forced me not only stay active with my hobby, but to seek out new opportunities that I otherwise might have missed. Having some type of assignment or challenge that forces you to use your camera will often help rekindle the flame that was once burning so bright, and help you fall in love with photography all over again, even if you do have other things going on in your life.

    Coneflower

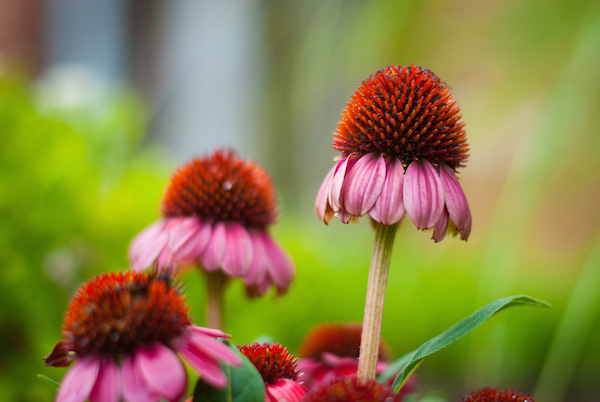
    I had to find a photograph for my blog, so I walked around a flower garden for a few minutes and got this shot of a coneflower. Without something to hold me accountable, I probably would never have gotten this shot.

    If you do go this route it’s important to find a method that is fun and enjoyable, rather than a burden. Photography should not be a chore, and I have known some individuals who have grown to resent their accountability methods because they took on more than they could handle. If you already find yourself stretched too thin, signing up for a daily challenge will probably not help. But a weekly challenge, monthly assignment, or local club meeting might be just what you need to fit photography into your already busy life.

    2. Bring your camera and keep your eyes open

    Whether you decide to participate in a photo assignment or not, one thing you can do to fit photography into your packed schedule is simply bring your camera with you. Most of us have similar daily routines involving home, work, school, or other obligations and you might think that the photogenic moments in your daily life are few and far between. But if you keep your camera close at hand, and keep your eyes peeled, you might learn to turn the mundane into the magnificent. That might sound like hollow grandiosity, but it’s true: if you start looking for the beauty in your everyday life, you will likely find a whole new world of picture-taking possibilities that you never noticed before. It’s a great way to keep your love for photography alive without adding another burden to your already crowded lifestyle.

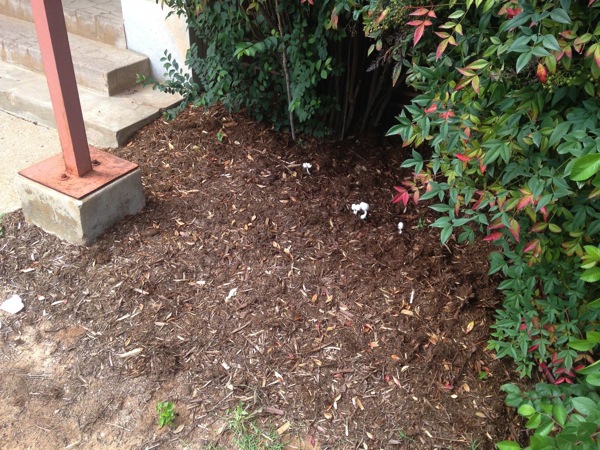
    Case in point: the other day I walked up to the office building at work and saw a patch of mushrooms by the door. At first I thought it was nothing special at all:

    Mushrooms iphone

    Shot with my iPhone

    But because I almost always have my DSLR with me I was able to take this picture of what might otherwise have been an entirely forgettable scene.

    Mushrooms d200

    Circumstances like this are all around you, and finding them is not a matter of time but of observation. If you find your expensive camera spending more time gathering dust than taking photos, it wouldn’t hurt to simply start bringing it with you more often and keeping your eyes opened.

    3. Get out of your comfort zone and try something new

    It’s human nature to grow complacent and comfortable. We are creatures of habit, and change can be difficult, especially when it threatens to upset a careful balance we have achieved in our lives. But stepping away from your comfortable surroundings and trying something new is a fantastic way to inspire you to find photographic opportunities in your life. Whether it’s a new lens, a new filter, a new technique, a new piece of software, or even a new camera, trying something new is a great way to spice up your photography and help you get your camera off the shelf and into your hands again.

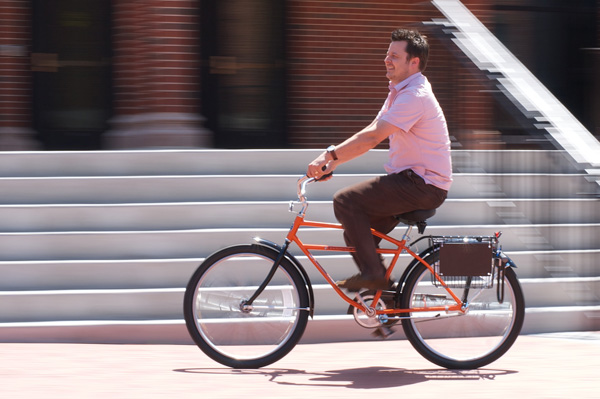
    Here at dPS there are hundreds of articles with a myriad of tips, tricks, and techniques to try – and that’s just the start. There is no shortage of articles on the internet filled with new ideas, and doing so won’t add any more hours to your day. But it might help you find ways to squeeze more time in for photography than you might otherwise think. For example, when I found myself stuck in a rut several months ago I read some articles on a technique known as panning. Then my friend, (and photography mentor) Ryan, rode around on a bike while I practiced with my camera, and we ended up with this shot. While it’s not perfect, it gave me an idea of a whole new aspect of photography to explore.

    Biking

    One of the main selling points of DSLRs and mirrorless models is that they have interchangeable lenses. While the kit lens that comes standard with most cameras is fine for many situations, shooting with a different lens can radically alter your perception of what the camera can do. In the process, you will likely experience the same spark of inspiration and creativity that you had when you first got your camera.

    Think of your camera body as a mobile device, and the lenses like applications. Every app on your phone or tablet has a different purpose and allows your device to do different things; in the same way every lens gives you different photographic possibilities for your camera. Using a camera with only one lens, especially the kit lens, would be like buying an expensive new smartphone or tablet but never downloading a single app. You might enjoy it, but you would be severely limiting the capabilities of what your device can actually do. If you want to inject a renewed sense of vitality into your photography, buying, renting, or just borrowing a new lens can do exactly that.

    General index

    This simple shot of some books in a dimly-lit library would not have been possible with a kit lens, but switching to a 50mm prime lens with wider f/1.8 aperture opened up a whole new set of possibilities like this.

    You are busy with plenty of demands on your time; it might seem impossible to fit photography in with everything else going on. But hopefully these tips give you a starting point, and if you have any others that have worked for you feel free to leave them in the comment section below.

    The post 3 Tips to Help Keep Your Photography Passion Alive by Simon Ringsmuth appeared first on Digital Photography School.


    Digital Photography School

  • 7 Tips to Help Improve Your Seascape Photos by Controlling the Waves

    When photographing outdoors, you generally take the world as you find it, and you have very little control over the elements. You cannot control the weather. The terrain is a given. You certainly cannot control the skies or the clouds.

    But when photographing seascapes there is one thing you can control, and that is the waves. At least, you can control the appearance of the waves. This is a fundamental difference between landscapes and seascapes.
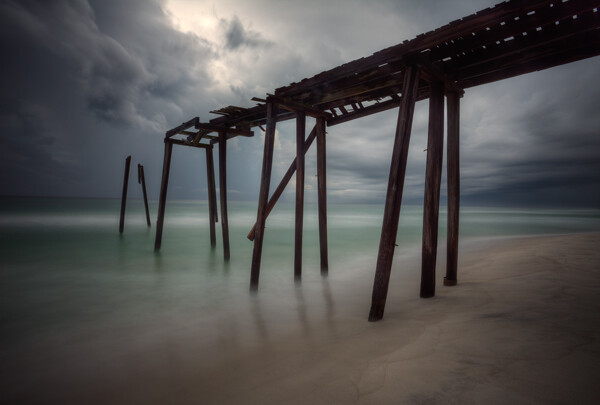
    Picture1 Pier

    In landscapes you have generally static ground and foreground elements, while in seascapes you are dealing with a fluid substance that is in constant motion. If you just treat a seascape as a landscape, you will get an ordinary photo, but with some attention to the waves you can get extraordinary pictures.

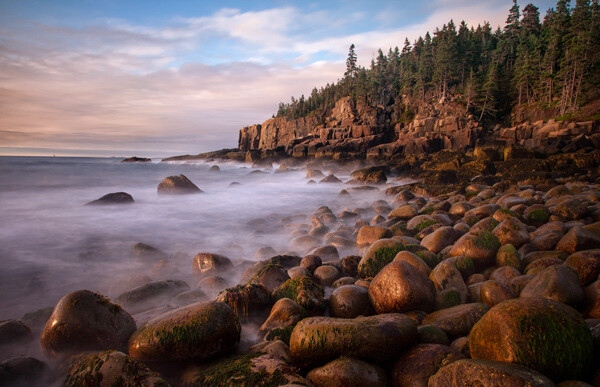
    You can actually control the appearance of the waves in order to add just the right mood and interesting effects to your photos. It is actually very simple to do; it’s all about controlling your shutter speed. In general, the slower the shutter speed, the more calm and serene the water will appear, while a very fast shutter speed implies power and action.

    In this article, I will walk you through some shutter speed ranges that you might try in your own seascape photography next time you are at the coast. So here are some tips to help you take better seascape photos:

    #1 Minimal Gear Needed

    To photograph moving water successfully at various speeds, you will not need much in the way of extra gear. Other than a camera, a tripod, and perhaps a remote shutter release, the only necessity is a neutral density filter.

    It is best to have a few different strengths of neutral density filters. A 10-stop filter is a must, and from there I recommend adding a 3-stop and a 6-stop filter. In a pinch, remember that polarizing filters typically reduce the amount of light reaching the camera by two stops, so you can use a polarizer as well.
    Picture2 AcadiaRocks

    #2 Controlling Shutter Speed

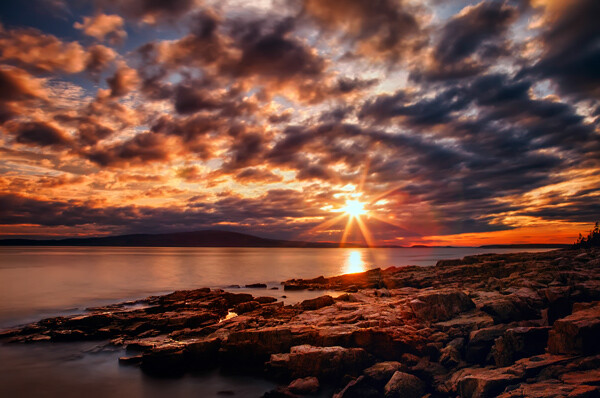
    Coastal pictures are all about controlling the shutter speed, and you will usually find yourself trying to slow down the shutter speed. If you are shooting in one of the automatic modes, this is a good opportunity for you to step up Manual (M) mode. Just set the shutter speed where you want it, then if you can get the proper exposure by changing the aperture settings, great. But if not, use your neutral density filter to cut down on amount of light entering the camera.

    This is also a rare instance where you might consider Shutter Priority (Tv or S) mode. Once you set the shutter speed, the camera will set the aperture for you. Of course, you could also use Aperture Priority (Av) mode and set the aperture with an eye toward where the camera is setting the shutter speed.

    When you get to the coast, take a few test shots, Keep an eye on the histogram to make sure your exposure settings work for the mood you are trying to create.
    Picture3 SchoodicSunset

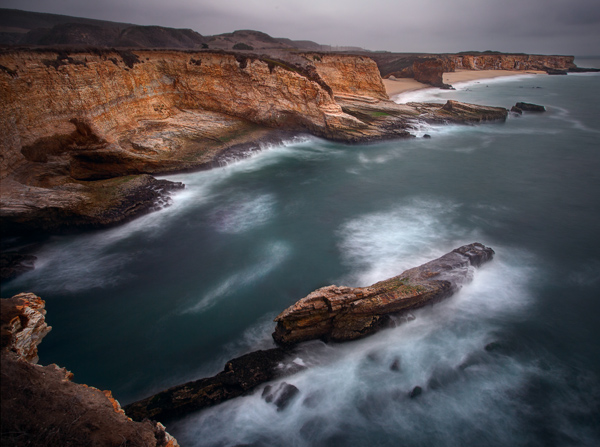
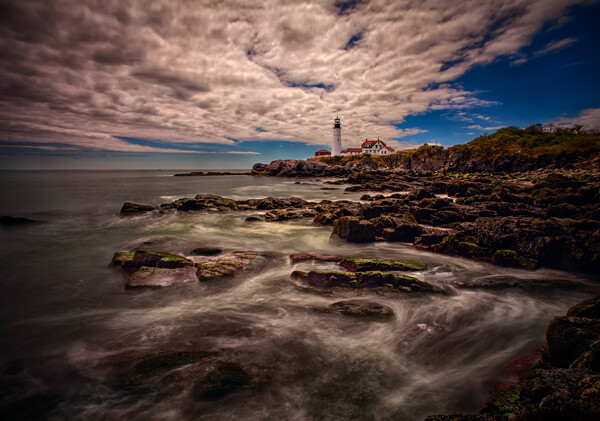
    #3 Creating Flat Seas with Extremely Long Shutter Speeds (at least 10 seconds)

    Most of my favorite seascapes were taken at shutter speeds of 10 seconds or more (sometimes a lot more). Under calm conditions this adds a sense of serenity to the seascape. Under other conditions the slow shutter speed can add some drama to the scene.
    Picture4 DavenportCliffs

    To accomplish this effect, you are probably going to need to use the 10-stop neutral density filter. If you are set up for a proper exposure before you put the filter on the lens, you will need to add 10 full stops of light to get the proper exposure once the lens is on the camera. If your camera is set up to adjust in 1/3-stop increments, that will mean 30 clicks (of your dial) of additional light.

    This filter is so powerful that it leads to some challenges. You are going to need to focus and set your exposure before you put the filter on the camera. Once you put the filter on, you will not be able to see anything or focus. A great process for these long exposures is this article: Step-by-step Guide to Long Exposure Photography

    In addition, keep in mind that the exposure will be quite long and the camera will need to be very stable. If you are on sand or other unstable surface, be sure to jam the legs deep into the sand to make it as stable as possible. If you are near the water, let a wave or two touch the tripod’s feet before shooting because the first wave will shift the tripod a little bit.
    Picture5 PortlandHeadLight

    #4 Ocean Trails: Long shutter speeds (2-8 seconds)

    Another great way to capture the sea is with a long shutter speed of at least a few seconds, but not so long as to blur everything out. The advantage of the speed is that it gives the viewer an idea of the rhythm, or currents, of the ocean. This range of shutter speed will often show trails in the ocean and give a general sense of the location of the waves.
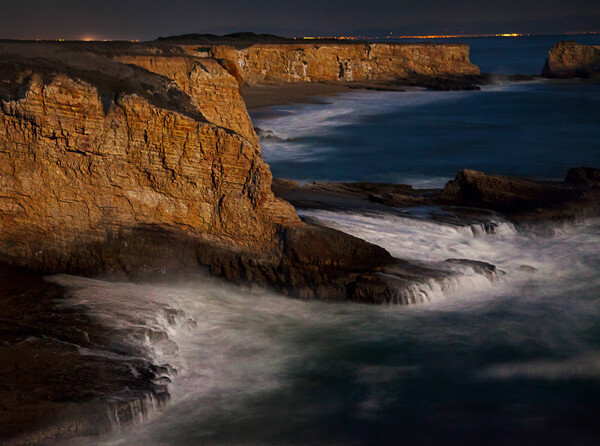
    Picture6 DavenportSurf

    To capture this look, the shutter speed will ordinarily be between two seconds and eight seconds. That also means a neutral density filter, but often not the 10-stop filter. If you have a 3-stop or 6-stop density filter, those usually work best in this situation, depending on the amount of light available.
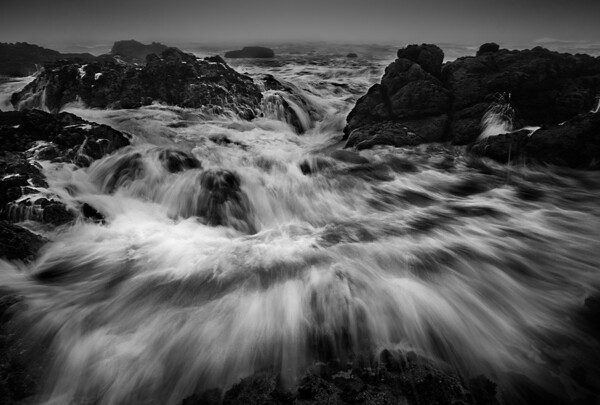
    Picture7 WaveApproaches

    #5 Motion and Power: Moderate shutter speeds (1/8 – 1/2 second)

    Sometimes you want the viewer to see the actual wave. It still helps to have a little motion to the wave though. This will convey both a sense of motion and give a sense of the power.

    To accomplish this, you will typically need to slow the shutter speed down just a little bit. You will find the best shutter speeds for this range are between 1/8th and 1/2 of a second. At these speeds, you can still clearly see the waves, but the slower shutter speed takes the jagged edges off of them.
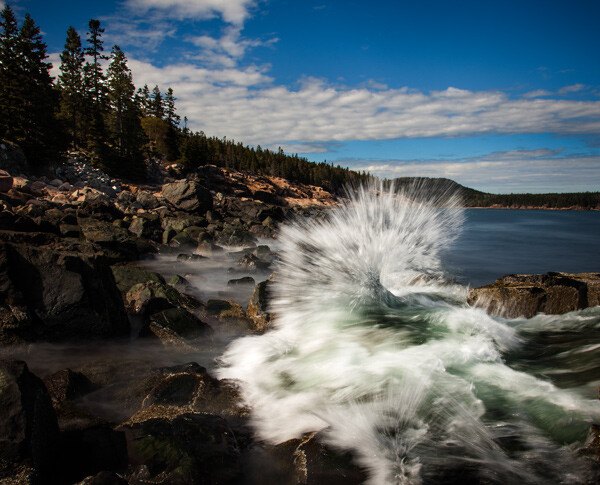
    Picture8 AcadiaWave

    While you will still need a tripod at these shutter speeds (they are too slow to hand-hold your camera and get sharp images), you can often get away without using a neutral density filter by stopping down the aperture.
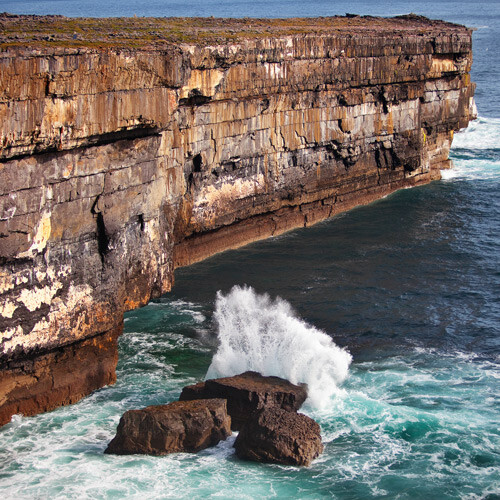
    Picture9 DunDochathair

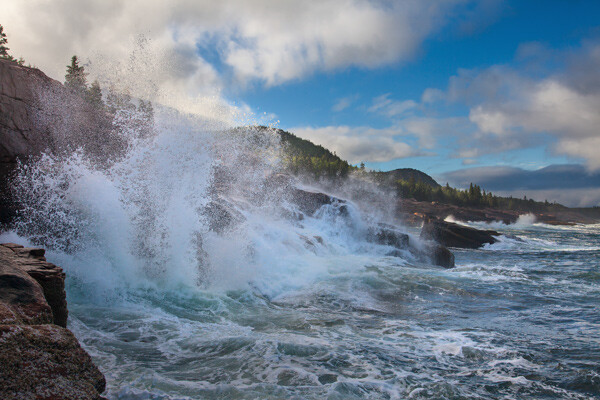
    #6 Pure Power: Fast shutter speeds (1/500 and up)

    Finally, there are days when the ocean is very active where you will want to stop the motion and really capture the power of the sea. A great way to do that is with a fast shutter speed. Speeds of 1/500 of a second and faster work best.
    Picture10 CrashingWave

    The good news here is that you will not need to use a neutral density filter. You can also ditch the tripod and just hand-hold your camera. These shots offer maximum flexibility and mobility.

    A fun thing to do is try to time the wave at it crashes into a rock or the surf. This means a lot of trial and error, but when you hit one, the results can be spectacular.

    #7 Before You Go

    Remember that the sea coast is a harsh and unforgiving environment. Salt water and electronics do not mix very well, and just the spray of the ocean can lead to serious camera problems (which, unfortunately, I have experienced firsthand). In addition, the terrain can be slippery and treacherous. If you are not careful, you can also find yourself stranded on some rocks in a rising tide (learned this one the hard way too, I’m afraid).

    But if you are careful about what you are doing, there is no better place to be than on the coast at dawn or sunset. So get out there and give it a try, and if you have questions or need additional information just use the comments below.

    The post 7 Tips to Help Improve Your Seascape Photos by Controlling the Waves by Jim Hamel appeared first on Digital Photography School.


    Digital Photography School

  • Couple Photography: Telling Their Love Story

    228

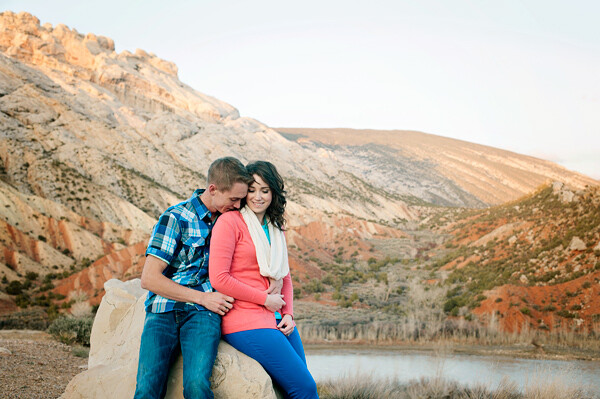
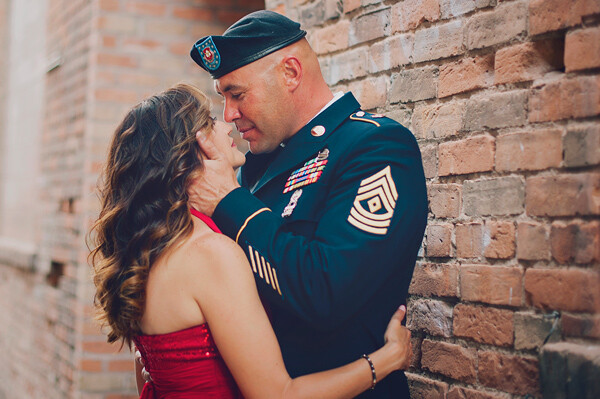
    A while ago, I went to the funeral for my husband’s dear Grandpa Wes, and I looked through old photos of him and his beautiful sweetheart, Daphene, who passed away just 6 months before (they couldn’t live without each other for very long). They had photos when they were young snuggled up together, holding hands, and even kissing, and it struck me how rare that was. Old photos usually are much more formal, and don’t show a lot of emotion or candid feelings. They also had more recent photos that showed the same affection, and that’s rare as well, to be married for decades and still have that connection. It made me realize even more how much I love what I do, and how much I especially love capturing those real moments, the ones that the grandkids will look back on later and say, wow, Grandpa and Grandma REALLY loved each other!

    I’ve found some great ways to get couples to really connect for me, and hopefully these tips will help you capture a love story for every couple you photograph too.

    196

    Be Invisible

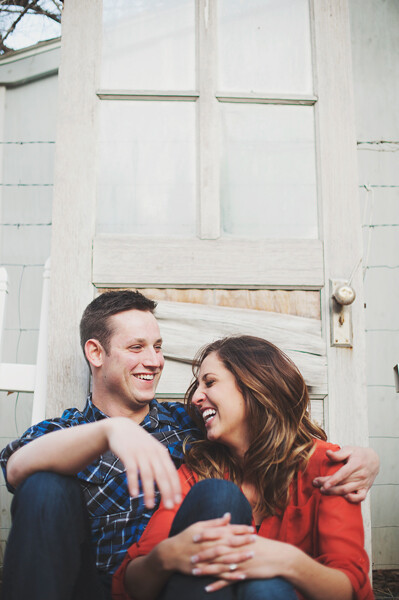
    I tell couples many times during a session to pretend that I am not there. It usually works to bring their focus on each other, and some of the focus off of me. You want your subjects to act naturally towards each other, and interact how they normally would on a daily basis. You don’t want them to be so worried about you taking their photo, that they forget that they even love each other.

    I like to tell them to look at each other, and say everything they feel about the other person with their eyes only. Some couples actually have deep, meaningful connections when I ask them to do this. Others laugh at the corniness, but it doesn’t matter. They are laughing with each other, and the connection is there. Either way, have your camera ready, and capture it.

    Another good interaction builder is to ask them to whisper something in the other’s ear. I tell them that I do not want to know what they said to each other under any circumstances! This usually helps them to relax, and gives them permission to whisper all sorts of things to each other that will either ignite sparks, or laughter. It doesn’t matter, as long as they are pretending I’m not there, pretending the camera isn’t there, and making a connection.

    187

    Get Them Closer

    Most of us have a distance comfort zone that we like to keep around ourselves. We don’t usually like people to be too close, especially when a photographer is watching us. Your job is to get them closer to each other. It may feel a little uncomfortable to them at first, but remind them that in a photo it doesn’t look as close as it feels, it just looks like they love each other.

    173

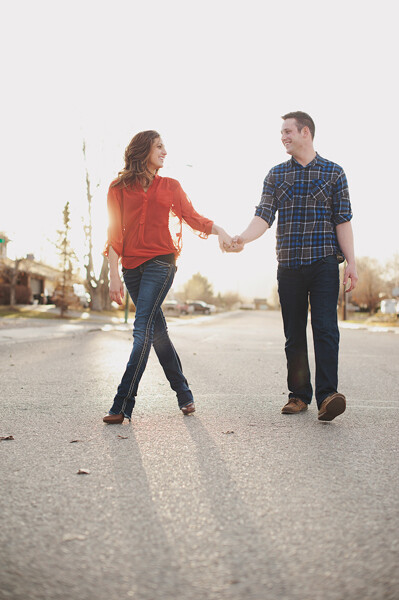
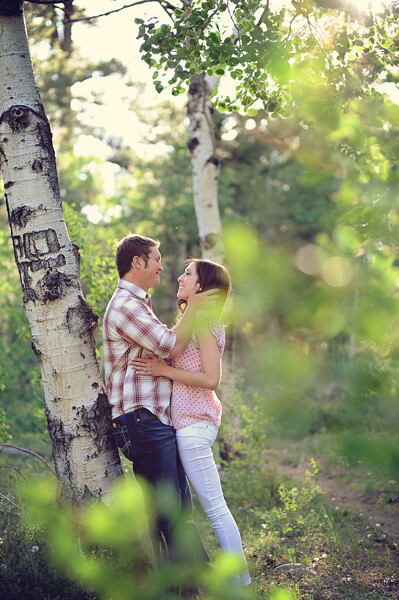
    You want to have a physical connection somewhere. Ask them to bring their foreheads or noses together (depending on height difference). Ask him to put his hand on her cheek, or on her back. She could put her hands on his chest, or on the back of his head. A good old fashioned kiss can work great too. A physical connection could be as simple as a hand hold, but just make sure they are connected. You don’t have to direct every hand placement, and pose them into uncomfortableness. Sometimes it’s enough just to ask them to hug lightly. Little cues go a long way – you want them to be natural with each other, and connect in a way that feels comfortable to them.

    157

    Give Them Something to Do

    People that aren’t particularly comfortable with the camera can get even more uncomfortable if there isn’t anything for them to do. Couples sessions can be easier than a solo session in that regard, because at least they have someone to hold on to, but sometimes that isn’t enough to get them comfortable with the situation. If you just expect them to stand there and make beautiful images for you, you might be disappointed.

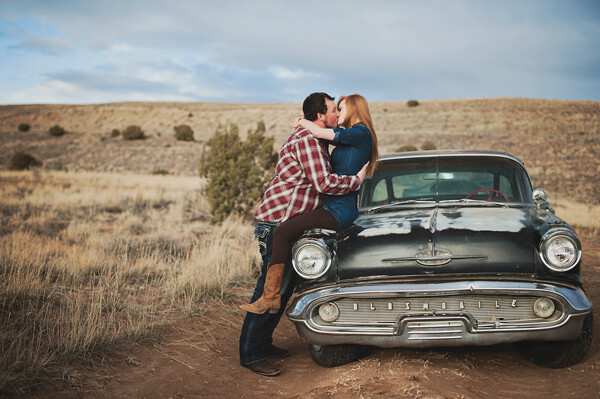
    Tell them to take a walk together, or look at each other and laugh. Corny? Yes. Effective? Most of the time. Use vehicles to sit on, sit in, or lean on. Let him push her gently on a swing. Have them bring a puppy to interact with together, or a horse to hold onto, or a blanket to sit on. Even a wall or tree to lean on can help them feel a little more comfortable.

    186

    Faces Aren’t Mandatory

    It’s great to get a few photos of the couple looking at you, although I still try to get them to have that physical connection with each other (cheeks together, but facing you; her head on his chest, both facing you, arms around each other, etc.). However, you can show even more connection sometimes without showing their faces at all. Intertwined fingers are a favorite thing of mine to photograph. A head on a shoulder, their backs as they walk away, or holding hands can show a lot too. Find those little details that can tell their love story in a subtle way.

    195

    Be Invisible – Again

    You’ve already told them to pretend you aren’t there, but you can really remove yourself by peeking your camera through branches, leaves, or curtains. Not only does it kind of remove you and the camera from the sight of your subjects, but it gives you a great perspective for your photo. It lets the viewer feel like they are peeking into something that they shouldn’t be seeing, and makes the emotions feel even more genuine.

    199

    Who doesn’t like a good love story? If a picture is worth a thousand words, then a whole photo session with a loving couple is a romance novel. Your job as the photographer is to make it a good one.

    The post Couple Photography: Telling Their Love Story by Melinda Smith appeared first on Digital Photography School.


    Digital Photography School

  • How to Avoid and Reduce Noise in Your Images

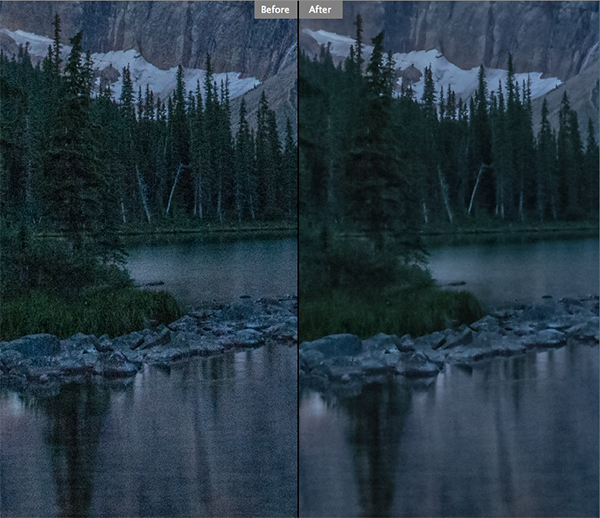
    Reducing noise in your images can make a huge difference to their quality

    Reducing noise in your images can make a huge difference to their quality

    We have all seen it in our images, that uneven grainy look that makes our images look a little unappealing. In the days of film, noise was called grain and it looked better (even the word grain sounded better) but the digital equivalent of noise can often make a good image look bad. The first question we need to answer is:

    What is noise?

    Generally speaking, noise is defined as aberrant pixels. That means pixels that are not representing the colour, or the exposure of the scene correctly. The next question is:

    When does noise happen?

    Noise is introduced into your images when you shoot a long exposure image or shoot at a high ISO setting. Does mean you should never go over ISO 100 or do long exposures? No, there are times that you may need, or even want, to shoot in those conditions. Landscape photographers shoot in low light all the time. The important things to know are; how to avoid getting too much noise in your image and, how to deal with it in your post-production.

    Let’s deal with how you can get less noise in your images first.

    1. Reduce noise in-camera:

    Shoot at lower ISO settings

    If your camera is three years old or newer, the ISO functionality will be great. You shouldn’t see too much noise creeping into your images, even up to ISO 1000. However, there might still be some noise at the higher ISO numbers, so be aware of your exposure. Shooting at a lower ISO means you will have less noise in your image. Higher ISO settings tell your camera’s sensor to group pixels together to capture more light. This grouping effect can make your image look gritty and noisy.

    So, how do you avoid shooting at a high ISO? If possible, open your aperture to its widest setting i.e. f/2.8. If you are shooting in low light, use a tripod if possible, or you could use a flash. If none of these options give you the correct exposure, then you will need to push the ISO up higher. Also, do some test shots to find out at what level the ISO settings on your camera start to degrade image quality. For many years I shot on a Nikon D80 and I knew that anything above ISO 500 was really difficult to use afterwards. This was because the noise became difficult to remove, even in third party software, and if it was removed, the image looked like a watercolour painting as a result of over processing of the noise. So I got to know the limits of my camera and worked within those constraints.

    Shoot in RAW format

    I know you may feel daunted by shooting in RAW, but you don’t need to be. RAW is a great way to get the best out of your images, so be sure to use it. You don’t have to shoot RAW all the time, but when you notice that the light is becoming a little too dark, switch over to RAW. The reason is that JPEG images already have compression applied to them. This means that there is already some noise, and what is known as JPEG artefacts, in the image. If you are using a high ISO with JPEG files, the noise can become even worse. Also, in post-production, you have much more flexibility removing noise, and increasing exposure, with a RAW file than a JPEG.

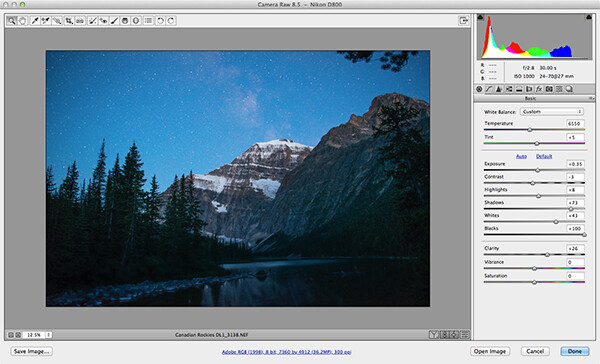
    Adobe Photoshop Camera Raw has some powerful noise reduction tools

    Adobe Photoshop Camera Raw has some powerful noise reduction tools

    Check your exposure

    When digital cameras first hit the market, they were really bad at rendering highlights correctly. Many photographers (myself included) would slightly underexpose the images in order to retain detail in the highlights. This meant that the shadow areas were really dark and when you tried to pull them up in Photoshop, the noise would become evident.  This has been largely sorted out now and the new generation of digital sensors does a great job of handling highlights and shadows. As a result, you can expose correctly without fear of having noise in the shadows, or problems in the highlights. In fact, you can now overexpose slightly so that the shadows are a little brighter than normal and then you can pull the highlights down in Photoshop. I have been doing this for a while now and it is amazing how much detail the new sensors can capture in the highlights. Be careful not to overexpose too much, watch that you don’t clip the highlights as the details may then be lost for good.

    Be careful when doing long exposures

    Long exposures make some of the most dramatic images, but if the exposure is too long, the sensor of the camera can begin to heat up and the pixels will render incorrect colours and exposure. You can still do long exposures, but again, be aware of how you camera handles the long exposure time. Does the image look too grainy? Test it out and experiment to see where your camera begins to struggle. Then make sure that you don’t shoot a long exposure for longer than whatever works on your camera. The key point here is to know the limits of your gear and shoot within those limits. This will ensure great images and easy image editing.

    Long exposure images can accentuate noise in a scene

    Long exposure images can accentuate noise in a scene

    Use in-camera noise reduction

    In most cameras there will be a function called High ISO Noise Reduction or Long Exposure Noise Reduction. It’s a good idea to turn this on if you are shooting at a high ISO or doing long exposures. The reason is that after the image has been shot, the camera will analyse the image and look for any pixels that are incorrectly rendered. It will then fix the pixels that are not properly rendered. This takes some time, usually as long as the exposure time. So if you shot an image that was 30 seconds long, the camera will do an analysis and correction that will take up to 30 seconds. This may become impractical if you are doing 10 minute exposures, but it is worth doing on shorter exposures. If you have the time, do it on the very long exposures too, as it can improve the image quality.

    Use in camera noise reduction for long exposures and lowlight images

    Use in camera noise reduction for long exposures and lowlight images

    2. Fixing noise in Lightroom or Photoshop:

    Once you have captured your image, you will want to open it up in Lightroom or Photoshop to see how it looks. It is a good idea to zoom your image to 100% to see the actual details of the noise in the image. When you make any adjustments, be sure to zoom in to 100% (1:1 in Lightroom), but also zoom out to see the full image to make sure that the whole thing looks good.

    Noise reduction workflow in Lightroom and Photoshop Camera Raw

    The controls in Lightroom and Photoshop Camera Raw are pretty much the same, so below is a quick overview of what each slider does and how to use them. In Lightroom you will find the Noise reduction tools in the Develop module and in Camera Raw you will find it as the third tab on right hand side of the screen, it is the Detail tab.

    The sliders do the following:

    The noise reduction sliders in Photoshop Camera Raw, are identical in Lightroom

    The noise reduction sliders in Photoshop Camera Raw, are identical in Lightroom

    Luminance

    Reduces luminance noise which is noise coming from over or underexposed pixels, this can be quite prevalent in long exposures.

    Luminance Detail

    Controls the luminance noise threshold. This is good for noisy photos. Higher values preserve more detail but can produce noisier results. Lower values produce cleaner results but also remove some detail.

    Luminance Contrast

    Controls the luminance contrast; useful for noisy photos. Higher values preserve contrast but can produce noisy blotches or mottling. Lower values produce smoother results but can also have less contrast.

    Colour

    Reduces color noise. This is often noticed in the underexposed shadow areas of an image.

    Colour Detail

    Controls the colour noise threshold. Higher values protect thin, detailed color edges but can result in color specking. Lower values remove color speckles but can result in colour bleeding.

    Colour Smoothness

    This slider controls the smoothness of the colours in the image. This is useful if you still have some unusual colour noise in your image after you have made all your adjustments above. Use this to finish off the noise reduction workflow.

    Conclusion

    There are no standard settings here that will work for every image. You will need to slide each adjustment around until you find the desired result and see how the changes interact with each other. I tend to slide Luminance and Colour to about 50 and then work from there, I slide each slider up and down, carefully watching how this is affecting the image. Once I am happy with the adjustment, I then move onto the next slider until I am done. I do this while I am zoomed into the image at 100% and after each change, I zoom out to see the effect it is having on the overall image. This may sound a little tedious, but if this is done properly, you will be able to eliminate most of the unsightly noise in just about any image. Practice is also important here, try this on as many images as you can and pretty soon you will be able to predict the effect of each changes.

    Do you have any other experiences or tips for noise avoidance and removal? Please share in the comments below.

    The post How to Avoid and Reduce Noise in Your Images by Barry J Brady appeared first on Digital Photography School.


    Digital Photography School