Category: Photography

  • How to Soften the Light When Using Flash

    Same Flash mounted in a Photo Flex Light Dome

    Why do flash images look harsh?

    Recently, a number of dPS readers have asked the question on Facebook, “How do I use a flash and not have my images look so harsh?”.

    Let us first understand the difference in using natural or ambient light and using a flash. With natural light you have little control over intensity, direction, or color. With a flash, you have a lot more control if you can grasp the fundamentals of light and exposure. Using a flash you can control the direction, intensity, color and distribution of the light.

    A good understanding of how your flash affects the way the subject is lit, and how it will appear in the final image is important.

    Understanding light

    The properties of light include: quality of light, quantity of light, and also color of light, but we will exclude that from this article.

    Brightness: is a relative expression of the intensity of energy output of a visible light source.

    Contrast: is the difference in light between parts of an image.

    Shadows and highlights: consider that the absence of light is shadow, so shadows are parts of your subject that are not lit, and highlights are the parts that are lit.

    The quality of light: here we use the terms “hard” and “soft” to define the quality of light. Hard light is found on a bright, sunny day. It creates very bright and very dark areas in the same scene. Another good example of hard light is an on-camera flash. When it is used as the only light source it results in a brightly lit subject and a very dark background. Soft light on the other hand can be defined as smooth, diffuse and evenly distributed. This type  of light creates few shadows. Cloudy days and shaded areas are examples of this quality of light.

    Size of the light:  small light sources produce hard light while large light sources produce soft light.

    Distance: the farther the light source is from the subject, the harder the light it will produce.

    Example: although the sun is very large, its relative size to us is small and it produces a hard light. However, on a cloudy day the light becomes a relatively large light source and the sun is no longer a hard light. Not only do the clouds make the light source relatively larger, they take that bright light source and diffuse it. As a result there is no direct light falling on anything in the scene you are photographing.
    dps4-1

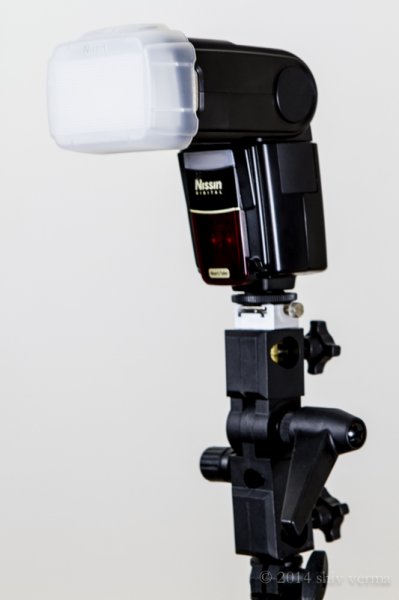
    Nissin Flash with Diffuser

    You can conclude that on a cloudless day, the light source is small, it is distant, it is bright and therefore is hard light. This light will create sharp shadows that define high contrast. On a cloudy day the relative size of the light source is large, it is much closer (the cloudy sky), less bright, and diffused. This light will create soft shadows and thereby lower contrast.

    Photographing different types of subjects require different types of light. In response to the question asked, lets consider people photography. Your portraits will be far more pleasing when they are photographed with less contrast using a soft light. Yet in some cases, like for dramatic portraits of actors, high contrast looks great. High contrast using hard light is good when you want to show texture of the skin in older people. Contrast will exaggerate texture and facial features as the shadows are well defined. Less contrast, or the use of soft light (diffuse light), will deemphasize the texture and give skin a smoother appearance. This is what you are looking for, particularly with the female portrait.

    When you use a flash, on or off camera, you are using a relatively small, hard, directional light source. This is a problem, since you end up with high contrast and a harsh appearance to your portrait. To solve this problem you have to make the light softer by making it larger. Remember, soft light is a large, light source, so the key to making your light softer is to make it larger.

    Modifying light from the flash

    On-camera flash

    Here are some ways to make the on-camera flash into a soft light source. We will start with the simplest without using additional products, and move on to the more complex options using modifiers.

    Bounce the flash: Bouncing is one way to make the light source larger but the light will also lose intensity. By bouncing the light off of walls and ceilings, the light falling on your subject will originate from a much larger area as compared to a directly aimed flash. Outdoors this may not be possible so you may have to find other means to bounce the flash. You can use large white foam core boards, umbrellas or you can buy a reflector. Reflectors come in various sizes and can have multiple surfaces that bounce or reflect the light. These can be twisted and folded into very compact and portable bags.  If all you have is a white business card or an index card on hand, use an elastic band and affix the card to the top of your flash.  This will serve as a small bounce and help provide catch lights in the subject’s eyes.

    Tips:

    • Since bouncing the light reduces light intensity you will need to adjust your flash for higher output.
    • Bouncing off colored walls or ceilings will impart the same color cast on your subject
    dps4-2

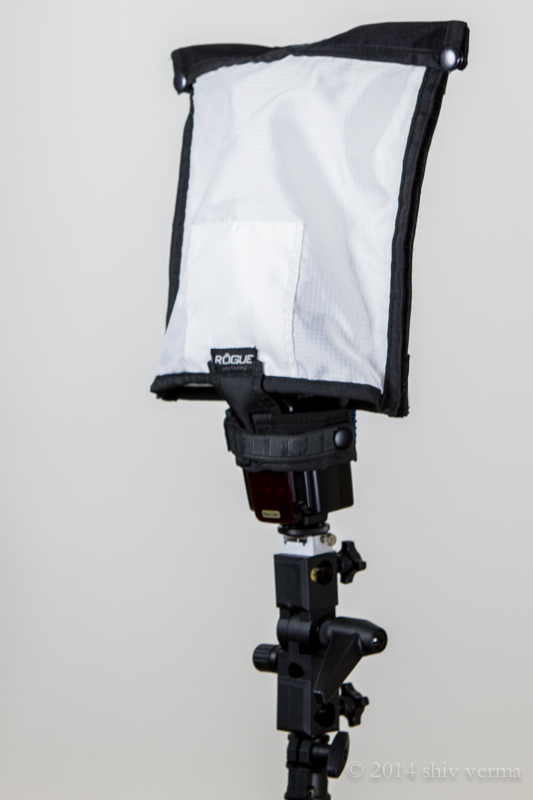
    Rogue FlashBender Large

    Use a Diffuser: The simplest diffuser is a piece of tissue paper taped in front of the flash lens. Plastic diffusers that either fit over the flash head or are fastened using Velcro or elastic bands, are the next step up. Stofen makes these diffusers in various sizes to fit most flash heads. A number of products that will bounce and diffuse light are available – Rogue Flash Bender products are a good example.  A number of manufacturers make small portable soft boxes designed for use with a flash.

    Diffusers work well for indoor flash photography but are not that useful when outdoors. In addition, just as when using bounced light, diffusers also require higher power to achieve the same exposure.

    There is one other problem that needs solving – flat lighting. The on-camera flash sits near the axis of your lens, so when you use a diffuser the light will still be coming from the same angle and you portraits will have little dimensionality. The images will appear flat. It gets worse if there is no diffuser. You will get red-eye or the deer in the headlights look.

    Off- camera flash

    The position and direction of the light source has a great impact on the appearance of your subject. We covered contrast and how contrast is defined, but the visibility of this contrast (visibility of shadows and highlights) depends on the position of the light source, be it diffused or not.

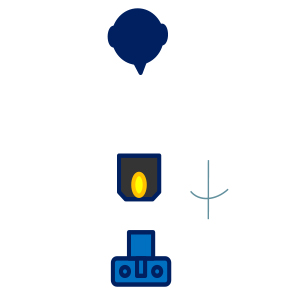
    Any subjects, no matter how much texture and dimension it may have, when lit and photographed from the same angle will look flat as shown in the diagram below left. In order to show dimension and texture, the flash direction and the angle of the camera lens must not be coincidental, as shown below right.
    Lighting-1 Lighting-2

    The maximum dimension theoretically would be when the light source and the camera are at 90 degrees. However, this is a bit extreme. See the diagram below.Lighting-3

    If the flash is mounted on-camera the camera will see and capture the side of the subject that is blasted with head-on light. As a result there are few if any shadows and you get the appearance of a harshly lit subject.

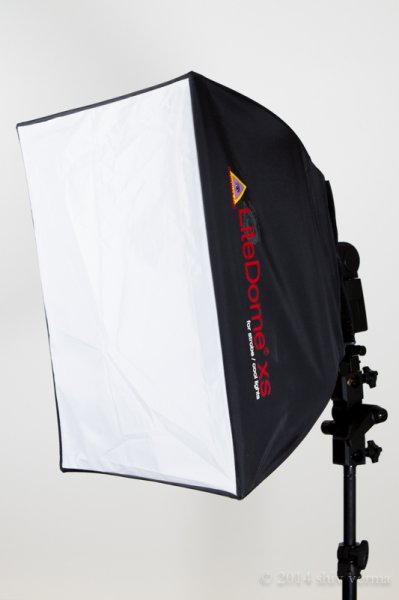
    It may not always be possible to use the flash off-camera. Even small extensions using flash brackets to either side or above will help. A flash mounted on a light stand and controlled via wireless trigger is ideal. Flash heads mounted in small softboxes (see below) or with a Rogue Flash Bender style product will defuse the light well.
    dps4-3

    Photoflex LiteDome XS

    If you are in a studio like environment or even at home you can increase the relative size of your flash by directing it through a translucent (white not clear) shower curtain. You can build a PVC pipe frame and drape a shower curtain over it, or buy ripstop nylon and use it as diffusion material.

    Finally, remember that the closer the light source is to your subject, the softer the light. The edge of the light source is softer than the center. Keep these tips in your arsenal. Armed with the information in this article you will hopefully make better portraits when using a flash and have a better understanding of controlling the light from your speedlight.

    The following two portraits were shot in a casual setting with a white foam core board serving as a fill from the left side of the camera.  For the first image a diffuser that comes with the flash head was used.  As you can see that despite the use of a diffuser the light source is still small and relatively harsh.  The second portrait was shot using the light dome.  Notice how much softer the light is on the subject.  Both images are straight from the camera – no post-processing was done.

    Single Flash with a manufacturer supplied Diffuser

    Single flash on-camera using a manufacturer supplied diffuser

    Same Flash mounted in a Photo Flex Light Dome

    Same flash mounted in a Photoflex LiteDome XS Softbox

    The post How to Soften the Light When Using Flash by Shiv Verma appeared first on Digital Photography School.
    Digital Photography School

  • A 10 Minute Lesson to Photographing Images with More Pizzazz

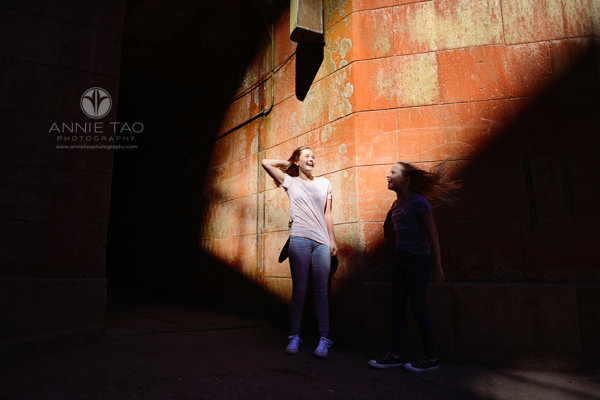
    Photograph-plain-things-with-pizzazz-article-shadow-helping-an-image

    Even the most seasoned photographer wants to continue to stretch their creativity. I know I do!

    One simple activity you can do in your spare time is to find new ways to photograph everyday, plain things. Yup, the things you see or use every day; no models, no glamorous set-ups, no breathtaking locations. You don’t even need to do this with a fancy DSLR camera or have a significant amount of time. The lesson you learn can be achieved in 10 minutes once a week, using a $ 100 camera or a smart phone.

    Your goal is to make something very plain look more interesting through your lens.

    Tips:

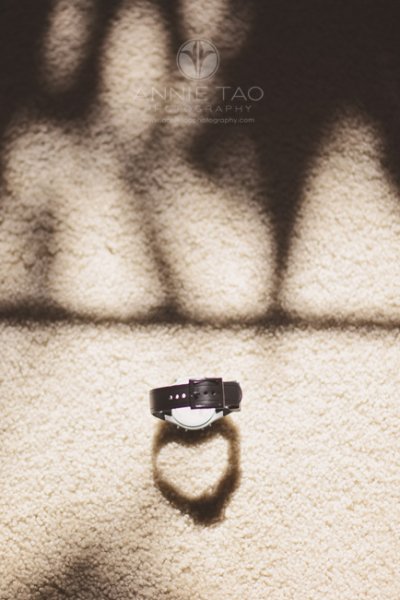
    1. Pay attention to the shadows

    If there is a lot of light, then there are probably shadows. Figure out if the shadows are helping the image or hurting it. If the shadows take away from the image, then make a change so that they don’t. The change could be a significant one, like moving your object altogether, or it could be a subtle one, like changing the angle you are shooting.

    Annie-Tao-Photography-everyday-hearts-watch-shadow

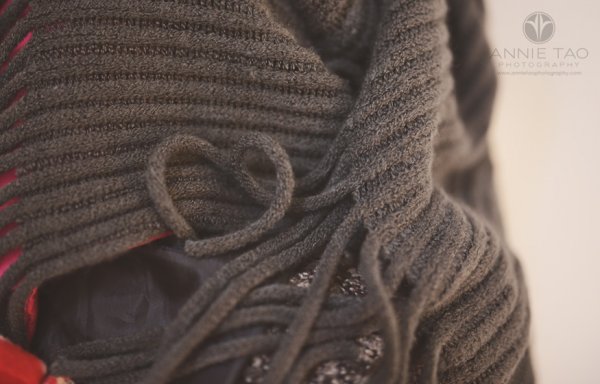
    2. Look for natural patterns and shapes

    If you can locate natural patterns in your shot or interesting shapes within the object or everyday scene, then you can shoot it in a way that highlights this.

    Annie-Tao-Photography-everyday-hearts-sweater-fringe

    3. Know where there is good light

    If you can move the object, then place it in the light you want. That could be near a window if you are indoors, or in the shade, if you are outside when the sun is too bright. If you can’t move what you are shooting, then re-position yourself or angle of your camera.

    4. Take a close-up shot of one of the key details

    You don’t always have to photograph the full object or the entire scene. Figure out what are the key details and consider photographing just that.

    5. If it opens, open it – if it moves, move it

    Is it a chest? A book? A cookie jar? Photographing it opened will show the content and make the image more dynamic.

    Annie-Tao-Photography-everyday-hearts-music-book

    Example:  Photographing plain things to create images with more pizzazz

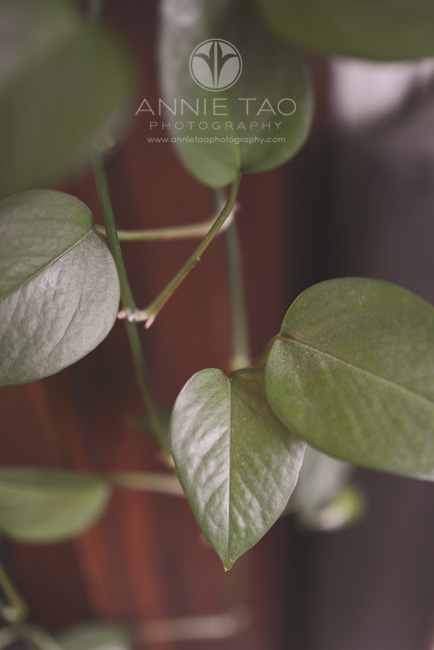
    I gave myself 10 minutes to walk around my house and find natural hearts. This lesson was easy and fun. More importantly, it let me see these plain, everyday objects differently (see three images above for more of the hearts I found).

    Annie-Tao-Photography-everyday-hearts-scissors

    Annie-Tao-Photography-everyday-hearts-leaf-of-green-plant

    So, now what?

    Doing this activity from time to time can help you discover new ways to photograph people, landscapes, or whatever makes your heart sing. You can give yourself a specific goal, like finding a particular shape, as I did in the example above, or give yourself a general goal of shooting an object with pizzazz in 10 minutes.

    Over time, your eyes will be trained to do this on their own, and the results may surprise you.

    How this activity translates into lifestyle shoots

    Here are a few examples from my recent photoshoots:

    Annie-Tao-Photography-photograph-plain-things-with-pizzazz-article-natural-pattern

    Photograph-plain-things-with-pizzazz-article-good-light

    Photograph-plain-things-with-pizzazz-article-different-perspective

    Photograph-plain-things-with-pizzazz-article-shadows-helping-image

    Annie-Tao-Photography-Photograph-plain-things-with-pizzazz-article-light-and-shadows

    How do YOU stretch your creativity? Share with us in the comments below, so we can all help each other grow.

    The post A 10 Minute Lesson to Photographing Images with More Pizzazz by Annie Tao appeared first on Digital Photography School.


    Digital Photography School

  • Create Beautiful Portraits with CameraBag 2 Software

    CameraBag for portraits

    Do you use Lightroom for processing portraits but get frustrated by its limitations?

    One way around this is to use a plug-in or buy some Develop Presets. But these can be expensive, so you may be interested in a cheaper alternative.

    One of my favourites is Nerve Center’s CameraBag 2. It’s a bargain at just $ 20, and while it’s not as convenient to use as a plug-in that you can access directly from Lightroom, it is easy to incorporate into your workflow. Let me give you a couple of examples. Here’s the first; I selected it because there’s a dramatic difference between the photo created in Lightroom and the one created in CameraBag.

    CameraBag for portraits

    CameraBag for portraits

    Here’s another one. The changes are more subtle, to show you can use the software with a light touch.

    CameraBag for portraits

    CameraBag for portraits

    Lightroom workflow

    Now you’ve got a taste for what CameraBag can do, I’d like to show you how to incorporate it into your Lightroom workflow.

    As CameraBag is not a Lightroom plug-in, you need to export your photos as either JPEG or TIFF files (I recommend 16-bit TIFF) before you can open them in CameraBag. Start by creating a folder on your hard drive to store the photos. I call mine Photos (plug-ins temporary).

    In Lightroom, select the photo/photos you want to edit in CameraBag. Go to File > Export. These are the settings you need to adjust in the Export window.

    Export Location: Select the folder you just created. This is where Lightroom will save the files.

    CameraBag for portraits

    File Settings: Set Image Format to TIFF, Color Space to sRGB and Bit Depth to 16 Bits/Component.

    You don’t need to touch any of the other settings in the Export window.

    CameraBag for portraits

    You can speed up the process by creating a User Preset. Click the Add button and give the new preset a name. All you have to do in future is click on the preset to apply the same settings. Easy!

    CameraBag for portraits

    Processing portraits in CameraBag

    Start by opening the portrait you want to edit in CameraBag. You will see something like this:

    CameraBag for portraits

    The layout is minimal. Use the four buttons* in the top-right corner to access the program’s editing options.

    CameraBag for portraits

    * Alternatively, you can access the controls by clicking on the tabs on the very right of the screen. The functions are the same, just laid out differently.

    My Styles and Cameras

    Click either of these buttons to instantly choose from over 150 filters. Naturally, not all of them will suit your portrait. But look closely and you will definitely find something you will want to work with.

    CameraBag for portraits

    My Style filters. This is where you’ll find the majority of the filters.

    CameraBag for portraits

    Camera filters. There are some additional choices here.

    On the surface, CameraBag may look as if it’s just another program designed to give your photos an Instagram type look. But dig a little deeper and you’ll see that it is a high quality photo editor. There are two important things to note here. The first is that CameraBag uses a 32-bit processing engine, preserving your portrait’s fine graduations of tone and colour.

    The second is that all editing is non-destructive. You can adjust or undo any edits you make. For this example I’ve chosen the Film NC-1A filter. It’s a subtle preset that adds a slight matte effect and a blue cast to the shadows.

    CameraBag for portraits

    Now look at the tiles that have appeared below the photo.

    CameraBag for portraits

    Some of these represent the edits that have been made by the filter to your portrait. The others are additional, allowing you to alter the effect of the filter. For example, when I click on the Toning tile, a slider appears that lets me adjust the strength of the effect.

    CameraBag for portraits

    When I click on the Saturation tile, the slider is set to 50, indicating that no change to colour saturation has been made. But the option is there to increase or decrease it.

    CameraBag for portraits

    Adjustments

    This is where you’ll find CameraBag’s photo editing tools. It’s a comprehensive selection. Among other things you can adjust colour, contrast and tonal values, add grain or a vignette, tweak the RGB or colour curves, crop, and adjust the colour temperature. I won’t bore you with detailed explanations, because you will be able to figure it out easily enough for yourself if you download the trial.

    However, there’s one tool I’d like to draw your attention to (I used it in both opening images at the beginning of the article), and that’s Lightleak. There are two sliders: Remix, which changes the appearance of the light leak effect, and Amount, which adjusts the strength.

    CameraBag for portraits

    Borders

    Finally, we come to the borders. You can choose one of CameraBag’s borders, or create your own in another program (such as Photoshop) and use that. While I used borders in the opening images to highlight one of the differences between CameraBag and Lightroom, they are something that I tend to avoid as I see them as bit of a gimmick. But they are there if you want to use them.

    You should also note that if you use one of CameraBag’s built-in borders, it reduces the size of your image to 2000 pixels along the longest edge.

    CameraBag for portraits

    By the way, you can create your own filters using the current settings you have picked for the photo you are editing. Just go to File > Add Filter to My Styles to do so. CameraBag prompts you to enter a name and it is stored under My Styles.

    You can download more filters, created by other CameraBag users, from the CameraBag website. You can also submit your own for others to share. Here’s the final version of my portrait (without the light leaks effect).

    CameraBag for portraits

    What CameraBag lacks

    Is there anything that CameraBag doesn’t have? There are two features that I would really like to see included in future versions. The first is some kind of masking feature so you can control which part of the image is affected by an edit. The second is some portrait retouching tools. Having said that, if you use CameraBag at the end of your workflow, to edit portraits that you have already processed in Lightroom or Photoshop, then these features won’t be missed much.

    Here’s a summary of CameraBag’s good and bad points.

    Pros:

    • Quick and easy to use.
    • Lots of interesting built-in presets.
    • Complements Lightroom and Photoshop.
    • Good control over colour, contrast and tonal values like highlights and shadows.
    • 32-bits per component colour depth.
    • Non-destructive editing.
    • Raw file support.
    • Inexpensive!

    Cons

    • Reduces image size to 2000 pixels along the longest edge if you apply a built-in border.
    • Only works with one colour space (whatever your monitor is set to).
    • Can’t be added as a plug-in to Lightroom, Aperture or Photoshop.
    • No local adjustments or portrait retouching tools.
    • No batch processing tool.

    Give it a try

    As with any software or plug-ins, the best way to see if CameraBag is for you is to download the trial version and have a play. Follow the link to download the software or learn more about it. You’ll find lots of information about CameraBag on the website, including how-to videos here.

    Your turn

    Have you used CameraBag or an inexpensive/free image editor such as Pixelmator, Picasa or GIMP? I’d like to hear about your experiences. What inexpensive software would you recommend for our readers?


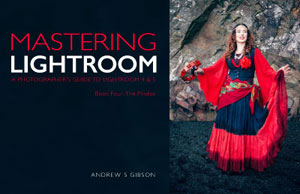
    Mastering Lightroom: Book Four – The Photos ebookMastering Lightroom: Book Four – The Photos

    My new ebook Mastering Lightroom: Book Four – The Photos takes you through ten beautiful examples of photography and shows you how I processed them step-by-step in Lightroom. It explores some of my favourite Develop Presets and plug-ins as well as the techniques I use in Lightroom itself. Click the link to learn more.

    The post Create Beautiful Portraits with CameraBag 2 Software by Andrew S. Gibson appeared first on Digital Photography School.


    Digital Photography School

  • How to Capture Perfect Selfie: 10 Tips for Amateurs and PROs

    There is no wrong way to capture a selfie. The selfie is a way of self-expression and the artistic choices vary as much as faces themselves. “Selfie” was named Oxford Dictionaries Word of the year for 2013, and it’s defined as a photo taken of oneself and shared on social media. Taking selfies is a fun way to show your Continue Reading

    The post How to Capture Perfect Selfie: 10 Tips for Amateurs and PROs appeared first on Photodoto.


    Photodoto

  • 4 Ways to Add a Sense of Motion to Your Urban Photography

    It is great to walk around a new city, or a new part of a familiar city, and just explore. You never know what will be on the next block or around the next corner. When you bring your camera along with you, you can often capture a few nice skyline photos, some interesting pictures of buildings, and perhaps some street photos of people going about their daily life.

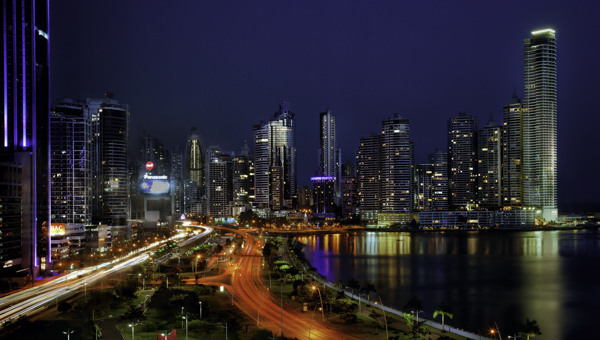
    CityMotion1 Panama

    But you know what is often missing from these photos? A sense of movement, and that’s what cities are all about. Cities are not just collections of buildings. They are dynamic environments full of hustle and bustle. The trouble, of course, is that it is hard to capture this movement in a still image.

    So I want to show you a few techniques for adding that sense of motion to your urban pictures – how to capture the city in motion

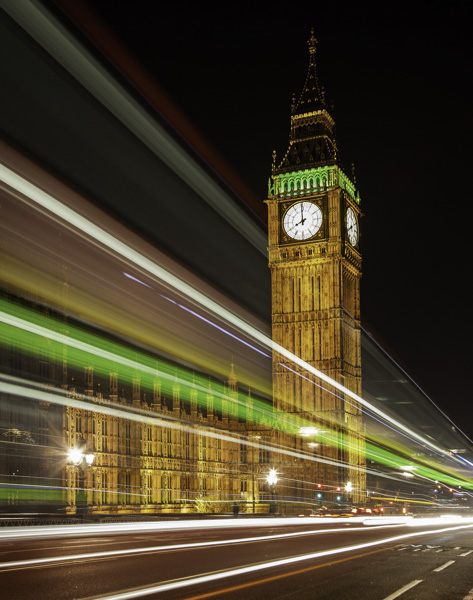
    #1 – Add streaking headlights and taillights

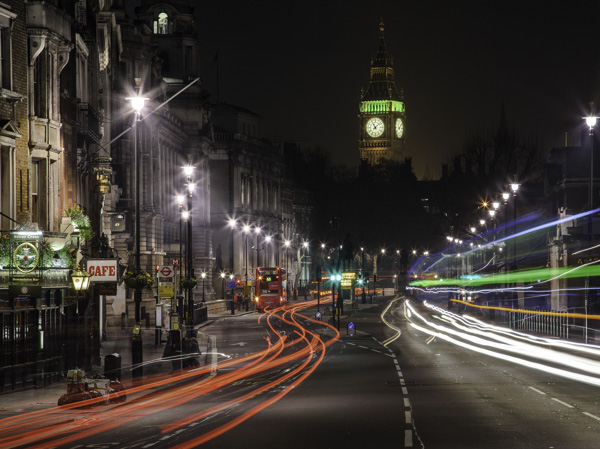
    A common way you can add movement to your urban photos is by including streaking headlights and taillights. But don’t stop with capturing only the streaking lights, without regard to capturing the city. Streaking lights can work really well as an accent to a photo of your city. In other words, the streetlights don’t necessarily need to dominate the image, but rather just add a sense of movement to the overall image.

    CityMotion6 Whitehall

    The key to capturing this effect is to set up your shot on a tripod with a long exposure and take shots as traffic moves past you.

    CityMotion4 Westminster

    There are no set exposure settings because the ambient light is always different. Start with something like a 20 second exposure at f/8 and adjust from there. Try triggering the shutter just before traffic enters your frame. You will probably need to take several of these pictures to make sure you’ve got it right.

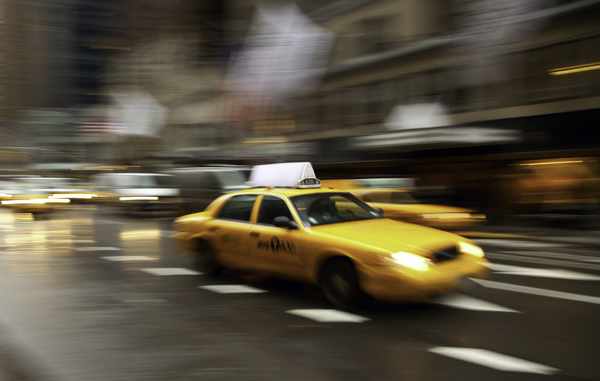
    #2 – Panning

    CityMotion3 NYCcab

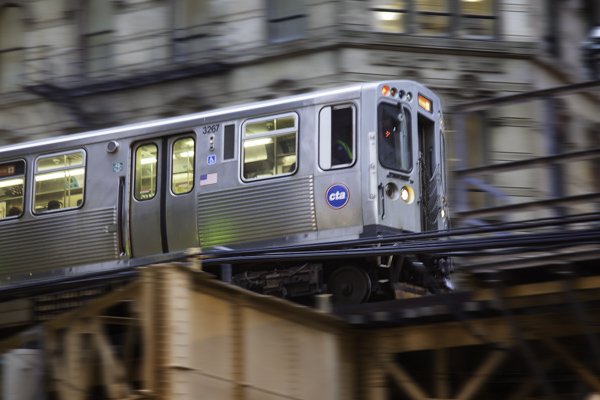
    Another great but often overlooked technique for capturing motion in the city is panning. Panning is where you follow a subject with your camera so that the subject is in focus and reasonably sharp, while the background is blurry and shows a sense of motion.

    CityMotion11 ChicagoTrain

    Panning is great because it doesn’t require a tripod and can’t be done at any time of day. What you do is follow a moving subject with your camera at a moderately slow shutter speed. The best shutter speed for this technique tends to be between a 1/30th and an 1/8 of a second. Since the camera is moving at the same rate as the subject, the subject should be reasonably sharp, while the background will be blurred.

    You can use this technique on anything that is moving, whether it be a train, a car, or even a bicyclist or skateboarder. My favorites tend to be the iconic vehicles of the city.

    When you get back to the computer, you can accentuate the effect a bit in Photoshop by sharpening your subject a little bit, while at the same time adding a slight blur to the background.

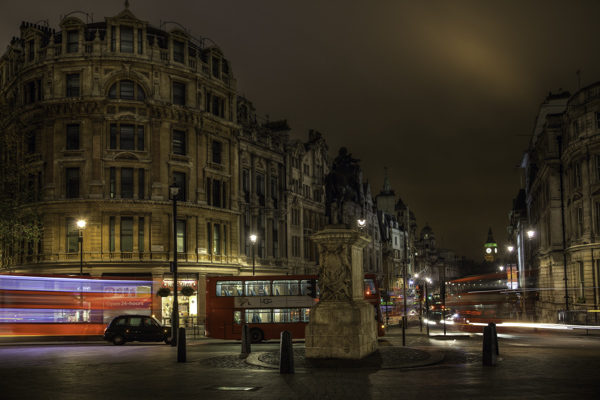
    CityMotion5 Trafalgar

    #3 – Capture movement of vehicles

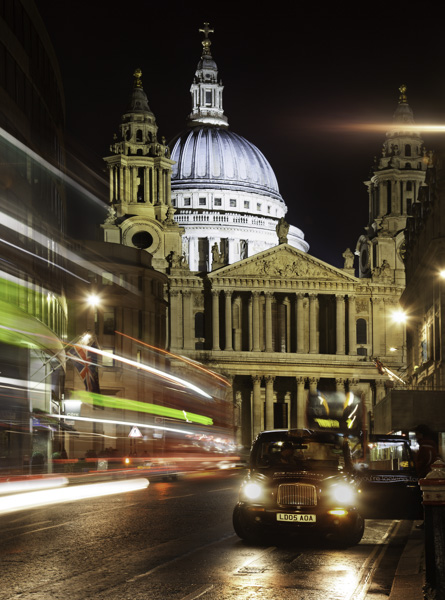
    When it comes to vehicles, don’t limit yourself to streaking taillights and headlights. It often works really well just to add a slight blur to vehicles in your frame to add a sense of movement. In fact, a lot of times this adds more of a sense of movement than just having lines streaking across the image.

    CityMotion8 Ludgate

    You will want to use a tripod for these types of shots. It is important that everything be sharp except the blurred vehicle. To capture the movement, a shutter speed of just a few seconds works really well. You will probably have to take several shots to get a good one.

    #4 – Capture the movement of people

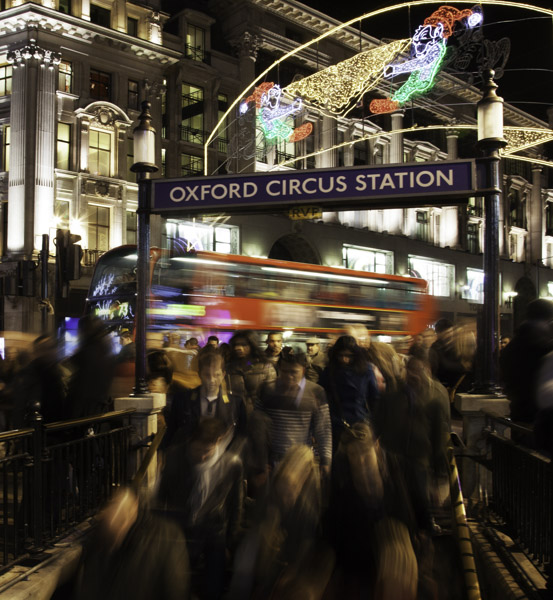
    CityMotion2 OxfordCircus

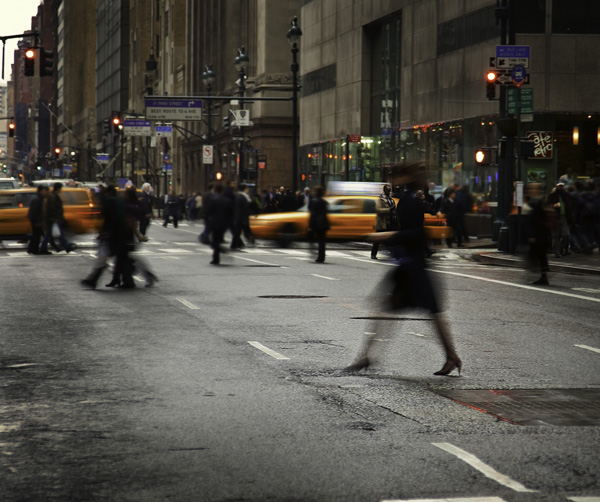
    The final way to capture movement in an urban setting is by capturing people in motion. This is used much less than the other techniques, largely because it is harder. People don’t have lights that streak across the screen. In addition, you have to get closer and it is more personal. But when done well, the results can be dramatic.

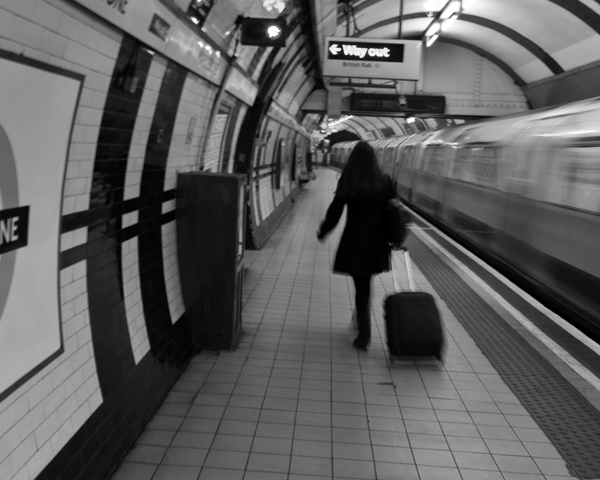
    CityMotion9 Tube

    The best way to go about it is to set up shop where you know people will be walking past you. Train stations, subway stations, and other places where people rush in and out, work really well for this. If you can use a tripod to keep the background sharp, do so.
    The shutter speed will need to be a bit slower than what you use to capture moving vehicles because people move so much slower. Typically a shutter speed of about 1/2 to 1/10th of a second works pretty well.

    This is another one you can do any time of day, any day of the year. It is a good thing to work on when conditions are not right for other photography you want to do.

    CityMotion7 NYClady

    Conclusion

    Including movement can add a missing element to your urban and street photography. It is also something that you can get out and do on any particular day or night. Plus it requires no special gear. If you have a camera and a tripod, you are good to go.

    So head out and try some of these techniques, and if you have any questions about it just leave it in the comments below.

    The post 4 Ways to Add a Sense of Motion to Your Urban Photography by Jim Hamel appeared first on Digital Photography School.

    Digital Photography School

  • Weekly Photography Challenge – Starry Nights

    Earlier today I shared a collection of starry night photos.

    Photograph Fossilized UFO by Sakhr Abdullah on 500px

    Fossilized UFO by Sakhr Abdullah on 500px

    We have some good articles on shooting the stars and night photography here on dPS including;

    • How to Photograph the Stars
    • Photography Under the Stars
    • Down and Dirty Guide to Milky Way Photography
    • Tips for Photographing Star Trails

    As you may have guessed you’re going to need these tips because it’s your turn to go out and shoot in this week’s challenge:

    Starry nights

    Photograph Mt Bromo Under The Stars by Elia Locardi on 500px

    Mt Bromo Under The Stars by Elia Locardi on 500px

    Photograph Startrails Matterhorn by Stanley Chen Xi on 500px

    Startrails Matterhorn by Stanley Chen Xi on 500px

    Photograph Stars 1 - Las Vegas Photographer - Ati Nagy by Ati Nagy on 500px

    Stars 1 – Las Vegas Photographer – Ati Nagy by Ati Nagy on 500px

    Photograph Eternal Loneliness by Stergos Skulukas on 500px

    Eternal Loneliness by Stergos Skulukas on 500px

    So grab your camera and tripod and get shooting!

    Share your starry night images

    Simply upload your shot into the comment field (look for the little camera icon in the Disqus comments section as pictured below) and they’ll get embedded for us all to see or if you’d prefer upload them to your favourite photo sharing site and leave the link to them. Show me your best images in this week’s challenge.

    Share your starry night images

    Simply upload your shot into the comment field (look for the little camera icon in the Disqus comments section as pictured below) and they’ll get embedded for us all to see or if you’d prefer upload them to your favourite photo sharing site and leave the link to them. Show me your best images in this week’s challenge.

    The post Weekly Photography Challenge – Starry Nights by Darlene Hildebrandt appeared first on Digital Photography School.

    Digital Photography School

  • Collection of Starry Night Images

    Photographing the night sky is challenging and also very rewarding. Doing it well takes patience and skill. In this collection I’ve searched for some outstanding starry night images for you.

    Let the star gazing begin!

    Photograph A Legend of Starry Night by Shawn Yang on 500px

    A Legend of Starry Night by Shawn Yang on 500px

    Photograph Home on the Range by Ben Canales on 500px

    Home on the Range by Ben Canales on 500px

    Photograph Starry night in Santorini by Luca Bettarini on 500px

    Starry night in Santorini by Luca Bettarini on 500px

    Photograph Black Magic! by Piyush Hatolkar on 500px

    Black Magic! by Piyush Hatolkar on 500px

    Photograph the road by jonathan sander on 500px

    the road by jonathan sander on 500px

    Photograph ~ Early morning ~ by Prakash Bajracharya on 500px

    ~ Early morning ~ by Prakash Bajracharya on 500px

    Photograph Medieval Vortex by Javier Martinez Moran on 500px

    Medieval Vortex by Javier Martinez Moran on 500px

    Photograph Galaxy love by Leung King Lun on 500px

    Galaxy love by Leung King Lun on 500px

    Photograph The Sky Watcher by Nimrod Genisher on 500px

    The Sky Watcher by Nimrod Genisher on 500px

    Photograph Starry Night by Vahid Varasteh on 500px

    Starry Night by Vahid Varasteh on 500px

    Photograph The Path to God by Hammad Iqbal on 500px

    The Path to God by Hammad Iqbal on 500px

    Photograph Starry Night by Alan Aurmont on 500px

    Starry Night by Alan Aurmont on 500px

    Photograph Life Struggles by Royce's NightScapes on 500px

    Life Struggles by Royce's NightScapes on 500px

    Photograph Starry night by Jorge Maia on 500px

    Starry night by Jorge Maia on 500px

    Photograph Past Life by Ben Canales on 500px

    Past Life by Ben Canales on 500px

    Photograph Mobius Arch by Sungjin Ahn on 500px

    Mobius Arch by Sungjin Ahn on 500px

    Photograph Night Train by Aaron J. Groen on 500px

    Night Train by Aaron J. Groen on 500px

    Photograph Stars over Teton homestead by Royce's NightScapes on 500px

    Stars over Teton homestead by Royce's NightScapes on 500px

    Photograph Starry lighthouse by Ivan Pedretti  on 500px

    Starry lighthouse by Ivan Pedretti on 500px

    Photograph Starry road by Ivan Pedretti  on 500px

    Starry road by Ivan Pedretti on 500px

    Photograph Starry Night over Crater Lake by Rick Parchen on 500px

    Starry Night over Crater Lake by Rick Parchen on 500px

    Photograph Starfalls by Ben Coffman on 500px

    Starfalls by Ben Coffman on 500px

    Photograph Stars over Historic Ward Charcoal ovens by Royce's NightScapes on 500px

    Stars over Historic Ward Charcoal ovens by Royce's NightScapes on 500px

    Photograph In the Still of the Night by Jessica Hendelman on 500px

    In the Still of the Night by Jessica Hendelman on 500px

    Photograph All That Glitters – Milky Way Above Yosemite Forest by Jim Goldstein on 500px

    All That Glitters – Milky Way Above Yosemite Forest by Jim Goldstein on 500px

    Photograph Stargazing Through A Window by Jerry Patterson on 500px

    Stargazing Through A Window by Jerry Patterson on 500px

    Photograph Reflection of the Galaxy | Pfeiffer Beach, California by Ali Erturk on 500px

    Reflection of the Galaxy | Pfeiffer Beach, California by Ali Erturk on 500px

    Photograph Earth, Air, Fire and Water by Greg Gibbs on 500px

    Earth, Air, Fire and Water by Greg Gibbs on 500px

    Photograph Andromeda Galaxy by Rogelio Bernal Andreo on 500px

    Andromeda Galaxy by Rogelio Bernal Andreo on 500px

    The post Collection of Starry Night Images by Darlene Hildebrandt appeared first on Digital Photography School.

    Digital Photography School

  • How to Use the Filter in Lightroom’s Library Module

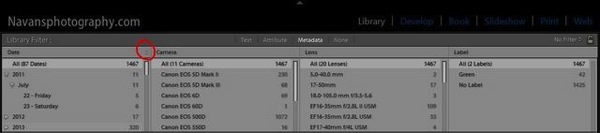
    Once you enable the filter in Lightroom’s library module, you are able to search your images in three ways – text, attributes and metadata. To activate the filter bar, the keyboard shortcut is backslash (\). The filter bar will be activated and displayed on top of the workspace (see the screenshot below), only if you press the backslash key in the Library module. If you press the same backslash key in Develop, you will be see the before version of the selected image, provided you have made some corrections to your image.

    Lightroom FilterBar None 01

    Filter by text

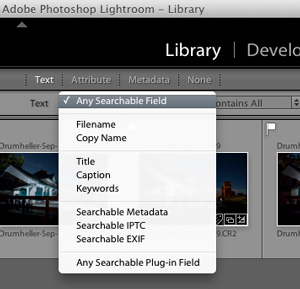
    The first option, Text mode allows you to search your images by the images’ text fields, from title, caption, keywords, searchable metadata, searchable IPTC, searchable EXIF, to any searchable plugin field. The field box comes as a drop down menu, where you can pick the text your search should be based upon.

    Lightroom FilterBar Text 02

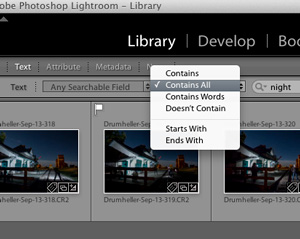
    In the next box you can pick either one of the following parameters – contains all, contains, contains words, or doesn’t contain. You can select starts with or ends with as well. In the last box you can enter your text, the text which you want your search should be based upon.

    Searchable Contains all

    Filter by image attributes

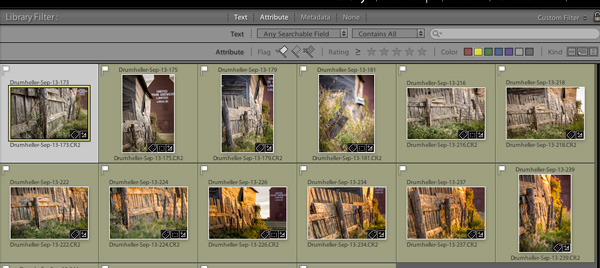
    The next option to filter is based upon the Image attributes. This section is further divided into flag status, ratings, color ratings and kind of file. In flag status, you can either pick flagged, unflagged, or rejected ones as well as a combination of two of those choices by clicking the flag symbols. Once you filter your images, the selected ones will be highlighted in white (use Ctrl/Cmd+A to select all).

    Lightroom FilterBar Attribute 03

    Filter by rating

    Lightroom FilterBar Rating 03a

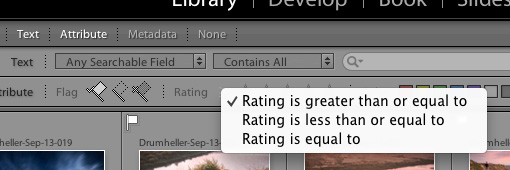
    The next option in this section is star rating; you can filter photographs based on the number ratings you have applied to them. You can click the third star if you want to filter the photographs which have three stars exactly. You can also select less than or greater than by clicking the greater than symbol (>), where you will be prompted to select one of the following:

    Greater than

    Filter by color label

    The next option in this section is filter by color label; you might have applied color labels based on your own methods of flagging images. For example green for web upload, red for yet to process, or something like that. Imagine you want to view only the red ones which you wish to process now. You can do that by clicking the red color box alone or you can add yellow along with it by clicking that box as well. In this way you can combine all the color labels, or only the ones you want. If one color label is selected, that particular box will be brighter than the other, which means it is active.

    Color filter

    Filter by kind of file

    The last option in this sub-section is to filter by kind; which in this instance means the kind of file. In Lightroom you can have three kinds of files; master image files, virtual copies, and video files. If you want only the virtual copies you can select that particular icon alone. Like the other filters here, you can also combine more than one choice.

    Filter by metadata

    The most powerful option to filter your photographs is by metadata – the options are endless.

    Lightroom FilterBar Metadata 04

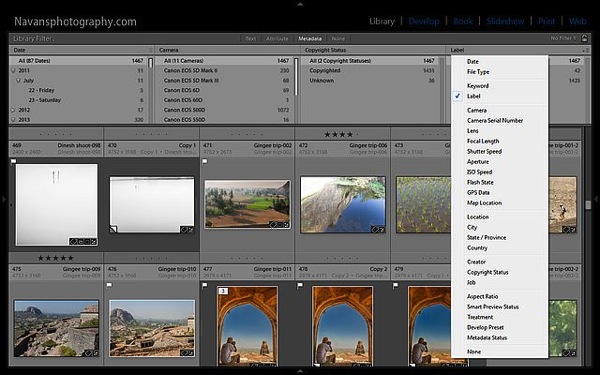
    You have the option to filter your photographs by all of the metadata in your files, you can get an idea by looking at the screenshot above. You can combine multiple metadata together to work for you by adding more filter columns. Click the right side of the title for an option to add more columns with other criteria. Click the filter title itself to change it to something else. In the screenshot, I have clicked the title Label; and you can see the pull-down menu of options that appeared.

    Lightroom FilterBar Metadata 05

    Miscellaneous other filtering tips

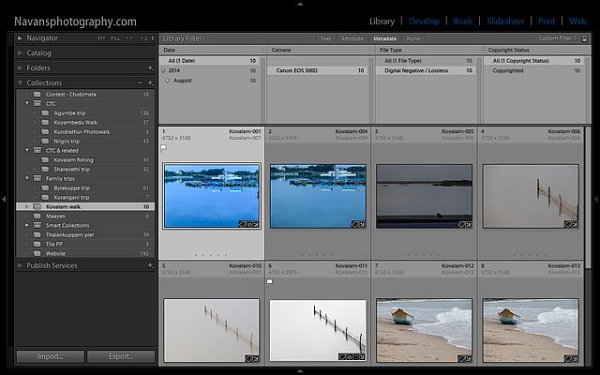
    The filtered photographs based on your criteria will be instantly displayed on the below workspace. You can also combine multiple filter sections from Text to Attributes to Metadata or all together, the options are almost endless.

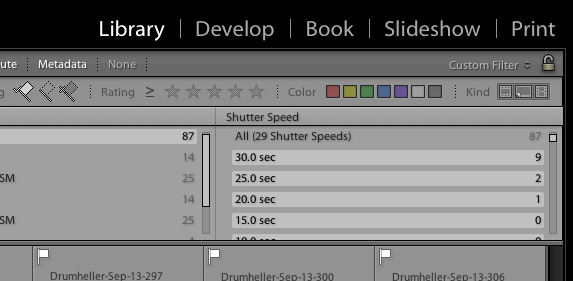
    You can create presets if you have a particular way of filtering your photographs, provided you have managed your library in that way. Have you noticed the lock symbol on the right end of the filter bar? The drop down menu next to the lock symbol has an option to save your search as a preset, so next time you just have to select that preset. Easy right?

    Save filter

    The lock symbol at the right end of the filter bar will lock the filter criteria (if you click it) and the same filter can be applied to all your collections or folders one by one as you select the folders and collections.

    Lightroom-FilterBar-Metadata-05a

    I hope this article helps you work smarter with Lightroom and saves you lots of time and resources.

    Cheers and happy photographing.

    The post How to Use the Filter in Lightroom’s Library Module by Navan Viswa appeared first on Digital Photography School.

    Digital Photography School

  • Inky’s Birthday Treat: Get 50% off All Deals and an iPhone 5S

    We told you about InkyDeals before. This time I’m happy to inform you that InkyDeals turns three! Since founding of the project, InkyDeals managed to gather a huge community of over 300k members. These days they’re one of the biggest websites offering daily design deals. InkyDeals is the place to go if you want to buy premium resources at unbeatable Continue Reading

    The post Inky’s Birthday Treat: Get 50% off All Deals and an iPhone 5S appeared first on Photodoto.


    Photodoto

  • Mobile Triggers Compared to Help You Choose the Right One

    When it comes to mobile triggers or cable releases photographers often have multiple responses:

    • I got the knock-off brand and it doesn’t work when I need it
    • I got the basic button kind and have to count the time on my own
    • The intervalometer is way too expensive
    • I could save money and build a DIY release but that’s too much effort
    Triggertrap

    Image from Triggertrap site

    Image from the Triggertrap website.

    I hear comments like that on almost a daily basis. In my previous article on long exposure photography accessories I mentioned Triggertrap and Trigger Happy. In this article I’m going to discuss both of those (with a bonus tip at the end) and also discuss some other options that are available to you.

    This article is not a review of the products but rather just an overview of what each offers. It is worth noting that I do own each of the products and will share my personal recommendation at the end of the article. So if you don’t care so much about the comparison then please skip down to the bonus tip and my recommendation.

    However, if you’re considering a mobile trigger for your camera, but haven’t purchased one yet, then please continue reading.

    Triggertrap

    Triggertrap started as a Kickstarter project, and really set the bar high for its standards and features. The Triggertrap software is open source and can be found on Github. The quality of the physical cables is top notch, very durable, and they’re also attractive.

    The mobile kits are available for Nikon, Canon, Fuji, Sony, Olympus, Samsung, Panasonic, Pentax, Sigma, Leica, Lytro, Hasselblad, Contax, Konica Minolta and Kodak.

    A mobile kit is available for nearly every camera you could possibly want. It connects to the headphone jack of your phone and then the cable release part of your camera. The mobile kits start at $ 37.46 USD.

    Triggertrap 1

    The mobile app (iOS and Android) has a variety of trigger options that can go way beyond just pushing the button. Here is a list of all the trigger options:

    • Sound sensor
    • Vibration sensor
    • Motion sensor
    • Facial recognition
    • Time-lapse
    • TimeWarp
    • DistanceLapse
    • Bramping
    • Star Trail
    • Long Exposure HDR
    • Long Exposure HDR time-lapse
    • Press and Hold
    • Timed Exposures
    • Simple Cable Release
    • Wifi Trigger
    • Triggertrap also includes a neutral density filter calculator, which is convenient. Although I prefer Slower Shutter, it is convenient having a calculator in the same place as the trigger. The app also includes local sunrise and sunset times which is very convenient.

    It is worth noting two more things about Triggertrap. First, all the features of the apps are not available on both iOS and Android. Second, that is likely to change quick because Triggertrap is always working on improvements and new features.

    The apps are free so while you are paying for the mobile kits, you are not paying for the software side.

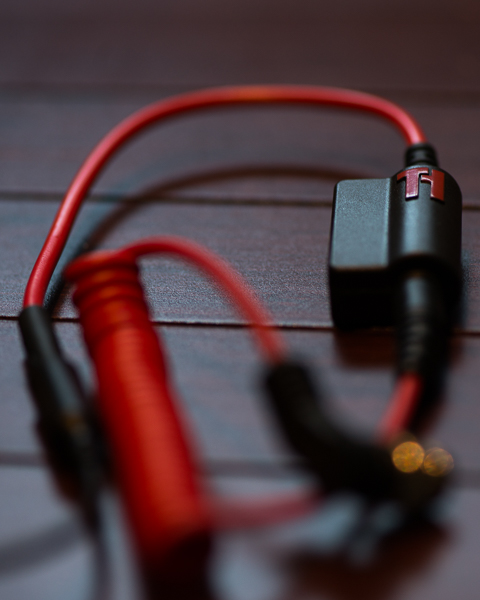
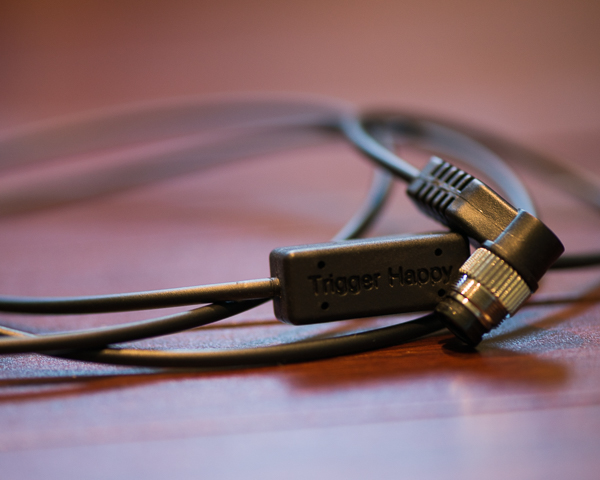
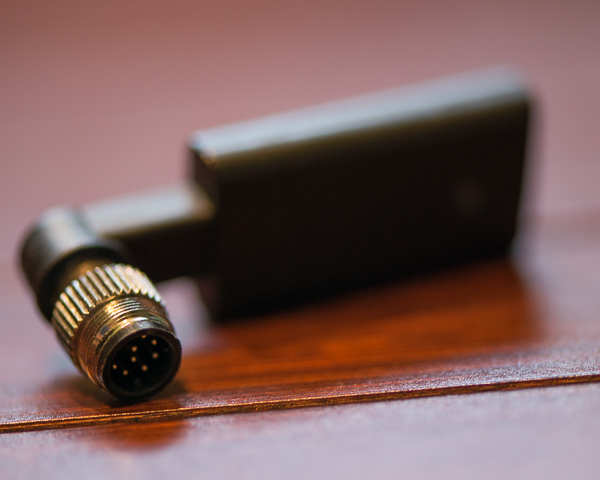
    Trigger Happy

    Trigger Happy also began as a Kickstarter project and was successfully funded. It works the same way at Triggertrap, using the headphone jack of your mobile device.

    NOTE: Since writing this article, TriggerHappy has closed for business, but some of the products are still available. They decided to open their software up to the world and made it Open Source available on GitHub.  They are also recommending people to check out Triggertrap.

    Triggerhappy

    The kits are available for Canon, Nikon, Pentax, Olympus, Sony only and retail at $ 29-49 USD. The apps are limited to the most basic features including the following trigger options:

    • Simple camera trigger
    • Bulb
    • Time-lapse mode / Intervalometer
    • HDR mode
    • Bramping

    This system was the first I owned, via the Kickstarter project; it’s changed since then but even the original still works very well. The apps are also free, so while you are paying for the kit you are not paying for the software side.

    SmartShutter

    SmartShutter is from a company called Zesty Accessories in Japan, and is different than the other mobile releases as it uses Bluetooth to trigger instead of a wired release. Cool, right? The product sells for between $ 39.99 and $ 64.99 direct or through Amazon.

    It works very well, but the app is extremely limited. I do have some issues with the design of the Nikon version, but instead of re-stating it here you can see to my full review and video of the product here.

    Zesty

    I mentioned that the product uses Bluetooth, but you should know that it relies on your camera’s battery for power. That means if you’re using a camera like the Sony A7, which has poor battery life, then this device will drain your camera battery faster. But if you have a camera like the Nikon D810 your battery life will continue performing well.

    The devices are available for Nikon, Canon, Sony, Olympus, Pentax, Konica Minolta, Contax, Fuji, Sigma, Hasselblad and Samsung.

    The free app allows for a quick trigger of the camera or a timed exposure. But the timed exposure allows for intervals, a delayed start, and even the number of photos to capture. In addition, the app has the ability to geotag your photographs using your phone’s GPS as well. The app is only available for iOS and is also free.

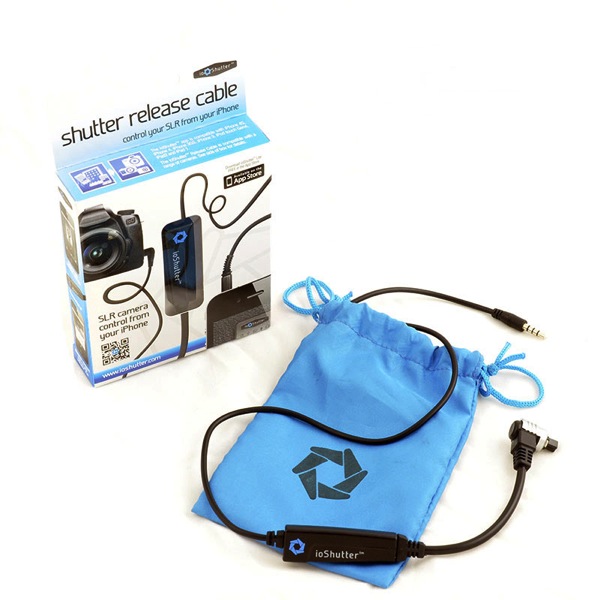
    ioShutterPro

    ioShutter is made by enlighten photo, the people who created Orbis and other amazing products for photographers. ioShutter is also the priciest of each of the triggers coming in at $ 69.99 for the cable kit. They do have a limited number available right now at 50% off due to what seems to be damaged packaging.

    It comes in a nice package and includes a pouch to hold the cable when not in use. The design is actually very similar to the Triggertrap where there is a module with a cable that connects the module to the camera. That way if one part breaks only half of the cable needs to be replaced.

    IoShutter

    Photo from enlighten photo website

    ioShutter is available for Canon, Nikon, Fuji, Pentax, Samsung and Hasselblad. But the mobile app(s) are only available for iOS at the time I’m writing this. Yes, I used plural because the ioShutter app comes in two versions: Lite which is free and Pro, which is an additional $ 5.99.

    ioShutter Lite gives you the standard shutter release function you’d expect to find in a cable release. However the Pro version comes with other trigger options:

    • Timed exposure
    • Time-lapse
    • ClapToSnap
    • ShakeToTake

    You can also stack features like creating a time-lapse with timed exposures.

    Bonus Time

    There are two quick things I want to mention before moving on to my recommended product.

    The first is for Lifeproof case users. Your case comes with a headphone adapter. I leave mine connected to my earbuds all the time. So I picked up a second adapter, which connects, to my mobile kits.

    The second tip is if you already own one of the cables mentioned above, but you want to try another app. I started with Trigger Happy but do not use their app anymore because I now use my favorite of them all, Triggertrap. Before I got my hands on a Triggertrap mobile kit I was using my Trigger Happy cable with the Triggertrap app. So it’s worth knowing that your cable kits should work fine with other apps. I also tested the Trigger Happy cable with ioShutter so I know it works there as well.

    Suggested Product

    My favorite mobile trigger is Triggertrap for two reasons. For one the app is amazing and contains so many useful features that shouldn’t and can’t be ignored. The team at Triggertrap is also looking for more ways to innovate in the industry, and they’re working on amazing things. For the price of the mobile kits, and the quality of the product itself, on top of the incredible mobile apps, the product is truly a winner.

    So there you go – a simple comparison of your options, some tips and my recommendation. Feel free to comment with questions and comments as I’m sure you have your own preferences.

    The post Mobile Triggers Compared to Help You Choose the Right One by Scott Wyden Kivowitz appeared first on Digital Photography School.

    Digital Photography School