Category: Photography

  • Birthday Gifts That Will Separate Your 7 Year-Old From His Computer Games

    Kids fondness for computer games is raising concerns among parents. The exponential growth of video game industry has made the already arduous job of parenting even tougher. Although there is nothing wrong with some video game time once in a while, but to witness billions of kids whose faces are glued to the screen, evokes doleful feelings. Watching your kid roll around on the floor dribbling to the screen completely distracted from learning anything useful, is not a very pleasant sight!

    The key to fending off such an addiction is by spending more time with your kids while they play the game and gravely practicing parental guidance. Another way is by involving your kid in other activities that are worthwhile in the child’s growth and development. The best way to bring out a new activity to a child is by using his or her birthday present. Birthday presents are extremely special- they stimulate, inspire, excite kids and hey are also bound to try these gifts. Given below are some wonderful gifts that can capture your 7 year old kids imagination

    Classic Board Games
    Children love playing classic board games! Most of them are timeless and can be enjoyable for children of any age. Such games provide opportunities for developing positive attitudes, building self concept and alleviating the fear of error and failure. Scrabble and Monopoly are the well known ones. You must also participate with them so that they feel they always have someone to play with.

    scrabble

    A Music Instrument
    It gives your child an opportunity for creativity and also inculcates in him or her discipline, self-esteem and passion for music. There is a plethora of such instruments, but you must help them choose the one they like. Your personal preferences will guide your child on what he or she likes.

    music

    Sport Equipment
    Sport is fundamental to the early development of children. Many of them love playing sports at a very young age with proper guidance. Through participation, they can learn about teamwork, honesty, fair play and respect for themselves and others. As parents, you must encourage them by gifting sport equipments that they can use.

    balls

    A Scooter Or A Bike
    Bikes and scooters are fun toys. Children love zipping around on them there are 2 main brands ezip and Razor. You must consider products such as the razor e100 electric scooter and the ezip e500 electric scooter, to check if it is a good product for your child. You can also find detailed information on the product in fan sites and reviews from parents who bought it. You can also explore buggies and other such adorable ride-on toys.

    scooter

    Your Child’s Health

  • Daily Photography Pros and Cons: is it for You?

    All photographers have room to grow, and we all of commit to honoring that growth in different ways. One way to dedicate yourself to your photography is to commit to doing it daily. It does not matter whether your camera is a phone, a compact camera, or a top-of-the-line DSLR. Daily photography simply means picking up your camera and using it every day.

    365project, daily photography

    You could commit to a specific plan or subject, or keep it more open. You might share your daily photographs on a blog or with a 365 project group, or keep them private. The focus is on pushing yourself to use your camera each day and to see where that journey leads you.

    The Benefits of Daily Photography

    Improvement requires effort, and effort requires time and dedication. Daily photography is one avenue for committing the time and dedication necessary to improve your photography. It keeps photography in the forefront of your mind and pushes you to innovate and try new things. Personally, I can only spend so many days staring around my apartment for inspiration before I kick myself into gear and head out to find something new. Committing to daily photography got me off my couch and out into the world, far more often than I would have done otherwise.

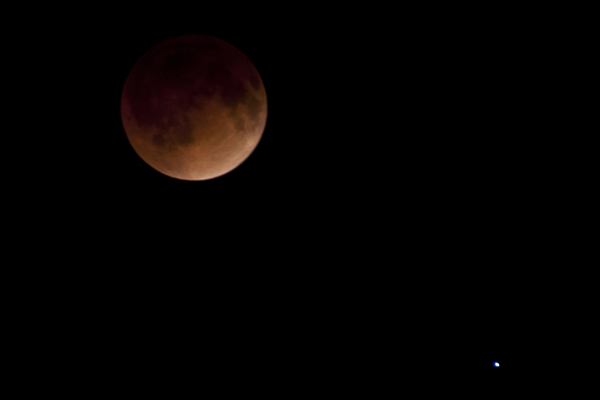
    eclipse, moon photography, full moon,

    Daily photography forces you to expand your repertoire. Perhaps you got hooked on photography while traveling, because you had a child, or you wanted an avenue to express yourself creatively. Daily photography will push you beyond that initial interest and help you explore new avenues and subjects.

    You likely cannot travel somewhere new every day, so you may find a new appreciation for the mundane. You may have taken your umpteenth portrait of your kids, so you start seeking out the tiny details of their life, or the unposed moments. You may find the challenge of expressing yourself daily leads you to try new techniques, or a new way of processing your images. Regardless, the day-in and day-out demands of daily photography will push you to expand.

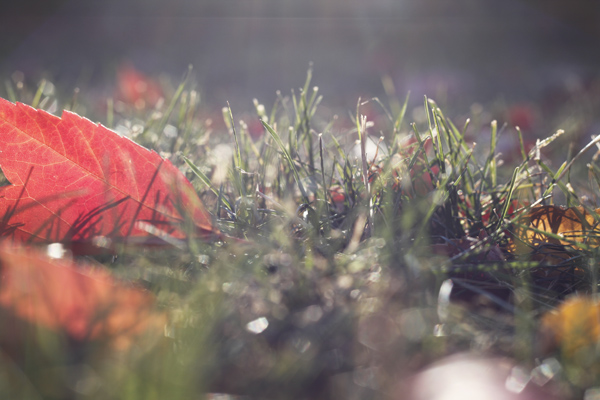
    autumn, fall, autumn leaves, leaf, bokeh

    Daily photography can also help you connect to the seasons and the changing rhythms of your days, weeks, and months. You may start to notice how the first signs of autumn are creeping in, and the greens of summer are fading. You may realize how much faster the light is fading, or how much later you can appreciate the sunrise. Daily photography can help center you in this moment of time.

    When shared in a community, daily photography is even better. Seek out a group of like-minded (or even unlike-minded for a real push) photographers willing to give and receive feedback. Ask for a challenge, or share a risk you took in your photography. Getting real feedback (not just accolades from your Facebook feed) can lead to real growth. Sharing in a community can also offer a level of encouragement and support to keep you motivated. Read more about daily photography communities in Jumpstart Your Photography: Start a 365 Project.

    The Downsides of Daily Photography

    Make no mistake, daily photography is a huge commitment. You may find yourself up late, haphazardly shooting a frame or two of your shoes, or your snack before falling into bed, simply to have photographed something. You may feel like your creativity is stifled by the daily demand of coming up with something new.

    candy, closeup, color, skittles

    Doing daily photography can also takes its toll on your friendships and relationships. You want to be careful that every trip, every outing, every moment does not become an excuse for a photo tour, or you may find the enthusiasm of your biggest supporters lagging. You do not want your children, spouse, friends, or even pets, to come to dread your camera. Always take into consideration the feelings of others when decided what, and when to photograph.

    You may find that you feel constantly behind, between the combined demands of taking photographs daily, organizing and processing those photographs, and sharing or commenting on the images of others. You may find that the “have to” feeling overpowers the love and joy of photography for you, turning a passion into more of a chore. Burning out is no way to build up your enthusiasm.

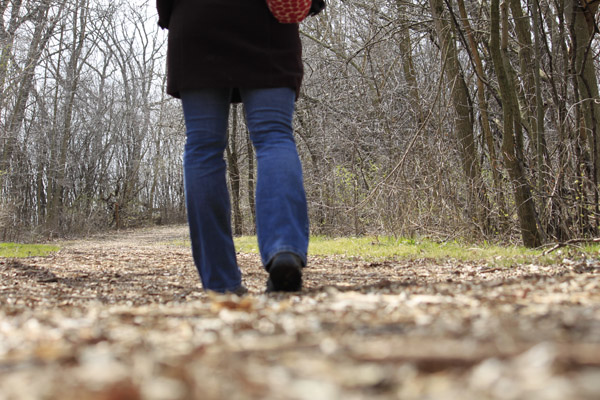
    walking, selfie, self portrait

    Daily Photography: Yes or No?

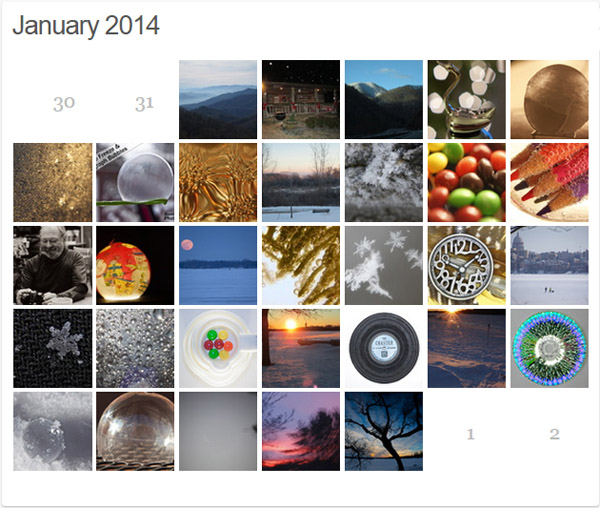
    Personally, I started a 365 project in January of 2011, which I continued for just shy of 1200 days (you can view it here at Archaeofrog). After more than three years of daily photography, I was ready for a break. But, on the other hand, I find myself missing much of the push and creative drive I received from my project.

    There are many ways to commit yourself to photography. If a 365 project sounds too intimidating consider a 52 weeks project, with a focus on taking at least one photograph each week instead of every day. Or start a shot list of styles or specific photographs that you want to capture. Make it your mission to work your way through the list when you have the time and inclination.

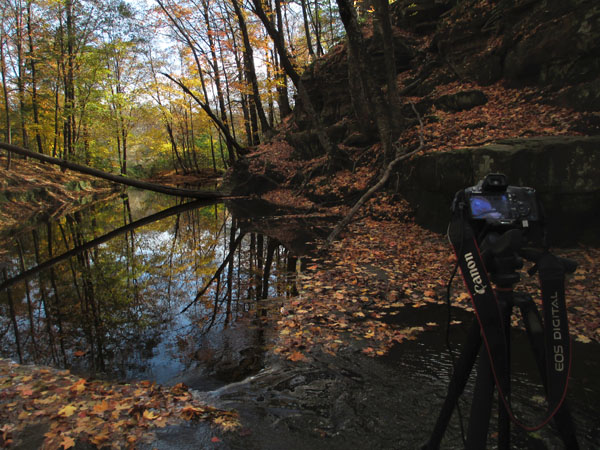
    fall, autumn, photography, tripod, setup

    You could plan a photography weekend or day trip. Set aside some time to visit an interesting location, invite a friend out for a photo shoot, or pencil in that upcoming full moon or meteor shower on your calendar. Find a way to make photography work for you by making time for it.

    What works best for you? Are you a daily photographer, or have you ever participated in a 365 project? Share your thoughts about the benefits or downsides in the comments below.

    The post Daily Photography Pros and Cons: is it for You? by Katie McEnaney appeared first on Digital Photography School.


    Digital Photography School

  • How to Recover Photos After a Data Loss

    Frank Grießhammer

    By Frank Grießhammer

    One of the worst things that can happen to you as a photographer is data loss, but there are ways to resolve it. This guide will talk you through how to recovery those all-important photos easily and quickly.

    Whether it’s a quick snap of your pet or a scenic landscape shot, chances are most of the photos you take are precious and important to you. Photos capture memories and moments; losing these would be disastrous. Sadly, photo loss is not an uncommon event. In fact, either it’s already happened to you in the past or it likely will in the future.

    Losing your photos can occur for a variety of reasons, one of the most common being simply human error. It could be something simple like accidentally deleting the wrong file or pressing the wrong button. However, as wonderful as technology is, it too is prone to failure. There are many stories of people unloading their memory cards from their cameras, putting it on their computer and then finding their files can’t be opened or are missing altogether.

    If you’ve discovered that you’re a victim of data loss then one of the most important steps to take is to stop using the card immediately, and remove it from your camera, just to make sure that no activity takes place on it. It’s crucial that no further data is written to the card.
    Jorge Quinteros

    By Jorge Quinteros

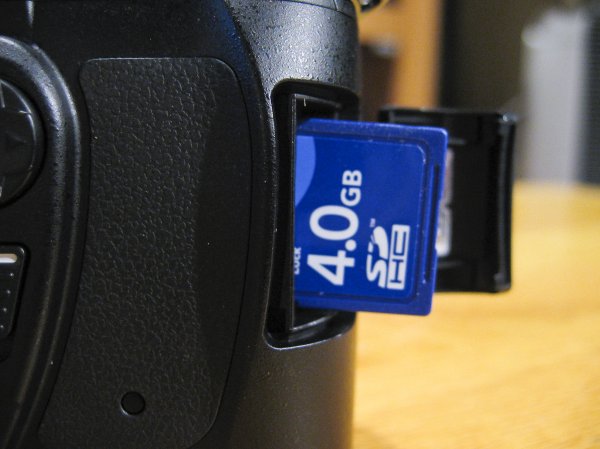
    When a photo is deleted, the data on the card isn’t immediately purged. There are two main types of data on an SD card: information about the files on the card and the data for the files themselves. When you delete a file, it’s that information about the files that is removed. The data for the files remains on the card until the space is needed for another file. As such, a new photo on the card could be assigned to the place where a deleted photo once was, wiping it out permanently.

    It’s now time to try and get your data back, so mount your SD card to your computer. Depending on the condition of the card (e.g. if it is corrupted or uses an unrecognizable file system), your system may automatically detect that there’s a fault with it. You might perhaps be suggested to use the manufacturer’s software to try and resolve the problem. Alternatively, a pop-up box could encourage you to format the card. Do not do any of this.

    Bridget AMES

    By Bridget AMES

    Formatting the card is especially dangerous and will lower your chances of successful data recovery to sinking level. It’s a last resort tactic. Your computer means well by suggesting a card format. It’s essentially saying “Hey, I can’t seem to locate any data, shall we wipe everything and start afresh?” However, just because your operating system can’t find the data it doesn’t mean it isn’t there, lurking under the surface.

    DO: stop using the card literally the moment you realize there’s a problem; remember to breathe and stay calm!

    DONT’T: browse the photos on your camera, take ‘just one more’ snap, or format the card.

    The next stage is to download a program that’s going to help you get your data back. For the purposes of this tutorial we’ll be using R-Undelete. There are other programs available, but this one is entirely free for home users and works really well. The only limitation is that it only works for FAT formatted SD cards—fortunately, practically all camera SD cards are FAT formatted. There are also some professional data recovery companies who will charge you to recover data, but frankly, in this circumstance, using something like R-Undelete will do the same job for none of the cost.

    Step One

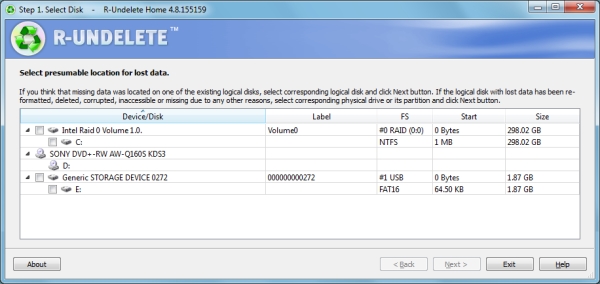
    The first screen you’ll be presented with a list of all the drives mounted to your computer. All you need to do is place a tick in the checkbox next to your SD card and click ‘Next’.
    Step1JPG

    As you can see, the example image above shows an internal drive, a DVD drive and an SD card. The SD card being used is called ‘Generic Storage Device’, but yours might have a more unique name. Refer to this or match up the size of your card to the ones listed (1.87 GB in the example).

    Step Two

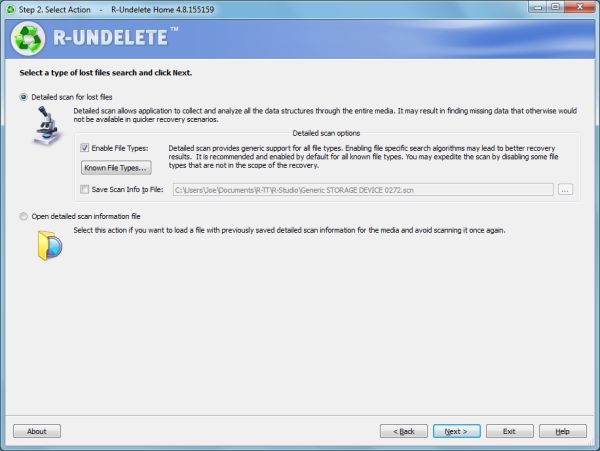
    This step is a simple one. The program will automatically select a detailed scan for lost files, which is precisely what you want. You can ask for the program to only search for specific types of files (like videos or pictures) by clicking ‘Known File Types…’, but it’s better to leave it on the default setting to scan everything.
    Step2JPG

    The scan information is going to be saved to Documents by default, but feel free to change that file path to whatever you wish by checking the box alongside. Remember that you must not save anything to the card that you’re recovering from, so it’s easiest to keep things on your internal drive.

    When you’re ready, click ‘Next’ and the scan will begin.

    Step Three
    Step3JPG

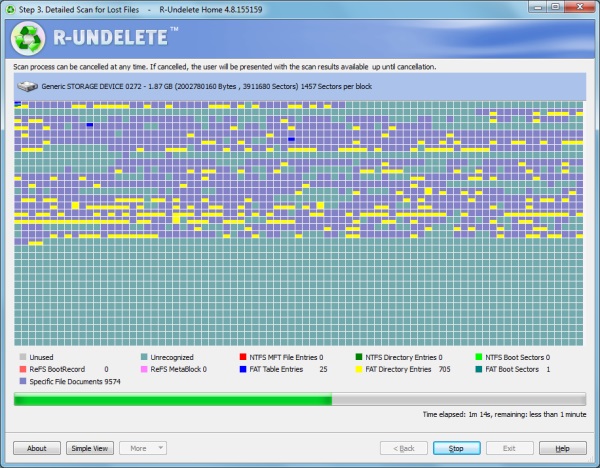
    The scan will then begin. This screen might look a bit scary at first, but there’s no need to worry. It’s just a visual representation of the type of data that is being scanned. Just wait for the scan to finish (it’ll be quick, but will vary depending on the size of your card) and click ‘Next’ when that option is available.

    Step Four

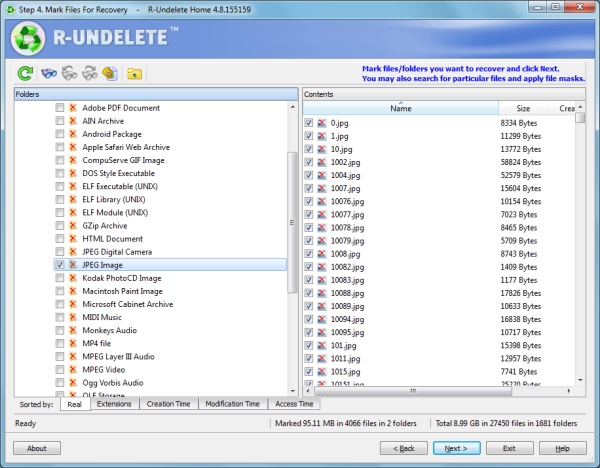
    You’ll be presented with a list of all the data that the program has found on the card. On the left are the folders, which show the contents on the right when they are clicked.
    Step4JPG

    The great thing is that you can sort the results by filters such as the file extension, the time the data was created, or when it was accessed. If you’re trying to hunt down specific files, then there’s also an advanced search tool where you can input variables to search for, like the size of the file or when it was last modified.

    One symptom of data loss is that the original file name is often lost, so don’t worry if you don’t recognize any of the file names. If you’re not sure where the data you seek is, go ahead and recover everything the program has found – you can recover as much or as little data as you want without issue.

    Once you’ve got the data you want to be recovered selected, click ‘Next’.

    Step Five

    Nearly there! First, select the folder where you want all your recovered data to go. Handily, the program reminds you not to choose anywhere on your SD card – but of course you know that by now!
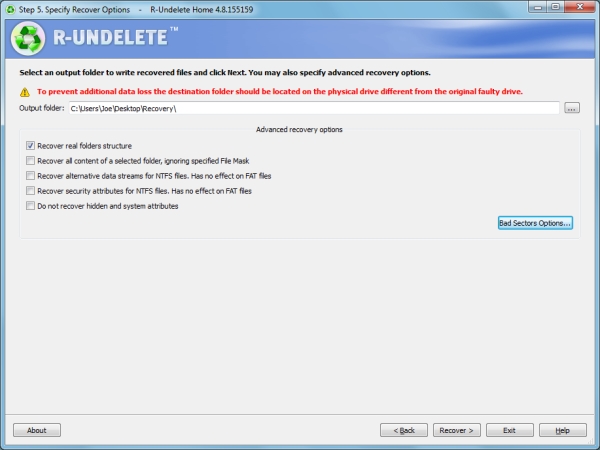
    Step5JPG

    There are also some advanced options available. The example above asks the program to try and recover the original folder structures, bear in mind however, this isn’t always possible. Providing you selected all the required files in step four, this should be the only option you might want to select.

    Are you ready to get your pictures back? Click ‘Recover’ and the program will begin to work its magic. The time it takes will depend on how much data you’ve asked to be recovered, but the process is relatively quick.

    Success!

    R-Undelete successfully recovered every image that I asked it to and hopefully it performed the same way for you.

    Try and remain calm throughout the whole process. Understandably, that’s probably easier said than done, but data recovery is entirely possible and if you follow the advice given then it should hopefully be pretty effective.

    You may aware of how important it is to back up your files, but don’t actually practice it. If possible, ensure your photos are being consistently backed up to another location. Whether you’re just transferring them to your computer at the end of the day, or sending them to cloud storage services like Dropbox or OneDrive, having multiple copies of your photos will mean that it’s less of a problem if data loss does occur.

    Best of luck and enjoy those recovered files!

    Editor’s note: please be aware the software mentioned only works on a PC. Just do a google search for: photo recovery Mac free and you’ll find a whole bunch that work similarly to the one mentioned in this article.

    The post How to Recover Photos After a Data Loss by Joe Keeley appeared first on Digital Photography School.


    Digital Photography School

  • Shopping for a New Tripod? Here are a Few Options to Check Out

    If you’re in the market for a new tripod, or perhaps looking to buy your first one here’s some help for you from the folks over at B&H Photo Video.

    You can check out these dPS articles as well:

    • Beginner’s Guide to Tripods
    • Different Tripods for Different Subjects – Which to Choose?
    • How to use Your Tripod (it’s not as simple as you think!)
    • An Introduction to Tripods
    • How to buy a tripod

    The post Shopping for a New Tripod? Here are a Few Options to Check Out by Darlene Hildebrandt appeared first on Digital Photography School.


    Digital Photography School

  • Tips For Great Indoor Portraits Using Natural Light

    192

    You don’t have to have an amazing dedicated photography studio to get great shots indoors. Most homes have at least one or two spots that work just fine. You don’t have to have a lot of additional equipment, in fact, these tips will help you take indoor photos with just your camera and natural window light (and even incandescent light in a pinch).180

    Seek the best light

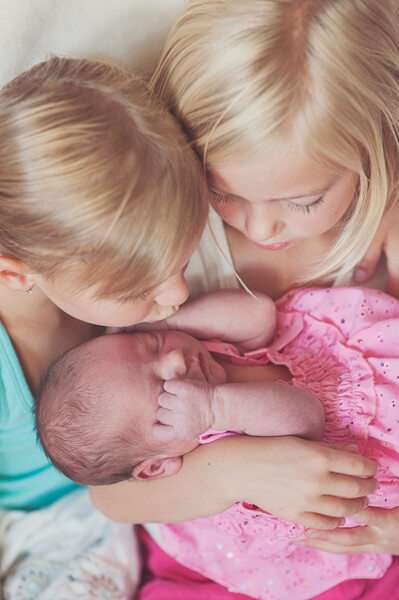
    Take a tour of the home you are going to shoot in to scout out the best light. I’ve done newborn sessions in a kitchen multiple times because that’s where the light was best. Often times bedrooms are little havens of sunshine as well. It might not be the room with the prettiest furniture, but that’s okay. Light is most important to me, and the other things in the room are secondary.

    Eliminate clutter or simplify

    Once you’ve found some nice light, do all that you can to eliminate clutter in the area you are going to shoot. Move distracting objects if possible; it’s much easier to move them before you shoot than to try to take them out later in post-processing. If you can’t avoid clutter, try getting in close to your subject.

    200

    Shooting in low light

    Most of the time I shoot indoors with my 50mm f/1.4 lens on a full-frame body (try a 35mm lens on an APS-C or cropped sensor). It gives me enough space to get everything in the photo that I want, and gives me the ability to open the aperture wide enough to take photos in poorly lit rooms, if needed. Other lenses can work just as well, depending on what you are trying to achieve, but this is the lens that I have found has the most versatility for my indoor shooting.

    You will often need to push the ISO higher if you don’t have a lot of natural light coming in. I prefer some noise, or grain, to the look of a flash, so this doesn’t bother me too much. Ideally you’ll want to shoot on days with plenty of sunlight, and a time of day when you have plenty of light indoors. This isn’t the situation to shoot in the golden hour, right before sunset. You might want to try late morning or early afternoon for more natural light.

    185

    Direction of light is important to create mood

    When you are shooting with natural window light, pay attention to the direction the light is coming in, just as you would when shooting outdoors with the sun. You can have a beautiful hazy backlit photo, or a dimensional dramatic side-lit photo, or a flattering crisp photo lit directly from the front. Decide what mood you’d like in your photo, and also pay attention to the space you have to maneuver, and any clutter that may be in the background. 451

    Mixed lighting situations

    Sometimes you have to just work with what you’ve got. If you’re forced to shoot with incandescent lighting, you can still get some meaningful photos. Try not to have incandescent lighting and natural window lighting fighting to light your subject at the same time. It usually creates a crazy white balance issue, and it’s hard to make right, unless you just convert the photo to black and white. I’ll usually turn overhead lighting off, unless there is absolutely not enough light without it, or I’m shooting in a situation where I don’t have control over where the action happens.

    456

    Fitting it all in the shot

    At times I have had to be very creative to get everything in the photo that I need to include. You can always use a wider angle lens, but that can distort things, and you might not want that look. I’ve stood on counter tops in the kitchen, on beds (watch out for ceiling fans-I’ve had a couple of close calls when I wasn’t paying attention), and wedged myself behind furniture. Anything for a good shot, right?

    183

    Finally

    One last tip: Sometimes you may not be sure exactly where the best spot is for the lighting you’re hoping for. Don’t be afraid to experiment, and move your subject around until you’re happy with the way everything looks. If I have a newborn on a blanket, it’s a simple thing to rotate the blanket around until I like the way the light rests on his face.

    Don’t be afraid to get your camera out indoors! With some practice and experimentation, you’ll find lots of ways to make great photos without any extra equipment.

    171


    The post Tips For Great Indoor Portraits Using Natural Light by Melinda Smith appeared first on Digital Photography School.


    Digital Photography School

  • Weekly Challenge of Bird Photography

    Earlier I shared an amazing bunch of photos of birds. Here’s a couple more for you:

    Susan

    By Susan

    Farrukh

    By Farrukh

    Weekly photography challenge – bird photography

    Now it’s your turn to go photograph some of our fine feathered friends, the birds. Keep in mind you don’t need to go farther than your own backyard to find birds, or the nearest park. If flying ones are too fast, how about a chicken? Visit a local farm to photograph some barnyard fowl.

    Need some help with bird photography tips?

    • Bird Photography Tips – How to Make Your Bird Photographs Stand Out
    • Bird Photography Tips for Beginners
    • Guide to Attracting Critters to Your Garden for Backyard Wildlife Photography
    • Tips for Photographing Birds in Flight

    A few more bird images to get you started:

    Nigel

    By nigel

    Howard Ignatius

    By Howard Ignatius

    Doug Brown

    By Doug Brown

    Davejdoe

    By davejdoe

    Share your bird photography

    Simply upload your shot into the comment field (look for the little camera icon in the Disqus comments section as pictured below) and they’ll get embedded for us all to see or if you’d prefer upload them to your favourite photo sharing site and leave the link to them. Show me your best images in this week’s challenge.

    The post Weekly Challenge of Bird Photography by Darlene Hildebrandt appeared first on Digital Photography School.


    Digital Photography School

  • A Collection of Stunning Photos of Birds

    Birds are a tricky subject to photograph. They move to fast and erratically, getting sharp images of them in flight is a challenge. But the large birds so majestic looking, and the tiny ones so delicate even shots of them in a flock or sitting still can be great.

    So let’s have a look at some photographers that are doing it right, and some stunning photos of birds in this week’s image collection.

    The Birds

    Photograph HELP !! by Henrik Nilsson on 500px

    HELP !! by Henrik Nilsson on 500px

    Photograph Look at me! by Marco Redaelli on 500px

    Look at me! by Marco Redaelli on 500px

    Photograph Flying Kiss 14 by Marco Redaelli on 500px

    Flying Kiss 14 by Marco Redaelli on 500px

    Photograph Phantom of the Opera by Max Rinaldi on 500px

    Phantom of the Opera by Max Rinaldi on 500px

    Photograph Sunrise Journey by Mostafa Ammar on 500px

    Sunrise Journey by Mostafa Ammar on 500px

    Photograph Taiwan blue magpie flying by FuYi Chen on 500px

    Taiwan blue magpie flying by FuYi Chen on 500px

    Photograph Carry Out by NHLinh on 500px

    Carry Out by NHLinh on 500px

    Photograph To The Moon by cherylorraine smith on 500px

    To The Moon by cherylorraine smith on 500px

    Photograph Eyes on You.. by Phoo (mallardg500) Chan on 500px

    Eyes on You.. by Phoo (mallardg500) Chan on 500px

    Photograph 73A2325 Follow The Leader by David Orias on 500px

    73A2325 Follow The Leader by David Orias on 500px

    Photograph Dove Love by Jon Rista on 500px

    Dove Love by Jon Rista on 500px

    Photograph Bath by Michaela Smidova on 500px

    Bath by Michaela Smidova on 500px

    Photograph Bathing Blackbird by Csilla Zelko on 500px

    Bathing Blackbird by Csilla Zelko on 500px

    Photograph Refreshment by Geoff Powell on 500px

    Refreshment by Geoff Powell on 500px

    Photograph Cooling down by Ronald Kamphuis on 500px

    Cooling down by Ronald Kamphuis on 500px

    Photograph An angry little bird by Jan M. on 500px

    An angry little bird by Jan M. on 500px

    Photograph Portrait by Ben Canavaggio on 500px

    Portrait by Ben Canavaggio on 500px

    Photograph Wrong way by John Purchase on 500px

    Wrong way by John Purchase on 500px

    Photograph tree and birds by ahmet  harmanc? on 500px

    tree and birds by ahmet harmanc? on 500px

    Photograph butter up >.< by Matcenbox  on 500px

    butter up >.< by Matcenbox on 500px

    Photograph Bird :) by Alexander Lazarov on 500px

    Bird :) by Alexander Lazarov on 500px

    Photograph siblings! by Itamar Campos on 500px

    siblings! by Itamar Campos on 500px

    Photograph Discussing!  by Itamar Campos on 500px

    Discussing! by Itamar Campos on 500px

    Photograph barn owl by Detlef Knapp on 500px

    barn owl by Detlef Knapp on 500px

    Photograph Mirror. by Geir Magne  Sætre on 500px

    Mirror. by Geir Magne Sætre on 500px

    Photograph Kussharo Swans 1 by Jon Cornforth ? Cornforth Images on 500px

    Kussharo Swans 1 by Jon Cornforth ? Cornforth Images on 500px

    Photograph Me! Me! by Sue Hsu on 500px

    Me! Me! by Sue Hsu on 500px

    Photograph We're Going On An Adventure by Justin Lo on 500px

    We're Going On An Adventure by Justin Lo on 500px

    Photograph oo00o by Prachit Punyapor on 500px

    oo00o by Prachit Punyapor on 500px

    Photograph Feeding Time by Chris Lue Shing on 500px

    Feeding Time by Chris Lue Shing on 500px

    Photograph Mom! Timmy won't move over! by Jim Cumming on 500px

    Mom! Timmy won't move over! by Jim Cumming on 500px

    Photograph I believe i can fly! by Remco van Daalen on 500px

    I believe i can fly! by Remco van Daalen on 500px

    Photograph Parents Love by Anneliese & Claus Possberg on 500px

    Parents Love by Anneliese & Claus Possberg on 500px

    Photograph Rockhopper Showering by Will Burrard-Lucas on 500px

    Rockhopper Showering by Will Burrard-Lucas on 500px

    Photograph Dippy on Compton Bay by Jeremy Cangialosi on 500px

    Dippy on Compton Bay by Jeremy Cangialosi on 500px

    Photograph Is this pose fine?? by Samrat  Mukhopadhyay on 500px

    Is this pose fine?? by Samrat Mukhopadhyay on 500px

    Photograph 3 Part Harmony by Ben Page on 500px

    3 Part Harmony by Ben Page on 500px

    Photograph Puffin with Sandeels by Ian Schofield on 500px

    Puffin with Sandeels by Ian Schofield on 500px

    Photograph Harmony by Photosequence  on 500px

    Harmony by Photosequence on 500px

    Photograph Left outside by Gilad Hazan on 500px

    Left outside by Gilad Hazan on 500px

    Okay so that ended up being a lot of photos. I like birds, what can I say?!

    The post A Collection of Stunning Photos of Birds by Darlene Hildebrandt appeared first on Digital Photography School.


    Digital Photography School
  • DSLR Camera Buying Guide 2014 for Newbies and Pros

    When it comes to buying a new digital camera, most beginners find it difficult to choose the best DSLR camera for photography. This article highlights some of the best professional cameras of 2014. It provides a round-up of the best digital cameras with DSLR technology that caters to the requirements of beginners as well as professional photographers. Let’s look at Continue Reading

    The post DSLR Camera Buying Guide 2014 for Newbies and Pros appeared first on Photodoto.


    Photodoto

  • 5 Beginner Tips for Photographing Animals in the Wild

    As I traveled through Africa, I learned many things about photographing animals while on safari. At first I knew absolutely nothing about it, but then with time and experience shooting in different conditions, I noticed certain factors that helped improve my photos. If you’re new to photographing animals, here are fire tips for photographing animals in the wild.

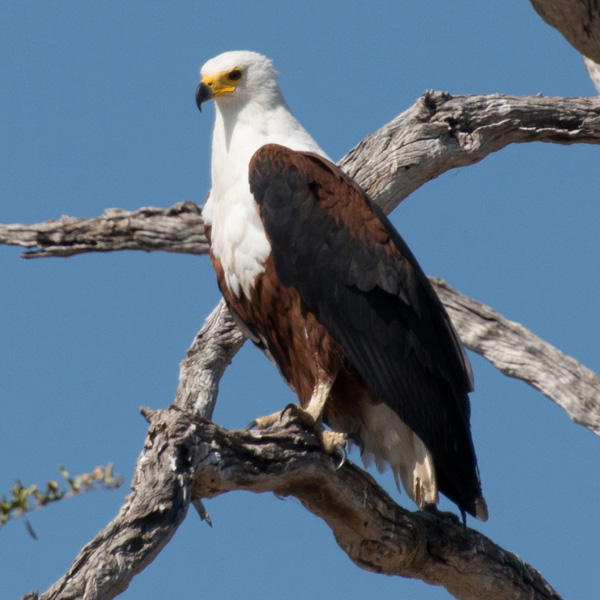
    DSC 0887 eagle

    1 – Use a zoom lens

    Many wild animals stay away from people. As soon as they notice you, they might immediately run off. This is truer with birds that tend to fly away if you get too close. The larger animals might stay put, but then you put yourself at great risk by getting too close to them. Elephants and rhinos can weigh a couple tons and could easily overturn your vehicle. Therefore, the easiest way for you to photograph animals is with a zoom lens.

    The photo above shows what a zoom lens can do. There is no way I would have been able to get close enough to that bird with a wide angle lens. This particular photo was shot at 300 mm, using my 28-300 mm.

    Some photographers will tell you that using a lens of this range will give you poor photos. But as a beginner, who was just starting to photograph animals, I found that it was adequate for my first few animal photo shoots. It was also easier on my wallet. A lens with this range will allow you to photograph birds in far away trees as well as larger animals which may be closer to you.

    Another benefit of a zoom lens is that you will not need to change your lens as frequently which will allow you to easily adjust your focal length as needed and quickly get the shot. Less lens changing will also help you to prevent the forest or jungle dust from entering your camera body and possibly dirtying your sensor.

    Therefore, if you are new to photographing wild animals, I recommend that you utilize a lens with a longer range. The zoom lens will help bridge the visual gap between you and the animal, while keeping you safe and the animal at ease.

    2 – Employ a faster shutter speed

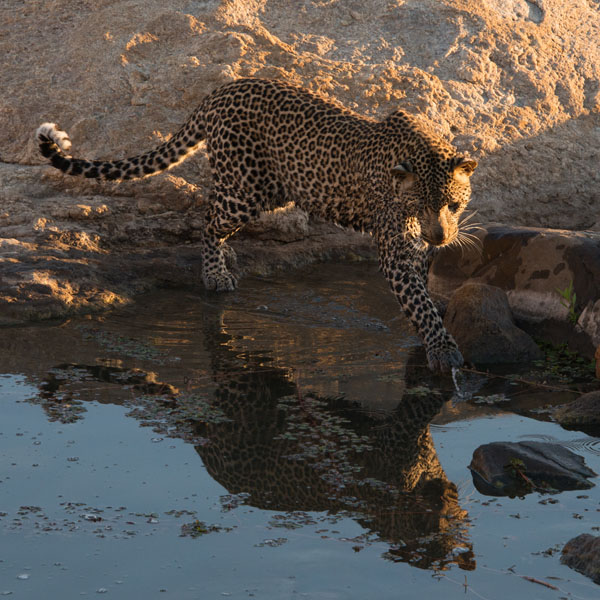
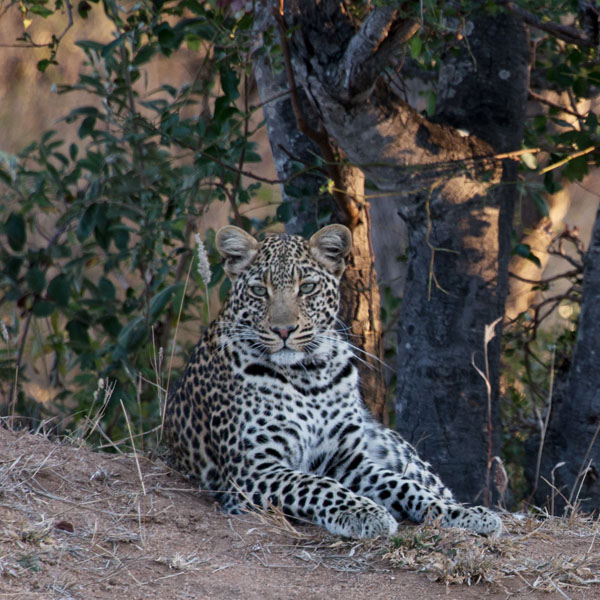
    DSC 7131 leopard reflect

    Because an animal may be constantly moving, you will want to use a faster shutter speed. Shutter speed is the amount of time your shutter is open. The faster or shorter this is, the less likely you are to blur the continuous movement of the animal in a single shot.

    Notice the photo above where I used a shutter speed of 1/250th of a second. This was taken in the early morning. The leopard was especially active because he was hunting fish by the water. At no point did the cat ever stay completely still for more than a few seconds. Because it was always moving, at 1/250th of a second, parts of the leopard are still not as sharp as they could have been.

    When photographing animals, you should try using a shutter speed of at least 1/500th of a second or faster, especially for more active or restless animals. This will help you freeze the animal’s motion and prevent parts of it from blurring.

    3 – Don’t be afraid to increase your ISO

    When you do use a faster shutter speed, you will notice that your exposure will darken since you are shortening the amount of time you let light onto your sensor. To balance this, you can increase your ISO. this is your camera sensor’s sensitivity to light. The more sensitive it is to light, the less exposure time you will need for light to hit your sensor.

    As a caveat, when you increase your ISO, you amplify the image signal in your camera. This will in turn amplify and increase the amount of noise you capture in your photo. Fortunately, there are many methods that can help you reduce the noise in your image if you find it unbearable. Having a slightly noisier picture is small price to pay for a better-exposed photo with the details that you want.

    Therefore, don’t be afraid to use a higher ISO. Play with the settings until you find that sweet spot. Yes, you may get a little noise, depending on your sensor, but that’s better than having an underexposed photo (or blurry), which may not capture all the detail.

    4 – Shoot closer to golden hour

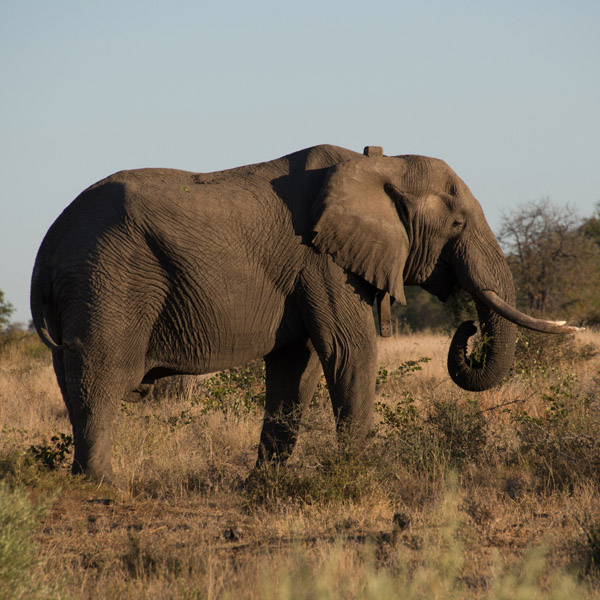
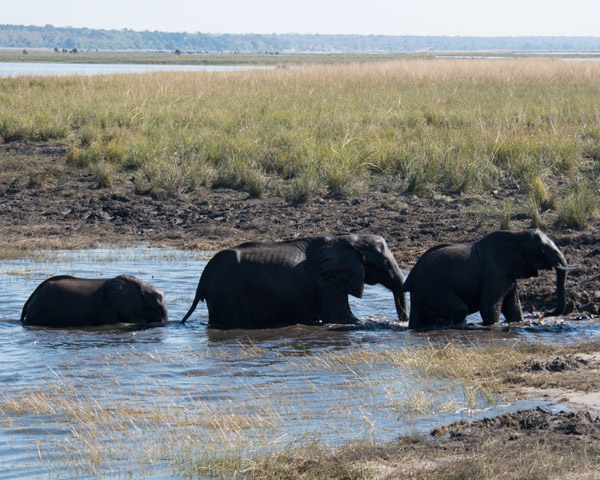
    DSC 7849 elephant afternoon

    The best time to photograph animals is close to golden hour. If you shoot when the light is directly overhead you’ll end up with a very harsh, bright, light and consequently dark shadows in your photos. The closer you shoot to golden hour, the closer the sun is to the horizon. This will produce a much more diffused and better angle of light on your animal subject.

    The photo above is an example of a photo shot closer to sunset. Notice how the shadows fall behind the elephant and less of its body is in shadow. You are able to see more of the elephant’s lines, wrinkles and texture. This photo has not been post processed using any filters, yet the light in the photo is warm and inviting. Compare this to the image below which was shot closer to noon. Notice how much harsher the shadows are on the elephants. Their bodies are almost covered entirely in shadows, and you are not able to see the texture of the elephants’ skin at all.

    DSC 1177 elephant group

    5 – Hire a capable tracker to easily identify animals

    DSC 7895 leopard camo

    A good tracker will help you to see even the most camouflaged animals. As we were driving through the dense African jungle, our guide was able to spot this leopard, which to my eyes was hidden among the bushes. Without my guide I never would have photographed it.

    You should hire a skilled tracker so that you don’t waste your time trying to find animals among the trees. Instead you can spend your time planning and improving your next shot. You can tell your tracker which specific animal you’d like to see. More than likely he will know where this animal prefers to roam. This will improve your chances of quickly finding your desired animal and getting your shot.

    What other tips can you think of for photographing wild animals? Do you ever use a tripod to stabilize your shots? What’s your favorite animal photo you’ve ever shot and in what conditions? Share some examples with us and of course, if you have any other tips for better wild life photos that you think I’ve missed, please share those as well. Happy photo hunting!

    The post 5 Beginner Tips for Photographing Animals in the Wild by Ry Sangalang appeared first on Digital Photography School.


    Digital Photography School
  • 3 Simple Ways to Create Stunning Eyes in Your Portrait Photography

    EYE MONTAGE

    Image model credits, clockwise from top left: Chris Milligan/Fremantle Media, Rachael Lever, Danny Spannerz/East Brunswick Tattoos, Tiffany Diaz

    “Here’s looking at you, kid.”

    Reclusive Hollywood legend Marlon Brando would always close his eyes when paparazzi tried to take his photo. He knew that without his eyes open an image wasn’t worth publishing.

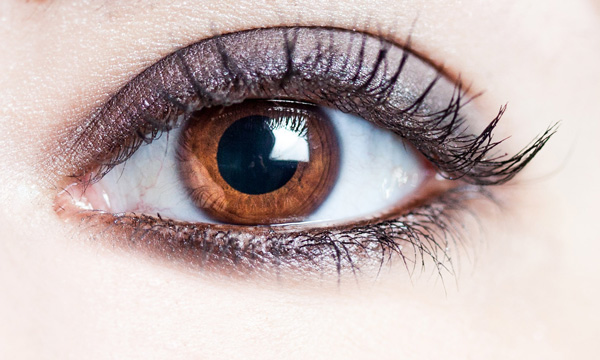
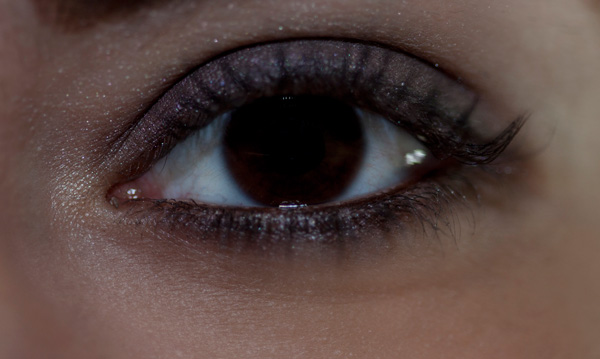
    The eyes are the single most important feature of any portrait. Beautiful eyes can make even the dullest portrait mesmerizing. Poorly lit, out of focus eyes, or eyes that lack connection, will weaken the impact of a portrait.

    Here are my three favorite techniques to make eyes really stand out in your portraits.

    #1 – Light

    Light makes photography. Embrace light. Admire it. Love it. But above all, know light. Know it for all you are worth, and you will know the key to photography.” – George Eastman

    Eyes look best when they are lit well, with beautiful catch light. Catch lights are the reflection of a light source in the eyes. The size, shape, and brightness of your catch lights depend on the light source you use.

    WindowLight

    Two large, frosted windows from my studio create beautiful catch lights. Model: Bryana Karanikos

    Naked Flash on camera

    Diffused flash on-camera creates a slightly softer, rectangular catch light.

    Med Soft off camera

    Medium softbox, off-camera, positioned at 2 o’clock gives a soft, natural catch light.

    ChasingLight 2250

    Poorly lit eyes without catch lights look cold, and a bit creepy.

    #2 – Expression

    You are what you think. All that you are arises from your thoughts. With your thoughts you make your world.” – Anon.

    EyesBA

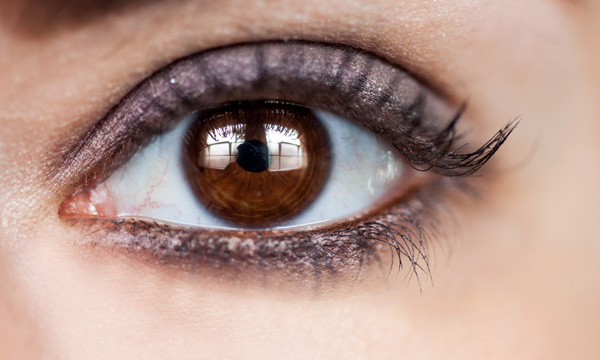
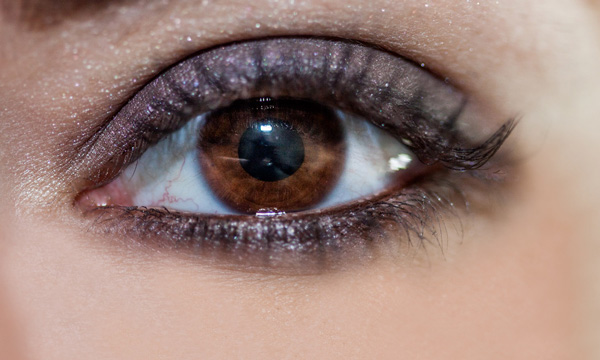
    In the image on the left (above), Tiffany’s eyes are cold, and she looks nervous. After I gave Tiffany a visualization exercise, her eyes appear warm, confident, and connected (right image above) Model: Tiffany Dias

    How you communicate, connect, and direct your model is key to capturing a great expression in the eyes. If your model’s smile isn’t genuine, his or her eyes will appear cold and dull-looking. If your model is nervous or distracted, this too will be reflected in his or her eyes.

    One technique I use to create a great expression is visualization. I ask my model, If you could be anywhere doing anything right now, where would that be? Tell me about that moment. Who is there? What does it feel like? Once they are in the moment of their visualization, their entire body language and expression changes.

    #3 – Post-production

    Be willing to give that extra effort that separates the winner from the one in second place.” — H. Jackson Brown Jr.

    Post-production can lift your images from good to great, when it’s done well. The key to great post-production is not overdoing it. It’s easy to get excited with all the tricks and enhancements that post-production software offers. It’s addictive and much like opening a jar of Nutella – very difficult to control yourself once you’ve begun.

    I try and use the overnight rule when it comes to retouching. Once I’ve worked on an image, I won’t look at it again for at least a day. I find my eyes constantly adjust to the modifications I’m making, so it’s more difficult to see when I’ve gone too far (much the same way I dressed in the ’80s).

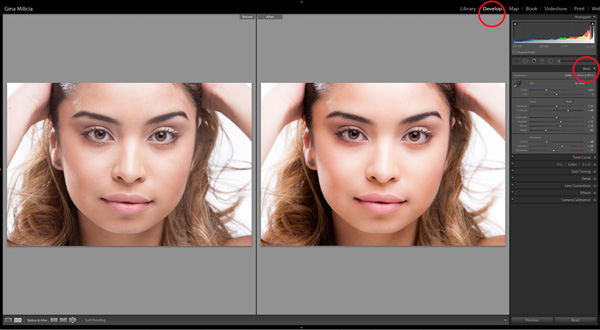
    Here’s a step-by-step technique to enhance eyes using Adobe Lightroom:

    EYESBP 10

    Before and after: I’ve used Lightroom to make the eyes sharper and brighter and enhanced their color.

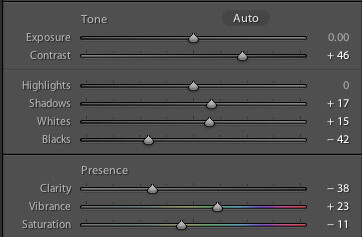
    a) Import your image into Lightroom and use the basic development panel to develop the shot. In this case, I’ve used one of my own beauty presets.

    EyesBP 2

    EyesBP 2B

    Here are the basic adjustments I’ve made for this image.

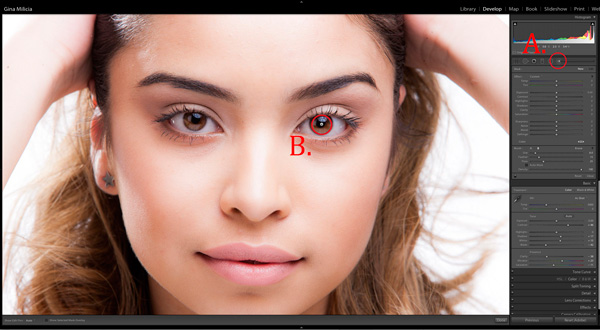
    b) Zoom in to the eyes (B.) and select the adjustment brush tool (A.) You can also select the brush using keyboard shortcut K. See image above.

    EyesBP 4

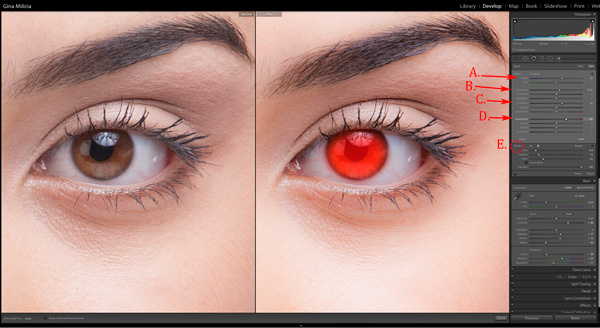
    c) The next step is adjusting the eye color:

    EyesBP 5

    • Increase the temperature slider (A.) to make the eyes appear warmer in tone.
    • Increase the exposure slider (B.) to brighten the iris.
    • Increase the shadow slider to bring more detail into the shadow area (C.)
    • Increase the sharpness slider to make the eyes appear more detailed.

    Adjusted only the colored part (the iris) of her eye (highlighted in red) and set the brush to have a slight feather and low flow so you can build up your adjustments slowly.

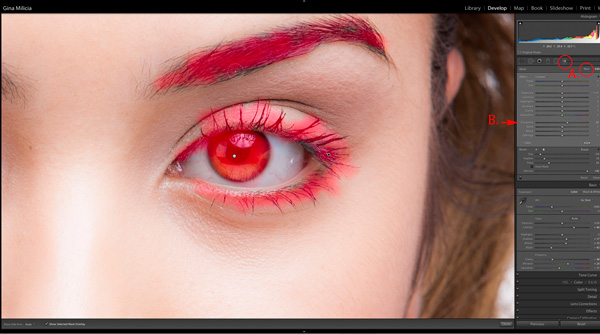
    d) Next, select a new adjustment brush (A.), increase the sharpness slider (B.) by +22 and paint over the colored part of the eyes, eyelashes, and eyebrows. This will really make the eyes stand out.

    EyesBP 6

    e) Finally, select a new adjustment brush. Set the exposure slider to -29 and increase the clarity to +10. Paint around the edge of the iris. This will darken the area slightly and give the eye more definition.

    f) The final image has been imported into Adobe® Photoshop®, where I have done a basic skin retouching to remove a few small blemishes.

    EyesFINAL

    I’d love to hear about your techniques for enhancing eyes and see some examples.

    Gina has a new dPS ebook just released – Portraits: After the Shot – check out out here!

    The post 3 Simple Ways to Create Stunning Eyes in Your Portrait Photography by Gina Milicia appeared first on Digital Photography School.


    Digital Photography School