Category: Photography

  • Smarter Sharpening in Photoshop using Adobe Camera Raw

    sharpen-in-Photoshop-using-Camera-raw-opener

    Sharpening in Photoshop has traditionally involved a compromise between applying it to the places in the image that you want to sharpen and avoiding those that you don’t want affected. Both Lightroom and Adobe Camera Raw have always had a much better sharpening tool which not only lets you see what you are doing more clearly, but also includes a very smart mask that lets you limit sharpening to detail areas.

    In Photoshop Creative Cloud a Camera Raw filter was added. This opens up a world of possibilities for sharpening images better and more easily and at the completion of your Photoshop editing workflow.

    So now, in Photoshop CC as you can do in Lightroom and Adobe Camera Raw, you can take advantage of this better sharpening tool. So you can sharpen a photo of a building and apply the effect to the building but not to the sky above it. This is important because blue sky is typically an area of flat color which may contain noise that you certainly don’t want to sharpen and make even more obvious!

    In the video below I show you how to sharpen an image from inside Photoshop CC using the new Camera Raw filter.

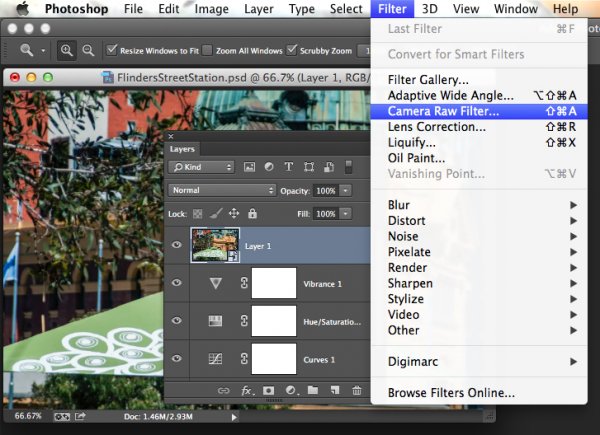
    Before you do this, if your image contains layers, you need to create a flattened version of the image to sharpen it. To do this, select all the layers in the image and choose Filter > Convert for Smart Filters so you are operating on the entire image. Alternately, click the topmost layer of the image and press Shift + Control +Alt +E (Shift + Command + Option + E on the Mac) to make a new layer containing a flattened version of the photo. Lastly, convert that to a Smart Filter and you’re ready to go:

    Do you have any other sharpening tips?

    The post Smarter Sharpening in Photoshop using Adobe Camera Raw by Helen Bradley appeared first on Digital Photography School.


    Digital Photography School

  • Tips for Photographing Head Shots

    I’m always amazed when I take professional head shots how every photo shoot presents different challenges. That’s the beauty, and sometimes frustrating part of being a photographer. No shoot is the same.

    When you have a model as the subject in front of your lens, being able to nail that shot will be a lot easier. What do I mean by easier? Models know how to pose and appear more relaxed in front of the camera than others. Straight away, you can concentrate on taking photos with little or minimal direction of your model.

    Didi

    Each photographer has their own unique style and methods when taking head shots. But like any genre of photography, the methods used will differ within each speciality. In landscape photography, a wide angle lens is a must and shooting with a small aperture(f/16), plus you are outdoors. Whereas shooting head shots is normally done in a studio with continuous or strobe lighting using a portrait lens.

    Technical bits:

    My favourite focal length for head shots is 70mm lens on a cropped sensor (Nikon 1.5x) so the equivalent is a 105mm on a full frame sensor. A tripod is essential for studio work, and Lighting is key. They are many different setups depending on how you want to shoot your model and how many lights that you have. The background should be neutral if possible (e.g. white, grey, black). Please see the description below for how to practice head shots in your home.

    Tips:

    • Play some music on low in the background to create a chilled atmosphere.
    • Your skill at interacting with people will be key in nailing the shot.
    • Get your subject to blink 10 times quickly. This is a fun way to get them to relax and it also creates fluid on the eye to get better catchlights. This is where the light source such as a beauty dish or umbrella causes a specular highlight in the subject’s eye. There are tutorials online for adding catchlights in post-production but I prefer to catch them in camera.
    • Get your subject to lick their lips. This really only applies to male subjects as they don’t normally wear lipstick. Similar to above, it causes specular highlights on the lips.
    • Tilting the head at an angle provides for a better composition. Normally, I would only get female subjects to tilt their heads. I did a corporate shoot awhile back and asked one of the guys to tilt his head and I felt it worked.

    Corporate headshot

    • Talk to your subject throughout the shoot by directing them, as opposed to talking incessantly. Most people who are posing for a head shot do not know what to do. This is key as a portrait photographer to be able to instruct without ordering.
    • Tell your subject beforehand to dress in neutral clothing, avoid fussy or very patterned garments or too many layers. As in the case of Michael’s headshot, I got him to remove his waist jacket.

    Animated

    • Similar to exercise, warming-up is important. This is where you can have some fun and get as many different expressions as possible. This will hopefully help to capture the shot. Usually, I get my best shots towards the end of the session.
    • Get your subject involved. Show them the shots, ask them for feedback.
    • Give as much direction and positive feedback as possible, for example use comments such as – hold that expression, great smile, excellent, now, I want you to turn a little more this direction – and so on. Use your hands to direct which way you want your model or subject to move, this avoids that left or right confusion.
    • Being comfortable and interacting with others is vital as a portrait photographer. Don’t be afraid to get your subject to talk to you while you photograph them. This gets rid of that mouth-closed-jammed-shut-look. This worked a treat for Michael’s shot.

    Black and white headshot

    Personally, I tend to work fast as I know most people’s span of attention for a photo shoot is limited before boredom sets in. There is nothing worse than seeing that bored expression on someone’s face reflected back at you on screen. Also no amount of photoshop can replicate someone’s expression or essence. I feel you have to master this technique in camera.

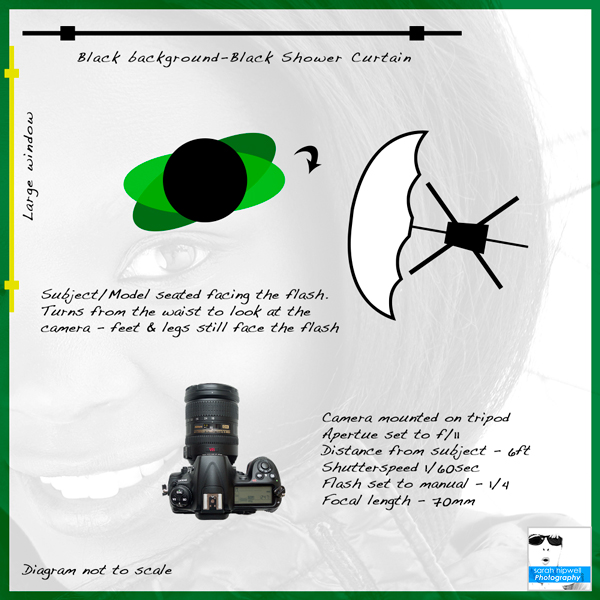
    Easy headshot setup at home using one light off-camera

    This setup can be easily done in your house beside a large window using one flash (speedlight) on a light stand. Have your subject sit facing towards the flash.

    Headshot setup at home

    Get the subject to turn from the waist towards the camera, so that their legs are still facing towards the flash. This will mean your subject’s form will not be square to the camera and their posture will be straighter. This makes for a more flattering pose. The eyes are the key feature to portrait shots. So they must be in sharp focus, and preferably have catchlights.

    Conclusion:

    Didi

    I chose the photo of Didi as one of my favourite professional head shots for the following reasons. I was outdoors, which is always more challenging. The light is always changing and I was at the mercy of the weather (unlike a studio setting where the lighting is constantly the same and it doesn’t rain).

    Just before I took this shot, it had started to rain – a light drizzle. I gave my jacket to Didi as she began to feel chilly. This was at the end of a long session. I got her to hold the white translucent umbrella that I brought with me. This was not for the rain but to block out the distracting background and it helped to bounce the natural light around her aided by the shiny material of the jacket – a sort of rim light. Her expression speaks for itself – she was happy and warm!

    Do you have a favourite headshot or any other tips you’d like to share? Please do so in the comments below.

    The post Tips for Photographing Head Shots by Sarah Hipwell appeared first on Digital Photography School.


    Digital Photography School

  • Change Lenses for a New Perspective and Story

    Recently we’ve had a few articles by dPS writers about lenses on such topics as:

    • Which Three Lenses do You Need for Photography?
    • The Only Three Lenses You Need for Travel Photography
    • Ready to Upgrade Your Kit Lens? Tips for Which Lens to Invest in Next
    • Buyers Guide – Prime Lenses vs Zoom Lenses

    change-lenses-new-storyThis video produced by Canon shows the photographers using pretty much the same three lenses as mentioned on the second article above: a really wide-angle lens, a 50mm, and a medium telephoto. See how the photographers used each lens to create a very different look and feel from each of the scenarios they encountered.

    The lenses mentioned in the video are (Nikon equivalents also listed):

    • Canon EF 10-18mm f/4.5-5.6
    • Nikon 10-24mm f/3.5-4.5G
    • Canon EF 50mm f/1.4
    • Nikon 50mm f/1.4G AF-S
    • Canon EF 70-200 f/2.8L IS
    • Nikon 70-200mm f/2.8G AF-S

    There are also many other great options for lenses including Pentax, Olympus and Sony. You could also consider some of the third party brands like Tamron and Sigma which are making some really  nice, highly rated, lenses.

    What can you take away from that? How can you use the lenses you already have to tell different, or perhaps even better, stories?

    Show us the same subject shot with three different lenses and let’s see your stories!

    The post Change Lenses for a New Perspective and Story by Darlene Hildebrandt appeared first on Digital Photography School.


    Digital Photography School

  • Give Your Photographs The Stage They Deserve – Make Sure Your Website is Mobile Ready

    If you post amazing professional-quality photographs to your website and nobody can access them, are they really that amazing? Nobody will know. All that hard work, focus, determination, and artistic ability -POOF – all for nothing. This is exactly what is happening to many very talented photographers. They pour their heart and soul into their art form and then entrust it to outdated technology that doesn’t adequately display their work on mobile devices.

    ResponsivePortfolioSite

    How important is being mobile friendly?

    With the proliferation of mobile devices, it’s no surprise that many people do most of their web browsing on the go. Consider the following eye-opening statistics found on visual.ly:

    • Mobile search queries have grown five times in the past two years.
    • Nine out of 10 mobile phone searches result in a purchase or visit.
    • Three out of every five searches are conducted on a mobile device.
    • 99% of Smartphone owners use their mobile browsers at least once a day.
    • 52% of all local searches are conducted on a mobile device.
    Mobile Search Statistics

    Those are startling numbers, especially if you’re not keeping up with the changing face of the web. Unfortunately, it seems that there has been a lag in photographers adopting the appropriate web technology to showcase their work in a way that accommodates mobile users. To ensure that your site and your photography work are presented in an impactful way, it must be optimized specifically for mobile viewing.

    Desktops and mobile devices don’t always play nice

    Just building a site for the desktop doesn’t guarantee that the results will transfer to phones and tablets, or even the new smart watches. You do not want interested viewers to open your site on a mobile device and find a helter-skelter layout with distorted or inaccessible images. If this happens, it puts you in a difficult spot – you’re left hoping that they remember and desire to seek out your site for a second time when they’re back at a desktop computer. That’s wishful thinking considering the deluge of distractions we all encounter every day and the somewhat shrinking attention spans of the high-definition, high-speed digital generation. Here today, gone tomorrow, or maybe sooner in the case of your hard work and aspirations.

    One of the worst-case scenarios you could be in is with a portfolio site that is completely based on Adobe Flash, leaving you to lose a whole group of mobile users who will rapidly look elsewhere when your site doesn’t load on their device. No one likes seeing a blank screen or a message saying, “This content cannot be displayed on your device.”

    FlashOnlySite

    Mobile devices often will not play Flash websites

    Making your work accessible

    It’s vital to give your audience exactly what they want – fast, fluid access to your dazzling work anytime anywhere. If they can’t clearly navigate your web site, it raises questions in their minds about your professionalism and your commitment to viewers and to your art form. This is not a good place to be for a proud, ambitious photographer. The good news, however, is that there are readily available solutions that you could leverage whether you already have an existing site or are starting one from scratch.

    The key to optimizing the mobile user’s experience is to have a site that uses responsive web design or adaptive web design. These are two types of site programming that ensure a seamless transition of your content from the desktop to all mobile devices, regardless of screen size. Anything less than that, and you’re severely limiting exposure for your work and jeopardizing your chance of making a significant first impression. Negative experiences can turn into negative reviews. These travel fast in the digital age, and it’s difficult to change those perceptions once they’re public.

    Using an adaptive design, you get a site that is specifically designed for particular browser sizes found on most mobile devices. In a lot of cases, the mobile site almost looks like a native app. Problogger.net (also run by dPS owner Darren Rowse) is an example of such a site. With this type of design, the experience on a mobile device is a bit different than that of a desktop, but you could still access the content in a readable format. This results in a fast and easy to read site that is user-friendlier on small web browsers.

    ProBlogger Adaptive

    Example of an adaptive design

    A Responsive site is even better in that it is flexible in displaying the same content across a large array of devices while keeping much of the same styles. It maintains a fluid layout by using elements that are automatically resizable and could be placed where they fit best on the screen. This even works great on desktops when you want to shrink the browser window.

    A perfect example of a website with a responsive design is Digital Photography School’s own site. If you’re accessing the site from a desktop browser, notice how the site responds fluidly as you resize the window. If you’re reading this from a mobile device, you’re still able to read the content just fine without having to manipulate the browser by zooming in and out or doing a lot of horizontal scrolling.

    ResponsivePhotoSite

    dPS is a responsive site

    Simple changes make a HUGE difference

    Updating your site from a clunky old format is quite simple, and the tools are readily available. Most people who have a blog use a Content Management System (CMS) such as WordPress, Joomla, or Drupal. These systems allow you to change the overall look and feel of your site by offering different designs or themes. There are plenty of available themes that are already responsive or adaptive right out of the box. These range in cost from free up to $ 100. A simple web search will reveal many sites that specialize in offering a variety of this type of themes. I’ve had great success using Theme Forest.

    In addition to themes that are optimized for mobile browsing, these CMSs also allow you to install plugins that display the same content in a mobile-only theme. In some cases, especially if you already have an existing site, this might be the easier route to take.

    Rock the mobile web

    At some point, we’ve all experienced the disconnect between the artistic or creative world and the technology world. But in the modern age, you really can’t draw a distinction without suffering the consequences. It’s much wiser to embrace the role of technology in displaying art – in this case photography – and use it to your advantage.

    With just a bit of effort, you can make sure that you nail that vital first impression with your fans and give your work the digital stage that it deserves!

    The post Give Your Photographs The Stage They Deserve – Make Sure Your Website is Mobile Ready by Jorge Hassan appeared first on Digital Photography School.


    Digital Photography School

  • Weekly Photography Challenge – Shadows

    Early I shared an assortment of shadowy images. I love playing with light and photographing shadows is a great way to help you learn to see light, and direction of light. Here are a few more examples:

    Mgstanton

    By mgstanton

    Life Pilgrim

    By Life Pilgrim

    Daniela Hartmann

    By Daniela Hartmann

    This week’s photography challenge is all about the shadows. So head out and look for some light that creates interesting shadows. For a shadow image to work well you need a couple of things:

    1. A hard light course like direct sun. You cannot find good shadows on an overcast or cloudy day.
    2. Light that skims the surface like the late evening or dusk kind. Look for the long shadows at the end of the day (or first thing in the morning) they will add more drama to your images.
    3. An interesting and well defined subject. For a shadow to be interesting the viewer needs to be able to identify and connect with the object producing the shadow, even if the object isn’t in the photo itself. Some things that work particularly well are trees, bicycles, people, a fence, etc.

    Let’s see a few more examples that are well done:

    Michael

    By Michael

    Angelo Domini

    By Angelo Domini

    Harris Hui

    By Harris Hui

    Broo_am (Andy B)

    By Broo_am (Andy B)

    Seema Krishnakumar

    By Seema Krishnakumar

    Grozz

    By Grozz

    Camil Tulcan

    By Camil Tulcan

    Mark Anderson

    By Mark Anderson

    David Rodriguez Martin

    By David Rodriguez Martin

    Hapal

    By hapal

    Magdalena Roeseler

    By Magdalena Roeseler

    You can see by the images above that even tiny things like a seed can produce a great shadow. Find some ordinary household objects, put them in the sun, and see what the light does to the shadow. Try rotating it or moving around it.

    Another idea is to do a self portrait using your own shadow. See how creative you can get with that. Throw your shadow on a wall, do a crazy pose, or get your camera in the shadow too. Mix it up, let’s see what you got! Humor is good too!

    Dustin Diaz

    By Dustin Diaz

    Gian?merz

    By gian?merz

    Claudio Cicali

    By Claudio Cicali

    Volodymyr Pavlyuk

    By Volodymyr Pavlyuk

    BMiz

    By BMiz

    Sherwood411

    By Sherwood411

    Share your images of shadows

    Simply upload your shot into the comment field (look for the little camera icon in the Disqus comments section as pictured below) and they’ll get embedded for us all to see or if you’d prefer upload them to your favourite photo sharing site and leave the link to them. Show me your best images in this week’s challenge.


    The post Weekly Photography Challenge – Shadows by Darlene Hildebrandt appeared first on Digital Photography School.


    Digital Photography School

  • An Assortment of Shadow Images

    It’s fall in the northern hemisphere. The sun is lower in the sky and dusk is earlier and earlier. Time to get out warmer clothes and pack away the summer ones. But the low sun and early dusk makes for some great opportunities to capture long shadows.

    I’ve rounded up a few shadow images that I thought were particularly good to inspire you. Enjoy!

    Photograph Encounters of the Third Kind by Fabio Secchia on 500px

    Encounters of the Third Kind by Fabio Secchia on 500px

    Photograph Aerial view from the bridge by Sergio Murria on 500px

    Aerial view from the bridge by Sergio Murria on 500px

    Photograph Light & Shadows ~ Black & White by Lucinda Walter on 500px

    Light & Shadows ~ Black & White by Lucinda Walter on 500px

    Photograph Shadow by Joseph Saadeh on 500px

    Shadow by Joseph Saadeh on 500px

    Photograph Light and shadow by Ricardo  Domínguez Alcaraz on 500px

    Light and shadow by Ricardo Domínguez Alcaraz on 500px

    Photograph Fast Runner by Claus Tom Christensen on 500px

    Fast Runner by Claus Tom Christensen on 500px

    Photograph Handyman by Josef Sieberer on 500px

    Handyman by Josef Sieberer on 500px

    Photograph [shadow dancer] by Julia Borodina on 500px

    [shadow dancer] by Julia Borodina on 500px

    Photograph The Lonely Chair by Sam Root on 500px

    The Lonely Chair by Sam Root on 500px

    Photograph Light of Hope by Carlos Gotay on 500px

    Light of Hope by Carlos Gotay on 500px

    Photograph Together again by Roberto Pireddu on 500px

    Together again by Roberto Pireddu on 500px

    Photograph Wheels by Kah Kit Yoong on 500px

    Wheels by Kah Kit Yoong on 500px

    Photograph Walking among the trees by Soumaya Dakhissi on 500px

    Walking among the trees by Soumaya Dakhissi on 500px

    Photograph Spotted by Laurence Penne on 500px

    Spotted by Laurence Penne on 500px

    Photograph Untitled by Maurizio Lattanzio on 500px

    Untitled by Maurizio Lattanzio on 500px

    Photograph Shadow B&W by Kr!shna ~ Ang!ra on 500px

    Shadow B&W by Kr!shna ~ Ang!ra on 500px

    Photograph new day new life by sirena lavetii on 500px

    new day new life by sirena lavetii on 500px

    Photograph Morning sun by Birgit Pittelkow on 500px

    Morning sun by Birgit Pittelkow on 500px

    Photograph Never-ending bricks by relux  on 500px

    Never-ending bricks by relux on 500px

    Photograph The Shadow by Marc Braner on 500px

    The Shadow by Marc Braner on 500px

    Photograph Cave Exploration by Erik Ahlbrecht on 500px

    Cave Exploration by Erik Ahlbrecht on 500px

    Photograph Shadow Play by Annie Weibull on 500px

    Shadow Play by Annie Weibull on 500px

    Photograph Selfportrait by Sergey Krotov on 500px

    Selfportrait by Sergey Krotov on 500px

    Photograph Afraid of the Dark by Gabriela Ferreira on 500px

    Afraid of the Dark by Gabriela Ferreira on 500px

    Photograph Untitled by Frank van Es on 500px

    Untitled by Frank van Es on 500px

    Photograph Shadow selfie by Valdi Sker on 500px

    Shadow selfie by Valdi Sker on 500px

    Photograph I, Me, Myself by Balasubramani Pillai on 500px

    I, Me, Myself by Balasubramani Pillai on 500px

    Photograph my shadow by Mario Mancuso on 500px

    my shadow by Mario Mancuso on 500px

    Photograph The Katydid Redux by Steve Passlow on 500px

    The Katydid Redux by Steve Passlow on 500px

    Photograph A Little Spy by Mostafa Ammar on 500px

    A Little Spy by Mostafa Ammar on 500px

    Photograph Which Is Me ? by Nasser Osman on 500px

    Which Is Me ? by Nasser Osman on 500px

    Photograph Shadow Puppet Show by Photos of Thailand .... on 500px

    Shadow Puppet Show by Photos of Thailand …. on 500px

    Photograph Man Rays by Stefano Corso on 500px

    Man Rays by Stefano Corso on 500px

    Photograph Shadow of a Prima Ballerina by Andrew Buay on 500px

    Shadow of a Prima Ballerina by Andrew Buay on 500px

    Photograph Shadow dancers by Valéry Joncheray on 500px

    Shadow dancers by Valéry Joncheray on 500px

    The post An Assortment of Shadow Images by Darlene Hildebrandt appeared first on Digital Photography School.


    Digital Photography School

  • 4 Killer Tips To Nail Your Next Portrait Shoot

    If you’re a portrait photographer perhaps you’ve found yourself in the position of carrying bulky, heavy gear around. That’s unnecessary though. With these 4 easy tips you’ll be able to get the best results at your next portrait session without the hassle and the back pain afterwards. These tips also help you save a fair amount of money that you Continue Reading

    The post 4 Killer Tips To Nail Your Next Portrait Shoot appeared first on Photodoto.


    Photodoto

  • Predicting Dramatic Sunsets

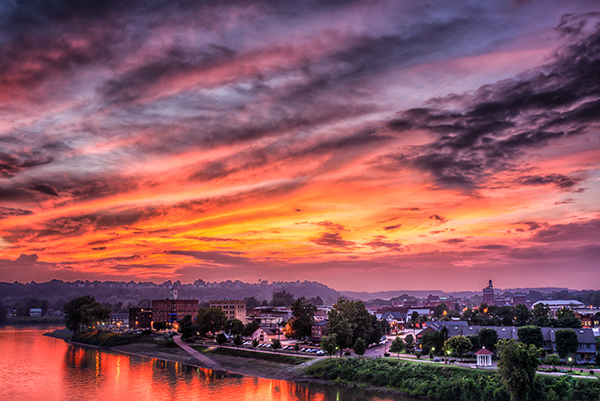
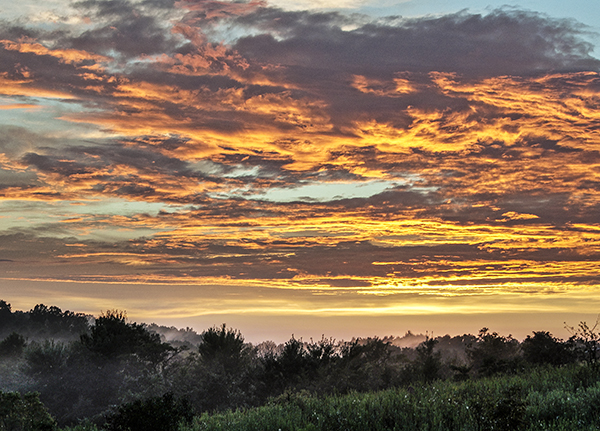
    Summer sunset over Marietta Ohio just after a storm had past through earlier in the afternoon.

    “Red Sky”  Summer sunset over Marietta, Ohio

    One question every child asks is, “Why is the sky blue?” But let’s look at why is the sky red at Sunset. Light from the sun is made up of all the colors in the rainbow. As the sunlight enters the earth’s atmosphere, the short wave length of blue light is scattered in all directions, more than any of the other colors, causing the sky to be blue during the day. At sunrise and sunset, the light has farther to travel due to the low angle of the sun in the sky. This causes the blue light to be blocked and scattered away, allowing the longer wave lengths of red and yellow colors to appear in the sky.

    I am sure you wish there was some magic formula that could tell you exactly the night for photographing a beautiful sunset? It’s not that easy, but hopefully we can discover some ways to increase your odds.

    Let’s take a closer look at some other factors that will help you predict brilliantly colored sunsets. You have no doubt heard the saying “Red sky in the morning, sailors take warning. Red sky at night, sailors’ delight”. This saying can also help you predict sunsets (and sunrises) if you know the weather forecast. Look for a red sky at sunrise ahead of a storm and at sunset after a storm. Knowing what to expect weather-wise is key to anticipating the right conditions for a shoot, so the first thing you need to do is find a good weather app or website. A website such as Intellicast.com will give you a detailed hourly report for key factors: cloud cover, air quality, humidity, and wind speed.

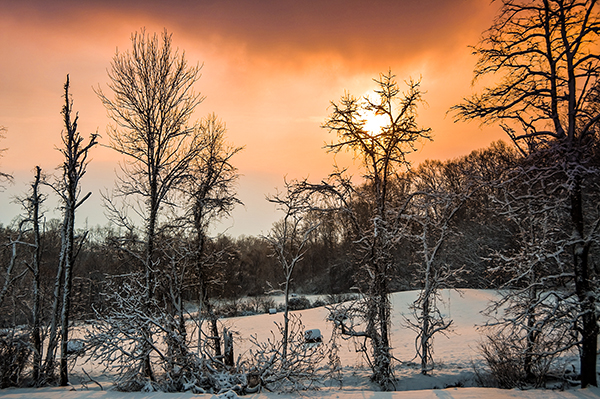
    Winter sunset after a snow storm.

    Winter sunset after a snow storm.

    Clouds and Cloud Cover

    Clouds are a crucial factor to predicting dramatic sunsets, for without clouds there is not much to see. One common misconception of brilliant sunsets is that clouds create the colors; in reality clouds only serve as the canvas to display the colors that the light is painting. High to mid-level clouds are the most effective canvases, as they will reflect the colors of the setting sun. Puffy clouds on the horizon at sunset will more than likely not allow the sun rays to pass through them, thus muting the colors. Lower clouds (such as dark rain-filled clouds) are not very helpful at reflecting much light. If the clouds on the horizon are low and thick the sun will not be able to shine through them. It is also worth noting that too many or too few clouds can be detrimental for an optimal photo, so check out your detailed weather report for cloud cover percentages between 30 to 70 percent at sunset.

    You can observe cloud conditions in the afternoon and if the sky looks favorable, you can hope that these clouds will still be present at sunset. No guarantees, but if there is not much wind these clouds may stick around to create a beautiful sunset.

    A brief description of fair weather clouds that may produce dramatic sunsets:

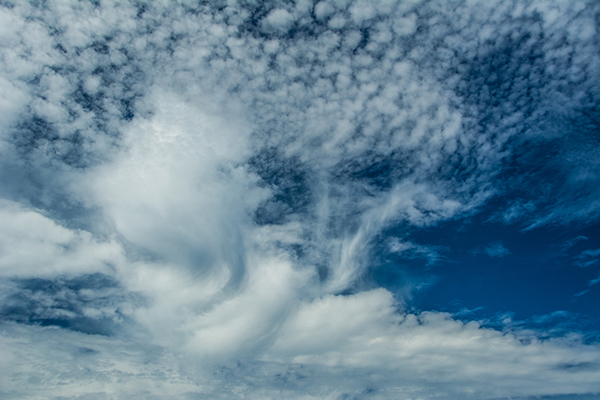
    • Cirrocumulus Clouds – These look like ripples on water. Blue sky is the usual backdrop.
    • Altocumulus Clouds – Often occur in sheets or patches with wavy, rounded masses or rolls, like little cotton balls. They are generally white or grey, and usually appear after a storm.
    • Cumulus Clouds – Easily recognizable, large, white, and fluffy, often with flat bases.
    • Cirrus Clouds – Generally characterized by thin, wispy strands. These clouds arrive in advance of frontal systems indicating that weather conditions may soon deteriorate. Nevertheless, these are one of the best kinds for photographing dramatic sunsets!
    DSC_1917

    If you see this kind of sky in the afternoon with calm winds, chances are good you are in for something special at sunset.

    5939386215_2d2133ebcc_o

    Clean Air

    Clean air is very effective at scattering the blue light. For this reason one of the best times for dramatic sunsets is right after a rain or wind storm. While lower clouds rarely reflect brilliant colors (as mentioned above), note that where the lower atmosphere is especially clean, as in over open oceans in tropical regions, more vivid colors are allowed pass through. This is the reason so many beautiful sunset images are captured in the tropics.

    Humidity

    The amount of humidity in the air will also have an effect on the colors of your sunset. Lower humidity will produce more vibrant colors. With higher humidity the colors will be muted because of the water content in the atmosphere. The seasons of autumn and winter typically produce lower humidity than in the warmer seasons.

    Wind

    Wind is a factor that can either enhance or destroy a beautiful sunset. A change in wind direction can cause the clouds to develop ripples or billows, which can create a beautiful effect as the setting sun reflects a nice red glow onto the ripples. Also, as established earlier, clean air will produce more brilliant colors, and a nice breeze before sunset can help clear the air. Unfortunately, the wind can become a negative factor on those days when favorable clouds are present in the afternoon, but a weather front moves through with strong winds that remove those clouds and leaves you with a clear sky at sunset. This is another instance when a good weather app or weather website can give you an indication on its radar as to when a front may move through your area.

    6022670360_25a65077ed_o

    To summarize your sunset prediction, look for:

    • Mid to high level clouds
    • 30 to 70 percent cloud coverage
    • Clean air
    • Lower humidity
    • Calm winds

    A final thought to consider when photographing sunsets – sometimes the afterglow of the sunset, which can occur 15 to 20 minutes after the sun goes behind the horizon, can be much more spectacular than the actual sunset.

    Generally, all these weather-related rules also apply to photographing sunrise, but the visual signs are more difficult to spot since it is darkest before the dawn. A good time to photograph at sunrise is in the fall and winter when it occurs later in the day than in the summer months.

    Do you have any other tips for predicting dramatic sunsets? Please share some of your favorite sunset images. Who doesn’t love a good sunset? If you want some tips for shooting the great sunset you’ve found try: 8 Simple Guidelines for Capturing Spectacular Sunrise and Sunset Images

    The post Predicting Dramatic Sunsets by Bruce Wunderlich appeared first on Digital Photography School.


    Digital Photography School

  • How to Improve Your Photography with Storytelling Images

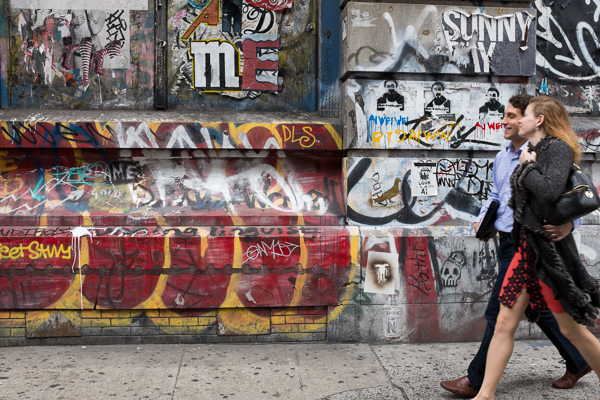
    east_village_gentrification7

    How many times have you had this interaction?

    “This photo is beautiful!”

    “Thanks!”

    End of conversation.

    There’s nothing wrong with this, of course. Beautiful is a great, great compliment. However, if you’ve ever wanted to have a longer conversation with a viewer about one of your photographs, then creating images with stories behind them, or around your own personal stories, can be a very important approach to try.

    My favorite photography tip has always been that you should photograph what you know and what you are most interested in. This passion and knowledge will help form your photographs and improve them. Instead of only sitting back and capturing what is given to you, go out searching for a way to capture something with which you have experience.

    There are three types of stories to think about: ambiguous, personal, and documentary

    Ambiguous stories

    The ambiguous photograph is an image with a story that is unclear. It is a photo that makes you think, where you can imagine multiple stories and arcs based on a single image. This is a very important way to think about your work. If you can create a photo with an evolving story then as it lives on your wall or the wall of a viewer, the photograph will never get old. There will always be mystery and an evolving story based on the viewpoint of the observer. It’s hard to get sick of an image like that.
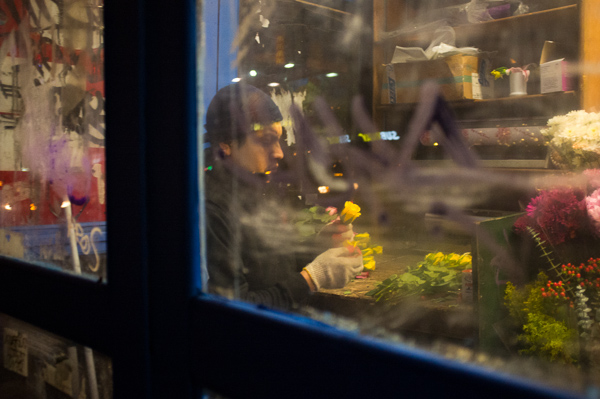
    Bodega Flower Worker, 2012

    Here’s an example of an ambiguous image for me. I walk by this flower stand outside of a bodega every day. I’ve always been curious about the lives of the people that work at these places. I know that some of them are immigrants looking to make a tough living in a tough city. On one of my walks home one evening, I noticed this man stopped and stared at the flower with this pained and thoughtful look. I have absolutely no idea what is going on here, but it makes me imagine a very elaborate story around what he is thinking about based on a simple look.

    Personal stories

    The personal story is to capture something that has happened to you. You can do this through multiple images or try to capture it within a single image. If you have a photo blog this is a great way to spice it up from just a solid stream of photographs with no commentary. When you put it on your wall, the next time someone complements you on how it looks, you can also tell the story behind the image. It’s good to create beautiful images for the sake of beauty, but it can also be fun to include images with stories. There is a place for both on your wall or on your blog.

    Here is a recent example taken straight from my own blog to give you some inspiration. It is a single image that brought up a fun memory from my youth.
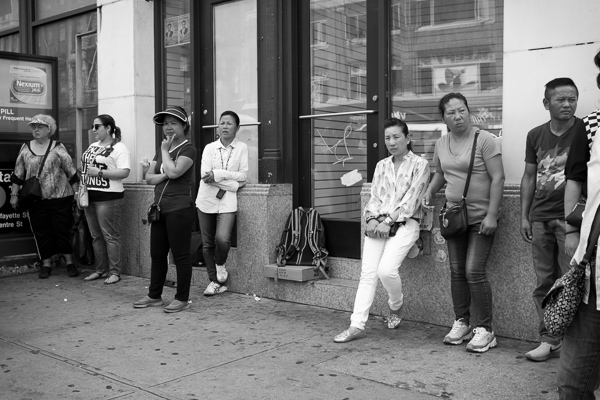
    Canal Street, New York

    Canal Street, New York

    “Louis Vuitton? Rolex? Rolex?

    These are the women on Canal Street in New York who sell fake handbags. I remember my first experience on Canal Street, the home of fake handbags. This must have been freshman or sophomore year in high school. My friend wanted to go to Canal Street to get a fake ID, so four of us took the subway down.

    We were walking down the street when someone walked by whispering, ‘Fake IDs, Fake IDs?’ I mean… he picked us out pretty quickly, we must have been perfect targets. So my friend says, ‘Yeah,’ and he takes us into a Chinese restaurant. ‘This is just a front for some illegal operations’ he tells us. I was kind of nervous, but the fact that I was a passive observer with a couple other people made me just sit back and not pay too much attention to what was going on. I already had an ID.  I’ll tell the full story here one day, but making fake IDs is how I got into photography. I downloaded a very early copy of photoshop to alter a photo of an ID and fell in love with it. The rest was history.

    The man sat us down at two separate tables with two of us at each table. It was here I probably should have realized something was going on. He clearly did that because the four of us together would have realized something was up.

    The two guys who were getting IDs sat at the other table and I overheard the man telling them that he had to go around the back to tell them we were here and to not move or say anything. He was purposely trying to make us nervous about everything.

    So he walks out. After a couple minutes we went over to their table. ‘What did he say?’ – ‘Oh, he’s coming back soon. He just had to take our money in first to make sure it’s not counterfeit.’

    ‘Um… I don’t think he’s coming back.’”

    Louis Vuitton, Canal Street

    Louis Vuitton, Canal Street

    Finally, there is the documentary photograph

    You can do this anywhere, but unless you are a professional documentary photographer, it will usually be more practical to create stories where you live and where you are familiar. Capture photographic stories in your community. You can even do this based on a story taken from your own life. The final manifestation of this is creating a full documentary project, but if you’ve never tried anything like this, then start smaller and create single images or small groups of images.

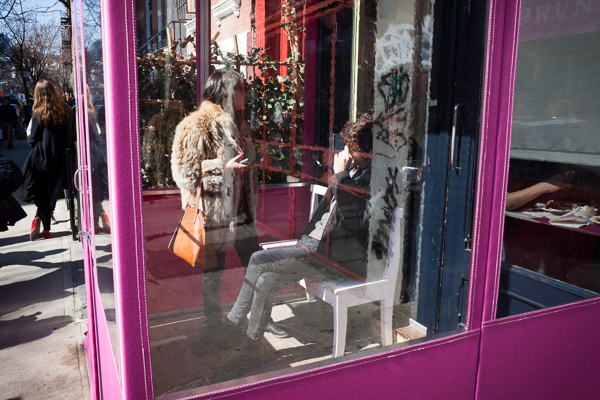
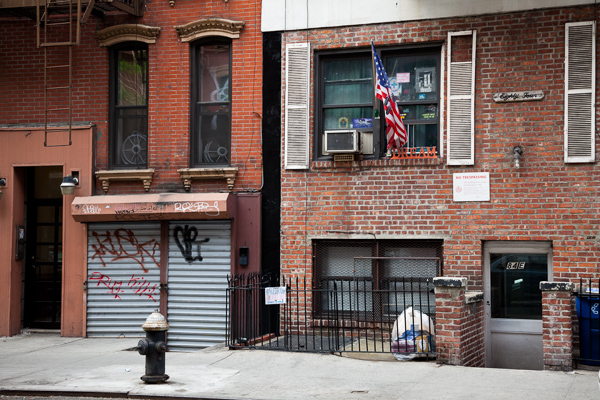
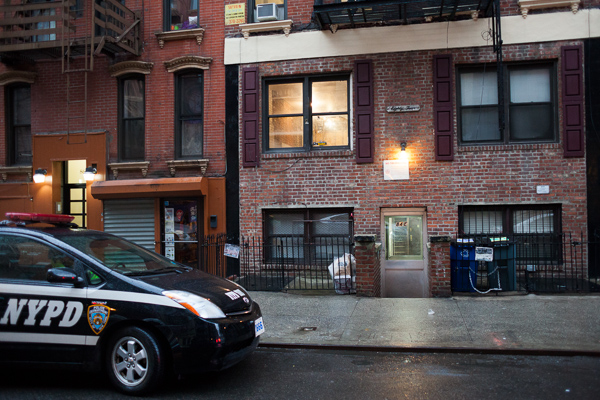
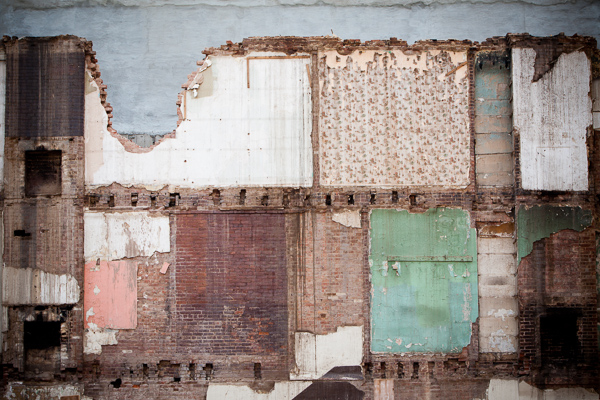
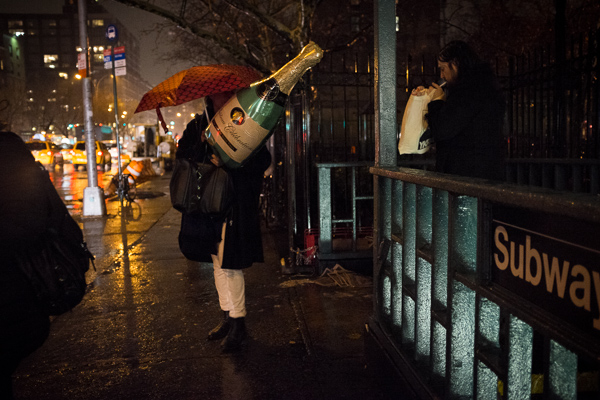
    The image at the top of this article, and the following nine, are based on a project that I’ve been working on documenting the gentrification and overall change in my community, the East Village and Lower East Side neighborhoods of New York City. For a somewhat brief version of the story, the neighborhood was once a center of immigrant life in New York, with polish, Ukrainian, Italian, Jewish, Puerto Rican, and people from many other countries around the world. The neighborhood was hit extremely hard during the drug epidemic in New York in the ’80s and it became the place in Manhattan to purchase drugs. People would line up down the block to purchase heroin from drug dealers who often dropped the drugs down in cans. Building owners abandoned their buildings for squatters to take over, and some even burned their buildings down for the insurance money.

    Because of all of this, the neighborhood was the cheapest place to live in the city. Musicians, artists, creatives, and many different types of people moving to New York, would go to the East Village because it was cheap and they would be able to pay the rent working a few odd jobs, spending the rest of their time on their art or whatever they wanted. The neighborhood became the birthplace of Punk Rock.

    It’s a wonderful neighborhood, the one in which my grandfather and mother grew up, but more recently it has become the trendiest area of the city. Developers have attacked the neighborhood, taking over buildings and illegally strong-arming out rent-controlled and rent-stabilized tenants, many of whom had lived there for 40 or more years. Neighborhood shops, many of which have been around for decades, are disappearing rapidly being replaced by chains. The night is filled with drunk people yelling and peeing on stoops.

    The story is much longer than that, but here are just a couple of images from the project that I feel gives a sense of what is happening to the neighborhood.
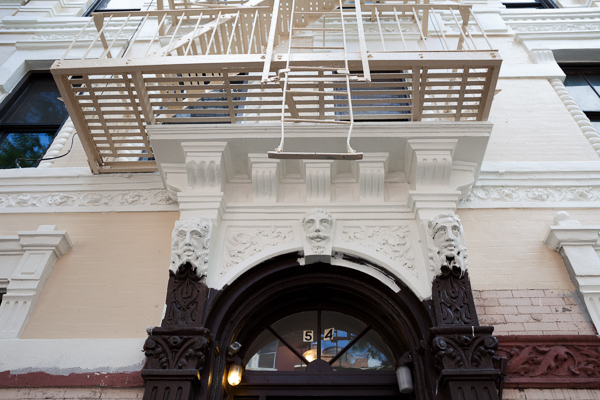
    east_village_gentrification

    east_village_gentrification8

    east_village_gentrification2

    east_village_gentrification9

    east_village_gentrification3

    east_village_gentrification4

    Razed Building, East Village, 2012.

    east_village_gentrification6

    east_village_gentrification10

    So grab a pad and brainstorm some ideas. Share any images you have taken with a good story behind them. Let’s see your stories.

    The post How to Improve Your Photography with Storytelling Images by James Maher appeared first on Digital Photography School.


    Digital Photography School
  • How to Improve Your Composition Using Juxtaposition and Contrast

    Juxtaposition and contrast in composition

    Today I’d like to explore two complementary elements juxtaposition and contrast, to help you improve your composition.

    Juxtaposition occurs when you place two contrasting subjects side by side. The difference (i.e. the contrast) between the two subjects creates an interesting photo.
    A classic example

    A great example of this is the Annie Leibovitz portrait (bottom of page linked) of jockey Willie Shoemaker (4’ 11” tall) and basketball player Wilt Chamberlain (7’ 1”). Placing the two men side by side (juxtaposition) emphasizes the difference in their height (contrast). As we’re not used to seeing an extremely short person standing next to a very tall one, the difference in height appeals to our sense of curiosity.

    Juxtaposition and contrast in action

    Here are some more examples, this time using my own photos, showing how you can use juxtaposition and contrast to improve the composition of your images.

    Juxtaposition and contrast in composition

    I took this photo in the remote village of Iruya in north-west Argentina. It was late afternoon and I wandered beyond the boundary of the village towards a pass through the mountains. I saw two people walking down a path cut between the rock, one of them leading a donkey.

    The juxtaposition here is between the human figures and the mountainside. The contrast is one of scale – the difference in size between the people and the landscape they are passing through.

    Juxtaposition and contrast in composition

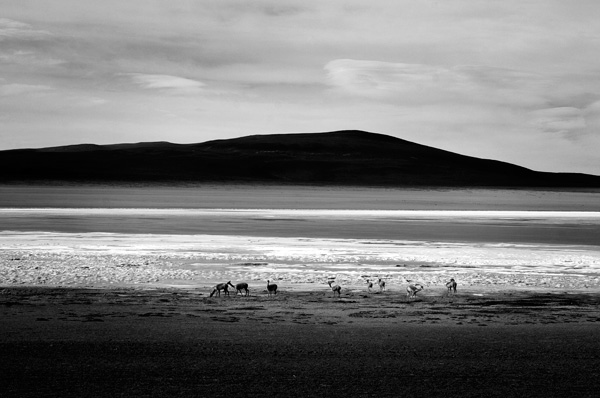
    This photo was also taken in South America, this time in south-west Bolivia. The juxtaposition is between the guanacos in the middle distance and the mountain in the background. The contrast in size gives a sense of distance and scale to the landscape.

    This photo is interesting because there is also strong tonal contrast, formed by the light and dark horizontal bands crossing the photo. The effect is emphasized because I used a short telephoto lens (the 55mm end of an 18-55mm kit lens on an APS-C camera), which compressed the landscape and flattened the perspective.

    Juxtaposition and contrast in composition

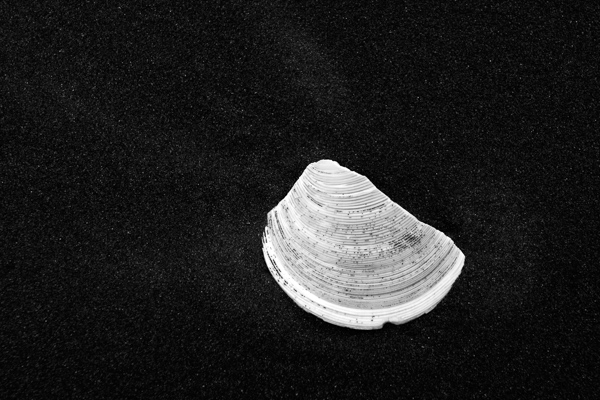
    This photo is a simple close-up of a seashell on a beach. The juxtaposition of the white shell against the black sand emphasizes the difference between them. It’s not a coincidence that I chose to convert this photo to black and white. Sometimes, good black and white photography is created simply by juxtaposing a black subject with a white one.

    Juxtaposition and contrast in composition

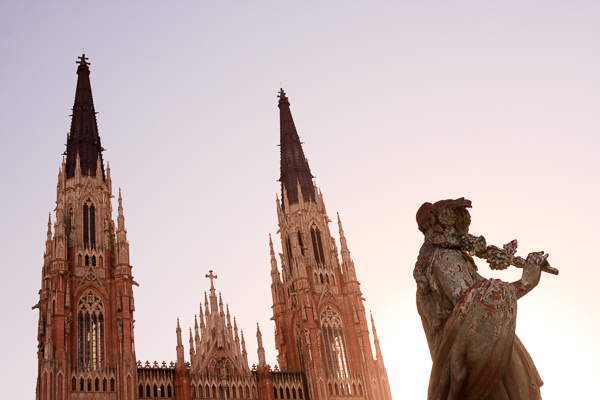
    I took this photo at sunset in the Argentinian city of La Plata. The cathedral is one of the largest in the Americas and was only completed in the 1990’s. The juxtaposition here is between the statue in the foreground and the spires of the cathedral. You can’t tell from this photo but the statue is located in a square in front of the cathedral. The two are some distance apart, separated by a road. By finding a position from which I could include both the statue and cathedral together, I created a composition that is more interesting than one containing either the cathedral or the statue alone. There is also a contrast between the gothic architecture of the cathedral and the weathered stonework of the statue that encourages the eye to move between the two.

    Juxtaposition and contrast in composition

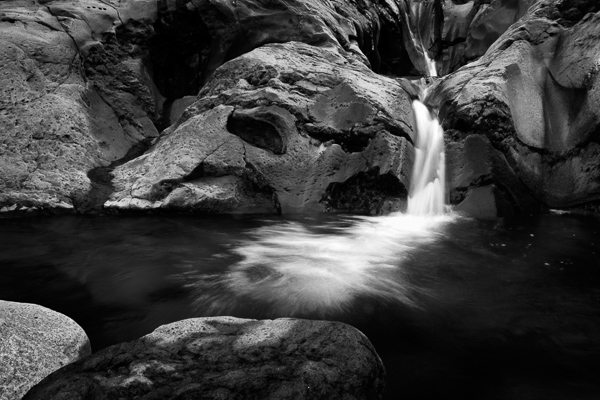
    I photographed this waterfall on the side of Mount Taranaki, a conical volcano on New Zealand’s North Island. I used a tripod to support the camera and a shutter speed of 1/3 second to blur the water.

    The juxtaposition here is between the rock and the water. The rocks are still, hard, and have a beautifully textured surface. The water is moving, soft and blurred. This type of contrast is the basis of many long exposure photographs.

    Juxtaposition and contrast in composition

    Finally, this photo taken in a temple in Shanghai, China, shows a different type of juxtaposition – the power of line. It’s a photo comprised of intersecting lines. The lines created by the incense sticks are perpendicular to the one created by the edge of the burner.

    There is another type of contrast too. The line formed by the edge of the burner is much bigger than the sticks of incense. It’s another type of contrast of scale, as seen in some of the earlier photos.

    Your turn

    Can you think of any other examples of juxtaposition and contrast? Please let us know in the comments, and feel free to add your photos so we can all see what you have done.


    Mastering Photography

    Composition and line

    My latest ebook, Mastering Photography: A Beginner’s Guide to Using Digital Cameras introduces you to digital photography and helps you make the most out of your digital cameras. It covers concepts such as lighting and composition as well as the camera settings you need to master to take photos like the ones in this article.

    The post How to Improve Your Composition Using Juxtaposition and Contrast by Andrew S. Gibson appeared first on Digital Photography School.


    Digital Photography School