Category: Photography

  • Inspiration: Atbin Eslami’s Video Bio

    Such a simple idea, and not so difficult to do—unless you count all of the self-inspection it will require. Iranian-born (now in Dubai) photographer Atbin Eslami's video-bio of herself first made me think, "that's really cool."

    And second, "Why haven't I done that?"

    Read more »
    Strobist

  • Dodging and Burning to Create More Effective Black and White Images

    With the huge assortment of software and plugins you have at your disposal these days, the photo processing technique of burning and dodging is practically ancient. It was (and still is) one of the most common ways of enhancing film images in the darkroom, and everyone from Ansel Adams to Imogen Cunningham used it.
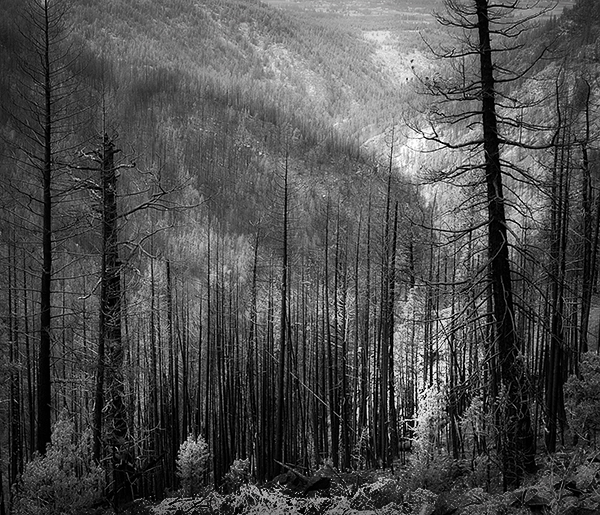
    myra2

    They used it because it is powerful and simple and still is to this day. With all the complicated plugins and post-processing procedures you have at your disposal, you won’t get any better bang for the buck than creative dodging and burning.

    This tutorial with show you  how I do dodging and burning in Photoshop, for black and white images. I’ll save another article for you about using the technique for your color images. First, though, let’s make sure we all know what dodging and burning is.

    WHAT IS DODGING AND BURNING?

    Originally, dodging and burning was used in the traditional darkroom, to retouch film to enhance highlights, and deepen shadows on photographic prints. Photographers used simple darkroom tools to either allow more light from the developer machine to reach certain parts of the light sensitive photographic paper. This was known as “burning in” which made these parts of the photo darker. The photographer could also dodge the light – hold it back from the paper – allowing that part of the photo to remain less developed or lighter than the non-dodged area.

    Using this method, photographers or retouch artists could control with great accuracy the developing process to ensure that their prints displayed the full range of tonal values needed to make the photograph pop.
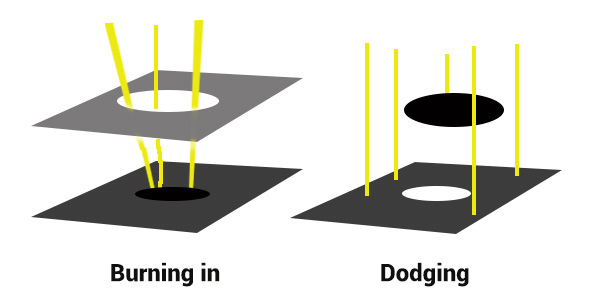
    Darkroom Burning and Dodging digram

    Darkroom burning and dodging: allowing more light to pass, or holding light back.

    WHY YOU SHOULD DODGE AND BURN YOUR DIGITAL PHOTOS

    So what has an ancient darkroom technique got to do with your photography? Plenty! Dodging and burning can add a whole new level of depth to your images. With Photoshop it’s simple.

    Here are some compelling reasons to incorporate dodging and burning into your digital photography post-processing workflow:

    • To create more dimensionality, make things pop out at your viewers, and make others recede into the shadows.
    • To draw your viewer into your image. Our eyes are programmed to follow the light, and the lightest, brightest parts of your photo are where you want to direct viewers. Some creative dodging and burning will help get their eyes where you want them to go.
    • To isolate the subject.
    • To minimize distracting backgrounds.
    • To turn the lights on, in a photo – if you need some creative lighting after your shot, dodging and burning can help.
    • To make things more dramatic and moody – enhance the shadows to darken things down.
    • Add a vignette to keep the viewer’s eye in the image.

    Dodging & Burning adds dimension.

    Dodging and burning add dimension.

    The three dimensionality of the circle on the right was created purely by dodging and burning a copy of the one on the left. As well, it is super easy with the technique you’re about to learn. As with most things in Photoshop there are many ways to accomplish the same goal, and each have their advantages and drawbacks. I prefer this way because it gives you a huge amount of control and flexibility. It’s drop dead simple, and non-destructive.

    Let’s look at  before and after shots so you can see  the difference between nothing, and selective dodging and burning.
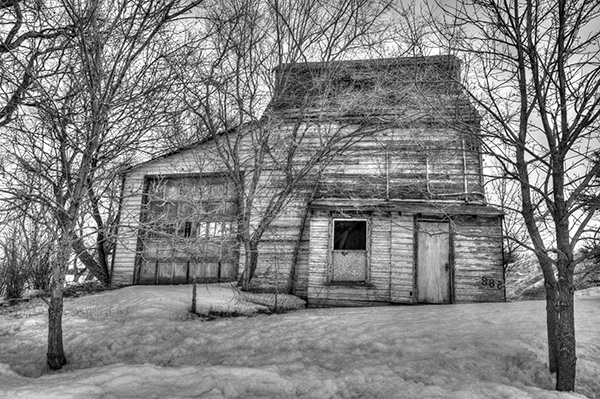
    Before Dodging and Burning

    Before dodging and burning, the image is flat and has no center of interest.
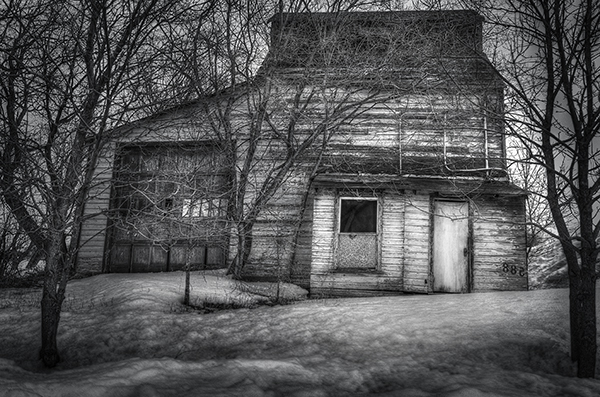
    Final Image, with Burning and Dodging applied - exaggerated for effect.

    Final image, with dodging and burning applied – we are drawn by light to the door.

    The second image has more drama, more of a moody feel. The snow has texture and dimension, and the small door and window are the clear center of interest. Nothing was changed in this photo other than adding tonality by dodging and burning. The look has been exaggerated so you can see the changes, normally dodging and burning is more subtle than this example. Although you can get quite dramatic results if that’s the mood you’re going for.

    USE THE BEST TOOLS FOR THE JOB

    toolsYou may have noticed in Photoshop’s Toolbar, a couple of tools called Dodge and Burn. Forget about them. I don’t use  these for my dodging and burning. I like to have more control when I work on my images. So instead of the pre-made tools I create my own using layers and the brush tool. It becomes artistic like creating a painting, and you have more freedom to be flexible.

    Using layers give you the flexibility to change opacity, and to group your different layers into folders. You can then selectively turn on layers to see how your work is progressing.

    HOW TO DO DODGING AND BURNING

    Dodging – adding more light:

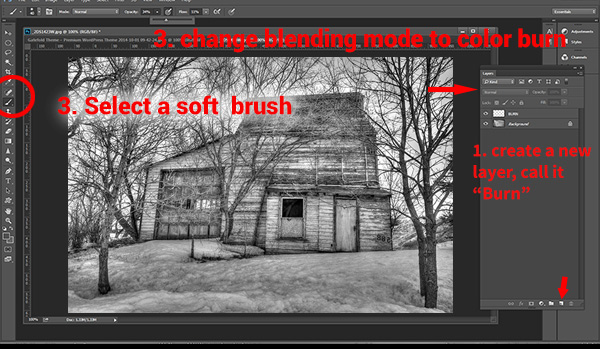
    • Create a new layer. Switch the blending mode to Color Dodge, and rename this layer Dodge. You may end up having many dodge layers, so name it something more descriptive, door dodge or tree dodge.
    • Select a pale gray color from the toolbox palette, initially this color will be light, for example #bcbcbc, or 188,188,188 on the RGB scale. This color determines the main intensity of the dodge, or how bright it will be.
    • Select a soft brush at a size suitable for the area you want to bring out or emphasize.
    • Initially set the Opacity and Flow of the brush to about 20% each.
    • Brush on the new layer and instantly see the light colors start to POP. If there’s too much, you can either reduce the opacity of the layer, or reduce the opacity and flow of the brush itself.
    step1

    Once you have an intensity you like, brush dodge segments of the image – the door for example. If you move to another part of the image use a new layer for that area or element. You do this because you may want to adjust the intensity by changing the opacity of the layer, or the brush, or even change the color to a lighter or darker shade of gray.

    Finally create a Layer Group – click the little folder icon in your layers palette. Move all your Dodge layers into one Group. Name the group Dodge. This allows you to instantly turn off all the “lights” to see before and after. Did you go overboard too much, should you do more, or is it just right? Being able to turn all the dodging off with one click will help you decide.

    Where and what to dodge:

    You want the lightest parts of your image to lead the viewer’s eye to your subject. Can you create a pathway of sorts with a dodged or brighter leading line, a bright path that the eye can easily follow? Alternately you can also make leading lines darker by burning. Leading lines don’t always have to be bright.

    Dodge (and burn) places with texture, to add that three dimensionality, to make the texture really stand out. Try dodging the subject a bit, just a subtle brushing with a gentle opacity to add some brighter tones relative to the rest of the image. Does it pop out a little more now?

    You’ve finished dodging for now, next let’s go over to the dark side!

    Burning – creating darkness:

    Next you’ll do the exact same process for burning. I suggest starting with the exact same color and opacity settings too. Simply create a new layer and set the blending mode of Color Burn, and name the layer Burn.

    Once again, if you need more drama, you can change the color of the brush, or change the opacity and flow of the brush or the layer. You can add more layers if needed, duplicate a layer to instantly double the amount of darkness.

    This method is quick and intuitive, and if I feel that you’ve gone too far, you can turn off a few layers to hide their visibility in the image. I suggest you make a Layer group for the Burn layers as well.

    You can even create another Layer group called D&B (for dodge and burn) and put the the other groups inside. Just ctrl+click to select them and drag them over top of the D&B layer. Now you’ll be able to see the total before and after view with one click. Off and on – good or not? More work needed or done?

    SEEING THE BIG PICTURE

    Once you’ve brushed in the areas that you want and think you have all the burning and dodging done, you can burn a vignette around the edges of your image to keep the viewer’s eye from leaving. It’s like framing your photo with a bit of darkness, so the eye stays on the brightness.

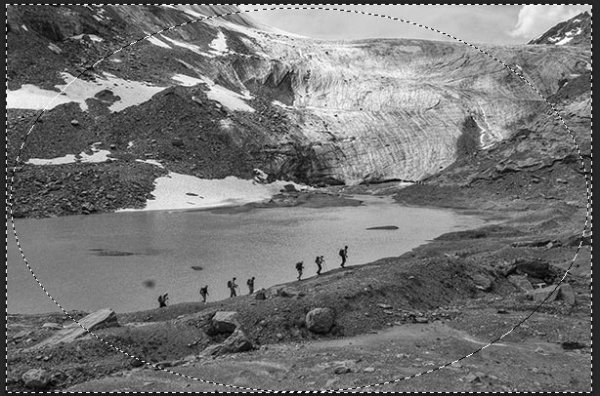
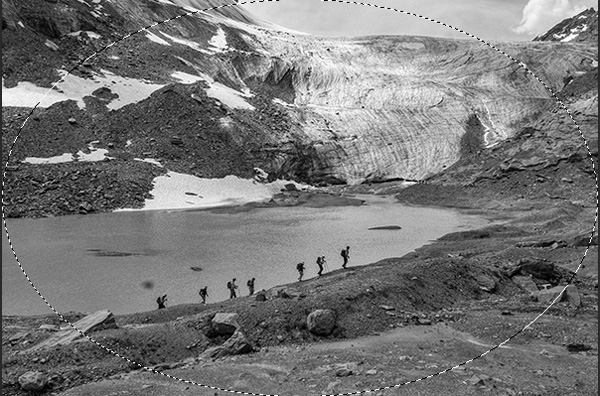
    All  you need to do here is create (yes) another layer and use the elliptical marquee tool, with a feathering setting of at least 50 pixels. On the new layer drag out the circle so it touches the edge of your frame. To add darkening to just the edge of the image to create the vignette, go to the top menu in Photoshop and click on Select>Inverse. This will now let you fill the area OUTSIDE the selection.

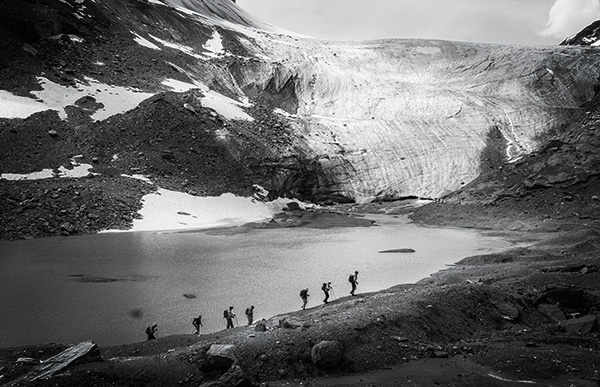
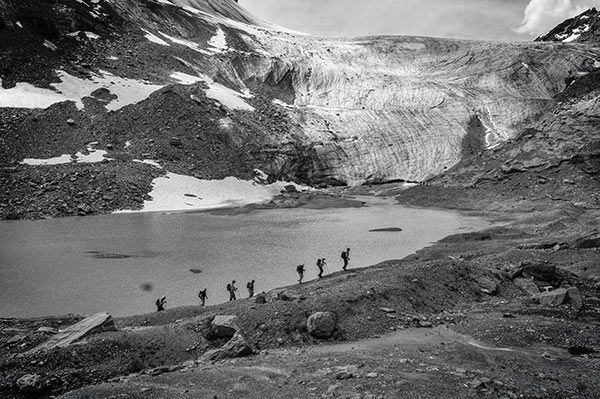
    In the Tools Box, select the same grey color you used for the initial burning of your image as your foreground color, then hit Alt>Backspace on your keyboard to fill that selection with color.  Set the layer blending mode to Color Burn. You may have to decrease the opacity of this layer a bit depending on the tones in your image.  This vignette should be pretty subtle, it’s not meant to be a frame, just a very slight darkening to keep your centre of interest a few tones brighter, to keep the viewers’ eye in your frame.
    marquee

    Initial selection

    Selection inverted
    Selection inverted

    Vignette added

    Vignette added

    _2DS2932VV

    FInal image

    I’ve made a short screen capture video showing my technique for dodging and burning you can watch below if you prefer to follow along:

    Once you give this method a try, you’ll see how easy it it and how you can achieve dramatic effects with a few quick steps. You have full control of the look and style of your image, and you can revert your steps at anytime to adjust if needed.

    If you have alternate methods for dodging and burning let me know why you like them, and also what challenges they create for you. If you’d have any dodged and burned images you’d like to share, please do post them here. Inspire us!

    The post Dodging and Burning to Create More Effective Black and White Images by Alex Morrison appeared first on Digital Photography School.


    Digital Photography School

  • How to Add Blur to Your Images for the Right Reasons

    Bycicle Blur

    Blurring is a Tool, Not a Gimmick

    Adding blur or movement to a photo just for the sake of it is the same as a magic trick; razzle-dazzle but without purpose. Using a blur effect makes sense when you actually wants to say something specific with the photo. Sometimes it’s to create a sense of speed, and sometimes it’s to add an ethereal, soft kind of ambiance to the shot, but it’s not something to use just because.

    Monks  before lunch

    Know What You Want to Convey

    Although it’s true that sometimes a random or accidental shot yields good fruit, more often than not, there is a better chance of taking a great photo if you think about the setup beforehand. Adding blur is a great option but should be used sparingly and always planned for. Take a look at your scenario and think about what you want from it; motion, speed, a little ethereal mystery? Achieving each of these in a photo takes a different attack, so plan ahead before taking the shot.

    Hard versus Soft, Blurry versus Sharp

    Taking good photographs means understanding contrast; light versus dark, soft versus sharp edge, focusing on the foreground or the background, etc. As for blurring, it always comes out best if the blur tool is only used on part of the photo. That way, the clearer, sharper part of the image is in contrast to the blur, and it’s this contrast that conveys the sense of speed.

    Bycicle Blur 2

    It’s All Right to Make Mistakes!

    Iteration is fine. Much like athletes and sketch artists need to warm up, taking several test shots, playing around with speed and f-stops is a great way to prepare for your final photo. Use these shots to find your direction, see what each exposure brings. As stated before, a good blurry picture requires some planning – so take the time to plan. The digital age of photography and instant viewing has given us a great boon in terms of being able to experiment in a trial-and-error sort of way, so you can calmly view and sort out what exactly you intend to do.

    Floating Monk

    Choose the Best Speed

    The main photographic technique for blurring is to use a slow shutter speed. Depending on the speed of the object or subject, as well as its relative direction or angle to you and your camera, you will need to play with your shutter speed. If someone is walking in a straight line, facing you, the speed needed in order to create the idea movement will be slower, perhaps 1/8 of a second. If the same person is walking form left to right perpendicular to you, you will need a faster speed, perhaps a 1/20th.

    Taking still shots of subjects that are sitting, standing, etc, your speed can be as low as ¼ of a second.

    Even if you are shooting at this speed, a still shot might not show the motion at all, if the subject doesn’t move. Usually for standard walking shots on the street the speed will be between 1/8 and 1/15.

    Again, the mantra to remember is that different scenarios call for different things. Devotees bathing at Varanasi, someone taking their time walking through a gallery, or a cyclist in mid-race will all need vastly different shutter speeds. As well, you have to determine the degree of movement you want to portray.

    In the case of the devotees in Varanasi, I did not want to reflect speed, so much as mystery, a very slight sense of motion, as if it were a dream.

    Early Morning Bath

    For producing a sense of mass motion, and by this I mean, small crowds strolling around galleries for example, you will sometimes need to use open exposure. This means letting people blur the image by moving, because it will create a contrast with anything that remains still.

    Take Care With F-Stops and ISO

    Remember that speed is only one of the three factors involved in correct exposure. The other two factors are aperture (f-stops) and ISO. My advice is to set the camera on shutter priority, (possibly “S” for your camera) and let it adjust the f-stop. See if the latter suits you, and adjust the ISO accordingly.

    Monks before lunch 2

    Don’t Leave Everything to Luck

    Certainly, if there’s one time when you need a little bit of luck, it’s when capturing something in motion.

    You should always plan and set yourself up if you want the best chance to get a lucky shot, especially when you want to work with something so unpredictable as motion-based shots. Normally, I get myself situated in my chosen venue and take picture after picture at all different speeds. It’s not unusual for me to glance at my watch and realize I’ve been in the same spot for over half an hour. But with one eye on the camera and the other on the scene in front of me, I’ve got a good view for when luck happens my way, as long as I have the patience and dedication to wait for it.

    Tuc Tuc Blur

    The post How to Add Blur to Your Images for the Right Reasons by Harry Fisch appeared first on Digital Photography School.


    Digital Photography School

  • Tips, Tricks and Treats for Your Halloween Photos

    This week, when my fearless leader, Photodoto Head Honcho Nancy Young, asked me to write a story on shooting Halloween, I must admit that I kind of had a freak out attack. I’m just not a Halloween person. I mean, bobbing for apples? Totally unsanitary. Haunted houses? They’re SCARY. But of course I take pictures of my children in their Continue Reading

    The post Tips, Tricks and Treats for Your Halloween Photos appeared first on Photodoto.


    Photodoto

  • A Common Misconception About Street Photography – Just Take Photos of People Walking

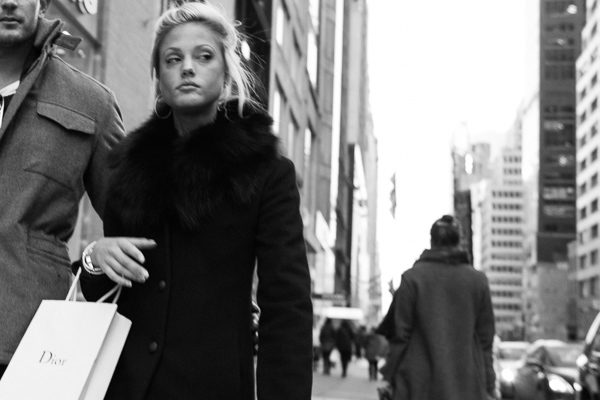
    Dior, 5th Avenue.

    Dior, 5th Avenue, NYC

    A common misconception about street photography is that it is that it is about capturing any person that looks slightly interesting walking down the street in front of an interesting background. It’s actually about trying to capture a story, idea, or emotion through an image. While this largely can take place on the street, it can be captured anywhere.

    What comes to mind when you see the term street photography? Is it a person walking down the street?

    Whether or not you you have practiced street photography, I am assuming that you have come across this idea or seen images like this – a person with a blank look just walking down the street. Maybe they have some interesting clothes, beautiful hair, or the background looks interesting. But nothing is happening. There is no idea or emotion present.

    Go beyond shots of people walking

    Good street photography, and good photography in general, goes beyond that. Street photography is not just about capturing images of people. It is about capturing candid and natural photographs about life. There has to be something there.

    My favorite street photographs make me feel like there’s something behind the curtain. Of course there needs to be something interesting and beautiful on the surface. There has to be a mix of both content and form, but behind the curtain there is some sort of idea or feeling, something that makes you think.

    I can’t tell you how many boring shots I have of a person with a blank look walking down the street. We all take these kinds of images. There is a lot of spontaneity and hand-eye coordination in this type of photography and most of the time you see the potential for the shot, react to take it, but there’s just nothing there. That is normal.

    Go for the expression

    SoHo

    The above image has a lot going for it. The main subject is up close and sharp, the angle is dynamic, the woman looks interesting and fashionable, the lighting is great, and the background is colorful and interesting. However, this image lacks for me what the top image has. There is no expression or emotion. It’s tough for me to feel anything under the surface of the image. Because of this I consider this image to be good but not great.

    What we are looking for however, is something to be there. This could be a strong facial expression whivh is one of the first things that I look for when I’m out there doing street photography, particularly the look in someone’s eyes. Fashion, the background, the light, are all important elements of a strong photograph and you should pay attention to them, but in my opinion, a good expression can trump them all. The photograph at the top of this article is a person walking down the street, but there is so much more to the photo than that, because of her facial expression.

    Watch for gestures

    Gesture, SoHo

    An example of gesture, SoHo. NYC

    Gesture is also very important. I prefer to think of gesture as an expression with the body. Pay attention to how people carry themselves and what hints that might give us about them. A facial expression could be considered a gesture as well, but look at the hand in the top image. The way the hand is position with the sharp nails makes it look like a claw. When you mix that with the facial expression, this becomes a very frightening image, at least to me. Or take a look at the gesture of the legs above with the weight all on one leg and the other turned gracefully. You can get a sense of this person just from that body position.

    Also, a street photograph does not have to have people in it. This goes beyond an urban landscape. Search for images that have the same effect as a good street photograph with a person. Search for an image that give us hints about life or makes us think or feel something, without people in the shot.

    Gowanus

    Gowanus, Brooklyn NYC

    The more you get involved with this type of photography, the more you will notice themes and consistency in your work and hints beneath the surface of your photographs. Focus on this when editing and group similar photographs together. This all takes time to develop and the more you think about your photography in this way, the more it will improve.

    What do you focus on when you do street photography? Do you have any other tips to share? Please do in the comments below.

    The post A Common Misconception About Street Photography – Just Take Photos of People Walking by James Maher appeared first on Digital Photography School.


    Digital Photography School

  • Optics Matter — Camera and Lens Guide for the New Canon DSLR Shooter

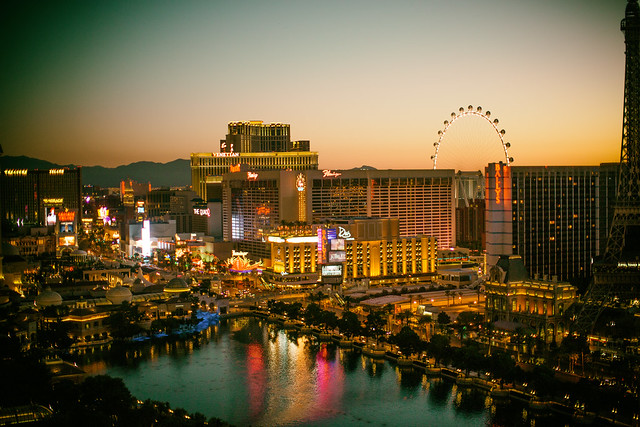
    Waking Up With You in Vegas

    Last month I spent four glorious days shooting the lights and sights of fabulous Las Vegas. As always, I packed my camera bag full of my favorite lenses and other accessories. I haven’t done a “what’s in my bag,” type post in a while, so I thought I’d use this trip to talk about what camera/lens combinations I used on this trip and why.

    In today’s day and age, I hear many photographers talk about ditching their DSLRs for other sorts of setups. I am not one of those photographers. Simply put, I believe that optics matter. I believe that there are things you can do with a DSLR and lens that simply cannot be done as well with other setups. There are unique qualities and characteristics of a well made piece of glass that cannot be replicated with micro compact software based algorithms.

    The light going through the glass is primary and fundamental in my opinion, and I refuse to give up the high quality I demand for the convenience of something tiny that I can fit in my shirt pocket, text my friends with or strap to my helmet.

    Each photographer must find their own way when it comes to what works best for them, but for me the glass is what matters most of all and there is just no substitute for high quality Canon lenses.

    I’ve been shooting Canon digital SLR cameras for over 10 years now and it’s the lenses that allow me to get the shots that I need to get and that allow me to accomplish what I need to accomplish photographically speaking. Like everyone else these days, I’ll snap off mobile shots and post them to Instagram, but what I feel is my more important body of work comes from my DSLR.

    To start with, I’ll inventory what I brought with me on my recent Las Vegas Trip — what’s in my bag:

    1 Canon EOS 70D camera body
    1 Canon EOS 5D Mark III camera body
    1 Canon EF-S 18-135mm f/3.5-5.6 IS STM lens
    1 Canon EF 135mm f/2L USM lens
    1 Canon EF 50mm f/1.2L USM lens
    1 Canon EF 100mm f/2.8 Macro USM lens
    1 Canon EF 8-15mm f/4 Fisheye USM lens
    1 Benro Carbon Fiber Tripod
    1 Sandisk 64GB SDXC Extreme Pro Flash Memory card
    1 Sandisk 32GB SDHC Extreme Plus Flash Memory card
    1 MacBook Pro
    1 Drobo Mini

    All of my camera gear fits comfortably into my LowePro CompuDaypack bag. I keep the MacBook Pro in the hotel room and it is where I dump my photos to at the end of each day of shooting. The Drobo Mini is used as backup, so that I always have two copies of my image files before clearing off my memory card. It easily fits in the hotel room safe, while I am out shooting during the day and night and connects via Thunderbolt so backup copies are quickly made.

    So this is my system, but what’s right for you may be a different story.

    The number one question I get from people on social networks is, “what camera should I buy?” The advice I give is pretty much always the same — some sort of Canon DSLR set up, depending on your budget.

    Part of why I recommend Canon, is because that’s the gear that I love, use and know. I am simply blown away with the high quality I personally get out of the system. For the life of me, I cannot imagine living without the crisp, sharp perfection of my EF 135mm f/2L USM lens (my favorite lens).

    While there are other systems out there, this is the system that I’ve adopted and mastered. It does a remarkable job of getting me the images that I want and need.

    There are lots of other reasons why I recommend Canon as well though.

    When you are a new DSLR user, I believe one of the best things you can do is try lots of different lenses. Because there are more DSLR Canon shooters out there than any other kind, I find that borrowing friends’ lenses is a great way to stretch your experience, then learn and try new approaches.

    Over the years I’ve lent my own lenses on photo walks to hundreds of different people and am always pleased when someone gets to try one of mine out. Likewise when I’m out shooting, I always like running across a different Canon lens and being able to swap with a friend for a few hours to try something new. Chances are if you are going to get into photography you will end up with photographer friends, and chances are that more of them will be shooting with a Canon DSLR system than any other.

    For example, this past year at Coachella I shot with some very serious high end professional lenses that my pal Robert Scoble got from a lens rental site, the Canon EF 200mm f/2L IS USM and the Canon EF 400mm f/2.8L IS II USM.

    If I wasn’t a Canon shooter, the fact that my buddy Robert Scoble brought those really nice lenses would have been worthless to me. As it was though, I was able to borrow these great lenses just like Robert was able to borrow my EF 8-15mm fisheye lens too to get some awesome crowd shots.

    Canon’s range of lenses is remarkable and unmatched. There is a reason why the pros primarily shoot Canon. Even if you can’t afford many of the most expensive professional grade lenses, you can borrow them or even rent them from many places online. Their line up is unmatched, which is optimal for expanding your work with new lenses or renting specialty lenses from time to time.

    Another positive about Canon is their great service and support. Many times I’ve sent my Canon bodies in for cleaning, my overworked lenses in for minor repairs, the service has always been quick and top notch. Although I’m more self taught and don’t have as much patience for training and education, Canon does have some great resources for the new DSLR user with the Canon Live Learning Center and Canon Live Learning.

    These days I usually recommend new users go one of two ways when they want to take the next step with their photography and invest in a DSLR system.

    For those on a bit tighter budget, I recommend getting the Canon EOS 70D Digital SLR Camera with the EF-S 18-135mm STM Lens. This is a perfect starter combo and runs around $ 1,500. While there are other cheaper Canon set ups, I think the EOS 70D provides significantly better quality for a little bit more in cost. This camera holds its value well and is a great camera to learn on. If you decide you want to spend more, you can always sell it back on eBay or somewhere else and upgrade to my next recommendation, the Canon EOS 5D Mark III.

    The Canon EOS 5D Mark III, is the camera that I personally use the most. It is the workhorse of digital SLRs. It is the best camera I have ever owned. It also costs around $ 3,400 for the body alone though — so this camera is either for people who have that sort of money to spend, who are very committed to honing their DSLR skills (and maybe even selling photos to offset the cost), or who have tried another Canon system, like the EOS 70D and are ready to take the next step up.

    Over the course of the next few weeks, I am going to give more detailed reports on the gear that I use in 5 different blog posts, one on the EOS 70D EFS 18-135mm STM lens set up for starters, and then one each on the four professional grade lenses I took on my Vegas Trip. I’ll provide photographic examples from these different set ups and talk about why I would recommend you consider each.

    Although I’ve written several “what’s in my bag” type posts before, by way of full disclosure, I want to disclose that part of the reason for my writing this post now is because Canon recently contacted me about working closer with me as a Canon photographer. They have agreed to sponsor this post and I’m receiving compensation from them.

    While I’ve turned down many sponsored type posts from other products in the past, because I’ve been such a passionate Canon user for so many years prior to being approached, I had no problem saying yes to this sort of arrangement with them. When I love a product I’m happy to endorse it. It’s exciting to me to be working closer with Canon and especially exciting to me that Canon is interested in the various social networks and what social photographers working on the web are doing today.

    I’m also very open to this post being a conversation about the current state of photography gear — so feel free to give your own input on what works best for you and why. I’m happy to consider your input and also to answer any questions you may have about my gear or recommendations from my perspective.


    Thomas Hawk Digital Connection

  • Review of the Tamron 16-300mm F/3.5-6.3 Macro Lens

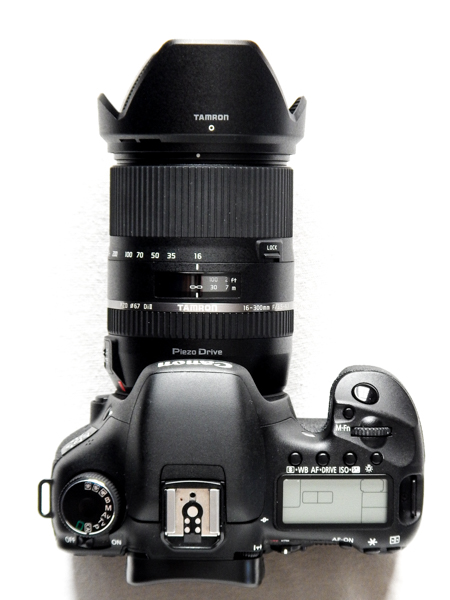
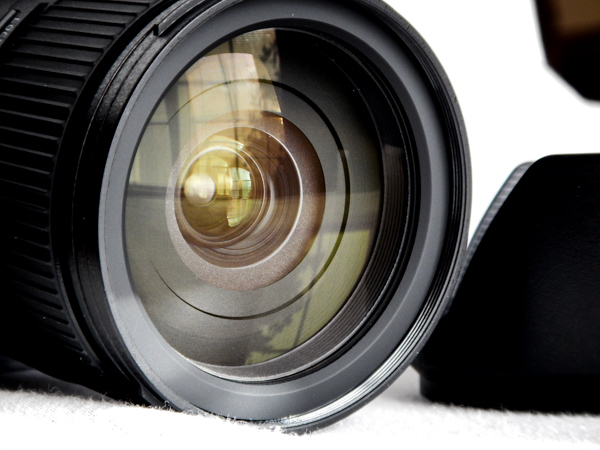
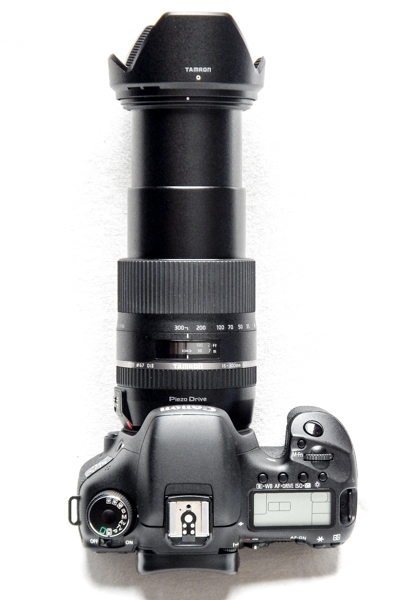
    Tamron1All test images are presented with no alteration in color, sharpness, contrast, or clarity except where indicated. Only small adjustments in exposure were made to test images. Gear used for this review and tests – Canon 7D and a Manfrotto 190 tripod.

    There is no denying that any lens capable of shooting in a wide range of conditions will always be in high demand and very popular. So called “all-in-one lenses” are most definitely a great way to be flexible in more situations without lugging around a lot of gear.

    Tamron2

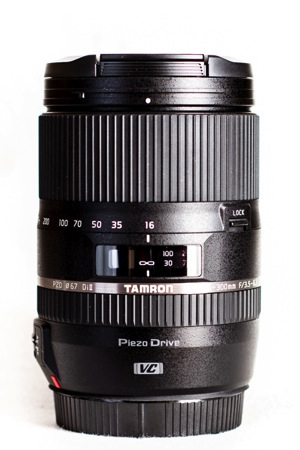
    One of Tamron’s latest additions to this category is the 16-300mm F/3.5-6.3 Di II VC PZD Macro. Don’t worry, all of those letters will meet with explanations shortly. It is a lens that is marketed as a go-to option for shooting wide angle scenes, as well as zooming in very tight for those dramatic close-ups. It is intended for those who want to pack as little gear as possible, but still keep consistent quality through a huge range of focal lengths.

    Lens Specifications

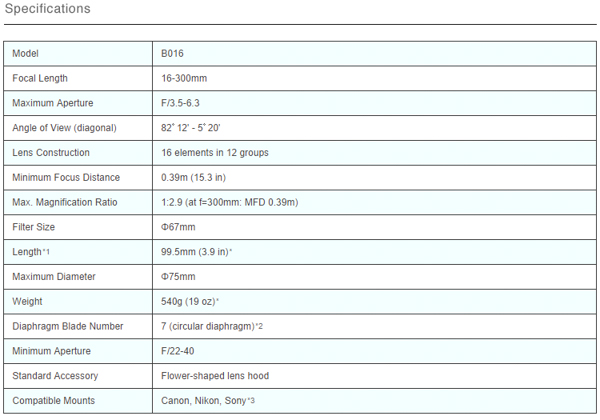
    Here is the nitty gritty for this lens. The specifications are taken directly from the Tamron USA website. Please note that the lens I worked with was a Canon mount and these specifications are for Nikon mounts, but the numbers should be very similar.

    Specs

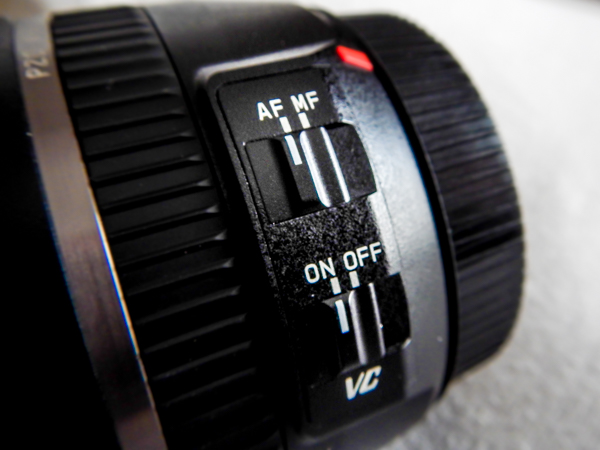
    Let’s talk about all those letters on the side of the lens that were mentioned earlier and go over their meanings. The “Di-II” designation simply means that the lens is intended for use with digital SLR cameras. The “VC” means that the lens is equipped with a vibration compensation (image stabilizer) feature and the “PZD” indicates the lens has Tamron’s proprietary Piezo Drive autofocus mechanism.

    Fit and Finish

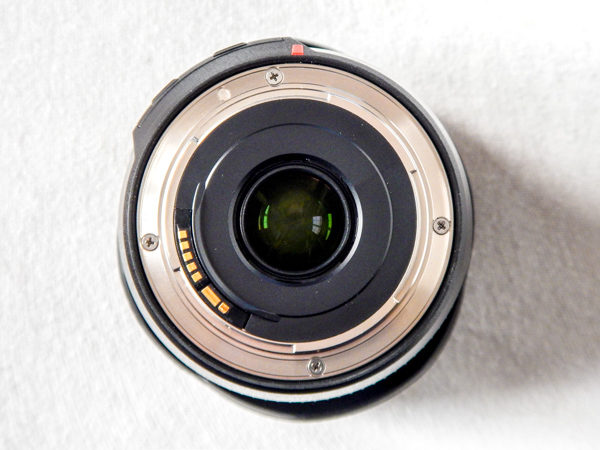
    The lens shipped from Tamron USA, included a nice hood, and of course front and end caps. Taking the lens in hand, you really get a feel for the weight. My first impression was that it felt somewhat heavy but after further handling I prefer to call the weight of the lens substantial rather than heavy. Tamron lists the lens as weighing 19 ounces (540g) which is actually lighter than some other lenses of similar zoom range and aperture.

    Tamron4

    Tamron8

    Tamron9

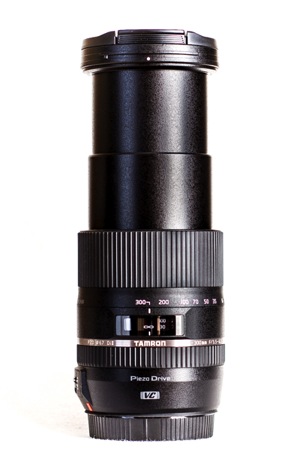
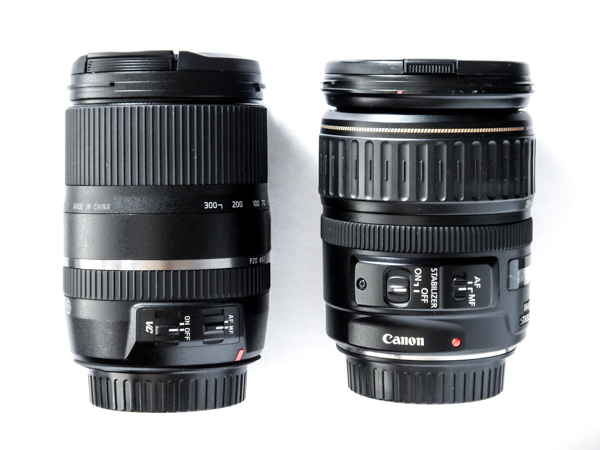
    For the amount of zoom power that has been packed inside, I was very surprised at the shear compactness of this lens. Tamron’s 16-300mm is just under four inches in length at 3.9 inches (9.9cm). Here is a side-by-side comparison with my trusty Canon 28-135mm.

    Sidebyside

    The lens feels very solid in hand and fits securely to the camera with no rattles or gaps. All of the on-lens controls are very crisp in their function and are well placed for easy no-look operation.

    Lensswitches

    The rubber used for the zoom and focusing ring has just enough bite to securely adjust the lens, without the overly rubberized and sticky feel of some manufacturer’s lenses. Straight out of the box I did notice the the zoom was very tight – and I do mean tight. However, over the course of using the lens for a few weeks the tightness quickly lessened, and the zoom remained very responsive and firm for the duration of use.

    Balance and Weight

    The balance on the lens is acceptable even when fully extended to 300mm. I attribute this to the relatively slender profile that keeps most of the weight close to the camera and makes this lens very nimble. That being said, you will still definitely know it is attached to your camera. Always practice good camera holding mechanics when using this and other larger lenses in the field for long periods of time.

    Tamron6

    Performance and Image Quality

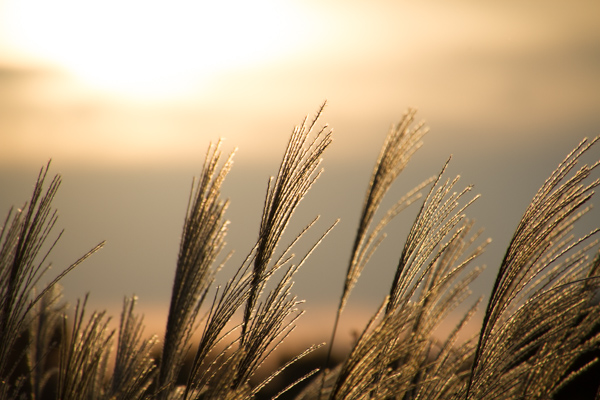
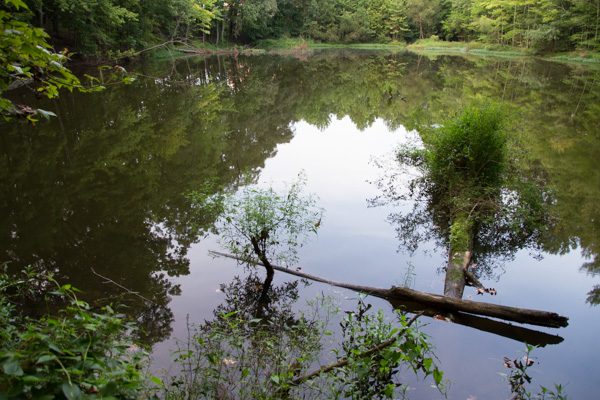
    Now, on to the good stuff. I was quite impressed with the overall image performance of the Tamron 16-300mm lens. The sharpness was much better than I had expected for such a wide range variable zoom lens, even when shooting at the maximum f/3.5. Color reproduction was very good bordering on superb, and the bokeh was surprisingly creamy.

    Grass

    Pond

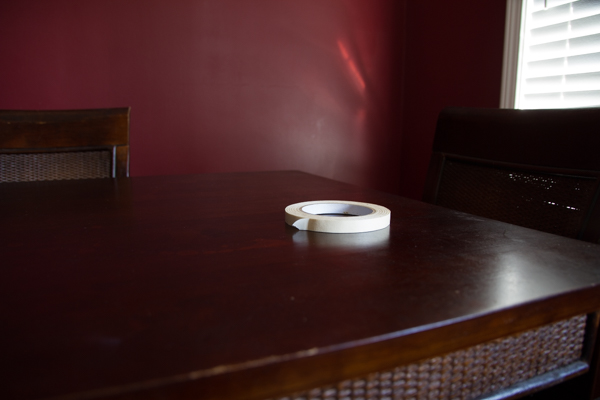
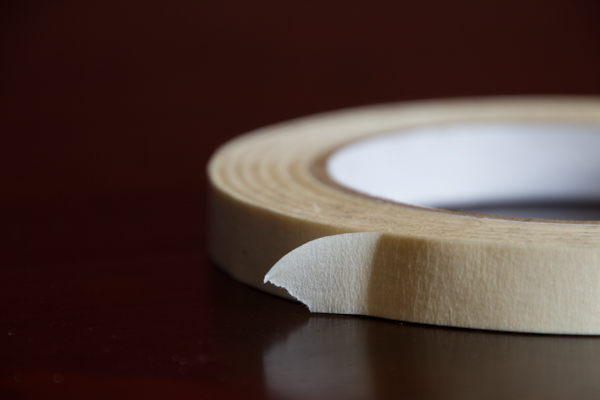
    This roll of tape was shot wide at 16mm and then again at 300mm.

    Tapewide

    Tapezoom

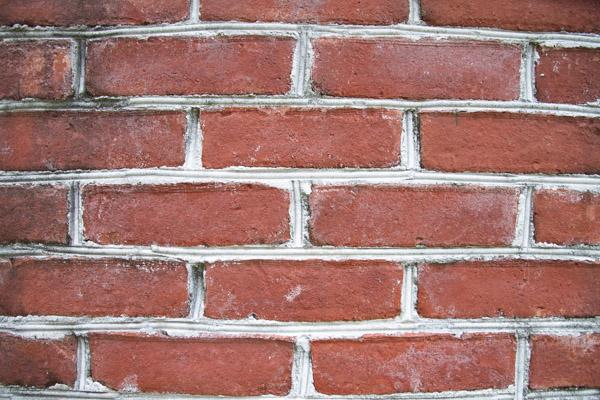
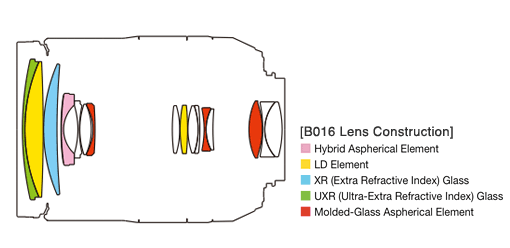
    There was very little vignetting around the edges of photos and little discernible chromatic aberration. The lack of this aberration is possibly due to the choice by Tamron to include three aspherical lens elements within the internal glass array. Though debated, aspherical lenses are known to produce less optical distortion and aberrations than conventional round lens elements. Still, at the widest angle of 16mm, there is some small but noticeable barrel distortion and edge darkening of images taken at or near the minimum focusing distance of 15.3 inches (38.9cm).

    Bricks

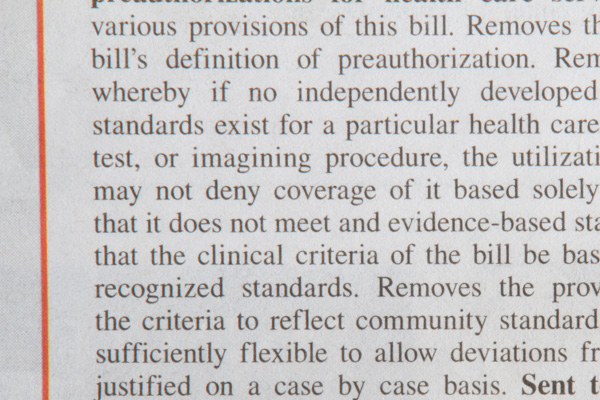
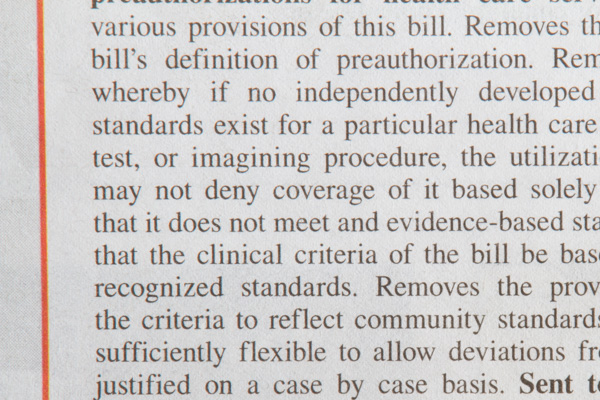
    Also, at wider apertures, again there is a small but still discernible edge softening of images. Here are five images shot over varying apertures. Notice the increasing edge softness as the size of the aperture increases.

    Printf44

    f/44

    Printf22

    f/22

    Printf16

    f/16

    Printf10

    f/10

    Printf6 3

    f/6.3

    The proprietary Piezo Drive autofocus seems to live up to the manufacturer’s acclaim. Autofocus is very fast and accurate. The focusing mechanism itself is very quiet but there is a somewhat audible clicking sound that is present when operating in AF-Servo (continuous AF) mode but it is not loud enough to cause panic for wildlife and nature photographers.

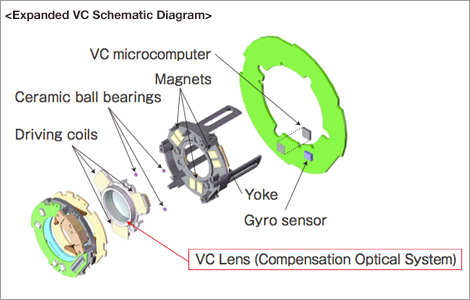
    Tamron has possibly hit a home run with the image stabilization system on this lens. Referred to as Vibration Control by Tamron, the image stabilization on this lens is outstanding.

    VC Diagram

    When looking through the viewfinder while engaging and disengaging the VC, you can truly see an immediate and substantial smoothing out of camera shake. Though definitely not a replacement for a good tripod and steady hands, the VC made a noticeable difference in the sharpness of images taken at slower shutter speeds in low light.

    Small Details

    As with most gear, people place varying degrees of importance on minute details. Here are a few small points that impressed me about the Tamron 16-300mm.

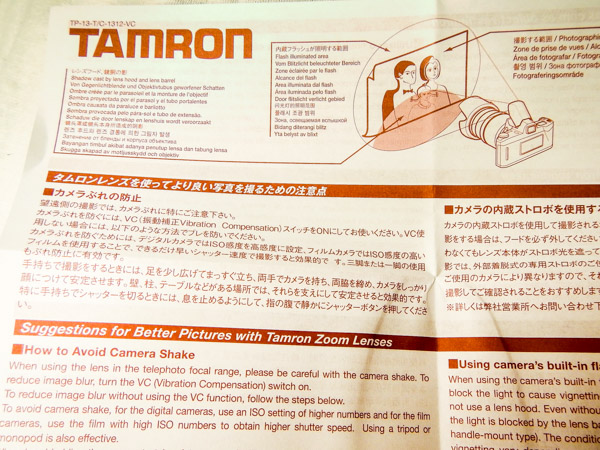
    • Tips for better shooting included – Tamron has chosen to include tips for better shooting with the paperwork that ships with the lens. Although these tips are very basic I found it be a positive gesture from the company to educate the people who purchase their product. Shootingtips
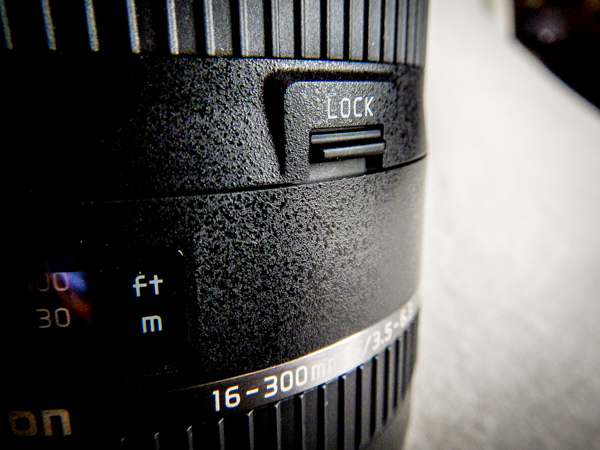
    • Zoom-lock function – A lockable zoom is very useful when you find yourself hiking or walking with a larger lens fixed to your camera. Gravity and vibration will slowly extend a downward pointing lens. The lock eliminates the constant pulling in of the lens barrel. I do, however, wish the lock could be used throughout the entire zoom range and not only at 16mm. Lenslock
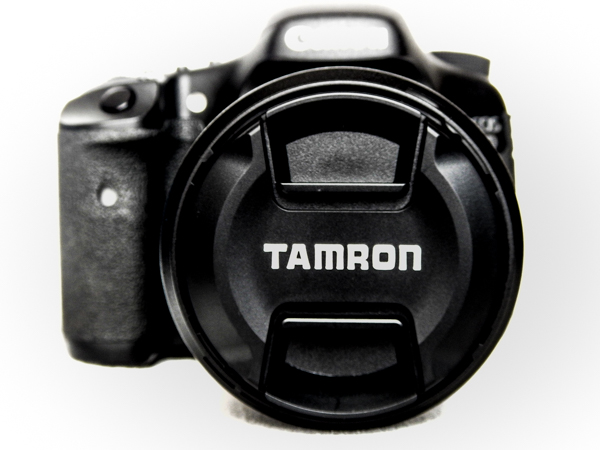
    • Deeper finger grips on the lens cap – I know, this is an extremely small and neurotic detail. In any case, it seems that Tamron has improved their lens caps with more pinchable clips making them easier to attach and remove from the lens. This feature also reduces the chance of fumbling a cap removal.
    • Aspherical lens elements – The pros and cons of aspherical lenses is delightfully arguable among photographers. Still, the aspherical lens elements in the Tamron 16-300mm do seem to reduce some distortions. Lensstack
    • Manual override autofocus – This is a handy feature. It allows you to micro adjust focus manually while still in autofocus mode. This saves you a little time and also makes it easier to maintain your mental focus while composing.

    Tamron7

    Bottom Line

    All in one lenses are loved, hated, and everything in between. Regardless of your inclination, the Tamron 16-300mm F/3.5-6.3 Di II VC PZD Macro seems to be a strong candidate for those looking to have one lens to cover most everything they will be shooting. It is a well constructed, reasonably compact, zoom lens that can shoot landscapes and high zoom with good image sharpness and color. Wildlife and street photographers will find this lens to be outstanding for long range subjects where camera shake can make or break a photograph. Overall, this is a lens that I would be happy to have in my bag.

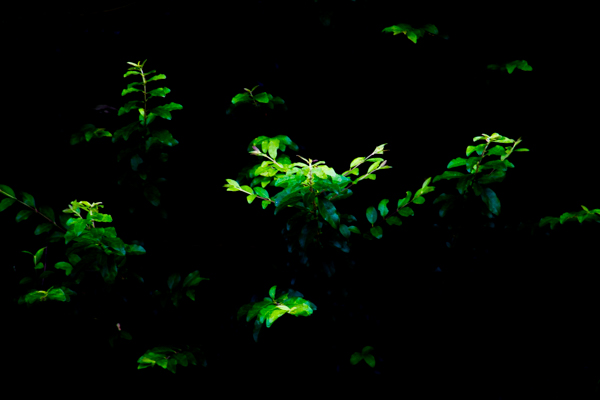
    These are some sample images taken with the Tamron 16-300mm F/3.5-6.3 Di II VC PZD Macro and processed in Adobe Lightroom 5.

    Leaves

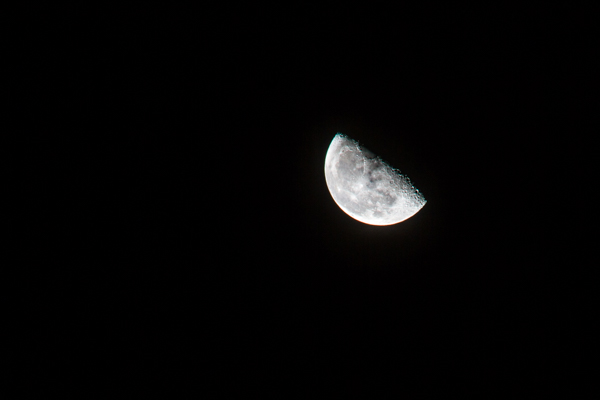
    Moon

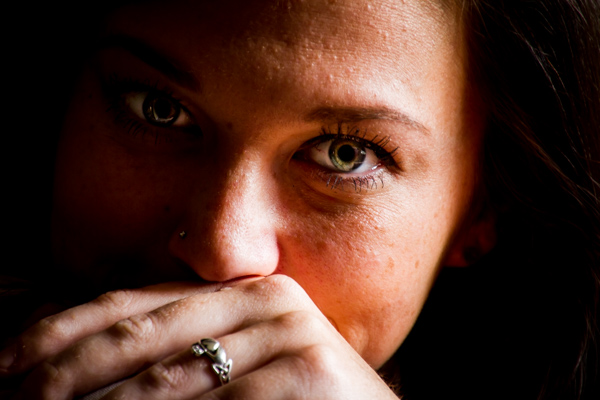
    Jamie

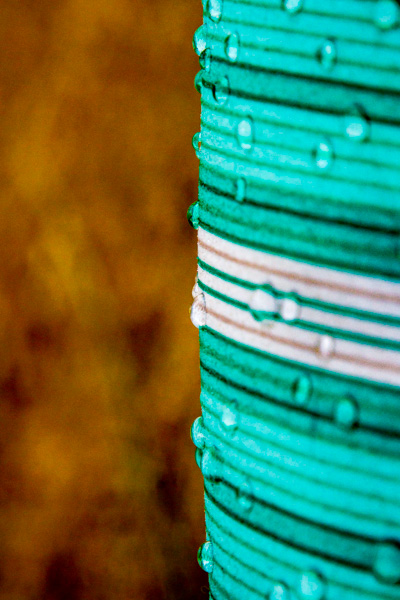
    Colordrops

    The post Review of the Tamron 16-300mm F/3.5-6.3 Macro Lens by Adam Welch appeared first on Digital Photography School.


    Digital Photography School

  • 5 Tips for Photography Using Natural Light Indoors

    Indoor Portraits Using Backlight Window Light

    You would probably love to have ideal lighting conditions for every shoot, especially if you are strictly an outdoor, natural light photographer. However there are many situations when the lighting is not ideal. Think winter, rain or even harsh midday sun. Sometimes you are stuck indoors, or your client wants to have a photoshoot inside their home. When used correctly, natural light indoors can be just as pleasing as outdoor lighting and can also provide opportunity for some creative portraiture with contrast, shadows, and drama. Here are some tips to get the most out of your photography using natural light shoot.

    #1 Know your environment and know the light

    Like any situation, do your research before you start photographing indoors. Many times the direction of the house, the position of the windows, along with the time of year plays an important part in the amount of light coming through. Is your house North-South facing or East-West? What are sunrise and sunset times where you live, or where you are going to be photographing? Does the room have a sunroof that lets in additional light? Light also changes depending on the time of day.  As light changes, so does the color of light. This directly affect the white balance (WB) of the image. If your camera has the ability to shoot in RAW use it, as white balance can then be adjusted in post-processing. If you really want to get it right in camera, experiment with the Kelvin scale.

    When planning a shoot in your home, take several shots the day before to analyze what time is best for the light.  Sometimes this is not possible especially if you are going to a client’s home or photographing a venue. But this is where a little prep work goes a long way. Don’t be afraid to ask these questions or even google the venue to check it out online.

    Indoor Portraits Using Window Light From the Side Angle Memorable Jaunts

    #2 Know how to use window light to your advantage

    One of the best sources of natural light indoors are windows. Learn how to use them to your advantage. In general, the closer you are to the window, the more light you will have to use and work with. Where you place your subject in relation to the window light will affect the image dramatically. There are three different scenarios for using window light:

    • Sidelight with the window: Here the subject is parallel or at a slight angle, to the window. Depending on the time of day and amount of light, this may yield images that have more contrast especially with midday sun streaming through the window.
    • Backlit by the window: Here the subject is sitting with their back to the window facing the photographer. You will need to meter for the subject and blowout the highlights to properly expose the image for the person. The other option is to expose for the highlights, as in the window and get an indoor silhouette. You can also use a reflector to pop light back onto the subject’s face.
    • Front lit by the window: Here the subject is directly facing the window, you are between the window and your subject. This type of lighting position produces the most even light of all the three.

    Indoor Portraits Using Window Light From a Back Angle Memorable Jaunts

    Indoor Portraits Using Window Light From the Front Angle Memorable Jaunts

    #3 Know your settings and equipment

    Remember your exposure triangle; the relationship between ISO, f-stop (aperture) and shutter speed. This plays an important role in indoor photography. Choosing a fast enough shutter speed will eliminate any camera shake if you are not using a tripod. Choosing a wide aperture (low f-stop number) will provide a shallow depth of field and blur out the background (particularly useful if there is some clutter around the house). Choosing a larger ISO provides more light; particularly useful if there isn’t much natural light coming indoors. Most of the newer DSLRs have a large range of ISO and handle high ISOs really well. Plus there are tools to help reduce noise in the image during post-processing if you want a less grainy look.

    #4 Use open hallways, doors, or even the garage to emulate a situation of open shade

    If for some reason you are not able to use window light to illuminate the subject (due to inaccessibility to a window ), you can use open hallways, doorways or even a garage to emulate a situation of open shade. Have the subject sit close to the edge of the doorway and face the light.

    Indoor Portraits Using Open Shade From A Garage Memorable Jaunts

    #5 Know when to use a reflector and a diffuser

    A reflector and diffuser are great tools to use for indoor portraits. A diffuser softens the window light just like a white curtain or blinds. It is particularly useful for windows that have harsh midday sun streaming through. A reflector used in conjunction with window light, can add just the right amount of light bounce-back to dramatically improve your indoor portraits (especially for sideand backlit images).

    Indoor Portraits Using Diffusers and Reflectors to bounce light back Memorable Jaunts
    The next time the weather gods decide to ruin all your perfectly laid out plans to have an outdoor, natural light, photoshoot, don’t rush to reschedule your session. Try and experiment with natural light indoors and diversify your portfolio. If you want to use other forms of indoor lighting check out the article from the dPS archives on creating indoor portraits without flash.

    For another dPS writer’s tips for using natural light read Melinda Smith’s Tips For Great Indoor Portraits Using Natural Light.

    Do you have any other tips for using natural light indoors? Please share those and your images in the comments section.

    The post 5 Tips for Photography Using Natural Light Indoors by Karthika Gupta appeared first on Digital Photography School.


    Digital Photography School

  • A Beginners Guide to Seascape Photography

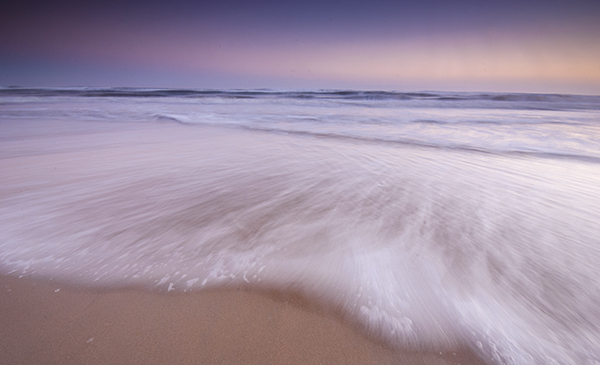
    A somewhat abstract seascape scene, the movement of the water makes the image dramatic

    A somewhat abstract seascape scene, the movement of the water makes the image dramatic

    Seascapes are often seen as a subset of landscape photography. This is true, but I feel that seascapes have their own specific techniques that need to be thought about when you are shooting a scene. The typical sea scene could be a warm sandy beach, blue sky and some palm trees. That is generally the kind of image I try and avoid. For something more dramatic, you may want to try to shoot at sunset and try and capture something unique, rather than a typical postcard shot. When you get it right, your seascape scene should be breathtaking and exciting to look at. It should show the scene, but not look like the kind of shot that anyone could have shot. That means, you may have to scout for some unique or unusual vantage points along the coast.

    Safety first please

    Seascape photography can be dangerous. Very often you will be hiking over slippery and sharp rocks, the tide may be rising and the waves might be coming in closer and closer. Always be aware of your surroundings and be careful to observe what is happening around you. On more than one occasion, I have been trapped on a rocky outcrop with nothing but wild sea around me. Getting back onto dry land was a relief and an ordeal on those occasions. I have also been completely soaked by freak waves at times and almost lost my camera into the water more than once. So yes, seascape photography can be a little dangerous, but the results are well worth it. The first rule is always, safety first. If possible, go out with a fellow photographer so that there are two of you to help each other if necessary. So, with that disclaimer out of the way, here are some tips on how to set up to get some great seascape images.

    Location considerations:

    1. Tide

    If you don’t know the tidal movements or the tidal range, it’s a good idea to find out. Most coastal towns will have a tide table or chart available, this is important information to know before you go out on your shoot. You can also simply Google “tide table for (city or town)” and all the tide times and measurements should be there. This is important because you may scout a location at low tide, only to return at high tide and find that the rock you were planning to stand on is now submerged under water. Also, the tide can affect the water movement and wave size. If it is high tide, there may not be as much water movement as you would like. It is also a good idea to chat with local photographers or fishermen to find out how the tide is moving.

    The incoming tide trapped me on this rocky outcrop

    The incoming tide trapped me on this rocky outcrop

    2. Weather

    Most coastal areas can be unpredictable from a weather perspective. A storm can roll in pretty quickly over a coastal town. Be sure to check the weather forecast for three or four hours before you plan to shoot, and an hour or two after you plan to end your shoot. Sometimes the weather and particularly the wind, can cause the conditions to become difficult to shoot in. One of my favourite apps on my iPhone is Accuweather. I use it often when I am in a location that I am unfamiliar with. It is very easy to use and has been about 90% accurate whenever I have used it.

    3. Location

    You need to decide where you want to shoot. Do you want to shoot from the beach, the rocks, or the elevated cliff? This will determine what kind of personal gear you will need to take with you (hiking boots, long pants, etc.) It is also a good idea to pack an extra sweater or rain jacket as it could become wet or cold very quickly. Be sure to look at where the sun will be setting. There is nothing more frustrating than being in the shadow of a headland with 80% of your scene in shade as the sun goes down. Remember to look out for channels where the sea water may run up into. These channels and gullies along a rocky coastline can be very dangerous as the water may recede when the tide is out, but as the tide comes in, they may be impossible to cross. If you cross the gulley in low tide and try to return at high tide, you may be trapped as the water could be too deep to cross over.

    Magnificent light and moving water makes for a great image

    4. Lighting

    It is easy to forget your headlamp or flashlight when you are walking along the beach in the warm sunlight. You may be at your location until way after dark and when you decide to return, you will realize that it is pitch dark and the path back has changed because the tide has come in. Don’t forget to carry your headlamp or flashlight with you whenever you do any kind of landscape photography, but especially when you do seascape photography. I have been lost on a rocky coastal outcrop a few times and it is more than a little scary. Fortunately, I always carry my headlamp in my camera bag, no matter what, so that has helped me find my way back to the road or my car.

    Photography considerations:

    1. Shutter speed

    Depending on the seascape scene you are shooting, you will have two choices. You can freeze the movement of the waves or you can blur the movement of the water. If you are shooting a seascape scene that includes rocks in the foreground and the water rolling over the rocks, then you may want to blur the water. This will give the water that soft silky effect and the images will look somewhat surreal. To slow things down even further you could use a neutral density filter to make the exposure time even longer. This will have the effect of really softening the water to the point that it may look misty. Depending on what your vision is for the shot, you need to decide how soft you want the water to be. To freeze the action of the water, you will need to be shooting at 1/1000th or faster. I find that freezing the action of the water is not always as dramatic as softening it. Being able to freeze the action is useful if you are shooting surfing or some other water sport.

    2. Aperture

    As with landscape photography, you will want to have everything from the foreground to the background in focus. That means you will need to be using an aperture of f/8 or smaller. This will also allow you to slow the shutter speed down, and get some soft water in your scene. Make sure that you focus your camera once you have decided on your scene and composition, then switch your camera to manual focus. That way, when the light begins to fade, your lens won’t be hunting to find a focus point.

    Look for reflections in a seascape scene

    Look for reflections in a seascape scene

    3. Colour or black and white

    Seascapes can work very well in black and white. You should shoot your images in colour and convert them afterwards in Photoshop or Lightroom. Both of these image editing suites have great black and white conversion tools and you will be able to make numerous adjustments to your image afterwards. If you shoot in black and white however, you can never get the colour back into the scene. You may try the image in black and white and realize it works better in colour, so be sure to keep shooting in colour.

    4. Tripod

    You will need a tripod to shoot seascapes effectively. You may be shooting after the sun has set and there is no way you could hold your camera still to get a great shot. Sharpness is key in a good seascape. Portions of your image will be blurred (water) but other parts of the image should be tack sharp (rocks, clouds, etc.) So be sure that everything is very sharp by using a tripod and a cable release if possible. Be aware if you set your tripod up on the sandy shoreline. As the sea comes in, it may cause your tripod to move or sink as the sand may not be firm enough to keep your tripod perfectly still. Always check your image afterwards to be sure that you have the rocks and clouds sharp.

    A tripod will be necessary in low light conditions

    A tripod is necessary in low light conditions

    Subject matter

    There are no shortage of scenes to shoot in a seascape scene. Some of the following are ideas to look out for on any beach:

    • Lighthouses – Always fun to shoot and if possible, shoot them in the early evening when the light first comes on.
    • Rocky outcrops – Moving water and rocky beaches make for great seascape images.
    • Reflections – if the tide is moving out on a flat beach, you can capture some amazing reflections of the sky on the shiny beach sand.
    • Colour of light – If you expose properly you can have a warm sky and the blue water in one image. This makes for a beautiful scene.
    • Storms – This is a little more tricky, but sometimes shooting a raging storm over the sea can make a fantastic shot.

    If you live near the sea or are planning to visit the seaside, then try your hand at this genre of photography. The results can be very satisfying and you will be astounded how easy it is to produce consistently good results, once you know how. The important thing is to be sure that you are safe and aware of your surroundings at all times. Don’t be afraid to venture out to try this type of photography, it is a lot of fun and it is worth it for sure.

    Good foreground interest will anchor the scene

    Good foreground interest will anchor the scene

    The post A Beginners Guide to Seascape Photography by Barry J Brady appeared first on Digital Photography School.


    Digital Photography School

  • Photography Branding: Pinterest Marketing Guide for Newbies

    Pinterest has grabbed the attention of many social media marketers and for good reason. The image sharing site has gathered millions of fans since its debut two years ago. With Pinterest you can easily share photos you’ve found around the web and interact with people from all over the globe. I previously wrote on Photodoto about Pinterest photography boards worth Continue Reading

    The post Photography Branding: Pinterest Marketing Guide for Newbies appeared first on Photodoto.


    Photodoto