Category: Photography

  • Essential Photography Business Kit: 5 Things to Keep Handy at All Times

    Even if you don’t have a business plan, or much of a business to speak of, if you’re going to be or already are a professional photographer, there are certain things you will need and often will be asked for over and over again. Luckily, you don’t have to do extra work every time to meet these needs — instead, Continue Reading

    The post Essential Photography Business Kit: 5 Things to Keep Handy at All Times appeared first on Photodoto.


    Photodoto

  • 5 Easy Steps to Exposure Blending for High Contrast Landscapes

    Final Image  Bear Rock, Dolly Sod Wilderness Area, West Virginia

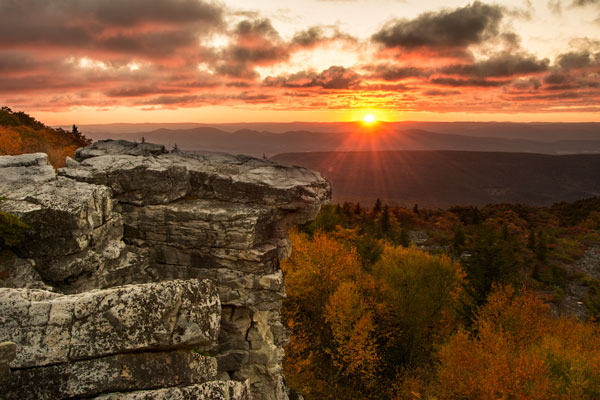
    Final Image: Bear Rock, Dolly Sod Wilderness Area, West Virginia. Sunrise and Sunsets can be extremely contrasting and very challenging to capture the wide exposure range.

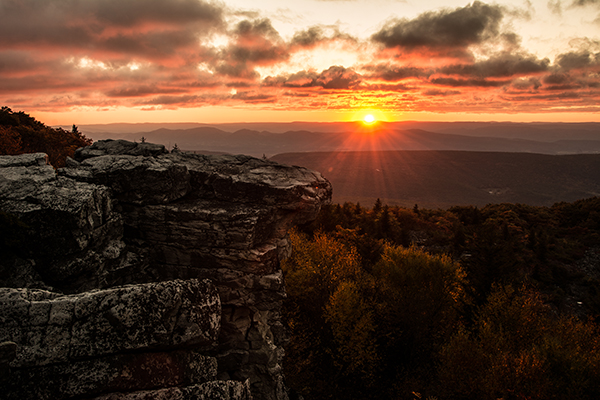
    Here’s a problem I am sure you have encountered, instances where you try to photograph an image that has a greater range of light and dark than your camera can accurately capture. In the example above, when we set our exposure to expose the sky correctly, the foreground objects are severely under-exposed. Likewise, if we set our exposure to correctly expose the foreground, the sky is blown out and loses almost all detail. One solution to this dilemma might be to use HDR software to combine several bracketed exposures into one image. However, this method can be overwhelming and time-consuming to do correctly for a pleasing result. Another solution to this problem could be to use graduated neutral density filters. Unfortunately, a good set of filters can be quite expensive and a cheap set can harm the quality of your image.

    A simple solution to this problem scenario may be as easy as taking two exposures, one correctly exposed for the dark areas (in this case the foreground) and the other correctly exposed for the lighter area (in this case the sky). Place your camera on a tripod so that both images will be composed exactly the same.

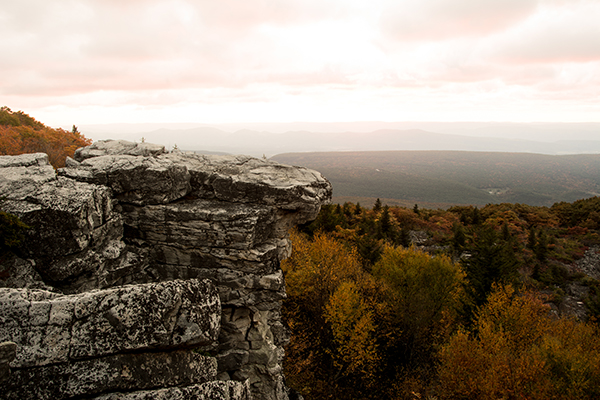
    image correctly exposed for the sky 1/10 of a second @ f/10. ISO 100

    Image exposed for the sky: 1/10th of a second @ f/10, ISO 100

    Image exposed for the foreground: 1 second @ f/10, ISO 100

    Image exposed for the foreground: 1 second @ f/10, ISO 100

    Now, let’s look at a simple five step exposure blending process, performed in Photoshop, to resolve this contrast issue.

    Step 1: Open your images

    Open the two exposures in Photoshop as layers. This can be simply done with the following script. In Photoshop, select: File/Scripts/Load files into stacks (if you use Lightroom just select both thumbnails, right click and choose “Edit in>Open as Layers in PS). Then select your two exposure files. Label the layers for identification. (In this case we label one layer “Sky” and the other “Foreground”). Drag the Sky to the top layer if not already in that position.

    Step 2: Add a layer mask

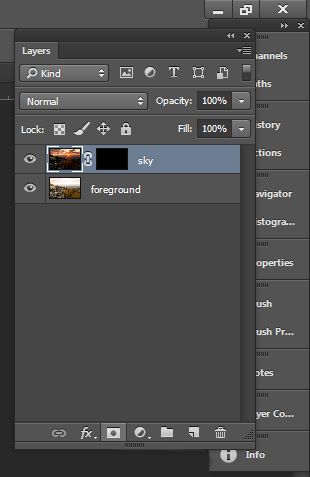
    Add layer mask filled with black to top layer.

    Add layer mask filled with black to the top layer.

    Add a layer mask, as shown below, to the highlighted Sky layer. While holding down the ALT (opt) key, select the Add layer mask button located at the bottom of the layer palette. This will add a layer mask to the Sky layer and automatically fill it with black. The black-filled layer will mask out all of the Sky layer and reveal all of the Foreground layer.

    Step 3: Paint over sky

    Click on the black layer mask and select the paintbrush tool. Set your paintbrush to paint with white, and set the size of your brush as needed. Set the hardness of your brush to a low number to give it a soft edge while you paint. Paint over the sky area of the image, which will reveal the Sky layer. By adjusting the opacity, size and hardness of the brush as you paint, blend the two exposures together.

    Paint with white on your layer mask to reveal the sky in the top image. use different opacities and hardness to make the blending look natural.

    Paint with white on your layer mask to reveal the sky in the top image. Use different opacities and brush hardness to make the blending look natural. This is what the mask might look like.

    Step 4: Add finishing touches

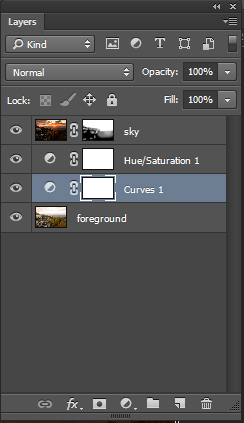
    Add adjustment layers (see below) as needed to adjust colors and contrast of the layers to make the image look natural.

    Final layer palette

    Final layer palette

    Step 5: Save your file

    Save your file as a Photoshop document (.PSD). This will preserve your image with layers which you can return to if you need to make further adjustments to improve the image.  You can now can flatten the layers (Layer/ Flatten Image) and Save As a single layer file such as a JPG.

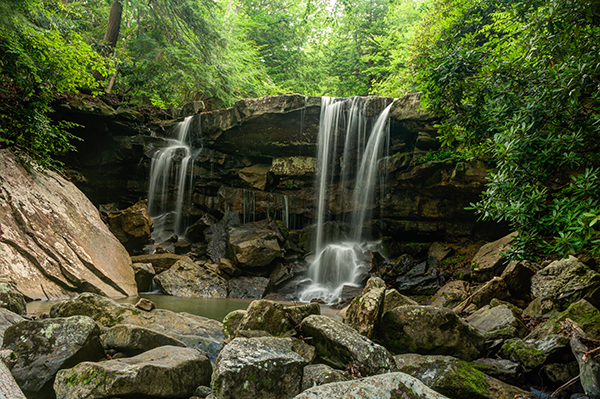
    This image was created from three files using Exposure blending. Exposure #1 was exposed for the light green area above the falls and exposure #2 was exposed for the shadow area below the falls. The light was hitting the rock on the left  very hard so a third exposure was need just for that rock.

    This image was created from three files using exposure blending. Exposure #1 was exposed for the light green area above the falls and exposure #2 was for the shadow area below the falls. The light was hitting the rock on the left very hard so exposure #3 was needed just for just that rock.

    So next time you are faced with an extremely contrasting scene, try this easy exposure blending process to extend the exposure range of your image. Do you have any exposure blending tricks that you use? Post samples of your images.

    The post 5 Easy Steps to Exposure Blending for High Contrast Landscapes by Bruce Wunderlich appeared first on Digital Photography School.


    Digital Photography School

  • Who Are You as a Photographer?

    Unpaid

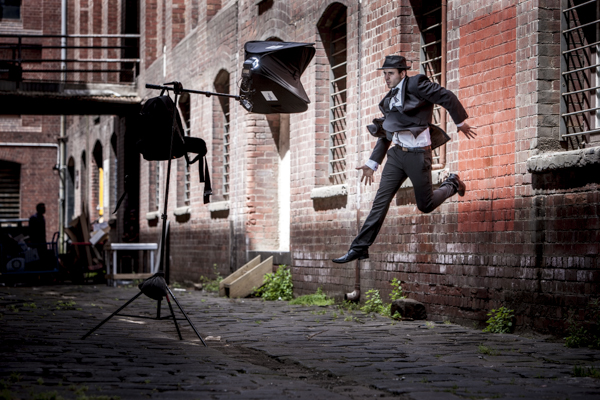
    This is a shot I did on my own for my portfolio. In other words, it was unpaid.

    Who am I? This is a question that I ask myself all the time. What kind of photography do I do? Since I am inspired by so many different photographers, across multiple genres (fashion, portrait, photojournalist, product, commercial), it can get hard for me to remember that I can’t be all things to all people, or clients.

    For the sake of time, I’ve had to learn to narrow down the types of photography that I will pursue. It takes a considerable amount of time and energy to pursue new clients, to test the waters of a different area of photography.

    For example, if you’ve shot primarily weddings and families for the past few years, it will take a lot of time and hard work for you to transition over to the commercial photography world. There’s a whole other language to the commercial world. Words like Prepro Doc, Hero Shot or Call Sheet may be foreign to you. The shooting process is also different, since you are likely working with a creative director before you ever even talk to the client. You also won’t get paid in advance, like you do with a wedding. In fact, I typically have to wait 30-60 days after I shoot the job to receive payment. You’ll likely need to know how to shoot with your camera tethered to a computer. You’ll need to know how to put together a quote, including usage fees. You’ll need to be able to assemble a team, including a hair stylist, makeup artist and stylist. You’ll need to have a separate website for your non-wedding photography and decent SEO for it (which can take years to build) so that new clients can find your work. You’ll need to have a decent commercial portfolio on that non-wedding site to entice creative directors, once they find their way to your site. It’s a lot to think about.

    Beyond choosing what areas of photography you are going to pursue, you need to consider what image you are putting out in to the world. If a new visiter were to come to your website or blog, what would they see? Would they see a random smattering of subjects, styles and executions or would they see a focused style, or signature, to the way you compose, light and edit your images? Take photographer Nadav Kander, for example. He’s a portrait and commerce photographer based in London, England. He is not only one of my favorite photographers, but his portraits are also some of the most easily recognizable because of his unique lighting and processing. The same applies to Neil Krug, Martin Schoeller and Dan Winters, some of my other favorite photographers.

    While you are in the process of determining which market(s) you want to focus on and you start to bring in to focus a signature style to your work, you need to factor these elements in to the types of clients you take, the kind of unpaid work you shoot for leisure or for your book and which images you show to the world, via social media and your website. For example, you may have the opportunity to shoot for a shoe company, a hair salon, or your kid’s soccer team, and the money is right (as in you’re hard up for cash and it pays the same day). Just because you took the gig and executed it well doesn’t mean that the images need to go on your website or blog. It may not fit in with your other images or be an area of photography you want to delve into, and that’s okay. That doesn’t make you a sell out.

    Didntblog

    This is from a shoot I did for a well-paying, super kind client. However, since it’s not the type of work that I want to pursue, I didn’t post any of the images on my blog.

    Let’s say, for example, that you are trying to transition to the world of fashion photography. You aren’t going to start landing gigs with agencies and magazines just because you updated your bio, listing yourself as a fashion photograher. You need images – great images at that – in your portfolio to show magazine editors or modelling agencies. This means that you will need to shoot these on your own time, for likely little or no money. And once you get those first few shoots under your belt, pick a select FEW images from those shoots (read less than ten) to put on your blog and social media and ONE image from the each shoot to put on your website. Otherwise, if a client goes to your site and sees multiple images that are obviously from the same shoot, they can only assume that you aren’t very experienced in the area of fashion photography and that you’ve only done a couple shoots. You also want to make sure to shoot in a variety of settings, using a variety of different models while utilizing a variety of techniques.

    Blog

    These are the three images (above) that I chose to put on my blog from a recent book-building (unpaid) photo shoot that I did for my portfolio.

    Port

    Note the highlighted image (above) is the only image from this shoot that made it onto my website.

    This process is of focusing your photography path and carving out your signature look is not a quick one. It’s been almost ten years since I graduated from college with a fine art photography degree and only within the last three or four years have I been able to start to narrow down what makes up my signature look and figure out what type of work I want to pursue. I mentioned earlier that I can’t be all things to all clients, nor do I want to be. The thought of conforming each photoshoot I do to the whims of a client’s mood board is an exhausting thought. Instead, now that I know who I am and what my style is, I can be confident that people are approaching me to shoot a job because they want me specifically. This also gives my voice more weight with a client when deciding which direction the shoot should take. Another way to ensure that you are being chosen for your style is that your prices are competitive with other photographers in the market, and the client isn’t simply choosing you because you’re the most affordable.

    Myinput

    This is a shot (above) I did for the cover of a local food magazine. The cover story was about edgy, high-end burgers. The editor initially asked for a photo-illustration without any people in the photo. By the end of the discussion, he went with my idea, which you can see is completely different than the editor’s original idea.

    Now that I have a tightly edited portfolio, full of images that show a range of the work that I am willing and able to do, I can more easily say no to a job if it doesn’t fit in with my brand. Let’s say that a client approaches me to shoot a sexy swimsuit or lingerie editorial. I would politely decline because that’s not a part of my vision for my brand. Besides, there are plenty of talented photographers who do this exact area of work and would be happy to take the gig. Not to mention, me being a 30-something married man with a young daughter is not the image that comes to mind when I picture a swimwear or boudoir photographer. I imagine a young woman (or man) that lives and breathes sexiness. Meanwhile, I stick to what I’m passionate about.

    Paid

    This last image is a shot I did Charles Penzone salon, who hired me over another photographer after they saw the top image from my unpaid photo shoot.

    Do you know who you are as photographer? Can you share any tips for newbies still finding their way?

    The post Who Are You as a Photographer? by Nick Fancher appeared first on Digital Photography School.


    Digital Photography School
  • 10 Tips to Help You Grow as an Artist in Photography

    UmbrellasinTokyo

    Over the past few days, I’ve thought about what’s helped me become a better photographer over the years. It’s a constant journey, and developing as an artist is a never ending pursuit that extends beyond owning any camera. In addition to practicing as much as possible with your camera, here are 10 tips to share that you may wish to consider while you continue on your own path in photography to help you grow as an artist.

    1. Wait to look at your photos

    I discovered this piece of advice over time, though a number of other photographers have suggested the same thing. Wait to look at your photographs if that’s possible. I know after a shoot you may feel anxious to go through and edit your pictures, but your anxiety and perception will often skew how you see your photos because this is at the height of your emotional attachment to your images. I’ve found that waiting a few days or better yet a couple of months to really go through a batch of photographs will be enough time to break down some of that attachment and reduce any biases you may carry.

    2. Only delete the obviously bad shots

    Some photographers even argue not to delete any of your shots because in the future, software developments may actually exist to fix super blurry or unfocused images. It’s your call, but if you see an image that you just don’t like, consider waiting a bit before you delete it. I’ve come across images that I marked with an X in my Lightroom, but interestingly, I’ve found that sometimes my perception of what I think is “good” changes. Photography is a learning experience as you expose yourself to other work and different styles. Down the road, you may rediscover some of your images in light of new ways you learn how to see. Besides, it’s always good to keep some of the bad shots around to really get an idea of the progress you make through the years.

    3. Shoot some film

    Shooting film can be more expensive, but it’s a great tool in becoming a better artist and photographer. With only a fixed number of exposures, you’re more selective of the images you shoot and the cost of developing film will keep you from shooting hit or miss style which forces you to think more. When shooting film, you’re in a different state of mind because of its limitations which challenge you to become more selective and refined before you press the shutter button.

    Shootfilm

    4. Study other artists’ work

    You have no idea how good your stuff is until you have something to compare it to. You can shoot a ton and feel pride in your images, and as you grow, you should feel good about this progress. Studying from great artists and photographers you admire is really the best way keep you humble; but it also prevents you from falling into creative stagnation. I find this to be one of my biggest sources of inspiration, and it’s a great motivator for when you start to feel a little bored with your images.

    5. Take a drawing or painting class

    Years ago, before I ever even picked up a camera, I wanted to learn how to paint. I loved mixing colors and the thought of learning how to compose a scene and conveying my own impressions upon a subject interested me. So I enrolled in a class at a local art college which served as the foundational cornerstone as my development in photography. My teacher sat with us intimately every class and taught us about reading light and composition. She told us flat out at the beginning of the class that we would never see the same way again, and she was right! She taught us about negative space, composition, and all the basic concepts that artists are supposed to know, things which photographers should know too. My teacher was right and I did learn to see for the first time. If you have the time or haven’t been through art school already, consider signing up for a drawing or a painting class. It will take you a long way toward your artistic growth.

    Tree

    6. Don’t listen to your friends and family

    I come across this advice often and it’s useful. Your friends and family are your biggest supporters, but because of this, they make it hard to get an objective, unbiased, perspective on your work. They all love your photos and they’ll even like or love all your pics on every social media site. But I’ve found that so much praise can become counterproductive or even misleading when you put too much stock into their opinions. Instead, you can join critique forums online or contact artists you admire to get them to review your work, as in my next point.

    7. Ask for a portfolio review from a professional artist that you admire

    This can often have an associated fee, but it’s a great way to get some professional feedback on your images. You can even seek help in sequencing the photographs in your portfolio as well. Better yet, join a workshop with a photographer you really admire and they’ll surely give you some substantial feedback.

    8. Capture the essence of a place

    Capturing the essence of a place in a photograph is its soul and without this connection, it’s hard to connect the story behind your images. It’s easy to get sidetracked or overwhelmed with seizing photo opportunities on a trip or when you’re traveling somewhere. But before you get too carried away with shooting, let your senses rest a little and try to feel the essence of the place and connect with it. Sometimes it takes a couple days or so to slow down and catch on to its vibe. When I went visited Sydney for the first time, I shot this photo of the ice cream truck on the beautiful day because I felt it perfectly captured both the beauty and the pace of life in the city.

    Sydney

    9. Fall in love with photography

    Becoming a photographer can feel downright intimidating in a world full of talent. If you’re running a full-time business then it’s easy to lose sight of why you fell in love with photography in the first place. Don’t forget to continue to immerse yourself in other people’s work, indulge in the history of photography, and enjoy the art of photography for its own existential reasons.

    10. Focus more on books and less on gear

    It’s impossible not to appreciate the craftsmanship of a nice camera or a beautiful lens, but fixating upon having the latest and best gear won’t make your photos any better if you have a limited artistic vocabulary. Instead, invest in some inspirational photography books from a variety of different artists; look at the sequencing and learn from their styles. I feel this is even more important if you are self-taught. Learning what a good photograph looks like can’t be accomplished by just shooting alone. There’s a rich number of artistic styles you can potentially gain inspiration from. Even more important, brushing up on color theory, composition and lighting techniques will take your photographs to a whole new level. You don’t need to follow these rules all the time, but it’s important to know they exist so you can manipulate your camera and subject matter with more purpose in mind. I like the image below because it uses a simple compositional technique of aligning the foreground with the background. But without first reaching out and learning these kinds of ideas, you most likely won’t even know they exist.

    Yokohamabridge

    In the end, Mark Twain gives some excellent advice, “You cannot depend on your eyes if your imagination is out of focus.” I’d love to hear about your tips as well for honing your own artistic side as a photographer.

    The post 10 Tips to Help You Grow as an Artist in Photography by Stephanie Huynh appeared first on Digital Photography School.


    Digital Photography School
  • First Impressions of the New Canon 7D Mark II are out!

    7d-mark2Canon introduced the new 7D Mark II recently to a lot of fan fair and hype. But does it live up to all of that? Some of the things that are really exciting include:

    • 10 frames per second burst rate
    • Extra large buffer to allow shooting 31 RAW files, or 130 full JPGs using burst mode
    • 65 cross-type autofocus points for fast, super accurate autofocus
    • Advanced autofocus menu settings similar to some of the higher end full frame cameras like the 1Dx
    • Low noise and great high ISO levels and performance
    • Built-in GPS
    • Accepts both Compact Flash and SD memory cards
    • Lots of customization of features and buttons

    In this video from B&H Photo Video, Larry Becker goes over some of the features that have sports and action photographers really excited, and a few you may not have heard about yet. Learn all that and more, just watch the video and click through to the B&H site if you want more info on pricing and technical specs.

    The post First Impressions of the New Canon 7D Mark II are out! by Darlene Hildebrandt appeared first on Digital Photography School.


    Digital Photography School
  • An Introduction to DSLR Photography, the Canon EOS 70D and EF-S 18-135mm f/3.5-5.6 IS STM Lens

    Just Wait Until Midnight

    The very first Canon DSLR I ever purchased, about a decade ago, was the Canon EOS 10D. The very first Canon lens I bought was the EF 28-135mm f/3.5-5.6 IS USM zoom lens.

    While my photography has advanced considerably over the past decade, this was an excellent starter set up for me. It was a decent DSLR for me (for the time) with a lens, which gave me a very wide range. Ultimately I upgraded bodies and got into more expensive Canon L series prime lenses, but this early set up gave me an opportunity to really experiment and try to figure out if this was a pursuit that I was going to invest more time and energy into.

    About the same time I bought my original EOS 10D and EF 28-135mm lens I also purchased a set of Ping golf clubs. I thought golf was going to be something that I’d end up being interested in. I paid too much for what at the time were top of the line clubs. Unfortunately, I never did take up golf seriously and I have a very expensive set of unused Ping golf clubs that sit in my basement today. Maybe someday one of my children will take up golf.

    The point of that story is, that if you are starting out with digital photography, you need something that is solid and good enough to take awesome photos, without investing $ 10,000 into your new hobby. This is why I suggest the EOS 70D and EF-S 18-135mm STM lens as an entry point for people starting out. The EOS 70D is one of Canon’s most popular DSLRs, but it’s much cheaper than the primary body I use, my EOS 5D Mark III. Although I do encourage people to use prime lenses, most people starting out don’t want to buy 5 different prime lenses with 5 different focal distances — that can get very expensive quickly.

    The EF-S 18-135mm lens is a strong, high quality lens that you can use with the EOS 70D and shoot everything from wide angle landscapes, to telephoto shots of your kid’s baseball game or school play. With just a bit more range than my first EF 28-135mm lens, it’s a great way to start out. Although I don’t personally shoot a lot of DSLR video, many people do and it’s nice to have such high quality video as another option with this set up.

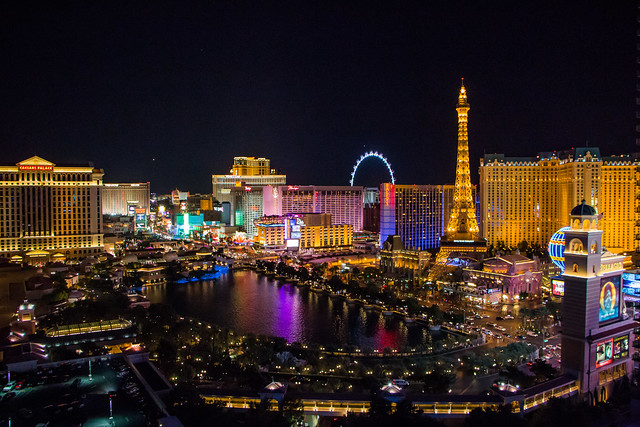
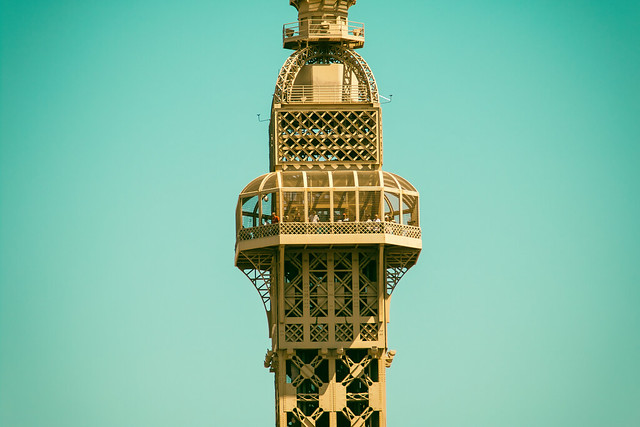
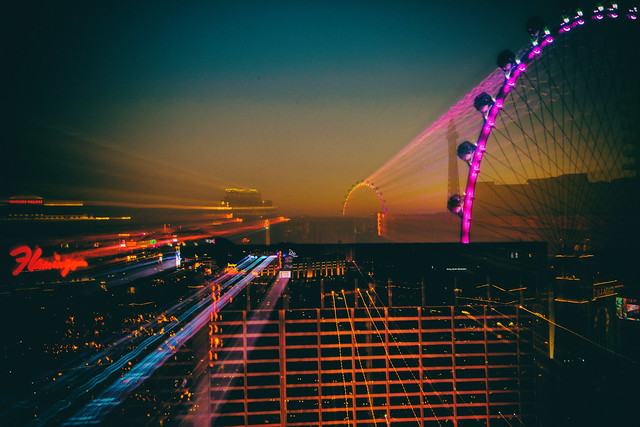
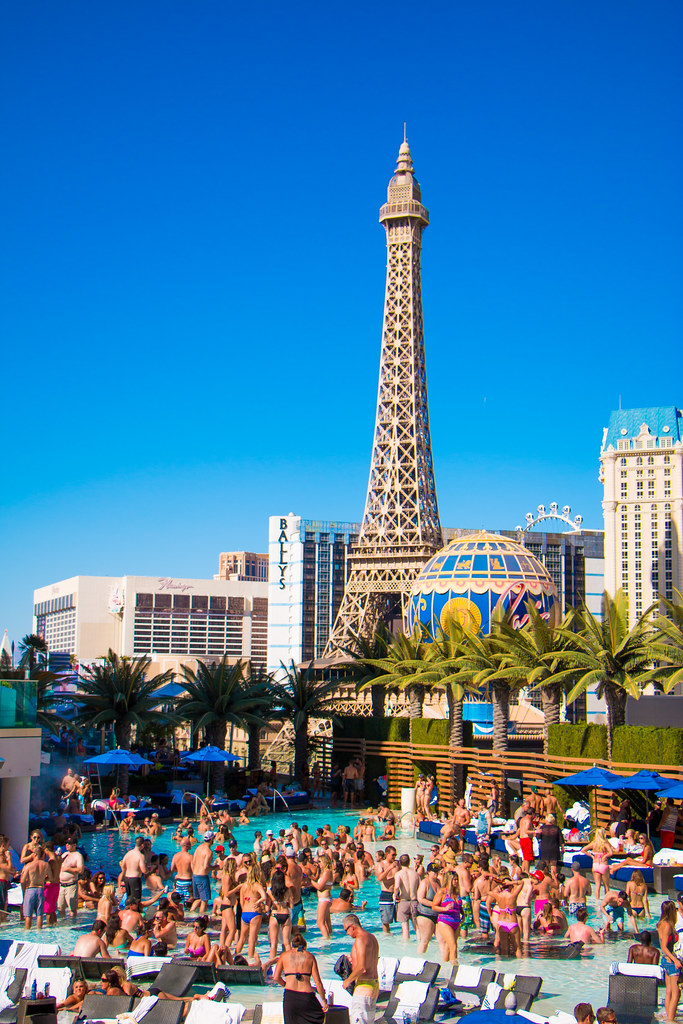
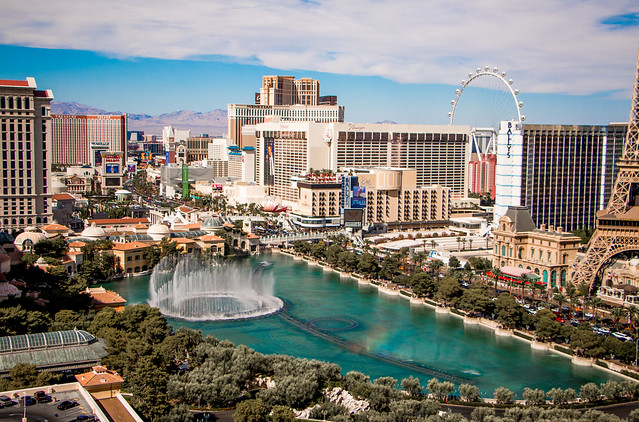
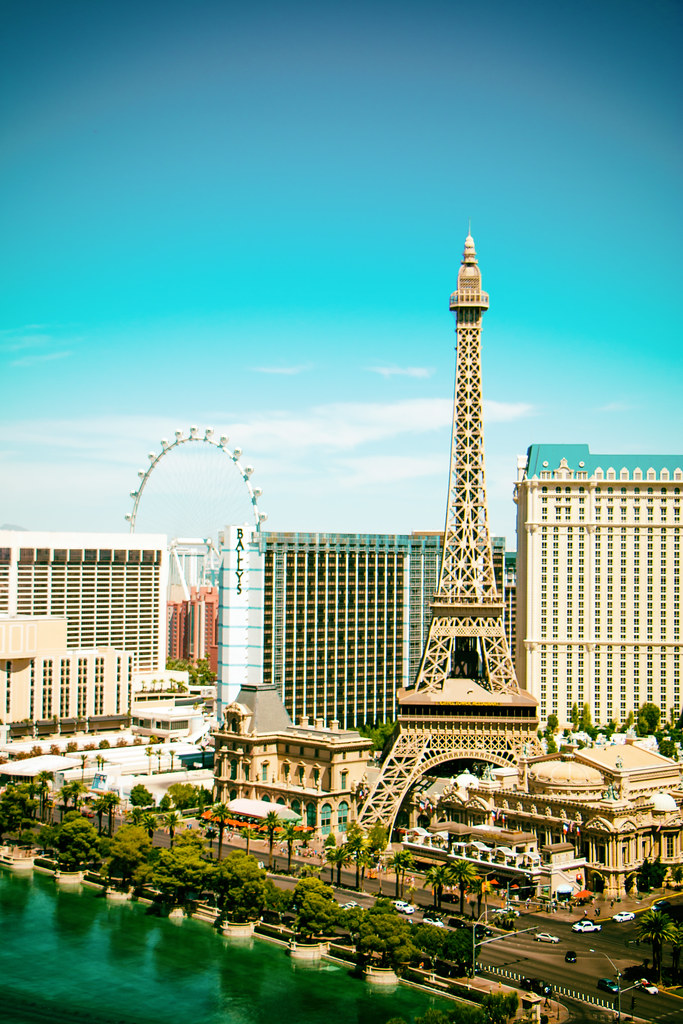
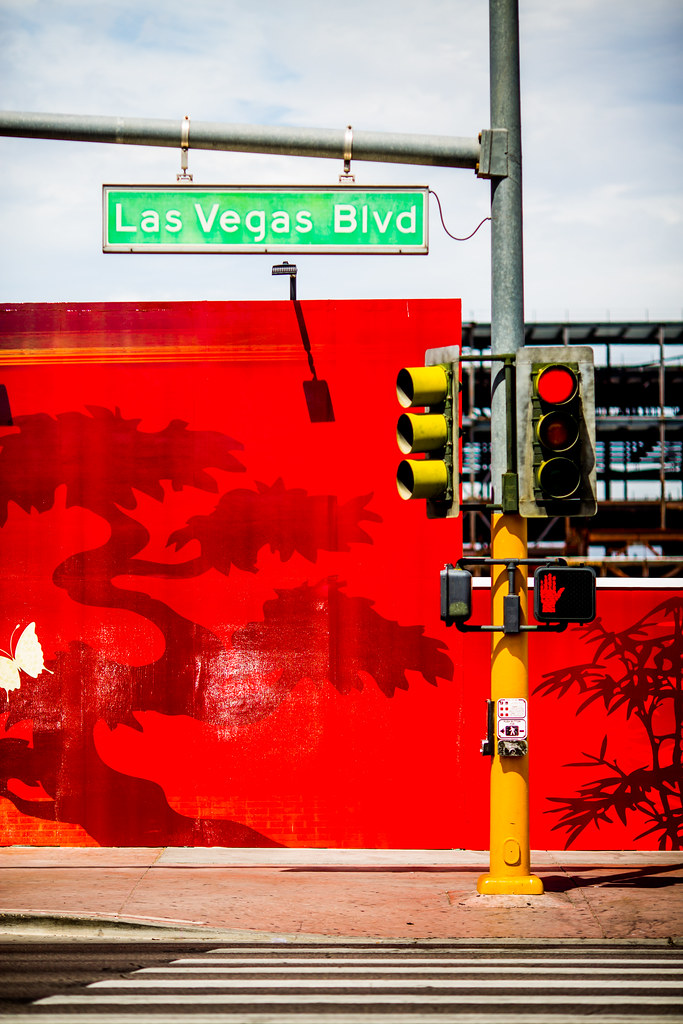
    The photos in this post were all taken with this camera and this lens on my recent trip to Las Vegas.

    A Joy You Could Not Measure

    Through the Years

    Because the EOS 70D is a cropped sensor, this lens actually has even more reach than a 135mm lens on a full frame. A cropped sensor is 1.6x times smaller than a full frame sensor — full frame sensors are the same size as traditional 35mm cameras.

    Practically speaking, what you see when you look through a camera with a cropped sensor at 50mm would be equivalent to what you would see at 80mm on a camera with a full frame sensor. For this reason, if you are shooting sports or wildlife or other subject matter where you want longer reach, the cropped sensor delivers more reach.

    Full frame sensors, in my opinion, do better in low light and at high iso settings and are preferable, but they are also more expensive and might not be as necessary for someone starting out.

    Sunrises Are Best in Las Vegas

    One of the fun things that I like doing with a zoom is zooming while my shutter is open on a long exposure shot. This creates an interesting double exposure zoom sort of effect that I use in some of my photographs. The disadvantage of this zoom is that it is not as fast (low aperture number) as some of the prime lenses.

    If you end up starting with this sort of a combo, you might also want to consider the excellent value you get from a Canon EF 50mm f/1.8 II or EF 50mm f/1.4 USM prime lenses. Both of these lenses represent excellent value and are some of the least expensive prime lenses you can buy. You’ll have no problem using the EF-S 18-135mm lens during the day, but at night, or in a much lower light situation, you’ll appreciate being able to put on a faster 50mm prime lens that will work better in less light.

    For many photographers the EOS 70D is all the camera you will ever need. Some of the best photographers I know are content to shoot with this body and never upgrade from here. To see some of the best work done with this camera body, check out these photos on Flickr all taken with the EOS 70D. Because this camera will be enough for some folks, I think this is a good place to start.

    I personally use my EOS 70D as a second camera — a good backup to use in case something goes wrong with my EOS 5D Mark III and a camera I can keep at my office in case I feel like taking a break during the day and walking around town and shooting. I think it works especially well for street photography given the range you can get with the EF-S 18-135mm lens.

    As your passion for photography grows though you will want to consider upgrading to a Canon EOS 5D Mark III and some of the prime lenses that I will review in some upcoming blog posts.

    As a reminder, my analysis of my Canon gear is being done in partnership with Canon and I am receiving compensation for this work with them.

    Better Lines

    Boulevard Poolside

    Lay Out

    Just Wait and See

    A Joy You Could Not Measure

    A Joy You Could Not Measure

    Through the Years

    Through the Years


    Thomas Hawk Digital Connection

  • 5 Tips for More Successful Event Photography Using a Shot List

    Company parties. Special galas. Nonprofit fundraisers. When someone asks you to shoot one of these events, you aren’t exactly leaping for joy, right?

    Event Photo 04

    Corporate event photography can get a bad reputation among creatives, mostly because it sounds like an unglamorous style of photography. While it is true that many aspects of corporate event photos can be very rote, these events actually a huge advantage that can lead to even more creative expression. Here’s why: There is almost always a set structure and schedule to corporate events that rarely deviates, meaning it is incredibly easy to build a shot list to get your essential shots out of the way very quickly. That means you have more time on your hands at the event to get creative with the way you choose to take these shots. Whether you’re a budding event photographer, or taking on an event as a favor, use these tips to build an effective event photography shot list that will make your clients happy and maybe even lead to other photography opportunities with them down the road!

    Fact: Most corporate clients will not know what kind of photos they need.

    At least in my experience working with west coast corporate clients, most of them can’t give me a clear answer when I ask how many photos they need, what they need shots of, etc. While this may seem frustrating at first, bear in mind that this vagueness from your client gives you the perfect opportunity to shine by filling in the blanks for them, because in general, most corporate clients want the same types of event photos.

    So what kinds of photos do corporate clients want?

    To answer this question, put yourself in the shoes of the branding or marketing coordinator who put the event together. Often, their whole purpose to having you there to is capture images that show that they did their jobs right by properly setting up the space and making sure the people they invited showed up and had a good time. They want shots that capture:

    1. Setup shots of empty rooms, trade show booths, promotional items, signage, etc.

    Event Photo 02

    Be sure to arrive early to capture any event setup shots. It was someone’s job to put everything together, so he or she will definitely want images that show off all of the hard work that went into it. Generally, setup shots should be taken before guests arrive so that everything is still intact.

    2. Candid and posed shots of VIPs or executives that are deemed important by the company.

    Event Photo 01

    This can be extremely tricky because often times, you won’t have any idea who the company CEO or big wigs are, even if the event coordinator hands you a sheet with all of their names on it. The best way to handle this is to ask the coordinator ahead of time if there is someone from the company who can accompany you and point out their VIPs and executives on site. Don’t be afraid to ask for help so that you can get your job done right.

    3. Closeups and wide angle shots of any speakers.

    Event Photo 03

    As much as possible, get shots of speakers that include branding and signage somewhere in the photo. Also bear in mind that you will not always have a designated spot to shoot from, so bring a telephoto lens and prepare to possibly shoot from farther away. If you’re shooting from up close, make your shots quick so that you don’t block the view of guests.

    4. Guests looking engaged and interested at the event.

    Barneys New York And The Parkinson's Project Host A Luncheon In Support Of The Parkinson's Project At The Kingfish Cafe

    Try not to capture photos of people (especially VIPs and executives) making unflattering expressions or gestures. It can take some patience, but make sure you get images that indicate everyone was having a good time. If you captured any goofy expressions or moments, you might be able to submit them, but be sure to flag them as optional outtakes.

    5. Shots that indicate the event was well attended, such as full room shots with lots of people.

    Event Photo 07

    While it might still be valuable to include full room shots where only half of the seats are filled, you’ll want to pull out your zoom lens and focus in on larger clumps of people to provide shots that indicate the event was well attended.

    The photos that corporate clients DON’T want

    While event photography can in many ways feel like photojournalism, this is not the time to take too many images that are overly honest. Bear in mind that many times the photos are intended to be used for marketing purposes, so the last thing your clients want to see are ugly, unfavorable photos. Even though events might be poorly attended and the attendees might not be the most interesting people, it’s your job to make the event look and seem as fun as possible, even if you have to act like a hype person or stage photos to do so.

    While there are many lessons and creative inspiration that can be obtained by winging it and thinking quick on the spot, professionals know there is generally more value to preparing ahead of time. One way to effectively do this is to think out every aspect of the shoot beforehand and great a comprehensive shot list. This will help you picture the finished shoot even before you step foot on set, greatly reducing any last minute issues that might arise, and giving you more freedom to take your necessary shots with creativity.

    Do you photograph events? Do you have any other tips you’d like to share? You could also read 5 Tips for Special Event Photography here on dPS for more tips on covering events.

    The post 5 Tips for More Successful Event Photography Using a Shot List by Suzi Pratt appeared first on Digital Photography School.


    Digital Photography School
  • My Favorite Lens of All, the Sharp, Smooth, Feel of the Canon EF 135mm f/2L USM

    One Last Hand

    For those of you who know me or follow my work, you probably already know about my love affair with the Canon EF 135mm f/2L USM telephoto lens. Simply put, this is my favorite lens I have ever used in my life. It’s also the lens I use for probably 70% of the photographs which I produce. This is a workhorse lens and I believe it is the sharpest lens that Canon makes. If I could only own a single Canon prime lens, this would be it.

    Bet Red

    Professional grade Canon L series lenses are not cheap. Canon’s L series represent their top of the line optics. They are what almost all Canon professional photographers shoot with. That said, I think the EF 135mm f/2L USM is one of the best values as far as Canon L series lenses go. The lens costs a little over $ 1,000 and is amongst the most economical L series lenses you can buy.

    I probably shoot this lens at f/2 the majority of the time. This gives you a super clean point of focus, with the beautiful out of focus bokeh away from your primary point of interest. For those low light shallow depth of field photos, it does not get better than this lens in my opinion. The portraits you can make with this lens are beautiful — sharp as tack but with the subtle bokeh around the edges that a lens like this can produce.

    Two Hearts Can't Be Wrong

    The autofocus on this lens is the most responsive of any lens I’ve ever used. It autofocuses so lightning fast and allows you to quickly lock in on the action that you want to see. It’s a very quiet and very smooth feel when you hit your focal point perfectly on the mark.

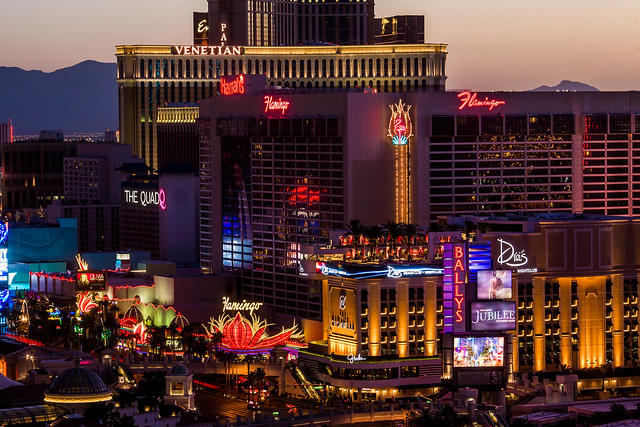
    The photos in this blog post were all taken on my recent trip to Vegas with this lens. I cannot recommend this lens strongly enough. An example of why I like this lens so much can be seen in the first photo in this post. Forget about it as it appears in this post, click here to see it in full high res glory. Look at how sharp the details are on that photo. Notice the individual neon tubes as visible in the Harrahs and Flamingo signs. I took this photo from the balcony of the Cosmopolitan of Las Vegas, a great distance away. The 135mm EF f/2L USM gave me the distance I needed to shoot down with such clarity on the neon signs in the photo.

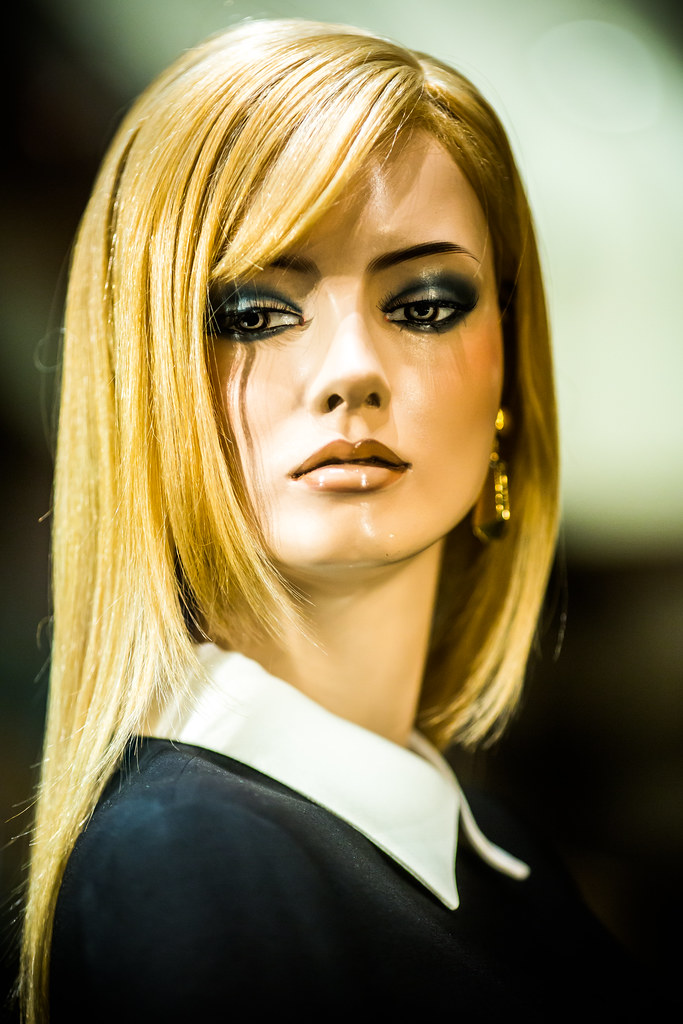
    The photo of the roulette wheel and the mannequin in the post show how great the bokeh and depth of field is around an isolated focus point. This is another of my favorite characteristics of this lens. Shooting portraits at f/2 on this lens feels just perfect to me.

    In addition to portraits, this lens is great for street photography, sports, concerts, abstracts, and so many other types of photography.

    As a reminder, my analysis of my Canon gear is being done in partnership with Canon and I am receiving compensation for this work with them. More on Canon telephoto lenses here.

    Teardrop

    I'll Take Two

    Seeing Red


    Thomas Hawk Digital Connection

  • How to Add a Grunge Effect to Your Portraits Using Lightroom

    Grunge Main 600

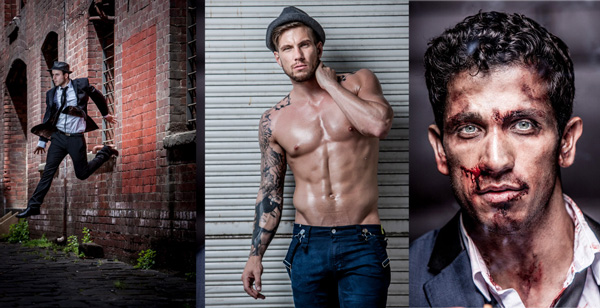
    All images copyright Gina Milicia – Model credits from left to right: Jess Kenneally, Nathan Kennedy, Firass Dirani.

    Gina has a new dPS ebook just released – Portraits: After the Shot – check out out!

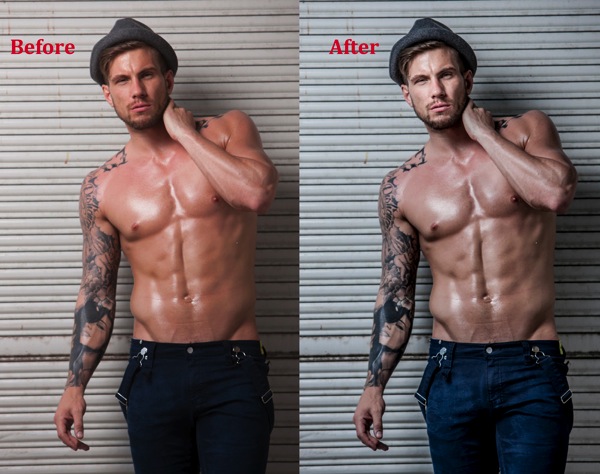
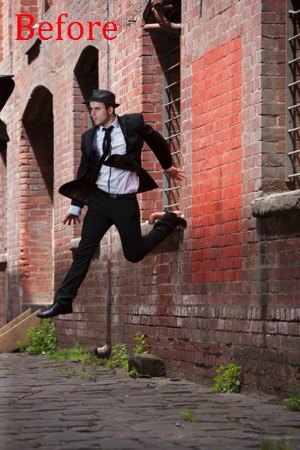
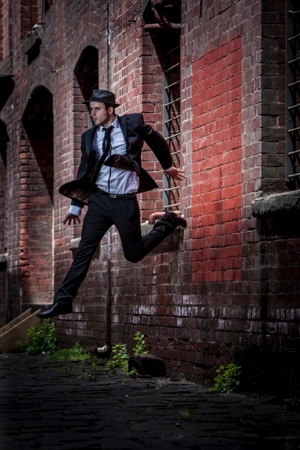
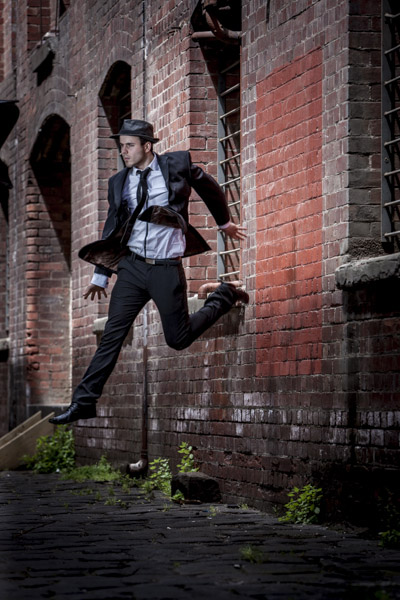
    The style of side lighting (in the image below) is a great way to enhance muscle definition, and the post-production technique complements the lighting style. You can see that it appears as if Nathan has far better muscle definition in his after shot. I love using this post-production technique in character portraits for the entertainment industry, advertising and editorial shoots. It deliberately gives the skin a hard, detailed, gritty look, which is perfectly suited to character-style portraits.

    Nathan Kennedy for ML Denim

    Model credit: Nathan Kennedy for ML Denim. In this image I used fill flash from my Elinchrom Quadra lights with a Rotolux Deep Octabox camera left, which is lighting Nathan from a 45-degree angle.

    If you want to see a full tutorial on my favourite lighting style for this type of effect, check out: How to Create this “Fight Club” Inspired Portrait using One Light.

    It’s not the most flattering technique for skin post-production, so I’m selective about which projects I use it on and tend to avoid using it on female skin tones. There are very few women who will say, “Wow, I love how detailed and large my pores look.”
    Don’t forget my overnight rule. After you’ve edited your image, try not to look at it for a minimum of 12 hours. When you look at it again with fresh eyes, you should trust your gut instinct on how it looks. If your first reaction is “Ewww”, then you may have gone too far!

    Here’s my step-by-step recipe for adding a grunge effect to your portraits using Lightroom:

    LW GRUNGE 1 LW GRUNGE 1B

    Note: Every lighting style is going to give you a slightly different result. I suggest you use my recipe as a rough guide only, tweaking your images until you get the results that best suit your image and personal style.

    LW Grunge 2

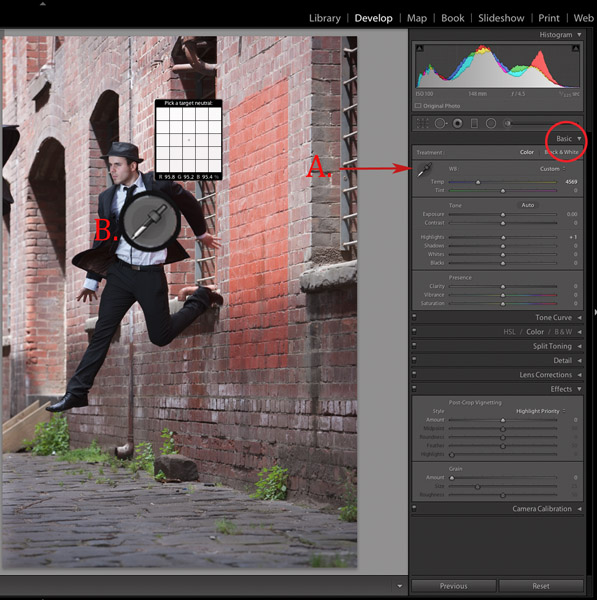
    Find a neutral area of your image and use it to correct white balance. In this case I’ve selected a very light gray section of the white shirt the model is wearing.

    Step 1. Import the file into Lightroom and in the Develop module, use the eyedropper tool (A.) and do a custom white balance (B.). This is achieved by finding a neutral area on your image (gray or white works best) then using your eyedropper tool (A) click on this (Neutral area) and Lightroom will automatically adjust your white balance.

    The best and most accurate technique to achieve a good white balance is to ask your model to hold a gray card in front of their face for the first frame. This gives you an accurate neutral gray to select from for your white balance.

    The third option to achieve white balance is to use Lightroom’s auto white balance. Test them all if you can and see which option best suits your shooting style.

    I like working with a combination of gray card and finding neutral areas. I will use Lightroom’s auto function if I am shooting television stills or theatre productions where I need to color correct images that were shot under tungsten lights.

    LW GRUNGE 3

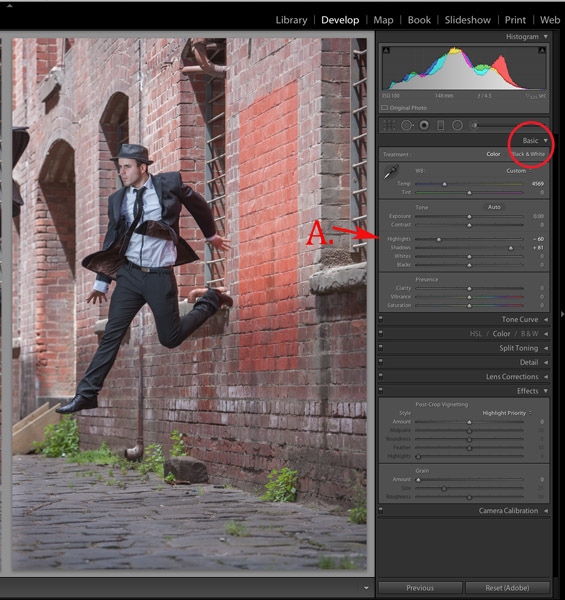
    Step 2. As a starting point, increase shadows (+81) and decrease highlights (-60). The image starts to look a little wrong, but stay with me.

    LW GRUNGE 4

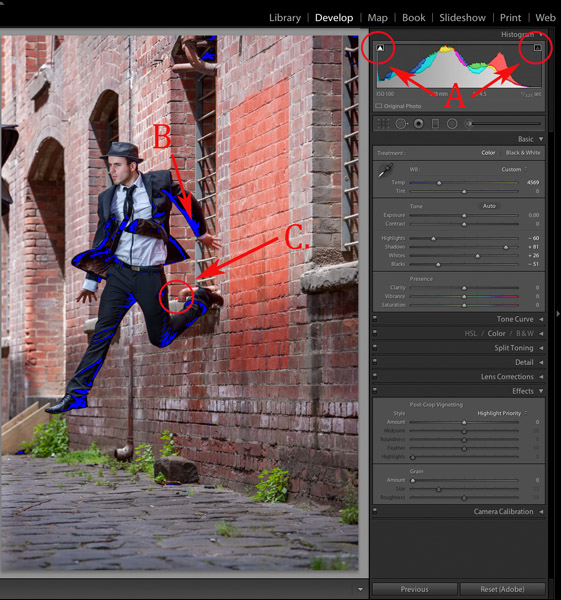
    Step 3. Switch on clipping mask (A.) by clicking on little triangles above the histogram.

    Move the blacks slider to the left until your image gets a good black tone. The areas in blue highlight loss of detail in the shadows, and areas highlighted in red indicate loss of detail in highlights.

    Purists will probably start twitching at this point because I am crunching my black tones (B.) and blowing my highlights (C.). I believe this gives the image a more realistic feel because we don’t always see detail in shadow areas with our naked eye.

    I personally like my images to look good overall, and if that means losing some detail in the shadows to gain good contrast across the whole image, I’ll do it. Just because Lightroom gives us the technology to see the entire gray scale doesn’t mean we have to.

    LW GRUNGE 5

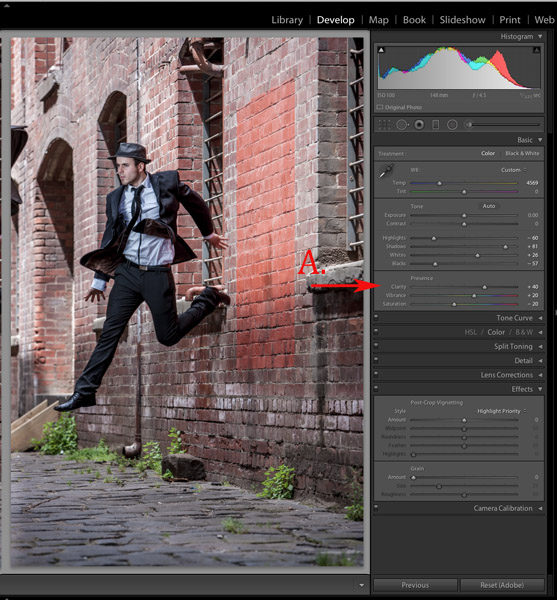
    Step 4. In the next step, I increase the mid-tone contrast or clarity) (A.). I also decrease saturation to counter the digital orange glow the skin tone tends to take on in Step 3. Then I increase vibrance to bring some tone back to the muted tones.

    LW GRUNGE 6

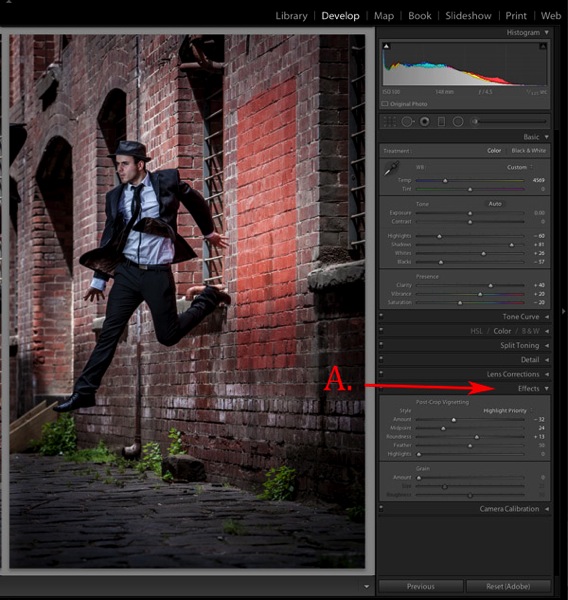
    Step 5. The next step is to add a vignette from the Effects menu (A.). This is optional, but I feel it finishes the image off nicely and draws our eye to the hero of the shot, Jesse.

    LW GRUNGE Main 2

    Step 6. Finally, I enhance the eyes slightly using my eye-enhancing technique for Lightroom.

    If you’d like to try it, you can check it out here: 3 Simple Ways to Create Stunning Eyes in Your Portrait Photography.

    LW GRUNGE BTS

    Behind the scenes on my air shoot with actor Jess Kenneally and my MacGyver-inspired lighting boom.

    • Canon 1DS MK3 ISO 100, F/5.6, 1/125th, 70-200mm IS zoom @ 200mm.
    • Jess has been lit using a Canon 580EX Speedlite and a medium softbox.

    How do you create a grungy, gritty look to your portraits? Should we keep detail in the blacks and highlights, or is it okay to crunch and blow out to create the right vibe? I’d love to hear what you think.

    Gina has a new dPS ebook just released – Portraits: After the Shot – check out out!

    The post How to Add a Grunge Effect to Your Portraits Using Lightroom by Gina Milicia appeared first on Digital Photography School.


    Digital Photography School

  • Spooky Images to Scare you for Halloween Week

    Are you scared yet? You should be – because this collection of images is straight out of a horror movie, designed to give you the creeps, make your skin crawl and keep you up at night!  Oooooh scary!

    In honor of All Hallow’s Eve coming soon I thought it would be appropriate to see a few scary images. Enjoy, if you dare!

    (These first few images are by my friend Renee Robyn, she has some masterful spooky images)

    Photograph Magicked by Renee Robyn on 500px

    Magicked by Renee Robyn on 500px

    Photograph Survivor by Renee Robyn on 500px

    Survivor by Renee Robyn on 500px

    Photograph Kanína by Renee Robyn on 500px

    Kanína by Renee Robyn on 500px

    Photograph Lexx by Renee Robyn on 500px

    Lexx by Renee Robyn on 500px

    Photograph Raziel by Renee Robyn on 500px

    Raziel by Renee Robyn on 500px

    Photograph Titan by Chris Fletcher on 500px

    Titan by Chris Fletcher on 500px

    Photograph Exit Planet Dust -Escape from the "Undead" by The Fotokraft on 500px

    Exit Planet Dust -Escape from the “Undead” by The Fotokraft on 500px

    Photograph The dead Countess by Rebeca  Saray on 500px

    The dead Countess by Rebeca Saray on 500px

    Photograph Happy Halloween! by Rebeca  Saray on 500px

    Happy Halloween! by Rebeca Saray on 500px

    Photograph Little vampire by Manuela Kulpa on 500px

    Little vampire by Manuela Kulpa on 500px

    Photograph TheCrow by D?nu? Antoche on 500px

    TheCrow by D?nu? Antoche on 500px

    Photograph 2013 Pumpkin by Max Ellis on 500px

    2013 Pumpkin by Max Ellis on 500px

    Photograph She's coming for you.. by Mattia Bonavida on 500px

    She’s coming for you.. by Mattia Bonavida on 500px

    Photograph Music Lessons by Andy Orozco on 500px

    Music Lessons by Andy Orozco on 500px

    Photograph Spooky Halloween to everyone by IgoRAW  on 500px

    Spooky Halloween to everyone by IgoRAW on 500px

    Photograph At the wizard... by Anatoly Che on 500px

    At the wizard… by Anatoly Che on 500px

    Photograph Ghostly Glow by Alan Borror on 500px

    Ghostly Glow by Alan Borror on 500px

    Photograph Halloween is Near by Phil Koch on 500px

    Halloween is Near by Phil Koch on 500px

    Photograph The Possession by Robert Armstrong on 500px

    The Possession by Robert Armstrong on 500px

    Photograph haunted house by Jörg Barthel on 500px

    haunted house by Jörg Barthel on 500px

    Photograph Lost Amongst the Stars by Lijah Hanley on 500px

    Lost Amongst the Stars by Lijah Hanley on 500px

    Photograph The Haunted Victorian Mansion by Frank Grace on 500px

    The Haunted Victorian Mansion by Frank Grace on 500px

    Photograph Moonlight by Zoltan Toth on 500px

    Moonlight by Zoltan Toth on 500px

    Photograph Haunted House by Dohotariu Mihai on 500px

    Haunted House by Dohotariu Mihai on 500px

    Photograph ghost rider :) by Adrian Sommeling on 500px

    ghost rider :) by Adrian Sommeling on 500px

    Photograph Hell and Heaven by Dr. Prem Sundar on 500px

    Hell and Heaven by Dr. Prem Sundar on 500px

    Photograph Conspire Dangerously by Paolo Giraudo on 500px

    Conspire Dangerously by Paolo Giraudo on 500px

    Photograph Revenge by Cleon Santos on 500px

    Revenge by Cleon Santos on 500px

    Photograph Ghost Rider by Ravikanth Kurma on 500px

    Ghost Rider by Ravikanth Kurma on 500px

    Photograph Dark Stormy Place by Aaron J. Groen on 500px

    Dark Stormy Place by Aaron J. Groen on 500px

    Photograph Come play with us... by Marta Borreguero on 500px

    Come play with us… by Marta Borreguero on 500px

    Photograph Damned by Johan Lennartsson on 500px

    Damned by Johan Lennartsson on 500px

    Photograph From the darkness it came by Chris Fletcher on 500px

    From the darkness it came by Chris Fletcher on 500px

    Last of all – a classic, by the legend himself.

    The post Spooky Images to Scare you for Halloween Week by Darlene Hildebrandt appeared first on Digital Photography School.


    Digital Photography School