Category: Photography

  • 4 Reasons to Capture Images of You and Your Child Together Right Now

    102

    1. You Need to Document That You Were There

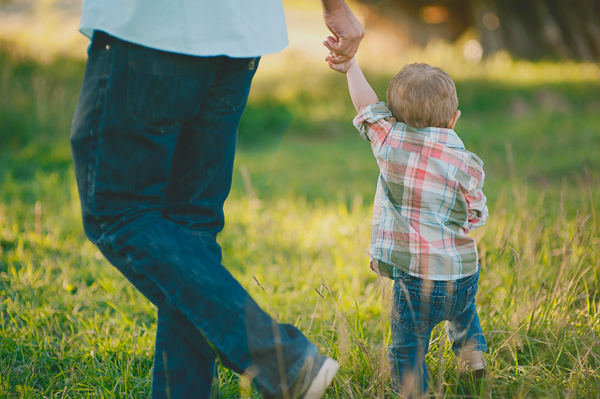
    I get it, I do. You’re the one behind the camera. You’re the one taking the photo of that adorable little smile. You’re the one documenting that you spent a day at the park together. Someone’s got to do it, right?

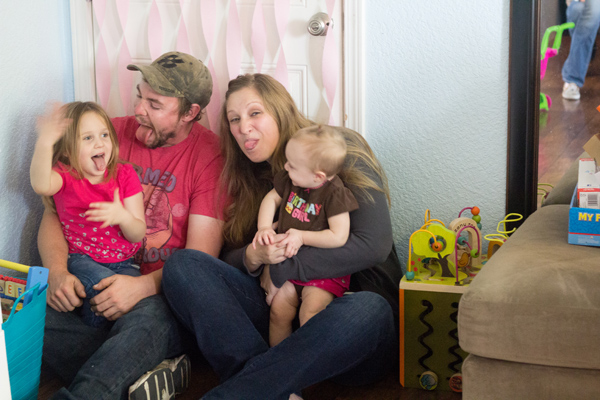
    Sometimes you have to get on the other side of the camera, and let someone else be the photographer for a minute. Even if you weren’t planning on being in photos that day, just do it. It doesn’t matter if your hair is perfect. It doesn’t matter if you wore the most flattering outfit. It doesn’t matter if you meant to lose five pounds first. Just get in there.

    164

    When your kids look back at photos years later, don’t you want them to remember the fun times you had together, instead of wonder if you were even there, since you don’t appear in ANY photos? Don’t you want to remember yourself as a young mother with a brand new baby, or a father that loved to play football with your kids? You may think that you’ll remember how things were, but the fact is, you won’t remember everything. These photos showing that you were THERE will mean everything to you and your kids later.

    191

    2. Once Upon a Time Your Kids Were Small

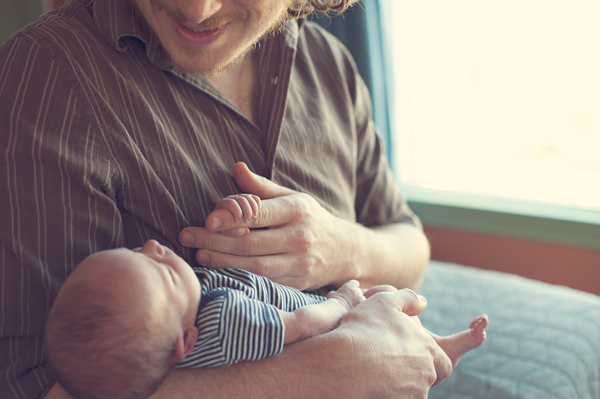
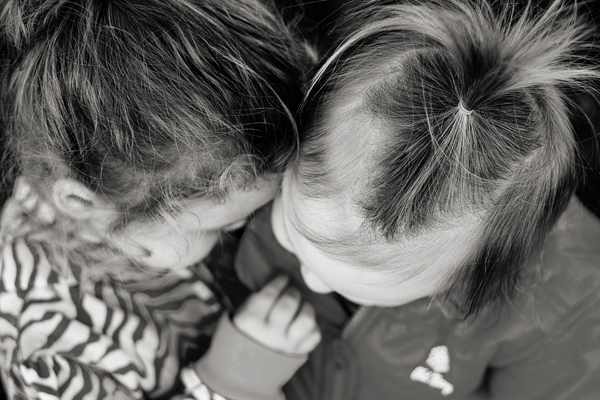
    One day that baby boy you’re holding in your arms is going to tower over you. He’ll have big man hands, and his voice will be deep and strong. You’ll have a hard time believing that there was a time when his teeny fingers couldn’t even wrap all the way around your fingers. Make sure to capture the little details. Those little faces, hands, and feet are so adorable when contrasted with a parent’s hands.

    194

    You might have days where you wonder if this kid ever even thought you were cool, or wanted to be around you, and honestly, you’ll probably have days where you wonder if you want to be around them. These photos that prove that your kid once thought that you hung the moon will then become even more meaningful. Nostalgia is a wonderful thing to warm your heart and strengthen your bonds.

    175

    3. You Have Fun Together

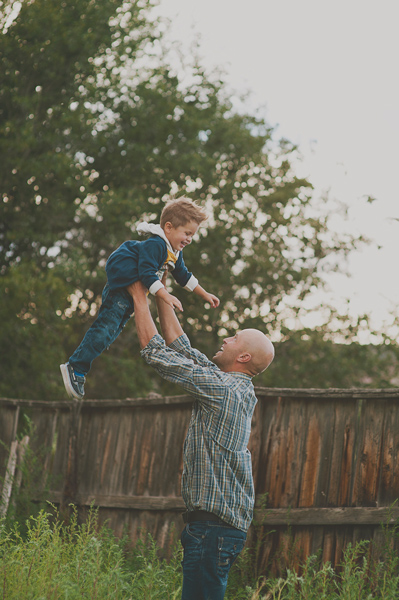
    You know those things that you do together that are just between the two of you? Maybe it’s eskimo kisses, tossing your child in the air so they can feel that sensation of flying for just a moment, or exploring new things together. Those special things you do together will change through the years. How much fun would it be to have all of those bonding memories captured to look back on, and remember how your child grew and changed as the years flew by?

    168

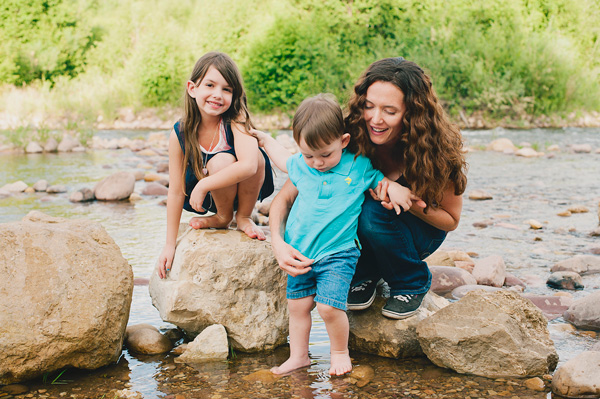
    Capturing your fun times together can be as big as taking photos of the two of you together on a ferris wheel, or with the classic car you restored together; or they can be as small as a special high five you always give each other. When you document these things with your kids, it shows them that they are a big part of your life, and the things you do together are as important to you as they are to them.

    169

    4. You Love Each Other

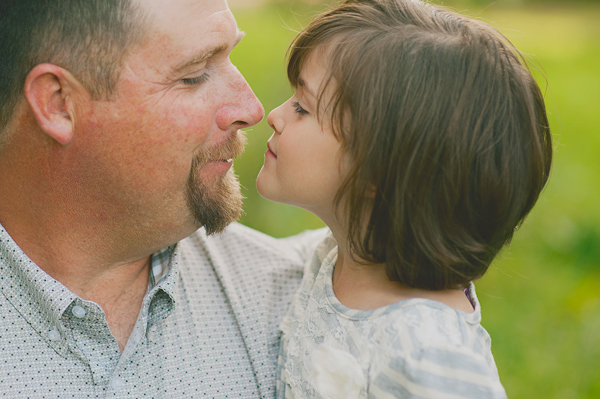
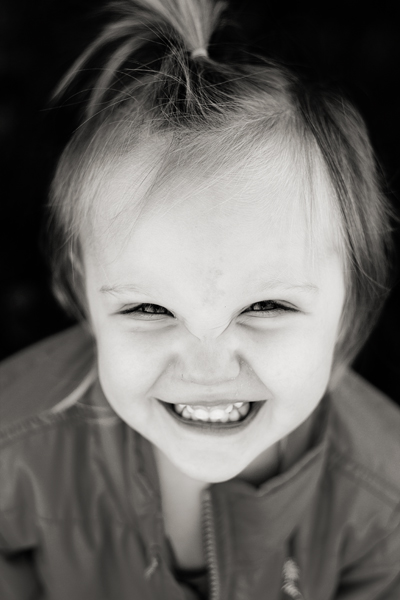
    Yes, this is perhaps the most important reason to get photos with you and your child together. You love each other. Your relationship is one of the most important relationships either of you will ever have in your life. A picture is worth a thousand words. Imagine how much a photo of you looking at your infant child with complete fascination and adoration will mean to that child when she is grown. Imagine how much you will treasure a photo of your child gazing up into your eyes with absolute trust. Saying “I love you” means so much, but a photo is a lasting reminder of that love.

    190

    I hope these four reasons will encourage you to be in more photos with your children. You will never ever regret these precious moments captured forever.

    The post 4 Reasons to Capture Images of You and Your Child Together Right Now by Melinda Smith appeared first on Digital Photography School.


    Digital Photography School

  • 10 Hot Photography Tutorials: October 2014

    Who else is slightly freaked out by the fact that we’re about to move into November? Where did the year go!

    Anyway – it’s time to look back on the hottest tutorials for October.

    This past month saw a few of our posts go a little viral. Here are the top 5!

    1. 10 Common Mistakes Made by New Photographers

    A post by Jame Mahaer that many of us can relate to and that many new photographers found helpful!

    NewImage

    2. 3 Simple Ways to Create Stunning Eyes in Your Portrait Photography

    Gina Milicia did it again with this helpful tutorial on giving a little extra attention to your portrait subjects eyes in post production.

    NewImage

    3. 3. Cheat Sheet: Getting Control over Your Camera in Manual Mode

    dPS readers love infographics – here’s the hottest one for this past month!

    Screen Shot 2014 10 30 at 1 57 50 pm

    4. Five Ways to Improve Your Eye for Composition

    Andrew Gibson hit the mark with many dPS readers with this post with 5 simple suggestions on improving your composition.

    NewImage

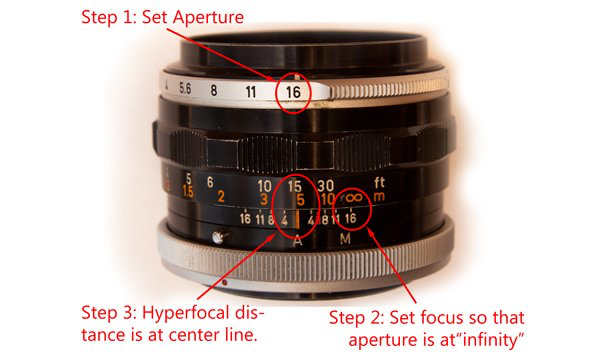
    5. How to Find and Use Hyperfocal Distance for Sharp Backgrounds

    Jim Hamel gives us the low down on finding and using Hyperlocal distance!

    NewImage

    5 More From This Time Last Year

    In the last 12 months we’ve had a LOT of new readers to dPS who have missed some of our older tutorials. So for you – here’s our top 5 most read posts from last year!

    1. The 3 Biggest Kid Photography Mistakes

    NewImage

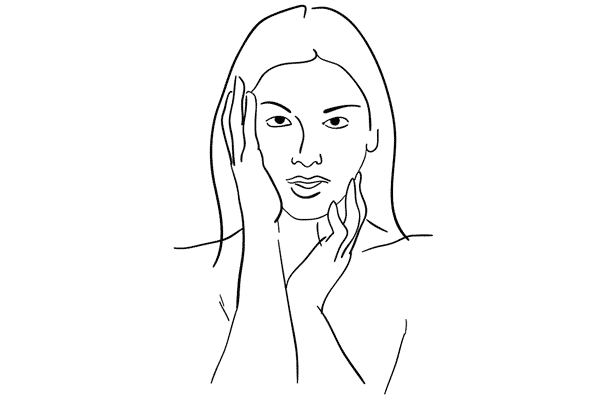
    2. Posing Guide: 21 Sample Poses to Get You Started with Photographing Women – Part I

    NewImage

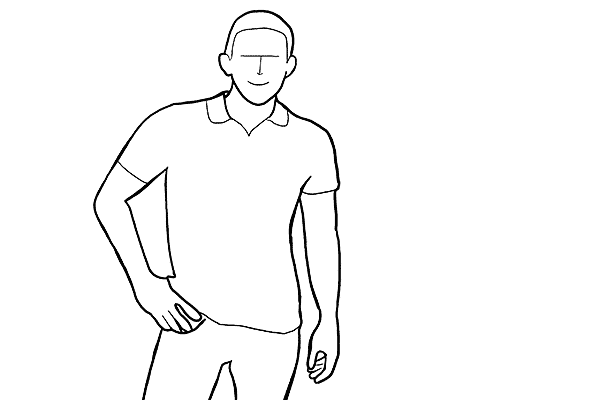
    3. Posing Guide: 21 Sample Poses to Get You Started with Photographing Men

    NewImage

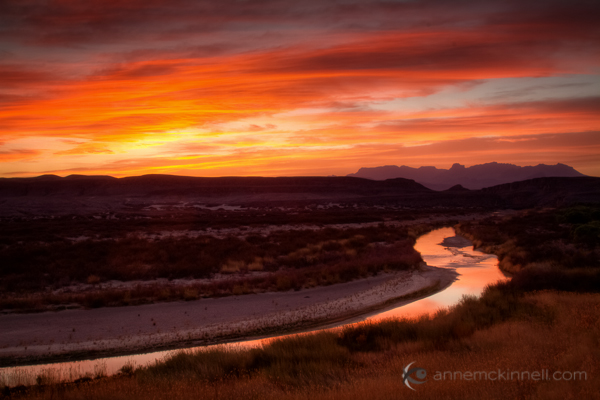
    4. How to Photograph Dramatic Clouds at Sunset

    NewImage

    5. Reflectors: Your Secret Weapon for Amazing Portrait Photography

    NewImage

    The post 10 Hot Photography Tutorials: October 2014 by Darren Rowse appeared first on Digital Photography School.


    Digital Photography School

  • 5 Tips for Creating Creepy Halloween Photos

    It’s the most wonderful time of the year! For some people that is Christmas, but for other’s it means that it’s time for the goblins and ghosts and all of the scary creatures to come out of hiding and find their way into our everyday lives. Theme parks have Halloween themed nights, scary movies are on television, haunted house tours start having people waiting in line and of course, it’s time for photographers to break out of their everyday subjects and come up with something dark and sinister to shoot.

    Here are some tips to help you when you are  preparing to shoot some creepy Halloween photos.

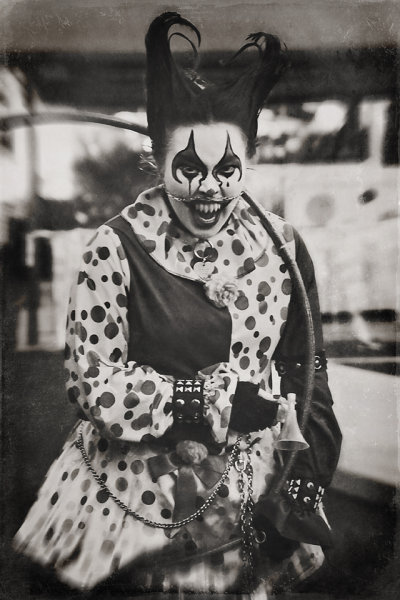
    CreatingaHalloweenPhotoshoot_DigitalPhotographySchool_LoriPeterson

    The fear of clowns is called Coulrophobia.

    #1  Pick a theme

    When you choose your theme make sure it is one that you know that you can do without scaring yourself. If you have a fear of something, picking that as your theme may not be the best idea. Just because the theme is for Halloween does not mean that you need to bring zombies or blood into the shoot if you do not want to. Your theme could encompass some of the phobias that people have, including clowns, spiders, cemeteries, dolls, or death.

    You can make your theme as twisted and as dark as you feel comfortable doing. Remember that there are more themes out there than just clowns, ghosts, and witches. You might even use the photoshoot as a way to get over the things that scare you. Your fears of clowns might be a little more alleviated if you are helping a clown with their costume and makeup and then watching them use their iPhone during breaks.

    #2  Scout your location

    CreatingaHalloweenPhotoshoot_DigitalPhotographySchool_LoriPeterson_DiadelosMuertos

    The fear of the dead is called Necrophobia and the fear of bones is Cartilogenophobia.

    Find a spot that is in the woods (if you can) so that you can shoot without being disturbed. You can also do a photo-shoot in a cemetery, but remember that most cemeteries close at dusk and please be respectful of the gravesites. While you may not know the people, that is the final resting place of someone’s loved one. Don’t climb on the headstones as some are very fragile. Wherever you decide to shoot make sure you leave the place as you found it. If the perfect location is on private property, ask for permission to use it. Stay off train tracks (that’s dangerous and illegal in most states). If shooting in a cemetery, be mindful that on the day you decide to shoot that there might be people there for a funeral. Move away from them and be respectful of their grief and what they are going through that day. If you are shooting in a park or in the woods and are approached by people, explain what you are doing. Some people will ask for your business card so they can look for the images online.

    # 3 Will you need costumes or props?

    You need to figure out (based on your theme) if you will need to find costumes that are already made or create costumes yourself.  The best costumes are usually the ones you make. Take elements of your idea and figure out what parts of it you can create yourself. Then the costume is customized and won’t resemble anyone else’s work. You can also add props to really create your look and pull it together.

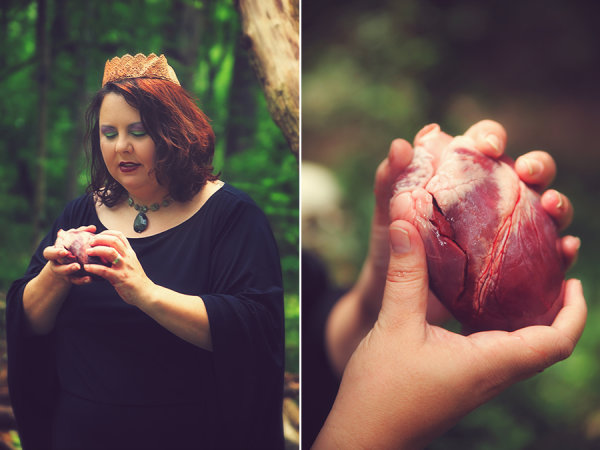
    Sometimes your models for your shoots will have pieces that will work and you can add jewelry or scary elements. You can find fake blood or for some photo-shoots you can even call your local butcher shop and they may be willing to help you out with some real props. They won’t be as surprised as you might think if you tell them you are a photographer and you need a pig heart for a photoshoot. You might be the one surprised when they ask “Do you want the heart with the valves attached or not?”.

    CreatingaHalloweenPhotoshoot_DigitalPhotographySchool_LoriPeterson_EvilQueen

    The fear of blood is called Hemaphobia.

    #4  Find Your Models

    Most photographers have at least a handful of models that they call for photoshoots. Ask your models if they are interested in doing something different from their regular sessions. If you are using children, make sure that their parents understand how the shoot might be scary. When they arrive talk to them about what you are doing and make it fun for them. They are less likely to be frightened once they see any masks or props before they are used. Give your models breaks if they are wearing masks. They can get hot no matter what time of year it is and some vintage masks have a very rubbery smell to them. Let children handle the props being used before you even pick up your camera so that they are familiar with them. You can even show them how you want them to be held and what you are wanting to get from the images. Some children actually enjoy scary stuff and will be more than happy to jump in. Some might need a little more guidance and support from you, so make sure you are paying attention to them.

    aubrey bw fb

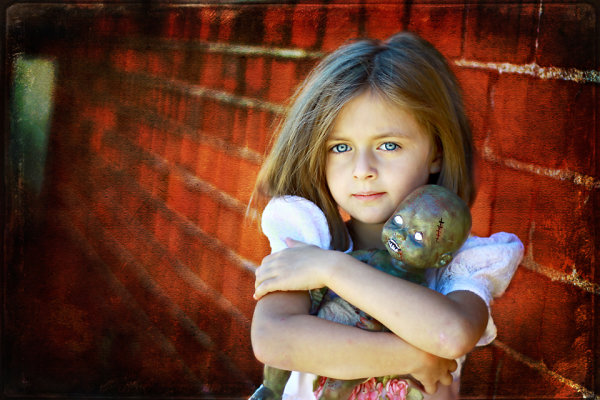
    Lori_Peterson_Unconditional

    The fear of dolls is called Pediophobia.

    #5 Think Outside of the Box

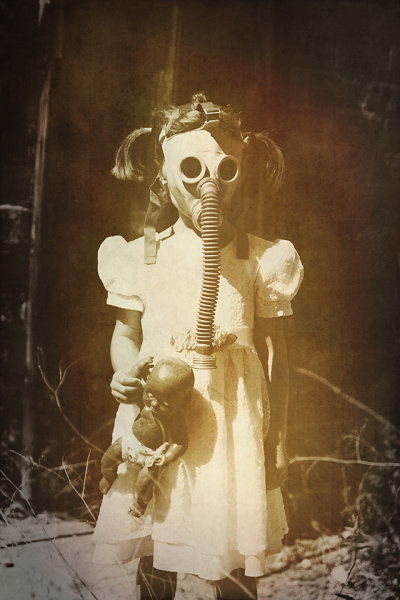
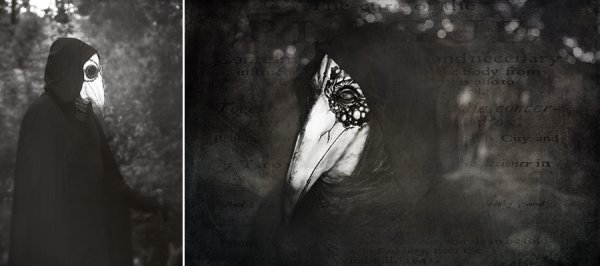
    Witches, ghosts and other Halloween ideas might not be your cup of tea because they are always associated with Halloween. Start thinking of things that fall outside of the typical Halloween realm. In the Halloween movies you were scared of Michael Myers because you could not see his face (and for other reasons too, but you had no idea what lurked under that Shatner mask.). Find some scary masks at a costume shop or online. Look for a gas mask, Plague Doctor, or clown mask. You can even use your own imagination and modify them to make them even scarier. When you can’t tell the identity of the person under the mask there is mystery and a little fear too. Don’t be afraid to create your own props or take old dolls or masks and modify them for your photoshoot.

    CreatingaHalloweenPhotoshoot_DigitalPhotographySchool_LoriPeterson_ThePlagueDoctor
    The wonderful thing about doing these types of shoots is that you don’t just have to do them close to Halloween. You can work on your ideas at any point through the year and accumulate the props, masks, costumes, or whatever you need and build up to the shoot. You can scout for your location to figure out where you want to do your shoot and what time of year. Exploring your creative side with Halloween photo shoots can bring a new insight into the work you do and you can have a lot of fun with these types of shoots.

    Use these tips to participate in the weekly photography challenge: Spooky images for Halloween

    The post 5 Tips for Creating Creepy Halloween Photos by Lori Peterson appeared first on Digital Photography School.


    Digital Photography School

  • 4 Tips for Photographing Bugs and Insects

    Sometimes the most interesting things to photograph are right under your nose, even though you might have to look a little harder to see them. Bugs, insects, and other creepy crawlies might not seem like compelling subjects, but if you take a bit of time to examine the smaller creatures who inhabit the world around us, you might not only come away with new and exciting photographic opportunities but a renewed sense of wonder and admiration for the beauty of creation. If you have never tried this type of photography before, you can get started right away without any special equipment and these tips for photographing bugs might give you a few ideas to try out along the way.

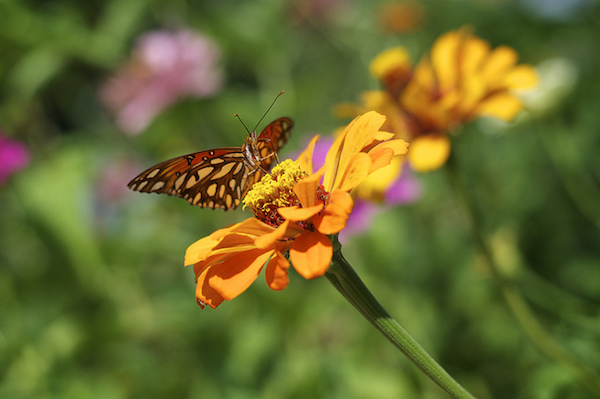
    butterfly-flower

    #1 Keep your eyes open

    This might sound obvious, but the first step in learning to take photos of insects is learning how to see them in the first place. Our six and eight-legged counterparts are all around us, but they don’t usually announce their presence with a trumpet blast. You often have to look just a little harder to see them, but you can great shots of bugs and insects on trees, shrubs, rocks, benches, buildings, or almost anywhere if you just keep your eyes peeled. The next time you head outside, whether it’s in a park or just in your own backyard, spend a little time examining the world around you to see if you can spot some of the amazing little critters that often go overlooked by us busy humans.

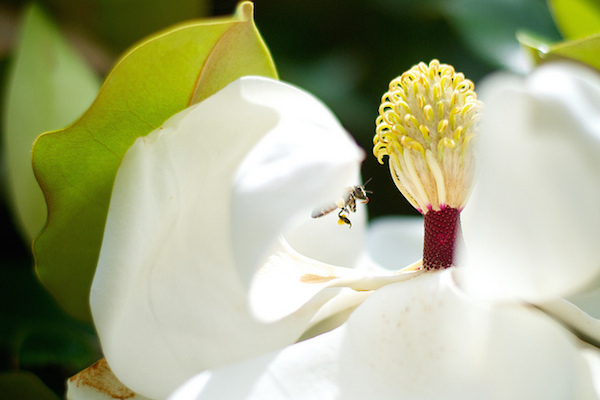
    bee-flower

    I wanted to get a closer look at some magnolia flowers, and noticed that they were full of bees. It took a while, but I finally got a shot of one of them on his way to gather some nectar.

    Most days I have a fairly predictable routine involving work and home duties, and sometimes I get a little stuck when it comes to scratching my photography itch.  It can seem like there is just nothing new under the sun worth photographing, and it’s times like that when bugs are ideally suited to draw out a bit of creativity.  Sometimes I will find myself crouching down on the ground, straddling a fence, or perched atop a ladder in order to get a better view of these small critters.  It’s fun, challenging, and a great way to get some fascinating photographs.

    #2 Be patient

    While insects are great at giving you unique photographic opportunities, they aren’t so good at following directions. Most of bugs simply will not listen to perfectly reasonable requests like “Hold still,” or “Turn the other way.” To compensate for their lack of cooperation, you often have to simply wait until a good photo opportunity presents itself. This could mean watching a cicada explore a shrub, keeping your eye on a beetle as it blazes a trail across your lawn, or waiting for dinner to fly into a spider’s web. The slightest sound can disturb our tiny little friends, so take care to move about quietly and not intrude on what they are busy doing. If your camera has a long zoom lens, you can use it to get right up close and personal even if you are far away, but unless you have plenty of light your shutter speed might not be fast enough to capture the action.  In those cases bumping up the ISO is a good way to compensate, though your picture might end up looking a bit grainier or noisier than you prefer.

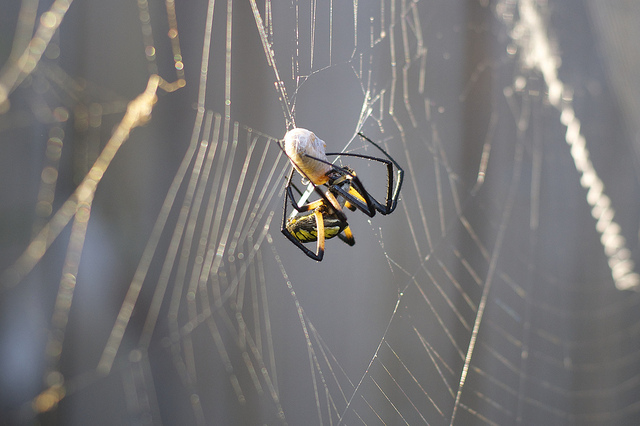
    spider-grub

    This garden spider built quite the web next to a fence, and his handiwork was rewarded when another bug wandered over to investigate.

    Sometimes you have to keep an eye on a critter for quite a long time, and even after all your waiting they might just decide to scurry off or fly away.  This can be an exercise in frustration as you wait for what seems like hours with nothing to show for it.  Nothing is guaranteed when you set out to take pictures of insects, but if you can find a balance between shooting and waiting, you might be pleasantly surprised at the results you get.

    #3 Capture the eyes, not just the insect

    This tip might seem a bit strange, and it’s not always easy to accomplish, but if you can capture the eyes of an insect it lends an entirely new dimension to your photographs.  As the saying goes, the eyes are the window to the soul, and while this certainly holds true for humans it also works for animals and even bugs.  When you can get a shot of an insect’s eyes it can be almost like the two of are sharing a moment, watching each other and allowing you to be in the other’s space for a few brief moments.  Even though the insect might not care one bit about you or why you are pointing a rounded lens in its face, capturing its eyes will add an emotional hook to the image that would otherwise be lacking.

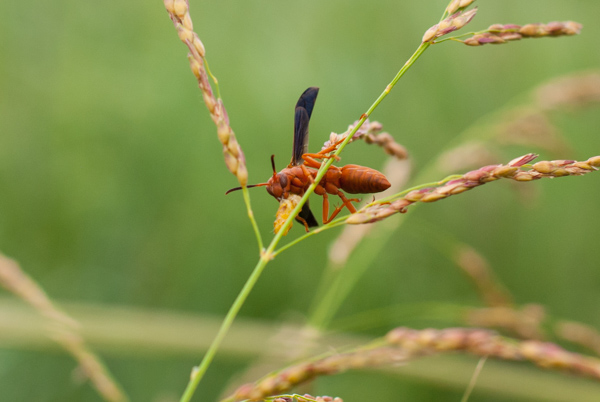
    I don't know what this wasp was thinking, but judging by the look on his face I imagine it was something like "Leave me alone, and I'll leave you alone."

    I don’t know what this wasp was thinking, but judging by his expression I imagine it was something like “Leave me alone, and I’ll leave you alone.”

    katydid

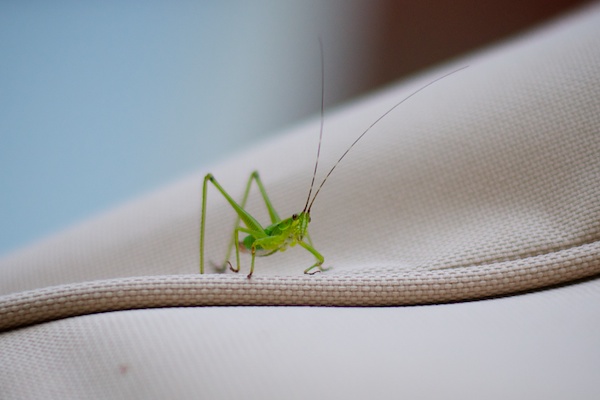
    This katydid seems like an inquisitive fellow, or at least that’s what I tell myself based on the expression on his face.

    I’m no entomologist, and I have no idea if these insects were thinking anything at all when I took their pictures, but seeing their eyes and faces lends a significant amount of depth to what would otherwise be just another photo of just another bug. It takes time and patience, but if you try to capture your insect subjects’ eyes you can draw your viewers into your photographs in new and compelling ways you may not have considered before.

    #4 Alter your perspective

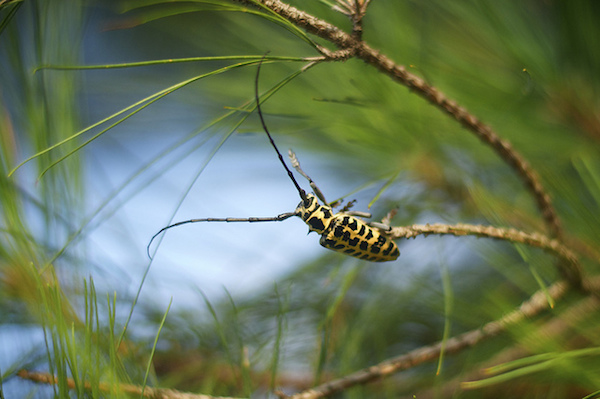
    One of the biggest mistakes you can make when photographing insects is to stand above them and point your camera down. You might get some pictures of spiders, beetles, or giant ants, but they will probably not be nearly as interesting, compelling, or engaging as they could be if you simply tried a different angle. I followed this cottonwood borer for almost a half hour as he climbed all over a pine tree, all because I wanted to get the picture from a more unconventional angle. I could have just taken a photo while he was on a branch or the trunk, but shooting him from a low angle while he was stretching out his front leg made for a much more engrossing photograph.

    borer

    This technique can also be used to transform almost anything into a more captivating photograph. People, pets, familiar scenery, even common household objects can take on entirely new dimensions if you examine them from new and unfamiliar angles. Of course it works great with bugs and insects, but the next time you pick up your camera try it with almost anything around you.

    Of course one of the best ways to get photographs of insects is to invest in a macro lens for your camera, and even though they can be quite pricey the results they produce are absolutely astounding.  All of the photos in this article were taken with either a 35mm or 50mm prime lens, which have minimum focusing distances of about 12 inches. Macro lenses can focus on objects right in front of the lens, which can give you some outstanding pictures of insects, bugs, or anything else for that matter. But even if you only have the kit lens that came with your camera you can still get some amazing images. If you have any to share, leave them in the comments below as well as any other tips you might have for getting pictures of our small little friends.

    Some other options for doing macro shots without investing an expensive lens:

    • Reverse Lens Macro: Close Up Photography Lesson #3
    • Getting Up Close with Close-Up Lenses
    • Alternatives to Buying a Dedicated Macro Lens for your DSLR
    • Extension Tubes: Close Up Photography Lesson #2

    The post 4 Tips for Photographing Bugs and Insects by Simon Ringsmuth appeared first on Digital Photography School.


    Digital Photography School

  • Fall Foliage Photography Guide for Taking Better Autumn Photos

    The world is filled with Red and Gold…Get out there and Shoot!!! So, as many of you know, I have never actually lived in a place with true fall. I’m from Los Angeles, lived in Hawaii, both of which basically are perfect always, did an eight year stint in North Dakota, where it’s frigid for ten months, then there’s a Continue Reading

    The post Fall Foliage Photography Guide for Taking Better Autumn Photos appeared first on Photodoto.


    Photodoto

  • Going Wide With the Tokina 11-16mm f/2.8

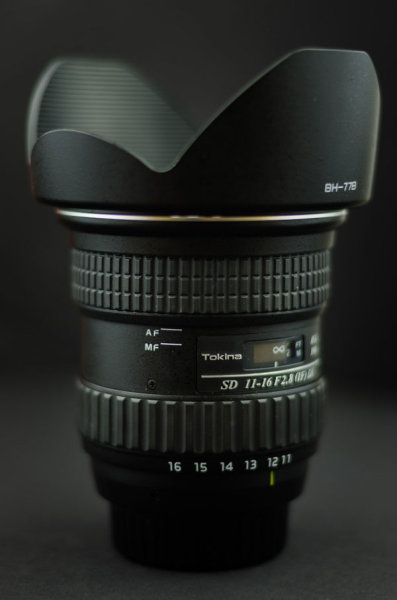
    The Tokina 11-16mm f/2.8 APS-C sensor lens is without a doubt my favorite lens in my camera bag and it also has some great reviews throughout the photography community. But is this lens for you? What are its strengths and weaknesses? Ultimately, what kind of photographs can you take with it?

    tokinalens

    Who is the Tokina 11-16mm f/2.8 for?

    On the surface this wide angle crop sensor lens is going to appeal to just about any landscape photographer using an APS-C sensor DSLR and particularly those who are on tighter budgets, as it can be found (at the time of this writing) for around $ 500 making it quite affordable for its quality.

    The main strengths

    The Tokina 11-16mm has been a popular lens for a few years with good reason. It is sharp throughout its focal range and has limited distortion and artifacts which can be easily corrected inside Lightroom or other post-production software.

    The lens is built like a tank and can really take a beating in the wild.

    The constant f/2.8 aperture is a great benefit if you plan on photographing in low light situations – for example – taking photos of the night sky.

    Its weaknesses?

    Of course, with every set of strengths, comes a set of weaknesses and the Tokina 11-16mm has a couple that are worth mentioning here.

    The small focal length range does at times feel a bit limiting. You’re always going to be at a wide angle shot, whereas something like the Nikon 10-24 will get you closer to your subject without swapping lenses.

    As I mentioned the Tokina is built like a tank, and as such, is quite large (550g) which does make it cumbersome to take with you on longer hikes. Not saying that it’s not doable, just that smaller is better when you’re packing for a trek and it’s worth considering.

    Overall I haven’t noticed too many problems with the lens, but the one I have, does get a little finicky when trying to focus in low light situations. It’s not always a problem, and by no means a deal breaker for me, but it is something to be aware of.

    So what kind of photographs can you take with this lens?

    As with any lens the photographs you make are only limited by your creativity when it comes to subject matter. That said, dramatic sunset photographs, or dynamic seascape scenes are the bread and butter for this lens.

    lazyphotographer

    ISO 100 | f/14 | 11mm | 2.5 seconds

    improve-photography-self-critic-5

    ISO 100 | f/11 | 11mm | 6 seconds

    On top of these, if you’ve wanted to capture a silky smooth waterfall photograph, this lens will certainly get it done, and I’ve used it many times photographing the numerous waterfalls of New England.

    show and tell-6

    ISO 100 | f/14 | 16mm | 3 seconds

    As mentioned above, having that constant f/2.8 aperture gives you the ability to capture great night sky photography. Pair it with a modern DSLR capable of shooting at relatively high ISOs and you’ll be able to capture some great shots of the stars, or create star-trails if that’s more your thing.

    p2077635047-4

    ISO 800 | f/2.8 | 11mm | 30 seconds

    startrailphoto

    ISO 800 | f/2.8 | 11mm | 30 seconds (~150 exposures)

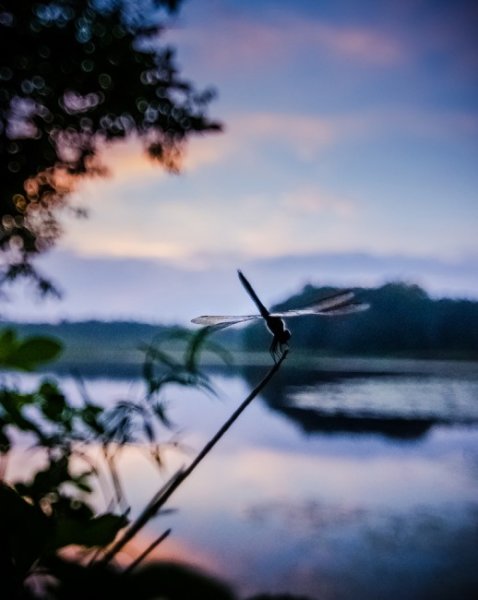
    Finally, even though this is a wide angle lens, you don’t have to get caught up in capturing these massive scenes to get something out of it. Sometimes you can make it work for a subject as simple as a dragonfly watching the sunset. So it really is limited only by your creativity.

    Dragonfly-Watching-Sunset-518x650

    ISO 3200 | f2.8 | 16mm | 1/1250

    Do you already own the Tokina 11-16mm f/2.8?

    Tell us your own thoughts on the lens and share some of your favorite shots taken with it in the comments below. Do you have a different favorite lens? See what dPS writer Andrew S. Gibson considers his favorite here.

    The post Going Wide With the Tokina 11-16mm f/2.8 by John Davenport appeared first on Digital Photography School.


    Digital Photography School

  • Better Star Trails Photographs with StarStaX

    Long, swirling star trail photography is on the bucket list of many photographers. In the film days, this required leaving your shutter open for one continuous exposure on the order of hours and hoping that everything would turn out just right. In the digital era, many photographers rely on a process known as stacking to take a large number of individual frames and combine them into the final image. This article will lay out how to capture incredible star trail photographs and combine them using the free program StarStaX.
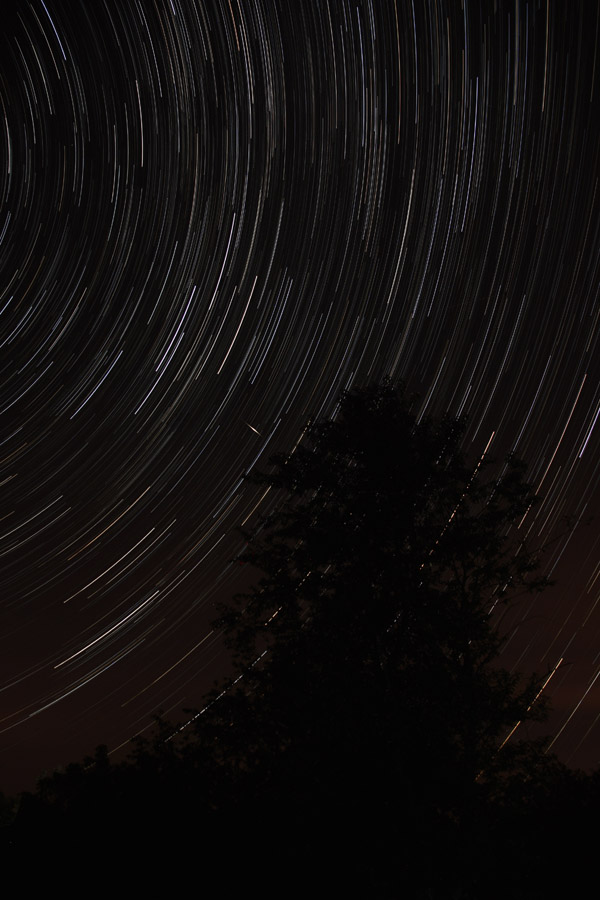
    StarStax, star photography, stacking, star trails, how to, astrophotography

    Shooting Your Individual Star Trails Photographs

    Many detailed posts have been written about how to capture individual photographs for star trails stacking, so this article will only provide a quick overview. Check out the linked posts at the end of this article for additional details.

    For equipment, you will need your camera, a fast wide angle lens, a sturdy tripod, a remote shutter release, and a full battery or two. A red headlamp or flashlight as well as a folding chair can also come in handy. I recommend a wide angle lens, like 18 mm (or wider), so that you can capture a larger expanse of the sky. A fast lens (one with a wide aperture, like f/1.8) is also preferred so that you can capture more light with each frame. (Most of the photographs in this article were shot at 18 mm and f/3.5 on my Tamron 18-270 mm lens.)
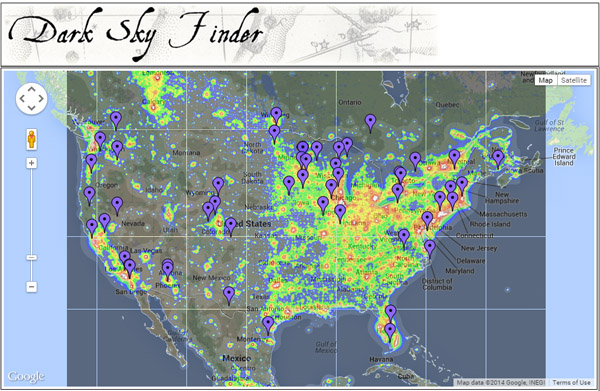
    dark sky finder, star trails, astrophotography

    Choose your location and timing carefully. Capturing star trails around the time of the new moon is preferable, so that bright moonlight does not wash out all the stars from the sky. You also want to get as far from artificial lights as possible. You can use the web site Dark Sky Finder to look for possible dark sky locations near you. Once you have chosen a location, you can use the web site Clear Dark Sky to check their 48 hour forecasts about the potential for clear sky in a given location.

    Once you are on location, spend some time choosing your final composition. Think about a position that will provide an interesting foreground – an unique tree, a geologic formation, or a body of water – as well as an expansive view of the night sky. If you want an image of the stars swirling around a complete circle, then be sure to include the North Star in your viewfinder (in the Northern Hemisphere). If you want extremely long swirls in less time, then compose for a view farther away from the North Star.
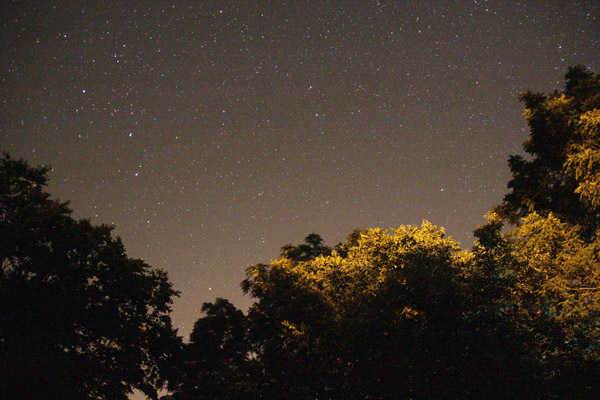
    star photography, star trails, astrophotography

    Shoot one photograph with your widest aperture and a fairly high ISO value for 30 seconds. (The image above was shot at 30 seconds, f/3.5, and ISO 6400.) Your image will be quite noisy, but you should get a strong sense for your overall composition.

    Once you have your composition nailed down, you want to dial in your final settings using manual mode. Choose your widest aperture (like f/1.8 or f/3.5), a 30 second shutter speed, and a mid-range ISO like 800-1600. (Newer cameras have less noise at higher ISO values, but you may want to use an ISO of 400 or 800 with an older or entry-level camera.) Turn off the autofocus and use manual focus to focus on infinity.

    Before you start shooting, cover your lens with a lens cap or piece of black paper and shoot a few frames. These will be your dark frames when you process the images in StarStaX. Dark frames allow the program to subtract digital noise and hot pixels from your final image.
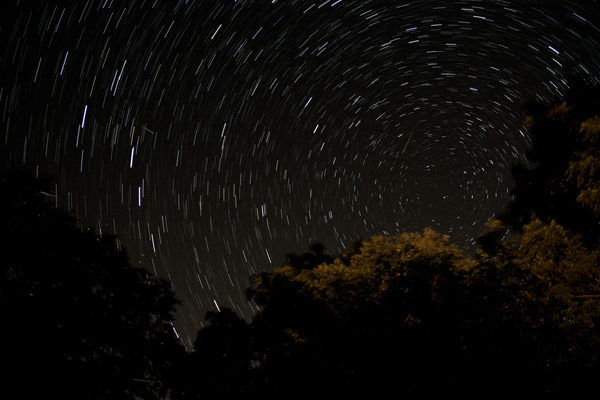
    star photography, star trails, astrophotography

    This image is a stack of 26 images shot with 18mm, 30 seconds, f/3.5, ISO 800. The green squiggles are fireflies.

    Use your remote shutter release to lock down your shutter. As soon as your camera finishes taking the first 30 second picture, it will start taking the next, and so on. Then pull out your folding chair, sit back, and enjoy the wait. An hour’s worth of shots is a good goal to aim for. The more photographs that you take for your stack, the longer and more defined your final star trails will be.

    Once you have finished capturing your shots, remember to take a few dark frames again at the end. Leave your settings the same but cover the lens with the lens cap and shoot a couple more frames.

    Preparing Photographs for Stacking

    Depending on your photographs and the end result you are envisioning, you may want to do some post-processing on your individual frames before loading them into StarStaX. Whether you use Lightroom, Photoshop, or another post-processing software, you will want to apply a similar treatment to all your images if you choose to do any corrections, such as adjusting the white balance or fixing the colors.
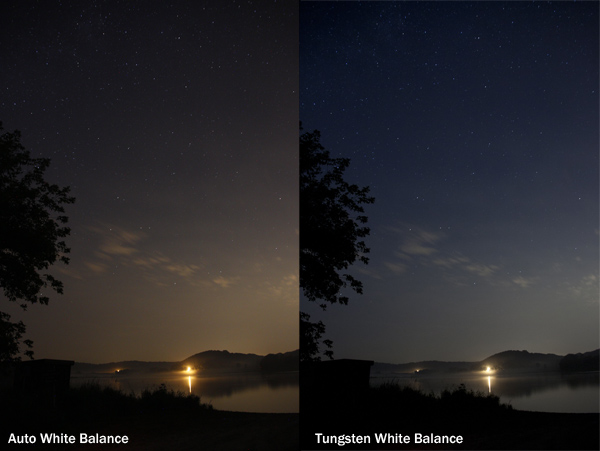
    star photography, star trails, how to, astrophotography

    You may also need to do some quick editing of individual shots, especially if you were shooting at a location with unwanted stray light. In the photographs below, you can see that this frame captured the light from passing cars on the far side of the lake. The quickest solution to problems like these is to open these individual frames in Photoshop, set the brush tool to black, and paint over any unwanted light.
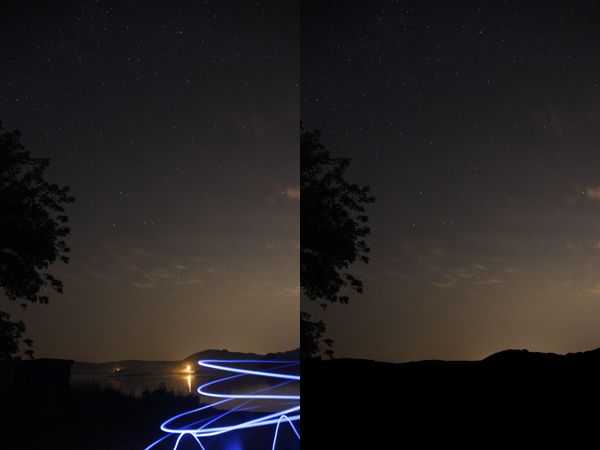
    star photography, star trails, how to, astrophotography

    You can see a big difference in the foreground between these two stacks of the same individual star trails. Painting out the stray light trails in those few individual pictures allows for a more seamless and less distracting foreground, once you stack all the photographs together.

    star photography, star trails, how to, astrophotography, StarStax, stacking

    Alternatively, you can choose one frame in Lightroom or Photoshop and make any adjustments needed until the non-sky portions of your image are just right. Then, after creating your star trails in StarStaX, you can combine your ideal foreground with your stacked sky using layers and masks in Photoshop.

    Stacking Your Star Trails Photographs Using StarStaX

    StarStaX was developed by Markus Enzweiler and is available as a free download for Windows, Mac, and Linux computers. (Screen shots courtesy of the Windows 0.60 version.) After downloading and opening the program, the first thing you need to do is load your individual photographs by going to File -> Open Images or hitting the Open Images button. You may select JPEG, TIFF, bitmap, or PNG file types. After selecting your star trails shots, you need to load your dark frames by going to File -> Open Dark Frames or hitting the Open Dark Frames button.

    StarStax, star photography, stacking, star trails, how to

    Once you have both types of files loaded, it is time to run your first stack. The default options are a good starting point: try lighten mode and check the button for subtract dark frames, if you have uploaded some. Click Edit -> Start Processing or the Start Processing button. The amount of time it will take the program to complete the stacking will vary based on your computer and the number of individual photographs, but it should be on the order of a few minutes at most.

    After the program has finished stacking your images, click File -> Save As or the Save button and save your stacked image. Stacks will not save automatically. You can use the zoom tools to look more closely at your stack and see if the results match your expectations.
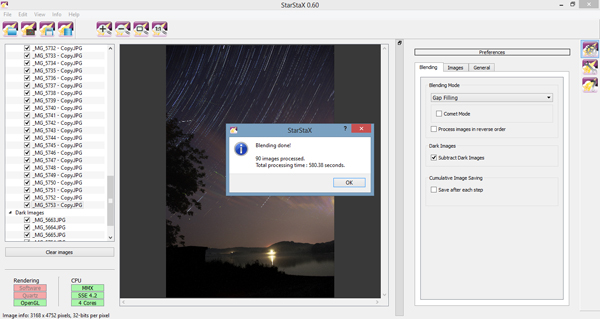
    StarStax, star photography, stacking, star trails, how to, astrophotography

    You may notice that there are some gaps in your star trails, which result from the time between one photograph ending and another beginning. In that case, you may want to run the stack again. Your individual photographs and dark frames are still loaded, so just change the blending mode to Gap Filling and start processing your files again.

    After your gap filling version has finished processing, there are a few options you can use to adjust the amount of gap filling applied. Click the Images tab and experiment with the different sliders to minimize the appearance of any gaps. Click the 1:1 button to zoom into the pixel level, as in the image below, to see the impact of the Gap Filing sliders.
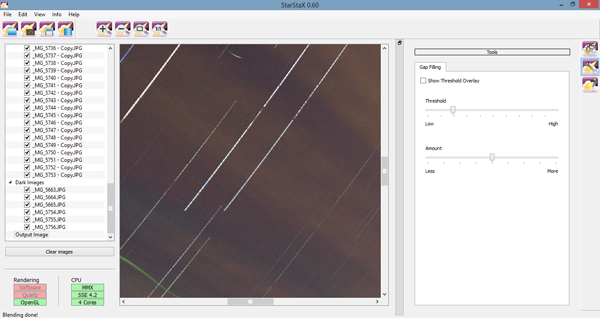
    StarStax, star photography, stacking, star trails, how to, astrophotography

    Want a really unique shot? Run the stack again in either Lighten or Gap Filling and click the checkbox for Comet Mode. Your final star trails will each take on the appearance of a streaking comet.
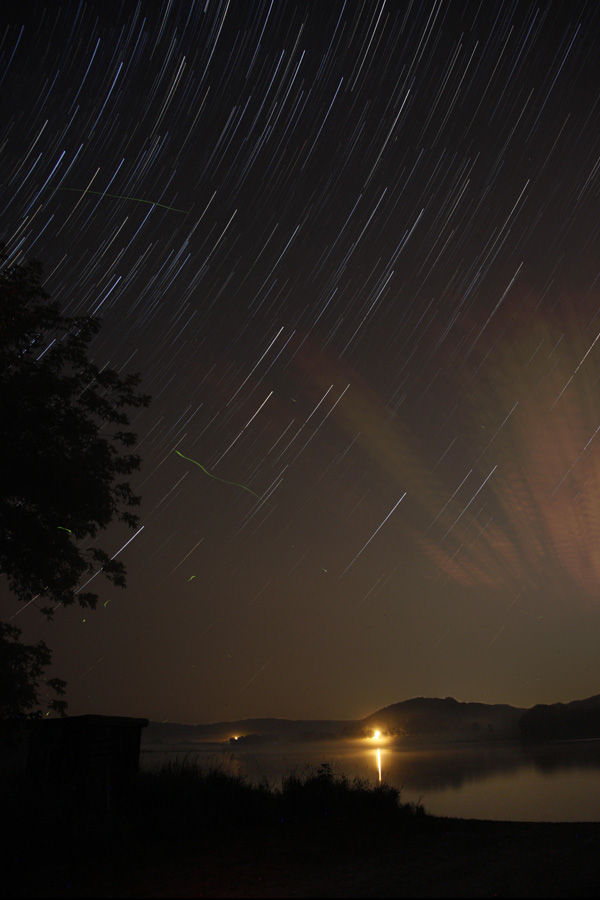
    star photography, star trails, how to, starstaX, astrophotography

    Stack of 90 images including six dark frames, each shot at 18 mm, 30 seconds., f/3.5, and ISO 800.

    Now You Try

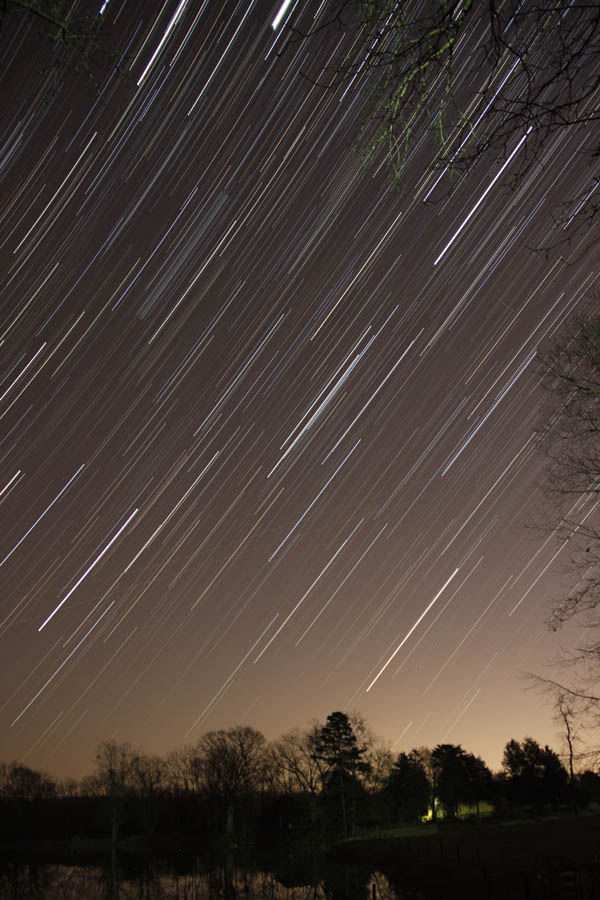
    Now that you have the basic idea, you need to find a great location and give it a try! Do not feel discouraged if you are far from any suitable dark sky locations. You might be surprised at what you can capture even under less than ideal settings.
    StarStax, star photography, stacking, star trails, how to, astrophotography

    Thus photo was taken just outside a city in North Carolina and was a stack of 78 images and seven dark frames, each taken at 30 seconds, f/3.5, and ISO 800.

    Have you used StarStaX to capture star trails? Share your thoughts or favorite images in the comments below!

    Need more help for shooting your star trails images, try these articles:

    • Tips for Photographing Star Trails
    • How To Photograph Star Trails
    • Photography Under the Stars

    The post Better Star Trails Photographs with StarStaX by Katie McEnaney appeared first on Digital Photography School.


    Digital Photography School
  • The Canon EF 50mm f/1.2 L USM lens — One of the Fastest Canon Primes You Can Buy

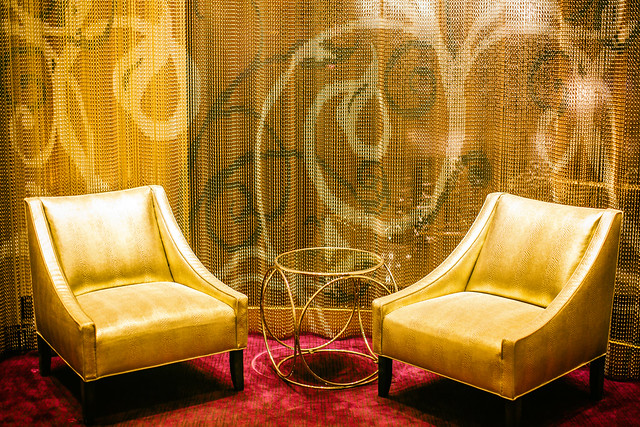
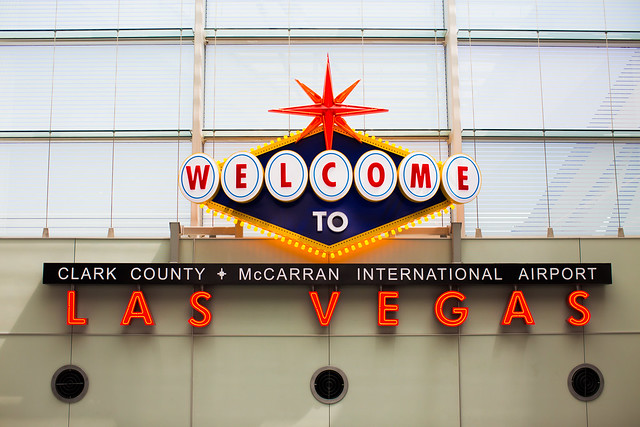
    Sunrises Are Best in Las Vegas

    It doesn’t get any more bokeh than f/1.2.

    The first thing you notice when you hold the EF 50mm f/1.2L USM lens for the first time is how significant the weight of this lens is over the less expensive EF 50mm f/1.4 USM lens or EF 50mm f/1.8 II lens(both also excellent 50mms lenses). You can feel the quality as you weigh it in your hand. A big, solid, piece of glass allows this super fast f/1.2L lens to get the shallowest depth of field possible.

    If you are going to be shooting in the darkest of environments, this is the lens for you. I use this lens a lot at night time parties or indoor events, where getting closer than you need with the EF 135mm lens is not a problem. I use this lens to take amazing photographs of paintings in museums and other places where you want a near perfect technical image at closer range. It’s a wonderful portrait lens of course.

    Verbena

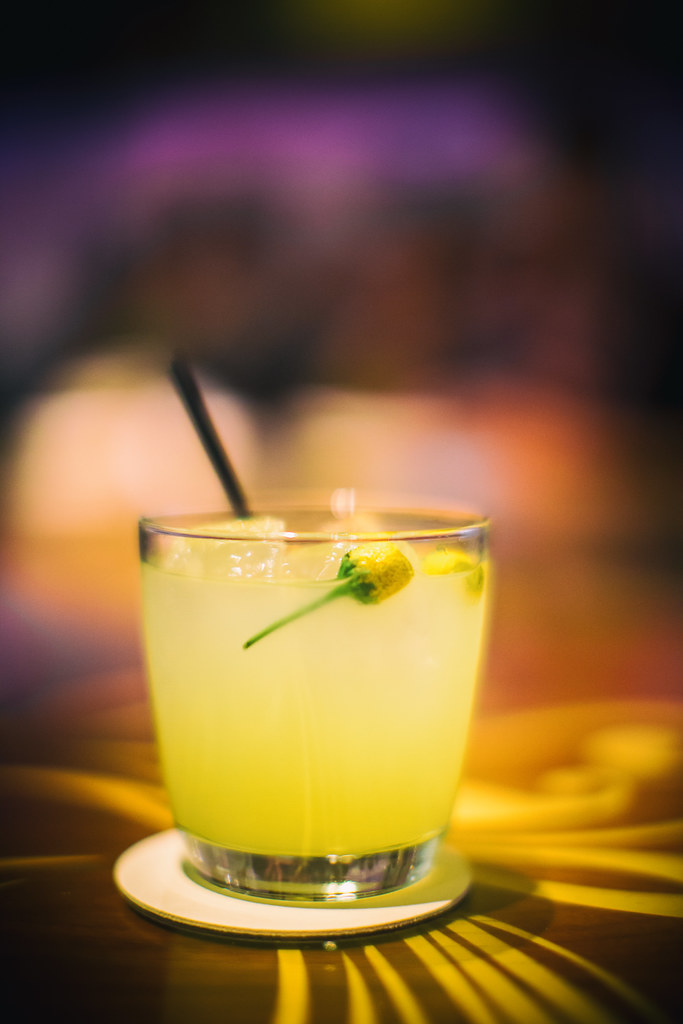
    I like to take this lens with me if I’m going out to dinner at a restaurant or out for cocktails as it does a remarkable job at capturing food/cocktails in low light. As an aside, the cocktail in this post that I photographed with it is called the verbena and is a secret drink off the menu at the Cosmopolitan Chandelier bar in Las Vegas. The cocktail contains an edible flower called a Szechuan button that you chew before drinking the cocktail. It actually alters your tastebuds and feels like an explosion of pop rocks in your mouth as your entire mouth goes numb. As you sip your cocktail after chewing the flower you taste it in a whole different way. I’d definitely recommend checking it out at the Cosmopolitan on your next trip to Vegas.

    Back to photography, the only drawback of this lens is the price. You do pay up a bit for quality here. It’s not that this lens is not worth the money (a little over $ 1,500), it is, it’s just that the EF 50mm f/1.4 USM lens is such a fantastic value when you compare the two (at around $ 400). While I like this lens much more than my EF 50mm f/1.4, if you are on more of a budget, you may find that the EF 50mm f/1.4 lens is the better 50mm lens for you to buy. On the other hand, if you really must own the best at 50mm lens, this is it.

    Sit Over There

    It should be noted that at f/1.2 this is currently the fastest (lowest aperture) lens in production by Canon but that it shares this distinction with the EF 85mm f/1.2 USM lens, another excellent Canon portrait lens that I do not own yet, but that is on my list to consider soon.

    There is another f/1.0 lens that Canon made, but that lens is no longer in production that I’ve never tried.

    As a reminder, my analysis of my Canon gear is being done in partnership with Canon and I am receiving compensation for this work with them. More on Canon prime lenses here.

    I'll Hold You

    Through the Years

    Through the Years

    I Felt This Way Before

    Just Wait and See

    Turn Me On

    A Reminder to Myself


    Thomas Hawk Digital Connection

  • 3 Factors to Think About When Composing Your Photos

    The way you frame a photo is an important part of the composition. There are several key decisions to make when composing your photos:

    1. What to exclude from the frame
    2. What to include in the frame
    3. Where to place the main subject

    The best way to learn about this is to look at several photos and explain how these principles apply. Let’s look at how they all apply:

    Natural light portrait – what to exclude

    Framing and composition

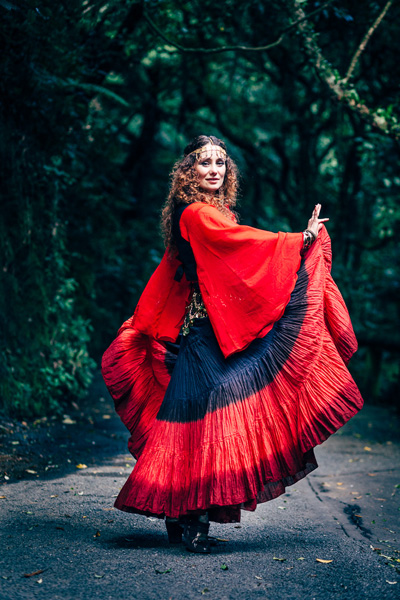
    I took this photo of a local singer in Wellington’s Botanical Gardens. I knew what I wanted to include in the composition: the singer herself (she is the main subject of the photo and should take front stage in the composition) plus a hint of the background.

    I achieved this by using a short telephoto lens (85mm on a full-frame camera). Telephotos are lenses of exclusion – their narrow field-of-view means they don’t include as much of the background as wide-angle lenses do.

    I was also able to blur the background by using an aperture of f/2.8. This is another form of exclusion. While the leafy trees in the background are still recognizable, they don’t pull the eye as much they would if they were in sharp focus. This helps direct attention to the singer.

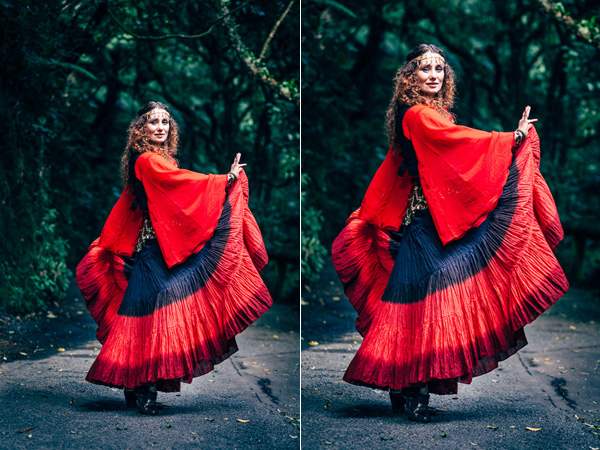
    I placed her centrally in the frame. Central compositions work well when the subject is quite prominent in the frame. There is only focal point, the person in the portrait, so she doesn’t have to be on a third (following the Rule of Thirds).

    Of course, this is subjective, and I know some people will disagree, so I’m going to provide a second version of this photo, cropped so the singer is on a third. It’s an important point because in an ideal world we will frame our photos perfectly when we take them, there are always times when a crop in post-production may improve the composition. Here are the two versions side-by-side.

    Framing and composition

    Which do you prefer? For me, I feel the original version has a better balance between the singer and the background.

    The cropped version includes less of the background, however, the singer is larger in the frame, which will make it more attractive to some people.

    There is no right or wrong here, like many aspects of composition it is completely subjective. But isn’t it interesting how a relatively small change in composition (a different crop) can make such a big difference to the same photo?

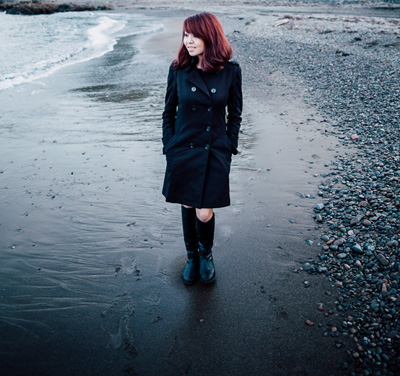
    Beach portrait – what to include

    Framing and composition

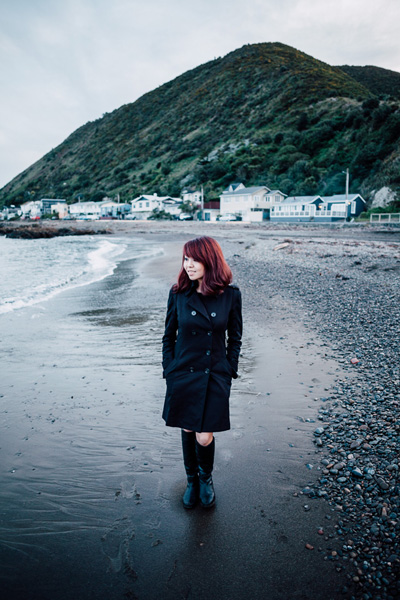
    In the first example I minimized the amount of background in the photo, but in this one I included a lot more. The environment is an important part of the portrait. It was a cold, cloudy, wintery afternoon. I included the houses and hill in the background to emphasize the bleakness of the weather and the location.

    The idea is for the viewer’s eye is to move between the girl in the foreground (the main subject of the portrait) to the houses and the hill in the background, taking in the detail along the way.

    To achieve this I used a wide-angle lens (24mm on a full-frame camera). I was standing quite close to my model, yet this lens still included a large amount of the background. I used an aperture of f/2.8 to make the background slightly out of focus.

    The placement of the model is an important part of the composition. If you have used a wide-angle lens you will know that a slight change in viewpoint makes a dramatic different to the composition. I made sure I held the camera high enough so that the model’s head was lower than the houses. If I crop the photo you can see that the only thing behind the model is the beach.

    Framing and composition

    I took care to prevent the model and the houses overlapping because they are separate elements of the photo. The composition is stronger if they are separated.

    Chinese Lantern Festival – where to place the subject

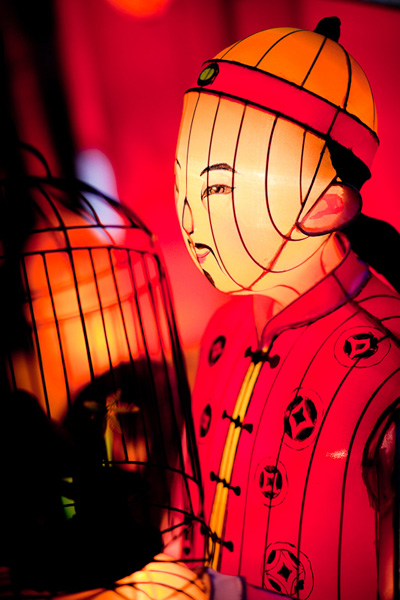
    I took this photo at a Chinese Lantern Festival in Auckland. There were hundreds of elaborate Chinese lanterns on display, and they made wonderful subjects.

    Framing and composition

    I like to take the simple approach to photography and for this shoot I used just one camera and one lens, an 85mm short telephoto. My aim was to focus on the subject and practice using wide apertures to throw the lights in the background out of focus. This is one of my favourite photos from the evening.

    I framed the image in such a way that the face of the lantern man was clearly the main focal point of the image and the lanterns in the background were out of focus. The question was just how much of the lantern should I include? The full lantern shows a Chinese man holding a bird cage. Including too much may weaken the composition. Getting too close risks cropping too tightly.

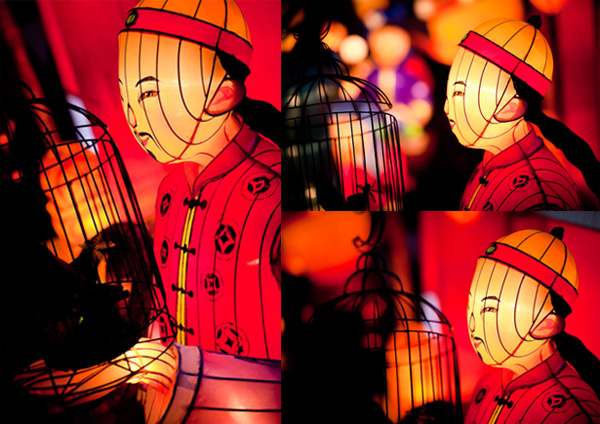
    The solution, which is easy to apply with a static subject like this, is to take a variety of photos. Take some time and explore it from different angles, moving closer or farther away to change the subject’s size in the frame. Then you have the luxury of deciding which composition works best when you get back home.

    The more photos you take, the more possibilities you see. It’s as if the act of taking photos warms up the part of your mind that works visually. It helps you see different and more effective ways of composing the image. It is normal to find that the last images you took are some of the best in the sequence. You end up with stronger photos than if you had taken just one or two then moved on.

    Here are some of the other photos I took of the same lantern as I worked the subject.

    Framing and composition

    Your turn

    Now it’s your turn. How do you use framing in your photos, and decide what to include or exclude from the frame? Let us know in the comments and feel free to add photos to illustrate your point.


    Mastering Photography

    Composition and line

    My latest ebook, Mastering Photography: A Beginner’s Guide to Using Digital Cameras introduces you to digital photography and helps you make the most out of your digital cameras. It covers concepts such as lighting and composition as well as the camera settings you need to master to take photos like the ones in this article.

    The post 3 Factors to Think About When Composing Your Photos by Andrew S. Gibson appeared first on Digital Photography School.


    Digital Photography School
  • Finding the Balance: Capturing Memories Versus Making Memories

    CM3

    I am more than a little obsessed with capturing and preserving memories for my family. We have a photo wall that’s regularly updated. We print photo books, both from Instagram and of photos from my “real” camera. My girls know that twice a year, we go out to a field nearby our house, and I do a mini photo session with them. I’m the type of person who easily had 5,000 photos in the first year after my daughter was born, and that’s just what I decided to keep. So whenever I see a mom taking photos of her kids at the park, or a dad taking pictures at his son’s soccer game, I want to run over and give them a high five. I want to tell them that I think they are awesome, and that capturing those memories for their family is something priceless. They’re images that will be pulled out during graduation parties, played on wedding slideshows, and – God forbid – treasured after the loss of a loved one. It’s important work, and it is work that I feel absolutely passionate about.

    But there’s a catch. If you’re anything like me, it can be easy to become so focused on capturing memories for our family and of our kids that we can sometimes tend to forget to be part of making memories WITH our family. It can be hard to find a balance, so here are a few tips that I have picked up along the way that can help you find that sweet spot of capturing those important moments, while also being present for them as well.

    1. Do a dry run

    CM

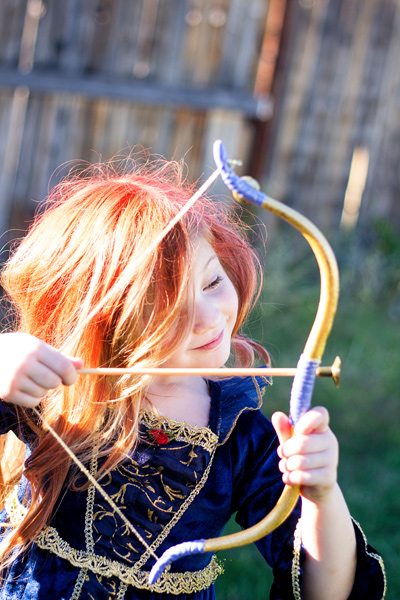
    Halloween is coming up later this month, and my oldest daughter Lizzy wants to be Merida (from Pixar’s Brave). I absolutely want a non-phone photo of her all dressed-up in her costume. This is non-negotiable. But, I know that on the day of Halloween Lizzy will be excited (and probably a little hopped up on sugar), and trying to have a little photo session with her on that day would probably be fighting a losing battle. So, we did a dry run. We do this every year, and it works out so well for us because I can take a few photos of her to stick in the scrapbook in a no-pressure environment, and then on Halloween night, I can leave the camera at home and just be present with my family. We all get a good outcome, and in my book that’s a win. Does it really matter that the photo was taken the weekend before the event? Not to me in this instance, because the memory that I’m actually interested in capturing was the fact that at age four-and-a-half, Lizzy thought that Merida was the coolest of all the princesses, and that she wants to be strong, independent, and brave just like Merida is.

    This tip is SO easy, but it has made such a big difference for our family, and it isn’t just for Halloween – this same idea would work for any occasion in which you want a photo of your kids either in a special outfit or with a particular person, opposed to during an event. For example, doing a dry run would be a good fit for capturing your daughter in her ballet outfit, taking a photo of your kids with Mom for Mother’s Day, or even to catch your kiddos in their Christmas pajamas.  As a bonus, doing a dry run lets us know if there are any costume or clothing  issues (dress is too itchy, shoes too tight, needing six cans of red hairspray instead of one) that need to be addressed before the big day as well.

    2. Make good use of your camera’s creative modes

    CM5

    I have several friends who are currently learning how to shoot in manual. One of them was told by her mentor that the creative modes on her camera are cheating and that she should quit using them cold turkey and shoot in full manual, all the time, if she wants to be a real photographer. When she told me all this, I audibly groaned.

    Here’s the deal – learning to shoot in manual is awesome and worthwhile. But as far as I’m concerned, if trying to shoot in full manual means that you spend all of your daughter’s soccer game (or birthday party) behind the camera trying to figure out appropriate settings rather than participating in the event itself, that’s a bummer. In my opinion, you would have been better off to stick your camera in Program mode or any other creative mode that you are very familiar with, take a few photos you love, and then be able to set the camera down and enjoy the rest of the time with your family. I’m not saying that you shouldn’t play around with settings or experiment at all, I’m simply saying that at special events like birthdays, weddings (in which you are not the official hired photographer), anniversaries, once-in-a-lifetime vacations, and graduations are the types of events where it is just as important to be a part of making the memories with your family as it is to be capturing those memories. If using one of your camera’s creative modes can help you in that way, go for it!

    3. Don’t feel the need to photograph everything

    CM2

    Such an easy thing to say, and such a difficult thing to put into practice! The reality is that I don’t need to photograph all three times my daughter will go to the pumpkin patch this month between school field trips, family, and friends. The reality is that I don’t need to photograph every time my kids go out to the backyard to play. Sometimes, pulling out the camera while they play is an awesome time for me to practice and play around, but it can also really frustrate my kids if I do it too often (EVEN if I’m not asking them to, “Look here and say cheese!”).
    So, for my sanity and theirs, whenever my gut instinct is to grab my camera, I try to stop and ask myself when the last time I photographed this particular event or activity was. If it has been less than a month, that’s a good cue for me to pause and consider whether or not I really need to bring the camera along that day. I really encourage all you moms and dads out there to choose a similar pause point for your family – maybe it’s weekly, maybe it’s monthly, but however frequent it is, it gives you and your kids some built in grace.
    4. Get IN the picture sometimes

    This is the only photo with me in it from my daughter's first birthday. It's a little blurry, but it went in the album nonetheless, and it's one of my daughter's favorite photos from the day.

    This is the only photo with me in it from my daughter’s first birthday. It’s a little blurry, but it went in the album nonetheless, and it’s one of my daughter’s favorite photos from the day.

    If you’re the photographer of the family, chances are that there are a lot fewer photos of you in the family album than there are of anyone else. I think this is something that we ALL struggle with. Or maybe you’ve even tried to pass the camera off to someone else and have been disappointed by the blurry, too light, too dark, weirdly cropped results. I get it, and I’ve been there.

    One thing that I’ve noticed is that if I’m quickly handing the camera off to a friend or family member that isn’t familiar with photography, I get the best result if I pass the camera off in AV mode, with the aperture set at least at the number of people that will be in the photo, and the center focal point selected. So, if there will be four people in the photo, make sure the aperture is set to at least f/4 when you hand it over. I usually have my 50mm lens on my camera, so if I hand the camera over in Program mode, there’s a chance that it will elect to shoot at f/1.8 or f/2.2, which would probably not yield the best results for a photo of four or five people. If you’re shooting with a kit lens that isn’t capable of shooting that wide open, it may be just as beneficial to pass off the camera in Program mode. This is just one simple thing that will help yield better results when passing the camera to someone else, but trust me when I say that when it comes to family photos, the important thing is that you’re there, not that you’re well composed and perfectly in focus.

    Do you struggle with the balance between capturing memories and making them? Do you have any other tips you’d like to share?

    The post Finding the Balance: Capturing Memories Versus Making Memories by Meredith Clark appeared first on Digital Photography School.


    Digital Photography School