Category: Photography

  • How To Ensure You Don’t Lose Any Of Your Important Images

    In my opinion, having to tell your clients that you “accidentally lost their images“ is one of the worst things that could possibly happen. Whether the data loss was your fault or not, your clients won’t care because it is your job to deliver images, regardless of hard drive failure or a corrupt SD-card. As a photographer, you should be Continue Reading

    The post How To Ensure You Don’t Lose Any Of Your Important Images appeared first on Photodoto.


    Photodoto

  • Tips for Creating Dance Portraits

    Dance and music have always been a part of my life, but work and my wife have kept me a bit busy lately. So when I had some photography assignments for a few dance concerts, I knew it was going to be a lot fun. It also made me realize that it can also be a bit challenging. In that split second, there is movement, emotion and a story to be captured. You need to anticipate that split second and capture the motion.

    Emotion 1

    When it comes to your viewers, you want them to believe and see that motion for themselves. So here a few tips to get prepared for a dance portrait. Why would you shoot dance portraits and how would you plan for it?

    • Dance concert – You are asked to take dance portraits as part of a dance concert.
    • Promotion – You are asked to take portraits of the dancer to promote them or the upcoming event that they are currently working on.
    • Head shots– You are helping the dancer to build their portfolio so that they can be represented by an agency or could be sent for casting calls.
    • To fulfil your creativity – You just want to experiment, unleash your creativity, and add Dance portraits to your portfolio.

    Whatever might be the reason for your dance portraits here are a few things that are common while planning and executing a dance portrait session:

    1. Knowledge and research

    It’s always good to know what dance form your model or dancer is learning or practicing. This would help you to do your ground work which includes researching the dance form, checking online for inspiration and creating your mood board.

    Research the clothing that is required for that dance form. You can either find a stylist to source the clothes for you or even better just ask the dancer if they would have something appropriate and comfortable that they can wear for the shoot. If you are doing this as part of a dance concert you would not have much say in it, as that will be predefined.

    Knowledge and Research  1

    Knowing the dance form can also help you choose music tracks for the shoot. Again your model can be a great help in this. Ask your model if they can bring along suitable music which you can play in the studio during the shoot. This helps to establish the environment.

    2. Motion

    The most important part in a dance portrait is motion or the sense of it. As a photographer you have to make sure that the viewer can visualize the motion. This can be done in a few ways:

    • It can be as simple as capturing someone mid-jump to convey motion.
    • Hair movement.
    • Dress or costume movement.

    Some techniques which can be useful for this are, to use a fast shutter speed. Fast shutter speed ensures that the movement is frozen. This can also be achieved by using a flash. At times having a motion blur can also help create a sense of movement.

    Motion 1

    Motion 2

    3. Emotion

    Dance is all about motion and emotion. It’s an art form that involves facial emotions combined with body language to convey the idea or concept.

    Make sure that you chat with your dancer beforehand to confirm the look they are after. This helps in two ways; one, it tells you what to expect and second you can adjust your lighting to capture the desired mood or add some more drama.

    Emotion 2

    Emotion 3

    4. Anticipation

    If you understand dance this one is very easy to master. But if you don’t you might need to work with your instinct. As a dance concert photographer you are expected to anticipate the movement and capture it at the right time to emphasize the effect. If you are photographing a dance concert the best way to address this, is to attend the dress rehearsal. This gives you an idea as to what to expect on the day. What will the lights be like and most importantly what are the critical moments that you need to capture and the best location from which to capture them?

    Anticipation  1

    If you are doing dance portraits in a studio this factor won’t be of much importance as you have more one on one time to repeat a step or pose if you missed it in the previous shot.

    5. Energy

    Capturing the energy of the dancer can make the photo look lively. One thing that works for me is I tell them the camera can capture their voice along with the picture. So don’t let them just stand there and smile. Tell them to shout or do something that they can’t do with their mouth closed. This could be done at the end of the shoot when you have got all your shots and just want to take some fun shots.

    Energy 1

    6. Creative twist

    As with any photography, adding that creative twist is always fun. You can experiment with many of different techniques.
    You can try panning where you follow the dancers’ movement, making sure that the dancer is in focus and blurring the background.
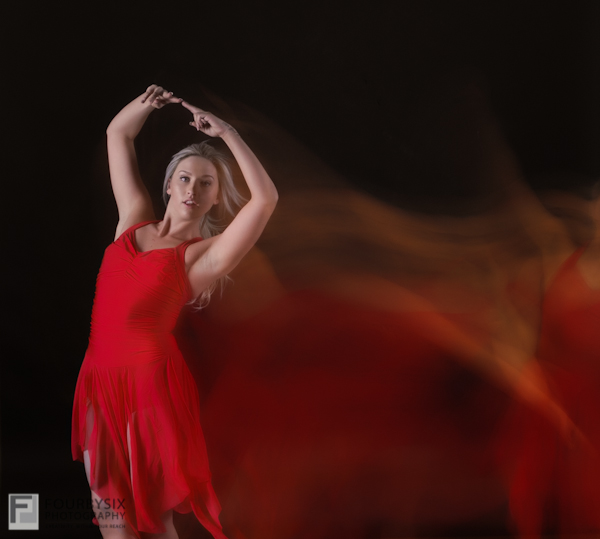
    Drag the shutter (keep the shutter open for longer duration) and capture creative blur. Or try your hand at stop motion where the shutter is left open for a longer duration and a flash is fired at the very end to freeze the final movement.

    Creative Twist 1

    A few tips for dance portraits:

    • A fast shutter speed helps freeze the motion, but if you want a creative blur a slow shutter speed will do the trick.
    • A faster lens, like f/2.8 or lower, is better suited to take photos of a dance concert where flash photography is usually not allowed.
    • Do not be scared to use a high ISO for a dance concert, this will add grain (noise) to your photo, but you will be able to use higher shutter speed to freeze the motion. Sometimes grain isn’t all that bad.
    • Most important have fun and enjoy what you shoot.

    Have you done any dance photography? Share your experience and any other tips you might have in the comments below.

    The post Tips for Creating Dance Portraits by Siddhesh Jukar appeared first on Digital Photography School.


    Digital Photography School

  • Speed Up Your Post-Processing Workflow With Photo Mechanic

    PMCleanCover-178x177Today there are a ton of photo editing software programs to choose from, but there is one in particular that is worth the investment if you’re in need of speed. Developed by Camera Bits, Photo Mechanic is a standalone image browser that offers the very basic features of previewing, selecting, and importing digital images (culling). While the software might seem like a questionable investment since all it does is cull with no photo editing capabilities, Photo Mechanic has long been vouched for by many professional photographers. In fact, it was debuted in 1998 and used by The Associated Press to accelerate its coverage of Super Bowl XXXII. Since then, Photo Mechanic has been a popular choice by professional sports shooters and photojournalists, and it has also been made available to amateurs at a price of $ 150.

    photo-mechanic

    Whether you are a pro or not, here is why you may want to consider looking into Photo Mechanic for your post-processing workflow:

    Photo Mechanic Image Browser

    The core benefit of using Photo Mechanic is its wicked fast speed and ingest utility that allows for copying files from multiple flash or SD cards cards simultaneously, as well as renaming the files and adding IPTC information to them. Photo Mechanic also has a Live Ingest feature that is ideal for shooting tethered or using remote cameras and seeing your shots as soon as they are taken.

    Photo Mechanic Image Browser

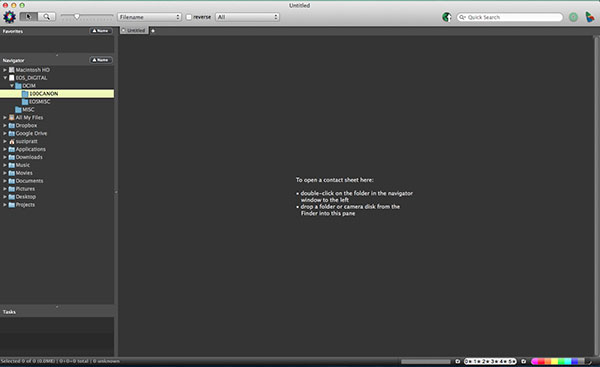
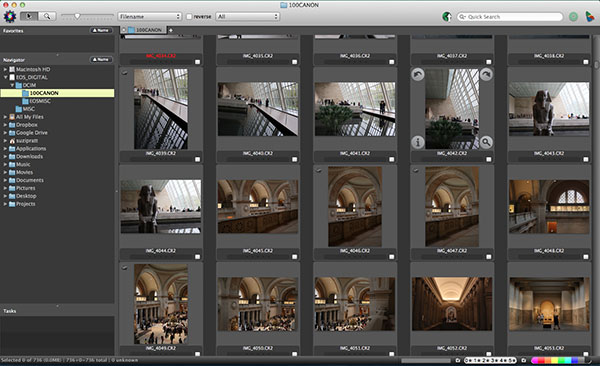
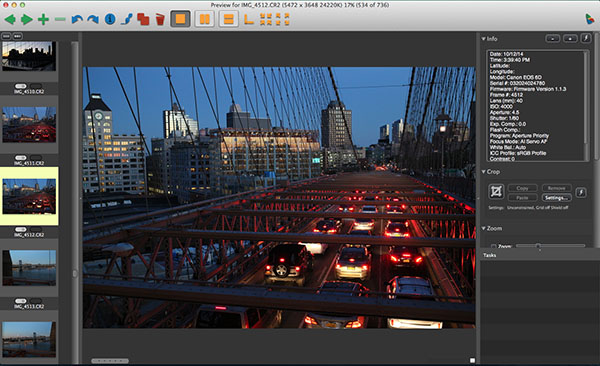
    As soon as you connect your SD or CF card to your computer and pull up Photo Mechanic, you will immediately see compressed JPEG previews of all of your card’s contents on your contact page. It won’t matter if you shot a couple thousand RAW photos – each one will be almost instantly available for preview. There isn’t the three to five second delay that is common on other photo browsing programs such as Adobe Lightroom and Bridge. When you double click on a single image in the contact page, the image will enlarge in a preview screen, and you’ll be able to immediately view your photo in high resolution, including zooming in to check the focus of tiny details. All of this is done without having to load the image, meaning it happens with little to no lag time. You’ll be able to preview the entire contents of your card with the same speed.

    Photo Mechanic Image Browser

    Once you begin ingesting (importing) files from your cards to your computer or external hard drive, you can immediately start editing the photos. There is no need to wait until the copy process is complete. You can even initiate up to three other ingest sessions at a time, meaning up to three cards can be culled at the same time. The latest version 5 of Photo Mechanic was released in 2013 and it enhances the ingest feature by giving you the option to automatically import images when a disk is mounted to your computer.

    Photo Mechanic Image Browser

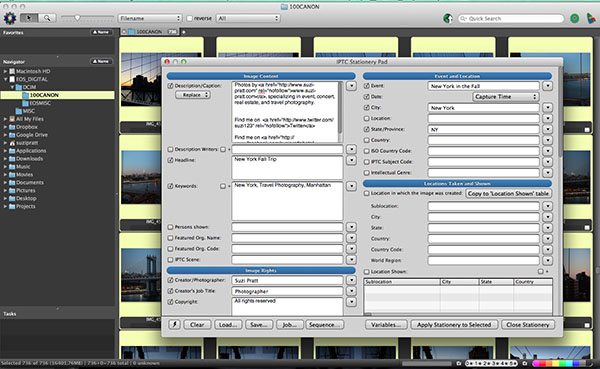
    To speed up the image sorting and organizing process, Photo Mechanic includes an IPTC Stationery Pad for adding captions, credits, metadata, and copyright information to batches of images. Version 5 of Photo Mechanic includes dozens of new IPTC fields and extra sorting options including color class, rating, and tag values.

    Photo Mechanic’s main disadvantage is that it does not convert RAW shots, meaning you’ll still need to use a separate program such as Lightroom or PhotoShop to perform any edits or convert RAW images into JPEGs. Some photographers might find it a hassle to go between programs, but if you’re in the market for speedy imports and downloads, then Photo Mechanic will be your preferred image browser. It also offers a free 30 day, fully functioning version if you want to test it out first.

    Have you tried it of a similar solution? What are your thoughts? Please share your comments with us.

    The post Speed Up Your Post-Processing Workflow With Photo Mechanic by Suzi Pratt appeared first on Digital Photography School.


    Digital Photography School

  • Photography Workflow Tips – From Memory Card to Computer and Beyond

    Discover the best workflow protocol for safe long-term file storage, and efficient file retrieval.

    “Be willing to give that extra effort that separates the winner from the one in second place” – H. Jackson Brown Jr.

    MemoryCards 1

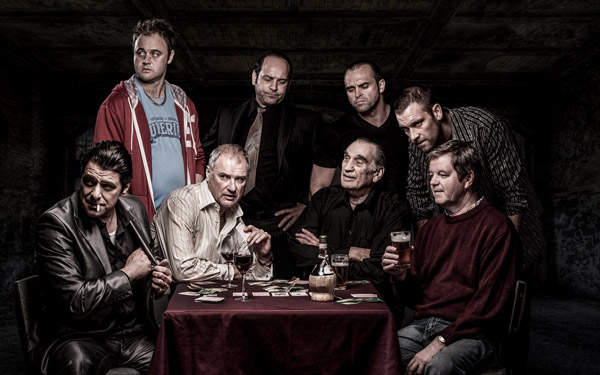
    All images copyright Gina Milicia – Playing your cards right means having a consistent workflow, which leads to safer long-term file storage and efficient file retrieval. Photo credits: Promo shoot for Fat Tony and Co. Image courtesy Nine Network Australia

    “Respect your efforts, respect yourself. Self-respect leads to self-discipline. When you have both firmly under your belt, that’s real power.” – Clint Eastwood

    It’s very easy to become lazy and a bit sloppy with post-production workflow protocols. If you are like many people I know, then you are currently downloading your files to a folder marked “downloads” or “photos” or “John”. Inside this folder you may have hundreds, perhaps thousands of images with file names like 5U9D2496.jpeg or 5U9D2497.CR2. This is all perfectly fine if you never want to see those images again but what if in five years time you need to find those images again?

    Following a constant workflow protocol will save you hours of valuable time and also prevent potential heartbreak caused from lost files.

    MemoryCards 2

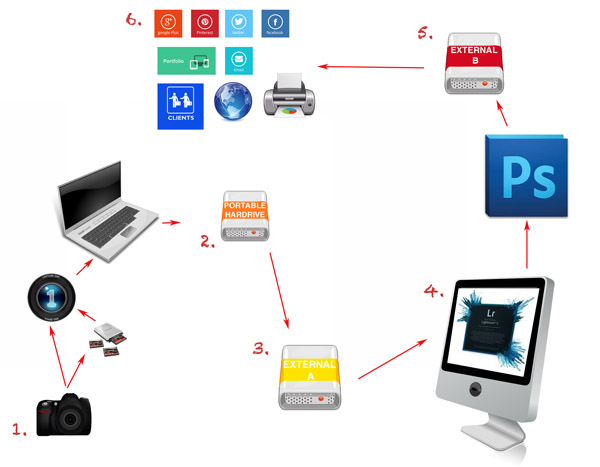
    An overview of the workflow tips:

    1. Import the images from your camera (first backup)
    2. Backup to portable hard drive (second backup)
    3. Backup to external hard drive (third backup)
    4. Editing
    5. Final backup
    6. Delivery

    Workflow tips – step by step

    “Success is the sum of small efforts, repeated day in and day out.” – Robert Collier

    Step 1: Import the images from your camera (backup #1)

    You can get the images off the memory card in a few different ways. Here are the pros and cons of each method.

    Memorycards 3

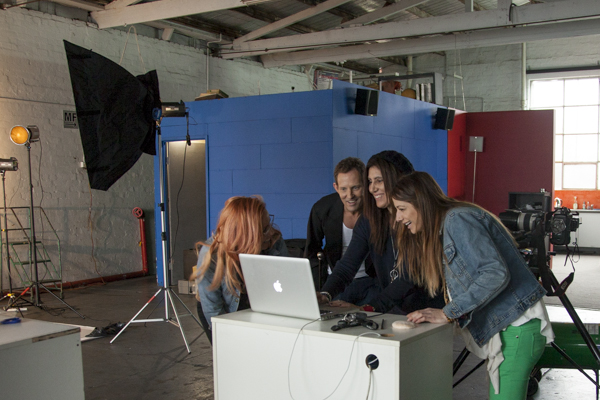
    Instant gratification: In this image I’m shooting tethered on a photo shoot for Australian entertainer Todd Mckenney (pictured second from left) and makeup artist extraordinaire, Fotini Hatzis (far right) with stylist to the stars Louise Petch (far left).

    Shooting tethered to your laptop

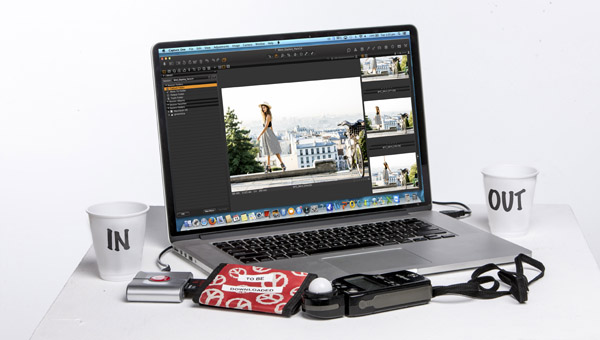
    I shoot about 70 percent of my work tethered (connected to my laptop) and it’s my preferred way of shooting. I have a memory card in the camera but the images are being downloaded straight to my laptop via image capture software. The memory card is just a backup.

    My preferred software for viewing images as I shoot is Phase One Capture One. I use Capture One to view my files because it’s very fast and I’ll often have several people crowded around the computer waiting to see the image. In these cases a couple of seconds can make all the difference.

    Shooting straight to memory card

    MemoryCards 5

    This shoot with Australian model, Mimi Elashiry was shot on location in Paris. It was photographed at dawn to avoid the crowds and I needed to work quickly in order to get all my shots done before the light became too hard and the crowds became an issue. This is a perfect situation for me to shoot straight to card.

    I will shoot straight to a memory card when I can’t have my laptop with me. Like, on remote locations, in extreme weather conditions, at press conferences, at events where I need to be mobile or I’m on stage photographing someone.

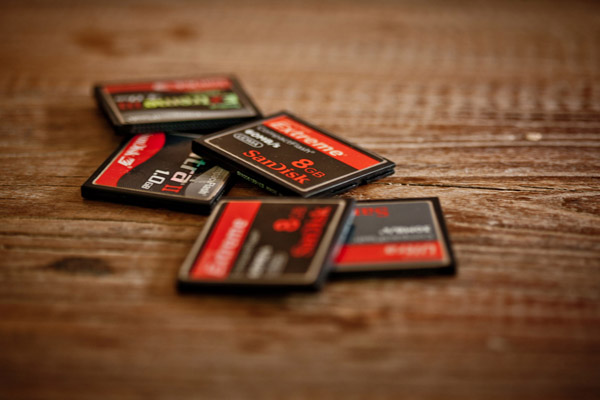
    I carry a special cardholder that is clearly marked “To be downloaded” and stored away from my gear. This way, if my camera bag is lost or stolen (or the day gets a bit frantic) before I’ve downloaded all the memory cards, I won’t lose my files.

    The images are then downloaded to my laptop using a memory card reader via Capture One.

    I use RAW capture software at this stage because it’s crucial to check my exposures and expressions as I work. I’m also often working with art directors, magazine editors, fashion designers or publicists who want to view the images straight away.

    All images stay as RAW files. This step is simply for checking, viewing and selecting (tagging) images.

    MemoryCards 4

    Some people will prefer to copy the images directly onto their computer desktop and use other software. I choose Capture One because for most of my shoots, my clients are right next to me and we’re making sure we’ve got the shot. I’ve also got an assistant double-checking the technical aspects of the shots.

    Capture One lets me handle the process simply and quickly, and the software is easy enough for clients to use. Lightroom works just as well but when I’m shooting thousands of images, I don’t like the interface. It’s a personal preference, that’s all.

    As long as you can organize, select and name your files at this point in the workflow – use whatever works for you.

    The memory card that has just been downloaded to my laptop is then put aside and not reused that day. This works really well when I’m shooting across multiple cards as it prevents any card being wiped, accidentally.

    I never leave a memory card in the camera, always removing the last card at the end of a shoot. This is another way of protecting my files and prevents me, or anyone else assistants, from accidentally deleting files.

    Renaming images

    Now back to all those images you have sitting in a folder marked “Photos” or “John” or they may be roaming free across your desktop and stored wherever they happen to land when you download them. I call this the “shoebox file storage system”. Everything gets stuffed in one place without any thought to ever having to retrieve the information again.

    For the sake of your own sanity, I beg you to not ignore this section.

    I rename images when I download the files from the camera to my laptop.

    My shoots often have very fast turnaround times with art directors, publicists, or clients choosing their images during or at the end of a shoot. Having the files already in an organized and consistent structure saves everyone a lot of time and hassle.

    • Images for private clients are renamed as:
      Folder name: Client name + year
      Filename: Client surname_first initial+last 2 digits of year_4 digit counter
    • So my shoot for James Brown in July 2014 would be named:
      Folder name: James Brown 2014
      Filename: Brown_J14_0001.CR2
    • Images for companies are renamed as:
      Folder name: Company + job + year
      Filename: Company_job+last 2 digits of year_4 digit counter
    • So when I shoot the next Nutella® Winter campaign (Dear Nutella® I’m available and will work for product. Call me.) I would create the folder and files as follows:
      Folder name: Nutella Winter 2014
      Filename: Nutella_Winter14_0001.CR2

    This naming system allows me to search by folder or file and find shoot quickly and efficiently.

    Step 2: Backup to portable hard drive (backup #2)

    I backup my RAW files onto a portable external hard drive every hour. During a full day shoot I may end up with 3000-5000 files so I need to make sure they are secure as I go.

    Step 3: Backup in the office (backup #3)

    When I get back to my office, I copy the images from the external portable hard drive I used at the shoot onto one of three working hard drives. In this case, I copy them on to working hard drive A.

    At this point in my workflow I have the entire shoot in three locations: my laptop, an external portable hard drive and working hard drive A. The shoot stays in all three locations until the job is delivered.

    I only use hard drives that are two or three terabytes in size because I don’t want everything on one single hard drive.

    I don’t use cloud storage mainly because my files are just too big. My website has storage for my final processed images and I use my website to deliver images to my clients. I trust the business hosting my website but if anything should happen, I still have the files on two other hard drives.

    Step 4: Editing

    I edit my images using Adobe® Photoshop® or Lightroom, or a combination of both, and the edited versions are saved to working hard drive A.

    Step 5: Archiving

    Memory6_11

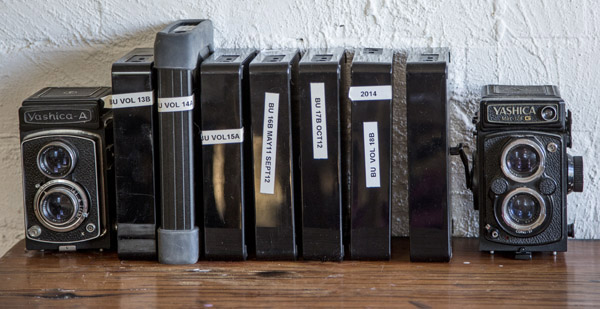
    Once post-production is complete I copy all my files onto working hard drive B, which is stored in an off-site location for safety.

    If you think this is overkill, remember: memory cards corrupt, laptops crash and hard drives fail. Protect your work with as many backups as you can.

    As a minimum, save your images in two different locations. Keep one with you, and store the other in a safe location off site. This way if disaster strikes you will still have a backup copy of your precious files.

    Step 6: Deliver

    Nearly all my jobs are delivered as electronic files with the exception of a small percentage of clients (about 5%) who require prints.

    The images they have selected are delivered via file transfer protocol (FTP), my website image archive (I use Photoshelter), DVD or an external hard drive.

    Editor’s note: your version of “deliver” might look like sharing photos online in social media, emailing a couple to friends, or making prints for yourself.

    What are some of your favorite workflow protocols? Do you have any great workflow, storage and delivery techniques you’d like to share? How do you safely store your memory cards before you download them? I’d love to hear about them.

    The post Photography Workflow Tips – From Memory Card to Computer and Beyond by Gina Milicia appeared first on Digital Photography School.


    Digital Photography School

  • Overcoming Fear in Photography

    Fear. It’s an emotion to which we all can relate. Luckily, nervousness or fear in photography can be overcome with practice and patience. After speaking with a few fellow photographers and borrowing from my own experiences, I have listed some shared fears among photographers and ways you can learn to overcome them.

    Overcome Fear

    1. The fear: I’m afraid I don’t know what I’m doing.

    Every photographer at some point feels a little out of their depth when encountering a new situation or problem. Whether it’s learning to use a new piece of equipment, a lighting conundrum, or simply making a careless mistake during a shoot – we all can feel a little lost from time to time. This is especially true when a person first begins to learn the art. There’s a lot of somewhat technical information to absorb and it can be frustrating to understand new things. I recall shooting my first large wedding. I was so nervous that I was sweating more than the groom. There were some hiccups but overall the shoot went smoothly and the client was pleased.

    How to beat it:

    Acceptance. That’s the best way to overcome your fear of being inexperienced. The most effective thing you can do as an aspiring photographer is to constantly remind yourself that we all start somewhere. At some point, even the most celebrated of photographers didn’t even know how to operate a camera. You will learn as you go and you will make mistakes. You will also have successes. The key to beating the fear is the determination to keep going.

    2. The fear: I’m afraid people won’t like my work.

    The fear of rejection is a biggie. We all feel it to some extent and we all struggle with the fact that some people simply will not like the work we produce. This is the beauty and the bane of any art form. Art, by its very nature, is extremely subjective. Each person will view a piece with there own eyes and make judgements based on their experiences.

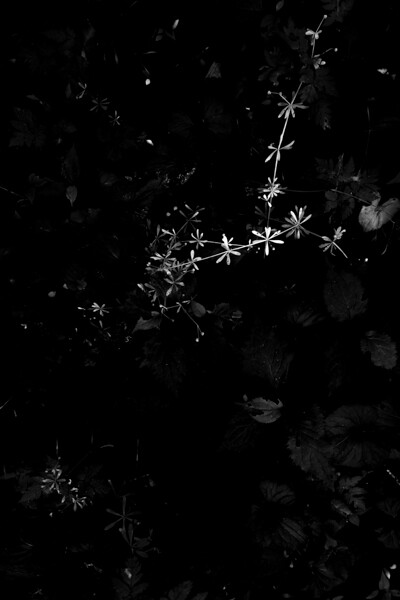
    Here is one of my personal favorite images and one of the least liked by the public.

    Ferns

    How to beat it:

    When I first began my photographic journey I was easily discouraged. It seemed that for every roll of film I used there would be only one or two decent exposures. I would get so frustrated to point I would just put down my camera. Fortunately for me, I stumbled upon this quote from Ansel Adams:

    “Twelve significant photographs in any one year is a good crop.”

    That sentence hit me hard. I realized that if one of the most influential American photographers of all time was happy with twelve good images in an entire year, then I should be thrilled of the progress I was making! As painful as it can be, failure is an essential learning tool. Seldom do we gain new knowledge only from our success. Do your work as best you can and show it to the world. The rest is out of your control.

    3. The fear: I’m afraid to photograph people.

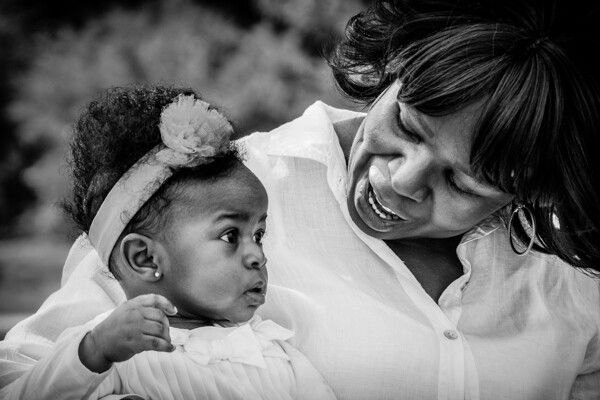
    Making photos of people can be compared to public speaking. Very few people (I haven’t met any) are able to hit the ground running when it comes to street or event photography. It’s just not easy. Anxiety is a constant, at least it was for me. I would worry about how the subject might react to being photographed or if I looked strange photographing a stranger on the street. Even the act of carrying my SLR around in public made me feel out of place.

    Child and Grandmother

    How to beat it:

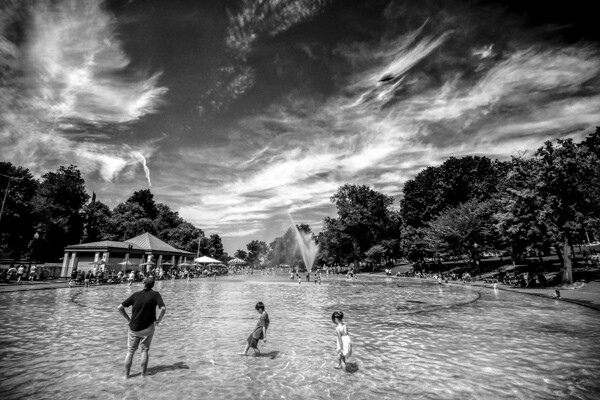
    The short answer – just do it. Go out and confront your fear. It sometimes helps to begin in a place where other people will likely be carrying cameras such as a public park, farmers market, or other large gathering. You will feel more at ease knowing that you aren’t the only one making photos. As you become more relaxed, begin taking your camera with you on a daily basis.

    Practice short excursions around your street or neighborhood and get used to being around people while using your camera. The more you do something the less frightening it will likely become.

    Boston Common

    Before you know it, you will be able to approach public situations with confidence.

    Party

    4. The fear: I’m afraid my gear isn’t good enough.

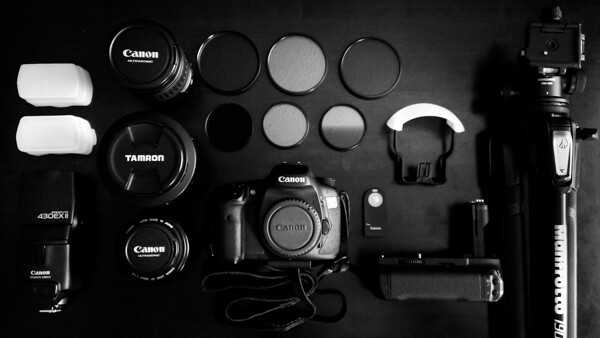
    Gear envy. That nagging notion that if you only had this lens or that filter or if you could afford the newest whatever – we all experience it to some degree. It’s a basic condition of humans to want what we don’t have and photographers (most, not all) are notorious for never having enough. We can sometimes let ourselves be afraid that our gear just isn’t up to the task and become convinced that all we need is more and better equipment.

    Gear

    How to beat it:

    The best way to overcome the fear of gear inadequacy is to understand that you will never have the best gear because the best gear hasn’t been made yet. Everything is evolving and you only have to do a quick internet search to realize most camera gear updates every couple of years. Stop focusing on what you don’t have. Instead, learn to make the most of what you do have. Study the capabilities of your gear and know what it can do. More importantly, understand what it can’t do. Constantly I see eager photographers become disappointed and discouraged because their expectations grossly overwhelm the capability of their gear. If you have realistic expectations then you won’t be so prone to doing the worst thing a photographer can do – which is quit.

    Do you suffer from any of these fears? Do you have others not listed here? Share with us in the comments – we’re all friends here and support each other in getting over our fears.

    The post Overcoming Fear in Photography by Adam Welch appeared first on Digital Photography School.


    Digital Photography School

  • How to Apply LAB Color Adjustments in Photoshop to Enhance Your Photo

    In this video we explore the most powerful color space in Photoshop LAB. You can do things in the LAB that are impossible in any other color mode, but in this video we keep it simple to start. We show you how LAB can help not only boost saturation in an image, but also how it can help separate colors Continue Reading

    The post How to Apply LAB Color Adjustments in Photoshop to Enhance Your Photo appeared first on Photodoto.


    Photodoto

  • The Fall’s Most Exciting New Cameras

    Fall is an exciting time for photography and it’s not just because of the scenery that comes with the season. The newest enthusiast and professional cameras tend to arrive on shelves in the fall and, even if you’re not in the market for a new shooter, the latest gear announcements are worth a peak just to see what new technology is being introduced.

    While a lot of new announcements are mediocre updates, the fall of 2014 has brought in several new cameras that are more than marginal. Canon has released a new DSLR with amazing burst speeds, while Nikon has announced the first full frame DSLR with both a tilting LCD screen and Wi-Fi. All mediocrity aside, here are the most exciting cameras hitting the shelves this fall.

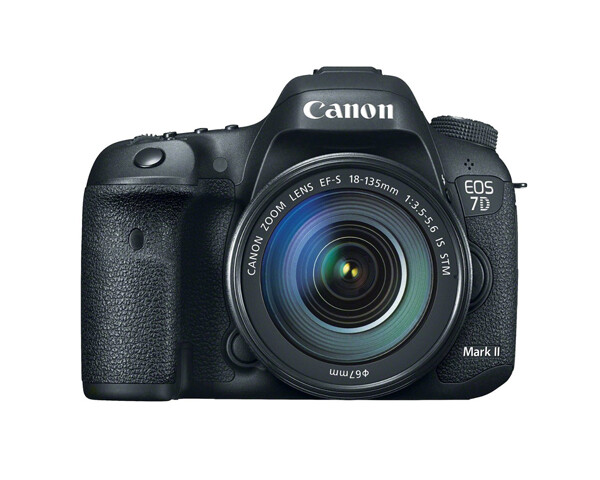
    Canon EOS 7D Mark II

    Canoneos7dii

    DSLRs have a lot of equipment inside that has to move every time an image is taken, so burst speeds of three to five frames per second are pretty typical until you hit the $ 4,000+ price range. Canon’s EOS 7D Mark II is boasting a 10fps burst speed, a huge accomplishment for a DSLR that’s priced under $ 2,000.

    The speed is making sports photographers take note, as well as shooters who often photograph active kids. To accomplish such high speeds, Canon has built-in not one, but two processors. Shutter speed is also quick at a maximum of 1/8000th of a second.

    The speed isn’t the only plus on the camera either, the Canon EOS 7D Mark II sports a 65-point autofocus system as well. As you’d also expect from Canon, there’s 1080p HD video at 60fps with smooth autofocusing. All of these features are wrapped up in a durable magnesium alloy body.

    Perhaps the biggest downside to the 7D Mark II is that the price is closer to that of a full frame camera, yet it only offers an APS-C sensor. The speed clearly points it towards sports shooters however, and the crop sensor means it’s easier to achieve telephoto zoom lengths over a full frame.

    The Canon EOS 7D Mark II is expected in stores November 28 for a list price of $ 1,799 USD. Pre-orders are currently available through several online retailers.

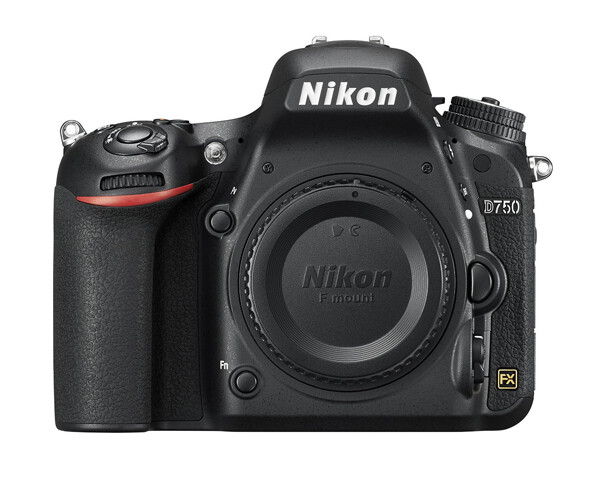
    Nikon D750

    NikonD750

    The announcement of the Nikon D750 took many by surprise, it’s been years since the D700 was introduced without any updates in between. The highlighting feature is that it’s the first to offer Wi-Fi and a tilting screen in a full frame DSLR, but it has several other features boasting image quality and getting the camera high marks in early reviews.

    The tilting LCD and Wi-Fi are more usability features than image quality changers; they’re paired with a lightweight body and an excellent battery life of 1,230 shots. Dual control wheels, two SD card slots, and a second screen at the top of the camera also look to make this new shooter fun and easy to use.

    It’s not all about usability, however. The D750 uses the same processor that’s inside the D810 and D4s. It doesn’t quite have the resolution of the D810 and still uses the optical low pass filter, but it also sits at about $ 1000 less. The D750 actually has a faster burst mode than the D810, thanks to the slightly smaller resolution, with a 6.5fps burst mode (the D810 has a 5fps burst). The D750 also offers 1080p HD video at a smooth 60fps.

    For not a whole lot more cash, the D750 offers quite a few more features than the D610. It’s available now for a list price of $ 2,296.95 USD.

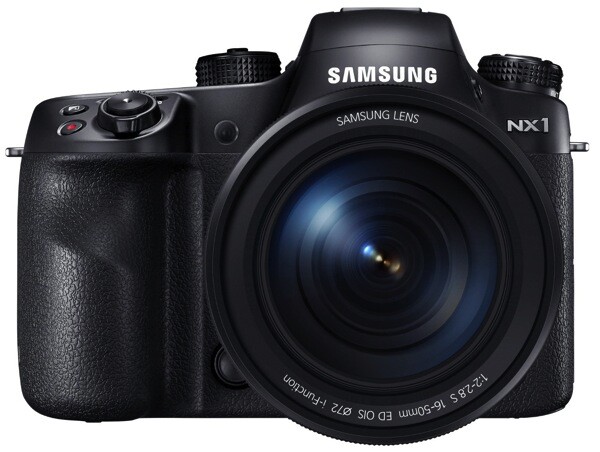
    Samsung NX1

    Samsungnx1

    It’s hard to pick out one headlining feature of the new Samsung NX1, since the mirrorless camera has quite a bit going for it. Backlit sensors are nothing new, their design improves the light gathering ability of the sensor, making them better in low light conditions. But backlit sensors are typically reserved for cameras with sensors an inch or smaller. The NX1’s APS-C sensor is backlit—technology that could potentially expand to more camera models in the future.

    4K video isn’t brand new to cameras, but in the past, recording shots of this resolution has required extra recording equipment. Samsung has built a compression method that keeps the resolution but reduces file sizes, so 4k video can be recorded directly to the SD card. Again, a new feature by Samsung that may expand to other models in the future.

    Last but not least, the NX1 has a 15fps burst mode. Since mirrorless cameras don’t have as much equipment to move as a DSLR (hence the name mirrorless) they’re typically faster, but 15fps with an APS-C sensor is unheard of. The Nikon 1 line rivals this speed, but is able to do so because the one inch sensor means much smaller files to process.

    The NX-1 is heading to shelves and online retailers on October 27, listed at $ 1,499.99 USD

    Noteworthy Compacts

    Manufacturers have also introduced a handful of compacts hitting the market this fall:

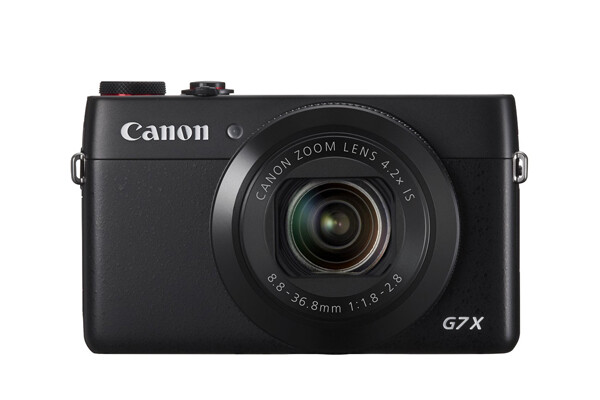
    • The Canon G7 X is a smaller version of their popular G1X Mark II advanced compact. It sports a one-inch sensor, an f/1.8 lens for solid image quality, and a 180 degree tilting touchscreen with Wi-Fi for selfie enthusiasts. This small shooter became available on October 17th and starts at $ 699 USD.CanonPowershotG7X
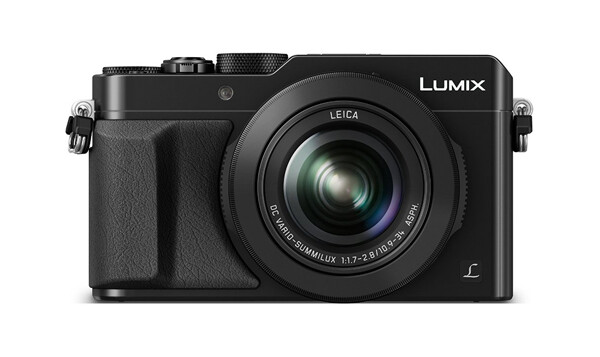
    • The Panasonic Lumix LX100 is a retro-style, advanced compact, with a Micro Four Thirds sensor and an f/1.7-2.8 lens. It’s turning heads with a leaf-style shutter that achieves shutter speeds of 1/16,000 and burst modes up to 6.5fps. There’s no automated modes, so it’s not for the average consumer. It’s available November 1st for $ 899.99 USD.Panasoniclx100

    New gear announcements are always exciting, but what’s really generating buzz this fall are the new features that could become more widely available (and more affordable) a few years down the road. Canon’s idea to use two processors creates faster burst speeds. Nikon has managed to fit both a tilting LCD screen and Wi-Fi into a full frame DSLR that’s smaller than the older models. Samsung proved backlit sensor design isn’t just for the small shooters anymore.

    This fall sees a few dozen new cameras heading to stores, but a handful have features that make them more than mediocre updates that can give you a good idea where camera technology is headed.

    Tell us in the comments which ones are you excited about?

    The post The Fall’s Most Exciting New Cameras by Hillary Grigonis appeared first on Digital Photography School.


    Digital Photography School

  • Free Resources for Photographers

    Right now there are many new photographers who are struggling as they try to get their businesses off the ground and photographers who have been in business for a while who are trying to maintain their existing business. Even industry pros who have been around for a long time have decided to cut corners where they can just to make their businesses more profitable in this economy. Finding resources,especially free ones, can make all the difference in the world to photographers. I assembled a small list of free resources for photographers that I think are definitely worth checking out.

    Educational Opportunities:

    • CreativeLive- CreativeLive offers free online seminars and classes. If you decided you want to purchase the class afterwards for future reference, you can do that from their site as well. They list each class and you can sign up for as many as you want for free.
    • Photographer’s Connection – This site has a bit of everything. There are marketing techniques, free videos offered here and there for learning Photoshop techniques, and when you sign up on their site you get free goodies delivered to your inbox. If you sign up for their free membership you will also get an invitation to their private Facebook group where you can make new photographer friends, ask questions and learn from people from all stages of photography.
    • Click it Up a Notch- What is really great about this website is that no matter what level you are in your photography career that you will find something useful here. Photography and posing tips and info, information about wall displays and how to maximize them and all sorts of ideas are on this site.
    • Digital Photography School- We pride ourselves on making tutorials, tips, and reviews of equipment and gear available to all photographers free of charge.

    FreeResourcesforPhotographers_DigitalPhotographySchool_LoriPeterson

    Business and Marketing:

    • The Law Tog – Rachel Brenke is a lawyer and a photographer. She combines both aspects of her career, helps other photographers with their legal documents and often shares advice on her blog. If you subscribe to her site, she sends you free legal documents to your email. You can see her article: 5 Things to Consider Before Starting Your Photography Business right here on dPS.
    • MailChimp- With MailChimp you can create email marketing campaigns and send up to 12,000 emails to 2,000 subscribers free of charge.
    • JotForm- If you want to be able to let your clients complete their registration for sessions online, you should look at JotForm. They have templates that you can customize or you can create your own. Clients can complete the forms and send them over to you completely online.
    • StudioCloud- StudioCloud is a free online software that can help you organize your business. Part of the free features are scheduling appointments, event reminders, generating invoices, and a lot more.
    • Defrozo- Defrozo is a new platform that allows photographers to create a website, manage their workflow, create galleries for clients, and more from one account.
    • Pinterest- Pinterest is very popular with photographers. Many have created boards showcasing their images and provided links to galleries and have used it not only to display the image, but to drive traffic to their websites.It’s not only a place to find inspiration, but you can use it as a marketing tool for your own business.

    FreeResourcesforPhotographers2_DigitalPhotographySchool_LoriPeterson

    Actions/Presets/Templates:

    • Pioneer Woman- Ree Drummond, The Pioneer Woman, created these actions that continue to be very popular for photographers. You can download the actions HERE.
    • MCP Actions- MCP Actions hosts some free actions for Photoshop and Elements, as well as some Lightroom Presets. You can browse the freebies HERE.
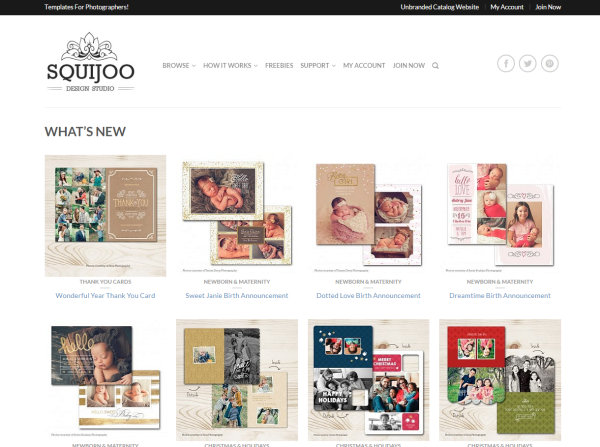
    • Squijoo- A one-stop source for templates, marketing sets, and so much more. If you decide you want more than just the freebies, you can access everything in their shop for $ 10 a month. DPS subscribers can use the code BD5C6 and get 50% off the monthly membership.
    • Paint the Moon- Paint the Moon freebies include actions, digital frames, a collage template, and more.

    DigitalPhotographySchool_ResourcesforPhotographers_Squijoo_LoriPeterson

    Online Gallery Proofing:

    • PASS- With PASS you can upload 100 images for free. After the 100 free ones, you have to pay $ 29 to upload more. You can create password protected galleries and you can allow clients to digitally download images as well.
    • Pixieset- If you know you will be uploading more than 100 images, then you should give Pixieset a try. The free account allows for uploading around 1,500 photos. You can create password protected galleries and allow digital downloads of either high resolution or web sized images.

    FreeResourcesforPhotographers_2_DigitalPhotographySchool_LoriPeterson

    This is just a small sample of the free resources that are available to photographers. I hope that you will find them useful. Finding resources is valuable in the photography industry. You can find everything from new techniques to new ways to showcase images for your clients. Utilizing your resources, especially those out there that are free, can help your business to save money and continue to grow. Feel free to leave any free resources that you know of in the comments section.

    Disclaimer: neither the author nor dPS were paid or compensated in any way to add businesses to this list.

    The post Free Resources for Photographers by Lori Peterson appeared first on Digital Photography School.


    Digital Photography School

  • 7 Tips for Photographing Groups

    Whether you’re an amateur or professional photographer, whether you usually photograph people, products, landscapes or insects, the time will come when you will be asked to photograph a large group of people.
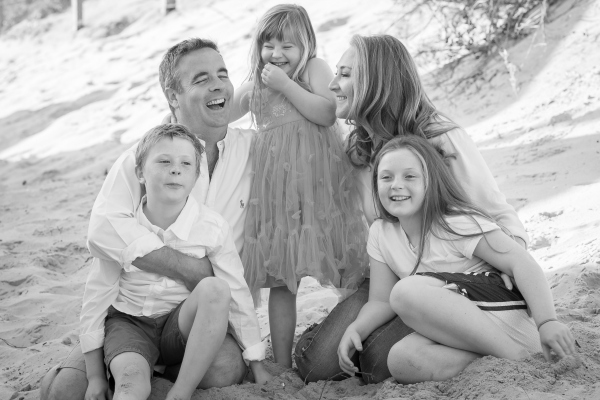
    Image H smaller family group

    Of course large is a relative term. If you are used to photographing couples or taking individual portraits, large could mean a group of five people. In general, I consider large to be a group of seven or more.

    The festive season is fast approaching, and this is the time of year when you are most likely to be asked to photograph large groups. During this season, families tend to congregate in one place, some travelling far and wide for the privilege of togetherness. Sports teams, dance clubs and social groups start winding down for the holiday season, and love to have an annual or seasonal record of their group.

    Wedding and school photographers are the true experts in group photography. I am neither of those; I’m a family and children’s photographer, and I don’t mind admitting that I’m a one-trick pony.

    However, over the past few months and for one reason or another, I have been asked to photograph an increasing number of large groups. Sometimes the lessons we need to learn find us, and it has been said that we best teach what we most need to learn. With that in mind, I’d like to share some of the lessons I’ve learned along the way, both through my own trial and error, and through tips for photographing large groups, passed on to me from other photographers.

    #1 – Choosing a location

    You won’t always have the luxury of being able to choose your location – sometimes you’ll be stuck with your aunt’s backyard, or some other less-than-ideal spot. If you have the luxury of choice, look to open spaces and uncluttered backgrounds.

    There are two reasons why simplicity is even more important with a group shot than with any other kind of portraiture.

    • First, by its very nature, a group shot is cluttered. With so many different faces and competing outfits, your group shot can end up looking very messy if the background is also complicated.
    • The second reason is that, in order to keep your entire group in focus, you will need to shoot at a higher number f-stop than you would for a single portrait, so you won’t benefit from the blurred background that you would when shooting wide open.

    When it comes to locations, my personal favourites are parks, gardens and beaches. The colours of nature never seem to clash or compete with your subjects. If you’re in a rural setting, and trees and grass are not your thing, look for hay bales, rustic sheds and timber fences. If you prefer an urban feel, seek out the unadorned walls and steps of old buildings and churches, or the clean lines of modern architecture.

    The images below illustrate the different moods that you can create with background. Although the playground shot is a little busy, it conveys colour and fun.
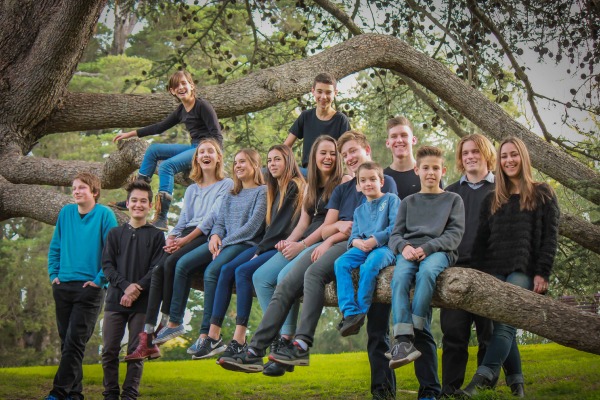
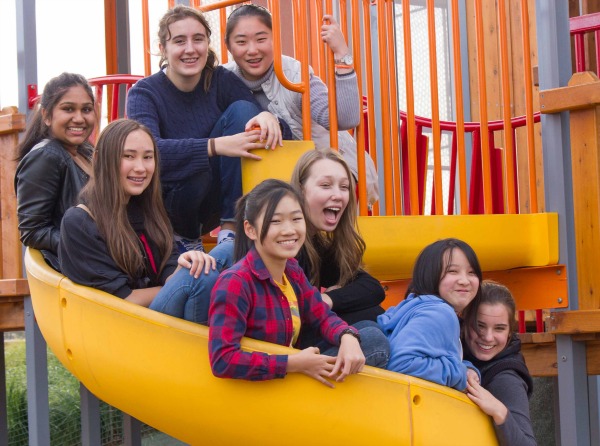
    Image A  teen group on branch

    Image B teen girls in playground

    These images show how you can create a different look to the same grouping, simply by changing your shooting position.
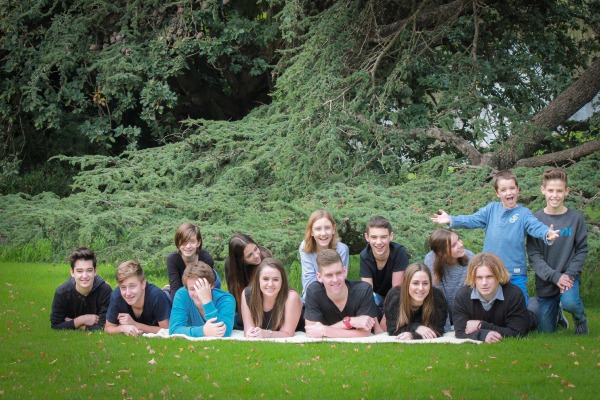
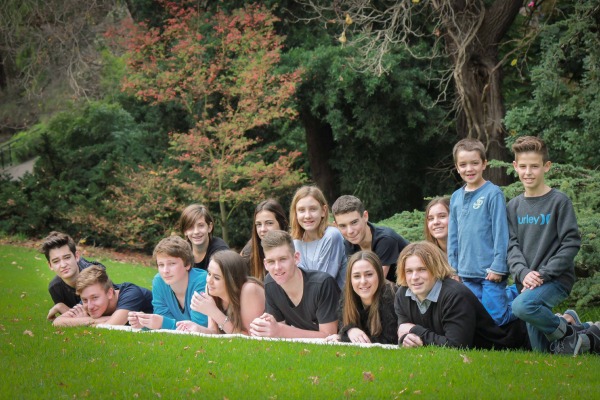
    Image C group on lawn front

    Image D group on lawn side

    #2 – Lighting

    Soft, even, light is imperative when photographing a group. If you can choose the time of day to shoot, opt for early morning or late afternoon to early evening, when the light is gentle and warm.

    If you’re stuck shooting in the middle of the day, avoid harsh shadows by shooting in open shade such as beneath the canopy of a large tree, or in the shadow of a building. Importantly, make sure the light falls evenly on your group, and that there are no patches of sun on anyone.

    #3 – Use a tripod

    If you are photographing a small group, and you want to get creative with poses and shooting angles, you probably won’t need a tripod. While they go a long way towards preventing blurry images caused by camera shake, I personally find them restrictive.

    However, when photographing a large group, you’ll probably want to keep your subjects in one position while you fire off lots of similar shots. A tripod has the benefit not only of preventing camera shake, but allowing you to take a number of shots at the same angle and focal length. So, when you discover that your perfect image is marred by one person blinking or doing something weird with their mouth, it’s easy to take spare parts from the other images and transpose them in Photoshop (do a head-swap).

    #4: Lens and aperture selection

    Lens and aperture preference are always controversial. To photograph a large group, I’d recommend playing it safe and using a 50mm lens. Depending on the depth of your group arrangement, stick with an aperture of f/9 or higher to ensure that everyone is sharp, and always do a test shot first.

    To avoid distortion when using a lens that is 50mm or below, make sure you leave plenty of space between the people at either side of the group, and the edge of the frame. No one will thank you for making them look wider than they are (which is what a wide-angle will do to the people on the edges)!

    While we’re on the subject, it’s a good idea to leave some space around your group to allow for different cropping ratios.

    #5 – Vary the head heights

    If your subjects are huddled close together on a level surface, chances are the people at the back will only be visible from the eyes up in the final images.

    You can easily remedy this by placing them on a graduated surface. A flight of steps is ideal, or a sloping lawn, a playground slide, the branch of a tree – anywhere that you can stagger the height of the heads to make sure everyone can be clearly seen without sitting in a dead-straight row.

    If you happen to be stuck with a flat surface, use chairs for a formal arrangement. Place some people standing behind the chairs, some seated on the chairs, and some sitting on the ground in front. The ground is a good spot for younger children, who get fidgety if asked to sit still for too long.

    For something a little different, find a vantage point that allows you to look down on the group. This might be a balcony, a ladder, or a chair.
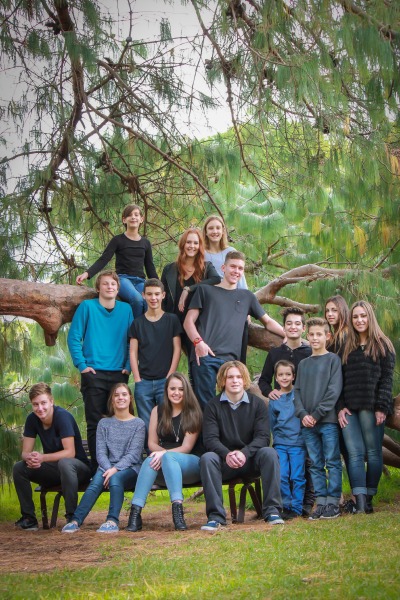
    Image F- group tiered on tree

    #6 – Last call: Nose check!

    I can’t tell you how many hours I’ve spent in Lightroom cleaning up little noses (and big ones), fixing smudged eyeliner and removing lint from clothing.

    While you are preparing your set-up, ask the women in the group to reapply their lipstick and check their hair and makeup.
    Immediately before you start shooting, ask the adults in your group to check their partners’ and children’s faces and clothing, paying special attention to noses, teeth and eyebrows. Have a packet of tissues and wet wipes handy. If you feel uncomfortable asking this, think of all the hours you’ll save post-processing.

    #7 – Ready, steady, shoot!

    Once you have your group positioned, work quickly. Fire off a test shot for exposure, focus, and depth of field. When checking the image on your screen, enlarge it to the maximum size and make sure everyone from the front row to the back is in focus. Adjust your aperture if necessary. When photographing smaller groups, you can get creative with depth of field by focussing on some individuals and allowing others to soften, but that’s a whole other story. With a large group, everyone should be in focus.

    With your camera’s drive mode set to continuous shooting, ask everyone in the group to close their eyes and open them on the count of three. Fire multiple shots on the count of three, and then repeat the process a few times to ensure you have at least one great image.

    As to obtaining an image with everyone’s eyes open, the jury is still out as to the best method. What works for me is to set the camera’s drive mode to continuous shooting, and ask everyone in the group to close their eyes and open them on the count of three. I fire multiple shots on the count of three, and then repeat the process a few times to ensure I have at least one great image.

    When you are satisfied with what you’ve captured, you can break the group down into individual families and other groupings, and have some fun with it. Ditch the tripod and get creative with posing and shooting positions. Avoid meltdowns by photographing families with the youngest children first, and use common sense when it comes to mixing children with water, pets, and climbable objects.
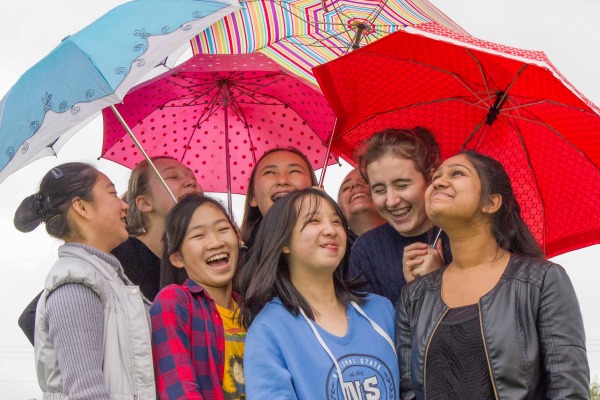
    Image G girls under unbrella

    Over to you

    What kind of groups have you photographed? What are your tips for photographing groups? What did you do right, and where did it go wrong?

    The post 7 Tips for Photographing Groups by Karen Quist appeared first on Digital Photography School.


    Digital Photography School

  • 5 Unforgiving Post-Processing Mistakes Every Bird Photographer Must Avoid

    Post-processing is one of the most important steps in the image making process. It is in fact one of the most powerful tools to make your vision come true. The camera does not see the way you see your world and it is your responsibility to translate your vision into reality in post-processing.

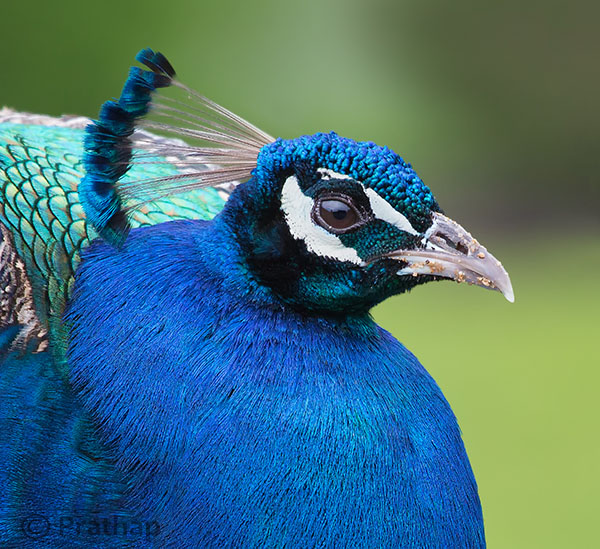
    0 Nature Photography Simplified Bird Photography Post Processing Tips Peacock Portrait Featured Image

    You can achieve most artistic results in post-processing that are simply not possible in reality. But, being a bird photographer you do not often get a chance to post-process your bird photographs artistically. Why?

    Since the viewer would have seen the bird in reality, it is easier to compare to what is presented in a photograph. Bird photography is generally about showing the bird and its natural beauty not enhancing it artistically to achieve something else!
    It is very similar to taking photograph of a person. Do you want to show the person as they are, or do you want to make them look someone else?

    Does this mean, you have to just keep it real?

    Not necessarily. But any enhancement in post-processing to make a bird or its features look beautiful has to be done with lot more care than if it was a landscape photograph for instance.

    Remember that the mistakes will be caught easily!

    Below I am listing the five post-processing mistakes that you, as a bird photographer, should avoid because they are unforgiving.
    Committing any of these mistakes may ruin your bird photograph, and you definitely do not want to ruin your hours and days of effort in getting that one photograph you love. Do you?

    Mistake #1: It’s cropped too tight

    There is an ongoing debate about whether to crop or to get everything perfect in field. Though it is desirable to compose in the field, cropping in the post becomes necessary many a times in bird photography because of several factors like:

    • Not enough time to compose the fast action that unfolds in split seconds
    • Not enough focal length to fill the frame
    • Not enough time to compose an image especially in case of birds in flight

    If you can improve the composition, then go ahead and crop the image. But too often, I see lot of bird photographers crop it too tight which makes the bird suffocate in the frame and the image look cramped.

    1-Nature-Photography-Simplified-Bird-Photography-Post-Processing-Tips-Too-Tight-Crop

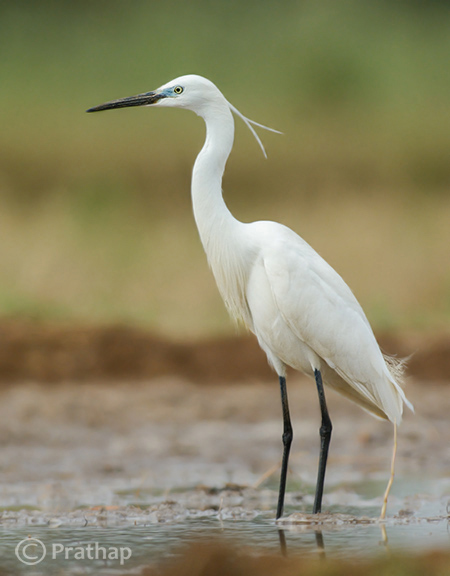
    The little Egret in this photograph looks suffocated because there is no breathing space in front to look into, and no space to move which makes it look cramped.

    2-Nature-Photography-Simplified-Bird-Photography-Post-Processing-Tips-Little-Egret

    Notice how a little bit more space around the bird gives him room to look into and move. It is more pleasing to our eyes also.

    Quick Tip: Use the Rule of Thirds as a guideline.

    Mistake #2: It’s unrealistic

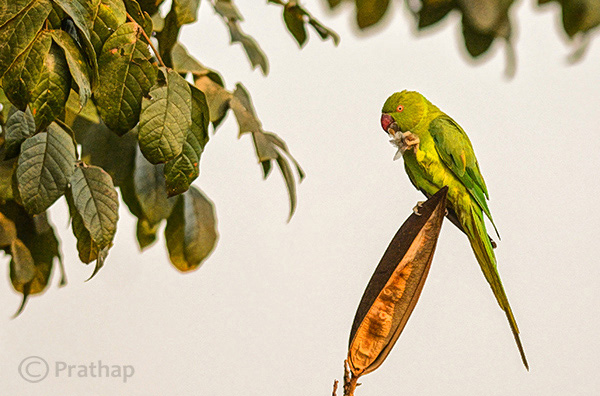
    The clarity slider in Adobe Lightroom is such a lethal weapon that is hard to replicate even with Adobe Photoshop. It enhances the local contrast in an image, which is one of the most important aspects of processing. Too much local contrast makes an image looks unrealistic as it tends to sharpen.

    The soft and smooth feeling of the smallest details in feathers of the bird starts to look very unrealistic.

    3 Nature Photography Simplified Bird Photography Post Processing Tips High Local Contrast

    Notice how unrealistic the Parakeet looks in the above image. Even the leaves look like plastic.

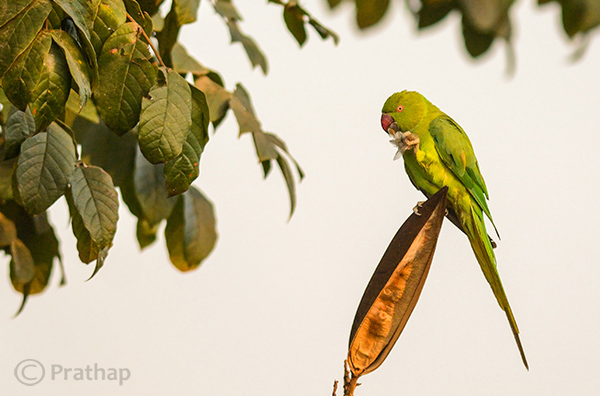
    4 Nature Photography Simplified Bird Photography Post Processing Tips Rose Ringed Parakeet Female

    Just enough local contrast (usually Clarity of +20 to +30) will bring out all the details in the bird.

    Quick Tip: Instead of using your mouse to pull the Clarity slider, use keyboard arrows and watch the changes as you bump up the clarity. Restrict to the smaller numbers like +10 to +30.

    Mistake #3: Everything is overly colorful

    Over-saturated images are everywhere!

    Birds are definitely colorful subjects and that is the reason we are all attracted to them. But are they so colorful?
    Too much saturation looks overcooked. If you try to increase the contrast as a last step in your post-processing workflow (which is usually recommended), then it will also increase the saturation.

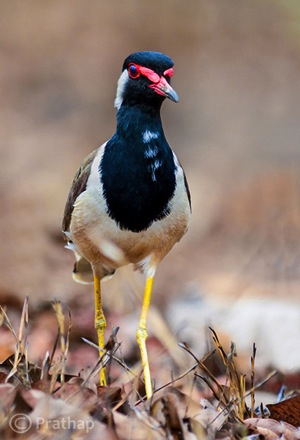
    Note that Saturation slider increases the overall saturation of the image making everything in the image colorful. Do you really want everything in the image looking colorful? Do you want to emphasize the bird or the background?

    5 Nature Photography Simplified Bird Photography Post Processing Tips Over Saturated

    Everything in the above photograph of a Red-Wattled Lapwing is colorful. It is way too colorful.

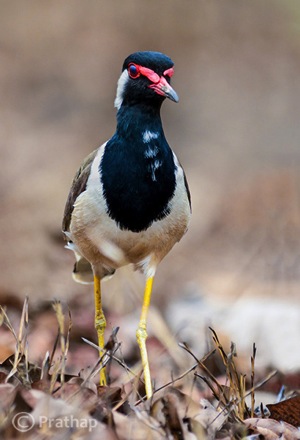
    6 Nature Photography Simplified Bird Photography Post Processing Tips Red Wattled Lapwing

    In the above photograph I have selectively increased the Saturation only for the bird in Adobe Photoshop.

    Quick Tip: Use selective coloring. Saturate only the colors or object that are very important. Use the HSL panel or the adjustment brush to apply the color.

    Mistake #4: The bird looks like a wax statue

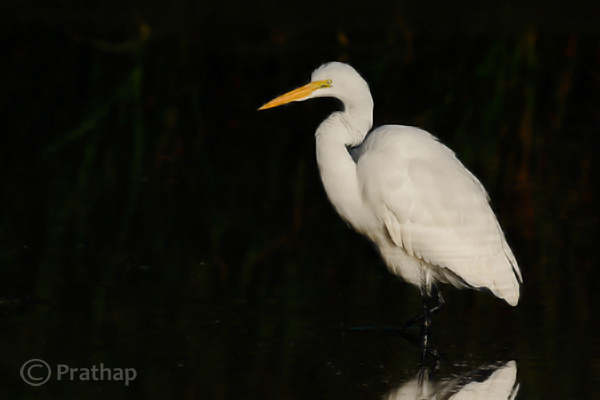
    Have you seen a wax statue of a bird in a shop? You can also see them on the web. Excessive noise reduction will give a plastic or wax statue look to your bird photographs.

    While it is important to reduce the noise because most often we have to bump up the ISO to 400 or 800 to freeze the action, it is also important to understand what the Noise Reduction filter does. It The smoothes out the edges, by smoothening out the minute and important details of the image and the bird.

    7 Nature Photography Simplified Bird Photography Post Processing Tips Waxing

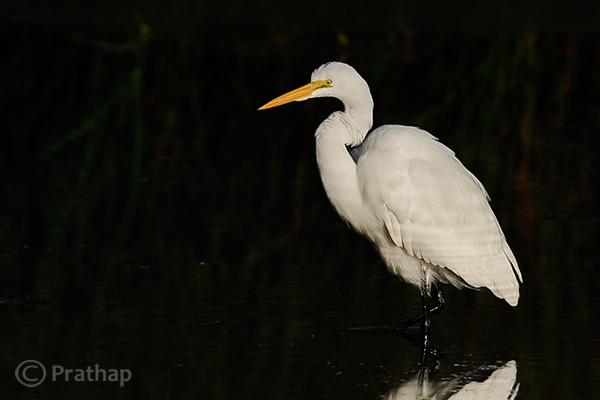
    The above image of a Great Egret has a waxy look because of the excessive noise reduction applied to the entire image. Remember that the water looses texture due to excessive noise reduction giving it an artificial look.

    8 Nature Photography Simplified Bird Photography Post Processing Tips Great Egret

    By reducing the noise only in the out-of-focus or low detailed or shadow regions of the image, it will help to keep the details intact.

    Quick Tip: Reduce the noise only in the smooth areas (like the background) since noise is generally not visible in the high detailed areas (like the bird’s body).

    Mistake #5: Too much is bad

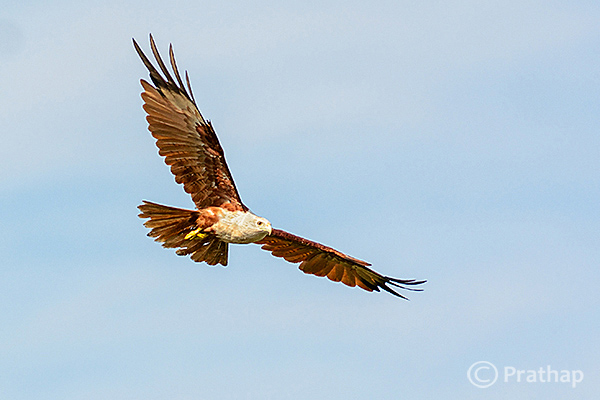
    Too much is bad in anything that we do. Pushing any post-processing slider too far will yield a bad image. But the most important one that is noticeable with many bird photographs, is that it is over-sharpened. No matter how good your post processing skills are, if you make this one mistake, there is no way out.

    Over-sharpening kills a photograph. Period.

    It is better to keep it little less sharp than to go too far and be overly sharp.

    9 Nature Photography Simplified Bird Photography Post Processing Tips Over Sharpened

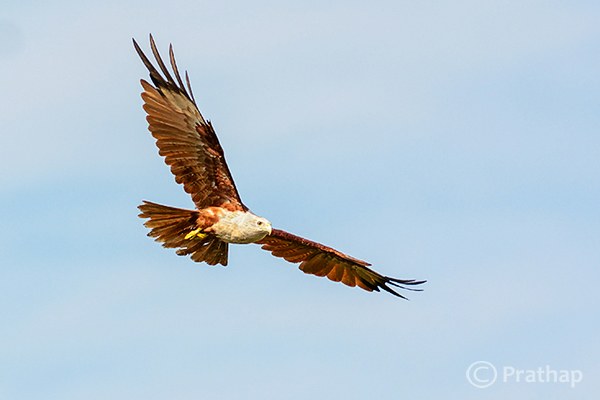
    The features of the Brahminy Kite are way sharper than what they should be. Also check out the halo around the bird formed due to sharpening on the overall image.

    10 Nature Photography Simplified Bird Photography Post Processing Tips Brahminy Kite In Flight

    Quick Tip: Apply sharpening only to the bird but not to the background.

    Final words

    These are some of the major mistakes that should be avoided. Because they are unforgiving and can potentially ruin your best photographs. The best way to avoid these mistakes is to keep a small checklist to see if you have committed any and correct them immediately. With practice, you will easily avoid all of them.

    Now, it’s your time to tell me the mistakes that you think should be avoided. What mistakes have you made in post-processing? Feel free to add your opinion on this subject but please make sure it is productive and helpful to all our readers.

    The post 5 Unforgiving Post-Processing Mistakes Every Bird Photographer Must Avoid by Prathap DK appeared first on Digital Photography School.


    Digital Photography School