Category: Photography

  • 3 Creative Uses of the Drop Shadow in Photoshop

    Default-Drop-Shadow

    Default Drop Shadow applied to Text

    Layer styles are a great way to add effects to your images in Photoshop. In this article, you will learn about the Drop Shadow. A typical example of the drop shadow effect in Photoshop is to add a 3D look to your text. Another example is when working with multiple images in the same document, the cutout elements should appear seamless in the background. A drop shadow effect can also be used in a creative way to make your image stand out.

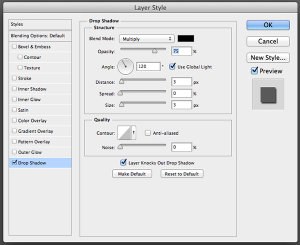
    You get into the layer styles in Photoshop, by clicking on the fx icon at the bottom of the layers palette. Then, click on Drop Shadow, this brings up the Drop Shadow Dialog Box.
    Drop-Shadow-Dialog-Box

    Drop Shadow Dialog Box

    Let’s take a minute to look at some of the default settings:

    • The Blend Mode has been changed to Multiply.
    • Opacity has been reduced to 75%.
    • The distance of the shadow from the object is set to three pixels.
    • The Size is what blurs the shadow, it is set to three pixels as well.

    All of these settings can be modified within this Dialog Box. For example, you may want to change the angle to 90 degrees so that the drop shadow is directly underneath. If you are new to adding effects in Photoshop.

    Getting to grips with layer styles is a good start. These effects are applied non-destructively. I prefer to work with layers so that I have more control over any adjustments that need to be made. I use Gaussian Blur quite a lot which can be found under Filter on the Menu bar. Next, I’m going to show you how to put the drop shadow layer style on its own separate layer.

    Beginning with the Drop Shadow Dialog Box already open, click Ok, then go back up to the Menu Bar>Layer>Layer Style>Create Layer. A dialog box appears with ‘Some aspects of the Effects cannot be reproduced with Layers!’ Just click Ok again.

    Custom-Drop-Shadow

    Custom Drop Shadow

    What this does is put the drop shadow on its own separate layer. You can now make modifications non-destructively to the drop shadow using adjustments layers. By moving this layer around, you are creating the distance and the angle of the drop shadow in one movement. Changing this layer to a Smart Object will mean you can add Gaussian Blur or any other filter and this effect will also be applied non-destructively. In the layers Panel, go up to Opacity to reduce the intensity of the drop shadow.

    Create a custom creative shadow

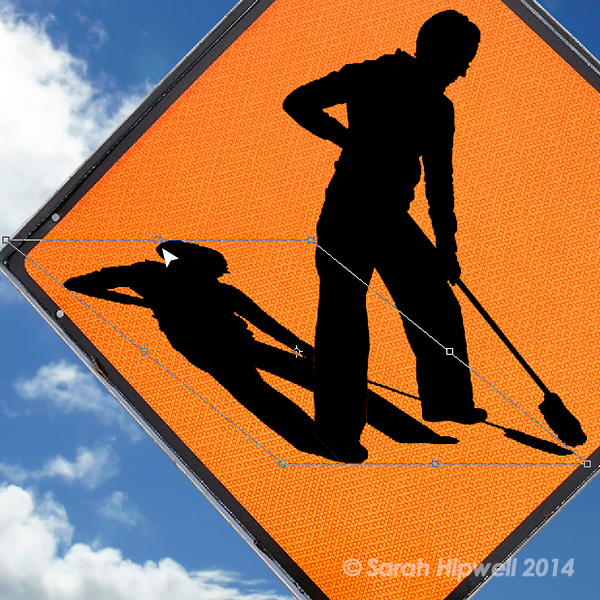
    You can also create a drop shadow without using the layer styles. When I am working with two or more images, (i.e. compositing) I import an image that has a clipping path or layer mask so that the subject or object has been already isolated or cutout from the background. For example, this image:

    Women-at-work

    Women at work

    The concept behind this image was a play on the men at work theme. Follow along the following steps:

    • Take a photo of your model.
    • The light isn’t important as will be turning your subject into a silhouette.
    • Create a clipping path with the pen tool, then open the destination (in this case the blank street sign) image and copy the path of the model into that image.
    • Next make a selection from the path and fill it with black.
    • Duplicate that layer and name it drop shadow.
    • Now you have two layers with the same black silhouette of your model.
    • Put the layer named drop shadow underneath the silhouette layer.
    • Next using the keyboard shortcut Cmd+T on a Mac(Ctrl+T on a PC), activate the Free Transform tool.
    • By holding down the Cmd key on the keyboard, hover your cursor over the top mid-point until the arrow turns white.
    • Click and drag the shadow out to the left and down.
    • Reduce the opacity to about 32%, convert this layer to a Smart Object, and apply a Gaussian Blur (I used four pixels).

    This is a creative drop shadow rather than a realistic one. See the resulting image below.
    Women-at-work-free-transform

    Women at work with free transform handles

    Shadows

    Shadows will play an important role when working on multiple images, especially if you want the cutout element to look as seamless as possible against the background. Let’s look at creating a more realistic shadow.

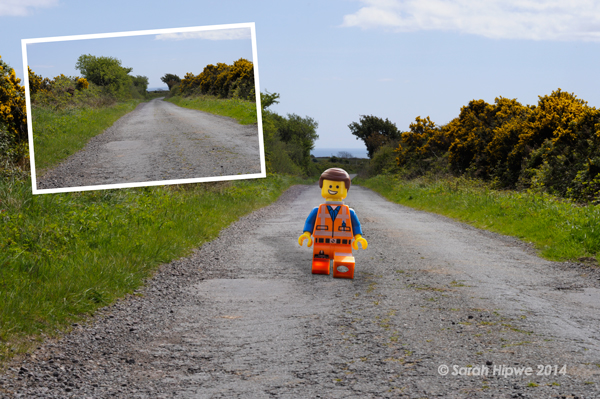
    In this image of a deserted road, I imported a cutout of the Lego figure. I used a combination of the method used above then created another drop shadow under his feet using layer styles. Follow along to create something similar using your images:

    • Duplicate the Lego figure (or your version of him) and fill it with black to give the long shadow cast by the sun.
    • Reduce the Opacity to about 22%.
    • Click on the fx icon at the bottom of the Layers panel to add the drop shadow layer style. In this image I wanted this drop shadow to be underneath the figure at its feet.
    • Put this shadow on its own layer (see description above) and convert it to a Smart Object.
    • Paint away the shadow on the body using a layer mask and then apply some Gaussian Blur, but not too much.
    • Reduce Opacity to 70%.
    • Shadows around the feet area will be darker and not as large as other shadows. The Lego figure now looks anchored to the image as opposed to floating in it.
    Lego-figure

    Lego figure

    In summing up, the drop shadow is a very useful effect and can greatly enhance your imagery. For realistic shadows take note of the direction and the type of light. Is the sun shining overhead or is it over to the right? Morning and evening light will have longer shadows than in the middle of the day. Gaussian Blur and Opacity will be your allies here.

    Do you have any other drop shadow tips or creative uses of them?

    The post 3 Creative Uses of the Drop Shadow in Photoshop by Sarah Hipwell appeared first on Digital Photography School.


    Digital Photography School

  • A Collection of Low to the Ground Images

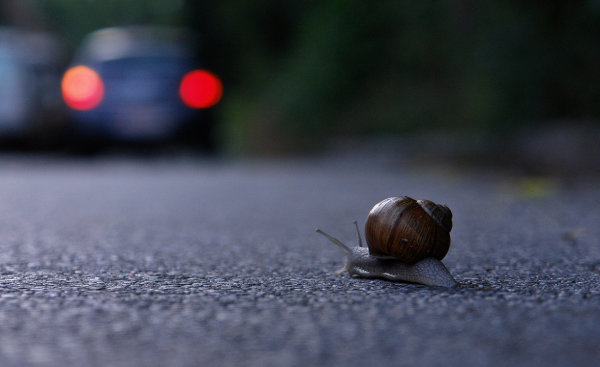
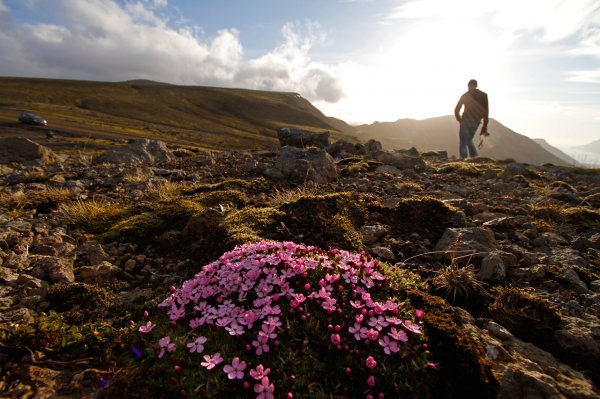
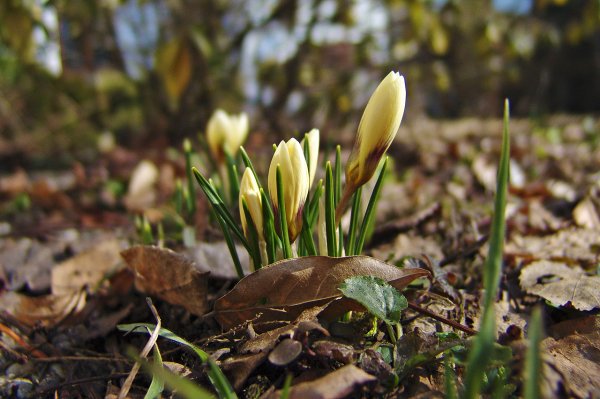
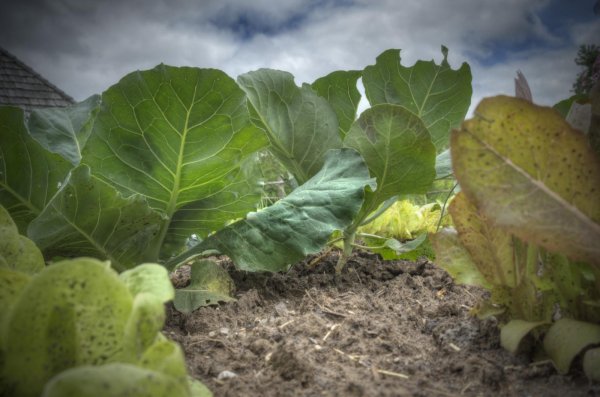
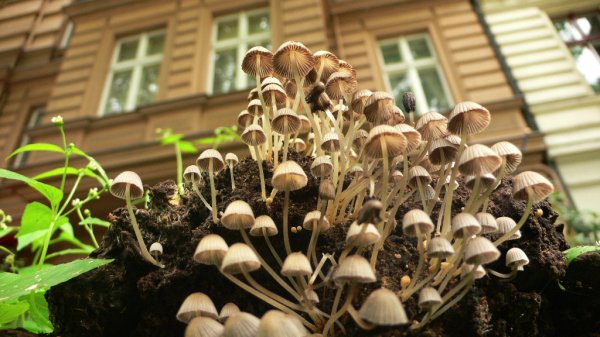
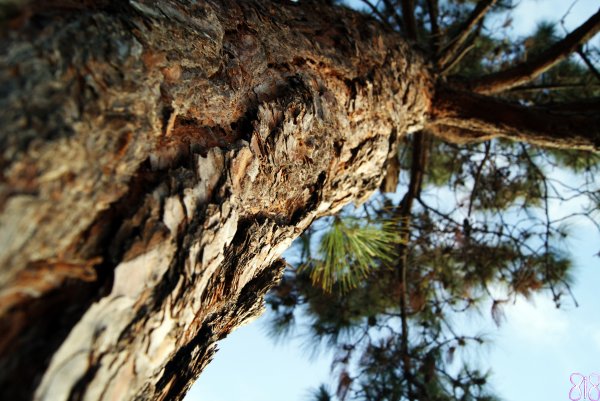
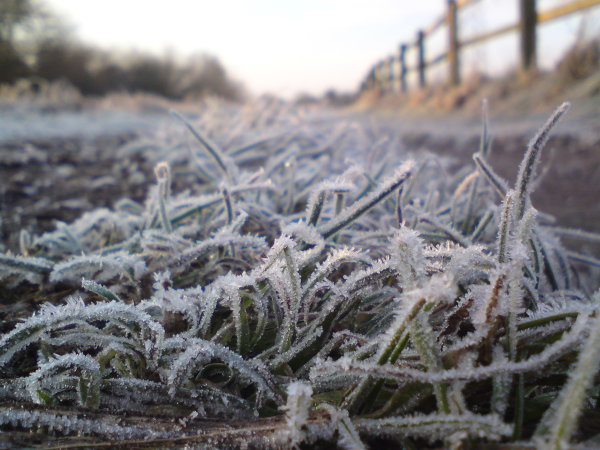
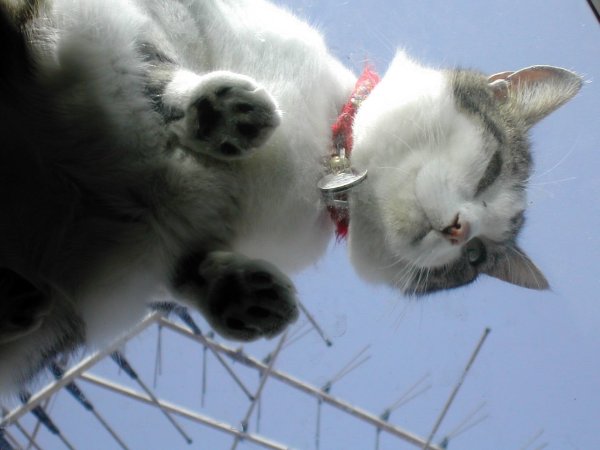
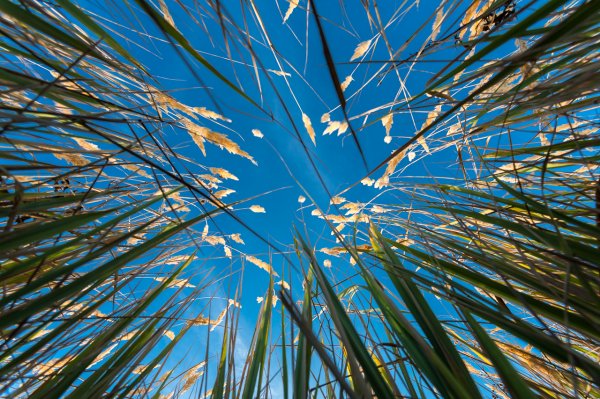
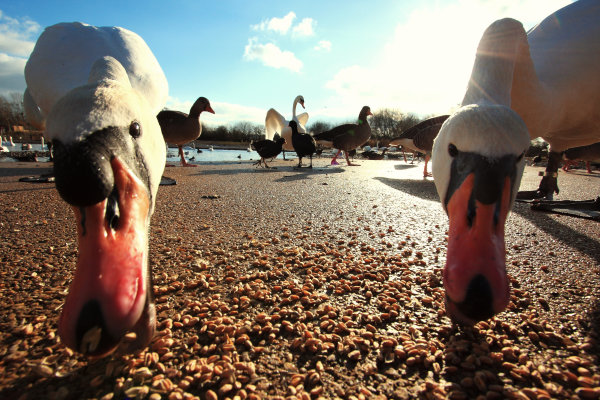
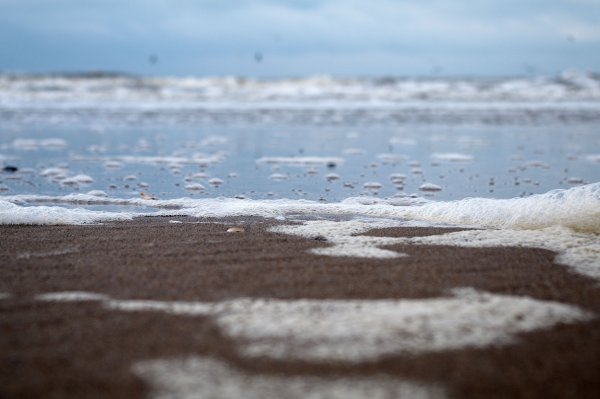
    Creating an original image can sometimes be challenging. One of the best ways to do it is to change up your camera angle or perspective. Getting up high and looking down is one method, another is crawling around in the dirt to get a worm’s eye view. As you can imagine the name comes from approximating the view a worm would have from his angle on the ground.

    Being low to the ground will set your images apart because the average person doesn’t see that way, or take photos from down there. It can also mean looking straight up. Here are some worm’s eye view images to give you some ideas:

    Photograph Really Red Rock by James Wheeler on 500px

    Really Red Rock by James Wheeler on 500px

    Photograph Walking in a Snowstorm by Tishan Baldeo on 500px

    Walking in a Snowstorm by Tishan Baldeo on 500px

    Photograph Iowa Corn by Aaron J. Groen on 500px

    Iowa Corn by Aaron J. Groen on 500px

    Photograph Baby Tortoise by Lee Bothma on 500px

    Baby Tortoise by Lee Bothma on 500px

    Photograph The Trench Run II by peter stewart on 500px

    The Trench Run II by peter stewart on 500px

    Photograph Low-Angle by AtomicZen : ) on 500px

    Low-Angle by AtomicZen : ) on 500px

    Photograph Mouse's View by Alexander Dragunov on 500px

    Mouse's View by Alexander Dragunov on 500px

    Photograph Through the Keyhole by Harry  Eggens on 500px

    Through the Keyhole by Harry Eggens on 500px

    Photograph Infinity by Artur Stanisz on 500px

    Infinity by Artur Stanisz on 500px

    Photograph * by Peter Writer on 500px

    * by Peter Writer on 500px

    Photograph To The Sky by Suradej Chuephanich on 500px

    To The Sky by Suradej Chuephanich on 500px

    Photograph Ruddy Strut by Gary Luhm on 500px

    Ruddy Strut by Gary Luhm on 500px

    Photograph Looking Up by Rob Younger on 500px

    Looking Up by Rob Younger on 500px

    Photograph Towering giants by Mike Dexter on 500px

    Towering giants by Mike Dexter on 500px

    Photograph Displaced by Lee Acaster on 500px

    Displaced by Lee Acaster on 500px

    Photograph Low angle ! by Emanuel Fernandes on 500px

    Low angle ! by Emanuel Fernandes on 500px

    Photograph Fast Sunrise by Tee Butler on 500px

    Fast Sunrise by Tee Butler on 500px

    Photograph The Cave by Thomas Brown on 500px

    The Cave by Thomas Brown on 500px

    Photograph Tube Mice by Aaron Yeoman on 500px

    Tube Mice by Aaron Yeoman on 500px

    Photograph Mouse point of view by Suren Manvelyan on 500px

    Mouse point of view by Suren Manvelyan on 500px

    Photograph Tower bridge by Paul Sharp on 500px

    Tower bridge by Paul Sharp on 500px

    Photograph Boots! by Dee McIntosh on 500px

    Boots! by Dee McIntosh on 500px

    Photograph Mice perspective / Mäuse Perspektive by Ralf Bitzer on 500px

    Mice perspective / Mäuse Perspektive by Ralf Bitzer on 500px

    Photograph Fly Agaric Mushroom by Terry Sohl on 500px

    Fly Agaric Mushroom by Terry Sohl on 500px

    Photograph Escalator by Tracey Whitefoot on 500px

    Escalator by Tracey Whitefoot on 500px

    Photograph Dawn Patrol by Scott Farrell on 500px

    Dawn Patrol by Scott Farrell on 500px

    Photograph Walk Alone by Phil Jones on 500px

    Walk Alone by Phil Jones on 500px

    Photograph . by Oliviero Masseroli on 500px

    . by Oliviero Masseroli on 500px

    Photograph AL-Marmoum Racing by Shoayb Khattab on 500px

    AL-Marmoum Racing by Shoayb Khattab on 500px

    Photograph Breno...ground level by Oliviero Masseroli on 500px

    Breno…ground level by Oliviero Masseroli on 500px

    Photograph Blowing off Steam by mark_fadely on 500px

    Blowing off Steam by mark_fadely on 500px

    Photograph Florian Prägant by Martin Steinthaler on 500px

    Florian Prägant by Martin Steinthaler on 500px

    Photograph Worm's Eye View Golfer by Stephen Stringer on 500px

    Worm's Eye View Golfer by Stephen Stringer on 500px

    The post A Collection of Low to the Ground Images by Darlene Hildebrandt appeared first on Digital Photography School.


    Digital Photography School

  • Weekly Photography Challenge Worm’s Eye View

    This week I rounded up a bunch of images taken low to the ground, otherwise known as worm’s eye view. It’s not a common view that people see, so images you create shot from this angle have a unique look and pique interest with viewers. Your job is to take on this low down task and shoot from the ground level. Here are some examples for you:

    Stephan Rebernik

    By Stephan Rebernik

    Stephan Rebernik

    By Stephan Rebernik

    Stephan Rebernik

    By Stephan Rebernik

    Tim Hamilton

    By Tim Hamilton

    Dr. Motte

    By Dr. Motte

    AJ Mangoba

    By AJ Mangoba

    There’s no special equipment needed to do this, or magical subject matter. Even the most ordinary objects can be made to look interesting when photographed from the worm’s eye view. So it’s your turn.

    Weekly photography challenge – worm’s eye view

    So get down on your hands and knees, don’t be afraid to get dirty, and get as low to the ground as you can (and still be able to get up again). You might find things down there you haven’t noticed before, perhaps even in your own home or back yard. Like macro photography that makes you look for tiny subjects, getting down on the ground has a similar benefit and you start to see things you’d otherwise miss. Give it a try.

    Share your worm’s eye view images here:

    Simply upload your shot into the comment field (look for the little camera icon in the Disqus comments section) and they’ll get embedded for us all to see or if you’d prefer upload them to your favourite photo sharing site and leave the link to them. Show me your best images in this week’s challenge.

    Here are some more  images to give you ideas:

    Weegeebored

    By weegeebored

    Christophe / Saturnino Iaïchouchen

    By Christophe / saturnino Iaïchouchen

    Ken Owen

    By Ken Owen

    André Hofmeister

    By André Hofmeister

    Kennysarmy

    By kennysarmy

    Gabrijel Gavranovi?

    By Gabrijel Gavranovi?

    The post Weekly Photography Challenge Worm’s Eye View by Darlene Hildebrandt appeared first on Digital Photography School.


    Digital Photography School

  • 20 Gorgeous “Thank You” Card Ideas for Photographers

    Photography business is all about working with clients and making the best impression you can. Shooting people and providing good photography is not quite enough to stay in business today. Competition is too high, and you need to give the best experience to your clients to survive in this red ocean. While delivering images to your clients, why not say Continue Reading

    The post 20 Gorgeous “Thank You” Card Ideas for Photographers appeared first on Photodoto.


    Photodoto

  • Improve your Images with Photography Projects

    Photography project

    Have you ever been in a situation where you are stuck for ideas about what to take photos of? I certainly have, and a lot of it comes from being so familiar with my surroundings that it’s hard to see the photographic potential in anything. A newcomer to my local area would probably see it completely differently, and find lots of inspiration.

    Given that most of us spend the majority of the year at home, is there an easy way to find inspiration? There is – the secret is to get in the habit of setting yourself photography projects.

    Projects are a way of giving yourself something to aim for, and developing a thematically linked body of work. Professionals set themselves projects to learn new skills, make new contacts and give themselves something creative and positive to do in quiet times. But you don’t have to be a pro to benefit. Projects can help you become a better photographer, no matter what your level.

    Photography project

    Benefits of projects

    Here are some of the practical benefits of projects.

    Projects help you develop new skills.

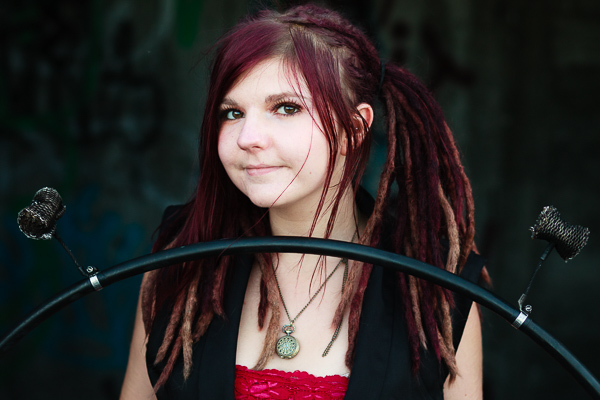
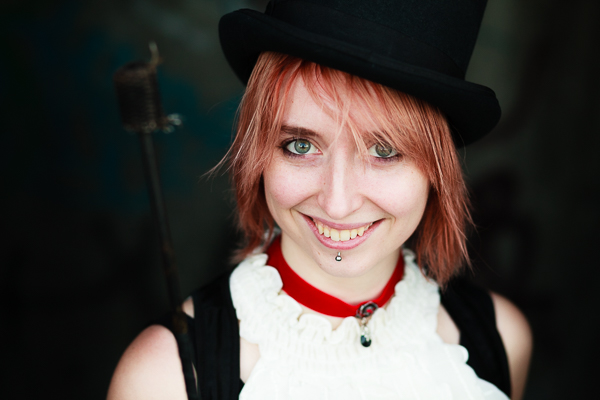
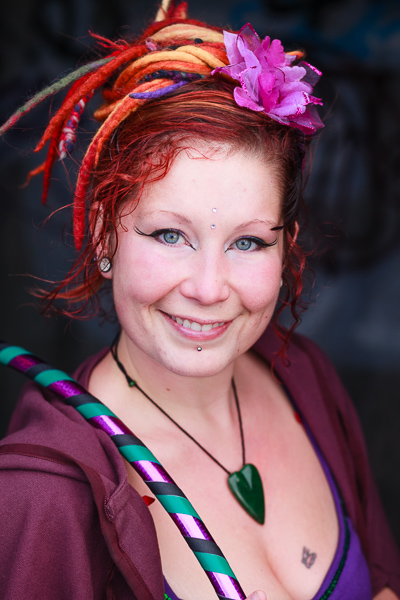
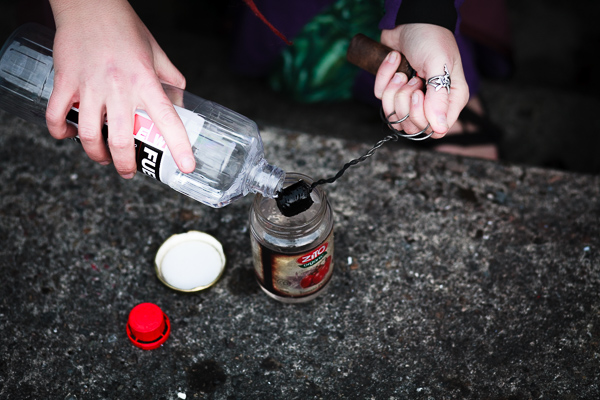
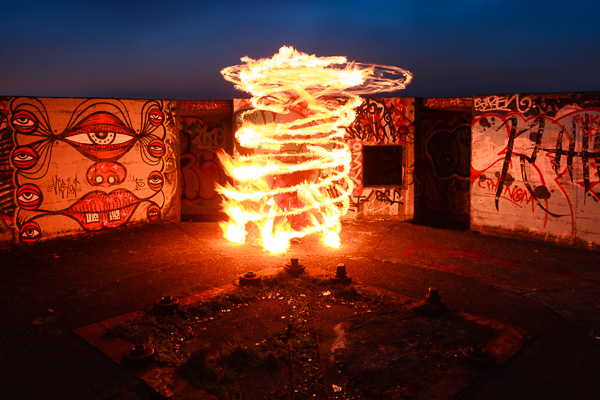
    For example, the photos illustrating this article were taken as part of a personal project photographing circus performers. The aim of the project, apart from creating an interesting set of portraits, was to improve my portrait taking skills. Setting myself a project with a specific theme allowed me to hone in on a group of interesting people. Circus is a tight-knit social group, so once I’d got started it was easy to meet more performers by asking the ones that I’d photographed if they knew anybody else who would be interested.

    Best of all I got to meet and get to know a new group of people. It has been great fun and opened my eyes to a way of life and outlook different to my own. The project has fuelled personal growth as well as helping me become a better photographer.

    Photography project

    Projects give you something to aim for.

    Once you’ve committed to a project, and the idea of taking a series of photos over a period of time, you get to compare your newest work with previous photos. You  will see how your skills and ideas progress over time.

    Projects can last for years.

    That’s right, there’s no need to work on one project at a time, or to work on a project with a finite time span. There’s no reason why you can’t have several ongoing projects, each with an indefinite time span, that only come to an end when you feel that your time with the project is done.

    Projects let you explore a subject in-depth.

    One way of taking photos is to visit somewhere for a day or two, taking photos of the scenery and anything else that catches your eye. That might help you take photos of landmarks and other well-known scenes, but it’s not an in-depth exploration of a subject. I’m aware of this because I’ve just returned from a trip exploring New Zealand’s South Island. I spent no more than two days in any location, photographing the most obvious (and sometimes not so obvious) landmarks and scenery. But that’s only a shallow coverage.

    Imagine how much more depth you can get if you have time to explore a place on a deeper level. If you live somewhere with beautiful landscapes, you can go beyond the more obvious scenic spots and find photogenic but little known places. Or you could photograph the lives of the people who live and work there.

    This isn’t easy to do when you’re visiting a place for a short period, but it’s something that’s much easier when your subject is closer to home. That’s why projects are such a good way of getting more out of your home town, or places nearby within a convenient travel distance.

    Photography project

    Project ideas

    Here are some ideas for projects to get you started:

    365 project

    This has become a classic – take a photo a day for a year, publishing the best photo from the day or your blog or Flickr photostream. The idea is that the discipline of taking a new photo every day pushes you to explore new subjects and encourages you to take your camera out with you to find things to take photos of. Your photography skills should improve immensely over the year.

    10o strangers project

    I love this concept (written about on Digital Photography School a few months ago by Matt John Robinson). The idea is to take photos of 100 strangers. Not candid photos taken without their knowledge, but by approaching your potential subject and asking if you can take their photo. Not only will you become a better portrait photographer by doing so, but you will meet some new and interesting people along the way.

    Photography project

    Night skies project

    I’ve been very impressed by the work of Wellington based photographer Mark Gee. He has built a reputation taking photos of the night sky, principally in the southern part of New Zealand’s North Island. This is a great example of a long-term project that anyone who lives outside a heavily built-up urban area can undertake. Not only will you learn a new skill (taking photos at night) but it will encourage you to go out and explore your area and appreciate its natural beauty during the night hours.

    Garden flowers project

    Mandy Disher is another photographer whose work I admire greatly. She takes photos of flowers and insects, the majority created within her own garden. This is a long term project that anybody with a garden can undertake, and it’s a great example of something you can do close to home.

    Photography project

    Your turn

    Have you ever undertaken a photography project, and do you have ideas for projects other than the ones I’ve mentioned here? Please let us know in the comments. I’m looking forward to reading about what ideas you come up with.


    Mastering Photography

    Composition and lineMy latest ebook, Mastering Photography: A Beginner’s Guide to Using Digital Cameras introduces you to digital photography and helps you make the most out of your digital cameras. It covers concepts such as lighting and composition as well as the camera settings you need to master to take photos like the ones in this article.

    The post Improve your Images with Photography Projects by Andrew S. Gibson appeared first on Digital Photography School.


    Digital Photography School

  • Writer’s Favorite Lens – 70-200mm Zoom

    What is the best lens for taking flattering portraits? ZOOM, ZOOM, ZOOM!

    Zoom Main

    Model credits left to right: Sherri Lee Bigs/Image courtesy Nine Network Australia, Nicole Di Silva/Foxtel, Jocelyn Idriss. All images copyright Gina Milicia

    “I’ve learned that people will forget what you said, people will forget what you did, but people will never forget how you made them feel.” – Maya Angelou

    My love affair with the zoom lens began in the late 80’s. I started my career as a portrait photographer using an entry level Nikon with an 80-200mm Sigma zoom lens. Back in the day “zoom lens” was code for paperweight or doorstop because they had the similar optics to a pair of cheap sunglasses and were about as sharp as a butter knife.

    Zoom lenses were for amateurs, pros used prime lenses.

    After I’d been shooting for a few years and could afford better gear, the zoom was shunned to the back of my kit. It only saw the light of day on the rare occasion I photographed a wedding or a corporate event. Then in 2004 I met and fell in love with the Canon 70-200mm zoom. I have to be honest here and tell you that it wasn’t love at first sight. I’d been burned before by zoom lenses that promised so much and yet delivered very little. But, it didn’t take much to convince me that this lens was different and completely revolutionized the way I worked.

    The Good

    Zoom Good 1 Zoom Good 2
    Zoom Good 3

    Model credit: Mimi Elashiry, John Scott Personal PR, Next Models Hair and Make-Up by Rachid

    This is a typical way I might use the 70-200mm zoom in a portrait shoot. The first image is set up as full length shot at a focal length of 70mm, then I zoom in to create a three-quarter shot at 150mm, and again to create a tight headshot at 200mm.

    Many of my clients suggest that I just shoot full length, and then they will crop to headshot or three-quarter in post-production.
    This sounds great in theory, but there are two problems with cropping in this situation. First, you end up with less than twenty percent of the original file, which is a drastic reduction in quality, and reduces a 60MB file to approximately 10MB. Second, the lens compression factor at 70mm is very different than at 200mm.

    Zoom Good 8

    Model credit: Tommi Pitsas

    Zoom Good 8A

    A tight headshot at 200mm creates the most beautiful blur (or bokeh) in the background (top image of Tom) that is not as prominent if the image were photographed at full length and cropped (bottom image of Tom above).

    I love working with a zoom lens when I’m taking portraits because it means I can set up my shot and create full length, three-quarter and tight head shots without having to move the camera. I can stay out of my model’s personal space, which can be intimidating or confronting, and keep the momentum of the shoot flowing.

    Zoom Good 6

    Zoom Good 7

    Zoom Good 9

    Model credits: Images Gina Milicia, Courtesy Nine-Network Australia

    Being able to work this quickly is perfect for editorial and celebrity photo shoots, which are always fast paced and high pressure.

    Zoom Good 4

    Model credit: Boone Freund and Jocelyn Idriss. Try capturing this beautiful moment with a wide angle lens. The only way you could get close enough is if you were on the bike too!

    The long zoom lens is also perfect for capturing intimate photos of couples or children, and even pets. I’m often shooting well back at 200mm, and this makes it much easier for my model to forget I am even taking their picture.

    Zoom Good 5

    Model credit: Jocelyn Idriss

    The whole “look” and feel of a portrait can be radically changed by focal length choice. A focal length less then 50mm will distort facial features. Some photographers love this look and have successfully incorporated it into their shooting style.

    I love to work with a focal length between 100mm and 200mm. Facial features are compressed slightly, which is flattering for portraits. I don’t like the way a wide focal length looks and it doesn’t suit my shooting style.

    The Bad

    The 70-200mm is a heavy lens to carry around all day long. The extra weight can make handheld shooting difficult. Its size and length also makes it stand out, making it incredibly difficult for you to shoot incognito, such as at an event or when taking street photos or travel pics. In these cases, I opt for my walk-around zoom, the 24-105mm Canon f/4, which is perfectly suited to these situations and is much lighter!

    The other downside of shooting with a long lens is I’m often backed into corners or having to shoot through windows or doorways just to be able to get the shot. I’m constantly shooting with my back to the wall. Literally!

    The Ugly

    The most annoying part about working with zoom lenses is the zoom action is continually sucking dust onto my camera sensor. Unwanted dust means I need to get my sensor professionally cleaned more often which is an added cost, and extra down time I wouldn’t have if I stuck to prime lenses.

    My Choice

    70 200L

    I work with the Canon 70-200mm IS F2.8 L series. It’s my workhorse, and I use it on 70-80% of my shoots. An average photo shoot for me will consist of approximately 2000-4000 frames, and I can’t think of another lens in my kit that would give me the consistency, ease, speed and high standard of the 70-200mmm.

    If you are considering buying a zoom there are now many excellent ones on the market. The price drops significantly if you choose a slower lens (f/4 instead of f/2.8) and one without image stabilization, that is almost unnecessary these days because cameras can shoot at a much higher ISO. If your budget is tight, you might also consider buying second hand. Yes, zoom lenses are pricey, but remember your lenses should last you a minimum of 10 years if you look after them. I’ve had mine for 10 years now, and it’s outlasted three cameras. This fact alone makes the 70-200mm my most cost effective investment.

    The other option you may like to consider is renting a long lens for a weekend. Prices are very reasonable.

    It took me ten years of experimentation with different focal lengths before I found my happy place. Do you like to shoot long? Which lens do you think is the most flattering lens for portraits? I’d love to hear your thoughts.

    The post Writer’s Favorite Lens – 70-200mm Zoom by Gina Milicia appeared first on Digital Photography School.


    Digital Photography School

  • How to Correct Purple Fringing in Photoshop

    A couple years after starting my business, I received a large print from my lab. Upon checking it, I noticed a problem with the print that was so blatant I couldn’t deliver it to my client. At first I thought the lab made the mistake, but nope. It was a problem created by my digital camera when I took the shot! It’s more than likely you’ve already noticed it in your images.

    The problem is called purple fringing. In this article I’ll go over what it is, how to prevent it, and how to get rid of it.

    What is Purple Fringing?

    Purple fringing is when you get purple color in high contrast boundary areas in an image that was most likely taken in low light situations with a brighter background. It is most often attributed to a chromatic aberration that occurs commonly with digital cameras, but purple fringing can also be caused by lens flare.

    How can you prevent getting it?

    • Avoid shooting with your lens wide open in high contrast situations.
    • Get a UV filter for all of your lenses.

    Unfortunately, these actions don’t always resolve fringing problems, but it can prevent it from happening some of the times.

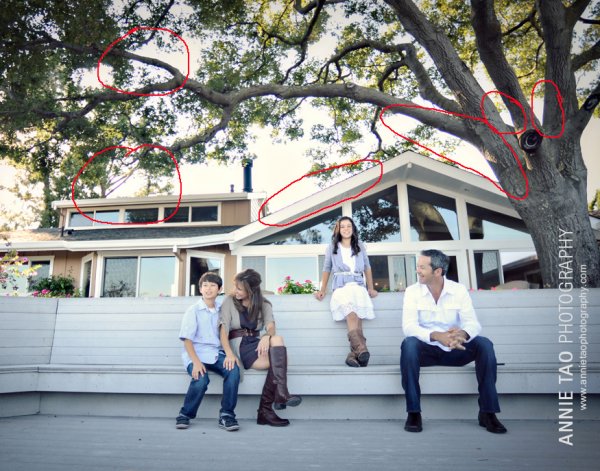
    Purple fringing

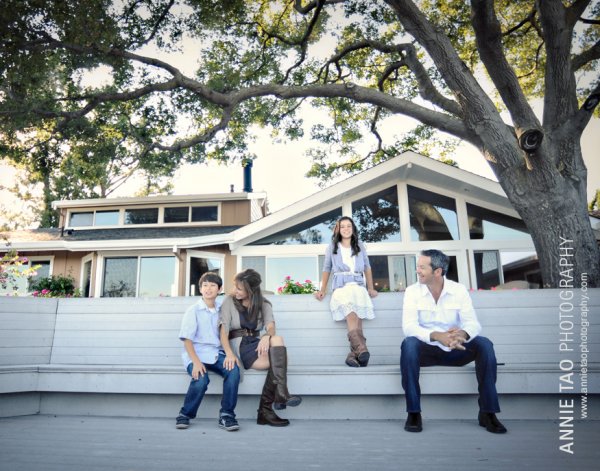
    Example image: You see it mostly in the branches and the edge of the roof.

    Purple-Fringe-in-images-PROBLEMS-MARKED2

    FYI:  I used my 14mm ultra wide lens for this shot. The lens looks like a fisheye lens with its bulging curvature, so it is not possible to put a lens filter on it.

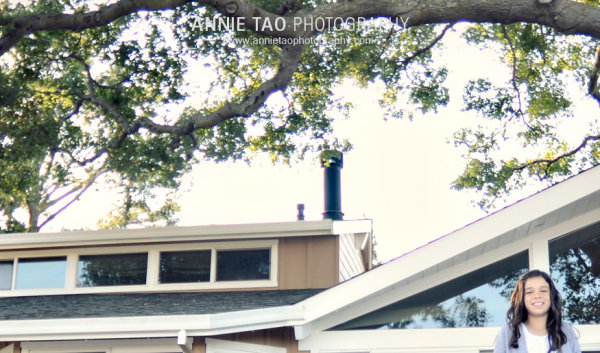
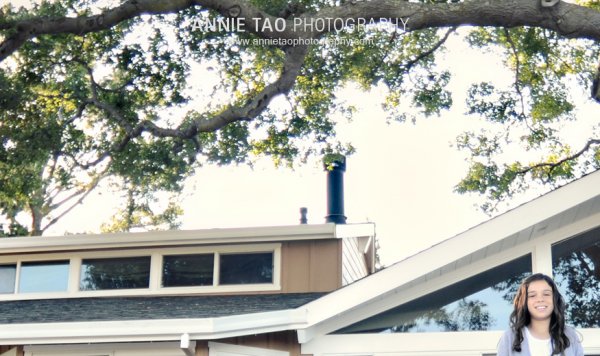
    Close-up view of purple fringing:

    Purple-Fringe-in-images-PROBLEM-closeup

    The image AFTER correcting it in post-processing:

    Purple-Fringe-in-images-FIXED

    Close-up view AFTER correcting it:

    Purple-Fringe-in-images-FIXED-closeup

    Steps to correct purple fringing in Photoshop:

    Step One:

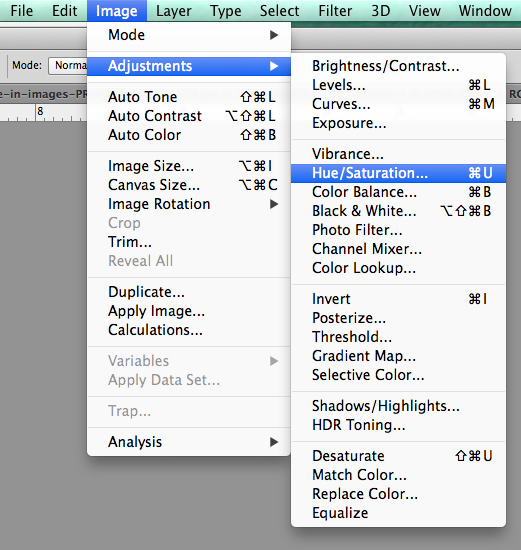
    In Photoshop, click on “Adjustments” under the “Image” tab.

    Step Two:

    Select “Hue/Saturation”. (Or you can do this as an adjustment layer as well in case you need to mask off some areas later).

    Photoshop-Saturation-menu

    Step Three:

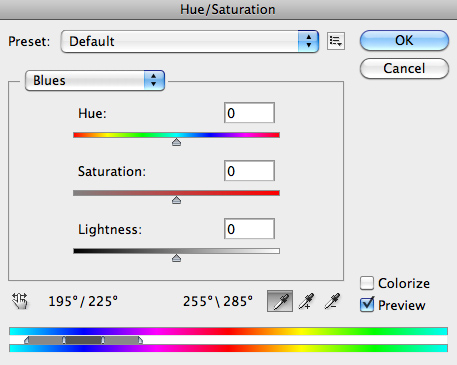
    Where you see “Master”, click on it and select “Blues” to get to the blue channel.

    Step Four:

    Once you’ve selected the specific color channel, you will have the eyedropper tool. Select the left-most eye dropper.

    BlueChannel

    Step Five:

    Then click on one of the areas in your image with purple fringing. I chose the tree branches on the right as they were one of the most prominent problem areas.

    Step Six:

    Next, go to the Saturation slide bar and move the slider to the left. Usually somewhere between -70 and -80 works best, but the exact number depends on the image and the amount of fringing.

    Step Seven:

    Lastly, check your image to see if you need to adjust anything else since reducing one color may effect the rest of your image. (If you’ve use an adjustment layer you can mask out the parts you don’t want effected)

    There you have it! You’ve zapped away the purple fringe!

    Read more on how to fix chromatic aberration here:

    • How to Fix Chromatic Aberration in Lightroom 5
    • How to Fix Chromatic Aberration in Photoshop

    The post How to Correct Purple Fringing in Photoshop by Annie Tao appeared first on Digital Photography School.


    Digital Photography School

  • Understanding Depth of Field for Beginners

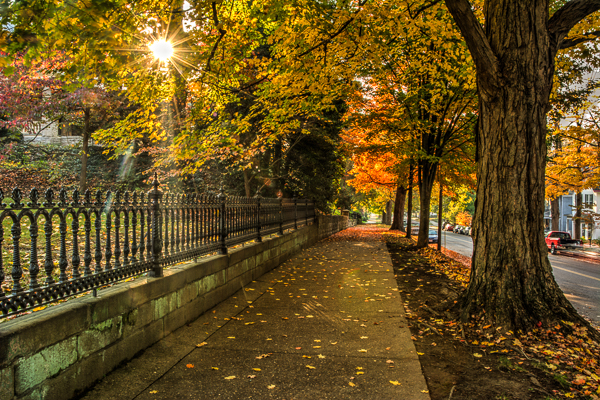
    DOF
    You may have heard the term depth of field (DoF), but if you are new to photography you may not yet be taking advantage of how DoF can enhance your photos. A basic definition of depth of field is: the zone of acceptable sharpness within a photo that will appear in focus. In every picture there is a certain area of your image in front of, and behind the subject that will appear in focus.

    This zone will vary from photo to photo. Some images may have very small zones of focus which is called shallow depth of field. Others may have a very large zone of focus which is called deepdepth of field. Three main factors that will affect how you control thedepth of field of your images are: aperture (f-stop), distance from the subject to the camera, and focal length of the lens on your camera. Here are some explanations and answers to other common questions concerningdepth of field.

    How does aperture control depth of field?

    Aperture refers to the access given to light from the lens to the camera sensors. The size of your aperture (the diameter of the hole through which light enters the camera) controls the amount of light entering your lens. Using the aperture (f-stop) of your lens is the simplest way to control your depth of field as you set up your shot.

    Large aperture = Small f-number = Shallow (small) depth of field
    Small aperture = Larger f-number = Deeper (larger) depth of field

    It may be easier to remember this simple concept: The lower your f-number, the smaller your depth of field. Likewise, the higher your f-number, the larger your depth of field. For example, using a setting of f/2.8 will produce a very shallow depth of field while f/11 will produce a deeper DoF.

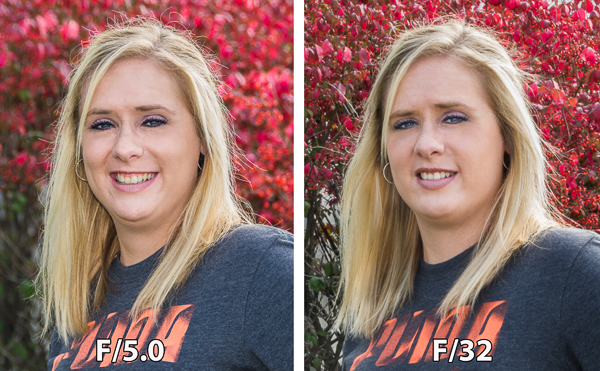
    The image on the left was captured at 250th of a second at F5.0 which resulted in a very shallow depth of field,

    The image on the left was captured at 250th of a second at f/5.0 which resulted in a very shallow depth of field.  Because of this the background is out of focus allowing the subject to stand out. The image on the right was captured at 1/5th of a second at f/32 which created a deep depth of field and a sharper background.

    How does distance control depth of field?

    The closer your subject is to the camera, the shallower your depth of field becomes. Therefore, moving further away from your subject will deepen your depth of field.

    How does the focal length of a lens control depth of field?

    Focal Length refers to the capability of a lens to magnify the image of a distant subject. This can get complicated, but the simple answer is that the longer you set your focal length the shallower the depth of field. Example: Your subject is 10 meters (33 feet) away, using a focal length of 50mm at f/4; your depth of field range would be from 7.5 -14.7 meters (24.6-48 feet) for a total DOF of 7.2 meters (23.6 feet). If you zoom into 100mm from the same spot, the depth of field changes to 9.2-10.9m (30.1-35.8′) for a total of 1.7m (5.7′) of depth of field. But if you move to 20m (66′) away from your subject using the 100mm lens, your depth of field is almost the same as it would be at 10 meters using a 50mm lens.

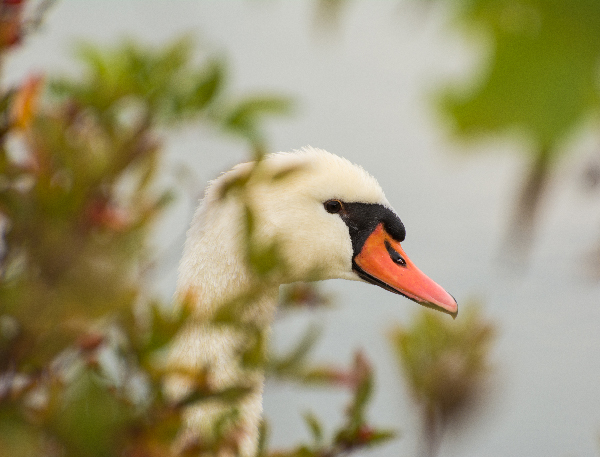
    Image of a swan hiding in the tall grass captured  from about 5 meters with 300 mm focal length created a DOF only about 5cm.

    This image of a swan hiding in the tall foliage was captured from about 5m (16′)  with a 300mm focal length lens. This combination of focal length and distance created a depth of field of approximately 5cm (2″).

    What if I just have a point and shoot camera, or don’t know how to change those settings?

    Even with a point and shoot camera, there are ways to control your depth of field. In the Scene Modes menu, look for a symbol of a human head, which is the setting for portraits. This will give you a narrow depth of field. In the same menu there is also a mountain symbol, which is a setting for landscapes, which will give you a deeper depth of field.

    If you are a beginner with a DSLR there are some simple ways you can control depth of field and still use and automatic shooting mode. By choosing Aperture Priority mode you can set your aperture to get the depth of field that you want, and the camera will automatically set the shutter speed.

    Can I set the depth of field exactly for each situation?

    Yes, but because changing your aperture affects your shutter speed, the result may not meet the needs of your image. For instance, if you are trying to increase your depth of field by reducing aperture size you will also need to increase (slow down) your shutter speed which could make your image blurry. Understanding how all these settings work together can increase your control over depth of field.

    Is depth of field equally distributed in front and back of my focus point?

    No, it’s usually about one third in front and two thirds behind your focal point, but as your focal length increases it becomes more equal.

    How will understanding depth of field improve my images?

    Managing depth of field is one of the most important tools at your disposal, because having tack sharp images is one of the most important factors to getting that great shot. Knowing how to make the parts of your image you want sharp and the parts you want to be out of focus, is a great artistic tool to create great images.

    Getting the right DOF for your shot can make the difference

    Getting the right depth of field for your shot can make all the difference.

    When should I use a shallow depth of field?

    Using a shallow depth of field is a good way to make your subject stand out from its background and is great for portrait photography. Shallow DoF can also be useful in wildlife photography, where you want the subject to stand out from its surroundings. This is also useful because many wildlife photo opportunities are low light situations, and increasing your aperture size will give you more light. Shallow depth of field is also effective for sports photography where many times you want to separate the athlete from the background to bring attention to them. The result of this should also help give you a fast enough shutter speed to freeze the action.

    This image captured at 300mm focal length and F/  produced a very shallow DOF. Because of this very shallow DOF it is important to set your focal point on the eye. Notice how the bird appears to pop out from the background.

    This image captured at 300mm focal length and f/5.6 produced a very shallow depth of field. Because of this, it is important to set your focal point on the subject’s eye. Notice how the bird pops out from the background.

    When should I use deeper depth of field?

    In landscape photography it is important to get as much of your scene in focus as possible. By using a wide angle lens and a small aperture you will be able maximize your depth of field to get your scene in focus.

    In this landscape captured at 50mm at F/16 Focus point was set at 8 meters which made everything from 4 meters to infinity in focus

    This landscape was captured with a 50mm focal length at f/16. The focus point was set at 8 meters, which made everything from 4 meters to infinity in focus.

    How can you determine depth of field?

    There are several on-line sites that will provide depth of field charts for your camera and lenses. Also, there are a number of apps available for smart phone users that can calculate it for you while you’re in the field. Most cameras have a DoF preview button which will give you a preview as you look through the eye piece. (This is probably the easiest and most under-utilized method.) Using this button may cause your image to appear darker as you view it through the eye piece, but not to worry. Your image will be properly exposed as long as you have the correct exposure settings.

    Can depth of field be adjusted to get everything in focus?

    Yes, using what is called the hyperfocal distance. When you are focused at the hyperfocal distance, your depth of field will extend from half the distance to your focal point to infinity. Use a DOF calculator to find your hyperfocal distance. If you don’t have a DoF calculator, a good rule of thumb is to focus a third of the way into the scene. Using an aperture of about f/11 or higher with a wide angle lens will maximize your depth of field.

    What about depth of field in macro photography?

    Because most macro images are produced in low light and with a longer focal length, the depth of field is often very shallow. Adjust your lens to the smallest aperture that the light will allow. It may also be necessary to increase your ISO to allow you to properly expose the image and to maximize your depth of field. Still, in many macro images your DoF may be very minute. With this very narrow focus it becomes necessary to use a tripod, because even the slightest movement of the camera will move your macro subject outside your depth of field.

    120 mm Marco at F8 still is a very shallow DOF with the lens only 15 cm from the focal point on the front flower.

    This 120 mm macro even at f/8 still has a very shallow depth of field.

    What is bokeh?

    Bokeh (boh-ke) comes from the Japanese word meaning blur. This effect is produced by the out-of-focus areas in your image that are beyond the depth of field. Bokeh commonly refers to the pleasing circle shapes caused by the shape of the lens aperture. Usually created when shooting with your aperture wide open, such as f/2.8, bokeh can also be created with smaller apertures if the background is distant enough.

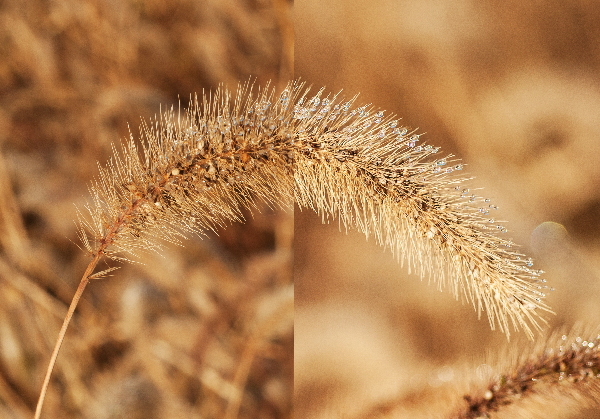
    Bokeh in this image caused by the distance from the subject to the background which fell well beyond the DOF

    Bokeh in this image was created by the distance of the subject to the background, which fell well beyond the depth of field.

    To summarize controlling depth of field:

    Increase depth of field

    • Narrow your aperture (larger f-number)
    • Move farther from the subject
    • Shorten focal length

    Decrease depth of field

    • Widen your aperture (smaller f-number)
    • Move closer to the subject
    • Lengthen your focal length

    Take control of your depth of field. Understanding how these adjustments control your it will greatly improve your photography. What questions do you have about depth of field? Please share your photos and comments.

    The post Understanding Depth of Field for Beginners by Bruce Wunderlich appeared first on Digital Photography School.


    Digital Photography School

  • LAB Color Correction Video Tutorial: Creative Grading Techniques for Images

    In this second video on LAB we explore a way to add creative color grading onto a desaturated dusk image. Once again exploring LAB colour mode and curves we get playful to create saturation and color contrast to add life to a dull scene. Don’t miss our first video on the LAB colors tutorial. Before After

    The post LAB Color Correction Video Tutorial: Creative Grading Techniques for Images appeared first on Photodoto.


    Photodoto

  • 5 Tips for Stress-free and Successful Child Portraits

    DSC 7364dps

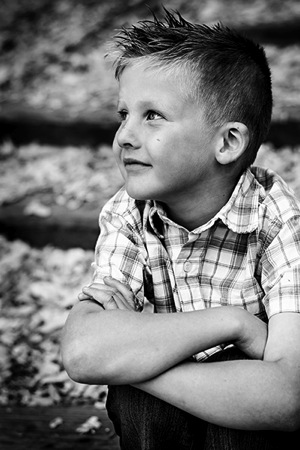
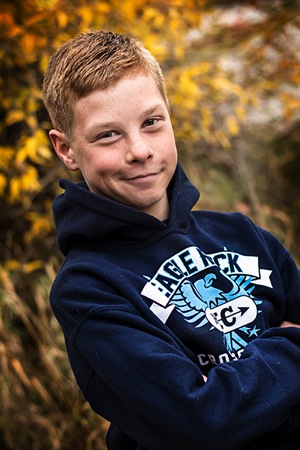
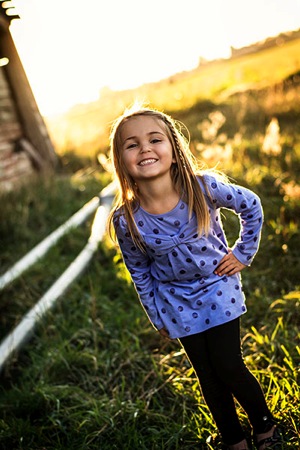
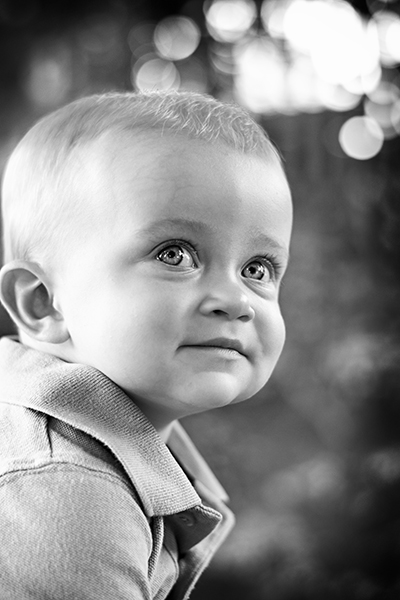
    Children are the best examples of spontaneity, creativity, and wonder and that is precisely why we all love them so much. Then family picture day comes and you wish they’d just sit down and be still for five seconds. Photographing children comes with its own brand of challenges, but if you arrive to a session with a few tricks in your bag, you’ll come away from that shoot with pictures that perfectly capture that what being a kid is all about. Here are five tips to help you have more stress-free and successful child portraits

    1 – Kids Don’t Like Dictators

    Children are used to being told what do to. All day long, it’s all they hear. “Sit down,” “Be quiet,” “Don’t hit your sister,” and “Spit that out!” Wven though they don’t like being told what to do, they’ll expect the same treatment from you. You’ll find, however, that you’re more likely to get great photos out of them if you shatter those expectations and treat them as equals.

    Children like being helpers and they like being grown-up. So give them what they want. Instead of saying, “Sit down there and look at the camera,” you might try something like, “Hey buddy, would you help me out by sitting right here so I can see if the light is right?” In that phrase, you made them the big helper. You may already know that the light is right, but the child doesn’t know that. All he knows is that you needed his help and you see him as an equal. Another technique is asking the child where they’d like their picture taken. This gives them adult-like control. Give them options though or you run the risk of them picking a bad spot. Point out a few spots that you’re okay with and let them choose from those. Even go as far as to ask their advice when it comes to posing. Give them a little control and they’ll be happy to give some back when you need it. I once had a three year-old tell me that he wanted to do his epic mad face for a pose. I told him, “That’s a great idea! Let’s do it!” After I took a picture of that epic mad face and I then said we should try out a few other faces just to make sure we get them all. He was more than happy to let me pick the next face.

    DSC 7130dps DSC 6481dps

    2 – They Don’t Need to Look at the Camera

    Even with the best psychologist-tested techniques, children are still children. Most children have a hard time looking at a camera. The reason? Because the camera is a big black thing and it doesn’t even come close to resembling a human being. Children like to look at people’s faces, especially their eyes. Older children have an easier time, but younger ones really don’t like looking at the black hole in the middle of our cameras.

    That’s okay! Some of your best shots could be the ones where the child isn’t looking at the camera. Being a kid means being on the go, constantly exploring, and living for the very next moment. Allow the child to move around the location and explore. Your job is to follow and click away. Once in a while, they may look directly into your lens and make a connection and that’s awesome. More than not, you’ll get shots of them whizzing past or looking down at a flower or hugging mom’s leg. All great shots that show what being a child is all about.

    DSC 1742bwdps

    3 – Use Their Inner Actor

    Getting genuine smiles out of a child is difficult at times. It seems that as children get older their smiles get more forced. So how do you instruct a child to smile naturally? Even adults have a hard time with that. One effective technique is to work with the little actor that lives at the heart of so many kids. Try asking your kid clients to give you a fake laugh. Go as far as to model how the laugh should go. The awesome thing is that when you ask someone, child or adult, to fake laugh, it’ll make them feel silly and then they’ll really laugh. There is a smile that happens toward the end of a laugh and that is where their natural smile lives. This technique can work even on shy children.

    You could also have them imagine something and see what expression you get. You could ask them to give you the smile they get when they’ve just gotten away with something or the smile they get when they get a present. For older children, it seems like asking them about a boy or a girl they like at school, in a playful manner, always elicits a very nice smile. Children like acting and pretending, so use it to your advantage.

    DSC 9653dps

    4 – Monkey See, Monkey Do

    Most children, especially young ones, don’t really excel at following directions. If you’re trying to pose them and you’re giving them the same directions you’d give adults, you’ll end up with a very confused child who pulls off a really weird pose. If you’re photographing children and they’re okay to sit and pose for you, model every pose you want from them. Children can mimic like pros, so use that gift. If you want them to sit cross-legged with their elbows on their knees, get down and do it yourself. This goes for facial expressions too. Say you want them to smile, but not a big toothy smile. Show them the smile you want. They’ll give you their own version of it, but you’ll get what you’re going for. You may be exhausted at the end of the shoot after moving around so much, but in many ways, it’s easier than trying to verbally instruct a child into a pose.

    DSC 9414dps

    5 – Give Them a Break

    DSC 9432dps

    We all have our limits. Children are no different. If you find that your kid client is getting tired or upset, it’s time for a break. Take them by the hand and explore your location together. If the parents are okay with it, break out some snacks and have a sit. Talk to them and let them relax. Many photographers are worried about the use of time during a shoot and may be reluctant to do something like smell the flowers with a three year-old when they should be getting those precious shots mom and dad want. That’s understandable. But great photographers understand that you’re more likely to get the shot you’re after if you work with the client, not against them. In fact, you might find the perfect shot during the little break. Perhaps the child is picking flowers or collecting rocks and because they’re so happy, they look at you and click! You’ve got the shot. If you’re doing a family shoot, a break could mean that you go off to photograph another member of the family while the little one gets to sit back and relax a bit.

    Children live in their own worlds with their own rules. If you prepare and have the right mindset, they’ll let you in and you’ll both have an awesome time.

    The post 5 Tips for Stress-free and Successful Child Portraits by Anna Durfee appeared first on Digital Photography School.


    Digital Photography School