Category: Photography

  • 8 Things You Should Know if You are Dating a Street Photographer

    Let’s face it, photographers are a breed of their own. Street photographers may belong to an even more extreme category… so here are eight things you should know if you are dating a street photographer:

    #1 You cannot walk where you want on your own

    No matter which side of the street your favorite shops or restaurants are, you will be required to walk on the side that offers the best dappled light, long shadows, reflections, backdrops, etc. You may also occasionally be used as a decoy to approach a situation inconspicuously.
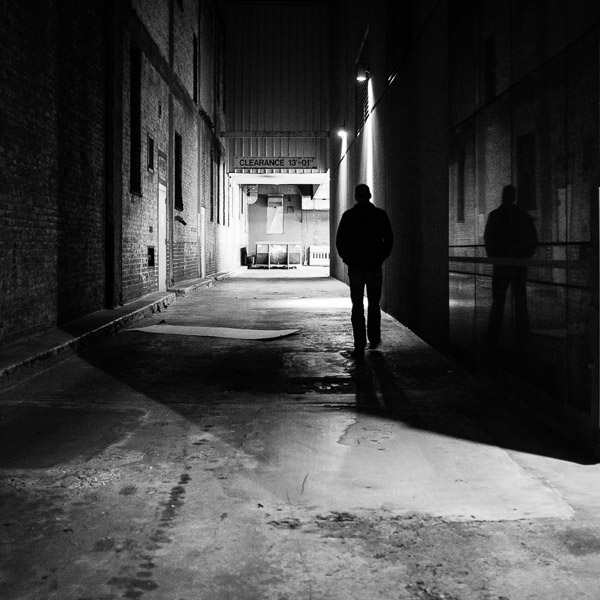
    Date night often means going downtown and it's also my opportunity to explore areas I would go on my own. We have fun, even if I'm the only one with a camera! ©Valérie Jardin

    Date night often means going downtown and it’s also my opportunity to explore areas where I would not go on my own. We have fun, even if I’m the only one with a camera!   ©Valérie Jardin

    #2 You may visit a lot of back alleys

    If you and your partner are on a shopping spree, you may often be required to exit a building through the back door. Back alleys hold secrets, interesting subjects and magical light that are too good to pass.

    #3 Good luck having a romantic night just the two of you (without a camera)

    Unless your street photographer date is blindfolded, you will rarely have a romantic night out in the city without a camera. Yes, we live and breathe street photography. The camera is an extension of ourselves. The temptation is too great and you might as well let us grab a shot or two to prevent mood-breaking frustration.

    #4 Do not expect to have your date’s full attention

    You will have a hard time spending an evening in public gazing into each other’s eyes. A street photographer is conditioned to be on constant alert to notice every gesture, expression and lighting in the immediate radius, with or without a camera. Hey, you knew all along you were dating a photographer…

    #5 You can expect to meet lots of new people

    Expect to stop often and talk with strangers of all walks of life, at any moment and on any given day. This can happen unexpectedly in the subway, at the bus stop, in the cab, at the coffee shop or while you are waiting to cross the street. Just know that the street photographer who shares your life has a keen eye at spotting interesting people from a mile away!

    #6 You may temporarily lose your date at a moment’s notice
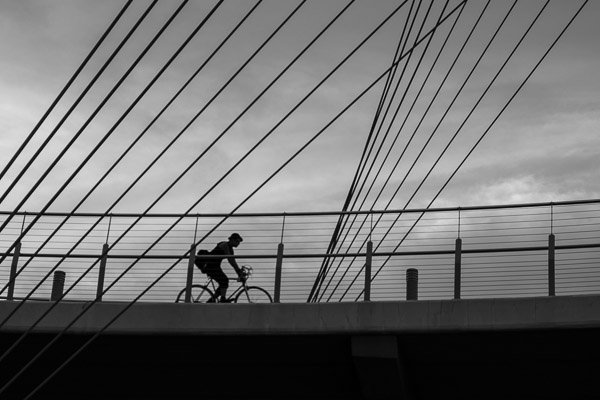
    I must admit, I had an ulterior motive when I suggested that we go for an evening walk over a bridge, down next to a highway so I could get this shot... ©Valérie Jardin

    I must admit, I had an ulterior motive when I suggested that we go for an evening walk over a bridge, down next to a highway so I could get this shot…   ©Valérie Jardin

    Do not worry if your street photographer takes off in a hurry in the middle of a conversation. The right subject may be entering the perfect backdrop for the shot of a lifetime. Or maybe an interesting person just passed you on the sidewalk and your street shooter now needs to run the other direction, well ahead of the subject, to find the best way to frame the shot.

    #7 You’ll need to have patience

    Bring a book! Setting a stage and waiting for the story to develop may very well be your partner’s favorite pastime. This can take a few minutes, or a few hours…

    #8 Your vacation destinations will be predetermined for you

    If your significant other is a street photographer, do not be surprised if your next vacation destination has an ulterior motive. We much prefer to walk the streets of a large city than to lie on the beach of an exotic island.
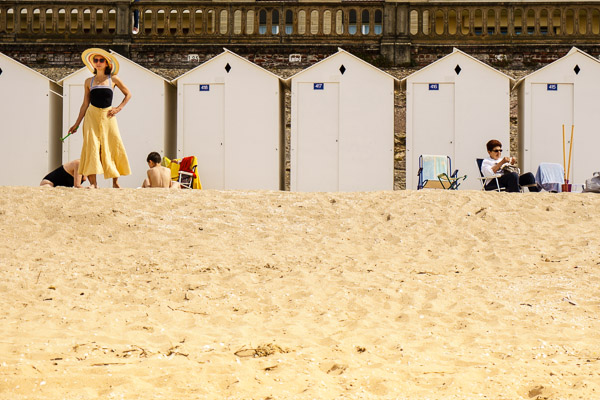
    Vacation on the beach? Sure, as long as it's not too isolated and there are people to photograph! ©Valérie Jardin

    Vacation on the beach? Sure, as long as it’s not too isolated and there are people to photograph!   ©Valérie Jardin

    Conclusion:

    Street photographers are not the easiest people to live with. Honestly I’m not sure I’d want to live with me if I wasn’t a photographer. We require a lot of patience. If you love one, don’t think for a second that you will be able to keep him/her away from that camera for more than a few hours. Be generous, give the street photographer in your life some time to pursue their passion on their own or with like-minded people. After all, wouldn’t you rather do your own things too? Look at it this way: We are the way we are because we have a true passion for people, it’s not such a bad thing.
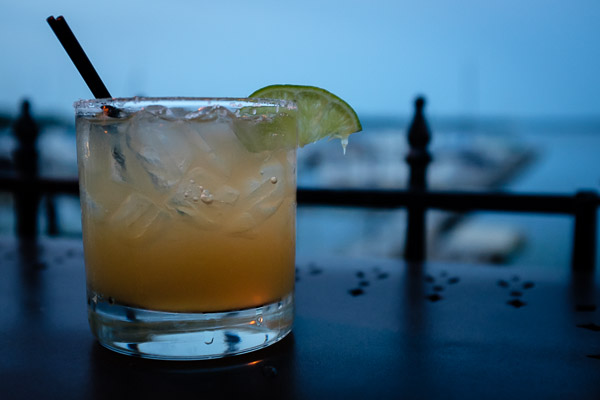
    Blue hour by the lake? At the very least I'll get a shot of my drink, or his... Sometimes both.  ©Valérie Jardin

    Blue hour by the lake? At the very least I’ll get a shot of my drink, or his… Sometimes both.
    ©Valérie Jardin

    If you read this article, you’re probably a photographer. Please share with the non-photographer in your life. And if you plead guilty to any of the above, please share your experience.

    The post 8 Things You Should Know if You are Dating a Street Photographer by Valerie Jardin appeared first on Digital Photography School.

    Digital Photography School

  • 5 Psychology Studies to Make Your Photography Business More Effective

    The vast majority of marketers are not psychologists, but they do know how to apply psychology studies to attract and engage customers. This is not some kind of special knowledge or secrets of the Mayans – it’s quite obvious things you might have never been thinking about. I’ve been putting together five psychology studies and wanting to make us better marketers Continue Reading

    The post 5 Psychology Studies to Make Your Photography Business More Effective appeared first on Photodoto.


    Photodoto

  • Tip for Using a Reflector for Portraits

    When it comes to portrait photography, one of the simplest and easiest things you can do to improve your images coming straight out of the camera, is using a reflector. There are many different sizes and shapes of reflectors, and the type of photography that you do most often will often dictate which size and shape you should purchase. For example, if you like to practice street or travel photography, it may be most beneficial to consider a round reflector that’s about 20″ wide so that you can hold it with one hand, and shoot with the other, without being intrusive in a small location like someone’s home. On the other hand, if you think you’d like to use a reflector for wedding photography, it is best to go for something rectangular and much larger (such as a 48×72″) so that the light you’re reflecting can reach everyone in the bridal party during portraits.

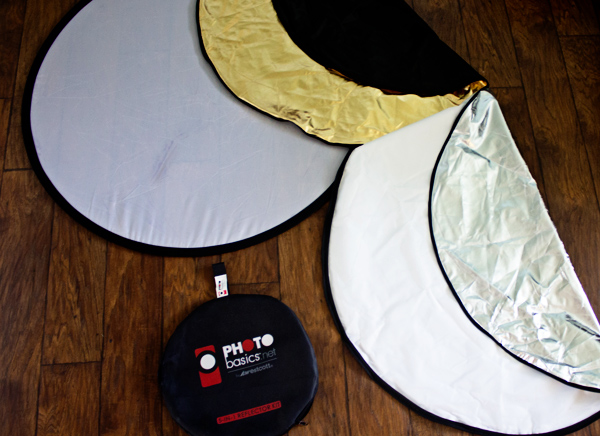
    Reflector Kit

    What kind of reflector should you buy?

    I suggest a 5-in-1 round reflector that’s between 40-43″ across because I have found this size reflector to work exceptionally well for individual or small group portraits. Do keep in mind that with this size reflector, you will probably need either an assistant or a stand to hold the reflector during portraits.

    5-in-1 reflectors typically come with a pop-up diffuser, and then a reversible zippered pouch to fit over the diffuser that includes white, silver, gold, and black sides. When you’re first beginning to use the reflector, the most difficult part can often be deciding which color reflector is best to use. As is often the case in photography, although there are some rules about when exactly to use each color reflector (my first photography professor in college used to tell us that a gold reflector was for indoor, studio portraits ONLY), the reality is that which color you should choose will vary based on your own style of photography and personal preference, and may or may not always follow the rules. I have found it most helpful to practice frequently with my reflector in a variety of settings so that I’ll have a better idea of a starting point when it comes to a real session.

    All that said, I’m a visual learner, and need to actually see something in order to understand it best. So yesterday afternoon, I borrowed my sister Courtney and went to the backyard to take some photos so that you can see what each color reflector looks like in a portrait setting. Each photo was shot in manual mode with exactly the same settings, and every image in this post is straight out of the camera so you can really see the difference a reflector makes without any post-processing. These photos were taken at about 2 p.m. I live in Oregon and we perpetually deal with smoke from forest fires in the summer, so that was the case here as well, but this is also a good example of the difference that a reflector can make on a slightly overcast day.

    Reflectors do just what they say—they reflect the light. So, because the direction of light will change depending on the time of day and the objects around you, you will want to experiment with placing the reflector in front of your model, as well as at head-height (often angled up slightly) on either side of your model. In this example, I had my model hold the reflector at chest-level in order to bounce catch-lights into her eyes and eliminate green color casting from the grass below. However, angling the reflector to bounce light from below can draw attention to the neck and chin and may not always be the most flattering way to light every subject. So, experiment with holding the reflector at different heights and angles in order to see what is most flattering on your particular model with your particular source of light.

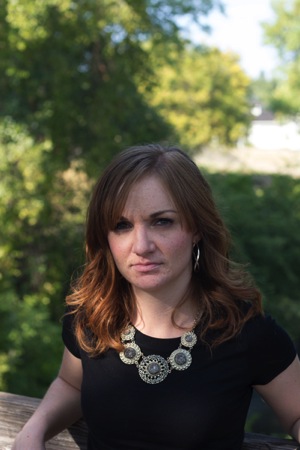
    First up, here’s Courtney with no reflector (below left). It’s not a bad photo, but it also isn’t a very dynamic photo either. I can absolutely add some “boost” in post-processing, but let’s make it better in camera, if we can.

    Reflector 1 Reflector 2

    White reflector

    I started by having Courtney hold the white side of the reflector under her face, about chest-high (above right). As you can see, this really bounced a lot of neutral light up into her face. If you like this look but find that it’s a bit too much light (as I think it is here), you can have your model continue to lower the reflector away from their face until you achieve a more natural light.

    Gold reflector

    Then we flipped the reflector to the gold side, and had Courtney hold the reflector at waist-height under her face (below left). You can see that this option brought a significant amount of warm light into her face, compared to the image with no reflector. The gold side of the reflector can be tricky, as it can easily make people look a bit radioactive if the reflector is placed too close to the model. I find that I use the gold side of the reflector almost exclusively in backlit sunset portraits, but if you tend to prefer a warmer look to portraits, you may want to reach for this one more frequently.

    Skin tone is also particularly important when it comes to the gold side of the reflector, and you will generally find the most success when using the gold side of the reflector on olive skin tones or people who are very tanned. Conversely, the silver or white reflector may be most flattering on people who have blue undertones in their skin.

    Reflector 3 Reflector 4

    Silver reflector

    Next, I unzipped the reflector, flipped it inside out, and turned it to the silver side. I had Courtney hold the reflector under her face at waist-height (image above right). I tend to prefer the coloring here best, but I also need to say that the silver side of the reflector is by FAR the most difficult to work with, as the sheer brightness can essentially be very difficult for a model to look at, resulting in portraits that look like this:

    Reflector 5

    So, even though I personally tend to like the coloring of the silver side best, I most often elect to begin with the white reflector, simply because the silver side tends to be very difficult for my clients unless they have had lots of modelling experience.

    Reflector 6

    Black reflector

    The black side isn’t a reflector at all; rather than reflecting light, it eats it up. I don’t use the black side of the reflector very often, but it can be useful for increasing shadows in very dramatic images. Can you tell where I was holding the black reflector in the image above? For more on how to use a black reflector to block light readt this dPS article: How to use a Gobo to add Depth to Your Portraits with Subtractive Lighting.

    Diffusion part of the reflector

    The part of the reflector that I end up using more than any other is actually the diffuser. The diffuser comes in handy when you’re in situations that may have mottled light, or direct sun overhead.

    Do you see here how the tree is creating mottled light on Courtney’s face (below left)? In other words, some parts of her face are very light while other parts tend to be shadowed. The easiest thing to do to avoid mottled light is to put the light behind your subject. But, since that’s not always possible, a diffuser is a great thing to have in your bag of tricks as well.

    Reflector 7 Reflector 8

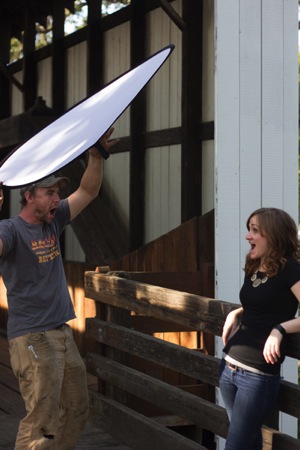
    The image above right is a pull-back of my husband holding the diffuser over Courtney’s head (and both of them just generally being silly). Notice the shadows on the diffuser – without it, they would be on her face. Instead, the diffuser blocks those shadows, creating more even light and a much more pleasant portrait overall.

    Reflector 9

    I hope that seeing examples of different colored reflectors used in the same setting has been helpful. I’d love to know, do you own a reflector? How (and which color) do you find yourself using it most often in your favorite style of photography?

    The post Tip for Using a Reflector for Portraits by Meredith Clark appeared first on Digital Photography School.


    Digital Photography School

  • 6 Great Reasons to Get over Post-Processing Anxiety

    I’m baffled when my workshop students tell me that they find image post-processing to be a chore, a dreaded task that prevents them from even looking at their beautiful photographs more than once. If you’re one of those types, I’m here to tell you that you’re missing out on a delicious second hit of creative joy.

    1 – Don’t Miss Out – Post-Processing is Half the Fun

    Night Photography with high ISO - Gavin Hardcastle

    Unprocessed version below. Total processing time = five minutes. Steps taken:

    1. Boosted blacks and shadows
    2. Reduced whites
    3. Increased exposure by +1
    4. Increased clarity
    5. Increase contrast
    6. Subtle noise reduction
    7. Subtle sharpening

    Victoria Night Photography - Gavin Hardcastle

    I think one of the reasons that I love photography so much is that I get that double whammy of artistic creativity. The first is when I’m out taking the shot, often standing in awe at the scenery unfolding before me. The second hit is when I get back home and start processing my images.

    When I’ve shot an image that I know is really strong, I can’t wait to get that RAW file opened up so that I can relive the moment and get creative with my processing to realize the visual feast that I witnessed when I was on location.

    2 – RAW Files are Your Best Teacher

    RAW file processing of Landslide Lake - Gavin Hardcastle

    Unprocessed version below. Total processing time = three minutes. Steps taken:

    1. Boosted blacks and shadows
    2. Reduced whites
    3. Added high contrast grad filter just above water level to emphasize mountain structure
    4. Increased clarity
    5. Increased contrast
    6. Subtle sharpening added
    7. Increased vibrance
    8. Increased red highlights in the foreground

    Unprocessed RAW image of Landslide Lake - Gavin Hardcastle

    The first thing that you’ll learn when processing your images is what you did wrong. Maybe you selected the wrong aperture, perhaps your ISO was too high and your image is full of noise, or maybe you just focused in the wrong spot.

    By processing and essentially studying your own photographs, you’ll quickly learn which techniques you need to improve and what you could have done to make your images better. If you got everything right when taking the shot, you’ll have loads of fun tweaking the most quality out of your RAW file, and producing an image that you’re proud to share with the world.

    If you simply don’t care about sharing your images that’s fine, but if you’ve captured a beautiful moment in time, chances are that most people will gain pleasure from seeing your work. Don’t be so shy, process that image and show the world what you made.

    3 – Didn’t Get it Right in Camera? No Problem

    It’s totally possible to capture a truly beautiful image in camera, that requires minimal or zero processing, and that’s something you should strive for. However, most of the time there are technical challenges that our cameras simply can’t handle. That’s where image processing comes to the rescue. This could be as simple as red-eye reduction, right through to noise reduction and fixing blown out highlights.

    When you’ve become adept at image processing, you’ll be far more daring in your photography by taking photos that you otherwise thought might have been too noisy, too blown out, or unusable for whatever reason. Having even a basic understanding of image processing will open your creative horizons and give you more confidence.

    4 – The Camera Sees What You Did Not

    aroura-borealis-photography-gavin-hardcastle

    Unprocessed version below. Total processing time = five minutes. Steps taken:

    1. Changed the white balance
    2. Reduced whites
    3. Reduced red highlights in the foreground
    4. Increased clarity
    5. Increased contrast
    6. Applied heavy noise reduction
    7. Added subtle sharpening
    8. Increased vibrance

    aroura-borealis-unprocessed-photography-gavin-hardcastle

    There are times when your camera can see things that you might have missed or were not capable of seeing. When shooting aurora like the image above, most cameras are able to record colours that are barely visible to the naked eye. Some of this processing happens in the camera, but until you look at the RAW file and see what can be done to clean up your image, you won’t realize the full potential of the moment that you captured.

    In the image above, I chose the wrong white balance while shooting, and wasn’t really happy with the colours until I switched the white balance to Tungsten in Adobe Camera Raw. I could have done this in camera, while shooting, but everything looks awesome on the little LCD screen on the back of the camera so I thought it was fine until I got back home.

    High ISO images of the Milky Way or an aurora might be totally unusable until we’ve cleaned up the noise, fixed any white balance issues and corrected the contrast – among other things.

    5 – It’s Easier Than You Think

    Sve Your Adobe Camera RAW Defaults

    This is how I do it in Adobe Camera RAW. Once you’ve tweaked your most commonly used settings such as lens profiles, chromatic aberration, shadows, highlights, etc., click on the top right tab and then choose ‘Save New Camera RAW defaults’. This well be called up automatically when you next open a RAW file.

    A lot of the grunt work can be taken out of editing your images by the simple act of saving your default processing settings to match your camera and lens. Whether you process your images in Adobe Camera RAW or in Lightroom’s Develop Module (which is almost the same thing), you can save your most commonly used processing settings as a default file that will automatically be applied to any RAW file that you open.

    This is a real time saver and can be used as a great starting point. There’s no one setting to suite all images, but if you often shoot the same types of images, it’s good to have a default setting that is already pre-configured for your equipment and processing style.

    You can even save multiple presets so that if you change your shooting style for different projects, you’ve already got your previous go-to processing settings to get you off to a quick start. From that point, simply tweak your settings until you’re happy.

    6 – Black and White Saves the Day

    buttle-lake-the-hand-monochrome-conversion

    Unprocessed version below. Total processing time = five minutes. Steps taken:

    1. Boosted blacks and shadows
    2. Reduced whites
    3. Converted to black and white
    4. Increased clarity
    5. Increased contrast
    6. Added a vignette
    7. Used the dodge brush to accentuate tree root highlights

    buttle-lake-the-hand-unprocessed

    I often shoot images that I know will work in black and white much more effectively.

    Let’s say I really like the composition that I’ve got and the weather conditions are just perfect, except for the fact that there isn’t much colour in my scene. In those situations I’m already looking forward to converting my image to black and white which can sometimes result in a much more punchy, and dramatic image than the original colour version.

    You can easily do the conversion in either Photoshop or Lightroom. Then have fun playing with contrast, shadows and highlights and maybe even a little dodge and burn to accentuate key areas.

    Start Processing Your Images Right Now

    I hope these six reasons have convinced you that it’s worth setting aside just a little bit of time to process your images. You might discover that you’re a much better photographer than you realized. At the very least, you’ll be able to figure out where you went wrong, and what you need to do to improve your photography.

    Maybe you’ll even learn to love image processing as much as you loved taking the shot.

    The post 6 Great Reasons to Get over Post-Processing Anxiety by Gavin Hardcastle appeared first on Digital Photography School.


    Digital Photography School

  • Choosing a Tripod

    For lighting photographers, the first thing to consider about a tripod is this: a tripod is your most powerful light.

    That’s because time (AKA shutter speed) is what we use to bring up the exposure in a large environment, which we then tweak/improve with judicious use of added flash. It is very difficult to light a large space, so just let the ambient do the heavy lifting and finish it off with your lighting genius.

    And even when you are not lighting, you’ll frequently need a tripod for a variety of reasons. And when you do, you want it to hold your camera still.

    To that end, every photographer needs good sticks.

    There are a couple of schools of thought about how to choose a good tripod. But no matter which way you go, the most important thing is this: don’t waste your time and money on a piece-of-crap version. You’ll just have to re-buy it later.

    Ask any photographer who has been around long enough to make mistakes, and you’ll probably hear tales of woe over misspent dollars in an attempt to save money on tripods. Alas, good tripods aren’t cheap and cheap tripods aren’t good.

    I just had a direct experience with this problem on a recent series of assignments for Lynda.com, wherein we were traveling around the world shooting and filming in various cities. My (young) shooting partner saved some money by buying an inexpensive, “feature-ladened” tripod.

    Actually, scratch that obfuscation. Let’s name names. He bought a “Vanguard” Tripod, and it turned out to be a piece of crap. (Don’t judge. It’s a common mistake.) The Vanguard was wobbly up top, and very quickly, one of the legs would not grab and click into the open position.

    (You had ONE JOB, Vanguard tripod…)

    After much swearing on Andrew’s part (and general uselessness on that of the tripod) he looked into repairing the probably-not-worth-fixing piece of gear. Though clearly defective—and still in warranty—Vanguard wanted Andrew to pay shipping both ways for the repair. Essentially, he’d be buying the cheap tripod again.

    Ugh.

    Look, don’t do this. Just don’t. Instead, do your research, ask around, buy a good tripod and be done with it.

    To Start…

    Independent of the factors listed below, here’s my first advice: go for a name brand with a good reputation.

    Manfrotto, Gitzo and Induro are good examples. None of them are cheap, but they are also likely to not let you down. They are supported by a great reputation and solid service, the same way your camera is supported by a good tripod.

    Don’t save money by buying a tripod that is spec’d to do less than you need it to do. That’s another mistake. And you may find there is not a one-size-fits-all tripod for you. The optimal tripod for your big bird-watching rig might be overkill for your travel photography needs.

    Similarly, a tripod designed for travel photography—even if a quality brand—might be way under-sized for your big lens work.

    So like most shooters you’ll probably end up with two tripods. One as a heavy-duty platform and one that is much more portable.

    General Purpose Tripods

    Your first tripod will probably be one that can do everything well, but maybe sacrifices extreme portability. And that’s a good strategy.

    Again, go with a good brand and buy enough support for your needs. If money is tight, rather than skimping on the brand I would suggest buying good quality, but buying used.

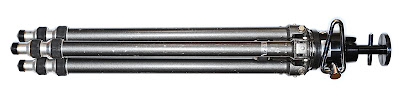
    The 20-yr-old old metal (more on that variable below) Gitzo Reporter Performance pictured above is total, rock-solid support. It was bought used (eBay) reasonably and will last me the rest of my life and well into someone else’s.

    Used quality is a better choice than new crap. But if you have the money to spend, by all means take some time and test drive some new tripods in person. You’ll quickly get a feel for the solidity and quality of the various options.

    But go with a brand that has a good reputation. Or skimp, curse a little and get it right on round two.

    Specialty Tripods

    By specialty, we generally mean portability: small, light, reverse-folding, etc. This is the tripod you take with you when you travel, or when shooting smaller mirrorless cameras. Or both, obviously.

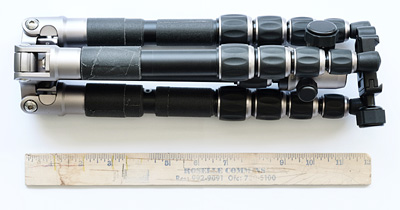
    For extreme portability in addition to solid support at the mirrorless level, I like the MeFOTO Backpacker, ($ 139 – Amazon) seen above. It is not full-sized, as it only goes to about chest-height.

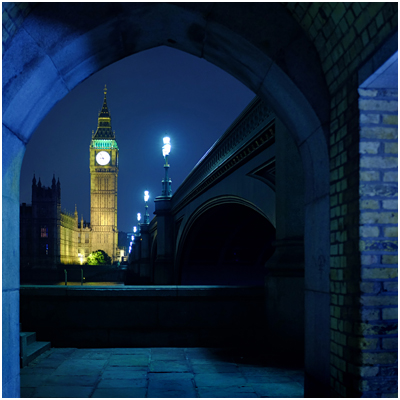
    But—BUT—it reverse folds to a very compact 12.6″, which makes it a total win for travel or backpacking (duh, the name) with mirrorless cameras. It is super-compact, and well-built. I used it with a Fuji X100s to make the photo of London’s Big Ben, above.

    If you shoot full-sized DSLR, I would suggest stepping up to a MeFOTO GlobeTrotter. It is bigger, more stable, goes up to 64″ in height and has a retractable center column while still keeping the reverse-fold design. Even still, it folds to just 16.1″ long. ($ 209 – Amazon). As a bonus it converts to a monopod, which is nice.

    You can spend an extra $ 160 on the GlobeTrotter and go carbon fiber, which saves you a pound. But for that price you can literally buy both and have $ 20 left over. Or $ 160 would get you a great, second general-purpose tripod used.

    Speaking of…

    Carbon Fiber or Metal?

    Tough choice. Carbon fiber is more expensive—sometimes shockingly so. For instance, an Induro (carbon) CT-214 cost $ 400—for just the legs (no head). But you can get the same legs (an AT-214) in aluminum for $ 149.

    Those are both great supports. And identical, except for the material used in the legs. But is the weight difference, at 3.3 vs. 4.4 lbs, worth that much to you? Or, perhaps will the size of the tripod itself be the limiting factor in your suitcase or backpack that outs it from travel for you?

    If the carbon version really fits your total needs and you can afford the price tag, maybe that’s cool. Or maybe you buy metal for big support and a MeFOTO for travel. You would save money (over $ 100 in this example) in the process.

    And honestly, that’s what I’d do.

    Either way, the worst, worst, worst thing you can do is to throw money away on a crap tripod. Consider my lessoned learned (and that of literally millions of photographers before you) sufficient warning.


    Strobist

  • The Winner of $1000 from our Essential Guide to Black and White Photography eBook Competition is….

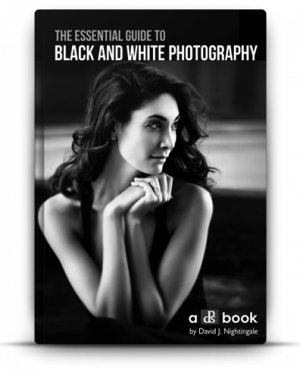
    NewImageRecently we launched our Essential Guide to Black and White Photography. As part of the launch we put everyone who purchased a copy into the draw to win $ 1000 in camera gear.

    The winner of this competition is…. Yves Wepadjuie!

    Congratulations Yves – we’ve just emailed you with details of how we’ll get you your prize and can’t wait to see what you buy!

    Thanks everyone else for picking up a copy of the Essential Guide to Black and White Photography – the eBook has received some amazing feedback and we appreciate you supporting dPS with your purchase – the sale of our eBooks is how we are able to keep producing 14 free tutorials each week here on the blog!

    Our Next eBook is Just Around the Corner

    For those looking forward to our next eBook – you don’t have to wait too long! We’ve got another exciting one for you very soon from our best selling author – Gina Milicia!

    The post The Winner of $ 1000 from our Essential Guide to Black and White Photography eBook Competition is…. by Darren Rowse appeared first on Digital Photography School.


    Digital Photography School

  • Nature and Wildlife Photography Tips for Beginners

    If you have an interest in wildlife or nature photography there is a good chance you have seen an image at some point that has completely taken your breath away. Maybe it was a photograph of a sweeping landscape washed in the golden light of the dying afternoon sun or close-up of some small natural miracle that you had never noticed before that moment. You might even have asked yourself, “How did they do that?”

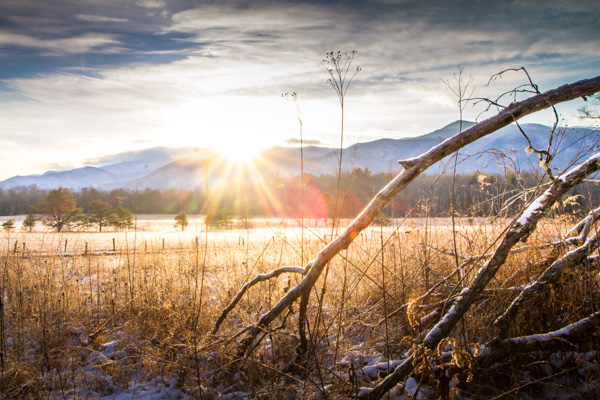
    Winter landscape

    Well, the majority of those incredible photographs came about through a good deal of physical hardship, practiced patience, and a healthy amount of self-made luck.

    Here are some tips to help you become stronger at wildlife photography and better at recording of the natural world.

    Do your homework before heading out

    Be as educated as possible before you ever make a photo. Doing your homework is one of the most important, yet loathed parts of wildlife photography. It never pays to walk into a situation and be completely clueless. Though you can never be totally prepared for every challenge you will face (that’s part of the fun) you can educate yourself so that you safely make the most of your outing.

    What gear to pack

    Advanced gear is not a requirement, however, patience and perseverance are essential. You don’t need the latest and greatest zoom lens or space-age gadgetry in order to produce outstanding nature and wildlife photos. At the same, you must also understand any limitations of your kit, so that you will have realistic expectations and avoid disappointment.

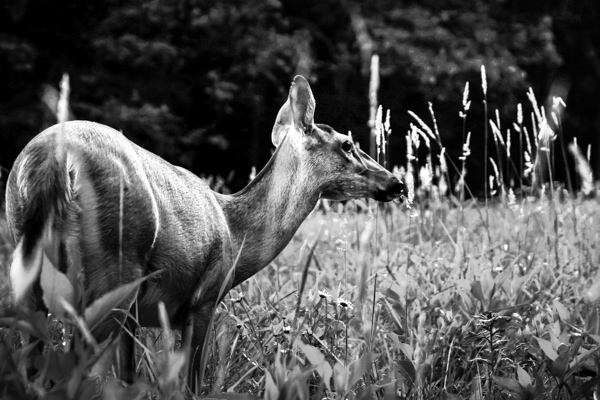
    Deer

    This photograph was made using the 28-135mm kit lens that came with my camera – after I slowly and quietly crawled into range.

    Gear up for what you’ll most likely be shooting. Packing for a photographic outing can cause a lot of anxiety. It’s easy to over pack due to fear of lacking a piece of gear. Over packing though, can be even worse than under packing. You become weighed down and uncomfortable. You find yourself not enjoying what you’re doing which is one of the most preventable of all mistakes, made by photographers. Research the animals and scenes you are likely to encounter. Decide what is most and least important to you. Make choices, commit to them, and then let it go. It will make packing a lot less stressful.

    If you plan on photographing wildlife, such as birds and animals that scare easily, then pack your best zoom lens so you can keep distance between you and your subject. Shooting landscapes or scenes where stealth is not a concern? You might consider taking along a wider angle lens to better capture your scene. Ultimately, there is no secret formula and no true all-in-one lens to cover every situation. Be informed before you leave so that you can make the best use of whatever lens you have.

    A good bag is worth its weight in gold

    All the planning in the world isn’t worth much unless you can comfortably carry your essential tools with you. Find a camera bag that can carry the gear you need easily, and is equally comfortable on your body. Bags range greatly in price and quality but you usually get what you pay for. For added piece of mind, you might consider a bag that is semi-weatherproof or water resistant.

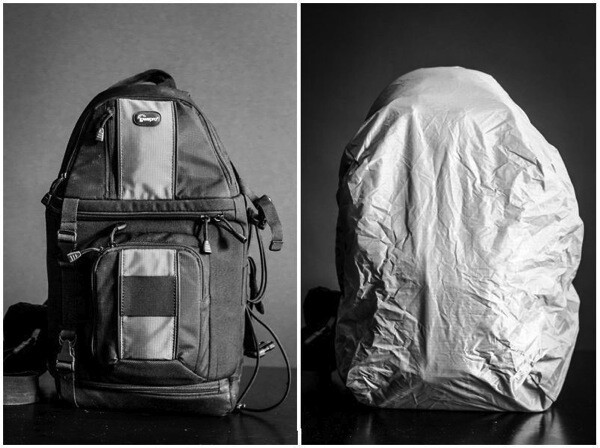
    My go-to lightweight bag for wildlife photography, shown with and without the handy rain cover deployed.

    Camerabag

    Read reviews and find a bag that fits your body, your gear, and your planned outing. You will have a much more comfortable and enjoyable experience. Speaking of comfort…

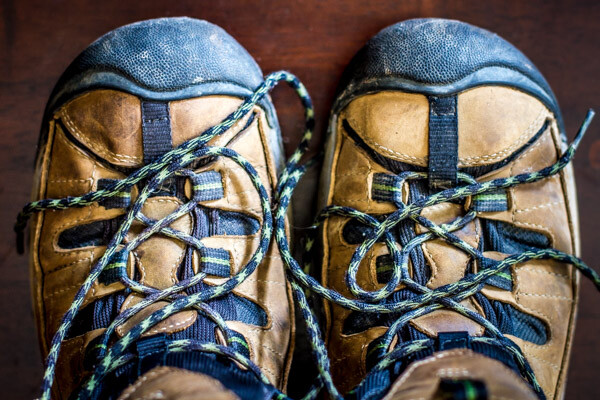
    Shoes

    Comfort items

    Shoes: A good pair of hiking shoes or boots is one of the most important pieces of gear for any wildlife photographer. Grit, dirt, mud, water, insects, rocks, and creepy-crawlies – you need a pair of shoes or boots that can handle all of these elements. Your shoes should be well fitting and suitable for walking long distances. If your feet become uncomfortable it won’t be long before you start thinking about cutting your trip short.

    Prepare a checklist

    It’s always a good idea to have a mental checklist before beginning any shoot. Before your outing ask yourself the following questions:

    • Are any special permits or permissions required? Some National or State Parks and wildlife sanctuaries require special permits for access to certain areas, especially those deemed as backcountry environments.
    • Where will I park my vehicle? This is very important. Believe me, if you park your vehicle in an unauthorized area you will be stuck with a sizeable fine or worse, return to find your vehicle has been towed.
    • Are there time restraints of any kind? Most natural areas and parks have hours of operation just like a business. You might arrive expecting to shoot a great sunrise only to find out the location you chose isn’t accessible until after daybreak. Also remember that wild creatures and critters are usually most active in the early morning or late evening.
    • What are the expected weather conditions? This is a biggie. Know what to expect as far as the weather is concerned. Check the forecast the day of departure and keep tabs on it throughout the day if possible. NEVER chance endangering yourself or your equipment by venturing out unprepared for bad weather.
    • What are the times for sunrise and sunset? Again, be sure the places you want to capture a sunrise or sunset are accessible during those times. You need to also be aware of the schedule so that you can allow enough time to reach your location and set up your gear before it’s go time.
    • Are there any commonly photographed animals, landmarks, or structures? Research what is usually photographed around the area you plan to visit. Find a park ranger or staff member and ask about lesser known spots that are less travelled by tourists. Knowing what’s popular will save you time and help to avoid shooting a scene the same way it has been done time and time again. Look for ways to be creative and set your work apart!

    So, you’ve researched your location and have a good idea of what to expect. Here are a few basic tips that can help you after you’ve reached your destination.

    Shoot RAW

    Shootraw

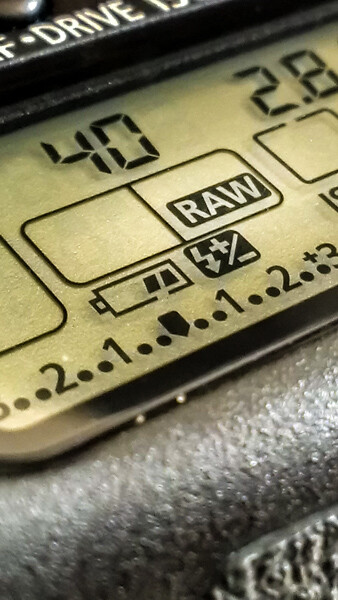
    If possible, set your camera to capture images in camera RAW format. RAW image files are basically unprocessed, one might say uncooked, straight from your camera’s image sensor. They contain a massive amount of pixel information when compared to JPEG and take up a lot more memory card space. However, this additional information allows more latitude for adjustments in post-processing.

    Use the lowest practical ISO

    The ISO number of photographic film and image sensors relates to their sensitivity to light. The boiled down explanation is, everything else being equal, the higher the ISO number the less light is required to make an image. Unfortunately with higher light sensitivity comes increased image noise. In most (but not all) situations you will generally want to use the lowest ISO possible. That is not to say you should be afraid of bumping up the ISO. A fast shutter speed is often needed to capture the quick movements of wildlife and increased noise is far less noticeable than a blurred image.

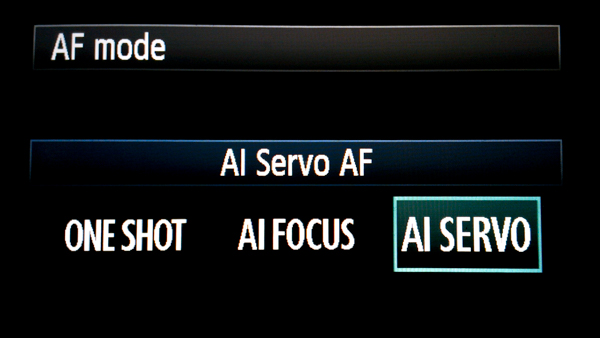
    Use AF continuous (AI Servo) mode when photographing wildlife

    Afservo

    Autofocus (AF) can be your best friend or your worst enemy. When it comes to photographing most wildlife, however, autofocus is a great tool! Animals and birds, especially the wild variety, are almost constantly on the move. They shift positions and move closer or farther away selfishly, with little regard for the photo you are so carefully trying to compose. This is when AF-Continuous and AF-Servo modes come in handy. Though called different names depending on your camera’s make, they both accomplish the same objective which is keeping a moving subject constantly in focus. Place your selected focus area over your subject and half-press the shutter button to engage the AF. Focus will be tracked for as long as you follow your subject while maintaining pressure on the shutter button. Read your camera’s manual (you’ve done that already, right?) for detailed information concerning specific autofocus capabilities for your model, and how each mode can be selected.

    Don’t forget the tripod

    “I really didn’t think I would need my tripod” are words that usually begin a sad story about how a potentially great shot is missed. In most wildlife and nature photography situations a tripod is always a good idea. It’s better to have access to one and not need it than to need it and not have one available. Find the lightest and most compact tripod that is sturdy enough to handle your camera setup.

    Learn so you can prepare. Prepare so you can photograph. Photograph so you can grow.

    Photographing wildlife can be difficult but it can also yield huge artistic, personal, and even spiritual rewards. So go out and have fun doing what you do, but don’t forget to put the camera down every now and then to enjoy the world around you.

    “Nature never goes out of style.” – Unknown

    The post Nature and Wildlife Photography Tips for Beginners by Adam Welch appeared first on Digital Photography School.


    Digital Photography School

  • How to Photograph Teenagers: a Kick-ass Guide

    Whether it’s for a magazine beauty and fashion spread, senior pictures, or my daughters and their friends just dressing up and having fun, teenagers are up for absolutely anything, which makes them my favorite subjects to photograph. Stand fully dressed under a freezing cold waterfall while hanging ten off a surfboard and holding a drooling English Bulldog? “Sure!” Go to Continue Reading

    The post How to Photograph Teenagers: a Kick-ass Guide appeared first on Photodoto.


    Photodoto

  • Carry Less – Photograph More: Elevate Your Travel Photography

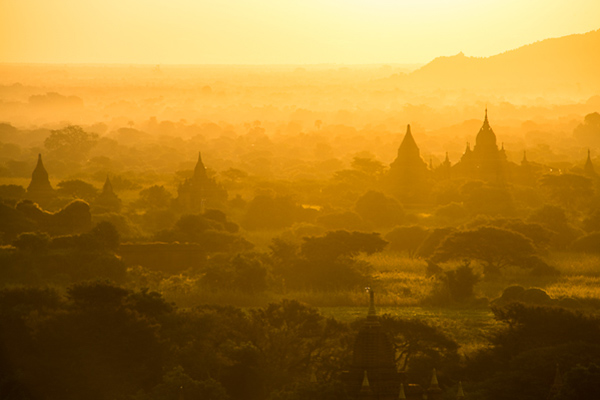
    20131206_Bagan_563b

    As a travel photographer, either on assignment or shooting a personal project, capturing great quality images that represent the spirit of a place and its people is key.

    Looking to achieve that was a priority for me, so I always traveled with a bag full of gear, including at least two DSRL bodies, three or four lenses, flash, tripod, batteries, etc. It was a heavy load, and it slowed me down. I am a Nikon shooter, so my first approach to unload weight was to carry an all-purpose lens. I got the Nikon 28-300mm, and along with this, I’d carry the 14-24mm for wide-angle shots. Now I needed a backup camera or second body. I debated whether to keep carrying another Nikon body or to try something more compact. Finally I decided to get myself a mirrorless camera; enter the Fuji X system. My first mirrorless camera was the Fuji X-E1 with the kit lens, the wonderful Fuji 28-55mm. That camera was a turning point for me, and after my first trip I was sold on the system. Yes, I still shoot Nikon, but I just don’t travel with those big guns anymore.

    The mirrorless technology is now really advanced – gone are the days when the image quality was not up to par with DSRLs and the availability of lenses was scarce. There are similar options from different manufacturers: Sony, Olympus, and Panasonic all have systems that eliminated the reflex portion and bulkiness of the typical DSRL. Please understand that I am mentioning Fuji because that’s the camera I use, but this is not an article to discuss a specific camera or brand. What you should consider is that for the most of us, the image quality of these cameras nowadays is amazing.

    20131212_Inle_Lake_535b

    I’d say I’ve switched, at least for travel. Fuji is now my go-to system for everything on the move, including photo walks. If you are planning to invest in a camera system, you should at least give mirrorless consideration, and here is why:

    1) Travel Light

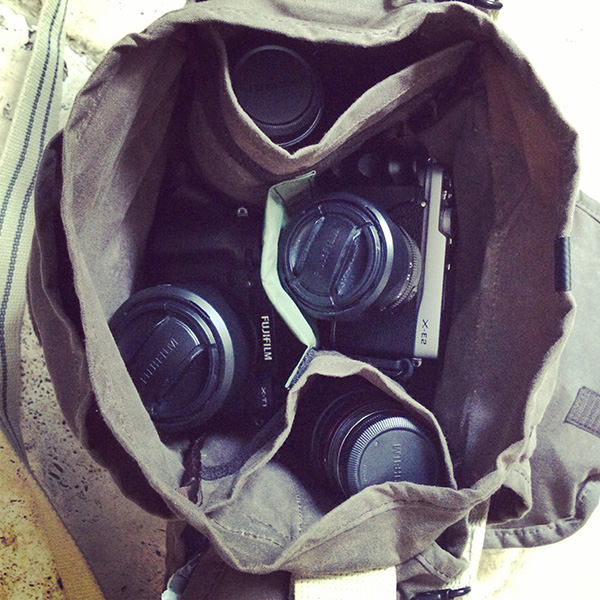
    When using a mirrorless system, traveling light doesn’t mean that you’ll be out of options in the field. In just a small camera bag, you can fit a lot. This Domke F-3X Super Compact bag contains two bodies, five lenses, a flash, four extra batteries, radio triggers, a GPS for geotagging and SD cards. What I have here in terms of camera are the Fuji X-T1, Fuji X-E2, Fuji18-55mm zoom, Fuji 55-200 zoom, the 23mm and 35mm primes and an 8mm fish-eye from Rokinon. Believe me, I can carry this all day long without putting strain on my back, which brings me to the second point.

    CAMERA BAG

    2) Shoot all day

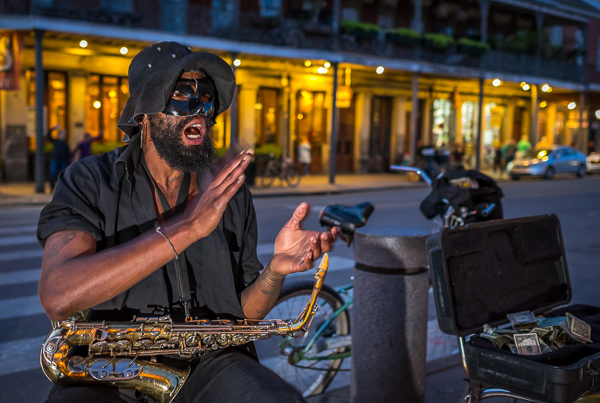
    Wandering light means you can wander more. A small and light kit won’t wear you out and you can pretty much shoot all day long. With these cameras you can always have one on you, even if you are not carrying a camera bag. There are plenty of options where you can take them on your belt and even inside the pocket of a jacket. Having a camera with you all the time brings more opportunities to capture the people and places where you are traveling. The photo below was taken my first day in New Orleans; after a long flight I just went out for a walk with the Fuji X-E2, the 23mm prime and a flash in my pockets, and when the opportunity presented itself I was able to shoot it.

    Street performer at night in New Orleans

    3) Be invisible, blend in

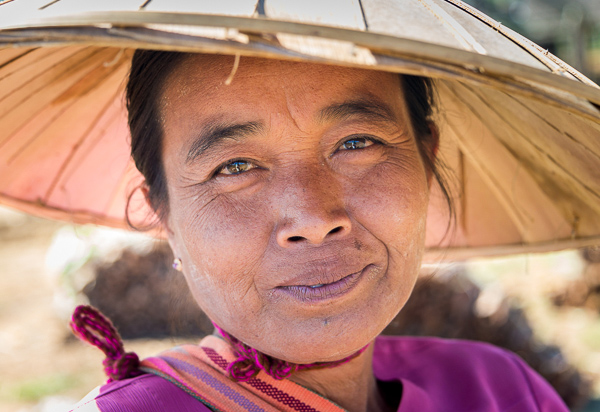
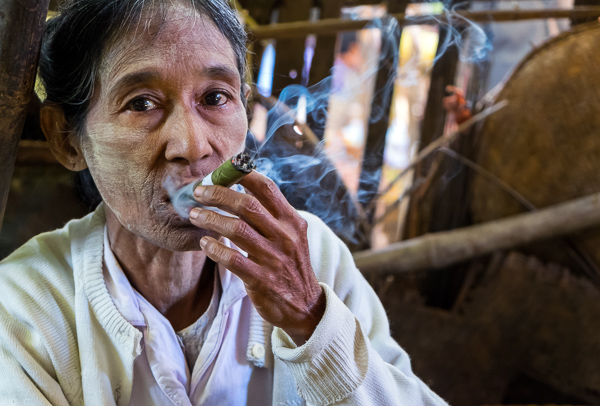
    There is nothing more annoying than people being scared of you. Trying to stick a big lens or camera in front of people in public spaces, or even worse, in remote locations where you don’t speak the local language, is a formula for disaster. There is also a difference if they see you as a pro photographer or just another tourist. When you carry a small camera, you’ll most likely go unnoticed or they won’t feel as intimidated as they would when they think you are pro shooting for a magazine. I personally love to shoot markets: these places, away from big cities, are one the best ways to explore local cultures. I’ve noticed a big difference since I started to shoot with the Fujis on my trips. I can blend in more, I can aim the camera, smile, and get a photo with no problems, whereas before many times I’d have people turning their faces down or away from me. Just consider this fact alone and the difference it can make in your photography.

    Old Burmese woman smoking a cigar

    Another great feature besides what is mentioned above is how easy it is to work with an electronic viewfinder. Imagine being able to see exactly what are you getting in your viewfinder before making the shot. You can quickly adjust camera settings and see the changes on the fly. Seeing where your whites are clipping or how the shooting mode will affect the result of the image without having to move your eyes out of the viewfinder is phenomenal. I could go on an on about the benefits, but I am not a technical person.

    If you like to travel and go places, in my opinion this is the way to go. The future is even brighter, as manufacturers continue to develop their lineups. Mirrorless is versatile and delivers excellent results. Touring light will make your travel photography better and you’ll be able to enjoy your trip more.

    Any other mirrorless fans here? Show us your photos and tell us about it.

    The post Carry Less – Photograph More: Elevate Your Travel Photography by Daniel Korzeniewski appeared first on Digital Photography School.

    Digital Photography School

  • 20 Tips for Photographing Historical Reenactments and Festivals

    No matter what the season, people love to congregate in special places to celebrate or commemorate special events. Here are some tips that may help you take maximum advantage of the opportunities that festivals and historical reenactments present.

    firing the canon

    #1 Research the event before you go

    Do some homework before you attend the event, to get an idea of the subject of the celebration, and something of its history. For example, if you are attending a battle reenactment, a little research before you arrive may give you an inside advantage as to how the battle may unfold in front of you. Even local street festivals exist for a celebration, so know what you can expect to experience, such as special displays, parades, entertainers, and fireworks.

    #2 Know the rules of the event

    For instance, some events may not allow you to bring coolers or large backpacks into a crowded venue, which could include your camera bag. Prepare accordingly to abide by the rules.

    #3 Acquire a schedule of events and map of the venue before arriving

    You’ll know ahead of time when to arrive and which locations you would like to shoot first.

    #4 Develop a shot list

    Preparing a shot list is a good way to help you to get all the images that you intend to capture. It is so easy to get caught up in a single attraction, then, when day is done, realize that you missed a lot of other shooting opportunities. So give yourself a game plan for the day, remembering that schedules can be flexible.

    #5 Arrive early and stay late

    The early bird gets the worm or the best parking place. Of course we know the best light of the day is during the early morning and pre-sunset, so arrive early and stay late to take advantage of it. Also, at many events the crowds don’t arrive until midday, and many who arrive early may also leave early.

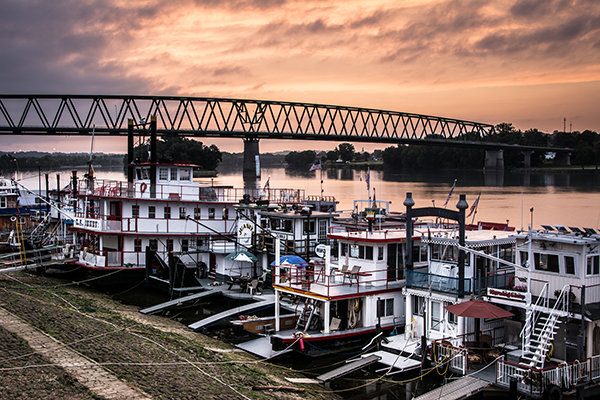
    Sunrise at the Ohio River Sternwheel Festival gives a colorful view of the event before the crowds arrive.

    Sunrise at the Ohio River Sternwheel Festival gives a colorful view of the event before the crowds arrive.

    #6 Bring a compass

    Upon arriving it is very important to get your bearings, which may require taking a compass reading. This becomes very important when looking to for the best lighting and vantage point from which to shoot.

    #7 Meet the people involved with event logistics

    Interaction with the event coordinators, staff, participants or re-enactors of an event can be very beneficial to you when it comes to getting inside information, and perhaps some behind-the-scenes shots. In some cases getting to know the right person might land you a unique vantage point, not accessible to the public. Offering to send photos to them can also be great way to get access to some great images. (Don’t forget to get contact information.)

    #8 Be prepared

    Always bring a spare camera battery. There is nothing worse than missing a great shot because your battery went dead. Spare memory cards are a must also, because you could be shooting thousands of photos each day and you want to have enough memory with you to hold all your images. For shooting in the middle of the day, in the harshest lighting conditions with deep shadows, consider using your pop-up flash to provide fill light for close-ups and portraits.

    #9 Prepare for weather

    Be prepared by checking the weather forecast ahead of time. You may find yourself standing for long periods of time in the direct sunlight, so sun screen is a must. Also bring plenty of water to stay hydrated. A wide brim hat can also be useful to keep the sun out of your eyes. Your equipment also may need protection from weather elements, especially moisture related.

    #10 Be aware of the wind direction

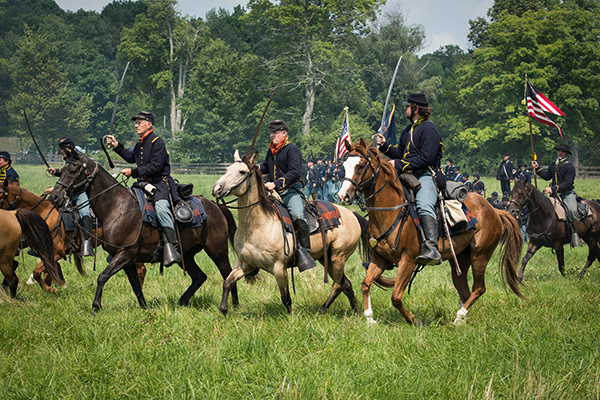
    Wind direction can be very important if you are photographing an event where there will be weapons (e.g. canons) fired. If your shooting location is downwind from the action, all you may get in your image is a lot of smoke. In some cases this could add some very interesting effects but, it is best to be aware of this ahead of time.

    #11 Play nice with re-enactors and other photographers

    Sometimes photographing these events can mean shooting in very crowded locations with everyone wanting to get that same great shot. Be courteous to your fellow photographers, interact with the people around you and work to help everyone have a great experience. Offer suggestions that might be helpful to those who are obviously less experienced. Also, remember festival workers are providing a service to you and in many cases it might be for very little or no pay, so be considerate of them.

    #12 Choose an appropriate lens

    A good walk-around lens, like a 28-300mm or 18-200mm zoom, is a desirable choice for these types of events and will allow you to use the same lens all day. However, if such an item is not in your arsenal, narrow your options down to just a couple of lenses, like a wide angle and a 200mm or 300mm telephoto.  If you choose to use multiple lenses, remember there can be lots of dust in the air at outdoor festivals, so you need to be careful while changing them not to get dust in your camera, which will find its way onto your sensor. If you must change lenses it would be a good idea to try to find a dust-free area, (your car would be a good spot, if parked nearby).

    #13 Shoot with a higher ISO if necessary

    Raising your ISO will allow the shutter speed to stop the action and aperture to maximize your depth of field. However, in some instances a narrow depth of field may be useful to make your subject stand out from the background.

    #14 Watch your background

    When you are shooting at a reenactment event, the last thing you want in an otherwise perfect image is a car or other object that will seem historically out of place in the background. In some cases you can remove these objects in post-production, but it is best to avoid them, and look for a different vantage point that allows you to exclude them.

    DSC_9671-Edit-2

    #15 Look for details

    Be observant to discover details that may make your shots stand out from all the other photographers shooting at the same location. Look for expressions on the faces of participants and spectators, as well as interactions between them.

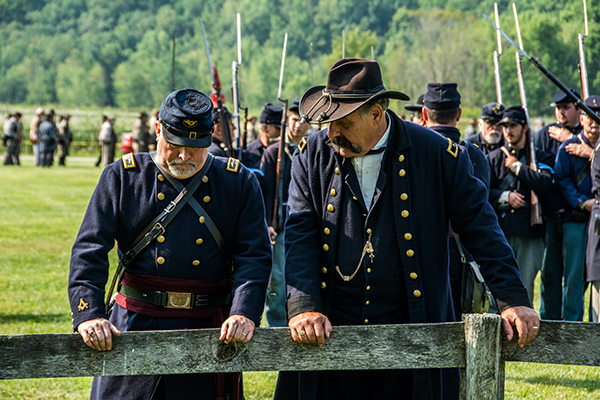
    Two officers standing at the fence discussing battle strategy.

    Two officers standing at the fence discussing battle strategy.

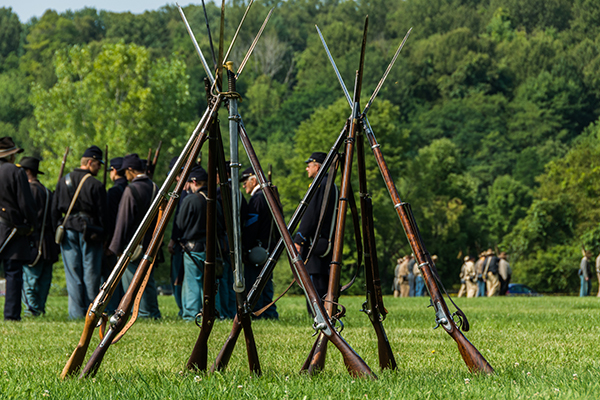
    Look for detail

    This image captured from ground level, features a unique detailed view of reenactment maneuvers.

    #16 Think safety

    Remember to keep in mind where you are, when you are looking through your lens for an extended period of time. It is easy to lose track of just how close to the action you might have become.

    #17 Tell a story

    You’ve heard it said that picture is worth a thousand words, so look for images that tell a story. It doesn’t make much difference how well the photo is composed, that your exposure is correct and image is in sharp focus, if the shot doesn’t communicate the event experience to the viewer.

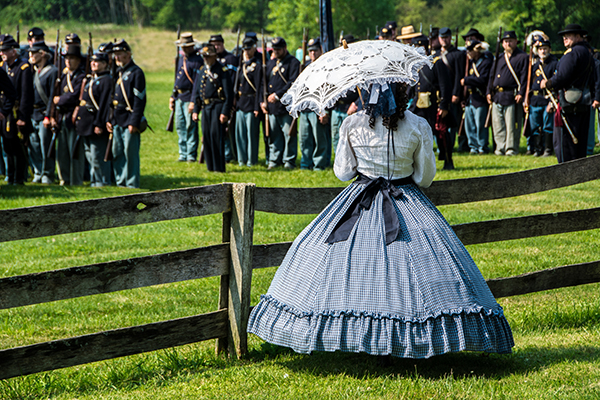
    Lady in era dress watching and waiting, tells a story

    Lady in period dress, watching and waiting, tells a story.

    #18 Attend more than one day

    If possible, returning for a second day can allow you to get some really great images. After attending the first day, it becomes easier to anticipate the action (especially in the case of a reenactment event), pick up other happenings missed the first day, or re-shoot favorite subjects with alternate lighting and camera settings.

    #19 Capture images that may interest the event organizers

    Often times festivals or events are looking for images to use for next year’s promotional material. Depending on the event’s budget, some might even offer to pay for desirable images, while others may not be able to offer more than a byline (it’s still very cool to see your images published). Many events hold a photo contest that pays prize money and features the winning image in promotional material. You should give such an opportunity your best shot.

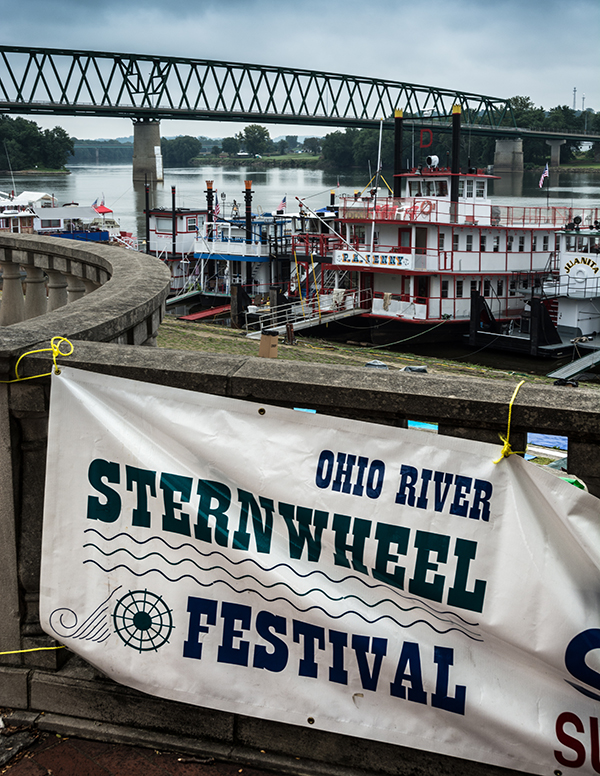
    Shoot images that might interest event organizers, such as this image from the Ohio River Sternwheel Festival held in Marietta, Ohio.

    Shoot images that might interest event organizers, such as this image from the Ohio River Sternwheel Festival held in Marietta, Ohio.

    #20 Give your photos a vintage effect in post-production

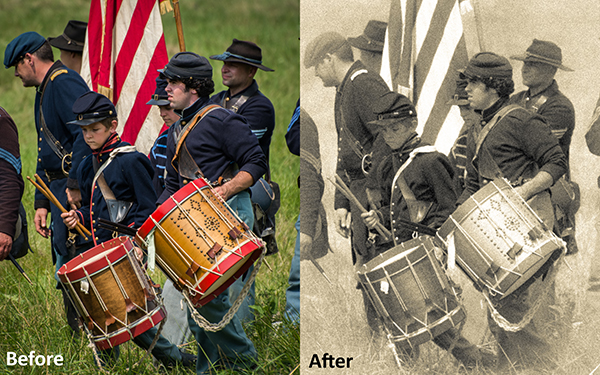
    Giving your image a nice sepia tone to match the photos of former eras can be an interesting way to present reenactment or old-time feeling events.  Click on this link to download an American Civil War Lightroom preset. This preset will give you the era’s sepia tone effect, with faded corners and added grain.

    DSC_9684_rto

    Remember to have fun when you are photographing events and festivals. It is easy to get so involved with getting that perfect shot that you don’t take the time to enjoy the experience. Please share some of your favorite reenactment or festival shots.

    The post 20 Tips for Photographing Historical Reenactments and Festivals by Bruce Wunderlich appeared first on Digital Photography School.

    Digital Photography School