Category: Photography

  • 20 Awe-Inspiring Photographer Promo Videos to Create a Buzz Around Your Brand

    The idea of this compilation  post was born while I was writing the article with tips for getting more word-of-mouth for photography brand. There, I told you that a promo video is one of the best ways to tell clients your story and to show yourself off while shooting and during the creative process. Moreover, a well-made promo clip can Continue Reading

    The post 20 Awe-Inspiring Photographer Promo Videos to Create a Buzz Around Your Brand appeared first on Photodoto.


    Photodoto

  • 3 Essential Photoshop Tools for New Portrait Photographers

    Opening Photoshop for the first time is kind of like going on your first date; your hands sweat, your eyes glaze over, you completely lose all sense of direction and time. At least that was the scenario for me.

    Portrait

    Photoshop is an incredibly complex program that can be used as an artistic tool for positive enhancement, or gross distortion when it comes to portraiture. It’s all too easy to over-edit, get carried away with the sheer number of the tools at your fingertips, or attempt elaborate cover-up schemes for poorly shot images when first starting out. There are certain tools I grasped at the beginning of my learning curve, however, that were essential for editing clean and simple portrait images. Three years after my initial dumb-struck encounter, and countless hours of reading and practicing later, there are three tools that I still use in almost every photo I push through Photoshop. I’ve since discovered that users at every stage continually apply these tools to their photography workflow, as well.

    Everyone has to start somewhere, so if you know nothing else about it yet, start by familiarizing yourself with these three Photoshop tools and you’ll build a solid foundation for taking your portrait photography editing to the next level.

    1. Curves

    The “S-curve” is one of the most common techniques in editing that packs an instant punch. I guarantee that a large majority of photographers working on everything from landscapes, to boudoir images, use this tool at some step in their Photoshop workflow. There are many different effects that you can achieve using the Curves tool, so the trick is to just play around with it a little to see what works best per image; there’s no specific settings within the tool that will always achieve great results. Much of it is about preference. You can achieve bold, colorful, contrast or a soft matte finish, simply by just readjusting the points on the curve. Extreme curves will give some strange discolorations, though, so for clean portrait editing, stick to small adjustments.

    Curves

    before-after-curves

    2. Clone (stamp) Tool

    Clonetool

    This is especially helpful for fixing blemishes or small imperfections on skin, but has countless other applications as well. To use, just hover your mouse over the area you want to copy, press the Option key for Mac (Alt for Windows) and click. This “clones” the area you want to replicate. Release the option/alt key, navigate your cursor over the area you wish to fix, then click again. This will replace the “bad” area with the “good” area.

    Lesson learned: don’t try to do all your skin smoothing with the clone tool. It will look way over-done and it’s far too time-consuming to match up every pixel. This was clearly not my smartest idea, I admit. Save yourself the trouble—there are better ways!

    As I got better with my precision of this tool, I was able to use it for things like removing stray hairs, filling in patches of sand or grass, and other little pesky details as well. It really is a crucial tool to master.

    Before after clone

    3. Dodge and Burn

    Dodge and burn

    Dodge and Burn are technically two different tools but are often used in conjunction with each other. They are a power duo with subtle but impressive impact. I use it most commonly on eyes to give them that extra sparkle. To understand the function of each, think of it this way: when you “dodge,” you’re dodging the shadows in order to brighten your highlights and when you “burn,” you’re burning in the shadows and making them darker.

    Befor eafter dodge burn

    When I use these tools for eyes, I decrease the opacity to about 30% and “dodge” the iris, then I “burn” the shadows in the ring around it as well as the eyelashes. Again, make sure you don’t go overboard and give your client ghostly bright eyes, but a little adjustment goes a long way in those close-up shots! You can also use these tools to add color and contrast to skies, or add interesting light to specific areas of your image.

    As with all the Photoshop tools, the successful edit hinges on the user knowing what to use when, and how to use in moderation. If you are a beginner, I hope this helps give you some direction about where to begin and rid you of the deer-in-the-headlights look for good!

    The post 3 Essential Photoshop Tools for New Portrait Photographers by Leah O’Connell appeared first on Digital Photography School.


    Digital Photography School

  • Beyond the Postcard – 14 Tips for Creating Unique Photographs in Iconic Locations

    Photography has been around since the early 1820’s. Of course, back then the technology of “picture taking” was not accessible to the common person. But have things ever changed! With the availability of digital cameras ever present, even in our cell phones, take a moment to consider these facts. Every two minutes today there are as many photos taken as were taken in the entire 19th century (1800s), and ten percent of all the photos ever taken were snapped within the last twelve months!

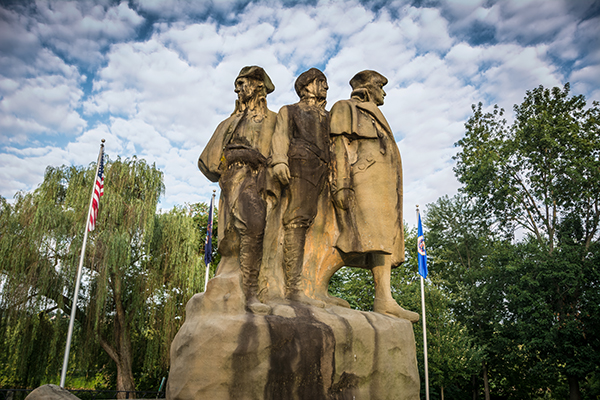
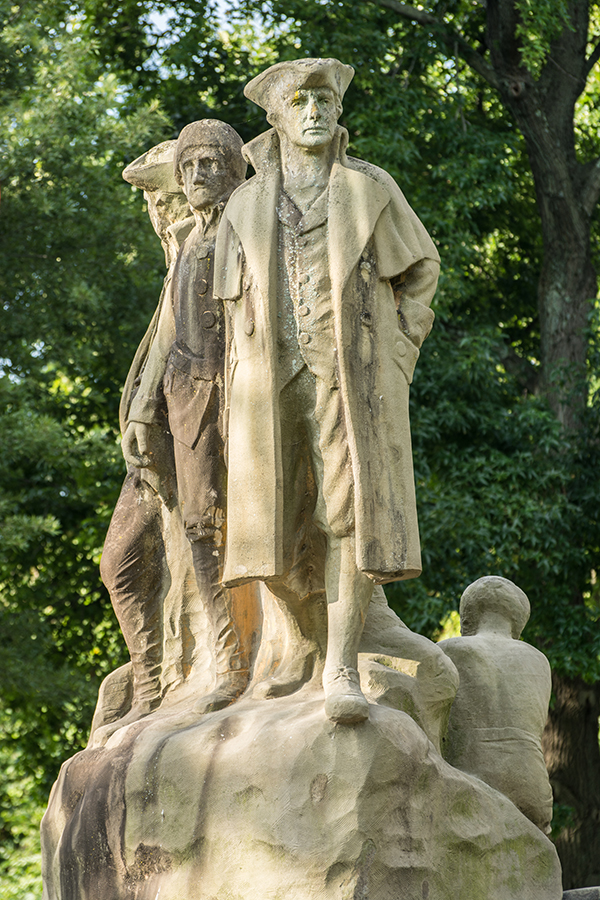
    The Postcard: The Start Westward Monument in Marietta, Ohio.  (18mm 1/80th of a second at f/5, ISO 100)

    The Postcard: The Start Westward Monument in Marietta, Ohio. (18mm 1/80th of a second at f/5, ISO 100)

    So, with nearly 200 years worth of photographs in our collective albums and portfolios, it has become challenging to find an iconic view or subject that hasn’t been overdone by millions of photographers, especially when it comes to state and national outdoor landmarks. In order to look beyond the “postcard shot”, you need to research unique perspectives and techniques to capture that popular subject in a way that creates an original image. But first, go ahead and take that “postcard shot”. (You know you want to!) Then consider the following 14 different suggestions for creating unique photographs of the most popular spots.

    #1 Check the internet

    This is a resource past generations would have loved to have! By searching Google, Flickr, 500px and other photo sharing sites you can see how other photographers have captured most popular scenes. Besides seeing the images that have already been done, this will give you an idea of the layout of the location before you arrive. You may also find ideas that other photographers have tried and notice something that you might do differently to make the same image better.

    #2 Get to know your location

    Research the area by downloading maps and brochures from the internet. If your destination is only open certain days and hours, be sure you’ve garnered that information before you head out on your shoot. Stop at the visitor centers and ask questions.

    #3 Talk to the locals

    Talking to a “local” can often lead you to all kinds of special photo opportunities that may have never been visited before, such as discovering a special lighting effect that only happens at a certain time of the day or year, or maybe a waterfall that is hidden from view.

    #4 Shoot at popular sites during the week

    Avoid the weekends when the crowds can make it almost impossible to get an image, especially if you are looking for a shot free of human presence.

    #5 Look for new angles

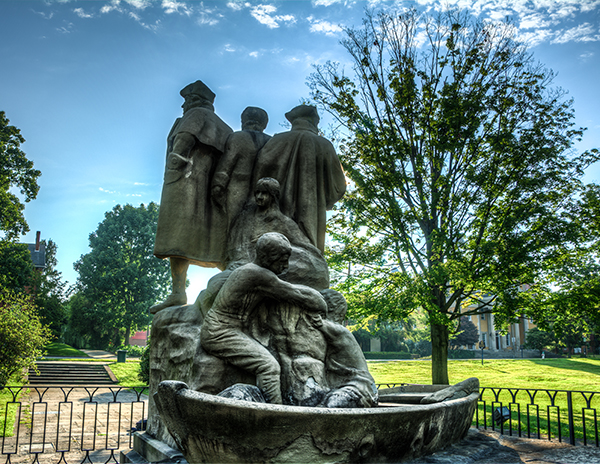
    While looking for different angles, don't forget to explore all sides of your subject.

    While looking for different angles, don’t forget to explore all sides of your subject.

    Try to avoid the obvious straight-on shot that presents itself right in front of you,(the typical postcard shot), but look around for other angles instead – high, low or from the right or left. If you must shoot straight in front, try to include a foreground object.

    Caution: If you are in a state or national park, be sure to abide by all park rules! Photographers sometimes tend to think that rules do not apply to them, but you will find that most park rangers will not agree with this point of view. These rules are put in place for your safety or to preserve the beauty of the area you are photographing.

    #6 Photograph in different seasons

    Photograph the scene or subject in all four seasons. Mother Nature provides amazing changes to scenery, from the different angles of the sun to the different colors of the leaves on the trees.

    #7 Look for special events in nature

    Some natural happenings can make your image unique, such as a full moon which may be included in the image if you are into nighttime photography. Special weather conditions can be conducive to producing a once-in-a-lifetime image. For example, some photographers may reject shooting on rainy days, but if you have the protective gear for your equipment, the rain can add special visual effects such as reflections or rainbows. Ice and snow coatings are often quite striking additions to outdoor objects both in nature or manmade.

    #8 Look for special lighting

    Of course the best light of every day will come during the golden hours, following the early morning sunrise and just before evening sunset. If you must shoot in the harsher lighting of midday, consider black and white images which can often produce some visually appealing contrast. If you are out on a heavily overcast day, you may be able to shoot all day, but in most of these cases avoid including the sky in your image. If you have the option, research natural lighting sources by using computer software, such as The Photographer’s Ephemeris, that show the position of the sun and moon to help you determine when the lighting will be best, and what time to arrive to capture your shot. These kinds of software can allow you to anticipate exactly when and where the best lighting may fall, on just the right spot, to create that once in a lifetime image.

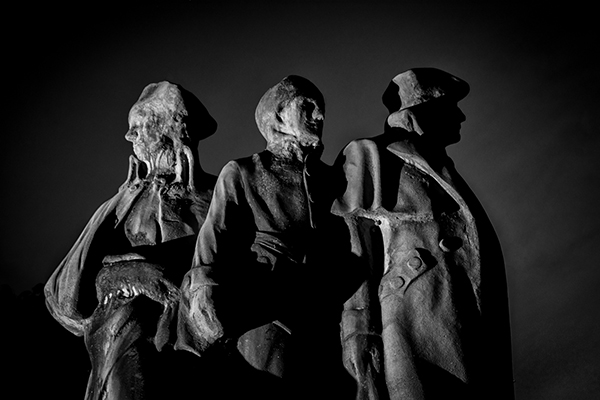
    Black and white image shot after dark was lit with an off camera flash from the left side of the image.

    Black and white image shot after dark was lit with an off camera flash from the left side of the image.

    #9 Add the human element

    Including a person in the scene not only will add a sense of scale, but can also add excitement and fun to your photo, which will make your image much more interesting to your viewer.

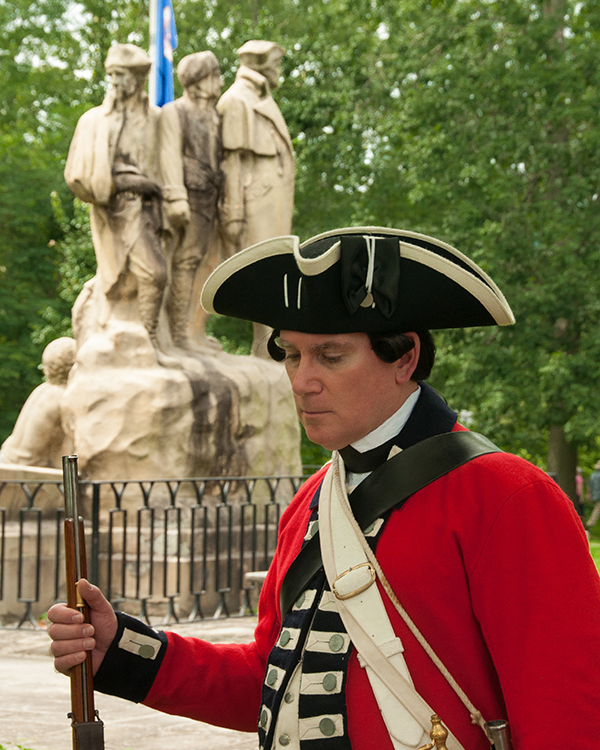
    Special events present an opportunity to include a human element, which add extra excitement to your image.

    Special events present opportunities to include human elements, which add extra excitement to your images.

    #10 Focus on details

    Narrowing your focus to capture details can be an especially effective way to create a unique photo. Whether zeroing in on the part of the vista that makes that site unique, or the feature of the statue that expresses its purpose, an original visual story may be captured in your image.

    #11 Include a foreground element

    Incorporating a foreground object to frame the subject can add depth to your scene and also enhance the image. A foreground object can also be used to lead the viewer’s eye to the subject of your photo.

    #12 Use special effects

    Two filters that could help make that standout image are the polarizing and neutral density filters. Use of a polarizing filter will enhance the blue of the sky and add color saturation. Use of a neutral density filter will cut down the light entering your camera, which allows you to slow down shutter speeds to capture interesting motion effects with the sky or water. Experimenting with your white balance can also create some interesting results.

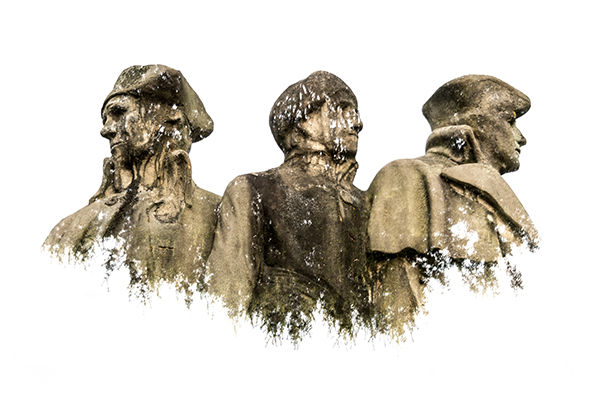
    This image was created by using multiple exposures. the first image was of the monument against the sky, in the second the camera was turned upside down and captured the top of some nearby tree tops. In each image the sky was overexposed creating the white background.

    This image was created by using multiple exposures. The first exposure was of the monument against the sky.  In the second exposure, the camera was turned upside down, capturing the top of some nearby trees. The sky was overexposed in each image, creating the white background.

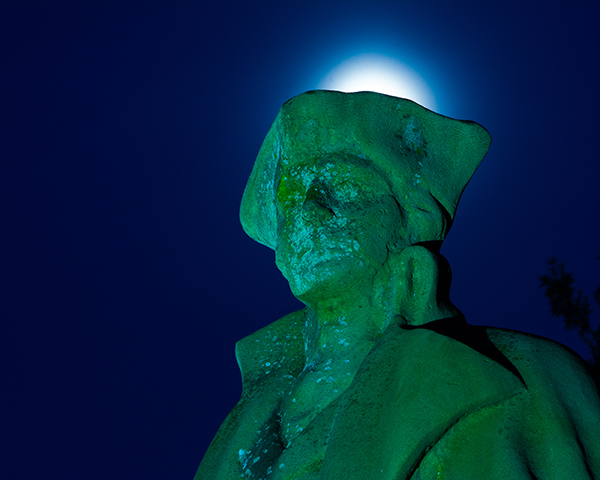
    In this image shot at night the white balance was changed to Tungsten, which causes the monument to have a teal color. The glow above the head was created by the moon glow.

    This image was shot at night the white balance was changed to Tungsten, which caused the monument to have a teal color. The glow above the head was created by the moon’s glow.

    #13 Vary your focal length

    Try different lenses to get varied results, for instance a telephoto lens will not only bring the scene closer to you, but will also compress the scene. On the other hand, a wide-angle lens allow you get more of your subject in the view, make background objects appear farther away, which adds depth to the scene.

    In this image the monument is captured just after sunrise giving the monument a nice glow. Also by using a telephoto lens at 150 mm @ f4.8 we compress the photo and the background is out of focus to make the monument stand out

    In this image the monument is captured just after sunrise giving it a nice glow. Also by using a 150mm telephoto lens at f/4.8 we compress the photo and the background is out of focus to make the monument stand out.

    #14 Experiment with DOF

    To narrow your depth of field, open your aperture to a lower number, such as f/ 2.8, and make your subject stand out from the background. A distant landscape requires more depth of field to keep objects in focus, so you may want to close your aperture to something like f/16 to sharpen your image.

    Researching your options and incorporating some of these tips will enhance the creative bent so many photographers already possess! Just don’t settle for the easiest, most common photographic result if you can take the time to shoot a more memorable image. Think and imagine your own photographic creations “beyond the postcard”. You’ll be glad you did!

    Have any unique photographs from iconic locations or landmarks? Please share in the comments.

    The post Beyond the Postcard – 14 Tips for Creating Unique Photographs in Iconic Locations by Bruce Wunderlich appeared first on Digital Photography School.


    Digital Photography School

  • Which Three Lenses do You Need for Photography?

    Camera lenses

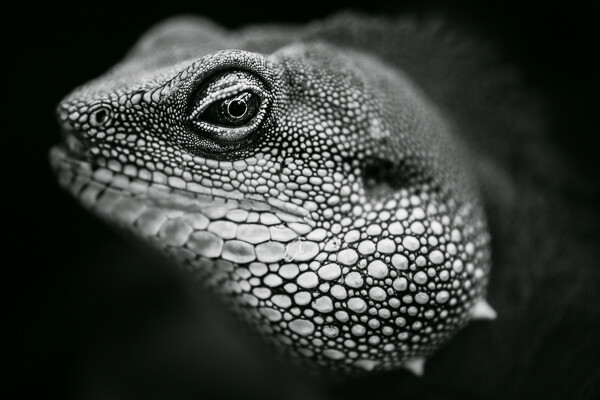
    I used an 85mm lens fitted with a 500D close-up lens to create this photo of a Chinese Water Dragon.

    Two things occurred to me When I read Phillip VanNostrand’s article The Only Three Lenses You Need for Travel Photography. One, is that his choice of lenses would not be my choice. Two, is that you cannot recommend three lenses for every photographer to use, as everybody’s requirements are different.

    Imagine if you went to a showroom to buy a new car and the salesperson said “Sir, the only car for you is a Ford Focus”. Fine, if that’s the car you happen to want. But how annoying would it be if the salesperson insisted that you should buy a Ford Focus if it didn’t fit your needs?

    A professional would establish your requirements first by asking you questions. How many miles do you drive a year? How many people does the car need to transport? Do you need lots of storage space? How important is fuel economy? Safety? What is your budget? And so on. When the answers to are known, the salesperson can make a recommendation.

    It’s the same for lenses. My needs are different from yours because we are different people with different priorities and requirements.

    Please don’t take this as a criticism of Phillip’s article (which is a great read, and the comments are fascinating). I learned this lesson when I wrote my article Buyers’ Guide – Prime Lenses vs Zoom Lenses in which I came down in favour of primes (my personal preference). Some readers quite correctly pointed out that the convenience of zooms makes them invaluable in certain situations. I realized that I was imposing my preferences on other people.

    The three lenses I couldn’t do without

    So here’s my question. If you could only own three lenses, which ones would they be? That’s right, three lenses to cover you for all the types of photography that you do. And, taking it further, if you could only own one lens, which one would you choose?

    It’s a hypothetical question for most, as we are free to buy as many lenses as we like. But there is a semi-serious point behind it. Creativity works best within constraints, and limiting your lens collection to three is certainly a constraint. Also, it is possible to put together a good selection of three lenses that cover you for most situations on a limited budget – there is no need to spend many thousands of dollars on expensive glass if you can’t afford, or don’t want to.

    Before you give your answer, have a think about your requirements, because they will drive your choice of lenses. These are my requirements:

    • My lenses must be light and relatively small. I don’t want to carry around a large, heavy bag full of gear.
    • My lenses must be good value for money. I don’t have a budget as such but when I buy a lens I need to know that I will use it a lot, it will last for decades and that I won’t have buyer’s remorse.
    • The autofocus must be reasonably quick and quiet.

    To get the debate started, here’s my choice of three lenses, in order of preference. Bear in mind that I’m a Canon user so that naturally influences my choice of lens, and that I use a full-frame camera.

    85mm f/1.8 lens

    This is my favourite lens. I use the 85mm f/1.8 for portraits, close-up photos and landscapes that benefit from selective framing and compression. It’s light, relatively inexpensive and the image quality is excellent. The only weakness of this lens is that the minimum focusing distance is 85cm (2.8 feet), so it is not so good for close-up photography. I get around that by attaching a 500D close-up lens (this is technically a lens, although I think of it as a filter and I’m not including it in my choice of three) which gives me excellent quality for close-up images as long as I stop down to f/2.8 or smaller.

    Camera lenses

    The 85mm f/1.8 lens is ideal for portraits, especially those taken in low light, like this one.

    Camera lenses

    The 500D close-up lens that I use with my 85mm lens for close-up photography.

    40mm f/2.8 pancake lens

    While I love the quality and versatility of 50mm prime lenses, they are too middle of the road in terms of focal length for me to include one in my choice of three. Instead, I’m selecting the Canon 40mm f/2.8 pancake lens. I love this lens because it is extremely small and has high image quality. On my full-frame camera the focal length sits on the borderline between wide-angle and normal focal lengths, and turns out to be a surprisingly useful focal length. I use this lens a lot and I love it.

    Camera lenses

    The 40mm lens is ideal for scenic photos like this.

    Camera lenses

    The 40mm lens is also idea for photos where the composition demands a gentle wide-angle, in this case for the converging verticals effect created by shooting from a low viewpoint.

    24mm f/2.8 IS lens

    This is the newest addition to my lens collection and while I’m still getting to know it, the 24mm f/2.8 become one of my favourites. There’s something special about the 24mm focal length – it’s ideal for landscapes and scenic photos without being too wide. The maximum aperture of f/2.8 is a little limiting (I like to experiment with wide apertures for creative effect) but I can live with it as the lens is much lighter, cheaper and smaller than the Canon 24mm f/1.4L lens.

    Another thing I like about it is the Image Stabilizer (IS). Theoretically with this engaged I can handhold the camera at shutter speeds down to around 1/2 second and still get sharp images. Yet anything moving within the frame will record as a blur – lots of creative potential there.

    Camera lenses

    The 24mm lens is great for environmental portraiture, where you want to show you subject and include a dramatic background.

    If I had to chose just one of these lenses, what a difficult decision! If I could only ever have one lens, and it had to be one of these three, I think I would go for the 85mm f/1.8. Otherwise I would go for something like the Canon 24-105mm f/4L lens. It’s bigger and heavier than my primes but it covers a very useful set of focal lengths.

    Your choice

    Now it’s your turn. If you could only own three camera lenses, which ones would they be? If you could only own one lens, which would you choose?  Please let us know why. What are your personal requirements? It should make for an interesting discussion.


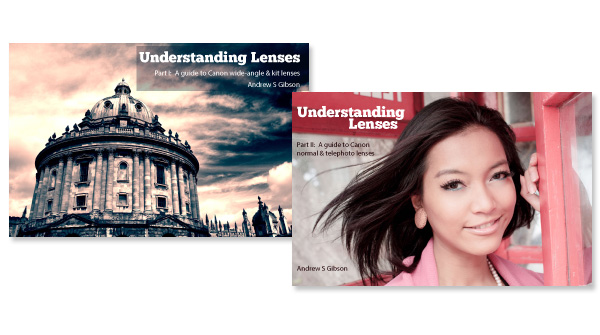
    Understanding Lenses ebook bundle

    Understanding Lenses ebooks

    My ebooks Understanding Lenses Part I and Understanding Lenses Part II will help Canon EOS owners decide what lenses to buy for their cameras. They are both filled with lots of tips to getting the most out of your Canon lenses. Click the links to learn more.


    The post Which Three Lenses do You Need for Photography? by Andrew S. Gibson appeared first on Digital Photography School.


    Digital Photography School

  • Tips on How to Get New Photography Clients

    Aaaaghhhh!!!! Why aren’t people knocking down my door to get me to photograph their most precious moments?!

    We’ve all said this. We’ve all had those moments where we just don’t understand where the people are, or the ones that will pay us are. Or you’ve finally built a business and now it’s time to move. I get it.

    MonicaDayDPSMarketing-01

    I’m a military spouse. I move…a lot. I have to rebuild my business every two to four years. But I’ve done it, and so can you. You don’t have to be a military spouse to benefit from these tips. They can be applied to a new business, a new market, a new city, or a new focus of your business. I’ve implemented these and have been able to standout and be successful in the places I’ve lived.

    So here are some tips on how to get new photography clients:

    1. Get Involved

    I’m sure you’ve heard it before, but I’m saying it anyway. Get involved. How will people know who you are if you don’t put yourself out there? Attend events, your children’s functions, community markets and festivals, and anything that’s going on in your target area. Talk about what you do.

    MonicaDayDPSMarketing-02

    2. Network

    Networking and getting involved are close, but not quite the same thing in my book. When I network, I do so with others in the industry. This means that I seek out hair stylists, makeup artists, wardrobe stylists, designers, models, and even other photographers. These can be great sources of leads.  When I moved to Boston I hooked up with a hair stylist/makeup artist that I’ve worked with continually. I send her clients and she sends me clients. Most of the time we are working together, but I can also refer her to other photographers. This has helped her see the value in continually referring her clients to me.

    Do you get your hair done? Your makeup or nails? Bring up what you do in a casual conversation with these service providers. They’ll remember…trust me.  Keep the door of communication open and use them when you can.

    3. Build Your Portfolio

    Portfolio building is great whether you’re brand new to photography or if you’re a seasoned veteran.  This is a great way to get people talking about what you do. It’s also a great way to find your favorite spots in the new area. I portfolio build whenever I get to a new area. I’m not shooting for free though. I will charge a very reduced price and run it as a special. Don’t give them everything for nothing but be sure to offer them a deal that can’t refuse, or won’t want to.

    Whenever I’m portfolio building I have an end goal in mind. I will heavily style these shoots. I will pick out wardrobe, makeup, hair, and location. Use this time to get those key shots that will showcase your new city. Your keywording in blog posts will make much more sense when the images show the actually place you’re targeting.

    MonicaDayDPSMarketing-03

    4. Blog

    We photographers are always trying to figure out a way to move up the search engine rankings. Well here’s a tip. Blog.  That’s right. Blog, blog, blog. Blog about your upcoming move. Blog about your new business. Blog about your preparations. Blog about your work. Be sure to keyword your images and blog posts. Learn good SEO practices and implement them. While word-of-mouth has been one of the best ways I’ve attained new clients, my blog posts bring in quite a few too. People like to search for images, and when they see one they like, they tend to look up the photographer. You want to be that photographer.

    MonicaDayDPSMarketing-04

    5. Creative Projects

    This goes along with portfolio building but is more focused towards shooting projects for fun. The ones that your clients might not “get”, but will get great feedback on Facebook and other social media outlets. These also help you keep your creative juices flowing while you’re building your business in a new area. I love doing “for me” project because there’s no pressure. There’s no pressure to please anyone but me.

    So how does this creative project get you new clients? Well, you’re most likely working with hair stylists and makeup artists for this project. You actually put in work to find them because there’s no pressure. These new connections can refer their clients to you. You didn’t seek hair and makeup professionals? No worries. Your amazing photos will be shared on social media and increase your exposure. You’ll also be posting this entire experience on your blog. Your amazing images will catch the eye of new people.

    MonicaDayDPSMarketing-05

    This image was taken during a photographer shoot out. This image alone brought many new people to my page and brought exposure to more new clients.

    6. Maintain Relationships

    I get a lot of repeat business from clients from other areas. That’s right. I get repeat business from clients in other cities. One of the most lucrative things I do is the traveling session. I will host boudoir marathons, mini-sessions, etc., in cities that have a substantial group of clients. That way I can capitalize off of all the work I’ve done, and maintain these people as my lifelong clients. Not all of your clients will wait for you, but many will. It’s important to keep those relationships positive. This world is small and your past clients can be your biggest cheerleaders.

    I have photographed this family 3 times. They are even coming to visit me in my new location for another family shoot.

    I have photographed this family 3 times. They are even coming to visit me in my new location for another family shoot.

    Try this tips out and stay in front of your target market. Remember, people won’t know you’re around unless you put yourself out there.

    You can also read these dPS articles for more tips:

    • How to Get More Referrals Than You Can Handle
    • 36 of the Best Online Tools to Boost Your Photography Business
    • The Ultimate Guide to Going Pro as a Photographer

    The post Tips on How to Get New Photography Clients by Monica Day appeared first on Digital Photography School.


    Digital Photography School

  • Defrozo Giveaway: Comment for a Chance to Win Premium Ebook

    Great news everyone! Today we’re starting a giveaway with which you have a chance to get one of Photodoto’s camera guides (normally priced at $ 9.99 each). Defrozo, our partners we have already told you about, are a new, awesome startup geared at both aspiring and pro photographers. Built by photogtraphers, Defrozo is an all-in-one platform that helps photographers better organize Continue Reading

    The post Defrozo Giveaway: Comment for a Chance to Win Premium Ebook appeared first on Photodoto.


    Photodoto

  • What’s Really Missing from Your Photographs?

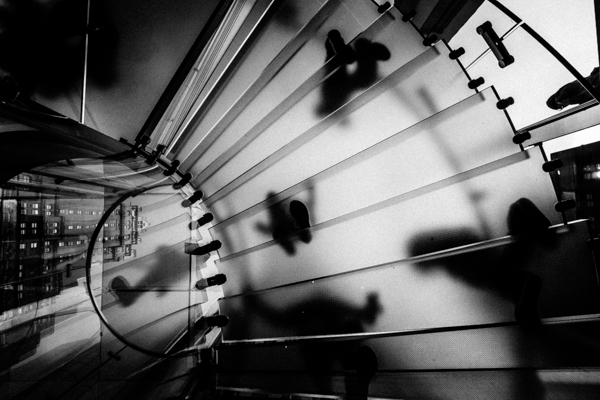
    01 cover apple store glass step

    Ever felt that your images are missing a certain je-ne-sais-quoi? I remember when I was a proud young shooter, I showed my images to my photography 101 teacher, ready for him to crown me the next best photographer he’s ever seen (Hey I was young). He looked at them, and politely said “They are coming along”.

    What. The. Heck dude!? I looked at him in disbelief. I tried some Jedi mind tricks on him; trying to juice some positive note out of him. After a while, it was evident he didn’t want to offend me, I tried pressing him a last time and he gave me the same answer…that my photos were coming along. After thanking him I went my own way, still fooling myself that my stuff I was amazing.

    Truth is, he was right, I felt there was something missing from my photographs, I couldn’t put my finger on it, but I knew it. I could see it in other’s images but not mine. I knew my technical photography, I knew the subtleties of composition, I was a graphic designer after all, but there was something that eluded me in photography and I couldn’t figure out what…until something terrible happened.

    RRrrrring! A few years ago, I got a call from my aunt, she asked me to call my brother. Apparently my mom had some health issues. I was cool about it, my mom was a cancer survivor, and she sometimes failed here and there, having seizure but never anything major. I dialled my brother promptly.

    Yo man! Heard there’s something wrong with mom, what’s up? I asked, ready for the news that she had a seizure episode or something.

    He quickly blurted out three words in a rage. I heard the three words I was always afraid of hearing. She. Is. Dead…………. I dreaded hearing those words for years, ever since I knew she had cancer when I was 10.

    I remember going to her room hundreds of times, just making sure that her belly was going up and down, meaning she was breathing, still alive. Mental preparedness didn’t mean jack in that moment. She survived cancer, but the Haitian earthquake claimed her.

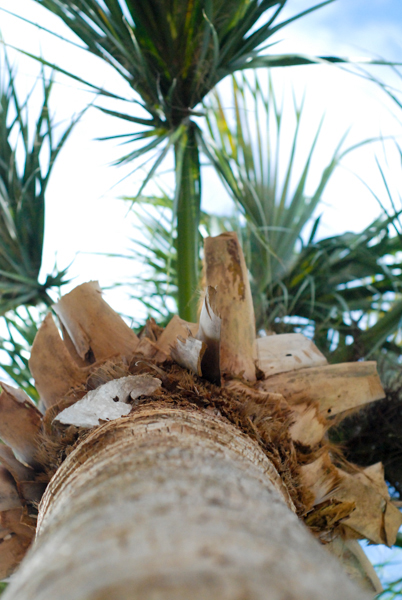
    Palm tree 1
    Typical image before my mom passed away

    Way to go brother to break the news, right, right? But I’m digressing. So, why am I telling you this? Well, after the storm calmed a bit, eventually, it dawned on me: I never made any photographs of her.

    Before my mother went back to Haiti, she was in the US, but instead of spending time making photos of her, I chose instead to take pictures of buildings and flowers. I then understood something a little too late: My photographs didn’t mean anything to me. I shot because I saw other people shooting (thanks internet!), not because I cared for what I was doing. That “thing” I was missing? It was simple: connection. Connection to my work. I could have made a photograph of my mother that showed how much I loved her, how much I cared. A photograph that only I could have made, but I kept shooting things I didn’t care about.

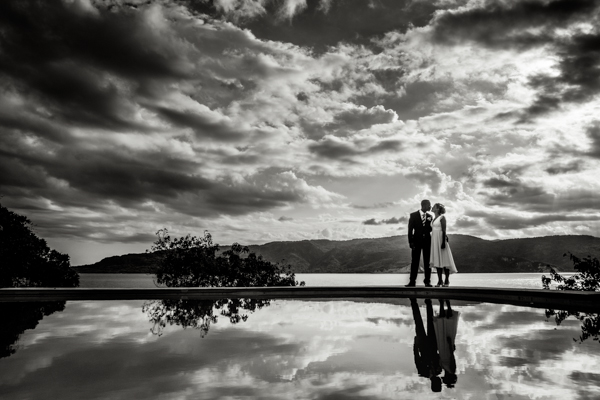
    02 haiti wedding

    Please don’t misunderstand, I’m not putting down making photos of flowers and buildings, I’m only saying to be emotionally connected with what you are doing. If you find yourself into photos of flowers and whatnot, by all means do it! Many photographers did, especially later in their life. You have to find your connection to your work. If you think that many landscape photographers fall short of Ansel Adam’s work, it’s really not because he had somehow special gear, it’s because he had a strong, borderline religious connection with Yosemite National Park, he came alive when he was there. Most modern landscape photographers are only interested in the physical landscape, Ansel was interested on making images that recreated the sense of awe and majesty that he felt.

    It’s not the technical, the gear, the sharpness that will make you a better photographer. It’s your connection to your work. That’s the magic that no one can replicate. So what’s really missing from your photography? You. Nothing more and nothing less. So far we can’t just plug our brains into another’s to transfer the feelings and emotions we are feeling inside, but can hardly express with words. The closest thing we have to transferring our emotions directly is photography (or art in general), so why spend our time shooting things we don’t care about in the first place?

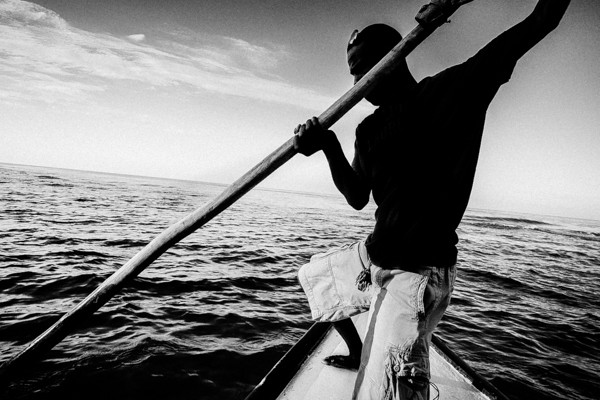
    03 haitian fisherman

    You can’t fake connection, shooting something that doesn’t mean anything to you will show in the work. What we feel while looking at a photograph is proportional to what the photographer felt when making it…..the big idea is that connection transcends the photograph.

    When someone looks at your images, do they see something distinctively you or do they see yet another photographer? It might be easy to get likes by shooting what is expected of a photographer, but it’s much more rewarding to be yourself and connected to your work as a photographer. Trust me, been there, done that!

    Be yourself, stay focused and keep on shooting.

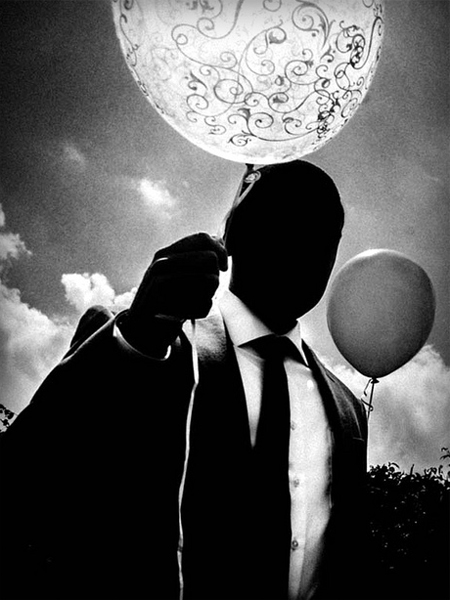
    04 surrelist photo

    The post What’s Really Missing from Your Photographs? by Olivier Duong appeared first on Digital Photography School.


    Digital Photography School

  • Luminosity Masks Versus HDR Software For Creating Natural Looking HDR Images

    Jimmy’s Luminosity Masks Tutorials – Art of Digital Blending Course For Photoshop is on sale now at 15% off over at SnapnDeals. Only until September 6th, grab it now!

    If you type the term ‘HDR’ into google images you’ll very quickly see why HDR photography has a bad reputation. While we all differ in our tastes, in recent years, those strongly saturated, blurry and noisy HDRs have fallen out of fashion, even amongst HDR photographers.
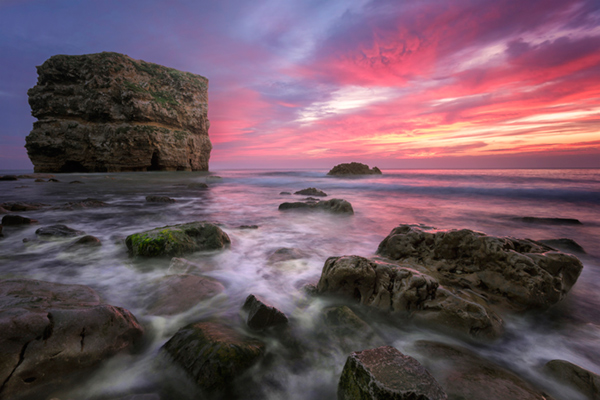
    Pink seascape

    Luminosity Masks Versus HDR Software For Creating Natural Looking HDR Images

    The goal, among many, is now a clean HDR look. HDR programs are attempting to tidy up their processes to meet the needs of the demanding HDR photographer. However, a large number of photographers are beginning to take the blending process into their own hands, and produced beautifully balanced HDRs using luminosity masks, probably the cleanest alternative to HDR software.

    In fact, luminosity masking has become an exciting buzz-term in the world of digital photography, and there’s good reason for that.

    If you’re new to luminosity mask exposure blending, you can see a beginner’s tutorial on dPS in my previous article: Exposure Blending Using Luminosity Masks Tutorial

    In this article we’ll take a look at the benefits and challenges of luminosity masks versus HDR software.

    Benefits of Luminosity Masks

    1. Image quality

    We’ve all seen over-saturated, noisy, messy, HDR images. One guaranteed way to avoid the poor image quality we normally associate with HDR is to manually blend your exposures in Photoshop using luminosity masks.

    When exposure blending with luminosity masks, you’re working only with the RAW files to restore highlights and shadows. You do not affect any other part of the image. In other words, your final blended image will be, more or less, exactly the same image quality as your RAW files.

    You do not affect any colour changes, you retain absolute sharpness, you don’t flare up noise (which means you can shoot at a much higher ISO), and you will not exaggerate chromatic aberration.

    This is the major reason why so many are turning to luminosity masking to create natural, balanced HDRs.
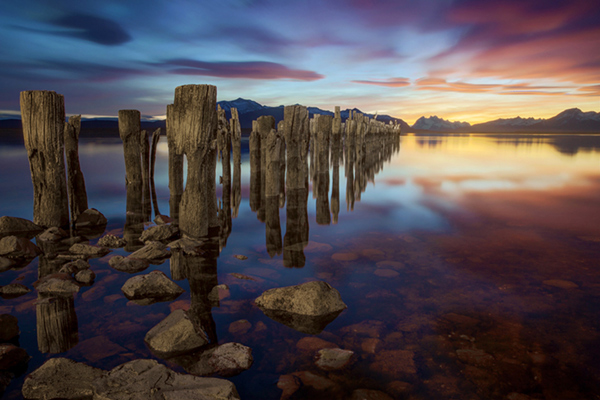
    Chilean sunset

    Sunset at Puerto Natales, Chile

    2. Complete control over what we blend

    Artists of any genre fight for complete control over their ability to express themselves. And so it is in photography. One of the problems with using HDR software is that we have very little control over the blending process.

    We rely on an algorithm to choose which areas to blend with which exposures. Then we’re given some sliders to adjust. Although this gives us greater control over the process, it isn’t giving us 100% control.

    Through luminosity masking, we begin with a base exposure, and we then decide for ourselves which exposures we wish to use in the blending process, and which areas we wish to adjust, and at what opacity.

    The image below is a good example of how you can make very precise changes with luminosity masks.
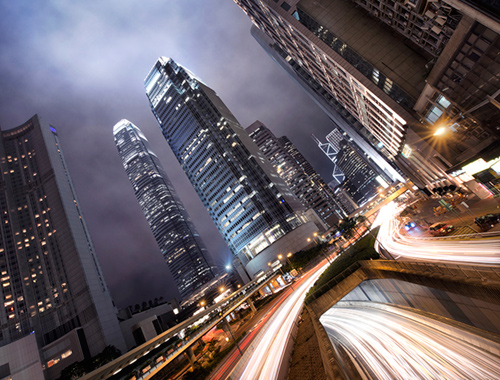
    Hong Kong Light Trails

    Hong Kong Light Trails

    This image is made up of 11 exposures; six of which were used for the light trails, four were used for exposure blending, and one was used as the base exposure. You can learn how to create light trails like this here: How To Add Dramatic Car Trails To Your Photos In Photoshop

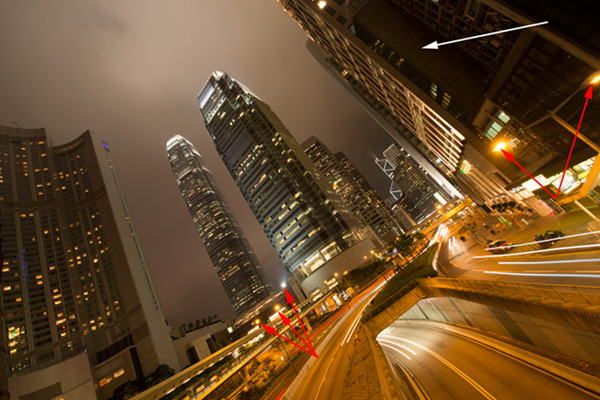
    Below you’ll see the RAW file used for the base exposure.
    HK Light Trails

    Base Exposure

    The only highlights I wanted to control in the image were the street lights, and even then I still wanted them to be bright. Through bright lights like this night cityscapes are able to give off a lot of energy and dynamism.

    I very gently blended in three darker exposures to gain a little bit of control in those areas, without darkening them too much. If I ran my exposures through an HDR program, all of the highlights in the image would have been affected to some degree, which is exactly what I didn’t want.

    For the darker areas, I only wanted to bring back information in one area, the side building to the right, which is noticeably dark. I used an exposure two stops brighter and, with luminosity masks, I easily painted details back into this area.

    #3. No more halos and fewer ghosts

    Halos simply don’t exist in luminosity mask exposure blending if you’ve done it correctly.

    As for ghosts, you will rarely encounter a moving object that is difficult to blend. Since you use a base exposure, which will be done for most of your images, and simply reduce specific highlights and shadows, there shouldn’t be any ghosting.

    The only challenge you may have, which is also a challenge when using HDR software, is if you have moving leaves on trees, for example, between exposures. Then the blending process is a little bit trickier.

    #4. Become a better photographer
    Mesa arch

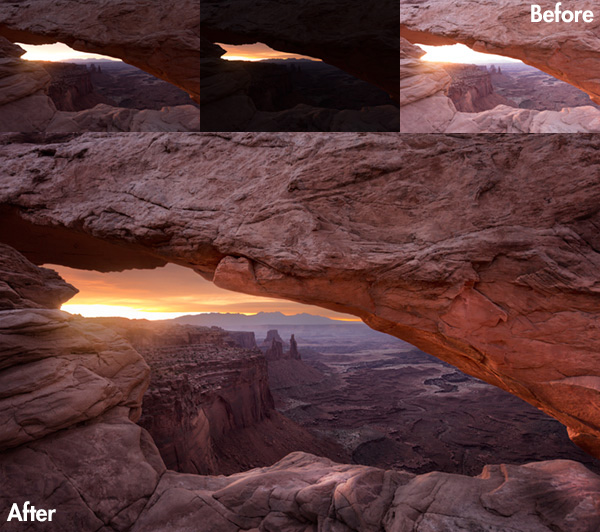
    Mesa Arch, Before and After Exposure Blending With Luminosity Masks

    In my early days I was a die hard tone mapper. I’d approach a scene and think, “this would be a cool HDR subject”. I’d fire off some brackets and take them into Photomatix when I got home. I had a predefined routine of what to do, what result I wanted, and how to get there. I had tunnel vision.

    When I began exploring luminosity masks, everything changed. I began to read a scene, not as an HDR subject, but in terms of its unique beauty and mood. I started to grasp more fully the use of light in controlling mood, whereas previously I was simply relying on getting the ‘HDR effect’ each time.

    Rather than shooting off a set of automatic brackets, for a complex scene I will often bracket manually, changing the aperture, ISO and shutter speed to capture different elements of the scene. Then I’ll blend in each of the elements to hopefully get the best out of that scene.

    In the Hong Kong Light Trails image above, the base exposures and brighter exposures, the light trails, and the darker exposures were all shot manually with different settings to achieve different effects.

    It is through using luminosity masks, and taking my imagery into my own hands, that I have pushed myself in the field to achieve more.

    #5. Combine with other HDR processes

    One of the beautiful things about luminosity masks is that you can combine them with other exposure blending methods to complete the blending process. 32-bit processing is becoming an interesting way of blending exposures cleanly, but we are a long way off before the process is good enough and our monitors can handle true 32-bit files.

    However, we can overcome the limitations of 32-bit processing by combining it with luminosity mask exposure blending. The tutorial below will show you exactly what I mean. The video is taken directly from the Art of Digital Blending course:

    Challenges with Luminosity Masks

    HDR software is simpler

    Luminosity masks require more patience and a steeper learning curve than HDR software. The concept takes a little bit of time to get used to, and it will certainly challenge you to re-learn a few things.

    While HDR software will take all of the leg-work out of it for you, luminosity masks require you to really think about your exposures and deepen your workflow.

    Luminosity Masks don’t work on every occasion

    Every now and then you’ll come across an image where luminosity masks won’t create a smooth blend between exposures. This happens because there isn’t enough contrast between the areas you wish to blend and the areas you don’t wish to affect.

    In which case, using 32-bit processing or HDR software would be a good alternative.

    Luminosity masks work in 8-bit mode

    Like all live selections in Photoshop, luminosity masks work in 8-bit mode. They don’t affect the bit depth of your image, so if you’re working at 16 bits that won’t change. But there may be a chance of posterization in some cases.

    A quote from Photoshop staff on the Adobe forum claims:

    “The selection mask is 8 bits, regardless of the document precision. That fact has no affect on the precision of the image.

    No, it won’t change the image or cause future posterization — the image data is still the same precision as it always was.”

    So while this shouldn’t be an issue, it is something to be aware of.
    Hong kong the peak view

    Conclusion

    HDR images don’t have to be messy, garish and overdone. There are many ways to cleanly blend exposures to create a beautifully natural and balanced HDR. Having luminosity masks in your arsenal, will give your workflow a superb cutting edge, that can quite literally change your imagery over night.

    It will require a little bit of extra work on your part, but often the best things in life do.

    Jimmy’s Luminosity Masks Tutorials – Art of Digital Blending Course For Photoshop is on sale now at 15% off over at SnapnDeals. Only until September 6th, grab it now!

    • Getting Real with HDR – a Step by Step Tutorial for Realistic Looking HDR
    • Is the Death of HDR Photography Coming?

    The post Luminosity Masks Versus HDR Software For Creating Natural Looking HDR Images by Jimmy McIntyre appeared first on Digital Photography School.


    Digital Photography School

  • Using Humor In Street Photography

    Humor may very well be the toughest assignment the street photographer will take on. It takes a keen eye to see humor in the streets and some skills to capture it in a fraction of a second. Here are a few things to consider before you head out on a quest to photograph humorous situations in the streets:

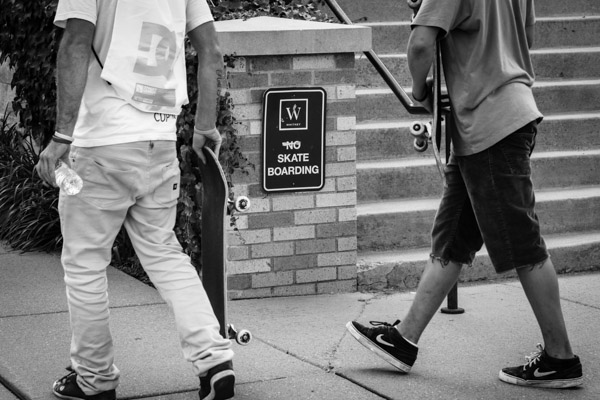
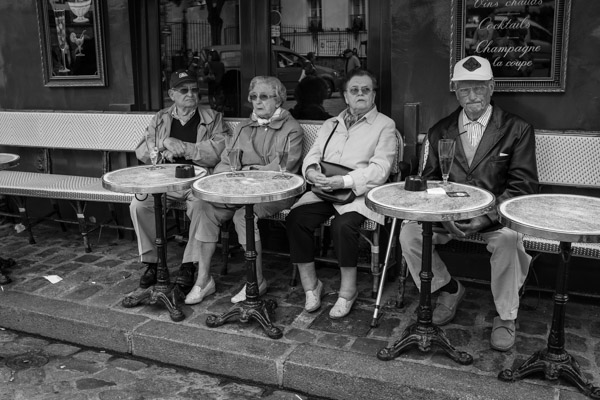
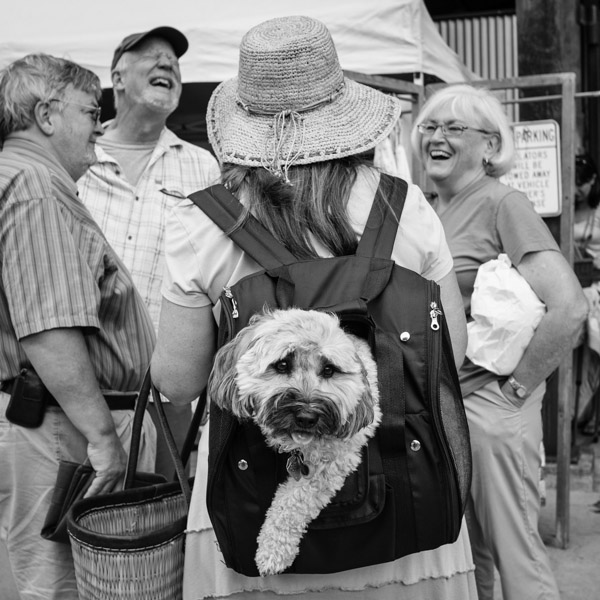
    Humor can be subtle ©Valerie Jardin

    Humor can be subtle ©Valerie Jardin

    Story in a frame

    Just like a good joke, no explanation should be necessary. A catchy caption should suffice to enhance the humor conveyed in the image. Many newspapers used to have a ‘feature’ picture in every issue. Many still do. Think of it as a visual treat for the reader. Its purpose is to provide a break from all the dreary news that fill the newspaper pages.

    Cultural differences

    Different cultures have a very different sense of humor. What may be funny in one country, can be interpreted entirely differently in another. What one photographer finds funny in one part of the world, can even be considered offensive in an other. Yet, thanks to the Internet, those cultural boundaries are becoming softer, as one is exposed to the world at large with the simple click of a mouse.

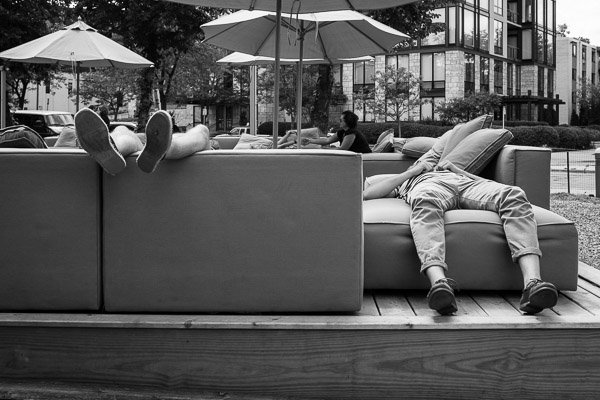
    Tired Tourists ©Valerie Jardin

    Tired Tourists ©Valerie Jardin

    Funny is a personal thing

    ‘Funny’ is very subjective and personal. What I find funny may leave you completely unresponsive. This is not only a cultural difference, but also a personal one, based of life experiences. Age, gender, culture, education, etc., will all play a part in what qualifies something as funny.

    Practice seeing first

    How do you practice? Instinct and the ability to anticipate are skills the street photographer acquires with experience, and a lot of practice. The more you walk those streets with your camera, the more in tune you will be with the world around you. As a street photographer you constantly scan your surroundings. No expression or gesture escapes you, the challenge is to record that story in a frame.

    Humor adds another level of difficulty to your street photography. The opportunities are there but they are often very subtle and extremely fleeting. I recommend practicing ‘seeing’ first and become proficient at telling a story in a frame, before you add a new dimension to your street photography with the element of humor.

    Legs ~ ©Valérie Jardin

    Legs ©Valérie Jardin

    Funny versus Ridicule

    Is everything that looks funny also fair game? I believe that the number one rule in street photography is respect. Humor is great, making ridicule of your subject is going too far. Turn it around. If it were you in the picture, how would you feel? Would you mind it being posted on social media for everyone to see? If the answer is yes (you would mind), then you should probably think twice about using the image.

    Caption this! ©Valerie Jardin

    Caption this! ©Valerie Jardin

    What works

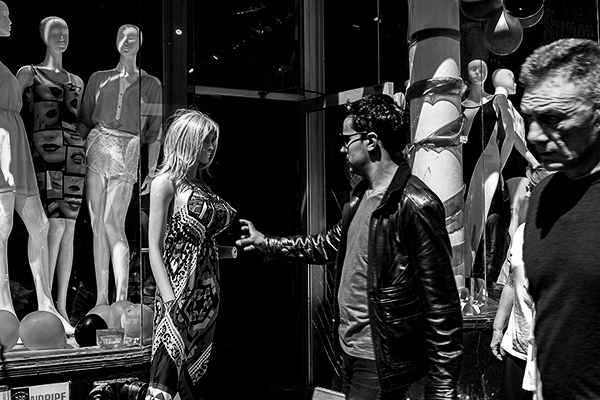
    In general, contrasts will make people smile, so will extreme situations or juxtapositions. The unexpected and the unusual are also often winners in conveying humor. Sometimes several components come together in a fleeting moment and you only have a fraction of a second to record it. This requires some quick thinking and a very good knowledge of your gear so that it doesn’t get in the way. Ideally, it should become an extension of your vision. Other times, a bit of planning, a certain degree of patience and some luck will all come together and give you the shot you envisioned. Setting a stage as a way to gain some control of the situation is a great way to capture some funny situations. You can position yourself in front of a billboard that will make the situation funny when the right protagonist enters the frame.

    This mannequin was the perfect opportunity for a fun shot. During my NYC street photographer workshop, one of my students managed to capture this shot. She found her stage, envisioned the shot, was prepared and grabbed the opportunity when the right subject entered the frame. Well done Yevette! ©Yevette Handler

    This mannequin was the perfect opportunity for a fun shot. During my NYC street photography workshop, one of my students managed to capture this shot. She found her stage, envisioned the shot, was prepared and grabbed the opportunity when the right subject entered the frame. Well done Yevette! ©Yevette Handler

    It is often better to let your camera do some of the work. Practicing street photography is not the best time to show your skills in full manual mode, you’ll probably miss the shot!

    It is clearly impossible to set out with the expectation of capturing humor in the streets every time you go on a photo walk. You can certainly train yourself to see better and work at increasing your response speed to a situation. Serendipity will play a big part in the outcome of your quest to find humor in the streets. The more you train yourself to observe the world around you, the more prepared you will be to get the winning shot.

    I highly recommend you check out the work of amazing photographers such as Martin Parr and Elliot Erwitt among others for some inspiration.

    Now get out there and shoot! Please share your images in the comment section.

    The post Using Humor In Street Photography by Valerie Jardin appeared first on Digital Photography School.


    Digital Photography School

  • Three Types of Light: Diffused, Backlight and Reflected – What are They and When to use Them

    Light: it is the main component for every image that you will take. It does however come in many different forms, producing very different results. Some of these types of light are diffused, backlit and reflected. There will be times when each of these types of light is more readily available than another, or even in some cases multiple types of light at once. Some people create their full photographic style by using a certain type more, or less, exclusively in their work. But, knowing how to first spot the different light forms will allow you to take full of advantage of every scenario and add depth, variety and a sense of individuality to your images.
    Figure 3

    Diffused Light

    Diffused light that which is not harsh and direct, it has been softened in some way. A great example is when you are outside and the sun is shining, with no clouds in the sky. The light is harsh and you will notice that there will be a lot shadows falling on or around your subject. But, if clouds are in the sky and they block out some of that harsh sunlight, the light then becomes diffused.

    You can use diffused lighting to your advantage in a great way. If you are shooting portraits on an overcast (diffused) day, you are pretty much shooting with nature’s own softbox. You will be able to work with your subject easier, and have different angles to shoot from, because you won’t be limited by the harsh lines and shadows that undiffused light can create. Overcast (diffused) lighting is preferred by many photographers, as it is a flat and even light. If it were a particularly sunny and bright day, shooting in the shade would also offer you some diffused lighting.

    Figure 1

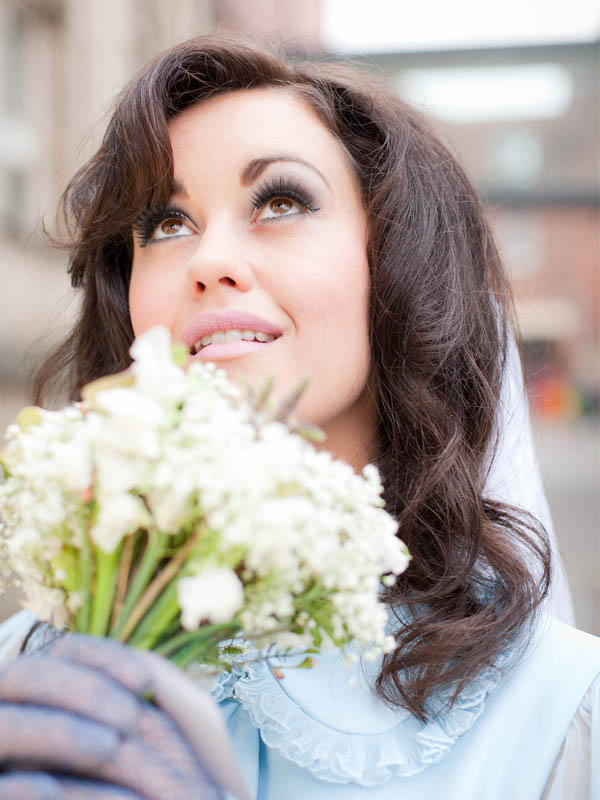
    This particular image shows the use of diffused lighting, using the shade of the building to soften the light, while also reflecting light shades back to the subject.
    Figure 2

    Backlight

    Backlighting is where you are illuminating your subject from the back, as opposed to from the front, or the side. Working with backlight you can silhouette your subject, or give them a glow. To Silhouette your subject, you would meter for the sky and to create a glow around your subject, you would meter for the subject itself. You need to place your subject in front of your preferred light source and allow that light to illuminate your subject. If you are using the sun as your light source, different times of the day will give you different types of backlighting. The lower the sun falls, the softer the light will feel. You may find that sometimes you will have to move yourself into a position where your camera can autofocus or switch to full manual, as the light can be so strong that your focusing point struggles to find what it is you want to focus on.

    Figure 4

    Reflected Light

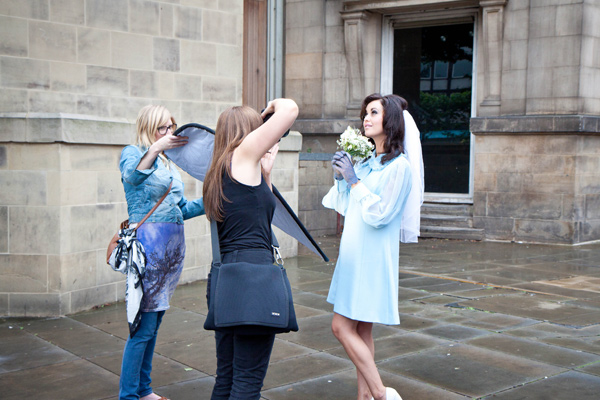
    Reflected light can be found everywhere, on most surfaces. Reflected light is literally the light that is reflected from a particular surface or material. If you were to shoot a portrait next to a white building, the light hitting the building would be reflected on to your subject, creating a soft light. If you were in the middle of the red Moroccan Atlas Mountains and you were to shoot a portrait, there would be a softer red reflection coming onto your subject from the ground. Or, if you were doing a portrait session outside and you wanted to bounce some additional light into your subject’s face, you could use an actual reflector. They normally come in two colours; one side gold, and one side white.

    Reflected light tends to be quite soft and takes on the colour of the surface/material that it is being bounced off.

    Figure 5

    The reflector was being used with the gold side to reflect a warm glow onto the subject’s face.

    Figure 6

    • How To: Silhouette Photography / Self Portraits
    • Tips for Photographing in Different Weather Conditions
    • Let’s Talk About Light – 3 Types of Lighting Conditions and how to Use Them
    • Choosing the Right Color Reflector for Your Photography

    The post Three Types of Light: Diffused, Backlight and Reflected – What are They and When to use Them by Natasha Cadman appeared first on Digital Photography School.


    Digital Photography School