Category: Photography

  • 15 Inspiring Photographer Interviews to Make You Hungry for Shooting

    Successful photographers become idols for newbies. It’s always interesting to see them in life, to take a glance behind the scenes, and hear their unique stories on how they got into photography. That’s the aim of the interviews. Each photography interview is a fascinating personal story of the photographer who shares his passion, tips, and advice on how to become Continue Reading

    The post 15 Inspiring Photographer Interviews to Make You Hungry for Shooting appeared first on Photodoto.


    Photodoto

  • Tips for Taking Great Portraits in 10 Minutes or Less

    Portraits 10 minutes or less 01

    Yes, you read that right. 10 minutes tops (not counting editing time), and you could have a set of photos worthy to hang on the wall. Don’t get me wrong, I’m not telling you that every session should be that speedy, but sometimes that’s all the time you have.

    Portraits 10 minutes or less 02

    Maybe you’re dealing with some kids that aren’t too happy about being there, and 10 minutes is all they’re going to give you before the meltdown. Maybe you’ve got awful weather, and you’ve got 10 minutes before the tornado hits. Maybe you decide 10 minutes before the sun goes down that it’s the perfect day for some photos, and you must do them right then (or your model shows up an hour late and you’re losing light fast). Maybe you want photos of your favorite pet, and you know that you’ll be lucky to get 10 minutes of attention.

    Maybe, like me, you like to do little mini-sessions sometimes, and you stack them in 10 minute increments. Maybe, just maybe, you like a challenge. So, here’s your challenge: see if you can follow these tips and get great portraits you’ll love in 10 minutes or less. Ready, set, go!

    Portraits 10 minutes or less 03

    Pick one location

    For a portrait session in a time crunch, you must choose ONE location. Just one. Find a spot that has good light, a nice background, and stick with it. Moving around is great if you have lots of time, but our goal right now is speed and quality. Use a tried and tested spot, or scout out a good spot ahead of time. This would also be a good time to use a great indoor studio spot, but stick with just one backdrop.

    Portraits 10 minutes or less 04

    Make a plan

    Go into your 10 minute session with a plan. For example: Let’s say you have a family who wants to hang a family photo collage on their wall. You know you’ll need a family photo, one of each kid, one of the kids together, and one of the parents together. You might want to give an option of portrait orientation (vertical), or landscape orientation (horizontal), especially for the family photo. So, take one of each of those. You may want to do one of family photo standing, and one seated. Maybe plan for one close-up and one full-body portrait of each kid. Whatever your scenario is, plan out ahead of time what you’re going to need, then stick to the plan. This isn’t the time to experiment.

    Portraits 10 minutes or less 05

    Put your subjects at ease quickly

    Normally, you’d get to know your subjects a little bit, and put them at ease. You still need them to feel comfortable, so don’t skip this, just put it on fast-forward. The second you greet them, be happy, be enthusiastic, be fun! Every minute counts, so let them know right away that for this 10 minutes, your only focus is them. Let them feel your confidence in them, and in yourself. You don’t have time for awkward photos, so they have to be on board and comfortable right from the start. You could say something like, “Are you ready for the most painless photo session you’ve ever had? Let’s do this!”. It might get a laugh, and put them at ease right away. Who doesn’t want a painless photo session?

    Portraits 10 minutes or less 06

    Know your camera well

    Finally, know your camera. When you’re in a time crunch, you don’t want to be fiddling with the settings, and panicking if things aren’t going how you expect. The more time you practice with your camera when you’re not under pressure, the better you’ll perform when it really counts. Know what settings you like, and when to use different apertures, shutter speeds, and ISO settings. If you are comfortable with these, you’ll be able to change them on the spot, in between photos, without wasting time.

    If you aren’t comfortable with your camera yet, this would be a good time to use aperture priority, or even the auto setting. This isn’t the time to learn; this is the time to apply what you have already learned.

    Portraits 10 minutes or less 07

    So, are you ready? I’m sure we’ve all got 10 minutes to spare. Give it a try, see if you can shoot at least eight portraits you love in 10 minutes or less using these tips. Let me know how it goes. The photos I shared here are an example of a real life less-than-10-minute session.

    Portraits 10 minutes or less 08

    The post Tips for Taking Great Portraits in 10 Minutes or Less by Melinda Smith appeared first on Digital Photography School.


    Digital Photography School

  • Review of The Promote Control for Time Lapse and Focus Stacking

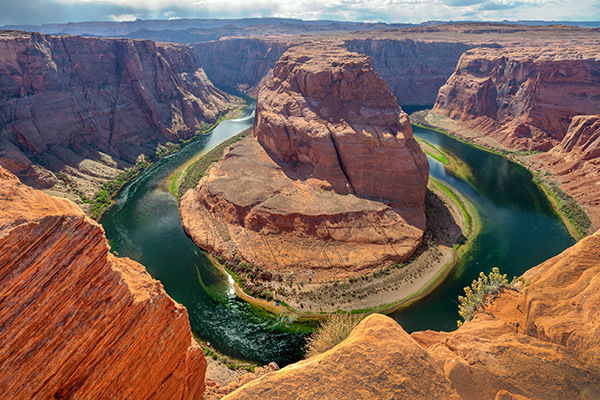
    Want to take super sharp “focus stacked” photographs that boast corner to corner sharpness with perfect focus? Want to shoot spectacular ‘holy grail’ time lapse sequences that capture the change from day to night? How about advanced bracketing for HDR shooting? Do you fancy getting shots like this?

    Horseshoe Bend Focus Stacked Gavin Hardcastle

    The Promote Control from Promote Systems delivers very precise control over DSLR cameras to open up new creative possibilities. Here’s a list of things that the Promote Control can do:

    • Promote Control ReviewHyperfocal Distance Calculator
    • Remote Shutter (One Shot)
    • Time Lapse Intervalometer
    • HDR Bracketing
    • BulB HDR Bracketing
    • Bulb Ramping for Time Lapse
    • Focus Stacking
    • Video Control
    • Manual Shutter for long Bulb Exposures

    This device is like a Swiss Army Knife for photographers who want to get the most out of their DSLR cameras. Currently priced at $ 299, it’s an accessory that will appeal to the more hardcore shooters, but for those photographers that regularly need advanced HDR bracketing, focus stacking or bulb ramping, the Promote Control is worth every penny.

    Rather than go into every single function of the Promote Control, I’m going to highlight its three most powerful features, which I believe merit the asking price themselves.

    Focus Stacking

    As a landscape shooter, I mostly want corner to corner sharpness in my images and sometimes I’ll use focus stacking to achieve maximum sharpness throughout the frame. This really only works when your static subjects are perfectly still, with little to no breeze. If you’ve ever tried focus stacking the manual way, you’ll know that there is some margin for error and it can take practice to do it well. The Promote Control takes all the guess work out of focus stacking by incrementally adjusting your focus from start and end points that you specify.

    Once you’ve done this a couple of times you’ll never be able to go back to doing it manually. When you see the results of your focus stacked image and the lack of weird looking artifacts that can sometimes result from inaccurate focus adjustments done manually, you’ll be hooked.

    Macro and small product photographers will love this feature.

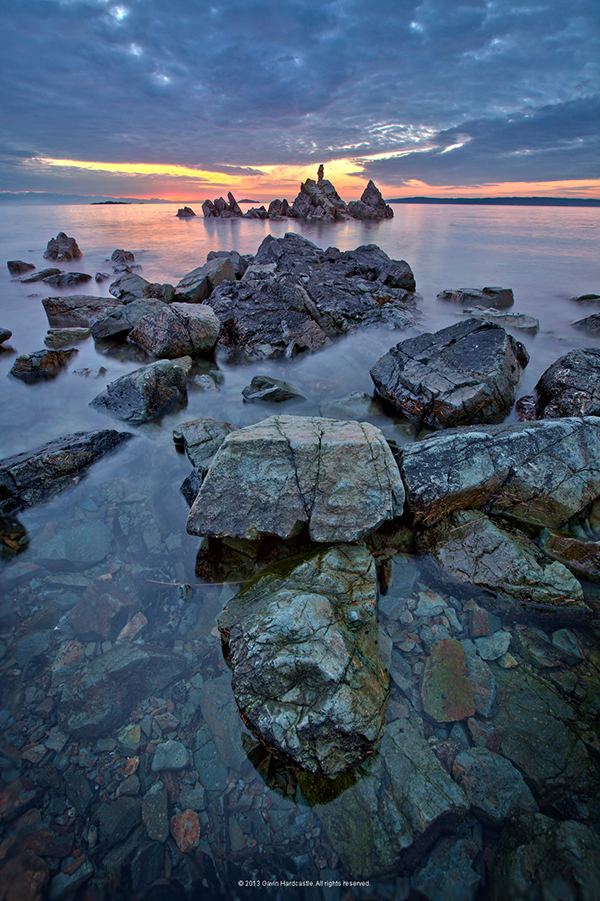
    Here’s an example of a focus stacked shot with corner to corner focus using a mid range aperture.

    Focus Stacking with the Promote Control

    Here’s a video demonstrating how this works with the Promote Control.

    Bulb Ramping for day to night Time Lapse

    If you’ve ever tried to shoot a time lapse sequence of the setting sun, you’ll know that there are only two ways to capture the correct exposures as the light changes. You either adjust the shutter speed manually while shooting (which introduces terrible flicker) or you use a bulb ramping device that can gradually and smoothly alter your shutter speed over time.

    This technique is known as Bulb Ramping, and there really aren’t that many devices out there that do a good job. The Promote Control has become something of a “go to” bulb ramping solution for quite some time now, because it simply does such an excellent job of adjusting your DSLR camera’s shutter speed in tiny increments, over a set period of time. You tell the Promote Control how long you’d like to shoot, and when you’d like it to begin increasing or decreasing the exposure time.

    Of course, it can’t know exactly when the changes in light occur, you have to know in advance by casing your location the night before, and making a note of the sunset time. The Promote  Control simply does what you tell it to do, and it does it well. Here’s a video of Joel Schat explaining how to achieve bulb ramping with the Promote Control.

    HDR Bracketing

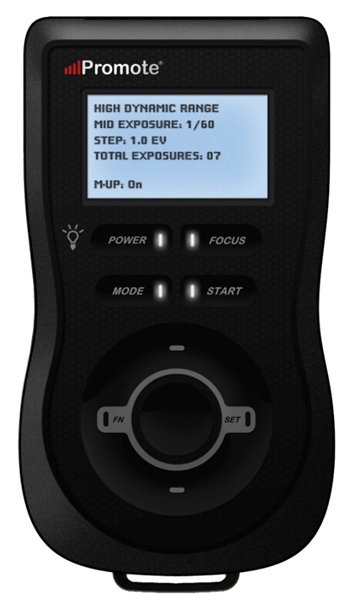
    If three or five bracketed exposures simply aren’t enough to capture the dynamic range of your scene, how does 45 exposures sound? Simply tell the Promote Control what shutter speed to use for the middle (or correct) exposure, then tell it how many EV steps to use and the number of total exposures. The Promote Control will do the grunt work while you look around for the next shot.

    A jack of all trades

    Everything that the Promote Control does, it does well. I expect that most users will only use two to three of this device’s powerful features but at $ 299 it’s worth every penny.

    Build quality

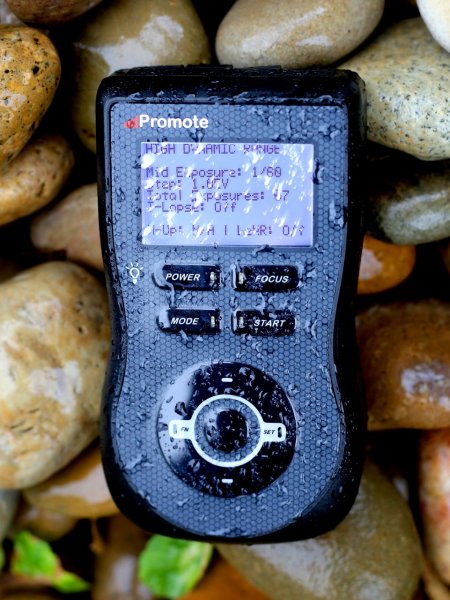
    weather sealed promote control

    The Promote Control is very well built. It’s a solid little unit that’s about the same size as a Smartphone, but is just under an inch thick. The backlit LCD screen is easy to read and there are only eight buttons on the entire unit. It’s small enough to pack into any mid-sized camera bag, and comes with a tidy little carry case. It even comes with a lifetime warranty for manufacturing and workmanship defects. How often do you see that?

    The device is powered by two AA batteries which last a long time. You can also power the Promote Control with an external DC power jack for taking super long exposures, or lengthy time lapse shoots.

    What I’d like to see in the next update

    To me, there is one glaringly obvious function that is missing from this device. HDR Focus Stacking. Why not combine the advanced HDR bracketing feature and the focus stacking feature? When I focus stack manually, I often have to bracket in order to capture the dynamic range. I can’t imagine why this feature is not available with this device.

    My only two complaints

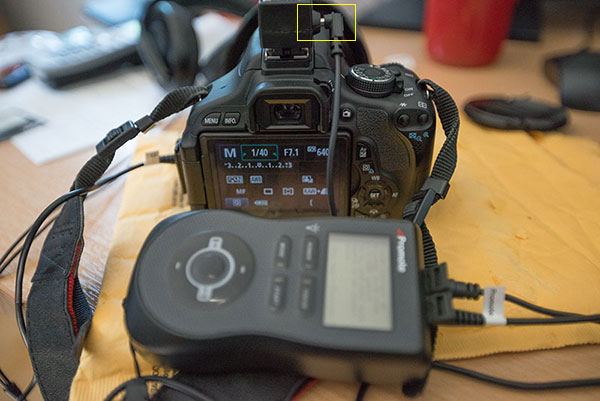
    The Promote Control is such a simple little device that there’s not much to complain about, it either works or it doesn’t. My only gripe isn’t with the unit itself, but with the hotshoe attachment, required for bulb ramping when shooting time lapse sequences. I found that the cable fell out of the hotshoe attachment at the slightest nudge, not something I would trust out in the field when shooting a lengthy time lapse.

    Hot Shoe Cable

    I had problems with the cable that attaches to the hotshoe accessory.

    My other complaint is that the Promote Control is not compatible with mirrorless cameras like my Sony A7R. Full compatibility only extends to Nikon and Canon, with limited compatibility for Sony and Sigma cameras. This is the only reason I decided not to buy the Promote Control. But if Promote Systems manages to catch up with the mirrorless movement, I’ll be unleashing the credit card.

    I asked Promote Systems about it and this was their response:

    We get a lot of requests for compatibility with the A7/A7R and we would love to support the cameras, but unfortunately Sony doesn’t make that possible. They implemented a tethering protocol on A7 cameras, but just as with earlier cameras, it refuses to save images on the card – you MUST pick them up and save them elsewhere, or all subsequent USB image acquisition commands will fail. Until Sony resolves the issues with not saving images on to the in-camera card when tethered, we can’t do much about it, unfortunately.

    Why can’t my camera do all this?

    When you look at what the Promote Control does and the results that it achieves, there’s obviously a demand for this level of functionality. There’s no reason why digital cameras can’t have all of this functionality built in, and with cameras like the Sony A7R able to run Apps that users install, it’s only a matter of time until all of this can be done in camera. Until then, Promote Systems are filling a gap in the market and they are doing it very well. I’m going to award the Promote Control 4 stars.

    Would you buy this clever little device?

    The post Review of The Promote Control for Time Lapse and Focus Stacking by Gavin Hardcastle appeared first on Digital Photography School.


    Digital Photography School

  • Weekly Photography Challenge – Flowers

    Earlier today I shared a bunch of flower photos to brighten your day. I can’t think of anyone who doesn’t like flowers, even the roughest toughest guys can appreciate nature’s beauty and splendour.

    By Michael J. Moeller

    The weekly photography challenge is flowers.

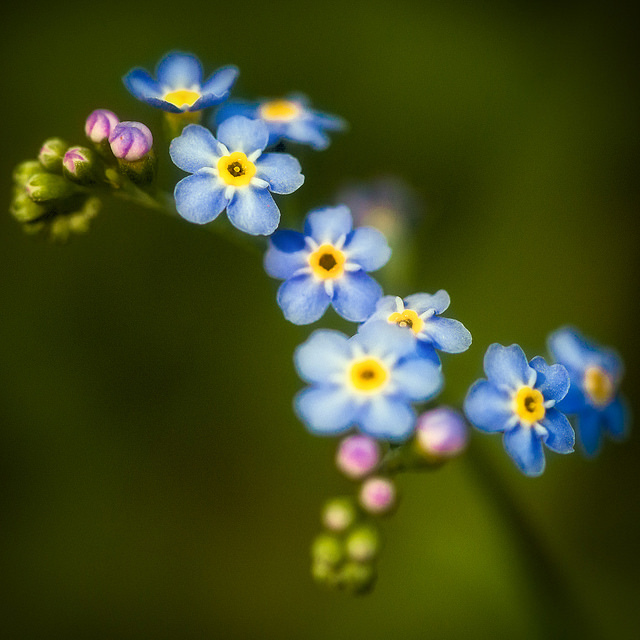
    Now of course it’s your turn. Go find some flowers and photograph them. Go for a walk, find some wild flowers, or visit a garden. You could even think outside the box and make paper flowers or draw some on the sidewalk in chalk. Perhaps you could set up your tripod and do some macro shots and wait for a bee or bug to come along. Try some creative depth of field using a large aperture, or some multiple exposures.

    The key of course is using light to your advantage. Show the flower off by backlighting it with gentle evening light. Or use side lighting to pick up extra texture. You’re only limited by your imagination.

    Here are a few flowers to get you started:

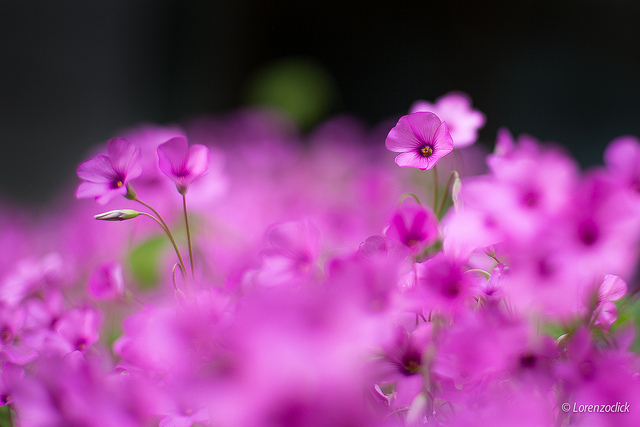
    By Lorenzoclick

    By aussiegall

    By @Doug88888

    By aussiegall

    By Theophilos Papadopoulos

    By @Doug88888

    By Alex Dram

    By Sorin Mutu

    By Richard Taylor

    By Louise Leclerc

    Now it’s your turn!

    Share your flower photos

    Simply upload your shot into the comment field (look for the little camera icon in the Disqus comments section as pictured below) and they’ll get embedded for us all to see or if you’d prefer upload them to your favourite photo sharing site and leave the link to them. Show me your leading lines using pathways and roads in this week’s challenge.

    The post Weekly Photography Challenge – Flowers by Darlene Hildebrandt appeared first on Digital Photography School.


    Digital Photography School

  • Shooting Details to Tell a Visual Story

    Cross

    The bride’s most prized possession for the wedding day

    A visual story, although no longer used as frequently in magazines or media, is a powerful way to give your viewer a taste of a

    situation without having to be there. It’s also a great way to challenge yourself to produce a coherent body of work. A collection of images, or picture story, can be engrossing and tell a story far beyond what a single image could do.

    Think back to a recent trip you took, a night out with your significant other, a favourite book or film. Try to describe it to an audience using only overarching themes. Thailand is hot and the people friendly. We went to see a movie. Lord of the Rings is about good and evil. These give your audience an idea of the content, but no clear idea of the details. The power of a story does not lie only in the bigger themes, or the “include-all” wide shot. In order to clearly convey your message, you often need small details that give your audience a glimpse into the building blocks of your story. The devil is in the details, as they say.

    If your pictures aren’t good enough, you’re not close enough. – Robert Capa

    Capa meant this in a couple of different ways: physically of course, but also emotionally. Both of these will help you shoot clear details to aid your viewer’s understanding.

    Go Wide

    In order to get closer, you don’t always need to zoom in. This will cut out distractions, but also give your viewer a sense that you’re not really close to your subject. Longer focal lengths necessitate being further from your subject. There is an intimacy that comes about by using wide-angle lenses and physically moving in very close. Just be careful of distortion.

    The street surrounding this man was littered with his creations, but by getting in close with a wide lens, I was able to just show his current work.
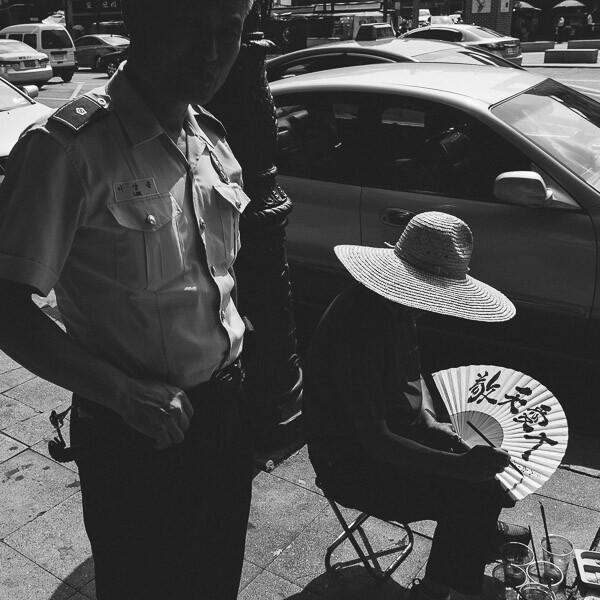
    Street Calligrapher in Seoul

    Street Calligrapher in Seoul

    Feel

    Being emotionally close can help you not only with being able to get physically close, but also give you a deeper understanding of your subject, and thus photograph details that are meaningful. If you are working with people, it will also help you gain trust. In the photograph below, it was important to gain the monk’s trust before asking him to take time out of his schedule to pose for a while. By watching and understanding him, the decision for which detail to shoot was obvious.
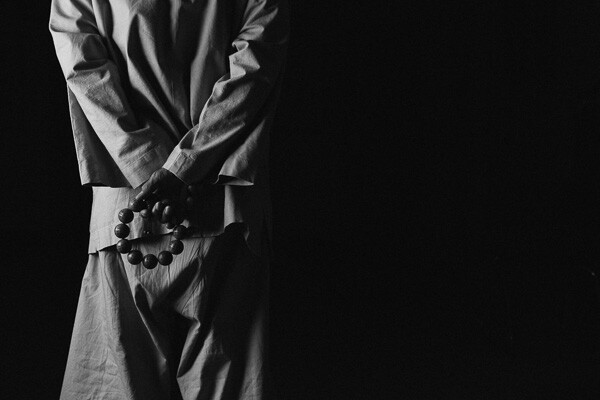
    Prayerbeads

    A Buddhist Monk with prayer beads

    John Loengard, the picture editor at Life Magazine, always used to tell me, “If you want something to look interesting, don’t light all of it.” – Joe McNally

    Loengard’s quote, by way of Joe McNally, gives us a very important concept that essentially tells us to shoot details. If, by not showing all of something we are making it more interesting, then details by their very nature are a strong starting point for interesting photographs.

    Light

    Light is a wonderful tool for showing only the details you want your viewer to see. Although our eyes are able to see a wide range of tones from light to dark, our cameras do not have that luxury, so you have to make creative decisions.

    In the scene below there were multiple interpretations that could have been made. The exposure could have been based on the faces of the candle bearers, blowing out (photographically speaking) the candles to pure white. But the story I chose to tell was about the prayer-candles themselves, and knowing that the scene would fade to black very quickly around the candles made for a great detail shot of a very chaotic scene.
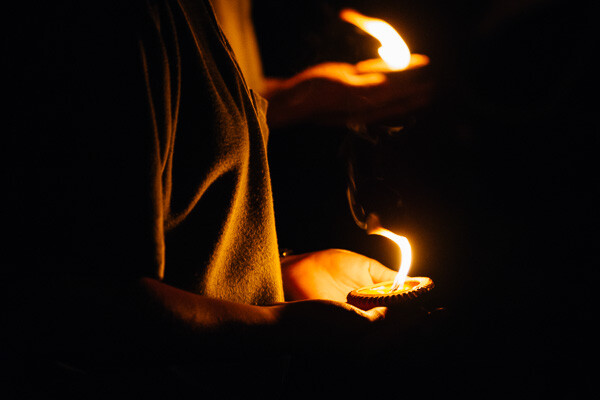
    Candles

    Choosing to expose for the brightest parts of the scene to show only the necessary details

    This applies to lighting, and also to composition. The strongest stories we read are the ones that leave us with guess-work and hints to pique our interest. The same goes for photographs. If you show the entire subject, or the entire scene, you are giving your viewer the answers. If you want them to linger on your photo, fill it with hints, but not complete answers.

    Focus

    Depth of Field, or selective focus, is a great way to shoot important details. Your eyes are drawn to areas of sharp contrast (which could be light, or focus) before areas of low contrast. This means that you can use depth of field to very effectively direct your viewer’s eye to what you want them to look at.

    While shooting this portrait of a young girl, I noticed that she was playing with her ribbon quite intently. This details speaks volumes about her that her mother will remember forever. Her hands will never be that small again, and that is an important reason to highlight them with a detail shot.
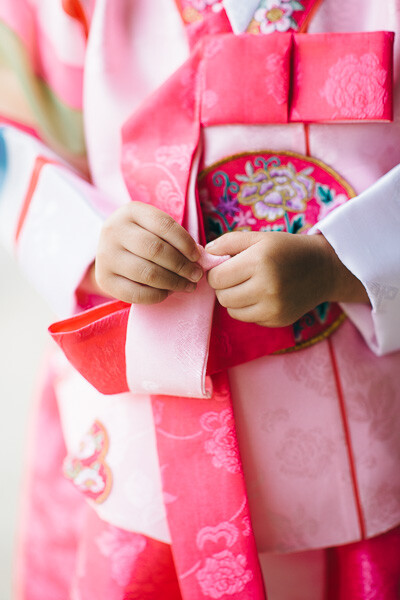
    Hanbok

    A young child’s hands holding the ribbon on her Hanbok

    You can use light, subject distance, lens choice, emotion, depth of field, and so many other technical aspects to show details and give extra depth to a story, or at the very least provide you with another interesting way to look at your subject.

    Set aside a few hours over the next couple of weeks to practice this. Choose a subject. That could be a person, a craft, a street in your town, a time of day, or whatever else you choose. The task here is to explore that subject. Shoot it from as many angles, and in as many ways as you can, with each and every frame trying to tell the story of your subject. Be sure to shoot as many details as you can using the techniques above. When you finish, take the time to look over these images and make a selection based on the ones that speak the most about your subject. The details will shine here, giving another dimension to the collection of images you have shot.

    Tools

    Tools at a Thai umbrella factory

    Do you have any other tips for capturing details to tell a story? Please share in the comments below.

    The post Shooting Details to Tell a Visual Story by Dylan Goldby appeared first on Digital Photography School.


    Digital Photography School
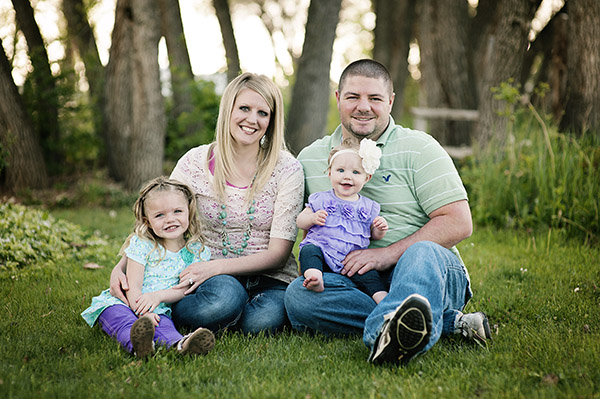
  • How to Photograph People: 7 Tips for Photographers Who Never Photograph People

    lynseymattingly7

    No matter what type of photography you specialize in or prefer, at some point you will find yourself having to photograph a human, or multiple humans. For favor, for fun, or because they share your genetic make-up or home address. If you own a fancy camera, there you will be at least once in your photographic life (but probably many more) where you will find yourself taking a portrait. Taking pictures of people is much different than beautiful mountains, scenic oceanscapes, historic architecture, butterflies, plates of food, or whatever it is that you usually photograph. Here are some basic tips to get the best portrait possible, especially for you if don’t usually see a human on the other side of the lens.

    #1 Be realistic

    Don’t overpromise your abilities or expect too much out of yourself. If someone asked me to take a picture of the snowcapped Rocky Mountains, which, as they have been my entire life, are right outside my window and something I know like the back of my hand, it would not be a good picture. I lack the skills for landscape photography, and more importantly, the interest. In my favor though, people aren’t likely to ask me to take a landscape image near like a non-portrait photographer will be asked to take portraits. Be upfront if you are willing to try it so that in the event it doesn’t go as planned, it won’t bother you enough to affect how you feel about photography in general.

    lynseymattingly2

    #2 Simplify everything

    Backgrounds, clothing, props, light, etc. – simplify everything. Give yourself a running start out of the gate by having a solid foundation to work with. Look for flat or level backgrounds, horizon lines that don’t run through people’s heads, even lighting, and solid colors. I can’t emphasize this enough. The details which are the focus should only relate to the person, whether it’s a portrait of just the face or a full body, everything else should compliment this, or completely disappear to the viewer’s eye.

    lynseymattingly5

    #3 The easiest setting I know

    At the risk of starting a heated discussion or this becoming a dumping ground for comments debating otherwise, I am going to share what I consider to be my best general setting and equipment advice.

    First a few disclaimers: I shoot Canon and have no idea if these will translate to something else. Also, you must promise you will not be upset if this doesn’t work for you; sometimes finding what doesn’t work is just as important as finding what does (I tell myself this often to justify my many mistakes). Lastly, taking a great portrait is a lot more complicated than just one setting, but you have to start somewhere. There are likely to be people who disagree with my advice and I hope that this could start a supportive discussion on what has worked for others, rather than unhelpful commentary. Now, on with it…

    • Using natural light only if at all possible, dial in your ISO for something that makes sense; ISO 200 if it’s bright, 400 if it’s cloudy but even, 600 if it’s darker.
    • Shooting in Aperture Priority mode will allow you the most room for error, and is how many portrait photographers shoot regularly.
    • I like the f-stop to be at f/2.2 for one or two people, and f/2.8 or f/3.2 for groups of three or more (obviously this is speaking very generally and would best be used as a starting point to find what works for you). These settings will give you that “portrait blurry background effect” known as good bokeh.
    • Shooting in RAW will give you more wiggle room later when editing, though it takes more space on your memory card.
    • Use a prime lens if you can; I shoot nearly everything I take with my 50mm L1.2. This is a fancy lens no doubt, but any prime lens will typically be faster (have a larger maximum aperture) than a zoom lens, and with everything else going on, I find that using my feet as my zoom is one less adjustment my eyes and hands have to do.
    • I typically underexpose my images one stop. This works for me because I like to get the details and then bring it back up as needed myself in post.

    This may not work for you, and there is absolutely no shame in running everything you aren’t sure about on auto. This doesn’t make you less of a photographer. All it means is that you think in this scenario, your camera – a magnificent piece of machinery that was created by thousands of professionals over decades with countless research, information, and experience – might guess better than you. That’s all.

    lynseymattingly1

    #4 Shoot from their eye level or higher, and at an angle

    While photographing a person from below and not capturing an amazing view of 15 chins they don’t even have is possible, it’s not easy. For the best, most flattering set-up, shoot at their same eye level or above. I often have people kneel down and look up at me while I remain standing. As someone who has 20 different chins that only come out and play for pictures, I’m sensitive about this one and I find that even a child with the most adorable chubby cheeks and double chin is best photographed on a level playing field.

    Additionally, taking pictures of someone straight on is both unflattering and uninteresting. Asking them to twist at the waist, shoulders, or neck and not face their body square-on, but rather follow their face’s direction will not only be much more forgiving to any subject (every single human has one eye that is smaller than the other – I’ve researched it), but will also make for a more professional finished portrait.

    lynseymattingly3

    #5 Don’t command a smile

    Don’t command a smile, or instruct “cheese!” or say “hold still!”, or anything that could be interpreted as you attempted to force your feelings, or agenda, onto your subject. Even if you are going for a serious tone, and are trying to catch an image when they don’t realize or least expect it, you are much better off engaging them in conversation than setting up the moment and expecting a single second of utter perfection. A true portrait is genuine at its very least.

    lynseymattingly6

    #6 Resist the urge to run your final images through every Photoshop trick you’ve ever learned

    If you don’t usually photograph people, the idea of playing around with editing tools might be fun. There are so many! This one turns their eyes into laser beams. This one makes their skin look like pure plastic perfection. It’s fascinating, I get it. However, if you’re wanting to stick to the basics, there isn’t much that needs to be done. Clean up blemishes with the Spot Healing Brush Tool, run a basic sharpen (I like the oddly named Unsharp Mask at 60%/2.0/0), and adjust your color and levels if needed. If I get stuck while editing an image, I ask those thousands of professionals what they think by running auto color, tone, and contrast just to see what it does. It nearly always takes everything too far, but it gives me an idea of where I want to go sometimes, just by showing me where I don’t.

    lynseymattingly4

    #7 Don’t try to turn it into something it’s not

    Oh how I wish this image had a little more POW. A little zing. I’d love it if her entire face was showing and her hair was either more haphazard, or more perfectly fanned out. I wish there was more background showing. However, this is not a picture for a fashion magazine cover, but rather an image of my stepdaughter I took with my iPhone. We were on a walk and I spotted the purple flowers on the ground and told her to go lay in them. And because all of my stepdaughters do whatever I say, and think that I am totally magical, she raced right over and did it. Then an enchanted unicorn wandered up and flew us home. It’s drastically cropped, not necessarily for effect, but because she was giving me a snarl and wearing a very busy shirt. Is this a portrait? To me, it is. It’s a perfectly fine, authentic image and the subject herself loves it.

    That is probably the most important thing when taking pictures of people.

    Do you have any other tips you’d like to share? Please leave a comment below.

    The post How to Photograph People: 7 Tips for Photographers Who Never Photograph People by Lynsey Mattingly appeared first on Digital Photography School.


    Digital Photography School
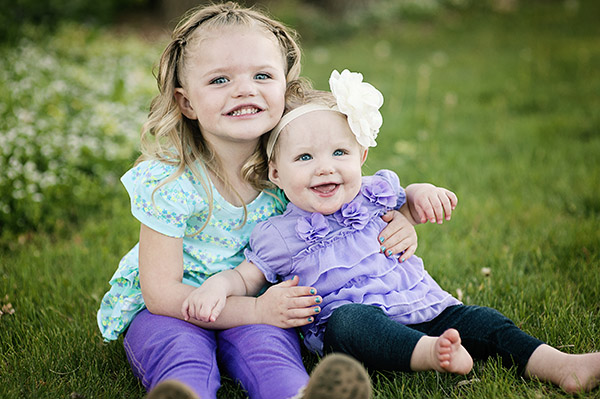
  • Another 15 Cheat Sheets, Printables and Infographics for Photographers

    Editor’s note: Last week we shared a list of some great resources for photographers. It was so popular we thought we’d bring you another set compiled for dPS by Julia May, enjoy.

    More Photography Tech and Creative Process

    The basics every photographer must know. Click the links to see the original article and source.

    Continued from #15 from last weeks: 15 of the Best Cheat Sheets, Printables and Infographics for Photographers

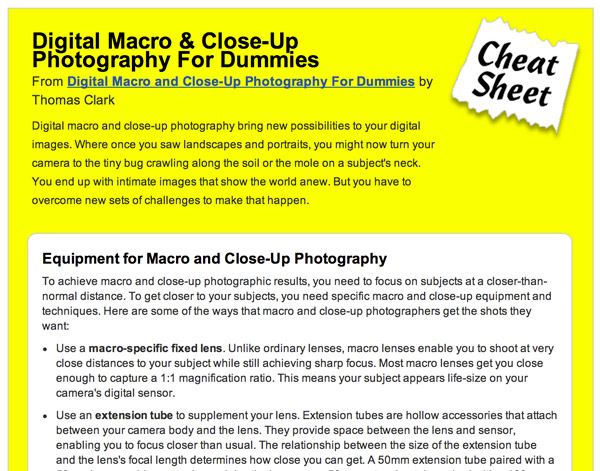
    #16 Digital Macro and Close-Up Photography for Dummies

    (click the link to read the full summary and see the whole sheet)

    18 macro dummies

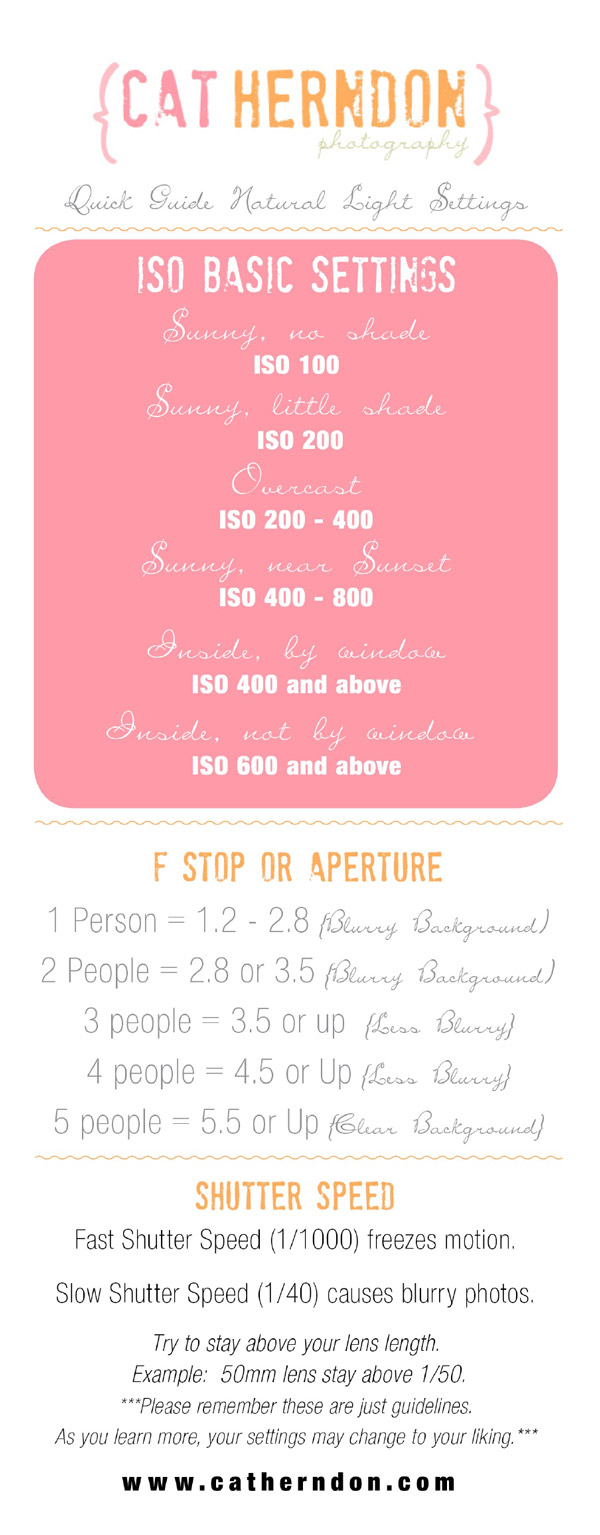
    #17 Quick Guide Natural Light Settings

    (Click the image to get a larger view of this graphic)

    18 natural light 600

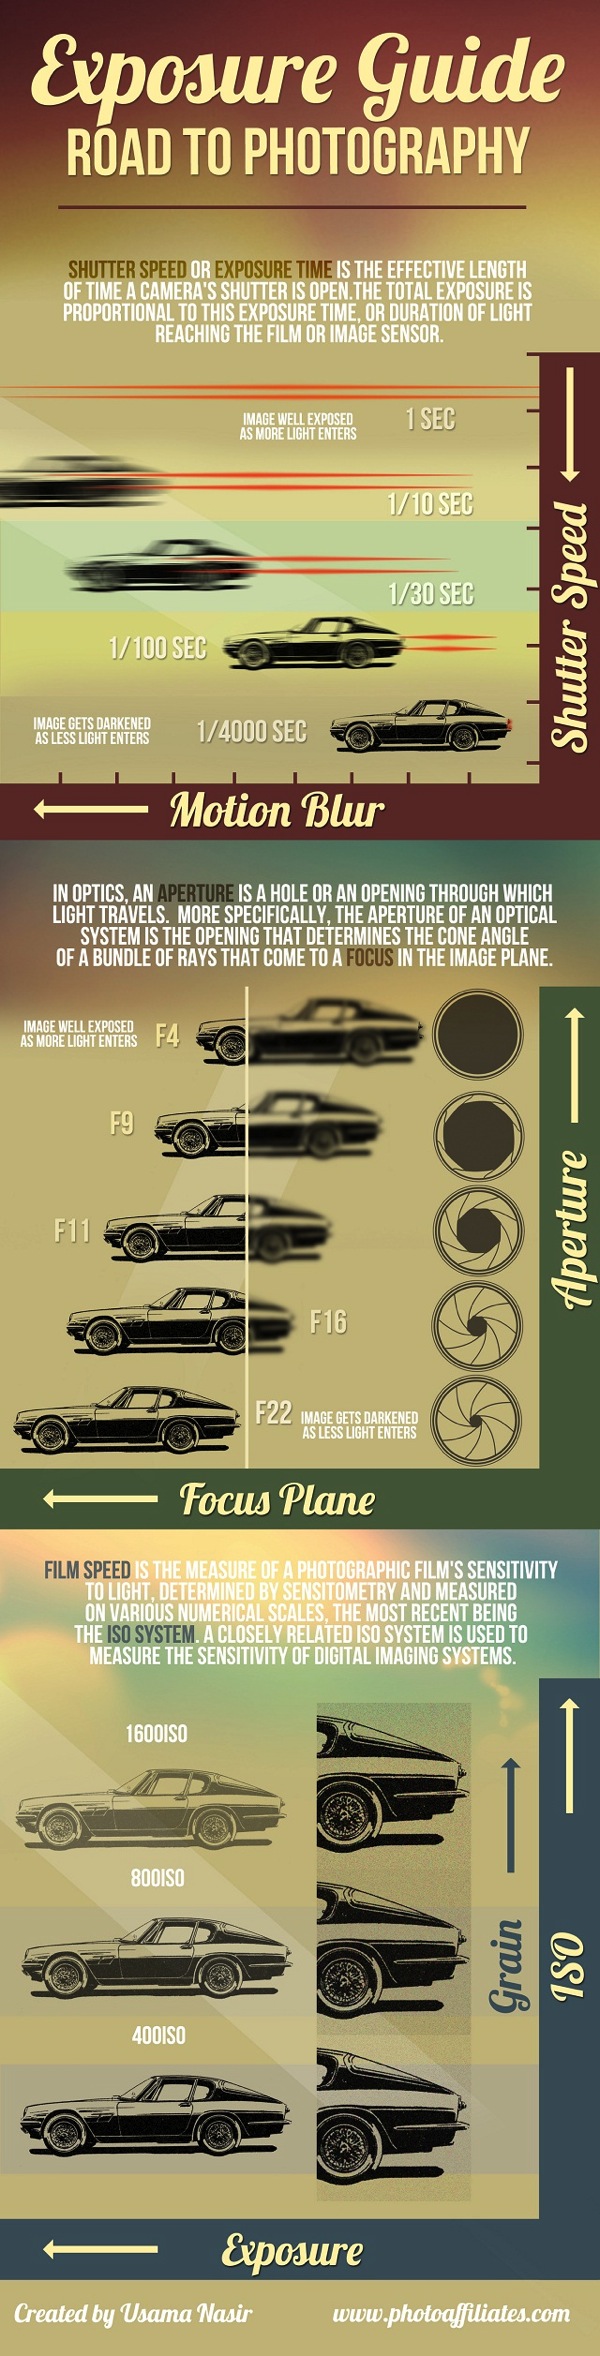
    #18 Exposure Guide: Road to Photography

    19 digital photography exposure guide

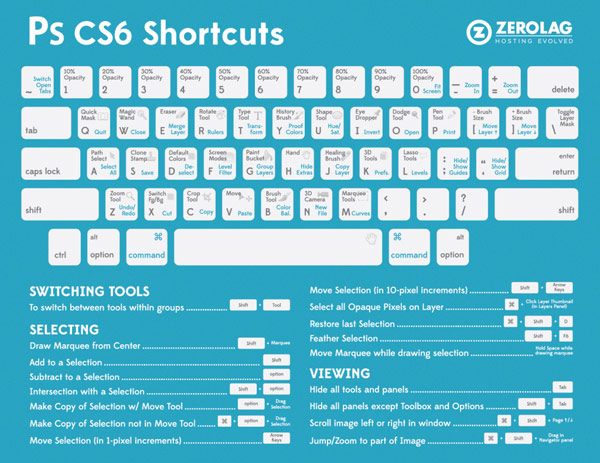
    #19 Photoshop CS6 Shortcut Cheatsheet

    20 photoshop cs6 shortcuts

    #20 How to Take Pictures Like a Pro

    (Click the image to get a larger view of this graphic)

    21 photography pro 600

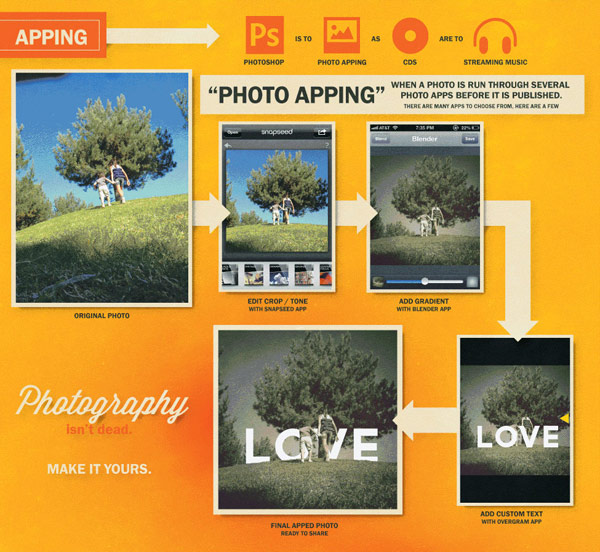
    #21 Is Photography Dead? Mobile Photography Explosion

    (Click the image to see the full graphic)

    22 mobile photography

    #22 21 Simple Poses to Get You Started With Photographing Children – a dPS article!

    (Click the link above for the full article and all images)

    23 posing guide children

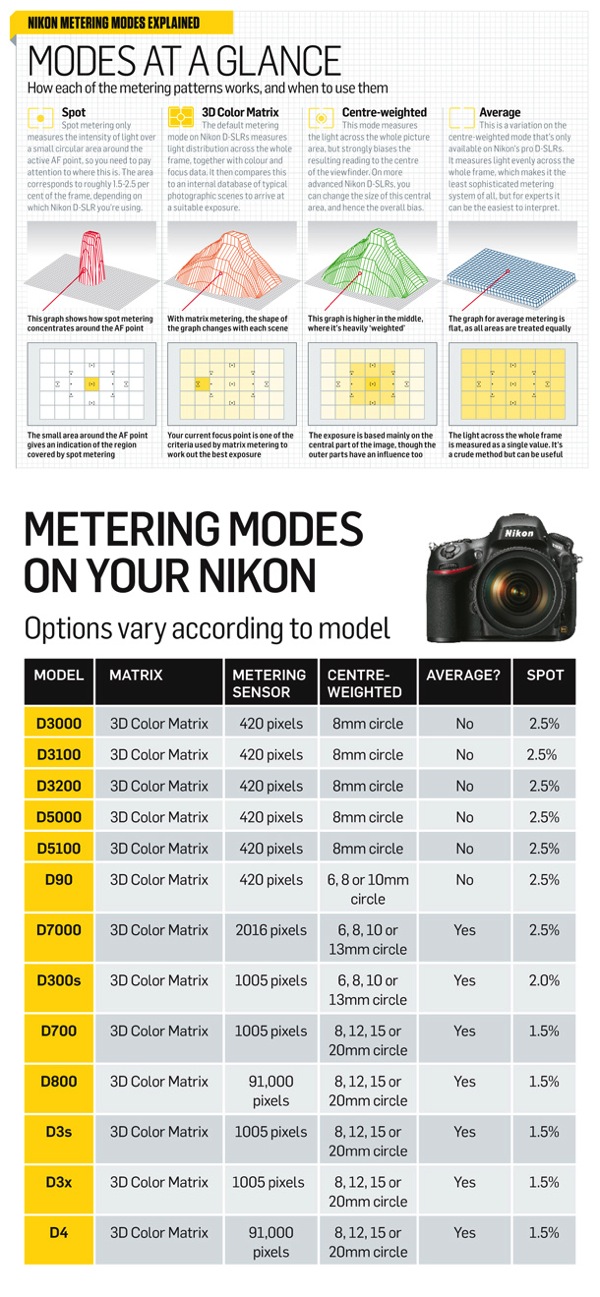
    #23 Using Nikon Metering Modes

    24 Nikon DSLRs metering modes full

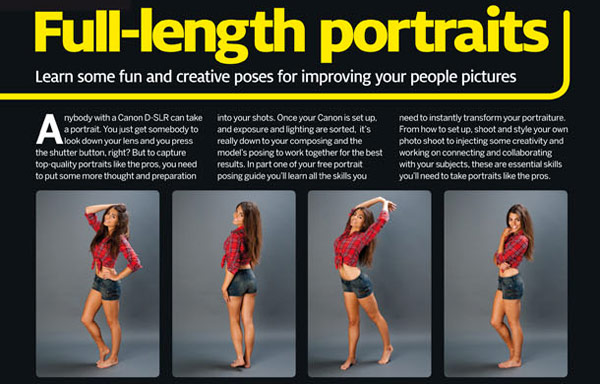
    #24 Portrait Posing Ideas (Printable)

    • Part One 54 Portrait Ideas – posing guide

    (Click the image to see the full graphic)

    25 Portrait Ideas

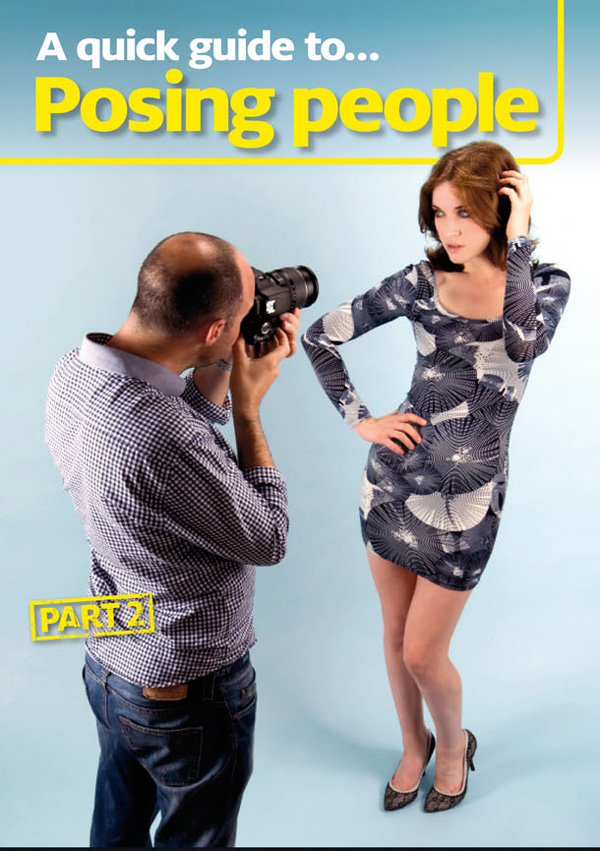
    • Part Two 40 More Portrait Ideas – posting guide

    (Click the image to see the full graphic)

    25 Portrait Ideas part2 cropped

    Photography Business and Legal

    Learn how to get started with your own photography business and check if your marketing strategy includes all the latest techniques.

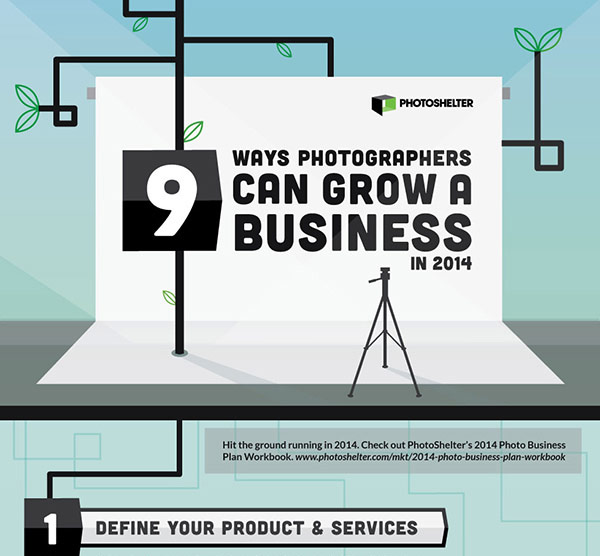
    #25 9 Ways to Grow Your Photography Business in 2014

    (Click the image to see the full graphic)

    26 photography business plan

    #26 9 Free Photography Contracts

    (Click the link above for the full article and get the contracts)

    27 photo contracts

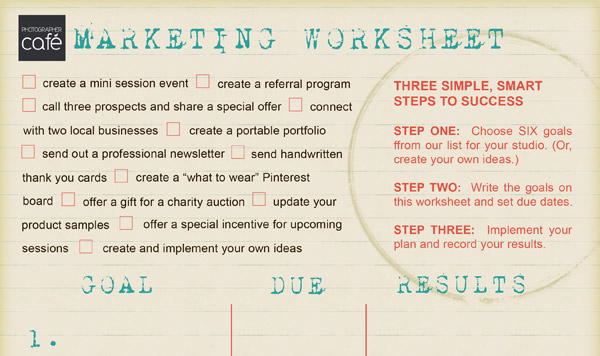
    #27 Creating a Marketing Plan That Works (Printable Worksheet)

    (Click the link above for the full article – click the image below for the full printable sheet)

    28 marketing photo worksheet

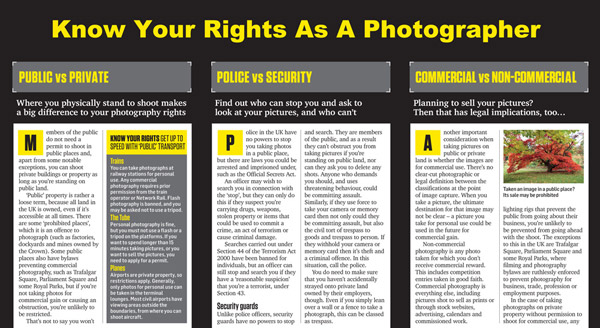
    #28 Know Your Rights As a Photographer

    (Click the image to see the full graphic)

    29 Photographers rights

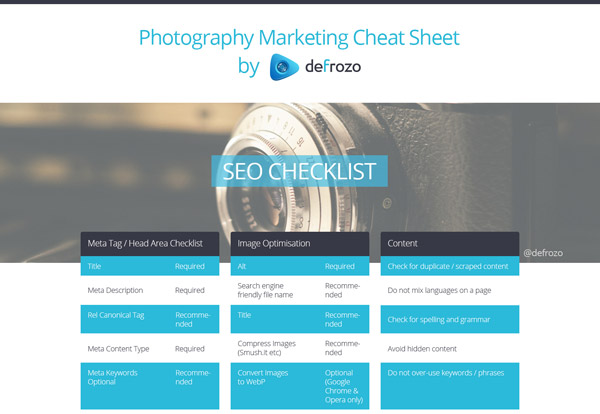
    #29 Photography Marketing Cheat Sheet (SEO, Social Media, Classic Marketing, Email Marketing)

    (Click the image to see the full graphic)

    30 defrozo photography marketing cheat sheet

    #30 Top 15 Photographers Under 25 by Defrozo

    (Click the image to see the full graphic)

    30 photographersunder25 600

    Any useful resource I missed? Share your suggestions in the comments below.

    The post Another 15 Cheat Sheets, Printables and Infographics for Photographers by Julia May appeared first on Digital Photography School.


    Digital Photography School
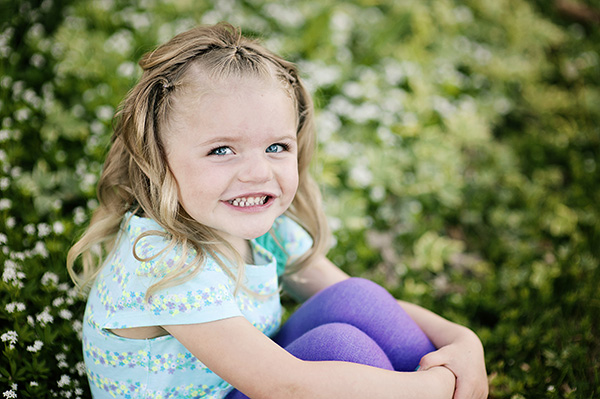
  • 5 Actionable Tips to Get More Word-of-Mouth for Your Photography Brand
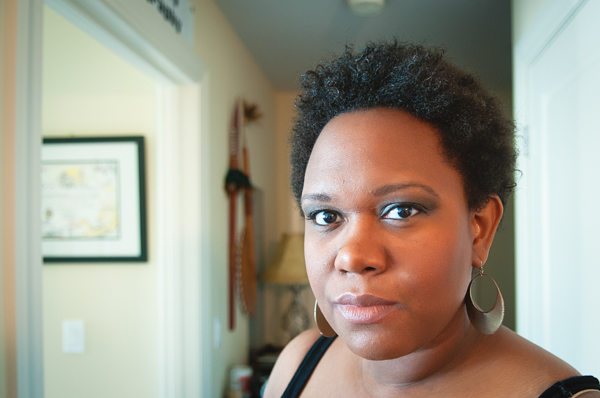
    Finding clients for your professional photography can be a challenge. That’s why your photography business, as with any other type of business, needs some promotion. Word-of-mouth marketing techniques are as old as the world itself, and it really works! In this article, we’re going to talk about the importance of personal style, which photo portfolio format works best for your Continue Reading

    The post 5 Actionable Tips to Get More Word-of-Mouth for Your Photography Brand appeared first on Photodoto.


    Photodoto

  • The New and Improved Flickr

    Flickr Staff Pre Marissa Mayer

    Flickr Staff Today

    Look at the two screenshots above. I took the first one in April of 2012, a few months before Marissa Mayer became CEO of Yahoo. The second one I took earlier today.

    Between pre-Mayer 2012 and today, Flickr’s staff has grown from 39 people working on Flickr to 109.

    About half of the 39 working on Flickr in 2012 are no longer on the team, which means that over 80% of the new, much larger team has been built since Mayer took over at Yahoo.

    After years of layoffs, CEO neglect, and lackluster product development, Flickr is back in a big way, firing on all cylinders.

    Under solid new leadership by former Googler Bernardo Hernandez, Flickr is getting strong and competitive again in photo sharing.

    All Flickr users have been given a terabyte of free high res photo storage.

    Flickr is making new smart and interesting acquisitions around the photo sharing space.

    Flickr recently relaunched a new and much better received photo page.

    Flickr’s new mobile app is among the best of breed with a 4.5 star rating in Apple’s app store.

    Flickr more recently has been ramping up photowalks and community again and recently hinted at future plans to help photographers monetize their photo collections.

    Marissa Mayer is the first Yahoo CEO to publicly have a Flickr photo page herself.

    I’ve had a few different opportunities to interact with staffers at the new and improved Flickr over the past few months and have come away each time super impressed at the new life that seems to flow through the team.

    Unlike the old Flickr, where staffers were demoralized over layoffs and hostile with users, the new Flickr feels incredibly positive and optimistic about Flickr’s future. A bright team of really smart engineers, designers and product managers are as enthusiastic as I’ve ever seen. The energy and morale at Flickr feels very high right now.

    I think the future really looks bright for Flickr and am happy to see the sort of rebirth and revitalization that is taking place there. While there still is a ton of work that can be done to make Flickr even better, I’m more confident than ever that Yahoo is going about it the right way and that Flickr, for the first time since being acquired by Yahoo, is in capable hands.

    Former Yahoo Jeff Minich recently wrote a post defending many of the ways that Mayer has improved Yahoo since taking over there as CEO. In it, he makes an important point that in order to really improve a tech company, you need to grow it. You can’t just lay people off to save money.

    Minich makes the point also that even as Yahoo has hired/acquired many new talented engineers, they’ve also managed the slackers out. I think the growth and change in employee composition at Flickr is a visible example of this — and I think the improvement in the product (especially in mobile) shows for it.

    If you are a photographer and have been neglecting your Flickr account, I’d encourage you to check back in and see where things are headed going forward.

    You can find me on Flickr here.


    Thomas Hawk Digital Connection

  • 8 Tips for Photographing the Perfect Headshot – for Yourself

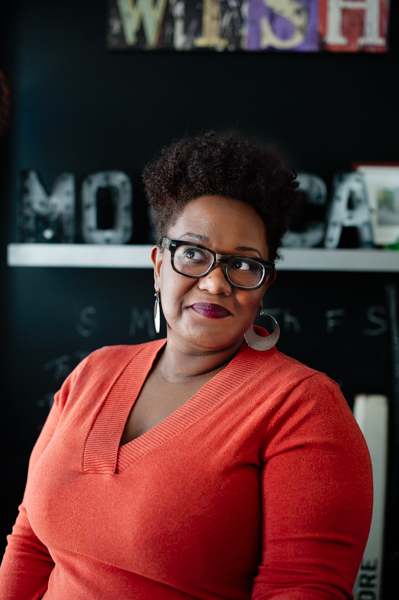
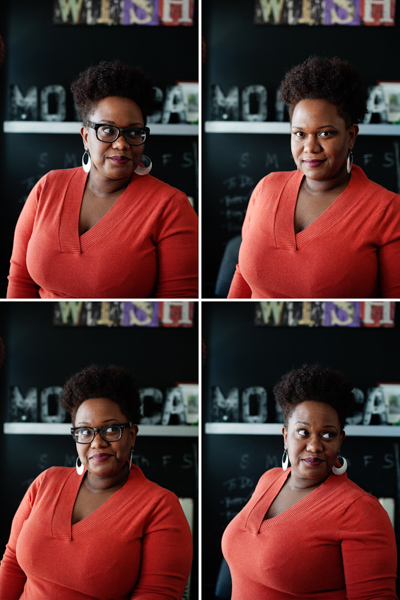
    Having an awesome headshot is a great way to express yourself to your potential clients. You want your headshot to show a bit of your personality or something else special about you. The great thing about being a photographer is that you can create your own headshot. This article will give you some tips to create a headshot that’s perfect for you!

    MonicaDayDPS 01

    You want to approach creating your own headshot like you would approach any shoot. You need to make sure you have great lighting and great focus.

    I created this headshot on my own. You can do this too. Here are my top tips for photographing the perfect headshot for yourself:

    Tip #1 – Look great

    Just because you’re your own photographer doesn’t mean you shouldn’t take this shoot seriously. Prepare for your headshot by making sure your hair is fabulous and that your makeup is done.

    Tip #2 – Have great lighting

    Whether you’re using available light or studio lighting, make sure you light your space well. If using available light, look for the light first. Find the best light in your home and make it work. Go outside if you need to. If you have strobes, flashes, or other light sources then make sure you’re set up with the most flattering light for your face.

    MonicaDayDPS 02

    Tip #3 – Shoot with a higher f-stop number

    Getting sharp focus will be the most difficult part of photographing yourself. Instead of shooting at f/2.8 try shooting with a smaller aperture say, at f/11. This will give you a greater plane of focus to work with, and a greater chance of having sharp focus on you.

    Tip #4 – Practice your posing

    As a photographer, part of your job is to guide your subjects into the most flattering positions. Now it’s time to learn how to pose yourself. Get in front of the mirror and find the position that works best.

    MonicaDayDPS 03

    Tip #5 – Shoot tethered

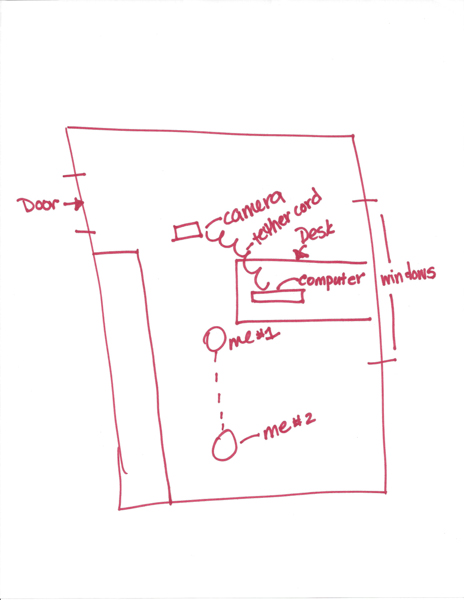
    Shooting tethered is great for self portraits. This allows you to easily see what your camera is picking up without moving from your spot. Make sure your screen can be easily seen from where you’re standing. Here’s a diagram of my setup.

    MonicaDayDPS 04

    Tip #6 – Bracket your poses

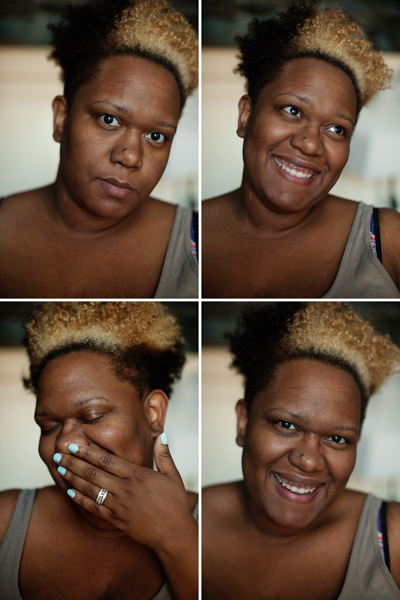
    Just like when bracketing for exposure, slightly alter your angles in a series of three to four shots at a time. If you’re shooting tethered, you can easily see what needs to be changed.

    MonicaDayDPS 05

    Tip #7 – Make it interesting

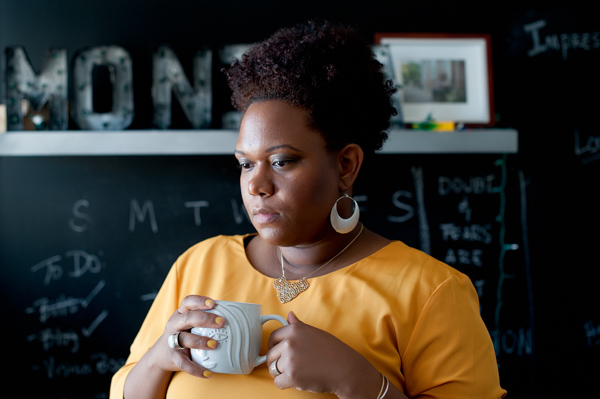
    You’re a photographer so that means you know how to get creative. Make your headshot a representation of your personality. Include your hobbies, your favorite place, things you like to do or even your name. Your headshot is an extension of your brand. Make it great.

    MonicaDayDPS 06

    Tip #8 – Edit it

    Make sure you edit your photo. Don’t forget this important step. Treat this photo like any other shoot. Take it from a snapshot to a professional photograph by adding your special touch.

    Remember, shooting your own headshot gives you complete control over your shoot while saving you a few bucks in the process. Don’t worry about making a mistake. You can take as many shots as you need to get the perfect photograph.

    The post 8 Tips for Photographing the Perfect Headshot – for Yourself by Monica Day appeared first on Digital Photography School.


    Digital Photography School