Category: Photography

  • Is Being a Photographer Synonymous With Being an Artist?

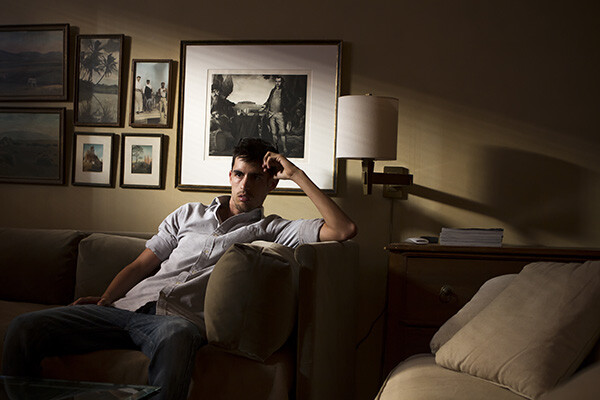
    Photo 1 Guy

    Sure, the concept of photography falls under the realm of one the arts, but can you strictly label someone an artist based on their job or hobby?

    Photographers are everywhere nowadays. Beyond the thousands upon thousands of photographers who have businesses and make a living taking pictures, there are also all the families with cameras and anyone who halfway knows how to use a camera phone. Every single one of you who calls yourself a photographer has the opportunity, in my opinion, to call yourself an artist.

    The term artist has a powerful meaning that is non-discriminatory. You, as an artist, have the distinct ability to take something and make it your own. But for me, I don’t consider myself an artist. It’s not a label I give myself because I feel that it is too strong for how I look at my own photos.

    What do I do? I am in one world, a staff photographer taking pictures of exotic cars, in another world, editorial portrait photographer, and in another a sports photographer. But where I find myself in true harmony is taking landscape and cityscape photos. Do any of these types of photography REQUIRE me to be an artist? Or is that just a term we can only identify ourselves with?

    Is the Word Artist too Demanding?

    Sometimes there’s a connotation that you have to be an artist to be considered a respectable photographer; whatever either of those terms mean.

    In our generation you don’t need much to pick up and learn how to take great photos. It’s not like you need a darkroom, chemicals, and to constantly be purchasing film. With just a good smart phone you can yield some amazing photos in spectacular quality. This has opened the world of photography and the arts to lot more people.
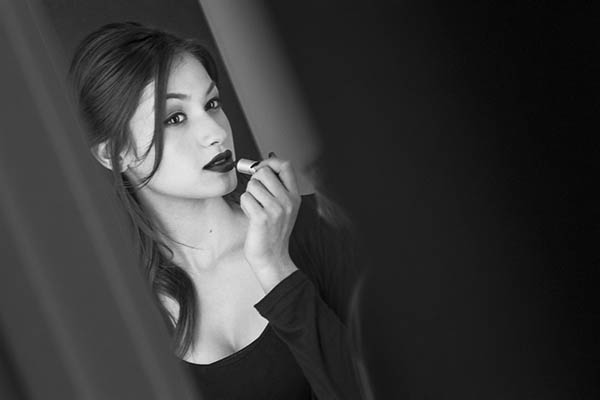
    Image 2  Girl

    With that said, do you need to be an artist, think like an artist, and go to art school to be a great photographer? I personally have a science mind. I graduated from college with a degree in Health Sciences. I picked up a camera sometime in college, and now that’s what I do.

    What about this: do you need to think like an artist and go to art school to BE an artist?

    Being a photographer can be just as much about having technical skill and experience, as it is about having a vision.
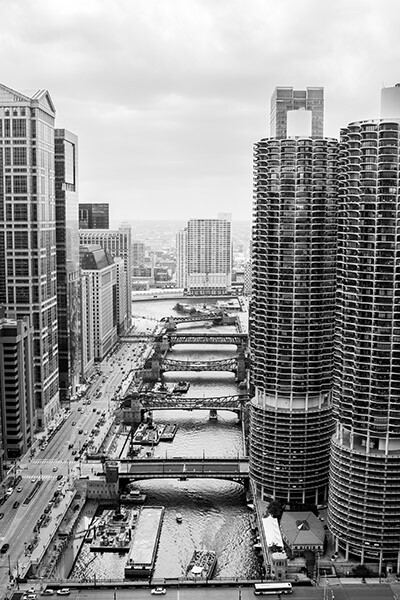
    Image 3  City

    The Balance Between Technical Skill and Vision

    In order to make great photographs you need to have both technical skills and a vision. The combination of these two is what converts real life into a photograph.

    Technical skill is required for just about everything you do. Maybe you started on automatic settings for your camera and slowly moved your way to manual as you got more comfortable with it. Maybe all of your photos are printed yourself?

    Whatever type of photo you’re trying to capture, chances are you won’t have all the time in the world to check every setting on your camera to see which photo comes out the best. You’ve already learned, and have experience with which settings work best. That’s how you continue to get good-looking photos out of the camera on fewer attempts.

    In the world today where just about every photo is being retouched to some degree, editing is also a technical skill that allows you to cement your style into your photos. Editing is an ever-evolving skill as you continue to learn new features in Photoshop (or other editing software) and as technology advances.

    In photography you progress, every day you get out there and take a new photo; you’ve gotten better. But that improvement needs to carry on by continuing to learn your craft. Every artist, every photographer, works to improve upon what they’ve already done. You can strive the same way, at your own pace.
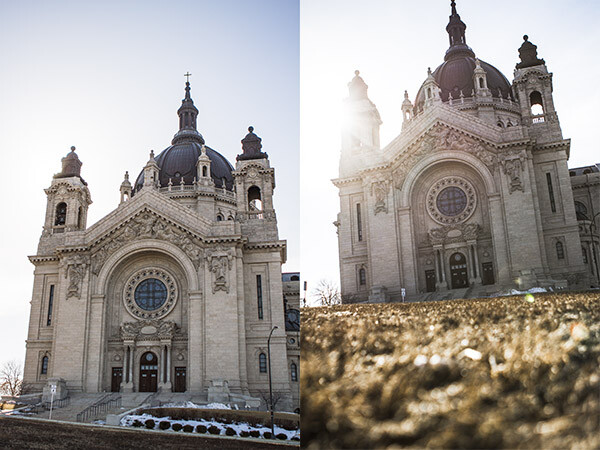
    Image 4  Churches

    When it comes to the other world of photography, some people tend to replace the term vision with other words, like artistic eye. You can call it whatever you want. Your vision can be a result of thorough internal planning of what’s going to make that a great photo. Or your vision can be more instinctual based on a knowledge of photography rules and personal experience.

    You see the world, you pull your camera to your eye and you take the photo. That’s what makes every photographer the same as well as different. From the same spot, 20 photographers will yield 20 different photos. Your vision is a result of how you see the world; and you see the world differently than the person next to you based on your upbringing and beliefs.

    You can continue to learn your own vision by understanding why you see the world the way that you do. Do your photos reflect the way that you see the world? I found my style because of how often I produced poor results. I eventually found my missing key: foreground and negative space.

    In your own personal photos, do you weigh skill and vision equally? Are you working to improve both of them and not just one?
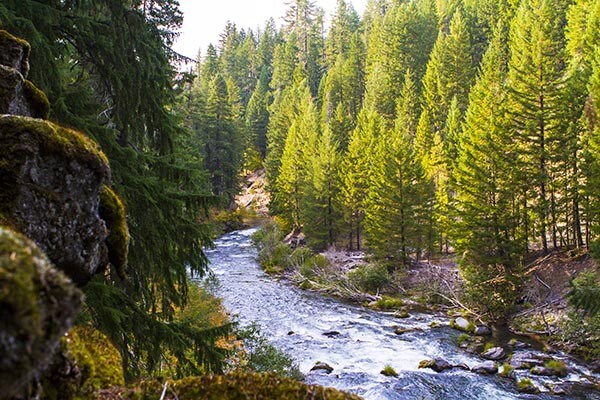
    Image 5  River

    The Reason Why This Distinction Between Photographer and Artist Matters…

    There’s no mold in photography. We don’t all have to fit any particular style. Find your own style and explore it. The stigma that one must act like an artist in order to feel comfortable with a camera is erroneous.

    You have the things you want to capture (vision) and over time you develop your own styles through skill and experience.

    Do you label yourself an artist?

    Will G. MacNeil (wgmphotography.com) takes photos for a living and is currently residing in Chicago, IL. Beyond everything, landscapes, editorials, and sports make up his style in the industry. You can follow Will G. MacNeil on Instagram for more concepts and photos.

    The post Is Being a Photographer Synonymous With Being an Artist? by Will G. MacNeil appeared first on Digital Photography School.


    Digital Photography School

  • The Controversy Around Flickr Selling Creative Commons Licensed Photos

    Douglas MacMillan has an article out in the Wall Street Journal today about the controversy surrounding Flickr selling prints of Creative Commons photos and not paying contributors for these images. It should be stressed that Flickr is only doing this on Creative Commons licensed photos where free commercial use is permitted by the license. If you license your photos Creative Commons Non-Commercial, this does not include you.

    In the article he quotes Flickr founder Stewart Butterfield: “Yahoo’s plan to sell the images appears “a little shortsighted,” said Flickr co-founder Stewart Butterfield, who left the company in 2008. “It’s hard to imagine the revenue from selling the prints will cover the cost of lost goodwill.”

    In addition to the Creative Commons photos that Flickr is selling and not paying photographers for use (legally), they are also handpicking other photos for this sales effort and here they are offering photographers 51% of the revenue on sales of these images who have agreed to participate.

    My two cents:

    I think it’s important that each photographer fully understand how the license that they are using with their photos online works. It is first and foremost the photographer’s responsibility to understand licensing. Creative Commons is a wonderful and liberal way to share your photos. It’s not for everyone though. You choose how your photos are licensed on Flickr though. By default Flickr licenses images “all rights reserved,” the most restrictive license available. So only photographers who have gone in and changed their license to a more liberal license would be affected by this.

    I license my images Creative Commons Non-Commercial. This is one of several variations of the Creative Commons license. This means that people can use my images for personal use or non-profit organizations can use them, but folks like Yahoo/Flickr and others can’t sell them commercially without my permission.

    If you are going to license your photos Creative Commons with no restriction, then you ought to be prepared for this type of use. If it’s not Flickr selling them, anyone else can, legally. If you are uncomfortable with this idea, then you should not use Creative Commons without any sort of restriction. If you like the idea of Creative Commons but are uncomfortable with commercial use without being compensated, then consider changing your license to Creative Commons Non-Commercial like I license mine.

    I think a lot of people though don’t consider the full implications of the license that they choose and like Stewart I wonder if the revenue is worth potential lost goodwill in this case. Some people will inevitably be put off when they see that the community (and Flickr is as much a community as a company) that is hosting their photos for them is now selling them without sharing the profit or asking for permission. Reminding people to read the fine print of their photo license that they chose without really considering it thoughtfully might not be the best answer to that complaint. People on Flickr LOVE to complain about anything and everything.

    I think Flickr does have to figure out how to pay for a free terabyte of storage for every user and maybe this is one way to do that.

    I haven’t been asked to participate in the online print marketplace, but if I was and was offered a 51% payout, I’d probably say yes. Anything 50% or better feels pretty fair to me. I create the image, but Flickr is driving the traffic to it for sale and handling fulfillment, etc. If I were to have a physical gallery sell my works, I’d probably be looking for a similar cut.

    The idea of selling Creative Commons images and getting to keep all of the money is interesting to Yahoo I’m sure, but maybe Flickr would be better off instead focusing on more of a total revenue share model for the entire effort and treating CC images like they treat CCNC and all rights reserved images. I bet people who license their work CC would be pleased if their images too were handpicked for inclusion and they got paid for use. Even if it were a small amount, it would be a positive affirmation to them about their photography and that would feel good.


    Thomas Hawk Digital Connection

  • Getting to Know Your New Camera

    Get to know your new camera

    With my new camera I can set Film Simulation to black and white and the camera gives me a black and white view in the electronic viewfinder. I can also select the square format and see a square image. This is a great aid to composition. Finding and using helpful features like this is part of getting to know your new camera.

    I recently purchased a new camera and the process of learning to use it has been a good reminder of just how long the process can take. My new Fujifilm X-Pro 1 is a very different machine from the Canon EOS digital SLRs I’m accustomed to using, and it’s taken me a while to find my way around the layout and menu.

    Based on my experience, here are some tips for getting to know your new camera. Most of these will apply if your new camera is from the same manufacturer as one you already own.

    Read the manual

    This one’s fairly basic – you can learn a lot about your camera from its manual. Even if your approach is to learn by using the camera, there are still times when you need to look up things you can’t figure out yourself. You could also buy a book or ebook about your specific camera. These are usually written by photographers who know the camera well and give plenty of tips for getting the most from it, including things not mentioned in the manual.

    Shoot at high ISOs

    Newer cameras have fantastic high ISO performance and it’s worth spending some time shooting in low light at your new camera’s high ISO settings. Then look at the results on your computer to determine the highest ISO setting you are happy to use. Remember, the amount of noise you will see depends as much upon your subject as the camera. If your subject contains lots of textured surfaces or light tones you’ll see less noise than if it contains dark tones or large areas of sky.

    Get to know your new camera

    This photo was taken at dusk at ISO 6400 on my new camera.

    Get to know your new camera

    This is a 100% magnification view (taken from the bottom of the previous image). You should look at your high ISO photos at 100% magnification to see how noisy the image is. Only you can decide which settings have too much noise.

    Shoot in tricky lighting situations

    The aim of this exercise is to learn how your camera’s meter reacts in different lighting situations. While metering modes such as centre-weighted and spot metering should work in much the same way on most cameras, you may find a larger difference in the way that evaluative metering* modes work.

    Evaluative metering is where your camera takes exposure readings from multiple areas of the frame (usually weighted in priority towards the active autofocus point) and then decides on the appropriate exposure according to a formula known only to the manufacturer. If the maker of your new camera uses a different formula to the maker of your old one, then both cameras may give different exposure readings for the same subject. Therefore it’s helpful to take some photos in tricky lighting situations to learn how your new camera copes with each of them.

    *Evaluative metering is the term used by Canon and Sigma. The same mode is called Matrix metering by Nikon, Multi segment metering by Sony and Pentax, Multi metering by Fujifilm and digital ESP metering by Olympus.

    There are three basic scenarios that can give your camera problems:

    Backlighting: With backlit photos, you need to decide whether you want to expose for the subject (burning out the background), the background (turning the subject dark) or somewhere in between. Only you can decide, and your camera’s evaluative metering may be weighted towards one option or the other. Test your camera with some backlit subjects to see how it reacts. Another function of this test is to learn how well your camera’s sensor renders blown out highlights.

    Subjects with predominantly light tones: Cameras tend to underexpose this type of subject. Experiment with exposure compensation to see how much you need to increase the exposure when taking photos of light toned subjects.

    Subjects with predominantly dark tones: Cameras tend to overexpose this type of subject. While this type of subject isn’t as common as light toned subjects, if you come across one you can experiment to see just how much you need to adjust the exposure compensation dial to make up for the camera’s tendency to underexpose.

    These last two concepts are explained in more detail in my article Why Your Camera’s Meter Gets Exposure Wrong.

    Get to know your new camera

    This is a good example of a dark toned subject that may fool your camera’s meter into overexposure. The only way to see how your camera responds is to test it.

    Find the limits of your camera’s autofocus

    One of the biggest differences between various cameras is autofocus. Every manufacturer approaches autofocus differently. Some cameras are designed to focus accurately on fast moving subjects, some are not. Some cameras have more autofocus points than others. Some cameras use phase detection autofocus, some use contrast autofocus, some use a combination of both.

    The best way to learn about the autofocus system on your camera is to start by reading the manual, then searching online for good articles written by photographers using your specific model.

    Then test your camera. How do you switch between autofocus modes? How do you move from one autofocus point to the other? How reliable is your camera when taking photos of moving subjects? You will only learn these things by testing and using your camera.

    Get to know your camera’s menu

    If your new camera is made by a different manufacturer than your old one, the menu system will be different. You need to spend time familiarizing yourself with the menu, and the functions that are relevant to the types of photography you do. Otherwise you may find yourself in the field searching for a certain setting and missing the opportunity to take a photo as a result.

    Get to know your new camera

    The menu on my new camera is completely different from that on the EOS cameras I’m accustomed to using. Until you’re familiar with a new menu system, it may take you much longer to find certain settings.

    Familiarize yourself with your camera’s layout

    Take some time to learn where all the buttons are on your camera. Do any of them have functions that are not immediately obvious? For example, on my X-Pro 1 it took me ages to work out how to activate Live View (there isn’t a button labelled Live View). Ideally, you should be able to find your way around all the important buttons and dials with your eyes closed, so you can use your camera without thinking when you take photos. Naturally, this level of familiarity takes time.

    Get to know your new camera

    The dials and buttons on my new camera are also very different from those on my EOS cameras.

    By the way, if you bought a new lens with your new camera, you may also find my article Getting to Know Your Lenses useful.

    Your turn

    This is not an exhaustive list of ways to get to know a new camera, but it’s a good start. What other suggestions can you make, based on your own experience? Please let us know in the comments.


    Mastering Photography

    Composition and lineMy latest ebook, Mastering Photography: A Beginner’s Guide to Using Digital Cameras introduces you to digital photography and helps you make the most out of your digital cameras. It covers concepts such as lighting and composition as well as the camera settings you need to master to take photos like the ones in this article.

    The post Getting to Know Your New Camera by Andrew S. Gibson appeared first on Digital Photography School.


    Digital Photography School

  • How to Make Freckles POP or Disappear using Lightroom

    Editing Freckles in Lightroom

    One photo, edited completely in Lightroom

    One photo, edited completely in Lightroom

    digitalphotographyschool-1-9

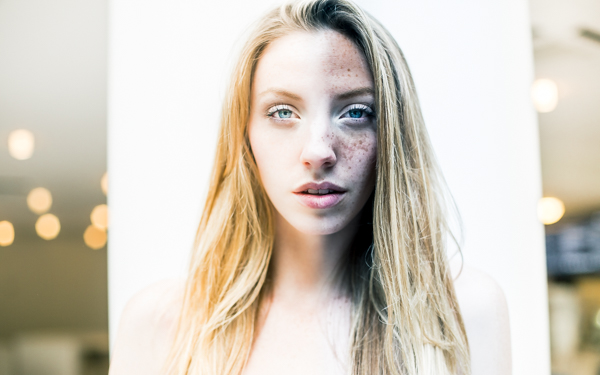
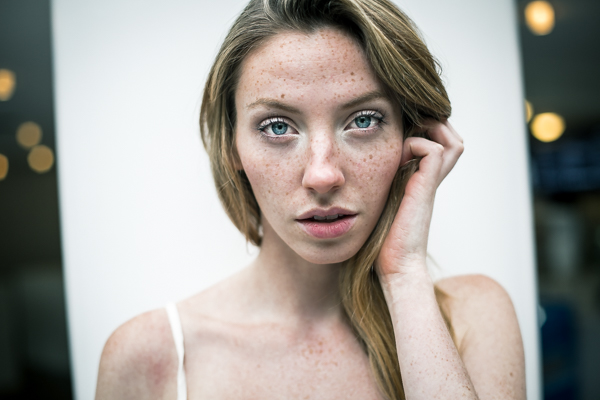
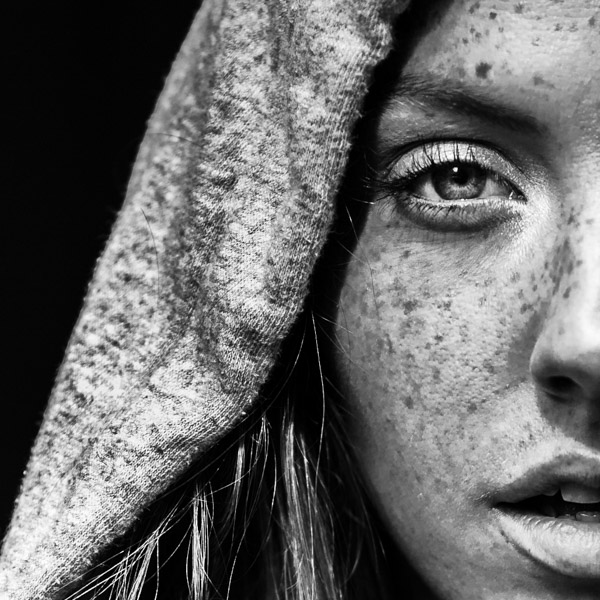
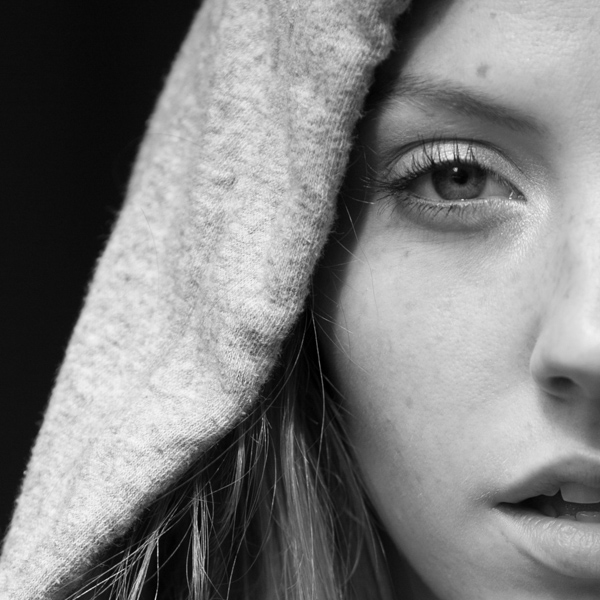
    I recently photographed a model in New York City. As I was communicating with her leading up to the shoot I noticed in some of her pictures that she had freckles. I personally am a big fan of freckles and wanted to do a shoot that highlighted her skin rather than hide it behind makeup or photoshop tricks. One of my favorite photos that came out of the shoot was this one, cropped close to highlight her eyes and skin:

    digitalphotographyschool-1-2

    After I posted the photo above on Instagram I was emailed by someone asking me what process I used to get that gritty look. I’m here to share my secrets and show how you can achieve this look in less than 30 seconds with Lightroom, every time.

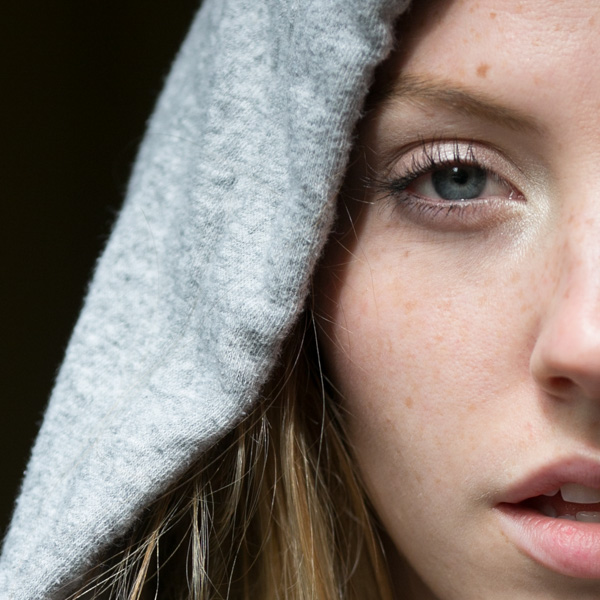
    First off, here is what the original looked like, straight out of the camera:

    digitalphotographyschool-1-3

    I shoot in RAW to make sure I have enough information to work with. All the freckles are there in the skin, which you can see lightly showing up in the original photo.

    Step One: Convert to Black and White

    The first step is to convert your image to black and white by selecting “B&W” in the develop panel of Lightroom, or using the shortcut key “v.”

    Now I have something that looks like this:

    digitalphotographyschool-1-4

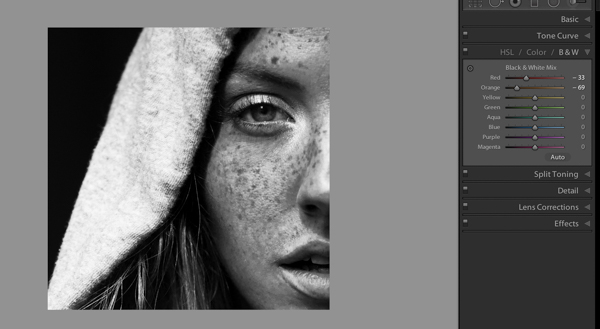
    Step 2: Adjust Red and Orange Sliders

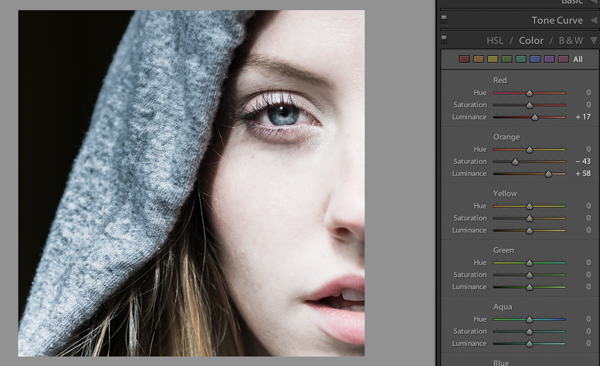
    Still not seeing the freckles, right? Under B&W in the develop module in Lightroom you should see “Black and White Mix” and a column of sliders beneath it with all the colors of the rainbow. These allow you to control the original colors in the photo, within the black and white mode.

    Knowing that freckles and skin blemishes are typically orange/red in nature, you will be playing with the orange and red sliders only. You get to decide how far you want to push them, making your subject more or less intense looking.

    digitalphotographyschool-1-5

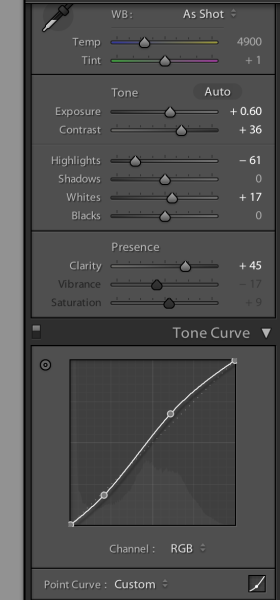
    That’s about it, actually. You’ve just enhanced the freckles in your photo. Congratulations! If you want to give it even a little more pop, try this with your tone curve and exposure sliders:

    editing_freckles_dps

    The last thing I did to the picture was use the Adjustment Brush (k) to bring the highlights down on the hood of her sweater, which I felt was too bright for the photo. Then I used the Adjustment Brush to brighten the eyes a bit using the Dodge (Lighten) effect.

    digitalphotographyschool-1-2

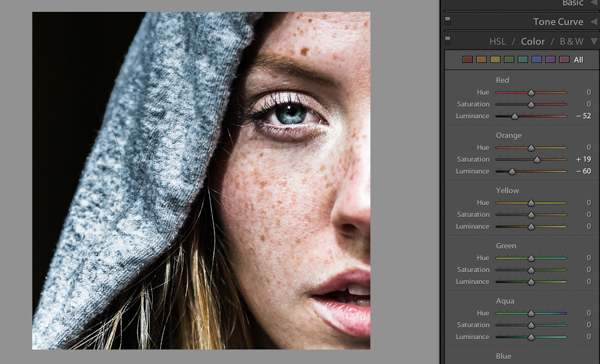
    Voila! This is equally impressive in color. You just need to adjust the Color sliders Red and Orange:

    digitalphotographyschool-1-7
    I would love to see what you do with photos of your children or self-portraits using this technique. And if you are someone who really wants to get rid of freckles, you can basically reverse the the effect by pulling the same sliders to the right instead:

    digitalphotographyschool-1-8

    Please post your examples below!

    The post How to Make Freckles POP or Disappear using Lightroom by Phillip VanNostrand appeared first on Digital Photography School.


    Digital Photography School

  • F-Stop Tilopa BC Backpack Review

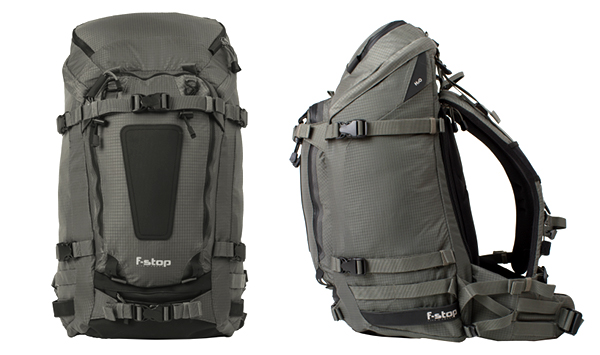
    I have to shamelessly admit that I, as are many other photographers, am a camera bag junkie. Maybe the reason behind it is that I was never able to find the perfect fit for my needs. Granted, different situations or travel circumstances may require different type of bags. It’s not the same to go out for a walk in your neighborhood as it is to go on an overseas trip. As I mentioned in one of my prior posts, I am a big believer in going light. During the years I have purchased, used, tested, abused and torn apart all kinds of bags. But only up until now, as I believe I have found my perfect travel companion, the bag that will perfectly suit almost any kind of adventure: the Tilopa BC by F-Stop.

    Tilopa_BC_Front_Profile

    I have used F-Stop products before, specifically the Kenti Backpack, and their quality was excellent. As I was about to travel for three weeks in Southeast Asia, including heavy trekking portions in northern Vietnam, I needed something bigger than the Kenti, a bag capable of transporting my gear, including computer, chargers, and essential clothing for two to threee days at a time. I needed something versatile.

    I went back to F-Stop because I was satisfied with my other bag. They have a different approach when it comes to building their products, which are rigorously tested by their team of pro photographers. It’s a concept that allows the company to permanently have field feedback straight from working hardcore users. One of the key elements for me is the flexibility available to build a system. The backpacks consist of two components: the backpack itself, and the Internal Camera Unit, called the ICU. In a nutshell, once you pick the backpack that suits you best, then you can configure the interior in several different ways depending on your needs. This is a big plus, as one bag can be used for different situations.

    The Tilopa BC

    I chose this bag because at 48 liters, it was big enough to carry all my gear and yet be very carry-on friendly. The dimensions are generous and can be configured in several ways. I have also picked up the Small Pro and Medium Slope ICU with the idea that if I needed a full bag of gear I could throw both in, and if I only needed a regular or small kit I could use just one of the ICUs.

    techspecs-tilopa_03

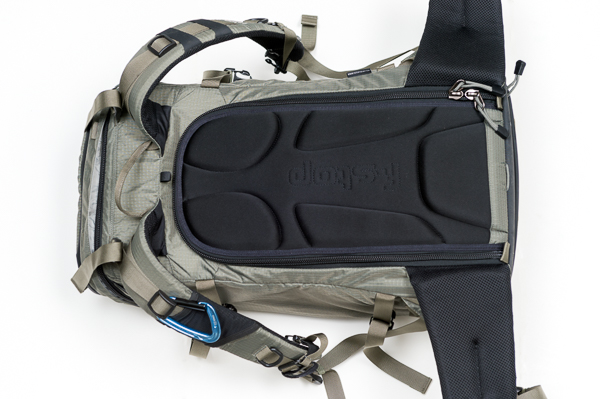
    The backpack is constructed with durable, water-resistant materials and features, double Ripstop Nylon with Polyurethane coating, YKK® heavy-gauge zippers, Duraflex® buckles, and Eva-padded shoulder straps and hip belts. There is also an internal aluminum frame support that helps to better distribute heavy loads.

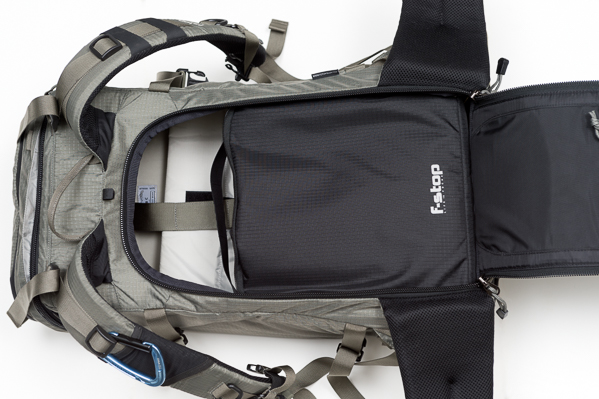
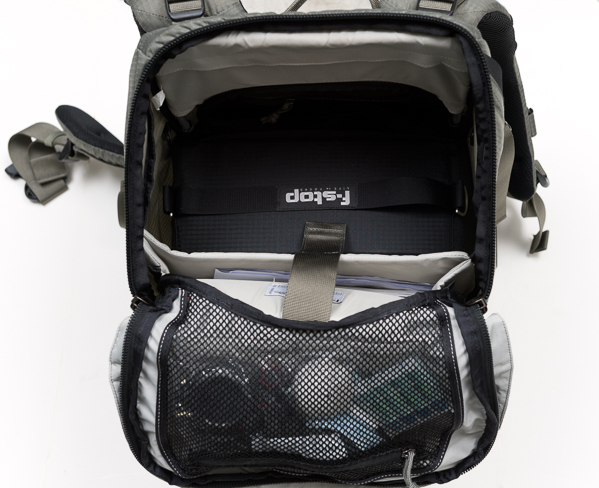
    Besides the internal ICU, there are several pockets and options to organize either accessories or essentials for a day out. The top lid features a separate pocket where you can store smart phones, extra batteries, headsets, travel documents, etc. There is also a mesh compartment in the interior side of the lid. A big front panel pocket can be used for extra layers or even a light jacket. The internal padded computer sleeve can fit a laptop up to 18”; there are also two smaller pockets (not padded) on the side that I’ve used to throw in hard drives.

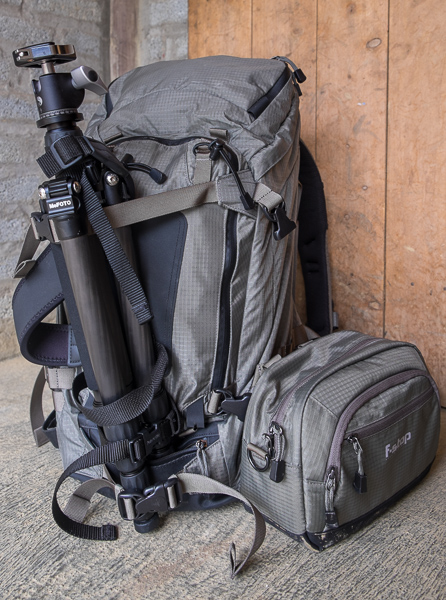
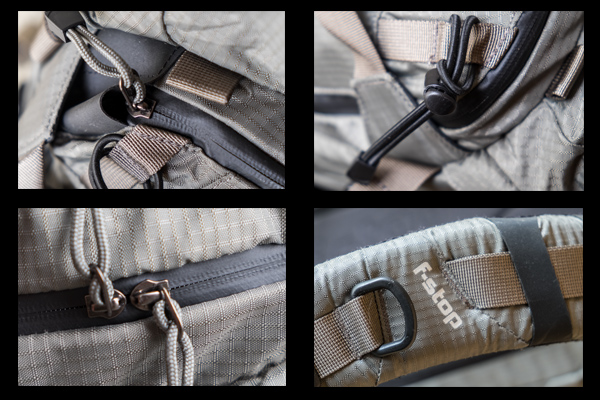
    If you carry a tripod, it can be mounted either on the front or the side of the bag using the multiple quick-release straps. These straps are very handy as the ones at the sides also allow for side compression, making it possible to adjust depth when the backpack is not full. Last, the pack also features the ability to attach multiple accessories as it is compatible with the MOLLE, an international standard used by other third-party add-ons companies and, of course, F-Stop itself. It also packs several bungee cords and two D-rings as additional mounting points for small accessories.

    F-Stop Tilopa BC bag with tripod attached at the front and accessory attached to the side via the MOLLE system

    F-Stop Tilopa BC bag with tripod attached at the front and accessory attached to the side via the MOLLE system

    Tilopa BC Detail

    In Practical Use

    I put the backpack through its paces during the three-week trip and it didn’t disappoint me. Despite being loaded, it was very easy to carry and the weight was well distributed. Over 10-mile treks in the mountains? No problem. Carry on in international or regional jets? Not a problem.

    One of things that I particularly like about the bag is that the camera gear is accessed via the back panel, so the equipment is secure, but you can also access the main compartment via the top opening as well, making it very practical.

    20141012_untitled_0004-Edit

    As I was taking my Fuji X kit, I outfitted the pack with just the Medium Slope ICU, and as you can see there was plenty of room left in the main compartment to carry other personal stuff. I put my cleaning stuff, extra caps, regular batteries and cables on the interior mesh pocket of the lid. My laptop (not shown here) and paper model releases were in the computer sleeve.

    20141012_untitled_0005-Edit

    20141012_untitled_0003-Edit

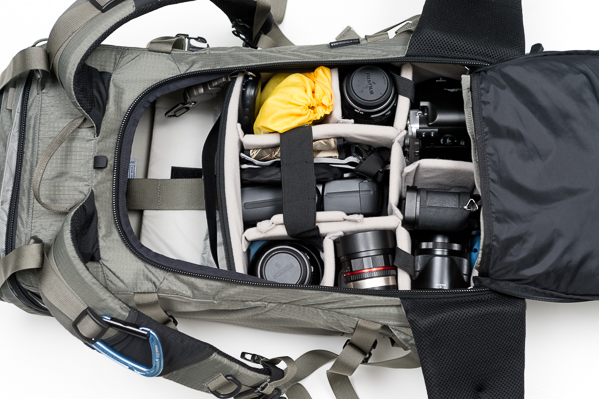
    The gear goes into the ICU; depending on your liking, you can either carry the internal ICU with the lid closed or open. My choice was to have it closed as it felt more secure having an extra layer of protection. The zippers are easy to access anyway, and it takes no time to open it and close it once you are in the field.

    20141012_untitled_0006-Edit

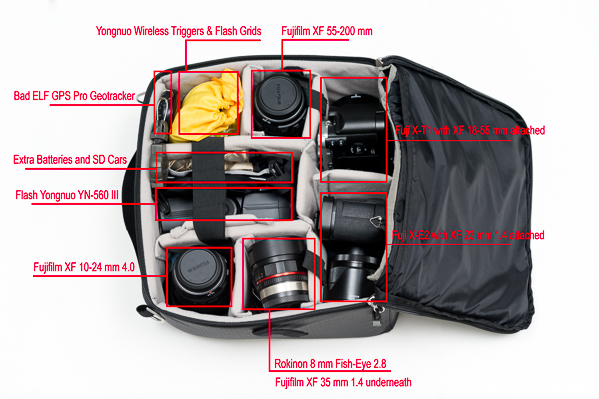
    The Medium Slope ICU is roomy and can fit my kit very well. I have two camera bodies, six lenses, a flash, wireless triggers, grids, batteries, SD cards and a GPS tracker.

    20141012_untitled_0008-Edit

    This is a bag I’ll continue to use on my travels as it is versatile, can be configured in several ways, and it really looks great.
    I have picked mine in Foliage Green, but you also have two more color options: Black and Malibu Blue. The price starts at $ 339 for the bag itself, a bit pricey, but when you consider the quality of the materials, construction, versatility, and the manufacturer’s 20-year warranty, the Tilopa BC becomes an excellent option for the hardcore photographer.

    The post F-Stop Tilopa BC Backpack Review by Daniel Korzeniewski appeared first on Digital Photography School.


    Digital Photography School

  • Using a 10 Stop Neutral Density Filter to add Drama to the Sky

    In this Adorama video Bryan Peterson shows you how he uses a 10 stop neutral density filter to take an image from average, to dynamic. The filter basically just blocks light allowing you to make longer exposures. In this city skyline shot it changes how the clouds appear in the final image.

    Filter mentioned in the video:

    • B+W 10 stop neutral density filter

    Other dPS articles about using ND filters:

    • Polarizing and Neutral Density Filters: Essentials for Landscape Photography
    • High Speed Sync Versus a Neutral Density Filter to Overcome Bright Sunlight in Portraits
    • How to do Dreamy Landscape Photography with a Neutral Density Filter
    • 7 Tips to Help Improve Your Seascape Photos by Controlling the Waves
    • Step-by-step Guide to Long Exposure Photography

    The post Using a 10 Stop Neutral Density Filter to add Drama to the Sky by Darlene Hildebrandt appeared first on Digital Photography School.


    Digital Photography School

  • How to Photograph Your Baby with a Special Gift or Toy

    This week, I had the opportunity to shoot photos for an adorable boutique clothing line called Bella and Gracies. Karen, the fabulous owner/designer had some super soft plush puppies that she wanted to show the world, so I lined up some of the most beautiful children known to mankind and we went to town. While I was shooting, I thought Continue Reading

    The post How to Photograph Your Baby with a Special Gift or Toy appeared first on Photodoto.


    Photodoto

  • 10 Tips for Getting the Most Out of Ello

    10 Tips for Getting the Most Out of Ello

    Ello is the most exciting new social network to appear in years. It’s a vibrant place full of interesting thinkers and artists — I spend more time on Ello than any other network right now. Every day new and interesting people are signing up, plugging in and joining. Although Ello is a social network like many others, it is also unlike many others as well. Ello has it’s own way of organizing things and after spending a few months on the site I thought I’d share some best practices for getting the most out of Ello.

    1. NSFW. As a community with a lot of artists as early members, Ello seems to have a healthy tolerance for all forms of expression, including fine art nudes and other adult oriented material. I’m a big fan of the human body as form and expression and think this is great.

    You won’t be bounced off Ello or censored (like Facebook) because you express the beauty of the human body in your art. If this sort of work is your thing, then Ello asks that you set your account as NSFW. I’m guessing that if you don’t do this voluntarily, they can/will do it for you.

    Similarly, it is up to you whether or not you want to *see* this sort of work on Ello.

    These are two independent settings.

    So there are two things for you to consider. Do you want to see NSFW content AND do you yourself in fact post NSFW content. A lot of people get this setting wrong. They check NSFW for both when they produce work that is entirely SFW. Be sure to understand the distinction and manage your settings (you can do that here: https://ello.co/settings) accordingly.

    If you are not posting nudes or other adult oriented materal, then make sure the “post adult oriented content” button is checked no. You can still check yes that you want to view it, but more people will see your stuff if you manage this setting correctly.

    2. Don’t overshare. I see a few people posting 10, 15, 20 photos in a row on Ello. Most people won’t want to see 20 of your photos in a row. They want variety. They want to see other stuff by other friends too. If you overshare, there is a very good chance that people will move your account into their noise bucket and a lot less people will see your work. The right number of items to share on Ello per day is probably a matter of personal opinion, but realize that every time you post you give people an option of moving you into the noise bucket where your work will be much less (if at all) visible to them going forward.

    I’d say anything over 4 or 5 posts a day on Ello is probably too much and starts to feel spammy. Save your very best work for Ello and self edit a bit more. I probably post 1 – 3 images there a day depending on the day. That might even be too much.

    3. Quality counts. Never has quality been as important. Again, people can easily move you into the noise category so consider that in what you post. Post your best work for others to see. Nothing makes me want to move someone to noise like thoughtless, mediocre work.

    I probably sound like a broken record with my dislike for watermarking and signatures, but on Ello it’s more important than other places to avoid these distasteful aesthetically displeasing nuisances. If you put ugly watermarks and signatures on your photos people will move you to noise (if they follow you at all) and your work will not be seen. Even your best friend might do this and you will never know. So put your best foot forward and only share what you consider to be your highest quality content.

    4. Be social. Ello is a *social* network, so be social. I see people already complaining that it doesn’t feel like they are getting enough attention on Ello. You shouldn’t expect to just post content and have people flock to your brilliant work. You need to engage with others. The best way to do this is to participate in conversations on other people’s posts. Find some interesting people who are engaging on the site and jump into conversations that you find. Ello is a place best served by meaningful, articulate dialog. Offer up considered thoughtful contributions to other people’s work and I think you’ll make friends fast there. Lurk and you will be alone.

    If you are new and are looking for some interesting and engaging people you may find some here. Also, don’t forget about the invite button. Do you know some really great people who should be on ello? Then make sure you send them an invitation to your new party. Inevitably people will start saying that “none of their friends,” are on Ello. This is your fault. It’s up to you to get them here. It’s also up to you to make new friends. :)

    Post about Ello on your other networks and encourage people there to come join you. Tweet, FB, G+, Flickr, etc. letting people know that you are hanging out there and offer to get an invitation to anyone who wants one.

    5. “I think everybody should be nice to everybody.” — Andy Warhol It goes without saying that you should be nice to others. This is one of the most important things that Andy Warhol ever said. Especially on Ello where there is not only a block function, but also a noise feature, people who are antisocial assholes will quickly be marginalized out of the experience. Being nice does not mean being bland, uncontroversial and boring. It just means that when you disagree with others, try to do it as respectfully as possible. Don’t personally attack people. Rise above that. Great ideas can be discussed on Ello and people can disagree on things, but respect is the key.

    6. Be visible. Make sure you have an avatar, a profile, and links to your other sites as the *very first thing* you do when you join Ello — then add some interesting content of your own. You only get one chance to make a strong first impression. When someone new follows me, a lot of the time I’ll go look at who they are by clicking on their profile link. If I’m taken to a blank page with a blank avatar and minimal description, I probably will not follow them back or engage with them. On the other hand if I find a thoughtfully written profile, links to other places where I can check out your work, and some compelling content already uploaded to your Ello account, I just might try to make friends by adding you back.

    7. Be active. If you want to get the most out of Ello, you should consider making a meaningful contribution to the site. Especially after you first join you should plan on spending some time on the site every day. Post content yourself daily, but also participate in posts by other people every day, and this means more than just typing “nice photo.” If you post a few photos and then disappear for a week, when people look at your account you’ll be passed over as a dead account.

    8. Understand Ello’s advertising position. Ello does not have ads on the site. Also, they don’t profile you and sell your personal data to advertisers (like they do on Facebook). This does not mean that brands are not welcome on Ello though, they are. They just won’t be able to advertise to people by paying Ello. Brands may not fully understand this and think that they need to stay away. One of Ello’s founders Paul Budnitz spells this position out clearly here:

    “Because Ello doesn’t have ads, the only way for brands to be on Ello effectively is to post interesting things that people want to see.

    Another way to say it is, the worst way to for a company to use social media is to advertise, because that is essentially paying money to show us things that we don’t want to see. Brands are welcome join Ello, but if their content sucks, nobody will want to follow them.”

    Budnitz’s own company Budnitz Bicycles has a brand page on Ello. And you know what, it features kick ass beautiful artistic quality photographic works of their bicycles. That’s a pretty good example of how you should think about Ello if you are a brand. Just because the anti-advertising ethos runs strong on Ello, this doesn’t mean your business/company/brand should not be there. It just means you are going to really have to work to get people’s attention by providing them interesting content and not typical advertising crap.

    9. Watch your activity. Click on the little lightning bolt frequently on Ello. Are new people following you? Go check them out. Did someone make a meaningful comment on a photograph of yours or ask a question? Go respond to them. Did someone mention you in one of their posts somewhere else on Ello, then acknowledge that and go say hi back. It’s important that you use this tool regularly. While you may not be able to get back to everyone who mentions you or look at everyone who adds you as a contact, be sure to spend time on your activity when you can and participate.

    10. Understand and respect both imagery and text. Are you a writer? Consider adding an interesting photo to your post (or borrowing one from an image creator with attribution and permission). This will make things more interesting than just a wall of text.

    Are you a photographer? Consider using the strong text function on Ello as a way to tell people more about you and your work. I’m sharing more about myself personally on Ello than I ever have on any network. When I post a photo, frequently, I write about where I was when I took it, how I made it, what my feelings are/were around the image. And I use my space on Ello as a sort of personal diary through text just as much as a visual diary through my imagery of America.

    A lot of people don’t get Ello yet. Many never will. It’s so early for Ello, but I do believe that Ello has the potential to become the most substantial social network going forward — bigger and more important than Facebook or Twitter or Google+.

    Being early there, you have an opportunity to participate in shaping this important new community — what it will be today and what it ultimately will become.

    You can find me most days on Ello here. :)


    Thomas Hawk Digital Connection

  • Tips for Using Shutter Speed Creatively

    Shutter speed is one of those things that is initially a problem to be solved, but once you do that it becomes a tool that allows you to take better and more creative photos.

    First you should understand how shutter speed works and how to change it. You will need to make sure it is fast enough that your pictures turn out crisp. But once you’ve mastered those things, you can start using shutter speed to your advantage. You can slow it down to create a sense of movement, or speed it up to stop the action.

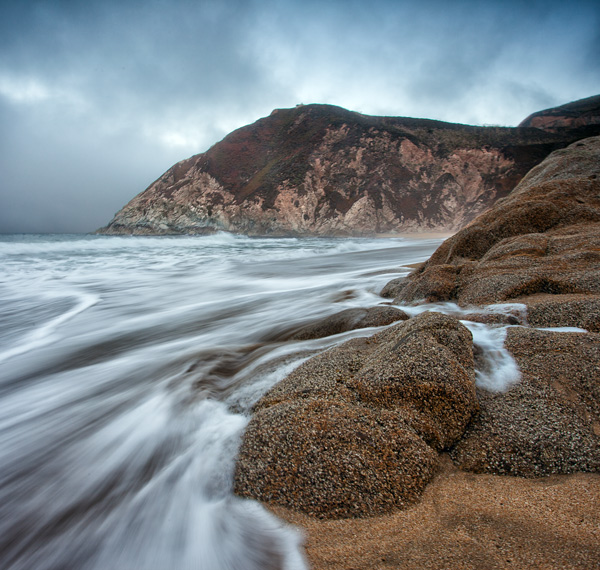
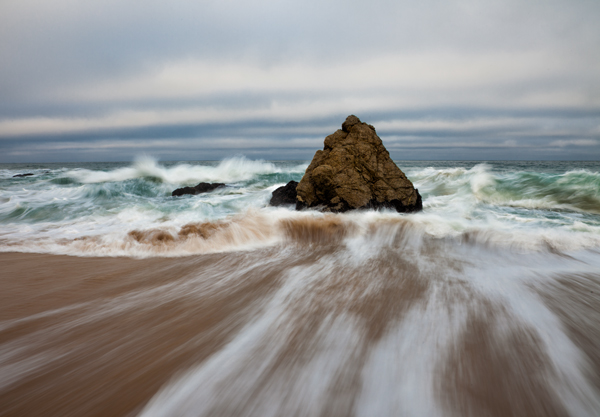
    GreyWhale

    Grey Whale Cove: 1/4 second at f/16, ISO 100

    This article will show you the basics of what you need to know regarding shutter speed and get you started with some creative effects using different shutter speeds.

    What is Shutter Speed?

    Shutter speed is simply the amount of time the shutter inside the camera is open, allowing light onto the digital sensor to expose the picture. The longer you hold the shutter open, the more light is let in to the camera to expose the picture.

    But holding the shutter open longer than a tiny fraction of a second has consequences. The camera must be held completely still during the exposure or the picture will be blurry. Without using a tripod or some other means of support, you cannot hold the camera still for longer than about 1/60th of a second and blur will start to creep in to the picture (more on this in a second).

    Shutter speed is recorded in fractions of a second. So a shutter speed that says 1/60 (it may just show 60) means that when you take the picture the camera will open the shutter for 1/60th of a second.  Most cameras have shutter speed ranges between 1/4000 of a second (on the short side) and about 30 seconds (on the long side). In addition, many cameras have a Bulb mode that allows you to hold the shutter open as long as you wish.

    Make Sure Your Shutter Speed is Fast Enough

    One of the first issues you will confront as a photographer is making sure your shutter speed is fast enough. If you have a tripod, this will not matter as much and you can leave the shutter open a long time (sometimes even several minutes). But assuming you are hand-holding your camera, a long shutter speed will introduce camera shake and make your image look blurry.

    But how fast is fast enough? There is something called the Reciprocal Rule designed to help you with that answer. This rule states that your shutter speed should be at least the reciprocal of your focal length. That sounds complicated, but don’t worry it is easy to figure out. You just put a one over your focal length and that is your minimum shutter speed.  So, for example, if your focal length is 60mm, just make sure your shutter speed is 1/60th of a second or faster. If you are zoomed in and your focal length is 200mm, make sure your shutter speed is 1/200 of a second or faster (remember to consider lens factor as well if you have an APS-C sensor) Any slower than that and it is time to break out the tripod (or raise open your aperture and raise the ISO).

    Beam

    1/200th at f/2.8, ISO 3200

    Changing Shutter Speeds

    The next question you will confront is how to change your shutter speed. The actual physical changing of the shutter speed is pretty simple, it’s typically done via a dial on top of your camera. The more important question is how are you to offset the change to shutter speed, assuming you are in manual mode (if you are in Aperture priority or Program mode the camera will make the change for you).

    If you use a faster shutter speed, the shutter is not open as long so the camera gathers less light. So, without something else changing, your picture will be underexposed by using a shorter shutter speed. To make a proper exposure, additional light has to come from somewhere. You can add that extra light to offset the use of a faster shutter speed in one of two ways:

    1. Open up the aperture: The aperture is the hole your the lens that allows light to pass into the camera. A larger aperture allows more light into the camera. So if you open up your aperture by one stop, you are letting in twice as much light during the same period of time.  But be careful, a larger aperture also creates a shallower depth of field, which you might not want.
    2. Increase the ISO: The ISO is the rating assigned to how sensitive your digital sensor is to light. It is adjustable, and the higher the number, the more sensitive you make your camera’s digital sensor to light. But this comes at a cost, digital noise, which increases as you increase the ISO.

    There are separate controls on your camera to make these changes.  Use either of these methods to add more light to your exposure whenever you are shortening your shutter speed.

    Using Shutter Speed Creatively

    Now that you understand shutter speed a little bit, you will want to put it to use creatively. There are several ways to do this, and we will work through some of them from the faster shutter speeds to the slowest.

    Stopping the Action

    In times of high action or drama, you can stop the motion by using a very fast shutter speed.

    To do this, you will want your shutter speed to be 1/250 of a second or faster. At times, like with the picture below of the water droplets being flipped through the air, you may want the shutter speed to be significantly faster. This particular picture was shot at 1/8000th of a second.

    Water

    1/8000th at f/2.8, ISO 250

    Accomplishing shutter speeds this fast, even on bright sunny days, will require offsetting moves. For example, you will need to open up the aperture to its widest setting. Doing so will result in a shallow depth of field, but in this sort of picture that usually won’t matter. You will also probably need to increase the ISO (a little on bright days, a lot on cloudy days or indoors).

    Another key for these type of shots where you are stopping the action, is to anticipate the shot. With the speeds at which modern cameras shoot, you may often want to just hold the shutter button down and blast away, this rarely works though. The decisive moment is usually only captured by anticipation and triggering the shutter at precisely the right moment.

    Panning

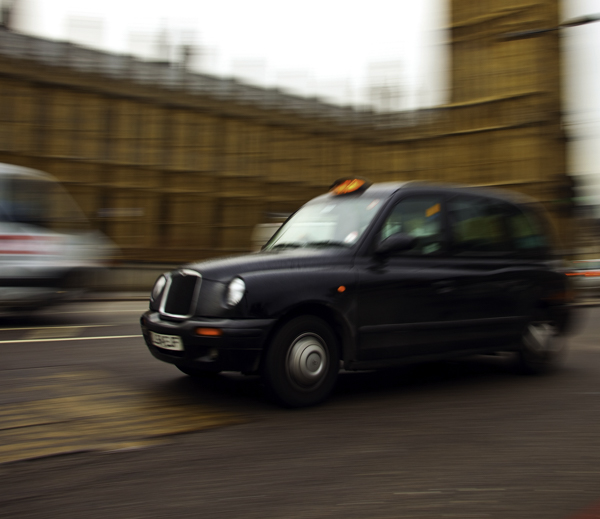
    Another way to use shutter speed creatively in times of action is to pan the subject. Panning is where you move the camera during the exposure to follow the subject. Done properly (or when you get lucky) the subject is relatively sharp, while the background is blurred and conveys a sense of motion.

    LondonCabPan

    1/15th at f/7.1, ISO 50

    Accomplishing this is usually best at slower shutter speeds between 1/8 and 1/30 of a second. Being able to slow down the shutter speed is typically welcome news, as it will mean you do not have to crank up your ISO, or make other offsetting moves. Getting a good result will frequently require at least a few attempts, while you gauge the speed, and other settings.

    If possible, get your exposure set up before you attempt to pan. That way you are only thinking about the panning during the shot, as opposed to worrying about all your other settings.

    Creating a Sense of Motion

    Still another creative use of shutter speed is slowing it down to create a sense of motion. This is accomplished when the subject is moving slightly through the frame during the exposure. This idea is for the subject to be identifiable, but slightly blurred.

    GreyWhaleRock

    1/4 second at f/16, ISO 50

    Shutter speeds for this type of shot are between 1/4 and 1/10th of a second. That is virtually always too slow for you to hand-hold your camera, so you will probably need to break out the tripod for this type of shot.

    Long Exposures

    The final creative use of shutter speed we will cover here is a long exposure. This is where you hold the shutter open for a long time and allow certain parts of your picture to move through the frame. You will always need a tripod for this technique.

    DavenportRock

    20 seconds at f/8, ISO 400

    Long exposure shutter speeds are between 10 and 30 seconds. Most cameras offer you the ability to go even longer by using Bulb mode, where the shutter will stay open as long as you hold the shutter button down. A remote shutter release, which is always a good idea when you are shooting from a tripod, is almost a necessity for this type of shot.

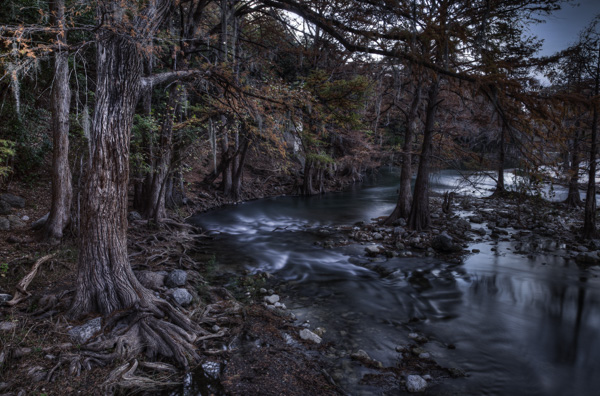
    Long exposure is a great technique whenever there is moving water involved, such as coastal scenes, rivers, and waterfalls. It is also great for streaking lights in night photography.

    Whereas most of the time, your challenge with shutter speed is to get enough light into the camera; in this context getting the shutter speed you want usually involves the opposite problem. The challenge is to limit the amount of light entering the camera so that you can leave the shutter open a long time without overexposing the image. To do that, first close down the aperture to its smallest setting and use the lowest ISO setting on your camera. The lowest ISO setting is usually 100, but some cameras contain an expandable ISO range that will allow you reduce the ISO further, so be sure to check your camera’s menu for that.

    But if those moves don’t restrict the light enough, you will need to use a neutral density filter. These are filters that restrict the amount of light coming into your camera. They come in different strengths, with typical values between two and 10 stops of light. Get one of these (or a few different strengths) and keep it in your bag if you think you will have any long exposures in your future.

    Guadalupe

    15 seconds at f/8, ISO 500

    Conclusion

    Once you have mastered the basics of shutter speed, it is a great tool for adding creativity to your photography. It is perhaps the most effective way to make our photos more interesting. So lock down the basics, and then give some of these techniques a try.

    The post Tips for Using Shutter Speed Creatively by Jim Hamel appeared first on Digital Photography School.


    Digital Photography School

  • How to Buy Used Camera Gear

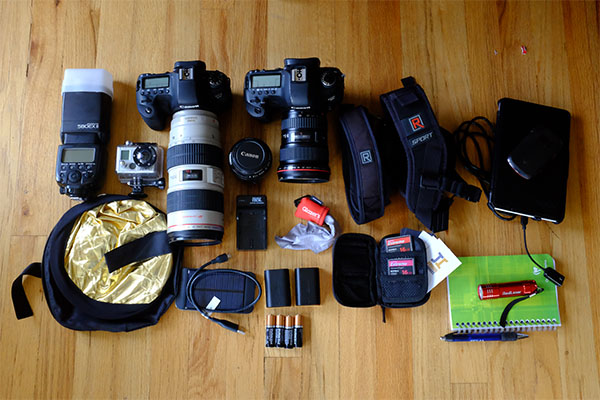
    Even though the prices of digital photography equipment continue to fall significantly, it can be a tough to dole out a thousand plus dollars on a brand new camera or lens. On the positive side, camera gear (especially lenses) retains its value really well. As a result, there’s almost always a surplus of used camera bodies, lenses, and accessories. Before you take the plunge and buy used gear, be sure to understand that used equipment can be a bit tricky to assess in terms of quality and price. As a photographer who shamelessly has about 50% used gear in her collection, here are some methods I run through when contemplating a used camera purchase.

    How to buy used photography gear

    Price check used items on reputable online sources

    By now, just about every online camera retailer has a used section on their website. Availability of items is obviously variable, but a simple item check can pull up estimates for the current standard used prices of the items you want. Be sure to note the quality rating and commentary of each item, and see how it matches up to your expectations. Often, used items that are priced too low have some sort of cosmetic or mechanical problem, so if you think you’re getting an amazing deal, get suspicious. Another reason to be suspicious of outrageously low prices is that they might be grey market items, which essentially come with no factory warranties. The best way to check if it’s a grey market item is to find the serial number and reference it in the camera maker’s database.

    The advantage to buying used gear online is that often the gear has been checked out and issued a rating by the retailer. There may also be some flexibility in terms of exchanges and returns in case you aren’t happy with your purchase. Be sure to double check and make sure you know who the seller is, especially on Amazon, which allows private sales to be made.

    • Amazon Used Camera Section
    • Keh.com
    • B&H Used Camera Section
    • Adorama Used Camera Section

    Used lens 03

    Check out the local classified ads

    Scan local communities boards or publications, or see what’s listed in your local Craigslist directory. The advantage to buying used gear in-person is the ability to test the gear out before you buy it. Nervous about meeting a stranger for a business transaction? Choose a meeting place at a super public space like a mall or cafe. Also, I’ve found that many Craigslist sellers of camera gear in my area tend to be other professionals, and thus their names and corresponding web portfolios can be easily researched online prior to meeting in person. If you do opt for an in-person transaction, be clear on how to assess used camera gear yourself.

    How to Determine Used Lens Quality

    Used lens 02

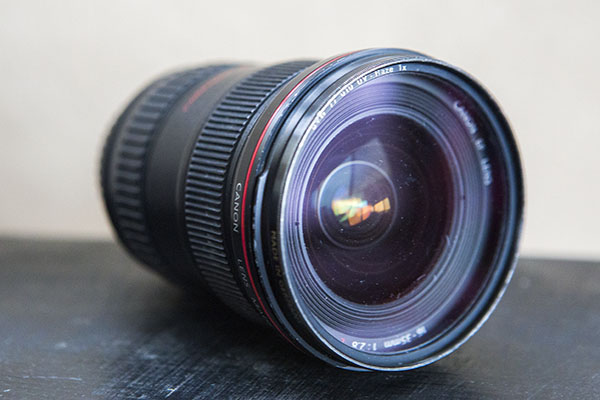
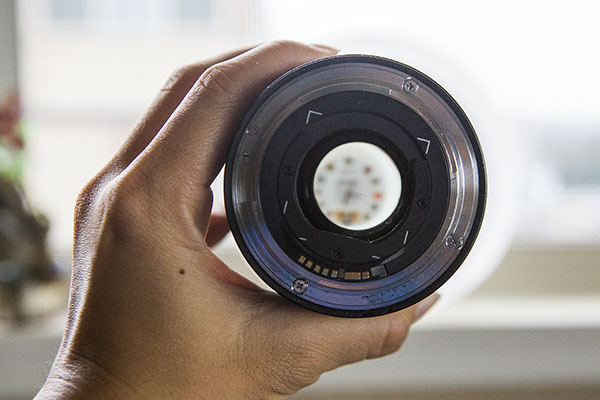
    Lenses are relatively straightforward to assess in terms of quality. First, investigate the lens thoroughly and watch out for common problems such as fungus, dust, and scratches. Shine a light through the lens, and any imperfections should be visible. Note that some problems such as dust and small scratches will likely just be cosmetic damage and should not affect overall image quality. However, any signs of fungus on the lens is a deal breaker as it is incredibly difficult and costly to remove.

    Second, do a mechanical test of the lens to see how it performs. It’s best to have your regular DSLR with you to see how it fits. Make sure the aperture blades on the ring are clean and can move freely, and try out both the zoom and focus rings. Depending on the lens model, it’s not uncommon for the rings to offer some resistance, but be sure sure they both operate relatively smoothly. Finally, check out the autofocus operation on the lens and make sure it is smooth.

    How to Determine Used Camera Body Quality

    Used camera 04
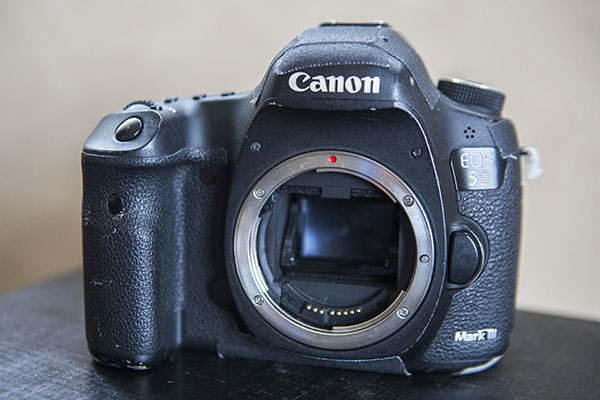
    Used camera bodies can be a bit trickier to assess. While it’s perfectly normal for bodies to have physical signs of wear and tear, use your initial visual impressions of the camera as your first judgement. If the camera appears badly worn and used, it’s likely not looking any better on the inside. However, the most telling part of the camera body’s lifespan is the shutter, which is very expensive to replace. Sometimes people will sell their cameras when the shutter is about to die, meaning the new owner will have to drop a lot of extra money soon after to replace it. How to check shutter counts, as well as how many shutter counts are acceptable for a used body, depend on the camera make and model. Google searches and forums should offer some resources.

    Autofocus is another aspect of the camera body that should be tested. Using a reliable lens that you bring with you, test out the camera and see how both single and continuous autofocus performs. While you’re at it, also examine the lens mount on the camera and make sure the lens mounts securely.

    Whether you’re an amateur or a professional, it’s completely acceptable to purchase used camera gear. Just be sure to do your research and have a thorough understanding of the product you are considering buying. Always use reputable sources, and remember that if the deal seems to good to be true, it probably is!

    The post How to Buy Used Camera Gear by Suzi Pratt appeared first on Digital Photography School.


    Digital Photography School