Category: Photography

  • Photography Challenge – Chill Out with Cool Tones

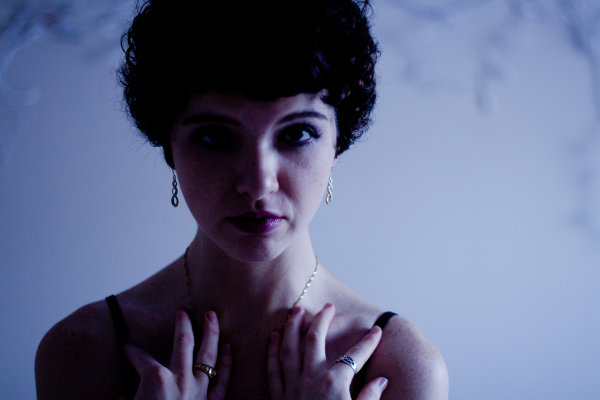
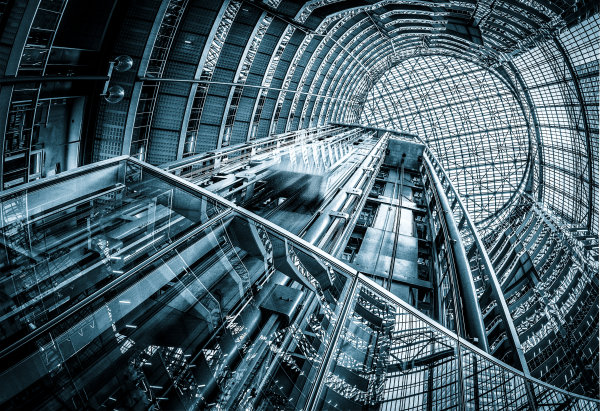
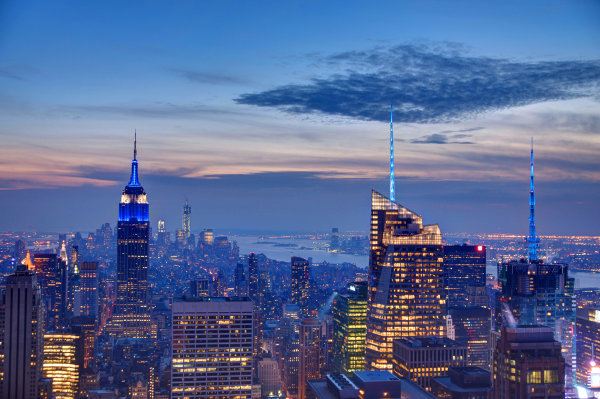
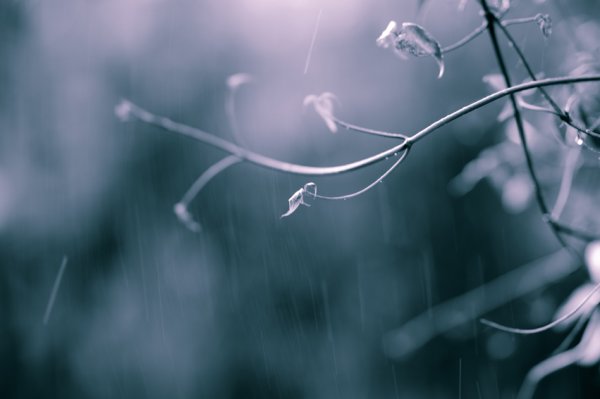
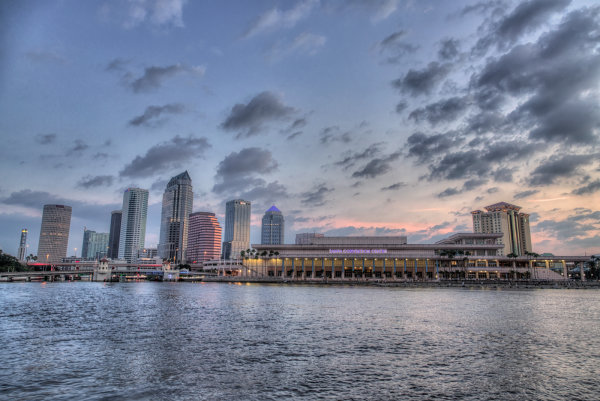
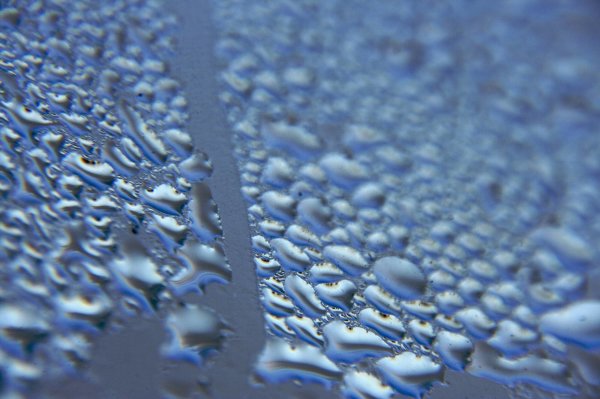
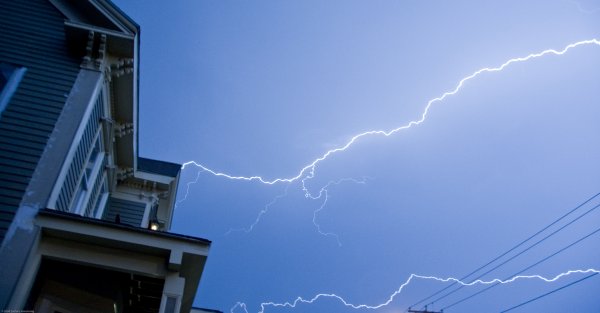
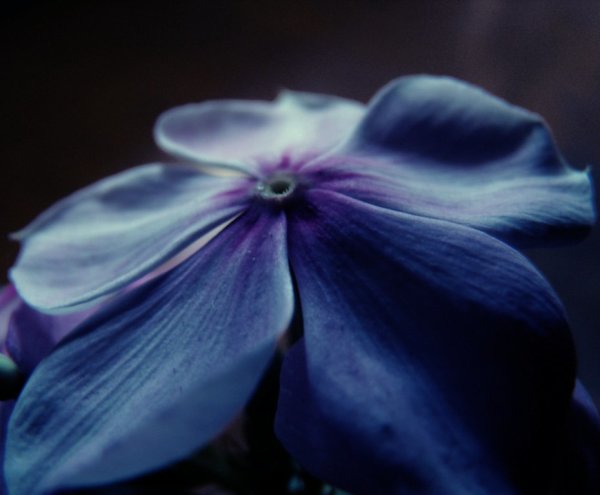
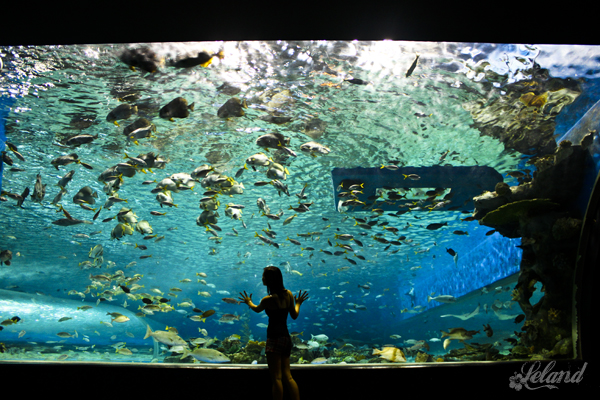
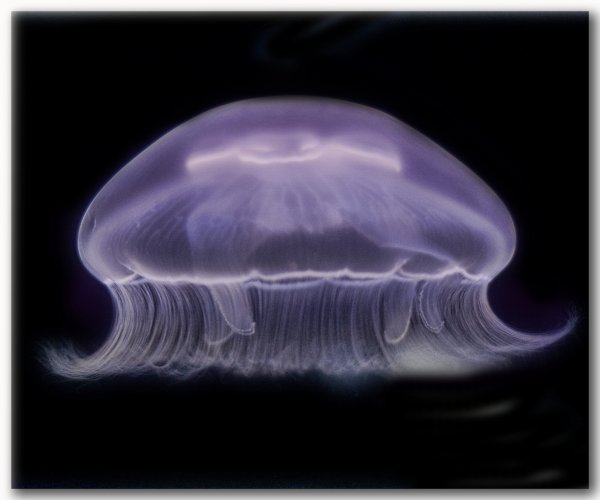
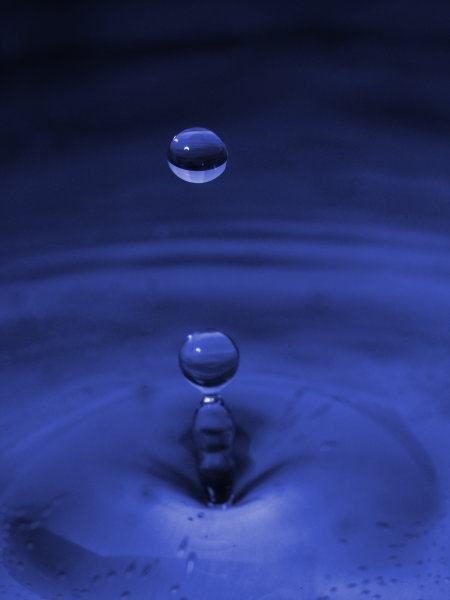
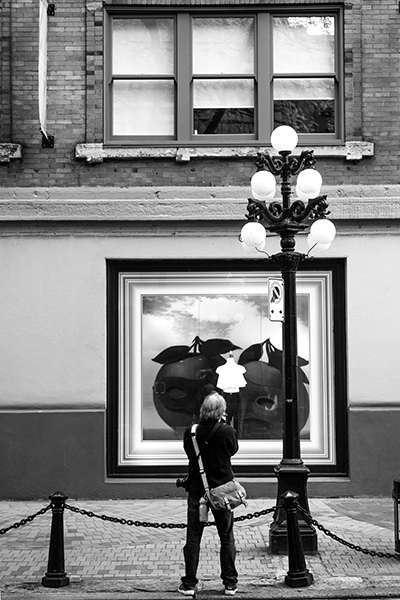
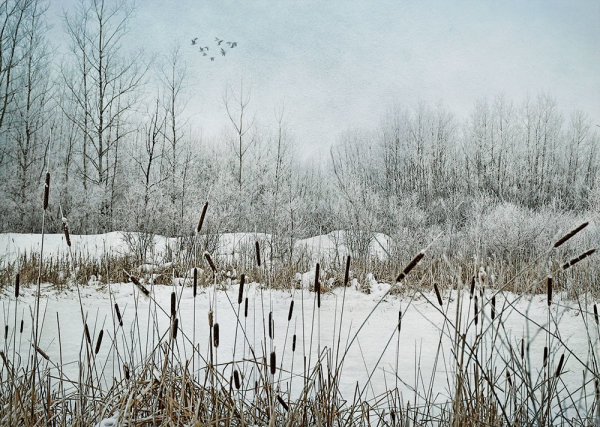
    Today I rounded up 37 great examples of images in cool tones. The tone or color of your image can create or shift the mood and meaning if your image and is a very powerful compositional tool when used well.

    This week your goal is to practice creating cool tones in your photography.

    Photography challenge – cool tones

    Here are a few examples of images with cool tones.

    Kelsi  Barr

    By Kelsi Barr

    Chris Smith

    By Chris Smith

    Brandon Watts

    By Brandon Watts

    You can create a color tint in your image a few different ways:

    • By shooting at blue hour
    • Adjusting your white balance
    • Changing the color in post-processing
    • Using a colored filter on your lens

    It’s your turn to get shooting, show me your blue or cool images.

    Share your cool tone images here:

    Simply upload your shot into the comment field (look for the little camera icon in the Disqus comments section) and they’ll get embedded for us all to see or if you’d prefer upload them to your favourite photo sharing site and leave the link to them. Show me your best images in this week’s challenge.

    Here are some more  examples:

    Barbara Willi

    By Barbara Willi

    Matthew Paulson

    By Matthew Paulson

    Edward Townend

    By Edward Townend

    Zacharmstrong

    By zacharmstrong

    Aphotoshooter

    By aphotoshooter

    Leland Francisco

    By Leland Francisco

    Giorgos~

    By Giorgos~

    Ateens Chen

    By Ateens Chen

    Dave Campbell

    By Dave Campbell

    The post Photography Challenge – Chill Out with Cool Tones by Darlene Hildebrandt appeared first on Digital Photography School.


    Digital Photography School

  • Mophie… the Best thing to happen to the iPhone since the iPhone

    Mophie... the Best thing to happen to the iPhone since the iPhone

    I’m a huge fan of Mophie. I started using the juice pack plus about a year and a half ago and since using it have never once ran out of battery power on my iPhone 5s. Even using it during a long day out shooting, somehow the I always end up making it through an entire day of heavy use. The great thing about the juice pack plus is that it is also a case for your iPhone. I’ve dropped my iPhone a few times and was happy that I had my juice pack plus on it to help protect it.

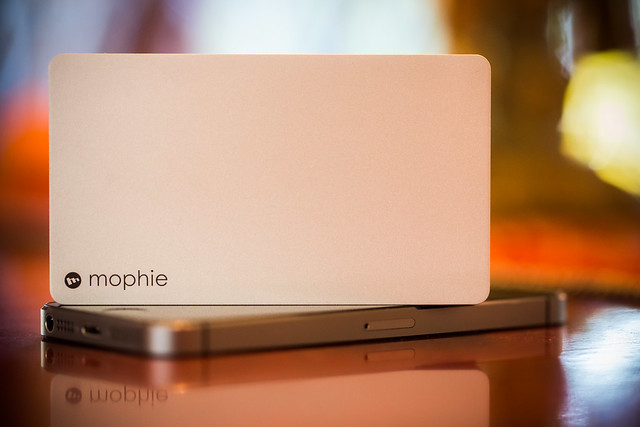
    Last week Mophie sent me one of their new powerstation plus charging units. You connect this device up to any USB port and it holds up to 2 full charges for your iPhone. It’s super small and lightweight and is another perfect complement to my iPhone. Even though I’m not worried about running out of power with my juice pack plus case on, it will be convenient to have this unit around in case my friends (right Mr. Mingus?) run out of juice on their phone while hanging out with them.

    It will also be a convenient thing to have around if I’m too lazy to go plug my phone into the regular wall charger. I will keep this new Mophie powerstation plus in my photo backpack and take it with me everywhere I go.

    Like a lot of places, Mophie is having a black Friday 40% off sale today. Use the code POWER. If you’ve been waiting to pick up a Mophie, today’s the day. :)

    Thanks Mophie, you guys rock!


    Thomas Hawk Digital Connection

  • 25 Top Photographers Share Their Best Christmas Gifts and Wishlists

    Winter is coming. While for some of you this sentence is associated with the hordes of blue-eyed walking dead (got ya, the Game of Thrones fanatics!), for most photographers it’s a call to refresh their photo bags. If you’re having hard times deciding what lens to include on your wish list or what photo gadget would make your special someone Continue Reading

    The post 25 Top Photographers Share Their Best Christmas Gifts and Wishlists appeared first on Photodoto.


    Photodoto

  • How to Create a Unique Bokeh Portrait for Under $10

    1

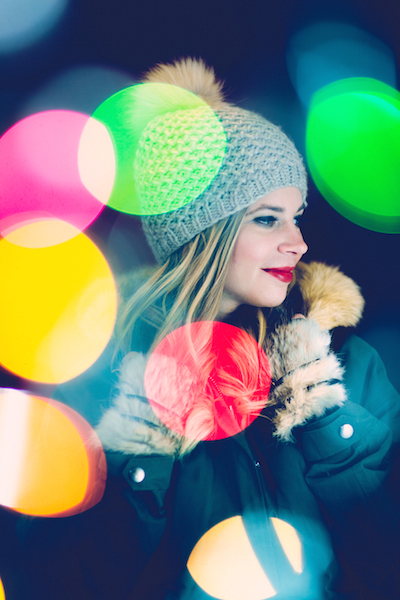
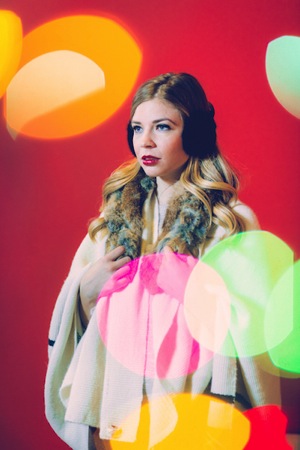
    This shot was lit with one light on the subject along with the Christmas lights.

    You can have a luxurious bokeh in any of your images for the low cost of $ 4.99. Yes, you heard me right, just $ 4.99. How, you ask? I’ll tell you, but you won’t believe me – Christmas lights.

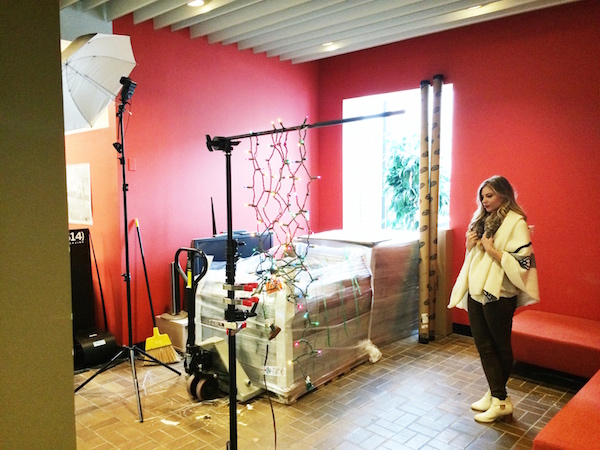
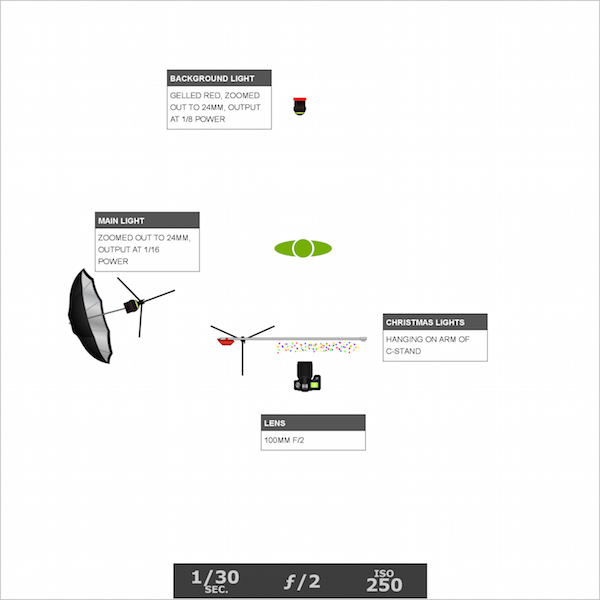
    Just a single strand of Christmas lights and a couple of flash units are all you need to immerse your subject in full-blown bokeh bliss. This isn’t a double exposure or a Photoshop trick. It can all be done in camera in a single exposure. I bought a strand of cheap Christmas lights from the store, draped them over a C-stand arm so that the lights were layered and overlapping. I used a Canon 100mm f/2 lens that I had borrowed from my buddy for the shoot.

    I also had two flashes. The background light was set to 1/8 power (in manual mode) and gelled red, aimed at the red wall behind the subject. The second light was set to 1/16 power and shot into a silver umbrella about seven feet away from the subject.

    2

    Note that the output on both speedlights was set rather low so that I could shoot with a wide open aperture. The large aperture, combined with a slower shutter speed of 1/30th, helped me attain a proper exposure when shooting the low watt Christmas lights. In order to properly pull off this technique, the room you are shooting in can’t be too bright, whether it be overhead lights or window light – the ambient light can’t overpower the Christmas lights or this won’t work.

    3

    Once I was ready to start shooting, I made sure that I was standing within two to three feet of the lights and the subject was five feet beyond the lights. Depending on how close I was standing to the Christmas lights, the size of the bokeh would change. When I was closer to the lights, the bokeh spots were larger and, accordingly smaller when I was further away from them.

    Focus issues

    One issue that you may encounter when shooting through an object is that the lens will try to focus on anything in the foreground. This is a problem, since what you want to focus on is behind the Christmas lights. There are a few ways to get past this. The first is switching to manual focus. But I don’t trust my eyes enough for this option.

    The second option is the enabling back button focus on your camera. This is the option that I use. Enabling this feature is a bit different for each camera, so you’ll have to look up how exactly to do it on your specific camera body. Basically what it does is allows you to shoot without the interruption of autofocus, and when you want to re-focus, you simply press the assigned button on the back of your camera and resume clicking.

    The third option is only available if you have a zoom lens that allows you to set your focal distance. For example, I have a Canon 70-200 f/4L IS which has a switch that, when flipped one way says 1.2m to infinity, and the other way says 3m to infinity. That means that if I don’t want to focus on the object in the foreground, I would select the 3m to infinity option so the lens doesn’t look for anything closer than 3 meters, which saves the lens and battery some focusing time.

    4

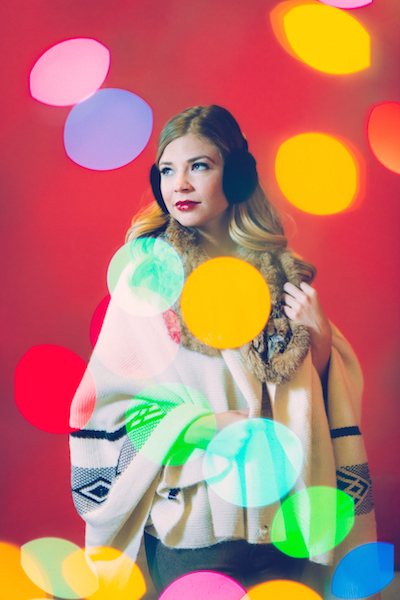
    This shot was lit with one light on the subject and one light gelled red on a red background.

    Now you’re ready to shoot. Play around with your camera’s placement in relation to the Christmas lights. As you move around, pay attention to where the colored bokeh is falling in the frame. Is it on the subject’s face? Maybe move an inch to the left so their face isn’t green. Or maybe you want it to be green. Take a shot and then move a bit and take another. Play around with size and placement of the bokeh and have fun!

    5

    Standing further away from the Christmas lights makes the bokeh smaller.

    6

    Standing closer to the Christmas lights makes the bokeh larger.

    The post How to Create a Unique Bokeh Portrait for Under $ 10 by Nick Fancher appeared first on Digital Photography School.


    Digital Photography School

  • 20 Thanksgiving Photography Examples to Get You in the Festive Mood

    Thanksgiving is the time for warm get-togethers and celebration of the autumn harvest. It marks the start of the holiday season which is naturally a busy time for photographers. Festive mood, holiday decorations, and family gatherings – this is the perfect time to create memorable emotional shots that will be enjoyed long after. This Thanksgiving don’t miss an opportunity to Continue Reading

    The post 20 Thanksgiving Photography Examples to Get You in the Festive Mood appeared first on Photodoto.


    Photodoto

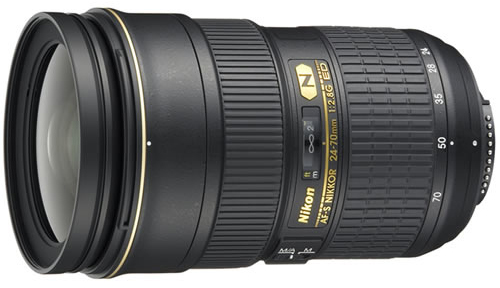
  • A Practical Review of the Nikon 24-70mm f/2.8 lens

    The Nikon 24-70mm F2.8 Lens

    The Nikon 24-70mm F2.8 Lens

    You will hear this from many photographers – “invest in your lenses”. Camera bodies will come and go, but a good lens can last a very long time. This was the advice that I first received when I started taking my photography seriously. Initially, I thought it was a bit hyped. I bought a cheap 70-300mm lens and used it at the first wedding I shot. I thought the images were fantastic until I bought a better lens a year later. I then realized how much difference a good lens can make.

    This review is not going to be a technical review of the lens. You want to know how this lens performs, what the strong points are and what the weak points are – I will cover that. You will see images taken with the lens, many will be edited in Photoshop, some will be straight out of the camera, I will point out to you which are which.

    About this lens

    This lens is regularly praised as the best midrange zoom lens that Nikon has ever made. That sounds like a crazy statement, but when you look at the image results from this lens you can understand why. The lens is a high spec lens with a maximum aperture of f/2.8 and a minimum of f/22. Here is a quick look at the technical specs:

    Focal Length: 24-70mm
    Format: Full Frame – 35mm, can be used on a DX body, but will be cropped
    Maximum aperture: f/2.8
    Minimum aperture: f/22
    Dimensions: 83mm (diameter) x 133mm (length)
    Weight: 900g
    Zoom ratio: 2.9X
    Minimum focusing distance: 38cm

    This lens is a perfect “all rounder” lens. You may find that you keep the lens on your camera most of the time. It has a really good focal range for everyday photography. It is a good travel lens too. Many photographers have said that this lens was the only lens they went on vacation with and it worked really well.

    Photographic Genres that it can be used for:

    1. Landscape Photography

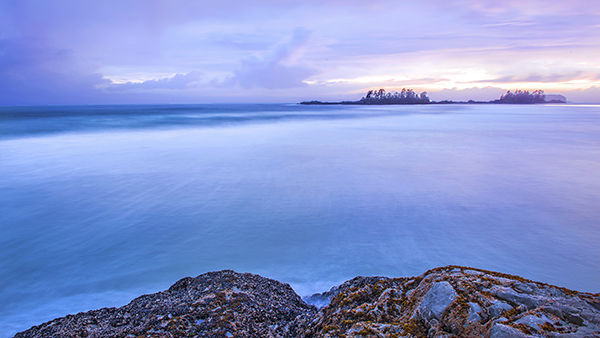
    This is not considered a super wide angle lens, but at 24mm on a full frame sensor, you will get a viewing angle of of 84 degrees which gives a pretty wide angle of view. This lens can be used for landscape photography for a few reasons. Firstly, it has really good glass elements that handle light beautifully. There is some distortion at 24mm, but this is easily corrected in Photoshop. Secondly the lens is really sharp, it makes an image seem almost too sharp. You may find that you won’t need to sharpen your image as much if you use a tripod and are properly focused. The colour rendition on this lens is really good too, colours are true and vibrant. This lens is good for landscapes, not necessarily as a dedicated landscape photography lens (you may want to look at some wide angle lenses) but it can certainly perform well for this type of photography.

    This seascape image was shot at 24mm. The clarity and colour was amazing, this has been edited in Photoshop

    This seascape image was shot at 24mm. The clarity and colour was amazing, this has been edited in Photoshop

    2. People Photography

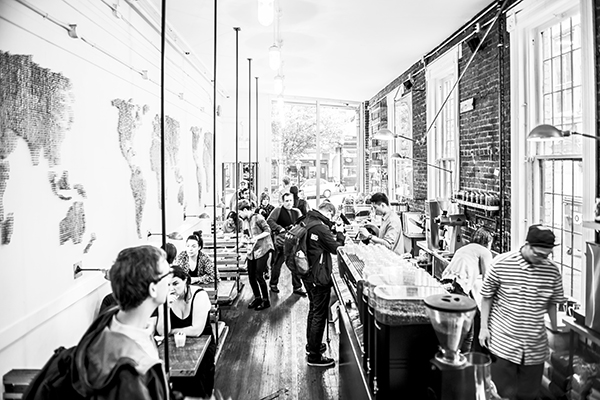
    This lens can work well for people photography as well which can encompass portraiture, weddings, and even street photography. This lens will do a really good job in any of these genres. In people photography, you will want to have a lens with minimal distortion. If you are using the 24-70mm for people photography, you will want to be shooting at 50mm and upwards. With a wide open aperture at f/2.8 you will be able to isolate your subject easily and have a soft out of focus background. The bokeh on this lens is good, but more on this later.

    A scene in a coffee shop, taken at 24mm. Converted to B&W and edited in Photoshop

    A scene in a coffee shop, taken at 24mm. Converted to B&W and edited in Photoshop

    3. Close-up and Macro Photography

    While the 24-70mm is not a macro lens, it has a 37 cm (14.5″) minimum focusing distance. That sounds like a long way, but at 70mm you can get pretty close to your subject. If you are shooting on a high resolution sensor (16 megapixels and above) you will be able to crop in quite a bit and so you will be able to get some good close up images. Bear in mind, this is not a macro lens, but if you want to get in close to a subject, really nice and close, this lens can do that. The sharpness and clarity is amazing, and it is good to have this ability on this lens.

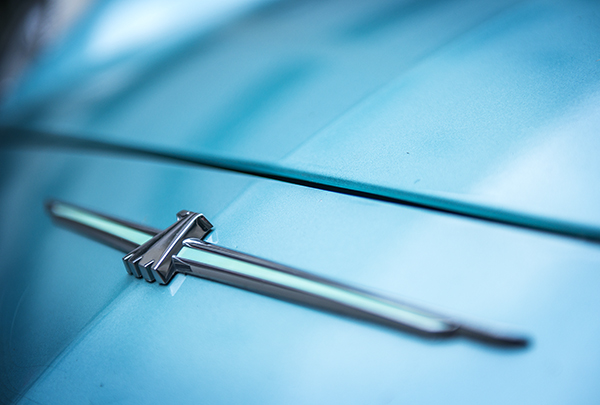
    This badge on the hood of a car was taken at 70mm and handheld. The clarity and sharpness is good and the close up shot isolates the badge

    This badge on the hood of a car was taken at 70mm and handheld. The clarity and sharpness is good and the close-up shot isolates the badge

    4. Street Photography

    Most street photographers will traditionally use a prime lens for their work. You will often find a 50mm f/1.8 or and 85mm f/2.8 on their cameras. Sometimes though, it is good to have a little more flexibility and the 24-70mm is perfect for this. You can shoot at 35mm, 50mm, or 70mm and you will get great results. Based on your creative desire, you can shoot at f/2.8 or up to f/8 depending on your scene. The beauty of the lens is that it can focus really quickly and easily. It has a SWM (Silent Wave Motor) which means the autofocus is quick and quiet, really useful in street photography. There is some vignetting when the lens is wide open at f/2.8, but this adds some depth and contrast to street photography images.

    This lens gives you flexibility when shooting street photography.

    This lens gives you flexibility when shooting street photography.

    5. Travel Photography

    When you are planning to travel, there is always the consideration of what lenses to pack. Weight is always a challenge and of course, space. Many photographers have found that the 24-70mm is a prefect travel lens. At the low end, you can capture some great images of wide open spaces and the interiors of  churches and cathedrals easily. Zoom in and you can get pretty close to your subject, step in closer and you can do some wonderful cameo and detail shots. The 24-70mm is almost designed for travel photography. Yes, it lacks a little in the zoom category, 70mm is not a huge zoom, but you will come home with bright, sharp, colour-filled images.

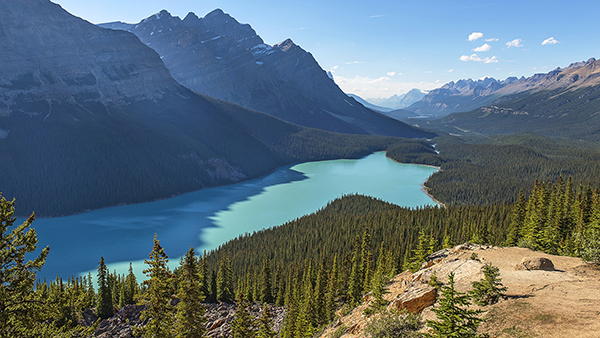
    The magnificent Peyto Lake in the Canadian Rockies, made with the 24-70mm lens

    The magnificent Peyto Lake in the Canadian Rockies, made with the 24-70mm lens

    Performance

    The Nikon 24-70mm has amazing optics. It is sharp throughout the zoom range and has a fixed aperture of f/2.8 which means you can get a very shallow depth of field throughout the entire range.

    1. Autofocus

    This lens focuses quickly and accurately. I use it on a Nikon D800 and it works really well on that camera. You can of course manually focus, but I would only suggest doing that when you are shooting landscapes or close-up photography. If you have a subject that is moving, autofocus is necessary.

    2. Colour rendition

    The lens produces good colour, which is vibrant and rich.

    3. Distortion

    If the lens is zoomed out to 24mm you will see some barrel distortion. Once you zoom in though, the distortion goes away, so be aware of the distortion when shooting at 24mm. It is easily fixed in Photoshop or Lightrooom, so don’t be too overly concerned about that.

    4. Handling

    The lens is quite large and heavy, mostly because the lens has all glass elements and the body of the lens is metal. It is a hardy lens and can take some rough handling, but be careful with it as it is an expensive lens and you wouldn’t want to repair it unnecessarily. When mounted on a Nikon D800 without a battery back, the combined weight of the lens and camera body will be at least 2 kilograms (4.4 pounds). Thats a fair amount of weight to carry around at the end of your hand, so be aware if you plan to buy this lens.

    5. Bokeh

    Many lenses are judged not only on how sharp they are, but how smooth and creamy are the out of focus areas (bokeh) of the image. In this area, the 24-70mm does okay. The bokeh on this lens is not a wow, but it is smooth and soft. On a lens that offers so much, the bokeh is not perfect, but it is acceptable.

    Overall Conclusion

    This lens has been praised as one of the best lenses Nikon has ever made. It is a great addition to any photography bag. You will find that you may keep it on your camera most of the time. It really is a sharp lens and is a perfect “all-round” everyday lens. Its specifications make it a “pro-spec” lens which means it’s not cheap (just under $ 2000). Remember though, it is recommended to invest in your lenses. Generally they will outlast your camera bodies and you will have them for many years if you look after them. This is one of those types of lenses, it will last well and produce great images for many years.

    The post A Practical Review of the Nikon 24-70mm f/2.8 lens by Barry J Brady appeared first on Digital Photography School.


    Digital Photography School

  • The Easy Way to Make Your Own Custom Photoshop Brushes

    If you’ve never heard about the creative use of brushes in Photoshop, this article is for you. If you already know about using brushes, you’ll be able to ramp up your creativity once you learn this easy skill – making your own brushes.

    DSC_0974Pond2W

    What are Photoshop brushes and why you’d want to learn how to make your own?

    Photoshop brushes are tools that are mostly used just like regular paint brushes to add strokes of color to your images. Most often people will use them as part of their dodging and burning workflow. Some people also use them in digital painting. The built-in brush set comes with a great assortment of  brush styles, such as soft bristles, round, square etc., but you can also make your own “fancy” custom brushes (which are reusable) to speed your workflow and add elements of interest to your images.

    The creative side of custom brushes allows you to use all sorts of imagery, textures, individual shapes, and even other photos like an old fashioned stamp pad, so you can quickly add artistic treatments to your images. You can even make a brush of your signature to easily sign your work.  Then combining the stamped brushes with layers and blending modes you have a whole other set of easy creative tools you can use to multiply your photographic impact.

    brushes-palette

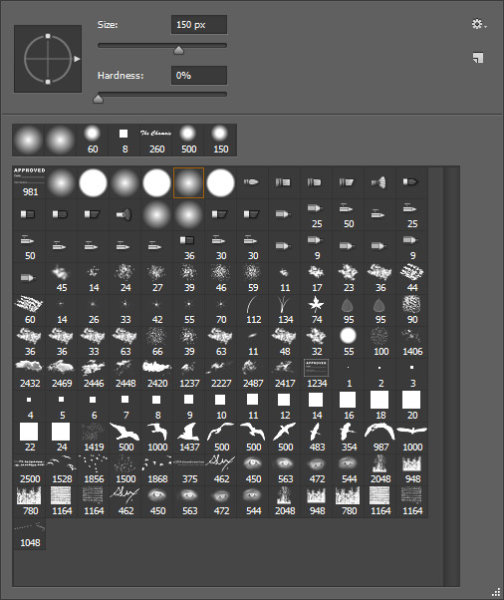
    Screenshot of the Brushes Palette – notice the birds and my name close to the bottom? These are custom brushes.

    Making reusable items into brushes helps you to easily add objects of interest or even subject matter to your images. Birds are very popular in landscape images these days. Who doesn’t instantly feel the freedom and purpose of birds in flight? Adding a carefully placed flock of birds, or even just one bird in flight, can change the entire story of the image and add a powerful element to your composition.

    _300385203W

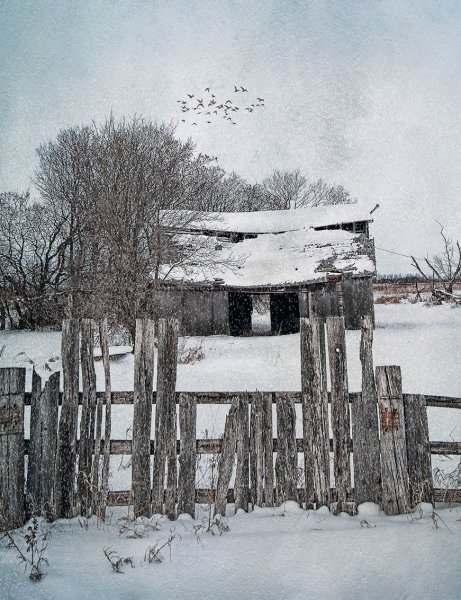
    Adding a “flock of birds” brush to create a better story.

    By creating your own “instant flock” with brushes you will never be at a loss to fill an empty sky. As well, this technique is the same whether you’re making a birds brush, a signature brush, sparkles, snow flakes, or music notes – what you can create is entirely open, limited only by your imagination.

    The Simple Process for Making Custom Brushes

    Let’s use birds for this example. Birds are popular and a versatile addition to landscape images, so this demo will show you how to make a custom reusable brush for adding a flock of birds to your images. This assumes you have a photo of birds. If you don’t, but still want to follow along, the zip file below contains all the elements you need to replicate this specific tutorial.

    Step 1

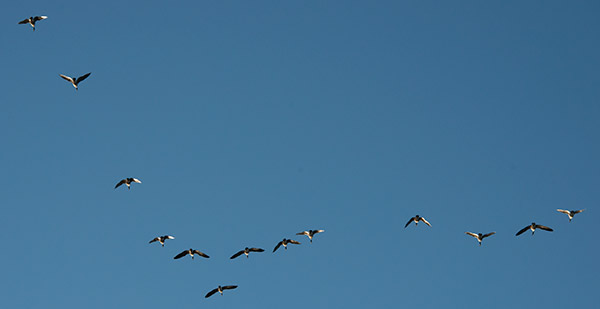
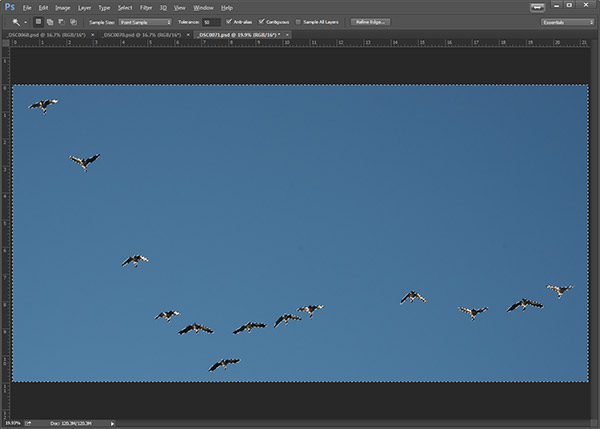
    Open the image you want to make the brush of – birds, trees, etc. – in Photoshop. The best images to use are ones where the item that is to be the brush is isolated on a plain background, in the case of birds a clear blue sky is perfect. If you want to make brushes from images of trees, try to use images where the trees are against a plain uncluttered background.

    A good image for a brush base.

    A good image for a brush base.

    Step 2

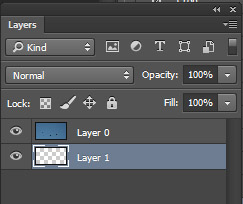
    Double click on the background layer to make it editable – it should now be called Layer 0. Make a new empty layer and move it beneath Layer 0 as shown below.

    layers

    Step 3

    Next,  you are going to select the background and cut it out. Using the Magic Wand tool, set the Tolerance in the top menu to around 50. This will ensure that all your background pixels are selected. If you have a more complex background, you will have to play with the Tolerance, or perhaps try the Lasso tool to cut out the background.

    magicwand

    Background selected with the Magic Want tool.

    Step 4

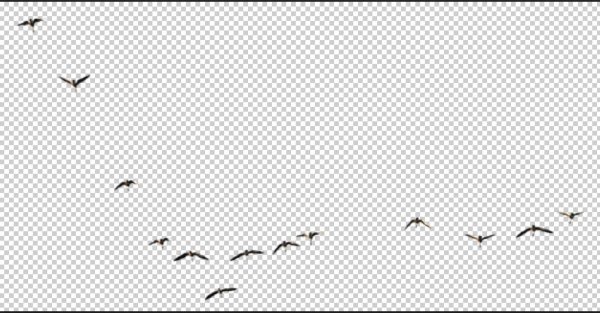
    With Layer 0 as your active layer, and the background with the marching ants, hit Backspace on your keyboard to delete the background. Click CTRL D to remove the marching ants. Your image should now look like this:

    brush-base

    Step 5

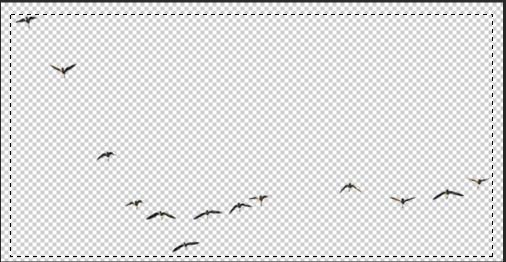
    Now you’ll will make the actual brush. You can use the Rectangular Marquee tool or the Freehand Lasso to select the birds or the subject of your brush. Which tool you use will depend on your brush subject. I will use the Rectangular Marquee tool for this example. Using the marquee tool draw a selection  around your birds.

    selection

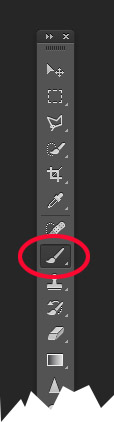
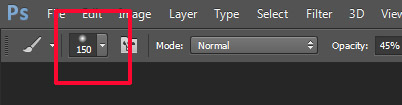
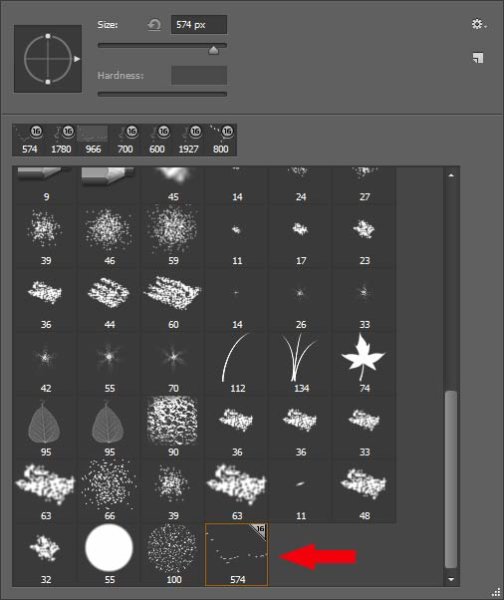
    Under the Edit menu, look for Define Brush Preset and select it. You’ll get a pop up that wants you to name your brush. Give it a creative name and click ok.  Now go into your Brush Preset palette by clicking on the brush tool, and you’ll see your newly minted brush at the bottom of the list.

    brush tool     brushes context menu


    your-new-brush

    Step 6 IMPORTANT!

    The final step is to SAVE your new brush so you can use it over and over. Look for the little gear in the top right corner of this brush preset palette. Click Save Brushes and give your new set a name.

    You’re done! Yay. Birds in flight forever. Whenever you want to add birds, just select this brush from the palette and stamp away (use the brush at 100% to have solid birds, anything less they will become see-through).

    One big hint for using ANY brush is to use it on a new layer. This way if you don’t like its position, opacity, size, etc., you can easily edit it without having to start your image over again.

    You may have noticed that this SAVE you just did, saves all the other brushes together with your new one.  If you want to really get savvy with custom brushes to create special brush sets with only your brushes watch for my article on Advanced Brush Creation and Management.

    Download the zip file for this image: DPS Making Brushes – use it to create your bird brushes. Show us the images you’ve made using brushes,  especially the ones you’ve created with this file!

    The post The Easy Way to Make Your Own Custom Photoshop Brushes by Alex Morrison appeared first on Digital Photography School.


    Digital Photography School

  • 3 Tips to Take Better Landscape Photos Regardless of the Weather

    Photographers are a special type of people that usually pay a lot of attention to detail. They’re also known to be patient and perseverant. However, in my opinion, landscape photographers are a unique breed. I’m sure that only a hand full of people are willing to hike 10 miles with 25 pounds of photography gear on their back, just because they hope to seize the perfect moment.

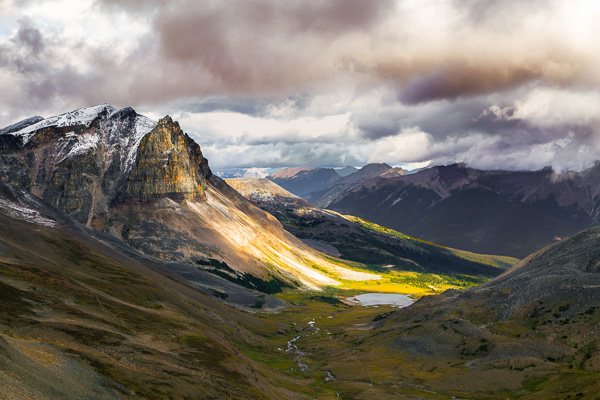
    Golden Hour in Pyramid Mountain  Jasper National Park  Alberta  Canada

    Generally, in photography, practice leads to improvement. However, practicing landscape photography is a bit trickier since you don’t have control over the light setup, the weather, or the subject. Sometimes, you might plan a trip for three months; you research the best spots, and you bring all your equipment. Then, when it’s show time, you walk outside to face a cloudy, rainy day, if not a snowy mess. All that can be very frustrating. Over the years I’ve learned a few tricks to deal with that. In this article, I will share three simple tips to help improve your images and take better landscape photos, regardless of the weather.

    1. Using clouds to avoid harsh light

    Let’s start by talking about one of the most important topics in photography, light. Usually, landscape photographers revolve their schedule around the Golden Hour, meaning the early morning or late afternoon. Photographers choose those portions of the day to take full advantage of the magical, warm, rich, natural light available. Yet sometimes, you cannot reach the planned location by car, making a strenuous hike of 10 miles the only available option to get to the desired place. Hiking is great, and if you love landscape photography you probably love the close contact with nature, but sometimes this passion doesn’t translate into mountain exploration at 3:30 a.m. Occasionally, you will find yourself starting your day hike around 6:00 a.m. to reach the desired area around 10:00 a.m., meaning that you will have to work with hard sunlight.

    Portrait photographers have an easy fix for that problem, move the model to the shade. I’ve tried using the same approach in landscape; but I’ve never had any luck trying to move mountains and lakes around. Another approach that portrait photographers use to avoid hard light is using light modifiers such as diffusers and softboxes. Unfortunately I don’t believe you can buy one of those big enough to use on a mountain. What you can certainly do is use the clouds as a light diffuser, thus avoiding the harsh sunlight from midday. Depending on how you capture your image, clouds can also help improve your composition by adding depth or a sense of movement. After I grasped this concept my mindset shifted, now I’m always hoping for the perfect cloudy day.

    Bald Hills  Maligne Lake  Jasper National Park  Alberta  Canada

    2. It’s all about the drama

    If this tip wasn’t enough to make you enjoy a cloudy day, let me tell you about a second trick that involves clouds when capturing landscape images. We all like to go online to wonder around photo sharing communities, looking for inspiration, a different point of view or even a new technique. I’m no different. I like to believe that I’m very active in some of those social media channels, however, when I look through pictures, I avoid focusing on landscapes. I like to explore portraits, Black and White, macro, pretty much anything but landscape. I can imagine you asking yourself, “Why would a landscape photographer do that?”. The answer is quite simple; I like to borrow successful techniques used in other fields. Sometimes, when I’m trying to capture an image of a mountain, I don’t face it as a landscape. I try, for example, to approach that image as a portrait. Once you learn how to repurpose techniques from one type of photography to another you will notice an improvement in your art.

    In most types of photography, the most striking photos are those with strong contrast; images that harmonize shadows and highlights seamlessly. One side effect of the current advances in digital photography, sensors, and the digital darkroom, is that a lot of landscape artists try to capture everything in one single image. Some will use HDR to bring up the shadows, others will use masking and blending to create a final image. I was no different.

    Lately, inspired by the work of great masters such Ansel Adams and Henri Cartier-Bresson, I’m trying to play with the shadow to highlight ratio in my images. Portrait photographers are very good at using artificial light (strobes or speedlights) to create dramatic images. In landscape it might be a bit more difficult to position the sun at a different angle. Still you can use clouds as a light filter, concealing light from distracting spots while revealing patches of bright sunlight that will accentuate your main subject. Once you start to play with this idea you will be able to create very dramatic images during those dreadful cloudy days.

    Tekarra Mountain  Skyline Trail  Jasper National Park  Alberta  Canada

    3. The path of balance

    Finally, keeping up with the idea of creating a dramatic image, photographers must be able to understand an important concept called balance. Not only the shadow and highlights balance, but also color balance, subject positioning, overall image balance and so forth. I remember some of the first photos I took, very often I liked the concept behind the photo, but the final image just didn’t convey what I had envisioned. That was when I discovered the concept of balance.

    This concept is very basic, yet extremely powerful. A well-balanced image will stand out on its own and will captivate your audience. Balance, simply put, is how you distribute the elements, colors, and brightness in the frame. There are countless ways to achieve balance, so many that we would probably need another entire article just to talk about it. As a general rule though, a well-balanced picture aims to distribute the elements evenly throughout the image. So next time you are out capturing an image, try noticing how you arrange the elements in the frame. Check if the amount and position of the shadow and highlight are reflecting what you want to show in your photograph. Finally, before you press the shutter, ask yourself if all the elements in the frame are contributing to the overall image. Sometimes, you can get overwhelmed by the landscape, and in an attempt to capture all the beauty you end up with a busy, unbalanced, and unappealing image.

    Silence  Banff National Park  Alberta  Canada

    I will leave you here, but next time you’re out there during a cloudy day, instead of complaining about it, just try your luck. You might be surprised by what you can achieve when you open your mind to work with whatever mother nature throws at you.

    Mountain tops  Banff National Park  Alberta  Canada

    Do you have any other cloudy day or landscape tips? Please share in the comments below.

    The post 3 Tips to Take Better Landscape Photos Regardless of the Weather by Diego Lapetina appeared first on Digital Photography School.


    Digital Photography School

  • Shooting Sunspots or How to Get a Beautiful Lens Flare

    Sunspots, they’re such an enigma. They’re huge right now. Everyone wants to see them in their photos, but they don’t want to have them on their wall…unless you do it right. When I first started in photography, 20 years ago, there were Big Taboos, the Uncrossable Chasms that one never even considered crossing; Never use a flash on camera, keep Continue Reading

    The post Shooting Sunspots or How to Get a Beautiful Lens Flare appeared first on Photodoto.


    Photodoto

  • How to get more from your printer – besides good quality prints!

    Canon Pixma MG6350 All-in-one-printer

    Canon Pixma MG6350 All-in-one-printer

    If you like to print hard copies of your photos at home, how do you decide which inkjet printer to buy? With such a myriad of printers on the market it can be daunting which one to choose. However, similar to buying a camera, one main consideration will be how much do you want to spend.

    I bought a Canon PIXMA MG6350 a little over a year ago.

    As luck would have it, my local computer shop had the white version in stock for nearly 50 Euros ($ 62USD) less than the black one. The white one was my first choice.

    This is a high-end, multifunction, inkjet printer. It is an all-in-one color printer with two paper trays. This means that it can print, copy, and scan and it also has WiFi and Airprint. I believe the latter lets you print from a smartphone or tablet but I haven’t tried it yet.

    The lower cassette can hold up to 125 sheets of A4 (US letter) size paper, while the upper tray is for photo paper (20 sheets) of 10 x 15cm (3.9 x 5.9 inches) or 13 x 18cm (5.1 x 7.1 inches). So it doesn’t hold a great deal of paper but I only ever load one sheet at a time.

    Its physical size, measuring 466 x 369 x 148mm (18.34 x 14.5 x 5.8 inches)was a perfect fit for my shelving unit. My Manfrotto travel tripod measures 18 inches when folded and this is exactly the width of the printer. It’s not small but at least it doesn’t have a top paper feed which can be awkward if the space between the shelves isn’t adequate enough.

    It’s solid but it is not light, it weighs approximately 8.4 kg (18.5 lbs). Also, this printer is noisy.

    Canon printer with Manfrotto travel tripod

    Manfrotto travel tripod on top of Canon Pixma MG6350 All-in-one-printer

    Canon Pixma MG6350 All-in-one printer

    Canon Pixma MG6350 printer-perfect fit on these shelves

    Inks

    The branded inks aren’t cheap. This is often the case with home, small office printers, whereby the consumables are not cost efficient. The Canon Pixma MG6350 uses a six-tank ink system. A full set of standard 15ml tanks will cost you around 62 Euros ($ 77.50 USD). The 22ml XL versions cost around 85 Euros ($ 106 USD), and are better value for money. The Canon Pixma MG6350 has a print resolution of up to 9600 x 2400 dpi.

    Generic third party inks have improved in their quality. It will be a case of trial and error to see which ones are better than others. The upside is that they can work out much cheaper. Currently, the non-branded full set XL versions cost 52 Euros ($ 65 USD) for this printer, so it is worth taking at look at them.

    DPI/PPI/MP

    In printing, DPI (dots per inch) refers to the output resolution of a printer or imagesetter. The more dot’s the higher the quality of the image.

    PPI (pixels per inch) refers to the input resolution of a photograph or image. Although these two terms are used in the same context, they are different but are analogous to each other.

    The real digital “resolution” of your photos are its pixels, the total of those is expressed as megapixels. For example, if your camera shoots 2848 x 4288 natively. Multiply these two figures and this represents the megapixels of your camera. In this case, it is 12.2 MP.

    Images viewed on the web have an output value of 96dpi (for PCs) and 72dpi (for Macs). However, this is where it can get confusing. An image displayed on your monitor with a resolution value of 72dpi, and the same image saved out as 300dpi will look exactly the same on screen (the resolution on your monitor is fixed). But if you were to print these images, this is where they would look very different. The image saved out as 300dpi will be a quarter the size of the image at 72dpi but the image will be better quality and won’t have that pixelated (jaggies) look.

    So why bother saving images for the web at 96/72dpi? Because they load faster and it saves on bandwidth.

    The standard output resolution(dpi) for printing when using inkjet printers is normally 240dpi (good), 300dpi (better) and 360dpi (better yet).

    To change the the resolution of a file in Photoshop, you first choose Image from the File menu and then Image Size. Make sure to uncheck Resample Image. If you need to make the image smaller or larger than leave Resample Image checked.

    However, if you want to change the resolution and the document size (print output size) at the same time here’s what you do. In this example, I want to change this file sized 9.49” x 14.29” at 300ppi to a 4” x 6” at 360ppi.

    1. Choose Image > Image Size (Alt+Ctrl+I). The Image Size dialog box appears.
    2. Deselect the Resample Image option, and change the Resolution to 360ppi. Notice that the Document Size changes to 7.9″ x 11.9″ because you’re moving the pixels closer together.
    3. Select Resample Image option and change the Document Size Width to 4 inches.
    4. Click OK. Now you have a file that is 4″ × 6″ at 360ppi.
    Resampling and image resizing in Photoshop

    Animated gif illustrating how to change resolution and size of image in Photoshop

    Scanning

    The Canon Pixma MG6350’s flatbed scanner has an optical resolution of up to 2400 x 4800 dpi, and is Twain compatible. This means that you can scan an image through Photoshop rather than using proprietary software. What I like about this flatbed scanner is that the flap can extend upwards allowing for books and larger items.

    This was particularly useful a few months back, I was presented with this very old portrait image to make a copy. As you can see, the actual image is much larger than the surface area of the scanner.

    Old large image on scanner bed

    Old large image on scanner bed

    Old portrait image-actual size-larger than scanner bed

    Old portrait image-actual size-larger than scanner bed

    Tip: Scan the image in as four separate files, working from top left to top right and then bottom left across to bottom right to ensure all the image has been scanned. Don’t worry if they overlap. Depending on the size of your photo, it is better to increase the DPI.

    For this image, I increased the DPI to 400. Save out the images as PNGs. This format is lossless, whereas JPEGs are a lossy compression which means that some detail is lost. The size of the image worked out at 6056 x 6983 pixels. This is a high resolution image.

    You then bring the four separate images into Photoshop. Go to File>Automate>Photomerge. A dialog box appears. By default, Auto is chosen which is fine. Make sure Blend Images Together checkbox is ticked too.

    Photomerge dialog box in Photoshop CS6

    Photomerge dialog box in Photoshop CS6

    Photoshop usually does a fantastic job of blending images together. It also creates the layer masks. This will be a huge time saver. Then save out your file as a PSD and work on cleaning up the image.

    Photomerge action completed showing scanned image with layer masks

    Photomerge action completed showing scanned image with layer masks

    Photo Papers

    When it comes to photo papers, the better quality branded papers are excellent. They are consistent and produce much better quality prints over non branded cheaper versions. My choice is the Ilford Galerie range (especially the Prestige Smooth Pearl paper), Hahnemühle FineArt Pearl-finish, and the Canon Luster range.

    However, I do use cheaper photo papers for my girls’ school projects. And if you are feeling in a creative mood, like I was, you can print up ID tags for your kids’ school bags using an old plastic gift/iTunes card, some double-sided tape, a colored cable tie and an O-ring.

    Another gift idea is the iron-on transfer papers. These papers allow you to print your photo onto a t-shirt. In the past I have given these as last minute birthday presents. They have always gone down as a treat.

    T-shirt+name-tag

    T-shirt+name-tag

    WiFi

    That fact that this printer works from WiFi is a plus. This helps prevent your desk looking like a spaghetti junction of cables from other connected peripherals.

    CD/DVD Labels

    A feature that I hadn’t realized came with the printer was neatly tucked under the second paper tray. This is the direct-to-disc tray for printing CD, DVD and Blu-ray labels.

    This is a much more favourable option over the self adhesive labels. These are known to peel and get stuck in the optical drive.

    While Apple is doing away with optical CD and DVD drives from their range of desktops and laptops. This technology is becoming defunct, especially as flash drives are getting cheaper to buy. Nonetheless, it makes for a good presentation to give someone a CD with photos and a cool label on it. This could be a potential client or gift to someone you like.

    Do you have any other printer tips you’d like to share?

    The post How to get more from your printer – besides good quality prints! by Sarah Hipwell appeared first on Digital Photography School.


    Digital Photography School