Category: Photography

  • 5 Tips to Help You Take More Natural Looking Portraits

    Writing for dPS has afforded me several opportunities, the best one being getting to converse with photographers – hobbyists to professionals and everything in between – from all over the world.

    lynseymattingly3

    Each time an article I write is published, I get the loveliest emails and comments, and I do my very best to respond to each of them. The question I get most often is one I ask other photographers all the time: How do you make your pictures look like……..that? The question may be worded differently, but ultimately it is the same:

    • How do you get your colors to pop?
    • What lens do you use?
    • How come the people all look so happy/comfortable/natural in your pictures?
    • What’s your editing process?

    When we ask another photographer these questions, we are all asking the same thing: How do you make your pictures look like that?

    When an image grabs you – makes you take an extra second to look at, to admire it, or to wonder if your own images look that great, (or throws you into a jealous rage over picture envy (please tell me I’m not the only one) – it’s as though the photographer has such a defined style, their entire message comes across in that one photo staring back at you. Since my style is candid portraiture, or lifestyle photography, or whatever the latest buzzword is we are calling it now, my subjects’ expressions and poses are what I typically get asked about most. Or maybe that’s just the only part I can explain very well, as the science and equipment piece of it is just not my cup of tea.

    lynseymattingly8

    So here are the five things I say and do during a portrait shoot that I feel make the biggest difference in the comfort level of my clients, and ultimately is the reason I occasionally strike gold. It’s these things that are the answer to how I make my pictures look like that.

    #1 Explain the process

    Before I take a single picture – whether my subjects are nine or 90 years old – I tell them exactly what to expect from the session, and what I expect from them. It nearly always goes like this: “I’m going to take some pictures. I’m going to take some pictures of just the kids, some pictures of just Mom and Dad, and some pictures of everybody. You can smile if you want to smile, but you don’t have to if you don’t want to, and at the end I’m going to give you a little prize.” This short little introduction often immediately puts my clients at ease and I am able to set the tone of the whole shoot based on their response.

    lynseymattingly6

    If I am photographing kids, I always sit down on the ground so I am closer to their level, but I say this exact thing to children and adults alike. Yes, I carry around lollipops. My gear bag has an entire area just for that, and people I have photographed before know it. A lollipop is a tiny treat and while it’s fun and funny, though not usually a huge motivator for teenagers and certain adults, you’d be surprised how far it gets me. Obviously for most, it’s not the prize itself, but rather that I am acknowledging that this is going to be a bit of work, and it’s going to have an end point. It’s an offering to them, silently asking for them to go all-in for photos and perhaps have a little patience with me.

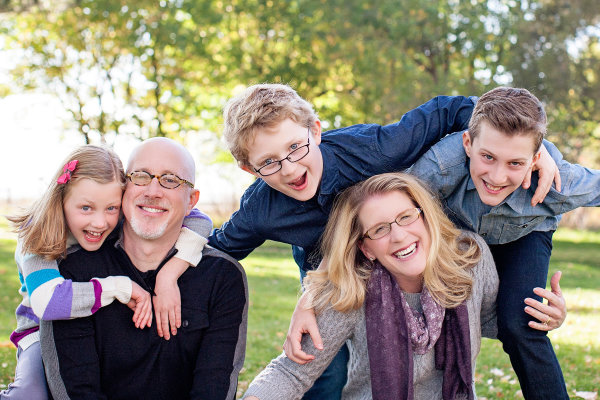
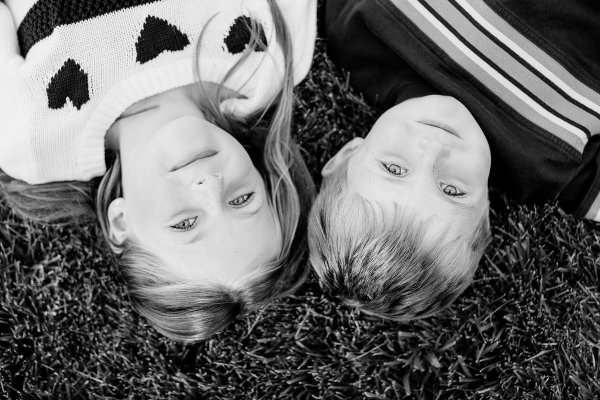
    Also important is that I tell them they don’t have to smile. I don’t want anyone smiling because they think they have to – smiles out of obligation makes for terrible pictures. I want them to smile because we are having so much fun, they do it instinctively.
    lynseymattingly1

    #2 Strive for interaction and reactions, not poses and smiles

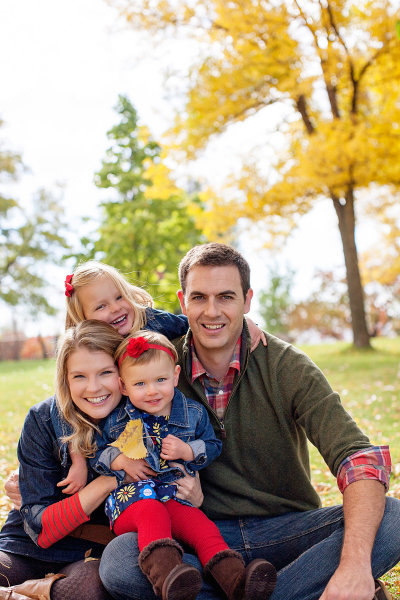
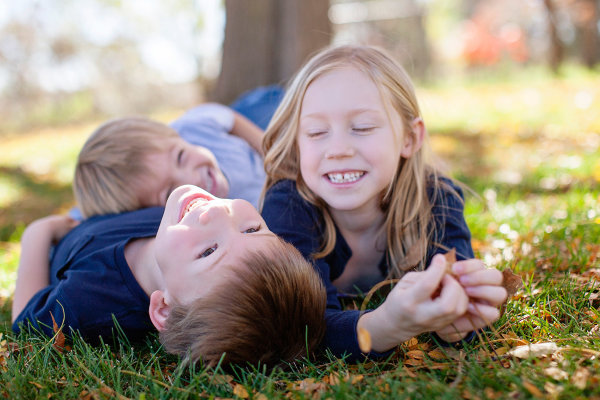
    If I have to choose between a picture of every face looking at me, smiling, or one of a family looking and laughing at each other, I will chose the latter every day and twice on Sunday. It is my personal and professional belief that 50 years from now, those images of people being themselves with their loved ones will be much more treasured than portrait studio shots that only show everyone together. I do my best to set-up a moment and let my subjects take it where they want. I can’t declare their reaction to something, so therefore I set the tone for funny or serious, or as I would say to a child: a loud picture or a quiet picture. I see myself as a third wheel on a great date – I’m along for the ride, I just happen to be photographing it.
    lynseymattingly5

    #3 Shoot everything

    I am a massive over-shooter. I carry more memory to a quick portrait shoot than some photographers would pack for a day-long wedding. Changing a card mid-shoot is completely normal for me. This no doubt adds to the backend of my process, as I have so much more to sort through, but this means I can feel confident enough to guarantee my clients a minimum number of images. This also means, I very rarely have a client ask: “Did you get it?”.

    I shoot looking through the viewfinder, and not. I line up the shot and then peek my head out so my subjects aren’t just staring at a black box. I make funny faces. I have a fake sneeze that can get even the most serious of baby giggling and that requires several sneezes, shots, and me not having a camera affixed to my face. I shoot an average ratio of one to 30. Meaning for every 30 images I shoot, one of them will get edited and delivered to the clients.

    This would be terrible if I shot film. To be honest sometimes it’s a little overwhelming the first time I upload all of the images from a shoot. Often it’s even a lesson in self-loathing, wondering how on earth I will ever get through them, and why do I do this to myself every – single – time. In the end, it always works out. Plus, I always have the images I was hoping I caught.

    lynseymattingly9

    #4 Be a giant cheerleader during a shoot

    I am a giant cheerleader during a shoot, to the point that it’s a bit eye-roll-inducing. If it’s dark and gloomy out, I show-up saying this is what we call perfect, even, light! If it’s bright and sunny, and miserably hot? What a perfect day for photos!

    Every single thing my clients do during a photo session is perfect and if it’s not, I tell them I’m going to fix it. I want my clients on the other side of that lens to feel beautiful, and like they are doing a perfect job. Having them feel awkward, or be in poses or positions that feel unflattering, will make for bad pictures. Being told that they are doing a great job and that the pictures are coming out perfectly, gives clients the confidence to be themselves. I’m their friend during a shoot – kids and adults alike. And if I’m not behaving in a way that people would want to hang-out with me when I am not taking photos, why would they want to hang-out with me when I am?
    lynseymattingly7

    #5 Know you are just a piece of the process

    I don’t want to get all cheesy on you or anything, but I don’t feel like any picture I have taken of someone is mine. The photo belongs to the person in it, and whomever they chose to share it with. I don’t do any printing. When someone pays for a photography session with me, they get the high resolution images as jpg files, and a release to print and use them as they would like. I honestly feel like this creates a comfort level that I didn’t see when I used to offer prints only. They know they are going to get the best of what I shoot and they aren’t going to have to pick a favorite for an expensive enlargement. They know there isn’t going to be a hard sale in a few weeks where we look at everything together. I don’t put watermarks on my images ever and I encourage them to share their pictures on social media. In fact, I often share their pictures on social media.
    lynseymattingly2

    Here’s why: if they didn’t hire me, show-up, look great, have fun, etc., I wouldn’t have the pictures to show in the first place. I’m only a piece of any picture I’ve ever taken. You may argue, what if someone steals your images? To do what? Claim them as their own? I have never run into a situation where that would truly hurt me. If there is a wild rampage of stealing other photographer’s images out there and mine are being stolen, I would honestly be a little flattered. That means they’re good! I’ve already been paid for my work. Though I would never use an image where my client hasn’t signed a release allowing my use, I don’t see how getting my images out there is anything but free advertising. I want my clients to love their photos so much they print them all in large sizes to hang up for their friends to see. I want them to talk about how fun the shoot was, how happy they are to get all of the images, and how they will hire me again and again. Those people know who took the pictures, and that’s all that really matters.

    How do you help clients feel comfortable during a photo shoot? Share your comments and suggestions with us below.

    googletag.cmd.push(function() {
    mobile_slots.push( googletag.defineSlot( “/1005424/_dPSv4_mob-all-article-bottom_(300×250)”, [300, 250], “pb-ad-78158” ).addService( googletag.pubads() ) );
    } );

    The post 5 Tips to Help You Take More Natural Looking Portraits by Lynsey Mattingly appeared first on Digital Photography School.
    Digital Photography School

  • 5 Tips for Planning a Winter Photography Excursion

    If you have seen the recent photos of the record snowfall in Buffalo, NY, you know that for much of the world winter is here and it’s coming fast, whether you like it or not.

    While your feet might be cold for the next four months, a reason to get excited is the photographic opportunities that will come from it. I am writing this to convince you to prepare now for photographing that next snowstorm because it will creep up on you, and you want to take full advantage of it.

    Tips for planning a winter photography excursion

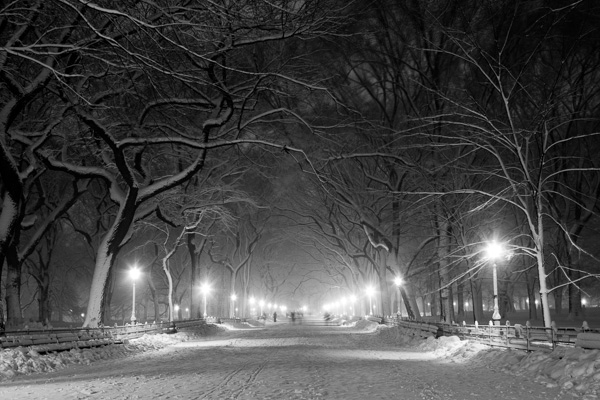
    Poets' Walk, Central Park

    Poets’ Walk, Central Park, NYC.

    1. Plan to go out in the middle of the storm

    A lot of photographers choose go out the next morning after the storm has hit, when the weather is clear and the snow is bright and crisp. You should do this as there are some fantastic photographic opportunities, however, in my opinion the best opportunities occur in the middle of the storm, when the weather is fierce and the skies are gray.

    If you are going to shoot in the middle of the storm, be careful. Make sure to be safe and that the storm will not have a chance to be severe enough to get you in trouble. Make sure you have a working and fully powered cellphone, the correct clothing, and any supplies that you might need should you get stuck for awhile. It will only be more fun with friends along but always make sure that someone who is not along on your excursion knows exactly where you are going.

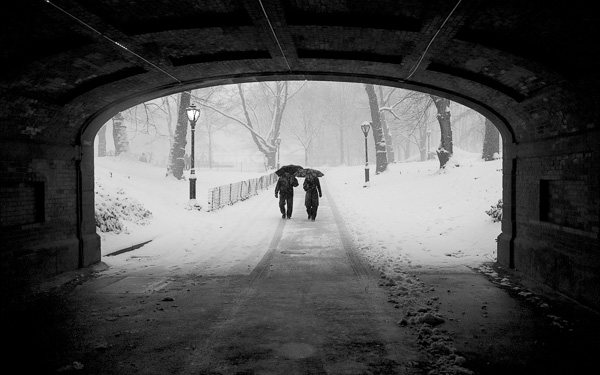
    Couple in Snowstorm, Central Park

    Couple in Snowstorm, Central Park, NYC.

    2. Scout your route

    Create your route ahead of time. You can always explore and veer off, but it will help to have a plan of action. The key to photographing snowstorms is that you are not going out to just photograph the snow, you are going out to photograph interesting places in the snow.

    Create a route with scenes that you think will look good in the snow. This could be a house, a barn, a lamppost, a main street, a park, or a scenic landscape. In addition, creating this route ahead of time will allow you to share it with someone beforehand should you get stranded.

    3. Protect your camera

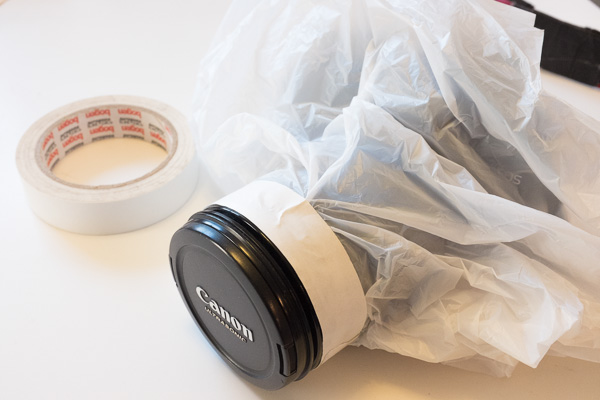
    The best camera weather protector, a small plastic bag and some tape.

    The best camera weather protection – a small plastic bag and some tape.

    Digital cameras are tough, but you still want to treat them carefully. In extremely cold and severe weather conditions you might want to take further precautions, but for most winter situations there are only a few things that you will need to do.

    Pick a lens for the day and keep it on your camera. Some people might disagree with this, but in this situation, I personally do not want to risk getting moisture inside the camera, so I will not change the lens. If anything, I will take a second camera with another lens on it, but mostly I will take either my 24-105mm or 70-200mm lens and only use one of them.

    I have tried so many rain protection devices for my Canon SLR and I have given up on every single one of them. They have all been too bulky and cumbersome to use with the camera freely in harsh weather. I have yet to find one that works better than a simple plastic bag with a hole in it, and tape to attach it to the lens or lens hood. I use the typical pharmacy plastic bags. Bring multiple bags and the roll of tape because they will have to be replaced a couple times during the day. I use this setup for shooting in the rain as well.

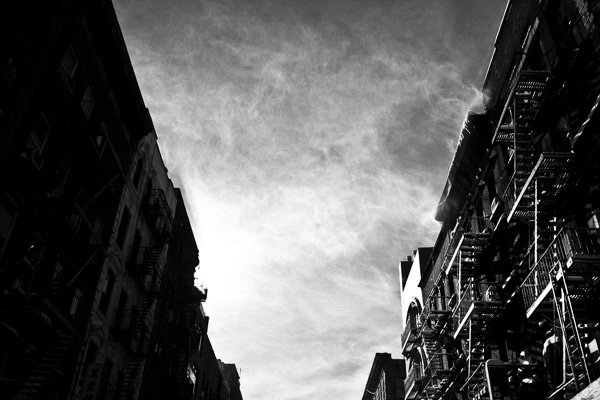
    Tenement Rooftops, Lower East Side.

    Tenement Rooftops, Lower East Side, NYC. You do not want that getting into your camera while you change lenses.

    Bring multiple hand towels and microfiber cloths to dry off the camera, and to keep the front of the lens clear from fog. A lens hood can add further protection. If the snow is light, then I will keep the camera uncovered and will often use a small umbrella, while drying off the camera frequently. When the snow gets stronger then I will use the plastic bag and sometimes I will use it in combination with the umbrella. In between shots I keep the camera covered and I always keep the front of the lens pointed down until I actually take the shot, to keep it clear of snow.

    You will also want to bring along extra batteries, since they do not work as well when they are cold.

    Finally, be careful about suddenly changing the temperatures on your camera. This is what can really hurt your camera. You do not want to go from shooting in the middle of a snowstorm to putting it by a warm fire right away. Let the camera warm up slowly in your car, garage, or in a cooler area of your house.

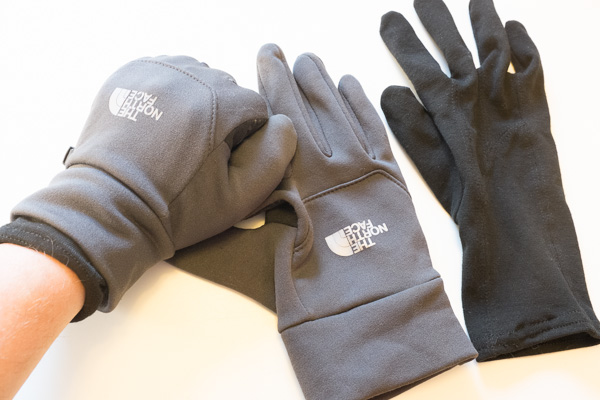
    Photography gloves.

    North Face touch screen gloves with inner linings. Still not as warm as heavy duty gloves, so not ideal for Arctic exploration, but they are much easier to work with when handling a camera.

    4. Prepare your clothing and equipment ahead of time

    Sense a theme here? Set up everything ahead of time so that when the storm hits all you have to do is get dressed and walk out the door. It is so easy to procrastinate and ultimately decide to stay in with some hot coffee. Planning and packing everything right before the shoot just adds another layer to stop you from doing it. I know this from experience. If everything is set, then the only thing that is standing between you and the outdoors is you.

    You might try to tell yourself that there will be another storm but that is never guaranteed. If the weather is perfect, then you need to take advantage of the opportunity while it is there. It could be a once in a lifetime experience.

    Use two layers of thinner gloves. Gloves are a huge problem with photography as the warmest ones are too bulky to adjust the fine controls on the camera, and the thin ones are not warm enough. I use a thin inner layer glove combined with a medium strength pair of North Face gloves. This is still not as warm as a heavy duty pair, but the mobility is a big advantage.

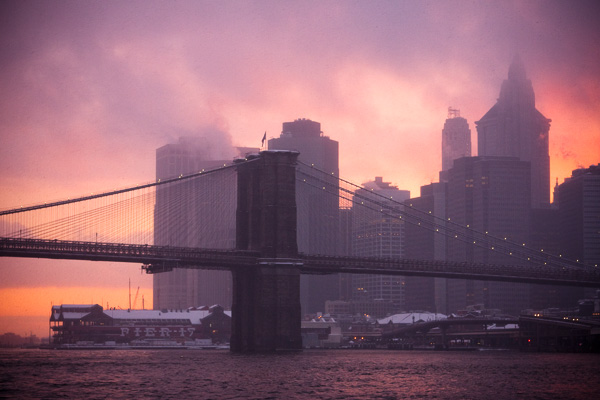
    Brooklyn Bridge in Snowstorm, at Sunset

    Brooklyn Bridge in Snowstorm, at Sunset, NYC.

    5. Plan a sunset into dusk route

    The most uncomfortable times to shoot often yield the best results. You may have heard to shoot during the golden hour, or at night, or during a snowstorm, but the real magic happens when all of these come together in one. Plan out exactly where you want to be during the golden hour and after the sun sets. If it is in the middle of a hard storm then the sunset might not shine through the fog, but everything will still get magical as it transitions to night.

    Make sure to bring a tripod for dusk. Also a strong flashlight can help for focusing, because it can be tough for the camera to lock onto dark scenes. You can also use manual focusing to select the focus distance that you want.

    Cold Spring, New York.

    Cold Spring, New York. The warm sunset light contrasted with the blue shade adds an interesting aspect of contrasting color.

    Bonus: Technical tips

    If you are not shooting in full manual, all that white snow is going to trick the camera’s light meter to make the images darker than they need to be. It is common for people to come back from a day shooting in the snow to wonder why the photos all look so gray. Raise your exposure compensation (+/-) to combat this and make the snow whiter, but make sure to not blow out the details completely.

    The opposite side of this tip is that a gray snowy scene can be fantastic, so you might not want the snow be very white. You have creative control here and can use the +/- on your camera or manual mode to achieve the exact look that you want. It is better to do this in the camera rather than in post-production.

    Also, pay attention to make sure that your focus point is correct and if you are shooting digitally then take a few shots of the same scene. Snowy and harsh conditions can make focusing tough and can make the problem of back-focus even easier to occur. Make sure the focus point is locked onto the area that you want to be the sharpest and not the area behind it.

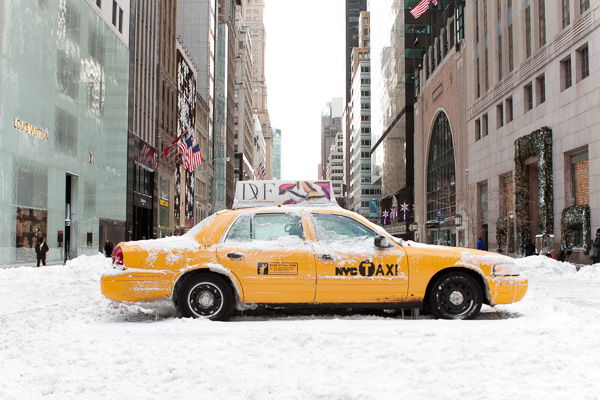
    Broken Taxi, 5th Avenue.

    Stuck Taxi, 5th Avenue, NYC.

    Be adventurous. This is not just about getting that ideal photo, it is about enjoying the process as well. The camera is a wonderful tool to force you out the door to explore gorgeous locations when you might otherwise decide to stay inside in the warmth. A camera is a gift in many ways.

    googletag.cmd.push(function() {
    mobile_slots.push( googletag.defineSlot( “/1005424/_dPSv4_mob-all-article-bottom_(300×250)”, [300, 250], “pb-ad-78158” ).addService( googletag.pubads() ) );
    } );

    The post 5 Tips for Planning a Winter Photography Excursion by James Maher appeared first on Digital Photography School.

    Digital Photography School

  • 6 Tips for Creating Leading Lines to Make Your Photos Stand Out More

    There is perhaps no more important tool in composition than lines. The eye will virtually always follow an actual or implied line across the picture. Because of this tendency, many lines are referred to as leading lines They are actual, or implied lines that control the eye of the viewer through the frame.

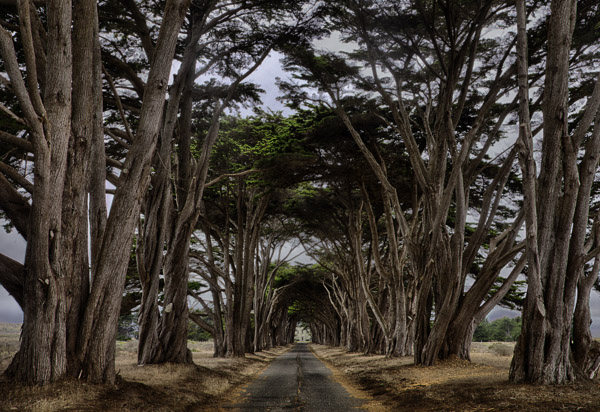
    PointReyesTrees

    Some leading lines guide the viewer entirely through the frame. Some lines are the subject of the photo themselves. But others, and my favorite sort of leading lines, are the ones that draw the viewer into the picture. They add depth to your image. So today I want to focus on that particular kind of leading line, giving you some examples and ideas for how to create them.

    1.  Plan for opportunities

    Lines that you can use to lead into your viewer into the frame are everywhere, but you’ve got to look for them. In fact, it is a good idea to plan a few shots ahead of time so that you can consider what to use as a leading line. Leaving it to chance when you are out shooting will often result in the idea of leading lines being overlooked while you are focused on other things.

    When you are thinking about possible lines leading into the frame, think about roads and paths, which work great. Plus they are everywhere so you almost never have to search for them. The edges of the road will converge in the distance, thereby pointing the viewer to the center of the frame. Although certainly not as prevalent as roads, railroad tracks also work great. Finally, don’t overlook the use of shadow to create a line toward the center of the picture.

    QueensWalk

    2.  Finding and using urban opportunities

    In an urban environment, besides roads, you can use buildings and other structures. Obviously rows of buildings can work. Perspective will make the buildings appear smaller as they become more distant, resulting in lines pointing to the center of the picture. Fences are another good choice.

    Keep your eye open for rows of streetlights, which we often overlook, but which can work great. In addition, don’t forget to look up, as the natural convergence of buildings toward the center of your frame (due to the distortion of your lens) can actually work for you in this context, and create lines that point to the center of the frame.

    TubeEscalator

    3.  Opportunities in nature

    When you are out in the wild, nature often provides you with the leading lines you seek. Patterns on the ground, whether it be paved, sand, or grass, can often provide markings that lead to the center of the frame. In addition, similar to the convergence of buildings mentioned above, looking up into tall trees will create the same effect.

    Sand

    Leading lines on the ground can be difficult if not impossible to see with the naked eye though. There are times you have to walk around with the viewfinder held to your eye (or looking through your LCD with the camera in Live View) in order to see the lines on the ground. Moving water can also provide lines toward the center of the frame. Again, however, these might not be visible to you. Frequently looking at a a long exposure after the fact is the only way you can actually see these lines. Take test shots when you can.

    4.  Manufacture your own lines

    Sometimes there are no leading lines tha to use and you have to make your own. There are many ways to do this. One of my favorites is by adding streaking lights that go into the frame. Taking a long exposure of moving water will also result in lines.

    GreyWhaleRock

    5.  Stay cognizant of lines when shooting

    Once you identify leading lines to draw your viewer into the frame, you need to take your picture in such a way that it will show them. We already mentioned shutter speed, which is particularly important when you are allowing lights or water to flow through your frame to show a leading line. But you will also want to keep an eye on your aperture setting. Most of the time you will want the entire leading line sharp, along with the subject that you are leading the viewer’s eye toward. You’ll want to use a small aperture in that case, which will create a large depth of field for your shot. On occasion, however, you want to blur out the background by using a large aperture. In any case, the important thing is to have a plan for showing the leading line in the final picture.

    WiseCoRoad

    6.  Accentuate the lines in post-production

    Finding and using leading lines to draw your viewer into the picture does not end when the shutter closes. Usually you can accentuate them in post-processing. The main way is through selective brightening and darkening. Oftentimes you will want to brighten your leading line to draw the viewer’s eye to it. Sometimes you might want to darken other parts of the frame for the same reason. You also might want to increase the contrast in, and around, your leading lines since the eye is attracted to contrast.

    The best way the accomplish this selective lightening and darkening is through curves adjustment layers. Just create a curves adjustment layer (Layer – New Adjustment Layer – Curves). Then brighten the picture by pulling the middle of the curve upward bit. Use whatever selection tools you are most comfortable with to mask away the brightening everywhere you don’t want it (which will be pretty much everywhere except for your leading lines). To darken portions of the picture, just do the same thing on a new adjustment layer, but instead of pulling the curve up, pull it down. Again, mask away the effect where you don’t want it (which, this time will be areas away from your leading lines).

    NYC

    Effort and reward

    The use of leading lines to draw the viewer into the frame is a great way to add depth to your pictures. Rather than looking at the picture the viewer is looking into the picture. But it isn’t always easy. It requires thought before, during, and after the shot. But with the right pre-planning, a little attention while shooting, and some accentuation during the post-processing, you can add an element to your photos that sets them apart.

    googletag.cmd.push(function() {
    mobile_slots.push( googletag.defineSlot( “/1005424/_dPSv4_mob-all-article-bottom_(300×250)”, [300, 250], “pb-ad-78158” ).addService( googletag.pubads() ) );
    } );

    The post 6 Tips for Creating Leading Lines to Make Your Photos Stand Out More by Jim Hamel appeared first on Digital Photography School.

    Digital Photography School

  • Guide to Buying Your First DSLR

    Your First DSLR

    For whatever the reason, you’re ready to buy your first DSLR. It could be that your point-and-shoot isn’t cutting it anymore in regards to features, speed, or image quality, or it could be that you’d like to turn photography into more than a rarely-touched hobby.

    Romain Ballez

    By Romain Ballez

    DSLR (Digital Single Lens Reflex) cameras are what the vast majority of professional photographers use to get the job done. Unlike point-and-shoot camera models, which record light (and therefore an image) onto an electronic sensor directly, a DSLR uses a mirror to bounce the light from a scene through an internal system and into a viewfinder or an electronic sensor, in the case of an open shutter.

    These cameras also allow for interchangeable lenses, giving you a wide array of options in regards to focal lengths and quality. There are, of course, advantages and disadvantages to DSLR systems, but at the end of the day, these cameras offer the features and quality required by advanced hobbyists and professionals.

    What You’re Looking For

    There’s no denying it, this is a big purchase for you. No, you’re not looking for a top-of-the-line, full-featured beast this go round; you need the best possible piece of equipment for a reasonable price. You need bang for your buck.

    Whether photography is a passionate hobby or a hopeful profession of the future, you are in a learning phase, and need a camera that will compliment that objective well. While current-generation point-and-shoots can be great products, DSLR’s do have a few advantages.

    Larger Sensors

    As a rule, DSLRs have a larger photo-sensitive digital sensor, which usually translates to better image quality. Please note that this has nothing to do with megapixels or resolution, neither of which are, by themselves, indicators of image quality.

    Interchangeable Lenses

    While there are some point-and-shoot systems beginning to offer interchangeable lenses, by and large, DSLR’s have the market dominated in this area. Not only do the big camera companies have their own lenses, third-party companies such as Sigma and Tamron offer great selections as well. There is a lens out there for virtually every application you can imagine.

    János Csongor Kerekes

    By János Csongor Kerekes

    A Viewfinder

    Instead of the usual LCD screen present in point-and-shoot cameras, DSLR’s collect light from the lens, direct it to the mirror, and through the viewfinder, giving you an almost exact representation of what is being captured on the sensor.

    Advanced Features and Controls

    Namely, manual controls. While point-and-shoots usually feature the ability to modify settings, DSLR’s are built from the ground up with manual control in mind. ISO ranges are higher with reflex cameras, and larger sensors combined with precise aperture controls allow for controlled depth of field in your photos.

    Speed

    DSLR’s are known for their faster shutter and system speeds, and in the world of photography, speed is usually a good thing.

    There are countless brands of equipment, but as far as DSLR’s go, there are the big three – Canon, Nikon, and Sony.

    Recently, Pentax has been gaining ground again, and there are more expensive offerings available from companies like Leica and Hasselblad. For our purposes, we’ll stick to the big three, as they are all known for offering outstanding entry-level cameras within their product lines, and can be relatively inexpensive.

    Elias Ruiz Monserrat

    By Elias Ruiz Monserrat

    What to look for when buying that all-important first SLR camera?

    Image Quality

    Image quality is usually the most important requirement of a new camera for photographers, and it’s also one of the most subjective. The quality of the photos a camera produces is dependent on several factors, including sensor size, lens quality, and the optics of the camera itself.

    Feature Set

    While almost all DSLR’s have a common set of features (such as the ability to shoot manually), some brands and models have automated some features, while others have not, or do not have those features at all. Different cameras have varying usable ISO ranges, autofocus points, and resolution (in megapixels).

    Design

    Although usually not the first thing you think of with an entry-level camera, buying a model with a solid design is still important. Some less expensive cameras have all plastic housing, whereas others may use more heavy-duty materials such as metal; others still may be weatherproof to a certain degree.

    Even at the price points we’re discussing, it’s a good idea to research that aspect of the prospective camera as well, and buy as solid a model as possible.

    Jung-nam Nam

    By Jung-nam Nam

    Cost

    We’re talking entry-level, for the scope of this article, so cost will be a factor. Obviously, the more money you’re able to spend, the more advanced system you can get. Keep in mind however, that often with entry-level models, differences between the cameras can come down to feature sets, with image quality staying more or less the same.

    Remember that the quality of the lens you’ll be attaching to the camera is more of a determining factor in the quality of the photo.

    Where to Buy

    Luckily, you have several options in this area. Gone are the days where you could only buy a camera at your local Wolf Camera (and unfortunately, gone are the Wolf Camera stores, as well). Now there are virtually limitless retail outlets and sellers online, carrying every system and component a photographer could need. You can order your camera from your living room and have it delivered to your house a few short days later, without ever leaving home.

    Amazon, B&H Photo, and Adorama are all large, respectable retailers you can shop with, and are among the most popular today.

    The Contenders

    Canon EOS Rebel T5i

    The Canon Rebel series has a long-standing tradition on solid, quality cameras at a reasonable price. While I won’t start a brand war here, it’s well-known that most photographers end up settling on either Canon, or Nikon.

    The Rebel series has come a long way from the days of the XS, and the latest generation of Rebel cameras are much closer to Canon’s midrange line than before, with better sensors, more features, and hardier construction.

    t5i_586x186

    Canon Rebel T5i

    The T5i is an 18MP (megapixel) camera, with an ISO range of 100 – 12800 (expandable to 25600). It also features a 3 inch Vari-angle Touchscreen LCD, 9 AF (autofocus) cross points, 5 fps (frames per second) continuous shooting speed, and shutter speeds up to 1/4000 second.

    As with most entry level systems, if you opt for the full kit, you’ll get the standard 18-55mm IS (image stabilization) zoom lens. While very good for learning novices, you’ll want to upgrade to a cheap prime such as the excellent Canon EF-S 50mm f/1.8 or something similar, as the cheaper build and documented chromatic aberration issues with the kit lens could leave you wanting a bit more. Note that this applies to all kit lenses on the entry-level cameras we’re discussing here.

    Nowadays, as systems get more advanced, HD video recording is becoming more of a requirement, and the T5i delivers this as well. As of this writing, the T5i kit is selling for $ 649.99.

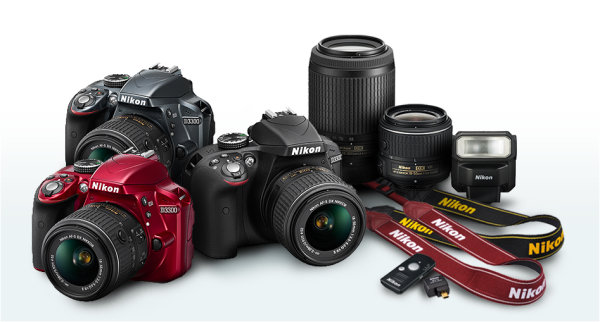
    Nikon D3300

    D3300

    Image courtesy Nikon

    Nikon upped their game with the D3300, equipping the camera with a generous 24 megapixels of resolution in a solid, compact, carbon fiber enhanced body. This model gives you, the budding photographer, an ISO range up to 12,800 (expandable up to 25,600), 11 autofocus points, and 5 frames per second of continuous shooting, along with a 3″ LCD screen that matches the Canon model.

    Just as with the Canon T3i, the D3300 supports shutter speeds up to 1/4000th of a second and allows for 1080p HD video recording.  Retailing around the $ 500 mark, the body and lens bundle includes the Nikkor 18-55mm 5.6 VR II lens, a relative equivalent to Canon’s 18-55mm kit lens.

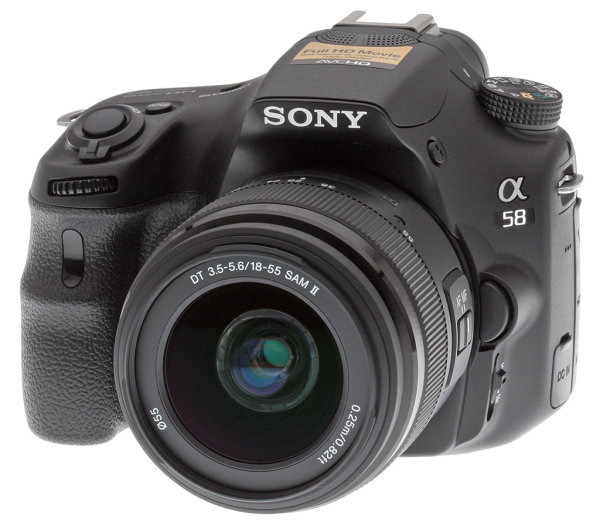
    Sony A58

    Usually considered the third wheel of the big three, Sony is known more for their other forays into the electronics world than their digital cameras, but don’t let this fool you; they know how to make a good DSLR, and the SLT-A58 is a wonderful example of that.

    sony-a58

    Image courtesy Sony

    Dipping even lower in price and the lowest of all three at $ 450, the A58 gives you quite a bit for that price point. This 20.1 megapixel camera offers a respectable ISO range up to 16,000, and is expandable up to 25,600. Leading the pack, this model offers 15 autofocus points, but forces you to give up a little bit with the smallish 2.7″ LCD screen.

    Battery life has been improved fairly drastically on the A58 in comparison to previous entries in the series, and for such a budget-friendly camera, it features a surprisingly big and bright viewfinder.

    Conclusion

    So which one is right for you? Any of these – or none of these. The answer lies in what you’re looking for, and what concessions you’re willing to make for the budget you have. All of these are excellent cameras, and were chosen because of what they offer for the price, but that doesn’t mean there aren’t other cameras that would serve the purpose just as well or even better.

    The prices we’ve discussed all include a kit lens to get you started, but be aware, these are usually the lowest-end optics available, and you’ll want to upgrade as soon as possible to another piece of glass. Also, in most cases you have the option of buying the camera body only, and picking out your lenses separately, which reduces your upfront cost of the DSLR itself. There are literally hundreds of lenses to choose from; just ensure they will fit your camera’s mount before purchasing.

    At the end of the day, you want a camera that will facilitate the learning process you’re going through, so choose a camera that assists in that purpose, without breaking the bank.

    Bought Your First DSLR? Here’s How to Learn How to Use it!

    Check out our Ultimate Guide to Learning How to Use Your First DSLR.

    Also check out our Photography Tips for Beginners page for lots of great photography tutorials suitable for first time DSLR buyers.

    googletag.cmd.push(function() {
    mobile_slots.push( googletag.defineSlot( “/1005424/_dPSv4_mob-all-article-bottom_(300×250)”, [300, 250], “pb-ad-78158” ).addService( googletag.pubads() ) );
    } );

    The post Guide to Buying Your First DSLR by Tim Gilbreath appeared first on Digital Photography School.

    Digital Photography School

  • Exploring the Upper North Platte River in Colorado by SUP

    beginning of the North Platte River

    Confluence of two Grizzly Creeks 10 miles SW of Walden, CO – the beginning of the North Platte River

    North Platte River is one of my favorite paddling destinations. Usually, I paddle various flatwater river sections in Wyoming above and below Saratoga. However, there is a 45 mile long river stretch in Colorado’s North Park before the North Platte enters the Northgate Canyon.

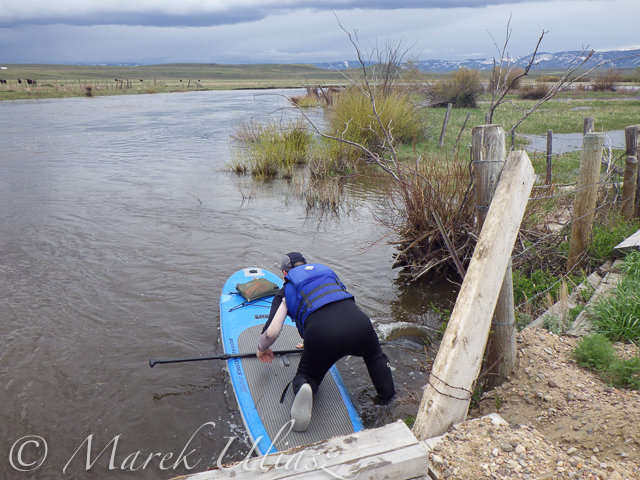
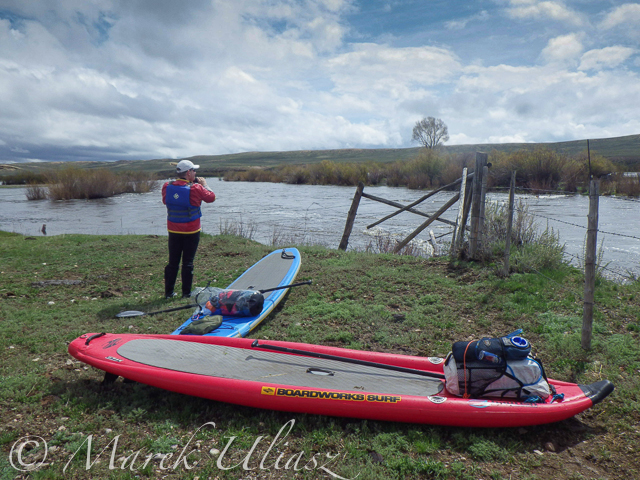
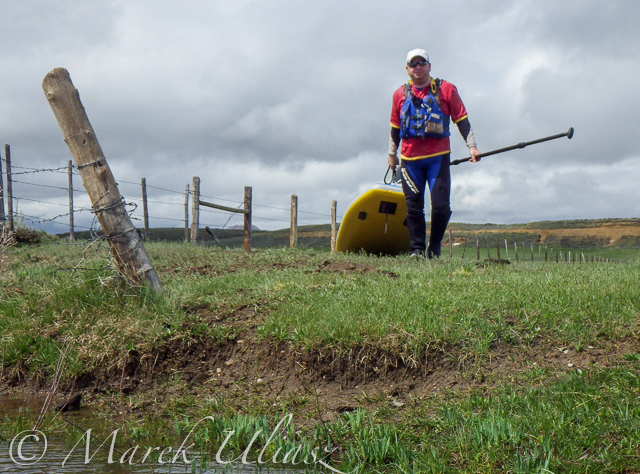
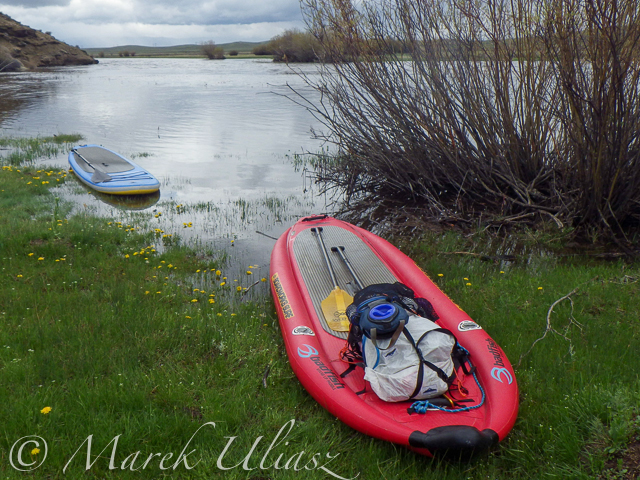
    After some fall and winter scouting and a lot of time spent on Google maps, the exploration of the upper North Platte River finally took place during the Memorial Day weekend. Rob Bean joined me to paddle our inflatable Bordwarks SUPs: Shubu and Badfish.

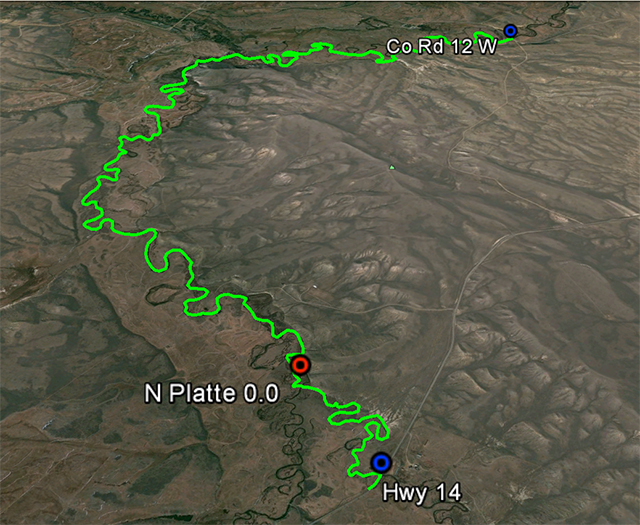
    Upper North Platte River on Google maps with some waypoints for access points and diversion dams.

    North Platte River near Walden, Colorado

    14 miles of the upper North Platte River near Walden with the river beginning
    as a confluence of Grizzly Creek and Little Grizzly Creek

    May 24, 2014
    Put-in: Grizzly Creek at highway 14, 10 miles south of Walden (not much room for off road parking)
    Take-off: Co road 12 W, 8 miles west of Walden (official fishing access, parking near bridge, another fishing access with parking ~0.5 mile below the bridge).
    GPS milege: 13.8 miles, time: 2:50 hours.
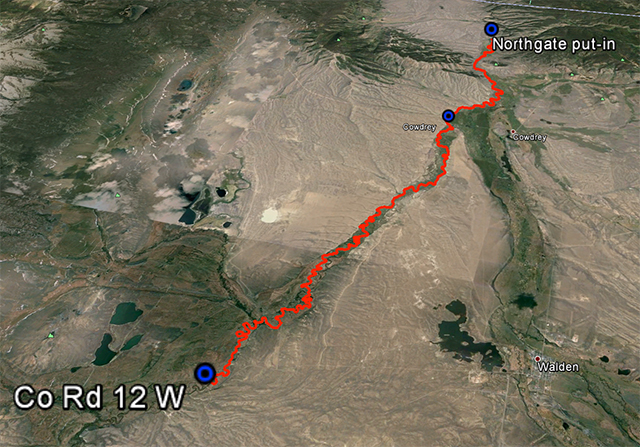
    North Platte River in Colorado near Walden

    31 miles of the North Platte River from Walden to the Northgate Canyon put-in

    May 25, 2014
    Put-in: Co road 12 W
    Take-off: put-in for the Northgate Canyon run, 9 miles north of Cowdrey
    Alternative put-in for a short 6 miles run: Co Rd 6, 2 miles west of Cowdrey (that run is described in Paddling Colorado book by Dunbar Hardy).
    GPS milege: 31 miles, time: 6:49 hours.

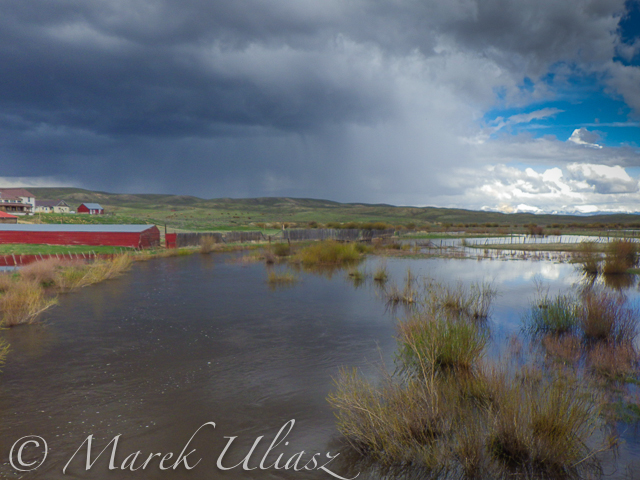
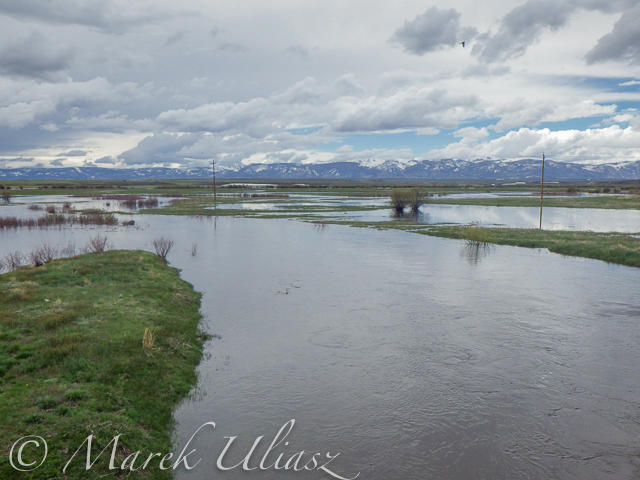
    River flow was rising from 3000 to 4000 cfs at Northgate during our two days of paddling. A lot of meadows in the river valley were flooded. Paddling speed: up to 9 mph.

    The weather was challenging. We had a lot of thunderstorms around us during the first day followed by ~8 hours of heavy rain. We were lucky to finished our paddling before the rain. A beautiful weather on second day lasted till noon, then we experienced a storm with a small hail followed by heavy rain for the rest of the day. Strong afternoon headwinds put us on our knees, especially, during the second day.

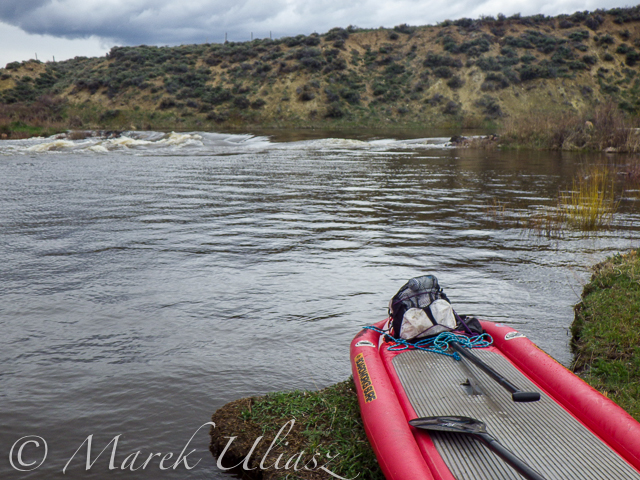
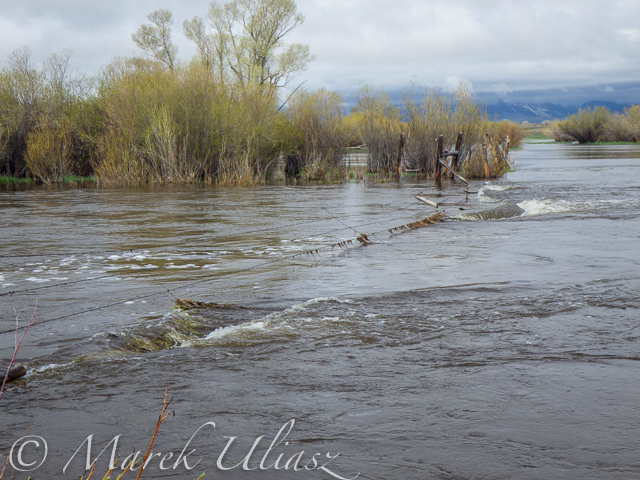
    Obstacles: diversion dams, fences across the river, low bridges depending a water level. No trees. No rapids (except dams). The river is wide and open, so you can see or hear all incoming obstacles well in advance. We never run into any troubles.

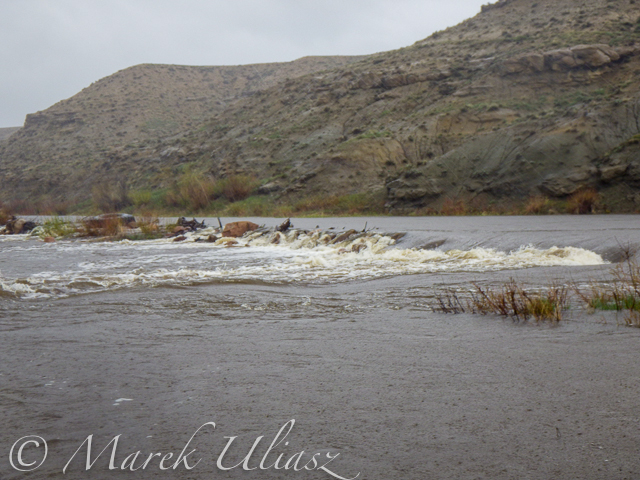
    Most of the dams can be seen on satellite pictures. The dam a few miles below Co road 12 W is pretty big and always requires portaging (not comfortable on right). Other dams are primitive rock dams and often can be run. We portaged most of them to avoid big waves, but I would run more of them in a canoe. We managed to paddle around a few of them. It is easier to select a correct river arm on a map than in practice on the river.

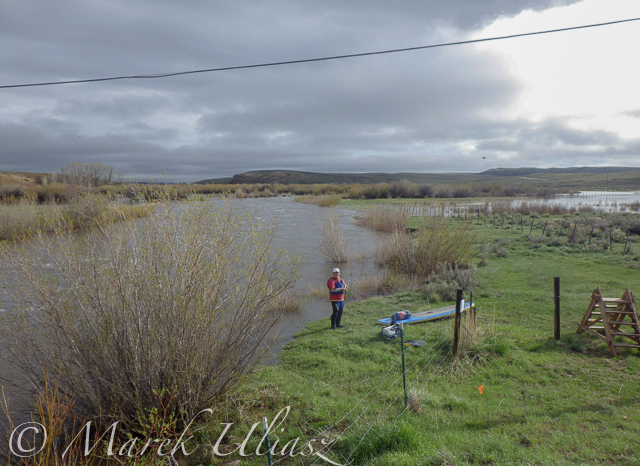
    We had to portage numerous barbed wire fences crossing the river. Some were in water and could be safely run over in a canoe, but we played safe in out inflatable SUPs. A few fences had only a single wire across the river and was possible to paddle under them. Always watch for these fences! You can notice stronger and taller posts on the shores and, sometimes, stairs over them, before seeing the actual wires over the river.

    One or two low farm bridges in the upper section required portaging. All bridges in the lower section have a high clearance.

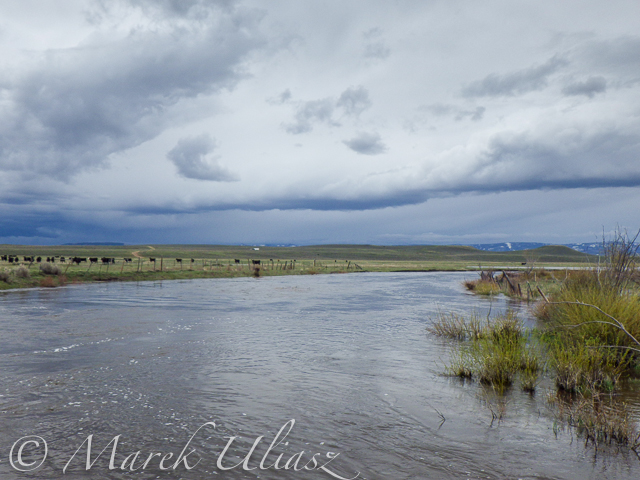
    Wildlife: moose, bighorn, deer, elk (a herd was swimming across the river several times just in front of us), bald and gold eagles, pelicans, geese and other waterfowl, numerous smaller birds, curious cows.

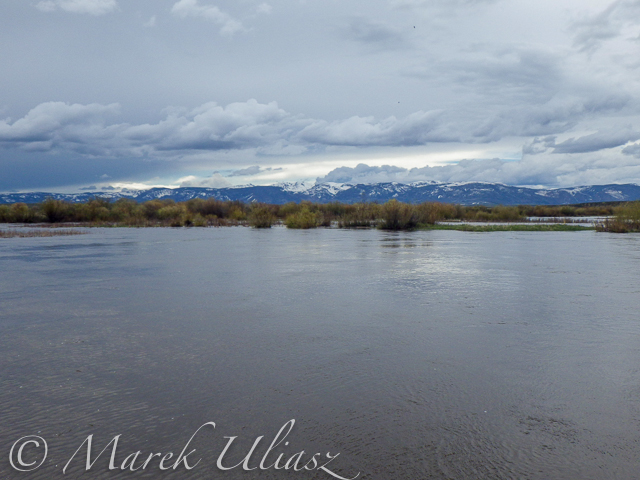
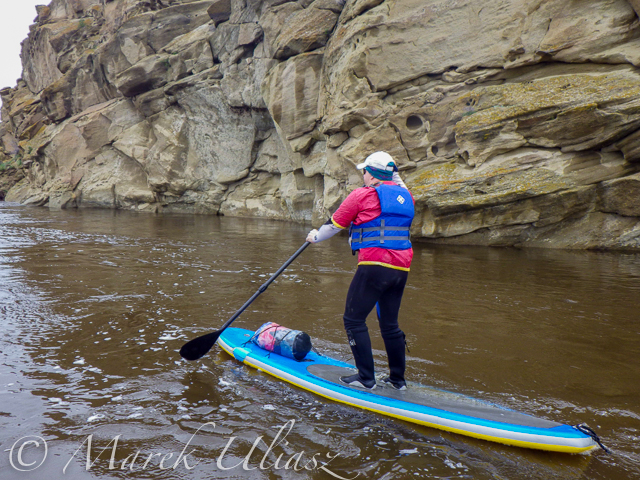
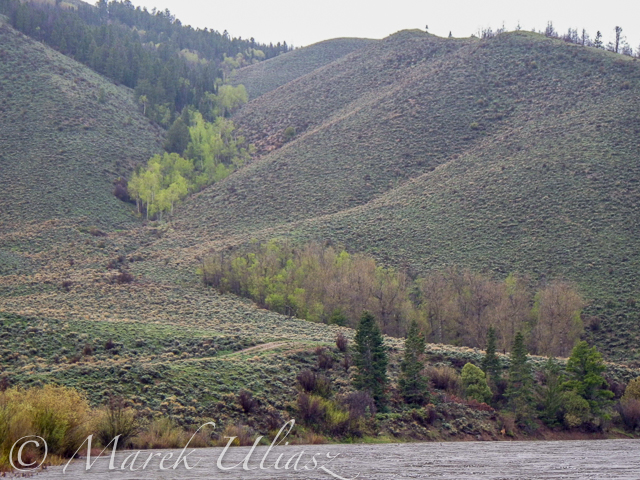
    Scenery: a wide valley surrounded by snowy mountains, crazy river meanders in the upper section, cliffs and rock outcroppings, just a few trees (often with eagle nest), higher hills with some forest in the lower section, a lot of water flowing around and flooding meadows, but, usually, not difficult to find a dry place to land.

    Grizzly Creek near Walden

    Grizzly Creek looking upstream from highway 14

    Grizzly Creek near Walden, CO

    Grizzly Creek looking downstream from highway 14 – start of our adventure

    North Platte River near Walden

    North Platte River meandering near Walden

    North Platte River

    One of high cliffs

    North Platte River - portage

    Going over a low farm bridge

    North Platte RIver near Walden

    One of diversion dams

    North Platte River at Co Rd 12 W near Walden

    North Platte River at Co Rd 12 W near Walden – the finish of day 1 and the start of day 2

    North Platte River below Walden

    Barbed wire fence across the river

    Another fence across the  river

    Another fence across the river

    North Platte River below Walden

    And another cattle fence to portage

    SUPs on North Platte River

    Lunch break – last minutes of nice weather

    North Platte River diversion dam

    Hail storm over diversion dam

    North Platte RIver above Northgate

    The last river section between Cowdrey and Northgate

    North Platte River - Northgate Canyon

    Finishing in rain at the Northgate

    North Platte River - Northgate Canyon

    The last look at the river – still raining

    North Platte River - Northgate Canyon

    Ready to go home …

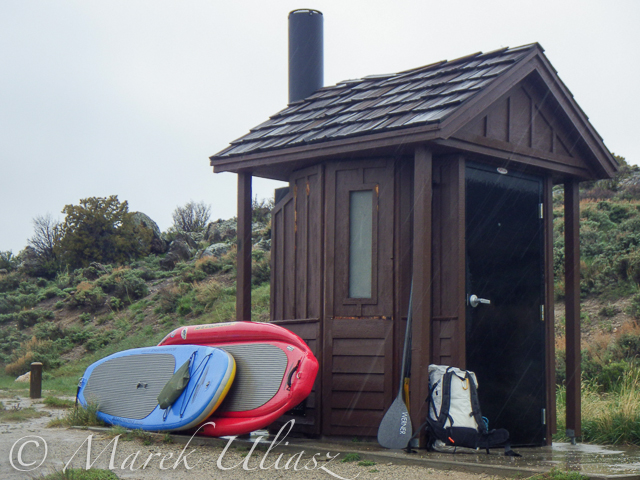
    All pictures were shot with my current paddling camera on duty – Pentax Optio WG-2. I have been using waterproof Pentax Optio cameras for paddling and other outdoor activities since their first original model was released in 2005. The newest model from that series is available now as Ricoh WG-4.

    Your browser does not support iFrame.

    Related posts:
    – North Platte River in Colorado above Northgate Canyon
    – Sun, Snow and Wind on the North Platte River in Wyoming
    – Bennett Peak to Pick Bridge on the North Platte River, Wyoming


    paddling with a camera

  • Review Of The Rugged Pelican 1510 Carry-On Case

    If you own a lot of photography gear, you’ll likely want to protect it from any environmental dangers as well as possible. Pelican claims that the 1510 is a hardcase that is water-, dust- and crushproof while still meeting carry-on restrictions of international airlines. The Pelican 1510 can be carried with a handle or rolled with the integrated wheels. Here’s Continue Reading

    The post Review Of The Rugged Pelican 1510 Carry-On Case appeared first on Photodoto.


    Photodoto

  • Create a Festive Christmas e-Card Using Your Photo

    A short tutorial for those who don’t have a graphic design degree, but wish to create a simple clean Christmas e-card from their images within the familiar surroundings of Photoshop. Don’t miss our our great collection of Christmas gift ideas for photographers! Before

    The post Create a Festive Christmas e-Card Using Your Photo appeared first on Photodoto.


    Photodoto

  • I think most “creatives” can relate:

    A great quote from Sebastian Marshall:

    I don’t differentiate between work and play. I think my time is spent in either excellent, good, okay, or bad fashion. If too much of my time is just “okay” or “bad” – I’m doing something wrong

    I think most freelance photographers, painters, writer, and pretty much anyone in a non-“standard” 9-5 job can relate.  Kinda reframes the whole “wasting time” thing – instead of trying to stop wasting time, just aim to increase the amount of time spent in excellent fashion!

    Tweet This Post Stumble This Post


    F/1.0

  • 6 Tips for Creating Leading Lines to Make Your Photos Stand Out More

    There is perhaps no more important tool in composition than lines. The eye will virtually always follow an actual or implied line across the picture. Because of this tendency, many lines are referred to as leading lines They are actual, or implied lines that control the eye of the viewer through the frame.

    PointReyesTrees

    Some leading lines guide the viewer entirely through the frame. Some lines are the subject of the photo themselves. But others, and my favorite sort of leading lines, are the ones that draw the viewer into the picture. They add depth to your image. So today I want to focus on that particular kind of leading line, giving you some examples and ideas for how to create them.

    1.  Plan for opportunities

    Lines that you can use to lead into your viewer into the frame are everywhere, but you’ve got to look for them. In fact, it is a good idea to plan a few shots ahead of time so that you can consider what to use as a leading line. Leaving it to chance when you are out shooting will often result in the idea of leading lines being overlooked while you are focused on other things.

    When you are thinking about possible lines leading into the frame, think about roads and paths, which work great. Plus they are everywhere so you almost never have to search for them. The edges of the road will converge in the distance, thereby pointing the viewer to the center of the frame. Although certainly not as prevalent as roads, railroad tracks also work great. Finally, don’t overlook the use of shadow to create a line toward the center of the picture.

    QueensWalk

    2.  Finding and using urban opportunities

    In an urban environment, besides roads, you can use buildings and other structures. Obviously rows of buildings can work. Perspective will make the buildings appear smaller as they become more distant, resulting in lines pointing to the center of the picture. Fences are another good choice.

    Keep your eye open for rows of streetlights, which we often overlook, but which can work great. In addition, don’t forget to look up, as the natural convergence of buildings toward the center of your frame (due to the distortion of your lens) can actually work for you in this context, and create lines that point to the center of the frame.

    TubeEscalator

    3.  Opportunities in nature

    When you are out in the wild, nature often provides you with the leading lines you seek. Patterns on the ground, whether it be paved, sand, or grass, can often provide markings that lead to the center of the frame. In addition, similar to the convergence of buildings mentioned above, looking up into tall trees will create the same effect.

    Sand

    Leading lines on the ground can be difficult if not impossible to see with the naked eye though. There are times you have to walk around with the viewfinder held to your eye (or looking through your LCD with the camera in Live View) in order to see the lines on the ground. Moving water can also provide lines toward the center of the frame. Again, however, these might not be visible to you. Frequently looking at a a long exposure after the fact is the only way you can actually see these lines. Take test shots when you can.

    4.  Manufacture your own lines

    Sometimes there are no leading lines tha to use and you have to make your own. There are many ways to do this. One of my favorites is by adding streaking lights that go into the frame. Taking a long exposure of moving water will also result in lines.

    GreyWhaleRock

    5.  Stay cognizant of lines when shooting

    Once you identify leading lines to draw your viewer into the frame, you need to take your picture in such a way that it will show them. We already mentioned shutter speed, which is particularly important when you are allowing lights or water to flow through your frame to show a leading line. But you will also want to keep an eye on your aperture setting. Most of the time you will want the entire leading line sharp, along with the subject that you are leading the viewer’s eye toward. You’ll want to use a small aperture in that case, which will create a large depth of field for your shot. On occasion, however, you want to blur out the background by using a large aperture. In any case, the important thing is to have a plan for showing the leading line in the final picture.

    WiseCoRoad

    6.  Accentuate the lines in post-production

    Finding and using leading lines to draw your viewer into the picture does not end when the shutter closes. Usually you can accentuate them in post-processing. The main way is through selective brightening and darkening. Oftentimes you will want to brighten your leading line to draw the viewer’s eye to it. Sometimes you might want to darken other parts of the frame for the same reason. You also might want to increase the contrast in, and around, your leading lines since the eye is attracted to contrast.

    The best way the accomplish this selective lightening and darkening is through curves adjustment layers. Just create a curves adjustment layer (Layer – New Adjustment Layer – Curves). Then brighten the picture by pulling the middle of the curve upward bit. Use whatever selection tools you are most comfortable with to mask away the brightening everywhere you don’t want it (which will be pretty much everywhere except for your leading lines). To darken portions of the picture, just do the same thing on a new adjustment layer, but instead of pulling the curve up, pull it down. Again, mask away the effect where you don’t want it (which, this time will be areas away from your leading lines).

    NYC

    Effort and reward

    The use of leading lines to draw the viewer into the frame is a great way to add depth to your pictures. Rather than looking at the picture the viewer is looking into the picture. But it isn’t always easy. It requires thought before, during, and after the shot. But with the right pre-planning, a little attention while shooting, and some accentuation during the post-processing, you can add an element to your photos that sets them apart.

    The post 6 Tips for Creating Leading Lines to Make Your Photos Stand Out More by Jim Hamel appeared first on Digital Photography School.

    Digital Photography School

  • Create a Festive Christmas e-Card Using Your Photo

    A short tutorial for those who don’t have a graphic design degree, but wish to create a simple clean Christmas e-card from their images within the familiar surroundings of Photoshop. Don’t miss our our great collection of Christmas gift ideas for photographers! Before

    The post Create a Festive Christmas e-Card Using Your Photo appeared first on Photodoto.


    Photodoto