Category: Photography

  • My Biggest Photography Failures and What I Learned

    Success 1

    “Success is a poor teacher. We learn the most about ourselves when we fail, so don’t be afraid of failing. Failing is part of the process of success. You cannot have success without failure.” – Rich Dad, Robert Kiyosaki

    I was at a high-pressure shoot recently, and one of my clients was watching me make adjustments to my camera and lighting. They commented, “How do you remember all that stuff? You make it all look so effortless.”. The truth is that after thousands of photo shoots it has become second nature, but this wasn’t always the case.
    Success 2 1

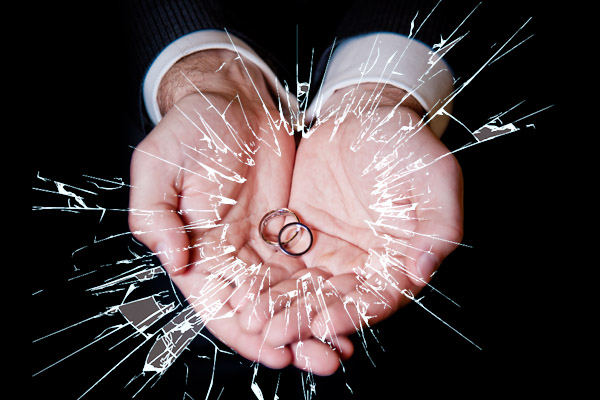
    I broke a wedding.

    Why am I always checking and rechecking exposure? Because I broke someone’s wedding. Yep, broke it.

    The wedding was ten years BD (before digital) and very early in my career. I was so inexperienced that I didn’t realize the flash tube on my external flash was only emitting about 1/4 of its power and, as a result, I underexposed all the images by three to four stops. They could not be salvaged. I only managed to get one useable frame.

    At the time, I just wanted to crawl into a hole and stay there, but this nightmare scenario defined the style of fill flash lighting I still use today.

    I also developed a pre-shoot protocol that ensured I would never have this kind of disaster again. I always test all my equipment before a shoot and check and recheck exposure as I’m shooting.

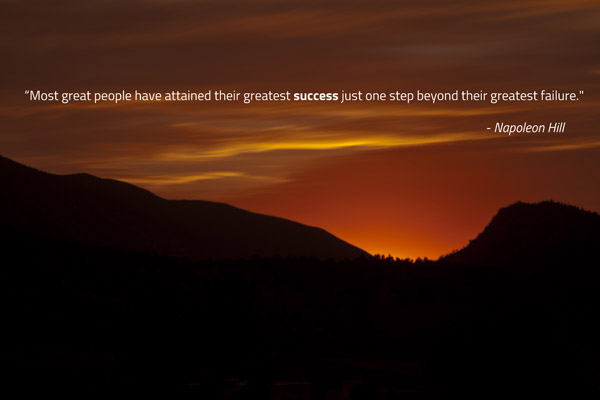
    “Fears are nothing more than a state of mind. Most great people have attained their greatest success just one step beyond their greatest failure.” – Napoleon Hill

    If I had not experienced this crushing blow early in my career, I might have become more slap dash as a photographer and prone to more failures, steering my career to go in another direction.
    Trevor Dennis

    By Trevor Dennis

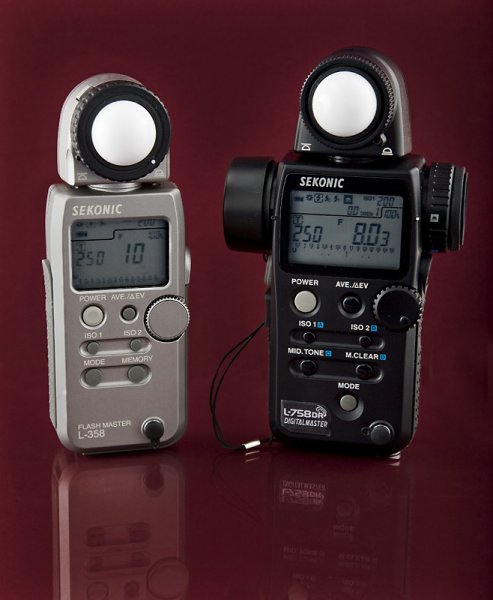
    Why do I always use a light meter? Because I ruined the shot of my life by looking at my camera screen for the exposure and my hair light ended up being three stops over exposed. That shot should have stopped traffic. Instead, I lost a client.

    Why do I back up twice while I’m shooting? Because an assistant (accidentally) dumped an entire shoot into the trash. I’m still in need of therapy over that one.

    I’m proud to admit that I have failed spectacularly on countless occasions.

    The aftermath was always the same. I’d have a complete meltdown and become a bit tired and emotional. I’d then spend a week at home curled up in the fetal position watching entire seasons of One Tree Hill and consuming my body weight in Nutella.

    Janine

    By Janine

    As painful as each failure is, I learned something new each time, and I never made those mistakes again. They became burned into my brain.

    “Failing is one of the greatest arts in the world. One fails toward success.” – Charles Kettering

    You need to go out and fail, time and time again. Get up, cry for a bit, learn, grow, and move on.

    At the time, these failures were devastating but I now know that my spectacular failures and toughest moments have been my greatest teachers and have molded me into the photographer that I am today.

    I’m also proud to be part of a massive club of spectacular failures who have all gone on to achieve remarkable success.

    Here are a few of my favorites:

    • Comedian Jerry Seinfeld completely froze during his first stand up gig and was booed off stage. He went back the next night was a huge success and went on to become one of the most successful American comedians in history.
    • Elvis Presley got fired from one of his first gigs and was told, “You ain’t goin’ nowhere, son. You ought to go back to drivin’ a truck.” Elvis Presley is one of the greatest recording artists of all time.
    • Oprah Winfrey (my hero) was fired from her television reporting job because TV executives thought she wasn’t fit to be on screen.
      She went on to create and star in “The Oprah Winfrey Show” the most watched talk show in the world, turning Oprah into a billionaire.
    • Winston Churchill failed grade six and lost every government position he ran for. He went on to become British prime minister at the age of 62.
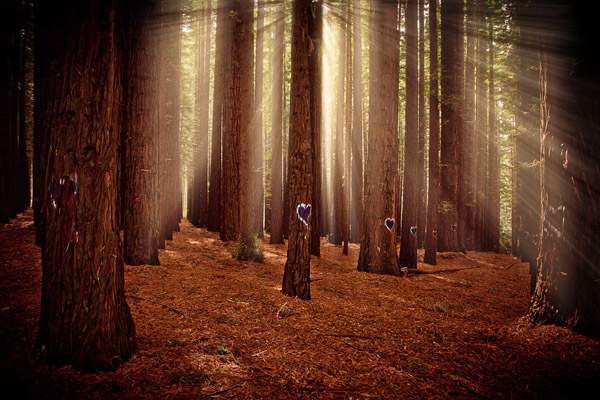
    Success 3 1

    And one of my all time stories of how failure led to success is Apple founder, Steve Jobs. He was devastated after being removed from the company he started. Years later in a commencement speech at Stanford University he reflected:

    “I didn’t see it then, but it turned out that getting fired from Apple was the best thing that could have ever happened to me. The heaviness of being successful was replaced by the lightness of being a beginner again, less sure about everything. It freed me to enter one of the most creative periods of my life.”

    When he returned to Apple, he created some of the most iconic products in the world, including the iPhone, iPad, iPod, and he went on to become one of the richest men in the world.

    “Never, never, never give up.” – Winston Churchill

    Have you experienced any spectacular failures, and what have you learned from them? What are your strategies for coping with failure? I’d love to hear from you.


    Gina is the author of four dPS eBooks including:

    • Portraits: Making the Shot
    • Portraits: Striking the Pose
    • Portraits: Lighting the Shot
    • Portraits: After the Shot

    You can buy one for $ 19.99 or grab the whole bundle for only $ 49.99 (save 38%) from any of the links above.

    googletag.cmd.push(function() {
    tablet_slots.push( googletag.defineSlot( “/1005424/_dPSv4_tab-all-article-bottom_(300×250)”, [300, 250], “pb-ad-78623” ).addService( googletag.pubads() ) );
    } );

    googletag.cmd.push(function() {
    mobile_slots.push( googletag.defineSlot( “/1005424/_dPSv4_mob-all-article-bottom_(300×250)”, [300, 250], “pb-ad-78158” ).addService( googletag.pubads() ) );
    } );

    The post My Biggest Photography Failures and What I Learned by Gina Milicia appeared first on Digital Photography School.

    Digital Photography School

  • Win One of Three Lenses from Tamron!

    Over the last few years here at dPS, we’ve run very some very popular competitions with our partners to give away to lucky dPS readers some of their great photographic products.

    We are lucky enough to be able to do it again this week!

    For this competition, Tamron is giving away THREE prizes!

    These three unique prizes are designed to help every level of photographer create BETTER pictures. Tamron is the world’s most awarded photographic lens line. Each will be won by a different dPS reader. Here’s what you could win:

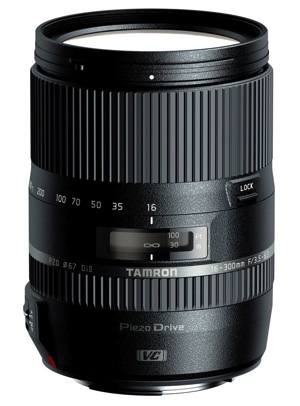
    • Tamron 16-300mm Di II VC PZD Macro – Value $ 629
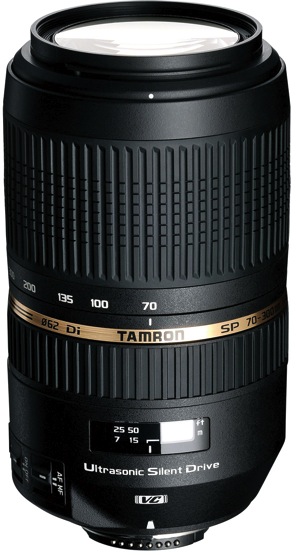
    • TWO – Tamron SP 70-300mm Di VC USD – Value $ 449
    Tamron 16 300mm Di II VC PZD Macro 600Tamron 16-300mm Di II VC PZD Macro 70 300VC USD model A005 600Tamron SP 70-300mm Di VC USD

    Learn a little more about Tamron here: Tamron.com

    How to Win

    To win this competition you’ll need to:

    • Visit the above lens information pages and learn more about each lens and its core use.
    • Leave a comment below and tell us why you’d like to win and HOW you would you utilize each lens. Please note: there is a limit of 1 entry per person.

    Do this in the next 14 days and on December 26, 2014, the sales team at dPS will choose what it considers the best three answers and we will announce the winners in the following days.

    Deadline Is December 23, 2014 at Midnight PDT (UTC-8). Comments left after deadline will not be considered.

    16300VC 3 Ian Plant Photo

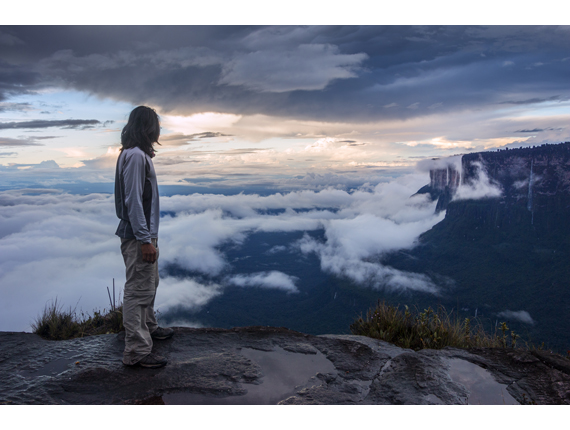
    Photo by Ian Plant

    By best – we’re looking for people who have an understanding of the lenses and how they will best suit your needs. So you’ll need to check out the product pages to put yourself in the best position to win.

    There’s no need to write essay length comments to win – but we’re looking to hear what you like about the lenses and how it would help your development as a photographer, professionally, personally, or both.

    This competition is open to everyone, no matter where you live – but there is only one entry per person. To enter – simply leave your comment below.

    Tamron logo

    About Tamron

    Disclaimer: Tamron is a paid partner of dPS.

    googletag.cmd.push(function() {
    tablet_slots.push( googletag.defineSlot( “/1005424/_dPSv4_tab-all-article-bottom_(300×250)”, [300, 250], “pb-ad-78623” ).addService( googletag.pubads() ) );
    } );

    googletag.cmd.push(function() {
    mobile_slots.push( googletag.defineSlot( “/1005424/_dPSv4_mob-all-article-bottom_(300×250)”, [300, 250], “pb-ad-78158” ).addService( googletag.pubads() ) );
    } );

    The post Win One of Three Lenses from Tamron! by Darlene Hildebrandt appeared first on Digital Photography School.


    Digital Photography School

  • 7 Tips and Etiquette for Taking Portraits in Public

    Facial expressions, skin and hair, and sad or sparkly faces have attracted the artist’s eye since the first caveman recorded his first story on rock. Facial features have the power to convey stories. A single image says more than a thousand words. If you are a photographer who shares this joy in the human form, you would recognize that each person is unique and beautiful in his or her own way. If you are a portrait photographer, you know how humbling it is when you are given the privilege of taking a photo.

    Storytelling through portraits requires a code of conduct that should be observed. Through my experience, I have developed some rules that I follow, and I would like to share some tips and etiquette of taking portraits in public with you.

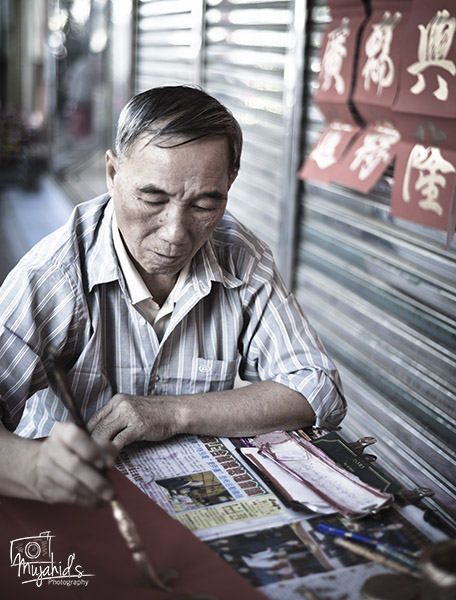
    Calligrapher  China Town Bangkok

    You can not only admire the beauty of the person, but also his work and workplace.

    #1 – Show Your Presence

    Smartphone holders, tourists, and casual snappers with DSLRs have made the jobs of serious portrait photographers a bit difficult. Photography overload has contributed toward a sort of over saturation in the population – perhaps the subjects have become weary. You are never sure of the reaction when you point your camera toward a person. If you see someone you would like to take a photo of, try to stand around for a while and become part of the scene. Observe the movements and dynamics, even try to catch their eye, but do not make the person feel uncomfortable.

    #2 – Engage

    If you don’t know the language, at least learn the local words to greet people. Remember, every culture has its signs of respect and ways to start a conversation, so keep those in mind. Show interest in whatever he or she is busy doing, selling, or offering. Engaging in such a manner normally makes people comfortable, and often less skeptical, of to your forbidding-looking, long lens. You come across first as an individual with a personality. Try to engage with something that you believe will be appreciated, be it about their children or their surroundings – sound them out, gauge a response. Of course, lack of response is answer enough that you do not proceed to take their picture.

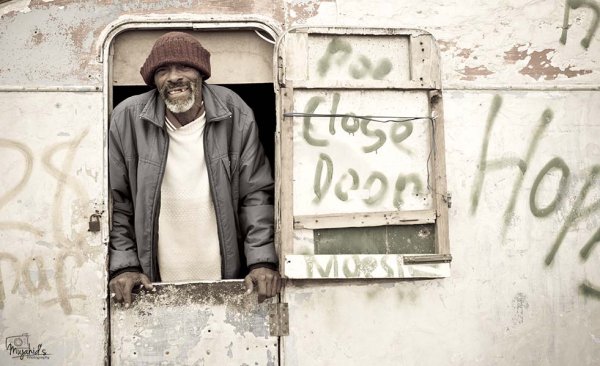
    Freek, the fisherman. I said hello to him as I passed by his caravan. We chatted for a while before I opened my camera bag and requested a photo.

    Freek, the fisherman. I said hello to him as I passed by his caravan. We chatted for a while before I opened my camera bag and requested a photo.

    #3 – Ask Permission

    You are allowed to take photos in public spots, even without permission. Portraits need all of what we have discussed so far. However, this is not an hour long process; you need to get to the bottom line soon. Ask permission. If it is given, help the person posing as per your preference. Do not feel bad if they refuse, accept it politely and pleasantly, and remember especially then, to be respectful. A few things I learned along the way:

    • A guard asked me to gain permission from the shop owner first (cool guard!).
    • I was once told by a religious person that his faith doesn’t allow taking photos.
    • A tribesman allowed me to take photos of men and children only, and not of the women.
    • A young girl allowed me to take her photo on condition that I would never upload it; it was for my eyes only as she was comfortable with me but not the general public.

    #4 Remember People

    You cannot do justice to a portrait if you do not include at the very least the name and background of the person, and preferably also age. You need to know who they were, and what their life was like. It is first and foremost a sign of respect to the person whose image you have used for your own purpose, but secondly you will realize how powerful your portraits become when contextualized. I currently use my smartphone to note down these details, but am considering carrying a dictaphone. A simple notebook will do.

    Notes

    Capture their names, ages and origin.

    #5 Show the results and make people feel good about themselves

    If your camera allows previews, show it immediately, and get feedback. Sometime the best ideas come from the person in front of the lens. Make your new friend smile and even chat while you are taking photos. I often ask questions while I am busy taking photos. I believe it is a great technique which helps people calm down. When they are animated about something important to them, it reflects in the photo. If you have a companion with you, sometimes having them strike a conversation allows for the opportunity of candid shots of your subject with spontaneous expressions.

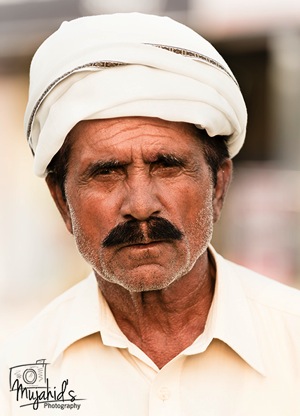
    “Wow, you are in grade 2. This is so cool buddy, I wish I was in grade 2 again”.

    “Were you a solider before Mr. Sadeeq? I feel that strength in your eyes”.

    “Enrique, you remind me of my cousin… he has a beautiful mustache like you”.

    Umbrella Lady Serious to smiling

    After I showed the first shot to this umbrella-making lady, and told her she looked beautiful, she felt shy and even gave me a big smile.

    #6 Respect their possessions

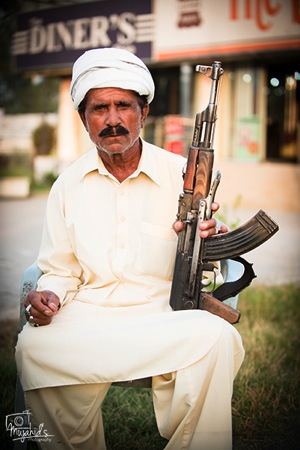
    I have not followed this rule strictly, and I have regretted it several times in retrospect, after the moment passed. Once, after taking photo of a guard, I proudly showed it to him, and he asked, “Where is my gun? It is not in the photo”. His voice echoed in my mind for many days, I had missed an important aspect of what made him a guard! Not only was it integral to his identity, but what an important prop I had omitted in error. Take two.

    Take a photo of the people with their surroundings to remember what they were doing. It will help you in your story telling one day!

    Sadeeq Guard Without Gun

    Take #1 – first photo.

    Sadeeq Guard With Gun

    Take #2 – photo with guard’s belongings, i.e. his gun.

    #7 Say Goodbye and inform them of the use of their photo (legal)

    Greet properly. Ask if they would mind if it was published or uploaded. Some photographers even carry model releases on their person, for use as required. If this is not feasible, as far as language allows, at the least make your subject aware that you may use the images. Later, if you were to personally or commercially use the images, depending on the laws of your country which are variously lax and stringent, you may either need to submit a model release and/or affidavit along with the photo to make its use legal.

    Remember to be informed and aware of not only the etiquette of taking portraits, but also of the legal requirements which will vary from country to country, and are a topic of their own. Be particularly cautious when photographing the faces of minors without formal consent of their parents. I still have inadequate knowledge in this area myself.

    I hope these tips would help you in your portrait photography. I look forward to seeing your feedback and learning from you all.

    googletag.cmd.push(function() {
    tablet_slots.push( googletag.defineSlot( “/1005424/_dPSv4_tab-all-article-bottom_(300×250)”, [300, 250], “pb-ad-78623” ).addService( googletag.pubads() ) );
    } );

    googletag.cmd.push(function() {
    mobile_slots.push( googletag.defineSlot( “/1005424/_dPSv4_mob-all-article-bottom_(300×250)”, [300, 250], “pb-ad-78158” ).addService( googletag.pubads() ) );
    } );

    The post 7 Tips and Etiquette for Taking Portraits in Public by Mujahid Urrehman appeared first on Digital Photography School.


    Digital Photography School

  • 5 Ninja Tips to Speed Up Your Lightroom Workflow

    Currently on for 33% OFF is Johny’s Lightroom Essentials for Landscape Photographers Course. Grab it now, only until December 23rd, 2014.

    DSC 8831 Edit
    Here are five things that will make a huge difference to your Lightroom workflow by making you more efficient and saving you time.

    1. Solo Mode

    Solo Mode

    Do you get frustrated scrolling up and down the panels looking for the right adjustment or setting? If so, then your frustration is over. Right click on one of the panels and in the drop down menu, select Solo Mode. Solo Mode only allows you to have one panel open at a time, so every time you open a panel the last one you had opened, closes. This allows you to easily see all the panels at once and find what your looking for quickly.

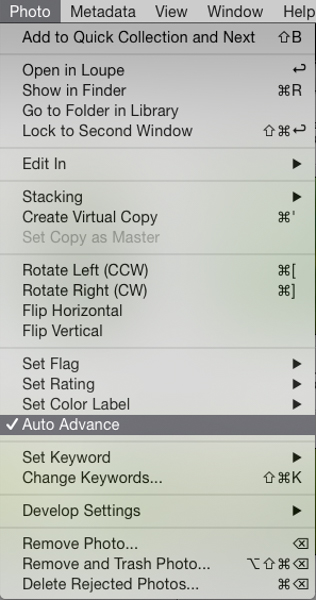
    2. Auto Advance

    The best way to find your keeper images after a shoot is by using flags. All you need to do is use the keyboard shortcuts; P for pick, and X for reject. This is a super fast way to power through your shoots. The problem is once you pick or reject an image you need to then click a right or left arrow key or mouse click on the next image to make the next selection. That’s where Auto Advance comes in. To turn it on make sure you’re in the Library module, then in the menu under Photo select Auto Advance. With this enabled, each time you flag an image Lightroom will move to the next image in the film strip automatically. This may not sound like a huge thing but believe me, when you have several hundred images to sort through saving one keystroke on each image will save you heaps of time.

    Auto Advance

    3. Quick Collections

    Collections are super important in Lightroom. Using them is the best way to quickly switch between groups of images in the Develop module without switching back to the Library module and digging through your folders. Quick Collections is a term I’ve coined, but honestly this is the quickest way to create a collection. It’s really simple. Just grab a folder of images you want to make a collection from, then click and drag the folder to the collections panel. Once you see a blue bar appear, drop the folder and BOOM, instant collection.

    Quick Collections

    4. Turning Off Auto Show Panels

    To give you more real estate on the screen it’s a great idea to hide the side panels when you are not using them. The perfect place to do this is with left panel in the develop module as most of the time everything you need is in the right panel. The problem is once it’s hidden and every time you mouse over to the left of the screen the panel pops out. That might be fine a couple of times but after a while you’ll find that it becomes annoying and starts to slow down your workflow. It’s easily fixed by right clicking on the panel disclosure triangle, and selecting manual from the drop down menu. This will stop the panel from opening automatically. When you want it back, just click on the triangle to show the panel.

    Turn Off Auto Show Panels

    5. Decluttering the Lightroom Interface

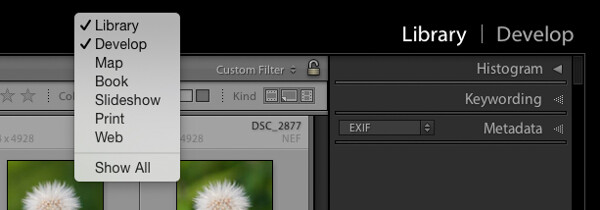
    Learning Lightroom can be very overwhelming especially when you see all the modules in the top bar and all the different panels and settings. There is so much going on in the interface, it can lead to what I call Lightroom burnout. The tip here is to turn off the modules and panels you aren’t using by cleaning up the interface. This allows you to only focus on just the things you are learning or need to use regularly. Just right click on the top bar or any of the panels, and in the drop down menu select what module or panel you want to hide, repeat the process to unhide.

    Declutter

    Like a lot of software there are many ways to achieve the same outcome. I encourage you to keep refining your workflow until you find the perfect system that works for you. Give these five tips a go; they will not only save you time, but help you on your way to achieve what I call Lightroom bliss. That is when you get to a place using Lightroom where there’s no more frustration or confusion, and it’s just all about having fun with your photography and creating beautiful images.

    Dancing Gulls

    DSC 8638

    Currently on for 33% OFF is Johny’s Lightroom Essentials for Landscape Photographers Course. Grab it now, only until December 23rd, 2014.

    googletag.cmd.push(function() {
    tablet_slots.push( googletag.defineSlot( “/1005424/_dPSv4_tab-all-article-bottom_(300×250)”, [300, 250], “pb-ad-78623” ).addService( googletag.pubads() ) );
    } );

    googletag.cmd.push(function() {
    mobile_slots.push( googletag.defineSlot( “/1005424/_dPSv4_mob-all-article-bottom_(300×250)”, [300, 250], “pb-ad-78158” ).addService( googletag.pubads() ) );
    } );

    The post 5 Ninja Tips to Speed Up Your Lightroom Workflow by Johny Spencer appeared first on Digital Photography School.


    Digital Photography School

  • The 30 Most Popular DSLR Lenses with our Readers

    Over the last week we’ve published posts revealing the most popular DSLRs and Compact System cameras among our readers (based upon what they’ve been buying in the last 3 months).

    Today we’re looking at the best selling and most popular DSLR Lenses*.

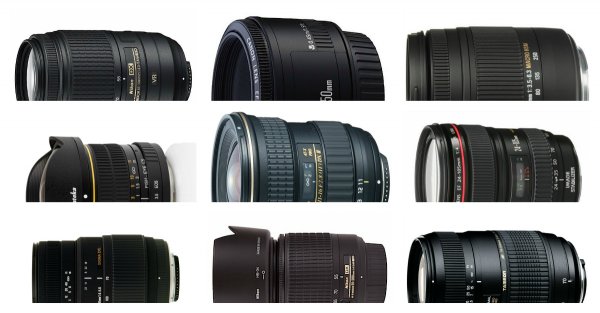
    popular lenses

    This list is completely dominated by Canon and Nikon lenses so we’ve decided to break them out separately into two lists and then have put the 6 other lenses (from a variety of manufacturers) into a third list.

    Note: at this stage we didn’t see any major trends in lenses for compact camera systems which is why we’ve not featured any hear. We expect this market to grow as the mirroless/compact system cameras continue to grow in popularity.

    Canon DSLR Lenses

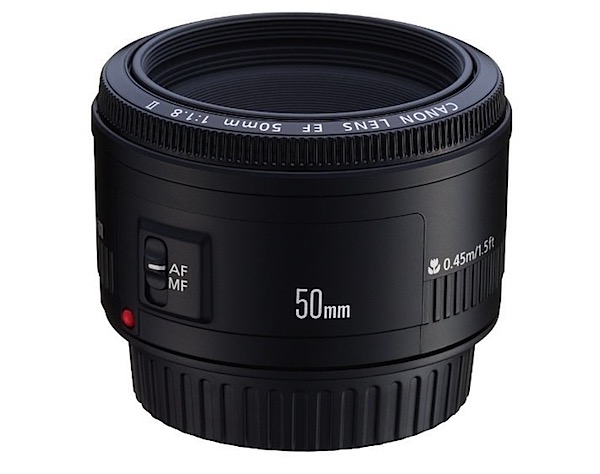
    1. Canon EF 50mm f/1.8 II Camera Lens

    71BuU2ZyOeL._SL1500_.jpg

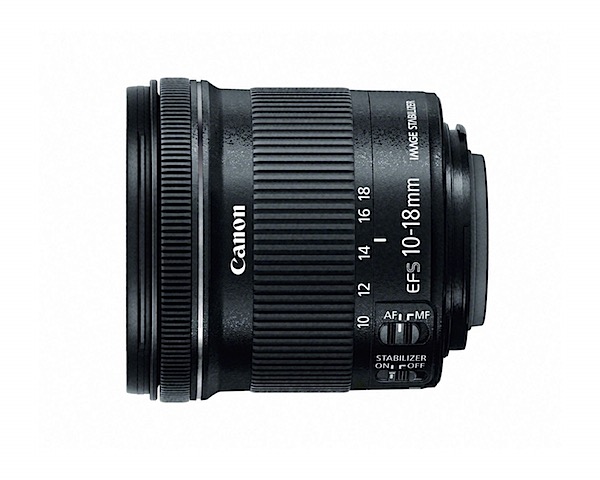
    2. Canon EF-S 10-18mm f/4.5-5.6 IS STM

    81bWpDA6EyL._SL1500_.jpg

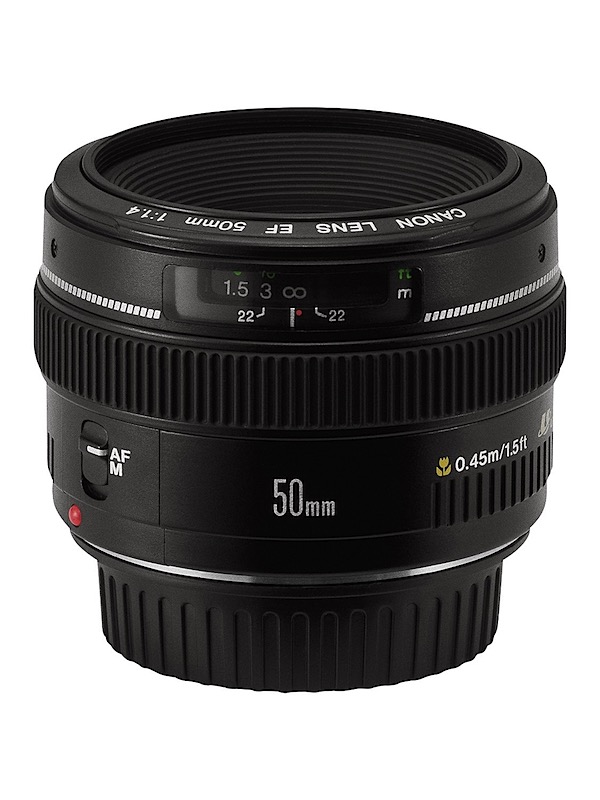
    3. Canon EF 50mm f/1.4 USM

    91fYqb6yGBL._SL1500_.jpg

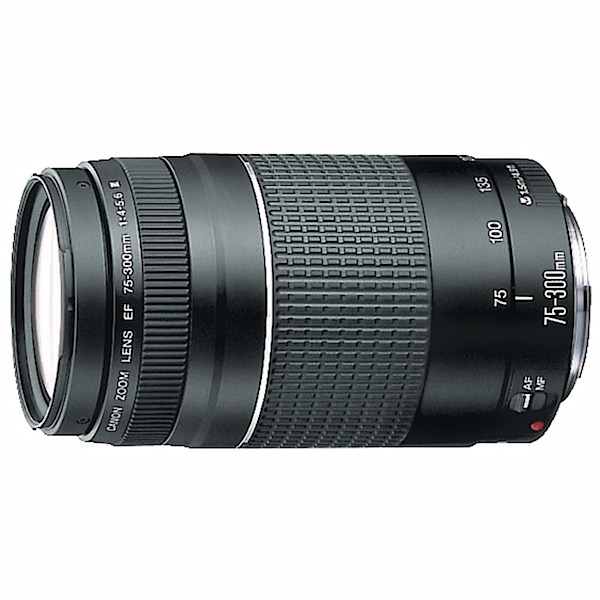
    4. Canon EF 75-300mm f/4-5.6 III

    71qY4hAxpoL._SL1500_.jpg

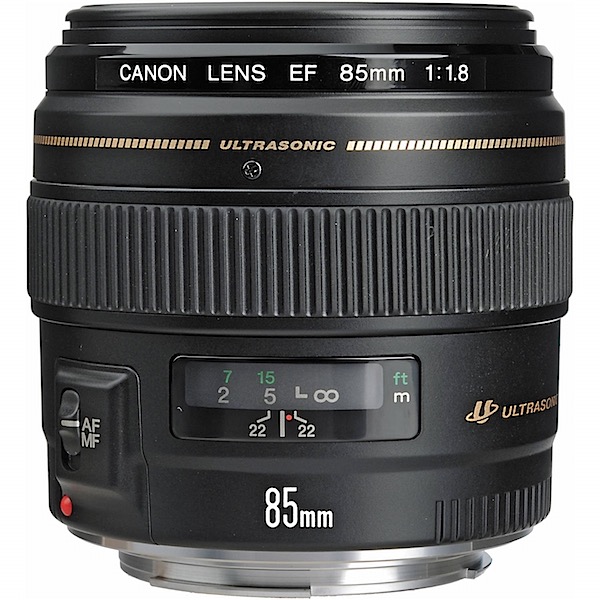
    5. Canon EF 85mm f/1.8 USM

    81XPZ7sQqsL._SL1500_.jpg

    1. Canon EF 24-70mm f/2.8L II USM Standard Zoom Lens
    2. Canon EF 40mm f/2.8 STM Lens
    3. Canon EF 24-105mm f/4 L IS USM
    4. Canon EF-S 17-55mm f/2.8 IS USM
    5. Canon EF-S 18-55mm f/3.5-5.6 IS II SLR Lens
    6. Canon EF 50mm f/1.2 L USM
    7. Canon EF 100mm f/2.8L IS USM Macro

    Nikon DSLR Lenses

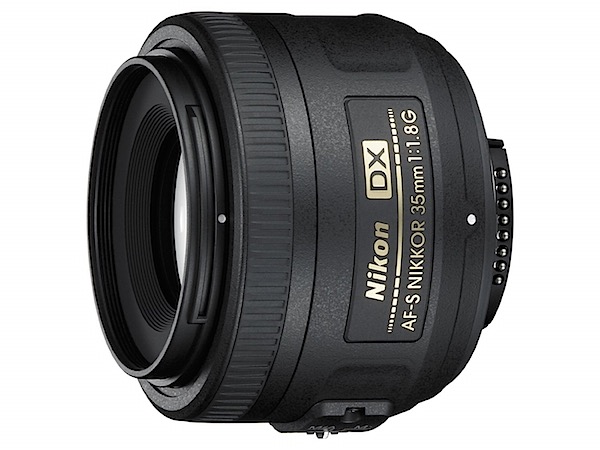
    1. Nikon 35mm f/1.8G AF-S DX

    71dJUbFOcEL._SL1500_.jpg

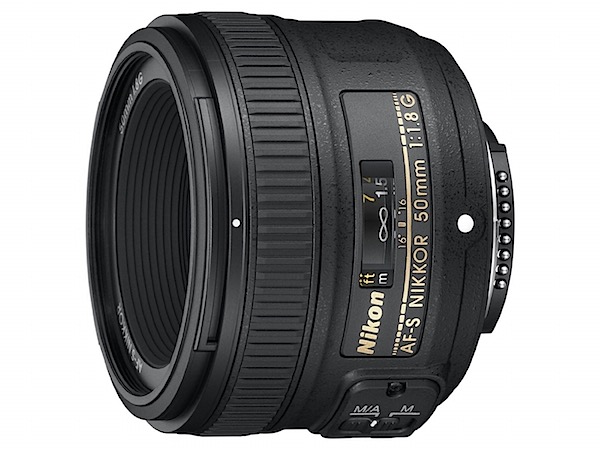
    2. Nikon 50mm f/1.8G AF-S NIKKOR FX

    712T0jBdPhL._SL1500_.jpg

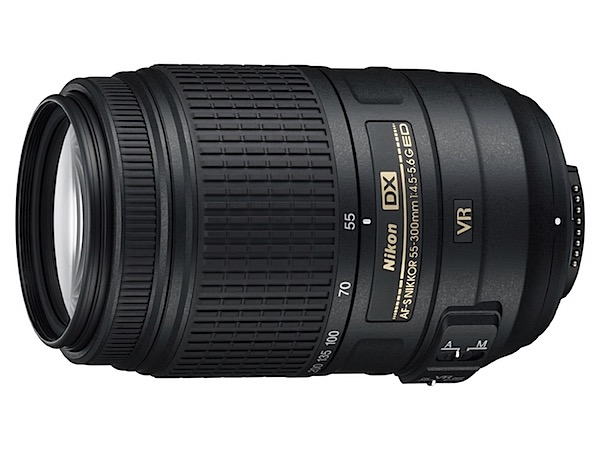
    3. Nikon 55-300mm f/4.5-5.6G ED VR
    71dAI8JvOTL._SL1500_.jpg

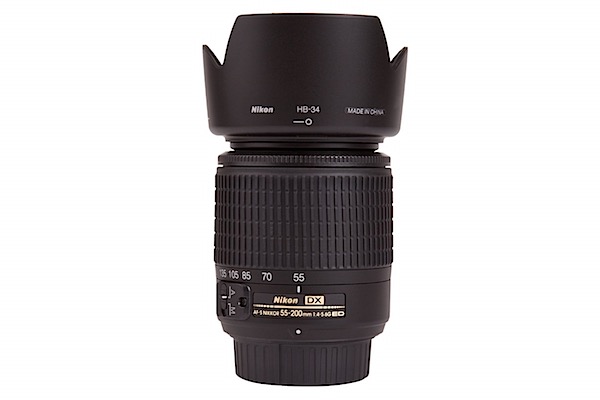
    4. Nikon 55-200mm f/4-5.6G ED IF AF-S DX

    71Ehi1XZoxL._SL1500_.jpg

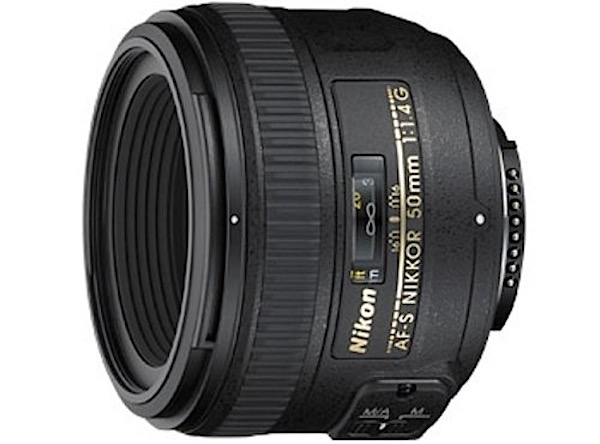
    5. Nikon 50mm f/1.4G SIC SW Prime AF-S

    41lq816JqzL.jpg

    1. Nikon 70-300mm f/4-5.6G AF
    2. Nikon 40mm f/2.8G AF-S DX Micro
    3. Nikon 28-300mm f/3.5-5.6G ED VR AF-S
    4. Nikon 85mm f/1.8G AF-S
    5. Nikon 18-55mm f/3.5-5.6G VR II AF-S
    6. Nikon 18-200mm f/3.5-5.6G AF-S ED VR II
    7. Nikon 18-300mm f/3.5-6.3G ED VR AF-S DX

    And also worth noting are the following other lenses made by other manufacturers.

    Other DSLR Lenses

    1. Sigma 70-300mm f/4-5.6 SLD DG Macro. (for Nikon DSLRs) Also available for Canon,Minolta and Sony and Pentax cameras.
    2. Tamron AF 70-300mm f/4.0-5.6 Di LD Macro (for Canon DSLRs). Also available for Nikons, Konica Minolta and Sony and Pentax cameras.
    3. Sigma 18-250mm f3.5-6.3 DC MACRO (For Canon DSLRs). Also available for Nikon and Sony cameras.
    4. Opteka 6.5mm f/3.5 HD Aspherical Fisheye for Canon DSLRs.
    5. Tokina 11-16mm f/2.8 AT-X116 Pro DX II (for Nikon DSLRs). Also available for Canon and Sony and Minolta cameras.
    6. Tamron AF 18-200mm f/3.5-6.3 XR Di II (for Canon DSLRs), Nikon, Konica Minolta and Sony and Pentax.

    *Note: as with our previous best seller lists this list was compiled from reports supplied to us from Amazon.com where we are affiliates. One of the ways dPS is able to cover its costs and be a sustainable business is that we earn a small commission when readers make a purchase from Amazon after clicking on our links (including those above). While no personal details are passed on we do get an overall report from Amazon about what was bought and are able to create this list.

    googletag.cmd.push(function() {
    tablet_slots.push( googletag.defineSlot( “/1005424/_dPSv4_tab-all-article-bottom_(300×250)”, [300, 250], “pb-ad-78623” ).addService( googletag.pubads() ) );
    } );

    googletag.cmd.push(function() {
    mobile_slots.push( googletag.defineSlot( “/1005424/_dPSv4_mob-all-article-bottom_(300×250)”, [300, 250], “pb-ad-78158” ).addService( googletag.pubads() ) );
    } );

    The post The 30 Most Popular DSLR Lenses with our Readers by Darren Rowse appeared first on Digital Photography School.


    Digital Photography School

  • 6 Tips for Photographing Dogs in Action

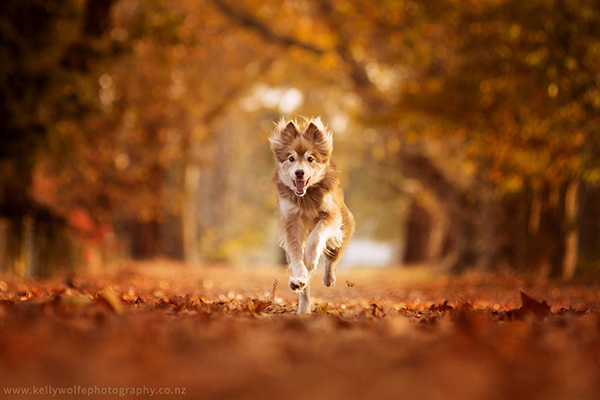
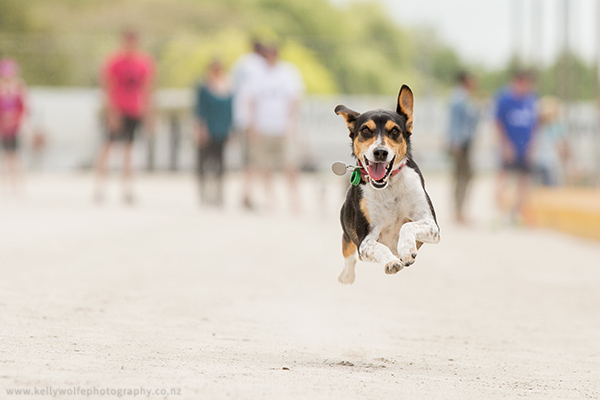
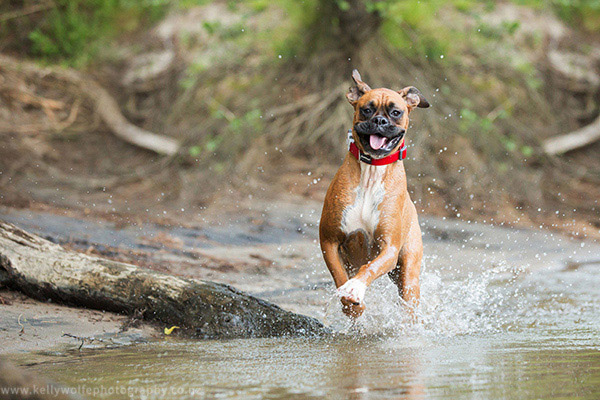
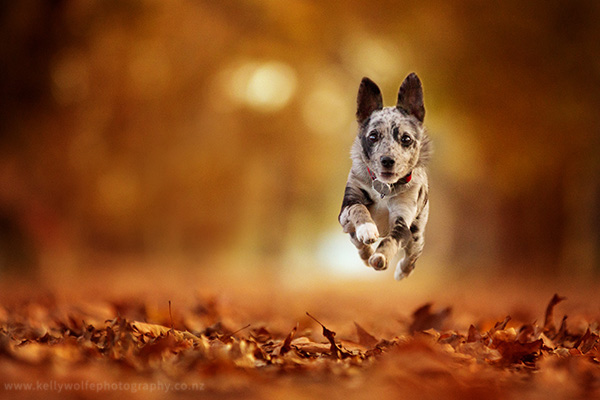
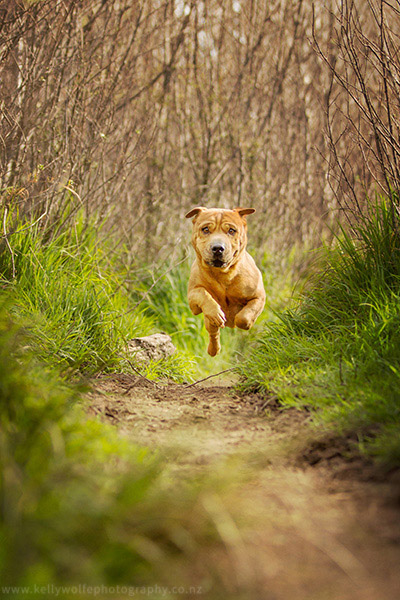
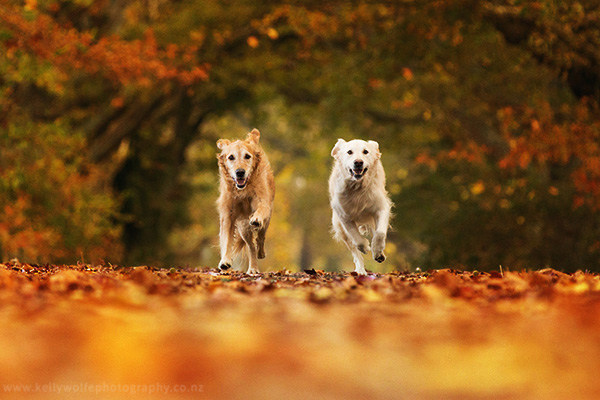
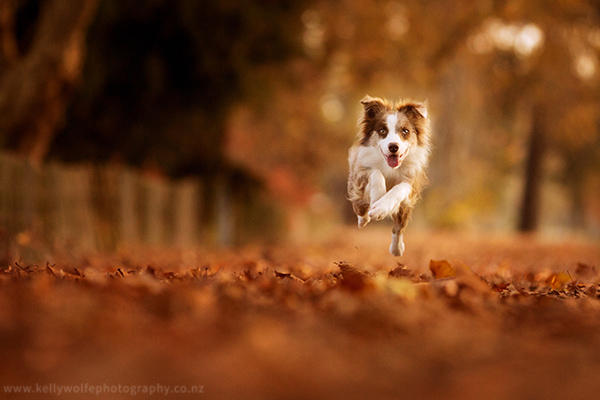
    Canine action images are my absolute favourite thing to photograph. The freedom you can see in their expressions that split second as they leap into the air in excitement, and being able to freeze that moment into a single photograph is amazing. It’s a lot of fun for the photographer, dog, owners and is a good challenge too!

    ArticleImage1

    Safety first

    Before you attempt any of the tips in this guide, please remember that no image is worth risking the safety of you or the animal. With dogs it is important that you only choose locations where dogs are permitted, that are secure and well away from hazards such as roads, and that you are able to keep the dog under control while they are moving. Also be aware that some dogs may not be willing or able to go at a full-out run. This is okay. When photographing pets, the goal is to capture the personality of the animal. If they aren’t comfortable running then just capture them at their own pace.

    PoochRacing

    The dogs need to have fun too!

    The key to good animal photography, in my opinion, is remembering that your animal handling skills are equally important to the shot as your photography skills. Anyone can take a perfectly focused photo with a bit of practice, but the expression that you capture in your images is what will set them apart from the rest. To get expression from the dog, it is important that both you and the owner use a very positive, encouraging voice when calling the dog, and have plenty of rewards waiting for them by the camera. Some of my personal favourites include squeaky toys, tennis balls, favourite dog treats and peanut butter.

    ArticleImage2

    How do you get the dog to run the right way?

    It is helpful to know a bit about the dog’s training level, health and personality before you begin. This allows you to create a plan of action for the best way to capture the image you have in your mind. It also gives you the information that you need to keep you and the dog safe.

    For well-trained dogs with a reliable sit and stay, I have the owners ask the dog to stay in a spot around 20 metres from where I am shooting. The owners then stands directly behind me and calls them towards the camera. For younger dogs, or ones with less training, using a secure location becomes even more important. I recommend using a quiet dog-friendly park, or even the dogs own backyard to reduce distractions. If you have another person that is able to help keep the dog in place then this can be used in place of the sit/stay. Another option is to keep the dog on a lead and have the owner run alongside them. The lead can be kept or you may choose to remove it later using Photoshop. Also consider whether you need to direct them at all. Some of my favourite action images have been captured while the dogs were simply being themselves, racing around having a blast with their favourite toys during their session!

    ArticleImage3

    Choose your settings wisely

    Now that you have the tools to get the dogs going in the right direction, it’s time to focus on capturing the fun! Grab your camera and your favourite telephoto lens. My current combination is the Canon 5D MkIII with a Canon 70-200mm f/2.8 lens, though many images in this article were created with a Canon 60D. Choose a spot a good distance away from the dog which will give you plenty of opportunity to catch the right moment in their run. Also try and get down to their level. This will give you a fresh perspective of the dog and also make it easier to capture the expressions on their face as they run towards you.

    ArticleImage4

    I photograph all my sessions in full manual mode as I enjoy having complete control over the final image. Generally I start with a shutter speed of 1/1000, an aperture of f/2.8 and adjust the ISO to suit. If you aren’t comfortable with full manual mode yet, using shutter priority mode or sports mode are both good starting points for these types of images. As you have more practice, you will find the combination of settings that works best for you and the type of photos you like to create.

    ArticleImage5

    Nail that focus

    One of the most difficult parts of photographing dogs in action is nailing the focus. I recommend using a single focus point with the camera in AI servo mode and back button focusing. This means that the camera will continue to refocus on that single point as long as you are holding down that back button. If you aren’t already using back button focusing, give it a try – it is a great tool to have for all types of photography.

    ArticleImage6

    Timing is everything

    Another challenge you face with action images is getting the timing right. I recommend trying a method that many horse riders use. When any new rider starts taking horse jumping lessons, one of the first things they learn is to count the horses strides. Counting aloud each time the horse’s leading leg leaves the ground, this helps riders to feel when a horse is going to take off and be prepared for the jump that follows.

    This same technique works for photographing any type of animal photography. Focus on the dog as they run. Each time the dog’s front legs leave the ground, count aloud. This will give you a steady and reliable time to take the photo, and you can easily adjust it to capture different moments in their movement. This technique is definitely easier with larger dogs with longer strides, but with practice it will get easier to see the stride. Keep working at it!

    ArticleImage7

    Do you enjoy photographing dogs in action? I would love to see some of your work! Share them in the comments below.

    googletag.cmd.push(function() {
    tablet_slots.push( googletag.defineSlot( “/1005424/_dPSv4_tab-all-article-bottom_(300×250)”, [300, 250], “pb-ad-78623” ).addService( googletag.pubads() ) );
    } );

    googletag.cmd.push(function() {
    mobile_slots.push( googletag.defineSlot( “/1005424/_dPSv4_mob-all-article-bottom_(300×250)”, [300, 250], “pb-ad-78158” ).addService( googletag.pubads() ) );
    } );

    The post 6 Tips for Photographing Dogs in Action by Kelly Wolfe appeared first on Digital Photography School.


    Digital Photography School

  • When NOT to use a Polarizing Filter

    Yes I just blasphemed against the gods of landscape photography. Not using a polarizing filter for landscape photography could be considered sacrilegious among some circles and indeed, I myself have written ad nauseam of the importance of this simple yet powerful photographer’s tool.

    When not to use your polarizer

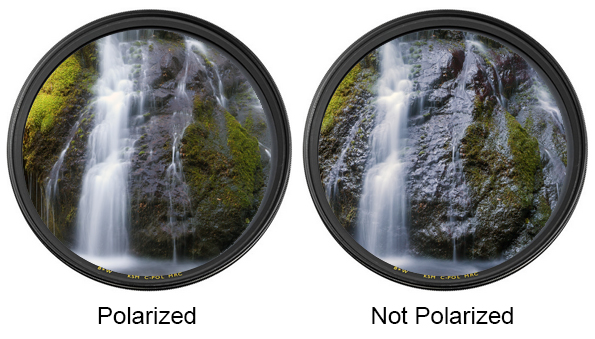
    Now I’m going to selectively contradict myself. The fact is that in most outdoor photography situations a circular polarizing filter can hugely improve your photographs, but there are times when leaving that shady piece of glass off the lens can actually gives better results.

    What does a circular polarizer do?

    Circular Polarizer Comparison

    As I’ve mentioned in my previous article (Why you MUST Have a Polarizer), a polarizer reduces reflected light before light enters your lens. The term circular refers to the fact that the filter can be turned by hand to engage or disengage the polarizing effect. This is most effective on reflective surfaces such as water, glass, wet rocks, cars.

    Most of the time you want to control those reflective surfaces and reduce the glare of reflected light, but what if you like that super wet look and the glare on certain surfaces? Let me show you some examples of where I felt that NOT using a polarizer actually made for a better image.

    When feflected light has colour

    When NOT to use a Polarizwer for landscape photography

    In the image above, I decided to remove the polarizer because the reflected side light on the wet rocks in the foreground had a distinct red colour which I really liked. Using a polarizer would have reduced this red reflected light and would have made for a less dramatic image.

    When you want that super wet look

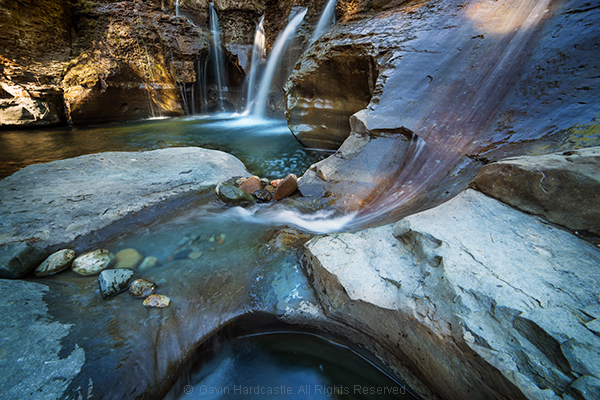
    When not to use circular polarizers in landscape photography

    With this image I found that the wet rocks had lovely highlights that caused a soft glare from reflected sun light. Even though the highlights didn’t really have any dramatic colour like the previous image, I still felt that wet look made for a better image so I opted not to use the polarizer

    In very low light or totally shaded areas

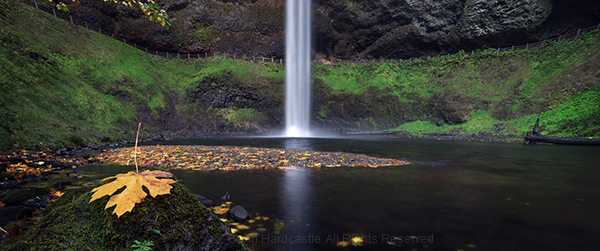
    When you don't need to use polarizers in landscapes.

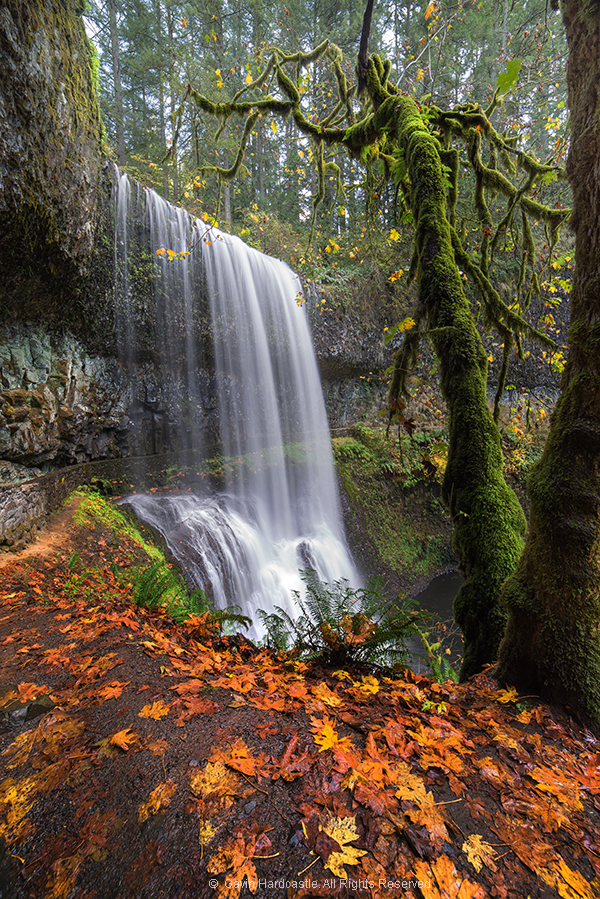
    This shot of Silver Falls State Park was a long exposure in very dim light, inside a canyon that had no direct sun light at the time. When the sun has gone down and it’s starting to get dark, there’s little point in using a polarizer for a scene like this.

    The only wet surfaces that could cause glare are the wet leaves in the foreground and it was so dim that there was no glare at all.

    Night shooting

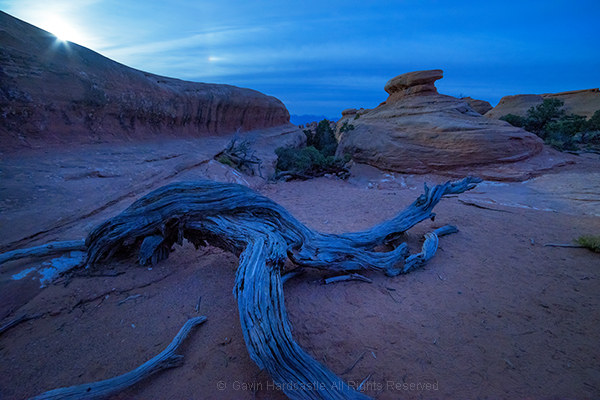
    Don't use a polarizer for full moon photography

    When you’re shooting in the dark of night, it’s mostly likely that you’ll want to get as much light as possible into your lens. A polarizer is going to reduce the amount of light and force you to use a longer shutter speed or higher ISO setting. Do yourself a favour and remove the polarizer. In the full moon shot above, the polarizer would only have served to slow down my shutter speed.

    When you want reflections in water

    Not using a polarizer in landscape photography at Silver Falls State Park

    Here’s where you want the best of both worlds. Let’s say you like the look of your image WITH the polarizer on. Your colours are nicely saturated and all of the glare has been reduced from the surfaces but you’re annoyed to see that the lovely reflections in the water have either vanished or diminished.

    The simple answer is to take two shots. One with the polarizer engaged and another with the polarizer disengaged, or removed entirely. You can easily blend those two exposures in Photoshop to take the best elements from each. With the shot above I really enjoyed the look of the reflected waterfall in the pool so I took two shots with different polarizer settings and then combined them.

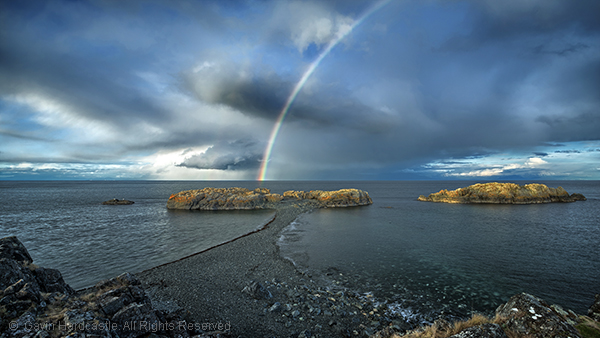
    When you want to shoot rainbows

    Don't use a polarizer when shooting rainbows

    I’m sure I’ll be corrected by our more well educated readers, but from a polarizers standpoint, a rainbow IS reflected light and that means that if your polarizer is engaged, the rainbow will perform a disappearing act in your photo. Disengage or remove the polarizer and presto, it’s back in your photograph.

    But still, don’t forget your polarizer

    As I mentioned at the start of this article, most of the time my polarizers live on the front of my lenses. If I leave the house and forget my polarizers I’ll actually turn around and drive home because they’re such an essential part of my kit. That being said, it’s important to recognize when conditions call for the removal of said polarizer and I hope this article helps you to identify those golden moments so that you can get your best shots.

    googletag.cmd.push(function() {
    tablet_slots.push( googletag.defineSlot( “/1005424/_dPSv4_tab-all-article-bottom_(300×250)”, [300, 250], “pb-ad-78623” ).addService( googletag.pubads() ) );
    } );

    googletag.cmd.push(function() {
    mobile_slots.push( googletag.defineSlot( “/1005424/_dPSv4_mob-all-article-bottom_(300×250)”, [300, 250], “pb-ad-78158” ).addService( googletag.pubads() ) );
    } );

    The post When NOT to use a Polarizing Filter by Gavin Hardcastle appeared first on Digital Photography School.


    Digital Photography School

  • Photoshop Video Tutorial: Dodge & Burn Using Curves

    From the early days of photography dodge & burning has been used to help add emphasis and impact to selective areas of images. Within photoshop we show one of the many ways to digitally dodge & burn an image with an added level of flexibility. Check out our LAB Color Correction Video Tutorial! Before After

    The post Photoshop Video Tutorial: Dodge & Burn Using Curves appeared first on Photodoto.


    Photodoto

  • Most Popular Compact System and Mirrorless Cameras with Our Readers

    Earlier in the week we revealed the DSLRs that were best selling among our readers over the last few months. While DSLRs are still the most popular type of readers among our readers this last quarter has seen a big rise in the number of you using compact system cameras.

    popular compact system cameras

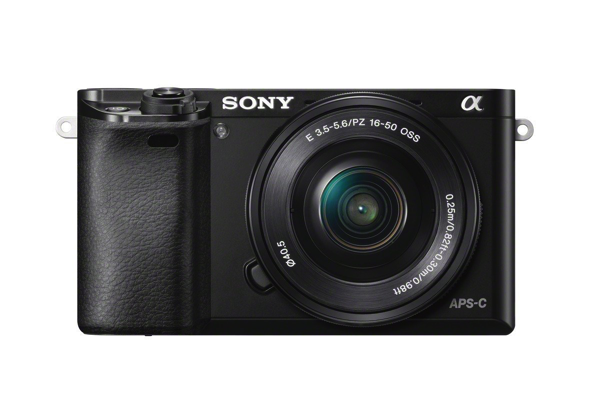
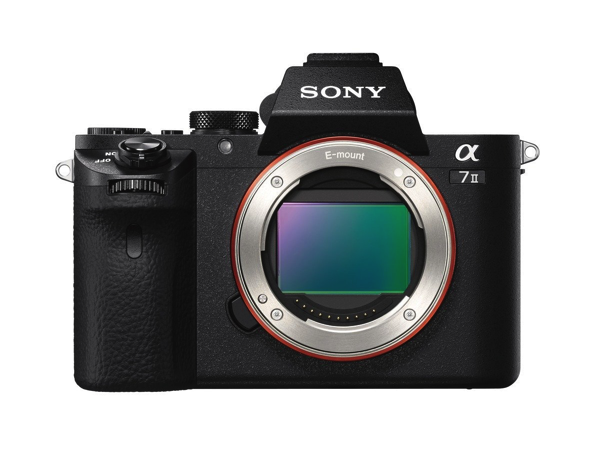
    In fact if we combined the two lists we’d now see compact system cameras in the top 20 cameras bought by our readers with the Sony Alpha a6000 and the Sony Alpha a7II both making that list.

    What is remarkable about this is that the newly announced Sony Alpha a7II is not even released yet and it makes the list purely based upon pre-order levels!

    Also an indication of the growth of sales in the compact system camera class of camera is that today we’re listing 19 of them while last time we created this list we only saw enough sales to justify making it a list of 9 cameras.

    Here are the most popular compact system cameras among our readers!

    Note: we’ve only included cameras with interchangeable lenses in this list. While other cameras like Fujifilms X100 series are sometimes classified in this way we’ll include them on a future list with other fixed lens cameras.

    1. Sony Alpha a6000

    NewImage

    2. Sony Alpha a7II (available for pre-order)

    NewImage

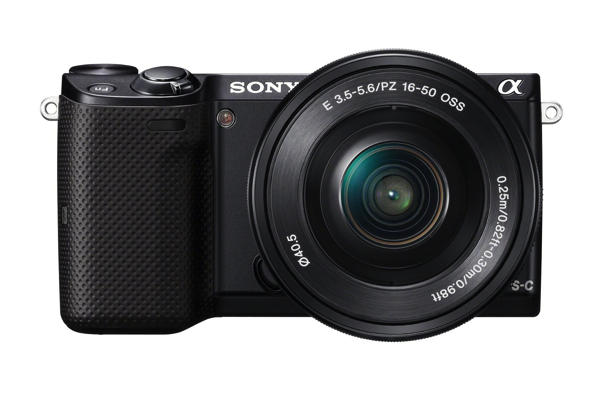
    3. Sony NEX-5TL

    NewImage

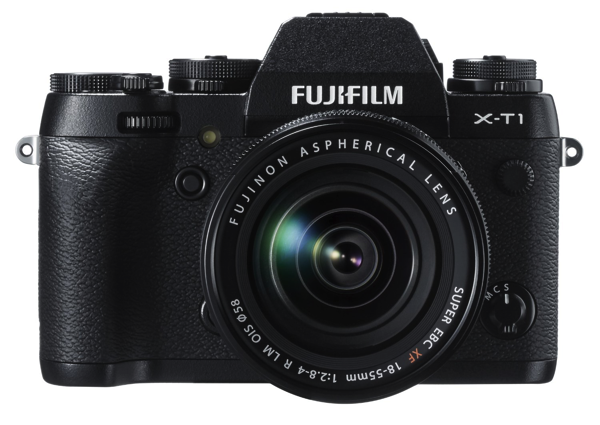
    4. Fujifilm X-T1

    NewImage

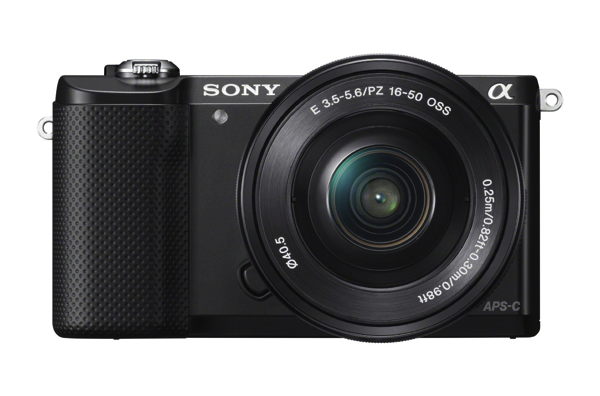
    5. Sony Alpha a5000

    NewImage

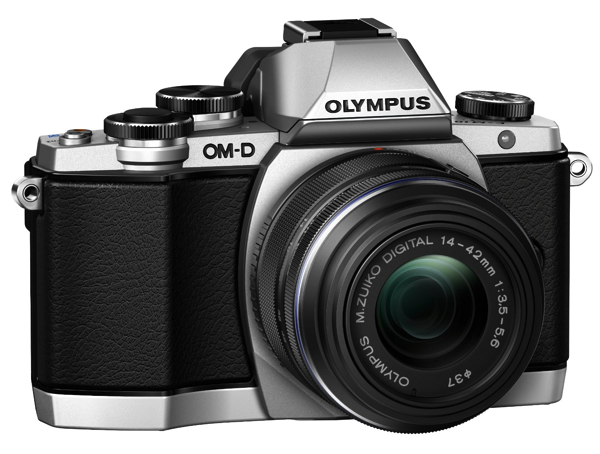
    6. Olympus OM-D E-M10

    NewImage

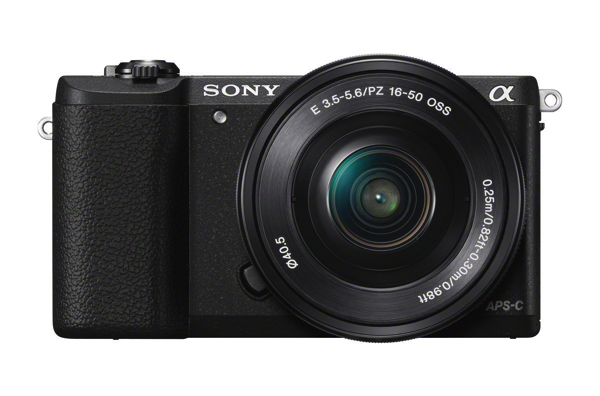
    7. Sony a5100

    NewImage

    8. Samsung NX300

    NewImage

    9. Samsung NX30

    NewImage

    10. Sony Alpha a7S

    NewImage

    That’s our top 10 – here are the next 9 most popular compact camera systems.

    1. Panasonic Lumix DMC-GF3KK
    2. Sony NEX-6L/B
    3. Panasonic DMC-GF6KK
    4. Sony a7R
    5. Olympus OM-D E-M5
    6. Nikon 1 J1
    7. Olympus E-PL7
    8. Fujifilm X-M1
    9. Olympus OM-D E-M1

    *Note: this list was compiled from reports supplied to us from Amazon.com where we are affiliates. One of the ways dPS is able to cover its costs and be a sustainable business is that we earn a small commission when readers make a purchase from Amazon after clicking on our links (including those above). While no personal details are passed on we do get an overall report from Amazon about what was bought and are able to create this list.

    googletag.cmd.push(function() {
    tablet_slots.push( googletag.defineSlot( “/1005424/_dPSv4_tab-all-article-bottom_(300×250)”, [300, 250], “pb-ad-78623” ).addService( googletag.pubads() ) );
    } );

    googletag.cmd.push(function() {
    mobile_slots.push( googletag.defineSlot( “/1005424/_dPSv4_mob-all-article-bottom_(300×250)”, [300, 250], “pb-ad-78158” ).addService( googletag.pubads() ) );
    } );

    The post Most Popular Compact System and Mirrorless Cameras with Our Readers by Darren Rowse appeared first on Digital Photography School.


    Digital Photography School

  • The Q Button – What Every Canon DSLR Photographer Needs to Know

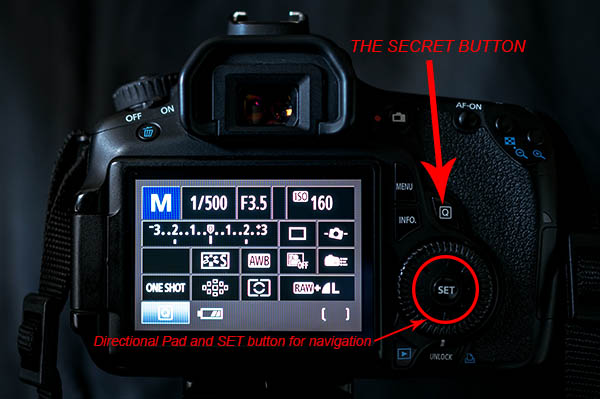
    Cameras can be super complex these days. Buttons, knobs and switches are everywhere. How can you remember what all of them do and where to begin? Well, Canon has given you a secret button to use that allows you to access all of those most important functions within your complex machine. Perfect, where is this secret button you ask? It’s right on the back of your camera marked with the letter Q. It’s not really a secret, it’s just under utilized.

    COVER IMAGE

    The Q Button

    What does Q stand for? Quick. The button makes navigating just that. Using the button gives you quick access to all of the major functions that you need. Let’s go through some of those functions so you can see how easy it is use your camera. Grab your Canon and let’s try it out.

    How to use it

    Go ahead, give the Q button a press while watching the LCD screen on the back of your camera. As you see it highlights one of your current settings. Depending on your Canon model this may light up the current selection in a blue/green color or it may outline it with an orange box. Next you can cycle through your settings by using the directional pad located around your SET button. Simply highlight the setting you want to change and then you have a couple of options.

    First, and easiest, is to roll your settings dial while it is highlighted. This will cycle through your options for that particular setting. Your second choice is to push the SET button while a setting is highlighted. This will lead you to a more detailed screen showing all of your options for that setting.

    The Secret Button

    Canon also made things easy by providing a description of each option at the bottom of the LCD as you scroll through. At first it will be more beneficial to use the second option so you become familiar with what settings are available, and what the symbols mean. Once you get that down, using option one to zip through the settings is a breeze.

    As a beginner it can be really helpful using the LCD screen and the Q button so you can see everything about the exposure and settings right in front of you. When you depress the shutter button half way the current exposure reading will be displayed on the meter on your LCD. This makes it really easy to adjust your settings while seeing how each element of exposure (aperture, shutter speed and ISO) is affecting the meter.

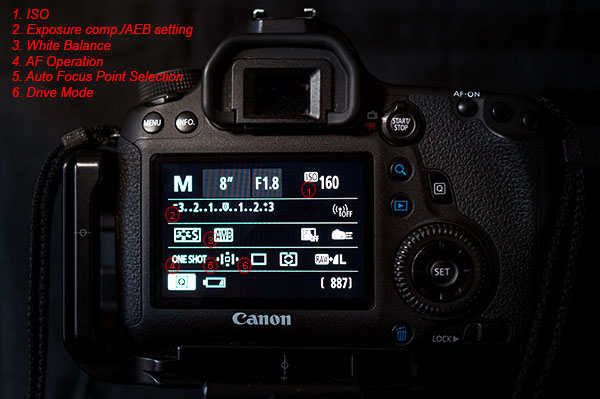
    Some of the settings you will adjust most are ISO, exposure bracketing, white balance, focus type, focus point and drive mode. When you use these techniques they each can be adjusted in seconds!

    Visual Guide

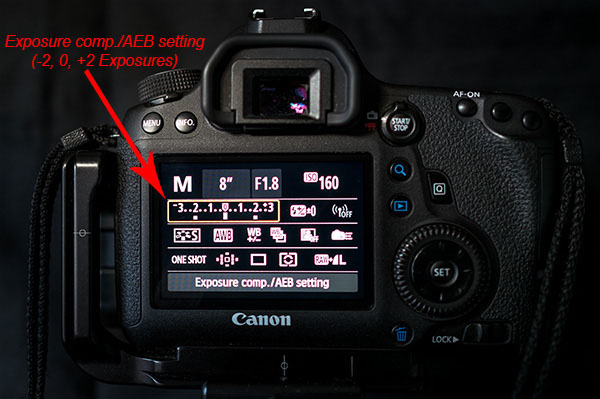
    The Q button is particularly useful when you are bracketing exposures for HDR. Press it and highlight the Exposure Compensation/AEB setting. Now spin your settings dial to the right and watch as the light meter changes to three lines in lieu of the typical single line. Set the lines as far apart as you want your bracket to be (i.e. -1, 0, +1 or -2, 0, +2). Last, use the directional pad to highlight the Drive Mode setting. Again scroll to the right until you reach the Self-timer (2 seconds/remote setting). Now, once you fully press the shutter button your camera will wait two seconds and then take all three exposures that you set. It’s as simple as that.

    Exposure comp

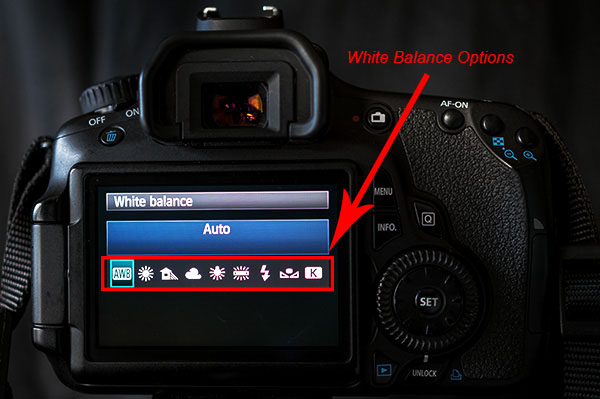
    As the light, and your shooting situation, changes your white balance settings need to be adjusted. You typically don’t find a special button for this important setting. Once again the Q button makes your life easy. As you scroll through the options you will see some simple pictures for each WB setting. A sun for sunny, a cloud for cloudy, a lighting bolt for flash, etc. Sometimes it is easier to see what your options are by looking at a picture. If not, Canon still gives you the description of the WB setting.

    White Balance

    Next up is the Auto Focus Point Selection. This is seriously one of the hardest functions to find on most cameras. Again, made easy by Canon. Press the Q and then use the directional pad to navigate to the AF Point Selection. Spin that dial and watch as the points spiral around to each individual focus point at your will.

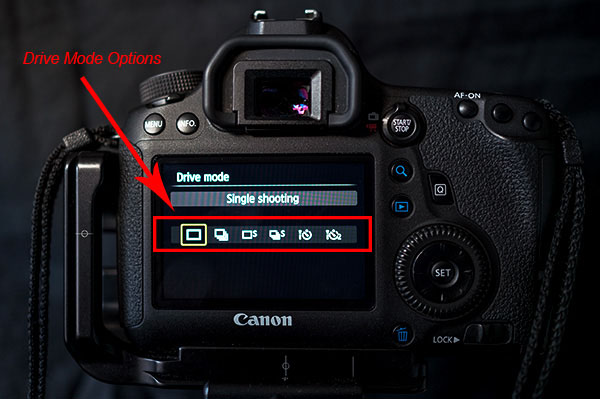
    Do you switch between shooting action and still subjects often? If so you may find yourself digging through the menu to find your Single and AI Focus options and the Drive Modes. Simply press the Q button and move over to the AF Operation. Roll your dial and you can choose ONE SHOT, AI FOCUS or AI SERVO. Then you can navigate over a couple of settings to the Drive Mode and choose between Single, Continuous Shooting or Timer Mode.

    Drive Mode

    Some Canon models are equipped with an internal level that is accessible from the Q menu. This is really helpful when you are shooting landscapes on a tripod. When in the menu highlight the Electronic level. Press the set button and a level looking like it belongs in the cockpit of an airplane shows up on the LCD. Tilt your camera from side to side and watch how the level changes. When your camera is horizontally level the line will turn green. This can definitely save you some time and heartache in post-processing when trying to make your horizon lines straight. It takes the guess work out of it for you.

    As you can see the Q button is the most powerful and useful button on your camera. Navigating through those complex menus are over. Once you use the secret button you will begin to wonder why any of the other buttons even exist, with the exception of the shutter of course. Go ahead and feel free to start spreading the secret. Have fun!!!

    googletag.cmd.push(function() {
    all_slots.push( googletag.defineSlot( “/1005424/_dPSv4_mob-all-article-bottom_(300×250)”, [300, 250], “pb-ad-78623” ).addService( googletag.pubads() ) );
    } );

    googletag.cmd.push(function() {
    mobile_slots.push( googletag.defineSlot( “/1005424/_dPSv4_mob-all-article-bottom_(300×250)”, [300, 250], “pb-ad-78158” ).addService( googletag.pubads() ) );
    } );

    The post The Q Button – What Every Canon DSLR Photographer Needs to Know by Jack Thatcher appeared first on Digital Photography School.


    Digital Photography School