Category: Photography

  • Setting Your White Balance with a Gray Card – a Tip from Phil Steele

    Setting your white balance can be done two ways: in camera when you’re shooting or later in post-processing. In this short video tutorial Phil Steele shows you how to do both methods.

    Part one is using a gray card to set a custom white balance. Read more about that topic with: Get your White Balance Right in Seconds Using Grey Card.

    Part two is how to adjust the white balance using a gray card in Lightroom. Read more here: Adjusting White Balance in Lightroom.

    Phil also mentioned where to buy gray cards, you can find several options on Amazon:

    If you liked this tip, you can find out more about Phil’s Lightroom course or his brand new Event Photography course here.

    googletag.cmd.push(function() {
    tablet_slots.push( googletag.defineSlot( “/1005424/_dPSv4_tab-all-article-bottom_(300×250)”, [300, 250], “pb-ad-78623” ).addService( googletag.pubads() ) ); } );

    googletag.cmd.push(function() {
    mobile_slots.push( googletag.defineSlot( “/1005424/_dPSv4_mob-all-article-bottom_(300×250)”, [300, 250], “pb-ad-78158” ).addService( googletag.pubads() ) ); } );

    The post Setting Your White Balance with a Gray Card – a Tip from Phil Steele by Darlene Hildebrandt appeared first on Digital Photography School.


    Digital Photography School

  • The Foundations of Starting a Photography Business

    Starting a photography business can be a very exciting yet scary thing. It’s exciting to share your talents with others, yet the business can be overwhelming!

    Sebastien Wiertz

    By Sebastien Wiertz

    If you’re at all like me when I started a photography business, you are worried that you won’t make any money. Taking pictures was so much fun, but would anyone pay for my work? With a lot of blind faith I jumped in and began working towards my dream. For me that meant many late nights and long weekends, shooting as much as I could and learning as I went along. Through years of growth, mistakes, and many successes, I learned so many things to share with you and help you to start your own business successfully.

    Every business needs a solid foundation, so start there. Once you’ve got your feet off the ground, the business triangle will help you build a strong company.

    Setting your foundation

    Depending on where you live, you will need to be legally set up for business. Check with your city, town, state or province to find out what steps you need to take to be an official business. Learn if you need to pay sales tax. Work with a professional that can help you, like an accountant or attorney.

    Once you are set up legally, you can also work through this checklist to get you started:

    • Your branding
    • Set up a website and blog
    • Set up accounts in social media
    • Get business cards
    • Set up a bank account
    • Find out about taxes if applicable
    • Choose a printing lab and packaging
    • Get insurance

    The business triangle

    After you’ve set up your company, the business triangle is your next step. This business triangle was designed to help you get organized as you start and maintain a photography business. Each of the points represents a different area of your business. If you are weaker in one area, then your business (and the triangle) is in jeopardy of failing. Evaluate yourself with each point to see where your business needs to improve to be stronger. You can use a rating system of one through 10.

    Image 1

    Confidence

    The first part of the business triangle is the center or the core. Like the core of the human body is important for wellness and function, the core of the business triangle (confidence) is important to your business.

    Having confidence will help propel you forward on your journey. It can help you turn your stumbling blocks into stepping stones, and take you from one level to the next. If you feel that you’re confidence could use a boost, try a few of these tips.

    1. Recognize all of your wins, big or small.
    2. Focus on your end result.
    3. Always work on your camera skills.
    4. Don’t compare yourself to others.

    Image 2

    Products

    The next part of the business triangle is products. This includes any business products such as your images and the items you sell to your clients, like prints or canvases.

    Your images are your number one form of marketing. The better they are, the more clients will want them. This might mean taking classes or workshops and participating in forums to continually get better. Never stop improving your skills.

    In addition to improving your photography skills, you also need to provide great products for your clients. Many clients want the digital files which are easy to provide and less hassle. However, there are some benefits to selling prints. One is that you have an opportunity to increase your overall sales. Also, having the actual prints in your client’s home can be great word of mouth marketing. Many photographers today are offering both prints and digital files.

    Working in the products category of the business triangle also includes figuring out how to price your work. You want to take into consideration the following:

    • Your time involved
    • Your expenses
    • Your desired income
    • Your local market
    • Your skill level

    Carefully analyze each of these categories to come up with a solid pricing structure that will work for you.

    Image 2a

    Marketing

    Next on the business triangle is marketing. Even if you live in a saturated market, if you get your name and your work out there, you will find there is still a need for your photography.

    There are three areas of marketing that you will want to focus on with your business; word of mouth, online and local marketing.

    The best form of marketing is word of mouth. Because getting photographs taken is so personal, clients will not likely hire just anyone. Instead, they will hire someone who has been recommended by a friend, or someone with an established reputation. These recommendations are earned by creating experiences for your customers that are above and beyond what other photographers are doing.

    The next form of marketing is online. In today’s world you need to have a strong online presence. Your clients will be looking for you through a website, blog, and social media. Make sure you are there so they can find you.

    Getting into your local community is the last form of marketing. This can be one of the most rewarding ways to build your business. Look for companies in your area that you can partner with to help build both of your businesses. You can partner with any type of business; from dairy farms, to clothing boutiques, or real estate offices. Almost every company needs pictures for their marketing and they have clients that need you.

    Customer service

    Image 3

    The last part of the business triangle is customer service. Creating excellent customer service is the best way to keep your clients around year after year.

    The most important thing to remember when building and growing a business is to make your customers feel special. How your clients feel when they leave you will determine how much they will tell their friends and family about you. Those family and friends are tomorrow’s clients!

    Use the following ideas to create a memorable experience for your clients that will keep them coming back for years to come:

    • Good communication
    • Honest and sincere compliments
    • Provide excellent products
    • Amazing packaging
    • Bring water bottles to the session
    • Treat them like they are your best friends
    • Give a thank you gift

    Image 4

    One of my favorite sayings is: “luck favors the prepared”. Although it may seem scary to start a photography business, break down your tasks of getting set up legally, then follow the business triangle to continue to build a strong a solid business.

    googletag.cmd.push(function() {
    tablet_slots.push( googletag.defineSlot( “/1005424/_dPSv4_tab-all-article-bottom_(300×250)”, [300, 250], “pb-ad-78623” ).addService( googletag.pubads() ) ); } );

    googletag.cmd.push(function() {
    mobile_slots.push( googletag.defineSlot( “/1005424/_dPSv4_mob-all-article-bottom_(300×250)”, [300, 250], “pb-ad-78158” ).addService( googletag.pubads() ) ); } );

    The post The Foundations of Starting a Photography Business by Amy Fraughton appeared first on Digital Photography School.


    Digital Photography School

  • Old Glass: How to Use Old Film Lenses with New DSLR Cameras

    Do you want a sharp and well built lens? Of course you do. Everyone does. Think you can’t afford great glass? Think again. You may not be looking in the right place.

    If you’re like me, browsing through latest high-end lenses can be a little depressing. The cost of luxury grade glass can easily peak in the thousands of dollars. What if I told you that you could have excellent lenses without breaking the bank?

    Front View

    Recently I learned about a method for retrofitting older film lenses to function with our modern cameras. The possible bad news is that these are mostly manual focus prime lenses so your autofocus and metering won’t work (with one exception we’ll talk about later). The great news is that the majority of these lenses are built like photographic tanks and possess extremely capable optics. These lenses are also readily available and affordable on most any budget.

    So how is it done? How can you make a twenty, thirty, or even forty year old piece of gear work with today’s advanced camera bodies? Believe it or not, the answer is deceptively simple. For virtually every lens and camera combination there is an adapter that will enable you to use any lens with any camera – regardless of manufacturer. Here’s an example:

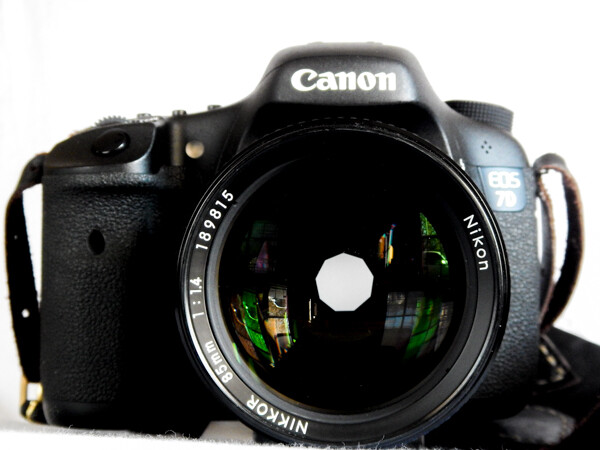
    I have an old analog Nikon F3 that was given to me by my father along with a couple of lenses: a Nikkor 85mm f/1.4 and a Nikkor 50mm f/1.8.

    50mm and 85mm

    The entire kit remained mostly forgotten in a camera bag, and in storage for years. One day I stumbled across some information about how a few photographers were using old M42 Zeiss screw-mount lenses with their DSLR’s using adapter rings and producing outstanding photographs. That got me thinking – if it were possible to find adapters for these old M42 lenses, could there also be manufacturers who produced similar adapters for other lens types? Almost instantly the old Nikon leaped from some distant corner of my memory. My main shooting body is a Canon 7D MkI. Could I possibly use those thirty year old Nikkor film lenses on my 7D Canon? Shockingly, the answer was yes! All I needed were these unassuming aluminium adapter rings which I sourced on eBay for about $ 12 USD each.

    One side of the ring matches the Nikkor mount.

    Adapter Nikon Side

    The other mates with the Canon body.

    Adapter Canon Side

    The entire process is very simple; the adapter simply snaps onto the lens.

    Nikkor Without
    Without the adapter.

    Nikkor With
    With the Canon adapter.

    Then it’s business as usual attaching the adapted lens to the camera. Just line up the indicator dot with the mounting dot on your camera body.

    Mount Point

    You’re done.

    Body Fit

    The adapters are also removable if you choose to do so later by depressing a small spring catch (most brands have these).

    As I said earlier, these are completely manual lenses. Meaning that you adjust your aperture by hand as well as focusing the lens.

    50mm

    Personally, I enjoy the deliberateness this action forces. You have to think about your composition so much more, and you get to experience the effects of aperture adjustment literally first hand.

    Aperture Blades 85mm
    The impressive aperture blades on this beautiful Nikkor 85mm.

    Don’t worry if this manual operation doesn’t appeal to you. The exception concerning the adapter rings I spoke of is that some are now being made with focus indicator chips built into the adapter. While this chip doesn’t enable you to use autofocus, it does allow the lens to communicate to the camera when the selected point of focus has been obtained. This is complete personal preference. I opted for the non-autofocus indication adapters because I wasn’t comfortable using aftermarket electronics of that type with my camera. Again, this is a completely subjective.

    Please Note: Neither the author nor Digital Photography School are responsible for any damages to your camera or lens as a result of using aftermarket devices. Please be an informed photographer prior to attempting any modifications to your precious gear!

    Now, here are some images produced through a little Frankensteinish innovation.

    Bee

    Color Traffic

    Bw Traffic

    Grass

    Leaves

    Nothing Free

    Rain on Glass

    googletag.cmd.push(function() {
    tablet_slots.push( googletag.defineSlot( “/1005424/_dPSv4_tab-all-article-bottom_(300×250)”, [300, 250], “pb-ad-78623” ).addService( googletag.pubads() ) ); } );

    googletag.cmd.push(function() {
    mobile_slots.push( googletag.defineSlot( “/1005424/_dPSv4_mob-all-article-bottom_(300×250)”, [300, 250], “pb-ad-78158” ).addService( googletag.pubads() ) ); } );

    The post Old Glass: How to Use Old Film Lenses with New DSLR Cameras by Adam Welch appeared first on Digital Photography School.


    Digital Photography School

  • Macro Photography on a Budget

    This post is by Ed Verosky whose new Macro Photography eBook is 53% off today only.

    Img 1

    Close-up and macro photography continue to be popular with shooters of all levels. Practical applications include product detail shots, food photography, and technical illustration (see image below). But the fun and artistic motivations are undeniable; flowers, insects, creative abstract, and the excitement of discovering the hidden worlds found in everyday objects.

    If you’ve been interested in doing some close-up and macro work, but don’t quite know how to get started, this article will show you how, without blowing your budget. Macro, in particular, is often accomplished with high-end specialty lenses and equipment, but there are ways to take impressive close-up and macro shots with little more than the gear you already have.

    Img 2

    Food and recipe images are featured in editorial as well as event photography. Here, a close-up shot of this delicious-looking cupcake provides context for the macro shot that follows. This shows how the power of close-up and macro can draw the viewer in and capture the imagination.

    Here are three of my favorite low-cost techniques detailed in my new eBook, Introduction to Close-Up & Macro Photography:

    Reverse Your Lens

    If you’d like to get started right away, this technique works great and requires no extra investment. All you need is a camera that uses interchangeable lenses (most DSLRs do). Just remove the lens from the camera and hold it backward against the lens mount to get a high degree of magnification. Any lens will do, but a normal lens, or the lens that came with your camera will probably work best (e.g. 50mm or the 18-55mm kit lens).

    Although this is an effective solution, you should be aware that your camera and lens won’t be able to communicate with each other when using this technique. That means no f-stop adjustments or automatic focusing. Fortunately, focusing won’t be a problem using this technique, and you can preset your lens to a specific f-stop using the aperture-locking trick I’ll detail below.

    Here are the steps for using this technique:

    1. Press your camera’s lens release button to remove the lens from the
      lens mount.
    2. Turn the lens around in your hand so that the front of the lens is facing
      the camera mount.
    3. Carefully match up the front of the lens to the ring of the camera mount and hold it there when taking your shots as shown in the image below.
    4. As with many macro shooting solutions, the way you’ll focus on your subject is by moving the camera and lens toward, or away, from the subject, not by turning the focusing ring. You’ll be within two or three inchses of your subject (or less) when acquiring focus.
    Reverse lens handheld

    An 18-55mm lens held backward onto the camera’s lens mount.

    Reversing Rings

    You can also use an adapter called a reverse ring (or reversing ring) which will allow you to actually mount your lens onto your camera in the backward position. This inexpensive gadget (see image below) is made to screw onto the front of your lens, similar to a lens filter. The other side of the reversing ring fits onto your camera’s lens mount. Make sure to get a reversing ring that not only matches the filter size (thread diameter) of your lens, but also matches the lens mount of the type of camera you’re using.

    Reverse ring

    Reverse (reversing) ring fits onto the front of this 18-55mm lens via the lens filter thread.

    Aperture-Locking Trick

    Whether you’re using the handheld reverse lens technique, or a reversing ring adapter, you can set a specific f-stop, even though your lens is not electronically coupled to your camera. This technique may not work with your particular camera and lens combination, but it works with all of the DSLRs that I’ve used:

    1. 1. With the camera powered on, and the lens mounted onto the camera in the normal way, set the f-stop.
    2. 2. Press and hold the depth-of-field preview button.
    3. 3. While still holding the DOF preview button down, press the lens release button and remove the lens. The aperture will remain stopped down as shown below.
    Aperture

    Aperture locked-in at f/16 on this 85mm lens.

    Other Budget-Minded Ways to Achieve Macro

    Other ways to get good close-up and macro shots on a budget include the use of lens coupling rings, diopters, and extension tubes. Here’s an overview:

    Coupling Rings:

    A variation on the reverse lens technique is to use two lenses, connected front-to-front using another type of adapter called a coupling ring (below). In this case, one of the lenses is mounted to your camera normally, while the other is in the reverse orientation. The coupling ring features threading on both sides and fits on to the front of both lenses at the same time via the filter threads. Because coupling rings generally feature the same thread diameter on each side, the lenses you use with it will have to have the same filter diameter, or you’ll have to attach a step-up or step-down adapter to one or both lenses.

    Coupling ring

    Coupling Ring: (A) 58mm diameter coupling ring. (B) Two lenses connected via the coupling ring. Either lens can be mounted to the camera.

    Be aware that a heavy lens coupled to a camera-mounted lighter (or less solidly built) lens can result in damage to one or both lenses because of the weight and stress placed on their front ends. Also, your camera-mounted lens will maintain the electronic contact with your camera, but the reverse-coupled lens will not, so you’ll have nearly the same limitations as you would with a single reversed lens.

    Diopters:

    One of the easiest ways to magnify your subject is with a simple filter-like attachment called a diopter (below). You can think of a diopter as a magnifying glass for your lens. They’re very easy to use; just screw one or more diopters onto your lens just like you would with any lens filter. An inexpensive set of diopters (often available for under $ 15) will give you several magnification levels to choose from. You’ll have to move in very close to your subject to achieve focus, and optical quality won’t always be as good as some of the other options presented here, but you might be very pleased with the results. Because they don’t cost much, are easy to use, and take up very little room in your camera bag, you might consider a set. Make sure to purchase diopters that fit the filter thread diameter of the lens you’ll be using them with.

    Diopters

    Diopters: (A) This set of Vivitar diopters was purchased for under $ 15. (B) The “10X Macro” diopter mounts just like a lens filter onto this 18-55mm kit lens.

    Extension Tubes:

    Finally, my favorite solution for macro on a budget; extension tubes. Your lens mounts to one end of an extension tube, while the other end of the tube mounts directly to your camera’s lens mount. Extension tubes effectively increase the focal length of your lens without adding any glass elements that might reduce optical quality. By doing so, your lens will be able to focus on small objects, at very close distances.

    While a good set of extension tubes is going to cost significantly more than a cheap set of diopters, it’s still a bargain compared to an actual macro lens. Some sets feature manufacturer-specific electronic connectors that allow the camera and lens to communicate normally; this allows for aperture and focus control. Plus, your single set of extension tubes will work with all of your lenses; there’s no need for rings or adapters of different sizes for each lens diameter. Extension tubes can be purchased as a set with different lengths for varying degrees of magnification. The tubes can also be combined (stacked) for increased magnification as shown below.

    Ext tubes 1

    Extension Tubes: (A) Three extension tubes (13mm, 21mm, and 31mm) stacked onto an 18-55mm lens. (B) Set of extension tubes. (C) 50mm lens mounted onto all three extension tubes which are mounted onto a DSLR.

    Img 3

    The combination of colors, detail and depth-of-field of this photo, featuring a pollen covered anther of a flower, could have only been captured through macro photography. Extreme close-up and macro give you the opportunity to find amazing beauty in places your eyes might otherwise miss.

    In this article, I’ve only provided a small sampling of the many ways to achieve quality close-up and macro images. I encourage you to explore the possibilities using one or more of these techniques, and to consider learning about other types of macro gear and lenses. The world of close-up and macro just might become your next photography obsession!

    Get more great Macro Photography Tips from Ed by picking his new Close Up and Macro photography eBook with a 53% discount – today only.

    googletag.cmd.push(function() {
    tablet_slots.push( googletag.defineSlot( “/1005424/_dPSv4_tab-all-article-bottom_(300×250)”, [300, 250], “pb-ad-78623” ).addService( googletag.pubads() ) ); } );

    googletag.cmd.push(function() {
    mobile_slots.push( googletag.defineSlot( “/1005424/_dPSv4_mob-all-article-bottom_(300×250)”, [300, 250], “pb-ad-78158” ).addService( googletag.pubads() ) ); } );

    The post Macro Photography on a Budget by Ed Verosky appeared first on Digital Photography School.


    Digital Photography School

  • 78% Off Ed Verosky’s eBook Bundle (or His New Macro Ebook for just $7): Today Only

    As we announced yesterday – today is Day 1 in our 12 Days of Christmas dPS promotion – and we’re kicking things off with a cracker of a deal!

    The Deal

    Today’s deal has two options:

    1. 53% off Ed Verosky’s new Introduction to Close-Up and Macro Photography. Today is is yours for just $ 7.

    OR

    2. Ed’s entire 9 eBook Bundle with Bonus Mini-Guide for a whopping 78% off the regular price. That’s 9 eBooks on everything from Flash Photography, to Portraiture, to the Basics of DSLR and much more. They’re all yours today for just $ 29 (or just $ 3.20 per eBook).

    Shareable day1

    Ed Verosky will be no stranger to many dPS readers as we’ve featured his work as a guest author numerous times. See his latest guest post on Macro Photography here.

    In previous years of our 12 Days of Christmas his eBooks have been among the most popular we’ve ever featured but as he’s just launched his new Macro Photography eBook we invited him to come back.

    Don’t Miss This Deal: It’ll be Gone in Less than 24 Hours

    So whether you’ve got all his other eBooks and just need the new one for the crazy low price of $ 7 (normally $ 15) or whether you’re new to Ed’s work and want to pick up his whole bundle of 9 eBooks for just $ 29 (normally $ 135) – todays deal is for you.

    Need more information on what’s in todays deals? Check them out here.

    But don’t forget – this deal lasts for 24 hours only so grab yours today.

    Screen Shot 2014-12-13 at 1.43.52 pm

    googletag.cmd.push(function() {
    tablet_slots.push( googletag.defineSlot( “/1005424/_dPSv4_tab-all-article-bottom_(300×250)”, [300, 250], “pb-ad-78623” ).addService( googletag.pubads() ) ); } );

    googletag.cmd.push(function() {
    mobile_slots.push( googletag.defineSlot( “/1005424/_dPSv4_mob-all-article-bottom_(300×250)”, [300, 250], “pb-ad-78158” ).addService( googletag.pubads() ) ); } );

    The post 78% Off Ed Verosky’s eBook Bundle (or His New Macro Ebook for just $ 7): Today Only by Darren Rowse appeared first on Digital Photography School.


    Digital Photography School

  • Weekly Photography Challenge – Graffiti Street Art

    In an earlier post I shared a set of some images of street art, also often referred to as graffiti.

    If you live an urban area or any city, than likely you have some of this type of art nearby. Graffiti artists range from ones who just seems to do vandalism, to other who are highly talented and skilled artists.

    Your job in this week’s photograph challenge is to seek out some street art in your area and photograph it in a manner fitting for the artwork. That could mean some grungy post-processing, a funky filter over the lens, or whatever creative idea you can come up with.

    Let’s see a few more examples of graffiti street art:

    Rob Schofield

    By Rob Schofield

    Pedro Ribeiro Simões

    By Pedro Ribeiro Simões

    Brent Pearson

    By Brent Pearson

    Charlón

    By Charlón

    Jason Taellious

    By Jason Taellious

    Share your graffiti street are images here:

    Simply upload your shot into the comment field (look for the little camera icon in the Disqus comments section) and they’ll get embedded for us all to see or if you’d prefer upload them to your favourite photo sharing site and leave the link to them. Show me your best images in this week’s challenge. Sometimes it takes a while for an image to appear so be patient and try not to post the same image twice.

    Need some help getting started? Try these dPS articles:

    • How to add a Grunge Effect to your Portraits using Lightroom (works on any kind of image also)
    • 4 Steps to Photoshop Artistry Using Fine Art Grunge Techniques
    • An Introduction to Urban Exploration
    • Urban Exploration Photography – Urbex
    • Focus on Scott Frederick – Urban Explorer
    Professor Bop

    By Professor Bop

    Brent Pearson

    By Brent Pearson

    Mamasuco ......un Peu Absent

    By mamasuco ……un peu absent

    Keoni Cabral

    By Keoni Cabral

    Badjonni

    By badjonni

    googletag.cmd.push(function() {
    tablet_slots.push( googletag.defineSlot( “/1005424/_dPSv4_tab-all-article-bottom_(300×250)”, [300, 250], “pb-ad-78623” ).addService( googletag.pubads() ) );
    } );

    googletag.cmd.push(function() {
    mobile_slots.push( googletag.defineSlot( “/1005424/_dPSv4_mob-all-article-bottom_(300×250)”, [300, 250], “pb-ad-78158” ).addService( googletag.pubads() ) );
    } );

    The post Weekly Photography Challenge – Graffiti Street Art by Darlene Hildebrandt appeared first on Digital Photography School.


    Digital Photography School

  • dPS 12 Days of Christmas: Save up to 88% on Some Great Photography Training

    It’s that time of year where we at dPS kick off our annual 12 days of Christmas campaign!

    12 days christmas

    This is the fifth time we’ve run this and this year we’ve got our biggest deals yet!

    Here’s how it works.

    Every day between now and Christmas we have put together a fantastic deal on some photography training products.

    In the coming 12 days you’ll see some of our own dPS eBooks at discounts we’ve never offered before as well as some deals from other photography sites that we’ve negotiated on your behalf.

    Deals this year are as high as 88% off.

    Each deal only lasts for 24 hours so you’ll need to be quick!

    Get Notified of Each Deal

    To get notified of each deal as soon as it goes live simply subscribe via email here:


    Don’t worry we keep your email completely private and you can unsubscribe at any point if you find the deals are too many!

    We’ll also be updating the deals here on the blog and on our Facebook page.

    Our first deal goes out to those who are subscribed in the next 24 hours so keep an eye on your inbox and don’t forget you only get 24 hours to grab each one!

    googletag.cmd.push(function() {
    tablet_slots.push( googletag.defineSlot( “/1005424/_dPSv4_tab-all-article-bottom_(300×250)”, [300, 250], “pb-ad-78623” ).addService( googletag.pubads() ) );
    } );

    googletag.cmd.push(function() {
    mobile_slots.push( googletag.defineSlot( “/1005424/_dPSv4_mob-all-article-bottom_(300×250)”, [300, 250], “pb-ad-78158” ).addService( googletag.pubads() ) );
    } );

    The post dPS 12 Days of Christmas: Save up to 88% on Some Great Photography Training by Darren Rowse appeared first on Digital Photography School.


    Digital Photography School

  • 5 Useful Tools to Run Your Holiday Promotions for Christmas 2014

    Christmas is around the corner. Holidays are a great opportunity to promote your photography brand as most people strive to capture those special moments with magic Xmas feeling running all through. So make a game plan, grab some tools, and go ahead to make the most out of this busy season. In today’s list we collected 5 online marketing tools Continue Reading

    The post 5 Useful Tools to Run Your Holiday Promotions for Christmas 2014 appeared first on Photodoto.


    Photodoto

  • 33 Gritty Photos of Graffiti Street Art

    Urban photography is a great way to get out and find some unique images, whether in your own city or abroad. Cities provide a multitude of interesting subjects. In this week’s image collection I’ve found a bunch of gritty photos of street art, also known as graffiti.

    In some cities like Melbourne they encourage this graffiti and businesses or the government actually sponsor the artists and provide a space to create murals and street art.

    Enjoy this series of grungy, gritty, street photography and art.

    Photograph Justin arrives by Shady ezz on 500px

    Justin arrives by Shady ezz on 500px

    Photograph Street Tagging by Lin Zee on 500px

    Street Tagging by Lin Zee on 500px

    Photograph Colors and the City by Xavier Liard on 500px

    Colors and the City by Xavier Liard on 500px

    Photograph street art by Samir Salim on 500px

    street art by Samir Salim on 500px

    Photograph around the corner by Dragan Todorovi? on 500px

    around the corner by Dragan Todorovi? on 500px

    Photograph Graffiti Invasion by Liban Yusuf on 500px

    Graffiti Invasion by Liban Yusuf on 500px

    Photograph Dónde está el 7º cielo?? by Gemma B&N  on 500px

    Dónde está el 7º cielo?? by Gemma B&N on 500px

    Photograph Graffiti? by  antoni  targarona  on 500px

    Graffiti? by antoni targarona on 500px

    Photograph Fisheye: Melbourne Street Art by Tom Cunningham on 500px

    Fisheye: Melbourne Street Art by Tom Cunningham on 500px

    Photograph Pump Dream by Fred  Adams on 500px

    Pump Dream by Fred Adams on 500px

    Photograph Vanishing Point by Len Saltiel on 500px

    Vanishing Point by Len Saltiel on 500px

    Photograph Ace of Spades by Fred  Adams on 500px

    Ace of Spades by Fred Adams on 500px

    Photograph Colors And Lines by Burak Arik on 500px

    Colors And Lines by Burak Arik on 500px

    Photograph Work or Cupcake by Kent Atwell on 500px

    Work or Cupcake by Kent Atwell on 500px

    Photograph graffiti by Vladimir Perfanov on 500px

    graffiti by Vladimir Perfanov on 500px

    Photograph painting the town by Shady ezz on 500px

    painting the town by Shady ezz on 500px

    Photograph { Walk along } by Thai Hoa Pham on 500px

    { Walk along } by Thai Hoa Pham on 500px

    Photograph physical graffiti by victor cucos on 500px

    physical graffiti by victor cucos on 500px

    Photograph Dark Room III by Xavier Liard on 500px

    Dark Room III by Xavier Liard on 500px

    Photograph Forgive me Lord, for I have sinned.. by Mathijs van den Bosch on 500px

    Forgive me Lord, for I have sinned.. by Mathijs van den Bosch on 500px

    Photograph woman on the wall by Gabor Nagy on 500px

    woman on the wall by Gabor Nagy on 500px

    Photograph Lost shoes by Joanna Lemanska on 500px

    Lost shoes by Joanna Lemanska on 500px

    Photograph Graffiti face by Brian Behling on 500px

    Graffiti face by Brian Behling on 500px

    Photograph dark tunnel by Gianluca Sgarriglia on 500px

    dark tunnel by Gianluca Sgarriglia on 500px

    Photograph blue eye by Sergio Spiegel on 500px

    blue eye by Sergio Spiegel on 500px

    Photograph Urban Graffiti @ by Philippe PONSIN on 500px

    Urban Graffiti @ by Philippe PONSIN on 500px

    Photograph graffiti tunnel 02 by Paul Hinderer on 500px

    graffiti tunnel 02 by Paul Hinderer on 500px

    Photograph Mid-Levels Street Art by Postcards from the World on 500px

    Mid-Levels Street Art by Postcards from the World on 500px

    Photograph Reckless Abandon by Nick Cox on 500px

    Reckless Abandon by Nick Cox on 500px

    Photograph NY Style Pizza, Jing'an by Craig McCormick on 500px

    NY Style Pizza, Jing’an by Craig McCormick on 500px

    Photograph Graffiti Lane by Paul Hinderer on 500px

    Graffiti Lane by Paul Hinderer on 500px

    Photograph Surprise! by Brian Sanders on 500px

    Surprise! by Brian Sanders on 500px

    Photograph Ghost train by Xavier Liard on 500px

    Ghost train by Xavier Liard on 500px

    googletag.cmd.push(function() {
    tablet_slots.push( googletag.defineSlot( “/1005424/_dPSv4_tab-all-article-bottom_(300×250)”, [300, 250], “pb-ad-78623” ).addService( googletag.pubads() ) );
    } );

    googletag.cmd.push(function() {
    mobile_slots.push( googletag.defineSlot( “/1005424/_dPSv4_mob-all-article-bottom_(300×250)”, [300, 250], “pb-ad-78158” ).addService( googletag.pubads() ) );
    } );

    The post 33 Gritty Photos of Graffiti Street Art by Darlene Hildebrandt appeared first on Digital Photography School.


    Digital Photography School

  • 9 Tips to Help you get Sharp Focus at Night

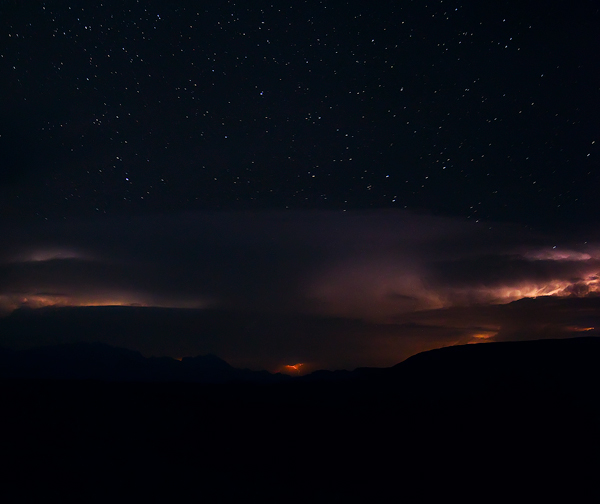
    Autofocus is so good on modern cameras that most photographers use it all the time. It seemingly never lets you down. But, let’s say it’s nighttime and you are going to do some shooting. You find a good spot. You set up your tripod. You go to focus your camera using the autofocus. You can feel the camera’s focus ring twisting back and forth, trying to focus. But it never gets there. The camera keeps hunting for a focus spot but never finds one.

    Uh-oh.  What are you going to do now?

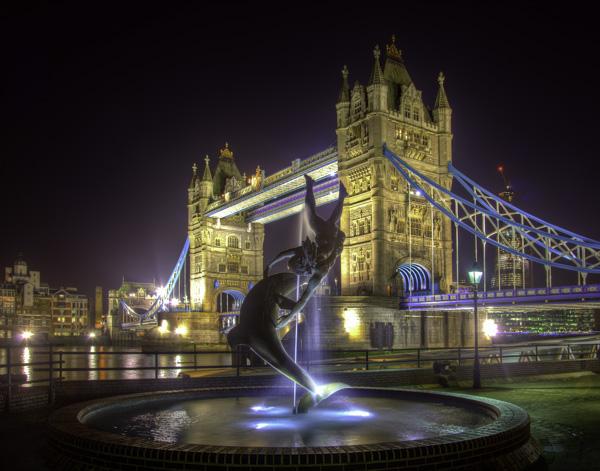
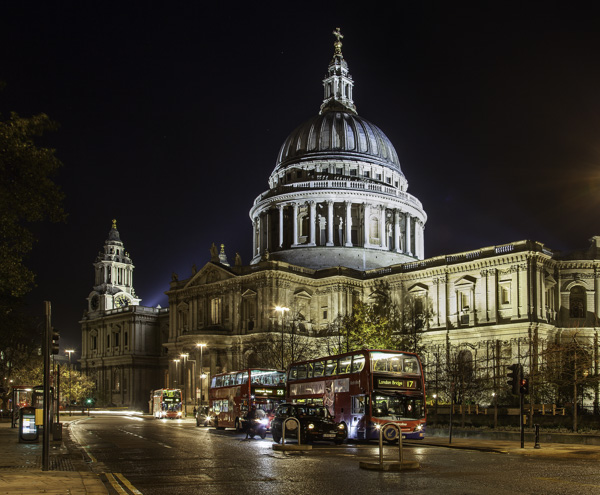
    Tower Bridge, March 2011

    Actually, this problem doesn’t arise only at night. Your camera will typically have trouble focusing in any really dark scene. So here are some tips for dealing with that situation and focusing your camera when it is dark:

    1. Aim for the bright spot

    Sometimes you can still use your autofocus. Even though it is dark, most night scenes will have a bright spot or two. They might be streetlights, or a lit-up building, or even the moon. That bright spot can be used to set your autofocus.

    To do so, find a bright spot that is reasonably close to your desired plane of focus (i.e., the same distance away as your focal point). Autofocusing on that point should take care of your problem. Just focus on that bright spot in a normal fashion and your camera is now focused on something the same distance away as your subject. You should then be able to take your picture with proper focus.

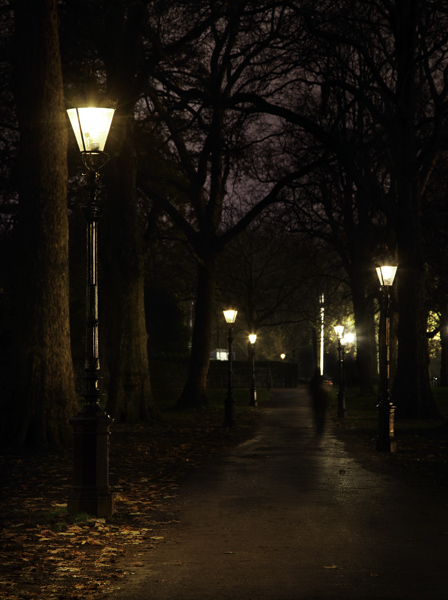
    Green Park, November 2012

    2. Focus on the edge

    Most cameras focus using something called contrast detection. That means the camera will have the best chance at finding something to focus on if you aim at the area of high contrast between something bright and the dark background.  So don’t aim your focus point at the middle of the bright spot in your frame. Rather, focus on the edge of the bright point. The camera will use the contrast between the very light and the very dark tones to focus.

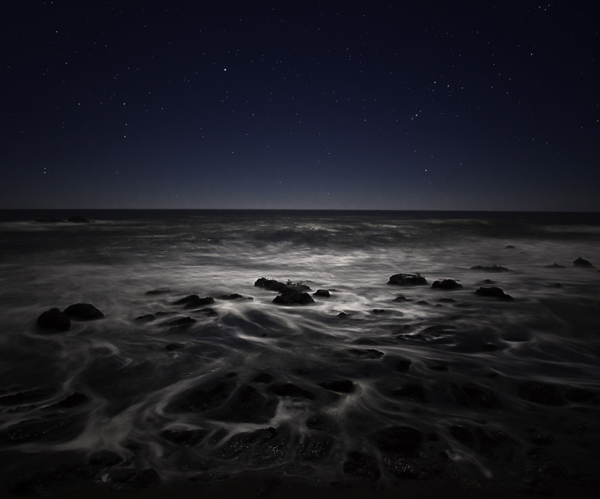
    CaCoast

    3. Use a flashlight

    If you are attempting to autofocus on a relatively close subject, you can use a flashlight to assist with the focus. This is one of the many reasons to keep a flashlight in your camera bag.

    To do that, shine your flashlight on your subject. That will lighten it up enough for the camera to focus on it. Set your focus, then you can turn off the flashlight and take your shot.

    4. Recompose after focusing

    Assume you now have your focus set using the methods set forth above. But to get that focus, you had to move your camera away from your desired composition to focus on the edge of a bright spot. Move your camera back to your desired composition to get the shot. Don’t refocus as you do so though – just move the camera and take the shot with the focus you’ve already set. (You will need to either hold the shutter button part way down, use focus lock, or focus and then turn off the AF so it doesn’t attempt to refocus once you have recomposed – or see #5 below.)

    BigBendNight

    5. Use back-button focus

    It is times like this, when you want to take a shot with out refocusing, that back-button focus really pays dividends. If your camera allows it, go into the menu and set up your focus so that it is not triggered when you press the shutter button halfway down, but rather is triggered when you press a button on the back of your camera. That way since your focus is not set with the shutter button, when you take the picture by pressing it there is no chance that your camera refocuses.

    6. Manually focus using the lens scale

    If there is nothing for you to use to set your autofocus, you might have to use the dreaded manual focus. But don’t worry, it is not difficult. In the dark, it is often easier to focus manually than hunt for something to use for autofocus.

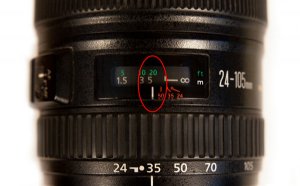
    Higher-end lenses make it easier to manually focus. In a high-end lens there should be a scale on the front that tells you the distance (in both feet and meters) at which you are focused. Use that to set the focus.

    You might need a flashlight to see the scale.  This is yet another reason to keep a flashlight in your camera bag.

    TopOfLens

    7. Manually focus by guestimating

    If you cannot find a point to focus on, and your lens does not have a distance scale, all is not lost. You can guestimate and get it right in a lot of cases.

    To do so, make sure you are shooting with a high aperture value (small opening, large f-number). That will create a wide depth of field to give you some wiggle room in your focus. Specifically, the wide aperture will make a wider range of things acceptably sharp in your frame.

    In addition, be sure you are shooting with a wide angle lens. This is not the time to try anything telephoto. The wider angle of view creates a more forgiving environment for your focus.

    With a wide aperture and the wide angle of view, you have a broader latitude in your focusing. Now manually focus your camera. If you are shooting a broad scene that extends to infinity, set the manual focus just shy of infinity. The latitude you built-in will make things acceptably sharp all the way to infinity and a certain distance in front of your focus point as well. That will give you the best chance of having the whole scene in focus.

    St. Paul, November 2012

    8. Use Live View

    If you can see anything on your camera’s LCD using Live View, then you can use that to manually focus. This is frequently better because you can zoom in on your subject and clearly see if you have nailed the focus. Try using this whenever possible, as it allows a degree of control over focus that is not otherwise possible.

    9. Remember you get a do-over

    One of the beautiful things about digital photography is that shooting is free. Unless your scene is moving in front of you, you get a free do-over. Use it liberally. Take a shot, look at it on the LCD, and if the focus isn’t right, just do it again. If your camera allows it, go ahead and zoom in on the preview to clearly see the detail and whether or not you have nailed the focus.

    Destin

    Conclusion

    These tips will help you set your focus at night or when you are in a very dark scene. In fact, some of these tips will also help in broad daylight when the camera thinks it is dark because you are using a 10-stop neutral density filter. Try them when your autofocus is hunting but not finding the focus. You should be able to nail the focus in almost any situation.

    googletag.cmd.push(function() {
    tablet_slots.push( googletag.defineSlot( “/1005424/_dPSv4_tab-all-article-bottom_(300×250)”, [300, 250], “pb-ad-78623” ).addService( googletag.pubads() ) );
    } );

    googletag.cmd.push(function() {
    mobile_slots.push( googletag.defineSlot( “/1005424/_dPSv4_mob-all-article-bottom_(300×250)”, [300, 250], “pb-ad-78158” ).addService( googletag.pubads() ) );
    } );

    The post 9 Tips to Help you get Sharp Focus at Night by Jim Hamel appeared first on Digital Photography School.


    Digital Photography School