Category: Photography

  • 35 Magical Musical Images to Make Your Heart Sing

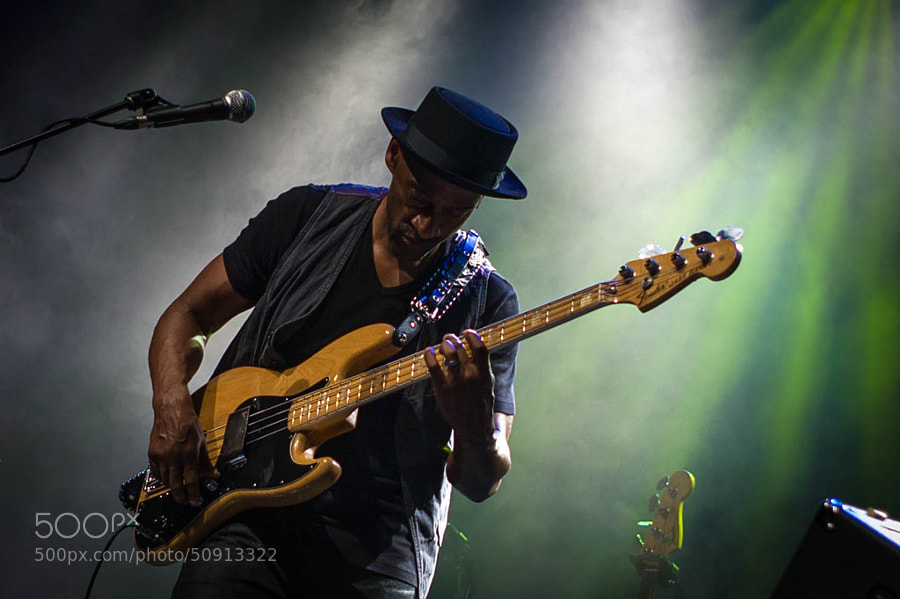
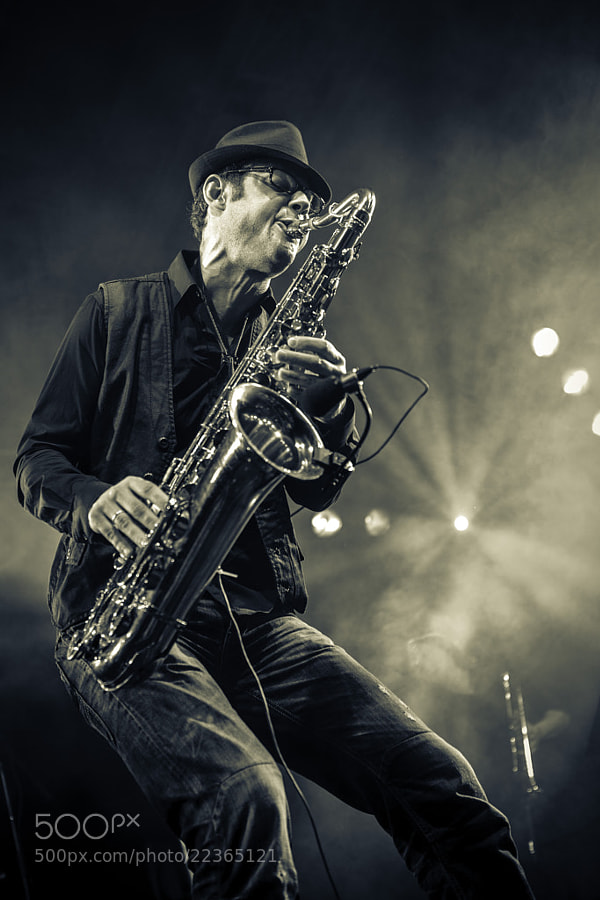
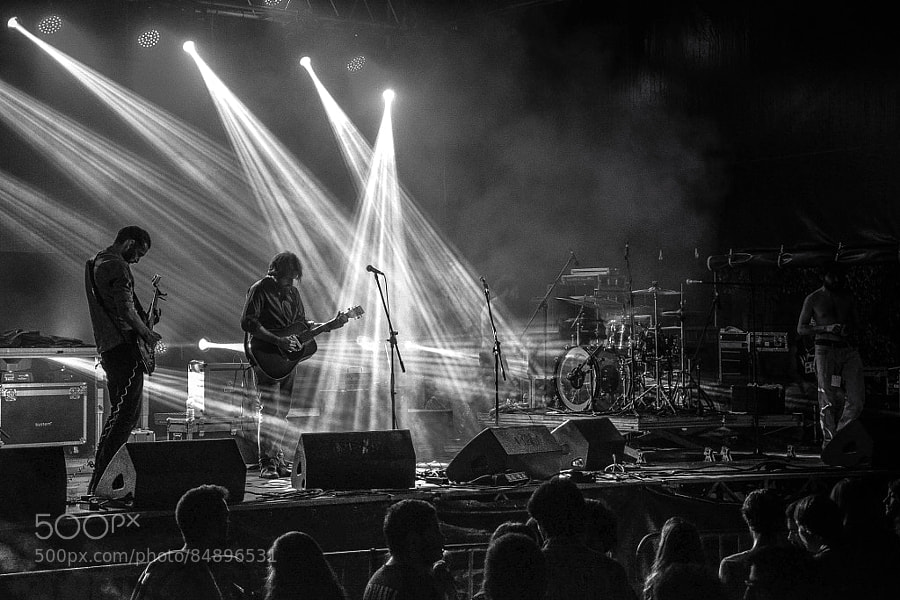
    Music is something universal. You don’t have to understand the words or the lyrics to enjoy music. You just know what speaks to you and what makes you feel good. Today’s image collection is all about how to capture that in an image.

    Which of these images do you connect with? Can you hear the music? Can you feel the passion of the artists?

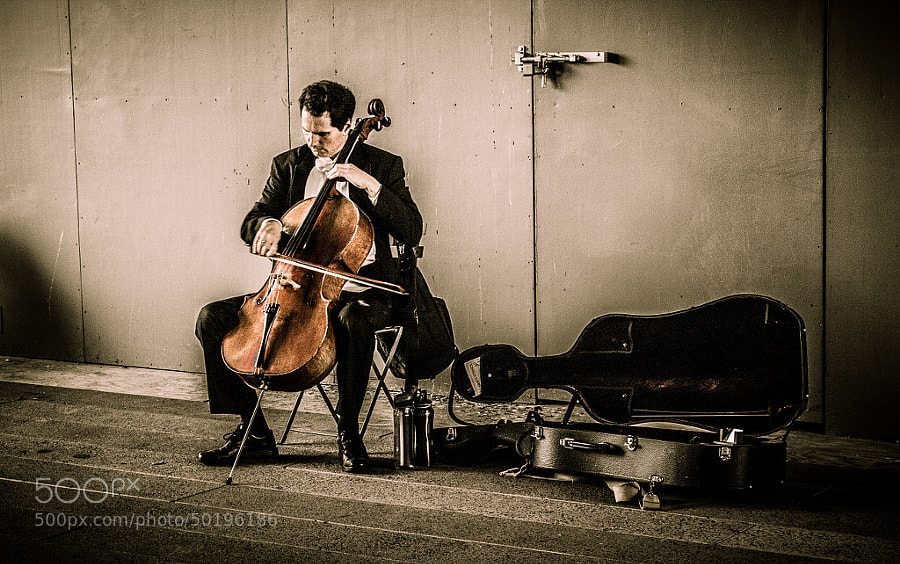
    Photograph Classical Street Performer by Marcus Anthony on 500px

    Classical Street Performer by Marcus Anthony on 500px

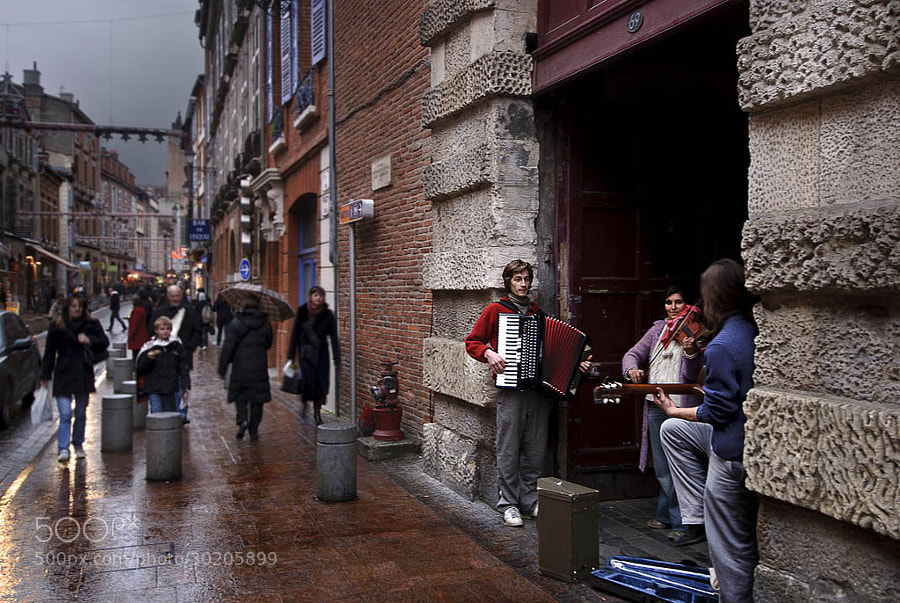
    Photograph Music in the rain by Giuliana & Antonio Corradetti on 500px

    Music in the rain by Giuliana & Antonio Corradetti on 500px

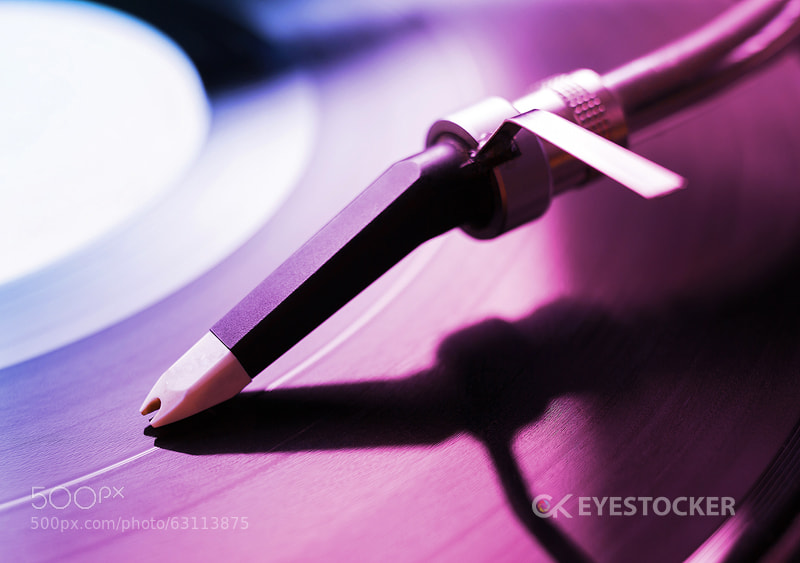
    Photograph Perspective view of spinning old fashioned turntable by Cristi Kerekes (Eyestocker) on 500px

    Perspective view of spinning old fashioned turntable by Cristi Kerekes (Eyestocker) on 500px

    Photograph George, we need to talk. by kerbla edzerdla on 500px

    George, we need to talk. by kerbla edzerdla on 500px

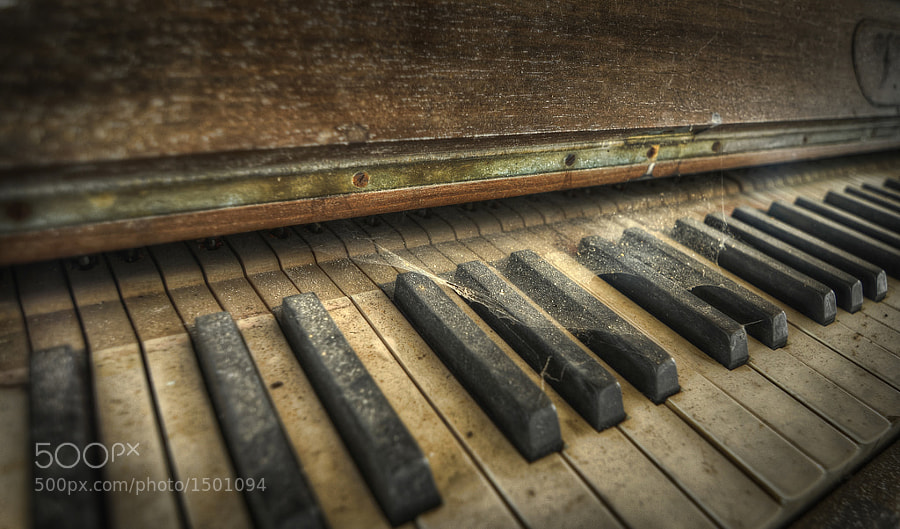
    Photograph The Day The Music Died by Niki Feijen on 500px

    The Day The Music Died by Niki Feijen on 500px

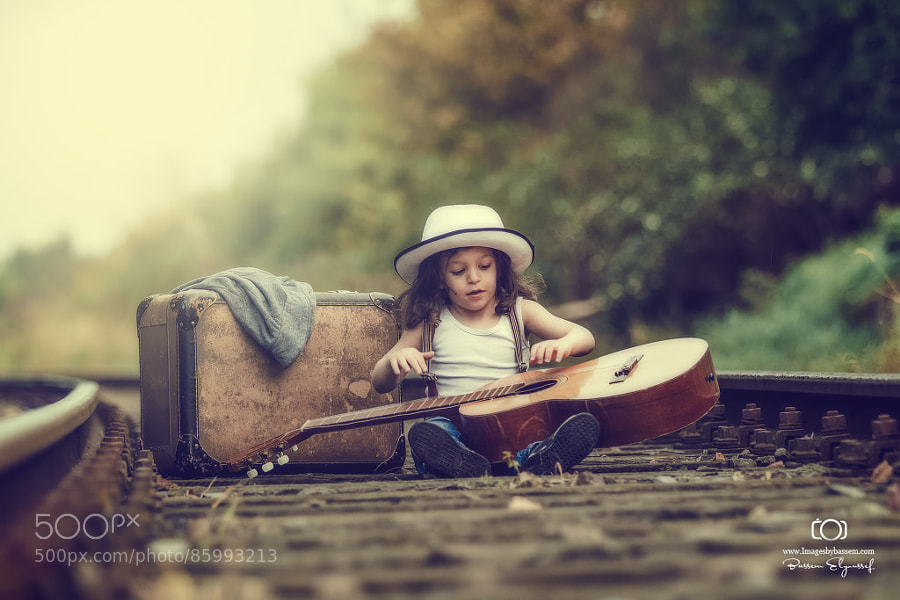
    Photograph Angels  rhythm by Bassem Elyoussef on 500px

    Angels rhythm by Bassem Elyoussef on 500px

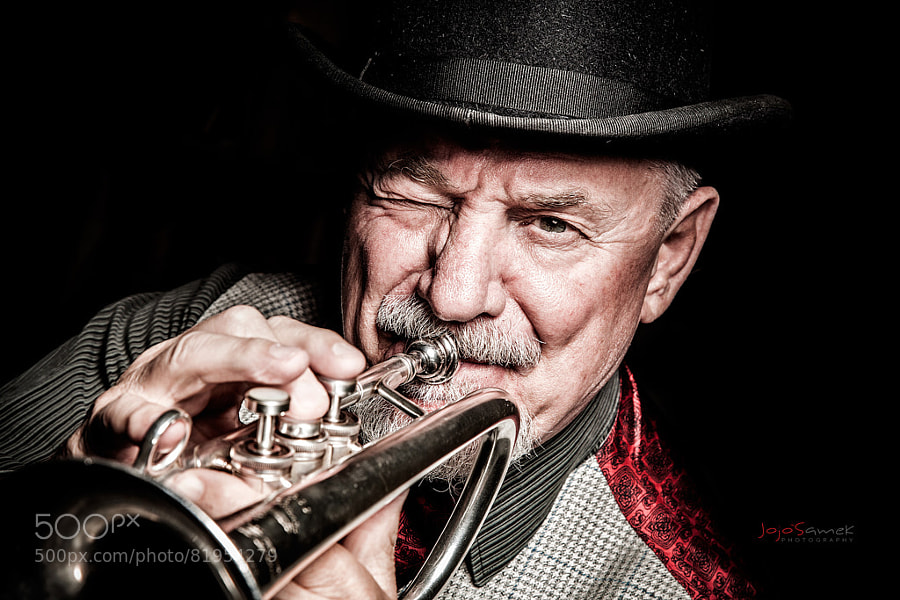
    Photograph Papa Fleigh Company by Jojo Samek on 500px

    Papa Fleigh Company by Jojo Samek on 500px

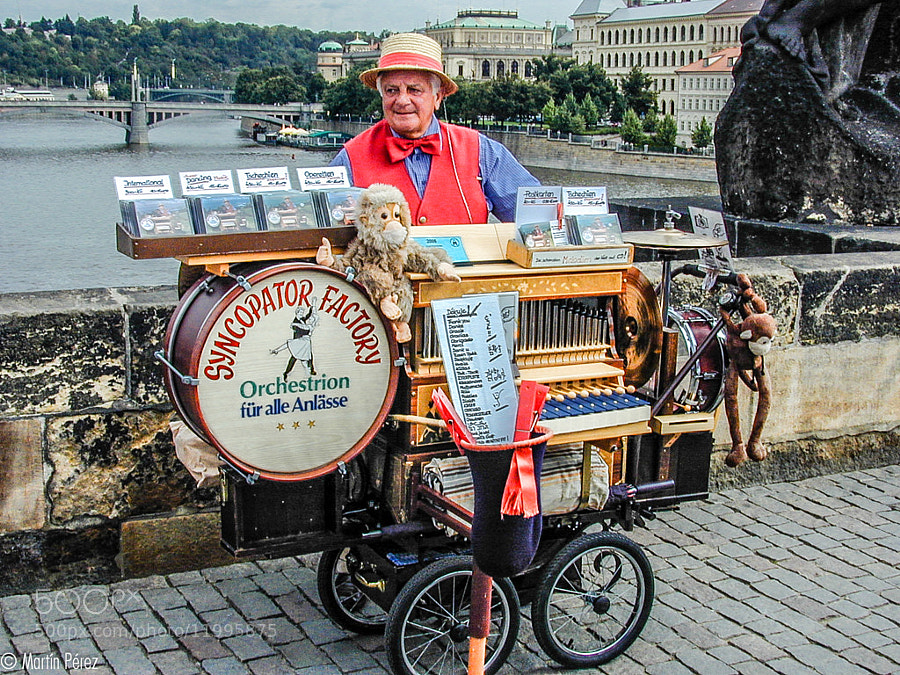
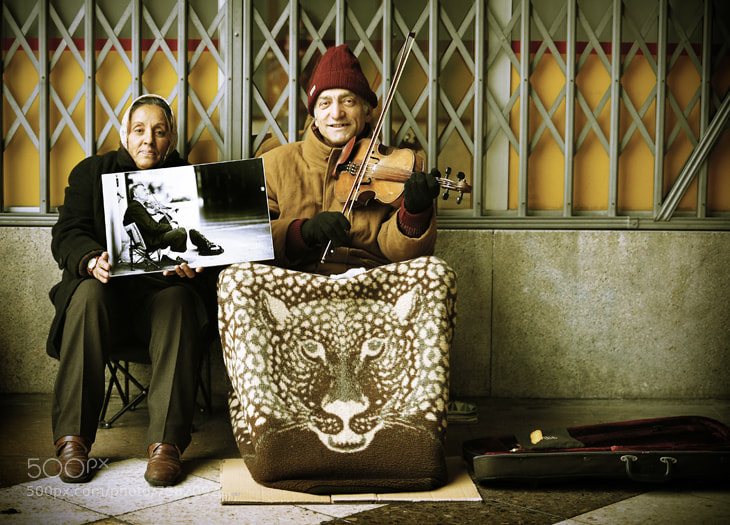
    Photograph popular musician in Prague by Martín Pérez on 500px

    popular musician in Prague by Martín Pérez on 500px

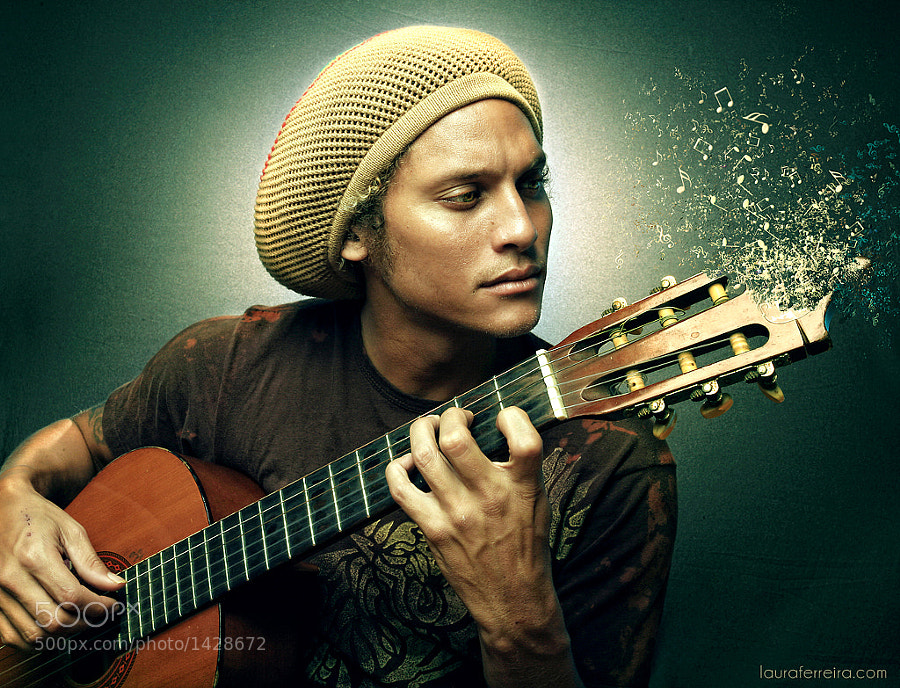
    Photograph Metamorphosis by Laura Ferreira on 500px

    Metamorphosis by Laura Ferreira on 500px

    Photograph Sunset melody..! by Adithetos ????????? on 500px

    Sunset melody..! by Adithetos ????????? on 500px

    Photograph Quid pro quo by Manuel Orero on 500px

    Quid pro quo by Manuel Orero on 500px

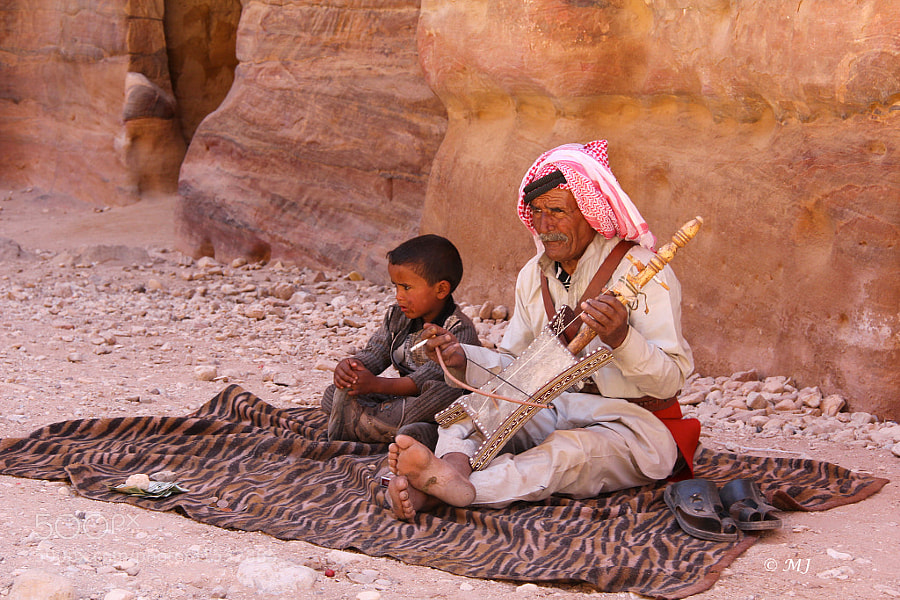
    Photograph Bedouin Musician by Jasmin Sajna on 500px

    Bedouin Musician by Jasmin Sajna on 500px

    Photograph Light Play by Gabriel Doty on 500px

    Light Play by Gabriel Doty on 500px

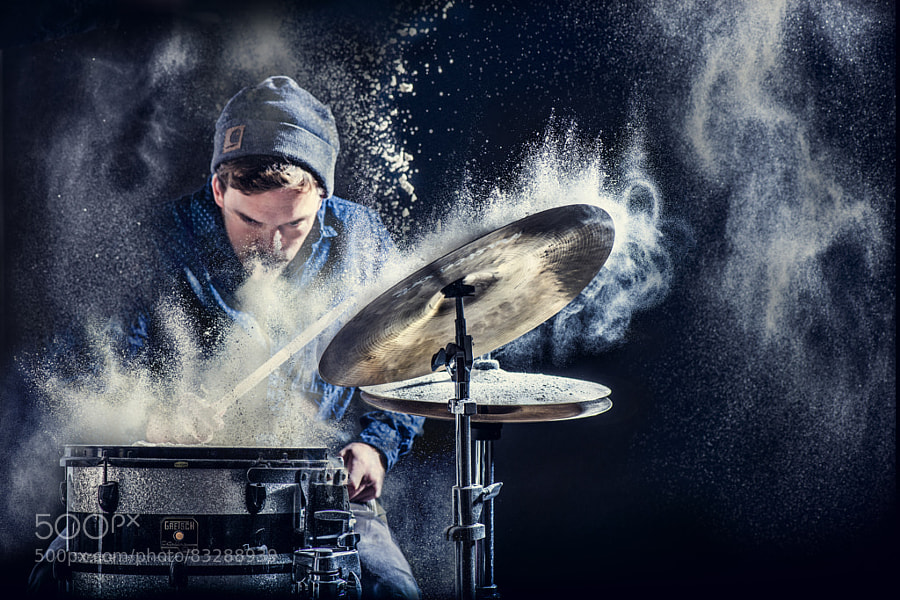
    Photograph Schlagzeug by Lisa Bajda on 500px

    Schlagzeug by Lisa Bajda on 500px

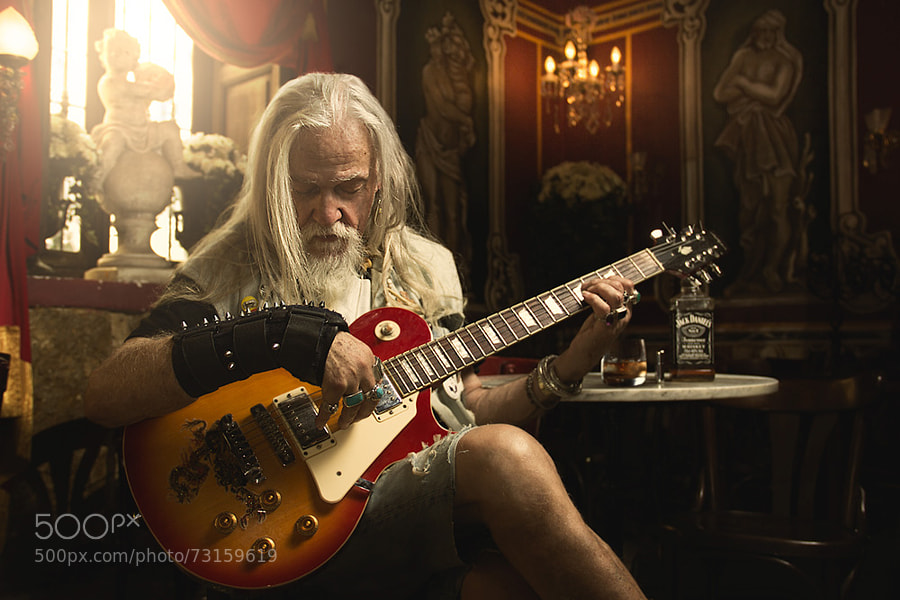
    Photograph Long live Rock&Roll by Adrià Vidal on 500px

    Long live Rock&Roll by Adrià Vidal on 500px

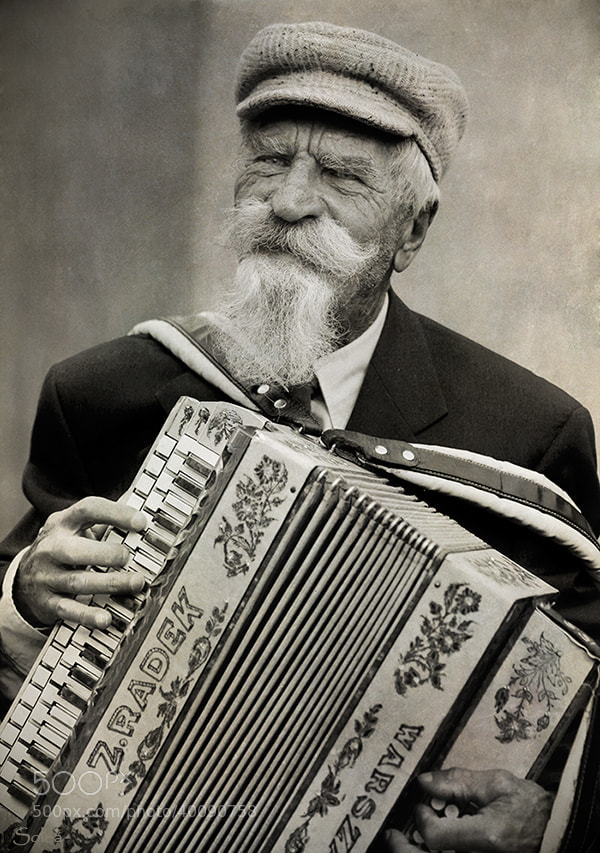
    Photograph Harmonista by Carmen Gonzalez on 500px

    Harmonista by Carmen Gonzalez on 500px

    Photograph Musician Village by Alamsyah Rauf on 500px

    Musician Village by Alamsyah Rauf on 500px

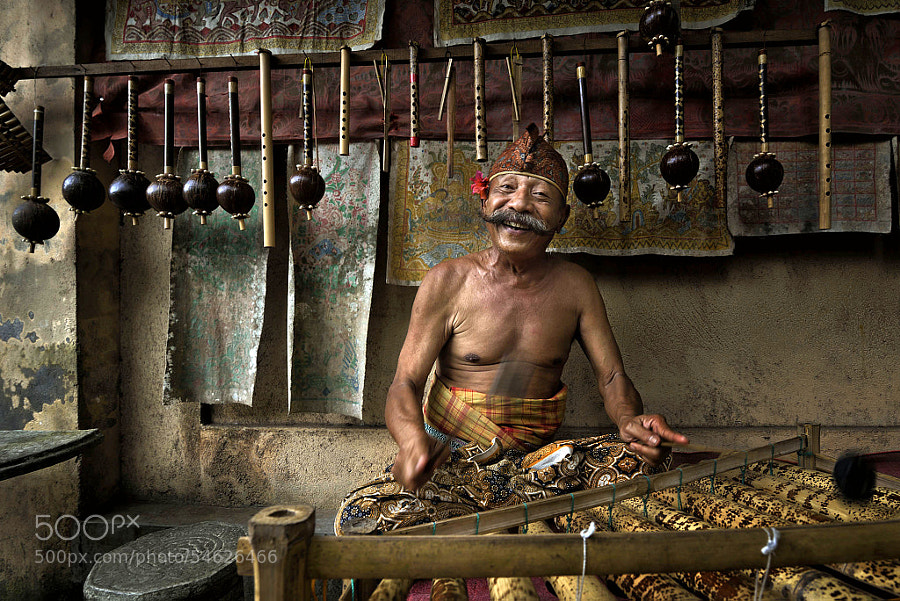
    Photograph Old Musician in Bali by toonman blchin on 500px

    Old Musician in Bali by toonman blchin on 500px

    Photograph musicians child by Osman Maasoglu on 500px

    musicians child by Osman Maasoglu on 500px

    Photograph Renaissance by Serge van Schie on 500px

    Renaissance by Serge van Schie on 500px

    Photograph Les Babettes - Turbo Swing Trio by Cosimo Barletta on 500px

    Les Babettes – Turbo Swing Trio by Cosimo Barletta on 500px

    Photograph NeoBash by Marco Heyda on 500px

    NeoBash by Marco Heyda on 500px

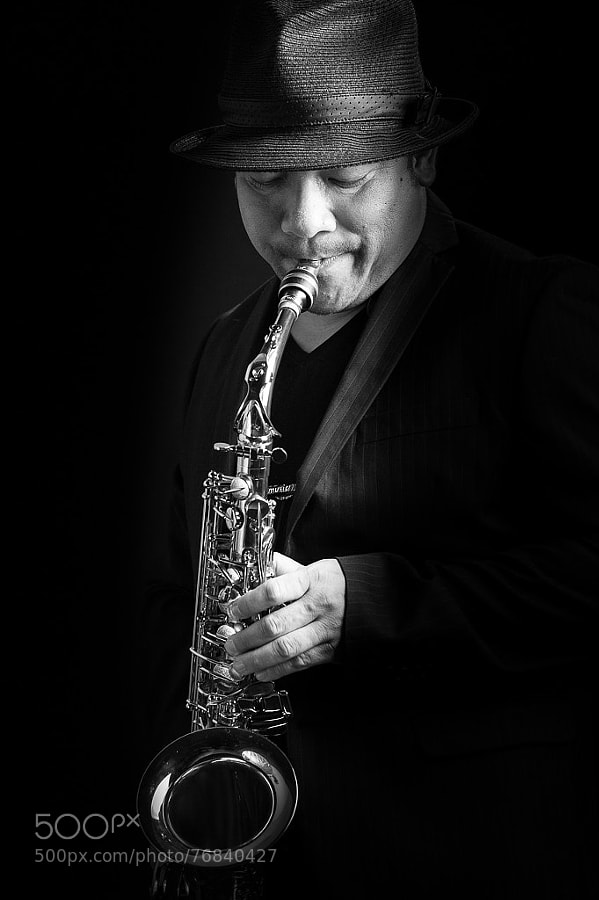
    Photograph Koh Mr.Saxman by Peteris Lehtla on 500px

    Koh Mr.Saxman by Peteris Lehtla on 500px

    Photograph Lights by João Venâncio on 500px

    Lights by João Venâncio on 500px

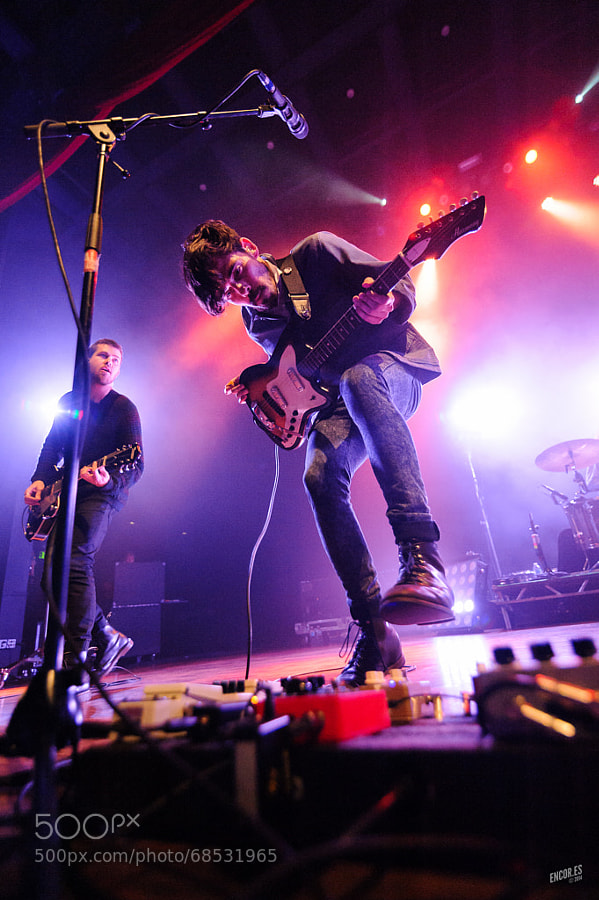
    Photograph Local Natives at The Pageant 4.24.14 by Jason Stoff on 500px

    Local Natives at The Pageant 4.24.14 by Jason Stoff on 500px

    Photograph Hitting The High Note by Andy Catlin on 500px

    Hitting The High Note by Andy Catlin on 500px

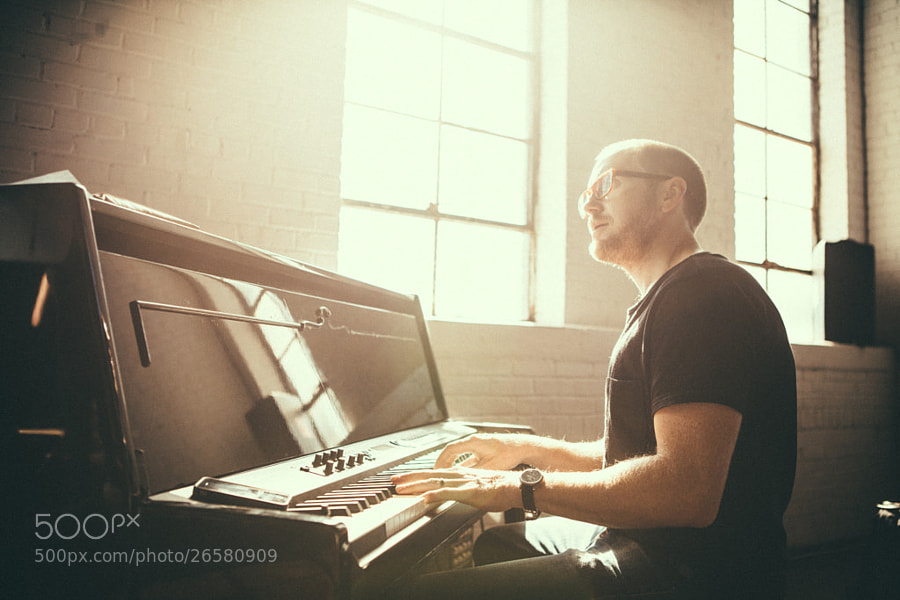
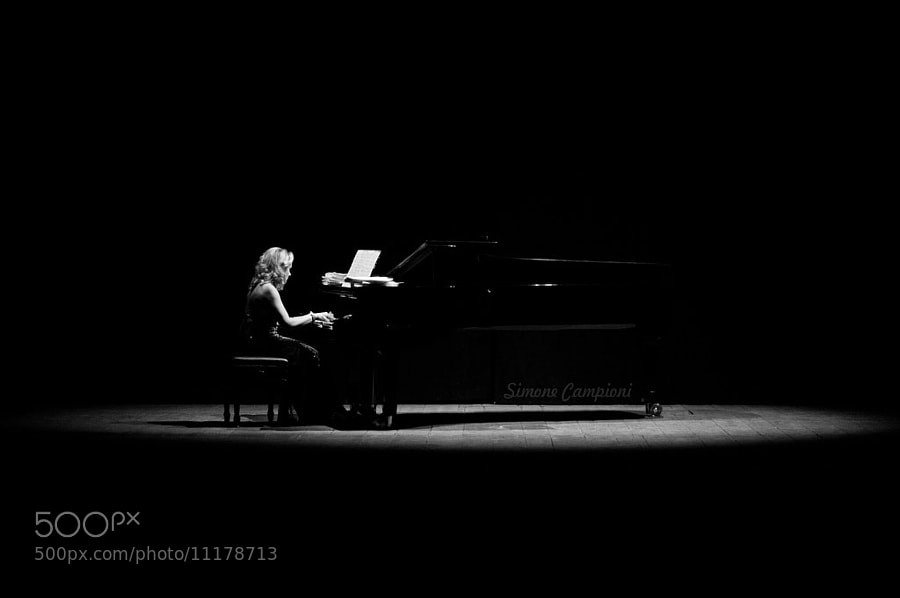
    Photograph Piano dimension by Simone Campioni on 500px

    Piano dimension by Simone Campioni on 500px

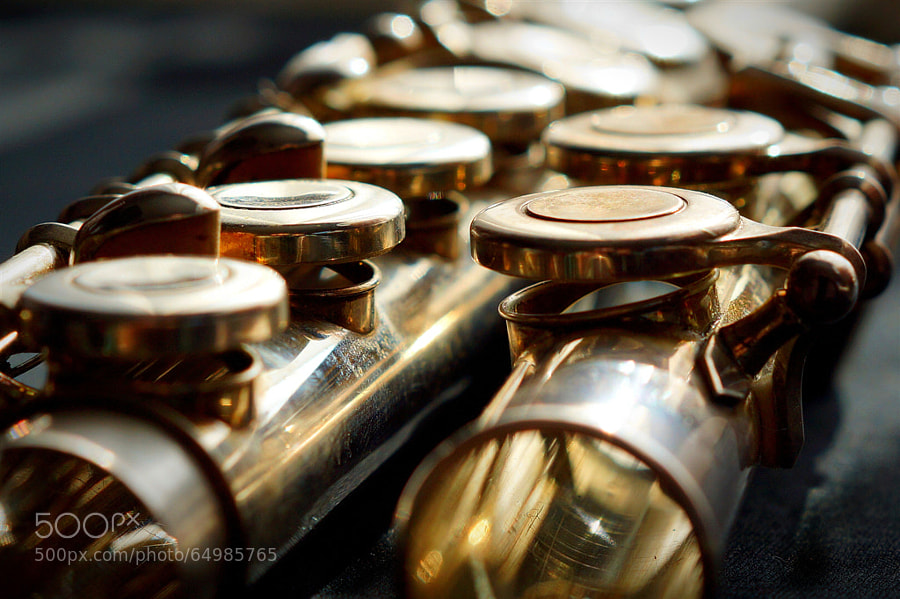
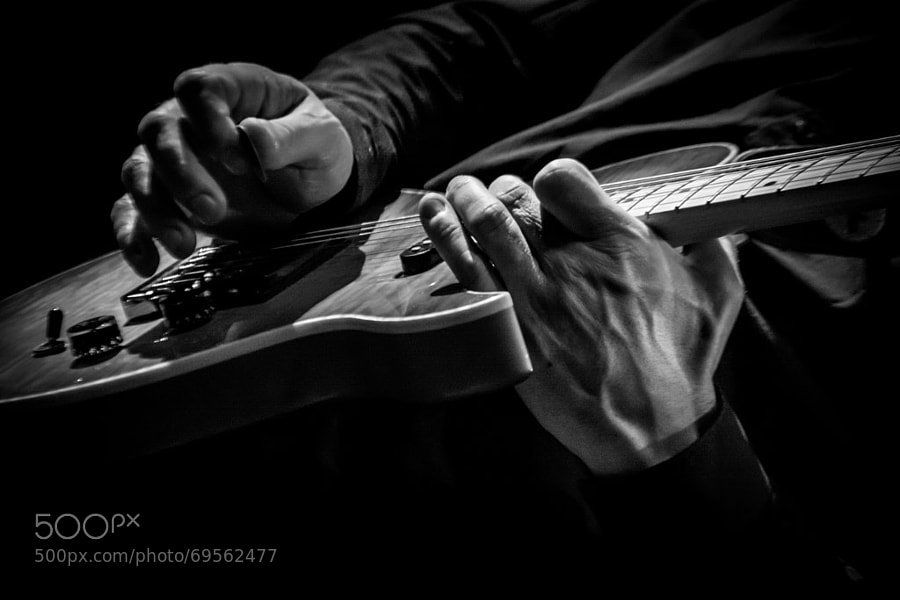
    Photograph Acoustic Jewel by Sim  Kim Seong on 500px

    Acoustic Jewel by Sim Kim Seong on 500px

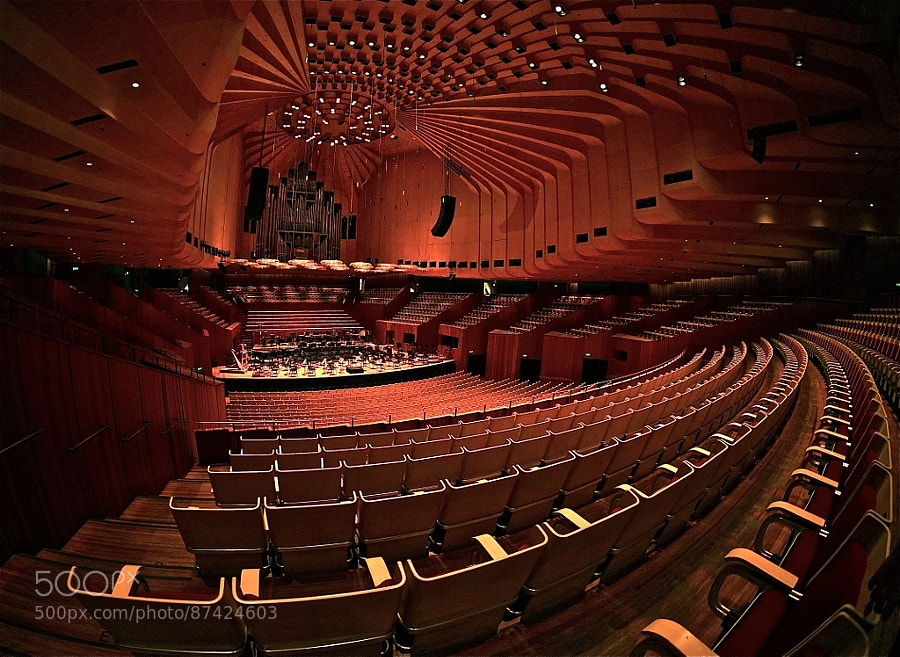
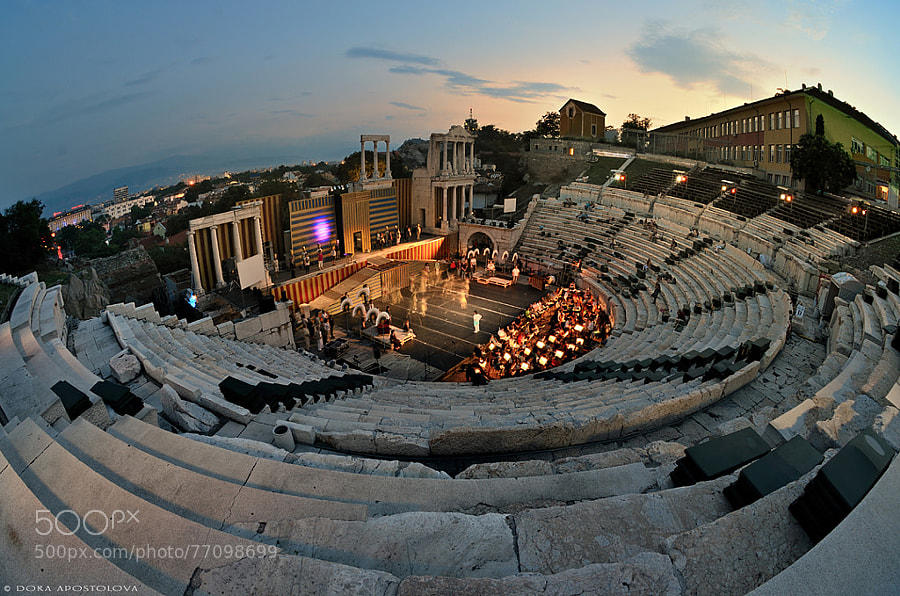
    Photograph Opera Evenings by Dora Apostolova on 500px

    Opera Evenings by Dora Apostolova on 500px

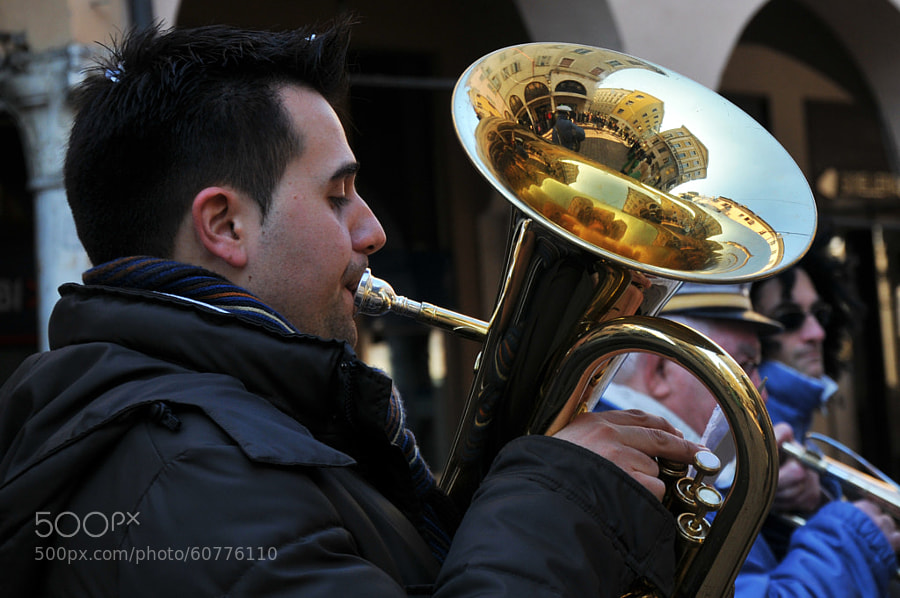
    Photograph Mantova inside a tuba by Maya Lynne on 500px

    Mantova inside a tuba by Maya Lynne on 500px

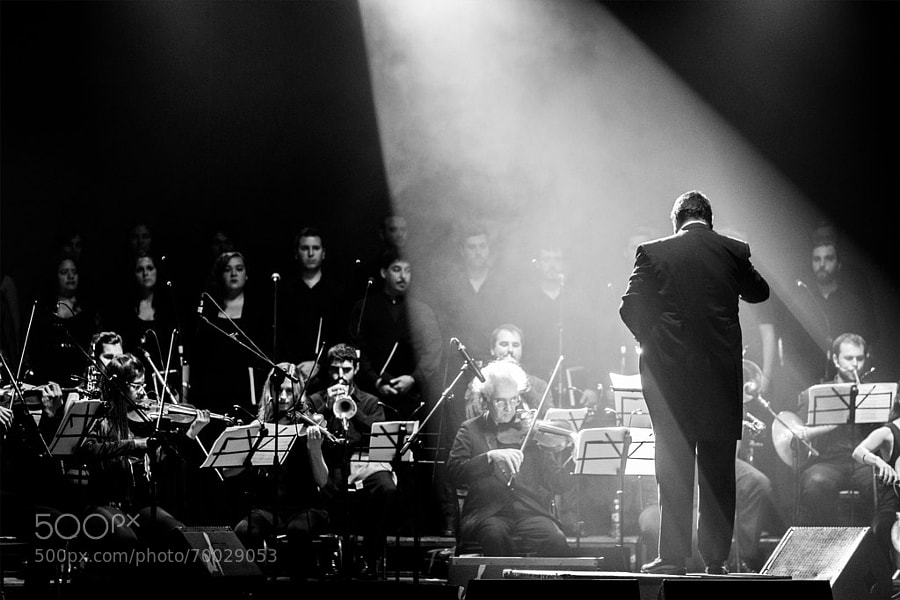
    Photograph Symphonic Tribute to Queen by German Lopez on 500px

    Symphonic Tribute to Queen by German Lopez on 500px

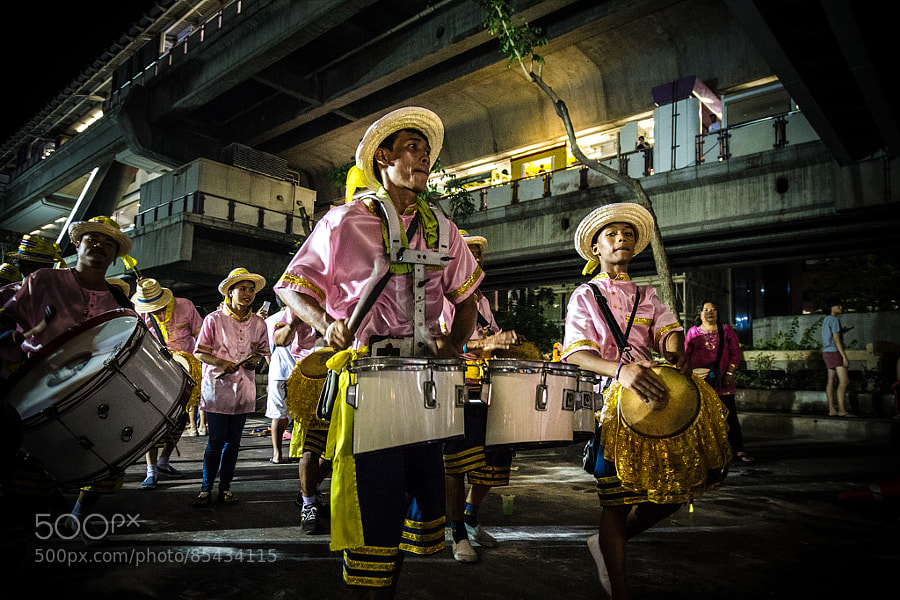
    Photograph Marching Band by Gerrit Phil  Baumann on 500px

    Marching Band by Gerrit Phil Baumann on 500px

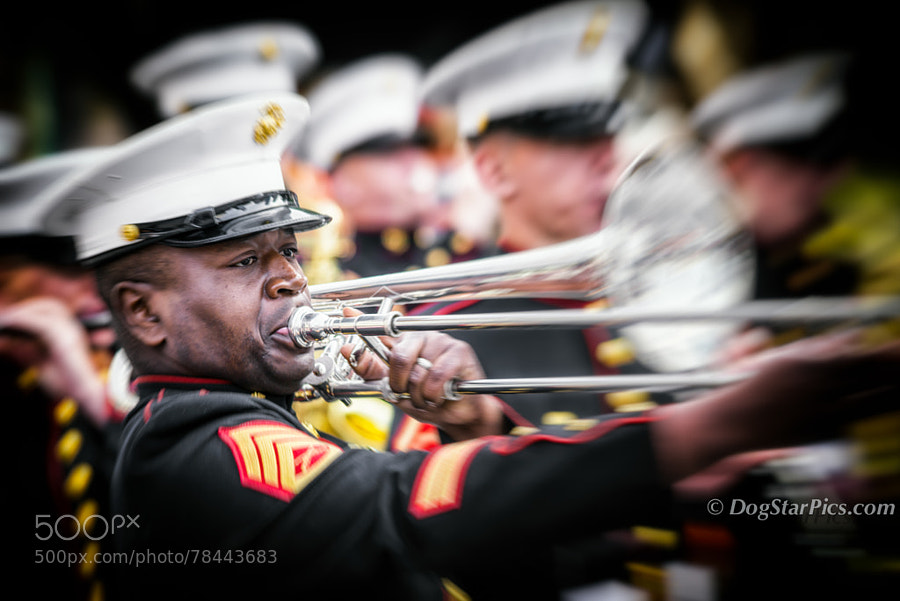
    Photograph Marine Band Houston Rodeo by DogStarPics  on 500px

    Marine Band Houston Rodeo by DogStarPics on 500px

    Photograph Mariachi band walking in street by Gable Denims on 500px

    Mariachi band walking in street by Gable Denims on 500px

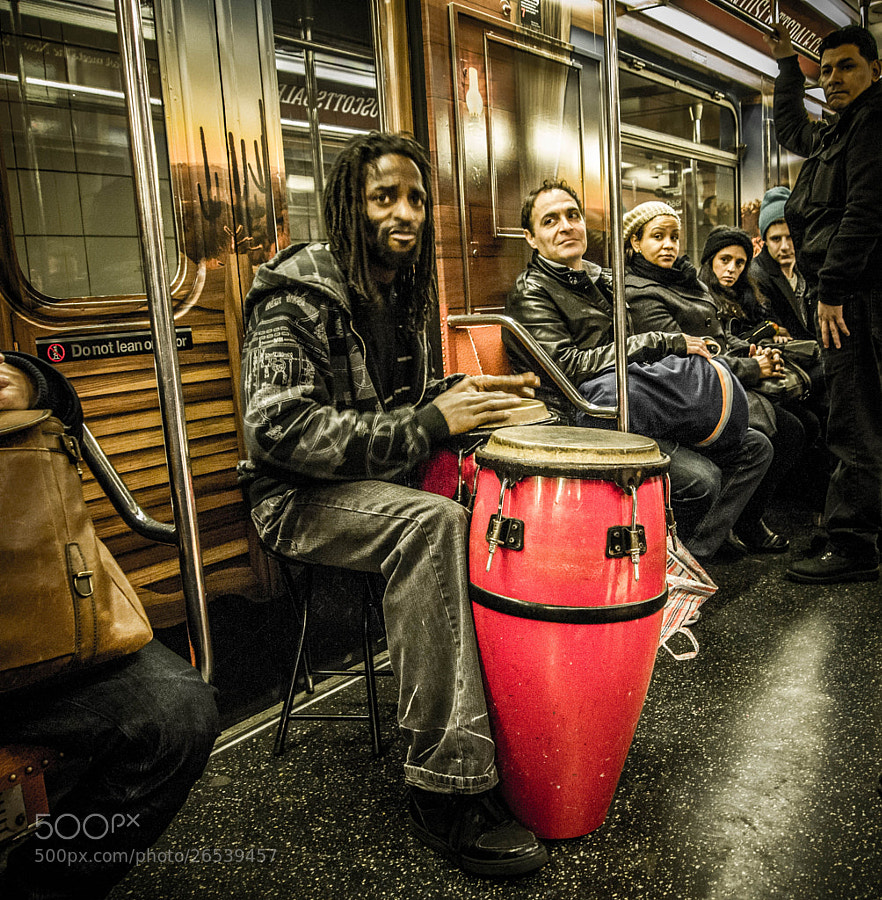
    Photograph Subway Rhythms by Ian Weissman on 500px

    Subway Rhythms by Ian Weissman on 500px

    googletag.cmd.push(function() {
    tablet_slots.push( googletag.defineSlot( “/1005424/_dPSv4_tab-all-article-bottom_(300×250)”, [300, 250], “pb-ad-78623” ).addService( googletag.pubads() ) ); } );

    googletag.cmd.push(function() {
    mobile_slots.push( googletag.defineSlot( “/1005424/_dPSv4_mob-all-article-bottom_(300×250)”, [300, 250], “pb-ad-78158” ).addService( googletag.pubads() ) ); } );

    The post 35 Magical Musical Images to Make Your Heart Sing by Darlene Hildebrandt appeared first on Digital Photography School.


    Digital Photography School

  • Telling a Story in a Single Image – Tips from a Photojournalist

    Photography is visual communication medium. You can follow and use some rules, through composition and technique – but photojournalism takes it a step farther and states facts and gives information that is true and real. You need to follow two basic pillars to be an ethical photojournalist. Those principles are: you do not manipulate your scene, and the information you are photographing must be real.

    The best recipe you can use for getting a good photo that tells a story is by combining good composition, action, and emotions. If you are able to engage with your subject mixing those three elements you will be able to get a good photograph.

    As photojournalist you can display facts and affairs but you will level up your work if you are able to evolve those facts in something emotional and touching. Then is when you photo stars to tell a story.

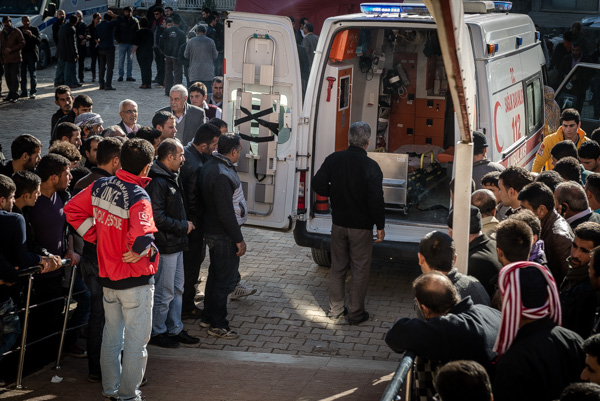
    FPC2841

    Suruç hospital receives Kurdish fighters from Syria.

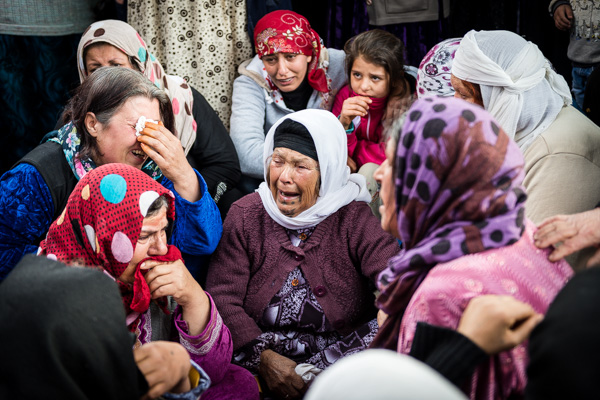
    FPC1936

    Kurdish women cry for the wounded, treated in Suruç hospital.

    Both photos describe real facts, something that is going on. In the first one you see some action, and some mood in the people waiting for the wounded fighters. But in the second one, the emotion is stronger and you see the action coming out from the other women crying around them.

    “If you want emotions in your photos you need people around”

    Include people in your frame. Look for the faces, not for the backs, but understand that body language in human beings is another way of communication so a full body can also express emotions.

    FPC3700

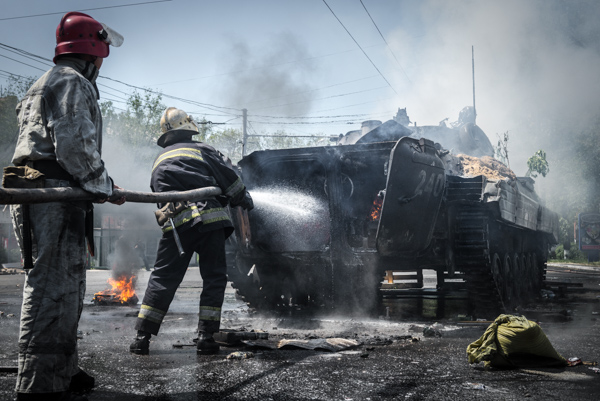
    Ukrainian army enters the eastern city of Mariupol leaving civilians casualties as result of the attack.

    Firefighters are in action, the fire inside the personal armoured carrier is action too and the whole scene makes the tension of a probable incoming explosion. You need to make the action evident, so you need to get close. The action needs a bigger space in your frame. For that, use your feet – they are your best zoom. You could step back ant shoot the armoured vehicle on fire from the distance, but the main characters of the photo will be lost and the man handling the water and the fire in the foreground is pure action.

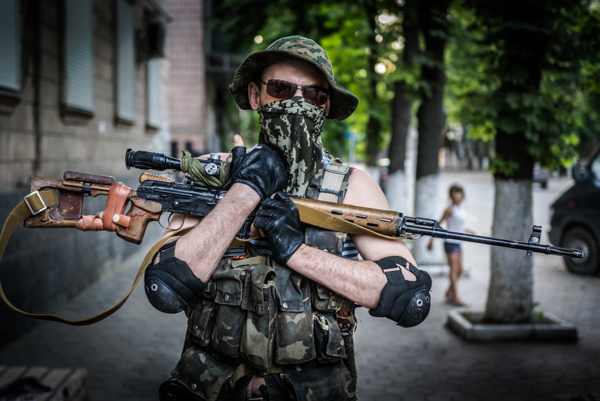
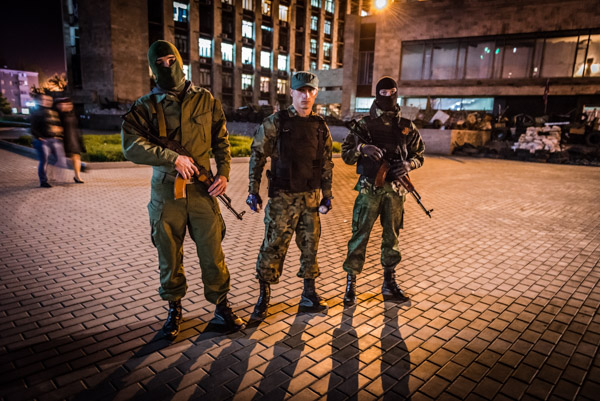
    You can get a story going on in your photos too, if you are able to engage with your subject. A close portrait with the right attitude is it always good. In these photos you can see a little bit of action in the background but not much. However, you can replace that making a strong engagement with your subject. You can feel in these photos they are arrogant, they are proud of what they are, they stand up not ashamed, and look forward and straight into the camera and their body languages speaks for itself.

    FPC4340

    Pro-Russian sniper guards a checkpoint in Slaviansk, eastern Ukraine.

    FPC3371

    Pro-Russian militias patrol the main administrative building in Donetsk, eastern Ukraine.

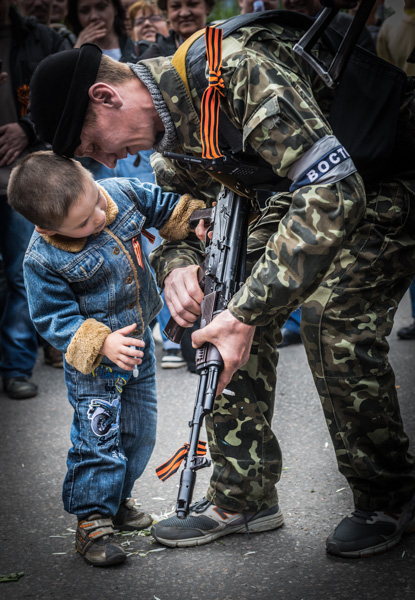
    When you look for a story in your photos try different angles, do not be afraid of watching things from a different perspective. Get low, as a photographer you need to change your point of view. When photographing kids and animals you always need to get to their level, at the same level you make them to stand up and you give them the major role in frame.

    FPC3564

    Pro-Russian militia Vostock Battalion celebrates the independency of the Donetsk People’s Republic.

    As you can see in these examples the action and emotions are the key. There is no better way to find those emotions than looking forward and getting close to the principal characters of the events.

    A good indicator of whether your photography is good is if you do not need to explain anything. A photograph telling a story does not need to be explained. If you want to make the story more complicated you will need to put more elements in harmony in your frame, it is more complicated but is a challenging experience.

    How do you tell stories with your images? What can you learn from these tips that you can use in your own photography, even if you do not do true photojournalism?

    googletag.cmd.push(function() {
    tablet_slots.push( googletag.defineSlot( “/1005424/_dPSv4_tab-all-article-bottom_(300×250)”, [300, 250], “pb-ad-78623” ).addService( googletag.pubads() ) ); } );

    googletag.cmd.push(function() {
    mobile_slots.push( googletag.defineSlot( “/1005424/_dPSv4_mob-all-article-bottom_(300×250)”, [300, 250], “pb-ad-78158” ).addService( googletag.pubads() ) ); } );

    The post Telling a Story in a Single Image – Tips from a Photojournalist by Felipe Passolas appeared first on Digital Photography School.


    Digital Photography School

  • Initial impressions of the Nikon D750

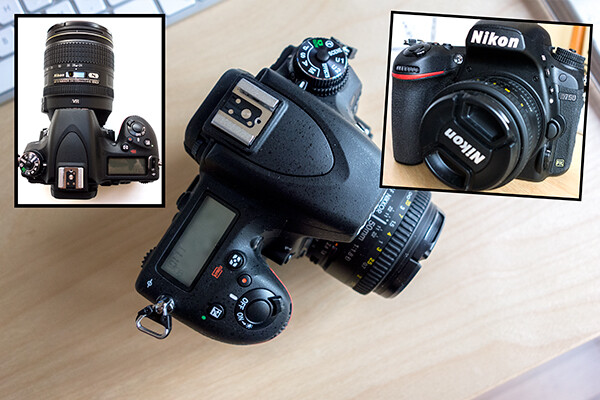
    Nikon D750

    Nikon D750

    When Nikon made their announcement just prior to Photokina in September of this year (2014)  that they were launching the D750, my interest piqued, especially as the specs on paper were ticking all my requirement boxes. The price looked good too!

    I have had the Nikon D750 a little over two months now, but have yet to put this camera through any serious testing. Over the following months, I will give this camera a thorough workout. In the meantime, this article will outline my first impressions and why I chose this particular camera.

    ‘Mirror mirror on the wall, who’s the fairest of them all’…why mirrorless of course!’

    Before I finally went ahead and purchased the Nikon D750, I did seriously consider taking the mirrorless route. Sony and Fuji have some excellent ones on the market. At this moment in time, I do feel the choice of lenses available are still limited. That said, because these MILC (mirroless interchangeable lens cameras) are much lighter than DSLRs, this is a serious factor to consider, especially if travel and landscape photography is your speciality.

    If you are interested in reading more about this topic, Simon Ringsmuth has an interesting article here the whole DSLR versus Mirrorless debate.

    Main considerations before I bought the D750

    1. I was looking to upgrade from my APS-C sensor camera to a full frame one. I’m not bothered about the brand – it’s what the camera can do for me.
    2. I wanted more dynamic range, so a larger sensor and megapixels was a prerequisite.
    3. Faster AF system.
    4. Trade-in my older gear to lessen the financial blow, plus it didn’t make sense for me to hang onto to older gear with the current speed of technology.
    5. Video – I want to get more adept at shooting HD video footage.

    A camera is an important tool in the photography profession and whatever camera suits your needs and gets the job done is the one for you.

    I wanted to upgrade to a full-frame camera and use full frame lenses. My Nikon D300 which has an APS-C sensor had served me well and it was seven years old. I don’t believe in holding on to digital equipment for too long, because it depreciates so quickly. I traded-in this camera with the 18-200mm lens which did make a difference to the final bill.

    Ergonomics

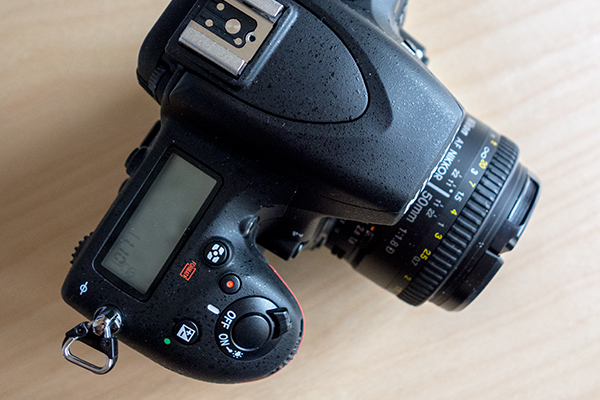
    When I held the D750 for the first time, the ergonomics felt great. The extra dimension to the grip makes all the difference and it fits very comfortably in my hand. I don’t have large, nor petite hands. The body feels lighter than my previous body and more slimline but still has that solid feel of a DSLR.

    Grip-on-the-Nikon-D750

    The grip on the Nikon has been extended to allow for a much more comfortable hold.

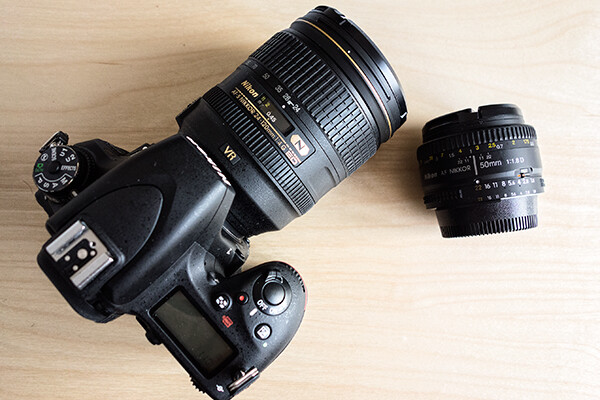
    I got the Nikkor 24-120mm f/4 lens with the camera in a bundle deal. In doing so, I got the lens for nearly half of the purchase price. This particular lens isn’t light though, it weighs nearly the same as the camera body, which is about 755g(1.7lb) including the battery. The camera plus this lens was now more hefty to hold.

    Nikon-D750-24-120mm f/4-lens+50mm-f/1.8D-lens

    Nikon D750 with the Nikkor 24-120mm f/4 lens plus the 50mm f/1.8D.

    First Test Run

    On the day that I took the camera out for its initial test run it was a fantastic sunny day. I had the 50mm f1.18D lens attached. It felt so light, mind you this lens weighs practically nothing in comparison to other lenses.

    Immediately, the camera felt very intuitive as I wasn’t fumbling around getting to grips with dials and menu systems. I am biased here given that I am more familiar with Nikon cameras so I had an advantage.

    Image Quality

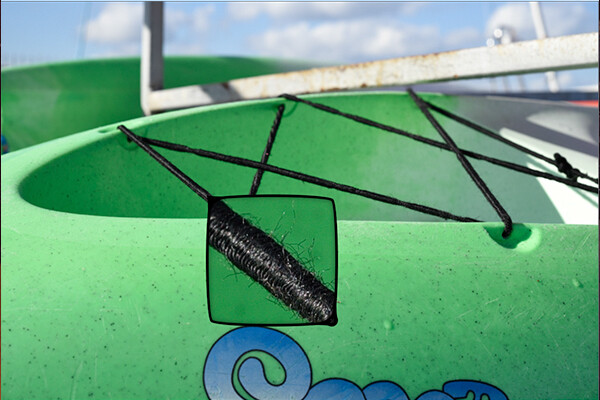
    I have to admit that I am a bit of a pixel peeper. This camera has a high resolution 24.3 megapixel sensor, which is reflected in the quality of the images. I was impressed with the detail and color of the images.

    Detail-on-dinghy

    Zoomed in at 100% to show the detail on the elastic cord on this dinghy.

    Autofocus

    The speed of the Autofocus was just amazing. It was very responsive and super fast.

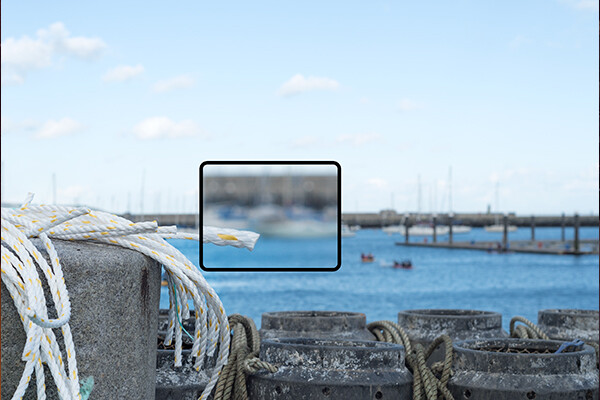
    Autofocus

    The AF was super fast and a dream to use. I was able to focus on the yachts in the background and then re-focus quickly on this part of the rope.

    Dynamic Range

    I had the opportunity to go on a night shoot in early November. I had never shot at night before, so this was a first. There was a full moon, so seemingly that’s not good if you want to catch star trails. I was happy enough with the moon. When I uploaded the images onto my computer, I wanted to see how much detail I could recover using Camera Raw. I was gob smacked!

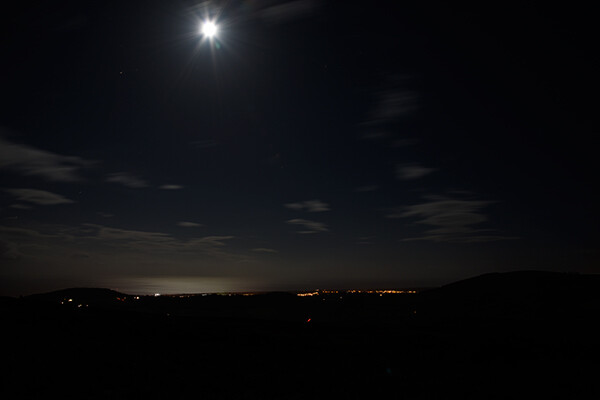
    Night-shot-original

    I took this shot on a night shoot with a group. This is the jpeg version, straight out of the camera.

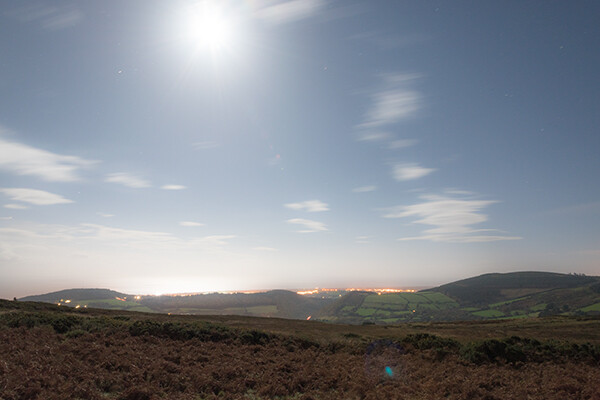
    Night-shot-details-recovered-by-3.5-f-stops

    This is the RAW file of the same night shot. However, when I brought it into Camera Raw, I was able to push the exposure by three and half stops to recover this detail, amazing!

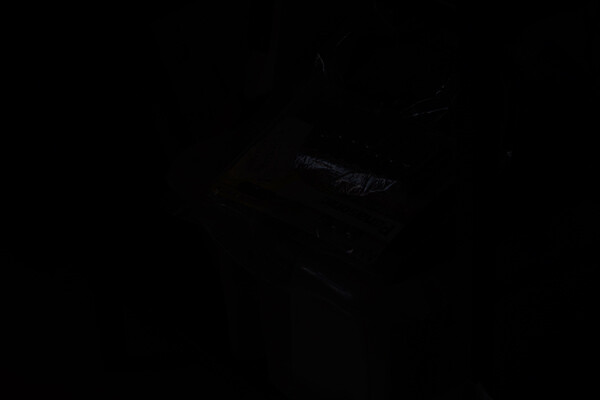
    misfired-original

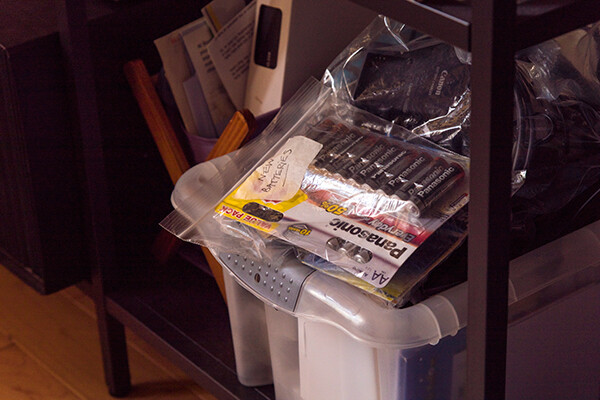
    This jpeg image that is straight-out-of-camera was taken accidentally while holding the camera down. If you look closely, you can just barely see the highlights from the plastic bag with the batteries in it.

    misfired-recovered-by-5-f-stops

    This is the RAW file of the same accidental shot processed with Camera Raw, where I was able to push the exposure by five stops.

    Adobe have launched camera raw 8.7 for the Nikon D750 but anyone who is using Adobe CS6, can download Photoshop Camera Raw 8.7 here.

    Pros

    This camera exceeds my expectations and then some with regards to image quality and dynamic range. The autofocus is so responsive and super fast.

    I haven’t tested out the WiFi but this would not be a main consideration for me.

    However, the tilt screen is a nice feature. This would be particularly useful, especially if you are a wedding photographer and you want to get down low for an interesting point of view or if you want to take an overhead shot at  a concert.

    Cons

    Not enough time!

    I have yet to put this camera through its proper paces. Once I have properly tested out this camera, the cons may present themselves or will they?

    Have you picked one up to try it or invested in the D750 already? What are your initial impressions?

    googletag.cmd.push(function() {
    tablet_slots.push( googletag.defineSlot( “/1005424/_dPSv4_tab-all-article-bottom_(300×250)”, [300, 250], “pb-ad-78623” ).addService( googletag.pubads() ) ); } );

    googletag.cmd.push(function() {
    mobile_slots.push( googletag.defineSlot( “/1005424/_dPSv4_mob-all-article-bottom_(300×250)”, [300, 250], “pb-ad-78158” ).addService( googletag.pubads() ) ); } );

    The post Initial impressions of the Nikon D750 by Sarah Hipwell appeared first on Digital Photography School.


    Digital Photography School

  • The Importance of Personal Projects for Professional Photographers

    In my last article, I talked about working on one or more personal projects as a great way to help photographers get motivated and get busy in a saturated market space. In this article I want to expand on the topic of personal photography projects: Why do you need one? How do you choose personal projects? What are some of the more popular personal projects around?

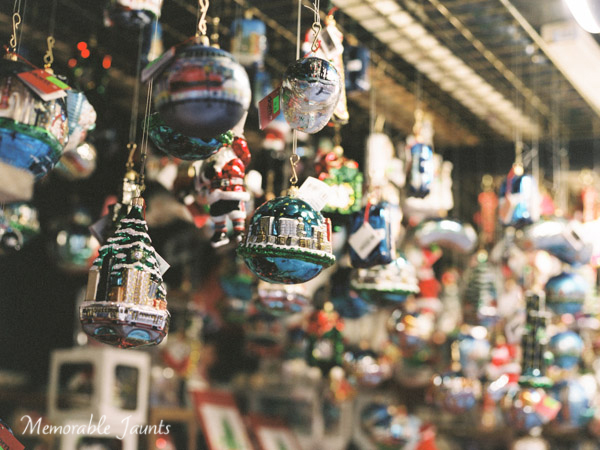
    Film Photos of Christmas Ornaments in Chicago Downtown Memorable Jaunts Lifestyle Film Photographer

    Why do you need personal photography projects?

    #1 – Personal projects help you get out of a photography rut

    Most photographers have a busy season and a slow season. Depending on where you are in your photography career, your slow season can be a few weeks or can be several months. Not picking up a camera for months on end can be disheartening and demotivating. Personal projects can help you keep going in those slow months and also help you fine tune your skills.
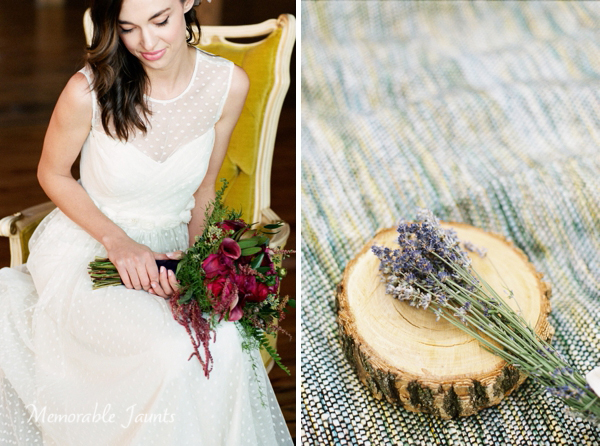
    Film Wedding Portraits Memorable Jaunts Chicago Illinois Wedding Photographer

    Experimenting with film ( 35mm and medium format) as one of my personal projects

    #2 – Diversify your portfolio and get noticed

    Depending on the type of personal project you pick, this can be a great way to diversify your portfolio and attract new clients based on your new body of work. Personal projects are just that – personal assignments. Once you take the pressures of a client out of the equation, you are free to explore, get creative and challenge yourself. This creative freedom is bound to reflect positively on your work. Your assignments can help you get noticed by your past and future clients and does have the potential of helping you get new clients who fall in love with your personal images.
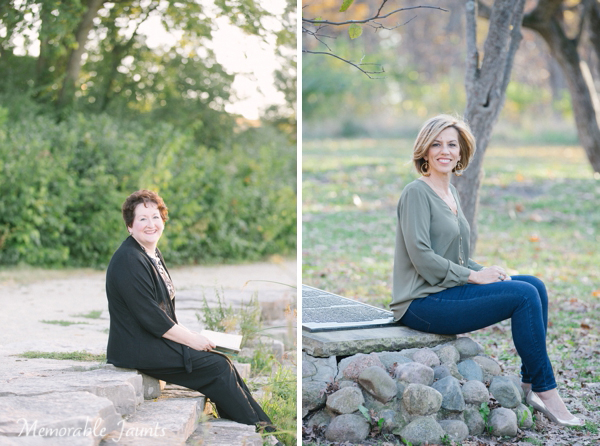
    Small Business Lifestyle Headshots Outdoors Memorable Jaunts Lifestyle Photographer Naperville Illinois

    What started off as a favor for a friend has turned into a new offering in my business – lifestyle headshots

    #3 – Help you engage with the photographic community

    Let’s face it, we all spend way too much time on the Internet. We are constantly browsing, reading and engaging with people (either actively or inactivity). Why not mix the two in a more productive way? As you are researching personal projects and assignments, you are bound to stumble upon photographers who are doing similar work. Reach out and start a conversation. Share your projects. Join a local or online community, a Facebook or Flickr group, and get active. Share you work and ask for feedback, browse the work of other artists and engage in healthy dialogue. Because this is a personal project, you are more relaxed. It certainly makes internet surfing more purposeful and useful.

    #4 – Experiment outside your comfort zone

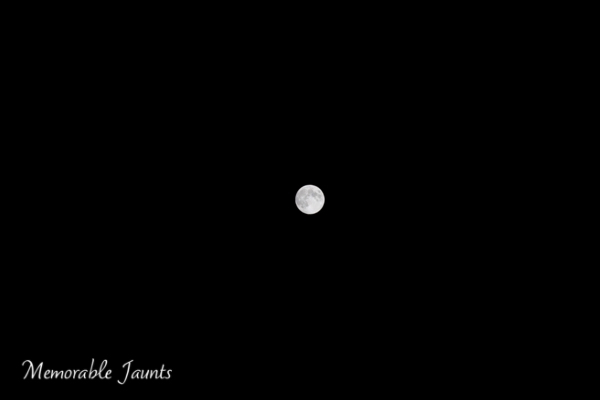
    When you are thinking of personal projects, really give yourself the permission to get creative. Choose projects and assignments that really push you as an artist and challenge your existing skills and techniques. There is no right or wrong here. But recognize when a project is too easy, versus when a project really makes you work. Also remember this is a personal assignment, don’t make it so hard or unrealistic that it has an almost 0% success rate. I mean, I would love to photograph the earth from outer space – what a fantastic personal achievement that would be – but it is highly unlikely to happen in my lifetime! I will stick to photographing the moon – on a clear night, on a stormy night, and during a lunar eclipse!
    Moon Photography on a clear night sky Memorable Jaunts Lifestyle Photographer Naperville Illinois

    My first (and last attempt) as photographing the moon on a clear night! – it was much harder than I expected!

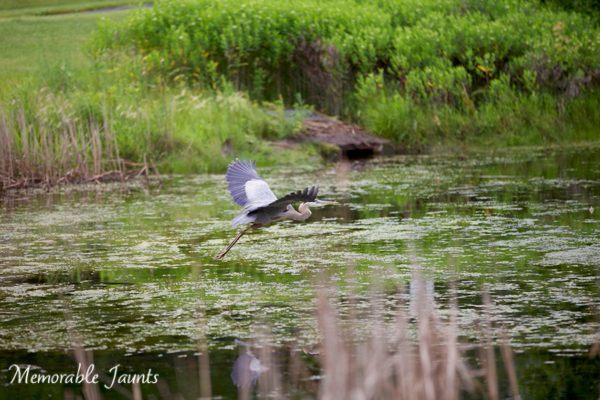
    Great Grey Heron in Flight Bird Photography Memorable Jaunts Lifestyle Photographer Naperville Illinois

    I love dabbling in bird photography – a nice change in subject from my normal wedding and family portrait clients

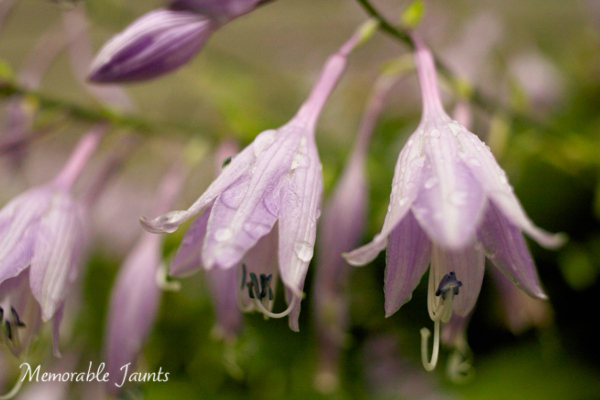
    Macro Photography of Purple Flowers Memorable Jaunts Lifestyle Photographer Naperville Illinois

    Macro photography is another easy subject to find in nature or with everyday household items

    Now that you know why you should have one or more personal projects, the next logical question is how does one go about choosing personal projects.

    How to choose personal projects

    There are several ways to choose personal projects. Here are some personal techniques I use several times during the year.

    #1 List your goals and derive projects and assignments that help you achieve that goal

    One of my goals for 2015 is to photograph more elopement and backyard weddings, as well as do some editorial work. To help achieve that, I have reached out to a few magazine editors, as well I plan on networking with other wedding photographers to possibly second shoot with them on smaller weddings as a way to get to my goal.

    #2 Write down a list of things that motivate you and pick assignments related to those items

    I love the outdoors with a passion. I love travel and everything associated with it. I carry my camera everywhere I go and try to document stories not just of my travels but also of the people I meet – something I plan to do a lot more of in 2015.

    #3 Look at your portfolio and see what is lacking

    Portfolio reviews are a great exercise to perform several times in the year. Match the images to your goals so you know where you are lacking – where do you stand now, and where do you want to go?

    #4 Review industry trends and pick topics that interest you – either related to gear, techniques or even subjects

    There are easy special assignments to give yourself like photographing with only one lens for a week, photographing one subject with a wide range of lens, or black and white architectural images. Another technique that is fascinating is low light photography – really pushing the limits of your camera to change the look and mood of an image.

    Popular personal project ideas to consider

    1. 365 series (a photo a day)
    2. 52 week series (a photo a week)
    3. Alphabet series (a photo for each alphabet)
    4. Gear related (a single lens for a week, prime lens only, macro, or film photography)
    5. Technique related (black and white images, low light images, leading lines or shadow play images)

    I hope this article has motivated you to delve into personal photography projects and assignments. They can be extremely rewarding and satisfying no matter what the outcome. After all, anything that motivates you to pick up your camera and photograph just for the love of the art, not necessarily for money, can only be a good thing, right?

    googletag.cmd.push(function() {
    tablet_slots.push( googletag.defineSlot( “/1005424/_dPSv4_tab-all-article-bottom_(300×250)”, [300, 250], “pb-ad-78623” ).addService( googletag.pubads() ) ); } );

    googletag.cmd.push(function() {
    mobile_slots.push( googletag.defineSlot( “/1005424/_dPSv4_mob-all-article-bottom_(300×250)”, [300, 250], “pb-ad-78158” ).addService( googletag.pubads() ) ); } );

    The post The Importance of Personal Projects for Professional Photographers by Karthika Gupta appeared first on Digital Photography School.


    Digital Photography School

  • The No-Fuss Way to Straighten Your Horizons in Photoshop

    No matter what type of photography you create, nothing screams “snapshot” more than an off-kilter horizon. This is especially true for landscape images where sloping horizons, even if just a few degrees off, distract from all your painstaking composition and patience for the right light. Unless your viewers can tell that you’ve shot at an extreme angle on purpose, the horizons in your images need to be horizontal.

    An off kilter horizon, not a pretty sight.

    An off-kilter horizon, not a pretty sight.

    If you weren’t able to get your horizon straight in camera, when you shot (because the ferry chain jerked big time right as I clicked the shutter in this shot!) you can relax – there is an easy ,and accurate way to do this in Photoshop.

    The One-click Tool for Straightening the Horizon

    The Photoshop Toolbox palette is a wondrous and often confusing place. Just like your old grandpa’s toolbox, it contains many mysterious things, many that rarely get used. But let me introduce you to the simple Ruler Tool. What would a tool box be after all, without a ruler?

    The Ruler is “conveniently” hidden in the Eyedropper fly-out menu in the Tool Box Palette.

    Untitled-1 ruler

    Now let’s see how easy this horizon straightening job is with the right tool. With your image open, and the Ruler Tool selected, drag the ruler along the crooked horizon.

    rulertoolinaction

    No go to the Image>Image Rotation menu and select Arbitrary. Accept the default angle and hit OK.

    rotate

    You’ll see your horizon is now straight. All you need to do now is crop.

    straight

    Here’s a short video of this in action so you can see how quick and easy it is:

    Have you got any other super quick methods?

    googletag.cmd.push(function() {
    tablet_slots.push( googletag.defineSlot( “/1005424/_dPSv4_tab-all-article-bottom_(300×250)”, [300, 250], “pb-ad-78623” ).addService( googletag.pubads() ) ); } );

    googletag.cmd.push(function() {
    mobile_slots.push( googletag.defineSlot( “/1005424/_dPSv4_mob-all-article-bottom_(300×250)”, [300, 250], “pb-ad-78158” ).addService( googletag.pubads() ) ); } );

    The post The No-Fuss Way to Straighten Your Horizons in Photoshop by Alex Morrison appeared first on Digital Photography School.


    Digital Photography School

  • How to Create Dark Moody Low-Key Portraits with Minimal Gear

    To paraphrase Samuel L. Jackson in Jackie Brown, “Grids: when you absolutely, positively got to kill every lumen in the room, accept no substitutes.” Do you have a room or environment that you want to appear black? You don’t even need a black backdrop or the dark cover of night to create a dark, dramatic scene. All you need is a flash, a grid and enough space to allow your subject to be at least 5-10 feet away from any walls. As long as you can keep your strobe light from falling on the ground, background or other objects in the scene, only the subject will be illuminated.

    1

    The scene: If you want to black out your environment to create dark moody low-key images, look for shaded areas with enough space to allow at least 5-10 feet between your subject and the background. The darker the background wall is, the better.

    2

    The raw file: If you look closely, you will see that there is a bit of background detail, which can be easily eliminated in Lightroom.

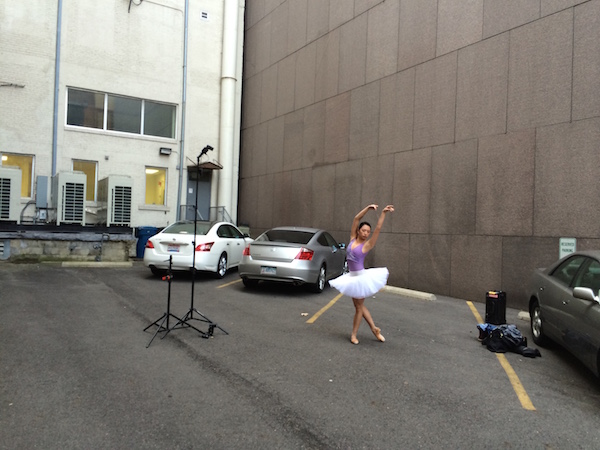
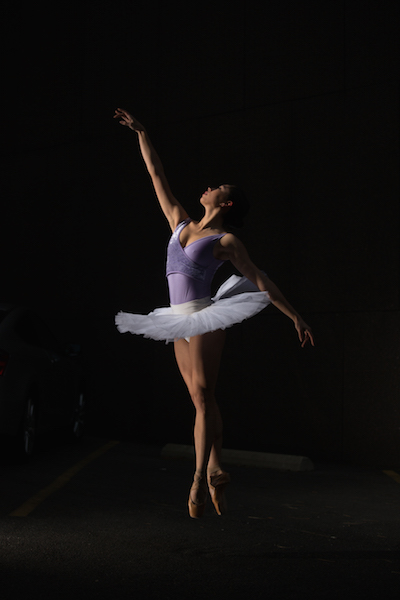
    It was a particularly windy day that I photographed ballerina Kristie Latham. Since I didn’t have an assistant, and sandbags were too heavy to lug around by myself (I was already pulling my case and carrying two light stands), I would have to shoot without light modifiers. Note, if I had added an umbrella to the light stand without it being sandbagged or held by an assistant, it would have blown over onto a nearby car within five seconds. Though an un-modified flash on a light stand can still be blown over by the wind, it’s much less likely to happen. That said, I still made sure that it wasn’t too close to any nearby cars.

    I wanted to highlight her form and the details of her outfit – specifically the tutu – so even though the light was going to be hard without modifiers, it would actually work out to my advantage. I began by setting up the main light. I placed it high – about 8 feet – in order to create dramatic, directional light. After taking a test shot, I saw that the light fell off below her tutu, since it came out about a foot from her body, causing her legs to go into shadow. To remedy this, I added a second light, placing it on the ground, aimed slightly up, to avoid lighting the ground. The second light worked at illuminating the lower half of her body (image above). By zooming the flashes in to a medium setting of 70mm, it allowed just enough light spread to cover her, while not spilling on too much of the environment around her. While a bit of background detail can be seen in the raw file, it can easily be removed in Lightroom in post-production.

    3

    The final shot: Kristie is now completely isolated in the void. Poetic.

    In a slightly different environment, I was doing a shoot with model Dani Dikeman, in a basement. She was in black body paint, wearing all black above the waist. I wanted the whole scene to appear black, save for the highlights on Dani and the textures of her outfit. It was a conceptual portrait shoot, this portion being the Hell portion of a Heaven/Hell-themed shoot. (The as-yet-to-be-shot Heaven scenario will, fittingly, be all white.)

    4
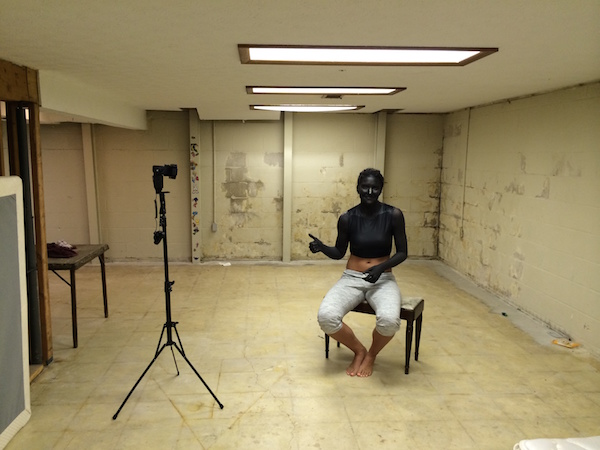
    The setup: This scenario took place in a basement.

    I met Dani at the makeup artist’s house, about an hour after they got started on the makeup, in order to give them a head start on the lengthy application. I knew that the basement was going to be an optimal shooting space because it was not only windowless, but wide open and barren. I quickly set up the sole flash, see above, and then waited while they put the finishing touches on the makeup and hair.

    5
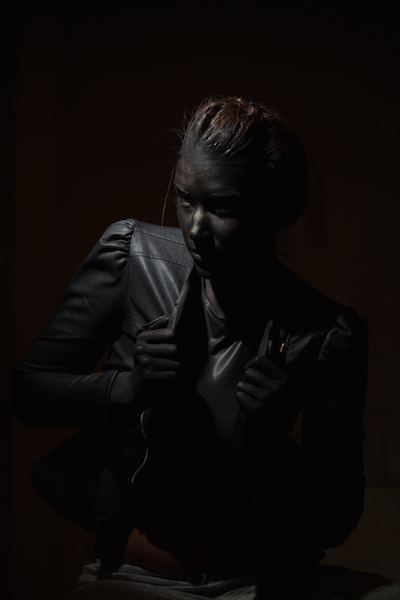
    The raw file: Though a bit of Dani’s unpainted abdomen and sweatpants are visible in the shot, a quick Lightroom adjustment would have the image ready to go.

    The shoot actually went rather quickly (15 minutes), which is ironic since the makeup application took two hours. Though the basement wasn’t especially large, by using a grid on my light to contain light from spilling on the nearby walls, the environment read pretty close to black in the raw files, as seen above. Although Dani’s unpainted abdomen and sweatpants visible in the shot, this wasn’t too big of an issue. Because the light falloff was so dramatic from her bust to her torso, a quick adjustment in Lightroom, lowering the exposure and it went easily to black.

    6
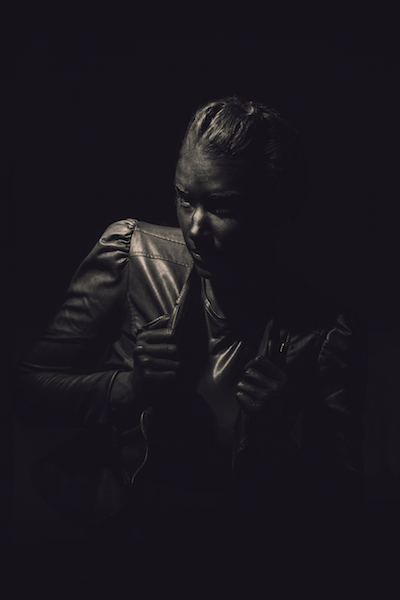
    The final shot. All black everything.

    Have you done all dark or low key images before? Have any other tips or comments to share?

    googletag.cmd.push(function() {
    tablet_slots.push( googletag.defineSlot( “/1005424/_dPSv4_tab-all-article-bottom_(300×250)”, [300, 250], “pb-ad-78623” ).addService( googletag.pubads() ) ); } );

    googletag.cmd.push(function() {
    mobile_slots.push( googletag.defineSlot( “/1005424/_dPSv4_mob-all-article-bottom_(300×250)”, [300, 250], “pb-ad-78158” ).addService( googletag.pubads() ) ); } );

    The post How to Create Dark Moody Low-Key Portraits with Minimal Gear by Nick Fancher appeared first on Digital Photography School.


    Digital Photography School

  • Shooting Winter Wonderland: How to Take Great Snow Images

    Shoot what you love. The Amazing Images Will Follow. That’s my motto. Above, you can see a shot of my daughters, Zoe and Tenley, on their first day of snow ever. Zoe wanted to hold the snow in her hands and blow it, Tenley agreed, and just as Zoe was blowing, Tenley reached up and whitewashed her face with the Continue Reading

    The post Shooting Winter Wonderland: How to Take Great Snow Images appeared first on Photodoto.


    Photodoto

  • Vanguard Vojo 25 Camera Bag Review

    Vanguard Vojo 25 camera bag review

    Earlier this year I bought a couple of mirrorless cameras. The camera bodies and lenses are smaller than those of my digital SLR system, so I also needed a new, smaller, camera bag to put them in. The one I chose is the Vanguard Vojo 25. I’m really happy with the purchase so I thought I’d share my experience for those of you in the market for a similar bag.

    Why I like this camera bag

    It’s light

    Shoulder bags soon weigh down on your shoulder no matter how well they are designed. If the bag is heavier than it should be, then that adds to the weight of your gear, and reduces the time you can comfortably use the bag. I learned this the hard way when I bought a Retrospective 10 shoulder bag for my dSLR. The bag is too heavy and, to be honest, I hate it. The Vojo 25 is much better.

    The Vojo 25 weights 920 grams (a little over two pounds).

    Vanguard Vojo 25 camera bag review

    The padded shoulder strap eases the weight of the bag on your shoulder.

    The design is well thought out

    This bag is really cleverly made. The shoulder strap is padded, so it doesn’t cut into your shoulder (something that should be standard on all shoulder bags). The flap that covers the bag is secured by both velcro and clips. There’s a zip in the top of the bag that you can leave undone for quick access to your gear, or keep closed for protection and security.

    Vanguard Vojo 25 camera bag review

    A zip in the top of the bag provides quick access to your gear.

    The padded insert is removable

    The insert that holds your gear is attached to the inside of the bag using velcro. It’s designed to be easy to remove so that you can use the bag for something other than holding your cameras. If you pull the straps on the side (the ones with the clips holding the flap in place) the bag is squeezed closed so it looks more like a satchel than a camera bag. The green version of the bag doesn’t look much like a camera bag, and does excellent double duty as a casual bag when required.

    Vanguard Vojo 25 camera bag review

    The removeable padded insert. You can zip it shut, making it ideal for storing your gear elsewhere while you are using the bag for something else, or even putting into another bag.

    Vanguard Vojo 25 camera bag review

    The side buckle that holds the bag’s flap shut.

    Vanguard Vojo 25 camera bag review

    If you take out the removeable insert and pull the side buckles tight the bag compresses into a satchel type bag, ideal for casual use.

    It has a waterproof cover

    Very important for those times when you’re caught out in a surprise rain shower. The cover protects both your bag and your equipment from the elements.

    There’s space for a tablet or a kindle

    The camera bag has a padded slot at the side that’s large enough for an iPad, or any tablet or kindle device the same size, or smaller.

    There are several Vojo bags to choose from

    If the Vojo 25 is too big or too small for you, there are several others in the range to choose from. The Vojo 28 is larger, and the Vojo 22 is smaller. The Vojo 13, Vojo 10 and Vojo 8 are much smaller, but even these mini versions come with a raincover and may be of interest if you just have one small camera to carry around.

    Vanguard Vojo 25 camera bag review

    The Vanguard Vojo 25 camera bag with a digital SLR, spare lens and iPad.

    Capacity

    The Vojo 25 can comfortably carry two mirrorless camera bodies with small to medium size lenses attached in the removable insert, a single mirrorless body and lens plus an extra lens or two, or a digital SLR with a small lens attached plus a second lens.

    The removable insert isn’t quite as big as the bag, leaving a gap at the side. That space is for the raincover plus any additional accessories you want to keep there.

    Vanguard Vojo 25 camera bag review

    The Vanguard Vojo 25 camera bag with two mirrorless cameras and iPad. The raincover is visible in the gap on the left-hand side.

    There’s also another padded slot at the front (ideal for a mobile phone), a small zipped compartment at the front (very tight, intended for small items such as lens cleaning cloths or lens caps) plus another small zipped compartment in the flap (again, suitable for small items like lens cloths and lens caps).

    Conclusion

    After two months of use I have to say I’m very happy with this camera bag and happily recommend it. I use it most of the day with a lightweight setup (one or two mirrorless bodies, a lens or two, plus a small water bottle). It’s ideal for photographers using mirrorless bodies or a single dSLR with small lenses (look at the Vojo 28 if you need more space). It’s a well-made bag that does exactly what it’s supposed to – protect my gear while simultaneously providing easy access.

    googletag.cmd.push(function() {
    tablet_slots.push( googletag.defineSlot( “/1005424/_dPSv4_tab-all-article-bottom_(300×250)”, [300, 250], “pb-ad-78623” ).addService( googletag.pubads() ) ); } );

    googletag.cmd.push(function() {
    mobile_slots.push( googletag.defineSlot( “/1005424/_dPSv4_mob-all-article-bottom_(300×250)”, [300, 250], “pb-ad-78158” ).addService( googletag.pubads() ) ); } );

    The post Vanguard Vojo 25 Camera Bag Review by Andrew S. Gibson appeared first on Digital Photography School.


    Digital Photography School

  • 10 Quick Photography Business Tips to Kickstart 2015

    It’s that time of the year – everywhere you turn, people are talking about new year resolutions, goals and targets. Be it health related, relationship related or even business related. If you have a professional photography business or even if you are an serious enthusiast who has thought about becoming a professional photographer, here are some business tips to help kickstart 2015.

    Memorable Jaunts Writing Business Goals Article for 2015

    A new year is the perfect time to set up new goals for your business.

    #1 Legitimize your business

    This can mean different things in different parts of the world. But the end result is almost always the same. Take whatever steps needed to ensure you are following the law in setting up your business the right way legally. In most countries, that means registering your business name, getting a tax ID number, and filing the appropriate paperwork with the local government. When you are legitimate, clients will appreciate and respect you even more.

    General Photography Business Tips From Memorable Jaunts for DPS

    Becoming a legit photography business goes beyond business cards, gear and website.

    #2 Create tangible, measurable and achievable goals

    I cannot stress enough the importance of creating professional goals. They form the anchor for your business and help you navigate the waters when things are going great, and when the waters turn rough. When you have a clear vision of where you want to go, nothing can stand in your way. When you are having a bad photography day where everything seems to be going wrong, revisit your goals and they will help you correct your course.

    Writing Goals for Your Photography Business

    Glitter glue and Shinny Stars are a must for any goal writing exercise – puts you in a good mood!

    #3 Invest in education

    The photography industry, like most industries, is constantly changing and evolving. As professionals we often forget to take the time to update our own skills and knowledge. Luckily there are many different avenues to get an update on what is the latest and greatest in the industry. There is no lack of online classes, articles, or even YouTube videos. Or if you are like me, sign up for a workshop or two – it is a great way to not only polish your skills, but also meet other photographers and make a connection or two.

    Memorable Jaunts Photography Education

    #4 Showcase your brand

    I really believe in the adage that there is only ‘One’ you. What makes your brand unique is you and your personality. There are millions of photographers out there, but there is only one you!  Differentiate yourself by showcasing your unique personality in your brand. You can do that in many different ways in your business – through videos, your interactions with your clients, the content on your website, and your images. My love for nature and the outdoors is very apparent in my images and my website. Travel is my inspiration and has its own page on my website. I love clean and fresh images and my editing style is minimalist – that is who I am, and my clients appreciate that and have come to expect it.

    #5 Streamline your workflow

    This was a great eye opener for me. Recently I sat down and documented my workflow from start (initial client inquiry) to finish (delivering products and getting paid). There was such an imbalance of time spent across various activities. Documenting the process not only helped me understand where I was wasting precious time, but also where I was spending too little time. I was able to automate some processes and streamline my workflow.

    Another personal tip – I turn off the internet and shut off my phone when I am editing a family session or a wedding. This really helps me focus and manage my workflow.

    Documenting your photography business workflow process

    #6 Differentiate yourself from the crowd

    Follow other photographers and gain inspiration from their work. But don’t imitate them – imitation stifles personal growth. Let your individuality shine through your own work. Not only will this help you stand out from the rest of the crowd, but it will also help you find your own voice and give you the confidence to take your art to the next level.

    Memorable Jaunts General Photography Business Tips for DPS

    My favorite motivational quote sits on my desk reminding me everyday why I do what I do.

    #7 Spruce up your blog

    We all know that having a blog is like having a voice on the internet. A blog helps clients interact with you. Make a conscious decision to update your blog regularly. Most people believe that updating your blog three times a week is really beneficial for SEO. If that is something that you can commit to, more power to you. Keep content fresh and exciting – don’t just blog about your sessions and post a bunch of images about the session. I categorize my blogposts as ‘Weddings’, ‘Portraits’, ‘Inspiration’ and ‘Personal’. Use your blog to showcase other aspects of your business – products you provide, gear that you love and why, or even who are you as a person – the face behind the camera.

    #8 Maintain your gear

    Check your equipment. This includes your primary camera, backup camera, and flash. Get cameras and lenses cleaned and serviced so that they are in top working order when you need them. I use Canon Professional Services Membership, which is a great service that is quick and efficient. Don’t forget the accessories – check reflectors for tears, missing tripod attachment plates, old batteries, and faulty memory cards. Keep everything ready for your photography season.

    Memorable Jaunts General Photography Business Tips for DPS

    I use a myriad of digital and film cameras – all my gear gets the same care and maintenance.

    #9 Update your website with your latest work

    I will be the first to admit this is generally one of the things I put on the back burner many times. However this is a key piece of the puzzle to attracting new clients. Showcase your best work on your website, blog, and other social media channels. Let your pictures speak volumes and keep the content fresh. Often times you are so busy photographing and managing your current clients, you forget about the new potential clients out there. Give those clients something new to look at so they keep coming back for more.

    #10 Maintain your health and general well being

    Perhaps this should be the first tip on the list. This is one of the most important things you can do for yourself and your family. Managing a photography business is hard and exhausting – both mentally and physically. I love photographing weddings but after every wedding, I feel like I have been run over by a truck! Set aside time to exercise, eat healthy, and schedule ‘retreat time’. Time away from the computer and camera to enjoy the other finer things in life! After all what good is a great photographic career, numerous awards, and accolades if you are not able, mentally or physically, to enjoy the glory.

    googletag.cmd.push(function() {
    tablet_slots.push( googletag.defineSlot( “/1005424/_dPSv4_tab-all-article-bottom_(300×250)”, [300, 250], “pb-ad-78623” ).addService( googletag.pubads() ) ); } );

    googletag.cmd.push(function() {
    mobile_slots.push( googletag.defineSlot( “/1005424/_dPSv4_mob-all-article-bottom_(300×250)”, [300, 250], “pb-ad-78158” ).addService( googletag.pubads() ) ); } );

    The post 10 Quick Photography Business Tips to Kickstart 2015 by Karthika Gupta appeared first on Digital Photography School.


    Digital Photography School

  • 5 Tips to Cut Your Portrait Editing Time in Half

    Editing is the bottleneck part of the workflow for many portrait photographers. We can shoot a great picture in mere seconds, but when it comes to editing dozens of images, it often feels like it takes forever. The biggest editing time saver is of course to get it right when shooting. There are countless things that can’t be “fixed” in Photoshop, but editing images isn’t meant to be the main part of a photographer’s job anyway.
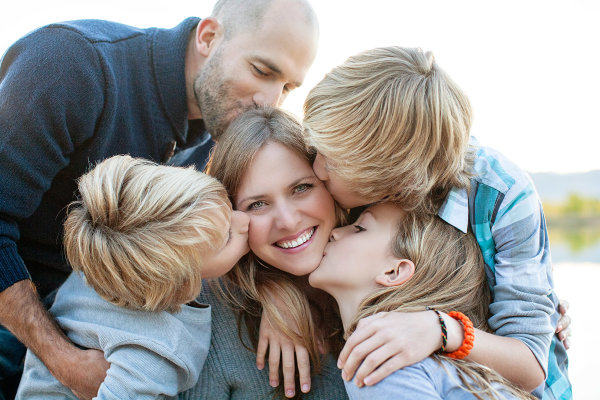
    lynseymattingly3

    I am always hesitant to talk about editing because I think it gets taken way too far, way too often and in those cases we aren’t talking about photo editing, but rather imagery manipulation (which is an art in and of itself, but an art completely different than portrait photography). All of that said, oh how I wish someone had taught me some tricks, and gave me some tips when I first started. You can learn to pose people, find good light and the ins and outs of your camera in time, but learning to edit is a frustrating and lengthy process that used to make me want to go pick-up an application at McDonalds.

    Professional photographers who have had great success are often so hesitant to tell their secrets and explain what they have learned. I have never understood that. I could tell you everything I do, exactly how I do it, and if you went about it the exact same way, you would still end up with a completely different image of your own. So here it is, my five best portrait editing tips (along with a bonus extra five tips below) to make your editing process more productive and hopefully much quicker. Because I use Photoshop, these are all geared in that direction, though there should be equivalents for nearly all image editing software.
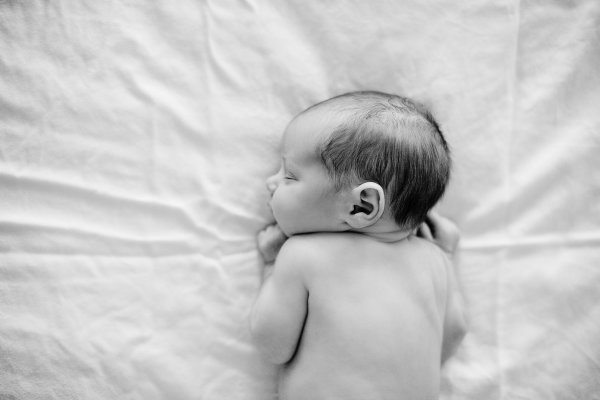
    lynseymattingly11

    #1 – Learn shortcuts and use actions

    All editing software offer keystroke shortcuts and actions (or similar) to make the things you do often easier and quicker. I could have a four year degree in Adobe and still likely just be scratching the surface of what can be done with photo editing software like Photoshop and Lightroom. Luckily I don’t have to store all of that in my brain (which is already pretty crowded with song lyrics and useless trivia), because I have memorized the keyboard shortcuts for the tools I use most often and have set up all of my customized actions to run on my F keys. Not only does this make editing ridiculously quick, it also means that I give 100% of my attention to a shoot and when it comes time to be an editing machine, I can sing-along to my terrible music and multi-task straight through it.
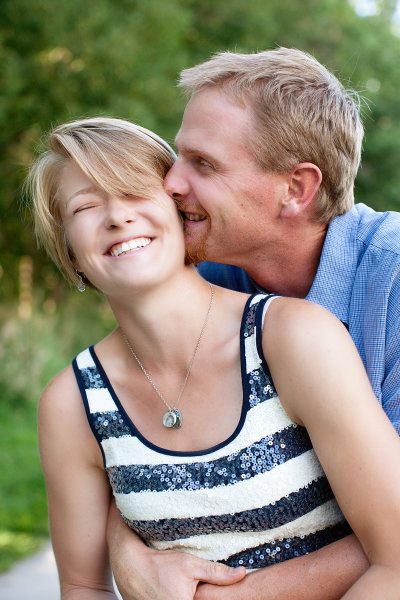
    lynseymattingly4

    #2 – Have one black and white and one color process

    Converting an image to a fun vintage or using your skills to cross-process is tempting, and maybe here and there, it’s fun. But the easiest way to scale back the amount of time you sit staring at editing software is to streamline your process and this means doing all of your images in the same manner.
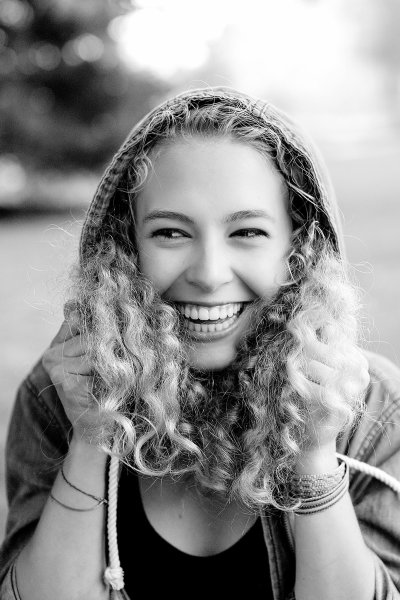
    lynseymattingly10I have one way that I do black and white images that I have programmed into a single action. Same with my color shots. I do whatever basic touch-up I’m going to do first, then I hit play for either my color or black and white action. Because I always photograph people, this simple task works for every photo I need to edit. It also has the added bonus of giving my images continuity and a signature look.

    My color images look different than yours – and they should! You should have a color process that gives people a hint that you took the image. Same for monochrome; I want someone to look at a black and white photo I took and know “that’s one of Lynsey’s photos”. This not only cuts down on editing time, but also helps define your brand.

    #3 – Run auto options

    When I get tired because I’ve been editing for hours on end, I can stare at an image forever and know that it needs something but I have no idea what. This is when it’s time for two things: to change the music you’re listening to and to run an “auto” function – auto color, auto tone, or the auto RAW image editor – not typically to use it, but to see what your software, in all its brilliance, thinks you should do. Sometimes it will have good ideas and sometimes it won’t, but it will always gives you a look at the image in a different way, which can be extremely helpful.
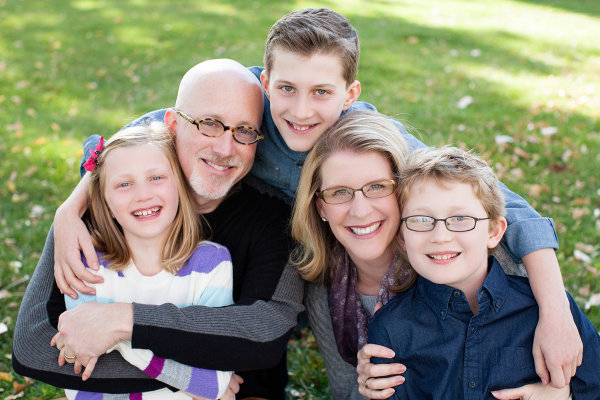
    lynseymattingly2

    #4 – Accept a few universal truths

    Everyone has one eye that is larger than the other. Kids will always have a scratch or scab somewhere. Double chins can happen to anyone. Most adults have a physical feature they aren’t 100% happy with.

    My husband has a gorgeous head of hair. At an age when many men are shaving their heads to supersede a bald spot, my husband gets asked if he does shampoo commercials. (He should, if only so we can become millionaires already, and get a pool.) You would think this would make for great pictures – not having to work with a shiny head reflecting everywhere – but you’d be wrong; you see, he hates his forehead. Which I think is ridiculous as it’s perfectly proportioned to his head and glorious hairline. But, even though he is my husband and knows I am always right, there is no convincing him on this issue. Nor is it my place to try when taking his picture.
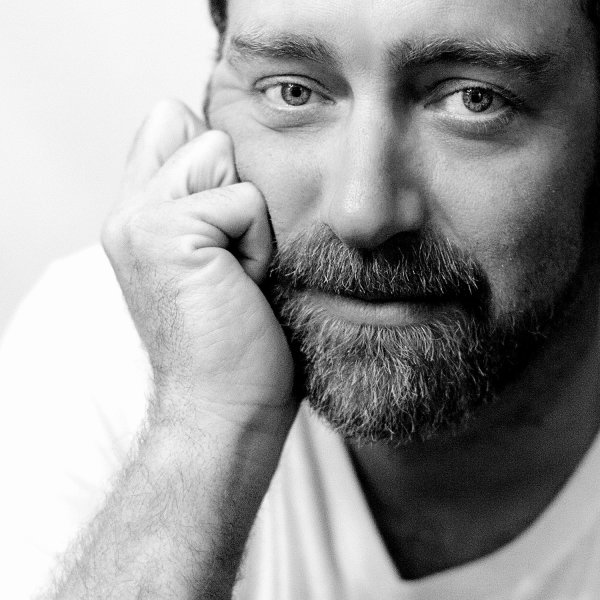
    lynseymattingly9

    The best thing I can do for anyone who expresses concern for a facial or body feature is give them a picture where they aren’t going to see their perceived flaw immediately. Pull out the great features so that you aren’t trying to both, take good pictures, and also change their mind.

    #5 – Aim for people to look exactly like themselves, turned up ONE notch

    You are not a plastic surgeon. We all want our clients to love photos of themselves but that shouldn’t come at the cost of you having to spend a great deal of time manipulating an image. My rule is simple: I don’t edit permanent features or make massive changes to faces or bodies. If you have a mole, I’m not going to touch it. But if you happen to have a pimple on picture day, fixing that is the least I can do for you. I sometimes dodge eyes lightly (keyboard shortcut O), but never in an obvious way. I may whiten teeth a bit (using the magnetic lasso and hue/saturation levels), smooth out a chin line (clone stamp and healing brush), or pull in a lumpy bit at the waist or otherwise (liquify and clone stamp), but only in a way that is more flattering and looks the way I know they usually would if they didn’t have a giant camera in their face, uncomfortable clothes on, and were running around after kids, or just generally feeling awkward like people tend to when someone is taking their picture.

    lynseymattingly8

    Like many other portrait photographers, I use a retouching tool (Totally Rad Pro Retouch action is my preference) that I apply liberally with the brush tool to all faces and then scale back by lowering the opacity. This allows for skin to look natural – normal skin has lines and freckles and areas rosier than others, but takes care of the small bumps and spots that cameras have a way of highlighting and putting on display.

    What happens when you blow it? You took shots that no amount of editing could make great? You vow to do it right next time, that’s what. Here is a little lagniappe from me to you:

    My five best quick portrait tips for getting it right in camera

    1.) Shoot from above

    Always have your subject lower than you so you are shooting downward. This can prevent double chins, unflattering angles, and in my husbands case, imaginary big foreheads. Unflattering portraits are most often due to bad camera angles and that is something that can’t be changed in any editing process.

    2.) Avoid “dead light”

    Shade is a wonderful thing for natural light photography, but large patches of shade, particularly in the morning hours, can often be very cold for color temperature. Everyone looks better with a little warmth, so strive to shoot in shady area that feel more warm in tone (think orange, yellow, red) than cool (blue).

    3.) Suggest solid clothing or large scale prints. Small prints on a shirt tend to make people look larger.

    4.) Photograph people doing something….anything. Avoid a boring portrait that is “all face” by having moment or action—this can be as small as involving their hands to frame their face or something more significant like leaning on wall or, my favorite, spinning.

    5.) Talk honestly with your subjects beforehand. Find out what features they feel most comfortable with and anything they would like you to avoid or watch out for. I’ve heard it all, from people swearing they have tiny heads to people who felt their large feet would throw off the entire photo. The single best thing you can to ensure they will like their photo is listen to them before you even take one. It is not your job to tell them they are wrong about their insecurities–it’s your job to try and show them they are likely being over-critical. Hear their words so you will be mindful of their concerns and photograph them looking beautiful. Or handsome. Or at least like they don’t have a big forehead.

    googletag.cmd.push(function() {
    tablet_slots.push( googletag.defineSlot( “/1005424/_dPSv4_tab-all-article-bottom_(300×250)”, [300, 250], “pb-ad-78623” ).addService( googletag.pubads() ) ); } );

    googletag.cmd.push(function() {
    mobile_slots.push( googletag.defineSlot( “/1005424/_dPSv4_mob-all-article-bottom_(300×250)”, [300, 250], “pb-ad-78158” ).addService( googletag.pubads() ) ); } );

    The post 5 Tips to Cut Your Portrait Editing Time in Half by Lynsey Mattingly appeared first on Digital Photography School.


    Digital Photography School