Category: Photography

  • Winter Wedding Photography Tips: All You Need to Know

    Winter weddings bring a lot of photography challenges because of weather, chilly winds and dark skies even in the day time. But still, many couples decide to have a winter wedding to enjoy the special discount on venues, catering and inexpensive honeymoon. The first thing that comes to our mind with winter weddings is bad weather– snowfall, temperatures below zero Continue Reading

    The post Winter Wedding Photography Tips: All You Need to Know appeared first on Photodoto.


    Photodoto

  • Is Your Tripod Sturdy Enough? Let’s Test it

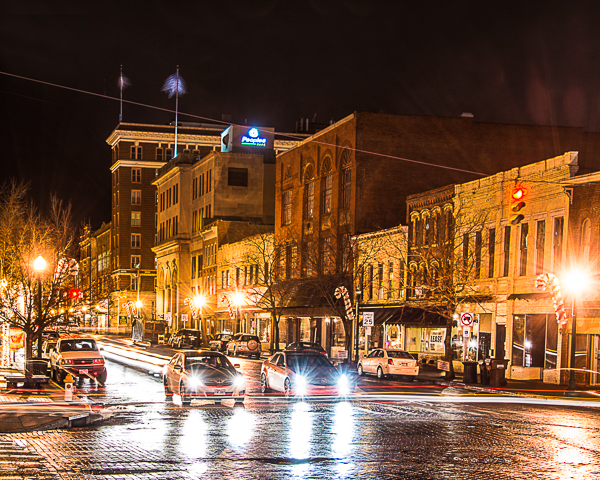
    If you are looking to take long exposure night shots like this 10 second exposure of downtown Marietta, Ohio, you'll need a quality tripod to give your camera a stable base.

    If you are looking to take long exposure shots like this 10 second night image of downtown Marietta, Ohio, you’ll need a quality tripod to give your camera a stable base.

    One of the most important pieces of equipment for a photographer to have access to is a sturdy tripod. You might be tempted to purchase just any tripod without regard to whether or not it is up to the job you are asking it to do, but a strong and stable tripod can be the difference between a great image and a blurry one.

    Warning: a high-quality tripod is not cheap! If you want a really functionable tripod, be prepared to invest more than a few dollars. However, in this article we are going to look at some ways you can test the tripod you are currently using to see just how effective it is. To begin, let’s examine a couple of tips that can make any tripod a little more stable.

    Tips for making your tripod stable

    • Tip #1 – If you are using your tripod for a long exposure, avoid extending the center column with the mount above the fulcrum.
    • Tip #2 – When setting the height of your tripod, make use of the thicker top sections of the legs before the thinner, less stable lower sections.
    • Tip #3 – If your tripod has different types of feet available, use the spiked feet to secure the ground for outdoor landscape shooting. When shooting indoors, use the rubber feet to prevent skidding on smooth flooring.
    • Tip#4 – When shooting outdoors on windy days, be sure to secure your camera strap. If the strap is blowing in the wind it will cause your tripod to move.

    Many photographers can be observed with their cameras mounted to tripods extended beyond their intended specifications. You may have heard that your tripod should be strong enough to hold a bowling ball. While this sounds funny, it’s a good idea to have a tripod that is rated for more weight than the combined weight of your camera and largest lens. For example, a tripod having no movement with a mounted camera and a 28mm lens may allow unacceptable movement with the same camera and a 300mm or larger lens.

    Regardless, even the best tripod will have some movement. Approximately 80% of the movement will most likely come from the head and the Quick Release mount, and very little actually from the tripod legs. There are many potential sources of vibrations, so let’s look at a series of tests that can help you determine if your tripod is up for the job you are giving it to do.

    Test Method #1

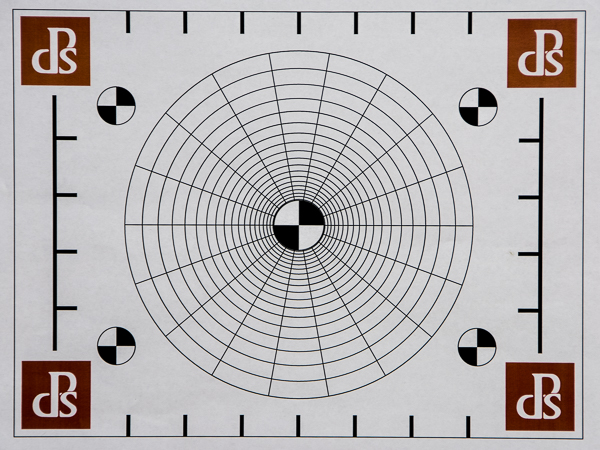
    Make a test pattern similar to the one below, or download the one I used here.

    Create a test pattern similar to this one.

    Create a test pattern similar to this one.

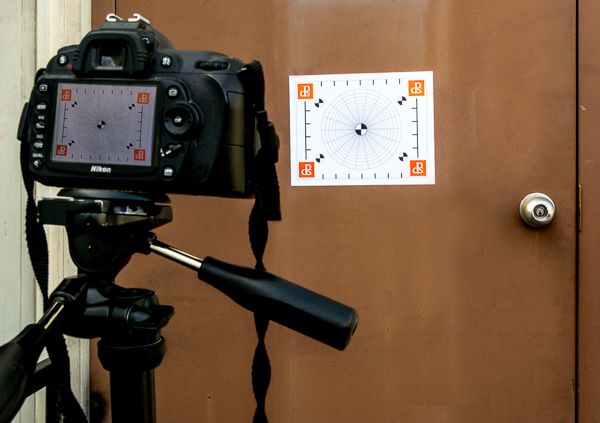
    Mount your print on a stable object with no movement. It’s important that the print has no movement at all. Mount your camera and heaviest lens combo on your tripod. Set up your tripod close enough to the target so that it fills the frame.

    What's wrong with this picture?  The center post is extended and the camera strap is hanging loose

    This setup has some problems. Can you spot them? Refer to the tips above.

    First, take a series of shots with a variety of different exposure speeds ranging for 1/100th of a second down to 1/2 a second. Use a remote or cable release to start the exposures. It’s also a good idea to use your mirror lockup feature to remove any camera vibration from the process.

    After completing this series of exposures, open the images in your choice of image software and check your target for any doubled or blurry lines which would indicate that your camera was moving during the exposures. If the faster shutter speeds are sharper than the slower ones, your tripod is not stable enough to use for shooting at slower shutter speeds.

    If your images show that you are getting movement during your exposures, the next step is to determine what part of you tripod is causing the problem.

    Shrink your tripod to its smallest height and repeat the test. If the results are not better, then your problem may be caused by your tripod head.

    Your problem could also be caused by your tripod’s leg locks, so test again with legs extended to different lengths, extending one, two or three sections and taking the same series of test shots.

    Repeat the process indoors, outdoors, and in windy conditions or with other camera and lens combinations.

    Test Method #2 – Multiple Exposures

    Many digital cameras have a setting for taking multiple exposures. If yours does, set your camera to take two or three exposures. Again using the test pattern, shoot a series of different shutter speeds ranging from 1/100th down to 1/2 a second.

    If your camera doesn’t have the multiple exposure feature, you can still use this method by simply taking two or three different images, then layering them over top of each other in Photoshop, and adjust the blending method of each layer so that all layers are visible. If your tripod is doing its job, all three images will be right on top of each other.

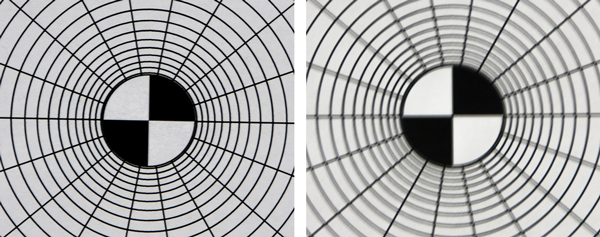
    The image on the left was created with a three shot multiple exposure set with a  1/2 second exposure on each. The fairly sharp image indicates that this tripod is up to the task. The image on the right was created with the same setting as the one on the left with another tripod, if you preview looks like this your tripod is not doing its job.

    Both of these image were created with a three shot multiple exposure with a 1/2 second exposure on each. The sharp image on the left indicates that this tripod is up to the task. The image on the right was created with another tripod. If your preview looks like this, your tripod is not doing its job.

    Test Method #3 – Live View

    Use the same test pattern as in the ones above. Focus your camera on the center of the target. Turn on Live View and zoom the preview to show the center of the target as large as possible.

    Remove your hands from the camera and tripod and see if the target remains still in your preview.  If the target in your preview continues to move, your tripod is not providing a sturdy enough base for your camera to produce sharp images at a slow shutter speed.

    Also in this method, try just touching and moving your camera strap. You may be surprised to see the preview move from just the slightest touch.

    Test Results

    If your tripod did not pass these tests, it is probably time to start looking for a better one. Be sure to check that the tripod is rated to support the weight of your camera and your largest/heaviest lens. If the tests show that your problem is in your tripod head, the solution might be as simple as replacing the head. If you have any other tips to enhance your tripod’s stability, please post in the comments below.

    googletag.cmd.push(function() {
    tablet_slots.push( googletag.defineSlot( “/1005424/_dPSv4_tab-all-article-bottom_(300×250)”, [300, 250], “pb-ad-78623” ).addService( googletag.pubads() ) ); } );

    googletag.cmd.push(function() {
    mobile_slots.push( googletag.defineSlot( “/1005424/_dPSv4_mob-all-article-bottom_(300×250)”, [300, 250], “pb-ad-78158” ).addService( googletag.pubads() ) ); } );

    The post Is Your Tripod Sturdy Enough? Let’s Test it by Bruce Wunderlich appeared first on Digital Photography School.


    Digital Photography School

  • How a Step Ladder is Useful for your Photography

    An-assistant

    The invaluable photography assistant

    Normally assistants play a key role on commercial shoots. They are integral to the team effort that is required to ensure a photo shoot goes as planned. They do a lot of the donkey work; moving lighting gear from one position to another; lugging camera gear around in general, and much more. The work of an assistant is unglamorous, tedious, and the hours are long.

    Assistants salaries will vary according to their level of skill, experience and employer, and they generally work freelance.

    When you are starting out in your photography career/hobby, a lot of time you are working solo trying build a nice portfolio, be it portraits, stock, etc. You don’t need to hire an assistant but an extra pair of hands is always welcome.

    I’ll paint a scenario. You have enlisted a family member or friend to volunteer for some portrait shots outdoors. You’ve also got another friend to help out as you need that extra pair of hands to hold a reflector. This is great way to keep costs down.

    However, such is life, your friend can’t make it on the day planned for the shoot. He/she has been struck down with a tummy bug! Blast, now what do you do? I’ve yet to work out how to hold a reflector and press the shutter button at the same time.

    Here are some of your options:

    1. You can still go ahead and work solo – you may not get the required lighting on your subject but you are getting the shooting practice which is always a good thing.
    2. Use your cell phone to call yet another friend.
    3. Ask a blank stranger who happens to be walking by.

    The first option is probably the safest. The other two require potentially losing a friend and trusting a blank stranger is risky.

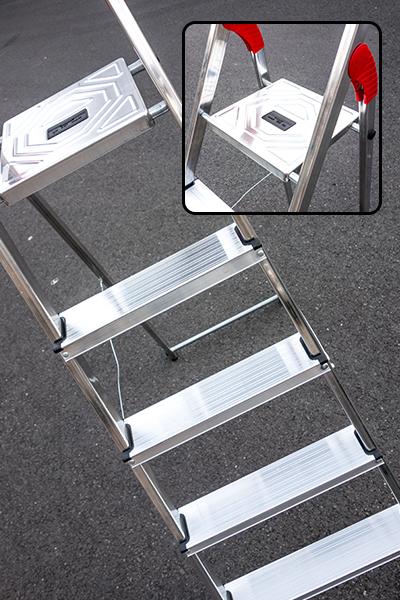
    Let me introduce you to the 5-step aluminium ladder. This is by no means a replacement for an actual pair of hands. But I have found it quite useful, and anything that helps is better than nothing at all.

    5-Step-Aluminium-ladder

    This 5-step aluminium ladder is very versatile and extremely lightweight.

     5 tips for using a step ladder in photography

    1. Portability – This particular ladder that I have weighs only 4.2kg/9.2Ibs. It can fit into my Volkswagon Golf car on the inside. If you have a roof rack, this is a better option, as it is so light to put it up and take it down. It is extremely easy to move it around with one hand.
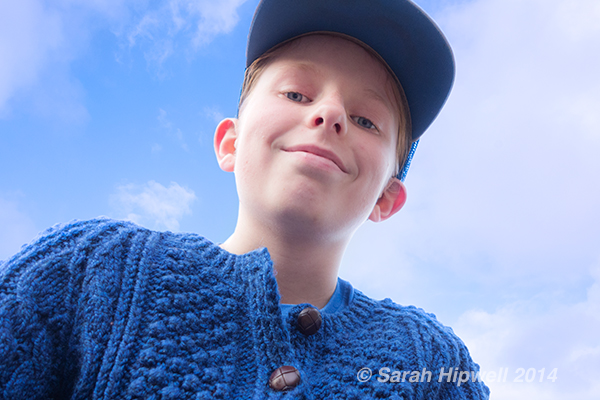
    2. Point of view – Getting that extra height for an overhead shot by standing on the fourth step and resting your knee on the top platform gives you more stability. A small child could sit on the top shelf and you could get a nice shot from underneath with a blue sky as the background.
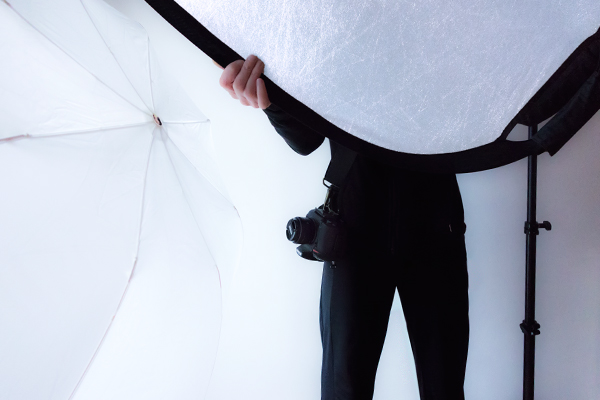
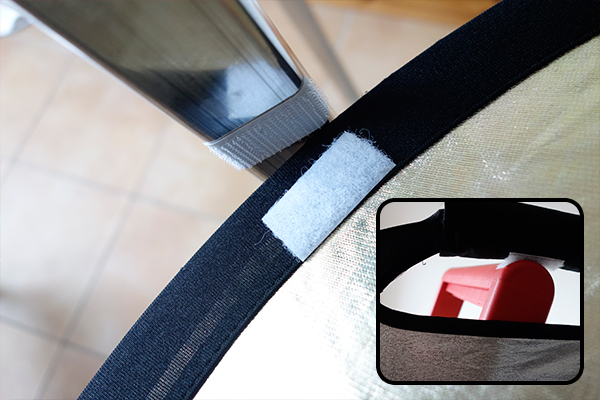
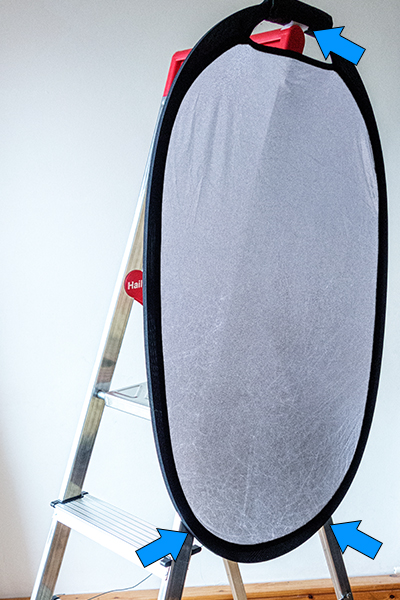
    3. Reflector holder – I find using reflectors for taking portrait shots indispensable, especially outdoors. For my reflector, I cut three self-adhesive velcro strips and attached them to the reflector and to the corresponding areas on the ladder. Once in place, you can then direct your subject from behind the camera on how far or near they stand next to the reflector. I tried it out on a really windy day. The day was overcast and I chose a spot under a tree to really test out the reflector. The reflector was securely attached using the velcro strips but as the ladder is so light, it was inclined to take off in the wind. I placed my camera bag on the top rung of the ladder which acted like a sandbag to stabilize it. Although crude, it did work.
    4. Helps eliminate camera shake – Hand holding your camera and resting your elbows on the top platform helps to reduce camera shake and provides added stability when holding your camera.
    5. As a make-shift light stand – You want to use one of your flashes off-camera but you have forgotten your light stand. Light stands can topple over if there is a gust of wind. Although, you could use sand bags arranged around the base of the stand to make it more stable. But, that is assuming you have such an item(s) or thought to bring them in the first place! This is where the extra pair of hands is great to hold the light stand.
    POV_worm_eye_view

    The top rung of this ladder is quite narrow, so there is only room for a small child.

    Velcro_strips_on_reflector_and_ladder

    Velcro self-adhesive strips on the reflector and on one of the ladder legs.

    Shot_reflector-in-place

    The reflector is attached to the ladder on left of the subject.

    reflector_ladder_self-adhesive_velcro-tape

    The reflector is attached to the ladder using three self-adhesive velcro strips.

    The design of this ladder is very stable considering how light weight it is.

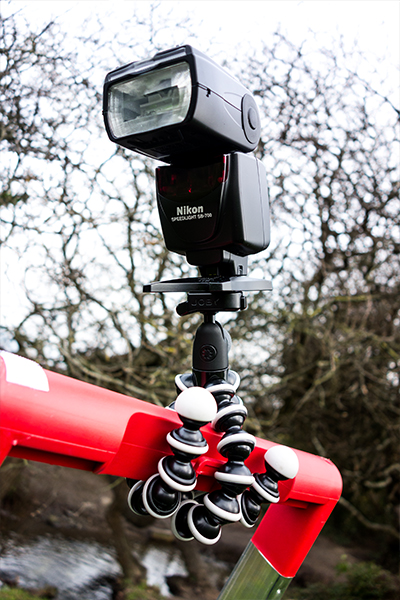
    I really love this Joby tripod where you pop on your flash and wrap it around the top part of the ladder. It is then easy to move the head of the flash in the direction you want.

    Flash_on_ladder

    Flash attached to the ladder using a Joby tripod.

    This type of ladder can be found in most people’s garages. Even if you don’t use it for your photography, it is still a very useful item to have. At this time of year, if you buy fir trees to decorate with baubles, tinsel and fairy lights, a step ladder is handy to put that star or whatever on top. In a few weeks time, you’ll need that step-up to take it down.

    googletag.cmd.push(function() {
    tablet_slots.push( googletag.defineSlot( “/1005424/_dPSv4_tab-all-article-bottom_(300×250)”, [300, 250], “pb-ad-78623” ).addService( googletag.pubads() ) ); } );

    googletag.cmd.push(function() {
    mobile_slots.push( googletag.defineSlot( “/1005424/_dPSv4_mob-all-article-bottom_(300×250)”, [300, 250], “pb-ad-78158” ).addService( googletag.pubads() ) ); } );

    The post How a Step Ladder is Useful for your Photography by Sarah Hipwell appeared first on Digital Photography School.


    Digital Photography School

  • How to Break Into the Photography Business with dPS Writer Gina Milicia

    Our very own dPS writer Gina Milicia was recently interviewed and asked about her thoughts on how to break into the photography business.

    She talks openly about how she got her break in the business and some of her struggles. I can totally relate to what she says about just wanting to do the thing you enjoy, no matter if you you get rich or make a living from it or not. Watch the video and see if you can relate to what she says too:

    “Just keep showing up every day and do something.” – Gina Milicia

    In this second video you can see the resulting images from some of the behind the scenes clips in the one above.

    Do you have any additional tips for someone just starting in the photography business? Please tell us in the comments below.


    Gina is the author of four dPS eBooks including:

    • Portraits: Making the Shot
    • Portraits: Striking the Pose
    • Portraits: Lighting the Shot
    • Portraits: After the Shot

    You can buy one for $ 19.99 or grab the whole bundle for only $ 49.99 (save 38%) from any of the links above.

    googletag.cmd.push(function() {
    tablet_slots.push( googletag.defineSlot( “/1005424/_dPSv4_tab-all-article-bottom_(300×250)”, [300, 250], “pb-ad-78623” ).addService( googletag.pubads() ) ); } );

    googletag.cmd.push(function() {
    mobile_slots.push( googletag.defineSlot( “/1005424/_dPSv4_mob-all-article-bottom_(300×250)”, [300, 250], “pb-ad-78158” ).addService( googletag.pubads() ) ); } );

    The post How to Break Into the Photography Business with dPS Writer Gina Milicia by Darlene Hildebrandt appeared first on Digital Photography School.


    Digital Photography School

  • Setting up Lightroom Mobile for First Time Users

    I laughed at Lightroom Mobile the first time I saw it. “Why would I ever want to use that stripped down gadget on a small screen?” And now, here I am about help you install and use it. Why is this?

    It’s because I have found how totally useful the app is in sorting through hundreds or thousands of images from the world of “any time, any where”. Most notably, in a comfy chair with good light or on a weekly airplane flight. iPads also became lighter and iPhone screens larger.

    Let’s start with how to set up Lightroom Mobile on your iPad or iPhone and then give some examples of how I find it useful in managing a huge library. I will be using a Collection of mine that is a work in progress to craft black and white images of the Himalayas.

    Setting up Lightroom for mobile use

    Connect Lightroom to your Adobe ID

    The first step is to make sure you have the right version of Lightroom on your PC or Mac. You need to have version 5.4 or later, you can download the latest version from Adobe here. You also need an Adobe ID (free) for this to all work as it is the hub in the cloud that makes this all spin. If you don’t have one, sign up here.

    With Lightroom open, you will notice in the upper left corner the phrase “Get started with Lightroom mobile”

    1

    Click the triangle next to the words and log in with your Adobe ID

    2

    You will then see that the top left of the screen has changed to the name you gave to Adobe upon creating your Adobe ID.

    3

    Great! Now let’s set up Collections to synchronize

    Setting up Collections to sync

    Lightroom Mobile will currently only work with Collections. If you need help setting up a Collection, the free Adobe video here will help. To enable a Collection for syncronization, simply right click on the Collection and choose “Sync with Lightroom mobile”. Pretty easy!

    4

    After clicking, you will notice a double arrow appears to the left of the Collection. This indicates the Collection will be syncing when sync is turned on.

    5 copy

    Now, up in the top left, Lightroom will let you know it is starting the sync of those images.

    6

    As a first pass, we are done! Simply repeat this process for Collections you have already created. Additionally, when creating a new Collection, there is a box that can be checked to automatically sync the new Collection. It looks like this:

    7

    Setting up your iPad or iPhone for use

    This is the easy part. First, ensure your iPad/iPhone is connected to the Internet. Go to the App Store and search for Lightroom Mobile.

    Peter-West-Carey-adobe2014-1217-0225

    Install (it’s free) and then start the app.

    Peter-West-Carey-adobe2014-1217-0229

    You will be presented with an Adobe ID screen after paging through the first time introduction.

    Peter-West-Carey-adobe2014-1217-0230

    After signing in you will be taken to a page showing all the Collections you have set up to sync on the desktop version of Lightroom.

    Peter-West-Carey-adobe2014-1217-0232

    Tap the main image and you will be taken to the Collection itself. The first time you run through Lightroom Mobile it will give you helpful contextual hints.

    Peter-West-Carey-adobe2014-1217-0233

    Tap on any picture to edit it.

    Peter-West-Carey-adobe2014-1217-0235

    Quick filtering with Lightroom mobile

    While there are a lot of features in Lightroom Mobile that make it useful for photographers, this post is going to concentrate on the basics to get you started.

    Now that you have a Collection synced to your iPad/iPhone (note: it might take a while to fully sync a larger Collection), you can start filtering. For me, filtering is the best use of this app, currently. I enjoy being able to filter my images from the comfort of my living room or while traveling. I also do some basic edits to images but I usually leave the major edits to my desktop. To filter images, I use both the flags and stars features. You can switch between changing those features by tapping the icons in the bottom left corner.

    Peter-West-Carey-adobe2014-1217-0238-2

    Peter-West-Carey-adobe2014-1217-0238

    When the flag icon is highlighted, as it is here, simply move your finger up or down on the screen to pick, unpick or reject images. These settings will then sync over to your desktop within seconds as long as Lightroom is open on the desktop.

    Peter-West-Carey-adobe2014-1217-0237

    Peter-West-Carey-adobe2014-1217-0239

    I use these two features to sort images. Flags are images I especially like and I know I want to work on back at my desktop. I then use two stars to indicate the image should be used for my stock photography work (the scale then goes up to three stars once edits are done, four stars when title and keywords are done and five stars when completely finished).

    There are a lot of editing options available in Lightroom Mobile that can be accessed from tapping the icons at the bottom of the screen on an individual image.

    Peter-West-Carey-adobe2014-1217-0241

    All of these features are best left for a future post.

    Offline use

    One last thing; Lightroom Mobile usually needs to ‘see’ your desktop’s version of Lightroom in order to show previews the first time and make edits. Therefor, once I have a Collection fully sync’d, I will then turn on Offline Editing which allows me freedom from wifi to make edits, knowing they will sync the next time I am online.

    To do this, click on the three little dots on the bottom of the Collection image:

    Peter-West-Carey-adobe2014-1217-0232-2

    This brings up a menu with many options.

    Peter-West-Carey-adobe2014-1217-0243

    Choose to Enable Offline Editing and Lightroom Mobile will now bring across Smart Previews of the images to your mobile device.

    Peter-West-Carey-adobe2014-1217-0242

    How do you use Lightroom Mobile

    Lightroom Mobile has a host of other features such as automatically uploading images shot on your iPhone/iPad into Lightroom on your desktop.

    What about you? What have you found useful in Adobe Lightroom Mobile?

    googletag.cmd.push(function() {
    tablet_slots.push( googletag.defineSlot( “/1005424/_dPSv4_tab-all-article-bottom_(300×250)”, [300, 250], “pb-ad-78623” ).addService( googletag.pubads() ) ); } );

    googletag.cmd.push(function() {
    mobile_slots.push( googletag.defineSlot( “/1005424/_dPSv4_mob-all-article-bottom_(300×250)”, [300, 250], “pb-ad-78158” ).addService( googletag.pubads() ) ); } );

    The post Setting up Lightroom Mobile for First Time Users by Peter West Carey appeared first on Digital Photography School.


    Digital Photography School
  • Weekly Photography Challenge – Spare Time

    Earlier we featured 36 images of people engaged in recreational activities, things they do in their spare time.

    Josh Hunter

    By josh hunter

    Weekly photography challenge – spare time

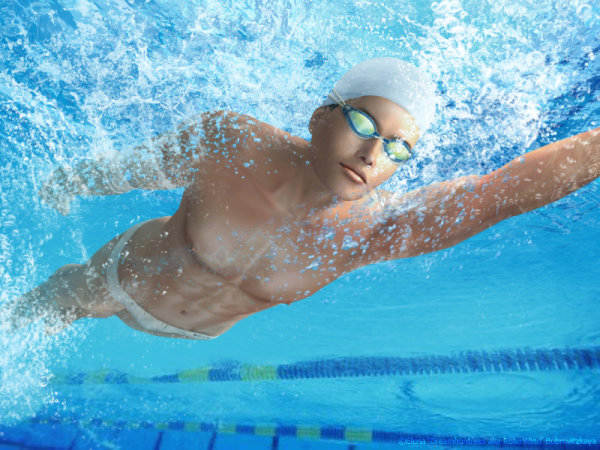
    This week for your photography challenge I urge you to think about what ELSE you do in your spare time. Do you read, cook, go bowling, ride a motorcycle, play sports, draw, or walk your dog? How do you spend your free time? What sorts of recreational activities do you participate in?

    Next go photograph some of these things. You could do a self-portrait or other people doing the things you enjoy doing as well. Such as:

    Elena Bobrovitzkaya

    By Elena Bobrovitzkaya

    David Yu

    By David Yu

    Dan Bergstrom

    By Dan Bergstrom

    Luke Addison

    By Luke Addison

    Andreas Hans J. Bauer

    By Andreas Hans J. Bauer

    Jonathan Haeber

    By Jonathan Haeber

    Share your spare time images here:

    Simply upload your shot into the comment field (look for the little camera icon in the Disqus comments section) and they’ll get embedded for us all to see or if you’d prefer upload them to your favourite photo sharing site and leave the link to them. Show me your best images in this week’s challenge. Sometimes it takes a while for an image to appear so be patient and try not to post the same image twice.

    googletag.cmd.push(function() {
    tablet_slots.push( googletag.defineSlot( “/1005424/_dPSv4_tab-all-article-bottom_(300×250)”, [300, 250], “pb-ad-78623” ).addService( googletag.pubads() ) ); } );

    googletag.cmd.push(function() {
    mobile_slots.push( googletag.defineSlot( “/1005424/_dPSv4_mob-all-article-bottom_(300×250)”, [300, 250], “pb-ad-78158” ).addService( googletag.pubads() ) ); } );

    The post Weekly Photography Challenge – Spare Time by Darlene Hildebrandt appeared first on Digital Photography School.


    Digital Photography School
  • What to Wear for a Photo Shoot: Clothing for Portraits

    What to wear? It’s an age old question. One that never goes away. And what to wear for a photo shoot even gets harder. Two weeks ago, Santa brought my oldest daughter, Zoe, ten BILLION outfits from across the globe. Knit sweaters, lace sweaters, casual sweaters, fringed sweaters…if there was a sweater being made, she got it, in addition to Continue Reading

    The post What to Wear for a Photo Shoot: Clothing for Portraits appeared first on Photodoto.


    Photodoto

  • 36 Energizing Images of Recreational Activities

    Some of you may be on vacation this week or have kids on school break. So what do you do in your spare time – besides photography that is? What do you do with friends or your family for fun?

    Here are some fun-filled images of people doing various recreational activities. Will it inspire you to take more photos – or try something new? I hope so.

    Photograph Aces in the Hole by Mark Miller on 500px

    Aces in the Hole by Mark Miller on 500px

    Photograph Card game in wartime (1914 -18) by de Vries eric on 500px

    Card game in wartime (1914 -18) by de Vries eric on 500px

    Photograph The Gambler Series: Image 1 by Twisty Focus on 500px

    The Gambler Series: Image 1 by Twisty Focus on 500px

    Photograph Find the lady by Ivor Sheehan on 500px

    Find the lady by Ivor Sheehan on 500px

    Photograph CUBA #035 by Marco Marotto on 500px

    CUBA #035 by Marco Marotto on 500px

    Photograph Chess Game by Konstantin Nabatnikov on 500px

    Chess Game by Konstantin Nabatnikov on 500px

    Photograph Chess by Anthony Hart on 500px

    Chess by Anthony Hart on 500px

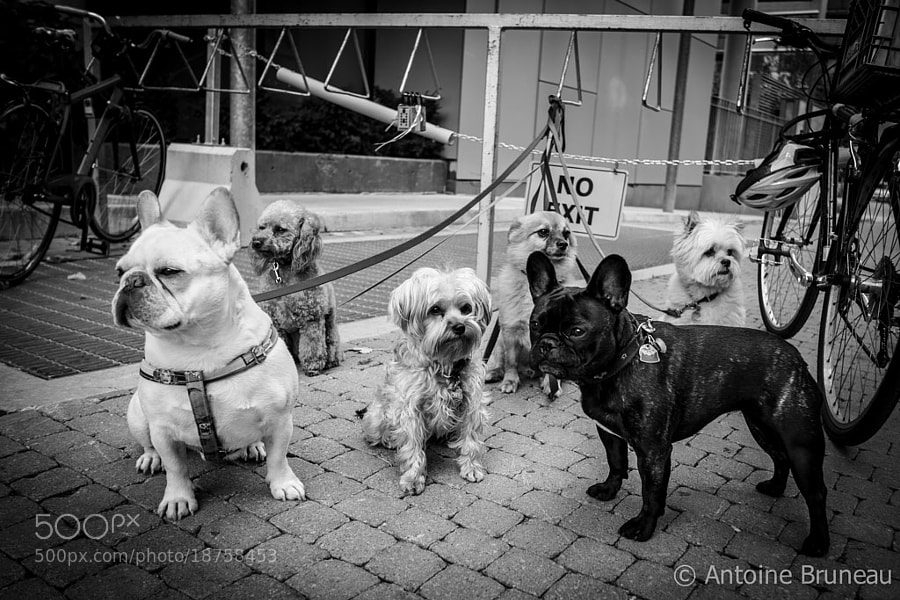
    Photograph Stay Pawsitive by Antoine BRUNEAU on 500px

    Stay Pawsitive by Antoine BRUNEAU on 500px

    Photograph Easy to walk the dogs? by WALL-AN  on 500px

    Easy to walk the dogs? by WALL-AN on 500px

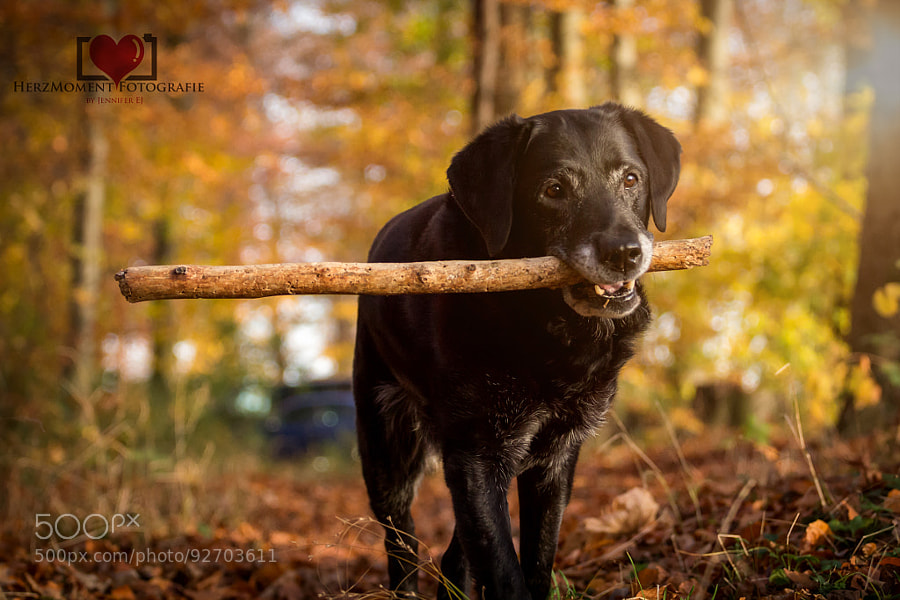
    Photograph The big stick by HerzMoment Fotografie on 500px

    The big stick by HerzMoment Fotografie on 500px

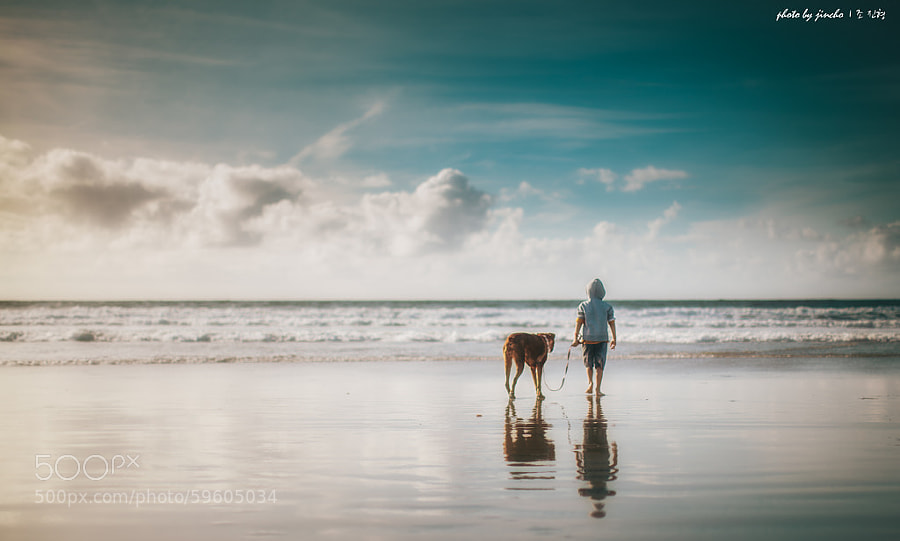
    Photograph Walk by Jin Cho on 500px

    Walk by Jin Cho on 500px

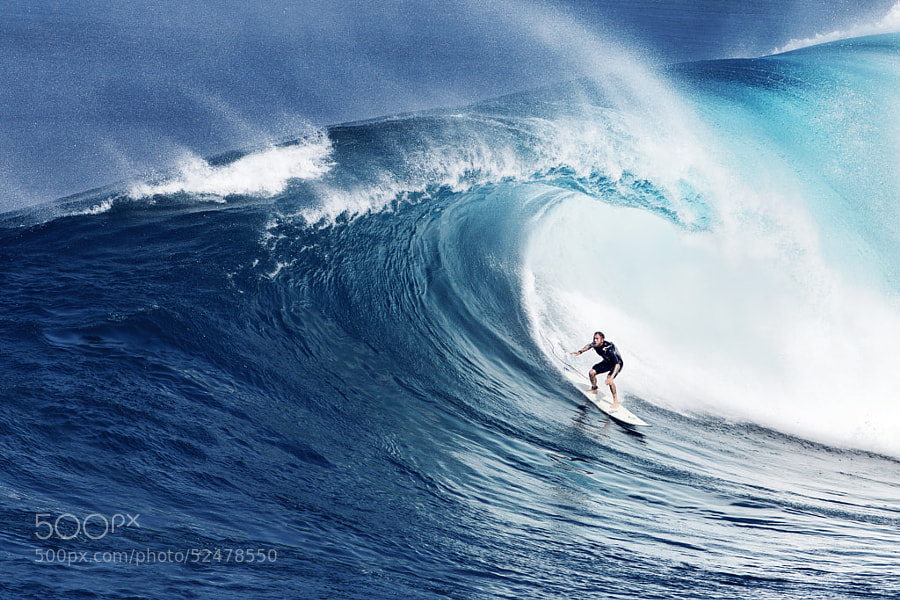
    Photograph Jaws, Maui. by Anton Repponen on 500px

    Jaws, Maui. by Anton Repponen on 500px

    Photograph Irish Gold by Roger Sharp on 500px

    Irish Gold by Roger Sharp on 500px

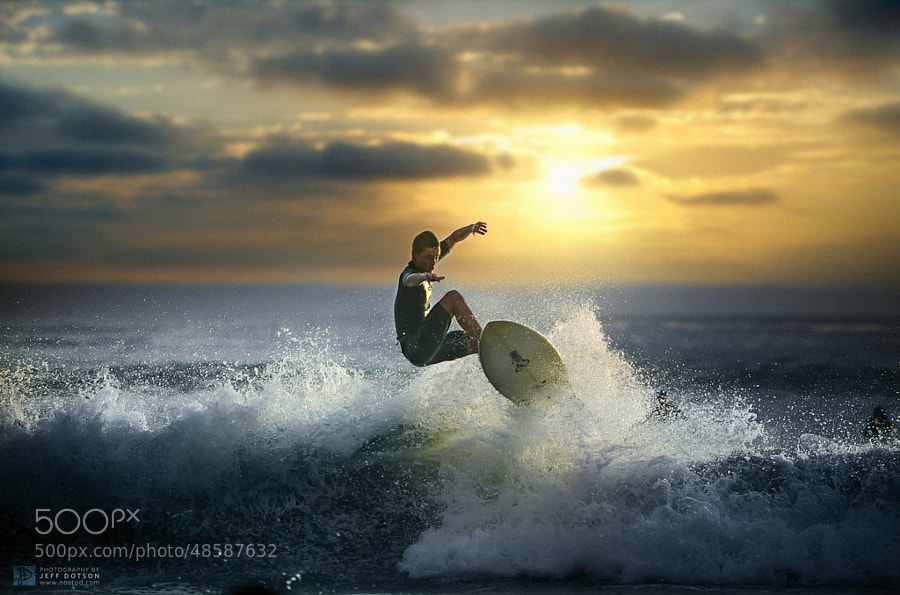
    Photograph Air Creek by Jeff Dotson on 500px

    Air Creek by Jeff Dotson on 500px

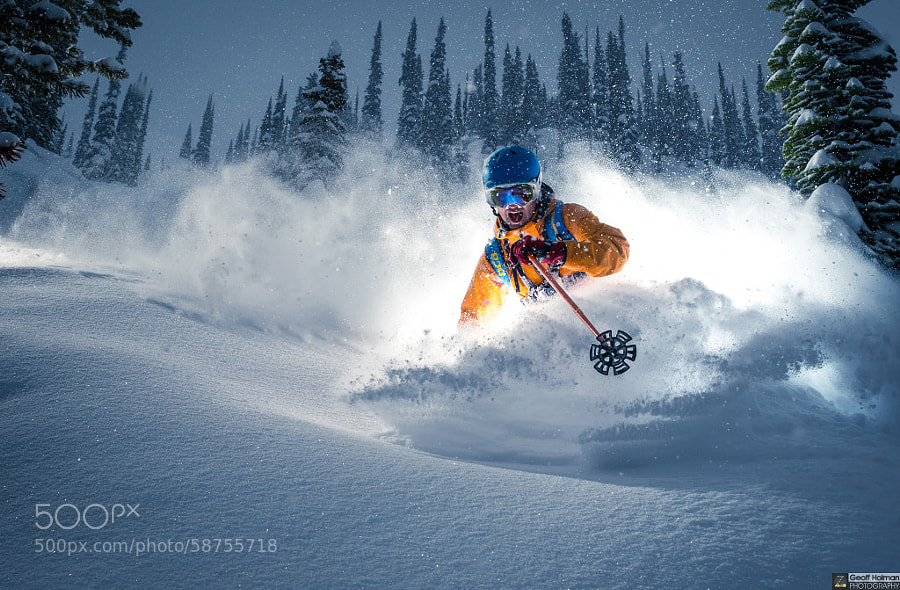
    Photograph True grits by Geoff Holman on 500px

    True grits by Geoff Holman on 500px

    Photograph "Blue" by Jure Makovec on 500px

    "Blue" by Jure Makovec on 500px

    Photograph The natural power of reading by Lara Zanarini on 500px

    The natural power of reading by Lara Zanarini on 500px

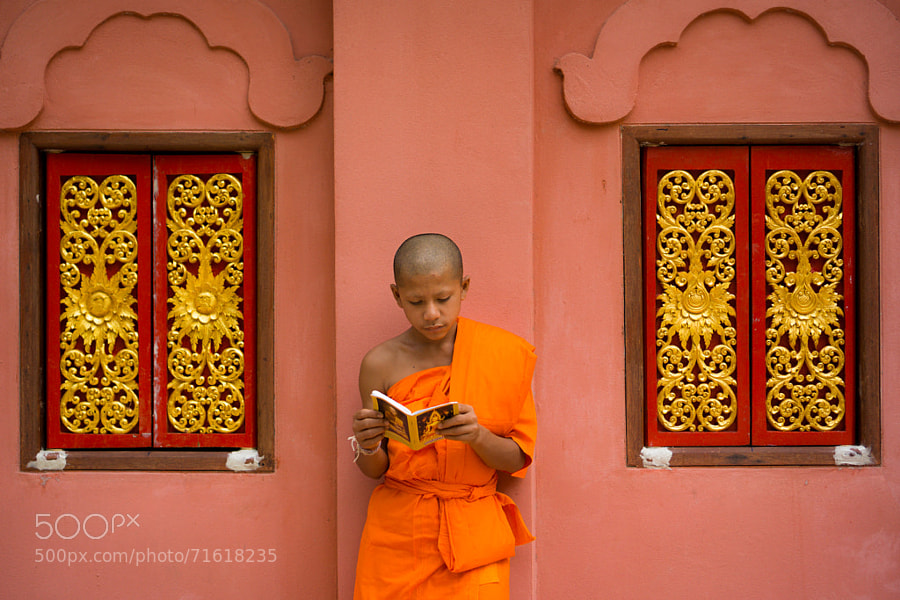
    Photograph Novice Monk Reading by Erik Pronske on 500px

    Novice Monk Reading by Erik Pronske on 500px

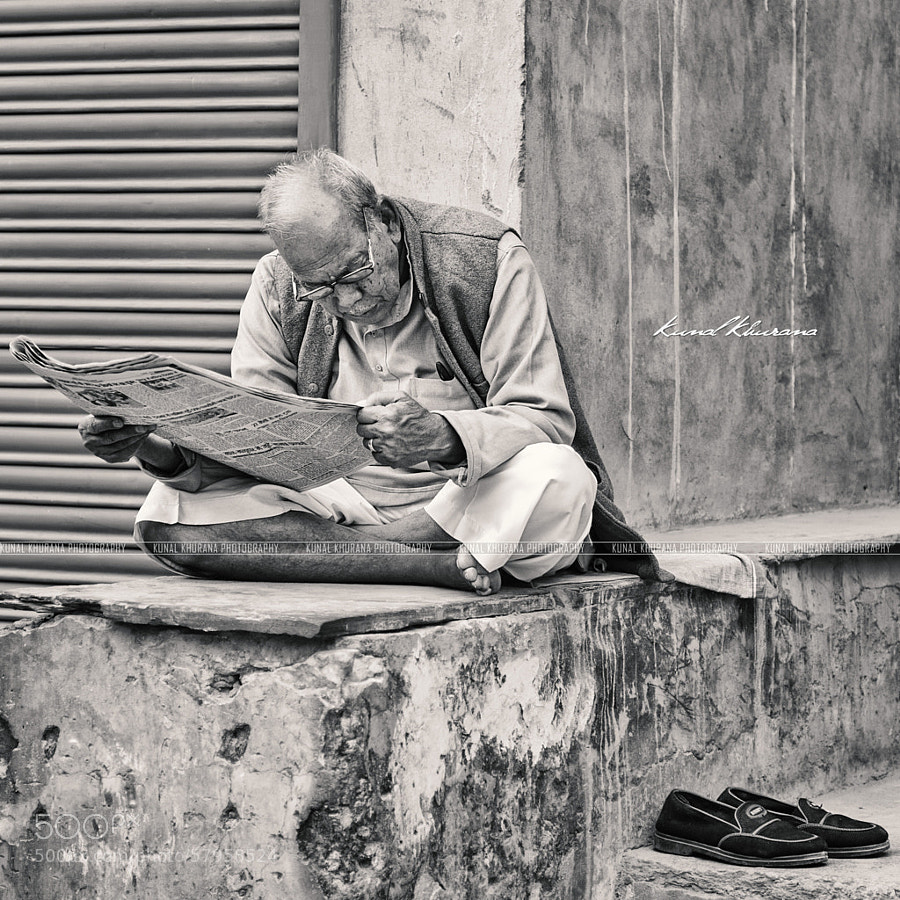
    Photograph Do Not Disturb! by Kunal Khurana on 500px

    Do Not Disturb! by Kunal Khurana on 500px

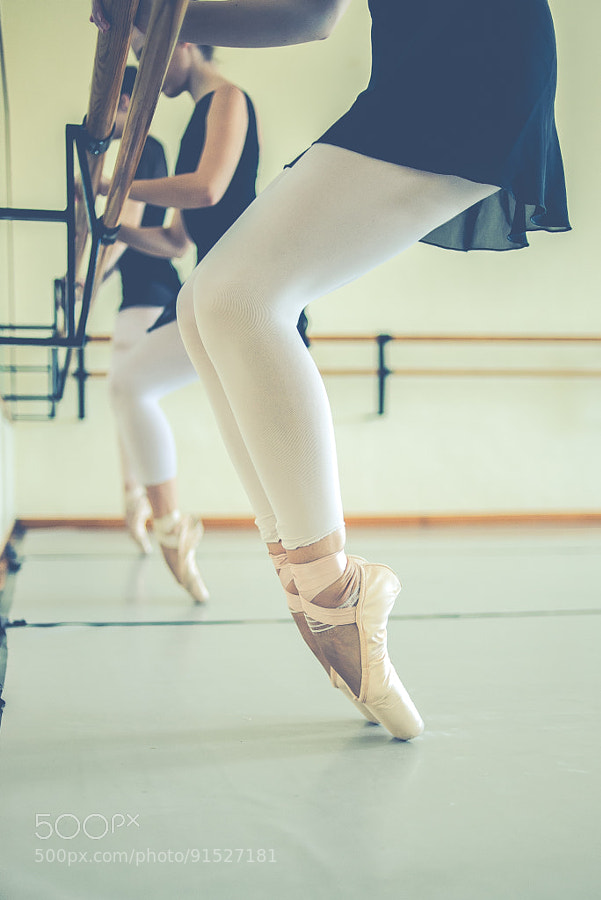
    Photograph Dance Class by M.A. Cabrera Luengo on 500px

    Dance Class by M.A. Cabrera Luengo on 500px

    Photograph The Dance by Richard Upshur on 500px

    The Dance by Richard Upshur on 500px

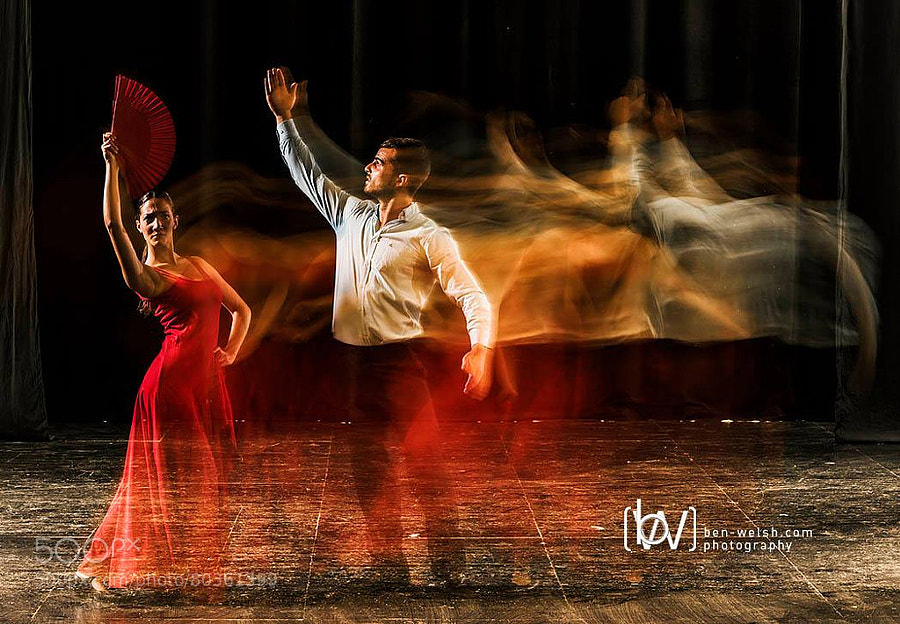
    Photograph Flamenco Dancers Photo by Ben Welsh by Ben Welsh on 500px

    Flamenco Dancers Photo by Ben Welsh by Ben Welsh on 500px

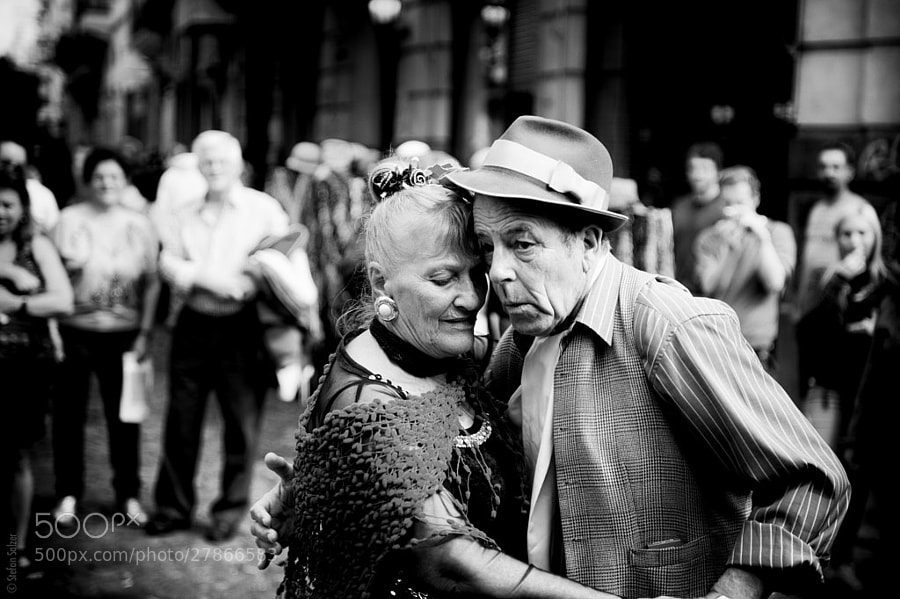
    Photograph Tango by Stefan S. on 500px

    Tango by Stefan S. on 500px

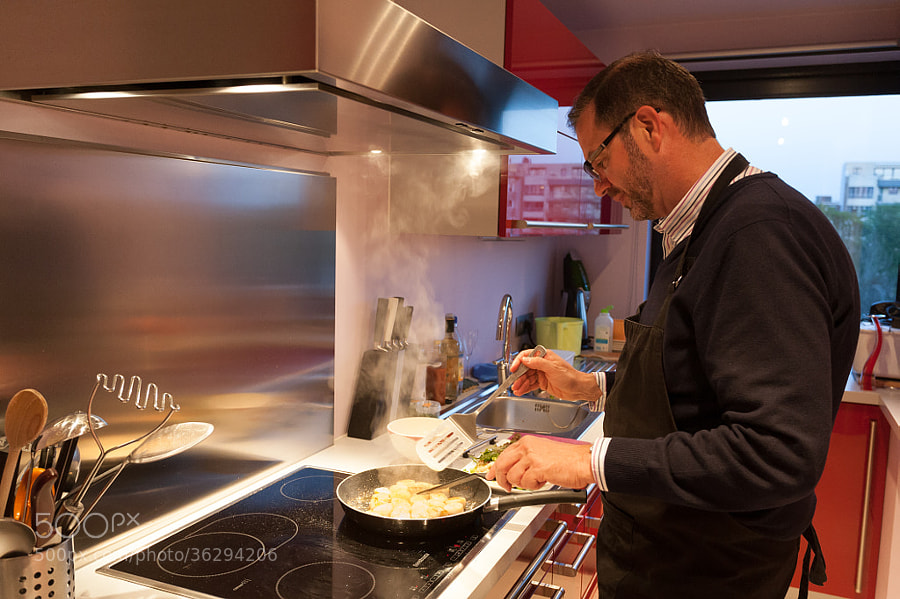
    Photograph Chef by Paul Indigo on 500px

    Chef by Paul Indigo on 500px

    Photograph yiayia Katina is cooking by katrin zdragka on 500px

    yiayia Katina is cooking by katrin zdragka on 500px

    Photograph Sunday Morning by Klas Wong on 500px

    Sunday Morning by Klas Wong on 500px

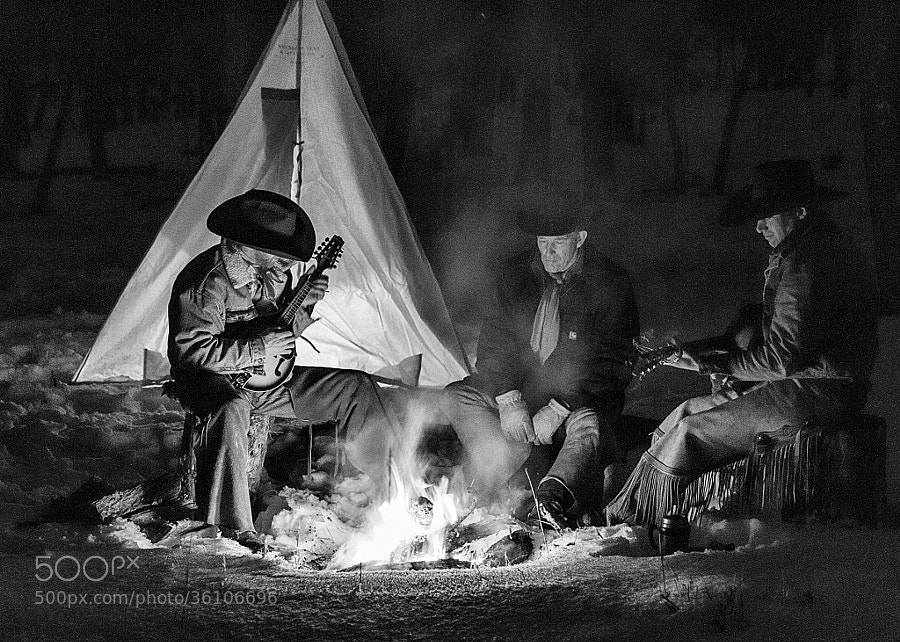
    Photograph Around the Winter Campfire by David  Bair on 500px

    Around the Winter Campfire by David Bair on 500px

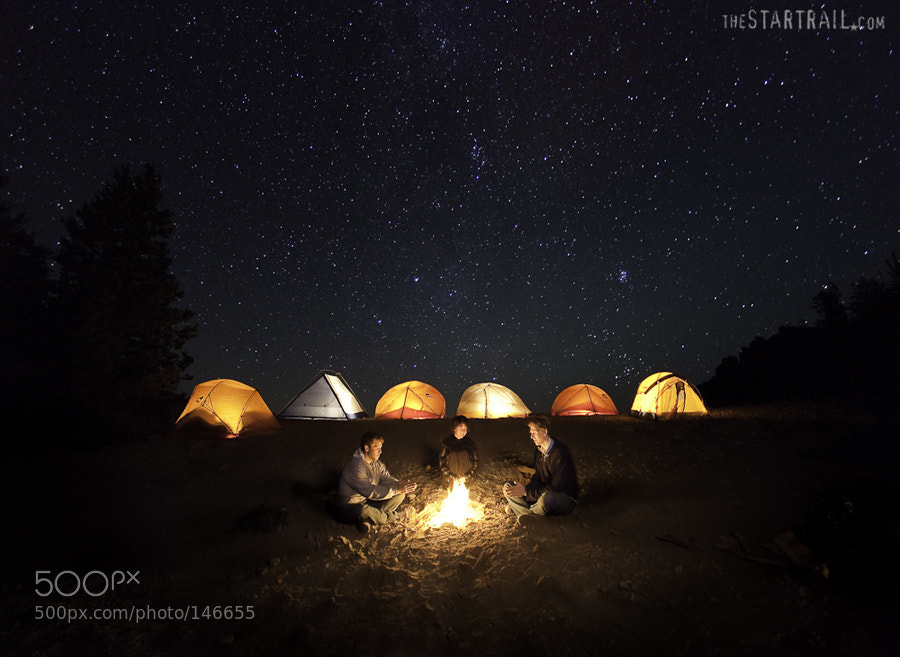
    Photograph with friends by Ben Canales on 500px

    with friends by Ben Canales on 500px

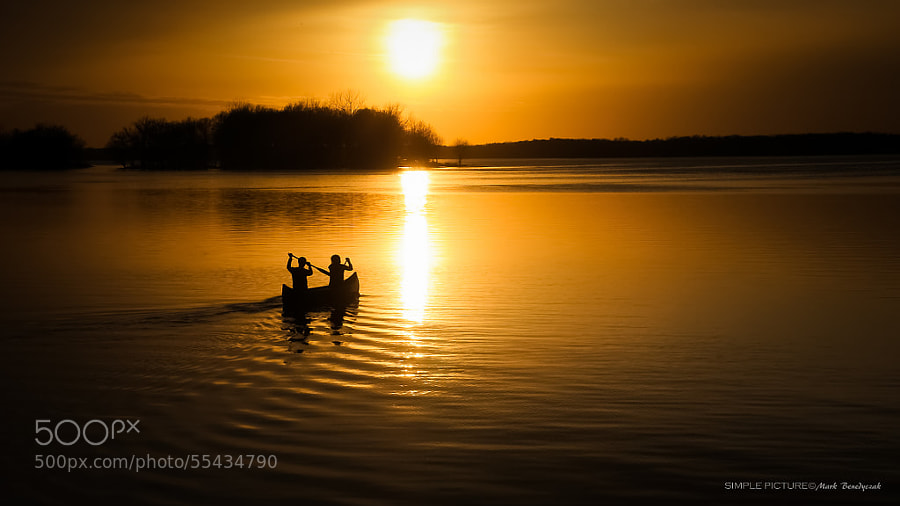
    Photograph The Journey - One Stroke At a Time by Mark L. Benedyczak on 500px

    The Journey – One Stroke At a Time by Mark L. Benedyczak on 500px

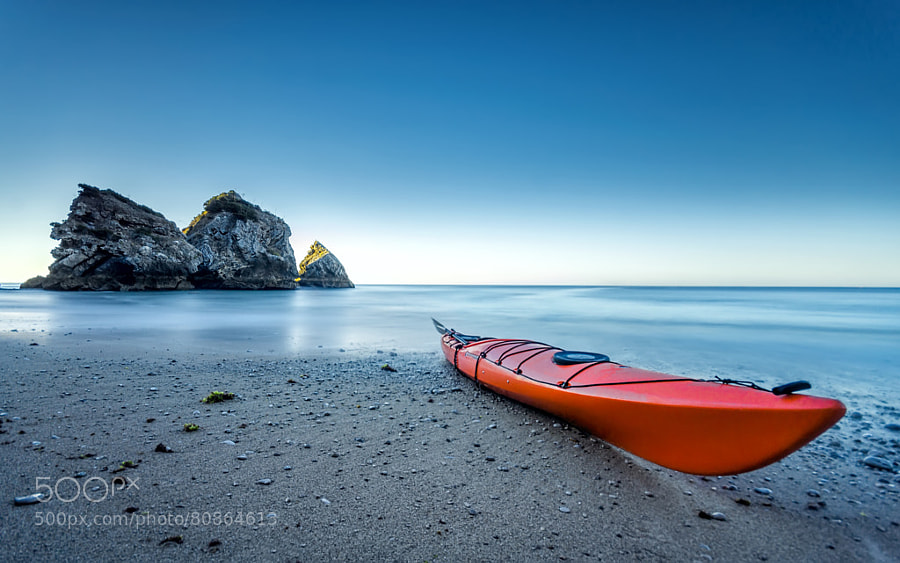
    Photograph The red kayak by Paulo Mendonça on 500px

    The red kayak by Paulo Mendonça on 500px

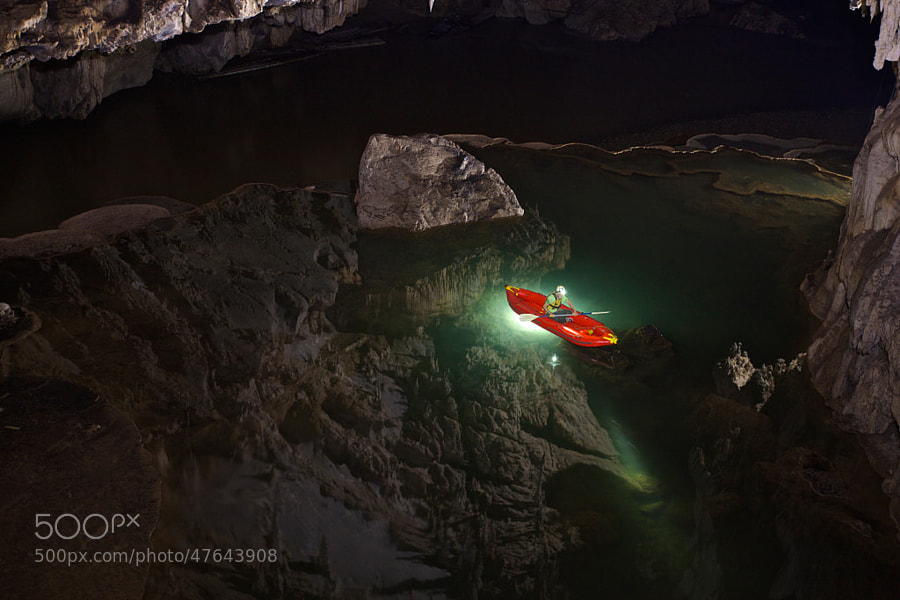
    Photograph Cave reflection by john spies on 500px

    Cave reflection by john spies on 500px

    Photograph Catch by Jessica Drossin on 500px

    Catch by Jessica Drossin on 500px

    Photograph Baseball 6 by Doug Day on 500px

    Baseball 6 by Doug Day on 500px

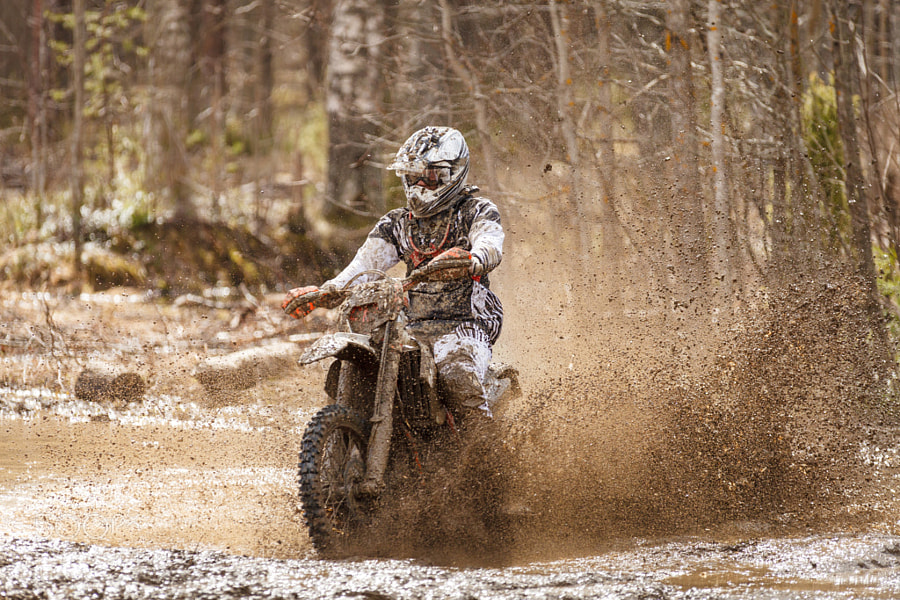
    Photograph Motocross Driver by Teemu Tretjakov on 500px

    Motocross Driver by Teemu Tretjakov on 500px

    Photograph A golden moment with the Honda by Daniel Kvick on 500px

    A golden moment with the Honda by Daniel Kvick on 500px

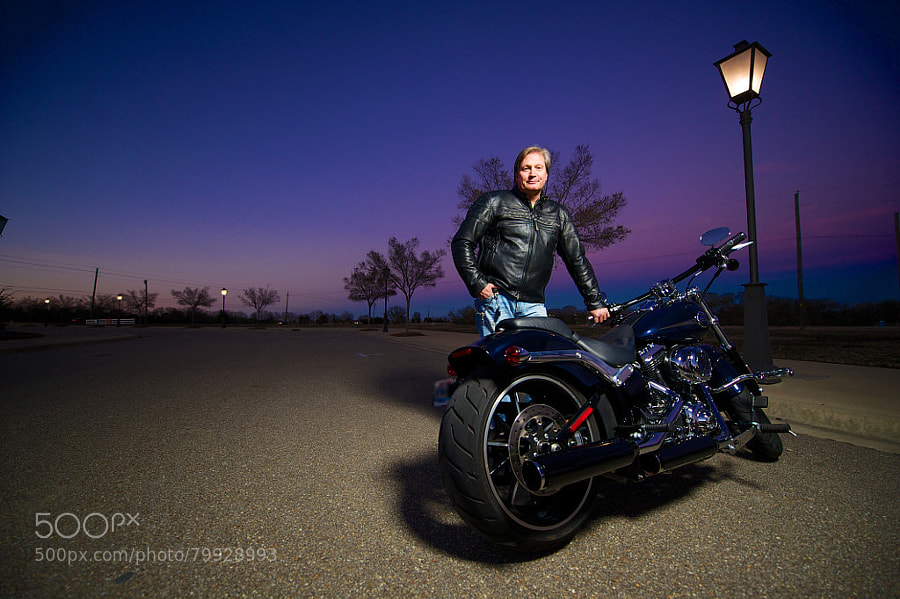
    Photograph A Man & His Bike by Josh Whitman on 500px

    A Man & His Bike by Josh Whitman on 500px

    googletag.cmd.push(function() {
    tablet_slots.push( googletag.defineSlot( “/1005424/_dPSv4_tab-all-article-bottom_(300×250)”, [300, 250], “pb-ad-78623” ).addService( googletag.pubads() ) ); } );

    googletag.cmd.push(function() {
    mobile_slots.push( googletag.defineSlot( “/1005424/_dPSv4_mob-all-article-bottom_(300×250)”, [300, 250], “pb-ad-78158” ).addService( googletag.pubads() ) ); } );

    The post 36 Energizing Images of Recreational Activities by Darlene Hildebrandt appeared first on Digital Photography School.


    Digital Photography School
  • How to Evoke Emotion with Your Images

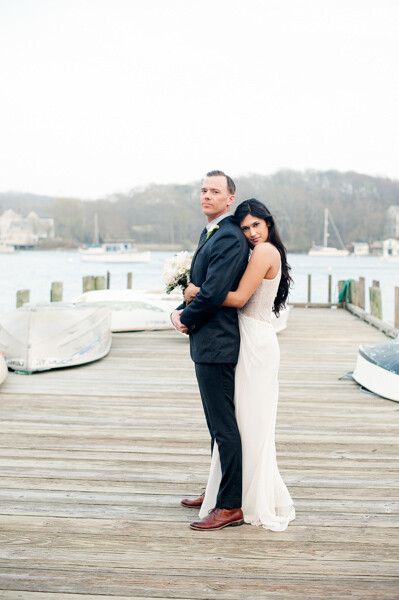
    The West WeddingSome of us come to photography because we want to learn how to take better pictures of our children. Some of us come to photography because we want to take better pictures for our business or blog. Many of us come to photography because we love art. For you artists, emotion is an integral part of your photography.

    You don’t have to wait until you’re a big time rock star photographer to evoke emotion with your images. Evoking emotion simply means that your photos say something. They may speak about something funny, moving, sad, or thoughtful. They might capture a mood, or put your viewer in a state of contemplation. Photos that evoke emotion simply portray a feeling. So how do you create that in your photos?

    Think about the feeling you want to convey

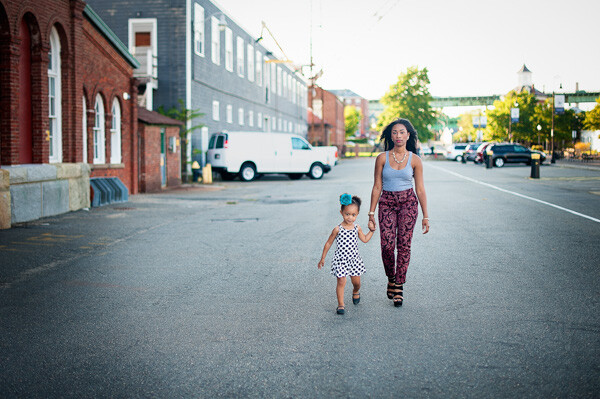
    Raising Strong Woman

    This mother feels it is very important that she raise her daughter to be independent and strong. By showing them walking hand in hand standing strong and tall, you get a sense of strength and independence.

    A large part of the business of photography is photographing families, and often times multiple generations. That is a perfect opportunity to play with evoking emotion. You can all do the standard sitting in the studio or standing on the beach but what if you take a few frames where you’re actually shooting with a bigger purpose? Think about framing a shot to convey a sense of strength in the women of the family. How can you show that these women are loving and encouraging toward one another? Body language, clothing, or even the setting can help you convey that message.

    Think about a mother and her small child. She loves her baby with all of her heart. How can you show that emotion? I often envision a woman in a flowy dress that cascades behind her. She’s holding her young daughter’s hand and leading her into the future. Can you imagine that? Just my description evokes emotion so just imagine what the photo will do.

    Consider your own feelings

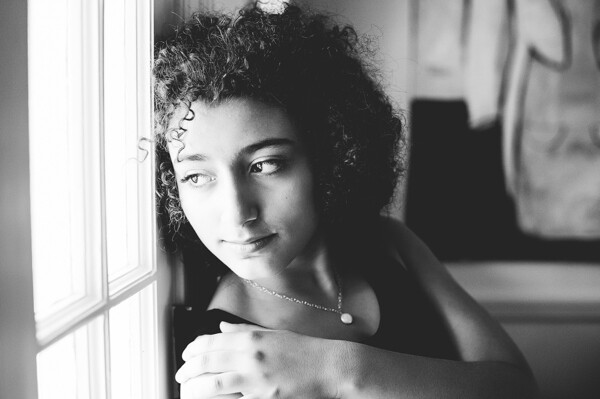
    Teen in thought

    This young teen is coming into herself as a woman and dealing with the changes in her life. Her gaze shows that she is deep in thought.

    Maybe you just want to express yourself for you. I find photography to be a great release. I love to express my emotions through self portraits. Evoking emotions based on your own personal experiences is a fantastic way to really learn this process. I recently decided to photograph myself without makeup, in the process of grooming. I did this because it speaks to those who struggle with imperfection. I often seem very put together, but I am just like every other woman. I took this sense of emotion and turned it into a photograph. You can do the same.

    Bare Monica

    Think about an issue that you are dealing with. It may be a sickness, or death in the family, a social issue, or even just joy in your life. How can you translate that into a photo project for yourself? You can also use your clients’ emotions to photograph them. Imagine that you’ve talked to your client and she has expressed that she’s having a very difficult time dealing with a family issue. You can help her express herself by photographing her in a way that she will be able to relate.

    Photograph landscapes, street settings, and inanimate objects

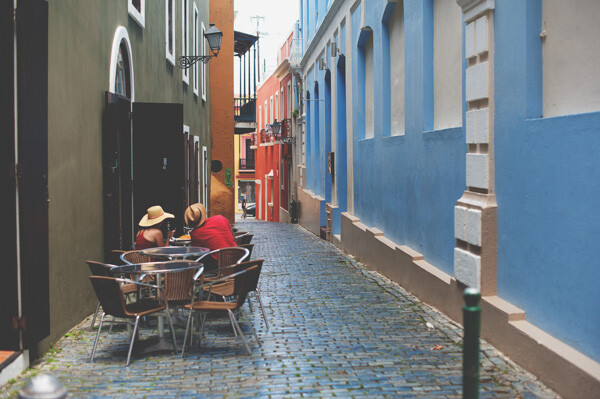
    Old San Juan Couple

    Street photography is a great way to capture emotion. You can make your photos tell whatever story you wish. This couple sitting alone in an alley in Old San Juan can mean anything you wish.

    You can evoke emotion through landscapes and objects around you. I started my photography career photographing the harbors, snow, and mountains of Alaska. You can evoke emotion in these types of settings by adjusting the times of day you shoot or even the conditions your shooting in. Fog is a lovely natural occurrence that creates instant mood. If your forecast is calling for fog then make sure you have your camera ready to head outside and grab some of that deliciousness.

    If you’re feeling particularly down and gloomy, then wait for that rainy day. Get outside with the raindrops and photograph something. Don’t feel like venturing outside in the weather? No problem. Use your wet window to create a bit of a screen to shoot through. Make it original so that your rainy window shot is different than the rest. Do you have a book, an heirloom, or a favorite object that means something to you? That’s a great way to add uniqueness to your emotional rainy photo. The idea is to use anything to create the feeling you want to portray.

    The Falls -01

    Street photography is wonderful when it comes to evoking emotion. You get to have people in their natural settings doing things that they naturally do. Your job is to frame your photos to convey the feeling you want to achieve. Are you longing for a loved one? Look for a couple that looks so in love and photograph them walking down the sidewalk. Use what you see around you to create the feeling you want to convey in your photographs.

    Evoking emotion is subjective to the photographer and the viewer. Your audience might not see what you intend but they will most likely see something. Many times we fall in love with a piece of art or a photograph and have no idea why. This is evoking emotion. This is your goal. Have fun with it and practice, practice, practice.

    googletag.cmd.push(function() {
    tablet_slots.push( googletag.defineSlot( “/1005424/_dPSv4_tab-all-article-bottom_(300×250)”, [300, 250], “pb-ad-78623” ).addService( googletag.pubads() ) ); } );

    googletag.cmd.push(function() {
    mobile_slots.push( googletag.defineSlot( “/1005424/_dPSv4_mob-all-article-bottom_(300×250)”, [300, 250], “pb-ad-78158” ).addService( googletag.pubads() ) ); } );

    The post How to Evoke Emotion with Your Images by Monica Day appeared first on Digital Photography School.


    Digital Photography School
  • Essential Accessories for Landscape Photography
    Have you ever hiked hours into the bush only to discover that you’ve left your tripod clip on your other camera? I confess I’ve done this and much worse. Many a choice swear word has been heard echoing in the valleys by all manner of wildlife. It’s a good thing there are no parrots where I go hiking.

    Inside a Landscape Photograhers Camera Bag

    Proper planning prevents disappointment

    I’ll admit I’m not the tidiest person, but when it comes to my camera bags, I now pack them with a microscopic fastidiousness that you’d expect from the likes of Hannibal Lector.

    I’ve learned the hard way that packing everything I need for a particular shooting environment will almost guarantee success – weather permitting of course.

    What to pack for fun landscape photography

    Let me share with you the essential gear that I usually pack into my camera bag. I think you’ll find it contains a few essential accessories you may not have considered before. I actually use three different bags for different occasions. I’ll use my largest bag for short hikes where I expect to be spending a lot of time shooting. I also use that large bag when I’m traveling internationally because I need to have ALL my stuff.

    The big bag – Lowepro Pro Trekker 450 AW

    Essential Landscape Photography Accessories

    1. Lens wipes
    2. Filters such as polarizers and neutral density filters
    3. Extra lens – in this case it’s the Samyang 14mm for shooting the stars
    4. Second camera – mine is the Sony A6000
    5. Third camera – this is the Gopro Hero 4 Black for quick and easy 4K video shooting
    6. Rain sleeve, or as I prefer to call them ‘camera condoms’
    7. Main camera – Sony A7R with a Canon 16-35mm lens
    8. Insect repellant – if I donate blood, it won’t be to those sodding mosquitoes
    9. Weather proof memory card holder
    10. Blower for lenses and sensors – this is essential if you switch lenses often
    11. Batteries for camera – as a Sony shooter I need three batteries to every Canon shooter’s one. I actually pack six
    12. Hand warmers – these handy little heat packs are a life saver. Just click the metal plate inside to trigger the chemical reaction and you have instant heat in your hand. They’ll probably be proven toxic eventually but until then I’ll remain in blissfully warm ignorance.
    13. Extra lens – in this case it’s the legendary Sigma 85mm 1.4 for those lovely bokeh shots
    14. Sensor cleaning kit for full frame and APS-C sensors. Absolutely essential
    15. (Image below) Battery grip for extended battery life. Most of the time I leave this off the camera. I use it for long duration time-lapse shooting
    16. Lens pen – for quick and easy removal of dust and water spots
    17. Headlamp (two) – avoid falling off cliffs or stepping in dung heaps during the night
    18. Battery chargers – I pack two chargers that I can plug into a wall socket or car
    19. Business cards – always be ready to promote your brand. You never know who you’ll bump into
    20. Battery pack – this device will charge/power my phone and battery chargers
    21. Spare tripod clips
    22. Extra storage for memory cards
    23. Tools – Allen wrenches for tripod maintenance
    24. Ear plugs are a life saver when you travel

    Landscape Photography Essential Equipment

    Not pictured

    • Laptop
    • Phone charger
    • Batteries for headlamps
    • Water bottle on the side of the bag

    The medium sized bag – Case Logic

    Medium Sized Camera Bag for Landscapes

    My medium sized Case Logic shown next to the Full sized Lowepro bag. This is just my own approximation of the scale comparison.

    If I’m planning on a large hike, I’ll actually use a medium sized bag that I strip down to the bare essentials. There’s no point dragging your entire kit list on a grueling 10 hour hike. In those cases you’ve really got to stop and think about exactly what you’re likely to need. Water is usually the most important. This bag is used for longer hikes and has a stripped down version of the big bag. I use a Case Logic bag which is about half the size of the giant camera bag show above. My medium sized bag weighs next to nothing empty and can fit most of the essentials needed for landscape photography.

    • Headlamps
    • Water
    • Camera batteries
    • Memory cards
    • Main camera with lens
    • Spare lens
    • Lens wipes
    • Blower
    • Lens pen
    • Rain sleeve
    • Filters
    • Insect repellant
    • Business cards
    • Ear plugs

    The small bag – Roots Safari

    Small Camera Bag

    When you can get away with only the minimum of gear, this bag will save your back and shoulders. This is my standard night photography bag. To be honest it’s nothing special, not even waterfproof but I never take it out in the rain anyway.

    • Headlamps (two)
    • Camera batteries
    • Memory cards
    • Main camera with lens
    • Lens wipes
    • Blower

    Safety first

    Many years ago I hiked nine kilometres around Uluru (Ayers Rock) in scorching heat with only one little bottle of water. Not the smartest thing to do, but having learned that hard lesson, it’s absolutely vital that you plan according to your environment. Desert photography requires a different kit list to arctic photography. It’s not just about what you pack into your camera bag but also the smaller things that you carry in your pockets. Water, food, gloves, phones and ideally a SAT phone are all things that need to be considered if you plan on staying alive and getting amazing photographs when you’re out in the wilderness.

    Whether it’s flash kits, ropes or umbrellas, I’d love to know what other essential accessories you’d bring on a landscape photography shoot.

    googletag.cmd.push(function() {
    tablet_slots.push( googletag.defineSlot( “/1005424/_dPSv4_tab-all-article-bottom_(300×250)”, [300, 250], “pb-ad-78623” ).addService( googletag.pubads() ) ); } );

    googletag.cmd.push(function() {
    mobile_slots.push( googletag.defineSlot( “/1005424/_dPSv4_mob-all-article-bottom_(300×250)”, [300, 250], “pb-ad-78158” ).addService( googletag.pubads() ) ); } );

    The post Essential Accessories for Landscape Photography by Gavin Hardcastle appeared first on Digital Photography School.


    Digital Photography School