Category: Photography

  • Posing Guide: How to Pose Groups without Losing Your Mind

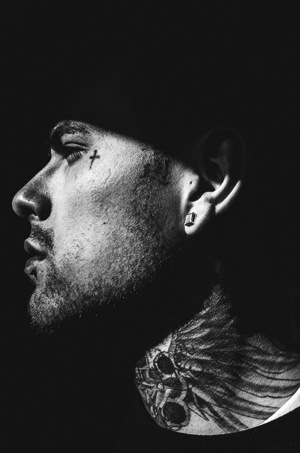
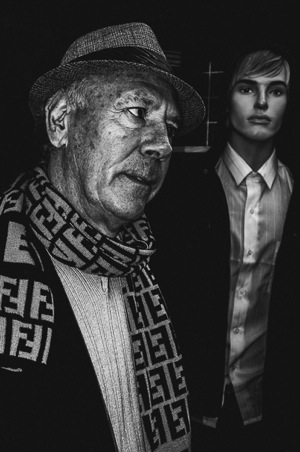
    The other day I had mom bring her daughter in for fine art dance pictures. “Oh, just snap away while she’s doing her competition routine… she doesn’t like to be interrupted,“ the mom said as the daughter grand jeted halfway off my roll paper half in the storage room, facing completely away from me. Shooting that would be crazy, right? Continue Reading

    The post Posing Guide: How to Pose Groups without Losing Your Mind appeared first on Photodoto.


    Photodoto

  • The Natural Light Cycle for Photographers

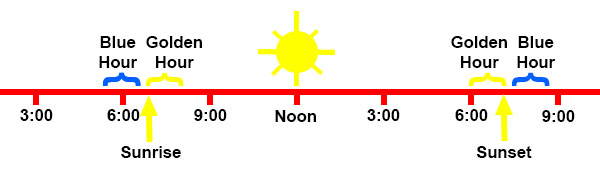
    Graphic showing best times of day for photography

    Natural light is what landscape photography is made of. Other forms of photography rely heavily on flash, but most landscapes rely entirely on the sun’s rays as their light source. That natural light from the sun is changing every second of the day. A picture taken at 9:00 a.m. will look fundamentally different than picture taken at 7:00 a.m., even if it is a picture of the exact same subject, from the exact same angle, using the exact same camera settings and focal length. Therefore, understanding these changes that occur throughout the day is critical to improving your landscape photography. By understanding these differing lighting conditions, you will know how and when to be set up and ready to take your landscape photos.

    These changes in natural light don’t just affect the overall lighting and exposure level of your photos, but also things like color and contrast. Different lighting will lend itself to different camera effects. So in this article we will take a quick walk through the times of day for the landscape photographer, focusing on the unique advantages and challenges of each.

    Morning

    Let’s start with the morning. An hour on either side of sunrise can be a bonanza for the photographer. Unfortunately for your sleep patterns, the photographer’s day does not start at dawn, but well before it.

    Some of the best photo opportunities occur before the sun is up. During this time, the sky is beginning to brighten, but the sun is not yet over the horizon. You will initially need to overcome the low light levels, meaning you will need a tripod and a remote shutter release.

    But with that hurdle overcome, there are distinct advantages to shooting before the sun comes up. You will not face overly harsh contrast, or a dynamic range problem since everything in your view will be somewhat dark. Further, because of the indirect angle of the sun’s rays, you will be treated to colors in the sky that you won’t see during the day.
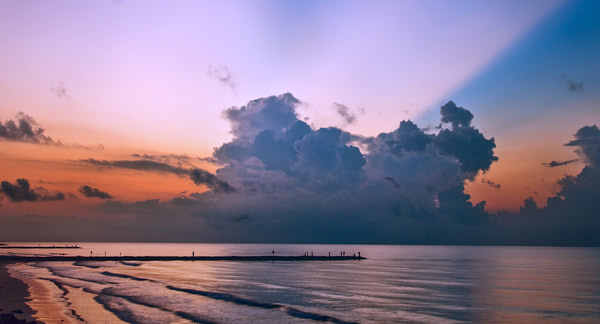
    Galveston

    The indirect rays of the sun at sunrise and before can provide you with a sky full of interesting colors.

    Twilight

    This time before the sun comes up is commonly referred to as twilight. You will want to get to know it better if you aim to improve your photos. Twilight is a rather broad term that can encompass different conditions. so it is further broken down into three segments. The actual terms and specifics below are not that important to your photography, but what is important is that you understand what is coming up next as you are out shooting.

    • Astronomical twilight: During this time, it is still dark, but the indirect rays of the sun are just starting to brighten the sky. The sun will be between 12 and 18 degrees below the horizon. Stars are clearly visible and the sky is dark overall. To most of us, this will not be much different than nighttime. Therefore, when photographing during this time, you will definitely need a tripod and remote shutter release.
    • Nautical twilight: The is the period of time when everything is fairly dark, but it has brightened up enough that you can see the horizon. The sun is between 6 and 12 degrees below the horizon. You can still see some stars, but the sky is noticeably brighter, particularly near the horizon line. This is when you will often see a blue tinge to the sky. You will still need a tripod, but you can now probably capture detail in the foreground as well as the stars in the sky.
    • Civil twilight: This is the period of time just before the sun has come up (or just after at has set in the evening). It is when the sun is between 0 and 6 degrees below the horizon. The point for the photographer is that it is still before sunrise, but everything around you is pretty bright. You can see everything and you might not even need a tripod (although I would recommend you keep using it ).
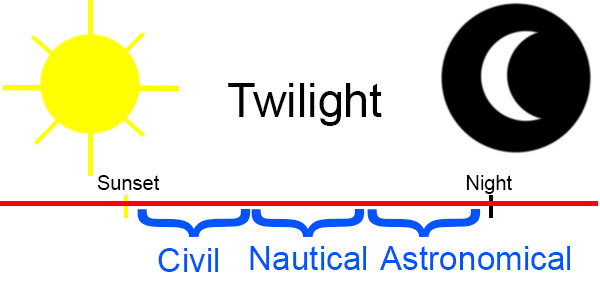
    Twilight

    The times and durations of the phases of twilight will depend upon your location and time of year. There are a variety of apps that will give you the exact times.

    Blue Hour

    It is during twilight (typically during nautical twilight) that a phenomena called the blue hour occurs. At this time, the sun is still a good distance below the horizon. Most of the sun’s red rays are shot into space, but a relatively high percentage of the blue rays enter the Earth’s atmosphere. The indirect light takes on a predominantly blue color. This lasts about 30-40 minutes and ends about 15 minutes before sunrise. This is a treasured time for many landscape photographers, so make sure you are in position at least a half hour before sunrise.
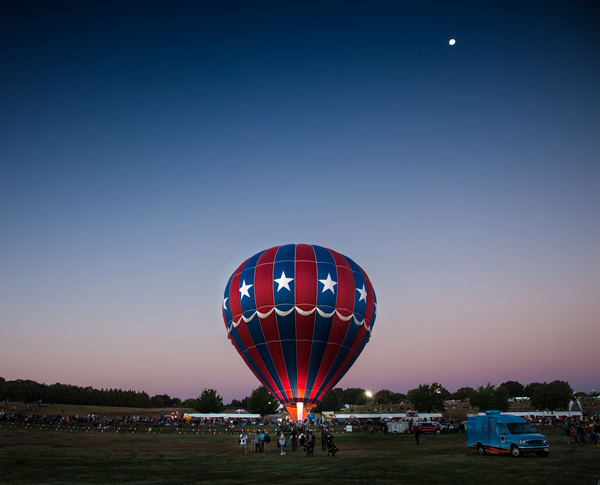
    During portions of twilight, there is enough light to see the foregound, but you can still see the stars and the moon.

    Sunrise

    After twilight comes sunrise, which needs no introduction. The landscape is brightened by this time, but the sun’s rays are tempered by the fact that portions of the sun are still behind the horizon and the rays are coming through a lot of the Earth’s atmosphere before they reach you. The sky will typically have a warmer color to it.

    What’s more, you can often put the sun directly in your picture. You can also make the sun’s rays more clear and even add a bit of a starburst effect to the sun by stopping down your aperture. Make sure your aperture is at least f/16 and perhaps even f/22 (at the risk off some diffraction).

    After sunrise

    The hour or so after dawn remains a good time to photograph. During that time, the sun is still low in the horizon. Therefore, the sun’s rays are coming through more of the Earth’s atmosphere, which diffuses the rays and cuts down on harsh contrasts. So even though the sun is fully in the sky by this point, it remains a good time for photography.
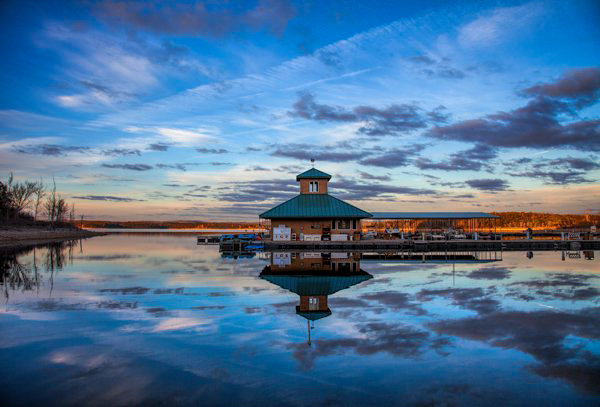
    Marina-2

    After that, the sun is getting higher in the sky and you get into the problems of midday photography.

    Afternoon

    The late morning and most of the afternoon is considered by many to be the worst time for photography. Many photographers simply put their cameras away during this time. It is the time of harsh contrast and black shadows. But you need not give up entirely during this time. There are a few things you can do to improve your photos.

    The first thing you can do is use a polarizing filter. Polarizers work by filtering out certain light rays that come to the camera at different angles. The light that enters your camera is often more diffuse and colorful. The best use for our purposes is making skies a rich, dark blue (although polarizers are also quite handy for cutting down on reflections). Polarizing filters actually work the best around midday when the sun is directly overhead. Be sure to rotate your filter to achieve its maximum (or desired) effect.
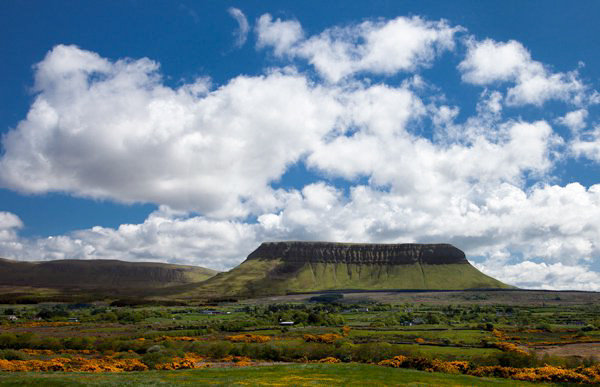
    Ben-2

    Mid-afternoon photos can often benefit from the use of a polarizing filter.

    Another thing you can do to combat the afternoon sun is convert your photos to black and white. As mentioned previously, one of the primary problems with shooting during the middle of the day is the high contrast and harsh shadows it creates. However, high contrast is actually a benefit in black and white photography, so the harsh light of midday can sometimes work to your advantage.
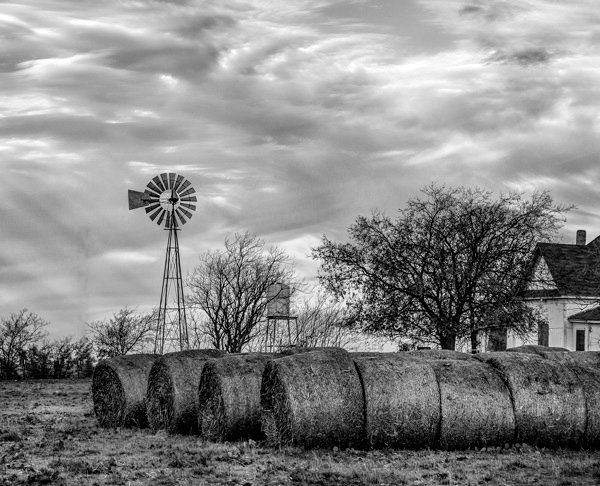
    Windmill-2

    Photos taken during the middle of the day often benefit the most from a conversion to black and white.

    If you must photograph in the middle of the day, oftentimes cloudy days work best. The clouds cut down on the harsh shadows, they also add some texture to the sky. Try to work them into your photos.

    Evening

    The evening is where you will encounter some of the best conditions for photography. It is essentially the same as you experienced in the morning around sunrise, but in reverse order. It starts with the sun dipping into the horizon, which results in some interesting changes in light quality.
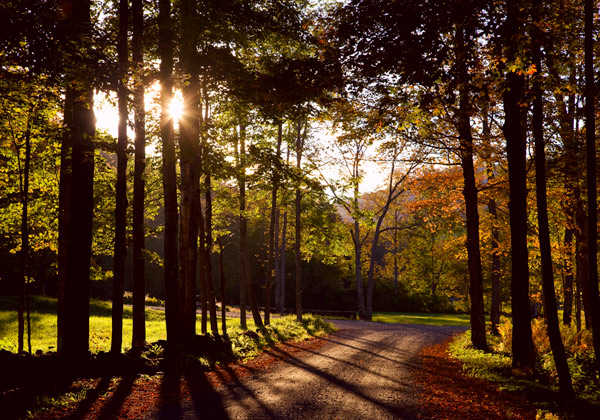
    The light in the late afternoon often starts to take on a yellow or reddish appearance.

    Golden hour

    As the Sun begins to set, the light you are receiving must travel through more of the Earth’s atmosphere to reach you. It is therefore more diffused by the time it reaches you. The light also takes on a warmer, more golden quality.

    The culminates just before sunset, which is called the Golden Hour. Actually it is not really an hour, but usually last about 30 -40 minutes (length varies depending on your location relevant to the equator). It starts just before sunset and ends about 20 minutes after the sun is down. Photographs taken during this time benefit from having plenty of light, but it is more diffused and softer to avoid harsh shadows. As the name suggests, the light has a warmer hue that can make for dramatic photos.

    Sunset

    Sunset is another time that photographers intuitively want to photograph. The conditions are well-known to everybody, so here I just want to focus on a few things you can do to make your sunset pictures look better.

    The first thing you can do is slightly underexpose your photos. That will be welcome news if you are not using a tripod, since you are rapidly losing light during this time. Underexposing will allow you to shorten your shutter speed and avoid camera shake (hopefully), and will generally make the colors in the sky much more vibrant.

    At sunset, due to the angle of the sun’s rays, there is usually no longer any direct light on the foreground. That tends to make everything black. You can deal with that in one of two ways, either by accepting it, or compensating for it:

    • You can accept the black foreground by creating silhouettes. This is commonly done with people, but it can work with a variety of subject matter. To do this, just meter the light of your scene from the sky. The brighter sky will be properly exposed and the foreground elements will be black.
    • You can attempt to compensate for the lack of direct light on the foreground by using a graduated neutral density filter. This filter will darken the sky without affecting the foreground. Inevitably, you will need to compensate by adding exposure to the whole picture (since the filter made the sky darker and the foreground was already dark). The upshot is that this filter will tone down your sky and cause the foreground to brighten.

    After sunset

    It is a huge mistake, which I see lots of photographers make, to pack up and head home right when the sun dips over the horizon. After sunset, you will continue to be treated to favorable light conditions, and in fact, some of the best conditions may follow. These will be the same as already discussed in the Twilight section above. You will also be treated to another Blue Hour, when the sun is considerably over the horizon and the diffused blue rays dominate.
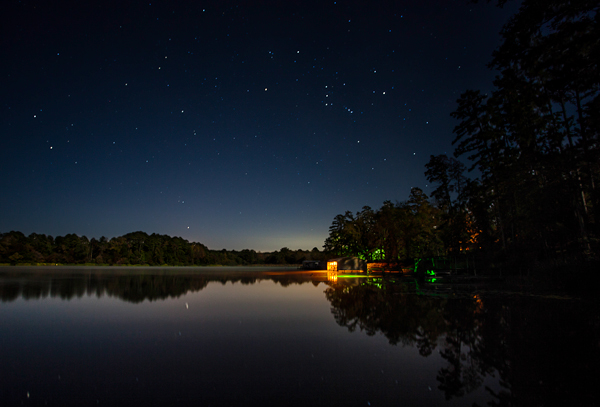
    Lakehouse

    In the final stages of twilight, the scene often looks very much like a night shot.

    Night

    Finally, don’t forget about night photography. It is half of the day, after all. Some of the most dramatic pictures can be taken during this time. Further, you do not really need to worry about changing light conditions, making this a more relaxing time to photograph.

    If you want to capture stars or otherwise needed to be true night time, be sure to wait a couple of hours after sunset. It will take a while for the sun’s rays to fully disappear from the atmosphere.

    Conclusion

    Photography is all about anticipation. It is about putting yourself in the best position possible to get a great shot. When it comes to landscape photography, much of that anticipation has to do with changes in the light. Those changes come remarkably quickly, especially around sunrise and sunset. By understanding the constantly changing conditions addressed here, you will better be able to anticipate the light and put yourself in the best position to get that great shot. I hope this discussion helps you get it.

    googletag.cmd.push(function() {
    tablet_slots.push( googletag.defineSlot( “/1005424/_dPSv4_tab-all-article-bottom_(300×250)”, [300, 250], “pb-ad-78623” ).addService( googletag.pubads() ) ); } );

    googletag.cmd.push(function() {
    mobile_slots.push( googletag.defineSlot( “/1005424/_dPSv4_mob-all-article-bottom_(300×250)”, [300, 250], “pb-ad-78158” ).addService( googletag.pubads() ) ); } );

    The post The Natural Light Cycle for Photographers by Jim Hamel appeared first on Digital Photography School.


    Digital Photography School
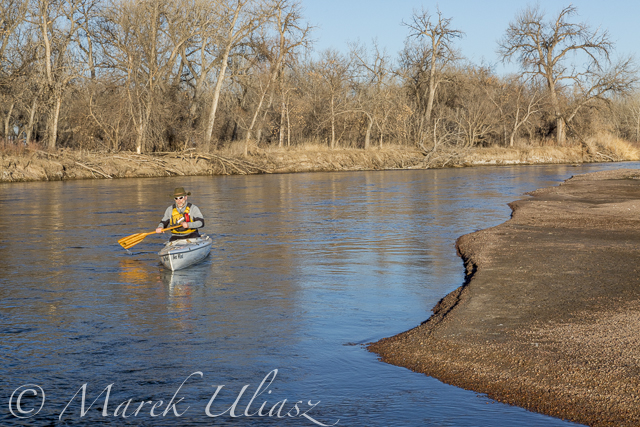
  • Opening 2015 Paddling Season on the South Platte River

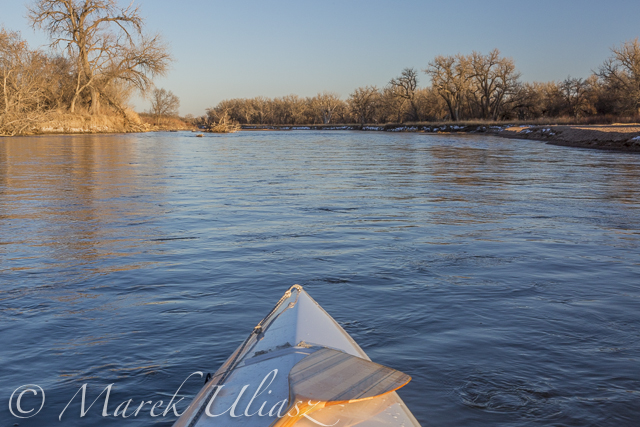
    winter paddling on South Platte River

    Paddling Sea Wind canoe upstream of the South Platte River above Masters

    March 6, 2015. Finally, I started my 2015 paddling season on the South Platte River. I took Sea Wind canoe to Masters (about 28 miles east of Greeley on highway 34) and paddled 2.5 miles upstream and back: easy workout, a short photo session, watching bald eagles and deer.

    Masters offers a typical bridge access to the river with a barbed wire fence and wide shoulder parking. It is similar to Kuner access, perhaps a little easier and shorter. There is a diversion dam just above the bridge. It was open and easy to paddle in both directions. Several diversion dams below Kuner can be open and runnable, at least in winter. River flow was much lower (~650cfs) than at Kersey (~1000cfs), but I still had plenty of water to paddle.

    Riverside Park at Evans.The main park access from 37th Street remains closed, but the park was partially open in September 2014. Here is information from City of Evans webpage:

    On September 13, 2013, Colorado experienced widespread flood destruction from what the media referred to as “biblical” rains. Riverside Park was completely destroyed in that flood.
    One year after the flood, on September 13, 2014, the City was able to proudly open a section of the park accessible from 42nd Street. The 7-acre Riverside Lake was opened for fishing and a portion of the trail around the lake was opened as well.

    It would be worth to check if there is an easy access to the river from the reopened part of the park. Last year, I was looking for an alternative river access at Evans. There is a possibility to launch boats under the highway 85 bridge (the end of the frontage road on left shore where a bike trail starts).

    South Platte River 2 miles above Masters

    South Platte River 2 miles above Masters

    Related posts:
    Scouting and Paddling the South Platte River after 2013 Flooding
    Opening 2014 Paddling Season on the South Platte River
    South Platte River below Denver – GPS/photo river guide


    paddling with a camera

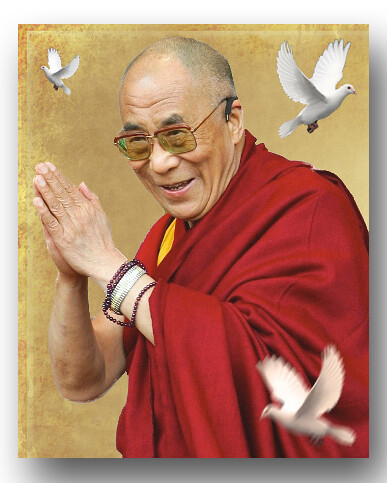
  • 11 Rules of Living by Dalai Lama to Help You Bring Zen to Your Photography

    Note from the Editor: this article is a little different than our usual dPS how to tutorials, more in line with personal growth. But see if there aren’t some things you can use and apply to you photography to help you take better photos.

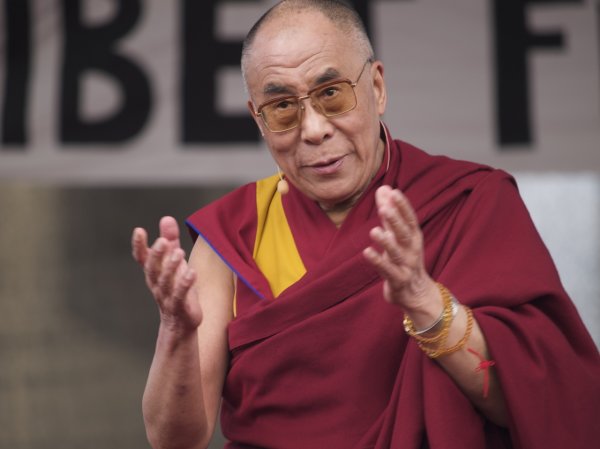
    “Happiness is not something ready made. It comes from your own actions.” – Dalai Lama

    Often times we feel a desire to start from scratch and achieve something remarkable. As spring is approaching, use this time of increased motivation to think about your goals as a photographer.

    Jan Michael Ihl

    By Jan Michael Ihl

    Over a decade ago, The Dalai Lama shared with the world a set of simple guidelines to help you live a complete and meaningful life. In this article we look at 11 of those rules of living from a photographer’s perspective. Whenever you decide to take your time and set your priorities, read the advice of the world’s greatest wise man and project it on your own career and life activities.

    1. Take into account that great love and great achievements involve great risk.

    Quitting your day job to start a photography business is a risky step accompanied by doubts and fear of failure. But if you’re firm about becoming a successful photographer, you just need to step out of your comfort zone. The ride to success will probably be harsh, but on the other hand, it will be fun! Just listen to your inner superhero and try to enjoy the very process of taking risk.

    2. Share your knowledge. It’s a way to achieve immortality.

    This advice isn’t as difficult to follow as you may think. These days blogging is a great way for people to spread their knowledge and exchange ideas. Being an active member on a photography forum, or supporting a photography related project (for instance, Defrozo calls all photographers to help them build the ultimate photography marketing platform) are also good opportunities for any photographer to do good for the community. After all, what goes around comes around.

    MD. Hasibul  Haque Sakib

    By MD. Hasibul Haque Sakib

    3. When you lose, don’t lose the lesson.

    Screwed up a photo shoot? That’s not a reason for giving up, as failing can teach you so much more than success. Analyze your missteps, do your best to fix them, and prepare more carefully next time. Yes, that mistake can leave a bitter aftertaste for a long time, but after all, you would never feel good without feeling bad.

    4. Follow the three Rs: Respect for self, Respect for others, Responsibility for all your actions.

    Respect for self ensures determination, which is crucial to success. For instance, if you set your prices too low, people may think you’re not confident about your professionalism and thus, would not commit capturing their memories to you.

    Even if you’re not sharing the values and interests of people you work with, there must be something they can teach you, respect that.

    Even if you’re a solopreneur, being responsible and respectful is essential for running a successful photography business.

    5. Remember that not getting what you want is sometimes a wonderful stroke of luck.

    I have a friend who couldn’t afford a Canon 5D MarkII a few years ago, which pushed him to seek other ways to reach the image he envisioned. As a result, he improved his skills drastically and even won a prestigious photography contest. He now owns a studio now and his business is growing fast. My friend is pretty sure he wouldn’t have reached this point if he had bought that camera and let it do the job for him. The moral of this story is that something you consider a lost opportunity may in reality be a chance to win. Just stay positive and keep your eyes wide open.

    Umberto Salvagnin

    By Umberto Salvagnin

    6. Learn the rules so you know how to break them properly.

    Did you know that Picasso mastered the illusion of volume just to learn how to flatten it in his paintings? Like with any art, in photography any rule can be broken – as long as it’s broken intentionally. If you’re looking for an innovative approach and want to go out of the box with your composition and lighting, you have to know where the box’s limits are.

    7. When you realize you’ve made a mistake, take immediate steps to correct it.

    Everyone could make a mistake, but not anyone could immediately react and correct it. It’s all about taking responsibility for your own actions. If the final photos don’t meet the expectations of your customer and you know it’s your fault, do something to fix it and do it fast. A free compensatory session or a small sorry gift can help you own the situation. Quick reaction will speak of your integrity – it won’t be left unnoticed.

    8. Spend some time alone every day.

    I’m sure you know how it feels when creative ideas flow out of you like a stream. I think you can also remember the tough periods of creative block when it seems you’re unable to produce anything new or interesting. Every creative experiences these ebbs and flows of inspiration. Some solitude during your day can be a great practice to help you stay balanced and productive.

    Jhoc

    By jhoc

    9. Once a year, go someplace you’ve never been before.

    Seeing new places and faces, discovering new cultures and atmospheres is extremely important for any photographer. So do your best to not get stuck in the routine, and go to a new destination at least once a year, even if it’s a small village not far from your habitat.

    10. Judge your success by what you had to give up in order to get it.

    Success is always about making sacrifices and compromises. However, it’s up to you to decide how much to give up on the way to it. Your own photography business will require you to be a wearer of many hats, it will also soak up tons of your time and energy. But if it pushes you to compromise your loved ones or life values, stop and think whether it will be a success at all if it’s achieved this way.

    11. Open your arms to change, but don’t let go of your values.

    Change is an essential part of any business, especially when you work in the creative field. Embrace new technologies and don’t miss an opportunity to boost up your marketing, but don’t betray your values as they are the first to speak of your personality and brand.

    Nick Kenrick

    By Nick Kenrick

    The Dalai Lama’s rules of living are not novelties, it’s something we’ve all heard at least once during a lifetime. However, we often forget or fail to apply these laws in our daily routine. So having these simple truths listed in one place which you can get back to once in a while may help you be a better person and achieve more in life. Do you agree? Share your own life lessons and favorite quotes in the comments!

    googletag.cmd.push(function() {
    tablet_slots.push( googletag.defineSlot( “/1005424/_dPSv4_tab-all-article-bottom_(300×250)”, [300, 250], “pb-ad-78623” ).addService( googletag.pubads() ) ); } );

    googletag.cmd.push(function() {
    mobile_slots.push( googletag.defineSlot( “/1005424/_dPSv4_mob-all-article-bottom_(300×250)”, [300, 250], “pb-ad-78158” ).addService( googletag.pubads() ) ); } );

    The post 11 Rules of Living by Dalai Lama to Help You Bring Zen to Your Photography by Darlene Hildebrandt appeared first on Digital Photography School.


    Digital Photography School
  • Post-processing RAW Files – ACR Compared to Some Free Software Options

    What is RAW?

    Title-imageA RAW file is really the digital negative, which means that all the data is stored waiting to be unleashed via a RAW Editor. Unlike a jpeg file which has been edited in-camera (or in post-processing) and is a compressed 8-bit file.

    Why shoot RAW?

    The main benefit to shooting RAW is simply to have as much information as possible in the file. When you upload a RAW file onto your computer the white balance, and tonal corrections have to be set manually. More detail can be retrieved from the highlights and shadows. It is then saved as a jpeg or some other format. The RAW file always remains in its original state.

    Shooting RAW has become more commonplace as cameras have the option, built-in and RAW editing software is more widely available on both Mac and PC. In this article, I will be testing out two RAW editors which are free to download. Yes, no purchase necessary. The main RAW editor that I will go into more detail on is Adobe Camera Raw (ACR), which comes with Photoshop and is my primary go-to RAW editing software.

    As a side note, this article is by no means a complete in-depth review of the pros and cons of each of the the three RAW editors. I merely wanted to test Photoshop’s ACR against some of the RAW editors that are available to download for free, such as GIMP and RawTherapee.

    A few years back, I was using ViewNX (now ViewNX2), which is Nikon’s RAW free editing software. Canon (DPP) and other major camera manufacturers have their own RAW proprietary software. But I found ACR just got better with each new release. I usually bring my images into Photoshop when I’ve done the initial edits in ACR. It means my workflow is quite efficient as I’m using ACR and Photoshop side-by-side.

    The Basics

    When you open ACR or any RAW editor, the user interface can be a bit daunting for the uninitiated. The range of adjustments and all the features of ACR would require several articles alone.

    So, let’s look at the basic adjustments where I begin the editing process of my RAW files. These adjustments are fundamental to any RAW editor. Similar adjustments can also be found in the Develop module of Lightroom and in Photoshop Elements 12 and 13. Let’s begin with Adobe Camera Raw, otherwise known as ACR.

    Adobe Camera Raw (ACR)

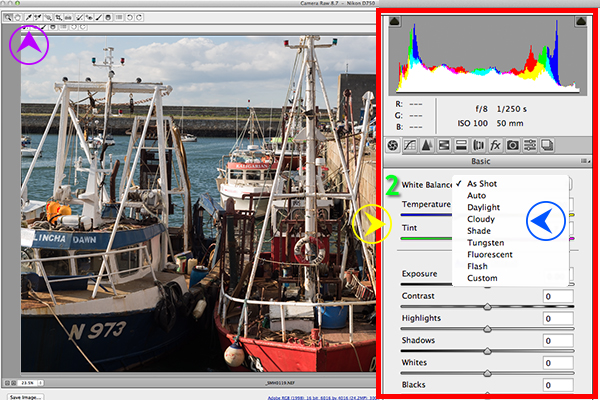
    ACR-UI

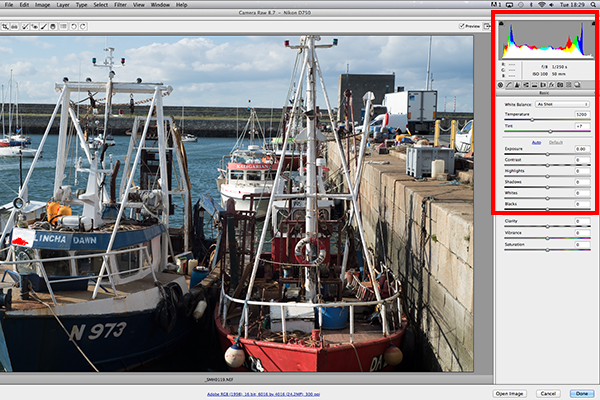
    The interface when a RAW file is opened in ACR

    When I open a RAW file in ACR, White Balance is my first port of call. This is about the color temperature of the image depending on the light source. If the white balance is incorrect, then a color cast will occur on your image. It may look slightly blue, orange or green.

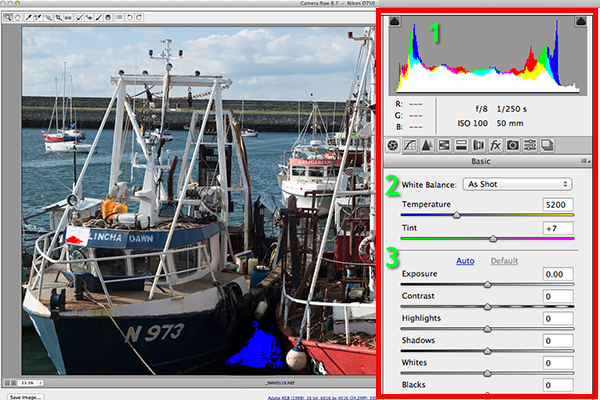
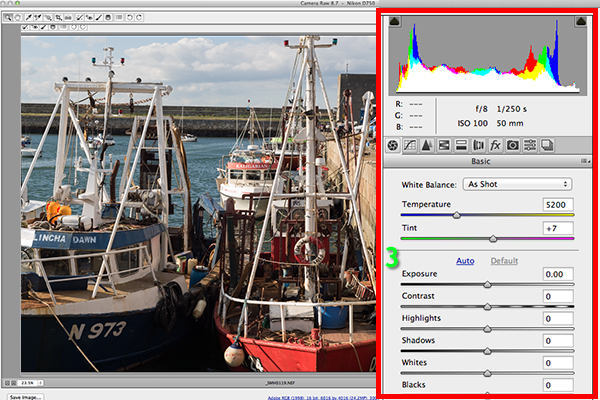
    The 3 important focus points in the Basic panel in ACR

    The three important focus points in the Basic panel in ACR

    In ACR, there are three ways to adjust White Balance.

    3-ways-to-edit-WB

    Three ways to edit White Balance in ACR:
    1. White Balance Tool
    2. Presets
    3. Temperature and Tint Sliders

    1. The White Balance Tool is my least favourite. The idea being that you click anywhere on the image that is suppose to be gray. I find this tool hit and miss.
    2. There are number of presets that are worth experimenting with, if you are new to RAW editing. Try Auto which is a good place to start.
    3. You can then adjust the Temperature and Tint sliders for finer tweaking and control. I favour these two sliders the most in my workflow.

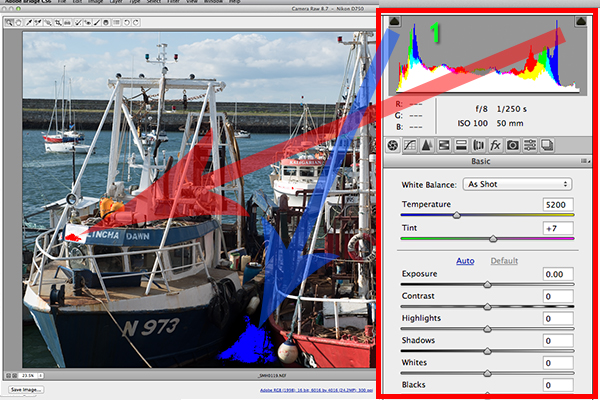
    Just above the Temperature and Tint sliders, you have the histogram panel. Click on the the two black triangles. These indicate the highlight (left) and shadow (right) areas that have been clipped (see photo below). As you can see in this image, the areas highlighted in red indicate where the clipping has taken place in the whites. Similar to the shadows, blue indicates where the shadow areas have been clipped.

    Highlights-shadows-clipping

    Highlights-shadows-clipping in the Histogram.

    When adjusting the White and Black sliders keep an eye on the black triangles in the Histogram chart. These triangles turn green when clipping occurs. Alternatively, you can hold down the Alt key while dragging the Blacks slider across to the left until the darkest area of the image starts to appear. Similar for the Whites slider, hold down the Alt key and drag the slider to the right until the brightest part of the image begins to show.

    I tend to leave the Exposure slider until after I have adjusted the Highlights and Shadow sliders.

    Exposure-contrast

    Exposure and Contrast sliders.

    The Contrast slider gives your image that final punch but go lightly.

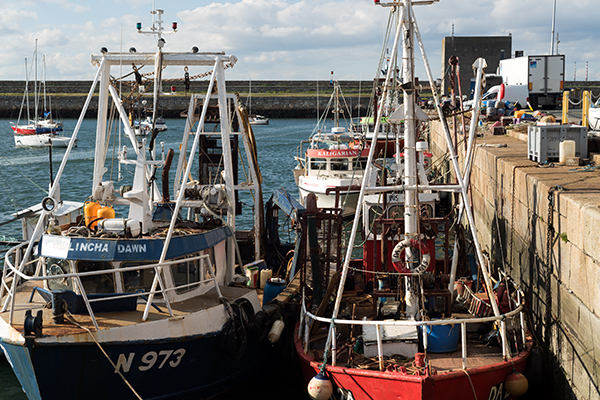
    edited-image

    Final edited image from the basic adjustments in ACR

    All edits done in ACR are non-destructive. Editing RAW files can be easily done in one pass, especially if you have captured the image that you want in-camera. However, there are no layers in ACR or Lightroom, so if you need further editing where layers are required you will need to use Photoshop or GIMP.

    GIMP

    So this brings us to the next RAW editor, UFRaw. This comes pre-installed in GIMP, version 2.8. I’ve never used GIMP before now and I was really curious and enthusiastic to try it out. It has the reputation of being as powerful as Photoshop for editing – and the fact that it is free, is a bonus.

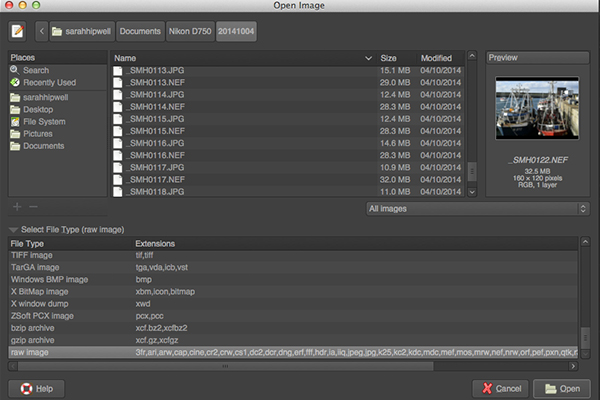
    I presumed that by opening a RAW file that the UFRaw editor would launch automatically. It didn’t. After a quick research online. I found a solution. I had to go to File>Open>Select file. I then had to Select File Type and scroll down to the bottom of a list and click on ‘raw image’. Once I opened the image in question. It did not resemble anything like the image I had taken on the day. Normally when I launch a RAW file in ACR, it would be similar to the jpeg version.

    Opening-RAW-file-in-GIMP

    The UFRaw editor does not launch automatically. A few clicks gets you there.

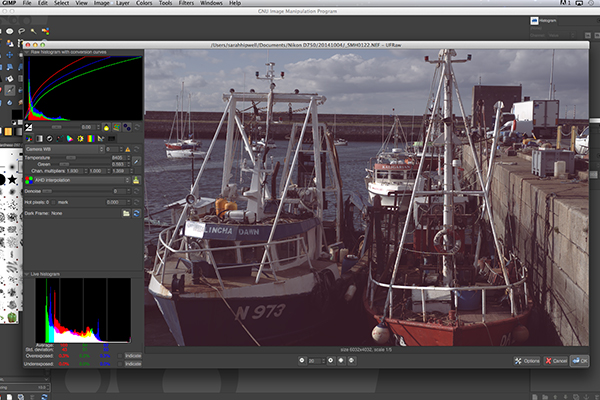
    The interface was completely alien to me, and I didn’t find it particularly user friendly. I played around with the sliders for awhile but I couldn’t get the image to look right at all. I tried adjusting the White Balance but I couldn’t get rid of a green/grey color cast on the image. By not having the familiar sliders in ACR, I was a bit lost to be honest. I really wanted to like UFRaw, as it is a free software for Mac and PC. To be fair, this was my first attempt at using the software, so I’ll put the mea culpa (blame) on me as opposed to the software.

    RAW-file-opened-in-GIMP

    The UFRaw editor UI in GIMP

    RawTherapee

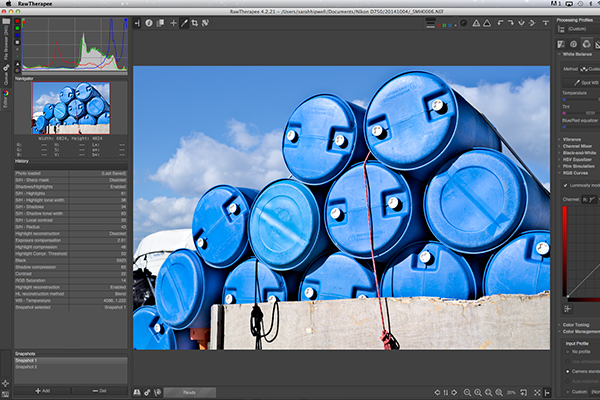
    Now onto RawTherapee. I love the name. I wasn’t expecting much after trying out GIMP’s UFRaw but I was completely surprised and impressed. RawTherapee is available in 64 and 32 bit forms for Mac OS X and Windows. It also supports a huge range of supported cameras and manufacturer filetypes.

    RawTherapee-UI

    RawTherapee interface

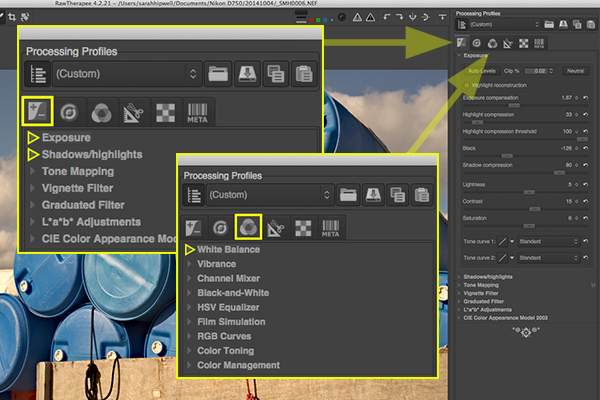
    This RAW editor is quite rich in features. Even so I found the user interface very intuitive, and after a few minutes I felt right at home. I quickly adapted to the menu system and found it very easy to navigate around. The editing panels are on the right.

    RawTherapee-adjustment-sliders

    Highlighted adjustment sliders that are similar to the ones in ACR.

    Summary

    If you haven’t edited a RAW file before, I would highly recommend that you try it out. The options are varied whether you decide to purchase Lightroom, or choose to pick from the many RAW editors that are free to download. The choice is really up to you. Another free RAW editor that has just been launched is Affinity Photo and it looks really promising (currently in beta for Mac only).

    googletag.cmd.push(function() {
    tablet_slots.push( googletag.defineSlot( “/1005424/_dPSv4_tab-all-article-bottom_(300×250)”, [300, 250], “pb-ad-78623” ).addService( googletag.pubads() ) ); } );

    googletag.cmd.push(function() {
    mobile_slots.push( googletag.defineSlot( “/1005424/_dPSv4_mob-all-article-bottom_(300×250)”, [300, 250], “pb-ad-78158” ).addService( googletag.pubads() ) ); } );

    The post Post-processing RAW Files – ACR Compared to Some Free Software Options by Sarah Hipwell appeared first on Digital Photography School.


    Digital Photography School
  • Fresh Images to Put Spring Visions in Your Head

    When I think of spring some of these words come to mind:

    • Rebirth
    • Growth
    • Fresh
    • New

    It’s my favorite time of year. I love how it smells after the rain comes. I love to see the grass turn green and flowers pop up. So here are some fresh images to get you thinking about spring.

    Photograph Chlorophylle by Gaétan Zilli on 500px

    Chlorophylle by Gaétan Zilli on 500px

    Photograph Feel the Green! by Shaz Mazhare on 500px

    Feel the Green! by Shaz Mazhare on 500px

    Photograph Fern Rhapsody by Jensen  Chua on 500px

    Fern Rhapsody by Jensen Chua on 500px

    Photograph Abstract flowers card by Sergii Syzonenko on 500px

    Abstract flowers card by Sergii Syzonenko on 500px

    Photograph Vintage apricot flower by Roksana Bashyrova on 500px

    Vintage apricot flower by Roksana Bashyrova on 500px

    Photograph June green grass flowering by Elena Elisseeva on 500px

    June green grass flowering by Elena Elisseeva on 500px

    Photograph grass flower with water drops by meesri apichart on 500px

    grass flower with water drops by meesri apichart on 500px

    Photograph Closeup view of wet, pink coneflower by Frank Hoekzema on 500px

    Closeup view of wet, pink coneflower by Frank Hoekzema on 500px

    Photograph SKC 2899 Damsel of Nature by Sunil Kapadia on 500px

    SKC 2899 Damsel of Nature by Sunil Kapadia on 500px

    Photograph Fresh pink tulip flowers. by Iryna Soltyska on 500px

    Fresh pink tulip flowers. by Iryna Soltyska on 500px

    Photograph Tulips by Teerasak Tiamdao on 500px

    Tulips by Teerasak Tiamdao on 500px

    Photograph Violet by Thomas Zsebok on 500px

    Violet by Thomas Zsebok on 500px

    Photograph green by Margo B. on 500px

    green by Margo B. on 500px

    Photograph Foggy meadow at sunset by Roman Tsubin on 500px

    Foggy meadow at sunset by Roman Tsubin on 500px

    Photograph Young butterfly by YOline SAntosa on 500px

    Young butterfly by YOline SAntosa on 500px

    Photograph Birth of a Beauty by S. Tabrizi on 500px

    Birth of a Beauty by S. Tabrizi on 500px

    Photograph Poppy "cocoon" by Florin  Negruti on 500px

    Poppy "cocoon" by Florin Negruti on 500px

    Photograph Cocoon by Asma Adnan on 500px

    Cocoon by Asma Adnan on 500px

    Photograph Brotherly love by Daan de Vos on 500px

    Brotherly love by Daan de Vos on 500px

    Photograph Press the Copy Button - 5 times by Vincent Cheng on 500px

    Press the Copy Button – 5 times by Vincent Cheng on 500px

    Photograph Hello, Little One by Ben Robson on 500px

    Hello, Little One by Ben Robson on 500px

    Photograph Origin of life by Hugo Alberto on 500px

    Origin of life by Hugo Alberto on 500px

    Photograph PIU!!! cock by rui mendes on 500px

    PIU!!! cock by rui mendes on 500px

    Photograph Kitten by Artur Polachowski on 500px

    Kitten by Artur Polachowski on 500px

    Photograph ???????? by Nozomi Itabashi on 500px

    ???????? by Nozomi Itabashi on 500px

    Photograph Violet by Magda  Bognar on 500px

    Violet by Magda Bognar on 500px

    Photograph Enjoy the Shower by Michael Kothes on 500px

    Enjoy the Shower by Michael Kothes on 500px

    Photograph Taste the rain by Steve Pomeroy on 500px

    Taste the rain by Steve Pomeroy on 500px

    Photograph drops by sydzey on 500px

    drops by sydzey on 500px

    Photograph Splish splash Im taking a bath by Leanne M Williams on 500px

    Splish splash Im taking a bath by Leanne M Williams on 500px

    Photograph Life Change by Shawn Malekifar on 500px

    Life Change by Shawn Malekifar on 500px

    googletag.cmd.push(function() {
    tablet_slots.push( googletag.defineSlot( “/1005424/_dPSv4_tab-all-article-bottom_(300×250)”, [300, 250], “pb-ad-78623” ).addService( googletag.pubads() ) ); } );

    googletag.cmd.push(function() {
    mobile_slots.push( googletag.defineSlot( “/1005424/_dPSv4_mob-all-article-bottom_(300×250)”, [300, 250], “pb-ad-78158” ).addService( googletag.pubads() ) ); } );

    The post Fresh Images to Put Spring Visions in Your Head by Darlene Hildebrandt appeared first on Digital Photography School.


    Digital Photography School
  • Weekly Photography Challenge – Spring

    Ah spring! The smell of fresh flowers in the air, an early morning dew on the grass, and rain shower in the afternoon – some of the signs that spring might be here.

    Bowen Chin

    Bowen Chin

    What images pop into your mind when you think of spring? Baby birds, leaves forming on the trees, the last puddles of snow melting, the bees coming to visit the new flowers?

    Weekly Photography Challenge – spring

    Whatever spring means to you it’s time to get out there and photography it. Your challenge this week is to get off the couch, get outside and see where new life is happening. If there is still snow where you live perhaps a visit to a local greenhouse will inspire you. Here are a few more spring images to get you thinking:

    Nutmeg66

    By nutmeg66

    Teresa Gibbison

    By Teresa Gibbison

    Emy ^^

    By Emy ^^

    Linda Gail.

    By Linda Gail.

    Martin Thomas

    By Martin Thomas

    Evan Leeson

    By Evan Leeson

    Sander Van Der Wel

    By Sander van der Wel

    Brad Smith

    By Brad Smith

    Storebukkebruse

    By storebukkebruse

    Putneypics

    By Putneypics

    Share your spring images here:

    Simply upload your shot into the comment field (look for the little camera icon in the Disqus comments section) and they’ll get embedded for us all to see or if you’d prefer upload them to your favourite photo sharing site and leave the link to them. Show me your best images in this week’s challenge. Sometimes it takes a while for an image to appear so be patient and try not to post the same image twice.

    googletag.cmd.push(function() {
    tablet_slots.push( googletag.defineSlot( “/1005424/_dPSv4_tab-all-article-bottom_(300×250)”, [300, 250], “pb-ad-78623” ).addService( googletag.pubads() ) ); } );

    googletag.cmd.push(function() {
    mobile_slots.push( googletag.defineSlot( “/1005424/_dPSv4_mob-all-article-bottom_(300×250)”, [300, 250], “pb-ad-78158” ).addService( googletag.pubads() ) ); } );

    The post Weekly Photography Challenge – Spring by Darlene Hildebrandt appeared first on Digital Photography School.


    Digital Photography School
  • Photoshop Video Tutorial: How to Add Warmth to Your Images

    Warming up images either on camera or in post production is an easy task to accomplish. However depending on the image it can sometimes look like ….well we have thrown a warming filter on the image! In this short video Simon shows a couple of easy but powerful tips to add warmth to your images but do it in a Continue Reading

    The post Photoshop Video Tutorial: How to Add Warmth to Your Images appeared first on Photodoto.


    Photodoto

  • Safety Tips for Travel Photographers (Particularly Women)

    Let me first address the obvious that while this article talks about safety tips for women photographers, it does not mean that these tips don’t apply to men as well. Most are general tips that could be applied to both genders. Being a woman photographer who has started to venture out alone for photoshoots and solo photowalks, these are things that I notice and practice as I do travel photography.

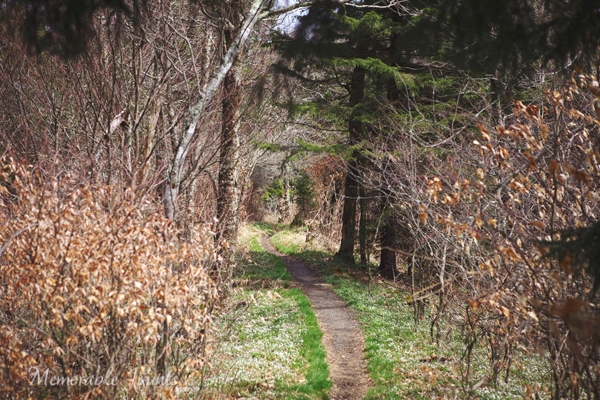
    Solo Hiking in the Appalachian Trail in Great Smoky Mountain National Park USA

    Solo Hiking the Appalachian Trail – Great Smoky Mountain National Park, USA

    It all started with a single trip. A couple of years ago while visiting Great Smoky Mountain National Park in the US, I decided to flex my muscles and go for a solo hike with my young kids. This was supposed to be a bonding experience as well as a confidence booster that I could do this alone. So off we went, water bottle and camera in hand to hike a two to three mile stretch of the Appalachian Trail.

    Half way into the trail, my confidence took a nose dive, as I realized I had done several stupid things – I vaguely remember telling my husband the actual trail we were going to take, we only had one bottle of water among the three of us, I was carrying 20lbs of photo gear and I had no emergency kit or even a phone. My kids, then 7 and 3, were hot and cranky and there was no end in sight. In my paranoia of either being attacked by a bear or a crazy psychopath on the trail, we literally sprinted the entire way. Thankfully, my husband had started off at the other end of the trail and met up with us. While it was an adreallian pumping, nerve racking experience, it did make me realize that with a few simple tips, one can travel smart, safe and actually have a wonderful time.

    #1 Research, research and then do more research

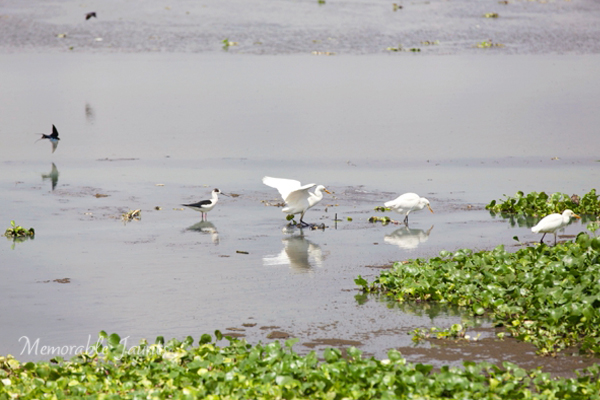
    Bird Photography in Chennai India

    A google maps satellite search revealed a bird photographer’s paradise literally five minutes from home when I travelled to Chennai, India

    There is no lack of informational resources for someone wanting to travel anywhere in the world. Between maps, guide books and online forums we can pretty much take a virtual tour in our pajamas and not have to leave the comfort of our homes. But if you are anything like me, the wanderlust bug is very prominent and the urge to escape the clutches of everyday life too urgent to ignore. Make sure you know everything there is to know about the place you want to visit. Scope out all the possible locations that interest you in detail. There are many online photography and travel forums where you can post questions around photographic opportunities for specific locations.

    #2 Record and insure your gear

    This is one of those business expenses that may seem like it is discretionary but trust me, it is absolutely critical especially if you plan to travel extensively. Having that peace of mind that your gear is as protected as it can be is very liberating.

    #3 Blend in as much as you can

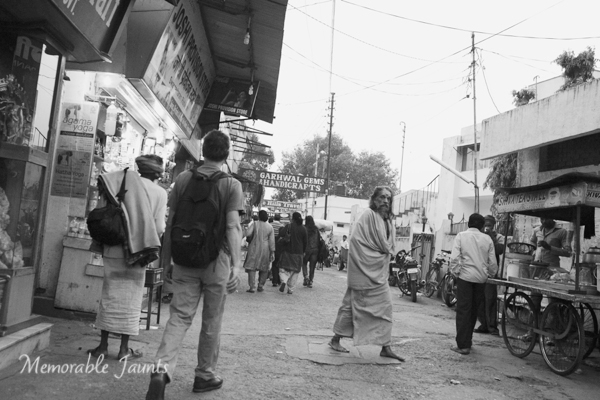
    Safe Travel Tips for Photographers DPS Article Memorable Jaunts

    A simple bag pack to carry your equipment might be the best travel gear to blend in with the locals

    With a camera in one hand and a map/guide book in the other, chances are you already stand out from the local crowd. Try not to make it more obvious in the way you dress or behave. The smart thing to do is to blend in with the locals. Dress like the locals wherever possible, then if you have done your research and planned out your excursion you don’t need to hold on to the map (a sure giveaway that you are a tourist).

    #4 Keep an updated itinerary with family and friends at all times

    Safe travel tips for women photographers DPS Memorable Jaunts Article

    Have a plan of where you want to go and what you want to do and make sure you communicate that to the right people

    This seems like a no-brainer but often times is easily overlooked. It’s one of those travel smart strategies that could literally save a life. This is one time when having a game plan for where you want to go, and when you want to get there is advisable particularly for solo travellers. Avoid changing plans on the fly – especially if you have taken the time to research and scope out the best photographic opportunities for your trip. If you have to change travel plans, make sure changes are communicated to the right people, at the right time.

    #5 Plan for emergencies

    Lets face it – this is life, not a scripted, rehearsed, movie set. Chances are things are going to go wrong – travel plans may change, equipment may malfunction, batteries may run out. Regardless, have a plan of action for some of the more obvious mishaps. Keep numbers handy for any local camera shops in case you need to use them in a pinch – definitely a much cheaper option than having things shipped or mailed to you, especially if you are out of the country.

    #6 Listen to your gut

    Words like “gut feeling” and “woman’s intuition” do actually exist, and more often than not, they are spot on. Trust your instincts. At the end of the day missing a photo opportunity is not as critical as being safe. Don’t do anything that you are not comfortable doing.

    #7 Carry only the essentials

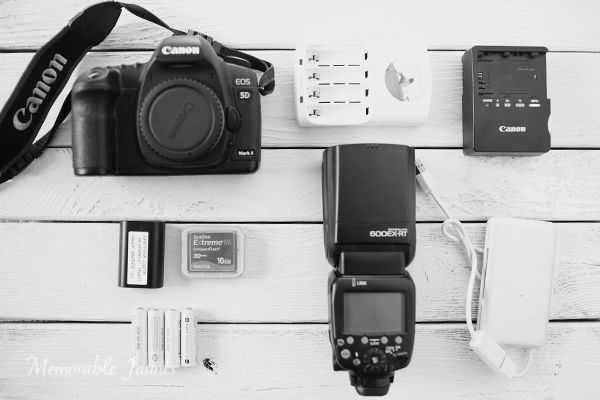
    Safe travel tips for photographers DPS Memorable Jaunts Article

    We photographers LOVE our gear and cannot imagine being away from it. Most of us feel we need every lens and gadget for every shoot for those what if situations. But challenge yourself to pack light. Maybe you only want to shoot with a wide angle lens or the nifty-fifty. Carry only what you need and not all the gear you own – your body will thank you.

    #8 Carry personal protection equipment

    No, I am NOT advocating carrying a gun or other such personal protection mechanisms. Personal protection can mean different things to different people and can also differ based on the situation. For a while I carried pepper spray in my purse. Then I switched to a swiss army knife. Then I decided that my 90lb german shepherd dog was my best defense mechanism especially for local sunrise and sunset photo excursions. Choose what is appropriate and practical for you.

    Do you have any safe travels tips to share based on your personal experiences? Feel free to share…

    googletag.cmd.push(function() {
    tablet_slots.push( googletag.defineSlot( “/1005424/_dPSv4_tab-all-article-bottom_(300×250)”, [300, 250], “pb-ad-78623” ).addService( googletag.pubads() ) ); } );

    googletag.cmd.push(function() {
    mobile_slots.push( googletag.defineSlot( “/1005424/_dPSv4_mob-all-article-bottom_(300×250)”, [300, 250], “pb-ad-78158” ).addService( googletag.pubads() ) ); } );

    The post Safety Tips for Travel Photographers (Particularly Women) by Karthika Gupta appeared first on Digital Photography School.


    Digital Photography School
  • The Magic of Thinking Big in Photography

    R0130233

    You want to be the best photographer you can. You’re constantly trying to educate yourself, improve, and take your photography to the next level. But how can you take your photography to new heights, and stand out from the crowd?
    The secret is thinking big.

    If you look at successful individuals outside of photography such as Elon Musk, Jeff Bezos, Richard Branson, and Larry Page – what do these leaders have in common? How were they able to leverage their strengths, continuously add value to the world, and become successful at what they do?

    In the book “Bold”, author Peter Diamandis shared the three attributes he thought they all had in common:

    1. Passion
    2. Purpose
    3. Curiosity

    In this article you will learn how you can better leverage passion, purpose, and curiosity to take your photography to the next level.

    1. Passion

    Passion is having this fire burning inside yourself — that you would do something (even if it didn’t earn you any money). You are passionate about doing things by which you feel intrinsically motivated (rather than extrinsically).

    For example, let’s do a thought experiment – if you were suddenly given one billion dollars, and didn’t have to work another day in your life, what would you do with the rest of your life?

    Personally for me, I am insanely passionate about street photography, education, and sharing knowledge. Even before I was able to do street photography workshops full-time to support myself, I was running a blog out of the pure joy of it (in order to help others), while I was working a full-time job.

    R0130194

    So what are you passionate about?

    I assume if you’re reading this article, you are passionate about photography. But what kind of photography really turns you on? Is it street photography? Is it landscape photography? Is it portrait photography? What really gets you up in the morning and calls you to be photographed?

    To be frank, passion is something you can’t fake. You either have it, or you don’t. But we all have things we are passionate about, especially when it comes to photography. So don’t ask others what they think would make an interesting photograph, just follow what you are passionate about, and photograph whatever inspires you.

    2. Purpose

    It isn’t enough to simply be passionate about what you do. If you want to be persistent with your work and your art, you need to have a strong sense of purpose. So how can you apply the concept of purpose to your photography?

    R0130128

    Well, you’ve got to make photos that aren’t just for yourself, but photos that you hope will influence, move, and change others.

    So for example, the reason I am drawn to street photography is because I feel that the images I make are purposeful. The images I make try to explore the human condition — how people feel and interact with the world. I wish to make images that my viewers can empathize with on an emotional level.

    Even if you’re not into street photography, let’s say you’re into landscape photography, how do you find landscape photography meaningful? Ansel Adams was passionate about nature, but also felt that he had a purpose to protect and conserve it. So the purpose of his photography was to connect with nature on an almost spiritual level, to show the world how beautiful these national parks were, and how they needed to be protected.

    So think to yourself — how are your photographs meaningful to you, and how do they serve a purpose by inspiring others?

    At the end of the day, if your photos serve a purpose to make you happy, that is good enough. But then again, you may also wish to make photographs that have a social purpose that will help inspire, influence, and move others.

    3. Curiosity

    R0130163 2 R0130091

    The sad thing is that when we are children we are infinitely curious, but that curiosity dies off when we are adults. You can be as passionate and purposeful with your photography as you want, but unless you are curious, you won’t continue breaking new ground and evolving as a photographer.

    Curiosity is following your intuition, your gut. Curiosity is following whatever you find interesting. Curiosity is like a bottomless pit — the more you feed it, the more curious you become (which in my opinion is a good thing).

    So if you currently shoot flowers and are curious to try out street photography — follow your curiosity and check it out. If you currently shoot street photography but want to get into fashion — follow your curiosity and check that out. If you shoot digital and want to try film, ask your parents or your friends for an old film camera and give it a go.

    Curiosity is the only thing in life worth following, to keep us alive creatively as artists and visual poets.

    Conclusion

    R0130115

    I can guarantee you if you follow these three things (passion, purpose, curiosity) — your work will excel. You will continue to make more photographs, they will be meaningful, and your work will become more complex and advanced as time goes on.

    The secret to becoming a great photographer comes down to hard work, putting in the time, and making more images that continue to challenge you.

    But at the same time, you want to be like a child in following your curiosity and not taking yourself too seriously.

    Try to find a mix of hustling hard in photography, and having a good time. Stick with this recipe, you will really become the best photographer you can, and achieve all your dreams.

    googletag.cmd.push(function() {
    tablet_slots.push( googletag.defineSlot( “/1005424/_dPSv4_tab-all-article-bottom_(300×250)”, [300, 250], “pb-ad-78623” ).addService( googletag.pubads() ) ); } );

    googletag.cmd.push(function() {
    mobile_slots.push( googletag.defineSlot( “/1005424/_dPSv4_mob-all-article-bottom_(300×250)”, [300, 250], “pb-ad-78158” ).addService( googletag.pubads() ) ); } );

    The post The Magic of Thinking Big in Photography by Eric Kim appeared first on Digital Photography School.


    Digital Photography School