Category: Photography

  • South Platte River from Wildcat to Evans by SUP

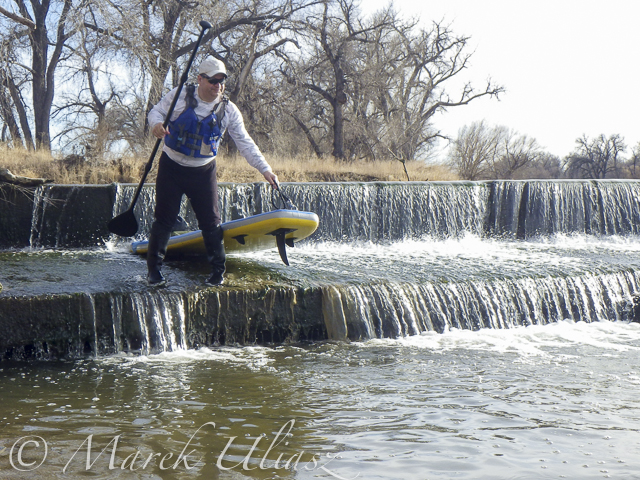
    March 14, 2015. 16 miles stand up paddling (SUP) trip from Wildcat on St Vrain Creek on the South Platte River to Evans Rob Bean. Beautiful, warm weather. Numereous bald eagles, turkeys and other birds, one turtle, and surprisingly a lot of people with children playing on the river.

    River flow: St Vrain Cr at mouth 230 cfs, South Platte River at Fort Lupton ~350cfs. Water level on the South Platte was lower than during my last trip. Some of rocks near Wildcat Mound visible in my aerial photos were exposed. I used a short fin on my Badfish SUP and paddled without special problems, but Rob was forced to remove his regular fin in the last miles of paddling..

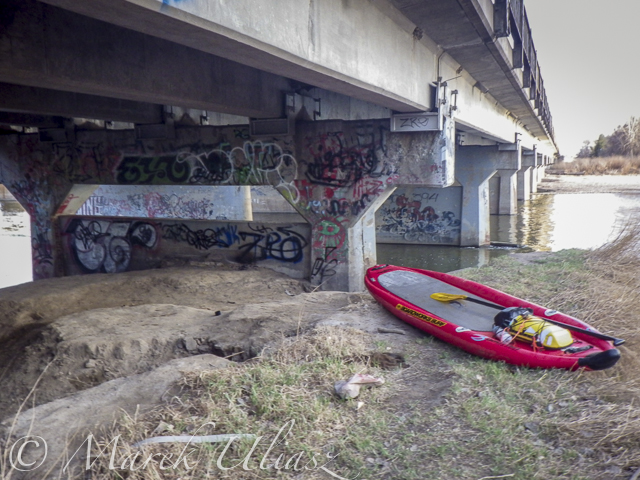
    We finished our trip at highway 85 bridge at Evans about 1 mile upstream from the closed Riverside Park. I was describing this place in my previous posts: comfortable parking (limited to ~10 cars) at the end of frontage road, a pretty good river access under the bridge, but the place has a lot of “urban” character (graffiti, garbage, beer bottles).

    Rob’s pictures from this paddling on facebook.

    Access to the river from the county road 19.5 looks more or less the same as before flooding. River flow ~200cfs. I started paddling trips here with flow as low as 90cfs.

    Wildcat – March 8, 2015. Access to the river from the county road 19.5 looks more or less the same as before flooding. River flow ~200cfs.

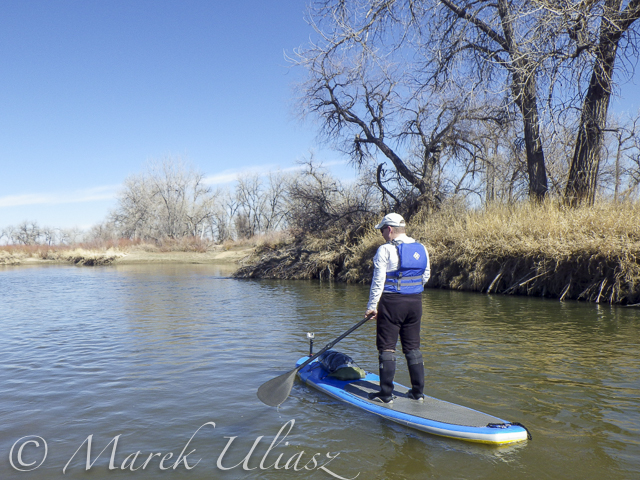
    paddling South Platte River by SUP

    Rob is paddling on St Vrain Creek just above confluence with South Platte River

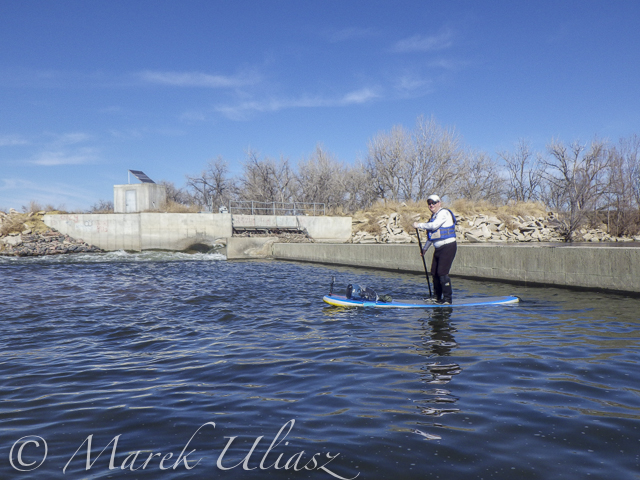
    paddling South Platte River by SUP

    The first diversion dam above highway 60 bridge.

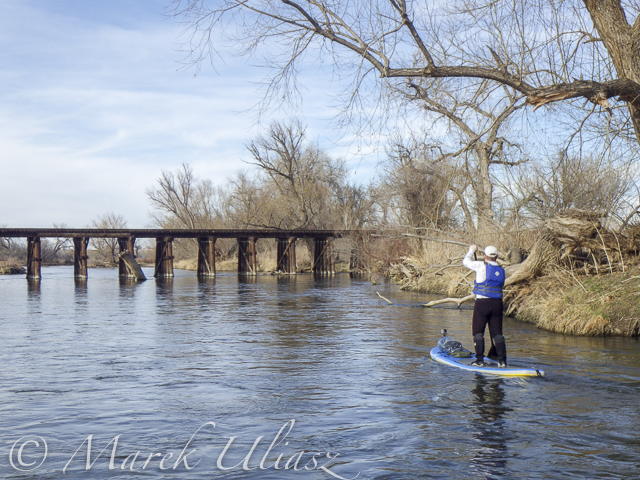
    paddling South Platte River by SUP

    Railroad trestle below highway 60 bridge.

    paddling South Platte River by SUP

    Portaging the 2nd dam. Water was low enough to just go over the dam.

    paddling South Platte River by SUP

    Landing at Evans under highway 85 bridge.

    Related posts:
    Exploring the Upper North Platte River in Colorado by SUP
    Paddling SUP on South Platte River from Kersey to Kuner
    South Platte River below Denver – GPS/photo river guide


    paddling with a camera

  • Photographers Ignite – 5 Minute Power Sessions to Change Your World

    Screen Shot 2015-03-11 at 7.17.19 PMI only just heard about Photographers Ignite, which is a twist on the extremely popular Ignite Sessions. It is produced by Kevin Kubota and I had a chance to sit in on the sessions on the last day of this year’s WPPI (Wedding and Portrait Photographers International) conference.

    I asked Kevin if I could share some of the videos and he agreed, so while the sessions from this year aren’t online yet I hand picked a few from the archives that I think you’ll enjoy.

    #1 – There’s gotta be something more . . .

    This video by Matt and Katie spoke to me on so many levels. I’ve been to the burnout stage and like Katie, survived and got my love for photography back. Giving back using my photography is something I believe in passionately and we even have a few articles about how to do that here on dPS (I’ll put some links below the video for you). Watch and see if it speaks to you as well.

    • Why to Consider Doing Photography Related Volunteering in Your Community
    • Using Photography to Make a Heartfelt Difference
    • Photography As A Means For Societal Betterment
    • Use Your Camera to Give
    • Photography projects that make you feel alive

    #2 – The Creativity of a child

    On a very similar theme of finding that lost passion or creativity, Melissa Niu tells her story of how her daughter helped her recapture hers. As adults with busy lives we seem to lose a little of ourselves and creativity is suppressed or put on the shelf. Find a way to rekindle yours.

    • Kick Your Creativity Up A Notch
    • 6 Ways to Enhance Your Creativity
    • 12 Ways to Add Randomness and Creativity to Your Photography
    • 5 Cheap and Easy Ways to Re-inspire Your Photographic Creativity

    #3 – Need to know

    Adobe teacher and guru Julieanne Kost (and self proclaimed geek) goes through the things she feels are the need to know items in terms of the technical side of photography. “Learn the technology” says Kost so you it becomes an asset which allows you to focus on your creativity not the technology.

    So? Are you inspired and motivated?

    Let here what you plan to do now. If you watch the Matt and Katie video he urges everyone to do what? DO! Take action. Because . . .

    “Inspiration and awareness without action is just entertainment.”

    googletag.cmd.push(function() {
    tablet_slots.push( googletag.defineSlot( “/1005424/_dPSv4_tab-all-article-bottom_(300×250)”, [300, 250], “pb-ad-78623” ).addService( googletag.pubads() ) ); googletag.pubads().enableSingleRequest();
    googletag.pubads().disableInitialLoad();
    googletag.pubads().collapseEmptyDivs( true );
    googletag.enableServices();
    } );

    googletag.cmd.push( function() { googletag.display( ‘pb-ad-78623’ ); } );

    googletag.cmd.push(function() {
    mobile_slots.push( googletag.defineSlot( “/1005424/_dPSv4_mob-all-article-bottom_(300×250)”, [300, 250], “pb-ad-78158” ).addService( googletag.pubads() ) ); googletag.pubads().enableSingleRequest();
    googletag.pubads().disableInitialLoad();
    googletag.pubads().collapseEmptyDivs( true );
    googletag.enableServices();
    } );

    googletag.cmd.push( function() { googletag.display( ‘pb-ad-78158’ ); } );

    The post Photographers Ignite – 5 Minute Power Sessions to Change Your World by Darlene Hildebrandt appeared first on Digital Photography School.


    Digital Photography School

  • Paddling and Flying with Geese at St Vrain and South Platte Confluence

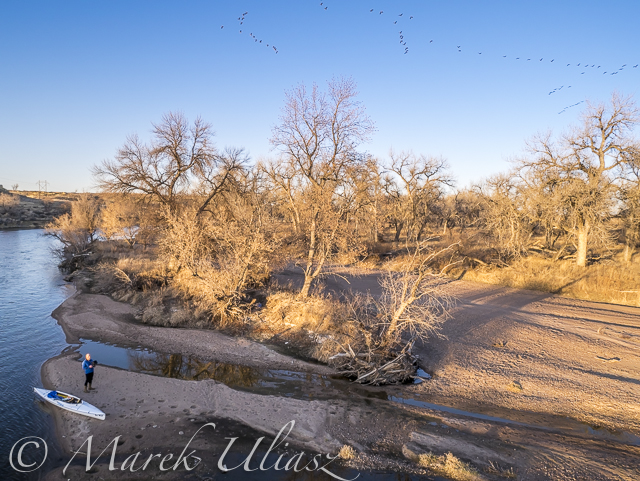
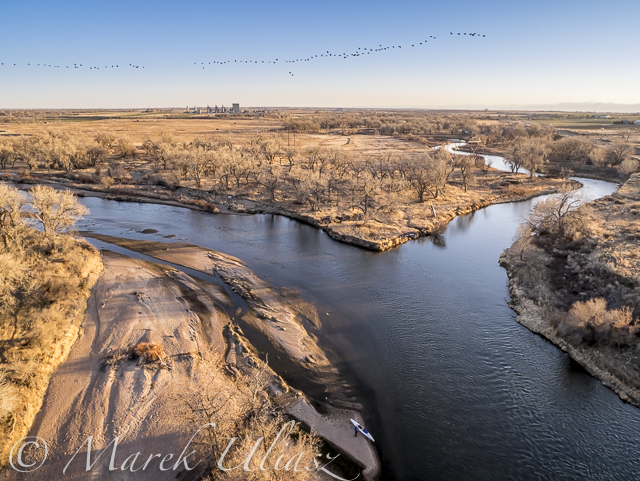
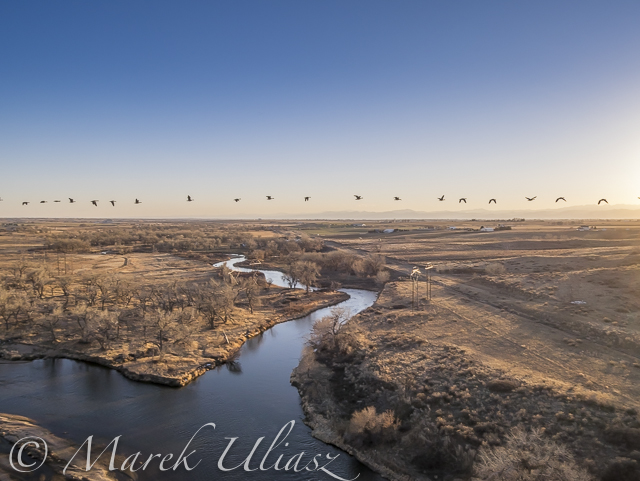
    During my last paddling trip I made a stop to photograph the confluence of St Vrain Creek and South Platte River below Platteville. It was just before sunset. Hundreds of Canadian geese were passing by. I had my drone about 8 minutes in the air and some of flying geese were captured in my pictures.

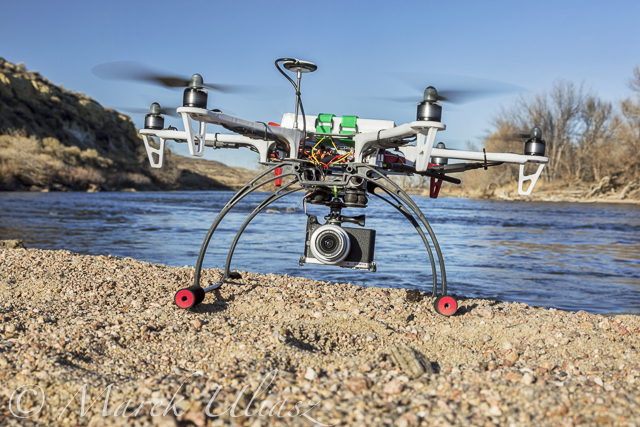
    Pictures of my drone (DJI Flame Wheel F550 with Panasonic Lumix GM1 camera) were shot earlier during my first stop at Wildcat Mound about 1 mile below the confluence.

    My next visit to this river section with be probably on SUP and without the drone. I paddle Badfish SUP with a short fin which is probably safer at some shallow and rocky spots below the confluence.

    South Platte River and St Vrain

    Aerial view of the South Platte River with Sea Wind canoe and a paddler/pilot.

    South Platte River and St Vrain

    Aerial view of South Platte River and St Vrain Creek confluence looking upstream, i.e., south

    South Platte River and St Vrain

    Aerial view of South Platte River and St Vrain Creek confluence

    DJI Flame Wheel F550 drone

    DJI Flame Wheel F550 drone with Panasonic Lumix GM1 camera on a sandbar

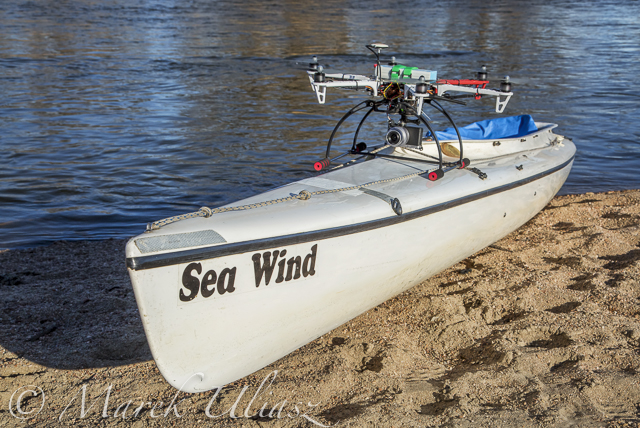
    hexacopter drone with camera and canoe

    Sea Wind canoe with DJI Flame Wheel F550 drone

    I am adding the above pictures to Aerial Landscape gallery in my stock photography portfolio. They are available for license and immediate download as royalty free images.

    Related posts:
    Aerial View of South Platte River at Wildcat Mound below Platteville
    Paddling SUP on South Platte River from Kersey to Kuner
    South Platte River below Denver – GPS/photo river guide


    paddling with a camera

  • GoPro Hero4 Black – Camera Review

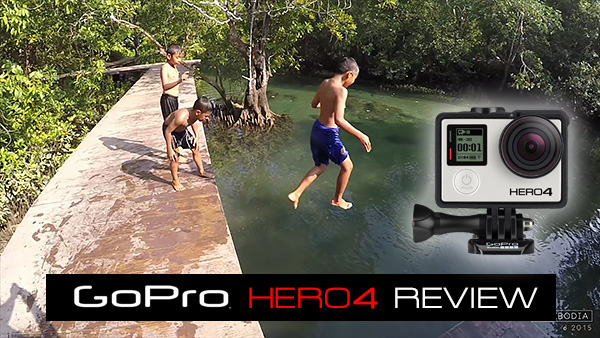
    GoPro Hero 4 Black Review

    The GoPro Hero 4 Black edition is an action cam for recording video but it’s also a very powerful stills camera if you’re interested in getting super wide angle shots on a budget, especially if you want to shoot underwater.

    If you are into shooting video of the 4K variety, don’t overlook this tiny but powerful little camera. Here’s a short test film I put together to show the 4K chops of the GoPro Hero4 Black.

    The 4K Image Quality

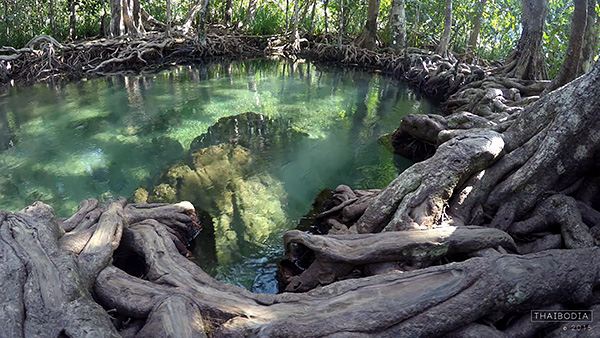
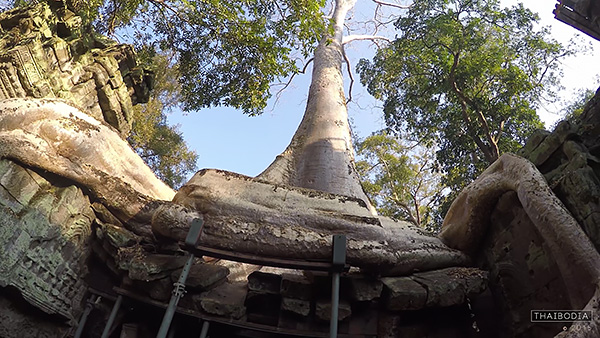
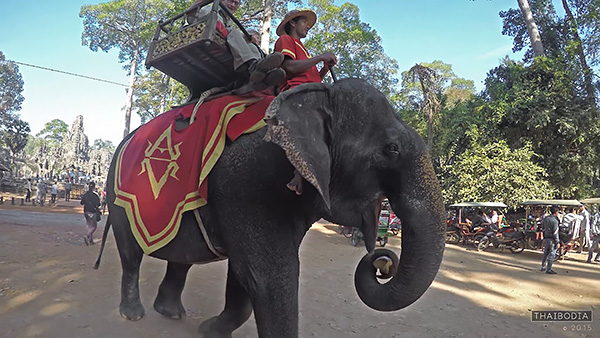
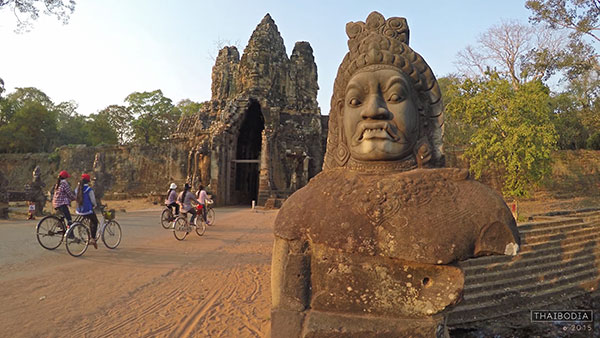
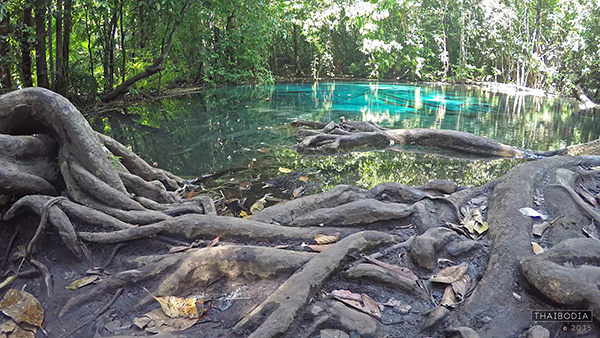
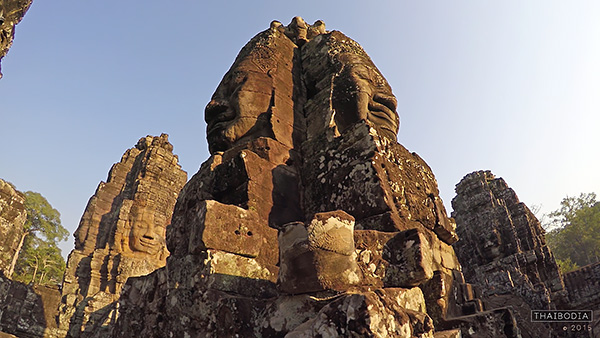
    I was so impressed with the clarity of the 4K video captured by the GoPro that I decided to shoot a little film while visiting Thailand and Cambodia. With only a cheap tripod and a slider you can create some beautiful looking 4K footage. To watch the above film in 4K click on the Youtube quality setting and set it to 2160p. Even if you don’t have a 4K capable screen you’ll still benefit from seeing that glorious extra resolution.

    The 4K image quality is amazing when you consider the price tag, but only in the right light. When shooting in dark or shaded conditions the image quality takes a massive drop with lots of noise and hardly any shadow detail.

    In low light conditions you’ll get better results on your still images by shooting in the 8 Megapixel still mode.

    Not Just an Action Cam

    With my film I set out to create a little art piece rather than the usual death-defying action or skateboard fails that you usually see from GoPro footage. It’s actually when using the GoPro in a fairly slow and stable setting, that you really get to see that crisp 4k at its best.

    Once you start jumping around and adding major vibration to your recordings, you might as well just shoot in 1080p and save yourself some disc space.

    Gopro Here 4 Review by Gavin Hardcastle

    Shooting Stills

    Once I’d gotten over the outrageous fisheye (Wide and SuperWide) perspective of the GoPro, the sharpness of that cheap little piece of glass blew me away. Not only are stills very, very crisp if you keep the camera still, but the 4K footage is so sharp that you can easily grab stills from frames in your video and that is where the GoPro really excels for stills photography.

    Yes, you’ll get better dynamic range and overall image quality from hitting the shutter button to actually take a still image, but if you missed the moment, the 4K video recording most likely didn’t.

    Imagine having a DSLR that shoots at 30 fps. When that day arrives you’ll never miss a moment of action but I doubt you’ll be paying $ 500 for that kind of power. Until that day, the GoPro Hero4 Black Edition will have to do. It fits in your pocket, weighs less than a muffin, and can go underwater when placed in the skin-tight waterproof housing.

    Try doing that with your DSLR. Actually, don’t!

    GoPro Hero Camera Review

    Ease of Use

    In terms of what photography settings you can control, things are very limited. You can’t set focus, do long exposures, or have any control over depth of field. You can change the white balance, ISO, and exposure value by two stops but that’s about it.

    The idea with the GoPro is switch it on and start shooting. It’s about as automatic as it gets.

    You get three buttons to set the shooting mode and the preferences of those modes. Sounds simple but having used professional cameras for years I have to say this is really frustrating. I was forever switching into the wrong mode accidentally which ruined some shoots. I’d often think I was shooting a 4k video sequence when in fact all I’d done was take a still image.

    You’ll get much better control of the GoPro if you use the Smartphone app but even that is limited. The image quality that gets transmitted to your phone is so bad that you won’t be able to clearly see everything in your frame, meaning you’ll get some nasty surprises during editing.

    GoPro Here 4 Black Edition Review

    The Touch Screen Option

    For an additional $ 90 you can attach a touch screen to the back of the GoPro. I found it to be a total waste of money and much prefer using the phone app. Of course, the app option won’t be much help for surfers and water warriors in general, in which case, the touch screen is better than nothing.

    I guarantee that it will drive you crazy the first time you try the Unlock Touchscreen swipe action, that you’re forced to use through the plastic housing. It’s kind of like scratching an itch while wearing boxing gloves.

    GoPro Hereo 4 Review in Cambodia

    Battery Purgatory

    I take back all my previous complaints about the battery life on mirrorless cameras. I’ve had sneezes that lasted longer than the battery in the GoPro. If you’re really lucky you’ll get around 20 minutes of battery life in clement temperatures. I shudder to think what the battery life would be in subzero temperatures.

    Dynamic Range

    I realize I’m totally spoiled with a background using DSLR and mirrorless cameras so it’s unfair to expect the GoPro to perform on that level, especially at just $ 500. I have to say though that the dynamic range of the GoPro 4K footage is pretty feeble. You’ll have to get used to blown out skies and murky shadows that you just can’t recover in post.

    I’d happily pay considerably more for a Pro version that allowed for better image quality and some kind of RAW video format that allows better control of shadows and highlights, but I’m not sure if that’s currently possible for such a tiny little camera.

    The Gopro Hero 4 Review

    There was no chance of recovering the blown out highlights of the trees in the background in this 4K video frame.

    Exposure Shifting Issues

    I had to scrap a lot of footage due to the fact that you can’t lock the exposure on the GoPro. As you move the camera around it’s constantly adjusting exposure. While that’s an essential requirement for action footage recording, it totally ruins artistic slider shots. If ever a Pro version of the GoPro becomes available I’d like to have a RAW video format and exposure locked where I decide to set it.

    Slow Motion

    Another cool feature of the latest GoPro is that it can record at 120 fps (frames per second) but unfortunately that’s only at 1080p resolution. When played back at 30 fps in editing software you get super smooth slow motion. I can’t wait for the next generation of GoPro that records 4K at 120 fps.

    The Gopro Here 4 Black Edition Camera Review

    Should GoPro Owners Upgrade

    If you already own a previous version of the GoPro and you’re thinking of upgrading, I’d ask yourself if the 4K recording means that much to you. If you’re recording dirt bike adventures in 4K you’ll not see much of an improvement over upscaled 1080p footage. All that shaking and fast movement really makes the 4k quality pointless.

    If you’re filming drone or slider footage, the 4K image quality is a major upgrade and gives you that added option of grabbing sharp stills from the frames of your video.

    Things I love about the GoPro4 Black Edition

    • Fits in your pocket
    • Sharp 4K video for under $ 500
    • It’s waterproof (when placed in the housing)
    • Weighs less than a muffin
    • Super wide angle for less than the cost of a DSLR fisheye lens
    • Ideal for drones
    • The phone app

    Things I dislike about the GoPro4 Black Edition

    • Battery life is beyond pathetic
    • You cannot lock the exposure value
    • The three button controls are annoying
    • The optional touchscreen is painful to use

    Conclusion

    Grumbles aside, I’m still impressed by the things I can do with this sub $ 500 camera. Capturing crispy 4k video footage from a palm sized toy is a breath of fresh air for me, especially when you consider the heavy gear I usually lug around on my travels. I’m giving the GoPro Hero4 Black Edition a generous four out of five stars.

    googletag.cmd.push(function() {
    tablet_slots.push( googletag.defineSlot( “/1005424/_dPSv4_tab-all-article-bottom_(300×250)”, [300, 250], “pb-ad-78623” ).addService( googletag.pubads() ) ); googletag.pubads().enableSingleRequest();
    googletag.pubads().disableInitialLoad();
    googletag.pubads().collapseEmptyDivs( true );
    googletag.enableServices();
    } );

    googletag.cmd.push( function() { googletag.display( ‘pb-ad-78623’ ); } );

    googletag.cmd.push(function() {
    mobile_slots.push( googletag.defineSlot( “/1005424/_dPSv4_mob-all-article-bottom_(300×250)”, [300, 250], “pb-ad-78158” ).addService( googletag.pubads() ) ); googletag.pubads().enableSingleRequest();
    googletag.pubads().disableInitialLoad();
    googletag.pubads().collapseEmptyDivs( true );
    googletag.enableServices();
    } );

    googletag.cmd.push( function() { googletag.display( ‘pb-ad-78158’ ); } );

    The post GoPro Hero4 Black – Camera Review by Gavin Hardcastle appeared first on Digital Photography School.


    Digital Photography School

  • Walk Through and Review of Autopano Giga – Image Stitching Software

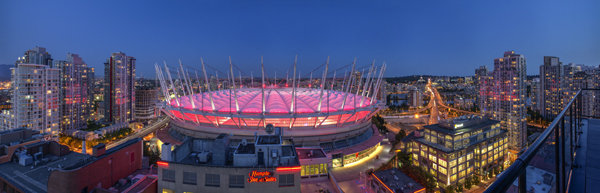
    A six image photostitch of BC Place in Vancouver

    A six image photostitch of BC Place in Vancouver

    My first image editing software was Photoshop Elements 6 and the photostitching function was really erratic to say the least. I was doing real estate and architectural photography and needed a reliable and accurate tool that could quickly and properly stitch images together. I tried a few, but was not happy with all the results. The software was difficult to use and the results were irregular.

    Then I heard about Autopano. I downloaded a trial and was pretty amazed at how quickly, and more importantly, accurately the software stitched scenes together that other pieces of software had not been able to. The stitching was seamless and effortless. I was impressed with the ease of use and the speed at which the software worked. I had found my tool of choice, Autopano Giga. Autopano Giga is a tool that is made by a company called Kolor. They develop image stitching software, pano tour software and 360 degree software, they are a specialist photography software company.
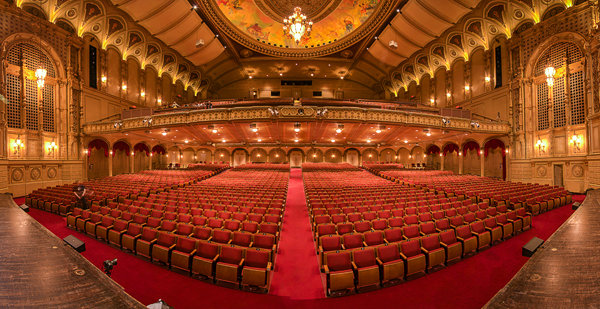
    5 shot photo stitched image of the Orpheum Theatre, Vancouver BC

    Five shot photo stitched image of the Orpheum Theatre, Vancouver BC

    The first step in making effective panoramic images is knowing how to photograph them. That is beyond the scope of this article so for the purpose of this review we’ll assume you have some panoramic images already shot and want to stitch them.

    Time to stitch

    For the image stitching part of this process, I am going to be referring to the interface in Autopano Giga. This product works extremely well. It has been rated as one of the best stitching packages available. I have used it to stitch some pretty crazy panos together and it has been able to process almost anything I have thrown at it. I have done normal photostitches and I have done some multi-row stitches too. Autopano Giga has handled these with ease, and in some cases I have been pretty surprised how well it worked.

    Let’s look at how this process works in Autopano Giga:
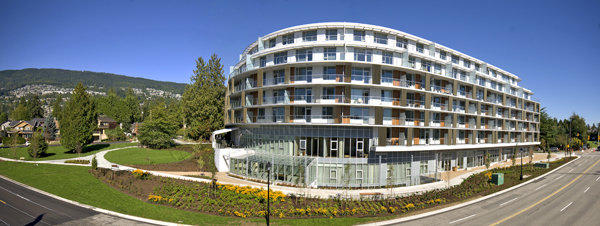
    Panoramic images work well for architectural photography

    Panoramic images work well for architectural photography

    1. Open Autopano Giga and on the first screen that you see, click on the second icon from the left to select your images to be stitched.
    2. Navigate to the images that you have processed and select them.
    3. Click on Detect on the top left hand side of the screen.
    4. Autopano Giga will now scan your images and do a preliminary stitch. This preview stitched image will be displayed on the right hand side of the screen that is open. This process may take a few minutes.
    5. Once the preview image is displaying, click on the Edit button (right-hand side of the screen) this will open the image in the Autopano edit screen. This is where you want to check the image to see that it has stitched together properly, and verify that there are no errors on the image.
    6. There are a number of options here, below is a high level overview of the most important functions
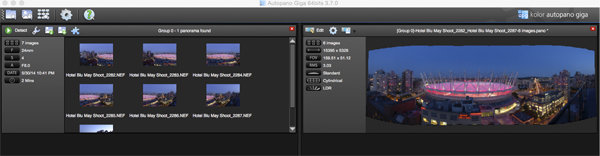
    Detection and preview screen in Autopano Giga

    Detection and preview screen in Autopano Giga

    Autopano functions on the edit screen:

    Autopano has a number of options you can use to render your panoramic image. These projections help with distortion and skewing. Below is an explanation of the most commonly used projections.

    • Spherical – The spherical function allows any panorama to be assembled. It is a commonly used option for building panoramic images.
    • Planar or rectilinear projection – This is a good choice if the angle is low. It’s recommended for architectural shots because it is the only mode that does not curve lines that are deemed to be straight lines. Sometimes if the angles are too extreme there may be a loss of sharpness, so just be aware of that.
    • Cylindrical projection – This projection can be used up to 360° (horizontally).
    • Mercator projection – The mercator projection can also be used up to 360° (horizontally). The effect of stretching up and down, the image may seem to become distorted.
    • Pannini projection – Keeps vertical lines vertical and straight radial lines. This can give a strong sense of perspective on views whose horizontal field of view is wide, and has a single and central vanishing point. It can however makes horizon lines seem curved. This can be corrected in the sliders that pop-up when you are editing in this projection.
    • Little planet projection – The Stereographic projection (also called fisheye projection) can be used to create a little planet. A right way up panorama achieves a planet effect and a backward panorama (180° rotation) makes a tunnel effect. Allows you to create an original view of a panorama, mainly using equirectangular panoramas (360°x180°). Using this projection with panoramas, whose horizontal field of view is less than 330°, is neither aesthetic nor usable.
    • Hammer projection – This projection is similar to a flattened world map, mainly used in astronomy applications. I use this for cityscapes too as it can correct some perspective distortion.
    • Orthographic projection – This is the view point of a sphere, whose panorama is viewed from afar, mapped to the outside and not inside like most other projections.
    • Mirror ball projection – This projection is the result of a visualization of the whole panorama on a spherical mirror, like looking into a crystal ball.
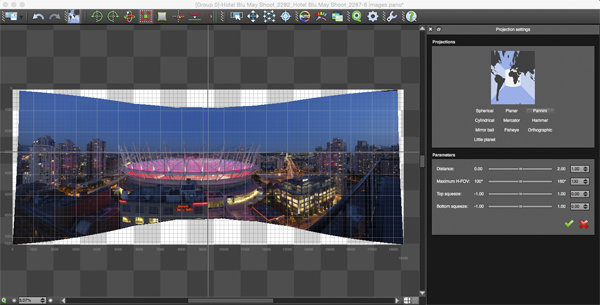
    Projection function in Autopano Giga

    Projection function in Autopano Giga

     Some of these projections are more useful than others. You may find that you will end up using only two or three. A good idea is click on each of them to see how they affect your image. The key factor in choosing a projection is in how the it affects your image visually. Does it work for the subject matter? Does the image look correct? Is the perspective distortion correct? Ask yourself these questions as you experiment with the projections.

    Once you are happy with your projection and the way the image looks, you can now save the image to a folder on your computer.

    Rendering

    This is the process of saving your panorama.It is called rendering because the software needs to perform the final stitching and edits to your image. On the rendering screen, you will need to take note of the following:
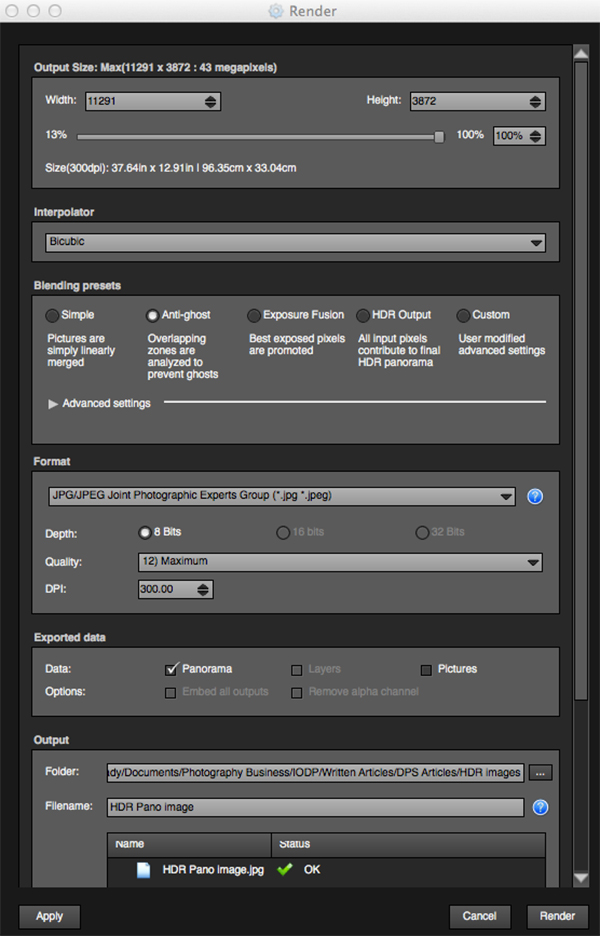
    Render and Save screen on Autopano Giga

    Render and Save screen on Autopano Giga

    Interpolator – The interpolator is the method used to assemble the pixels of your panoramic image, and will determine the quality and sharpness of your image. There are a few different options here, but the most commonly used option is Bicubic. The others are useful for advanced stitching.

    Blending settings – The purpose of the blending settings is to allow combining of the overlapped sections of your panoramic to look smooth and seamless. You will notice the following presets:

    • Simple – This is fast, but it is possible that defects may be seen where the areas overlap.
    • Anti-ghost – Conserve the image’s strong characteristics (stops, lines, curves) when mixing while automatically removing objects that have moved
    • Exposure fusion – To be used if the panorama was created with a set of bracketed shoots. Keeps the best of different exposures.
    • HDR output – To be used by users who wish to create a “.hdr” format file in order to create post-production or special effects. Don’t use this on these images if they have already been processed as HDR images.
    • Custom – This is enabled when you manually change the parameters and they no longer correspond to a profile.

    On the advanced settings, I generally leave that on the default.

    Some of the features that I appreciate in Autopano Giga are as follows:

    Exposure and colour blending – The software works hard at sorting out colour and exposure in the blended images. In the past, one of the worst problems with photo stitching was that sometimes the colour or exposure drifted and there was banding in the scene where the light or colour changed. This is a non-issue in Autopano Giga.

    Panoramic detection – Sometimes I have shot more than a few panoramic images. When I get back to my computer, I can’t always see or remember which images were which. No problem, you can simply point Autopano Giga to a folder and it will detect all panoramics in that folder.

    You can shoot freehand – The software has some really good functionality built-in that can work out multiple viewpoints. So, if you shoot a panoramic without using a tripod or a pano head, the software will be able to detect the scene and make adjustments for it, within reason. Nice to have though, I have shot many handheld panoramic and then dropped them into Autopano and they stitched quite easily.

    Format

    This section allows you to determine the format in which you want your image to be saved. The two formats I use most are TIFF and JPEG. TIFF is an uncompressed file (which means all the information is still in the file, this is great if you are planning to print the image large) The downside to TIFF is that the files are big. JPEG is a compressed format, that means that some image information has been discarded, the quality will still look the same to the naked eye, but if you print a JPEG image up really big, you may notice some image degradation. Depending on your final output and your space constraints you can choose the format that works best for you. Take the quality up to 12 and set the DPI to 300. This will ensure that you have the best quality image saved.

    Output

    On this screen, the software needs to know where to save your panoramic and what you want to call it. Choose your destination folder and name the file. Once this is done (it sounds more complicated than it is) click on the render button and the software will begin rendering your image. Depending on the size of the files being stitched, this rendering process can take a few minutes. Once complete, a screen will pop-up to let you know that the image is now rendered.

    Edit the final image in Lightroom or Photoshop

    Your image is now stitched together, but the final step in the process is to edit the image in your choice of editor. You may want to correct any perspective distortion in Photoshop using the transform tools. If your panoramic image is of a cityscape you will want to make sure that your horizon line is straight and that the buildings are vertical in relation to the horizon. From there you can follow your normal image editing workflow. Once you are done, you will have a fantastic, high resolution, panoramic image.
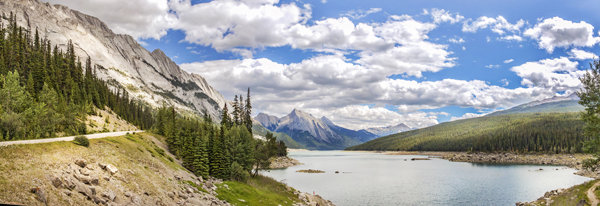
    Final edited panoramic image of Medicine Lake in the Canadian Rockies

    Final edited panoramic image of Medicine Lake in the Canadian Rockies

    My comments on Autopano Giga

    Autopano giga has made my editing and processing time much quicker and easier. I do a fair amount of panoramic photography, and the time saving when using this software is significant. I have used it to photograph landscape scenes, hotel rooms, building exteriors and architectural photography. It works exceptionally well in all of those areas. If you make sure that you overlap the images enough, it will stitch your images with ease.

    The editing process in Autopano Giga is also very easy to use. Simply click on the projections to see how your image looks, make a choice, and you are done. You can make some technical adjustments within the editing area, but I recommend only doing that if it is absolutely essential.

    The perspective control of Autopano Giga is fantastic. For the most part, the final stitched images look correct and I almost never pick up an error on the stitch. It is always a good idea to zoom in to the image to make sure that there are no issues like duplicated areas or bad stitches. This is not normally a problem if your overlap is good.

    Autopano Giga is a great tool and if you enjoy shooting panoramic images, download a trial and see how it works for you. Panoramic photography is a lot of fun, I am always excited when I see the final stitched image, very often it is not what I was expecting and thats part of the excitement of these types of images. Having a tool that takes the frustration out of the process is a great advantage. So, go out there and experiment.

    googletag.cmd.push(function() {
    tablet_slots.push( googletag.defineSlot( “/1005424/_dPSv4_tab-all-article-bottom_(300×250)”, [300, 250], “pb-ad-78623” ).addService( googletag.pubads() ) ); googletag.pubads().enableSingleRequest();
    googletag.pubads().disableInitialLoad();
    googletag.pubads().collapseEmptyDivs( true );
    googletag.enableServices();
    } );

    googletag.cmd.push( function() { googletag.display( ‘pb-ad-78623’ ); } );

    googletag.cmd.push(function() {
    mobile_slots.push( googletag.defineSlot( “/1005424/_dPSv4_mob-all-article-bottom_(300×250)”, [300, 250], “pb-ad-78158” ).addService( googletag.pubads() ) ); googletag.pubads().enableSingleRequest();
    googletag.pubads().disableInitialLoad();
    googletag.pubads().collapseEmptyDivs( true );
    googletag.enableServices();
    } );

    googletag.cmd.push( function() { googletag.display( ‘pb-ad-78158’ ); } );

    The post Walk Through and Review of Autopano Giga – Image Stitching Software by Barry J Brady appeared first on Digital Photography School.


    Digital Photography School
  • Weekly Photography Challenge – Darkness and Light

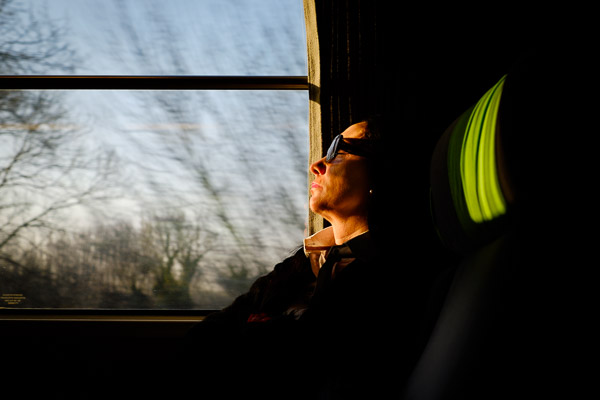
    Have a look at these example images using light and dark for dramatic effect.

    In photography light is everything. But to have depth and drama you must also have dark and shadow. So it’s your turn to interpret that and see how you can use darkness and light in your images this week.

    Weekly Photography Challenge – Darkness and Light

    Photophilde

    By photophilde

    Look for contrast, drama and moody lighting. Harsh lighting might work in your favour here but isn’t mandatory. Think about shadows, look for subjects with unique shapes.

    Here are a few more examples:

    Ester-**

    By ester-**

    Seyed Mostafa Zamani

    By seyed mostafa zamani

    Bill Gracey

    By Bill Gracey

    Ray Schamp

    By Ray Schamp

    Jesse Freeman

    By Jesse Freeman

    Nicolas Alejandro

    By Nicolas Alejandro

    Share your dark and light images here:

    Simply upload your shot into the comment field (look for the little camera icon in the Disqus comments section) and they’ll get embedded for us all to see or if you’d prefer upload them to your favourite photo sharing site and leave the link to them. Show me your best images in this week’s challenge. Sometimes it takes a while for an image to appear so be patient and try not to post the same image twice.

    googletag.cmd.push(function() {
    tablet_slots.push( googletag.defineSlot( “/1005424/_dPSv4_tab-all-article-bottom_(300×250)”, [300, 250], “pb-ad-78623” ).addService( googletag.pubads() ) ); googletag.pubads().enableSingleRequest();
    googletag.pubads().disableInitialLoad();
    googletag.pubads().collapseEmptyDivs( true );
    googletag.enableServices();
    } );

    googletag.cmd.push( function() { googletag.display( ‘pb-ad-78623’ ); } );

    googletag.cmd.push(function() {
    mobile_slots.push( googletag.defineSlot( “/1005424/_dPSv4_mob-all-article-bottom_(300×250)”, [300, 250], “pb-ad-78158” ).addService( googletag.pubads() ) ); googletag.pubads().enableSingleRequest();
    googletag.pubads().disableInitialLoad();
    googletag.pubads().collapseEmptyDivs( true );
    googletag.enableServices();
    } );

    googletag.cmd.push( function() { googletag.display( ‘pb-ad-78158’ ); } );

    The post Weekly Photography Challenge – Darkness and Light by Darlene Hildebrandt appeared first on Digital Photography School.


    Digital Photography School
  • 26 Images of Light and Dark that Speak to the Soul

    In case you hadn’t noticed, this past week we had a theme to a lot of the articles – light!

    In keeping with that topic here are some images that feature light and dark. You can’t have contrast without both of them, and you can’t have light without dark. It’s sort of a symbiotic relationship.

    Photograph Cloisters by Michael Sinat on 500px

    Cloisters by Michael Sinat on 500px

    Photograph Sunlight shining through a green leaf by A_Kiggal on 500px

    Sunlight shining through a green leaf by A_Kiggal on 500px

    Photograph Deadly Beauty 2 by Rick Priest on 500px

    Deadly Beauty 2 by Rick Priest on 500px

    Photograph ~collar by chinh n on 500px

    ~collar by chinh n on 500px

    Photograph ~abstract leaf (I) by chinh n on 500px

    ~abstract leaf (I) by chinh n on 500px

    Photograph Fragility by Noelle Buske on 500px

    Fragility by Noelle Buske on 500px

    Photograph Old carriage interior with light intruding by Anna Váczi on 500px

    Old carriage interior with light intruding by Anna Váczi on 500px

    Photograph The lonely light by Karthik babu on 500px

    The lonely light by Karthik babu on 500px

    Photograph The Light of the Night by Joerg Bonner on 500px

    The Light of the Night by Joerg Bonner on 500px

    Photograph Ajar by Tony Antoniou on 500px

    Ajar by Tony Antoniou on 500px

    Photograph crazy lights by Adriano Saccio on 500px

    crazy lights by Adriano Saccio on 500px

    Photograph Beautiful city II. by Petr Kubát on 500px

    Beautiful city II. by Petr Kubát on 500px

    Photograph Light Path by Abdulmajeed  Aljuhani on 500px

    Light Path by Abdulmajeed Aljuhani on 500px

    Photograph Path of life II by Janek Sedlar on 500px

    Path of life II by Janek Sedlar on 500px

    Photograph Right Light by Daniel Bosma on 500px

    Right Light by Daniel Bosma on 500px

    Photograph Foggy path by Jose Ramon Santos Mosquera on 500px

    Foggy path by Jose Ramon Santos Mosquera on 500px

    Photograph Owl can smile by Drak ? Spirit  on 500px

    Owl can smile by Drak ? Spirit on 500px

    Photograph The essence of night by Liban Yusuf B&W on 500px

    The essence of night by Liban Yusuf B&W on 500px

    Photograph Walking in the dark by Carles Carreras on 500px

    Walking in the dark by Carles Carreras on 500px

    Photograph Black & White Flower by Alecia Groth on 500px

    Black & White Flower by Alecia Groth on 500px

    Photograph Oak and Winter Fog by Jeff Reindl on 500px

    Oak and Winter Fog by Jeff Reindl on 500px

    Photograph Geng by Bry Manaloto on 500px

    Geng by Bry Manaloto on 500px

    Photograph Silence by Ztd125 on 500px

    Silence by Ztd125 on 500px

    Photograph Stage Light on Queen Anne by Jocelyn Ball on 500px

    Stage Light on Queen Anne by Jocelyn Ball on 500px

    Photograph Abadoned by Luke Rooney on 500px

    Abadoned by Luke Rooney on 500px

    Photograph The Bird by Mark Horvath on 500px

    The Bird by Mark Horvath on 500px

    googletag.cmd.push(function() {
    tablet_slots.push( googletag.defineSlot( “/1005424/_dPSv4_tab-all-article-bottom_(300×250)”, [300, 250], “pb-ad-78623” ).addService( googletag.pubads() ) ); googletag.pubads().enableSingleRequest();
    googletag.pubads().disableInitialLoad();
    googletag.pubads().collapseEmptyDivs( true );
    googletag.enableServices();
    } );

    googletag.cmd.push( function() { googletag.display( ‘pb-ad-78623’ ); } );

    googletag.cmd.push(function() {
    mobile_slots.push( googletag.defineSlot( “/1005424/_dPSv4_mob-all-article-bottom_(300×250)”, [300, 250], “pb-ad-78158” ).addService( googletag.pubads() ) ); googletag.pubads().enableSingleRequest();
    googletag.pubads().disableInitialLoad();
    googletag.pubads().collapseEmptyDivs( true );
    googletag.enableServices();
    } );

    googletag.cmd.push( function() { googletag.display( ‘pb-ad-78158’ ); } );

    The post 26 Images of Light and Dark that Speak to the Soul by Darlene Hildebrandt appeared first on Digital Photography School.


    Digital Photography School
  • 20 Fabulous Easter Decoration Ideas for Your Photo Session

    Spring is here. It’s awesome time to make a few mini Easter photo sessions. So, today we put together 20 DIY Easter decoration tutorials which will help you to create a perfect deco stuff for your photo sessions. In this round-up you’ll find eggs garland, table runner with bunnies, flower wraps, decorations for mantelpiece, and many more items that will Continue Reading

    The post 20 Fabulous Easter Decoration Ideas for Your Photo Session appeared first on Photodoto.


    Photodoto

  • Beginner’s Guide to Light Painting

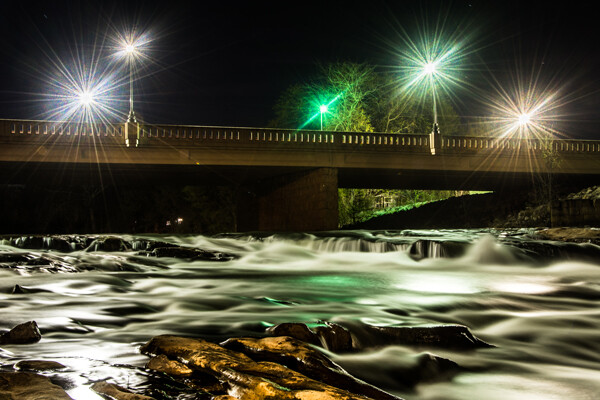
    Mill Falls in Logan, Ohio. Main source of light for this scene was the street lights on the bridge over the river. The bridge was light painted with a high power spot light and some light was also add to the rocks in the foreground. Exposure was 69 seconds. Aperture was set at f/14 to maximize the star burst on the street lights. This image won the auther Bruce Wunderlich a photographers choice award in the 2014 Shoot the Hills photo contest.

    Mill Falls in Logan, Ohio. The main source of light for this scene was the street lights on the bridge over the river. The bridge was light painted with a high-powered spotlight. Light was also add to the rocks in the foreground. Exposure was 69 seconds. Aperture was set at f/14 to maximize the starburst on the street lights. This image won me a Photographers Choice award in the 2014 Shoot the Hills photo contest.

    What is light painting?

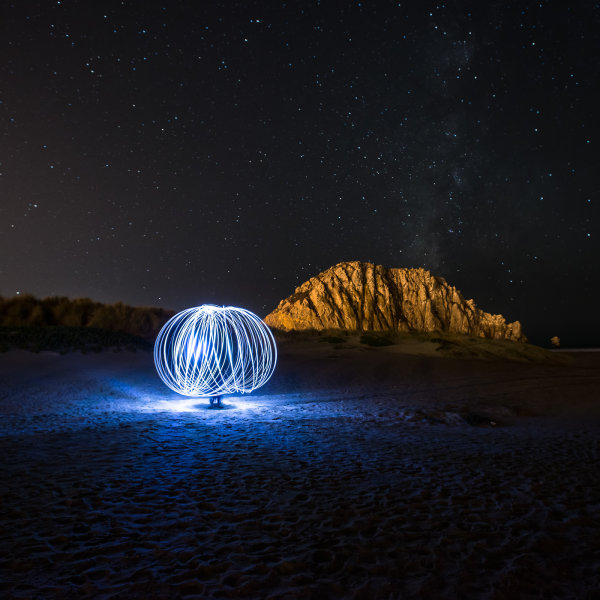
    Light painting is an imaging technique that uses a moving light source to add light to an under-illuminated subject while taking a long-exposure photograph. A scene or object can be brought to life by painting with a beam of light!

    You, the photographer, becomes an artist, and instead of just capturing an image as presented, with light painting you create the image that the camera is capturing. Light painting may take lots of patience and practice to perfect, but the results can be very rewarding. But let’s not make this sound too complicated – light painting is a lot like any low light photography, except in this scenario we are putting an outside light source in motion to enhance an image. Let’s take a look at some of the basics for light painting photography.

    School_house_in_snow

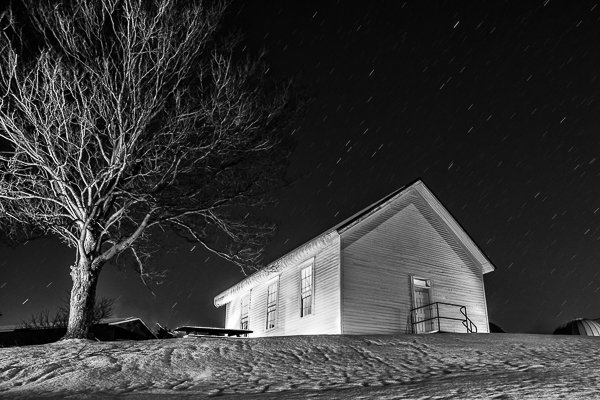
    Schoolhouse in the snow – 170 second exposure, f/8, ISO 100. Notice the light coming from inside the school house, added from the outside by shining a flash light through windows on the back side of the building.


    Tools

    • Camera – Any digital camera capable of manual settings (Bulb).
    • Tripod – One of the most important tools to produce light paintings is a sturdy tripod. In most cases your shutter is going to be open for several minutes and it is very important that your camera does not move during the exposure.
    • Shutter release – Either use a cable release or a remote shutter release to begin your exposure. If you don’t have either of these, use your camera’s timer function to initiate the shot. To light paint, it is very important that you never touch your camera or tripod to prevent vibrations during the exposure.
    • Stop watch – A stop watch or some other way of timing your exposures is helpful, since most of these exposures are going to require your camera set to Bulb.
    • Light source – Many different types of lights can be used to do light painting. These light sources are your brushes and may include: flashlights, torch lights, lasers, glow sticks, flash or strobes, cell phones, or even candles. Just about anything that can produce light can be used as a brush to do light painting. Different light sources will produce different colors of light. For example, a LED light source will produce a cooler (blue) colored light, while a halogen source will produce a much warmer (orange) colored light.
    • Color gels –  Color gels can be used over your lights to alter the tint of your light and add color to your painting.
    Exposure time 30 seconds at f/8

    Exposure time 30 seconds at f/8

    Camera Settings

    • Mode – Use the Manual mode setting, which allows you to set your shutter speed and aperture.
    • Image quality – Set your image quality to RAW, which allows you to capture as much information about your image as possible. (This is not a necessity if you are uncomfortable with shooting RAW, but is a recommendation.)
    • White Balance –  If you are wanting to balance your lighting to the light source, choose either the Incandescent or Tungsten setting. However, sometimes experimenting with other white balance settings can produce some interesting light effects. Daylight white balance is a good starting point if you want to use the color tones of your light sources. Auto White Balance is not recommended.
    • ISO – Set to a low ISO, such as 100.
    • F-stop or aperture – Stop down to f/8 or f/10, which allows you to get more depth of field and enables you to use a longer shutter speed.
    • Shutter speed – Set shutter speed to Bulb, so your actual shutter speed will be determined by the amount of ambient light in the scene.
    • LCD brightness – Lower the brightness of your LCD preview, because the normal setting is too bright at night and will make your image look bright when it is really under-exposed.
    • Histogram – Use your histogram to help check your exposure. If the histogram charts heavily over to the left, your image is going to be mostly dark.
    • Blinkies – Turn on your blinkies (highlight warning) to help you determine if your highlights are exposed properly. It is perfectly acceptable for your brightest highlights to have the blinkies if the rest of your image is properly exposed.
    • Image Stabilization – Set to Off. With your camera on a tripod, having image stabilization turned on can actually fool your camera or lens and cause blurring in your image.
    • Long exposure noise reduction – Recommended setting is Off. This setting can be set to On, but will cause your exposures to double while the camera takes a second black exposure to help remove noise. If your camera is set to a low ISO, the noise level will be low enough in most cases to make this setting unnecessary. Still, it is a good idea to check your noise level before you start, and some older cameras may require this setting to be On to get usable noise levels.
    Still_life

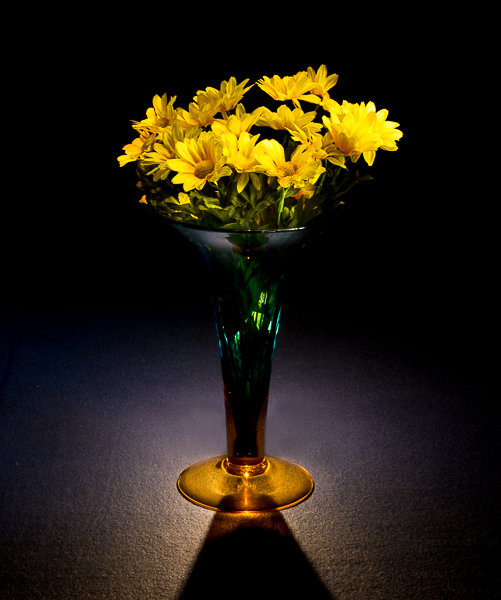
    This vase was back lit with a candle and the flowers were painted with a small pen light. 30 second exposure, f/16 ISO 100.


    Begin with ambient light

    The first step before beginning any light painting is to determine the ambient light in your scene. Determining base exposures can be time consuming when you are experimenting with exposures that could be three to four minutes long. Here is a little trick that can help expedite this process.

    1. Set your ISO to six stops higher than the ISO you plan to use. Example, if you are planning to shoot at ISO 100, set your ISO to 6400.
    2. With your camera set at ISO 6400, experiment to find out how many seconds you will need to expose the ambient light of your scene. Every second of exposure at ISO 6400 is equal to one minute at ISO 100.
    3. So now set your ISO back to 100 and prepare to begin your exposure in minutes instead of seconds. Many cameras lowest ISO is 200 so 6 stops higher would be 12800, and if you cameras lowest ISO is 50, six stops higher would be 3200.
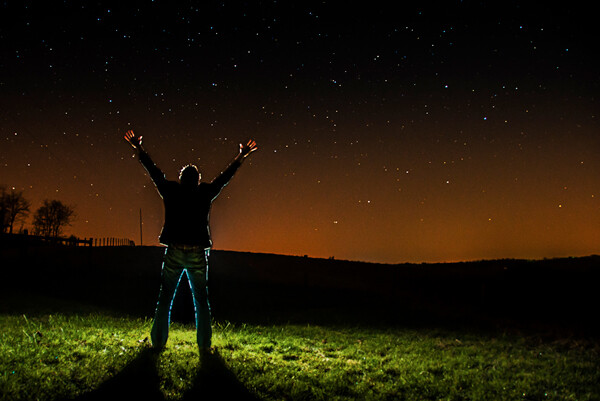
    30 second exposure at ISO 800. In this image the ISO was increased to shorten the exposure to 30 second any exposure longer then that would cause a noticeable blur on the stars. Light Painting was applied from the front of the subject without letting the light shine directly back at the camera.

    30 second exposure at ISO 800. In this image the ISO was increased to shorten the exposure to 30 second because any exposure longer then that would cause a noticeable blur on the stars. Light painting was applied from the front of the subject without letting the light shine directly back at the camera.

    Focusing

    Focusing your camera is an important step and in the dark it can sometimes be difficult to achieve. The simplest way to get your focus is to shine a light source to a spot in your scene that you have determined must be in focus. Using autofocus, place your focus point on the light and make sure your camera is focused on that point. Now change your camera from autofocus to manual and your focus will not change. But remember, if you move the camera you must turn your autofocus back and refocus. Back button focusing is another great way to achieve focus for light painting.

    The Exposure

    At this point, you have determined your exposure time and have your camera focused on your subject. It’s time to begin your exposure and start painting. Most cameras will allow you to set exposures of up to 30 seconds. For exposures over 30 seconds, set your shutter speed to Bulb. Use your cable release or remote to trigger your shutter open. Your shutter will remain open until you press the release again. Use your stop watch, or the timer on your phone, to time the exposure length.

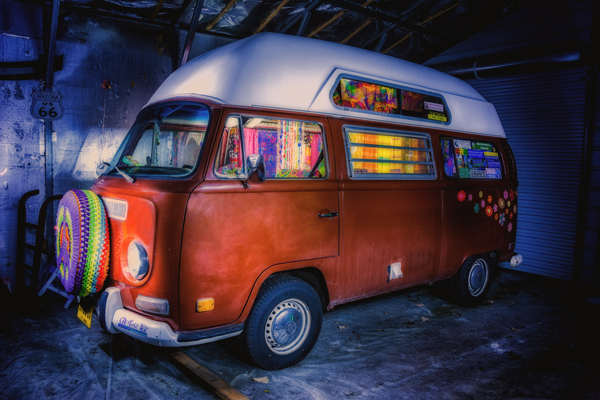
    1971 VW bus

    This vintage 1971 bus was painted using one LED flash light on the outside, with a second light used inside to light up the interior of the bus. White balance was set to Daylight, which cause the LED light to produce the cool blue cast around the bus.

    Painting techniques

    • Paint from the sides – Don’t just stand behind your camera and wave your light around over your image. Painting flat surfaces from the side will allow you to bring out the textures of the surface.
    • Use lots of different angles – for instance, when painting the ground hold the beam low and pan the light over the ground. This will keep the ground from appearing flat and bring out all the details of the surface. Also, by adding light from many angles your resulting image will have an interesting three dimensional effect.
    • Don’t stand between the camera and your light source or you will show up as a silhouetted ghost in your image.
    • Wear dark non-reflecting clothing and keep moving. Again, you do not want to appear as a ghost in your image!
    • Don’t shine the light source back at the camera, or else you will create a bright spot in the image.
    • Use a flash light with a red filter when you need to check your camera to make adjustments. The red light will keep you from ruining your night vision.
    • Different surfaces are going to react to light differently. Wood surfaces may require more light than shiny surfaces such as metal or glass, as rougher surfaces absorb more light than smooth surfaces.
    • Keep your light moving. Move the beam in slow strokes to add light and make faster strokes in areas where less light is needed.
    • Paint in up-and-down or side-to-side strokes, just like one paints with real paint.
    •  You are more than likely not going to get the shot you want on the first try, and it may take multiple attempts to get an image that you are satisfied with. For this reason, try to keep track of how much light you add to each surface. Develop a plan so that you can make adjustments to each exposure until you get the image you have visualized.
    Howard Ignatius

    30 second exposure at f/5.6, ISO 1250 (to get the stars to show up). By Howard Ignatius

    Be Creative

    These are a few basic tips to help you get started with light painting. There is so much more you can do with this medium. Be creative and fearless about trying new things. Once you start to get the hang of light painting, there is no limit to the images you can create with your camera in the dark and a few creative light sources. Do you have any additional tricks or tips for light painting to share?

    googletag.cmd.push(function() {
    tablet_slots.push( googletag.defineSlot( “/1005424/_dPSv4_tab-all-article-bottom_(300×250)”, [300, 250], “pb-ad-78623” ).addService( googletag.pubads() ) ); } );

    googletag.cmd.push(function() {
    mobile_slots.push( googletag.defineSlot( “/1005424/_dPSv4_mob-all-article-bottom_(300×250)”, [300, 250], “pb-ad-78158” ).addService( googletag.pubads() ) ); } );

    The post Beginner’s Guide to Light Painting by Bruce Wunderlich appeared first on Digital Photography School.


    Digital Photography School
  • There is No Bad Light for Street Photography

    One of the advantages of being a street photographer is that you certainly don’t need to get up before dawn to catch the good light. Harsh sunlight, nighttime and rainy days are only a few of the most desired situations on the streets. Getting up too early, before people are out and about, may actually be counter-productive in your search for the decisive moment.

    The key is to use light, any light, to your advantage

    Any time of day or night, be aware of the quality and quantity of light, and look for interesting light sources and subjects.

    ©Valérie Jardin

    ©Valérie Jardin

    Nighttime photography

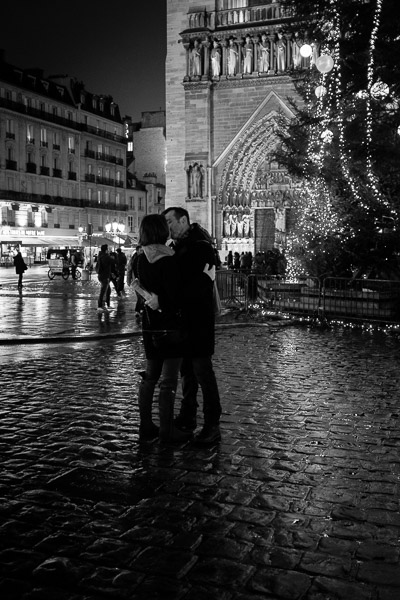
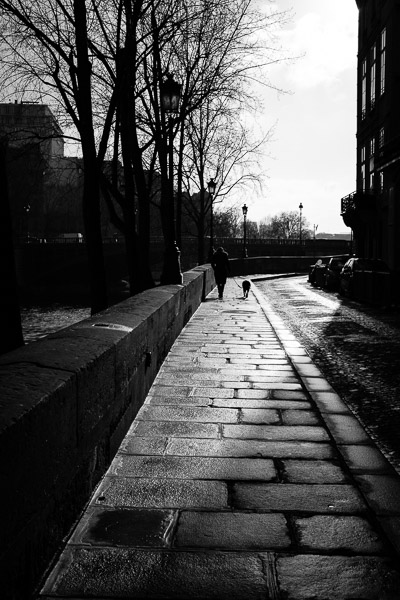
    The night adds a new dimension to your street photography. There are so many interesting light sources to work with such as street lights, traffic lights, car lights, neon signs, etc. Even bright Smartphone screens illuminating people’s faces can make for a fun shot. Learn to focus manually for night photography. Even if the auto focus works in most conditions, practice switching to manual focus rapidly, it may save the shot!

    It’s true that a simple slider action in post-processing can bring out details from the shadows, but that doesn’t mean that you should always use it. This is a common mistake that I see too often when the night scene starts to look like it was shot in the daytime. Let the shadows fall where they do and embrace the atmosphere and mystery of the night.

    ©Valérie Jardin

    ©Valérie Jardin

    Don’t worry about noise, especially if you shoot black and white. First, you can now push the ISO of most cameras to very high numbers with very little noise. Second, the little bit of grain in your pictures will enhance the mood and atmosphere. Likewise, embrace the motion blur and the slightly out of focus shots. Who says that a good image has to be tack sharp? What’s the point of technical perfection if your subject is boring, or the story non-existent?

    ©Valérie Jardin

    ©Valérie Jardin

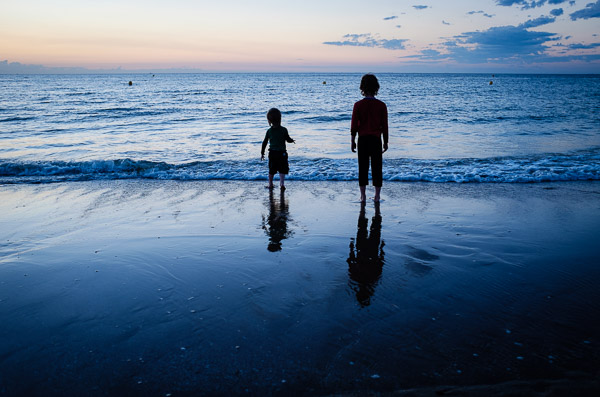
    Silhouettes

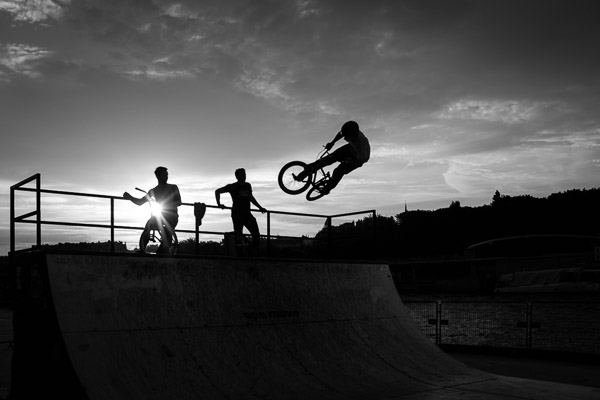
    The key to successful silhouette photography is to find a well-defined subject. Remember that not everyone makes an interesting street photography subject and the same principle applies to silhouettes. The shape of the body should be well defined, capturing the right gesture is even more important to achieving a strong image. Many elements can add interest as well, such as umbrellas, bicycles, hats, etc. Watch for obstructions in front of and behind your subject, and if they are moving, make sure you don’t catch them in between steps. Setting your camera in burst mode will increase your chances of getting the right gesture. Remember that your subject is not the background, which can act as a distraction, so do not be afraid to blow out the highlights behind your silhouettes unless it is an integral part of the story.

    In order to shoot successful silhouettes, you need to take control of your camera first. Instead to going through all the steps here, check out: How to Photograph Silhouettes in 8 Easy Steps.

    Shooting into the bright sun

    Shooting into the sun when it’s low in the sky can create some dramatic shots. Add a sunburst effect when possible. The starburst effect is best achieved by setting your camera at a small aperture and hiding the sun partially behind a structure or person. Experiment with exposure compensation to get a nice dark silhouette and once you’re happy with the result, wait for the right subject to enter your frame, or the right action to happen.

    ©Valérie Jardin

    ©Valérie Jardin

    Strong shadows

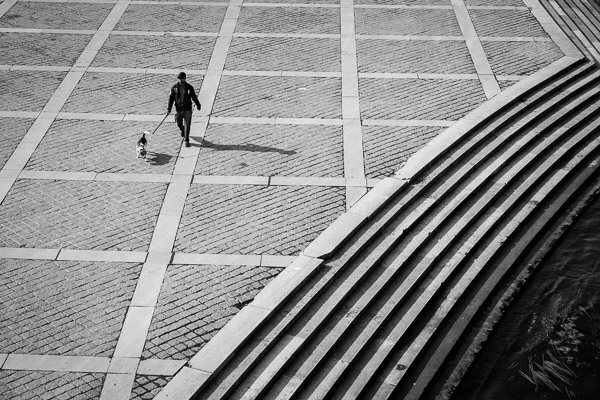
    Street photographers love shadows. Similarly to silhouettes, not every shadow works. It should be really dark and well defined. The surface on which it shows will also play a part in the result. It’s important to strategize and position yourself to get the best possible shot, the shadow may hit a wall next to the subject for instance. Long shadows are also really interesting when shot from a higher vantage point. Sometimes it’s all about the shadow, and the subject casting it does not even need to be fully included. This method, if well executed, will add an element of mystery.

    ©Valérie Jardin

    ©Valérie Jardin

    Reflections

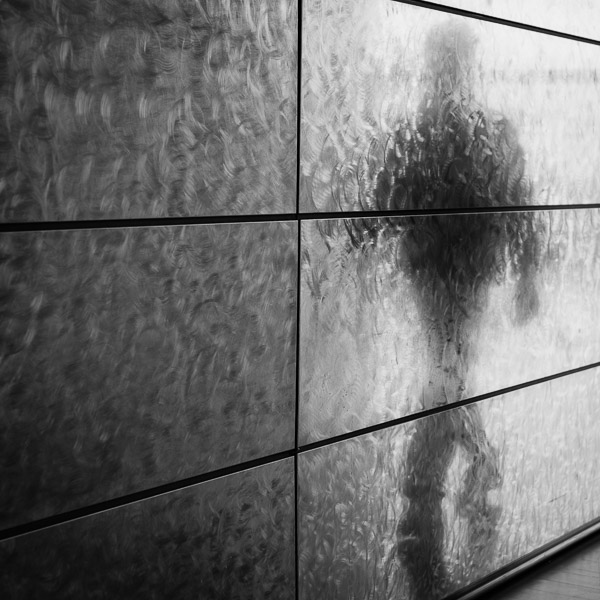
    Sunlight can create some really cool reflections in windows, puddles, or other surfaces and add interest to your street photography. Don’t be afraid to experiment!

    ©Valérie Jardin

    ©Valérie Jardin

    High contrast situations

    Harsh sunlight and deep shadows can create ideal situations for the discerning street photographer.  The sun comes out after the rain? Even better! The wet pavement will add yet another dimension and interest.

    ©Valérie Jardin

    ©Valérie Jardin

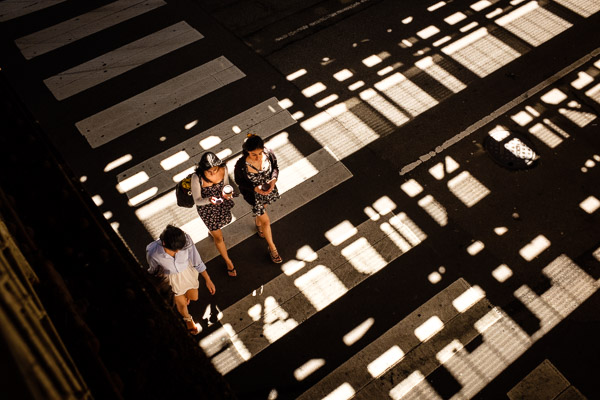
    Dappled light

    One of my favorite daylight situations in street photography is when I find a nice source of dappled light. Remember that even if the situation is ideal, not every person walking down the street will make an interesting subject. It’s often a game of patience…

    ©Valérie Jardin

    ©Valérie Jardin

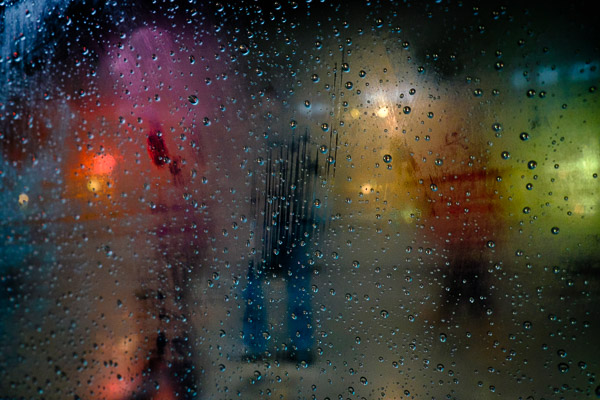
    Rainy days

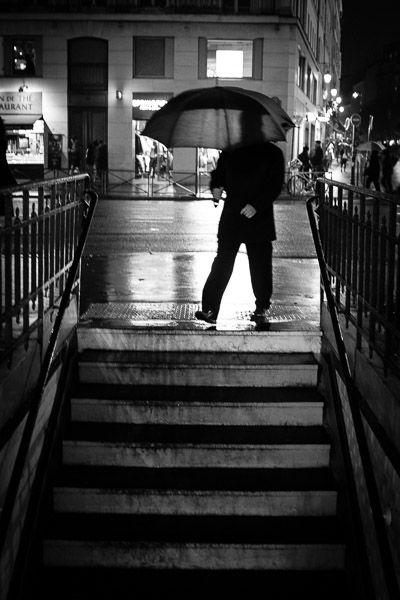
    As long as you protect your gear (and yourself), rainy days can provide some of the best street photography opportunities. People on the streets will behave very differently when it’s raining, creating some interesting situations. Umbrellas also make for good props. There are also ways to embrace the rain by focussing selectively through windows, car windshields, etc.

    ©Valérie Jardin

    ©Valérie Jardin

    Open shade for street portraits

    If you enjoy doing street portraits, then the same simple rules that you apply for any other portrait will help you achieve the best result. Once you’ve asked your subject for a portrait, you might as well go the extra step and ask them to move slightly, or even cross the street for the most flattering light. Look for open shade to avoid harsh shadows on their face.

    Golden and blue hour

    Of course, there are also beautiful photographs of people to be made in the early morning and late evening hours, but always remember that there is no bad light!

    ©Valérie Jardin

    ©Valérie Jardin

    Conclusion

    Never use the quality of light as an excuse not to hit the streets. Making any light work in your favor is part of the fun and also the best way to improve your skills and get some cool shots. Have fun!

    googletag.cmd.push(function() {
    tablet_slots.push( googletag.defineSlot( “/1005424/_dPSv4_tab-all-article-bottom_(300×250)”, [300, 250], “pb-ad-78623” ).addService( googletag.pubads() ) ); } );

    googletag.cmd.push(function() {
    mobile_slots.push( googletag.defineSlot( “/1005424/_dPSv4_mob-all-article-bottom_(300×250)”, [300, 250], “pb-ad-78158” ).addService( googletag.pubads() ) ); } );

    The post There is No Bad Light for Street Photography by Valerie Jardin appeared first on Digital Photography School.


    Digital Photography School