Category: Photography

  • How to Photograph Babies from a Week Old to Sitting up

    There is a huge trend among baby photographers to do all of those awesome shots of babies all curled up and almost “in the womb” looking. I LOVE those shots, but they have very definite parameters, meaning that you have to catch the baby while she is still curly; so 3 to 7, or sometimes, at the very oldest, 12 Continue Reading

    The post How to Photograph Babies from a Week Old to Sitting up appeared first on Photodoto.


    Photodoto

  • 6 Steps to Edit and Deliver Wedding Photographs in One Day

    This is exactly how I process every wedding that I photograph. I am now on my fifth year of shooting weddings and have shot roughly 70 of them. I am a big fan of working smart and not hard. Every step of my workflow is thought out, and belongs for very specific reasons. Most of the time I am finishing and delivering my wedding photos within four to five days. If it wasn’t for attention span and the internet, I should be able to finish wedding photographs in 24 hours every time.

    digitalphotographyschool-1-31

    1/100, f/5.0, ISO 2000, 15mm fisheye

     Step #1 – Import and backup (1-3 hours)

    I first import all images (1500-2000) via Lightroom into a folder (titled bride’s name and groom’s name, in alphabetical order) on my 1TB portable Lacie Porsche drive.

    I work on the go a lot, and I am often editing in a coffee shop, friend’s place or co-working space, so I have my 13 inch Macbook Pro (retina display) and portable drive to work from. The drive currently holds about six months of images, or 80,000 photos.

    I have a big gripe about people who organize their photos by date. In my opinion, it’s a terrible system when it comes to finding photos at a later date. When your bride Tiffany asks for a change in a photo from color to black and white, how do you find that folder with her wedding? On my drive it would be under “Weddings,” and in a subfolder titled “Jeremy & Tiffany.”

    digitalphotographyschool-1-12

    1/400, f/6.3, ISO 2500, on a Canon 135mm f/2

    While my images are uploading I will be posting a Facebook album of the same day slideshow that I produced at the wedding, and tagging the bride and groom in it. This is usually 30-50 images that I’ve edited during dinner or during any sort of down time, like the end of cocktail hour.

    Note: This means I have already added the bride and/or groom on Facebook, which is standard practice for me. Being friends with my clients is probably one of the greatest perks of my job, and it also guarantees tons of referrals. I have a competitive side that always wants to post the pictures faster and better than any friend, uncle or cousin at the wedding. Whoever posts first on Facebook will get the most attention. 

    digitalphotographyschool-1-36

    1/50, f/2.8, ISO 2500, 24mm with the Canon 24-70 2.8

    I then plug in my backup 3TB drive, go to sleep and let my computer backup via Time Machine overnight.

    Losing photos is the greatest fear of most photographers, and for that reason alone many professionals have multiple backup systems in place. I don’t usually format my memory cards until the wedding has been delivered or backed up, if I can help it. I also use Backblaze, a cloud-based backup system that constantly backs up files whenever I am online.

    digitalphotographyschool-1-23

    1/400, f/2.5, ISO 400 with the Canon 135mm f/2

    Step #2 – Culling (30 min an hour)

    In Lightroom I go through all 1500-2000 photos and select every photo that looks good, unique, and usable. I use the star rating system in Lightroom, by pressing the “1” key on the photos I like. I usually end up with about 800 photos after this. If you focus and know what you are looking for, this should only take about 30 minutes to an hour, maximum. No agonizing over which photo is best between two very similar ones. Just trust your gut and go.

    One “trick” I’ve unconsciously been doing is usually selecting the last photo in a series of similar photos. If you’re like me, you take two or three photos of each thing you are photographing. I move on when I think I’ve got it, and that means the second or third photo in a series should be my selection.

    digitalphotographyschool-1-17

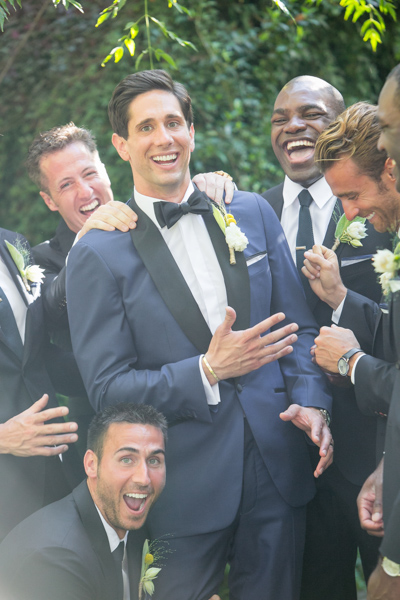
    To get photos like these, I usually have the guys grouped together in a friendly way, and then I tell them to “harass the groom.”

    Next I go through and do my two-star selects. These are the best photos from the day that tell a clear story from beginning to end. They are images that would likely end up in a photo album (besides family photos). I almost always end up with 100 photos, give or take a few. This should take about 10-15 minutes, since you are selecting from a much narrower field of photos. Also, you really have to trust your gut on which photos are winners here.

    Step #3 – Editing and retouching (three hours)

    After I’ve selected my favorites, I edit them first. I actually enjoy editing these ones, because I am proudest of them, and they are all different. I edit everything in Lightroom. I never open photoshop unless I’m making a diptych or doing heavy changes to a photo. Sometimes I start with a base preset in Lightroom, one I called “Typical Phil.” I hand edit all of these photos. This should take about an hour or two tops. These are then exported at 2500px, 300dpi, 88 quality, (and also renamed Highlights-0001.jpg, Highlights-0002.jpg, etc.), into a folder called Highlights which has been created inside the the main folder of images. I upload the Highlights into a PASS gallery, and deliver this immediately, so the clients don’t have to wait any longer to see some of their wedding images.

    Never spend more than 30 seconds on a photo. If you do, you are editing for yourself and other photographers, not the client. Most clients won’t be able to tell the difference between good, great, and perfect. Aim for great.

    My export settings make each of my images only about one or two megabytes in size, but they are able to be printed up to 11×14″. Anything larger and I’m happy to provide a specific file to my client directly. I do this in the interest of hard drive and cloud storage space. Also, clients are usually only printing at most one or two photos extra large, so I don’t see the need to make every photo 30 inches on the long edge.

    PASS is a phenomenal application that is incredibly intuitive and easy to use for delivering digital photos to clients. Pixieset is another popular competitor. PASS charges per album of photos; Pixieset charges for bandwith/storage.

    digitalphotographyschool-1-13

    This next part is the secret to my rapid editing and turnaround of images. Take each of the favorite images that you’ve edited (two-star images), and copy each edit onto surrounding photos with a similar light source. If your exposure is consistent in this range of photos, the edit you do for one image should look great for every other image in that scene. This should take about two hours straight through.

    Lightroom speed tip

    Here is a Lightroom secret to make the copying and deselecting of images extra fast. With your main image selected, hold down Command and select all the other images you want to copy the edit to. In Develop mode, hold down the option key and press sync. This automatically copies the edit onto all the other photos (to make sure you are copying the appropriate edits across all photos, you can simply press sync and a dialogue box will pop up showing which edits are going to be copied).

    Now that the edits are synced, you can deselect each image and check for consistency by pressing “/” which is the shortcut for deselecting the current image. I do this to make sure I’ve seen and checked each image for perfect exposure.

    digitalphotographyschool-2-3

    Remember, you’re not retouching every face, every sky, every element of a picture. You can spend a little more time doing that on the favorites, but chances are your couple isn’t going to be printing every single photo from their wedding, so why are you retouching random shots from the reception?

    Step #4 – Exporting (45 minutes)

    Export all images from each section of the wedding into their own folders. Folders and images can be named according to which part of the wedding they belong to (Getting Ready or Pre-Ceremony, Ceremony, Family, etc.). These can all be exported with these settings: 88 Quality, 2500 px long edge, 300dpi. This should take about ten minutes to start doing, and maybe an hour for the computer to finish (depending on number of images and your computer’s power and speed).

    digitalphotographyschool-3-6

    Step #5 – Uploading (one hour)

    Upload all your files to your photo sharing service of choice (PASS, Pixieset, Zenfolio, Pixifi, etc.). Ideally, the first gallery that a viewer will see is the Favorites, or Highlights gallery. No need to overwhelm them with every photo from the Getting Ready series. Your top 50-100 photos makes for an excellent opener in an online wedding gallery, like this.

    That should take about 10-30 minutes (up to an hour or so), depending on how fast your internet connection is.

    digitalphotographyschool-1-15

    Step #6 – Delivery (10 minutes)

    Email the bride/groom the following:

    “Hi! How is everything going? I know I said it would be a couple of weeks until the photos are finished, but I have good news for you! I’ve finished and edited ALL the photos and they are ready for you to see and download in this gallery here.

    Simply click on the download button to create a zip file with all of the high resolution images to your computer. This will save you time having to wait for me to mail you a disk or thumb drive, which would have all the exact same files in it.

    As a special surprise, I am gifting you $ 50 of print credit! Simply put in “bridegroomname” in the checkout section of ordering prints under coupon code. This should buy you up to X amount of 8×10’s, or X amount of 5×7’s.

    Let me know if you have any questions about anything! Enjoy the photos :)

    -Phil”

    digitalphotographyschool-1-34
    I recognize this doesn’t involve an in-person sales meeting, delivery of albums, or anything of that nature. This is simply the fastest way you can do business and work smart, not hard. I regularly book weddings between $ 3000-4000 doing exactly this. I have sold wedding albums, and that’s room for more profit, but also more headache and work. Write to me and I’ll let you know how to make album making a painless, quick process as well. It’s all about guiding your clients’ expectations.

    digitalphotographyschool-5-2

    Do you have any other workflow tips for weddings?

    googletag.cmd.push(function() {
    tablet_slots.push( googletag.defineSlot( “/1005424/_dPSv4_tab-all-article-bottom_(300×250)”, [300, 250], “pb-ad-78623” ).addService( googletag.pubads() ) ); } );

    googletag.cmd.push(function() {
    mobile_slots.push( googletag.defineSlot( “/1005424/_dPSv4_mob-all-article-bottom_(300×250)”, [300, 250], “pb-ad-78158” ).addService( googletag.pubads() ) ); } );

    The post 6 Steps to Edit and Deliver Wedding Photographs in One Day by Phillip Van Nostrand appeared first on Digital Photography School.


    Digital Photography School

  • 5 Lessons Learned Switching from DSLR to Mirrorless for Travel Photography

    Two months ago, after shooting for 10 years with Canon, I completely switched to Sony. It surprised some readers of my blog, as well as some fellow photographers. To address the issue, I published a detailed post on my blog with the reasons behind my switch. To save you time, I will summarize my reasoning, not only in one sentence but in one word: INNOVATION. I could see that, in the last two to three years, the main innovation was happening in the realm of mirrorless systems and I felt that Canon was simply an outside observer.

    I considered the switch for a long time. I first waited because mirrorless systems were not up to DSLR standards to which I was accustomed. Then suddenly, about a year ago, all mirrorless manufacturers began releasing new camera models that could compete with any DSLR and, in some cases, even surpassed them.
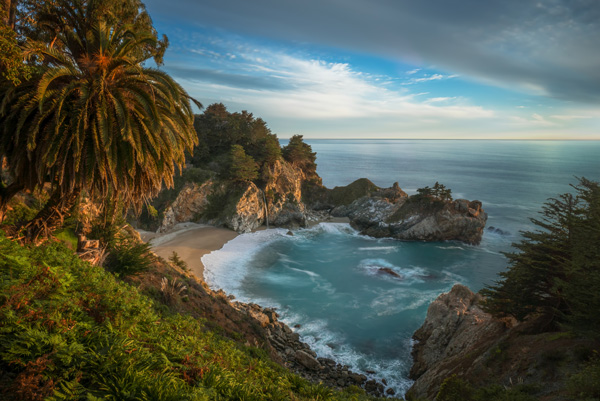
    SwitchingfromCanont Sony Photo 1

    Big Sur, California – Sony A6000, Sony 10-18mm lens

    That was when I decided to switch. But, it took another six to seven months to choose the right kit (camera and lenses) for my travel photography needs.

    My initial choice was the Panasonic Lumix GX-7 which was the perfect camera for me feature-wise but I was not too crazy about the selection of high-end wide angle lenses.

    My second choice was the full frame Sony A7 and, I almost pulled the trigger last fall. However, after holding it in my hands, the Sony A7II in combination with the newly released Zeiss 16-35mm lens was almost comparable to the DSLR in weight and size.

    That was when my choice was made. Just before the Christmas holidays, I sold all of my Canon gear to prevent cold feet. Then, I ordered the Sony A6000, Sony 10-18mm f/4, and Zeiss 16-70mm f/4 in one shot. I paid $ 2000 in total. Sony lenses are always pricy but I found that the price of the complete kit was very reasonable.
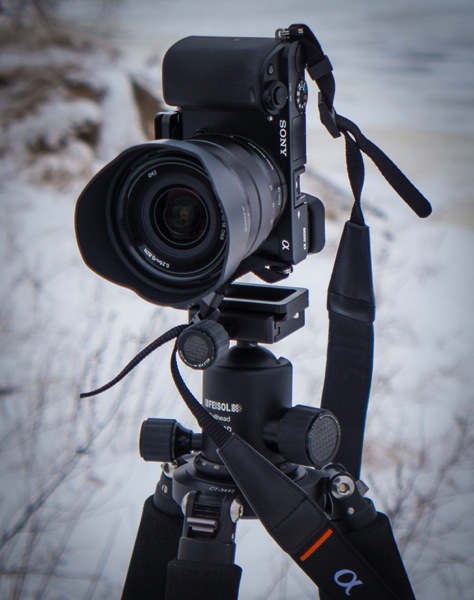
    SwitchingfromCanont Sony Photo 2

    Sony A6000, Sony 10-18mm lens and Feisol Tournament Tripod

    I just returned from my first photography trip of the year; I spent two weeks in Hawaii and Northern California where I exclusively shot with my brand new Sony gear.

    Below are my thoughts after putting this new equipment through the real life test of travel photography. Please note, I only addressed the features of the camera which are important to me as travel photographer.

    Lesson 1: Size does matter in travel photography

    As a DSLR shooter, when preparing for a long and demanding sunrise/sunset hike, I always faced the same dilemma – what equipment to bring? Should I carry everything and look (and feel) like a Sherpa tackling Everest? Or should I hike light and risk missing important gear?

    I do not have to compromise anymore as I can now put everything in a small camera bag and bring it with me. The Sony A6000 (344g) and the Sony 10-18mm (220g) weigh 564g (19.9oz) total. I still cannot believe that a high-quality wide angle zoom lens can weigh only 220g. I call it freedom.

    Don’t get me wrong, the size and the weight were not the main reasons for my switch. I would never jeopardize quality for the sake of weight reduction but it was important consideration.
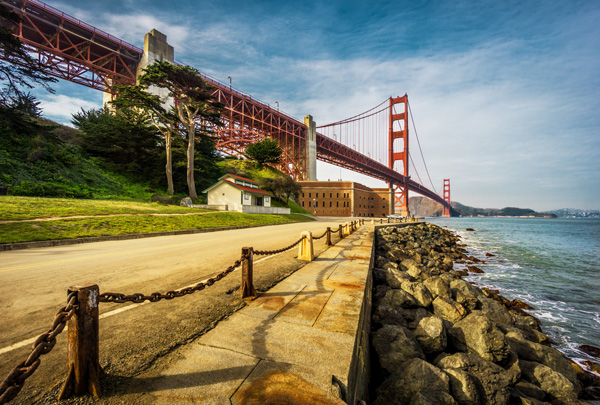
    SwitchingfromCanont Sony Photo 3

    San Francisco, California – Sony A6000 with Sony 10-18mm lens

    Lesson 2: Electronic Viewfinder (EVF) – a new way of looking at the scene

    Somehow, in many mirrorless reviews, the EVF is presented as a negative factor and is portrayed as somewhat of a disadvantage compared to the DSLR optical viewfinder. I do not agree with that conclusion. For me, the EVF is one of the main advantages of mirrorless cameras. Finally, when I look through the viewfinder I can see what the camera’s sensor sees.

    It is a very new and refreshing experience with the EVF, when you can assess the depth of field of the scene before taking the picture.

    Here’s a real life scenario. Earlier I was shooting using exposure compensation -2EV and I forgot to reset it to zero. Now, when looking through the EVF, I can see right away that the exposure is wrong because the EVF picture is too dark.

    When I shoot wide at 10mm, I can even see barrel distortion which realistically represents the photo I am about to take.

    I often use manual focusing when shooting landscapes, which was pretty much an impossible task with the DSLR in bright conditions because of the display screen glare. Now, not only can I easily use the manual focus in any condition, I can also take advantage of Focus Peaking, an amazing feature that highlights areas that are in focus with the bright color. There is no more guess work.

    In one of the reviews, I read how awful and pixelated the EVF picture becomes in dark conditions. I can confirm that it looks pretty bad but it is good enough for composing the shot and beats the DSLR where all you can see is pitch black.

    For me, the EVF simplifies the process of taking pictures and makes it more predictable.
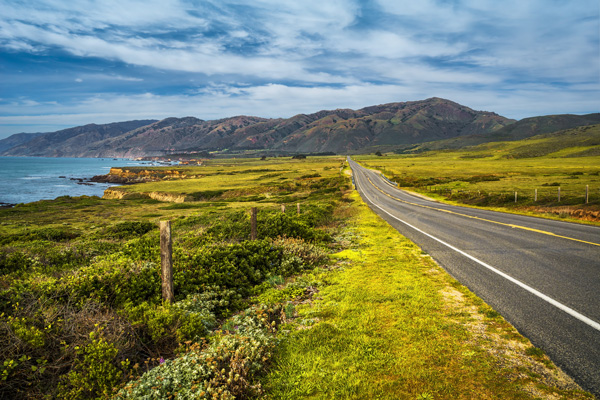
    SwitchingfromCanont Sony Photo 4

    California State Route 1 – Sony A6000 with Zeiss 16-70mm lens

    Lesson 3: I love the 24 megapixels sensor

    During the silly megapixel war between major camera manufacturers, I decided for myself that 16Mpx was the right pixel count for my needs and I had no plans of upgrading only for that reason.

    The Sony A6000 comes with 24Mpix, which I initially did not consider as an important upgrade. What I realized later, after starting to process photos, is that the 24Mpx sensor produces unbelievably clean and sharp images and, in combination with native quality lenses, it resolves an insane amount of detail. Photos look acceptable even at 100% magnification.

    Although, I have to admit the higher pixel count is more taxing on my computer and I might need to upgrade it soon.

    High ISO photography is not something that I do often when I travel and it was hard for me to assess low light performance of the sensor. But, what I can see based on family photos from the holidays is that ISO 3200 is still acceptable and excessive noise is easy to eliminate in Lightroom.
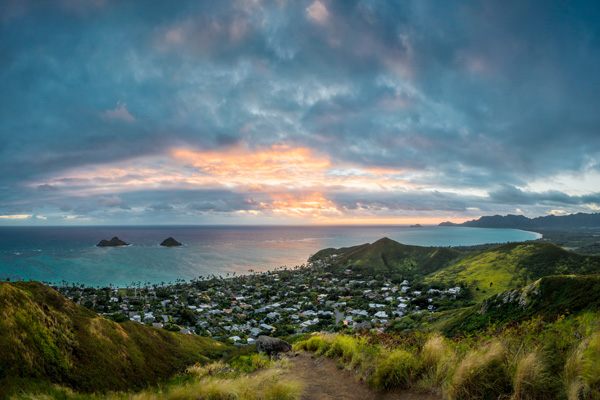
    SwitchingfromCanont Sony Photo 5

    Lanikai Beach O’ahu, Hawaii – Sony A6000 with Sony 10-18mm lens

    Lesson 4: 11fps is a game changer

    Sports photography is somewhat of a hobby for me. The only times when I shoot sports are when professional cycling peloton comes to Montreal every September and when my daughter is playing water polo. In order to test 11fps in combination with the fastest focusing system in the industry, I went to the beach in Hawaii to photograph surfers.

    I switched from RAW to JPEG, set the camera to a continuous shooting mode and enabled Object Tracking. I was amazed not only with the new experience of shooting but with the results as well. Shooting at 11fps reminded me of filming the video and then going frame by frame in the editing software, selecting the best frames. There are no missing moments. The focus was spot on, in pretty much every frame.

    I can see how the Sony A6000 can be a game changer for sports and wildlife photographers.
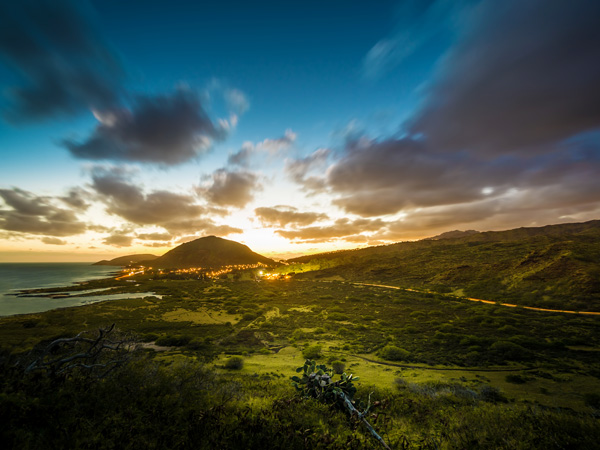
    SwitchingfromCanont Sony Photo 6

    Makapu’u Point O’ahu, Hawaii – Sony A6000 with Sony 10-18mm lens

    Lesson 5: Not everything is perfect in paradise

    Even though my initial experience of using the Sony A6000 is very positive, there are some shortcomings and annoyances I want to address.

    Battery life:

    According to Sony, you can take up to 360 shots on a single battery charge and I found this number to be pretty accurate. I even managed to take close to 390 shots when shooting in bracketing mode. It is not bad at all considering the small battery size and the EVF high power consumption. However, when you are accustomed to shooting 1500 shots on a single charge with the DSLR, the difference is very obvious. Now, I carry three spare batteries with me at all times and I have to remember to keep them charged.

    Bracketing:

    For some inexplicable reason you can shoot five bracketed shots at 0.7EV intervals only, which makes it completely useless. In extreme lighting conditions I have to shoot two sets of bracketed shots (-2, 0, +2), offsetting them manually using exposure compensation (-1 EV). This is very annoying.

    No GPS tagging:

    Even though the camera has decent wireless connectivity, the GPS tagging utilizing a mobile phone is missing.

    Buffer writing lock:

    When a camera transfers photos from the buffer to a memory card, the system is completely locked. You cannot even preview images during the transfer.

    2-Second delay shortcoming:

    You cannot trigger bracketed shots using the 2-second delay functionality. I had to buy, and carry around, an unnecessary extra piece of equipment: Wireless Shutter Release ($ 10).
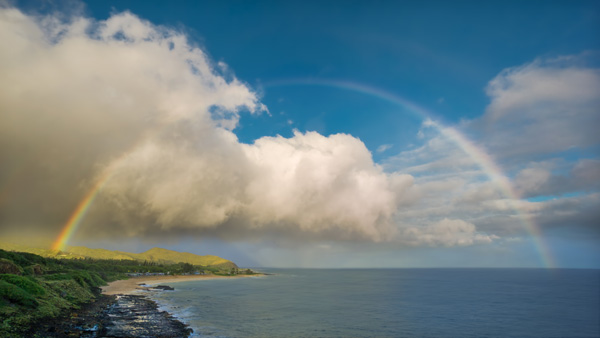
    SwitchingfromCanont Sony Photo 7

    Sandy Beach, Hawaii – Sony A6000 with Sony 10-18mm lens

    Conclusion

    The switch from a Canon DSLR to the mirrorless Sony A6000 was less stressful and less painful than I expected. I believe that one of the main factors that made it possible was my purchase of native Sony lenses so I did not have to deal with the glass from other systems with the converters.

    I am waiting for the widely rumored Sony A7000 which is supposed to be the successor of the Sony NEX-7. I hope Sony addressed the shortcomings of the A6000 and introduces new pro features like: weather sealing, built-in body stabilization, GPS tagging and advanced bracketing. I am definitely planning to get the new A7000 and keep the A6000 as a backup body.

    googletag.cmd.push(function() {
    tablet_slots.push( googletag.defineSlot( “/1005424/_dPSv4_tab-all-article-bottom_(300×250)”, [300, 250], “pb-ad-78623” ).addService( googletag.pubads() ) ); } );

    googletag.cmd.push(function() {
    mobile_slots.push( googletag.defineSlot( “/1005424/_dPSv4_mob-all-article-bottom_(300×250)”, [300, 250], “pb-ad-78158” ).addService( googletag.pubads() ) ); } );

    The post 5 Lessons Learned Switching from DSLR to Mirrorless for Travel Photography by Viktor Elizarov appeared first on Digital Photography School.


    Digital Photography School
  • Social Dance Photography Tips

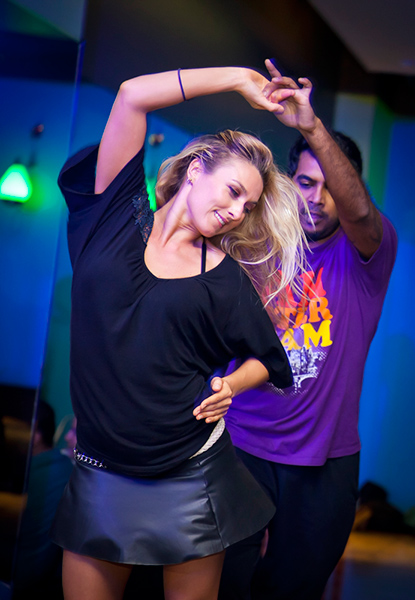
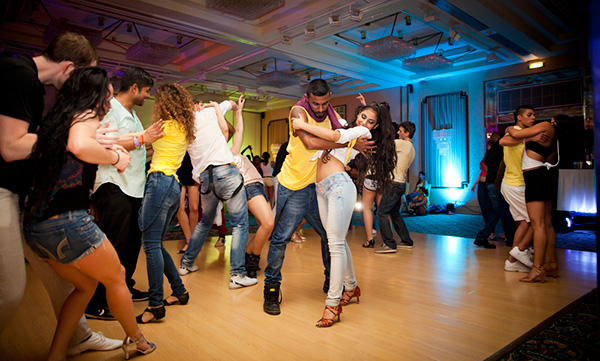
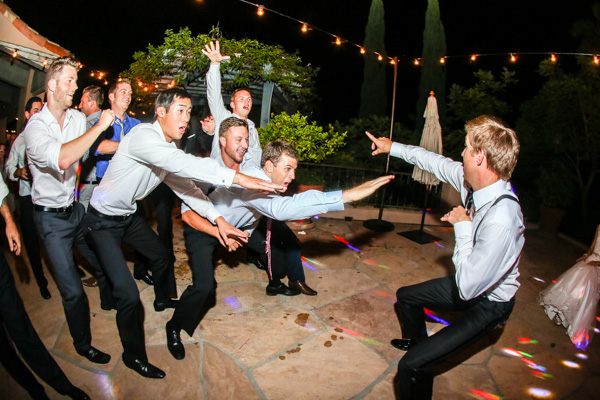
    Nowadays it is very popular to have social dancing as hobby; people go dancing to the themed parties, special events, and travel to the international dance congresses. So definitely the subject of social dance photography is getting more interest worldwide. Doesn’t matter what kind of dance you enjoy the most – the challenges of capturing a great dance moment are very similar.

    Photo1

    Have you ever seen dark, blurry photos, taken from a weird angle of yourself on the dance floor? I bet your answer is yes. Being a dancer myself I could relate to such matters too, which made me realize that it’s not an easy task to get great dance shots. So I started practicing.

    Photo2

    Gladly I had a lot of opportunities to do so due my active role in growing Zouk community in Abu Dhabi, capital of United Arab Emirates.

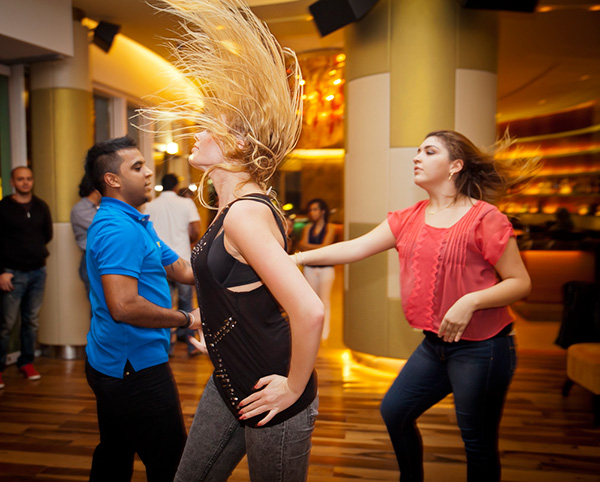
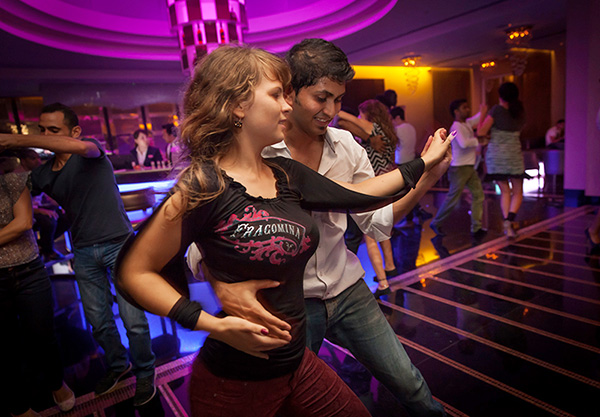
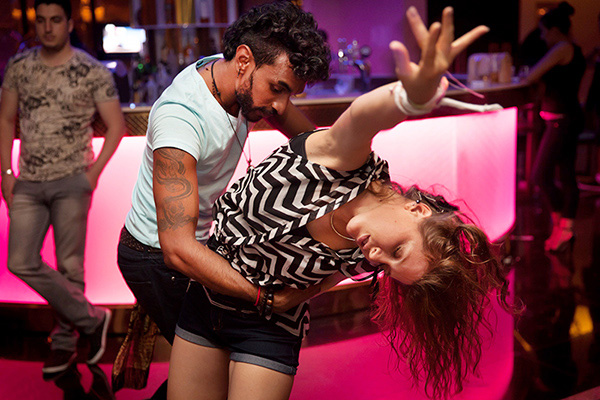
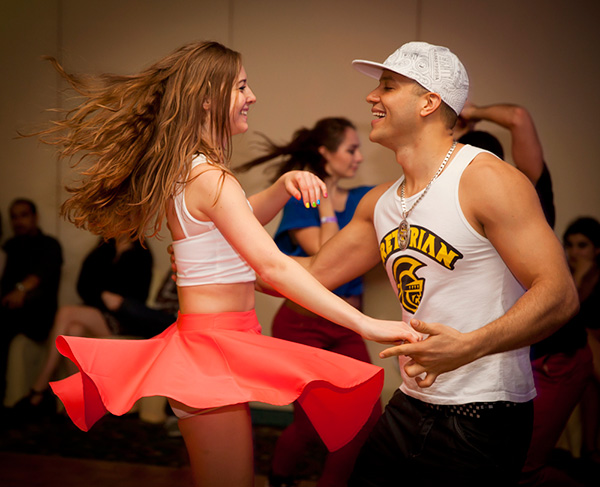
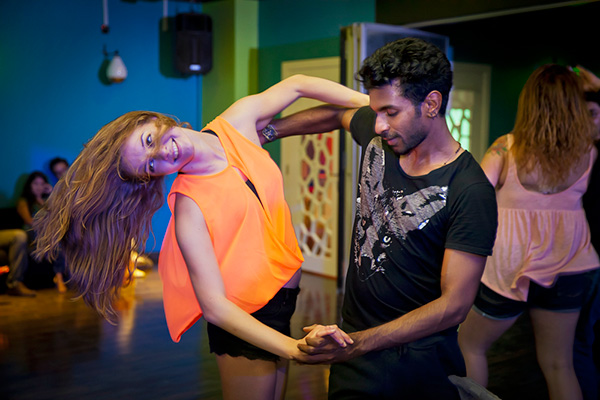
    Zouk is a Brazilian dance; very sensual and addictive. It is known as the dance of the 21st century, and is becoming viral all over the world. The rhythm of Zouk gives dancers a lot of flexibility and freedom to experiment and adapt their style to the music. It offers a lot of beautiful poses for photographer to capture (head flicks, body rolls, spins, twirls, dips and various hip movements).

    Let’s look at the challenges of capturing beautiful dance movements and how to overcome them:

    Photo3

    A dark environment

    Social parties are usually happening in bars, restaurants, or ballrooms where the lights are dimmed. The trick is to expose for the ambient light (use a slower shutter speed, open your aperture as much as possible, increase ISO – up to 1600 worked fine with a Canon 5D Mark II), and use second curtain shutter sync for your flash. For Canon 5D Mark II users that option is located under External Speedlite control>Flash function settings>Shutter sync – check your camera’s manual if you have a different body. Not a problem if your shutter speed gets really low – you still will get last part of the frame frozen, thanks to those flash settings. You can get really creative if the ambient lights include lasers and rotating heads. By moving your camera sideways when the shutter is open you will get strikes and lines which will make your photos even more interesting. Sometimes it is hard to get focus right in a dark environment, so I usually have small pocket laser with me to light the dancers at the moment of focusing.

    Photo4

    Direct flash

    Often with this option you get overexposed figures of dancers and a dark, underexposed background. If possible, scout the environment before the dance event. Search for white walls and ceiling, which can work as a large soft box to reflect light, and use bounce flash instead of direct flash. Another alternative is to use a portable speedlight softbox off-camera to diffuse, and soften strong light.

    Photo5

    Shutter delay

    Have you ever pressed the shutter release button and the slight delay gets you a photo of dancers with their backs to the camera, instead of what you imagined? Try to study movements (if you are not dancer yourself) to oversee what move comes next and press the shutter just before that so you catch the right moment. Each camera is slightly different, so test yours to understand.

    Photo6

    Camera angle

    If your camera angle is too high the dancers’ heads will look bigger and their legs shorter – not always pretty to look at. I usually shoot at the chest level, or in some situations – waist level. Sometimes experimenting with getting really low works well too. Decide on the go what works for you – judge the available space between you and the dancers, and keep in mind how you’re using your flash (if you are bouncing it – you need some distance).

    Photo7

    Lens choice

    My favorite social dance photography lens is 24-70mm f/2.8. It serves me well most of the time, though it depends on size of the party. If the crowd is big and you would like to show that, you might switch to a wide angle lens from time to time, for example, a 16-35mm f/2.8.

    Photo8

    Full-body shots or close-ups?

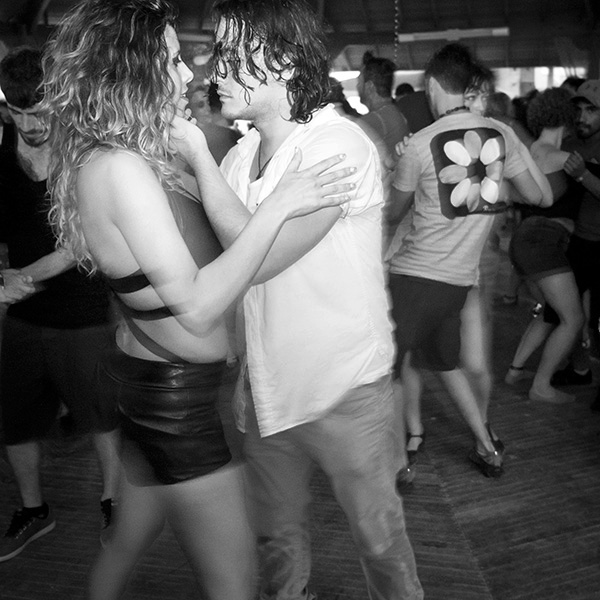
    This is up to you again, depending on dance aesthetics. One note: do not cut off hands or fingers and include a little space around the subject, so photo can breathe. Although this is very subjective, sometimes it can create a different mood when you fill the frame really tight.

    Photo9

    Lastly – keep practicing

    Apply the general rule of photographers; the more you practice – the better shots you get!

    Photo10

    I wish you happy social dance photography; hope you will make dancers look beautiful and graceful! Catch your moments!

    Please share your experiments in comments below and ask any questions there as well.

    googletag.cmd.push(function() {
    tablet_slots.push( googletag.defineSlot( “/1005424/_dPSv4_tab-all-article-bottom_(300×250)”, [300, 250], “pb-ad-78623” ).addService( googletag.pubads() ) ); } );

    googletag.cmd.push(function() {
    mobile_slots.push( googletag.defineSlot( “/1005424/_dPSv4_mob-all-article-bottom_(300×250)”, [300, 250], “pb-ad-78158” ).addService( googletag.pubads() ) ); } );

    The post Social Dance Photography Tips by Viktoryia Vinnikava appeared first on Digital Photography School.


    Digital Photography School
  • Death Valley: One of America’s Worst National Parks?

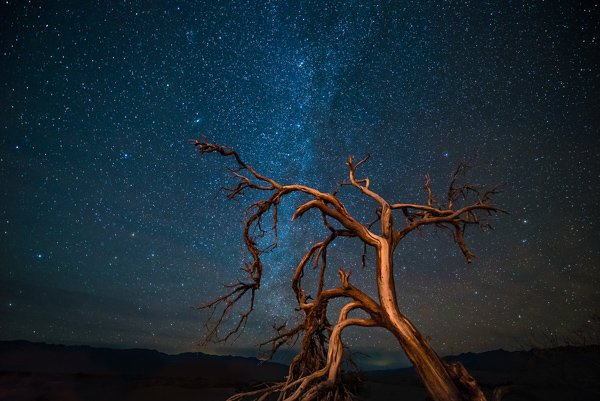
    An ages old mesquite tree looking up at one of the darkest rated night skies in America.

    An ages old mesquite tree looking up at one of the darkest rated night skies in America.

    I recently came across an article by Bill Fink on Yahoo titled “Our Tax Dollars Pay for What? The Nation’s Worst National Parks.” In all fairness, there are some pretty lame national parks and monuments, I’m not going to argue that. Certainly a few of them ended up on this list as expected. But when I got to number five on the list and saw Death Valley National Park, I was astonished.

    Fink writes in the brief article that the best way to simulate a visit to Death Valley is to “heat a pan full of sand to about 200 degrees, then pour it on your head,” and that “when it’s not hot [in Death Valley] it’s bitterly cold, so at least you get some variety in your misery.”

    I’ve been to Death Valley National Park five times now. Twice on photography trips and three times to lead workshops through the park. All three workshops in Death Valley sold out in less than 24 hours. So either I (and my students) have terrible taste in beauty or Bill Fink doesn’t know what he’s talking about. In fact, after reading through his brief writeup a few times, I’d wager that Bill hasn’t even been to the park. If that’s true, it just goes to show how far we’ve come from true journalism in today’s age of click bait articles.

    Death Valley is, in my opinion, one of the absolute best national parks in the country. Here’s a few ways to make certain you agree after your next visit:

    Visit the park between January and March

    The second time I visited Death Valley was in early September back in 2013. The reported temperate at Stovepipe Wells was right around 118 degrees fahrenheit (47.8c). We knew it was going to be hot in the park, but we didn’t know it would be that hot. We were after some Milky Way images and figured we’d give it a go. Since it was still daylight, we decided to hike out into the Mesquite Flat Sand Dunes where the temperatures were around 10 degrees higher (128f or 53c) because of all the reflective sand.

    I had a Camelback on to stay hydrated but if I didn’t continuously drink out of it, the water that gets stuck in the tube would get piping hot. Suffice it to say, the last thing you want to do when you’re experiencing the highest temperatures you’ve could ever imagine is to drink it a mouth full of piping hot water. It was, in a word, miserable.

    As sunset approached, we decided to head to Badwater Basin. There, temperatures had cooled down to a much more manageable 113f (45c). The crazy thing is, the temperature didn’t drop as the sun set and darkness approached. It was pitch black outside and my tripod was too hot to touch and my Canon 1Ds Mark III was flashing warnings at me saying it was overheating. Yes, Canon’s flagship (at the time) pro level camera made to endure the harshest elements couldn’t handle the heat.

    Badwater Basin at a scorching 113?F.

    Badwater Basin at a scorching 113f (45c).

    You may be thinking at this time that Bill Fink was pretty spot on, and if that had been my only visit to the park, I might be inclined to agree. If you want to enjoy everything Death Valley has to offer, you shouldn’t go when the temperatures are unbearable. The average high/low temps in fahrenheit in January for Death Valley are 67/40 (19.4/4.4C), February is 73/46 (22.8/8C)and March is 82/55 (28/13C). Anything past that and you’re looking at possible highs in the 90s and 100s. All three workshops I’ve done in the park have occurred during these months and they all had absolutely beautiful weather.

    Rent a Jeep from Farabee’s

    Much of what Death Valley has to offer isn’t accessible with the Ford Fiesta you rented in Vegas. Places like Racetrack Playa, Eureka Sand Dunes and Titus Canyon simply can’t (and shouldn’t) be reached without a good 4×4 vehicle. I’ve been to Racetrack Playa three times now. Once in a VW Toureg, once in a Chevy Tahoe and once in a Jeep from Farabee’s. The Toureg is a great SUV but it wasn’t 4-wheel drive. We got to the playa without any problems, but on the way out we busted something in the transmission and had to limp back to Vegas for three days while we waiting to get the car repaired. The second trip, with the Tahoe, resulted in a flat tire on the way in at Teakettle Junction. I think it goes without saying that the rest of the drive in, as well as the drive out was pretty nerve racking, considering our only spare tire had already been used.

    The third trip (and my most recent), I finally decided to rent Jeeps for our workshop group from Farabee’s Jeep Rentals in Furnace Creek. We had to rent three because we had nine students and two instructors so we got two 4-door Jeeps and one 2-door. Getting out to Racetrack Playa in the Jeeps was like a dream. Sure, the road was still rough and unforgiving, but the Jeeps handled it without a problem. They also include coolers in the back full of ice cold water and a radio beacon in case you run into trouble, which will send them to your location immediately.

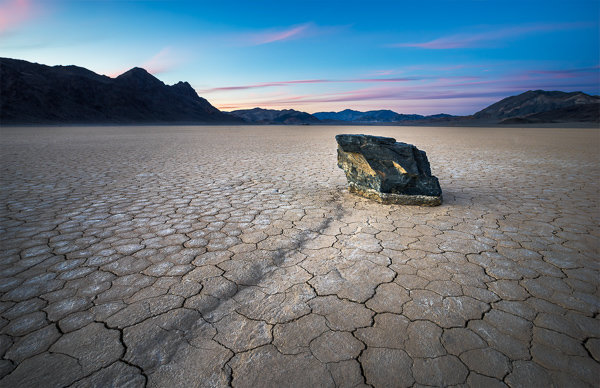
    A "sailing stone" at the Racetrack Playa.

    A “sailing stone” at the Racetrack Playa.

    Parking lots are for tourists – don’t be a tourist

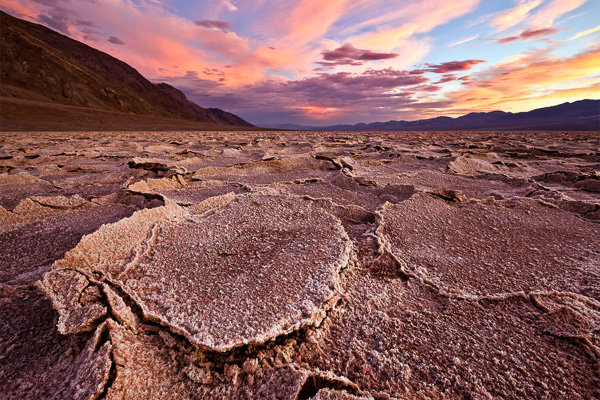
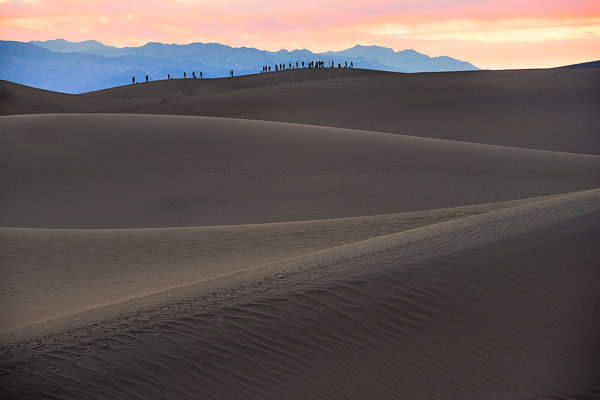
    Two of the most incredible places in Death Valley are the Mesquite Flat Sand Dunes and Badwater Basin. Both have large parking lots that can be totally full at any given time and both locations can be pristine or totally useless depending on the recent weather conditions in the park. When the winds calm down for days or weeks on end, the sand dunes get covered in foot prints quickly and become totally un-photogenic. The salt plates at Badwater Basin are always changing and depend on rain to get back to their pristine condition with white salt and low, thin borders. As the plates dry and time goes on, the salt turns brown and the edges rise until they become totally unrecognizable.

    The best thing to do at the Mesquite Sand Dunes is to park about a half mile before or after the parking lot on the side of Highway 190. Then, just hike out to the dunes from there. You’ll be free of nearly 90% of all foot traffic and will have mostly untouched dunes at your disposal. Just be smart and do your very best to tread lightly. Only walk were you have to and try not to trample the most beautiful dunes.

    If the salt patterns at Badwater Basin look terrible from lack of rain, head over to West Side Road. You’ll actually drive right past this road on the way to the Badwater Parking lot, but most people just keep driving because it just looks like a dirt road. Drive about half mile or so down this road and you’ll have a great chance at finding some incredible patterns here. Just keep in mind that Badwater Basin is always changing and this information could be totally reversed during your visit.

    From our location at sunrise (looking toward the parking area) we could see the circus or photographers already underway at sunrise.

    From our location at sunrise (looking toward the parking area) we could see the circus or photographers already underway at sunrise.

    Scout during the day – shoot at the edges

    Blue skies are the norm in Death Valley. So don’t be surprised if you don’t see much in the way of clouds on your trip. I’ve actually lucked out quite a bit during my visits to the park and have experienced some incredible conditions. All that aside, don’t go photographing this place in broad daylight thinking that you’re going to come out with a bunch of keepers. This is the same with any landscape photography, all over the world. If you want to experience this park in all its glory, you need to capture it at sunrise, sunset or at night.

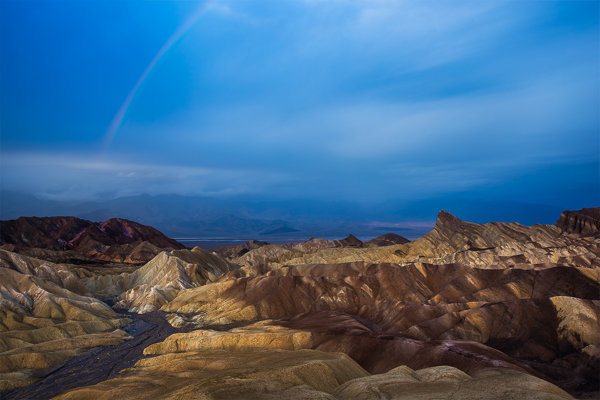
    Zabriskie Point at dawn as storms move through the park.

    Zabriskie Point at dawn as storms move through the park.

    Conclusion

    Death Valley is one of the most magnificent, diverse and photogenic national parks in America (USA). You just have to know how to do it right. You can either listen to some editor on Yahoo who just threw a list together (probably) without even going to the places in the article. Or you can listen to the throngs of photographers who visit the park each and every year, including ones like me who keep coming back again and again.

    What do you think? Should Death Valley have made this list of worst national parks? Let’s talk in the comments below!

    googletag.cmd.push(function() {
    tablet_slots.push( googletag.defineSlot( “/1005424/_dPSv4_tab-all-article-bottom_(300×250)”, [300, 250], “pb-ad-78623” ).addService( googletag.pubads() ) ); } );

    googletag.cmd.push(function() {
    mobile_slots.push( googletag.defineSlot( “/1005424/_dPSv4_mob-all-article-bottom_(300×250)”, [300, 250], “pb-ad-78158” ).addService( googletag.pubads() ) ); } );

    The post Death Valley: One of America’s Worst National Parks? by James Brandon appeared first on Digital Photography School.


    Digital Photography School
  • 10 Quick Lightroom Tips and Shortcuts

    Lightroom is a powerful and complex program. It’s great to have shortcuts and fast ways to do things you do often. Here are ten Lightroom tips to help you out:

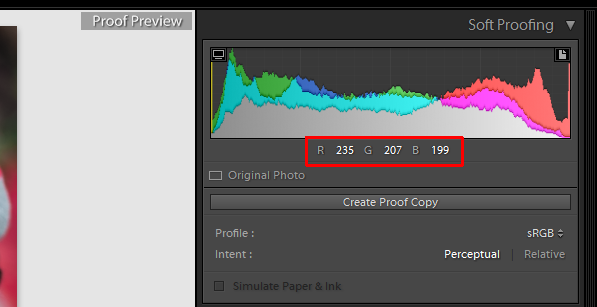
    #1 Check RBG values

    Did you know that you can check the RGB value of the pixels for an selected image in Lightroom? When you are working in the Develop module press S on the keyboard which will show you the soft proofing for the image. Hover the cursor over the image area, and it will display the RGB values (not percentages) of the pixel where your mouse is being located, look just below the histogram. (See the screenshot below)

    Smarttips Lightroom 01

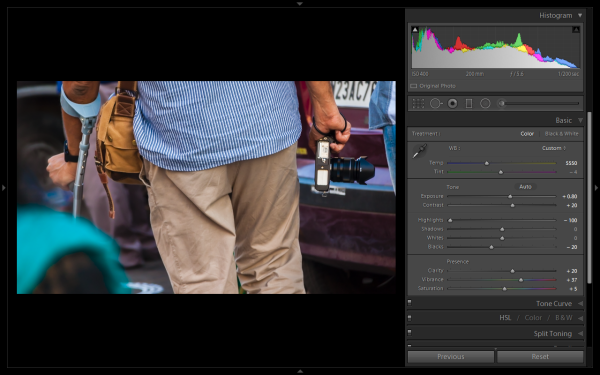
    #2 Full screen mode

    2. Making a clutter free workspace will not only provide you more working area but it will be distraction free as well. To enable full screen (without even the menu bar and the window frame )- press Shift+F (in LR4 and earlier just hit F). Pressing that combination repeatedly will give you another two options. Try it out for yourself. I use this all the time.

    Smarttips Lightroom 02

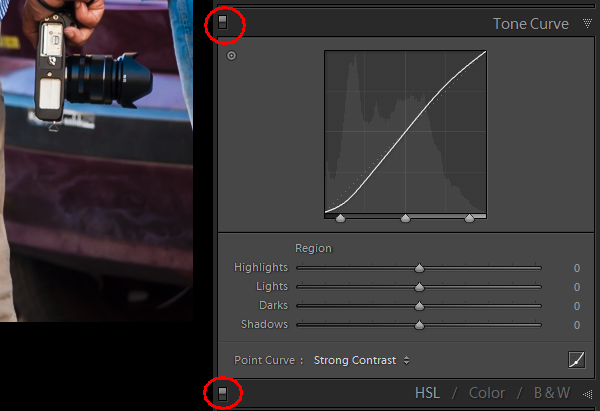
    #3 Preview effects by panel

    You can turn off one particular sub-panel’s effect on the image. Click that little button to see the effect of that particular panel on the image toggle off and on.

    Smarttips Lightroom 03

    #4 Work with the histogram

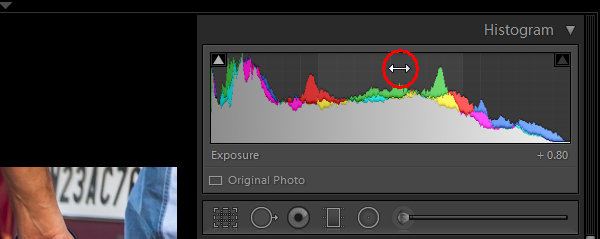
    4. If you are person who works based on the histogram, you can work directly on the image’s histogram itself inside Lightroom. Once hover your cursor over on the histogram, it will change into a double-sided arrow on specific areas. Then you only have to click and drag to the right or left, as you wish based on what values you want to change (Black, Shadows, Exposure or mid tones, Highlights, or Whites).

    Smarttips Lightroom 04

    #5 View file properties

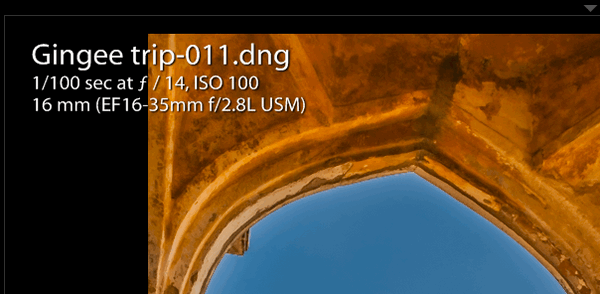
    If, while working on your photograph, for whatever reason you want to check the image’s properties including size, format, you can do so by pressing I (it will display the size of the file, file type, date taken, lens model). Pressing I one more time will provide you another set of properties, clicking I again will remove all the details from displaying.

    Smarttips Lightroom 05

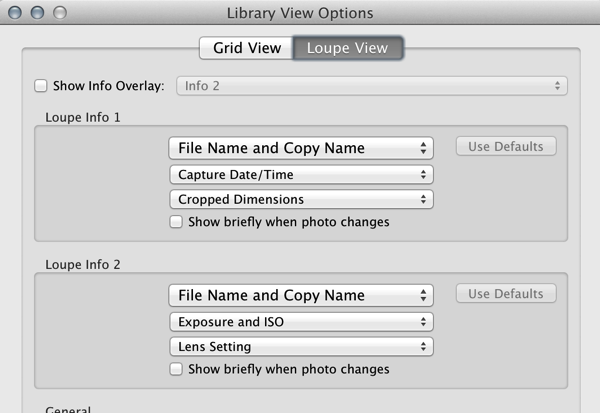
    If you do not see all of those options go to View > View Options (Cmd+J) where you can customize what is displayed in the Louse overlay mode using this pop-up dialog box.

    Screen Shot 2015 03 14 at 5 35 25 PM

    #6 Clipping warnings

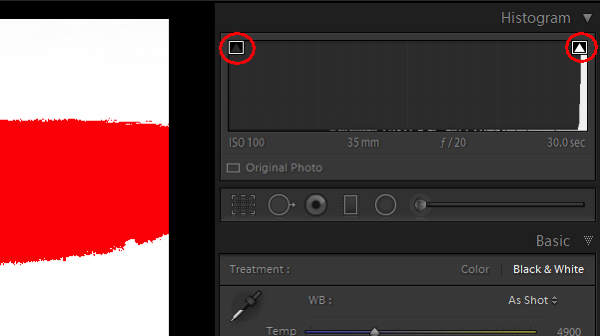
    To avoid processing outside of your image’s dynamic range, while working in develop module clicking J (keyboard shortcut) will activate the clipping warnings for highlights and shadows. If you push exposure towards the right far more, a red colour warning will be displayed on the region of the photograph where it is overexposed, Conversely if you bring down the exposure (for whatsoever reason) a blue colour warning will be displayed on the region of the photograph where it is underexposed. (Below screenshot is an example of overexposure)

    Smarttips Lightroom 06

    #7 Unflagging

    In Library module, when you are flagging photographs for sorting purposes, if you mistakenly press pick (p) instead of rejecting (x), stay calm and press (u) for unpick or unflag. It will remove the flag, now you can mark it as you originally wished.

    #8 Lesser known Develop keyboard shortcuts

    If you are in the habit of using your keyboard, in Develop module the complete basic panel can be controlled by keyboard. Press period (.) or comma (,) for selecting a slider (e.g., Exposure) and then press plus (+) to increase the value and press minus (-) to decrease the value of the same. Now press period (.) to go the next. Repeat, enjoy.

    #9 Shift key to lock

    While applying a graduated filter, if you want to make it straight – press and hold Shift the key to make the filter locked into perfectly horizontal or vertical position. You can also hold Shift when applying the crop tool on your image (if required), to avoid changing the image proportions.

    #10 Saving local adjustment tool presets

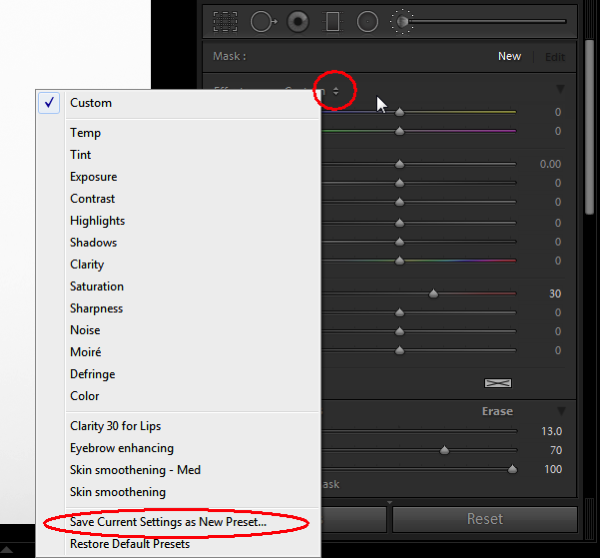
    You can save any of the local adjustment tool settings as a preset which can be used for any of the tools. For example, if you are a portrait retoucher, you may want to save your favorite skin-softening settinsg as a preset. You can do that by clicking save as a preset at the bottom of the local correction tool set. Likewise you can save any kind of settings which you may use often.

    Smarttips Lightroom 10

    Do you have any others you’d like to add to this list of Lightroom quick tips?

    googletag.cmd.push(function() {
    tablet_slots.push( googletag.defineSlot( “/1005424/_dPSv4_tab-all-article-bottom_(300×250)”, [300, 250], “pb-ad-78623” ).addService( googletag.pubads() ) ); } );

    googletag.cmd.push(function() {
    mobile_slots.push( googletag.defineSlot( “/1005424/_dPSv4_mob-all-article-bottom_(300×250)”, [300, 250], “pb-ad-78158” ).addService( googletag.pubads() ) ); } );

    The post 10 Quick Lightroom Tips and Shortcuts by Navan Viswa appeared first on Digital Photography School.


    Digital Photography School
  • Weekly Photography Challenge – Emotions

    Brett Davies

    By Brett Davies

    Image which show emotions or evoke them are powerful. But what kinds of emotions can be captured or portrayed in a photograph? How about these, just to get started:

    • Anger
    • Sadness
    • Fear
    • Love
    • Loneliness
    • Confusion
    • Pride
    • Jealousy
    • Fatigue
    • Dispair

    What others can you think of?

    Illusive Photography

    By Illusive Photography

    [AndreasS]

    By [AndreasS]

    Weekly photography challenge – emotions

    Your challenge this week is to take a photo, or series of them, that pull at the emotions. It might be a person and their expression, or an inanimate object. Lighting, lens selection, and camera angle can all affect mood in an image, so choose carefully and purposefully to create emotional images.

    This does not mean images of people pretending to cry or be angry – no real emotions. A baby’s giggling face when it’s tickled, the pleasure of a great meal or coffee, genuine real emotion. Include a person or not – it’s your choice.

    Jelly Dude

    By Jelly Dude

    Andi Campbell-Jones

    By Andi Campbell-Jones

    Luke Andrew Scowen

    By Luke Andrew Scowen

    Brett Davies

    By Brett Davies

    Share your emotional images here:

    Simply upload your shot into the comment field (look for the little camera icon in the Disqus comments section) and they’ll get embedded for us all to see or if you’d prefer upload them to your favourite photo sharing site and leave the link to them. Show me your best images in this week’s challenge. Sometimes it takes a while for an image to appear so be patient and try not to post the same image twice.

    googletag.cmd.push(function() {
    tablet_slots.push( googletag.defineSlot( “/1005424/_dPSv4_tab-all-article-bottom_(300×250)”, [300, 250], “pb-ad-78623” ).addService( googletag.pubads() ) ); } );

    googletag.cmd.push(function() {
    mobile_slots.push( googletag.defineSlot( “/1005424/_dPSv4_mob-all-article-bottom_(300×250)”, [300, 250], “pb-ad-78158” ).addService( googletag.pubads() ) ); } );

    The post Weekly Photography Challenge – Emotions by Darlene Hildebrandt appeared first on Digital Photography School.


    Digital Photography School
  • Where Did I Put That? Tips for Organizing Your Photos

    In the interest of full disclosure, I must admit something. My photos are unorganized. By that, I mean terribly unorganized. Over the years, I’ve taken thousands and thousands of photos, all the while dumping them in folders automatically created and named by my computer’s default importing program. As such, I’d be hard-pressed to quickly find photos from a specific shoot Continue Reading

    The post Where Did I Put That? Tips for Organizing Your Photos appeared first on Photodoto.


    Photodoto

  • 28 Emotional Images That Make You Feel

    Photography, like any art, when done well can really express and show emotions. This week I went searching for images that do just that.

    See what emotions you feel when you view these images:

    Photograph ...have you seen my chew bone? by Christoph Oberschneider on 500px

    …have you seen my chew bone? by Christoph Oberschneider on 500px

    Photograph Dies, Nox et Omnia by Mathieu Degrotte on 500px

    Dies, Nox et Omnia by Mathieu Degrotte on 500px

    Photograph Standing in the rain... by Sham Jolimie on 500px

    Standing in the rain… by Sham Jolimie on 500px

    Photograph Angry Boy by J.J. Taylor on 500px

    Angry Boy by J.J. Taylor on 500px

    Photograph My thougths are anchors and I'm drowning at sea. by Romana Kreider on 500px

    My thougths are anchors and I'm drowning at sea. by Romana Kreider on 500px

    Photograph Dove Love by Jon Rista on 500px

    Dove Love by Jon Rista on 500px

    Photograph Enjoy solitude by Isabel Membrado on 500px

    Enjoy solitude by Isabel Membrado on 500px

    Photograph The Chair by Phil Grieve on 500px

    The Chair by Phil Grieve on 500px

    Photograph A.W. by davide mezzalira on 500px

    A.W. by davide mezzalira on 500px

    Photograph Fog Invasion - Original WB by Craig Fraser on 500px

    Fog Invasion – Original WB by Craig Fraser on 500px

    Photograph Window Into Infinity by Ken Lee on 500px

    Window Into Infinity by Ken Lee on 500px

    Photograph Road to Home by Vince Ha on 500px

    Road to Home by Vince Ha on 500px

    Photograph Fantasia by tvurk  on 500px

    Fantasia by tvurk on 500px

    Photograph The Dreamy Island by Ratul Maiti on 500px

    The Dreamy Island by Ratul Maiti on 500px

    Photograph ~The flood~ by Christian Wig on 500px

    ~The flood~ by Christian Wig on 500px

    Photograph Dreamy by Dheny Patungka on 500px

    Dreamy by Dheny Patungka on 500px

    Photograph Locked by Tracy Williams on 500px

    Locked by Tracy Williams on 500px

    Photograph Internal Thinking by Kevin Kent on 500px

    Internal Thinking by Kevin Kent on 500px

    Photograph Best Friend by chegu diman on 500px

    Best Friend by chegu diman on 500px

    Photograph Cloud Atlas by Meer Sadi on 500px

    Cloud Atlas by Meer Sadi on 500px

    Photograph ?????????? by Srinavin Kumar on 500px

    ?????????? by Srinavin Kumar on 500px

    Photograph Eyjafjallajokull 2010 Iceland by Gunnar Gestur  on 500px

    Eyjafjallajokull 2010 Iceland by Gunnar Gestur on 500px

    Photograph I'll Be Black! by Ashley Vincent on 500px

    I'll Be Black! by Ashley Vincent on 500px

    Photograph The goofy goober by Elke Vogelsang on 500px

    The goofy goober by Elke Vogelsang on 500px

    Photograph The Roof ... by Yacine Edga Photography on 500px

    The Roof … by Yacine Edga Photography on 500px

    Photograph *** by Luis Valadares on 500px

    *** by Luis Valadares on 500px

    Photograph Unconditional Love by William Roberts on 500px

    Unconditional Love by William Roberts on 500px

    Photograph Sun Kissed by Ernie Manzano on 500px

    Sun Kissed by Ernie Manzano on 500px

    googletag.cmd.push(function() {
    tablet_slots.push( googletag.defineSlot( “/1005424/_dPSv4_tab-all-article-bottom_(300×250)”, [300, 250], “pb-ad-78623” ).addService( googletag.pubads() ) ); } );

    googletag.cmd.push(function() {
    mobile_slots.push( googletag.defineSlot( “/1005424/_dPSv4_mob-all-article-bottom_(300×250)”, [300, 250], “pb-ad-78158” ).addService( googletag.pubads() ) ); } );

    The post 28 Emotional Images That Make You Feel by Darlene Hildebrandt appeared first on Digital Photography School.


    Digital Photography School
  • Priime, The Best iPhone Photo Editor I’ve Ever Used

    Priime is Liive -- Get It While It's Hot

    Disclosure, I am an advisor to Priime and have styles included in their style marketplace.

    Boom. Just a few hours ago Priime went live in the Apple iTunes App Store and already on launch day Apple is featuring it in their best new apps section.

    What is Priime?

    Priime is the best mobile phone editor I’ve ever used. I’ve been using it behind the scenes for the past few months and am blown away by how much better it is than anything else out for mobile editing today. The free app features a powerful suite of editing tools allowing you to enhance a lot of the basics around your photos: brightness, structure, contrast, warmth, tint, saturation, sharpness, highlights/shadows, vignette and fade. The app can also save photos up to 50 megapixel in size! I don’t know of any other app that can let you output such high res photos.

    In addition to these tools, Priime has currated some of the best mobile photo styles available. These are styles developed by photographers for photographers. I have two styles for sale in the Priime marketplace — Americana and Neon. Neon can be a particularly tricky thing to shoot sometimes. I’ve taken over 10,000 photos of neon signs and this is my best attempt at an overlay that works especially well for signs.

    The app gives you some great free starter styles. It will also make suggestions for what styles may work best with your photo after analyzing it.

    In addition to my styles, Priime features styles developed by 30 other insanely talented photographers, each with their own unique way of processing the world through their iPhone.

    Daniel Krieger, who shoots for the NY Times, is probably the best working food photographer in the world right now. If you are going to take photos of food, you are definitely going to want to get his filter. Vivienne Gucwa just put out a fantastic book of New York City photographs and has some amazing styles as well.

    There is no Android version yet (it is on the roadmap), but the app is compatible with iPhone, iPad, and iPod touch.

    One of the things that I think makes Priime different from other photo editing apps is that it was actually developed by photographers. I have known Art Chang for several years. We went and shot Death Valley with a bunch of Google+ photographers 4 years ago. He’s an amazing photographer and has especially done cool things with mobile. His Instagram stream is here. Art has a love for photography that I think gives the app a unique photographer driven perspective and street cred. Art’s co-founders are also all photographers — Loren Baxter, Andrew Ng and Joe Pestro.

    Priime is sharing the revenue for their styles with the photographers who have developed them. I think that is a really cool thing. I can’t wait to see what other photographers are added as time goes on.

    Anyways, check out Priime in the iPhone App Store. Here is a direct link to the app here. I’d love to hear what you think of it. Remember it’s Priime with two ii’s. :)

    My Styles in the New Release iPhone App Priime

    Priime Featured in the Best New Apps Section of the iPhone App Store


    Thomas Hawk Digital Connection