Category: Photography

  • How to Mix Ambient Light and Fill-Flash for Outdoor Portraits

    If you have ever wondered how to improve your outdoor portraits. Turn off your Smartphone, shuffle your schedule, and make sure you read every single word on this page. Because outdoor portrait lighting secrets will finally be revealed.

    Below is an example of one of my typical on-location lighting setups. It consists of a studio strobe with a battery pack and a Westcott 35″ Deep Parabolic Zeppelin modifier.
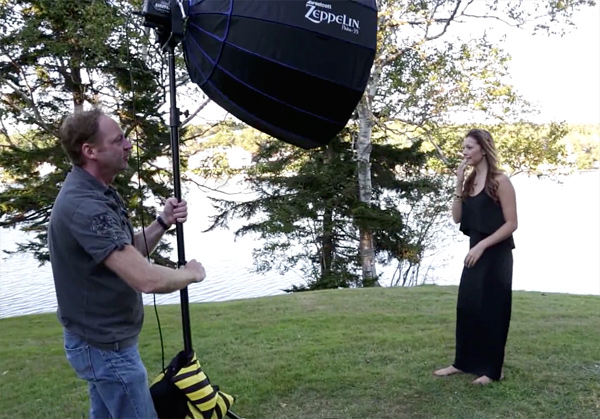
    Mod1

    I am guessing you have most likely stumbled upon this article because you are searching for a way to improve your outdoor portraits. If you would like to capture perfectly exposed images in ambient light, the real secret is to use fill-flash and a light modifier. Sure, if you have a reflector and an assistant you may be able to achieve similar results using only natural light. But in this article, I am going to assume you shoot outdoor portraits by yourself and you are looking for the easiest way to control, and modify the light in your images.

    Below is an example of an image taken with the above lighting set up, where I lowered the background exposure with a three stop neutral density filter.

    Lia1

    Before we go any further, I just want to caution you, you may find some aspects of this article confusing the first time you read them. So I have included a video tutorial for you to further illustrate the lighting concepts discussed here.

    Let’s break it down step by step:

    Step #1 – meter the background

    Step one is to meter the background area behind your subject, using either a light meter or your in-camera meter. For example, let’s say you metered the background at f/5.6 and you took a test exposure with your camera.

    Step #2 – check highlights on the test shot

    The second step is to examine your test shot and to make sure there are no blown out highlights in the brightest part of your image. Some DSLR models have a highlight warning indicator that you can enable and you can also view the Histogram to help you decide if your exposure falls within an acceptable range. The reason you are checking for blown out areas, is that once you loose detail in the highlights, the information from that part of the image is lost forever. So adjust your exposure if necessary to ensure you have an accurately exposed image with highlight detail intact.

    Malia1

    Step #3 – check highlights on the test shot

    Once you are pleased with the background exposure you may find that your subject appears too dark in relation to the background. Your next step is to match the foreground exposure with fill-flash. To do that, you can use either a speedlight or a studio strobe with the light modifier of your choice.

    Let’s go into a little more detail. For example, if your background is exposed at f/5.6 then you have to match the same exposure on your subject’s face. Sounds simple right? Here is where you can run into some problems. If you meter the background at f/16 on a sunny day, but the speedlight you are using only meters f/11 at full power – then what do you do? Your subject will appear darker than the background. What are your choices?

    In most cases your first impulse would be to raise the shutter speed, but when you’re using strobe lights you are capped at a shutter speed between 1/160 and 1/200th of a second. In some cases you may be able to use high-speed sync, but for the purpose of this article let’s say your maximum shutter speed is 1/200 (your camera’s native flash sync speed). If that is the case, you will have to use a two or three stop neutral density filter to lower the background exposure, so you can match the foreground exposure to the background.

    Have I lost you yet? In case you find this concept difficult to grasp, I have included another video tutorial below on outdoor portraits using fill-flash, where I use a three stop neutral density filter to bring down the ambient exposure. In this example that allows me to use a wide open aperture, in combination with fill-flash to create a blurry background effect.

    If you are like most people, it will probably take you a little practice until you feel comfortable balancing ambient light and fill-flash. Take your time and have fun with it. Read the article a few times and watch the video tutorials again. Once you have a pretty good grasp of the concepts discussed, head out and practice balancing your exposure. Some people prefer a background exposure that is one to two stops darker than their subject. Experiment with different ratios until you find a look that suits your style.

    Sheena1

    Please post any questions you have in the comments below.

    googletag.cmd.push(function() {
    tablet_slots.push( googletag.defineSlot( “/1005424/_dPSv4_tab-all-article-bottom_(300×250)”, [300, 250], “pb-ad-78623” ).addService( googletag.pubads() ) ); } );

    googletag.cmd.push(function() {
    mobile_slots.push( googletag.defineSlot( “/1005424/_dPSv4_mob-all-article-bottom_(300×250)”, [300, 250], “pb-ad-78158” ).addService( googletag.pubads() ) ); } );

    The post How to Mix Ambient Light and Fill-Flash for Outdoor Portraits by Craig Beckta appeared first on Digital Photography School.
    Digital Photography School

  • The Importance of Capturing Gesture and Emotion in Street Photography

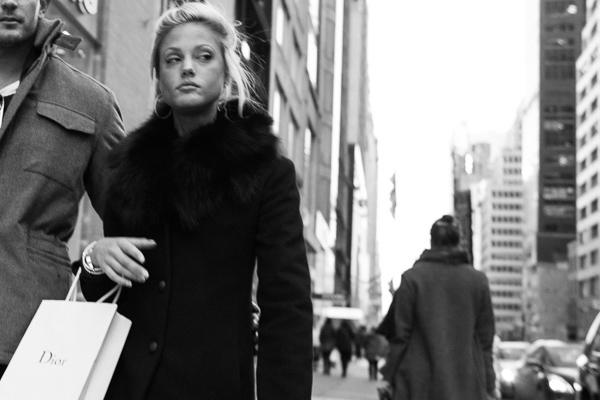
    Sometimes an expression can cut you like a knife.

    Sometimes an expression can cut you like a knife.

    One of the most fascinating things about street photography is that it can be so hard to pinpoint the reasons why one photograph works and another does not.

    A good street photograph can be sharp or it can be blurry; it can be in contrasty light or in soft and even light; it can be an energetic scene with layers of people or it can be a quiet shot with nobody in it. It gets further complicated when you start to think about the ideas, moods, and feelings that your images suggest.

    Despite this lack of certainty, I believe there are two things that will always improve a candid photograph, and that is a gesture in a subject’s body or an emotion captured on a subject’s face. Both of these elements have the power to be the defining reason that a photograph is great. They can be the basis for an entire image.

    When I refer to emotion, I am talking about the look in a person’s face, in their eyes, in their mouth, in their eyebrows, or even in their nose. When I refer to gesture, I am talking about a movement, a stance, an elegance, or any position of a subject’s body that is suggestive in some way.

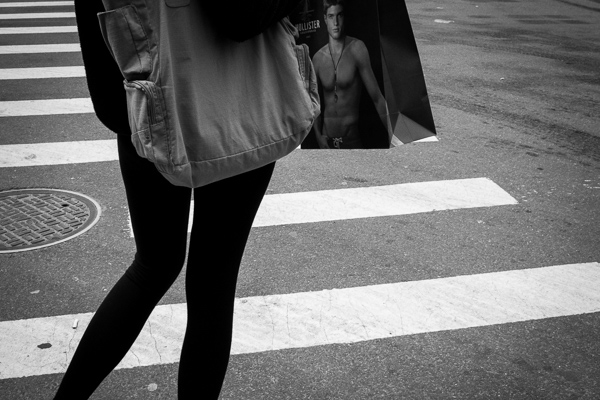
    This image would not have worked without the elegant and suggestive stance in the legs.

    This image would not have worked without the elegant and suggestive stance in the legs.

    It can be misunderstood that doing street photography well is solely about photographing people that seem to pop out at you in some obvious someway. Maybe this is through a unique fashion or an interesting facial feature. The result is that you see images of people deemed interesting for some reason that don’t seem to be actually doing or thinking anything – they are expressionless and neutral in stride.

    Instead of photographing with only the intention of capturing interesting people, try to take this idea further and locate interesting emotions and gestures in all different types of people. I don’t believe that you can differentiate who is more worthy of a photograph based solely on someone’s facial features or clothing. Your most ‘uninteresting’ person aesthetically can give you the best photograph of your life with a single powerful expression. So many compelling moments lie within these expressions and gestures.

    So the next time you’re out photographing, pay attention to what you think a person is feeling and work from there out.

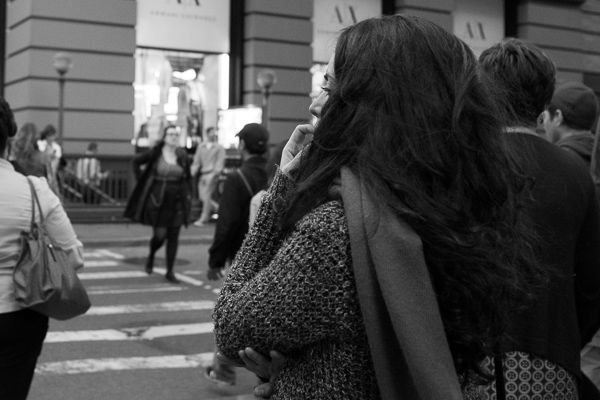
    NY is filled with nervous people. This image tells the story of the city more than any image of a skyscraper can.

    New York is made up of nervous people. To me this image tells the story of the city more than any image of a skyscraper can.

    For more street photography tips try these articles:

    • There is No Bad Light for Street Photography
    • 7 Tips for a More Anonymous Approach to Street Photography
    • How to Create Amazing Urban Landscape and Street Photography Images
    • Practical Tips To Build Your Street Photography Confidence

    googletag.cmd.push(function() {
    tablet_slots.push( googletag.defineSlot( “/1005424/_dPSv4_tab-all-article-bottom_(300×250)”, [300, 250], “pb-ad-78623” ).addService( googletag.pubads() ) ); } );

    googletag.cmd.push(function() {
    mobile_slots.push( googletag.defineSlot( “/1005424/_dPSv4_mob-all-article-bottom_(300×250)”, [300, 250], “pb-ad-78158” ).addService( googletag.pubads() ) ); } );

    The post The Importance of Capturing Gesture and Emotion in Street Photography by James Maher appeared first on Digital Photography School.
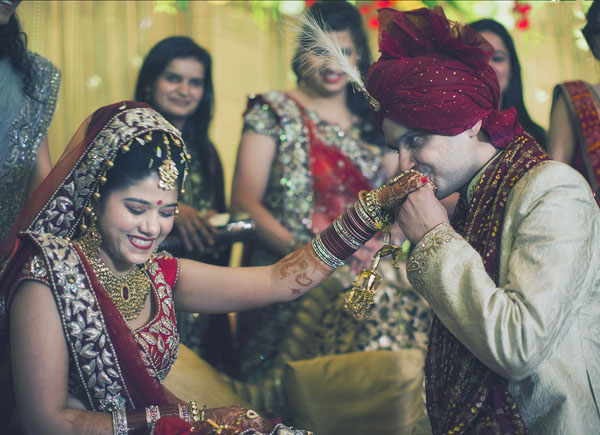

    Digital Photography School

  • Street Photography: Easy To Learn, Impossible To Master

    Of all the different fields of photography, street photography might be the most difficult. However, it’s also an area that many aspiring photographers jump into first. Street photography almost seems like the reason photography was created for in the first place. Unlike taking photos in a studio, shooting landscapes or working with models, street photography entails a bit of chaos. Continue Reading

    The post Street Photography: Easy To Learn, Impossible To Master appeared first on Photodoto.


    Photodoto

  • 5 Tips for Doing Candid Wedding Photography

    Weddings have changed drastically in the past few years. Couples want more from a wedding these days, they don’t want the traditional, normal photography anymore. They frequently ask for documentary or candid wedding photography because it captures the emotions of not only the couple, but also the guests enjoying themselves without lining them up in front of the camera.

    IMG 0072

    But, candid photography is so much more than just pointing your camera at people and shooting away to glory. You, as a photographer, need to know and understand the finer nuances involved in candid wedding photography; you need to know how to get good candid shots without people noticing you. Here are five tips to shoot a wedding in a lovely, unobtrusive and candid way which would make the entire task much easier for you.

    1. Always be ready

    The prime tip for candid wedding photography which I can give is, to be always ready. By that, I mean you must always keep an eye out for moments, and keep that camera ready. Your camera needs to be in your hands and ready to shoot at a moment’s notice. You must set the camera according to the light conditions (settings like the aperture, shutter speed, ISO, white balance, etc.) so that you don’t need to fiddle around with the settings while things happen in front of you. (IMG_7211)

    IMG 7211

    2. Know your equipment

    I cannot tell you how many times I’ve seen photographers miss the shot while they are trying to change the camera settings. You must know the equipment that you are using, inside out. It helps to gauge the light conditions and set the camera accordingly, so that you don’t miss the events that would warrant a picture. It might very well be helpful to have a smaller camera handy, in addition to that big bulky DSLR, just incase.

    IMG 6243

    3. Use a telephoto zoom lens

    Candid photography is all about taking pictures of the bride, groom, guests, etc., from a distance without them noticing you. Nothing will be more helpful in achieving this than a fairly long telephoto zoom lens. I regularly use lenses like a 100mm, 70-200mm or even a 100-400mm when I need to capture those emotions, those candid moments. You can, of course, use any lens you want (something like a 50mm could be helpful too!). But, since candid photography is all about being unobtrusive and capturing those emotions in a natural way, I would suggest using a zoom lens. What it essentially does is helps maintain the intimacy of the picture being taken, which is so important in wedding photography.

    IMG 7210

    4. Do not use flash

    One sure-fire way of getting people to notice you is to use a flash (whether it be the onboard one, or an external flash gun). Not only this, light from a flash can be so unflattering and boring, to put it simply. If there is a dearth of light, you as a photographer need to find other ways to brighten up the scene that you are photographing, either by opening up the aperture, increasing the ISO, slowing up the shutter (to an acceptable range), etc. I understand that by increasing the ISO a little too much, you might include a fair bit of noise into the picture, but the idea is to capture the moment, and there are times when noise is actually a good thing.

    IMG 2346

    5. Foresee or plan ahead

    As a candid wedding photographer, it is your job to foresee what is going to happen, or at least take your best calculated guess. If possible, I’d suggest you visit the location before the wedding so that you can scout out some good locations for taking pictures. If you are unable to go visit the location beforehand, then at least reach the venue well before the function is to start. That way you can scout out not only some great locations to take pictures from, but you can perhaps even scope out the main rooms that will be used for the wedding and the reception. A little bit of planning goes a long way in getting some great shots.

    I hope these top five tips will help you the next time you are out photographing a wedding in a candid, documentary style.

    googletag.cmd.push(function() {
    tablet_slots.push( googletag.defineSlot( “/1005424/_dPSv4_tab-all-article-bottom_(300×250)”, [300, 250], “pb-ad-78623” ).addService( googletag.pubads() ) ); } );

    googletag.cmd.push(function() {
    mobile_slots.push( googletag.defineSlot( “/1005424/_dPSv4_mob-all-article-bottom_(300×250)”, [300, 250], “pb-ad-78158” ).addService( googletag.pubads() ) ); } );

    The post 5 Tips for Doing Candid Wedding Photography by Bobby Roy appeared first on Digital Photography School.


    Digital Photography School

  • 5 Simple Yet Clever Ways to Impress Your Photography Clients

    While a satisfied client is the fuel for further sales and word of mouth, an excited client is the jet engine for your marketing. Unfortunately, many photographers don’t know how to turn regular customers into fans.

    In this article you’ll find five simple, time-proven techniques of impressing your photography clients and building a long-lasting relationship from an ordinary photo shoot.

    1. Be Professional

    01 be professional
    Image by niekverlaan

    You should portray a professional image of yourself right from the beginning. This doesn’t necessarily involve spending hundreds of dollars on premium graphic design services and printed materials. In today’s world we have to deal with poor customer service too often, so being quick with your replies to client requests is an old yet very effective way to impress people.

    Another factor contributing to your professional image is your website. It’s the first thing your clients see when they find you on the Internet, so it’s critically important to keep your site accessible and up-to-date. Don’t forget to update your portfolio and copyright information and make sure your website is mobile-friendly. Update information on your site regularly along with the copyright, share some personal stuff on your blog and “about me” page to show that you’re an open and available person, share your interests to make potential clients feel closer to you even before you meet.

    Also, take care of your outfits and your entire appearance. No matter what type of photo shoot you’re heading to, make sure you’re dressed appropriately as it will directly affect whether or not you’ll get future jobs from this shoot. A rule of thumb is to avoid busy and loud clothing in favor of smooth colors and neutral style. Consider your own comfort, but probably more importantly, make your clients feel comfortable with you walking around.

    2. Be Helpful, Be an Authority

    02 be authority

    Image by tpsdave

    Give your clients an additional reason to book your service by providing exclusive, helpful information. It can be a blog post on how to dress for different types of photo sessions, or you could organize a workshop for moms on how to take great snaps of their children using a smartphone or a pocket camera. The idea is to figure out your clients’ possible knowledge gaps and fill them.

    Not only is this a great way to strengthen relationships with your current customers, but it can also help you establish the reputation of being an experienced, leading professional which works as a charm for attracting qualified leads.

    3. Get Creative with Bonuses

    Every business is interested in long-term relationships with their customers, and photographers should be no exception. Your loyal clients help you find new client, but what do they get in return? Develop a loyalty program for your customer base. An exclusive discount or a free mini-session just for using your services will definitely leave an impact.

    03 give bonuses
    Image by GLady

    Another neat way to please your loyal audience with an unsolicited bonus is creating a personalized product for them. For instance, with Defrozo you can create custom downloadable client galleries for free. The albums look great on both desktop and mobile screens, and can be built within a couple of minutes. The developers of Defrozo also promise full-featured websites for clients available later this year as the project raises funds on Kickstarter. You could also create a sweet, short video showing some backstage moments using Magisto.

    Remember that bonuses don’t have to be monetary. It’s attention and a personal approach that will impress people.

    4. Be the guy/girl next door

    In other words, get to know what interests you have in common and use this info to customize your approach to the needs of your clients.

    Fortunately you can make use of social networks. Not all of your clients will use them or share a lot of their personal details, but you can still get to know people you work with better by simply following their social media updates.

    04 be the guy next door
    Image by Alejandro Escamilla

    Another great way to connect with your clients on a personal level can be seen on the website of well-known wedding photographers Justin and Mary Marantz. They simply listed things they like presented as icons accompanied by funny comments on their About page. That’s the information that turns a “leading destination photographer” into a “guy/girl next door” that understands you in a way no other photographer does, and therefore, can be entrusted to photograph one of the most special days of your life. Genius, huh?

    5. Follow Up

    Following up is important. When done right, it helps you reinforce relationships with your current clients. Besides, it’s a sure way for you to be recommended more often.

    05 follow up
    Image by Ginger Quip

    It’s not uncommon to send your clients a printed Thank You card, along with a photobook or image pack from their session. You could go further and send them an extra print about a month after. Break the mould of typical follow-up messages that are only sent when a business wants to sell something and only include a note that would remind your client about the fun time you had during the photo shoot. It can work great as a feedback request too.

    If sending a physical gift does not fit your budget at the moment, writing a detailed blog post about a specific client’s session is a decent alternative. It won’t cost you a penny, but sincere words shared publicly won’t leave them cold, for sure.

    Summary

    It’s sincerity, passion for what you do, and commitment to quality that motivates people to stick around forever. Is that what you can say about your business approach? Congrats, then, you’ve got that wow-factor to impress your clients. Remember that when creating your next marketing campaign and it will work like a charm.

    What’s your number-one marketing tactic you use to impress your clients? Share with the community by leaving a comment below!

    googletag.cmd.push(function() {
    tablet_slots.push( googletag.defineSlot( “/1005424/_dPSv4_tab-all-article-bottom_(300×250)”, [300, 250], “pb-ad-78623” ).addService( googletag.pubads() ) ); } );

    googletag.cmd.push(function() {
    mobile_slots.push( googletag.defineSlot( “/1005424/_dPSv4_mob-all-article-bottom_(300×250)”, [300, 250], “pb-ad-78158” ).addService( googletag.pubads() ) ); } );

    The post 5 Simple Yet Clever Ways to Impress Your Photography Clients by Julia May appeared first on Digital Photography School.
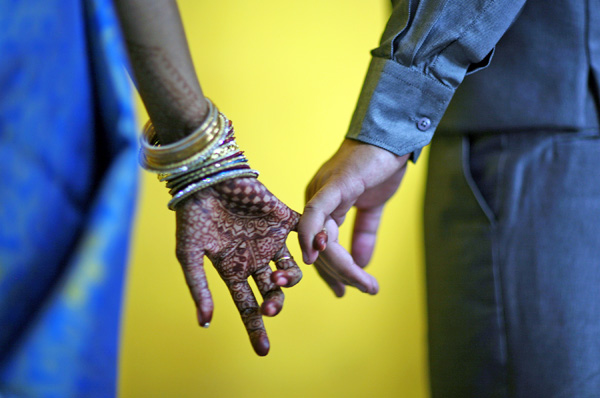

    Digital Photography School

  • Overview of the New Affinity Photo Editing Software

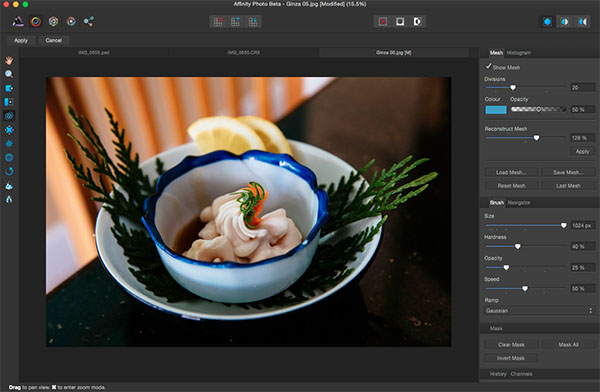
    In early February, software company Serif announced the free beta version of Affinity Photo, a Mac-only photo editing program said to rival the likes of other editing tools, including the standards for creative professionals, Adobe Photoshop and Lightroom. In this article, I’ll walk through the public beta version of Affinity Photo and describe some pros and cons to using this new software.

    Affinity Photo Basics

    Affinity Photo editing software for MacAt the moment, Affinity Photo beta is available as a free online download and is compatible with Apple OSX Lion 10.7.5, and up. Some key features that move Affinity up in the ranks include support for CMYK color, RAW file processing, 16-bit editing, 64-bit Photoshop plug-in compatibility, ICC color management, and LAB color. A few other noteworthy tools include Affinity Photo’s Inpainting feature, which is essentially the equivalent of Adobe content-aware fill, and real-time editing that will apply edits instantly without the need to render a preview.

    It’s uncertain when Affinity Photo’s full version will launch, but when it does it will be available for purchase in the Mac App Store for about $ 49.99. A Windows/PC version of the app is said to be in works, but again no solid timeline is available.

    Pro: Speed and reliability

    The first feature of the tool that really stood out was its speed and reliability. Affinity Photo is extremely fast and it never once crashed during the seven times I used it, which is impressive for a beta version. The tool’s speed is accredited to it being built on an entirely new and modern codebase, unlike Adobe Photoshop, which recently celebrated its 25 year anniversary and thus has been built on architecture that is also a couple decades old.

    Con: Default RAW file conversion

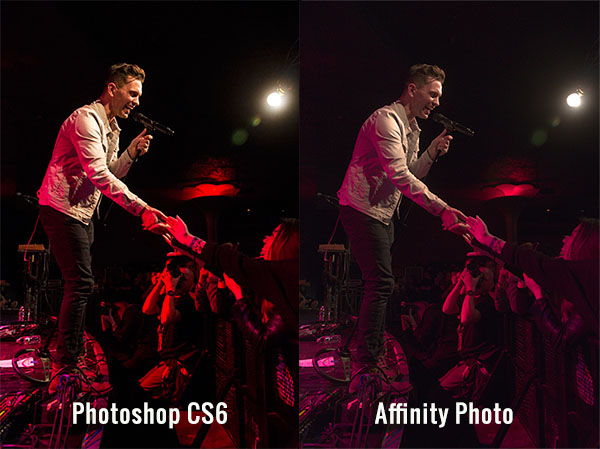
    One of the most striking differences that I immediately noticed was the default adjustment that Affinity Photo made to my RAW image when I first imported it. While these defaults could likely be adjusted to taste, I was surprised at how drastically Affinity altered my image when all I did was import it.

    Affinity Photo editing software for Mac

    Pro: Easy access to basic photo editing tools

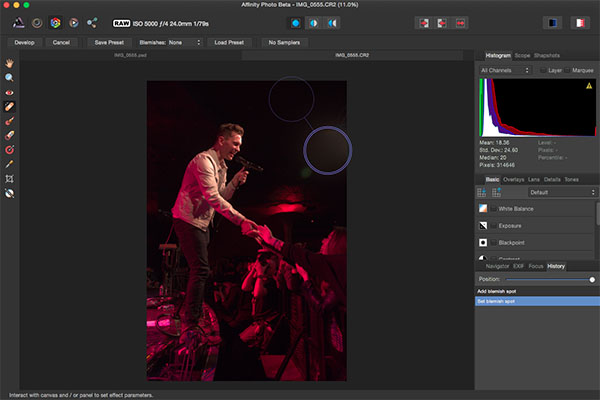
    The interface, and ease of use, is where Affinity Photo really shines. Despite being a longtime Photoshop user, I’ll admit that its layout can be overly complicated, presenting too many tools that are beyond the scope of basic photo edits. While Affinity’s interface definitely borrows some features from Photoshop, its basic layout is relatively straightforward and easy to understand without requiring a ton of customization. The top bar below the menu shows all of the basic details of your photo (file format, ISO, shutter speed, aperture, etc.), which is something that seemed rather hidden and hard to find in Photoshop.

    Basic editing tools are presented in the right hand panel under the histogram, the tools are nicely labeled, and easy to adjust with sliders. There is also a History tab that, in the same way that Photoshop does, keeps track of every edit, making it easy to track and reverse any changes. Hardcore photo retouchers might find these editing tools to be lacking, but for beginners or photographers in need of basic edits, these tools will get the job done in a straightforward manner.

    Affinity Photo editing software for Mac

    As a photographer who shoots almost exclusively in RAW, I’ve grown accustomed to the seamless integration of Camera RAW with Photoshop and Lightroom’s smooth handling of RAW image conversion. The way that Affinity handles RAW editing took a bit of troubleshooting, but was straightforward when all was understood.

    Initial RAW Editing Tools

    When you first open a RAW file into Affinity, there are distinctly fewer editing options and adjustments to choose from. The Basic tab offers easy access to make basic adjustments to white balance, exposure, contrast, shadows and highlights, clarity, vibrance, and black points. What was curiously missing from this panel were saturation and tint control. The Lens tab offers adjustments for lens correction, chromatic aberration reduction, vignettes, and defringing. The Details tab allows for detail refinement, noise reduction, and noise addition. The Tones tab is where you can adjust curves, split toning, and black and white image conversion. In this mode, the left hand panel also has a vertical tool bar reminiscent of Photoshop’s, but when editing RAW files, it is noticeably much sparser containing just 10 tools versus the 20+ tools in Photoshop.

    Unlocking the Full Editing Menu

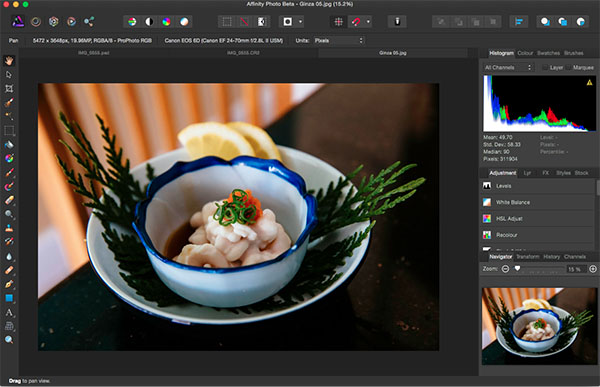
    In order to unleash Affinity Photo’s full set of editing tools, it’s essential to click the small Develop button in the upper left hand corner of the RAW image editing window. This will transform Affinity’s interface dramatically to more closely resemble that of Photoshop. If you work exclusively with JPGs, this step will automatically be done for you upon the uploading of the JPG image, but this is an extra step when working with RAW files that to me was not so intuitive.

    Affinity Photo editing software for Mac

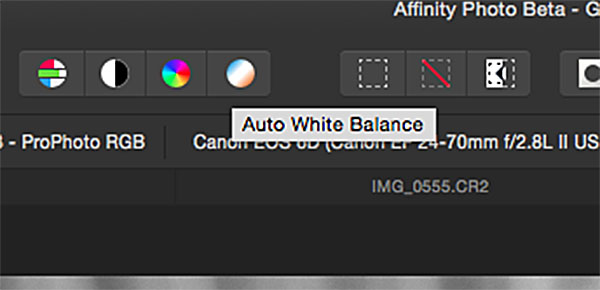
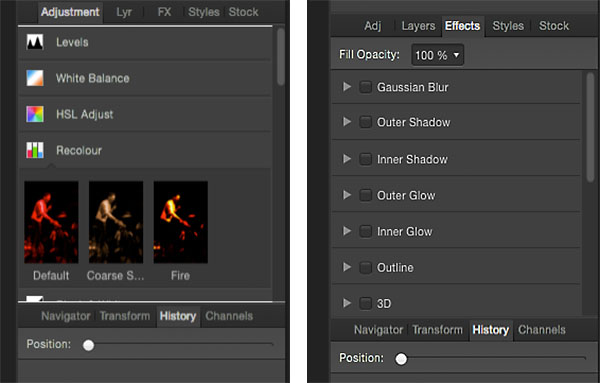
    Within the full Affinity Photo interface, you no longer get the image EXIF data in the menu bar, but instead a full row of icons that offer shortcuts to quick edit features such as auto white balance, contrast, and color. There are also several icons on the right that describe different personas such as Liquify, Develop and Macro Persona. A couple of these were not yet available in thw beta version, but clicking on the Liquify Persona offered just about the same editing tools and capabilities that Photoshop’s liquify feature does. For the sake of demonstration, the below image shows off the use of Affinity’s Liquify Twirl Tool, which was intuitive and easy to use.

    Affinity Photo editing software for Mac

    Affinity Photo editing software for Mac

    Note that the left hand tool bar is significantly longer offering; paint brushes, clone tools, dodging and burning, text overlays, and much more. The right hand editing tool panel is also laid out differently with tabs including Adjustment, Layers, Effects, and Styles. Want to add a Gaussian blur or 3D effect to your image? Just head over to the Effects tab and check the box next to the desired effect, and it is instantly applied as opposed to hunting around menus or creating an action as you would do in Photoshop.

    Affinity Photo editing software for Mac

    Closing Thoughts

    It’s not often that a platform emerges to go head-on with Adobe, but so far Affinity Photo is setting itself up as a professional-grade app. While there are many high level features for advanced photo editing, there are also lots of basic photo editing tools that are intuitively positioned, making Affinity much more approachable for beginning or amateur photographers.

    Whatever the fate of Affinity Photo, the fact that companies like Serif are working on platforms to advance the process of photo editing adds healthy competition to an industry that has long been dominated by big players like Adobe and will hopefully give photographers more options in the future.

    Have you tested out Affinity beta yet? If so, what are your thoughts about what works well, and what could be improved?

    googletag.cmd.push(function() {
    tablet_slots.push( googletag.defineSlot( “/1005424/_dPSv4_tab-all-article-bottom_(300×250)”, [300, 250], “pb-ad-78623” ).addService( googletag.pubads() ) ); } );

    googletag.cmd.push(function() {
    mobile_slots.push( googletag.defineSlot( “/1005424/_dPSv4_mob-all-article-bottom_(300×250)”, [300, 250], “pb-ad-78158” ).addService( googletag.pubads() ) ); } );

    The post Overview of the New Affinity Photo Editing Software by Suzi Pratt appeared first on Digital Photography School.
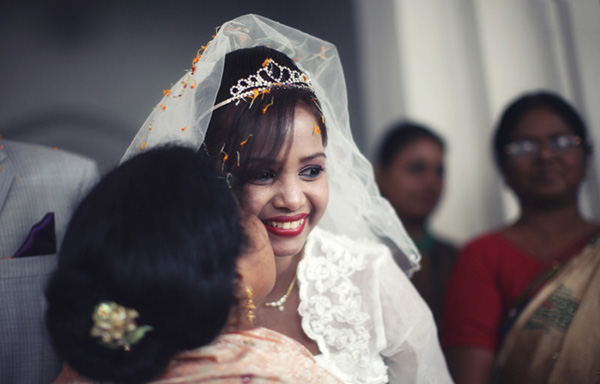

    Digital Photography School

  • Review: Flash Disc Lighting Modifier by Fstoppers

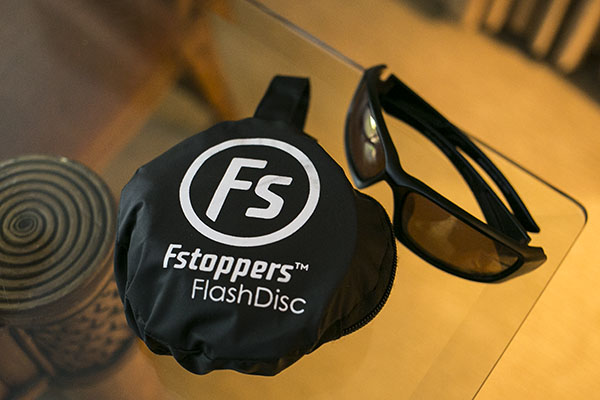
    The more you experiment with off-camera flash, the more you realize that many lighting modifiers are pretty large in size. From softboxes to beauty dishes to umbrellas, many take up space not only in your camera equipment bags, but also on site at a photo shoot. This may be a small price to pay for the dramatic impact these modifiers can have on the resulting image, but sometimes you just want a really compact lighting modifier that can produce great results. One of the answers to this problem is the new Flash Disc by Fstoppers.

    Flash Disc Product 02

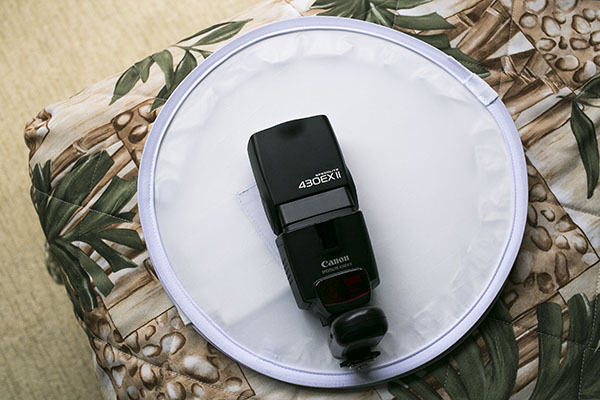
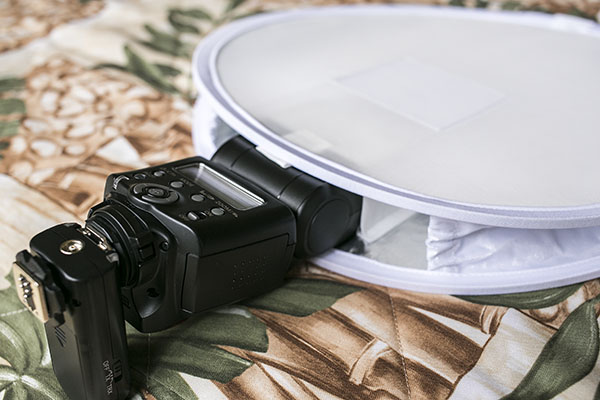
    A handy little device made to fit speedlights, the Flash Disc was created by Lee Morris of Fstoppers with the intent of being a portable softbox. It appears at first to be a little white reflector, as it folds up like one into a compact size that can fit into a large pocket or small bag. However, the Flash Disc is actually more like two reflectors that sandwich your speedlight. When a flash is fired, the light bounces between the two reflectors, creating a softer spread of light. Available for purchase online at a price of $ 49.99, the first batch of Flash Discs were so popular they sold out and supplies were only recently replenished.

    Flash Disc Product

    As a food, portrait, and event photographer, who travels a lot for photo shoots, the main features I’m looking for in a lighting kit are portability and functionality. I generally travel with one Speedlite flash (Canon 430 EXII) and a pair of wireless flash triggers (Yongnuo RF-603 II) for on-location portraits, candid event shots, and food photos in varied lighting conditions. When I have the luxury of space, I’ll bring an octabox softbox or shoot-through umbrella as a lighting modifier, although these devices take up both space in my photography kit as well as setup time while on location. I recently got my hands on the Fstoppers Flash Disc and was very impressed by its compact form, as well as big impact in helping diffuse and bounce my off-camera flash lighting.

    Without a lighting modifier, off-camera Speedlight flash tends to be way too harsh.

    Without a lighting modifier, off-camera flash tends to be way too harsh and overpowering.

    Pro: Small and low-profile

    The first big plus about the Flash Disc is that it is incredibly tiny when it folds up like a reflector and is put into its little black carrying case. Dimensions-wise, the Flash Disc is 12 inches in diameter when open, and 4 inches in diameter when closed. It’s very lightweight at less than 1 pound, and it is compatible with most external flash units. It really can fit into a jacket pocket, or be clipped (via a carabiner) to a loop on your belt or camera bag.

    Flash Disc 05

    Con: Very tight when collapsed

    A possible drawback to having two reflectors folded into each other is that the Flash Disc can literally pop opened. I had a close call once when I opened the Flash Disc with my hands right next to an open bottle of water, resulting in said bottle being knocked over and spilled. Be sure not to open it close to your body or camera as it could possibly knock something over.

    Pro: Includes a grey card

    One side of the Flash Disc is translucent white and the other has built-in strips of white, black, and 18% grey. This is helpful for setting your white balance in post-processing (or doing custom white balance in the field)

    Con: Sometimes the lighting is too harsh

    Considering the 12″” diameter of the Flash Disc, sometimes the light it emits isn’t the softest, especially when compared to light from a 30″” softbox or umbrella. It’s a size trade-off that can sometimes result in the Flash Disc light still being a tad too harsh, although there are certain situations and photography styles that can benefit from this look.

    Best uses

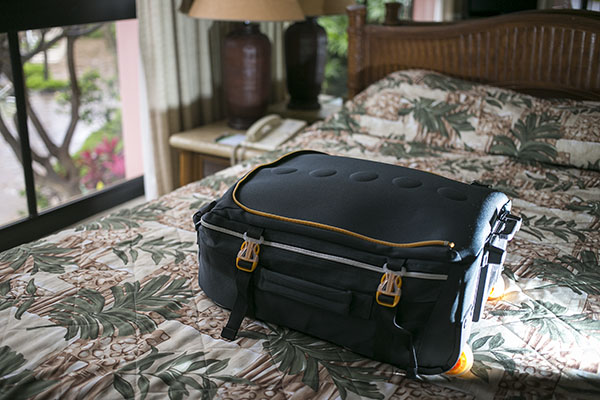
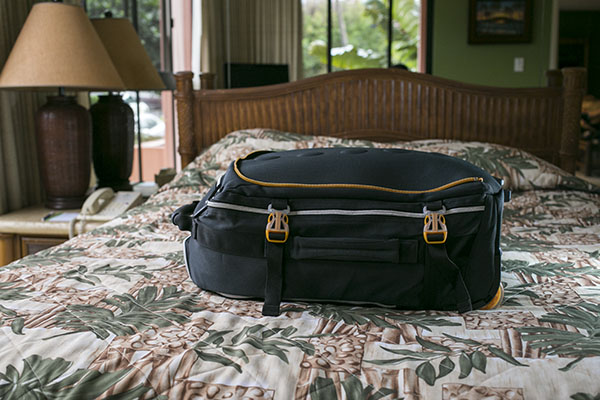
    I tested out the Flash Disc during a recent tropical vacation-  using it on food, portrait, and product photography – and was pleased with the overall results. In the below product photo of a carry-on suitcase, the Flash Disc on a Canon 430 EXII was positioned camera right. The flash was in manual mode, dialled down to 1/64 power, and the result is a soft fill light on the bottom of the suitcase.

    Flash Disc

    For food photography, the Flash Disc’s compact size was crucial as many food photos are taken in restaurants or tight kitchens where there isn’t the space or time to indulge in more elaborate lighting setups. In the image below of a fish taco plate, natural lighting was illuminating most of the dish. The Flash Disc was camera right, fired at 1/64 power to fill in the shadow areas of the dish.

    Flash Disc 02

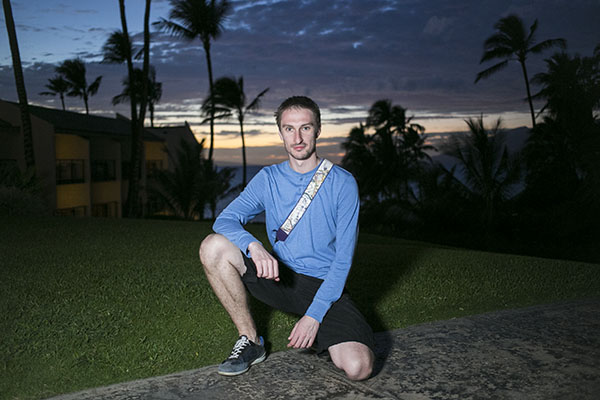
    The Flash Disc also came in extremely handy while doing casual location-based outdoor portraits, another scenario in which lugging around a large umbrella or reflector wouldn’t be convenient without an assistant. The portrait below was taken just after sunset, and my subject is lit by the Flash Disc fired at 1/64 power from camera left. This is an example of when the Flash Disc’s light quality is arguably on the harsher side, especially if you’re working as a lone “run and gun” photographer without an assistant, meaning you can only place the Flash Disc as near or far from your subject as your arm can stretch.

    Flash Disc Portrait

    Has anyone else tested out the Flash Disc? I’d love to hear your thoughts on how useful (or not) you find it.

    googletag.cmd.push(function() {
    tablet_slots.push( googletag.defineSlot( “/1005424/_dPSv4_tab-all-article-bottom_(300×250)”, [300, 250], “pb-ad-78623” ).addService( googletag.pubads() ) ); } );

    googletag.cmd.push(function() {
    mobile_slots.push( googletag.defineSlot( “/1005424/_dPSv4_mob-all-article-bottom_(300×250)”, [300, 250], “pb-ad-78158” ).addService( googletag.pubads() ) ); } );

    The post Review: Flash Disc Lighting Modifier by Fstoppers by Suzi Pratt appeared first on Digital Photography School.
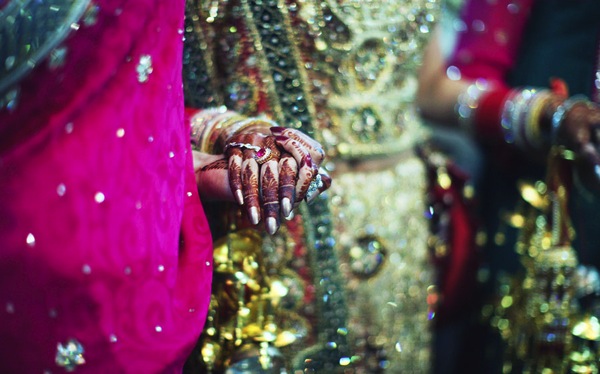

    Digital Photography School

  • 25 Photographs of the Moon with Peace and Tranquility

    The moon and night sky is a mysterious thing. Photographs of the moon can be tricky, but done well can convey an overwhelming sense of peacefulness and calm. I love doing night photography and when you can get the stars, moon or the Milky Way it’s even better.

    Enjoy these images of the moon and allow yourself to star gaze and be inspired:

    Photograph Moonlight shadows by Otto Hütter on 500px

    Moonlight shadows by Otto Hütter on 500px

    Photograph Bats under the moonlight by Weerapong Chaipuck on 500px

    Bats under the moonlight by Weerapong Chaipuck on 500px

    Photograph Winter Night by Arild Heitmann on 500px

    Winter Night by Arild Heitmann on 500px

    Photograph Looks like a Vulcano by Gianmaria Veronese on 500px

    Looks like a Vulcano by Gianmaria Veronese on 500px

    Photograph Lunar Eclipse Over Mt Shasta Revisited by Sean Bagshaw on 500px

    Lunar Eclipse Over Mt Shasta Revisited by Sean Bagshaw on 500px

    Photograph Dying Earth by Michael  Goh on 500px

    Dying Earth by Michael Goh on 500px

    Photograph El Matadors View by Ted Gore on 500px

    El Matadors View by Ted Gore on 500px

    Photograph The Blood Moon by Timothy Green on 500px

    The Blood Moon by Timothy Green on 500px

    Photograph Road to Nowhere - Supermoon by Aaron J. Groen on 500px

    Road to Nowhere – Supermoon by Aaron J. Groen on 500px

    Photograph Golden Bay: When Night Falls by Yan Zhang on 500px

    Golden Bay: When Night Falls by Yan Zhang on 500px

    Photograph Winding Owens by Nagesh Mahadev on 500px

    Winding Owens by Nagesh Mahadev on 500px

    Photograph BY THE LIGHT OF THE MOON by Michelle Cobble on 500px

    BY THE LIGHT OF THE MOON by Michelle Cobble on 500px

    Photograph Storybook by Jeff Lewis on 500px

    Storybook by Jeff Lewis on 500px

    Photograph Pearly Gates to Nirvana by Yuga Kurita on 500px

    Pearly Gates to Nirvana by Yuga Kurita on 500px

    Photograph The Polarizer by Miles Morgan on 500px

    The Polarizer by Miles Morgan on 500px

    Photograph Moon by Uccio78 on 500px

    Moon by Uccio78 on 500px

    (Okay that was a sneaky one – it’s not the moon but I think the image is great so I shared it)

    Photograph Ancient Memories by Raza Durrani on 500px

    Ancient Memories by Raza Durrani on 500px

    Photograph The Old Bridge by Mostafa Hamad on 500px

    The Old Bridge by Mostafa Hamad on 500px

    Photograph with filter by Kajo_Kamil_Sadlon on 500px

    with filter by Kajo_Kamil_Sadlon on 500px

    Photograph Paying Reverence To The Rising Moon by Jeff Deveau on 500px

    Paying Reverence To The Rising Moon by Jeff Deveau on 500px

    Photograph Good Night... by Ahmet Kizilhan on 500px

    Good Night… by Ahmet Kizilhan on 500px

    Photograph Halo by Michael Bollino on 500px

    Halo by Michael Bollino on 500px

    Photograph Flight from moon by Michael Priesch on 500px

    Flight from moon by Michael Priesch on 500px

    Photograph Illuminate my Heart by Sherry Akrami on 500px

    Illuminate my Heart by Sherry Akrami on 500px

    Photograph Pink Moon  by MO AOUN PHOTO on 500px

    Pink Moon by MO AOUN PHOTO on 500px

    googletag.cmd.push(function() {
    tablet_slots.push( googletag.defineSlot( “/1005424/_dPSv4_tab-all-article-bottom_(300×250)”, [300, 250], “pb-ad-78623” ).addService( googletag.pubads() ) ); } );

    googletag.cmd.push(function() {
    mobile_slots.push( googletag.defineSlot( “/1005424/_dPSv4_mob-all-article-bottom_(300×250)”, [300, 250], “pb-ad-78158” ).addService( googletag.pubads() ) ); } );

    The post 25 Photographs of the Moon with Peace and Tranquility by Darlene Hildebrandt appeared first on Digital Photography School.


    Digital Photography School

  • Weekly Photography Challenge – Shoot the Moon

    Luz Adriana Villa

    By Luz Adriana Villa

    The image above and these other 25 images of the moon might give you a hint as to your challenge this week.

    Night sky photography can be challenging and a lot of fun. Now’s the time to get out and try photographing the moon if you haven’t already.

    We have several articles on the topic here on dPS if you need assistance:

    • 20 Dos and Don’ts for Shooting the Moon
    • Beyond Full Moon Photography
    • Moon Photography: 6 Tips for Better Moon Photos
    • Moon Photography Made Simple
    Sam Javanrouh

    By Sam Javanrouh

    @lbyper

    By @lbyper

    Christian Ronnel

    By Christian Ronnel

    Dylan Toh

    By Dylan Toh

    Share your shoot the moon images here:

    Simply upload your shot into the comment field (look for the little camera icon in the Disqus comments section) and they’ll get embedded for us all to see or if you’d prefer upload them to your favourite photo sharing site and leave the link to them. Show me your best images in this week’s challenge. Sometimes it takes a while for an image to appear so be patient and try not to post the same image twice.

    googletag.cmd.push(function() {
    tablet_slots.push( googletag.defineSlot( “/1005424/_dPSv4_tab-all-article-bottom_(300×250)”, [300, 250], “pb-ad-78623” ).addService( googletag.pubads() ) ); } );

    googletag.cmd.push(function() {
    mobile_slots.push( googletag.defineSlot( “/1005424/_dPSv4_mob-all-article-bottom_(300×250)”, [300, 250], “pb-ad-78158” ).addService( googletag.pubads() ) ); } );

    The post Weekly Photography Challenge – Shoot the Moon by Darlene Hildebrandt appeared first on Digital Photography School.

    Digital Photography School

  • The Quick Guide To Corporate Photography

    Businesses as well as individual business professionals have a wide range of photography needs that may need to be filled over time, and as a professional photographer, you have the opportunity to profit when you make an effort to fill these needs. There are essentially two types of corporate photography that you can focus on, and you may choose to Continue Reading

    The post The Quick Guide To Corporate Photography appeared first on Photodoto.


    Photodoto