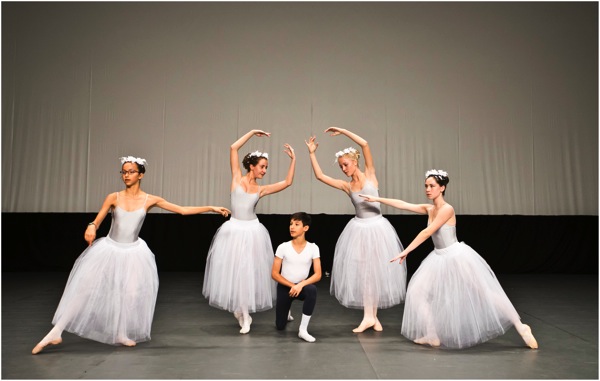
Category: Photography

  • A Guide to Photographing Dance Performances in a Theatre

    DSC4090

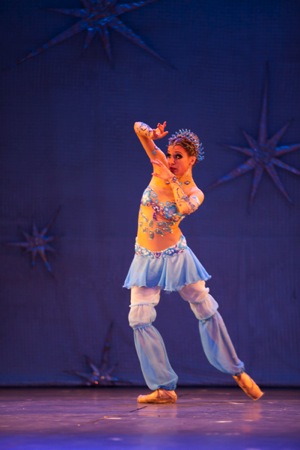
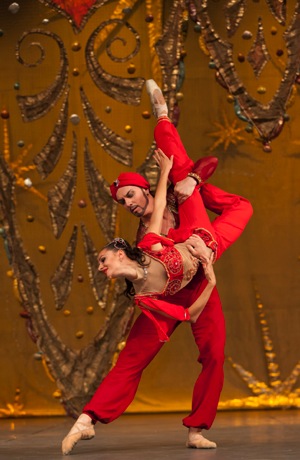
    One of the biggest challenges as photographer is shooting inside a theatre, simply because the only thing that you can control is the camera. You may be faced with very dim lighting conditions, dancers moving around at great speed, different lighting settings during the show, no use of flash, and your movement in the theatre during the show may be limited.

    I am writing this guide based on an assignment you have with the organizer, as photographer of the event. Some of the points might not be relevant or accessible for you if you are attending a performance as a member of the public.
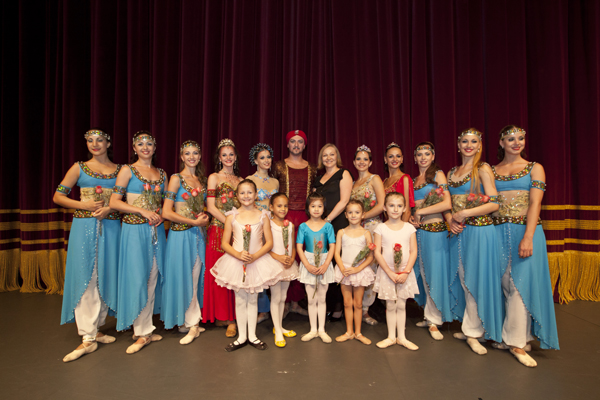
    IMG 7011

    Preparation for the shoot

    Know the ground

    A protocol for all professional photographers is to understand the grounds and what to expect. This can be done through an early visit (if allowed), or a search online for other’s work in the same location, to understand the layout and surroundings.

    Request to attend a rehearsal prior to the performance (usual this is done free of charge) if possible, but to me this is mandatory if the opportunity exist. This not only gives you a chance to enter the theatre but also to understand what is to be performed and its sequence. You can then be better prepared to know the photos you will wish to take, and at which location you’ll need to be so you’ll be ready for the shot. Take this opportunity to talk to the organizer on which seats you will be allocated or which seat you prefer. I will cover location of seat for shooting in the technique part later.
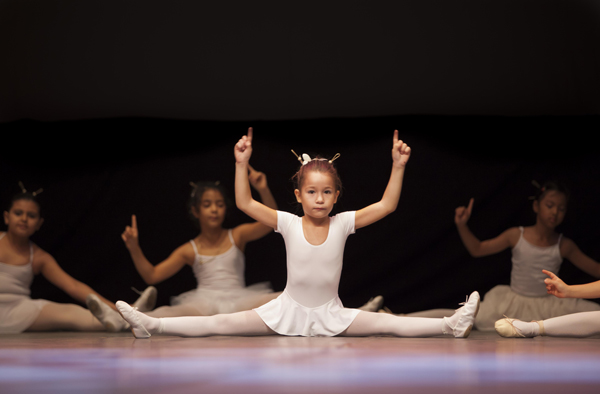
    IMG 4792 1

    Settings: f/2.8, 1/125th, ISO 1600

    Choosing your seat (if you have a choice)

    I am very particular in my location of shoot as it reflect the quality if work I will produce from the assignment.
    Most theatres can accommodate hundreds, to thousands of spectators at various elevations. My personal recommendation is to locate yourself on the ground level, a few rows behind the front, right in the middle. Below are some explanations of some problem you may encounter at different locations.

    Up in the balcony

    Cons: Too far from the stage, shooting angle not directly perpendicular to the dancers.

    First row seats

    Cons: Too near to the stage.

    Side Seat

    Cons: shooting angle not directly perpendicular to the dancers, too many distractions in photos (sometimes you can see dancers at the side before entry to the stage.
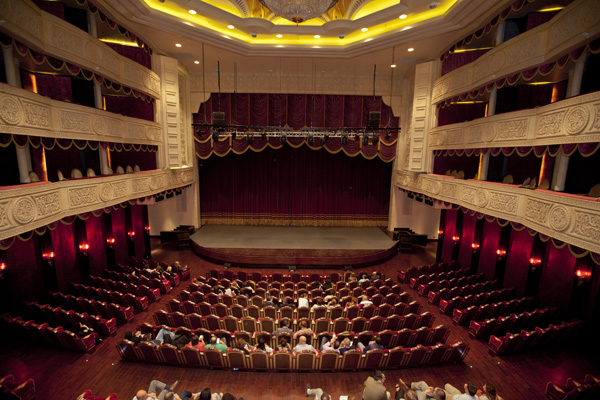
    IMG 4399 1

    Ideal seat

    On the ground level, a few rows behind the front, right in the middle is the ideal seat. Personally if I can only sit at one location throughout the show, I will prefer this seat as it provide me a comfortable direction to the stage and most of my shots will be facing the dancers.

    Type of Equipment needed

    With the above, you can know decide what equipment you need for the shoot.

    Flash Gun

    As most performances prohibit use of flash during show, you can omit having one on your camera during the performance but do still carry one with you (I use it for group photo at the end of the show). The use of LED light is good as well for after the show shots.

    Camera

    In such challenging conditions, a camera with capability to handle high ISO settings without producing too much noise is preferred. I usually have my Canon 5D Mark II, and also my Sony 7R for such assignments.
    IMG 6849 IMG 4669 1

    Lenses

    The most important piece of equipment you need after understanding the grounds and location is the right lens. A zoom lens is mandatory for me to enable me to reach out to the stage and get close-ups of the dancers. Lenses with large apertures are preferred in such low light conditions. I will touch on that more at the later section on why. I usually have my 70-200mm f/2.8 on my Canon, and the 16-35mm f/2.8 on my Sony 7R for wide-angle shooting.

    Tripod/Monopod

    This is a interesting topic as most theatres prohibit you from setting up a tripod, subject to organizer approval. If you are given a seat for shooting, a tripod will be difficult to manage with limited legroom space. I always use a monopod for such assignments in order to conserve energy.
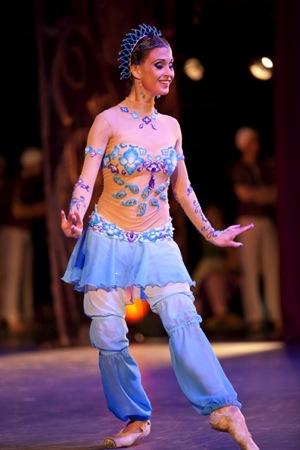
    IMG 6252

    Camera settings: f/2.8, 1/30th, ISO 1000

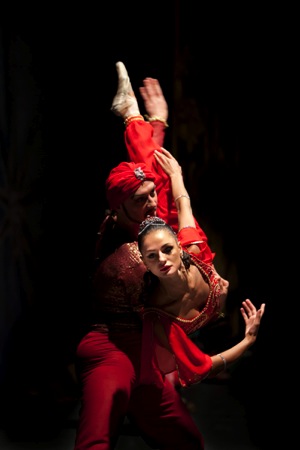
    IMG 4454 1

    Camera settings: f/3.2, 1/500th, ISO 2500

    Know your gear inside out

    I am often on site photographing events and someone will come and ask for help as they can’t tune back to certain setting or something is not functioning correctly on their camera.

    Shooting in a theatre is like sports photography. If you missed a moment it will be gone, and you will not have a second chance. Always be ready, and anticipate what is coming up. Study your camera inside out for all the functions that you wish to use and manipulate during the shoot. Know all the commonly used functions like setting ISO, aperture, shutter speed, etc. I usually use AV (Aperture priority) and control the ISO if I need more shutter speed.
    On ISO, every camera has its own capability to handle ISO and minimize noise. Know the limit of your camera, like my 5D MarkII, I will not push it to more than 5000 ISO.
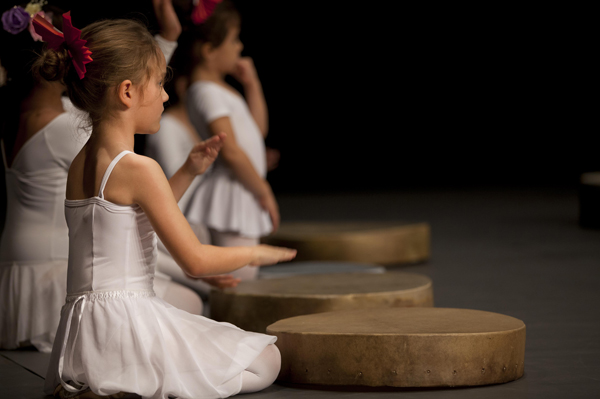
    IMG 4470 1

    Camera settings: f/2.8, 1/200th, ISO 800

    Techniques to adopt

    Basic technique for shooting such scenes is to select the right ISO for the shot with the right shutter speed, depending on the movement speed of the dancer. Things moves very fast in a performance and you have to make your camera adapt to what is happening on the stage, so you capture what you need.

    A common trick I use something is to pre-focus on an stationary object on the stage prior to the dancers coming into position. This only works if you attend the rehearsal and know the staging of the show.

    Lastly always shoot RAW for such events so that back at your desk the white balance can still be adjusted. Color balance can be off due to some lighting differences during the show.
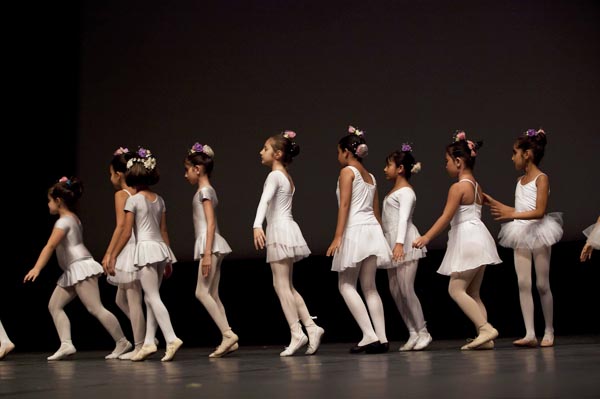
    IMG 4908

    Camera settings: f/4, 1/250th, ISO 1600
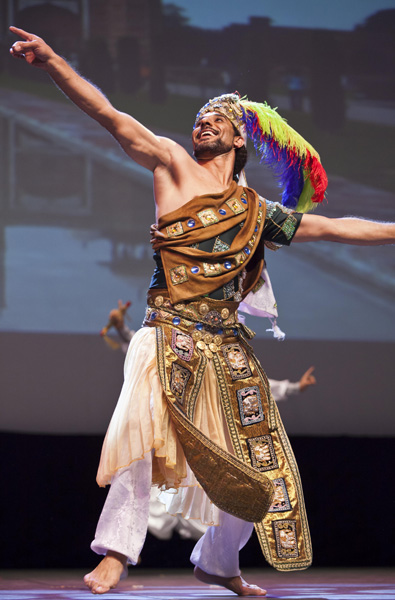
    IMG 4594 1

    Camera settings: f/2.8, 1/320th, ISO 1600

    Photos taken during Enana Production and Academy performances.

    googletag.cmd.push(function() {
    tablet_slots.push( googletag.defineSlot( “/1005424/_dPSv4_tab-all-article-bottom_(300×250)”, [300, 250], “pb-ad-78623” ).addService( googletag.pubads() ) ); } );

    googletag.cmd.push(function() {
    mobile_slots.push( googletag.defineSlot( “/1005424/_dPSv4_mob-all-article-bottom_(300×250)”, [300, 250], “pb-ad-78158” ).addService( googletag.pubads() ) ); } );

    The post A Guide to Photographing Dance Performances in a Theatre by Ray Toh appeared first on Digital Photography School.
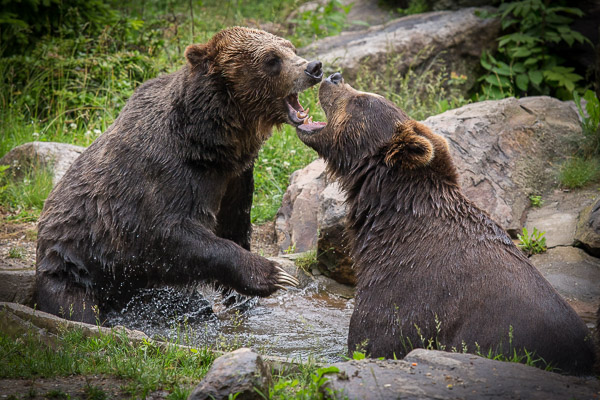
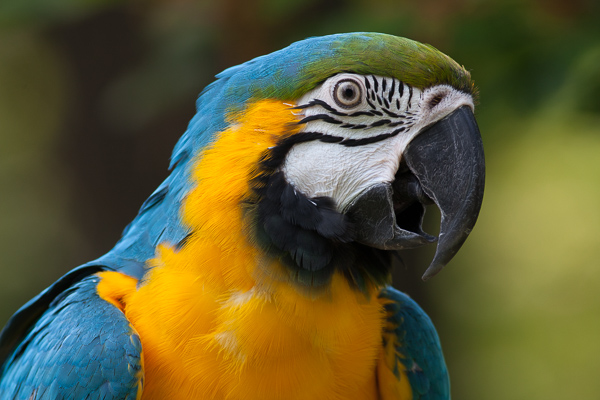
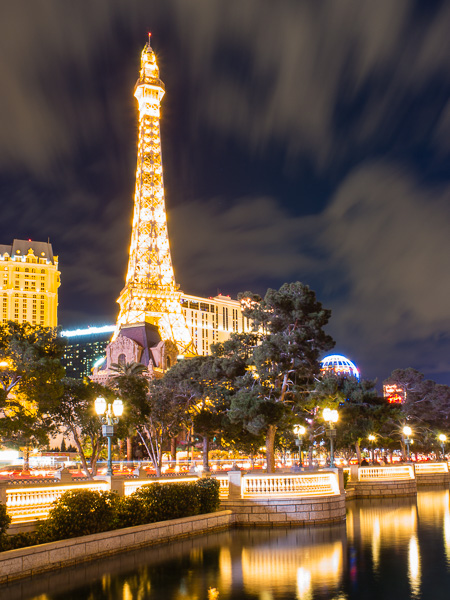
    Digital Photography School

  • 6 of the Most Essential but Underused Camera Features

    If you are just getting started in photography, you’ll be pleasantly surprised to find these six often overlooked features in the menu of your DSLR. While each one can be used to create professional quality results, extensive experience is not required to leverage their usefulness. Best of all, there’s no need to upgrade to a high end model. These settings are now found on even the most entry-level camera bodies. With the ability to take full control of your camera, you’re more likely to get the shot right at the time of the exposure.

    1 roar

    1) Flash Exposure Compensation

    The pop-up flash gets a bad rap, and this is unfortunate as it’s actually a very useful tool when set properly. Out of the box, it simply provides too much light, resulting in a bright, washed-out appearance. The trick is to adjust the flash exposure compensation to a reduced output. As a starting point, bring it down to negative two (-2). This creates a soft quality of fill flash that’s immediately more pleasing. Should you need even less light, you can further reduce the flash to negative three. While it’s rarely necessary, you could even add intensity to the flash by raising it towards the positive. Just remember, effective use of flash is meant to soften, not eliminate shadows.

    2 fill flash

    2) Two Second Timer

    This rarely used setting can open up a whole new world of creative possibility for you. It’s typically found in the “drive” menu, along with single shot, multi-shot burst mode, etc. If you’re in a place that doesn’t allow tripods, it’s still possible to take sharp photos, even with long exposure times.

    Select the two second timer and rest the camera on a chair, or the ground. You can use the folded camera strap to angle the camera upwards if necessary. When you press the shutter, the camera will move initially. Don’t worry, you have two seconds for it to settle down before the camera actually fires. This is also helpful for tripods that are not as stable as they should be. If you don’t have a cable release, the timer is a terrific wireless alternative.

    3 two second timer

    3) Histogram

    Think of the histogram as a visual cheat-sheet for photographing bright tones. To render a subject as true white, you want the data on the right hand side to be as close to the edge of the graph (histogram) as possible. This will indicate a crisp exposure rather than a muddy, grey appearance. As you change the exposure to let in more light, the histogram will inch towards the right. Keep adjusting your settings until it’s literally just a hair from the outer wall. You are now maximizing all of the wonderful dynamic range of which your camera is capable.

    Once the data actually collides with the right hand wall of the histogram, you’ve technically overexposed part of your scene. This means there is no detail in the highlights, but rather a hotspot that is impossible to recover, even with sophisticated software. While this data is valuable, it doesn’t tell you exactly where the trouble spot is in your scene. This is where the “highlight alert” becomes a helpful aid.

    4 histogram

    4) Highlight Alert

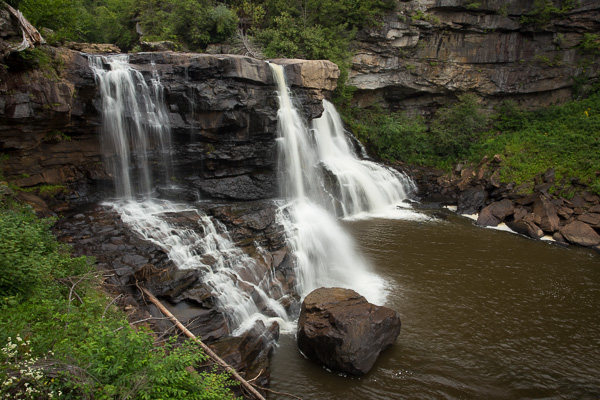
    By default, many camera models have the highlight alert turned off so you’ll need to enable it in the menu. Commonly referred to as “the blinkies”, this feature alerts you to the precise location that’s overexposed. With this knowledge, you can make a quick adjustment to the exposure, or even change your composition to eliminate the unwanted area. That translates to more consistent exposures with no washed-out areas. You’ll also be rewarded with less time in the digital darkroom, trying to fix problems that could have been prevented in the field.

    5 waterfall

    5) Live View

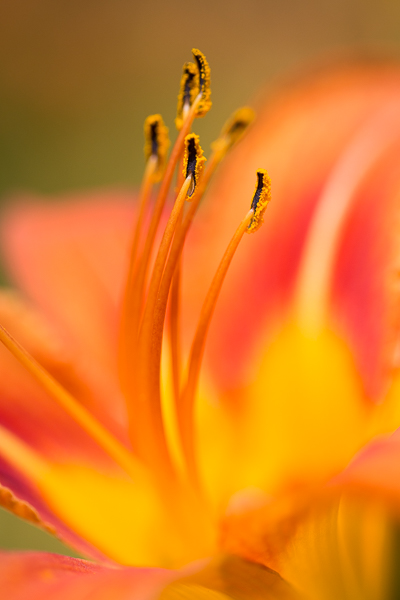
    If you’ve ever struggled to achieve autofocus at night, or desire more accuracy for macro work, Live View will be your new favorite mode. With it, you can zoom in on a tiny portion of a subject at 5x and 10x magnification. This extreme close-up gives you the ability to carefully micro-focus on whatever is most important in your scene. Just note, the enlarged view on your LCD is not representative of your lens’ effective focal length. Upon pressing the shutter, the entire scene will still be captured in sharp detail. You’ll be amazed at the level of precision possible. For the ultimate in control, use this with manual focus and a sturdy tripod.

    6 macro

    Live View is not only useful for focus, but composition as well. For example, if your DSLR lacks a tilt or swivel screen, shooting from ground level can be a real challenge. With a live image on the LCD however, there’s no need to crane your neck for viewfinder access. The same idea can be applied to those crowded situations when you must raise the camera over your head. Instead of shooting blind, you can use Live View to better compose the shot.

    6) Single AF Point

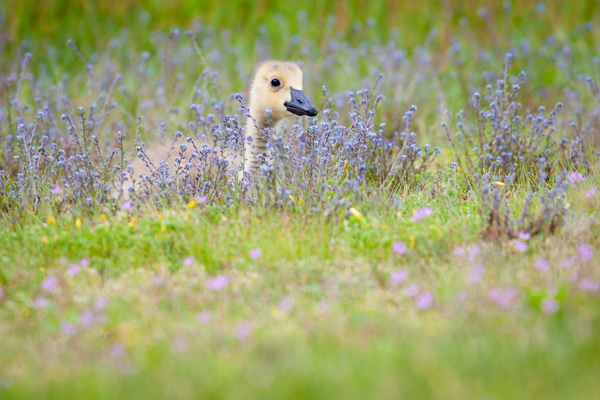
    7 goose

    Allowing the camera to automatically choose your focus point is one of the biggest causes of blurry photos. Don’t get me wrong, you can still use autofocus, but it works most consistently when you manually set the autofocus point. Otherwise, the camera will choose incorrectly, leaving the fence post sharp and your subject out of focus. While some cameras offer clusters of focus points, a simpler approach will often work to your advantage. By placing a single active AF point on what you want sharpest, you eliminate the guess work, and your percentage of keepers will soar.

    Do you have any other hidden gems on your camera you’d like to share? What have you discovered in the menu of your camera?

    googletag.cmd.push(function() {
    tablet_slots.push( googletag.defineSlot( “/1005424/_dPSv4_tab-all-article-bottom_(300×250)”, [300, 250], “pb-ad-78623” ).addService( googletag.pubads() ) ); } );

    googletag.cmd.push(function() {
    mobile_slots.push( googletag.defineSlot( “/1005424/_dPSv4_mob-all-article-bottom_(300×250)”, [300, 250], “pb-ad-78158” ).addService( googletag.pubads() ) ); } );

    The post 6 of the Most Essential but Underused Camera Features by Chris Corradino appeared first on Digital Photography School.
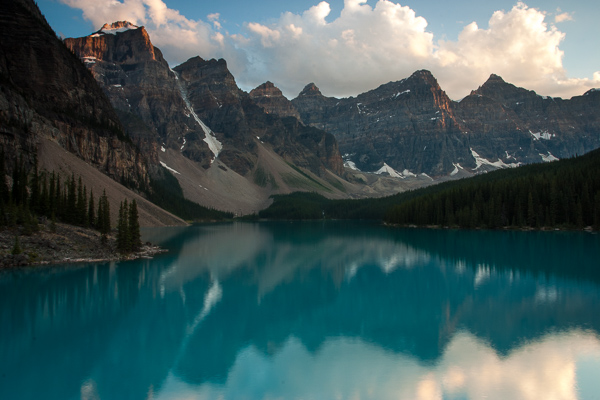

    Digital Photography School

  • 3 Tips for Capturing Connections in Family Portraits

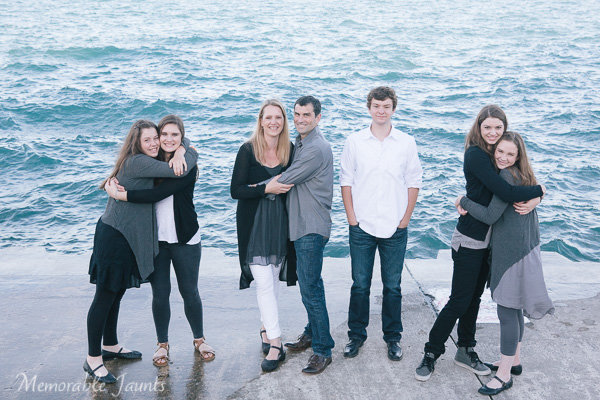
    Capturing Conenctions in Family Portraits Article for DPS by Memorable Jaunts 01


    We’ve all heard the dreaded words, “Okay everyone, look at the camera and at the count of three say Cheese!”. I have been guilty of using this technique too in my early days of as a family portrait photographer. I remember coming home from client photo shoots and kicking myself for not being original, botching up my client’s experience, and getting really mediocre images that lacked any emotion or connection.

    Over the course of time, my style of photography evolved and I started investing more time and effort in making my clients feel comfortable before, during, and after their photoshoot. The results were images that were fun, fresh and full of emotions. Exactly the kind of images that I want in my portfolio. My clients love the experience and I often hear words like, “Oh that was so much fun!” or ‘Thank you for making it so easy”, and “I loved how you made us feel at ease”. I realized that if, as a photographer, I was having a good time interacting with and photographing my clients, they were having a great time too.

    Capturing Conenctions in Family Portraits Article for DPS by Memorable Jaunts 02


    At the end of the day, my job as a photographer is not only to take great, meaningful and beautiful pictures for my clients but also to make sure they have a great time and it is a pleasant experience. To that end, there are some things to keep in mind to capture connections among your clients

    #1 – Family dynamics

    It is very important to understand family dynamics prior to the photoshoot. This goes beyond the typical questions about the names and ages of the kids. Try and understand likes and dislikes of the people involved. If there are young children involved, take the time to understand personalities of the kids as individuals, and with their siblings. Is the family casual and easy going, or do they like formal, traditional posed pictures? Just because they like a particular style of imagery does not mean you have to stick to that. But certainly incorporate what they want first, then feel free to experiment.

    Capturing Conenctions in Family Portraits Article for DPS by Memorable Jaunts 03

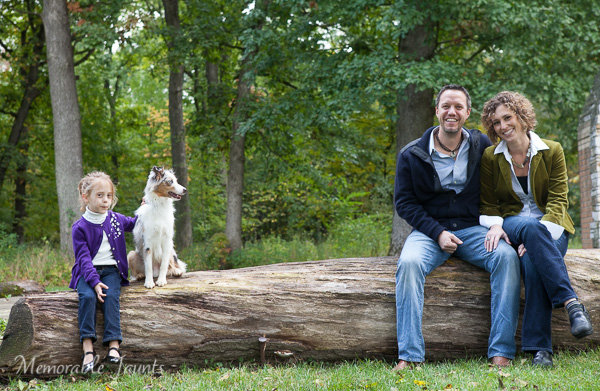
    This family made it very clear that their new puppy was their second baby! – Rather than excluding the dog, I made sure to include him in almost all their images.

    Capturing Conenctions in Family Portraits Article for DPS by Memorable Jaunts 04

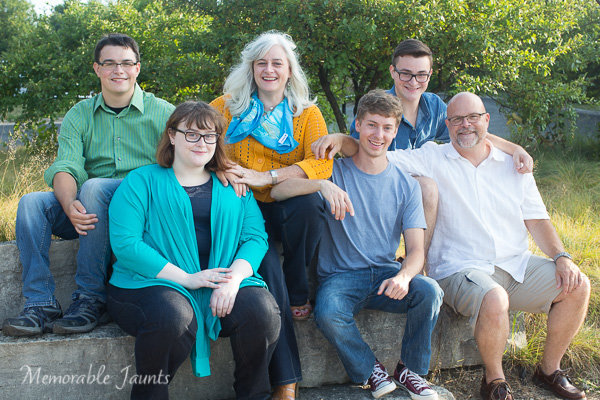
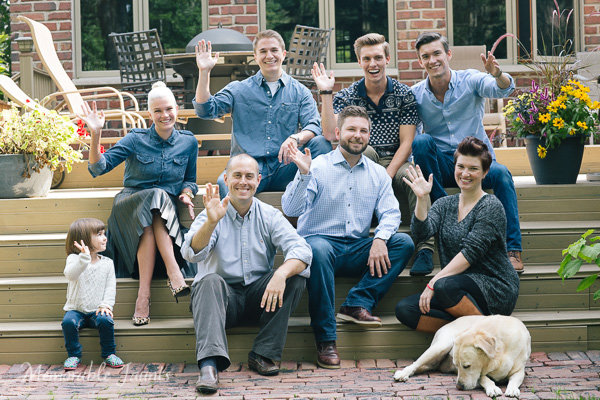
    Large family groups don’t have to be intimidating. Just engage with them and give them something to do.


    #2 – Structure the shoot

    Trust me, this is key and will ensure you maintain your sanity during the photoshoot. Have a plan of action. I make it a point to spend the first five minutes of every session educating my clients on what they can expect. The first few minutes is warmup time – testing the light, figuring out the right lens, etc. I let my clients know exactly what’s happening, and many times, I get a lot of beautiful images during this time. Clients are much more relaxed if they think these first few minutes don’t really count.

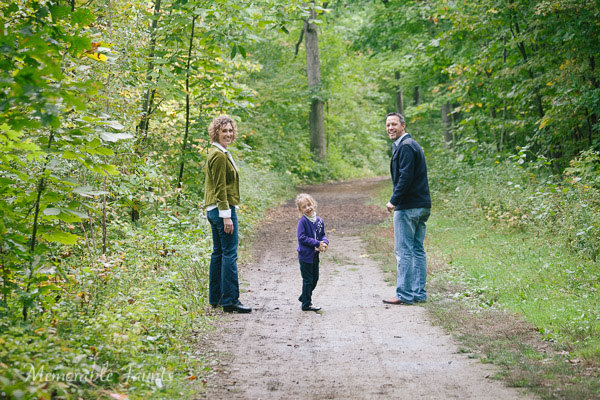
    Then we incorporate an activity like walking along a path, climbing a tree, playing in the park, and I photograph around that activity. Finally we just sit down to enjoy each other’s company. This not only let’s the clients know exactly how we are going to spend our time but also helps keep me in check. Because let’s face it, for most of us, once we start clicking that shutter, it is so easy to loose track of time!

    Capturing Conenctions in Family Portraits Article for DPS by Memorable Jaunts 05

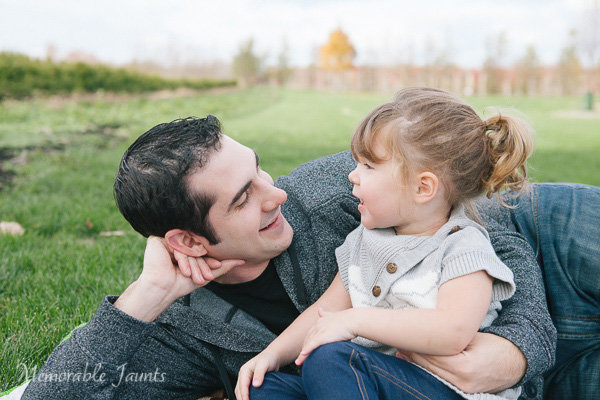
    A simple conversation that was set up resulted in some magical daddy-daughter moments.

    Capturing Conenctions in Family Portraits Article for DPS by Memorable Jaunts 06

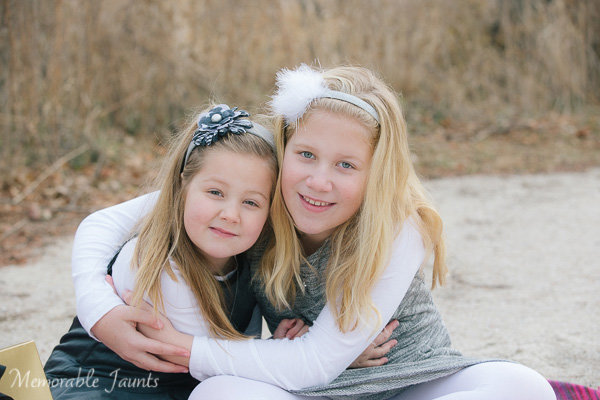
    Sometimes just use hands to communicate connection among family members.


    #3 – Make it fun

    This is a critical part of capturing connections among family members during the photoshoot. For family portraits with little kids, try techniques like tickle-fest, blowing bubbles, rocking out those dance moves and other such methods to get the kids in the spirit of having fun. If kids are a little older, try cracking jokes. Bring some basic props if required and let the kids play. Photograph around the activity and capture candid moments of family interactions. If all else fails, it is okay to setup the shot and work the family into the pose. Make sure to keep clicking so that you can get some candids through out the whole process.

    Capturing Conenctions in Family Portraits Article for DPS by Memorable Jaunts 07

    Capturing Conenctions in Family Portraits Article for DPS by Memorable Jaunts 08

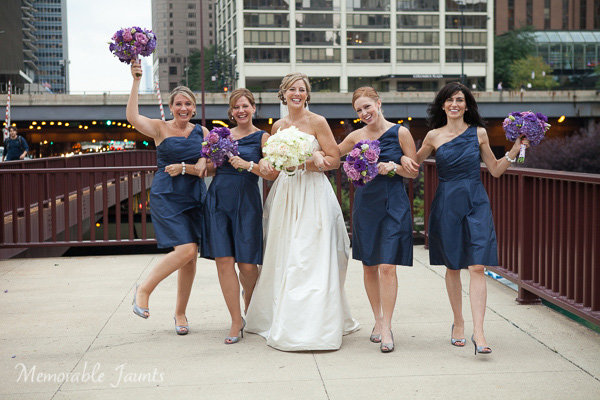
    Bride + Bridesmaids + a catwalk pose = really fun images!


    Remember that families that play together, stay together. Your job as a photographer is to capture these family dynamics in a fun and pleasing way. If your clients have a great time during the shoot, it is more than likely that they will love your images because they will remember the experience in a positive light.

    googletag.cmd.push(function() {
    tablet_slots.push( googletag.defineSlot( “/1005424/_dPSv4_tab-all-article-bottom_(300×250)”, [300, 250], “pb-ad-78623” ).addService( googletag.pubads() ) ); } );

    googletag.cmd.push(function() {
    mobile_slots.push( googletag.defineSlot( “/1005424/_dPSv4_mob-all-article-bottom_(300×250)”, [300, 250], “pb-ad-78158” ).addService( googletag.pubads() ) ); } );

    The post 3 Tips for Capturing Connections in Family Portraits by Karthika Gupta appeared first on Digital Photography School.

    Digital Photography School

  • How to Create Your Own Lightroom Presets

    Import presets Lightroom

    A straight out of the camera Raw file from an EOS 5D Mark II, without any corrections applied in Lightroom. This is the sort of thing you see when you import images into Lightroom without applying a Develop Preset at the import stage.

    There are mundane tasks in Lightroom that you carry out on almost every photo you import. You can save time by creating Develop Presets to perform these jobs automatically upon import, so that you don’t have to do them later.

    Import presets Lightroom

    The same photo with Profile set to Landscape, lens corrections applied, chromatic aberrations removed and white balance set to auto. This is what you would see after importing the photo into Lightroom if you applied an import preset similar to the one that I show you how to make in this article. The biggest benefit is that it saves you time.

    Here’s an example of how I created a Develop Preset to use when I import photos taken with my Fujifilm X-T1 camera. The idea was to create a preset that takes me to a neutral starting point from where I can process the file. You can follow along to create an import Develop Preset for your own camera. I’ll explain what I’m doing at each step and suggest some variations you can try.

    Start by selecting a photo taken with the camera that you are going to create the Develop Preset for and open it in the Develop module. Zero all the settings by pressing the Reset button at the bottom (you may find it helpful to make a Virtual Copy of the photo first so you don’t undo any edits you have already made).

    1. Camera Calibration panel

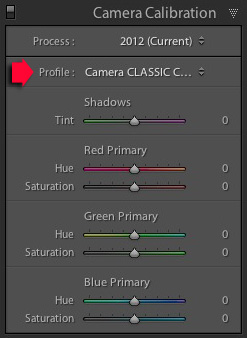
    I set Process to 2012 (Current) the most recent, and Profile to Classic Chrome (the Film Simulation setting I use most often). The Profile options available to you vary depending on the camera.

    Import presets Lightroom

    Possible variation: You can create a different Develop Preset for each Profile that you regularly use.

    2. Lens Corrections panel

    Import presets LightroomI don’t have to do anything here for the X-T1 as lens corrections are carried out by the camera, saved within the Raw file, and automatically applied by Lightroom.

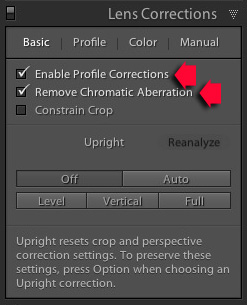
    Most cameras don’t do this, so if this applies to you then go to the Basic tab and tick the Enable Profile Corrections and Remove Chromatic Aberration boxes. Then go to the Profile tab and set Setup to Auto so that Lightroom adjusts the settings according to what lens is mounted on the camera.

    3. Basic panel

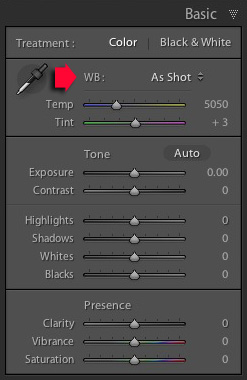
    Set White Balance to As Shot and make sure all the other sliders are zeroed.

    Possible variation #1: Tick the Auto Tone box to have Lightroom automatically set the Exposure, Contrast, Highlights, Shadows, Whites and Blacks sliders. This is a matter of preference, I don’t do this as I prefer to set them myself.

    Import presets Lightroom

    Possible variation #2: Create one preset for colour photos, and another for those you intend to convert to black and white by setting Treatment to Black & White.

    Creating the Preset

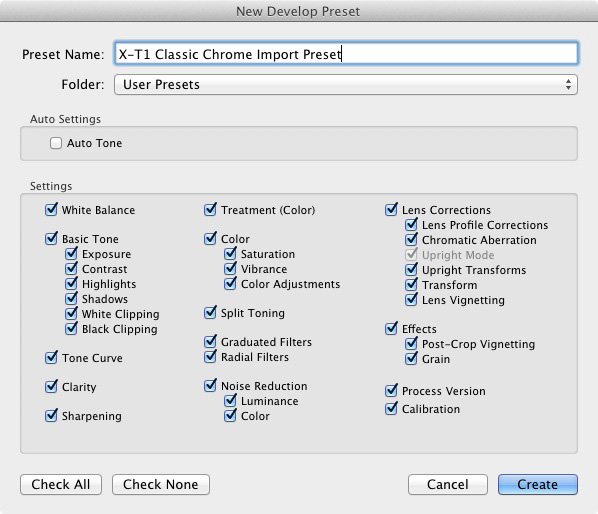
    Go to the Develop Preset panel (on the left side) and click the Create New Preset icon (the plus sign at the top, to the right of the word “Presets”). This brings up the New Develop Preset window. Give the Preset a name and select a folder to save it in (User Presets is a good one). Click the Check All button and press Create when you are ready to save the Preset.

    Import presets Lightroom

    That’s it! It’s a simple process that doesn’t take very long and can save you a lot of time when you import your photos.

    Applying Develop Presets upon Import

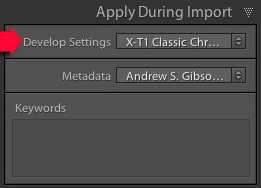
    Import presets LightroomTo apply the Develop Preset you just created, launch the Import Window and go to the Apply During Import panel. Set Develop Settings to the appropriate preset. This is where creating several presets helps saves time, as you can pick the most appropriate one for the photos you are importing. When you click the Import button Lightroom applies the settings in the selected preset, and renders a preview that includes those settings.

    Adding Copyright Info

    While you’re in the Import Window, it’s worth setting up another Preset to automatically add Copyright information to the metadata of your photos when you import them.

    Go to the Metadata menu in the Apply During Import panel and select New. Lightroom opens the New Metadata Preset window, where you can add information such as your name and copyright details.

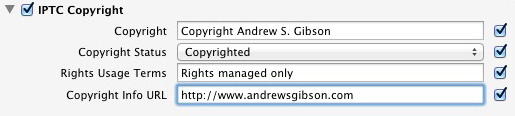
    Start by giving the Preset a name and clicking the Check Filled button. Under IPTC Copyright, set Copyright Status to Copyrighted and fill in the other fields appropriately (my entries are shown below).

    Import presets Lightroom

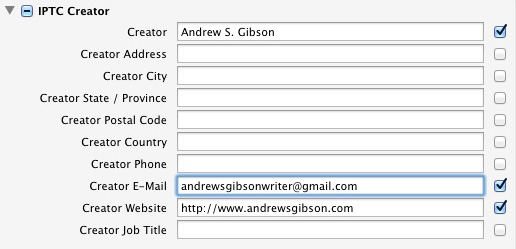
    Under IPTC Creator, add your name, website, email address and any other appropriate details. I leave out my address here as I move around a lot so it’s constantly changing (plus identity theft is a risk).

    Import presets Lightroom

    Click Done when you’re finished. When you import photos all you have to do is select the Preset you just created from the Metadata menu.

    File Renaming

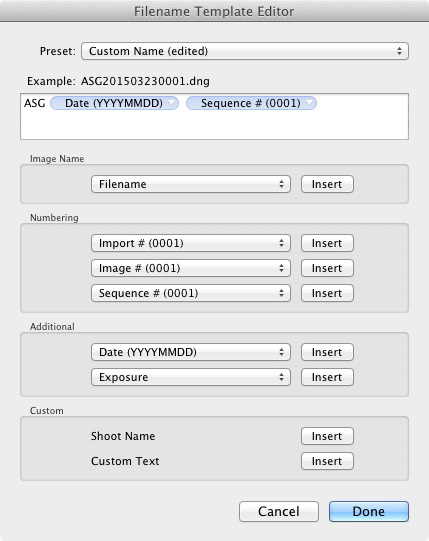
    If you’re in the habit of renaming your photos you can set up a Filename Template to do so. Go to the File Renaming panel and selecting one of the options from the Template menu. Alternatively, select Edit to open the Filename Template Editor and create your own Template

    There are lots of variations you could use here, so make sure you pick something that makes sense to you. The idea is to give each photo a unique name so that you don’t end up with more than one photo sharing the same name, as your camera’s counter cycles back around to zero.

    You could go for something like your initials, followed by the date and a sequence number, as in the example below. When it’s ready go to the Preset menu at the top and select Save Current Settings as New Preset. Lightroom asks you to give the new template a name. All you have to do to use the Preset is select it from the File Renaming menu.

    Import presets Lightroom

    You can also add a dash in between if you like so your filename looks like: ASG-20150323-0001.dng

    Your turn

    Hopefully this has given you some useful ideas for creating your own Presets in Lightroom to save time and speed up your workflow. How do you use Presets when you import photos into Lightroom? I’d love to hear some good time saving tips. Please let us know in the comments.


    The Mastering Lightroom Collection

    Mastering Lightroom ebooksMy Mastering Lightroom ebooks will help you get the most out of Lightroom 4 and Lightroom 5. They cover every aspect of the software from the Library module through to creating beautiful images in the Develop module. Click the link to learn more or buy.

    googletag.cmd.push(function() {
    tablet_slots.push( googletag.defineSlot( “/1005424/_dPSv4_tab-all-article-bottom_(300×250)”, [300, 250], “pb-ad-78623” ).addService( googletag.pubads() ) ); } );

    googletag.cmd.push(function() {
    mobile_slots.push( googletag.defineSlot( “/1005424/_dPSv4_mob-all-article-bottom_(300×250)”, [300, 250], “pb-ad-78158” ).addService( googletag.pubads() ) ); } );

    The post How to Create Your Own Lightroom Presets by Andrew S. Gibson appeared first on Digital Photography School.

    Digital Photography School

  • How to Make a DIY Light Panel or Scrim

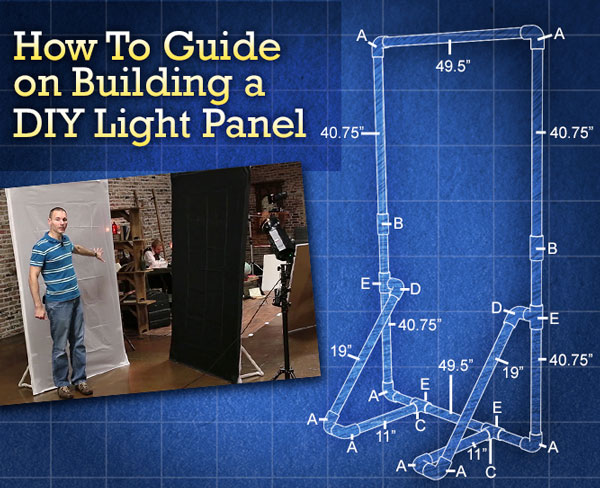
    how-to-guide-banner

    In an earlier article we discussed 10 reasons why you should consider using a light panel instead of a softbox for your next shoot. In this, part two, I am going to:

    • Show you how to create your own self-standing PVC light panel frames and accessories
    • Share some cheap fabric alternatives to use with your new frames
    • Offer helpful tips on making them stronger and easier to assemble

    Before we get started, I want to talk a little bit about the size of our panels versus what you may buy online. There are a lot of different brands of frames out in the market, and most of them top out at around 72”. A six foot tall panel might sound plenty big, but when you are shooting someone who is tall, you are not going to have the area of coverage you need around your model’s head. To remedy this, you will have to attach the panel to your light stands, using an adapter, to raise it off the floor.

    The panels we are going to create measure in at roughly seven feet tall, giving you a little more headroom and allowing you to free up your light stands for things such as… lights!

    With that being said, while the panel part of this project is pretty quick and easy, creating the fabrics can be a bit more daunting, especially if you are uncomfortable around a sewing machine.

    If you do not want to tackle making your own fabrics, you can still clamp large pieces of fabrics to the frame – such as bed sheets. Another option would be to build your frames to the smaller dimensions as a name-brand panel, then purchase the fabrics from that company. The money you save building the panels might even be enough to cover the cost of the fabrics.

    Here are the main things you are going to need to create your panel:

    List of Tools for Creating the Frame

    1. Ratcheting PVC cutter or shears
    2. Measuring tape
    3. A marker

    As far as PVC goes, your local hardware store will most likely have two lengths to choose from. Depending on how you are going to transport the PVC, you can choose between the standard 10 foot sections or pre-cut five foot sections. The 10 foot sections will save you more money, but getting them home may prove a bit tricky, unless you have a long vehicle such as a truck, SUV, or van.

    I like to build my panels out of ¾” Schedule 40 pipe. Schedule 40 is both rigid and lightweight. If you decide to buy the PVC in 10 foot sections, you will need three pieces per panel. If you go with five foot sections, you are going to need six pieces per panel.

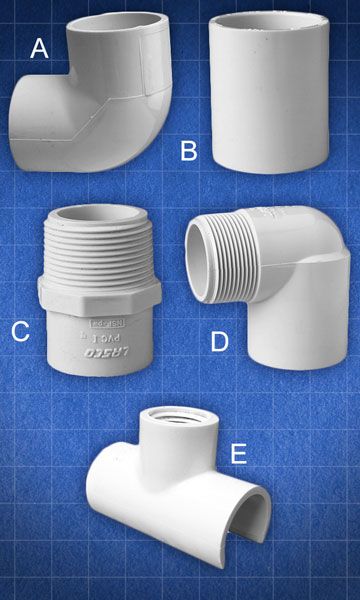
    As far as fittings, you are going to need: (all fittings Schedule 40)

    • Eight 90 degree ¾” elbows
    • Two ¾” couplers
    • Two ¾” slip to threaded adapters
    • Two ¾” slip to threaded street elbows
    • Four ¾” threaded saddle tees
    fittings

    (A) 90 degree ¾” elbow (B) ¾” coupler (C) ¾” slip to threaded adapter (D) ¾” slip to threaded street elbow (E) ¾” threaded saddle tee

    That should do it. Let’s get started on the panel.

    Measure and mark

    With your tape measure and marker, measure and mark your cuts on each section of pipe. When measuring your cuts, be sure to start your measurement from the last mark you made.

    Your marks need to be at:

    For 10’ pipe

    Piece 1

    • Mark 1 – 40.75” (103.5 cm)
    • Mark 2  – 40.75“ (103.5 cm)
    • Mark 3 – 19” (48.3 cm)
    • Mark 4 – 19” (48.3 cm)

    Piece 2

    • Mark 1 – 40.75” (103.5 cm)
    • Mark 2  – 49.5“ (125.7 cm)
    • Mark 3 – 11” (27.9 cm)
    • Mark 4 – 11” (27.9 cm)

    Piece 3

    • Mark 1 – 49.5” (125.7 cm)
    • Mark 2  – 40.75“ (103.5 cm)

    For 5’ pipe

    Piece 1

    • Mark 1 – 40.75” (103.5 cm)
    • Mark 2  – 19“ (48.3 cm)

    Piece 2

    • Mark 1 – 40.75” (103.5 cm)
    • Mark 2  – 19“ (48.3 cm)

    Piece 3

    • Mark 1 – 40.75” (103.5 cm)
    • Mark 2  – 11” (27.9 cm)

    Piece 4

    • Mark 1 – 40.75” (103.5 cm)
    • Mark 2  – 11” (27.9 cm)

    Piece 5

    • Mark 1 – 49.5” (125.7 cm)

    Piece 6

    • Mark 1 – 49.5” (125.7 cm)

    Once you have finished marking all of your cuts, take your PVC cutters or shears, and cut out all the pieces. When you’re done you should have:

    • Panel Sides: four  40.75” pieces
    • Panel Top and Bottom: Two 49.5” pieces
    • Leg 1: One 11” and one 19” piece
    • Leg 2: One 11” and one 19” piece

    Next, take one of your leftover scrap pieces and cut two small sections of pipe, roughly 1.25” inches in length. These will later be inserted into the elbow joints of the legs, so that they can pivot.

    Assembly

    panel-construction-diagram

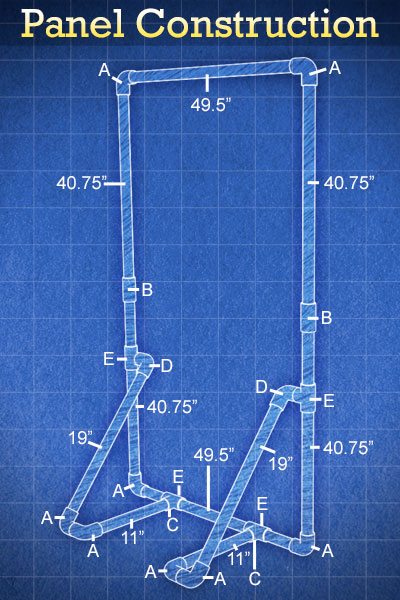
    Assembly diagram showing each length of pipe, and each fitting, that make up the completed light panel. Letters coincide with above fitting diagram.

    To create the sides of the panel, join together the ends of two side pieces with a coupler. Next, connect the top and bottom sections to the side pieces using 90 degree elbows.

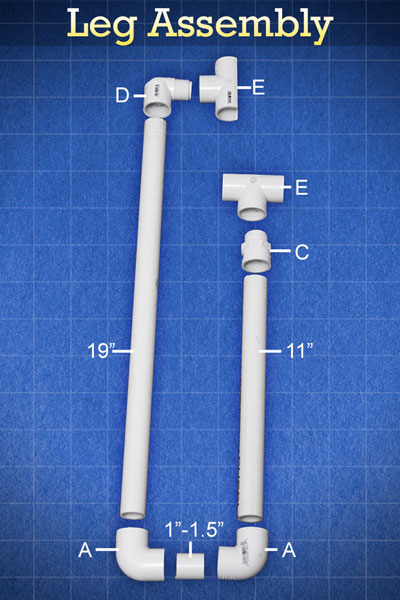
    Three short sections of PVC are all that make up the feet for your panel. First, add a 90 degree elbow to the 19″ and 11″ pieces of pipe. Attach the threaded coupler adapter to the other end of the 11” piece, then attach the 90 degree street elbow to the other end of the 19” piece. Next, screw a threaded saddle tee connector onto each of the threaded adapters. Finally, join the two pieces together by inserting the small piece of PVC between the two 90 degree elbows. You should now have a pivoting leg that can snap onto your panel, so that it can stand on its own without having to attach it to a light stand.

    leg-assembly

    Assembly diagram showing how to assemble the snap-on panel legs. Letters coincide with the above fitting diagram.

    *Quick Tip*

    The shape of the legs are great for placing sandbags on, whenever you are on location and it is breezy.

    Fabrics

    I have three main types of fabric that I always keep handy. Diffusion, black, and white. You should be able to find everything you need at your local fabric store. For the diffusion panel, I use a white (translucent) rip-stop nylon. For the black, I use a nylon material. Make sure that it does not let a lot of light pass through it, that it’s fairly opaque. For white panels, I found that the white lining of blackout curtains works awesome! It does not have to be hemmed, and it does not allow light to pass through it, which seems to make it a very efficient bounce source. Just make sure you pick the whitest blackout fabric you can find. (The fabric comes in off-white colors, as well.)

    The fabrics for the panels can be made by cutting out pieces of material, about 2-3 inches larger than the  4’ x 7’ frame, then hemming them. Hemming is not required but will keep the edges tidy and professional looking.

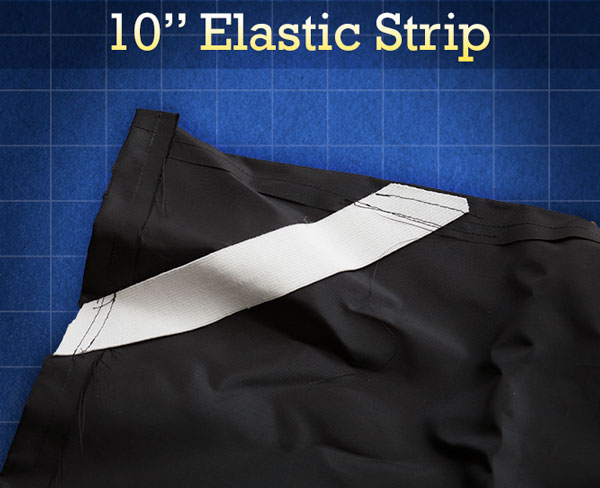
    To make the fabric panels easier to attach to the frames, sew 10” strips of wide elastic on a diagonal to the back corners of each piece. Once added, attaching the panels to the frames is as easy as slipping each corner into the elastic pocket.

    elastic-strip

    Example of elastic strip pocket, created to make fabrics easier to attach to panel frame.

    At this point, you have pretty much finished your DIY light panel. Now, I am going to show you some additions that will make your light panel even more versatile.

    Accessories

    Crossbar

    A crossbar is a great thing to add to your panel for extra strength in outdoor windy conditions, and it can make the panel a lot easier for an assistant to hold and position.

    To add a crossbar to your panel, just cut out an extra 49.5” section of PVC, the same size as the top and bottom sections of our panels. Next, replace the couplings on each of the side pieces with a ¾” tee. This will give you a channel to attach your crossbar to. That is all there is to it!

    A Bungee or Shock Cord

    If you decide to make more than one panel, you are soon going to realize how cumbersome it is to dump out all the individual pieces and sort through them.

    To make your life a little easier, you can use a 23 foot length of thin elastic bungee (shock) cord and run it through each piece of your panel. The bungee cord keeps all your pieces together when the panel is broken down, and the slight tension helps pop the pieces into place when you are ready to set things up.

    To add the shock cord to your frame, lay out all the un-assembled pieces on the ground and start feeding the elastic cord through the PVC. Next, pull the two ends of the bungee cord tight until the ends of the frame touch each other, then tie the ends together. Finally, cut off and discard any extra cord.

    Single and Double Clips

    clips

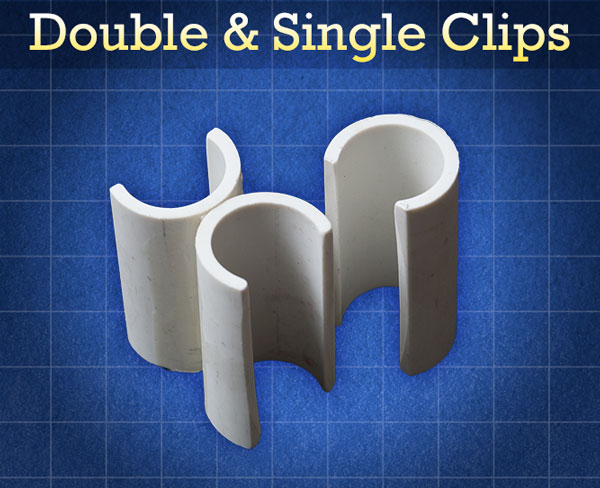
    Single and double clips are an essential accessory to carry in your bag, along with your panels. Single clips offer a great way to attach pieces of fabric to your frame, or further secure your fabrics for windy conditions.

    Things Needed to Make Clips:

    1. Measuring Tape
    2. Marker
    3. 5’ section of 1” Schedule 40 Pipe
    4. Ratcheting PVC Cutter/Shears
    5. Dremel tool with cutting and grinding attachment
    6. PVC cement
    7. C-Clamp

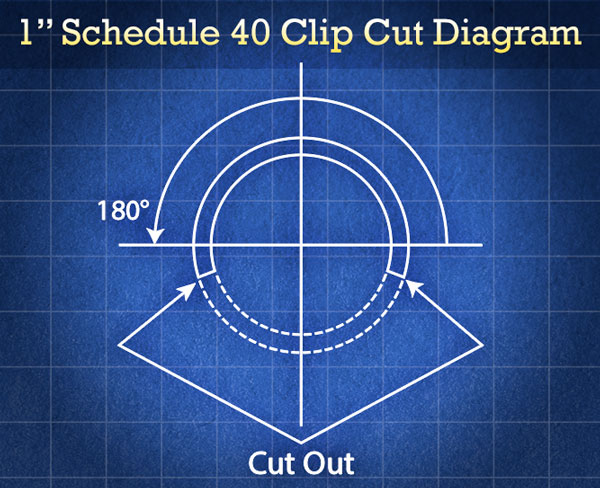
    To create a single clip, cut a 2” section of pipe using your shears. Next, use a Dremel tool fitted with a cutting wheel to cut a section from the PVC. (Use the circumference diagram below as a reference, to produce a sufficient clip.) Once you finish cutting out the section, use a grinding attachment to bevel, smooth, and round any rough edges.

    clip-cut-diagram

    Double clips are made by cementing two single clips together, then attaching a c-clamp to them until the cement dries. These clips do an awesome job of attaching two or more frames together. For instance, by using double clips, you can create a giant 8’x7’ diffusion source, bounce source, or v-flat.

    Adding Strength

    Though PVC frames are cheap and lightweight, their strength does not stand up to their commercial aluminum counterparts. If you find that you are needing your panel frames to be stronger and more rigid, there are a few things that you can do to strengthen them without adding a lot to their weight. (The only downside of each method is that you won’t be able to use bungee cord to keep the panels together.)

    Spray Foam

    Filling your tubes with spray foam might be the easiest way to add stiffness and strength to your panels. To insure that there are no voids left in the pipe during the filling process, drill a few small holes along the length of each section. The holes should be just large enough to stick the straw of the spray foam through. Once each section is filled, make sure that it is placed on a flat surface, otherwise it will stay bent once the foam dries.

    Dowel Rods

    Wooden dowel rods are another great way to strengthen your PVC frames. This method will require a saw to cut off the excess ends of the dowels. A ¾” dowel will not fit snugly into most ¾” pipe. (The inner diameter of the pipe is more around .8”.) To remedy this, try wrapping the ends of the dowels in a few layers of gaffer or duct tape, then hammer them into the pipes using a rubber mallet. You can also try applying a large glob of PVC cement to the rod before placing it inside the tube. Once the cement dries, it should hold the dowel in place.

    Closing Thoughts

    I hope this article has proven helpful and has made you excited to start using light panels in your photography. If you have not yet read the first article entitled “10 Reasons to Ditch Your Softbox for a Light Panel”, I encourage you to do so. This article shows the benefits of using a light panel over a softbox and shares techniques that will help you get the most out of using one.

    Until next time, go out, have fun, experiment and create something awesome!

    googletag.cmd.push(function() {
    tablet_slots.push( googletag.defineSlot( “/1005424/_dPSv4_tab-all-article-bottom_(300×250)”, [300, 250], “pb-ad-78623” ).addService( googletag.pubads() ) ); } );

    googletag.cmd.push(function() {
    mobile_slots.push( googletag.defineSlot( “/1005424/_dPSv4_mob-all-article-bottom_(300×250)”, [300, 250], “pb-ad-78158” ).addService( googletag.pubads() ) ); } );

    The post How to Make a DIY Light Panel or Scrim by Joel Dryer appeared first on Digital Photography School.

    Digital Photography School

  • Contest – Win One of Five Defrozo Prize Packages

    For this contest, Defrozo is giving away five prize packs

    Defrozo is a team of web developers and photographers currently seeking contributors on Kickstarter in order to finish their one-stop photography marketing platform by October 2015.

    Defrozo 1b

    Defrozo is built to help photographers grow by offering seven essential tools, from a website manager to shopping cart, and even a CRM (customer relation management) system, for better display and marketing of their work online.

    There are going to be five winners to this giveaway. Each winner will receive a Prize Pack designed to help both enthusiast and pro photographers create an engaging, relationship-driven online brand that generates leads, referrals, and sales.

    Each prize pack includes the following:

    1. Item 1: Kickstarter Ultimate VIP Pack+ ($ 50 value)

    Defrozo 2b

    Get our most popular Kickstarter reward for free. This includes:

    • Two years of Defrozo top-tier subscription plan, Ultimate free
    • Private development time access
    • Kickstarter Edition website theme
    • Three eBooks kit
    • Founder Medal on your Defrozo website
    • Personalized Wallpaper
    • Thanks in social media

    2. Item 2: Photography Marketing Triple Set

    Strengthen your brand by using three professional marketing templates produced by Defrozo’s respected partner, TemplateMonster. Set includes:

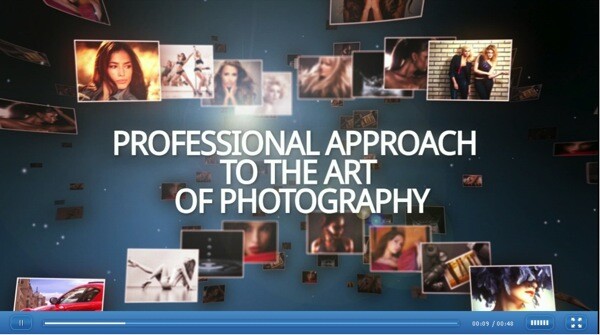
    • Photographer Portfolio After Effects Intro ($ 85 retail value). Full HD video intro template to make your presentations more dynamic and engaging. View live demo here.Defrozo 3b
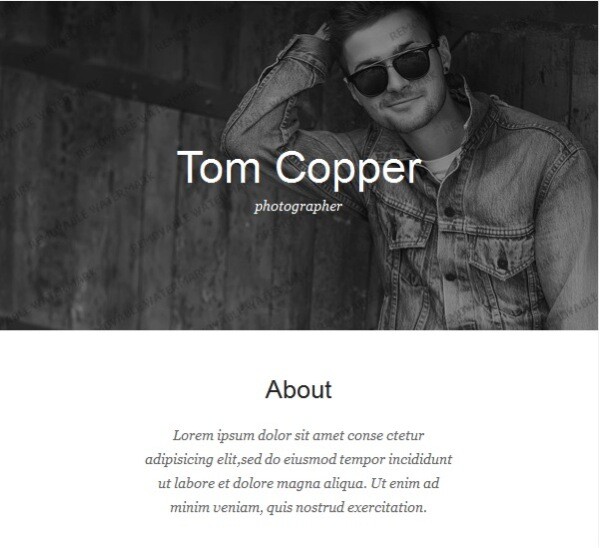
    • Responsive Newsletter Template ($ 25 retail value). MailChimp-ready, responsive template to boost your email marketing. View live demo here.Defrozo 4b
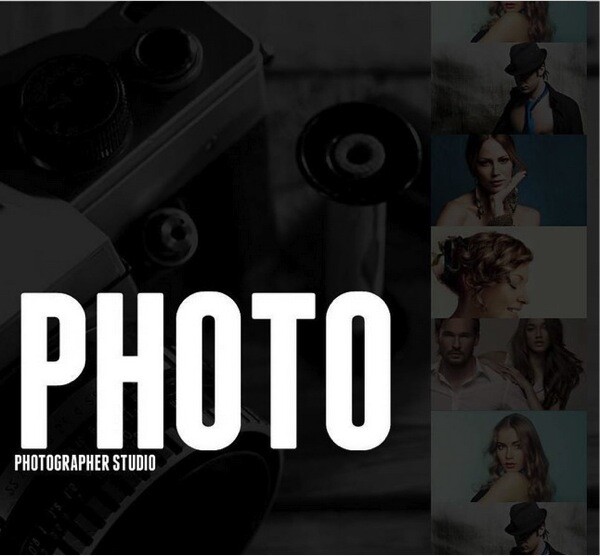
    • Photo Studio Facebook HTML CMS Template (retail value $ 59). Custom tab template to take your Facebook business page to the next level. View live demo here.Defrozo 5b

    How to win

    To win this contest you’ll need to:

    • Visit the Defrozo Kickstarter page and learn more about the product and its benefits for your photography career.
    • Leave a comment below and tell us which features and tools you’d like to see in the full version of Defrozo (scheduled for the release in October 2015), and more importantly, HOW you would use them to highlight and market your photography. Please note: there is a limit of ONE entry per person.
    • Do this in the next six days and after April 14th, the team at Defrozo will choose the best five answers and we will announce the winners in the following days.
    • The deadline to enter is April 12th, Midnight PDT (GMT-7). Comments left after the deadline will not be considered.

    By best – the Defrozo Co-Founders are looking to see if you have an understanding of what Defrozo is about and how it best suits your needs, so you’ll need to check out the project’s Kickstarter page to put yourself in the best position to win.

    There’s no need to write essay length comments to win, but we’re looking to hear your feedback about Defrozo and how it would help your development as a photographer.

    This competition is open to everyone around the world, no matter where you live, but there is only one entry per person.

    To enter, simply leave your comment below.

    Defrozo is a community-driven platform which means that your feedback and suggestions will be used by the developers to build a truly versatile and effective system capable to solve many problems photographers face day to day.

    Don’t forget to share this post with your friends and like Defrozo on Facebook for special offers and announcements on all Defrozo events.

    Disclaimer: Defrozo is a Paid Partner of dPS.

    googletag.cmd.push(function() {
    tablet_slots.push( googletag.defineSlot( “/1005424/_dPSv4_tab-all-article-bottom_(300×250)”, [300, 250], “pb-ad-78623” ).addService( googletag.pubads() ) ); } );

    googletag.cmd.push(function() {
    mobile_slots.push( googletag.defineSlot( “/1005424/_dPSv4_mob-all-article-bottom_(300×250)”, [300, 250], “pb-ad-78158” ).addService( googletag.pubads() ) ); } );

    The post Contest – Win One of Five Defrozo Prize Packages by Darlene Hildebrandt appeared first on Digital Photography School.

    Digital Photography School

  • How to Use a Wide-Angle Lens for People Photography

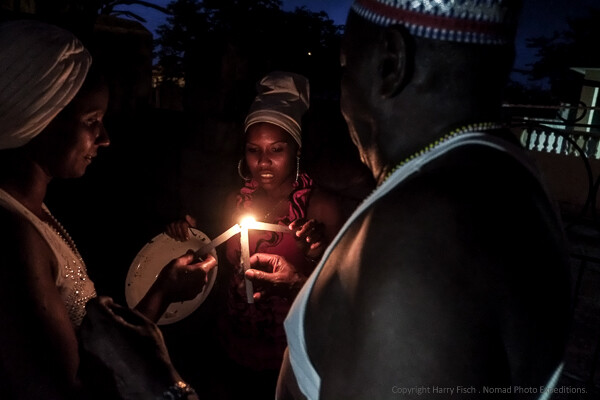
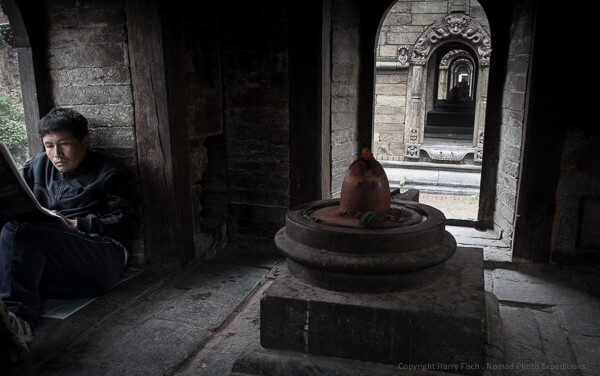
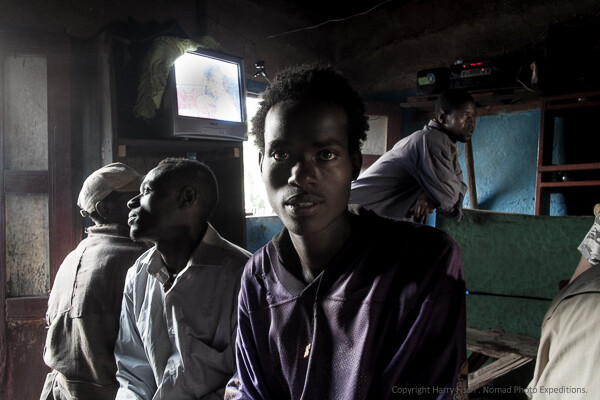
    Wide-angle lenses are indispensable in travel photography. When I organize photo tours, I find that each and every trip has a storytelling component. Almost always, we as photographers, strive to not only describe a situation, but tell a tale, and when it’s about people, we want to tell the audience the story of the hero in the center of it. We want to draw the viewer in so far that they can sense it, breathing the very scents of the scene.

    How to use wide angle H Fisch 1050

    There is an ideal tool for this type of need; the wide-angle lens that normally ranges (on a full frame camera) from about 21mm to 35mm. It has a variety of advantages; you can get close to people, evoke a sense of immersion in the viewer, and get people and objects in focus with minimal effort.

    I normally use FUJI X cameras which have APS-C sized sensors. As this sensor is smaller than full frame, if you want to translate the focal length of the lens from full frame (a size of sensor similar to that of 35mm film cameras), you will have to multiply it by 1.5 times. Thus an 18mm lens on full frame is LIKE a 27mm lens on a cropped sensor (18 x 1.5 = 27).

    In this article, when I refer to a focal length, for example 24mm, I am referring to the length on full frame. A focal length of 24mm on a full frame camera will act like a 36mm on the Fuji ASP-C sensor.

    How to use wide angle H Fisch 8638

    The difficulty inherent in the wide-angle lens is that it forces you to be very conscious of the distortions it produces. When photographing people, it also requires you to get close to the subject, which can be uncomfortable for most amateurs.

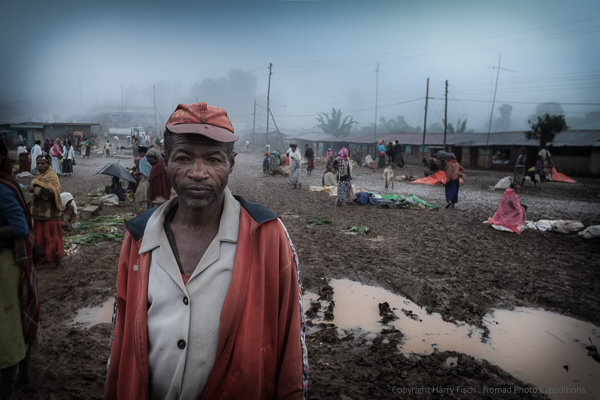
    If you are looking for the dream location to take the wide-angle lens for a spin, it’s India, specifically Benares. It’s a scenario full of detail, with dramatic first planes of foregrounds, colorful seconds, smells, activity, and noise. It’s a great big beautiful mess, and there are always extraordinarily attractive people to photograph.

    With wide-angle, the typical range goes from 21mm to 35mm, although some photographers use up to 18mm when photographing people. The famous photo agency Reuters published its best photos of 2013, and if you read the blurb under each, you’ll see that 80% of them were taken with a 24mm wide-angle lens. With a quality prime 24mm lens, the distortion of the outside lines is not as much of an issue.

    How to use wide angle H Fisch 9541

    Between the photo tours I organize in India, Ethiopia, Thailand, and Cuba (among other places), I recognize that I have a special predilection for Varanasi. By what I can see in the data from my Adobe Lightroom software, is that 73% of the photos I take are done with a 18mm lens. I also use – despite the fact that it requires a lot of skill when dealing with people as subjects – a Zeiss 12mm, which is the equivalent of an 18mm on APS-C format.

    It isn’t only that wide-angle lenses open the shot more, the viewer gets more information inside the frame, and the wide-angle lens allows for a much more natural view (it is argued among experts as to whether a 28mm or a 35mm is the most natural point of view).

    How to use wide angle H Fisch 2159

    Wide-angle has a series of advantages, but – as aforementioned – not without also presenting an inconvenience; it does have a great tendency to deform the outlines, like on images of people. Also, it does require a specific and honed technique to get the best photos from it. In the majority of cases you have to get close to the subject in order to get dramatic results, as well as getting a notable depth of field, and this is something that creates yet more issues for photographers who are not accustomed to getting up close and personal with people.

    Now, let’s take a look at some of the characteristics of the wide-angle lens.

    Wide-angle lens characteristics

    Distortion of the point of view

    A 24mm lens, if it is not used properly, will deform outlines and produce exaggerations. If the lens is not good quality, you will see a curvature in some parts of the photo instead of straight lines. In some type of photography this exaggeration of the lines is considered a creative argument and can add a dreamy look to a picture. This works fine from time to time, specially if you do not over do it.

    How to use wide angle H Fisch 1054

    The best approach to this possible issue is to be aware of the horizontal position of your camera and avoid, as much as possible, tilting it up or down. Having the camera on an horizontal plane parallel to the ground helps.

    Distortion of the vertical axis

    It is important to take your time situating the camera critically with respect to the vertical axis. This is why whenever I use a wide-angle lens I change my position (camera height) with respect to ground level. Using a wide-angle lens 50cm (19.7″) off the ground isn’t the same as being one meter (39″), or one meter eighty high (5.9 feet). I normally try a few levels to find the position that will give me the best angle, though I recognize that with practice you can understand this process before actually having to go through trial and error.

    How to use wide angle H Fisch 3867

    I am always very aware of at least one vertical line in a picture taken with a wide lens. It can be a street corner, a mast, a raised arm. The vertical reference can many times be the anchor, the basic reference of the picture, the nail of the whole image. The best way to ruin a good picture is to show a bent mast where the viewer clearly expects, and knows, that it should be straight and distortion has been created by your position taking the picture. On many modern cameras you can set your viewfinder to display a grid. This will allow you to see through the display and organize the lines of the whole set with the vertical and horizontal references that are visible.

    High and low angle

    How to use wide angle H Fisch 8064

    A high camera angle consists of taking in the subject or the scene from top to bottom, situated on high ground from the objects you want to photograph. When using a low angle, you would be taking a photo from bottom to top from a point below what you want to photograph. As well as getting a more original point of view, a lot of times it is used as a technique to augment the distortion and highlight different parts of the subject. Honestly, I would use it with a lot of caution, here’s why:

    If you have seen the movies of Orson Wells you will remember the scenes which evoke feelings of dreaminess – or sometimes nightmares. Wells loved to use the emphatic form made by shooting from a high angle far above the subject, and the low angle doing just the opposite. Anyone who has seen his movies knows perfectly how much distortion it produced, as he used it to create very specific environments. If you use extreme high and low angles, you will get this effect as well.

    Depth of field, getting everything in focus

    Depth of field is important if you want everything in focus. With an 18mm lens it’s difficult to get a photo that has shallow depth of field or less of the scene in focus. With an aperture of f/5.6, it will keep practically everything in focus from a distance of one meter (3.3 feet) to infinity. This makes it interesting and convenient if you want to take pictures without even focusing.

    How to use wide angle H Fisch 6098

    A lot of street photographers shoot this way – focus at two meters (6.6 feet) with an aperture of f/5.6. From there, you already know that if you keep a set distance from the subject, everything will be reasonably in focus. This can save you lots of time in situations were you do not have much time to focus properly or you find that your automatic focus behaves erratically.

    The originality of the plane and of the frame

    With an extreme wide-angle lens, once your eye is trained, you can offer a rather original vision of reality. In real life we do not see wider than 50mm. Going beyond this, 28mm, 24mm, 21mm, 18mmm, creates a kind of unreal feeling. Lines exaggerate their proximity or separation, the foreground seems tremendous (large) in relation to the background. The relative size of objects differs from what we normally sense. If we add to all this the depth of field characteristic and the possible distortions, we do have a creative weapon that should be used with great care! As much as we are surprised by an original point of view, we get bored by seeing to many wide-angle lens distortions.

    How to use wide angle H Fisch

    Proximity to the subject

    This will give the viewer a strong feeling of being there, of immersion into the scene. In possibly half of the photographs that I take with a wide-angle lens, the distance to the subject is less than two meters (6.6 feet). In documentary style photography – not necessarily photographing landscapes – a wide-angle lens rewards closeness with a subject, as it results in a rather impressive image. Great photographs are done with a 18mm lens and have been made from a distance of less than one meter (3.3 feet) from the subject. This is typically done by getting the subject in the third of the frame and allowing the viewer to observe what is happening at the second plane. You should be specially aware of the way your lens behaves; the nearer the subject to the edge of the frame, the bigger optical distortion you will get. Also remember what has been said about the way to hold your camera to avoid distortion; vertical and horizontal axes as well as the tilting issue.

    How to use wide angle H Fisch 0669

    Many photographers feel uncomfortable getting this close. But, if you like photographing people, a wide-angle is an essential tool. The best you can do is get used to getting close to people, with a friendly manner and a smile.

    Landscape photographers do not always follow this proximity suggestion. Their use of the wide-angle is aimed more at obtaining an impressive depth of field, many times a spectacular symmetry and… searched distortion! You will see hundreds of pictures taken with a 15mm were the clouds follow a very characteristic pattern created by the distortion of the lens.

    googletag.cmd.push(function() {
    tablet_slots.push( googletag.defineSlot( “/1005424/_dPSv4_tab-all-article-bottom_(300×250)”, [300, 250], “pb-ad-78623” ).addService( googletag.pubads() ) ); } );

    googletag.cmd.push(function() {
    mobile_slots.push( googletag.defineSlot( “/1005424/_dPSv4_mob-all-article-bottom_(300×250)”, [300, 250], “pb-ad-78158” ).addService( googletag.pubads() ) ); } );

    The post How to Use a Wide-Angle Lens for People Photography by Harry Fisch appeared first on Digital Photography School.

    Digital Photography School

  • Anatomy of a Green Screen Shot: How to Use It Right

    I have a family that I shoot several times a year, They’re “show people” , all outgoing and crazy and fun, and after at a certain point, the mom, Ginette, said to me, “You know, I love all of the perfect and beautiful shots that you get of us, but I think it’s time to show the world the kind Continue Reading

    The post Anatomy of a Green Screen Shot: How to Use It Right appeared first on Photodoto.


    Photodoto

  • Macro Photography Tips – Video Tutorials

    This time of year is a great time to get out and find some macro photography subjects. So I dug around and found a few videos to help get you started if you want to try it.

    Macro Photography by Matt Granger

    First up is a lesson by Matt Granger as he teaches Tina (a new photographer) how to do macro photography. Follow along with her and try it yourself as they go through using a long zoom lens, hand held, natural light, adding flash, and using a tripod.

    Getting sharper images

    The second video is from Alessandro Zocchi he gives you a few tips to help you get sharper macro images.

    Focus stacking

    Lastly Peter Bargh covers a more advanced technique, focus stacking, which involves taking multiple shots focused at different points, and merging them later.

    You can find the software he mentioned here:

    • Combine ZM
    • Helicon Focus

    You can also use Phototoshop if you have it. Read: How to Focus-Stack Macro Images using Photoshop for more on that technique.  Check It’s a Small World – the World of Macro Photography if you need some subject ideas.

    Have fun!

    googletag.cmd.push(function() {
    tablet_slots.push( googletag.defineSlot( “/1005424/_dPSv4_tab-all-article-bottom_(300×250)”, [300, 250], “pb-ad-78623” ).addService( googletag.pubads() ) ); } );

    googletag.cmd.push(function() {
    mobile_slots.push( googletag.defineSlot( “/1005424/_dPSv4_mob-all-article-bottom_(300×250)”, [300, 250], “pb-ad-78158” ).addService( googletag.pubads() ) ); } );

    The post Macro Photography Tips – Video Tutorials by Darlene Hildebrandt appeared first on Digital Photography School.

    Digital Photography School

  • 10 Low-Cost Marketing Strategies for Your Photography Business

    Marketing-logosWhether you already have clientele or are looking to build a client list, marketing is a never-ending task for photographers. You’ve already focused in on a target market (or two), but where to start? Are you unsure of how to get things started with a shoestring budget? Here are 10 low-cost marketing strategies for your photography business:

    1. Get out of the house

    This biggest thing you can do to spread your name is to be out there. Finding events and activities where your target market may be is key. Meetup.com has a huge selection of groups that host events, many for no cost. While it can be overwhelming, and may take some trial and error, there are loads of opportunities on that site. Your local Chamber of Commerce also has events that are open to the public and offer networking time. They are ideal if you’re looking to connect with local small businesses that may need your services. If your target market is within a certain profession, you can look into professional organizations in your area. Most professions have local and national chapters that meet regularly, and most of these groups welcome guest speakers. Offer to speak to their members about what you do, and how it relates to their work. It’s a perfect opportunity to put yourself in front of potential clients at no cost but your preparation time.

    2. Get charitable

    Is there a cause that is close to your heart? How can your photo skills help them out? Maybe a local animal shelter could use professional photos of the animals to help them get adopted quickly. Maybe there is an organization that helps the homeless find work, and those folks could use headshots. Make it something that resonates with your cause, or with your target clientele.

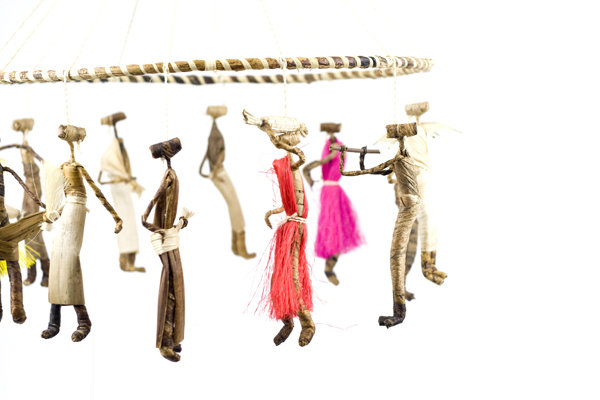
    Donated Product Photography for African Refugee Business Owners

    Donated product photography for African refugee business owners

    3. Tell your friends and family

    Often just telling people what you’re enthusiastic about will also get them excited and make them want to help you. By just letting people you know what you’re working on, and what you have planned, they will often make suggestions or give you leads. There’s no need to do a sales pitch to them; just tell them about your life and what you have going on.

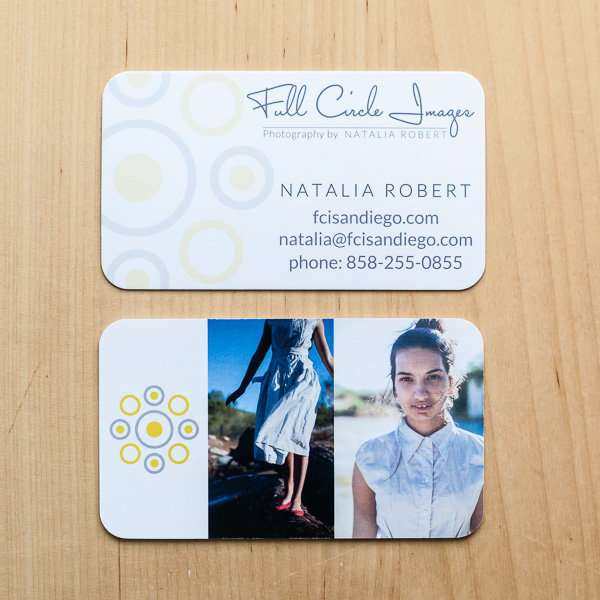
    4. Put a photo on your business cards and hand them out to EVERYONE

    We all have some sort of business card, so why not put a photo on there that will make people notice? It will give them something to “ooh and aah” over when they first get your card, and it will be a memorable card that they’ll recall easily.

    Color photos on back side of business card

    Color photos on back side of business card

    5. Seek out opportunities and ask for a chance

    If you want to shoot large events, check local calendars or your convention center for what’s going on in your area. Contact these organizations and see if they have photography coverage booked. Sometimes all it takes is asking. Have you participated in a great event and want to be involved as a photographer? Ask them! Having someone help that has already been involved in the event will be a big bonus for them.

    6. Become a source

    Write articles. Start a blog. Use Meetup.com to start a group and lead photo walks or workshops. Use social media to follow folks you admire, and connect with them. Interaction is key. If they post something of interest to you, thank them for it or ask a follow-up question. If you have a link (not necessarily your own) that relates to something they are speaking about, be a resource for them and share the link. By doing so, you build credibility and create a professional relationship, and will therefore be someone that comes to mind for future needs.

    Marketing-tags2

    7. Make sure you love the work that you’re sharing

    Passion is contagious and palpable. If you’re excited, others will get excited and will be more willing to help out in any way they can. It’s that simple.

    8. Offer a free session to a strategic friend or family

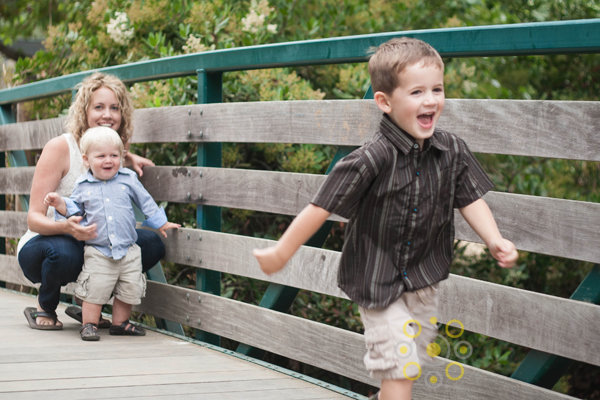
    The key word here is strategic. If you give away services that you would normally charge for, be sure that there is a reason for giving it away. For example, if you are looking to do more family portraits, offer a session to a well-connected friend with kids. Be sure that it’s someone who is active on social media so that they will share your work if they like it. Also, be sure to ask for a testimonial for your website.

    A free sample session for marketing to families

    A free sample session for marketing to families

    9. Collaborate

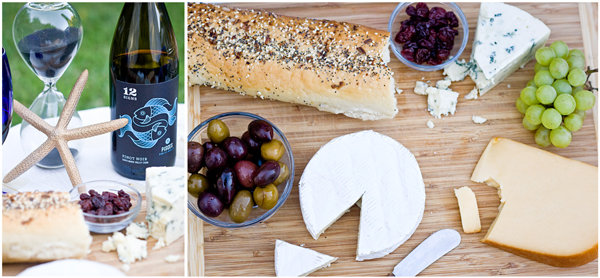
    Strategic partnerships are much better when you create something cool together that you can show off. Maybe you organize a styled wedding shoot with other wedding vendors (and then you can submit images for features in local wedding publications). For kids, maybe you put together an elaborate cake smash session with folks that do cakes, kids clothing, party decor. Not only do you have something beautiful to show from your collaboration, but these fellow vendors will be a great source for referrals as well.

    Strategic collaboration with a food stylist and wine brand

    Strategic collaboration with a food stylist and wine brand

    10. Incentives

    You may have heard of giving incentives for referrals or to new clients, but how about giving incentives to your existing client base? If you do family sessions, you can send an email offering a small discount for booking their following year’s portrait session early. If you have wedding clients, touch base with them on their first anniversary, and then again at milestones to offer a discount for booking with you for updated portraits. If you’ve worked with a local business before, contact them periodically and offer a small discount to book for new product shots, new headshots, or photos of their new location. Be sure to put an expiration date on these discounts to encourage folks to book early.

    One thing to keep in mind with any marketing tactic is that it will most likely not provide instant results, so you need to be patient and consistent. Only you can determine when it’s time to give up, and move on to something that will be a better fit for your business, but patience and consistency will help yield results.

    What marketing strategies have you made that had great results? Do you have other ideas for free or low-cost marketing? Please share in the comments below.

    googletag.cmd.push(function() {
    tablet_slots.push( googletag.defineSlot( “/1005424/_dPSv4_tab-all-article-bottom_(300×250)”, [300, 250], “pb-ad-78623” ).addService( googletag.pubads() ) ); } );

    googletag.cmd.push(function() {
    mobile_slots.push( googletag.defineSlot( “/1005424/_dPSv4_mob-all-article-bottom_(300×250)”, [300, 250], “pb-ad-78158” ).addService( googletag.pubads() ) ); } );

    The post 10 Low-Cost Marketing Strategies for Your Photography Business by Natalia Robert appeared first on Digital Photography School.

    Digital Photography School