Category: Photography

  • How to Start Your Own Camera Club

    KjellLeknes

    Kjell – camera club leader

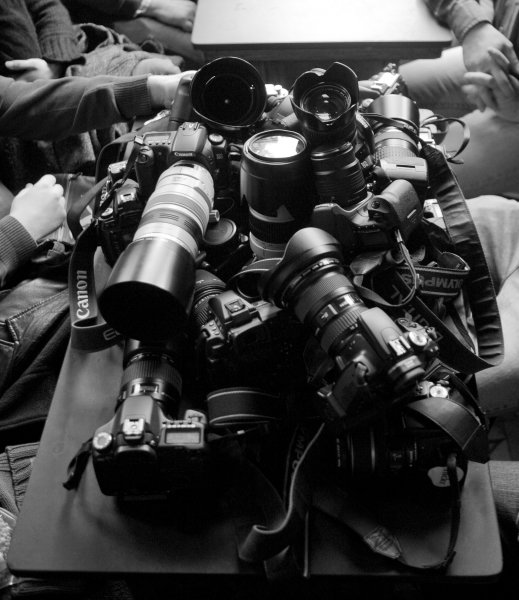
    A camera club is a great way to keep your passion for photography going, meet new people with similar interests, share your photos, and get inspiration from other photographers. Here are a few tips on how to get your own local camera club up and running. Before getting started, check if there already is a local camera club were you live. If so, join them! See how you can take part and contribute to their existing community. It is better to have one large community, than several smaller ones. As a team, you and your new team members can help each other. Local partners will be more interested in participating and sponsoring your events.

    Finding members and venues for meetings

    The membership of your camera club doesn’t have to be all photographers only. They can also be photography enthusiasts interested in seeing and discussing photography. Social online networks like MeetUp.com are popular places to find and start a camera club. It relieves you from much of the administrative work like; keeping track of who’s joining your meetings, sends reminders, limits RSVPs and generate waiting lists for full events.
    Cameraclub2

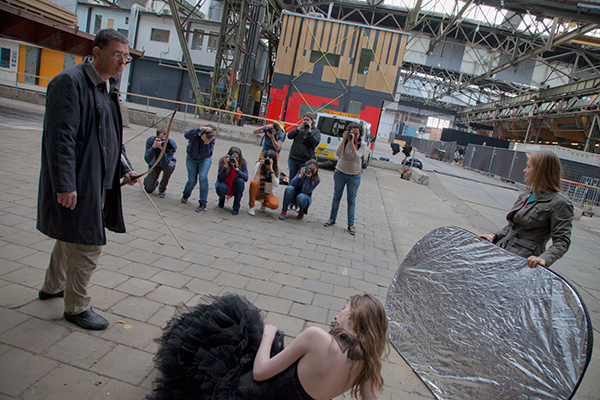
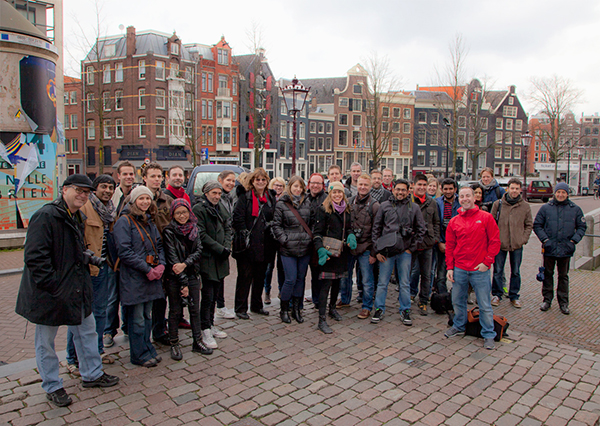
    Photo walk

    Photographers are usually down to earth people. They don’t need a fancy hotel conference center to meet. Try approaching local high schools and photography related shops, galleries and museums. Perhaps the local library, book shop or municipality. See if they are willing to sponsor use of their venue for free. If not, see which event venues can be rented. You can charge your members a small fee to cover the costs. Ask if they give discounts for not-for-profit initiatives. Check where other local clubs meet and approach those venues.

    Events and membership
    Cameraclub1

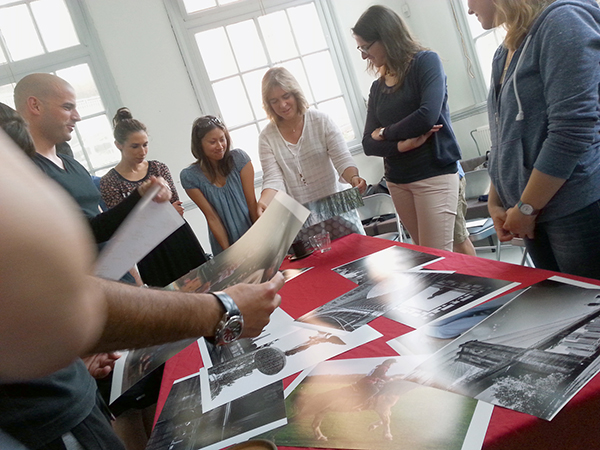
    Portfolio review

    Cameraclub4

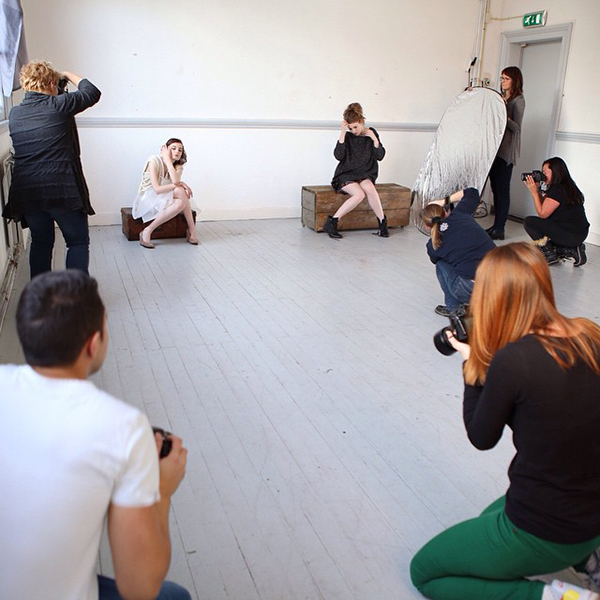
    Model workshop

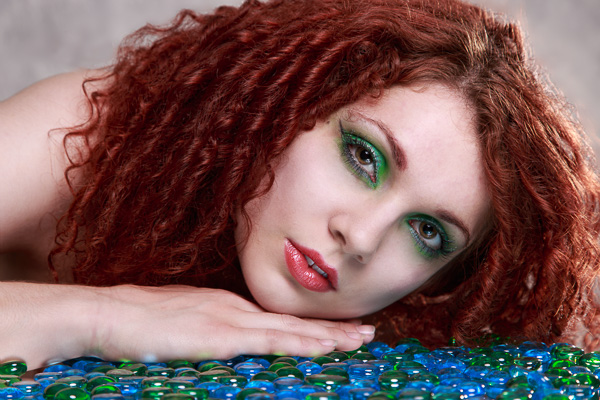
    A camera club can have several different kinds of events such as; portfolio reviews where members bring their photos, share, learn and get inspired by each other; photo walks were you meet up and walk together taking photos. Expect the participation numbers to be low at first. Remember you are in the early stages of building your network. If your events are good, word will spread and your camera club will grow at an accelerated speed. Other types of events to keep in mind; visits to local galleries, workshops by hired instructors, and lectures by local professionals.
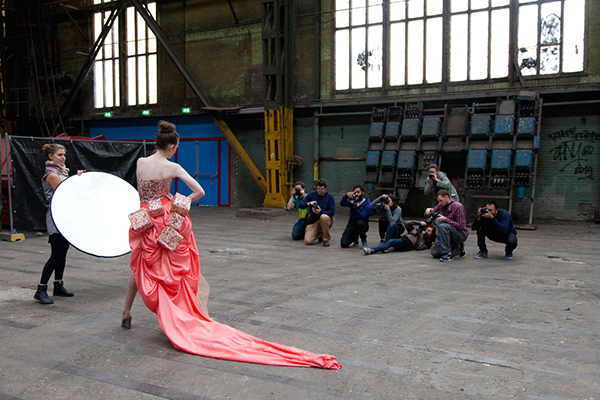
    Cameraclub3

    Model workshop

    Cameraclub7

    Model workshop

    Be very clear in the communication with your members, and specify events in detail. It is important that participants have a very clear picture of what the event will be like. That way you increase your chances the event will meet expectations and become a great success. Decide early on if you want your camera club to charge a membership fee, or if it will be free. Keeping it free will mean more members. You can always charge per event to cover costs.

    Website and social media

    A camera club should have a website where people wanting to join can find basic information. It’s also a great way to feature member’s photos and advertise upcoming events. Facebook, Twitter and Flickr accounts would be natural add-ons.
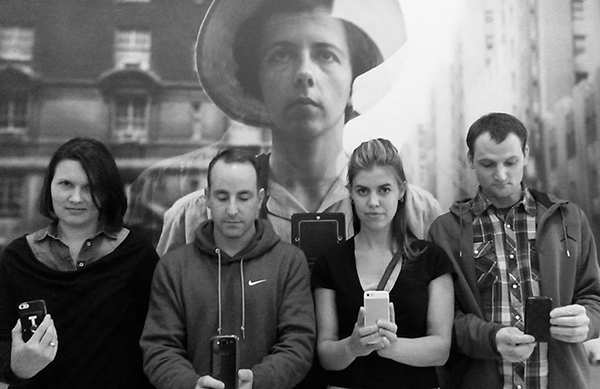
    Cameraclub6

    Selfies with Vivian Maier at a gallery visit

    Quality, not quantity

    As your camera club grows, pay attention to the most active members. Invite them to help run the camera club. Together, your initiative can become a great success. Make a written partnership agreement. It doesn’t have to be in formal legal jargon. It just needs to be a simple outline; who is responsible for what, how events should be run, and what should happen with the camera club’s common assets should the partnership not work out. Make sure people you take on don’t have conflicting goals about what the camera club should become, or what you want to get out of it in the end.
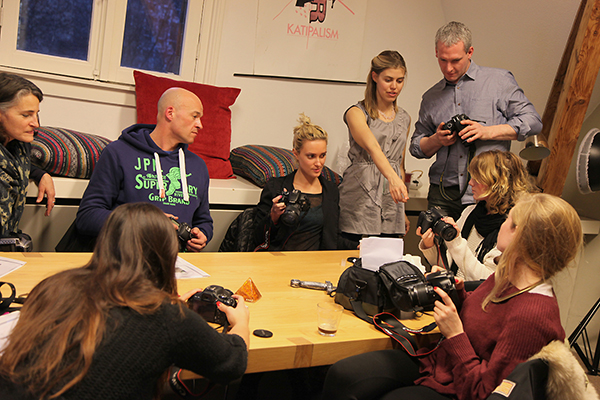
    Cameraclub5

    Photo course for beginners

    It is better to have a small camera club with good quality events, than a large camera club with little or no activity. Spend time developing events you think other photographers would love to participate in, this way, your camera club will grow at a comfortable rate with good quality events.

    googletag.cmd.push(function() {
    tablet_slots.push( googletag.defineSlot( “/1005424/_dPSv4_tab-all-article-bottom_(300×250)”, [300, 250], “pb-ad-78623” ).addService( googletag.pubads() ) ); } );

    googletag.cmd.push(function() {
    mobile_slots.push( googletag.defineSlot( “/1005424/_dPSv4_mob-all-article-bottom_(300×250)”, [300, 250], “pb-ad-78158” ).addService( googletag.pubads() ) ); } );

    The post How to Start Your Own Camera Club by Kjell Leknes appeared first on Digital Photography School.

    Digital Photography School

  • Lightroom Walk Through – Event Photography Workflow with Phil Steele

    Phil Steele is a well-known and respected photography educator. In this video tutorial he walks you through exactly how he works through the post-processing of an event he has just shot.

    Learn tips on importing, rating, culling, organizing in Collections, exporting, and delivering the photos as Phil goes through his entire event photography workflow step by step.

    If you enjoyed that and want more you can check out Phil’s courses here:

    • How to Shoot Headshots and Portraits on a Budget with Small Flashes
    • Photoshop Basics for Photographers
    • Lightroom Made Easy
    • Event Photography course

    googletag.cmd.push(function() {
    tablet_slots.push( googletag.defineSlot( “/1005424/_dPSv4_tab-all-article-bottom_(300×250)”, [300, 250], “pb-ad-78623” ).addService( googletag.pubads() ) ); } );

    googletag.cmd.push(function() {
    mobile_slots.push( googletag.defineSlot( “/1005424/_dPSv4_mob-all-article-bottom_(300×250)”, [300, 250], “pb-ad-78158” ).addService( googletag.pubads() ) ); } );

    The post Lightroom Walk Through – Event Photography Workflow with Phil Steele by Darlene Hildebrandt appeared first on Digital Photography School.

    Digital Photography School

  • 5 Ways to Use a Beauty Dish Light for Portraits

    The beauty dish. It’s one of my favorite light modifiers, which is why I’m so excited to share some techniques you can try with your beauty dish. Don’t have one? Not to worry. There are plenty of DIY beauty dish project plans online. I’ve actually made them out of aluminum turkey pans. When you decide to step up to a more professional beauty dish, however, they are usually not as expensive as most light modifiers and you can get them for speedlights or studio strobes.

    Beautydish 2

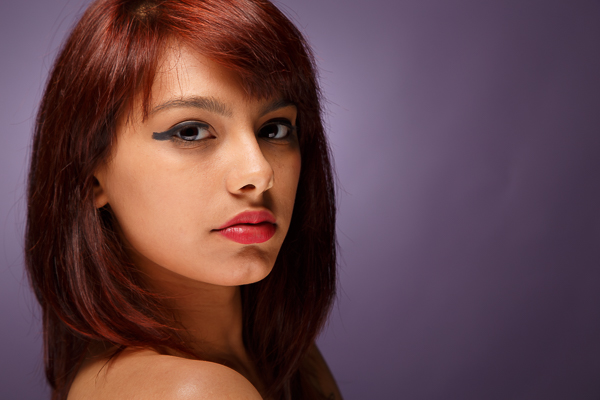
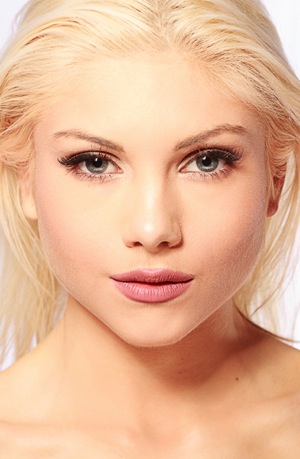
    Beauty dishes are a niche modifier usually reserved for beauty shots. These tend to be head and shoulder portraits that highlight makeup and hair, and are commonly used in the fashion industry. So why should you try it? Well, it’s fun to see if you can make images like you see in the fashion magazines, it’s also very creative. You really have to plan and construct the entire image. This may include everything from your choice of background, lighting setup, and hair and makeup.

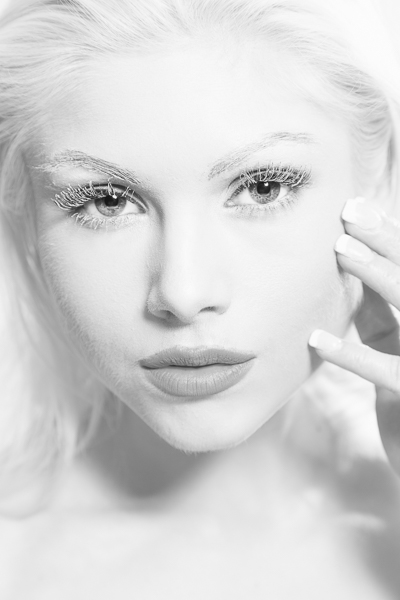
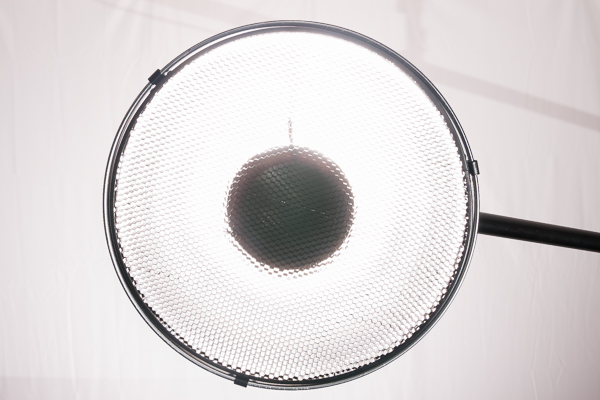
    The quality of light produced by a beauty dish is not as soft as a softbox, but it is softer than an umbrella, and not as hard as just using a 7 inch reflector. The light falloff is quite rapid, which helps to sculpt the subject’s face and to show texture in their skin. Beauty dishes often produce nice catch lights in the eyes and shadows under the jaw line. They are versatile modifiers because you can change the quality of light by choosing a dish with a silver, or white, inner surface. The white surface will produce slightly less specular highlights on the subject’s face. You can also control the spill of light by using a grid and even further soften the light by adding a sock over the front.

    Beautydish 3

    When you plan a shoot using a beauty dish, only use it on clients or models with very good skin because the light pattern it produces can show off imperfections like wrinkles and blemishes. It’s also helpful to find a good makeup and hair artist because you will be showing off the subject’s face in detail. If you’re not ready to pay a makeup artist for this service, you can offer them a trade for images so they can expand their portfolios; or, if you’re really lucky sometimes you can find a model that is skilled at doing her own makeup.

    When setting up your camera, I recommend a lens in the 85-200mm range. I use studio strobes and an aperture around f/8 or f/11. I would also recommend using a boom arm because it will help you put the beauty dish in just the right spot, without getting in the way of your shot. The beauty dish will give you very nice light on the subject’s face. Keep in mind you often need to spice up the image with a rim (or accent) light, hair light or a background light.

    Beautydish 3 2

    Let’s get started with five ways to use your beauty dish:

    1. One light with a reflector: Clam shell lighting)

    This is the typical way you will see a beauty shot set up. The dish is positioned right above the subject’s face, pointed down slightly, so the center of the dish is aimed at the subject’s forehead, right between the eyes. The dish should be close to your subject to produce soft light, usually within two to four feet. When you set this up, make sure you can see catchlights in the top of subject’s eyes. Then add a reflector under the beauty dish to bounce light back up on to their face. This will help minimize the shadows under chin, and add a catch light at the bottom of the eyes. You will have to put your camera between the beauty dish and the reflector. Some photographers also like to add black cards on either side of the subject to help create shadows on the sides of the face.

    Beautydish 1 2 Beautydish 2 2

    2. Two light setup: Clam shell lighting

    This is basically the same as number one above, except you use a strobe in place of the reflector. This allows you control of the power output of the fill light. I prefer to use a strip box for this purpose, set one or two stops darker (lower) than the main light.

    Beautydish 7b Beautydish 8

    3. Add a sock over the beauty dish

    The sock is a piece of diffusion material, that looks like a shower cap, which you put over the beauty dish. This softens the light on the subject’s face, and if you are getting shiny spots it will reduce the specularity of the light. Using a sock will produce a creamy look, with less skin texture.

    Beautydish 9

    4. Add a grid to the beauty dish

    The grid will focus the light into more of a spotlight type pattern, which can be used to create some interesting effects. Just make sure the grid is pointed directly at the subject or the light pattern will not strike the face correctly. The easiest way to check this is to make sure the subject can see directly through the grid to the light source.

    Beautydish 4

    5. Take it outdoors

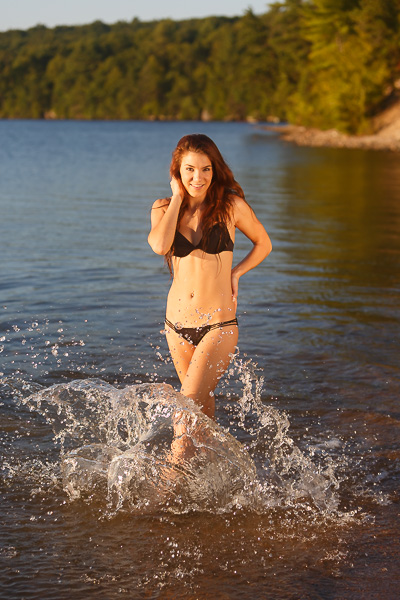
    The beauty dish is a great light modifier for outdoors because it’s more compact than a softbox, but can be used like one. The light quality will be softer than an umbrella, and won’t catch the wind as much as an umbrella or a softbox. It can be used as the main light source or as a fill light. If you use it as a main or fill light you can set it up at a 45 degree angle like you might use a softbox. When the light conditions are warm in tone such as sunrise or sunset, you may want to add a color temperature orange gel over the beauty dish to help blend the strobe’s light with the sunlight.

    Beautydish 6

    The beauty dish is a bit of a specialist tool that can produce wonderful lighting patterns when used correctly. However, it can also be used in many creative ways to produce interesting shots. I hope you have fun giving the beauty dish a try.

    Beautydish 5

    googletag.cmd.push(function() {
    tablet_slots.push( googletag.defineSlot( “/1005424/_dPSv4_tab-all-article-bottom_(300×250)”, [300, 250], “pb-ad-78623” ).addService( googletag.pubads() ) ); } );

    googletag.cmd.push(function() {
    mobile_slots.push( googletag.defineSlot( “/1005424/_dPSv4_mob-all-article-bottom_(300×250)”, [300, 250], “pb-ad-78158” ).addService( googletag.pubads() ) ); } );

    The post 5 Ways to Use a Beauty Dish Light for Portraits by Gary Detonnancourt appeared first on Digital Photography School.

    Digital Photography School

  • 3 Valid Reasons it Might be Time to Upgrade Your Camera Equipment

    Ludovic Hirlimann

    By Ludovic Hirlimann

    For all of you camera enthusiasts, lens aficionados and gear fetishists, hearts race and palms sweat when broaching the subject of camera equipment upgrades. Camera companies keep a constant flow of equipment releases coming to quench the insatiable appetite of those who are convinced they need the latest and greatest.

    It’s important to keep in mind that just because the new iteration of your camera body or a new lens with an even longer list of acronyms outlining its features is released, it doesn’t instantly make your equipment obsolete.

    All you savvy consumers should strive to be honest with yourselves and carefully consider the tangible benefits that you will enjoy from that upgrade. Certainly most of you will legitimately grow out of that point-and-shoot or entry-level DSLR, however, many make the jump too soon before you’re able to fully exploit the capabilities of your equipment.

    Some good reasons to to upgrade:

    If you are reading this, you have likely purchased a camera (and possibly additional lenses and other accessories), in which case you are familiar with what could be called the Christmas morning feeling.

    #1 Renew your enthusiasm or spark creativity

    For photographers, an upgraded body or a new lens can be an important catalyst to revive waning enthusiasm. Many certainly see this as a thinly veiled excuse for coughing up the cash for some new equipment, but it can provide a needed boost to drag you out of the dreaded photographers-block.

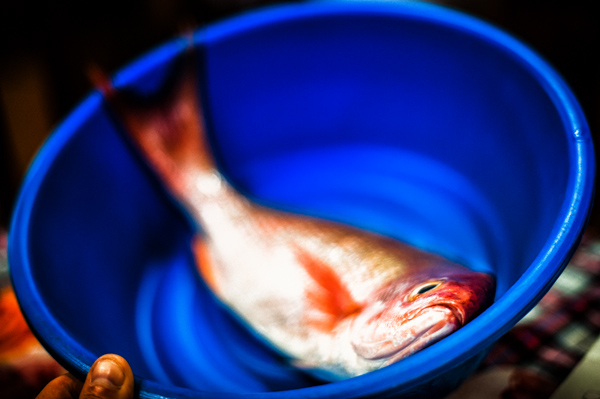
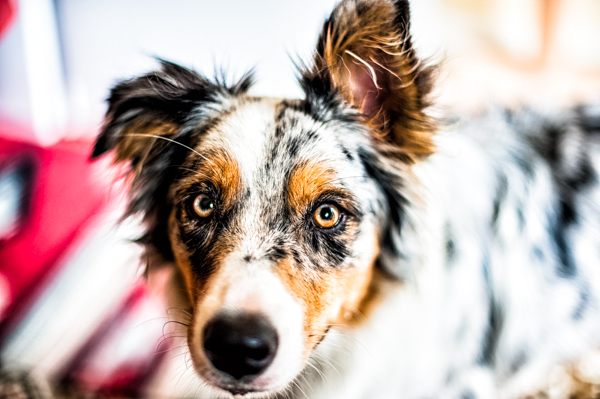
    For example, adding a large aperture lens – with an f-stop of f/2.8 or greater – to your stable reveals a whole new perspective, enabling you to further blur out backgrounds and isolate your subject.

    Depth of field 1

    Depth of field 2

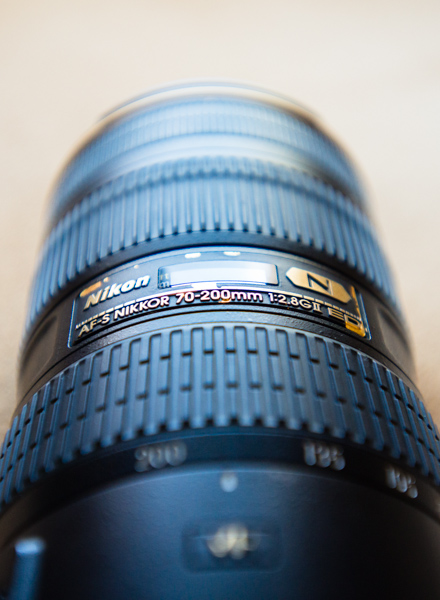
    Similarly, a telephoto lens will enable you to compose tighter shots from farther away, or experiment with closely cropped shots from a short distance. As focal length increases (and with it the distance to the subject), depth of field decreases and background objects appear closer to the subject opening up new compositional opportunities.

    Telephoto by Jeremie Schatz 1

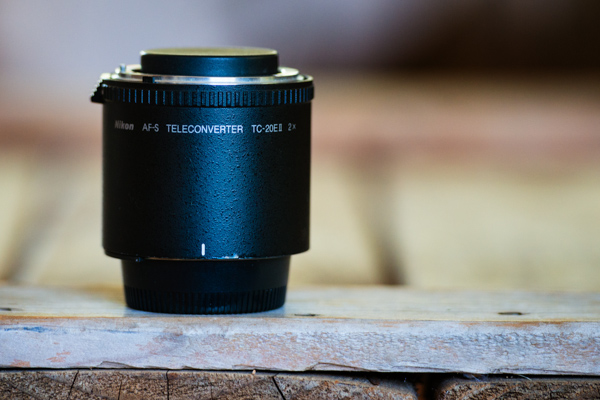
    If you are already shooting with a DSLR, depending on the lenses you are using, adding a teleconverter to your bag can be a less expensive option for increasing lens focal length. Teleconverters fit between the lens and camera, and add a certain level of magnification such as 1.5x or 2x. Many lenses are compatible with teleconverters, but not all, so be sure to check with the manufacturer before buying one.

    Teleconverter by Jeremie Schatz 1

    While some photographers can continue to produce compelling images with a basic body and a 50mm lens, many will discover a new realm of possibilities which unfold with the addition of new equipment.

    #2 Your gear is limiting your progress as a photographer

    Another way to legitimize an upgrade is if you recognize that your evolution as a photographer is being hindered by your equipment’s limitations.

    One advancement which can be gained with a camera or lens upgrade is improved low-light performance. If you find yourself shooting fast-moving kids in your dimly lit house or indoor sporting events, you will quickly discover that shooting at high ISO settings at maximum aperture results in less sharp images riddled with color noise. Color rendition and saturation levels can also suffer greatly in these situations, especially in shadowed areas and with skin tones.

    Unfortunately, other than the limited corrections you can make with editing software, an equipment upgrade may be a necessity if you want to get great looking photos in low-light conditions. Point-and-shoot and entry-level DSLR cameras sport better high-ISO performance than just a few years ago, but more advanced models show a drastic improvement in this regard and large aperture lenses can enable you to shoot at lower ISO settings.

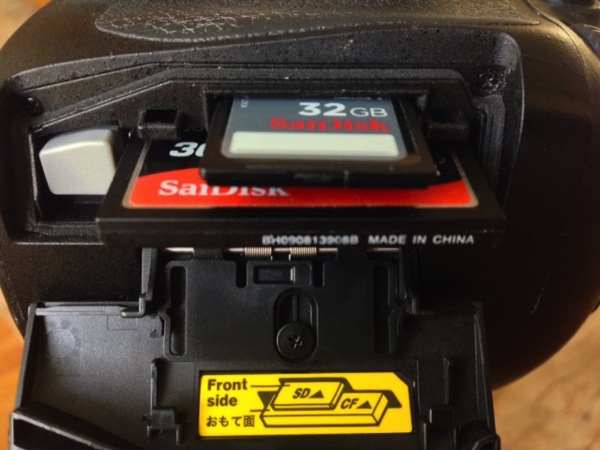
    In addition to better low-light performance, upgrading your camera body can put a bunch of useful features in your hands such as: a self-cleaning sensor, wireless uploading, increased pixel count, more accurate auto-focusing, faster shooting rates, dual memory-card slots, and more. Be sure to compare your current camera’s specifications with that of a potential upgrade and ask yourself if the added features will have a significant impact on your photography.

    Memory card slots

    Although it doesn’t go in your camera bag, upgrading your editing software can be a game changer for your photographic pursuits. Making the leap from using free editing software, to purchasing and learning Lightroom or Photoshop, can make drastic changes to your final images. These programs open up new avenues for stylizing your images, and countless plugins are available which can enable you to have even more control over the look and feel of your work.

    Even if you have the software already, an upgrade in your understanding and ability to use it, can go a long way. Investing time in knowing how to use the software properly, may help boost the quality of your images.

    Lightroom by Jeremie Schatz 1

    #3 The equipment is no longer usable

    A more utilitarian reason to upgrade equipment is that it is simply reaching the end of its usable life. Camera shutters are rated for a certain number of actuations, at which point the risk of failure and inaccurate shutter speeds increase.

    Even the best lenses have many plastic parts, and most modern ones have internal motors with a finite life span. Stiff or stuttering zoom and focus rings, loud or slow focusing and loose lens mounts are a few indications that a repair or replacement is imminent.

    This may be a non-issue for many who live by the “if it’s not broken, don’t fix it” philosophy, however, if you use your equipment for paying gigs or to document important events, you may end up regretting a potentially preventable equipment failure.

    There are many reasons to make equipment upgrades and most of you will make that leap at some point, but it is important not to set your expectations too high as to what new gear will do for your photographs. Think about your goals and consider which is the most accessible path to take in order to reach them.

    Sergio

    By Sergio

    I’ll leave you to think about this quote:

    “A lot of photographers think that if they buy a better camera they’ll be able to take better photographs. A better camera won’t do a thing for you if you don’t have anything in your head or in your heart.” – Arnold Newman

    googletag.cmd.push(function() {
    tablet_slots.push( googletag.defineSlot( “/1005424/_dPSv4_tab-all-article-bottom_(300×250)”, [300, 250], “pb-ad-78623” ).addService( googletag.pubads() ) ); } );

    googletag.cmd.push(function() {
    mobile_slots.push( googletag.defineSlot( “/1005424/_dPSv4_mob-all-article-bottom_(300×250)”, [300, 250], “pb-ad-78158” ).addService( googletag.pubads() ) ); } );

    The post 3 Valid Reasons it Might be Time to Upgrade Your Camera Equipment by Jeremie Schatz appeared first on Digital Photography School.

    Digital Photography School

  • Weekly Photography Challenge – Monochrome

    Have a look at these 25 monochrome images. Get some ideas of color you can use because that is your challenge for this week.

    Weekly Photography Challenge – Monochrome

    André Mellagi

    By André Mellagi

    Darlene Hildebrandt

    By Darlene Hildebrandt

    Shooting in monochrome is an option on most cameras. If you also shoot in raw format you can still recover the color information in post-processing if you wish, but it will help you learn to see things in their simplest form – light and shape.

    Here are a few more examples (even stuck a few of my own images in there):

    Darlene Hildebrandt

    By Darlene Hildebrandt

    Darlene Hildebrandt

    By Darlene Hildebrandt

    Nana B Agyei

    By Nana B Agyei

    Rjabinnik And Rounien

    By Rjabinnik and Rounien

    Cat Burton

    By Cat Burton

    Cat Burton

    By Cat Burton

    Amira_a

    By amira_a

    Jasper Nance

    By Jasper Nance

    Thomas Hawk

    By Thomas Hawk

    Share your monochrome images here:

    Simply upload your shot into the comment field (look for the little camera icon in the Disqus comments section) and they’ll get embedded for us all to see or if you’d prefer upload them to your favourite photo sharing site and leave the link to them. Show me your best images in this week’s challenge. Sometimes it takes a while for an image to appear so be patient and try not to post the same image twice.

    googletag.cmd.push(function() {
    tablet_slots.push( googletag.defineSlot( “/1005424/_dPSv4_tab-all-article-bottom_(300×250)”, [300, 250], “pb-ad-78623” ).addService( googletag.pubads() ) ); } );

    googletag.cmd.push(function() {
    mobile_slots.push( googletag.defineSlot( “/1005424/_dPSv4_mob-all-article-bottom_(300×250)”, [300, 250], “pb-ad-78158” ).addService( googletag.pubads() ) ); } );

    The post Weekly Photography Challenge – Monochrome by Darlene Hildebrandt appeared first on Digital Photography School.

    Digital Photography School

  • 25 Magnificent Monochrome Images

    Last week I shared 24 Powerful Images With Complementary Colors, ones that are opposite on the color wheel.

    So it’s time for another opposite, images which use only one color. Yes that could mean black and white, but monochrome just means one color so it could be green, blue, red, anything. Have a look at the composition and light in these images. See what makes them work.

    Photograph Snow Globe by Jeff Lewis on 500px

    Snow Globe by Jeff Lewis on 500px

    Photograph Shark Buddha by Ellen Cuylaerts on 500px

    Shark Buddha by Ellen Cuylaerts on 500px

    Photograph Green tea field by Jaewoon U on 500px

    Green tea field by Jaewoon U on 500px

    Photograph Dance of the Night by Marc  Adamus on 500px

    Dance of the Night by Marc Adamus on 500px

    Photograph Hump Rock by Miles Morgan on 500px

    Hump Rock by Miles Morgan on 500px

    Photograph Field of Dreams by Ashley Vincent on 500px

    Field of Dreams by Ashley Vincent on 500px

    Photograph Day Break on the Li by Michael Steverson on 500px

    Day Break on the Li by Michael Steverson on 500px

    Photograph Dancing on the Water by Teddy Winanda on 500px

    Dancing on the Water by Teddy Winanda on 500px

    Photograph Night bamboo by Ryusuke Komori on 500px

    Night bamboo by Ryusuke Komori on 500px

    Photograph golden light by Yaman Ibrahim on 500px

    golden light by Yaman Ibrahim on 500px

    Photograph Gold lines by MONEF AL-GAHITHI on 500px

    Gold lines by MONEF AL-GAHITHI on 500px

    Photograph SOFT PINK by Aina Apelthun on 500px

    SOFT PINK by Aina Apelthun on 500px

    Photograph Pretty In Pink by Adrian  on 500px

    Pretty In Pink by Adrian on 500px

    Photograph Cristal by Chris Marcel on 500px

    Cristal by Chris Marcel on 500px

    Photograph Treasure chest by Sabino Parente on 500px

    Treasure chest by Sabino Parente on 500px

    Photograph ?????? by Natalia Lisovskaya on 500px

    ?????? by Natalia Lisovskaya on 500px

    Photograph ?????????? ? ????????? by Natalia Lisovskaya on 500px

    ?????????? ? ????????? by Natalia Lisovskaya on 500px

    Photograph Coffee Collection by Natasha Breen on 500px

    Coffee Collection by Natasha Breen on 500px

    Photograph A Slice of Lime by Andy Barrow (SnapHappyExpat) on 500px

    A Slice of Lime by Andy Barrow (SnapHappyExpat) on 500px

    Photograph Blue Easter Eggs by Sasha L'Estrange-Bell on 500px

    Blue Easter Eggs by Sasha L'Estrange-Bell on 500px

    Photograph Silent forest by Xavier Jamonet on 500px

    Silent forest by Xavier Jamonet on 500px

    Photograph Tramonto sulle rive del lago by Daniele Dainelli on 500px

    Tramonto sulle rive del lago by Daniele Dainelli on 500px

    Photograph Revival by Alessandra Piasecka on 500px

    Revival by Alessandra Piasecka on 500px

    Photograph For St. Patrick's Day by Ursula Abresch on 500px

    For St. Patrick's Day by Ursula Abresch on 500px

    Photograph Huntington Castle by Alex Pieussergues on 500px

    Huntington Castle by Alex Pieussergues on 500px

    googletag.cmd.push(function() {
    tablet_slots.push( googletag.defineSlot( “/1005424/_dPSv4_tab-all-article-bottom_(300×250)”, [300, 250], “pb-ad-78623” ).addService( googletag.pubads() ) ); } );

    googletag.cmd.push(function() {
    mobile_slots.push( googletag.defineSlot( “/1005424/_dPSv4_mob-all-article-bottom_(300×250)”, [300, 250], “pb-ad-78158” ).addService( googletag.pubads() ) ); } );

    The post 25 Magnificent Monochrome Images by Darlene Hildebrandt appeared first on Digital Photography School.

    Digital Photography School

  • Wedding Photography Infographic: Everything You Need to Know

    Wedding Photography is one of the most important things to consider before your big day. Wedding photos are something you will cherish for the rest of your life so it’s vital that you are completely satisfied with them. Take the time to choose the right photographer for your needs as well as communicating effectively with them during the process is Continue Reading

    The post Wedding Photography Infographic: Everything You Need to Know appeared first on Photodoto.


    Photodoto

  • 3 Tips for Getting Great Skin Tones Using Adobe Camera Raw

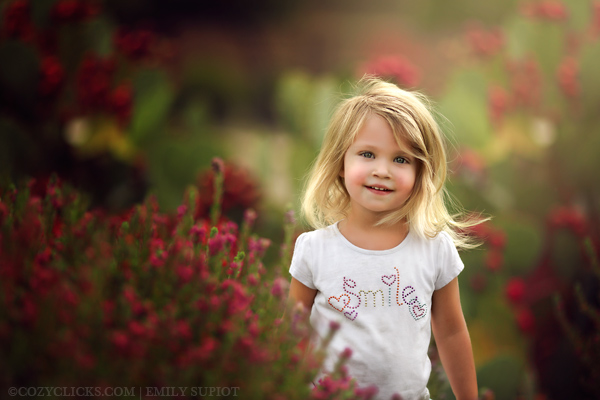
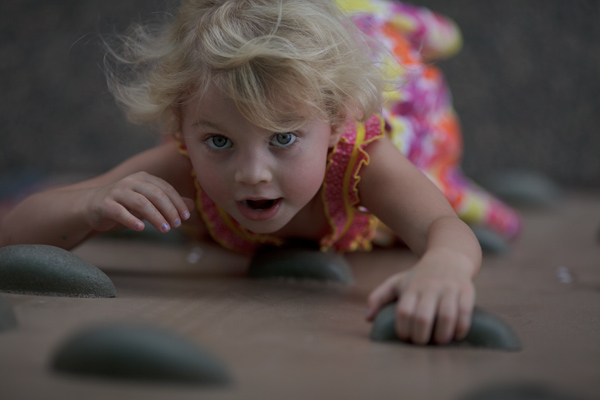
    Skin tones can be one of the more difficult aspects of a photograph to master. Getting pleasing skin tones will make your image appear more eye-catching and attractive. If you know the right steps to take, skin can be pretty simple to master. Using these three simple tricks, using only Adobe Camera Raw (ACR), your skin tones will appear more balanced and pleasing to the eye.

    Before3 1

    After3 1

    Note: working in Lightroom you can do the this as well, because the sliders and options are the same!

    White Balance

    When trying to get great looking skin tones, the first thing you should pay attention to is the white balance. Correct white balance will set the stage for great skin tones. If the white balance is too cool, your skin will appear gray or bluish. On the other hand, if the white balance is too warm, the skin will look yellow or orange. Neither of these options are very pleasing to the eye, and make the skin more difficult to work with later on.

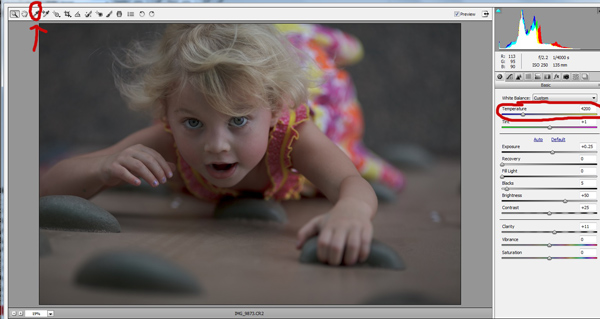
    To see if your white balance is accurate, use the white balance targeted adjustment tool. It looks like an eye-dropper and is located at the top of the screen. It is the third tool over from the left. Click on the dropper, then click on an area of your photo that is white. The whites of the eyes are a good place to start. This should give you a good indication of where the white balance should be set. If your image still appears too warm or cool to your taste, use the temperature slider located to the right of your screen, it is the first one. Adjust this by sliding it to the right or left until your get a pleasing white balance. You may have to adjust Tint as well.

    Whitebalance1

    Exposure

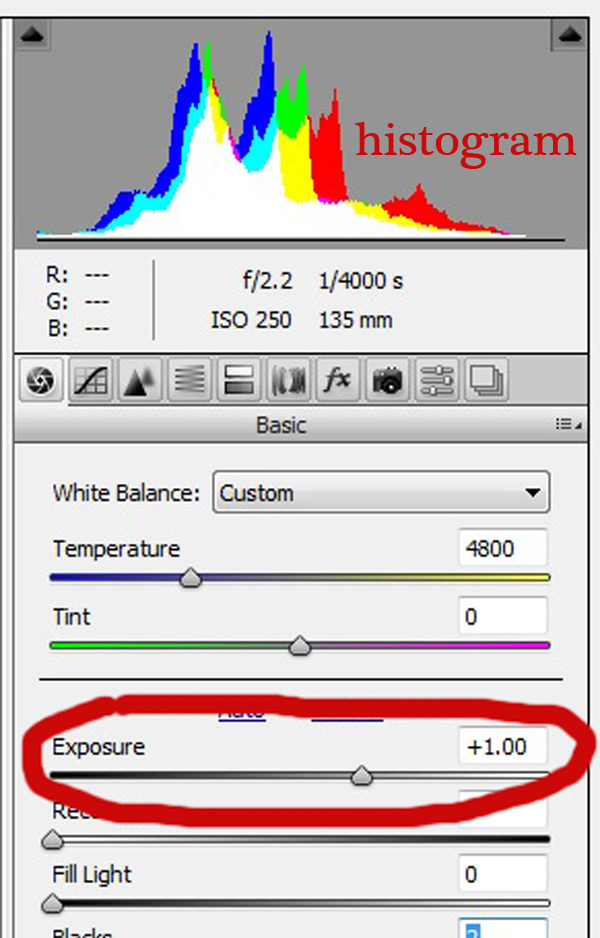
    Next, make sure your exposure is correct. Take a look at the histogram located in the upper right hand corner of the screen. Ideally, you want it to look like a smooth bell curve, with the high point of the curve right in the middle. Check to make sure that the curve does not go too far to the left or the right. This may indicate that your photo is over or underexposed, causing your skin tones to either be gray and dark, or too bright and blown-out in some spots.

    Exposure 2

    If your curve does fall too far to one side, use the exposure slider to fix it. Located three sliders down on the right hand side of your screen, move it either left or right. Watch your histogram. When the majority of the curve is in the middle, you’ve got it! In some photos, there will be parts of your image that are very bright or dark, and cause your histogram to spike on parts of the curve. This happens often when you have a bright sky in the background. If this is the case, your curve will be off the chart on the right edge of the histogram. In an image like this, you would look at where the majority of your curve lies and ignore the parts of the curve that are out of range.

    For more information see: How to Read and Use Histograms

    Luminance

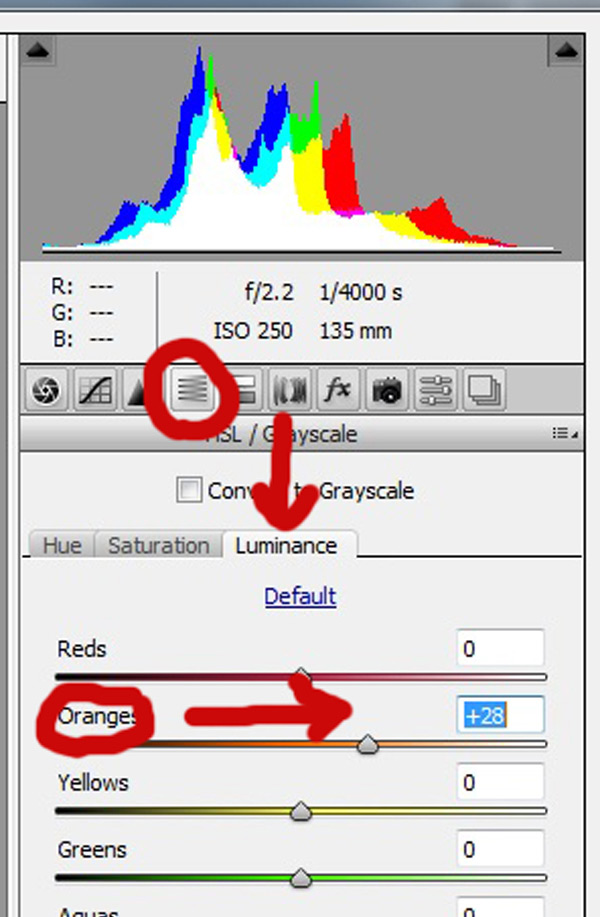
    Finally, to give your skin tones just a little more brightness you will want to locate the luminance sliders (look for the HSL panel, the L stands for Luminance). You will see a horizontal strip of buttons directly under the histogram on the right panel. The fourth one to the left is HSL/Grayscale, click on that button. After selecting that option, three tabs will appear. Click on the Luminance tab. Choose the orange slider, which is two down, and move it to the right. You will notice that this affects mainly the skin in your photo and leaves the other areas of the image untouched. The more you move it to the right, the brighter the skin will appear. Keep moving the orange slider back and forth until the skin is the brightness you prefer.

    Luminance 2

    Before1 1

    After1 1

    Once you have adjusted your RAW image using these three steps, you can open it up in Photoshop to do any fine tuning or adjustments on the remainder of your photo. Your skin tones, however, should already look great and need little, if any additional work.

    Before2 1

    After2 1

    Do you have any other tips for making great looking skin tones using ACR? Please share them in the comments below.

    googletag.cmd.push(function() {
    tablet_slots.push( googletag.defineSlot( “/1005424/_dPSv4_tab-all-article-bottom_(300×250)”, [300, 250], “pb-ad-78623” ).addService( googletag.pubads() ) ); } );

    googletag.cmd.push(function() {
    mobile_slots.push( googletag.defineSlot( “/1005424/_dPSv4_mob-all-article-bottom_(300×250)”, [300, 250], “pb-ad-78158” ).addService( googletag.pubads() ) ); } );

    The post 3 Tips for Getting Great Skin Tones Using Adobe Camera Raw by Emily Supiot appeared first on Digital Photography School.

    Digital Photography School

  • Photographing Stars Using a Kit Lens

    Pic 01 d5100 18mm f3 5 20sec iso1600

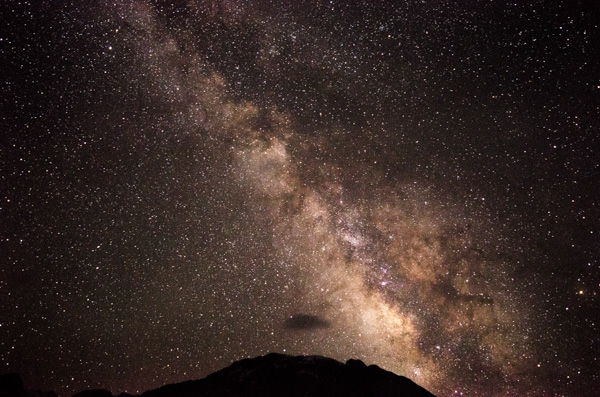
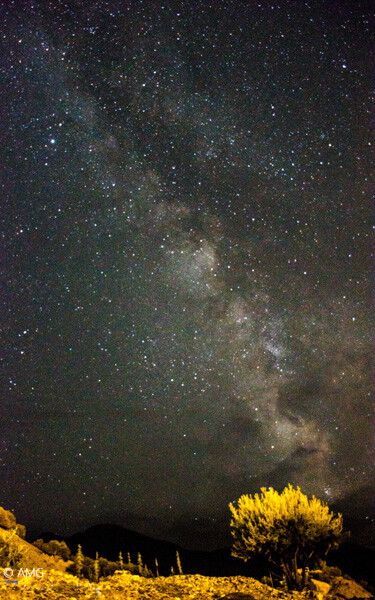
    Looking at a starry sky while sitting in the open is always a soothing experience, but shooting those stars is a much better one. Have you seen those amazing starry skies and Milky Way photographs from professional photographers and wondered how to do this yourself but never tried it because you thought you did not have the proper equipment? Let me tell you, “You were wrong”.

    If you own a normal DSLR camera and are interested in shooting stars (and the Milky Way), you can do this with your kit lens. I will explain the whole process step by step in the easiest possible way, so that even if you do not have much technical knowledge, you can understand and implement this method.

    Basics of star photography

    To get started, you need to have following points in mind:

    • A place away from the city lights. The less light pollution you have, the more chance of getting clear stars you will have.
    • A moonless night. Stars can also be shot on a full moon night, but the brighter the moon is, the more light pollution it creates, and the stars will not be as prominent.
    • A normal DSLR camera with a standard 18-55 mm kit lens.
    • A tripod

    You can Google your surroundings for away from the city spots (Dark Sky) and moon phases at night. You should know beforehand in what direction, and at what time the moon is going to rise. That will help you a lot with composition of your images. A moonless night is always best to shoot stars.

    Additionally, you can also use a compass app on your smartphone (for Android here) to locate the north star for star trails and you can also download an app called Star Chart (for iOS or for Android) or Google Sky just to give you an idea of which stars there are above you. Both of these apps also show you the direction of the Milky Way so you can directly shoot it and get amazing results.

    These apps are pretty accurate, and with their help you can also see Mars, even with your naked eye (which I am sure you saw previously but were unable to differentiate it from stars). If you want to plan your shoot for future, or look for appropriate time sto shoot Milky Way in your location, you can download a desktop app Stellarium. Put in your coordinates and it will show you the direction of the Milky Way at a specific time, on a specific date of the year. Using this application, you can know exactly at what time of year, the brightest part of Milky Way will be above your location to shoot.

    Pic 02 d5100 18mm f3 5 20sec iso1600

    Camera settings

    Now let’s get to the important part, camera settings. You will need to take control of your camera, keeping it in Manual mode. Change the mode to Manual and tune in the following settings.

    Focal length: Set your focal length to the widest you have – e.g., 18 mm in the case of a kit lens. You can choose any focal length you want, but the more you zoom in (the longer the focal length is), the less stars you will be able to capture, and your optimum exposure time before star trails start to develop will also decrease (500 Rule).

    Aperture: Setting your aperture to the widest option is key here – e.g., f/3.5 as in a kit lens. By using the widest the aperture, more light will enter through your lens giving you brighter stars and Milky Way.

    Shutter speed: If you are only shooting stars and/or the Milky Way, set the shutter speed to 20 seconds or star trails will start to appear, giving the look of larger, unfocused stars. If you are wondering, why 20 seconds, here is the answer. Optimum exposure before you start getting star trails is calculated by dividing 500 by your focal length (also divide the answer by 1.5 if you are using cropped sensor.) So in the example of an 18mm lens on a cropped sensor – 500 divided by 18 = 27.78 divided by 1.5 = 18.52 (so roughly 20 seconds).

    Pic 08 D5100 18mm f3 5 20sec ISO 1600 2

    ISO: Start by keeping the ISO at 1600, and increase it later depending on your results. Keep in mind that greater the ISO, more noise there will be in your image. Although it does depend on signal to noise ratio of camera body you are using. High end or even new consumer camera bodies tend to produce less noise at higher ISOs, than do older ones, even three years old.

    Shutter release: You need to have a shutter release (remote trigger) to avoid camera shake while shooting. If you don’t have a shutter release remote/cable, just use your camera;s 2-second or 10-second timer. That will minimize any blur in the picture due to camera shake.

    It’s also best to switch OFF your “Vibration-Reduction” or “Image-Stabilization”, as the vibration of the motors can cause shake in the picture too.

    Focusing the lens to infinity: Next, after putting up all these settings, the next most important thing left to do it focus your lens to infinity. As kit lens doesn’t have infinity marker on it, we will use hyper-focal distance values to focus the lens to infinity. Mount your camera and lens on a tripod, and focus it on any bright object far away at a distance of 20 feet or more. Point a flashlight towards camera from a distance of minimum 20 feet and focus on it if you are in the dark, and don’t have anything to focus. Once the lens is focused beyond 20 feet, its hyper-focal distance will project to infinity and your stars will be sharp. It will also help in getting anything in the foreground sharp too.

    Don’t forget to switch your lens to M (Manual) after focusing, or else it will start to hunt for focus again when shutter is pressed.

    If your lens is not focused to infinity, you will get the Milky Way but the stars will not be as sharp and will appear bigger. Same can happen if you go for a longer speed than required for not causing stars to produce trails. An example of these mistakes is here.

    Pic 03 lens was not focused to infinity 2

    Lens was not focused to infinity.

    Pic 04 lens was not focused to infinity 2

    Lens was not focused to infinity.

    Pic 05 lens was not focused to infinity 2

    Lens was not focused to infinity.

    Recommendations:

    It’s better to first sit in the dark for at least 15 minutes to let your eyes adjust with the surroundings. This will help you to see a lot of stars, and even the Milky Way with the naked eye and will also help you compose your images better. Enjoying your surroundings for a while is better than just starting to shoot as soon as you reach the site.

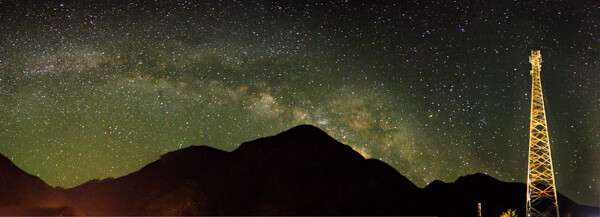
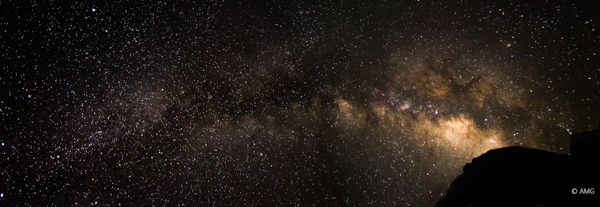
    You are all set to shoot your own stars. With the help of kit lens you might not be able to get an award or feature your shot on 500px but yes, the shots will be very reasonable to make yourself happy, and impress your friends too. You could even try merging panoramas to get more of the Milky Way in your composition.

    Pic 06 Panorama Stitch of 4shots 2

    Post-processing:

    The first part to better post-processing is RAW. Yes! always shoot in RAW as it will give you a lot of room for post-processing without affecting the quality. Secondly, some post-processing is always needed to get optimum results. You can find many tutorials on how to post process Milky Way images but the most elaborate one I found is from Hammad Iqbal Photography who also has a tutorial here on dPS on making star trails in Photoshop.

    Star trails:

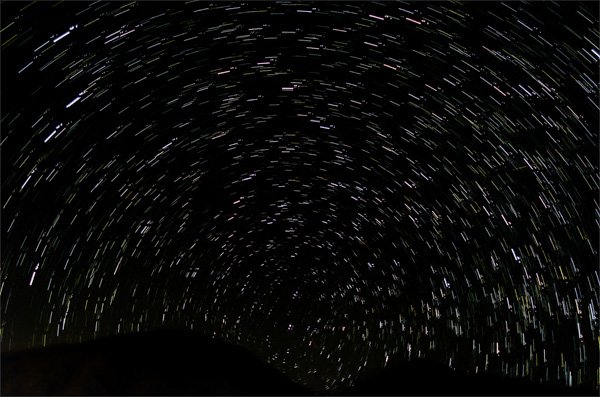
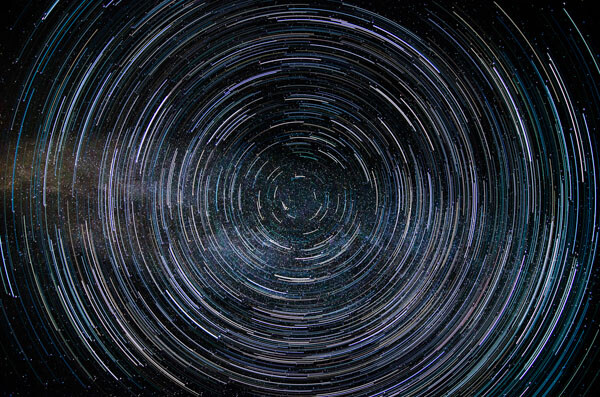
    If you are satisfied with your shots, you can advance further to get star trails. Just locate the north star on the north pole using the Star Chart app and keep the north star (all stars rotate around this star) in your composition. For star trails, all camera settings will remain the same except that you can increase the shutter speed to 30 sec if you want.

    You can go with faster shutter speeds (20 seconds or faster, if there are lights in the area and 30 seconds is overexposing). Keep the camera on continuous shooting mode and let it shoot as many exposures as it can shoot. The more pictures you will have, the more clear your star trails will be. Later, you can join all the exposures in Photoshop or use any star-trails software to create star trails. Alternately, you can take one stars shot and make star trails with it using HM Technique.

    Pic 07 Star Trails A merge of 18 shots each at 30 sec

    Pic 10 Star trail created in PS using HM Technique

    Star trail created in PS using HM Technique

    Pic 11 Fun in PS

    Fun in Photoshop

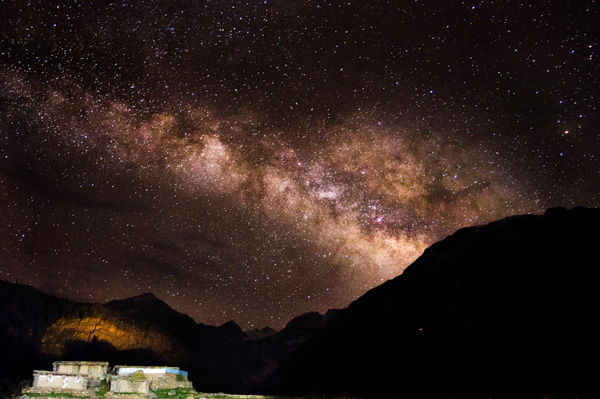
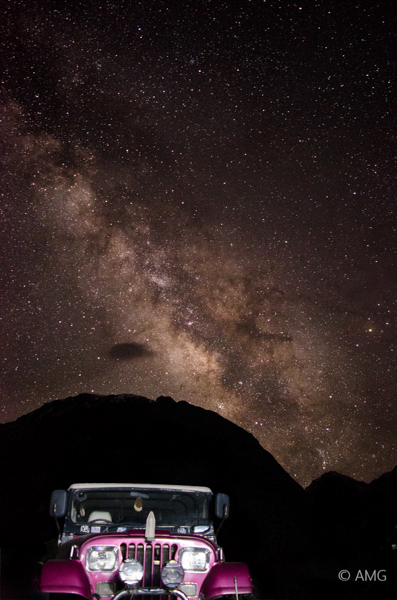
    Once you have nailed the Milky Way, try including foreground objects for better compositions.

    Pic 09 D7000 18mm f3 5 20sec ISO 1600

    Happy shooting, and keep me updated with your results. Let me know if you need any help.

    googletag.cmd.push(function() {
    tablet_slots.push( googletag.defineSlot( “/1005424/_dPSv4_tab-all-article-bottom_(300×250)”, [300, 250], “pb-ad-78623” ).addService( googletag.pubads() ) ); } );

    googletag.cmd.push(function() {
    mobile_slots.push( googletag.defineSlot( “/1005424/_dPSv4_mob-all-article-bottom_(300×250)”, [300, 250], “pb-ad-78158” ).addService( googletag.pubads() ) ); } );

    The post Photographing Stars Using a Kit Lens by Adeel Gondal appeared first on Digital Photography School.

    Digital Photography School

  • Exploring Minimalist Photography: History, Philosophy, Inspiration

    Minimalism as an artistic philosophy is difficult to precisely define. There are certain elements that are largely agreed upon, the foremost being that minimalism is all about simplicity. Different photographers may have varying definitions of simple. If you were to give 10 photographers the same subject and ask them to shoot it within their own idea if minimalism, you’d likely Continue Reading

    The post Exploring Minimalist Photography: History, Philosophy, Inspiration appeared first on Photodoto.


    Photodoto